ipmsusa2
-
Posts
578 -
Joined
-
Last visited
-
Days Won
31
Content Type
Profiles
Forums
Events
Everything posted by ipmsusa2
-
Strangely enough, I've never paid any attention to the temperature. Over the decades, I airbrushed paint when it was 105 in the shade and I had to be careful that my sweat didn't drip into the paint cup. On the flip side, I've sprayed paint when it was so cold in the room that ice crystals were floating in the decal water. Of course I was spraying Model Master Enamels, Pactra, Floquil and two-part commercial urethane as well as lacquer at various times. Never had a problem. Why? I don't have a clue. About all I've ever done is toss in a little more thinner if it needed it, or retarder if the lacquer was drying on the nozzle. None of what I've described is recommended, but the point is that the ambient temperature...high, low or in between...has never seemed to be a factor on my projects. And keep in mind that I do this as a business.
-
Thanks Gil. Those side windows are tricky because they're a butt joint all the way around, leaving you with minimal contact surface for cementing.
-
As promised, Part 8 of the Kinetic E-2C 2000 with revised photos is now available for your viewing pleasure. You can ignore Part 8 and 8A. As usual, comments are not only welcome but encouraged.
-
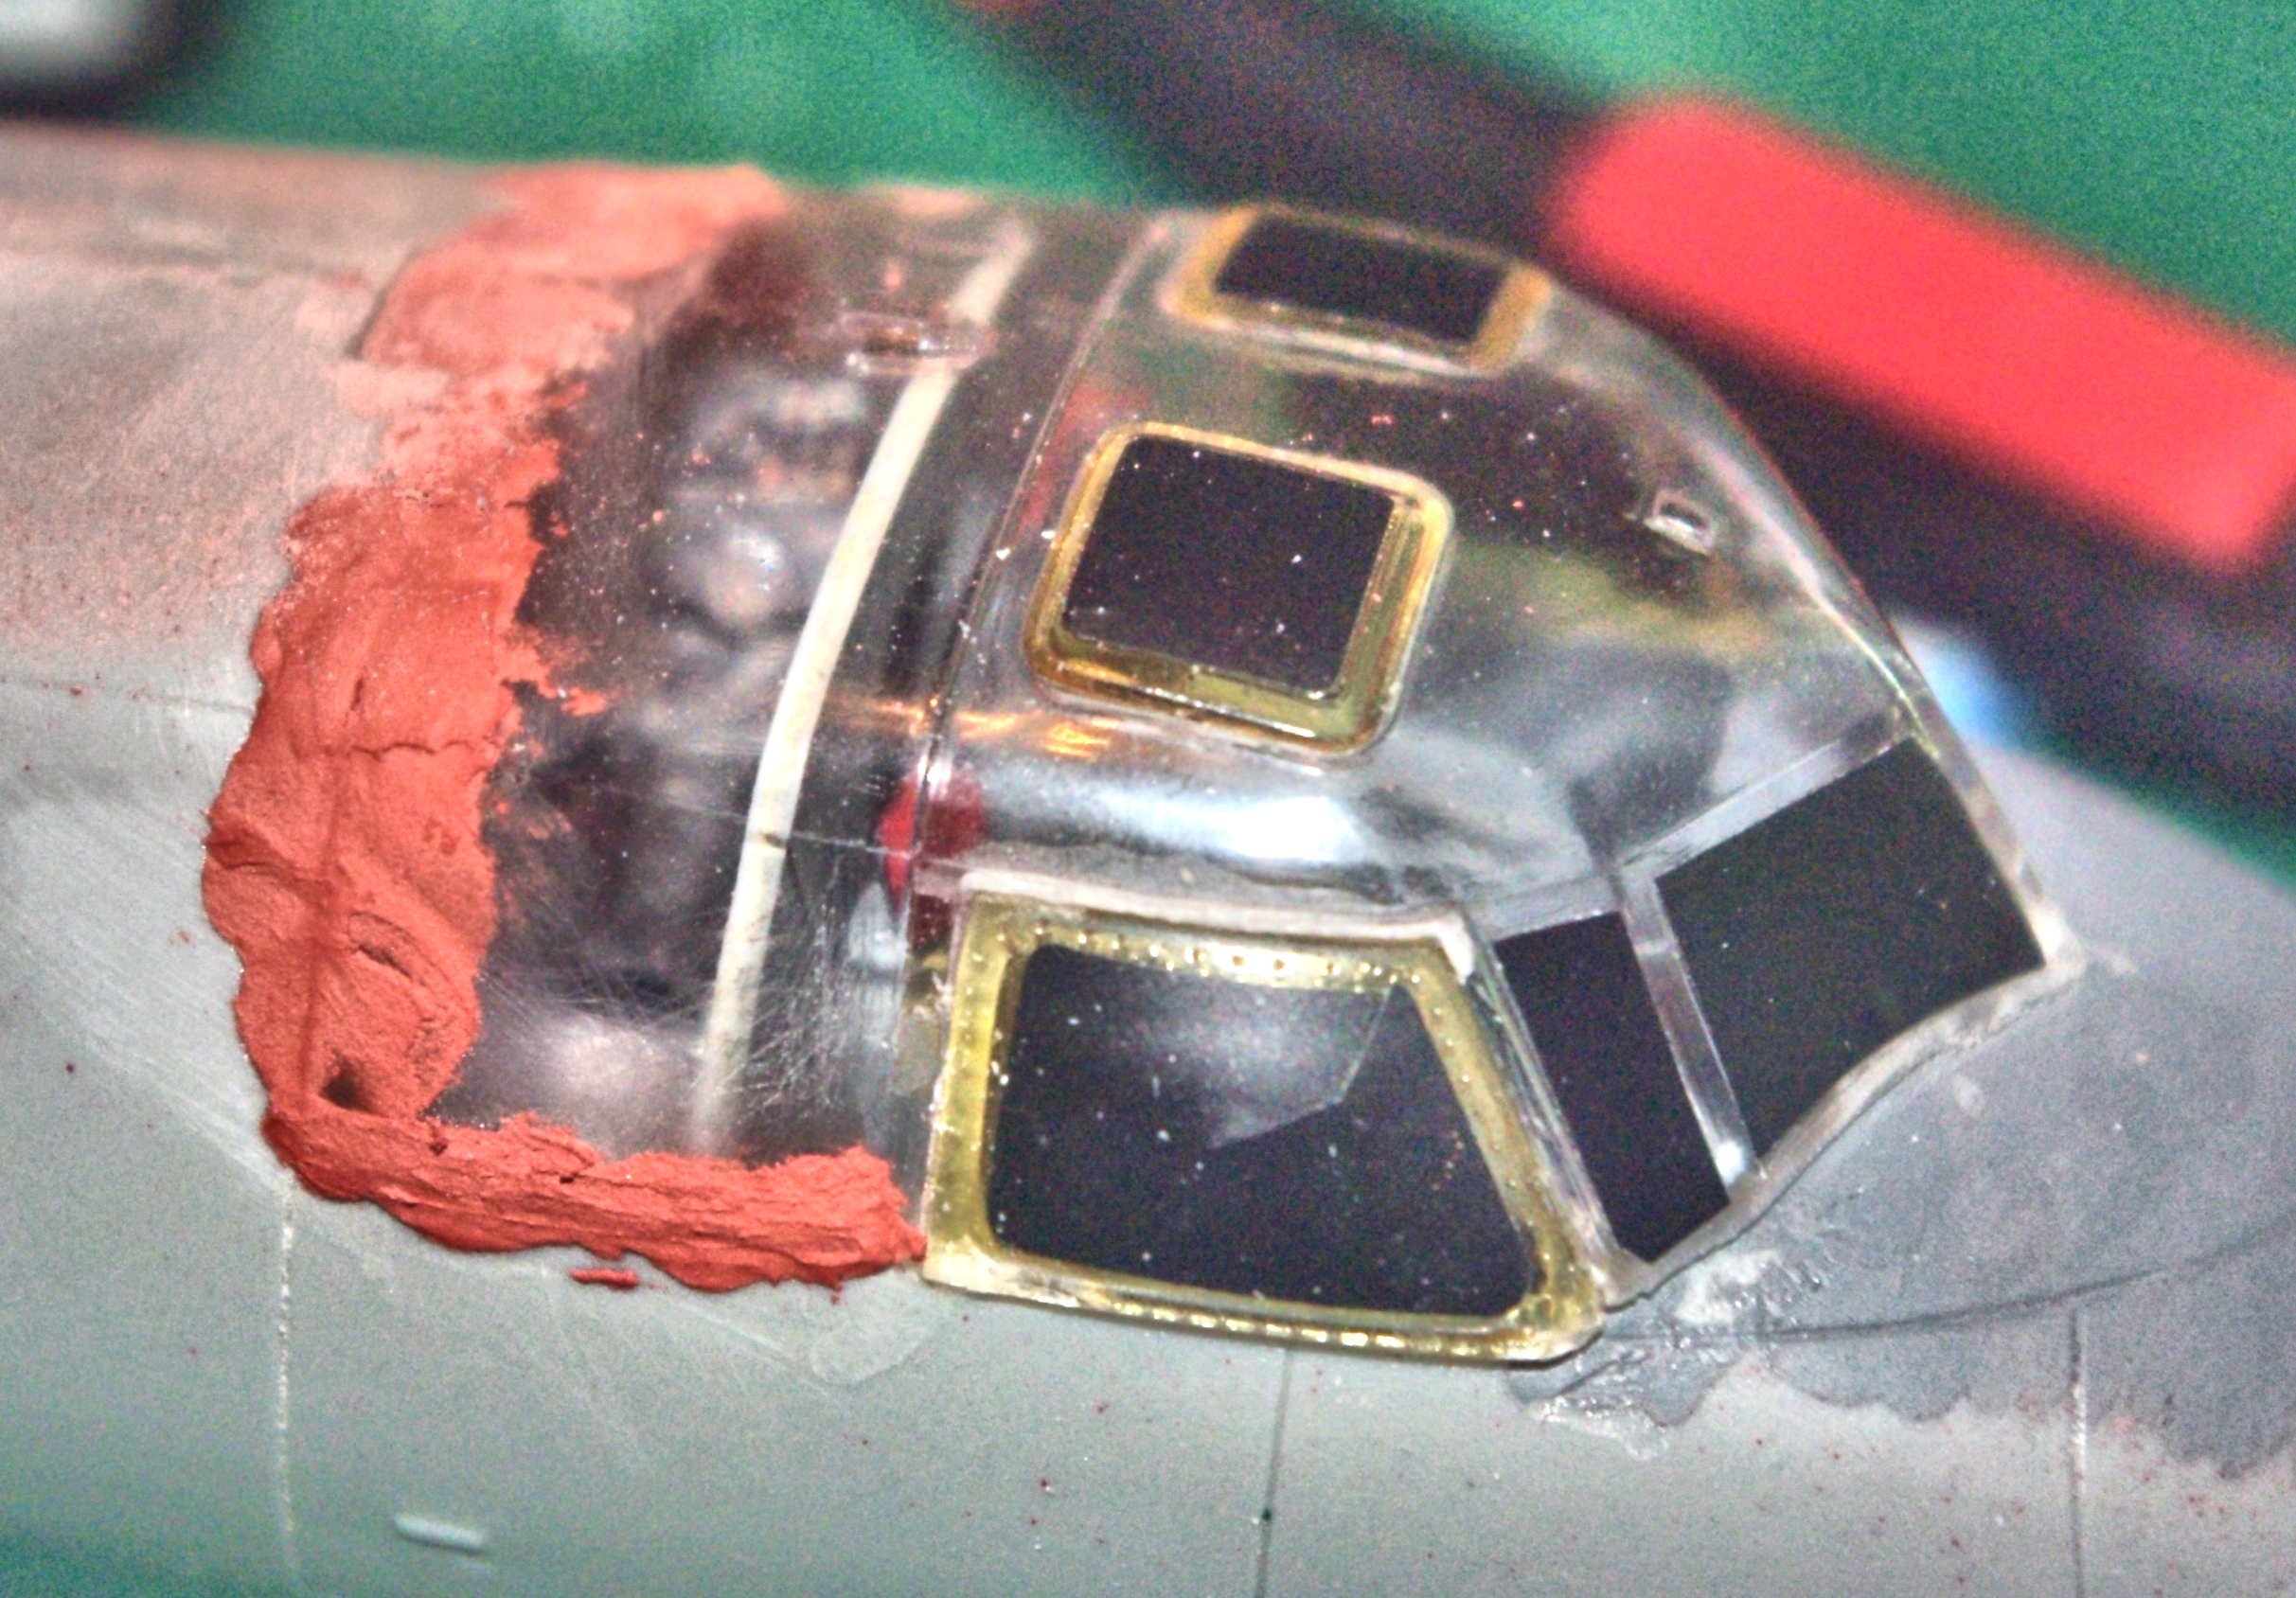
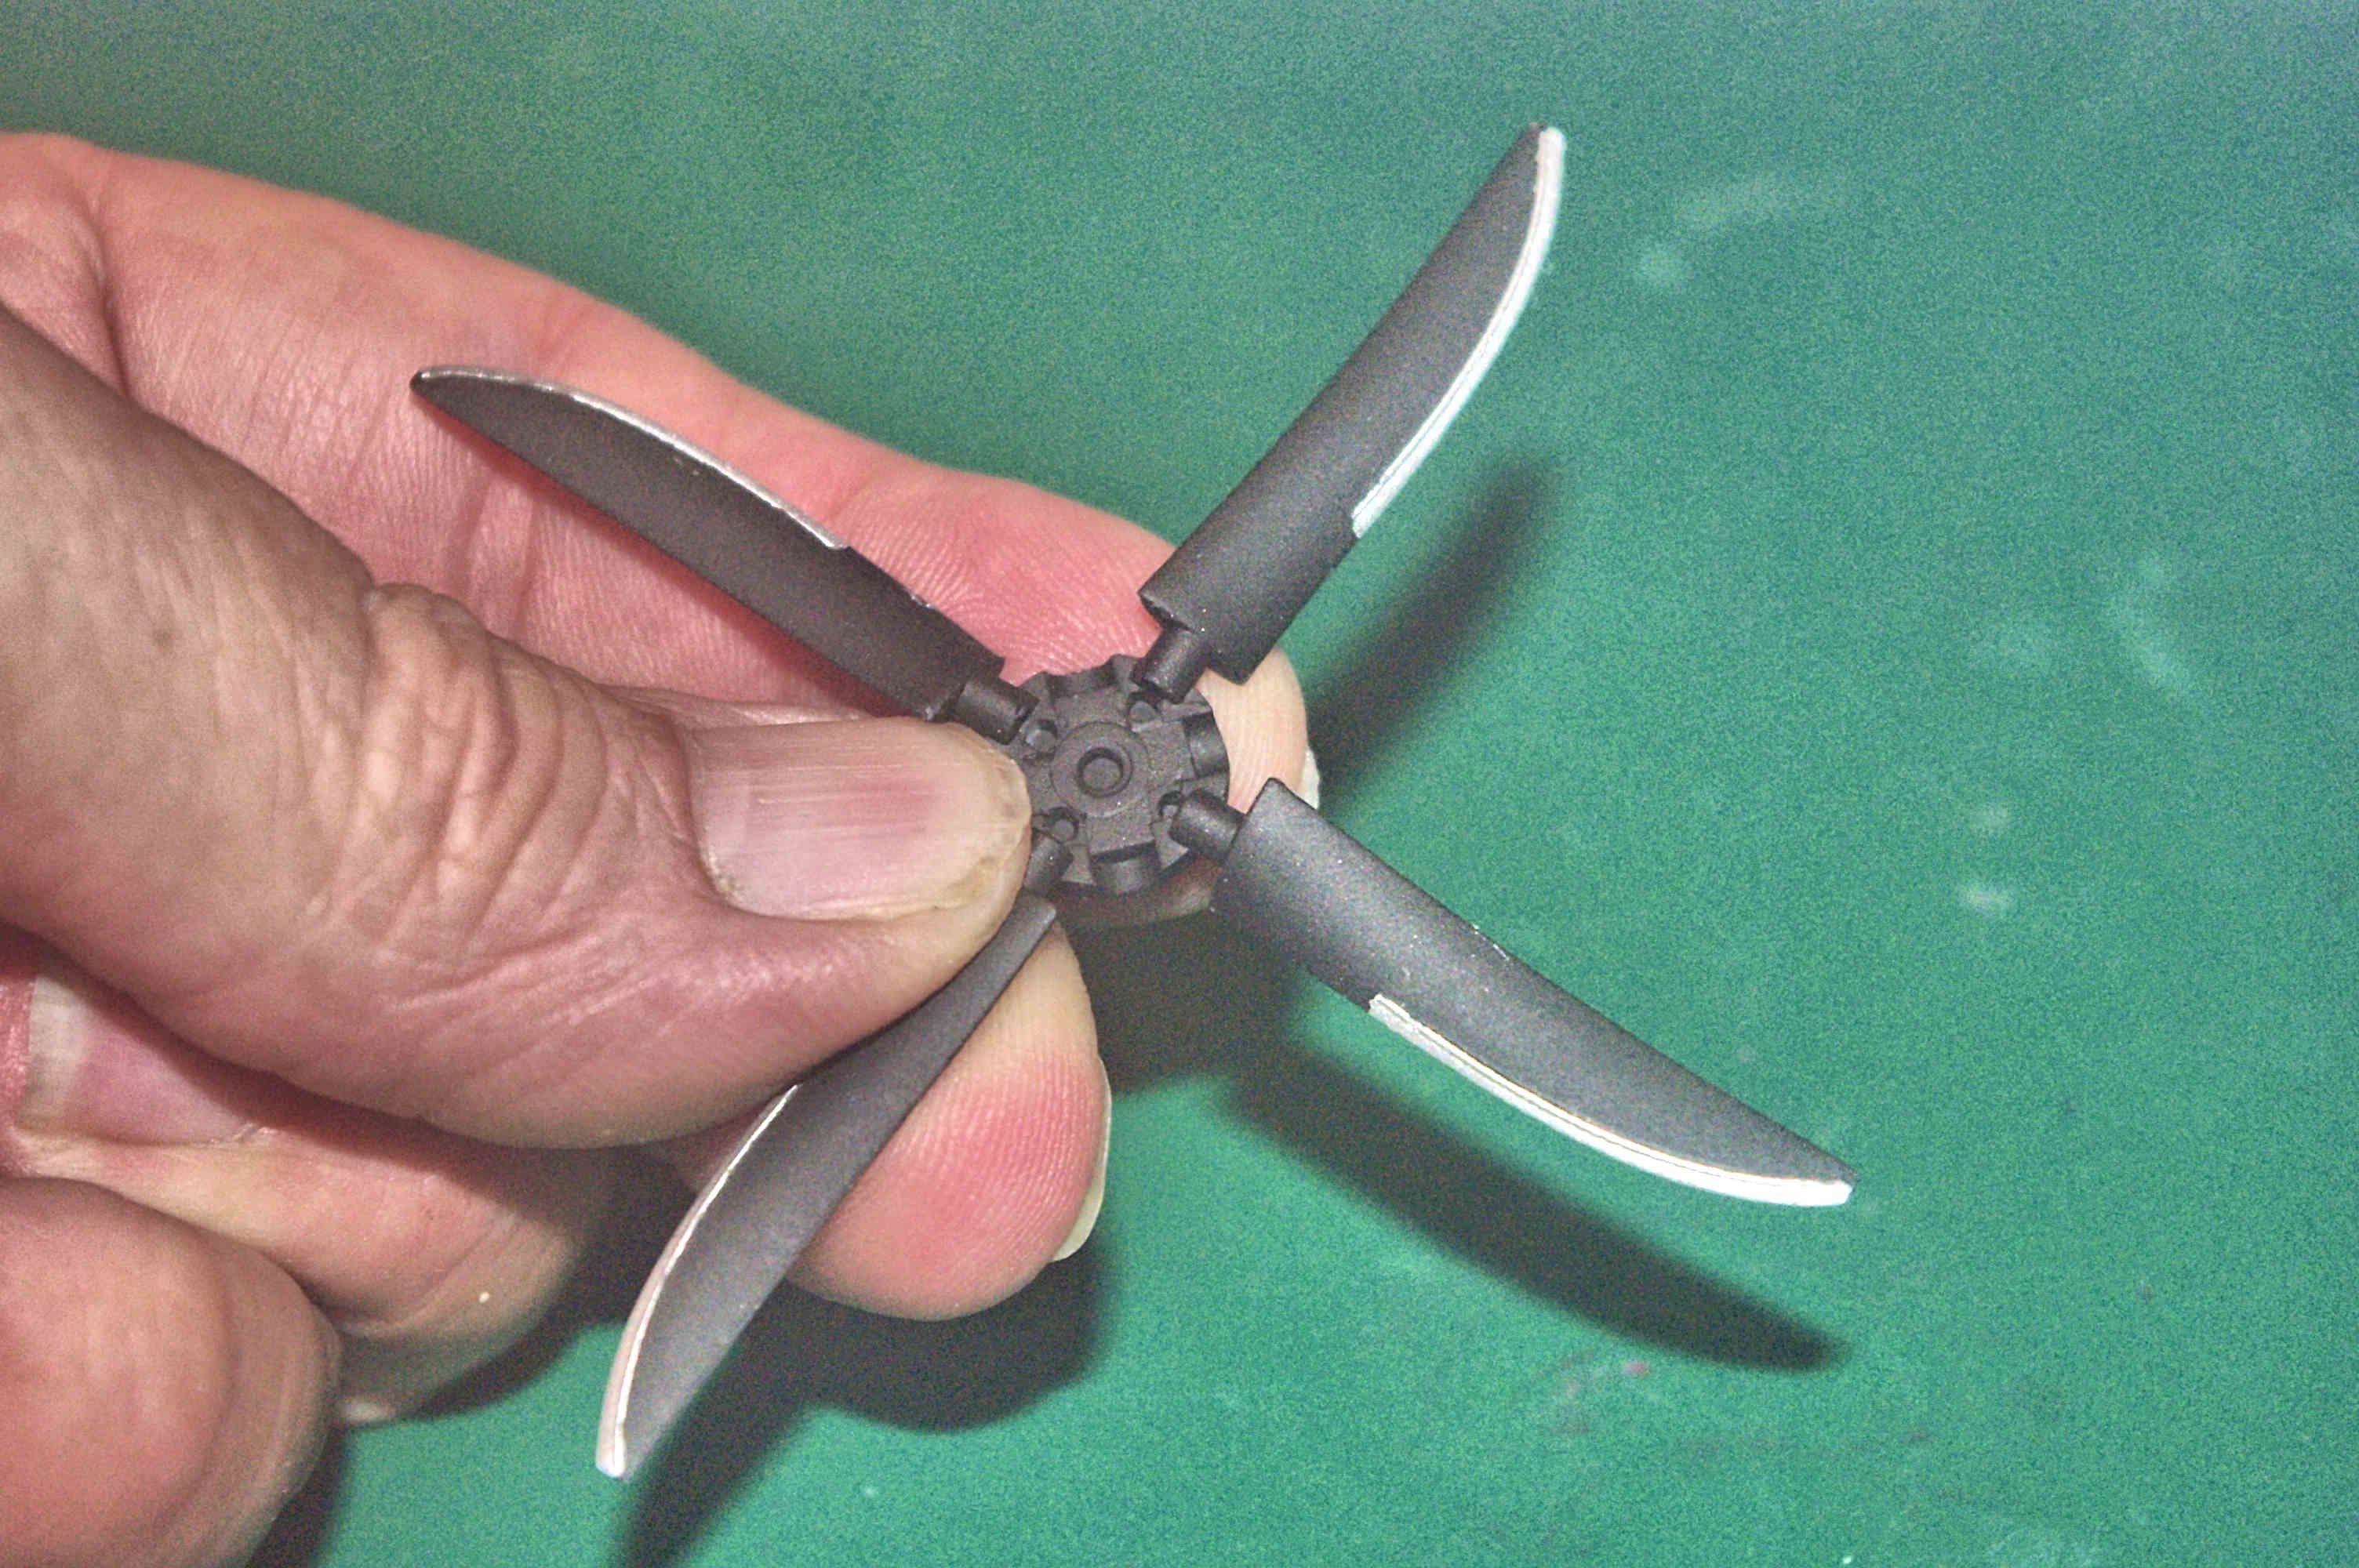
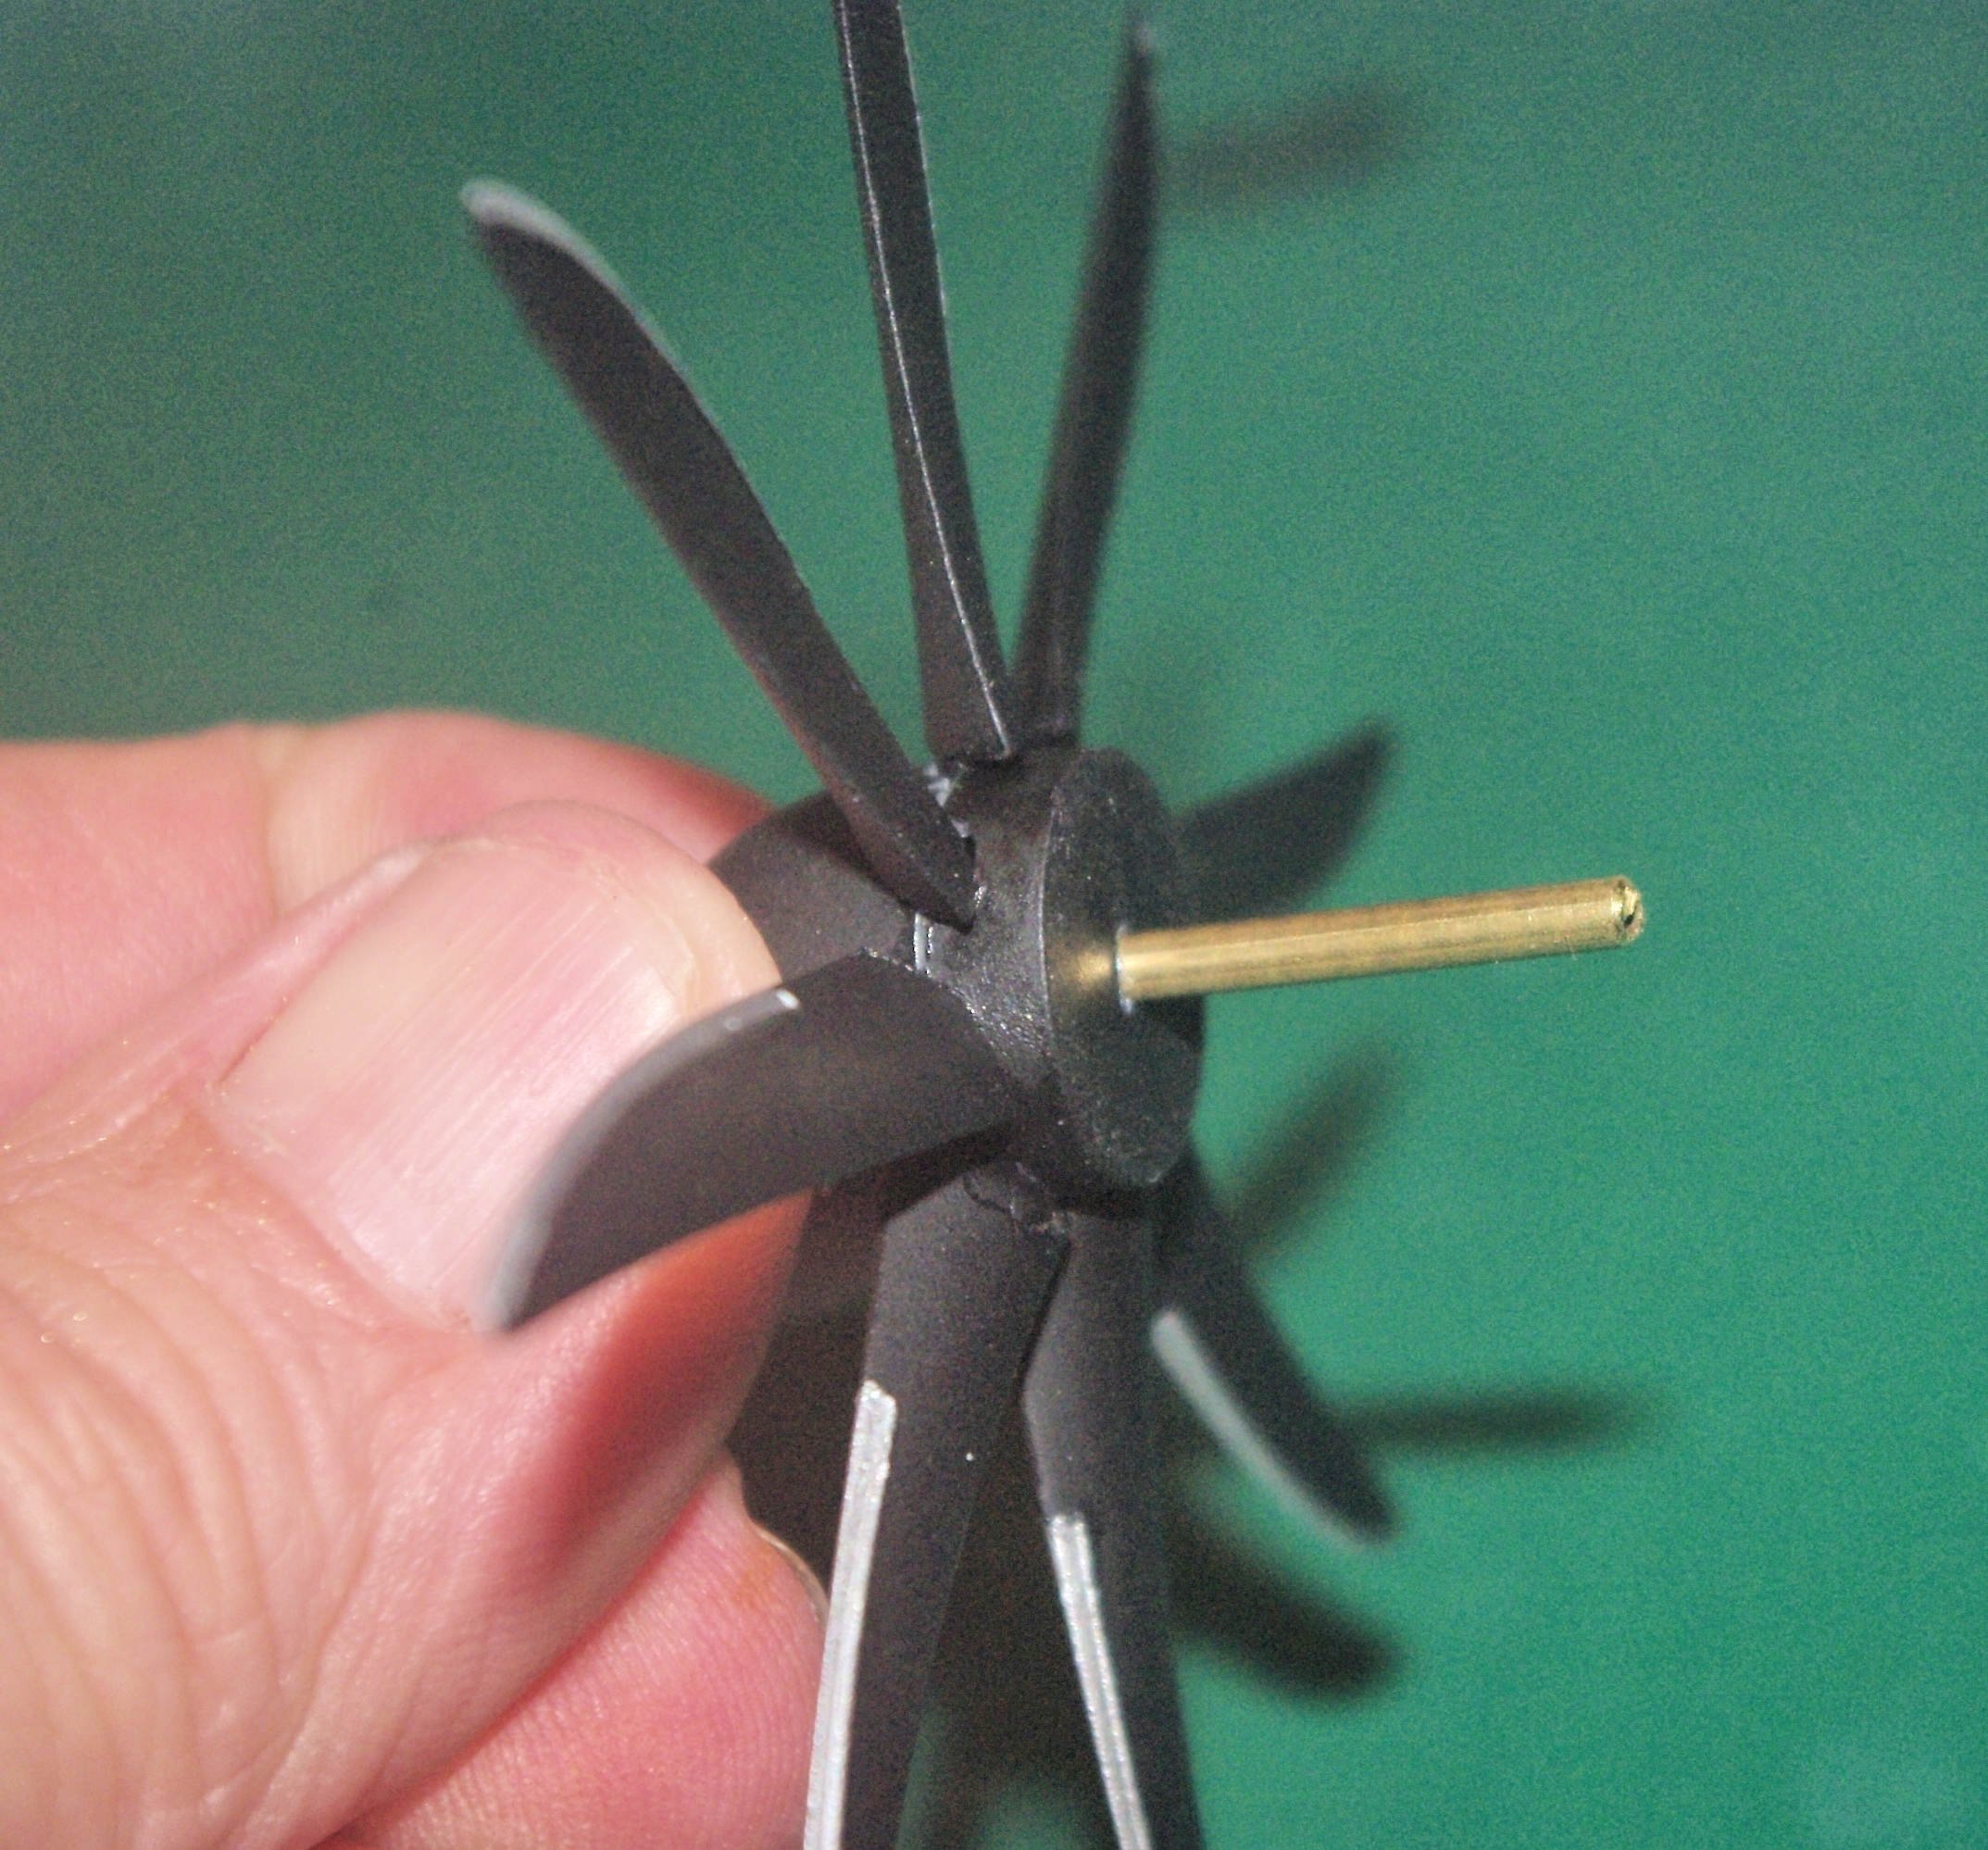
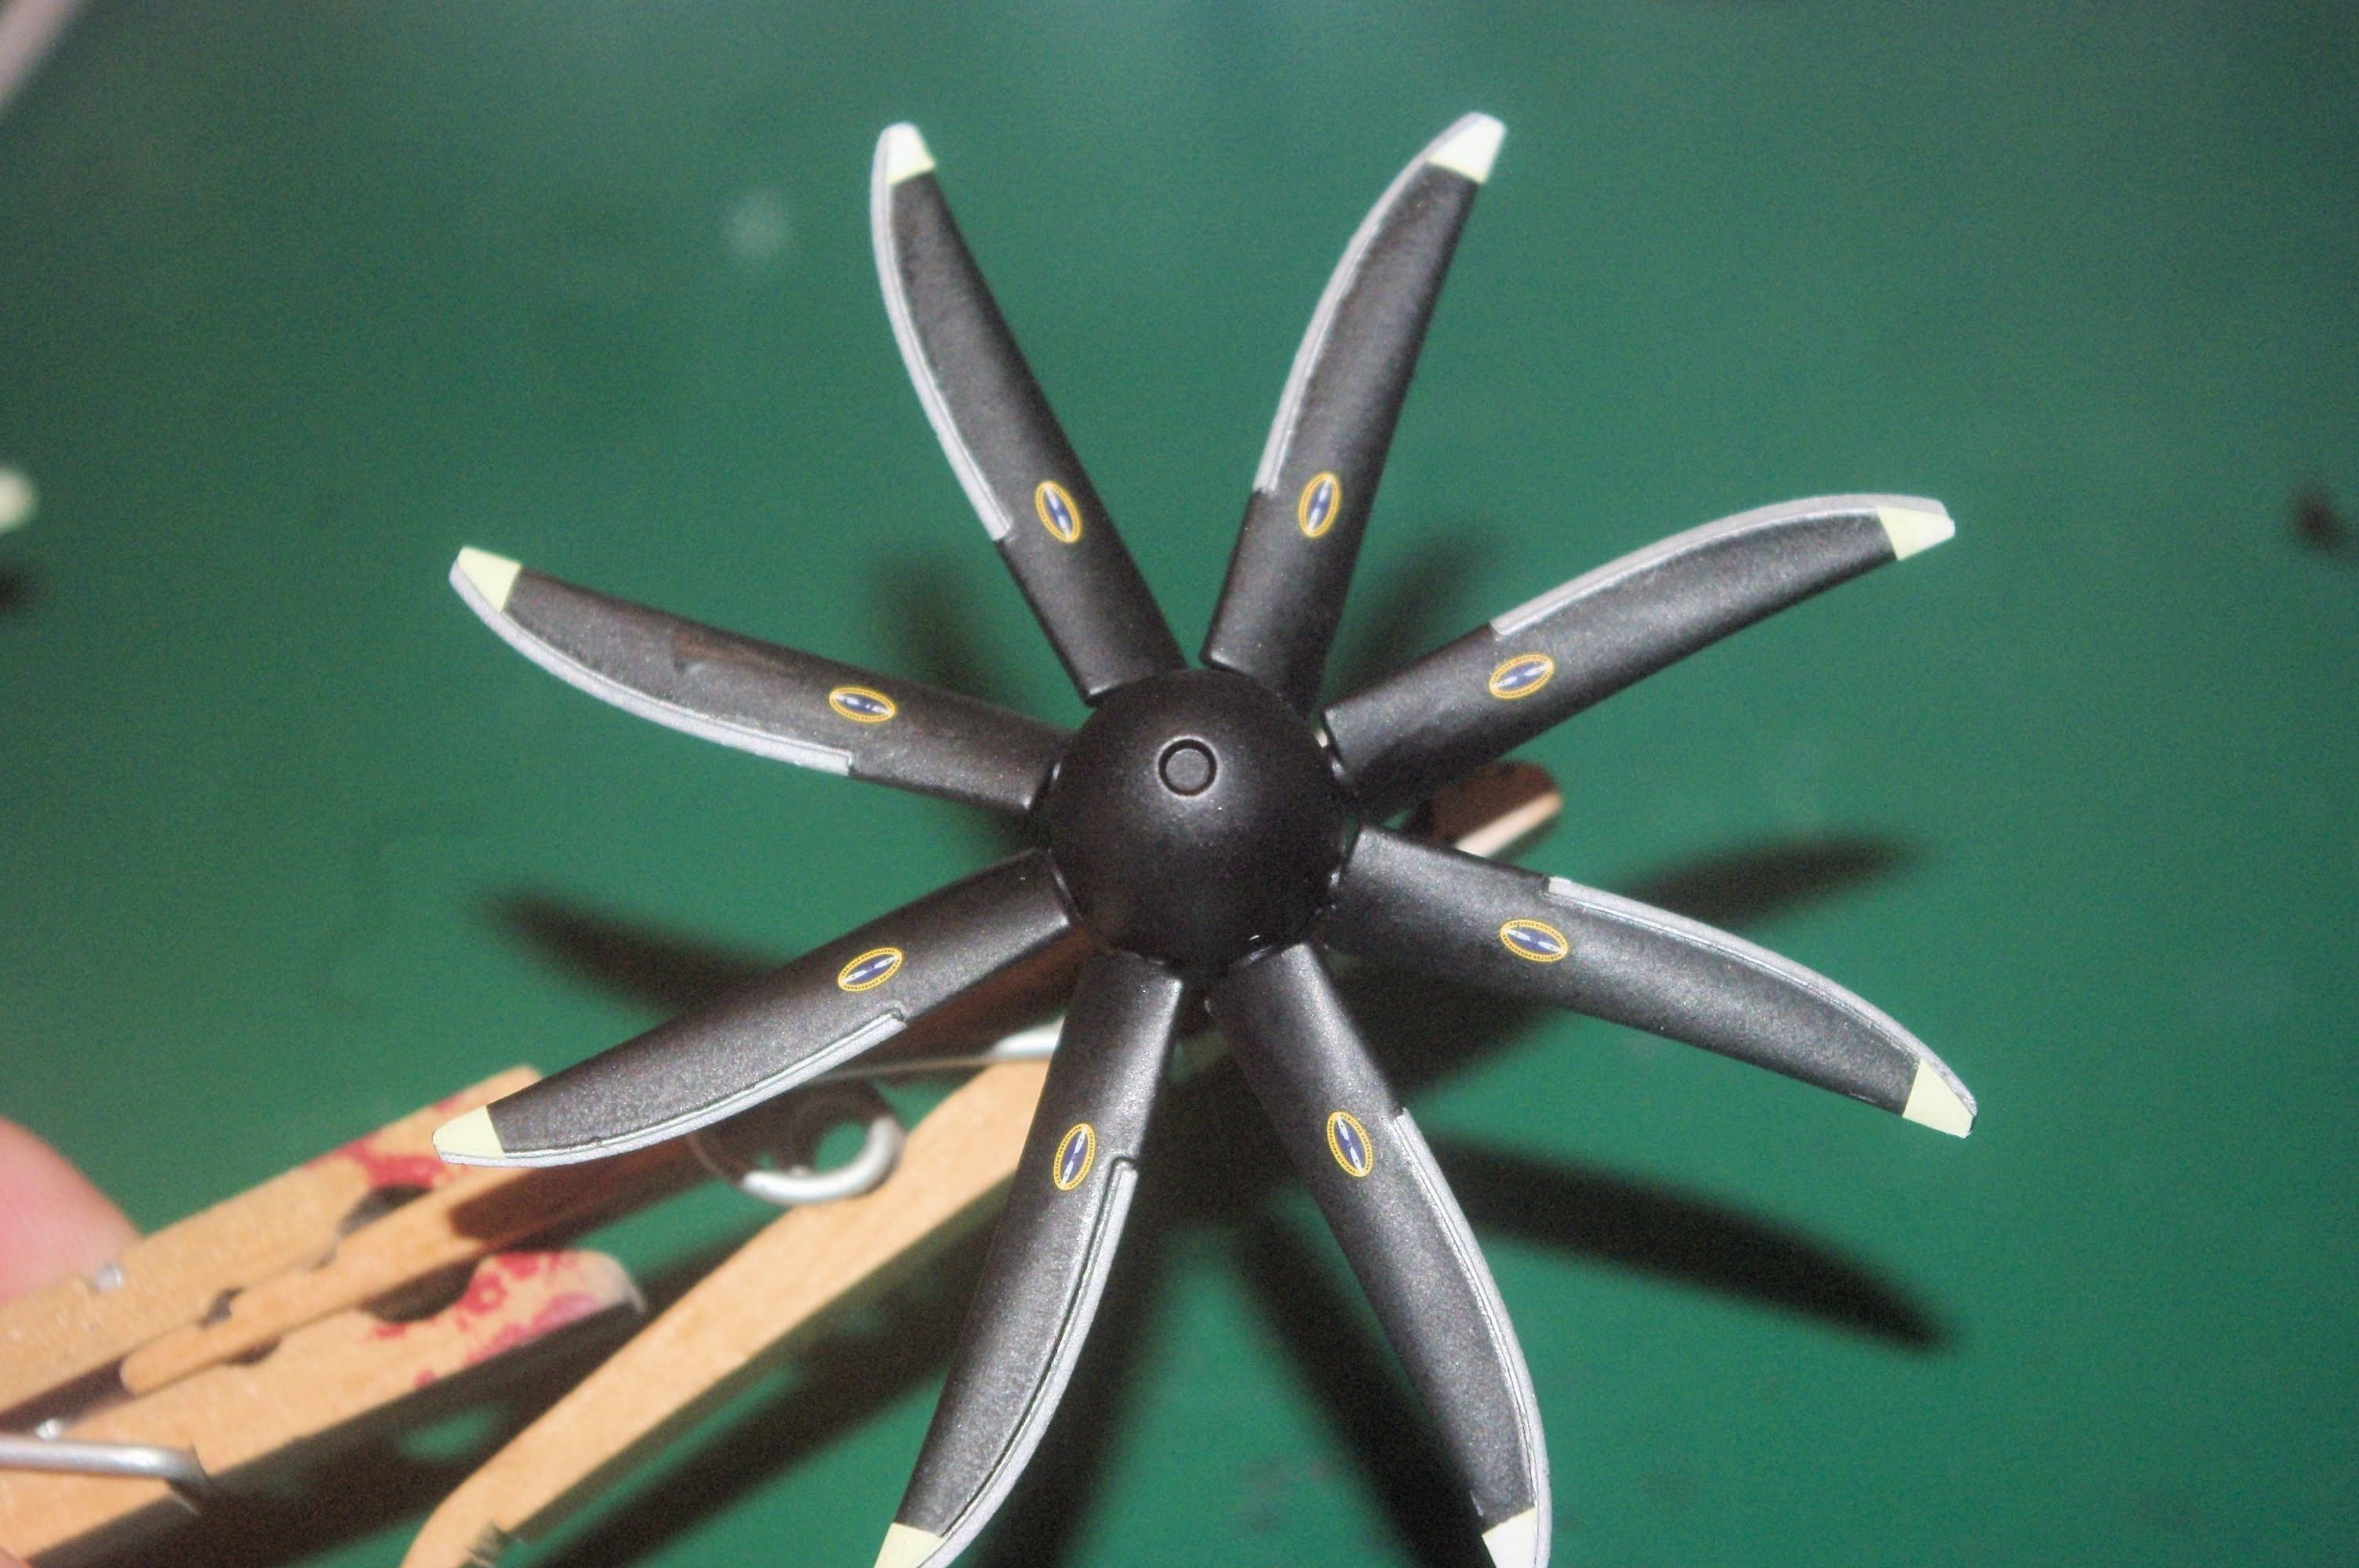
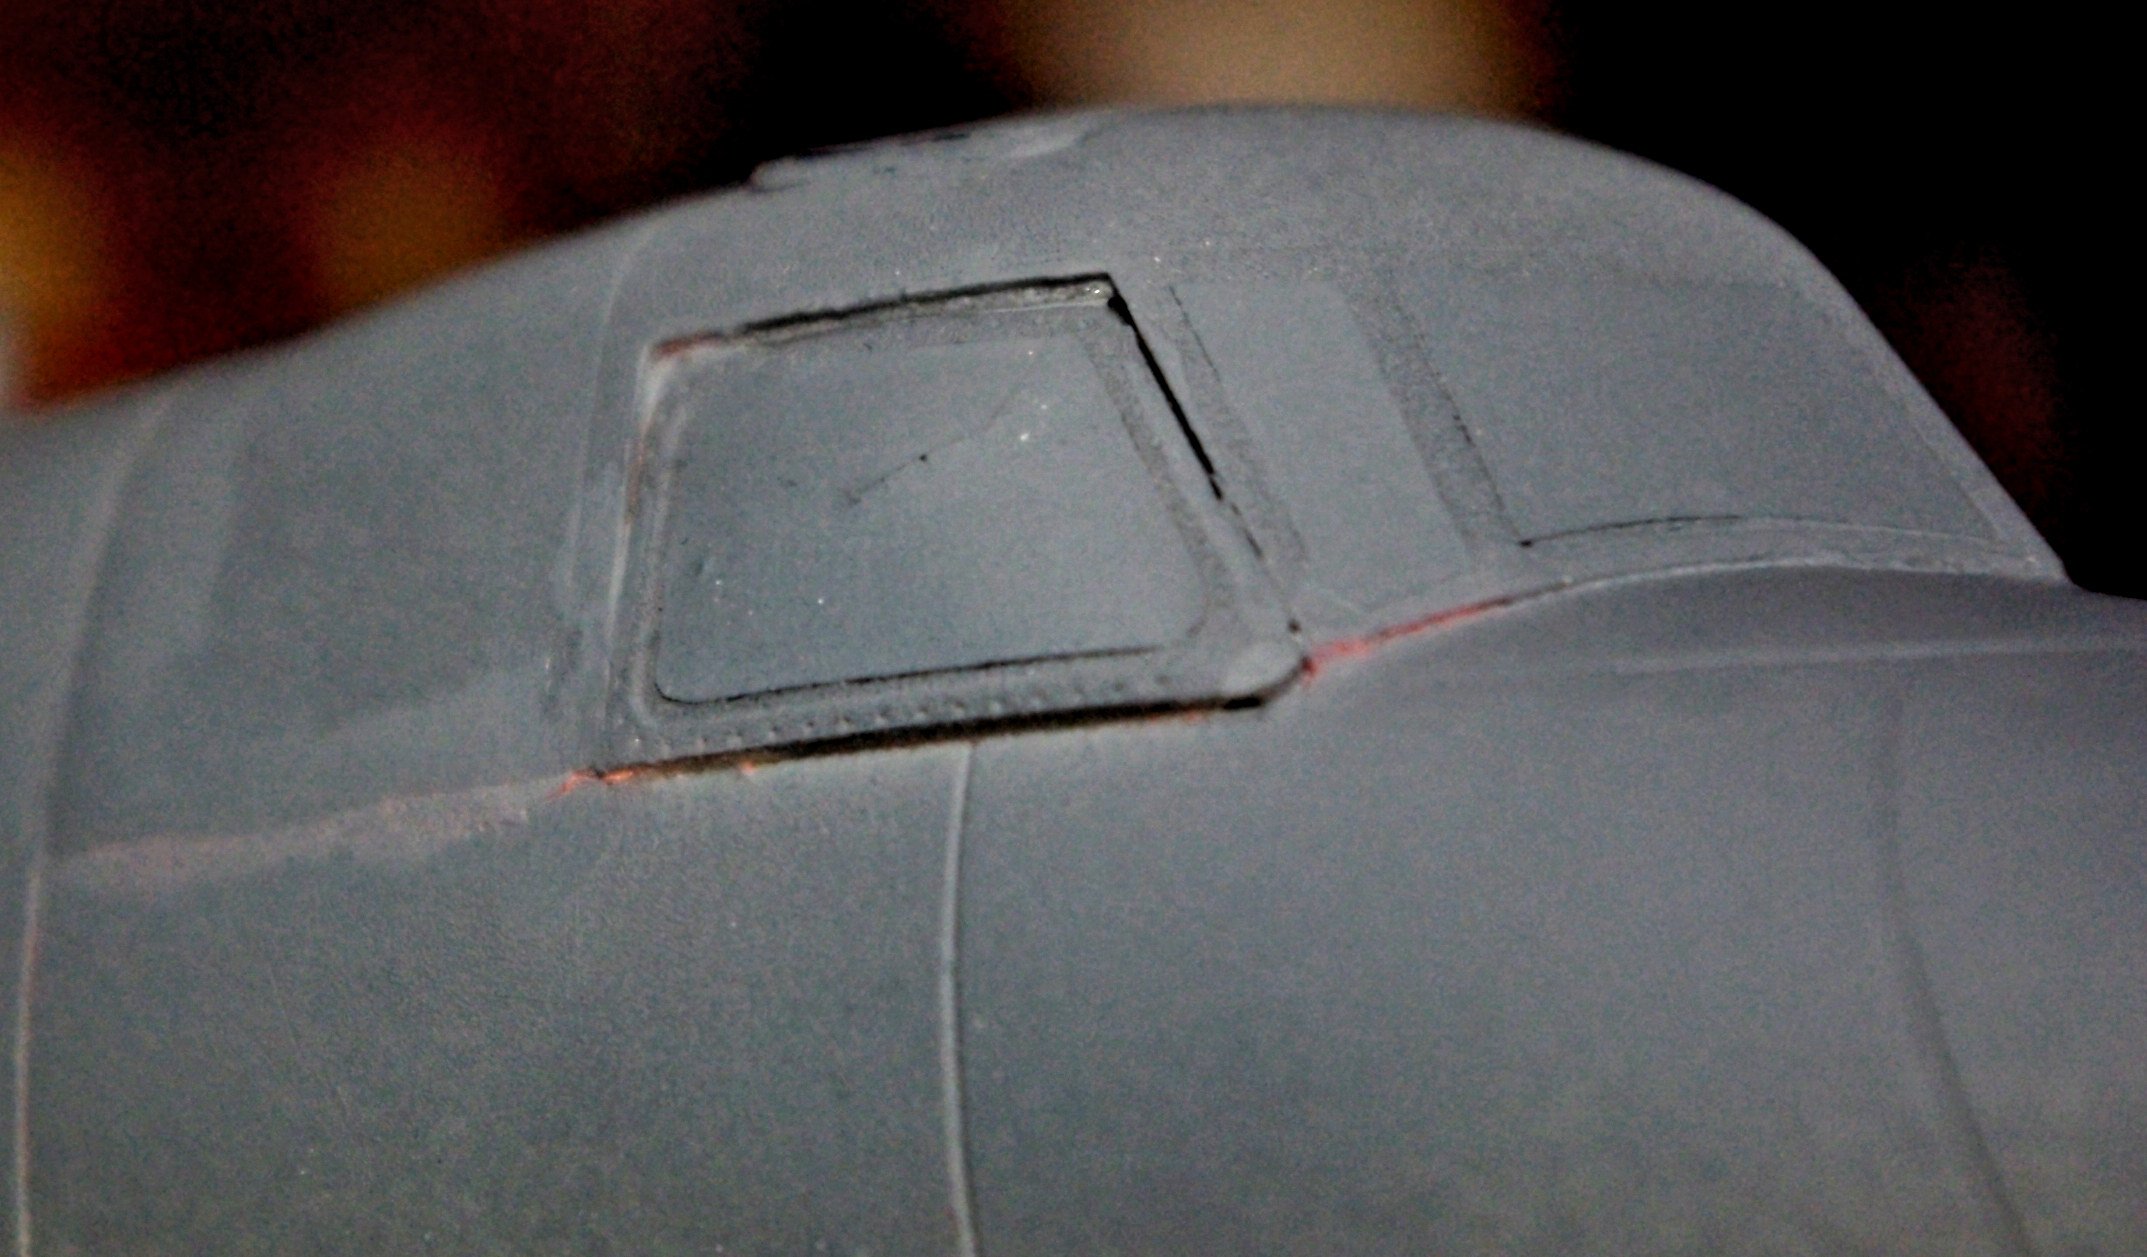
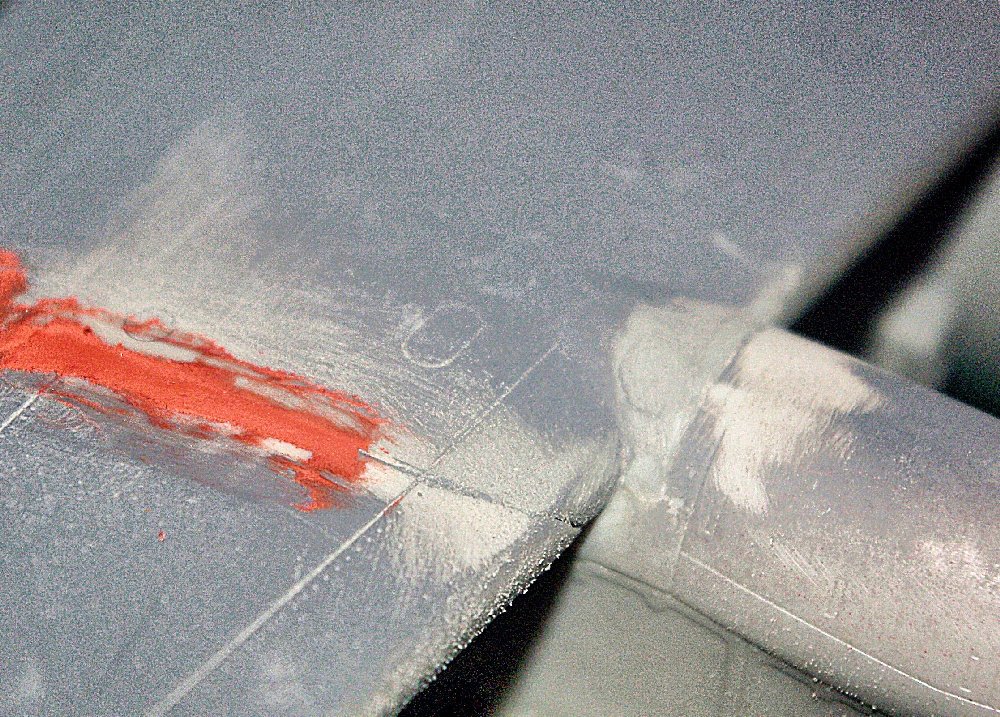
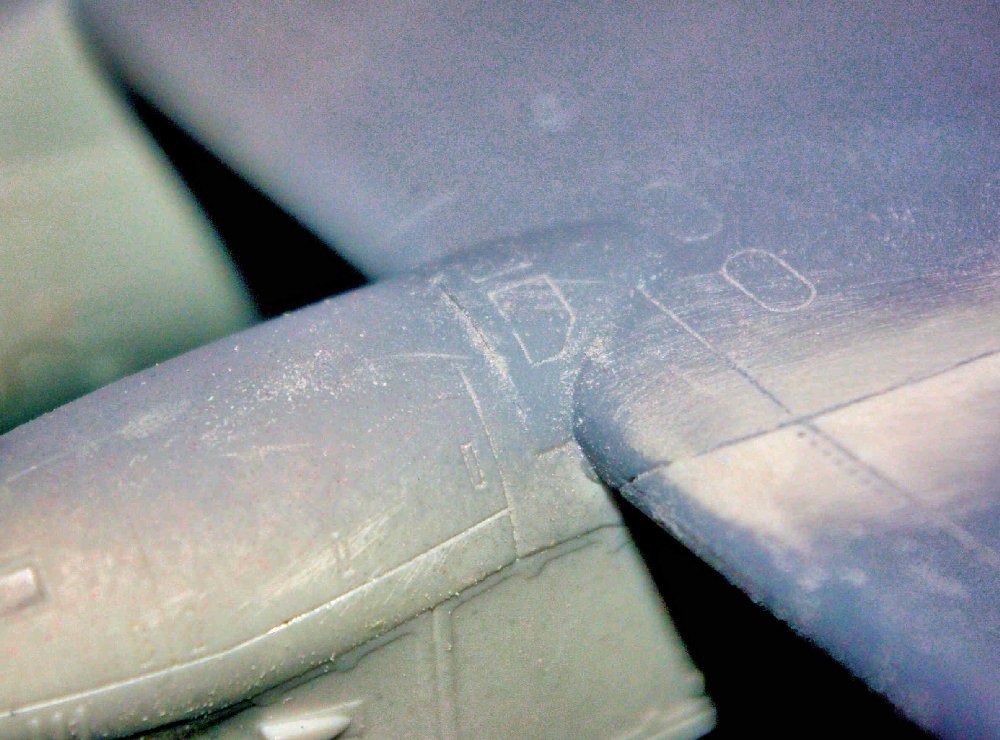
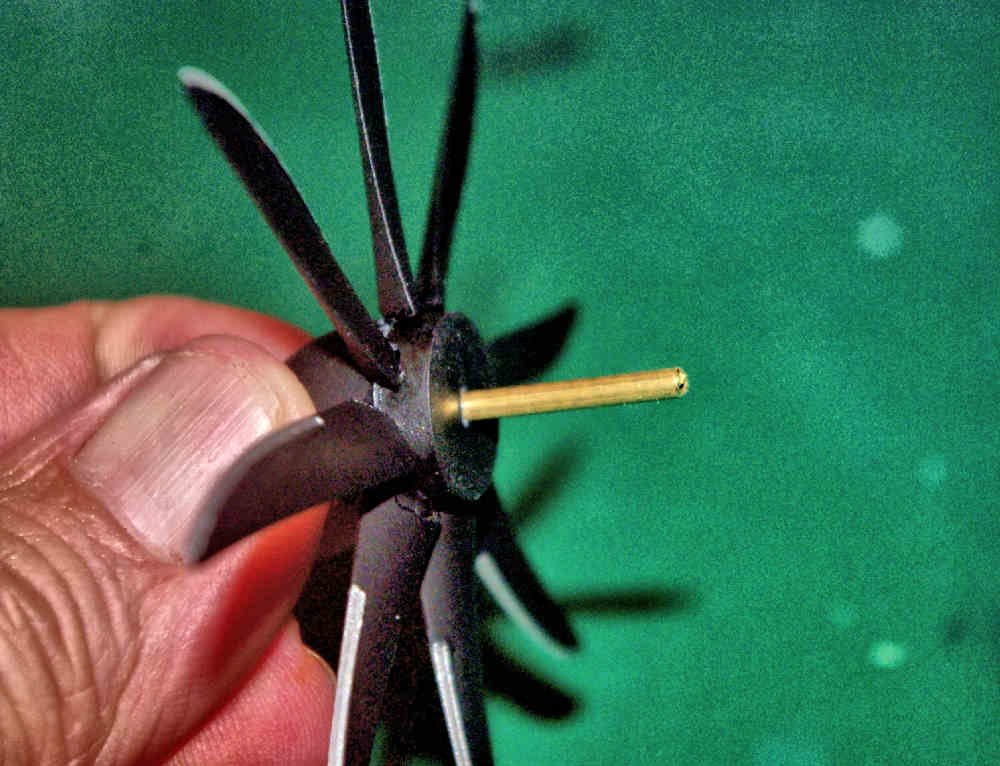
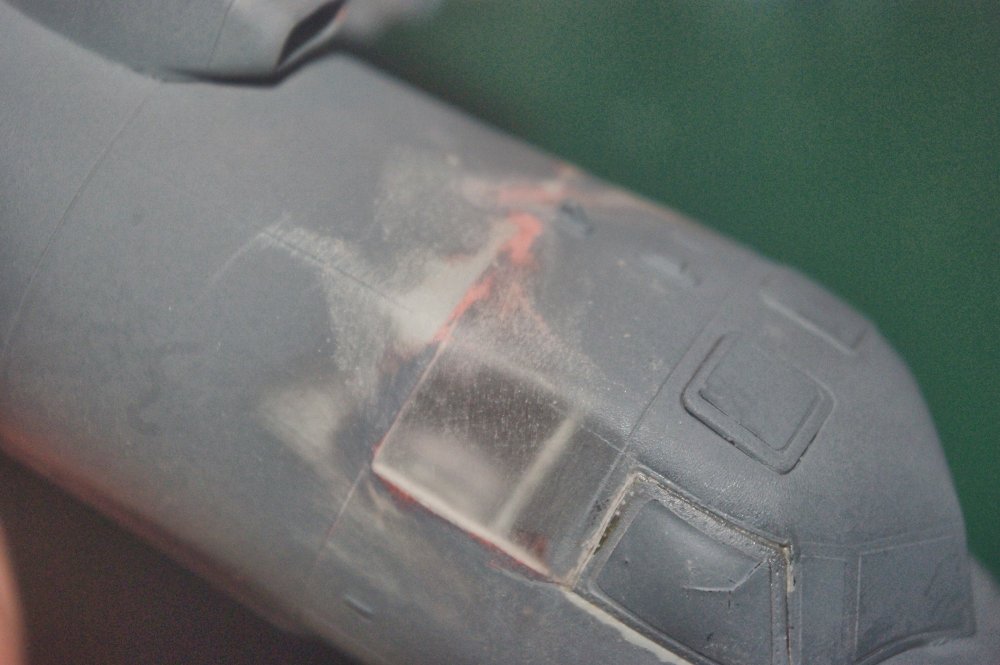
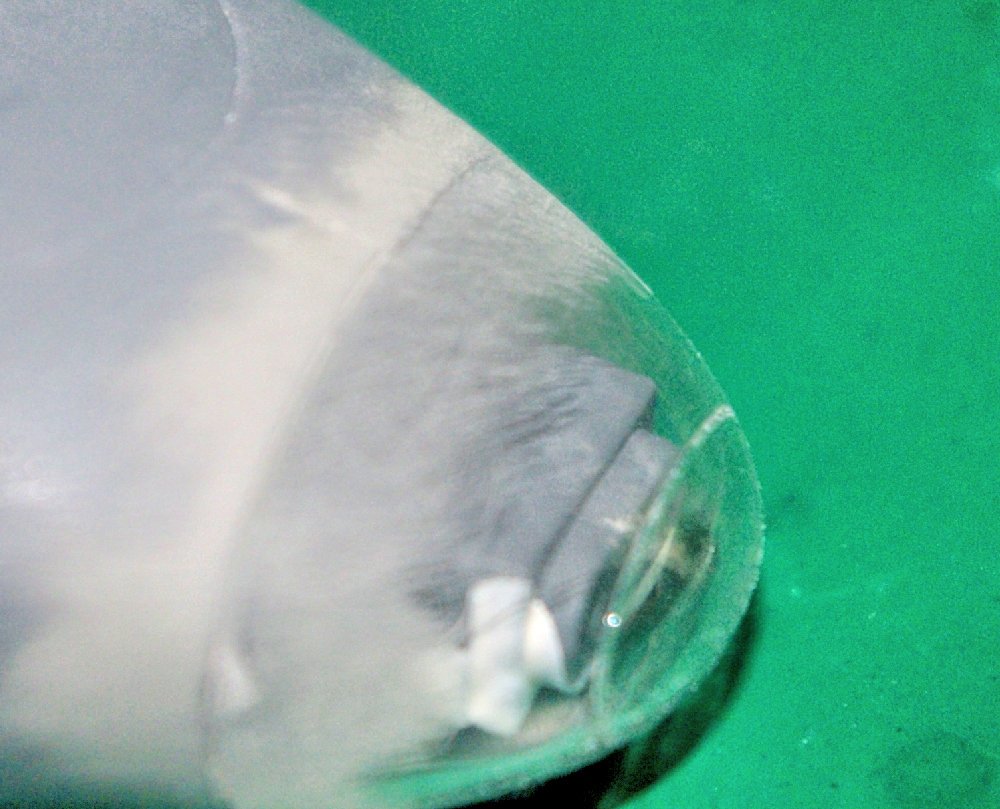
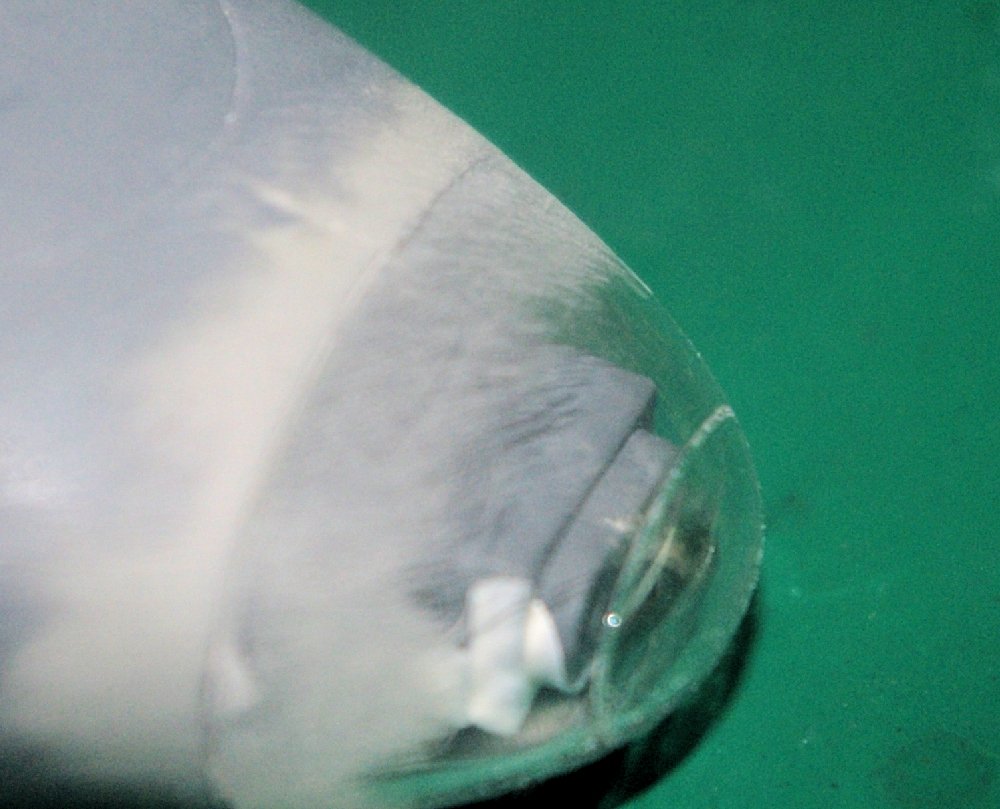
Hi all, Here's the latest on the E2C 2000. The canopy was masked with Montex Mini Mask (# SM 48321). Not only do they fit perfectly, you get a double set so you can mask both the inside and outside if you choose. I got mine from Sprue Brothers, but the Montex website is montex-mask.com. One advantage to Kinetic's canopy approach is that it includes a section of the fuselage. Since the canopy isn't a perfect fit...probably the result of a replacement part due to a short shot in the kit...it allows you to putty and sand any problem seams with relative ease. Incidentally, unless the Kinetic policy has changed, when you request a replacement part, they won't acknowledge the request. Just send the part when they get around to running the kit mold again. This means that your needed part will eventually show up in your mailbox anywhere from a few weeks to a couple of months or more later. Remember I said the wing fold joints and nacelle/wing joints fit perfectly? Well, they do. Mostly. But when I looked close, I found a slight step in the starboard wing step joint and a similar problem with the nacelle/wing joints. This is likely the result of the kit parts fitting as tightly as they do and it's something you need to watch out for. In any event, the problem isn't severe and can be taken care of without losing much if any surface detail, which can be easily restored. The port wing joint, nacelle area just took a little sanding and no putty at all. Whether the bulged side window...which is a separate piece that has to be installed before mounting the canopy...shifted during canopy installation or I simply screwed up the initial installation, I can't say. In any event, I had to carefully cut out the window and reinstall correctly. As it turned out, at least on my kit, the window was slightly too large to fit properly so it took several test fits and very gentle trimming to get things right. The eight-blade props are built up from a pair of four-bladers. Each blade also has an engraved leading edge that needs to be painted steel. Checking references, the steel sections appear to be everything from dark steel to bright aluminum. How much of this is due to light reflection and/or viewing angle I can't say. So for model purposes I chose to go with Model Master Metalizer Non-Buffing Aluminum. In an earlier installment, i installed brass tubing in the nacelles in preparation for removable props. To complete that system, I installed a length of 3/32" (.094") tubing in the back of each prop. Length of the tubing doesn't matter, within reason, and you'll have to align the new shafts with ye olde Mk. I eyeball computer. Done right, they'll spin like a whirligig if you hold the model in front of a fan. One of the eight-blade props completely finished. The white tips are decals and are designed to fold over to create white tips both front and back. It works for the most part, but you'll probably need to do a little bit of touchup on the back with Model Master Flat White. I did. And of course manufacturers logos go on the front of each blade, positioned so that the beltline of the logo aligns with the bottom line of the steel/aluminum leading edge. The decals from the kit sheet are appropriately thin, but they take a long time to release from their backing sheet. Since there are a total of 32 decals for the two props, you should plan on a relatively extended decal session. Also, I wound up using tweezers to handle and position all of the logos and some of the tip decals. The side windows have been corrected and reinstalled. The canopy section/fuselage seam has been eliminated. Last but not least, Finally the nose cone was added. The nose cone is indexed with a locator pin. As a result, the bottom part of the seam is a perfect fit but the top seam requires a little sanding to bring things into line. With that done, all that's left is a final shot of primer, finish paint and decals. Incidentally, 'all' is not as simple as it sounds considering the large number of decals.

-
Tried to get the latest installment in before a doctor's appointment. Will repost when I get back with better photos. Tried to add ten photos and had to reduce the image size which resulted in lower quality/grainy appearance. My apologies.
-
Hi all, Here's the latest on the E2C 2000. The canopy was masked with Montex Mini Mask (# SM 48321). Not only do they fit perfectly, you get a double set so you can mask both the inside and outside if you choose. I got mine from Sprue Brothers, but the Montex website is montex-mask.com. One advantage to Kinetic's canopy approach is that it includes a section of the fuselage. Since the canopy isn't a perfect fit...probably the result of a replacement part due to a short shot in the kit...it allows you to putty and sand any problem seams with relative ease. Incidentally, unless the Kinetic policy has changed, when you request a replacement part, they won't acknowledge the request. Just send the part when they get around to running the kit mold again. This means that your needed part will eventually show up in your mailbox anywhere from a few weeks to a couple of months or more later. Remember I said the wing fold joints and nacelle/wing joints fit perfectly? Well, they do. Mostly. But when I looked close, I found a slight step in the starboard wing step joint and a similar problem with the nacelle/wing joints. This is likely the result of the kit parts fitting as tightly as they do and it's something you need to watch out for. In any event, the problem isn't severe and can be taken care of without losing much if any surface detail, which can be easily restored. The port wing joint, nacelle area just took a little sanding and no putty at all. Whether the bulged side window...which is a separate piece that has to be installed before mounting the canopy...shifted during canopy installation or I simply screwed up the initial installation, I can't say. In any event, I had to carefully cut out the window and reinstall correctly. As it turned out, at least on my kit, the window was slightly too large to fit properly so it took several test fits and very gentle trimming to get things right. The eight-blade props are built up from a pair of four-bladers. Each blade also has an engraved leading edge that needs to be painted steel. Checking references, the steel sections appear to be everything from dark steel to bright aluminum. How much of this is due to light reflection and/or viewing angle I can't say. So for model purposes I chose to go with Model Master Metalizer Non-Buffing Aluminum. In an earlier installment, i installed brass tubing in the nacelles in preparation for removable props. To complete that system, I installed a length of 3/32" tubing in the back of each prop. Length of the tubing doesn't matter, within reason, and you'll have to align the new shafts with ye olde Mk. I eyeball computer. Done right, they'll spin like a whirligig if you hold the model in front of a fan. One of the eight-blade props completely finished. The white tips are decals and are designed to fold over to create white tips both front and back. It works for the most part, but you'll probably need to do a little bit of touchup on the back with Model Master Flat White. I did. And of course manufacturers logos go on the front of each blade, positioned so that the beltline of the logo aligns with the bottom line of the steel/aluminum leading edge. The decals from the kit sheet are appropriately thin, but they take a long time to release from their backing sheet. Since there are a total of 32 decals for the two props, you should plan on a relatively extended decal session. Also, I wound up using tweezers to handle and position all of the logos and some of the tip decals. The side windows have been corrected and reinstalled. The canopy section/fuselage seam has been eliminated. Last but not least, Finally the nose cone was added. The nose cone is indexed with a locator pin. As a result, the bottom part of the seam is a perfect fit but the top seam requires a little sanding to bring things into line. With that done, all that's left is a final shot of primer, finish paint and decals. Incidentally, 'all' is not as simple as it sounds considering the large number of decals.
-
Hi all, I received a phone call from a 78 year old gentleman in Norwich, NY. His grandson damaged a Sopwith Camel model...knocked the top wing off...and he needs it repaired. Wingspan of the model is approximately 15" and was purchased ready built. It is not a kit. It isn't practical for him to ship it to me in Texas for repairs, so I would like to put him together with someone in the Syracuse/Norwich/Binghamton area who would be willing to do the repairs for him. Anyone interested, please reply to my email at tennexican@gmail.com and I will provide the gentleman's name and full contact information.
-
Nicely done, Duke!
-
Gil, Another possibility would be the different variants of a single type, though that could get out of hand with the F4 Phantom or F-111. One I'm currently planning takes three Monogram kits of a single type and building three variants. One more or less out of the box and the other two with most or all of the aftermarket bells and whistles.
-
Gil, You raise an interesting point. I'd have to limit a single ebook to three or maybe four subjects or the ebook would take forever to finish. For example, Building the Monogram 1/48th Medium Bombers. That would be the B-25, B-26 and A-26. It's an interesting idea and something I'll strongly consider. Of course there would still be single subject ebooks, so I'd appreciate your ideas there as well.
-
Kevin, What's really frustrating...and worse than recasting...is when a company takes a resin casting of a conversion part that no one else has ever produced and copies it. Not by recasting the part so that it is the same size, but by vacuforming OVER the part so that their vacuform version is larger than the original by the thickness of the plastic. Of course the customer ends up with a part that doesn't fit the way it's supposed to. I've had that experience and...as you state...there is very little that can be done about it unless you have the deep pockets to take the person/company to court.
-
The question of recasting has parallels with piracy in E-book publishing. As with recasting, anyone who wants to can copy an ebook, even to the point of claiming it's their own work. Most authors, and I suspect most sculptors, simply tolerate the pirating...unless it gets out of hand....as another form of advertising. The bottom line is that there is no practical way to prevent pirating of ebooks or the recasting of aftermarket products short of taking each person who does it to court. Given the legal fees involved versus the potential income lost of the recast item in question, it's a lose-lose situation for both the author and sculptor. About the best we can do is publicize the fact that the practice of recasting and ebook piracy is both immoral and unethical. As others have said, making a few copies of a part for yourself is acceptable and I would think no sculptor would have a problem with it. After all, it would be unreasonable to expect someone to buy a second $100 kit in order to get duplicates of two parts that they need. But selling those copies...especially with the intention of making a profit, is another thing entirely.
-
In order to find the best direction for my Modelbuilding Guide E-book series, I need some input. Specifically, what would y'all like to see in the way of step-by-step single subject e-books along the lines of my recent Williams Bros C-46 and upcoming Kinetic E-2C 2000. Primary interest: Preferred scale: Classic kits with aftermarket upgrades: Latest & Greatest Specific kit of interest: Other comments: To see what I've already covered, please see scalepublications.freeyellow.com
-
I just talked to Squadron and learned that there is an entire batch of White Stuff that was bad. They are now in the process of correcting the problem and will replace any bad tubes if you contact them. If you use White Stuff, regardless of where you buy it, call Squadron and they will replace it no questions asked.
-
A rather interesting problem has recently surfaced. My tube of Squadron White Putty went bad in the tube. Picked up a new tube...new package, redesigned tube layout...and when I opened it the putty wasn't putty. What I got was a watery fluid instead of the usual solid putty that should have been about the consistency of thick/stiff toothpaste. The shop where I bought it gave me another tube. Same result when opened, only this time it was a hazy gel. As a backup, I stopped by an auto supply to buy my old reliable spot 'n glaze putty. The counter guy didn't know what I was talking about and finally showed me to the Bondo area. Fine, I thought, since Bondo is one of the companies that makes the putty. What I thought was a tube of the putty came with a tube of hardener so you had to mix them. According to the guy, no one carries the putty any more except for shops that sell to professional auto body shops. Finally went to another auto supply and they actually had another version that was actually had what I was looking for. Had to find it on my own, though, because this counter guy...when I said putty...looked like a deer caught in the headlights as he repeated putty with a question mark. He had no clue. Bottom line is that you normally used the red spot 'n glaze putty as I do, you'd better lay in a few extra tubes. I suspect the stuff's going to become a little hard to find. Incidentally, Testors used to offer a red putty that was exactly the same as what I was looking for. They no longer offer it, of course.
-
On-line hobby shopping is about to get a bit more expensive.
ipmsusa2 replied to SkyKing's topic in General Modeling
For the most part, I deal with the kits my clients provide. When I have to it comes from the net but buy locally whenever I can. As for supplies of all kinds, the net is the last place I'll go, though I've been forced into it a couple of times lately. What I'm wondering about is where downloadable ebooks fall. Depending on how that shakes out, I could very easily be put out of business since I do offer a How-To Modelbuilding Series. There is, of course, one thing we have to keep in mind. Those who sell on the net are usually exempt if their annual sales are below a certain amount....such as $50,000 or $100,000. There are a slew of small etaillers who will never come near that level. -
Latest on Model Master at Hobby Lobby...and an Insult
ipmsusa2 replied to ipmsusa2's topic in General Modeling
I agree that the answer is 'depends'. What's interesting is the inconsistency. Here in Ft. Worth you have three major auto parts shops...Auto Zone, O'Reilly's and Advance. O'Reilly's and Advance have their spray cans on the open shelves while Auto Zone has theirs locked behind glass. Same group of customers, two display methods. Go figure. -
Ron, I can think of one situation where it wouldn't. In my Modelbuilding Guide E-books, I promote the IPMS/USA with a small blurb and a link to the IPMS/USA website. I do not use an image of the logo, but it would be nice if I could. However, from the above language, it appears that would be prohibited since the E-books carry a price. Can you get a clarification on that situation?
-
The original swing wing jet!
ipmsusa2 replied to ghodges's topic in THEME PICS: Turning point of the war.
Gil, Mark & Dave, All of your Jaguar models are very well done. BUT at the risk of raining on y'all's parade, the XF-10F was not the original swing wing jet. Nor was the XF-10F the aircraft that had all the bugs worked out so the F-111 and F-14 could be built. The progenitor of the swingwing design traces all the way back to Nazi Germany and the Messerschmitt P.1101. While not a swingwing, it was a positionable wing design and the immediate predecessor to the swingwing concept. When Germany collapsed, Bell Aircraft got their hands on the P.1101 and built a dead copy of the aircraft with one additional feature: Functional variable geometry wings that could change their sweep in flight. The aircraft? The Bell X-5. Next up was the XF-10F Jaguar, which...in spite of actually flying onto and off of carriers...had to deal with the same problems as the X-5. Namely a shift in the center of gravity since it was believed that the wing pivot point had to be at the centerline of the aircraft. The first successful variable geometry (or swingwing) aircraft...as well as the first operational v.g. aircraft was the General Dynamics F-111. Reason? Because of the famous NASA glove box that moved the wing pivot point outside the fuselage, thus eliminating the c.g. problems resulting from a centerline pivot location. Grumman was an early partner with General Dynamics but bowed out when McNamara's commonality policy was unsuccessful in the F-111B being a practical design for carrier service. At the same time, lessons learned by Grumman during its F-111 adventure laid the groundwork for the F-14. Bottom line is that the F-111 deserves the credit as the the world's first successful, operational variable geometry swingwing aircraft. Those that came before it have their own place in aviation history, but without the F-111 and the NASA glove box, variable geometry aircraft designs that are as common today as mushrooms after a rain would not exist. -
IPMS/USA National Convention 2020
ipmsusa2 replied to LenPilhofer's topic in About the IPMS/USA National Convention
As a born and bred Southerner, Tennessee and Texas, I love your choice of the Convention Logo. Does that suggest that the Convention Theme will be Anything Texas? -
Gil, I had a friend...Tony Weddel...who was a professional aviation artist. We never discussed the subject at hand since he spent the last eight years of his life in a nursing home. BUT he did play around with computer art and produced some very good art that was essentially indistinguishable from that done with a brush on various media. Both would've been recognized for what they were and perhaps that would be a solution to the question of 3-D printed busts vs hand sculpted and cast in resin busts. They each have their strengths and weaknesses, so acknowledging those differences with separate categories might be the way to go. Richard
-
Gil, Though we are discussing our points in different ways, you and I are essentially in the same camp. As you know, I've been involved in the IPMS/USA since before the IPMS/USA formally existed. Jim Sage and I were involved in the Texas Aviation Historical Society (TAHS) when Sage learned about the formation of the IPMS in England and the rest is history. The last thing I want is for any change to occur that would be detrimental to the IPMS/USA. Richard
-
Excellent points, Gil. A contest level aircraft or AFV...or any other subject for that matter...has evolved into a multi-media model. But at the same time it is still primarily a plastic kit. Complete resin kits have their own category within the various IPMS/USA contests and that is as it should be in spite of the fact that resin is another form of plastic. Same goes for 3-D printed KITS. There is, however, one category that raises some interesting problems and that is one-piece busts. Most of those are produced in resin, but what about 3-D printed one-piece busts? Both are one-piece and both are judged primarily on painting skills. Keep in mind that I'm not advocating for 3-D printing to replace injected styrene kits. Like you, my preference is for plastic kits...at least primarily. And I also agree that we have to draw the line somewhere or we could well cease to be IPMS. Still, the 3-D revolution is moving at warp speed and we are going to have to figure out how to deal with it while retaining our plastic kit identity. Richard
-
Nick, I agree with your comments in spite of what I said. But I do believe that injection molding for model kits will eventually be a minor technique...hopefully not in my lifetime. 3-D printing is definitely the coming thing until another unknown technology supplants it. Still, as you said, each type of model construction...be it paper, balsa & tissue, injection styrene, photoetch, etc...will survive as long as there are a few artists....and that is really what we are...who prefer that particular medium and continue to work in it. As for scratchbuilding, scratchbuilding is scratchbuilding and the object of that category is to simply get the result you're looking for irregardless of the medium used. I come from the old school, having been building models of one kind or another since the late 1940s. Since I also do it as a business, I've used darn near every medium there is, but I still like and prefer the products, materials and techniques that most of us in the IPMS use. It's where I'm most comfortable, but I'm not against using anything that does the job. If I had that attitude, I'd have never made any money at this.
-
After looking at the Gambody site and a couple of their model kits, it is apparent that the days of traditional mold making and injected plastic kits are numbered. Rather than using steel, beryllium, copper, rtv, etc to create molds for injecting styrene, abs, etc, to create model parts, 3-D printing will become the standard method. As the 3-D printers become more sophisticated for the fine detail common in the model world...and also cheaper..., conventional mold technology will gradually go away. 3-D printed kits will become indistinguishable from present day Hasegawa, Trumpeter or Tamiya in quality, detail and number of parts. Libraries are already dedicating areas to 3-D printing where you can bring your own .stl files and use the library's computer/3-D printer setup to print your own design. Cost? It's a public library, so cost ranges from zero to minimal. Beyond that, libraries are also creating areas designed specifically for children and teens in order to educate them about the 3-D printing world and help them become enthused about it. To give you an idea of how fast things are moving, I spent almost seven years wring a column on modelbuilding techniques for a magazine. Then I was unceremoniously dropped...dumped?...because they wanted to run a column that focused specifically on 3-D printing. While we won't be able to simply tell...verbally...a 3-D printer what we want and have it created out of thin air...yet..., the world of the Star Trek:The Next Generation replicator is on a fast track and accelerating.