Search the Community
Showing results for tags 'kit builds'.
-
Hi all, In an effort to provide Modelbuilding Guides...step by step kit builds...that y'all both want and will buy, I present a list of possible future subjects for your consideration. All subjects will be available in printable PDF format. There will also be a link to sites for epub and mobi formats for those who prefer alternatives. Look over the list and let me know the projects you can't do without. #1 Atlantis 1/48 JN-4D Jenny (repop of Lindberg kit. #2 Academy1/48 MiG-21PF Fishbed D #3 Trumpeter 1/48 MiG-15 #4 Hasegawa 1/48 F/A-18 Super Hornet #5 Encore & Trumpeter A-37B (kit build comparison e-book) #6 Revell 1/48 Arado AR-234 #7 Monogram 1/48 Do-635 Conversion #8 Williams Bros 1/32 F9C Sparrowhawk #9 AmTech 1/48 Hs-123B 10 Accurate Miniatures 1/48 SBD-1 11 Accurate Miniature 1/48 SBD-5 12 Accurate Miniatures 1/48 P-51B 13 Academy 1/72 PBY-5 14 Hobbycraft 1/48 DeHavilland Beaver on Floats 15 Accurate Miniatures 1/48 F3F 16 Revell 1/48 PT-17 Note that some of these projects may be incorporated into vignettes or dioramas for a better appearance. Finally, if there is a subject you would like to see as a Modelbuilding Guide that isn't on this list, don't hesitate to let me know. Richard Marmo
-
 As promised, Part 8 of the Kinetic E-2C 2000 with revised photos is now available for your viewing pleasure. You can ignore Part 8 and 8A. As usual, comments are not only welcome but encouraged.
 -
Installment #7 of the Kinetic E2C 2000 build series has been posted in the Builds Sub-Forum. All comments welcome.
-
Installment #6 of the Kinetic E2C 2000 build series has been posted in the Builds Sub-Forum. All comments welcome.
-
Installment #5 of the Kinetic E2C 2000 build series has been posted in the Buids Sub-Forum. All comments welcome.
-
Installment #4 of the Kinetic E2C 2000 build series has been posted in the Buids Sub-Forum. All comments welcome.
-
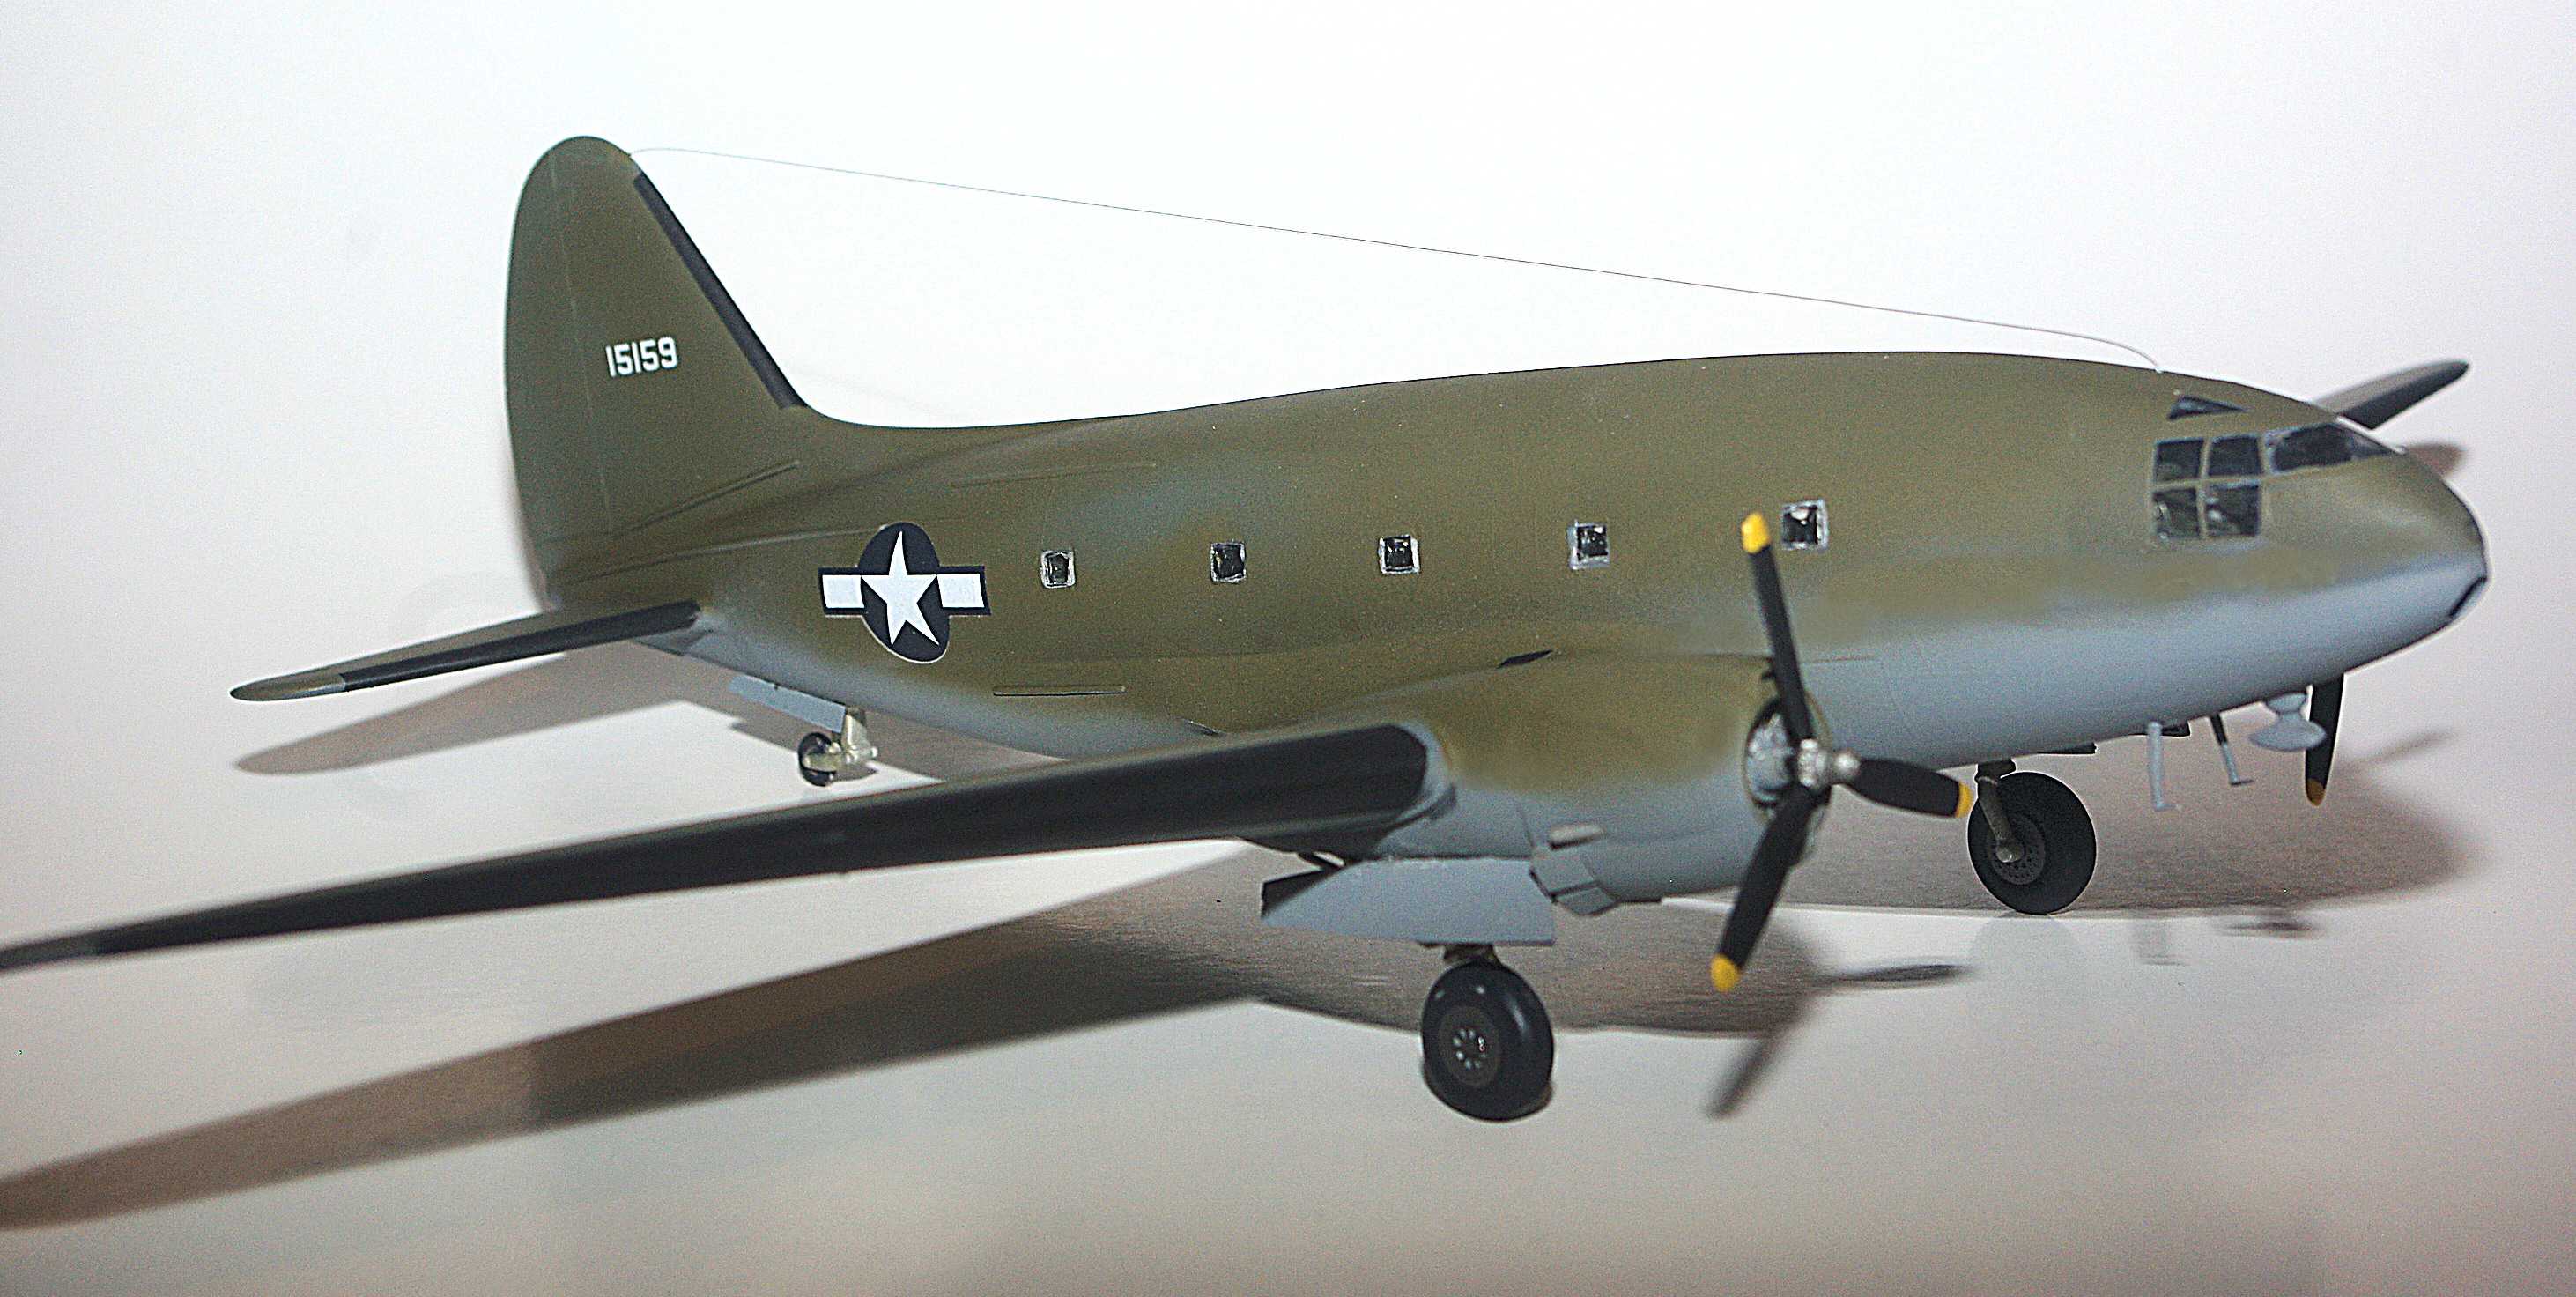
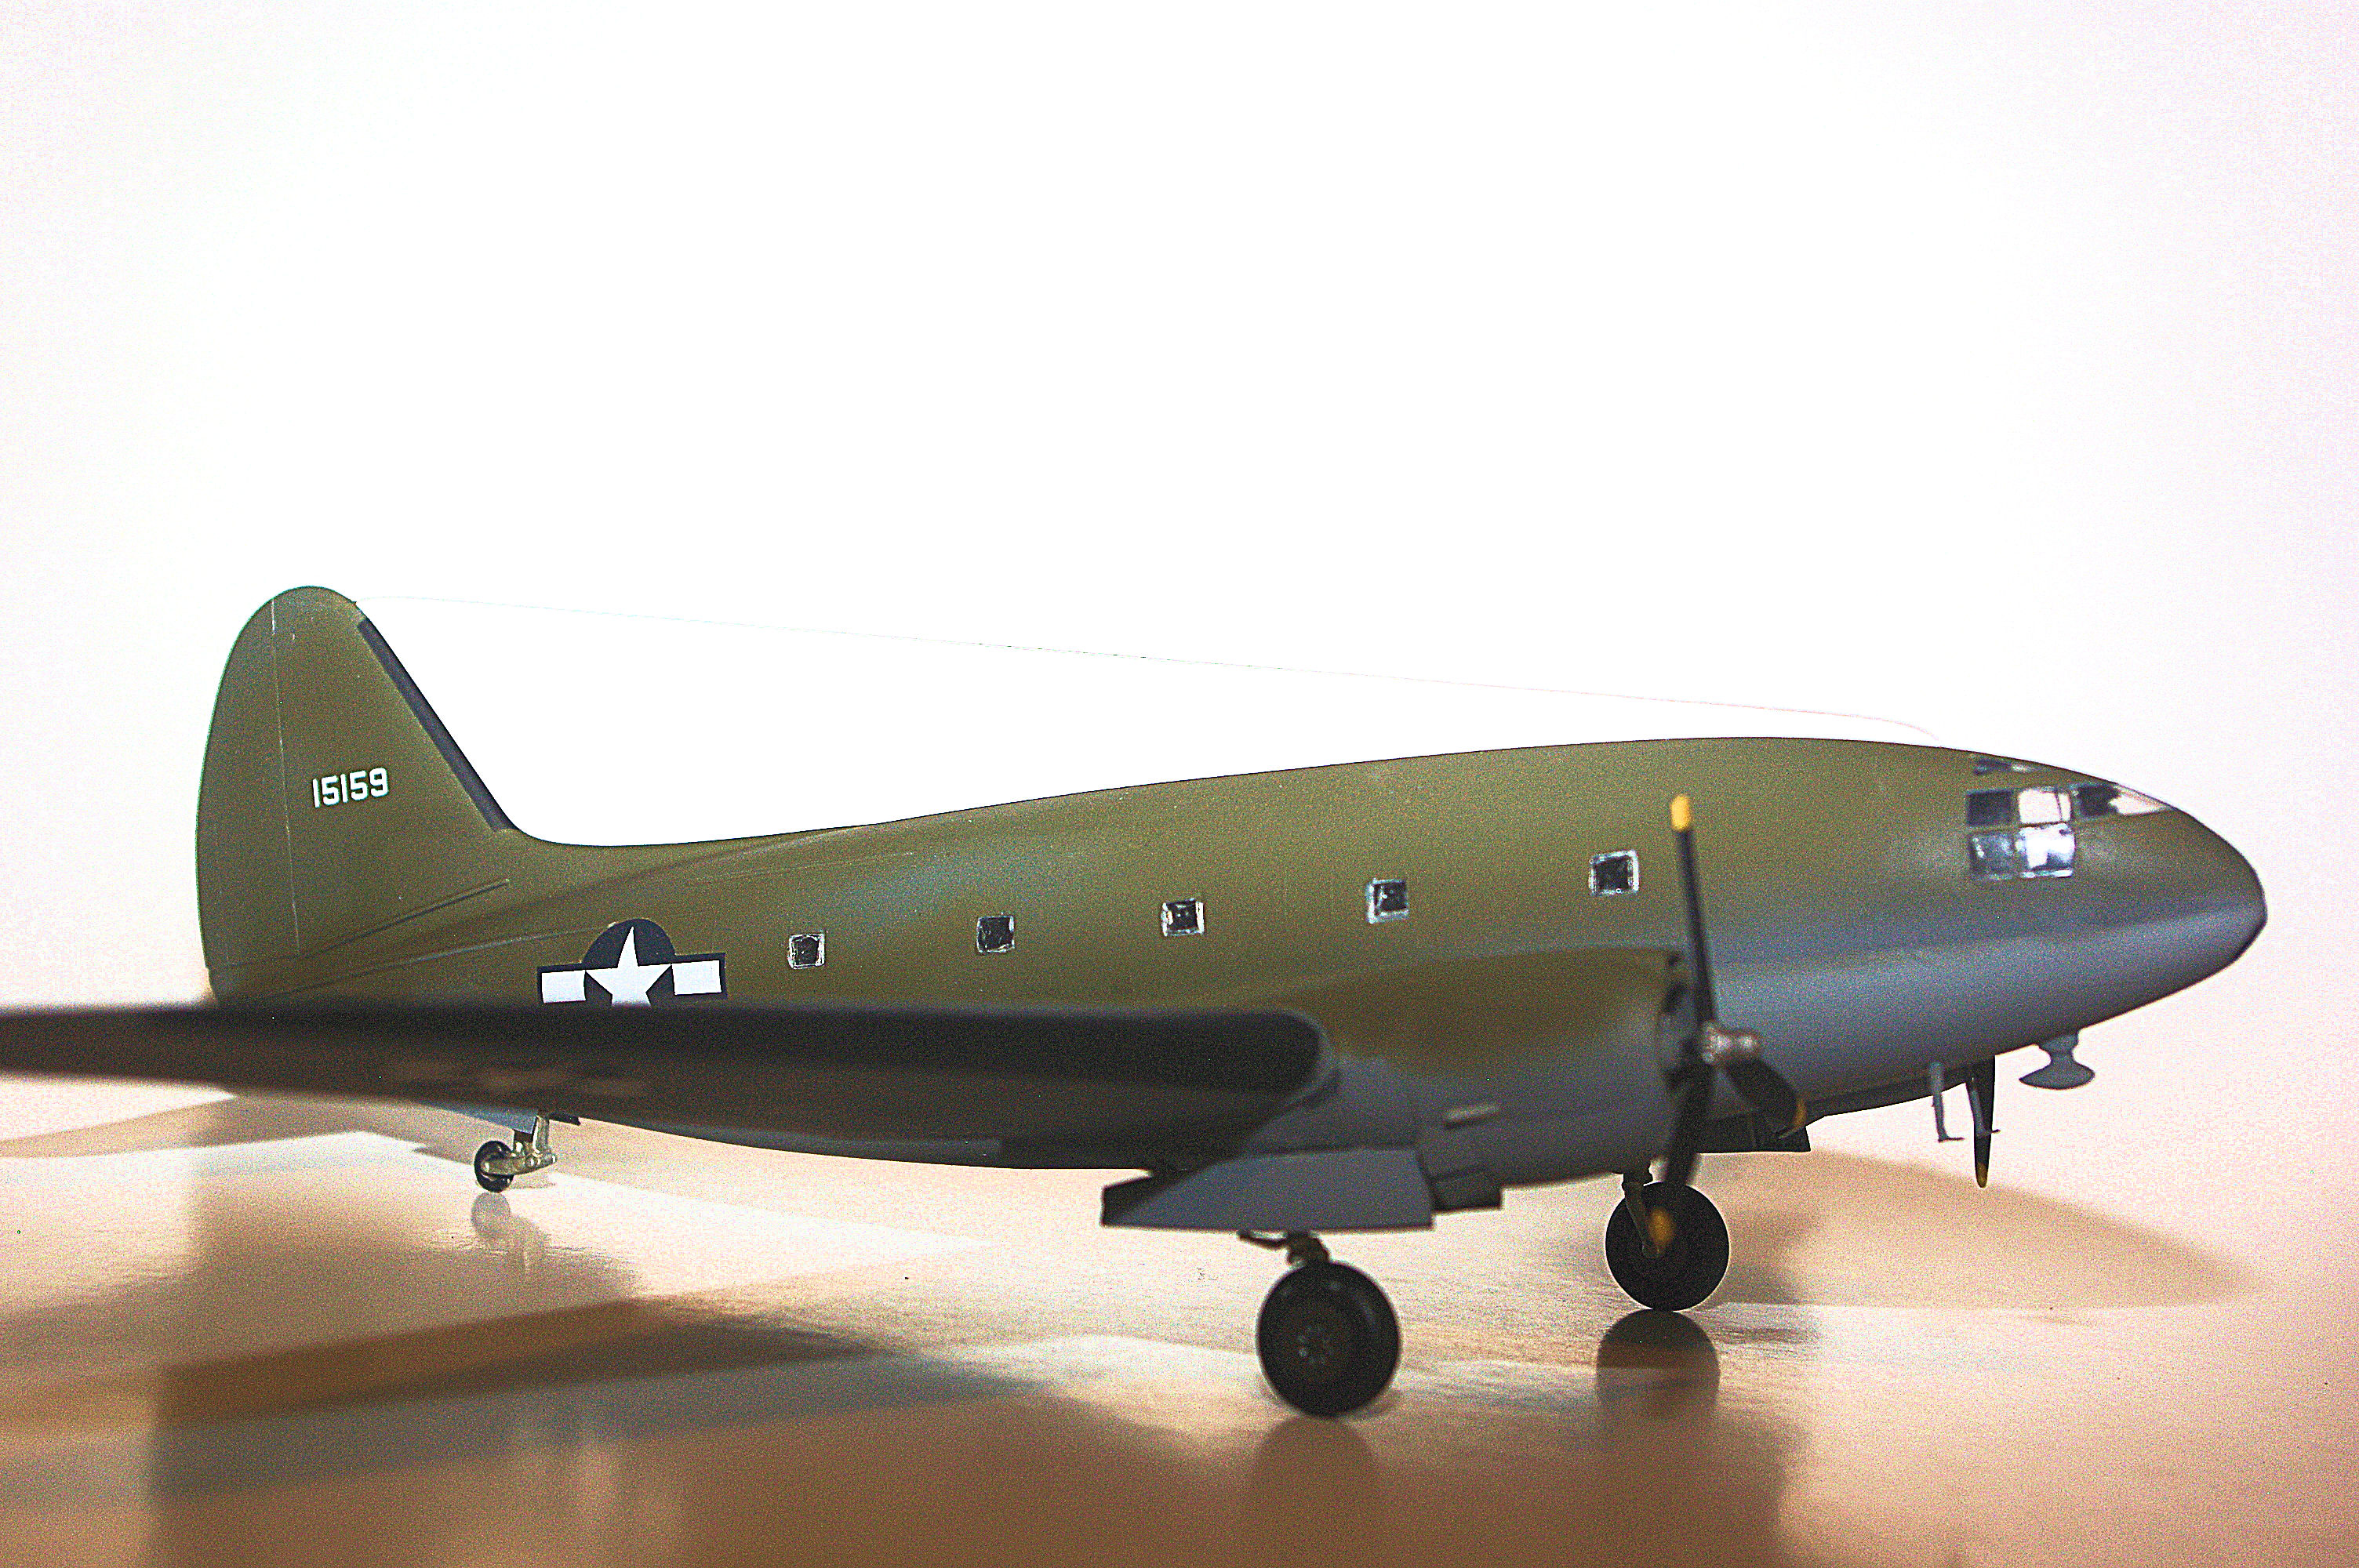
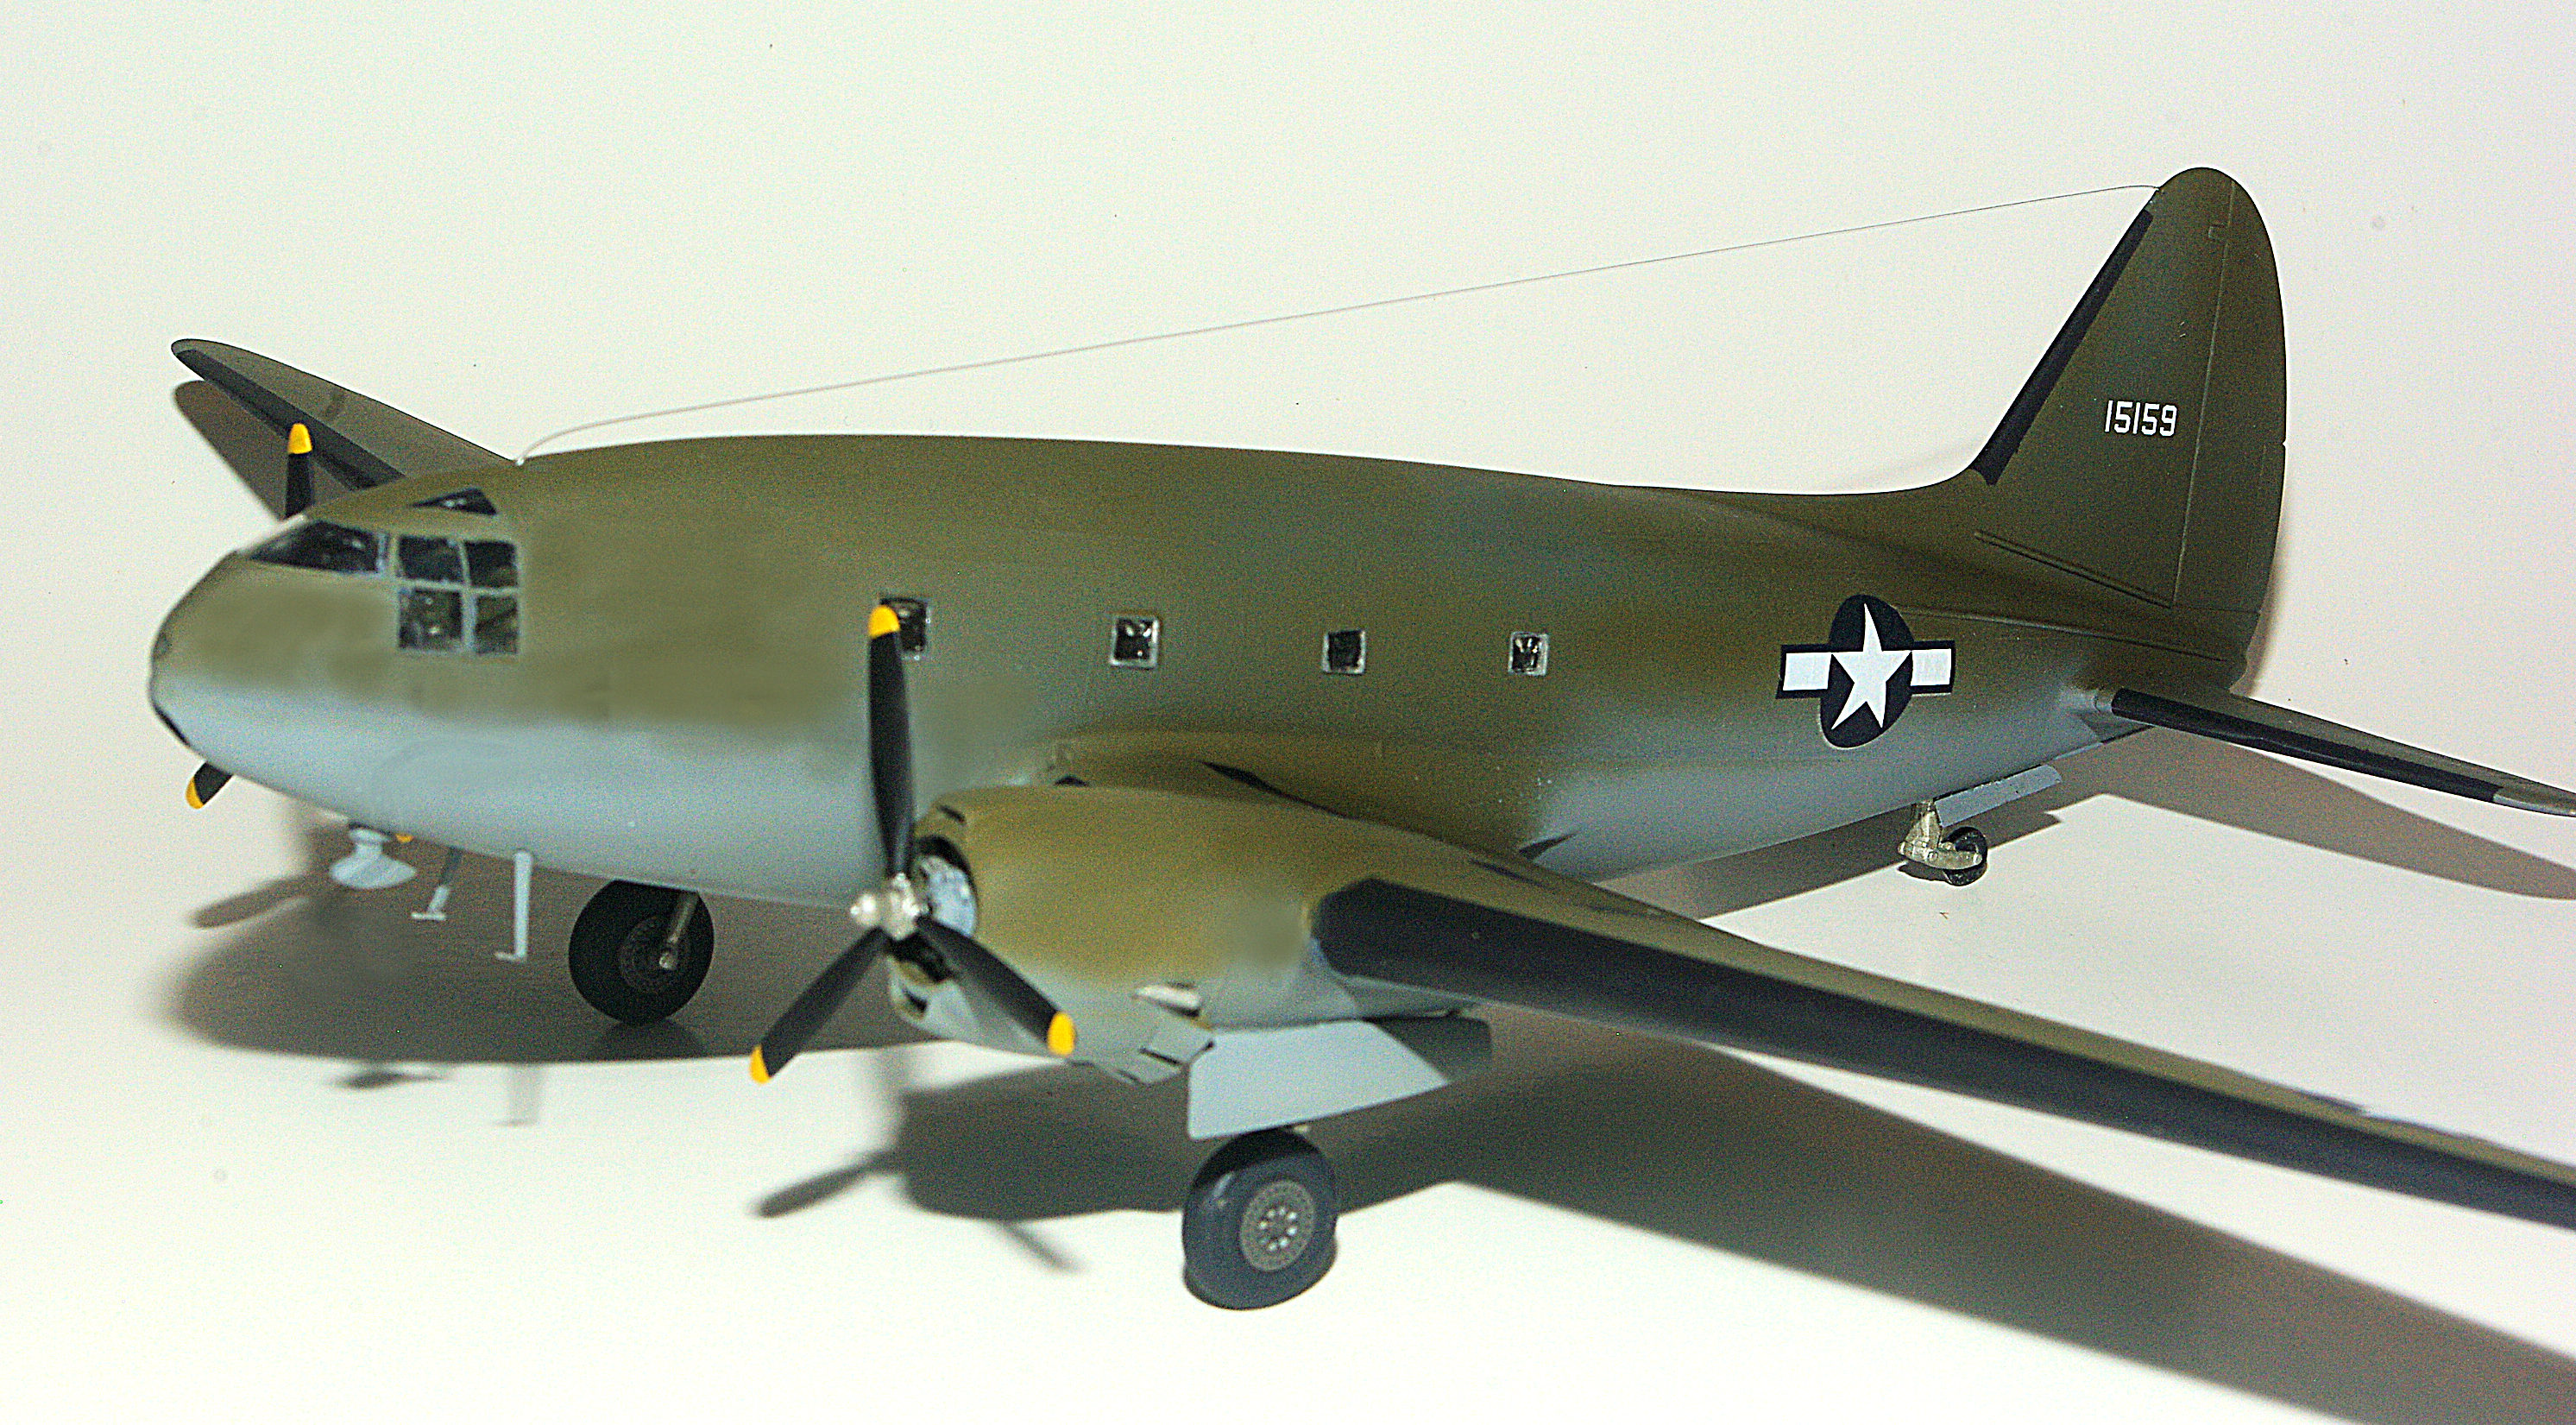
Back for the 18th and last time...at least where the C-46 is concerned. Hope you enjoy the final details and the beauty shots. C-46 Commandos displayed a dizzying variety of antenna configurations. Essentially, the only way you can be entirely accurate is to have photos of the specific C-46 that you're replicating. Since this model is a representative C-46A, I settled...with my client's agreement...on a single radio wire running from the vertical tail to the fuselage skin over the radio compartment. A #79 (.016") drill bit in a pin vise was used to drill a hole. Then a tiny bit of CA was applied to the end of a length of .0135" monofilament, inserted into the hole and allowed to dry. While I used the line that John provided, any monofilament, EZ Line or invisible thread will also work. It all depends on personal preferences or...in some cases...what's available. When you drill a hole in the vertical, it will be necessary to angle the bit slightly so that it comes out the side of the skin. Then you can run the end of the monofilament thru the hole, pull it taught...carefully...and hang a weight on the loose end to keep the line straight. Depending on circumstances, a clothespin or two will do the job, but if you need more weight, try a metal spring clip from your nearest office supply. When the line is tight, add a small dab of CA using a toothpick or similar and allow to dry. When the CA dries, all that's left to do is nip the surplus monofilament flush with the skin and carefully touchup when necessary with matching paint. And that, folks, puts FINISH to the Williams Bros 1/72 C-46A. Below are a selection of final photos. All that remains is to pack it and ship it.

-
Hi all, Just a quick note to let you know that the entire C-46A build series is now available as an e-book in your choice of formats. You can find it here. I know this post may not be appropriate here, so I won't be offended if one of the moderators deletes it. Simply wanted to make a quick mention for those who had been following the build. The next few days I'll see about submitting a copy for review along with a flyer in the what's new section.
-
Installment 18 (and the end of the series) of my 1/72 Williams Bros C-46 build is now available in the Builds Sub-Forum. Comments welcome as always.
-
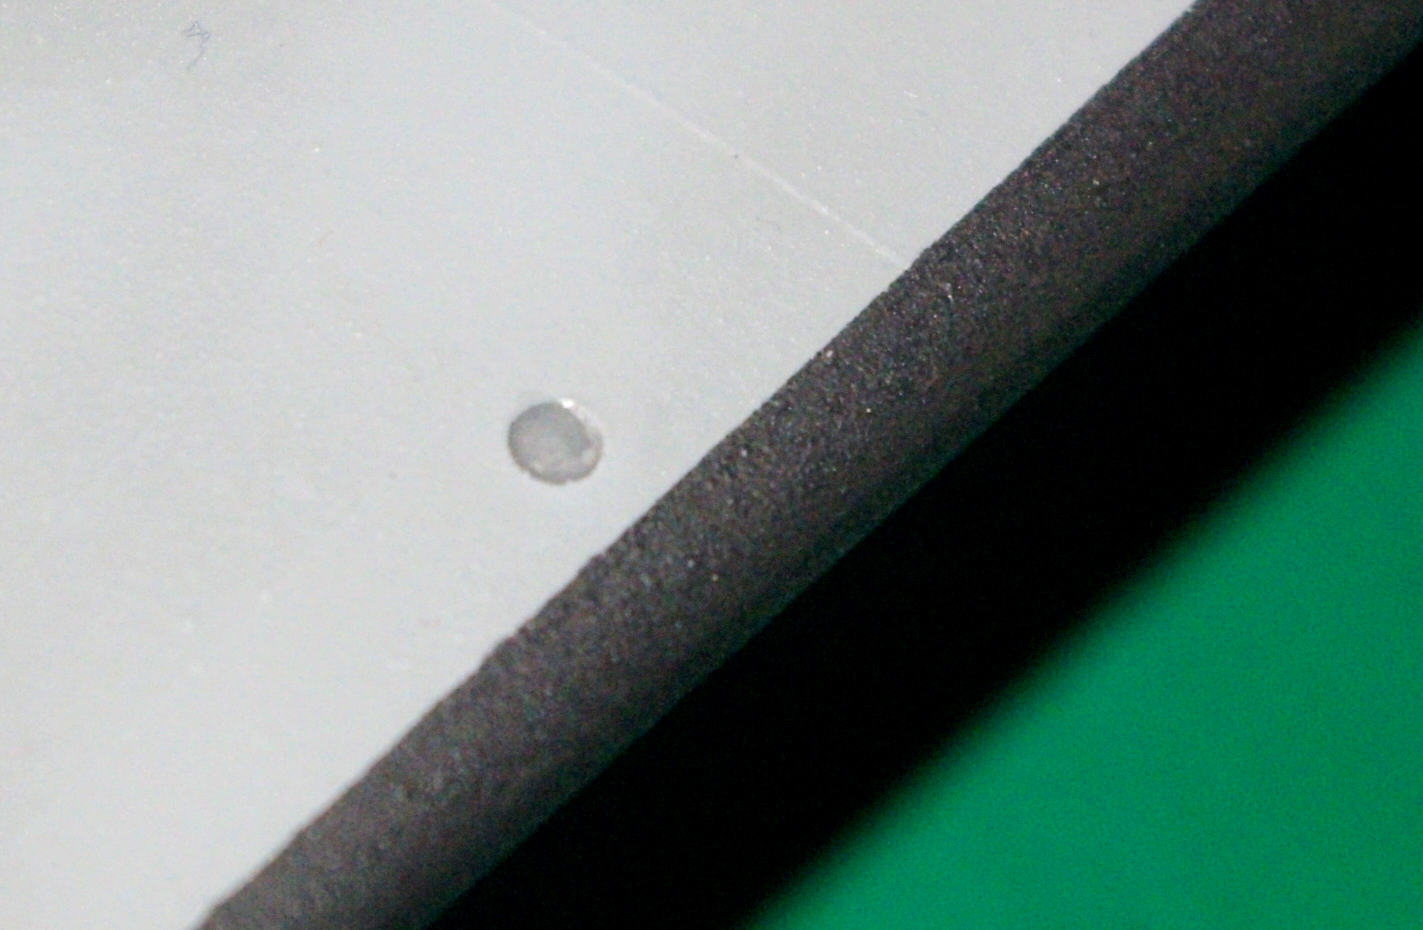
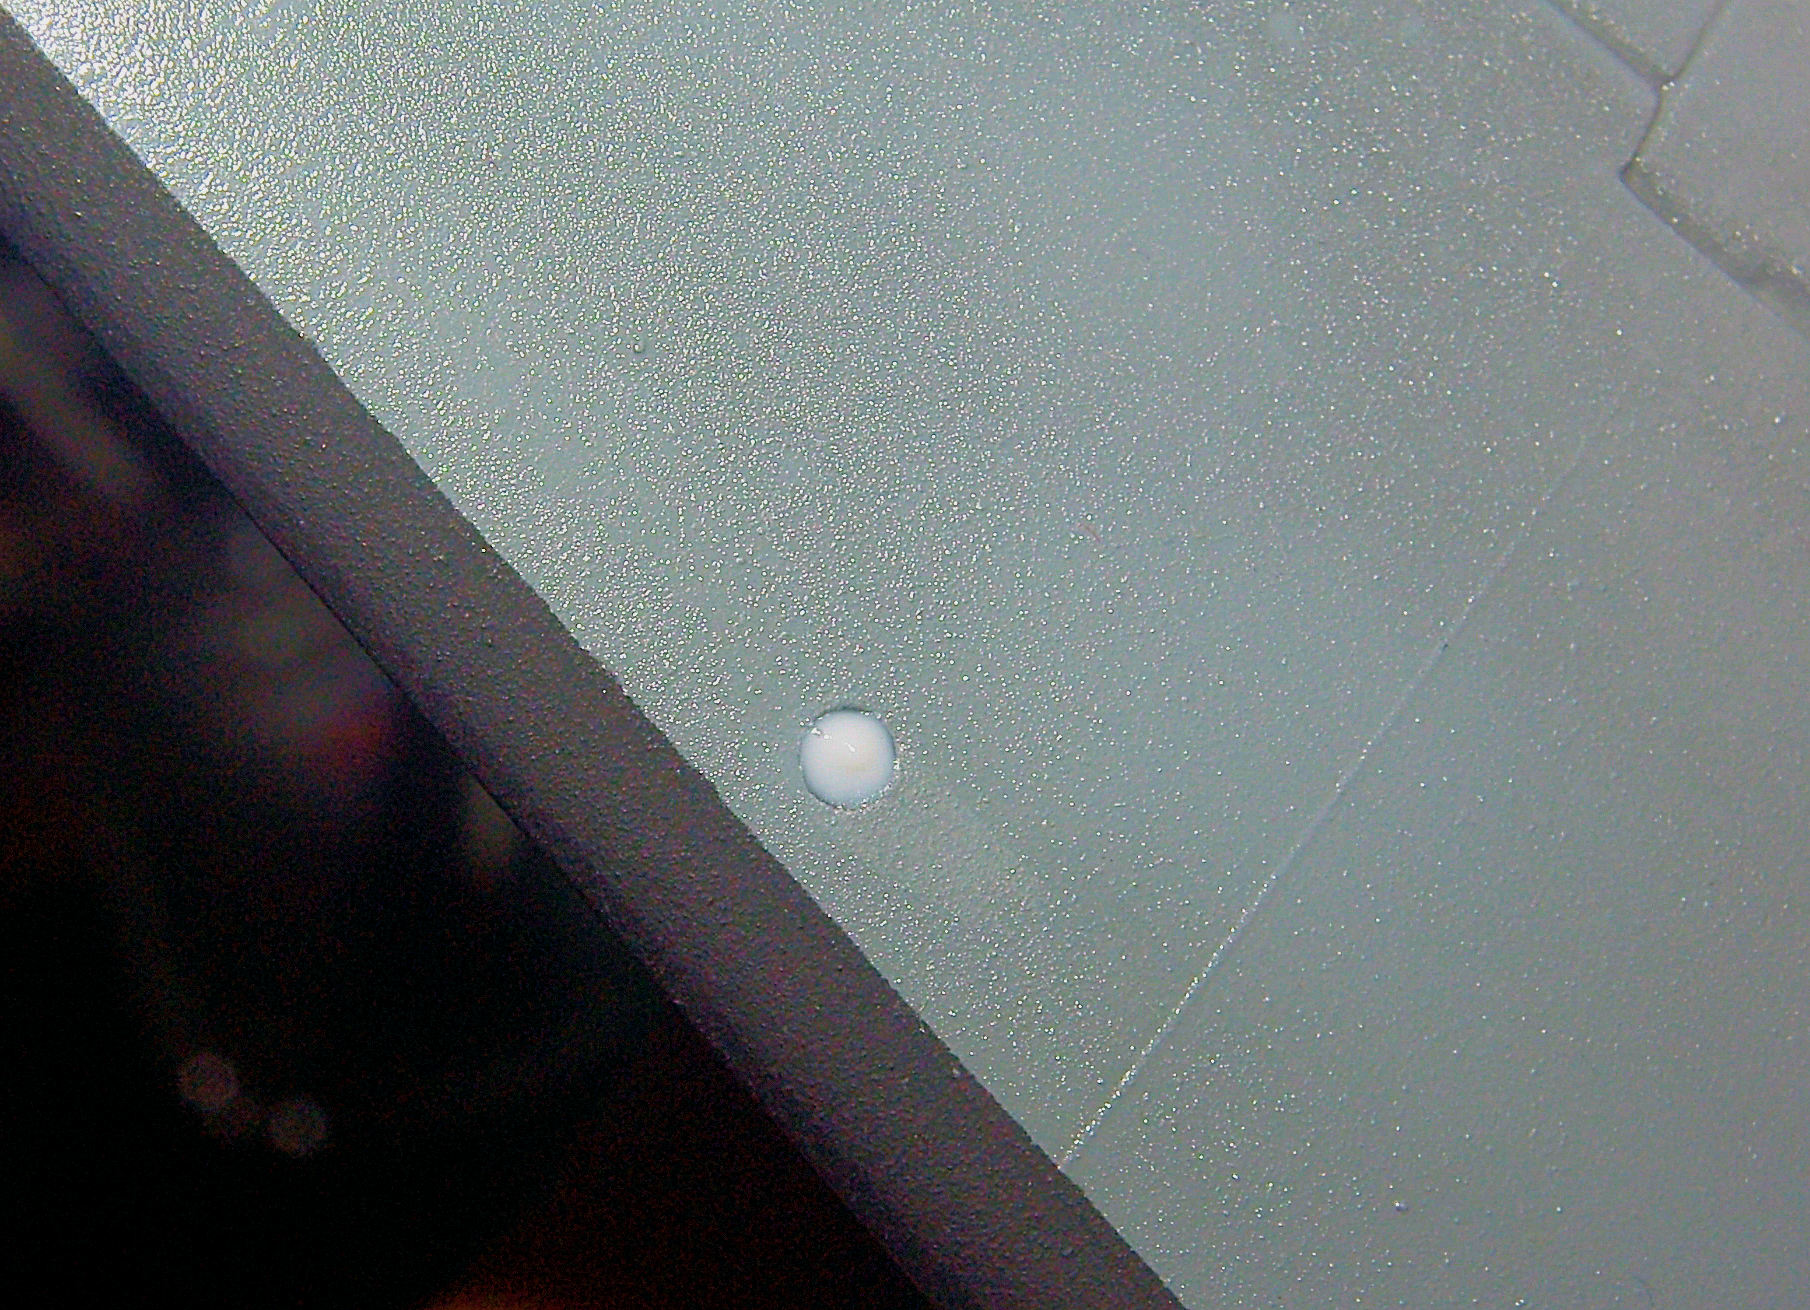
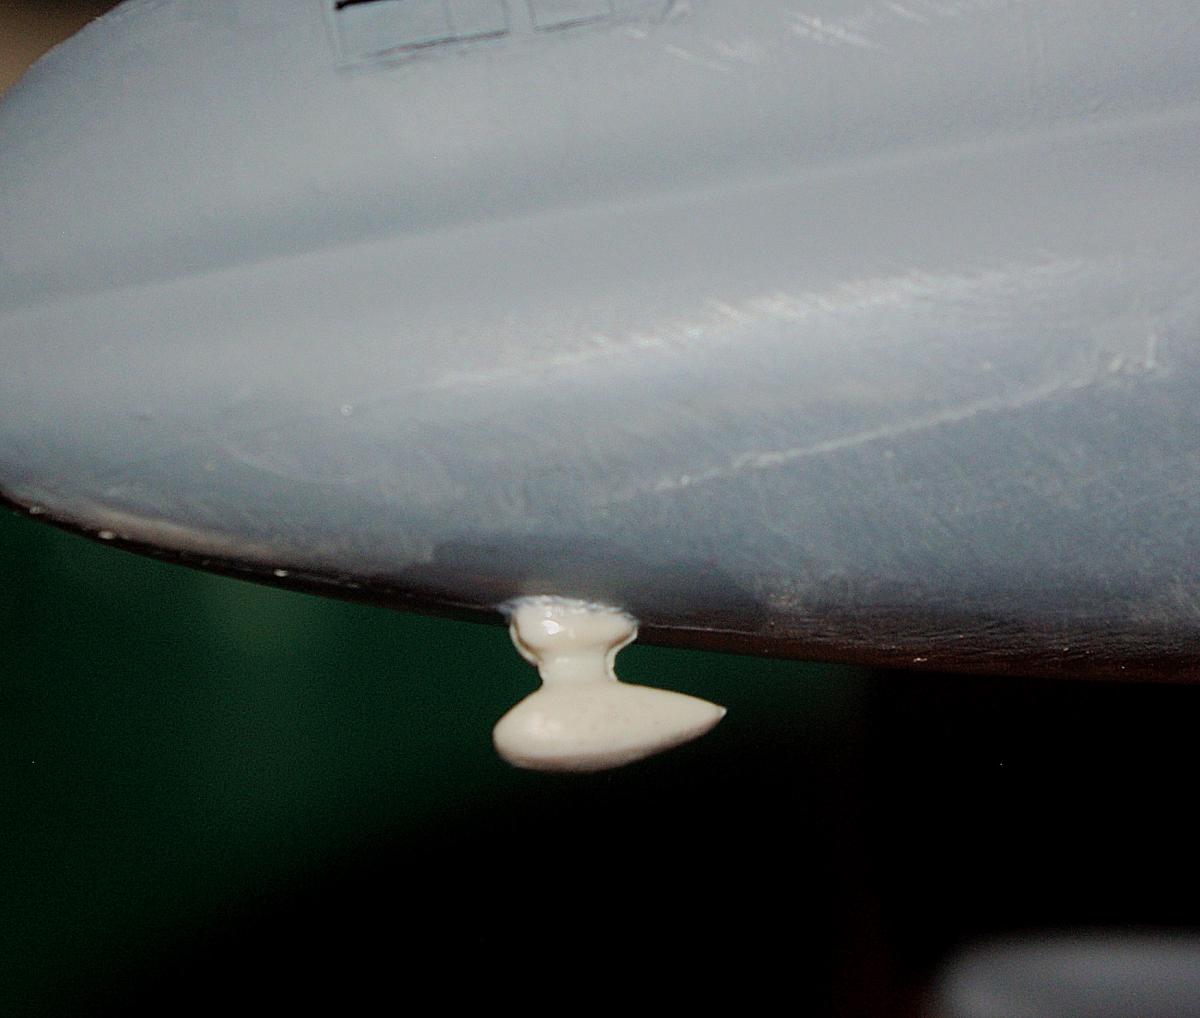
We are now at the penultimate installment. With the exception in installing the radio wire and posting beauty shots, this Williams Bros 1/72 C-46A is finished and I'm exhausted!! The nearly finished C-46A with all markings applied. For this particular scheme/time period, the only underside marking is a national insignia on the underside of the starboard wing. Though it's hard to see in this shot, due to being washed out by the camera strobes, the model still has a glossy finish from the markings being sealed with a final coat of Future. With the flat coat on and the window masking stripped, the C-46 is almost ready for the showcase. It's been a long and winding road for a very challenging kit, but the end result is very satisfying. And, as I said in the beginning, it's the only game in town if you're looking to add a 1/72nd scale Commando to your collection. So buy a kit along with the aftermarket parts and have at it. The landing light holes are filled with Gator's Grip Acrylic Hobby Glue. When it dries, a clear landing light lens will be the result. Nearly. After the Gator's Grip dried, I added a top coat of Future (PFM) to function as a final lens. By the way, this is a very close shot that makes the black deice boots look rough and grainy instead of its actual appearance.
-
Installment 17 of my 1/72 Williams Bros C-46 build is now available in the Builds Sub-Forum. Comments welcome as always.
-
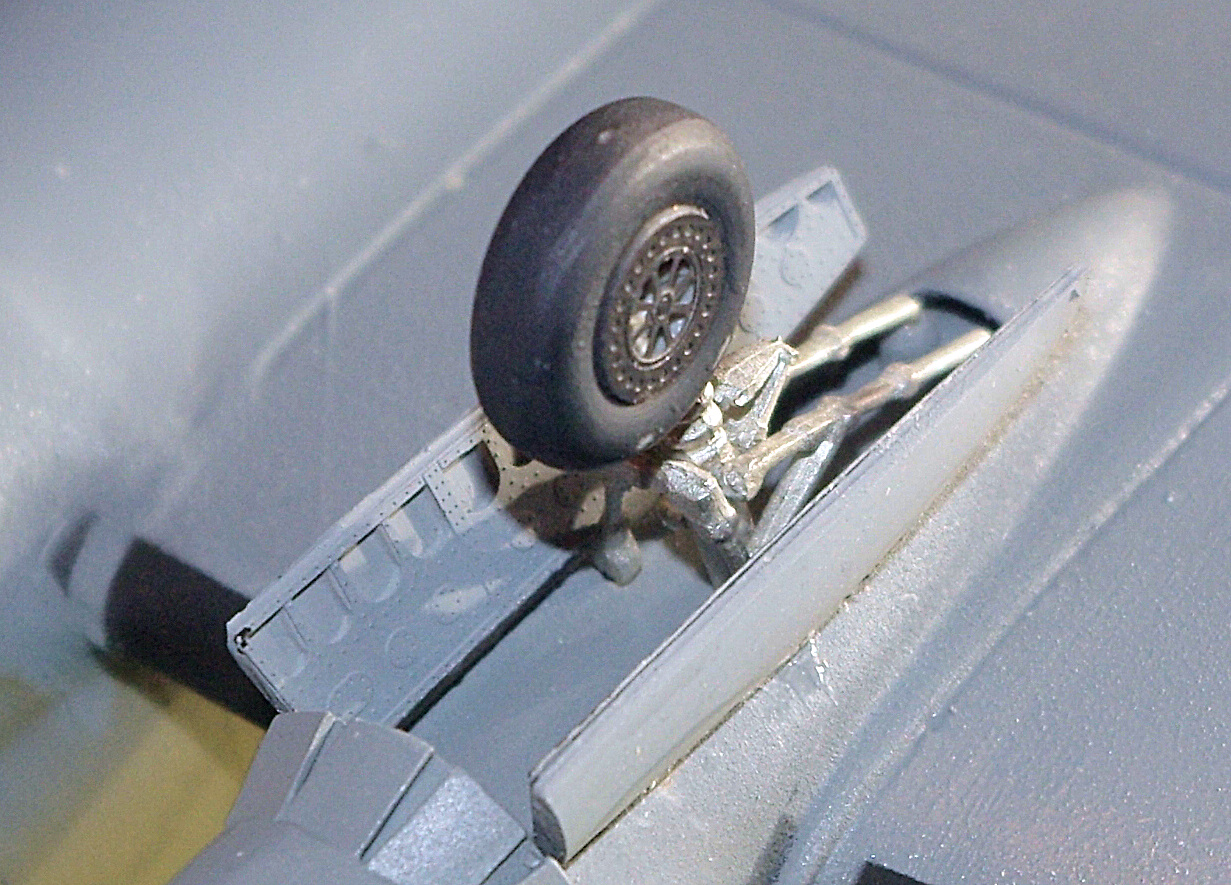
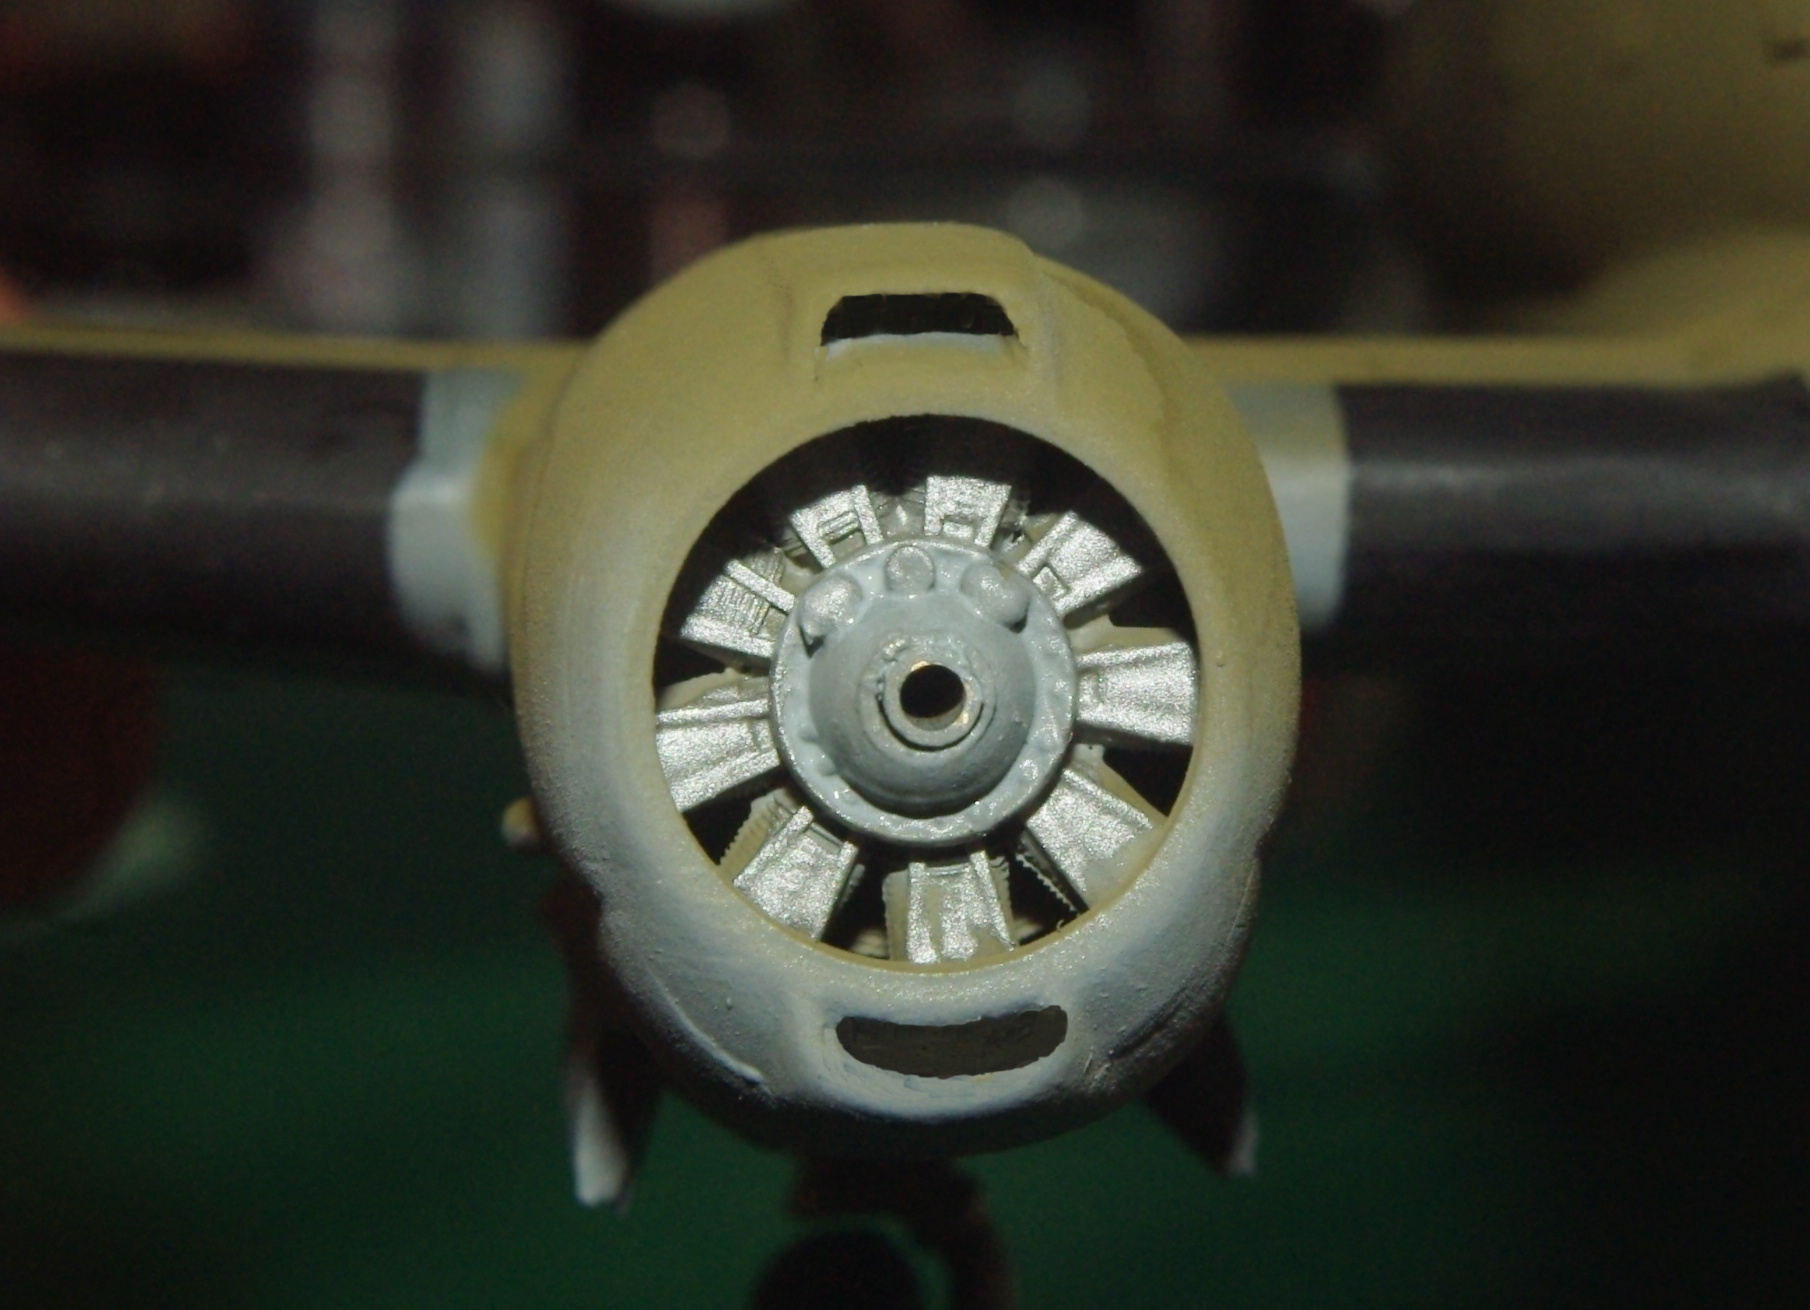
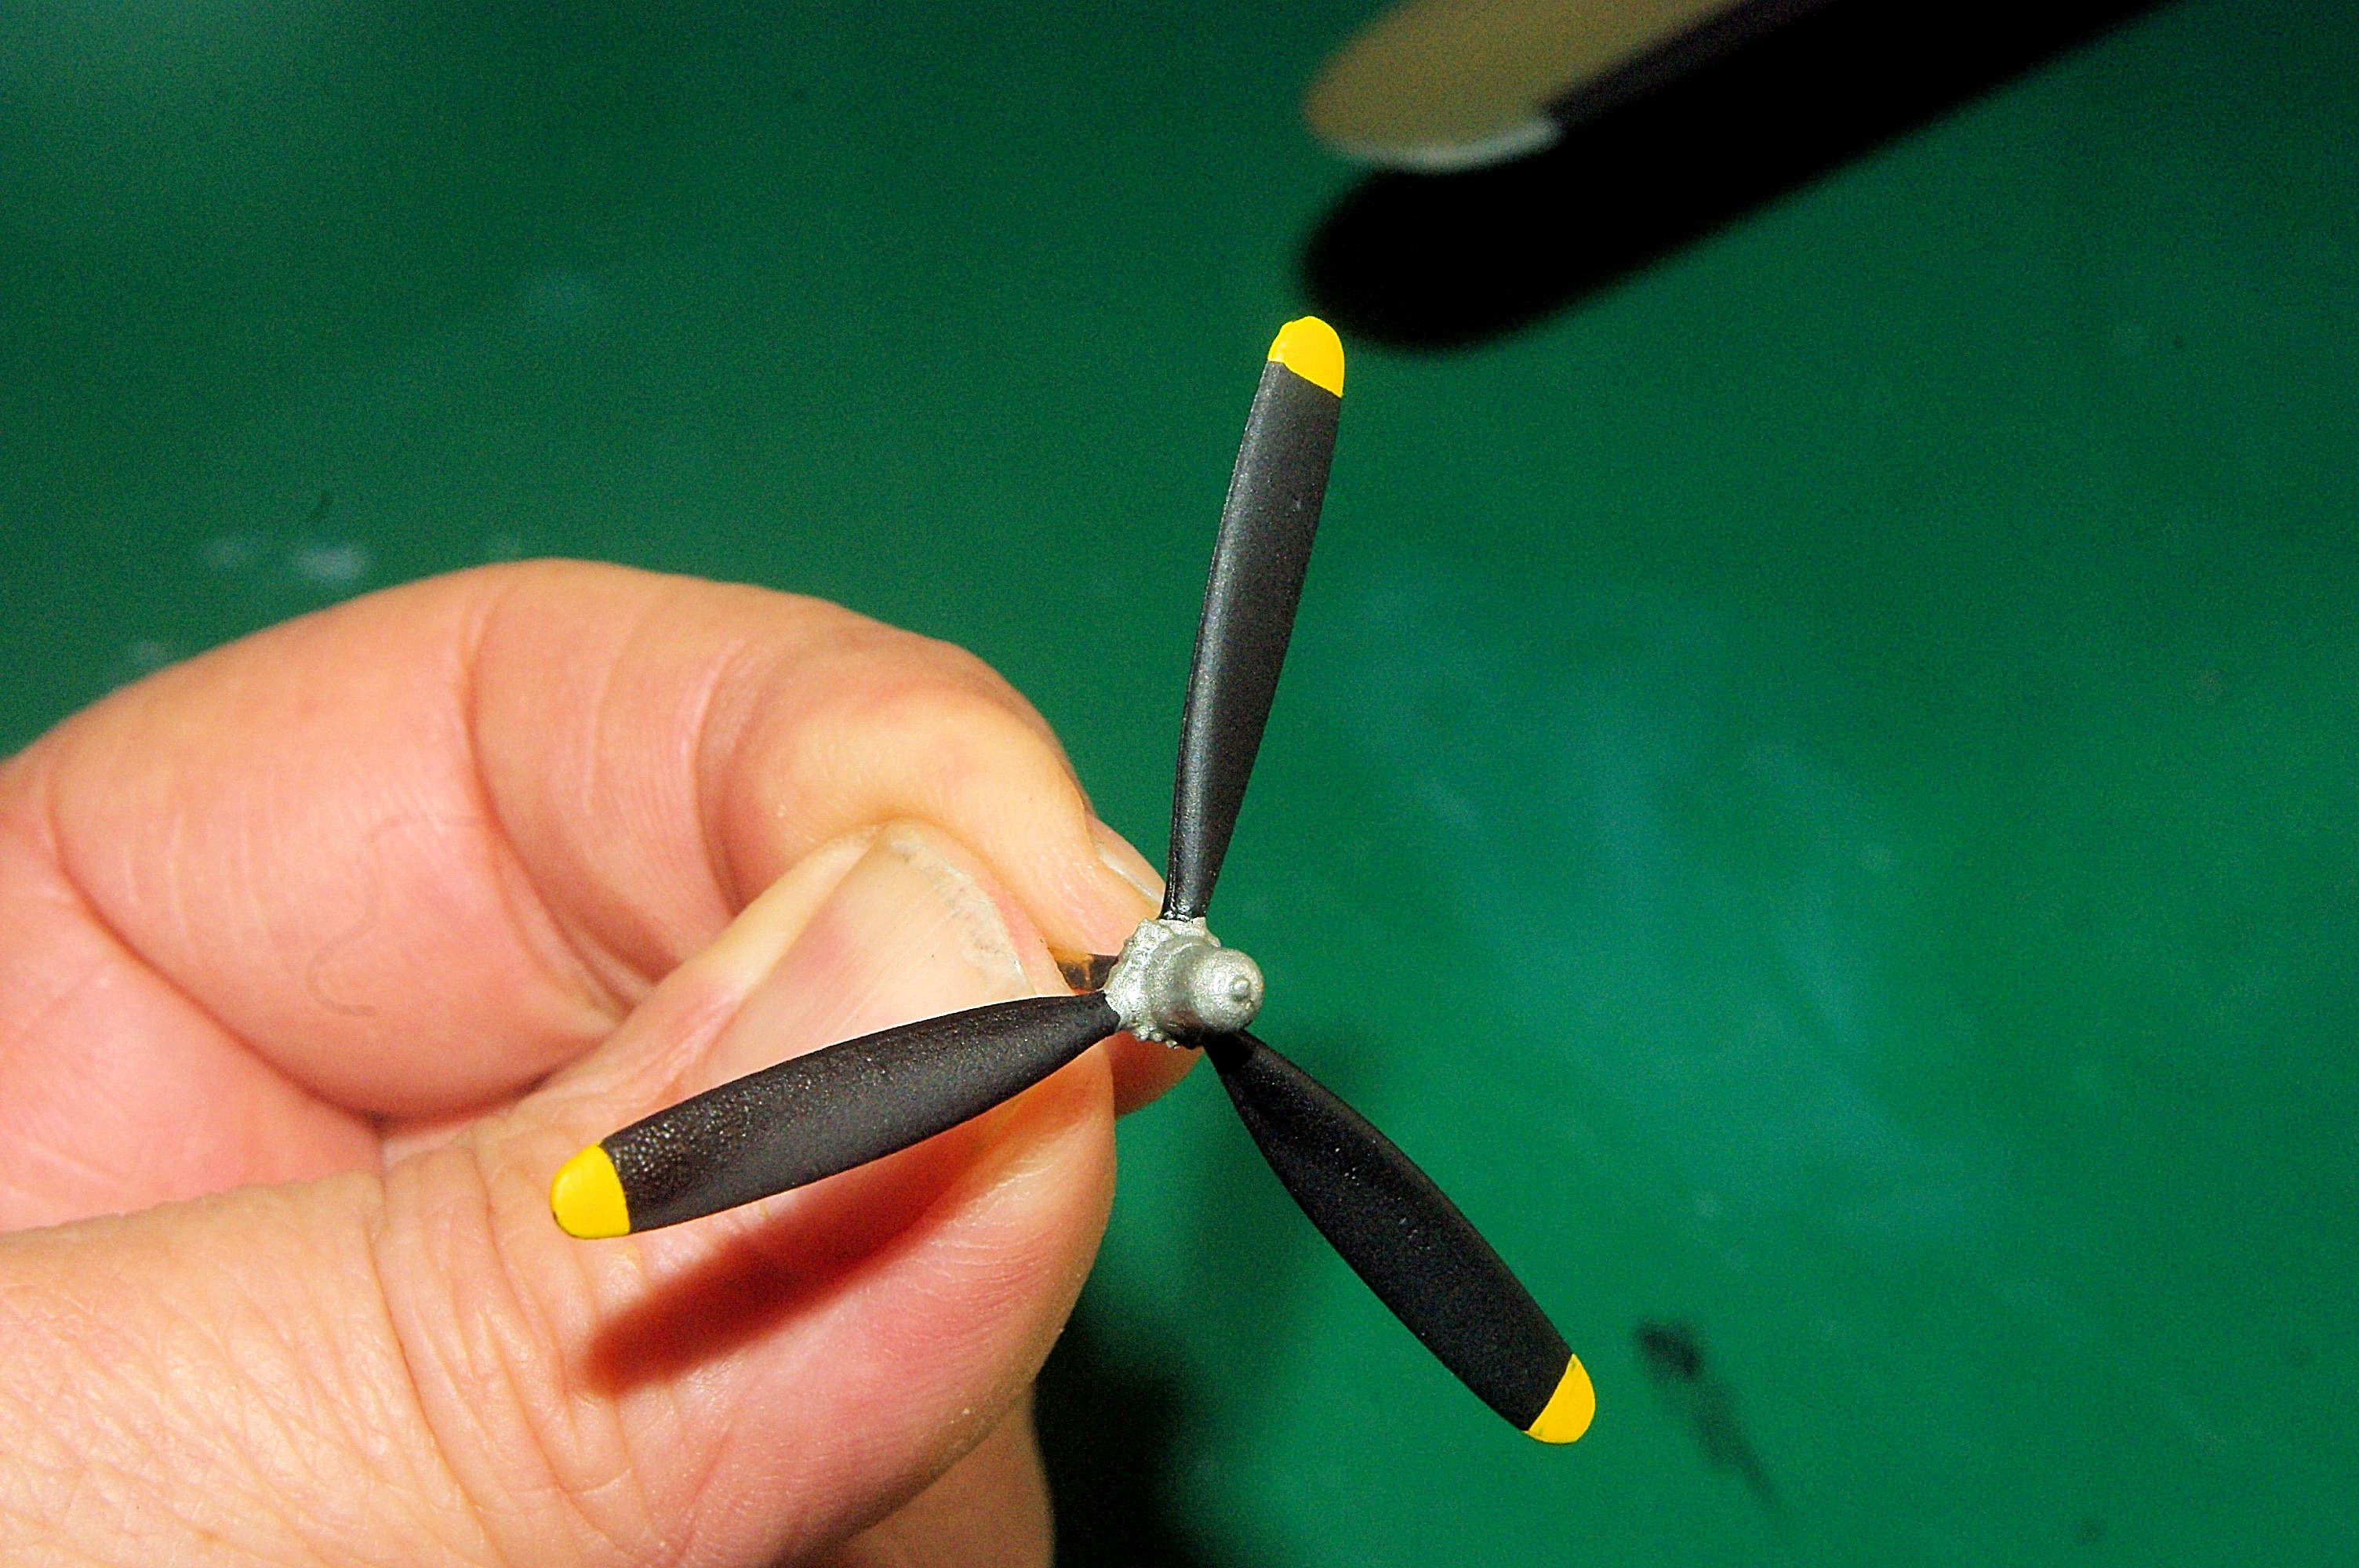
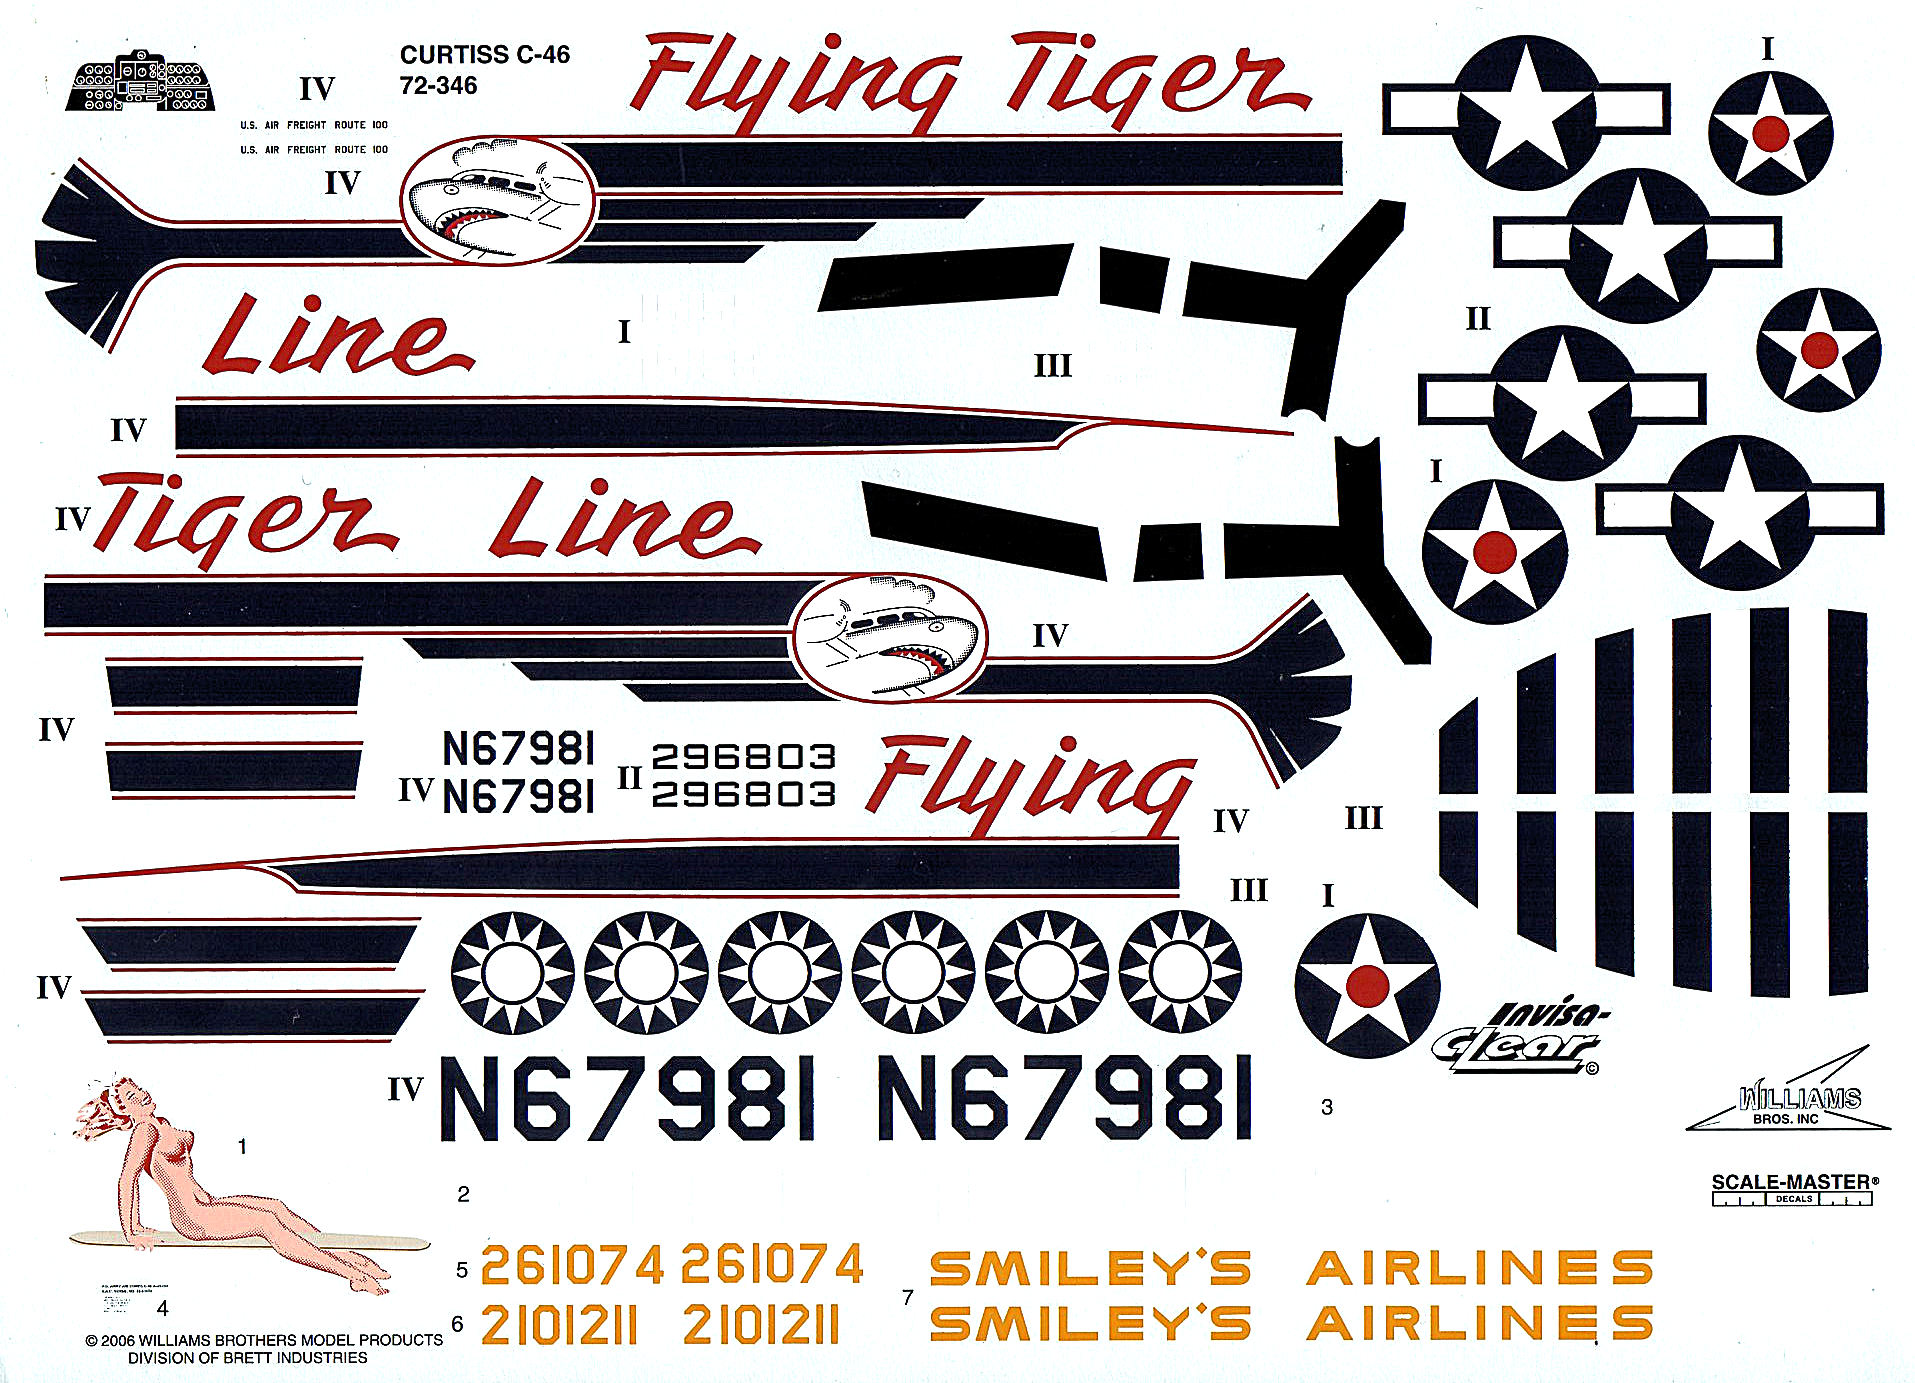
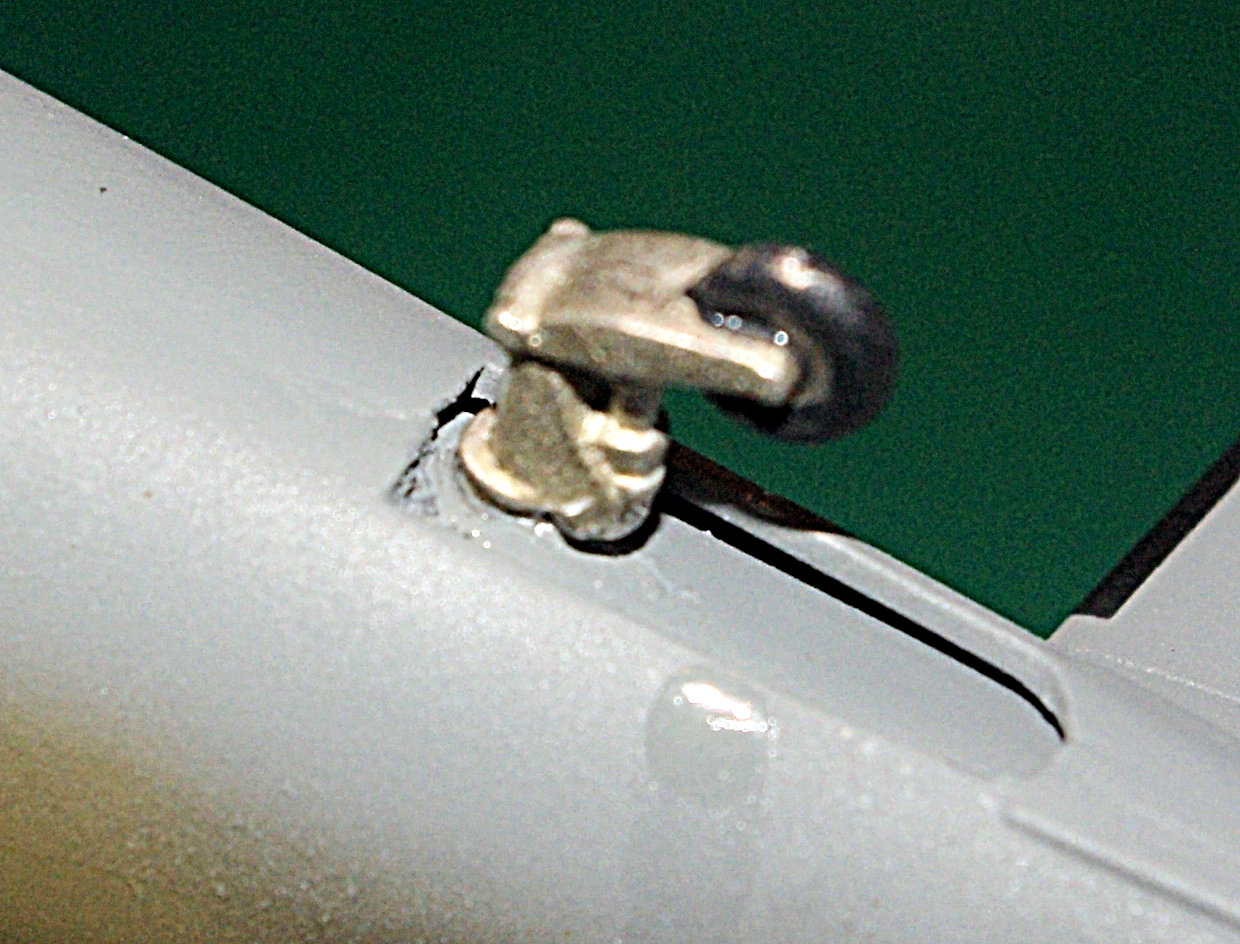
Hi all. The C-46 finish line is in sight! Here's the latest shots: The completed starboard main gear. I wound up having to apply BSI IC Gel to the mounting edge of the door, then hold it in place with one hand while applying a shot of BSI Accelerator with the other hand. Definitely tricky and I actually had to clean the cured CA on the door and try it again a couple of times before I got it right. To say this approach is tedious is an understatement of the first magnitude! The same technique had to be used on the tailwheel doors, but with the addition of tweezers to hold the doors due to their small size. The same starboard gear installation from a slightly different angle. The photoetch parts add a lot to the gear door detail and the SAC metal gear guarantees the gear won't be collapsing on you. While I did paint the engine cylinders Model Master Steel, no superdetailing was done. With the props in place, most superdetailing would be obscured. These replacement metal props really add a lot to the finished model. Model Master FS37038 Flat Black combined with Model Master Steel and Model Master FS33538 Flat Yellow produced a very nice result. Still have no idea where my client found them. This decal sheet is from the Brett Industries C-46 kit. Produced by Scale-Master, it's a state of the art sheet with markings for four different aircraft. For the subject of this model, all that was needed was the four star and bar national insignia, wing walks and some white tail numbers that my client sent from another sheet. Update from my client: The metal props were produced by a now defunct aftermarket manufacturer in the UK and were specific to the C-46. National insignia and wing walk is seen here on the starboard wing. The Solvaset seen adjacent to the model was used to snug the decals down. By the way, my ebook "How To Make Your Own Decals" covers the subject in extensive detail. You can find a copy of it at Scale Publications.
-
Installment 16 of my 1/72 Williams Bros C-46 build is now available in the Builds Sub-Forum. Comments welcome as always.
-
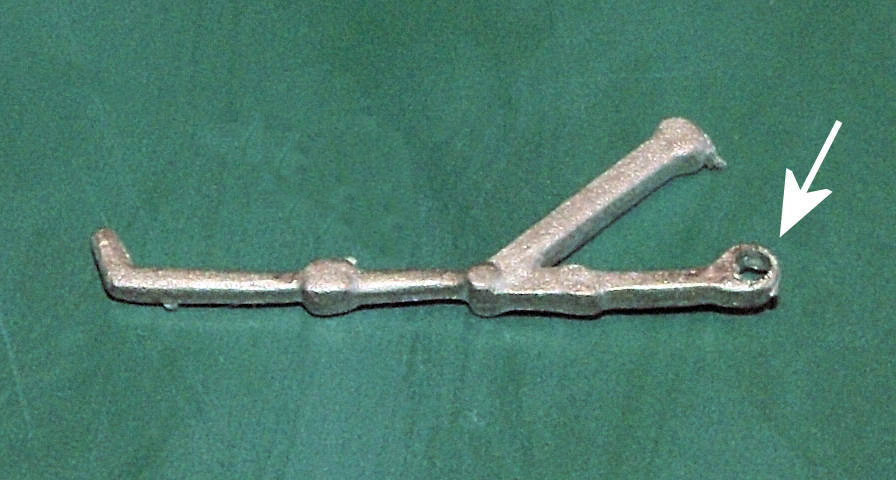
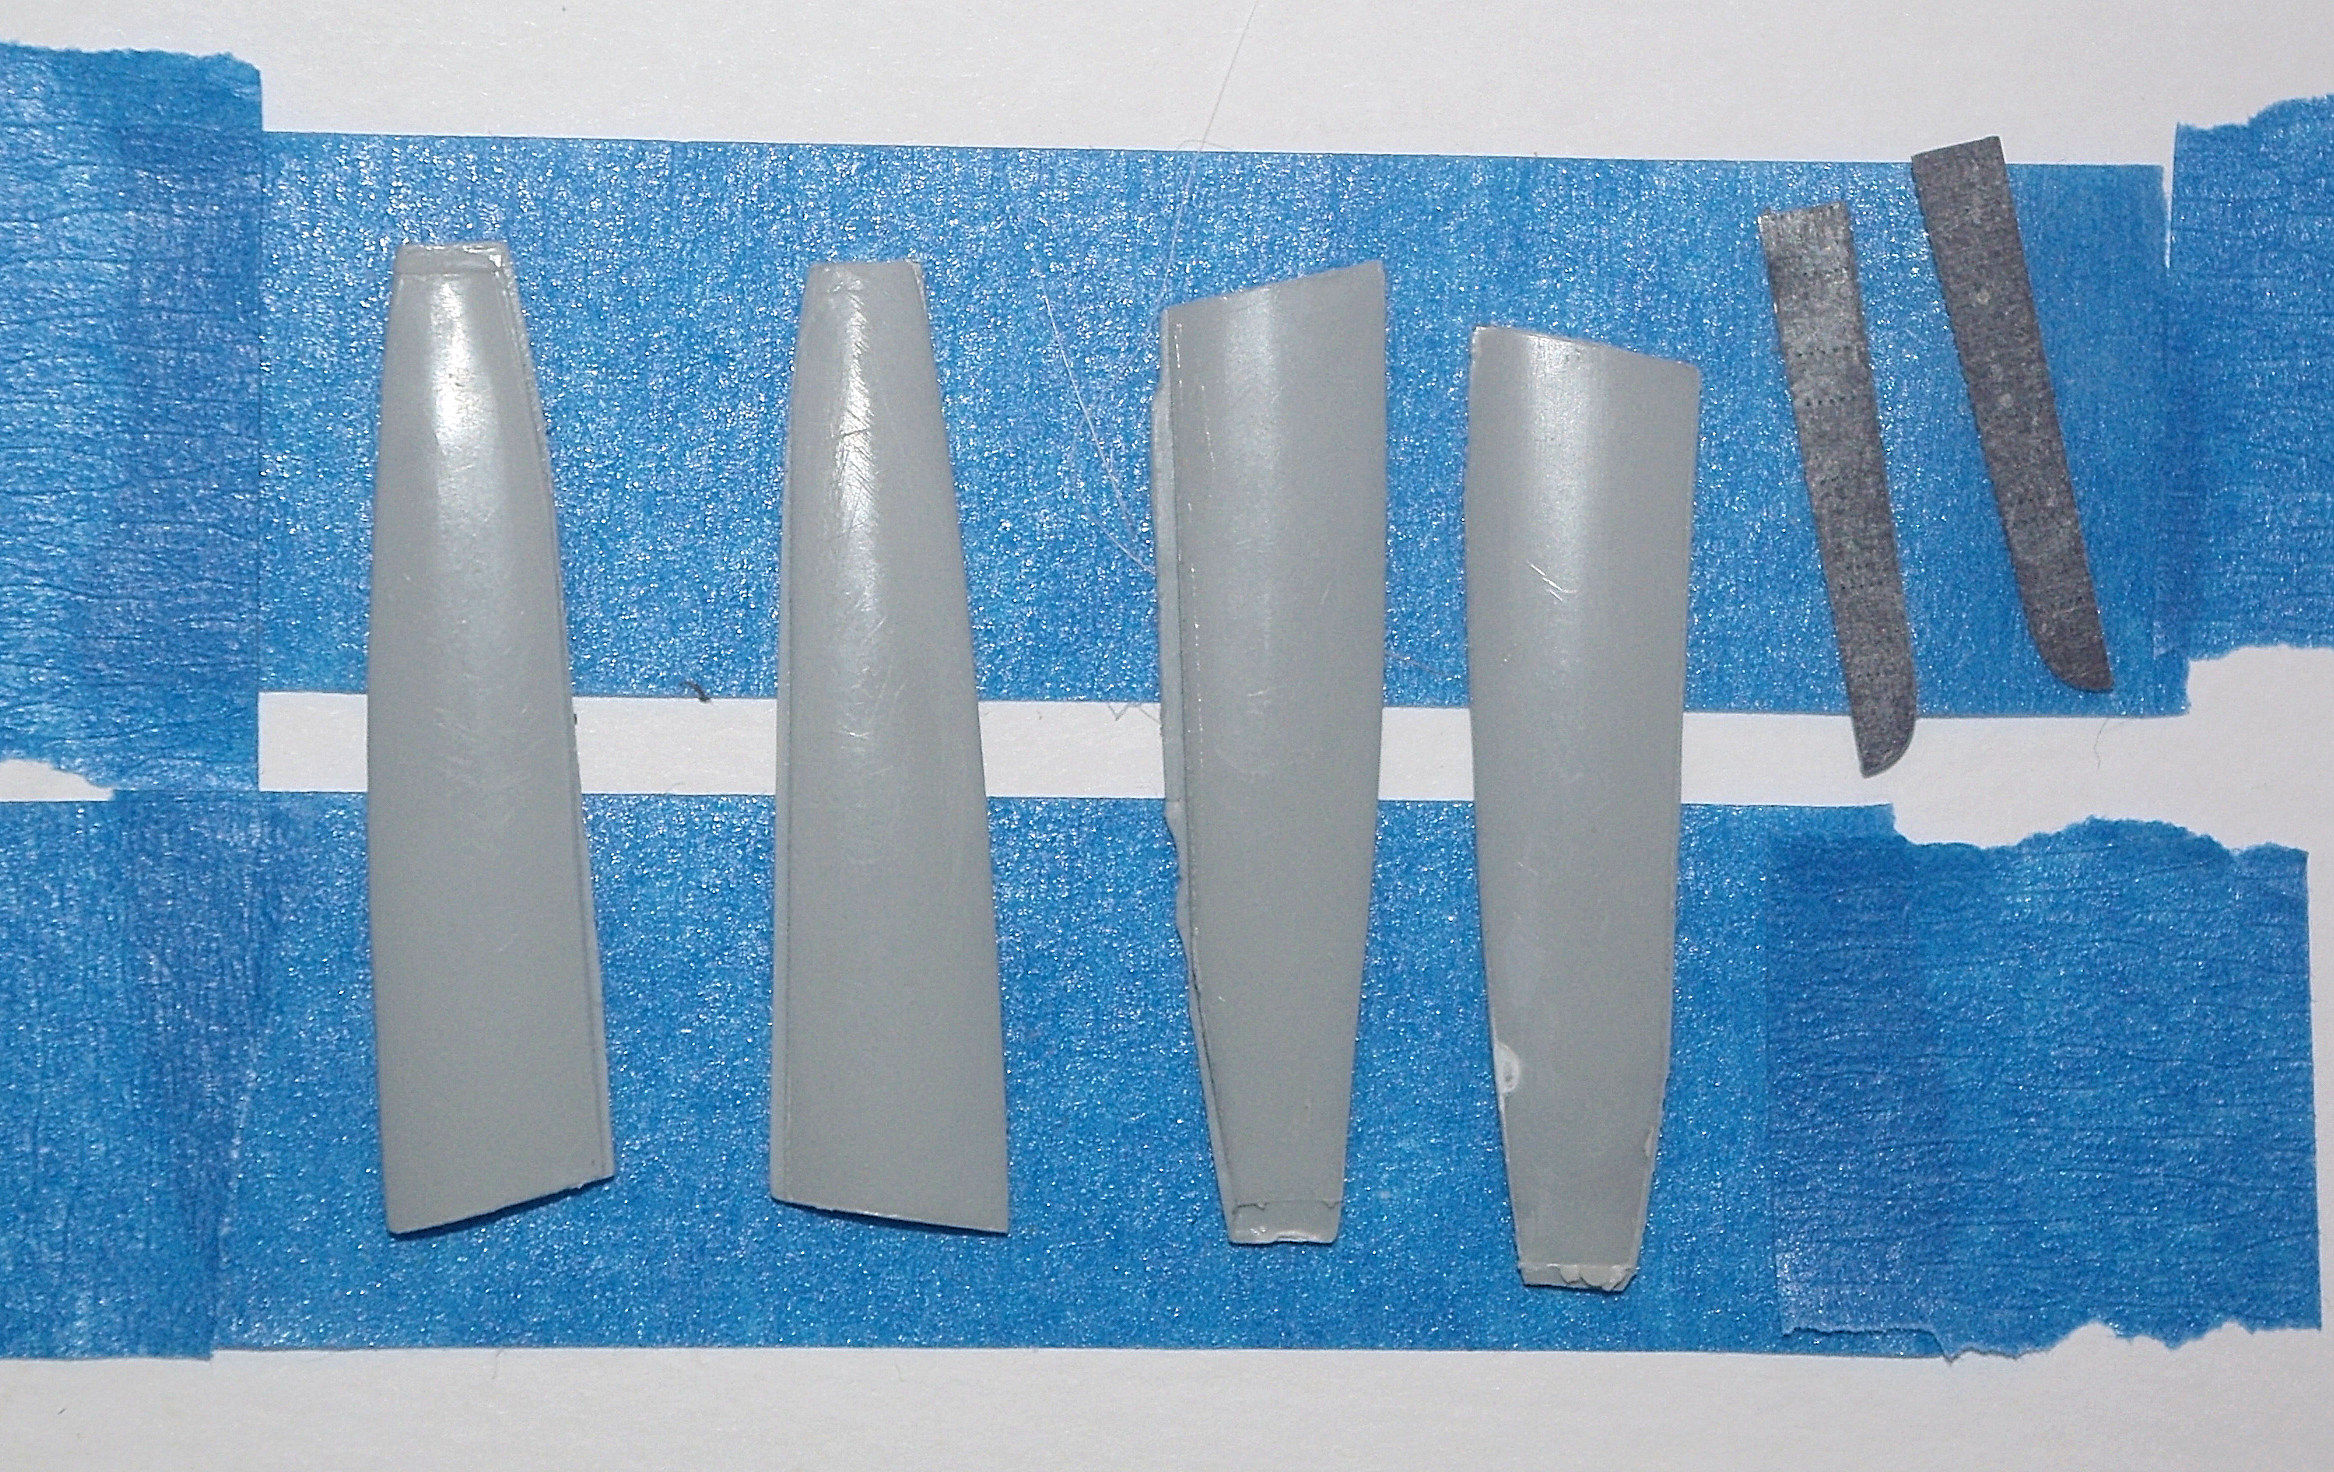
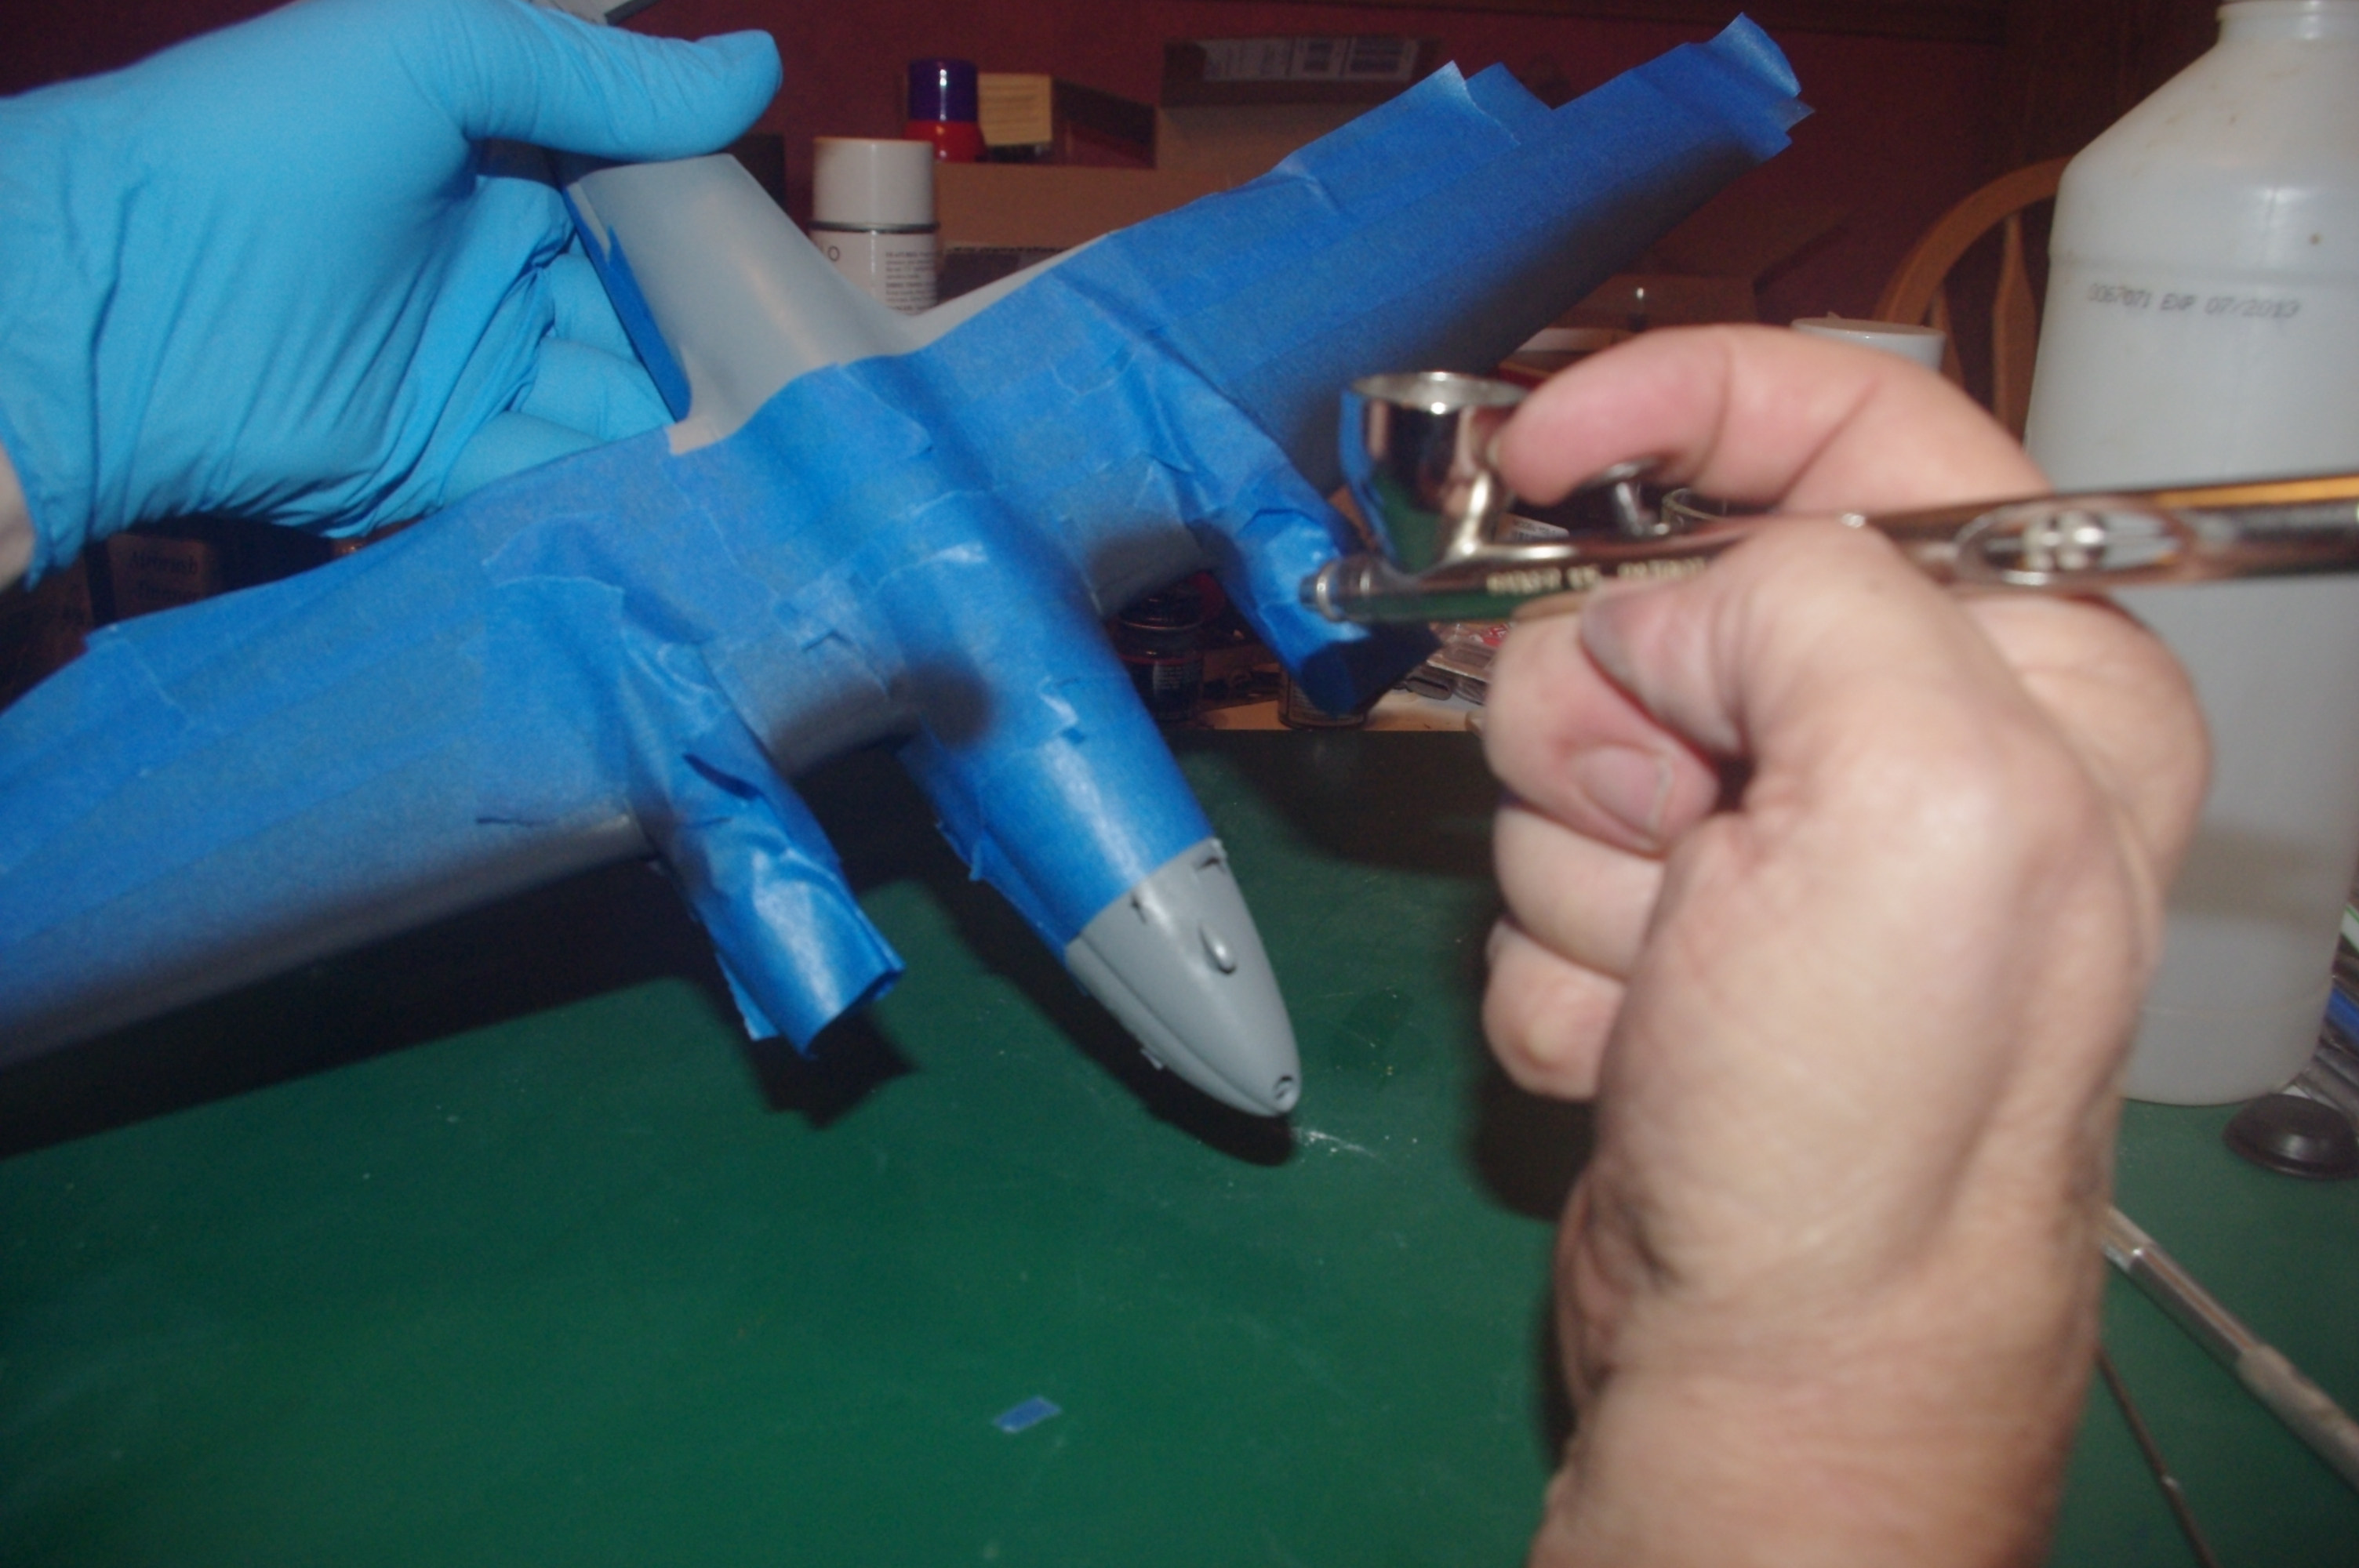
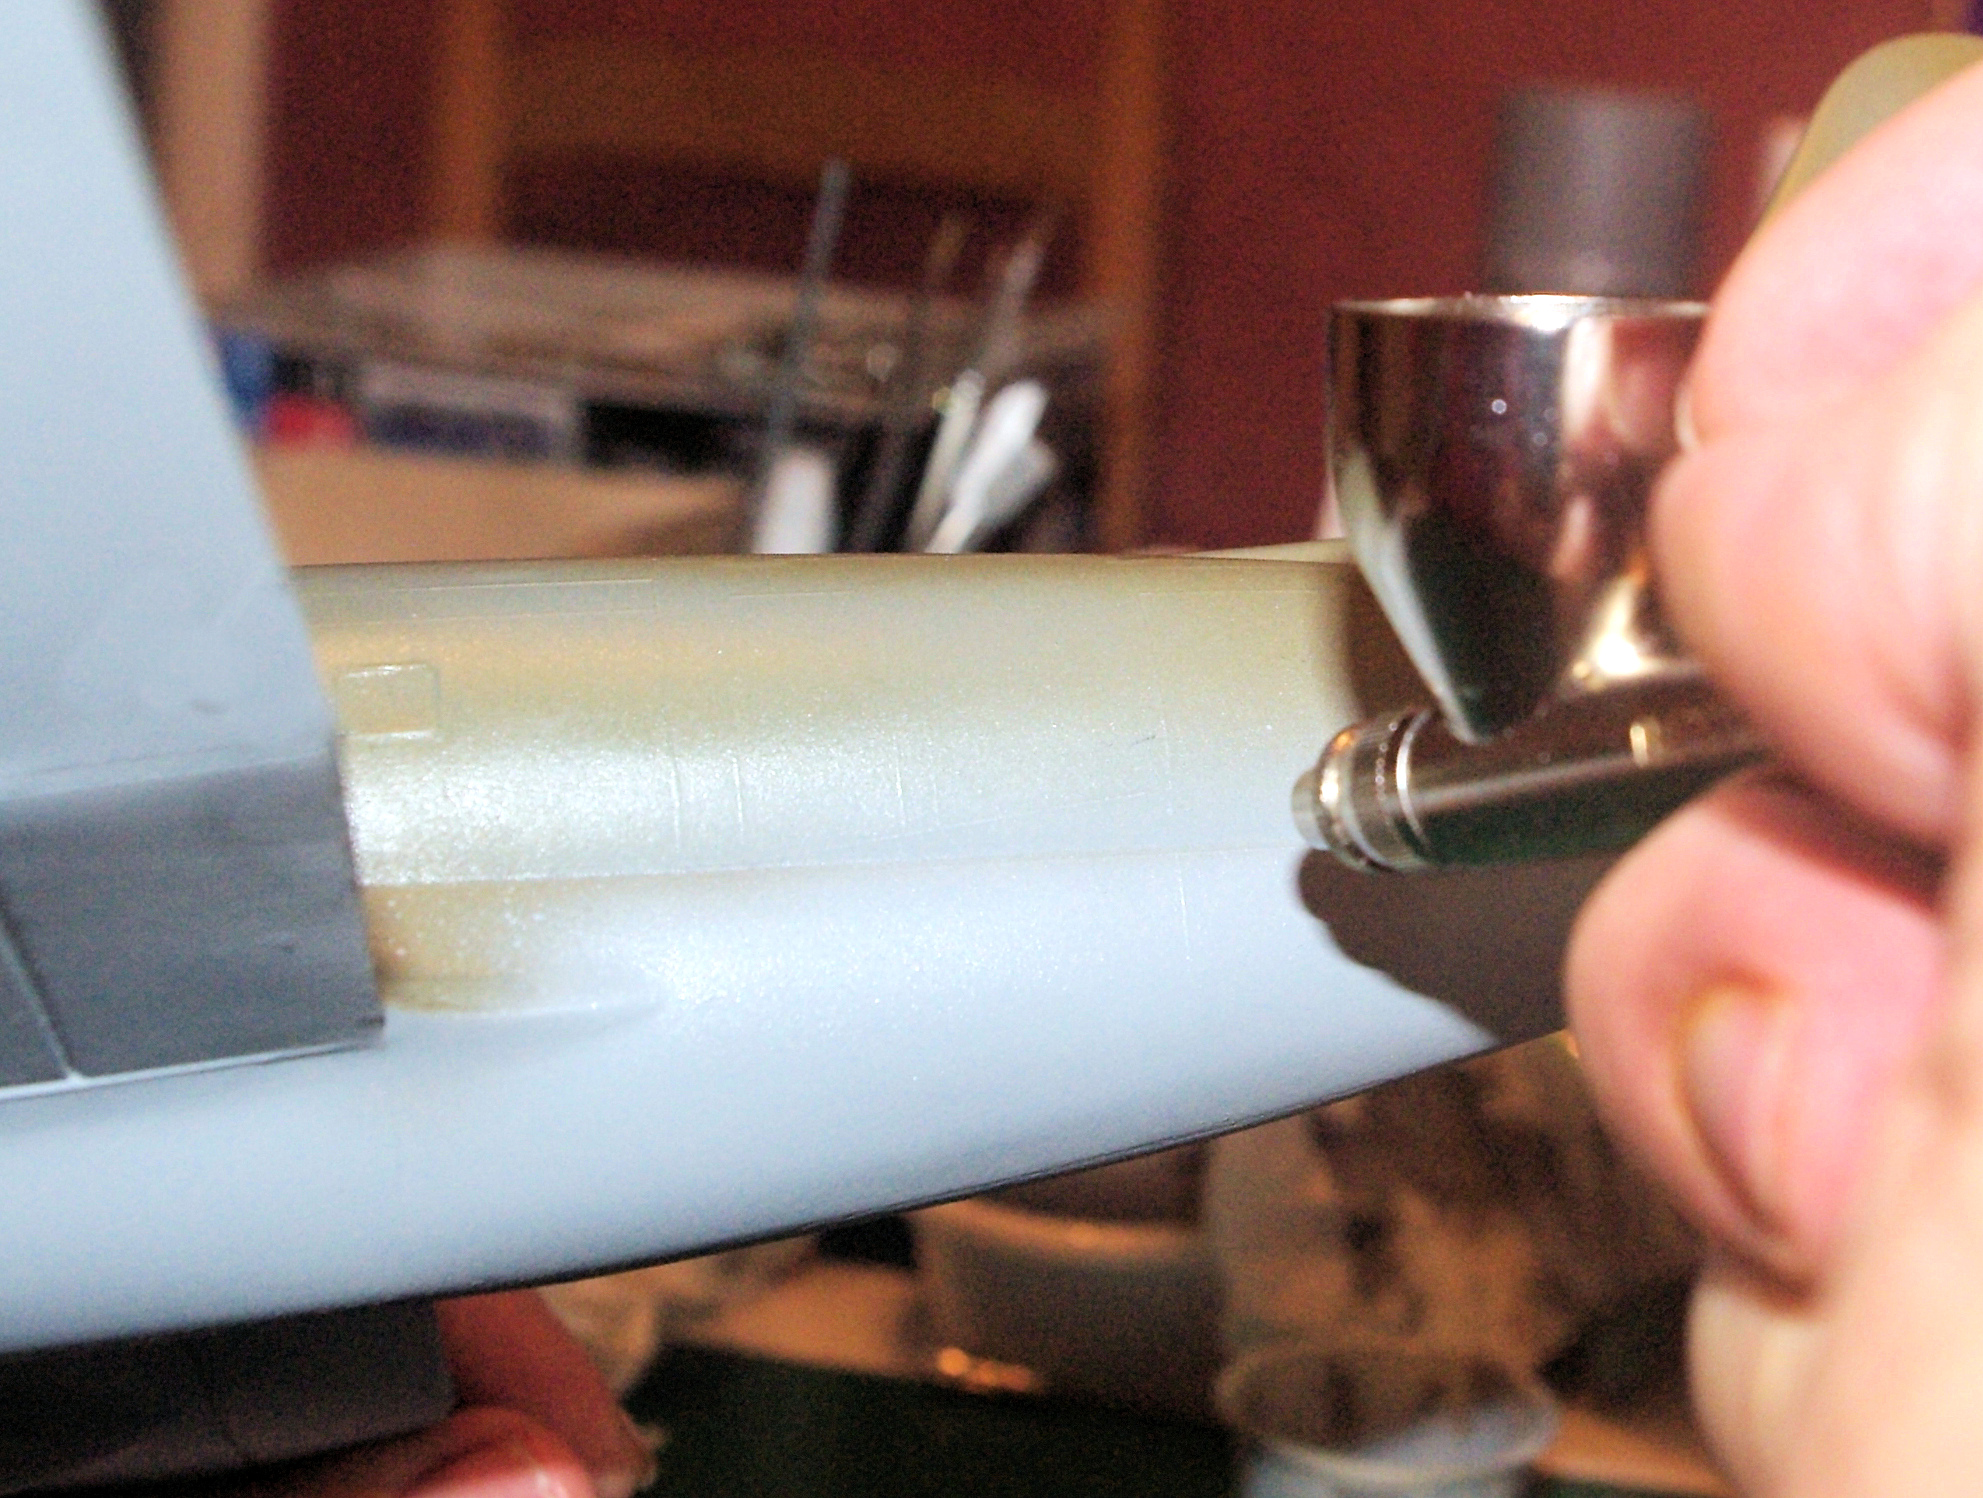
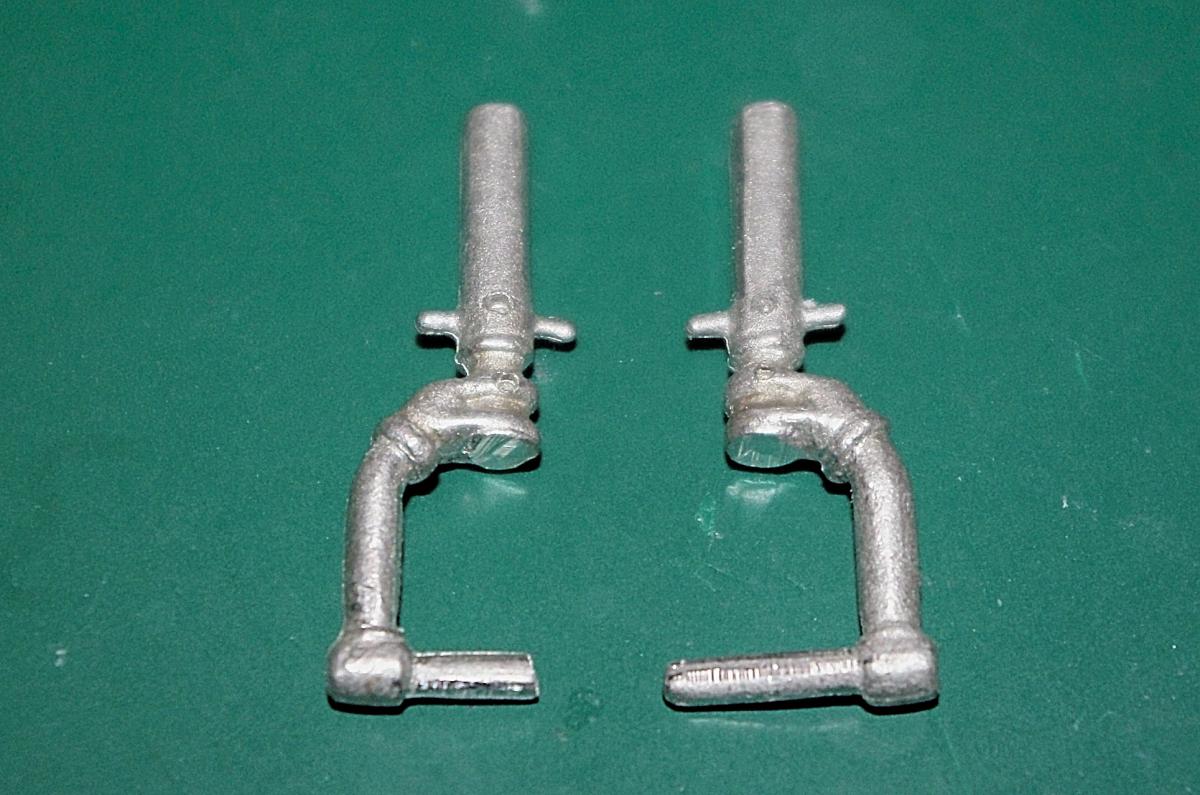
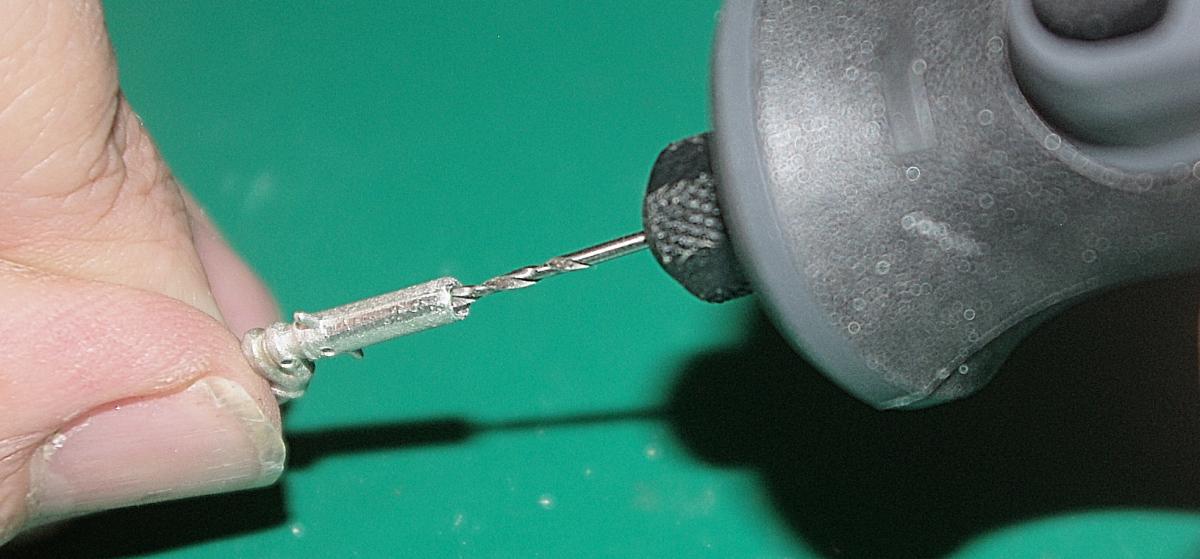
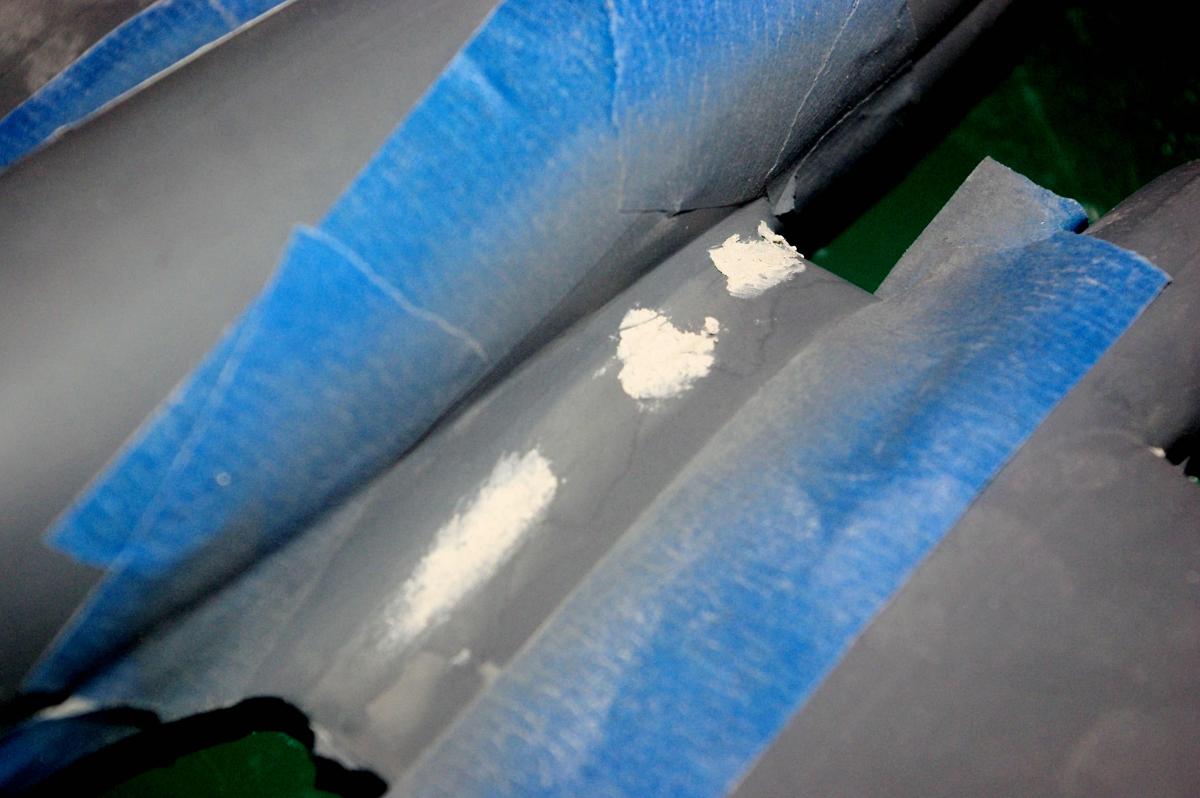
Here's the latest on the C-46: Once the Future has dried, the deice boots were masked off with blue painters tape. Depending on how you like to work, you could mask the boots on the bottom of the wing and then paint'em before... ...tackling the top, leaving the tail surfaces for last. I chose to mask all of the boots at one time and then.... ...spray'em with Model Master FS37038 Flat Black in a single session. By the way, here I'm using a Badger Patriot 105 double action airbrush that I had to buy after losing the needle cap from my Iwata HP-CH airbrush so I could keep working while waiting for a new cap to arrive. With all the tape removed, we have a very nice set of deice boots on the undersurfaces.... ....and on the uppersurfaces. Now to give her some legs to stand on. The tailwheel strut/wheel is a single assembly, so I brush painted the tire first with Pactra M-1 Scale Flat Black or any Scale Black of your choosing. Then the assembly was installed with BSI Super Gold + CA. Don't be surprised if you have to either thin down the mounting shaft or slightly enlarge the mounting hole. The Scale Aircraft Conversions main gear have been completed by the addition of the torque links. When installed, you'll want to make sure that the links point to the rear and the end of the axles to the outside. In this photo, the starboard strut is on the left and the port is on the right. The retraction link in the SAC metal set is where you'll run into trouble. The links are handed, so the mounting recess for the strut connection should be handed as well. Scale Aircraft Conversions has been notified and is checking stock to see how widespread the problem is. If you have one of these problem sets, the solution is easy. Simply drill the mounting recess all the way thru with a .031" (or 1/32") drill bit as I've done in this photo. Note that you only need to do this to two of the links. Here you see the complete SAC starboard main gear properly installed. All it lacks is the wheel/tire and doors And a very tight shot of the same completed assembly. Yet another shot of the same starboard gear from the opposite side. The gear doors laid down on a couple of pieces of tape, just prior to spraying the Model Master FS36270 Neutral Gray. When dry, flip'em over, spray some more Neutral Gray and you're done. All that's left is to install'em. Since you can't stick a toothpick or matchstick thru the axle hole to hold the tire for painting, due to the photoetch outer wheel detail, I used the same approach as the gear doors. Paint was Pactra M-1 Flat Scale Black. Incidentally, that paint hasn't been around for a very long time, but I still happen to have a 35 or 40 year old bottle that's perfectly good. But any Scale Black or Grimy Black paint will produce the same results.
-
Installment 15 of my 1/72 Williams Bros C-46 build is now available in the Builds Sub-Forum. Comments welcome as always.
-
The latest installment of the C-46 build series is available in the Build sub-forum. Check it out at your convenience and remember, comments are always welcome.
-
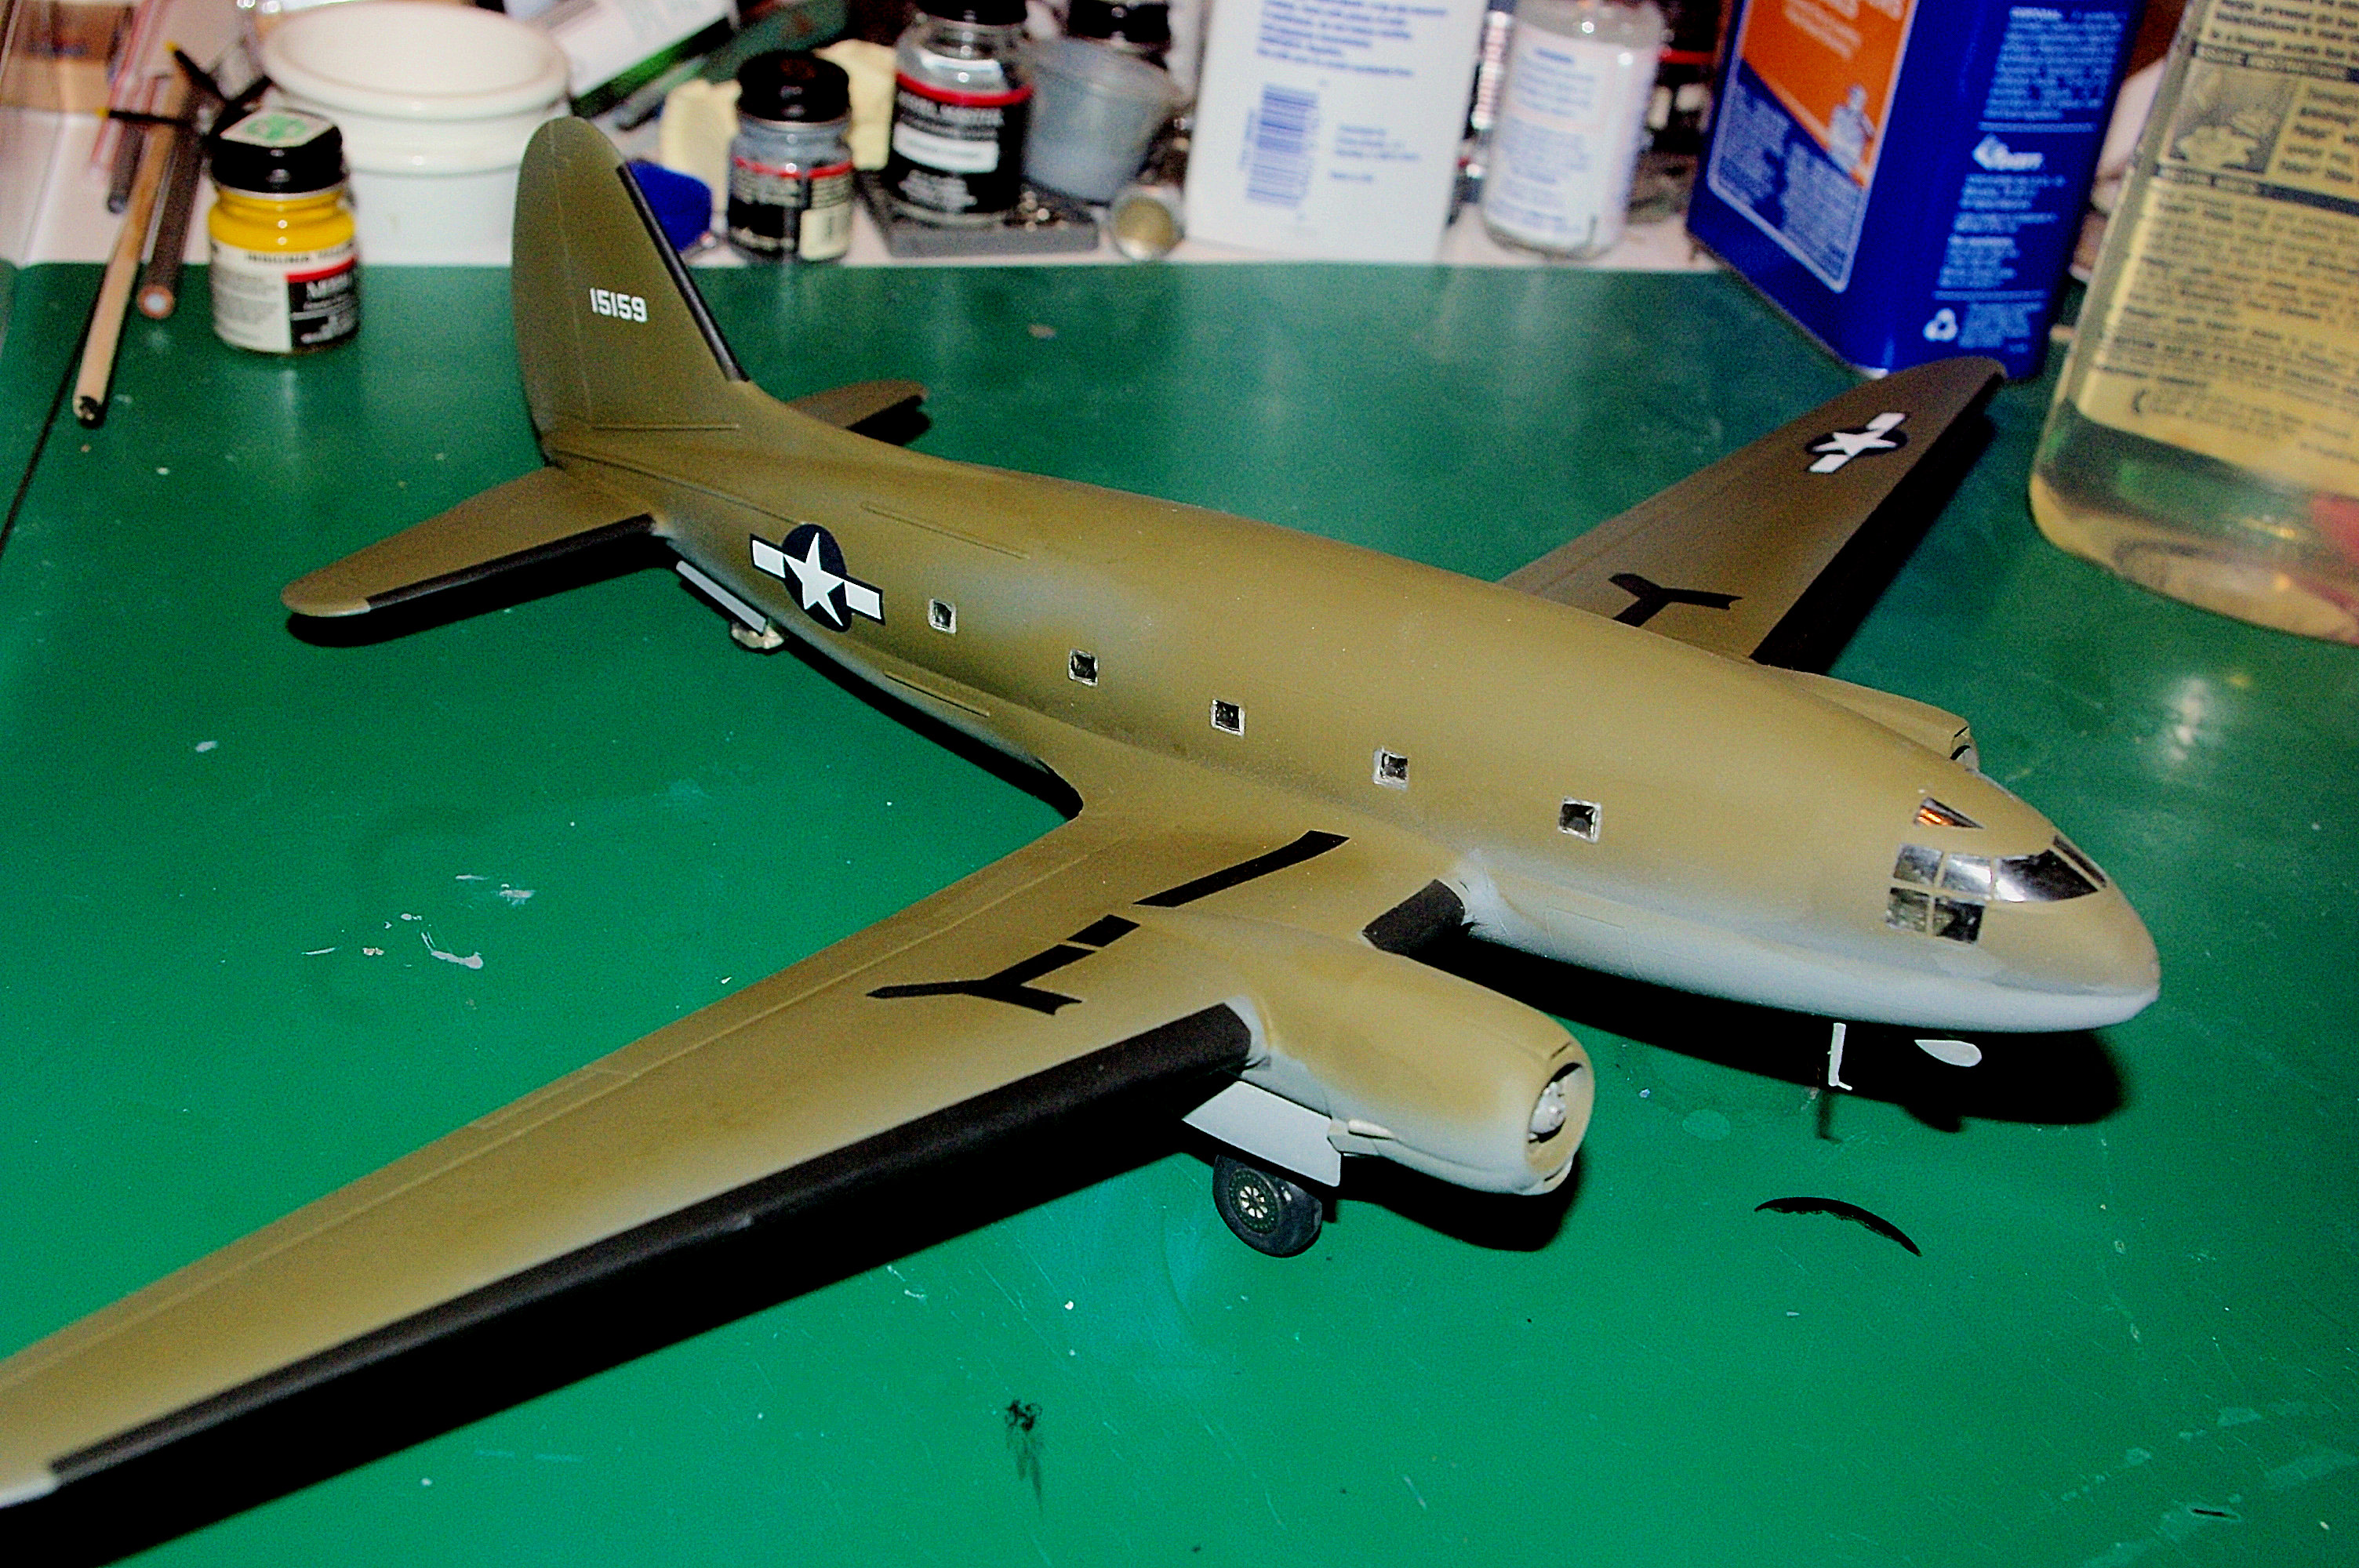
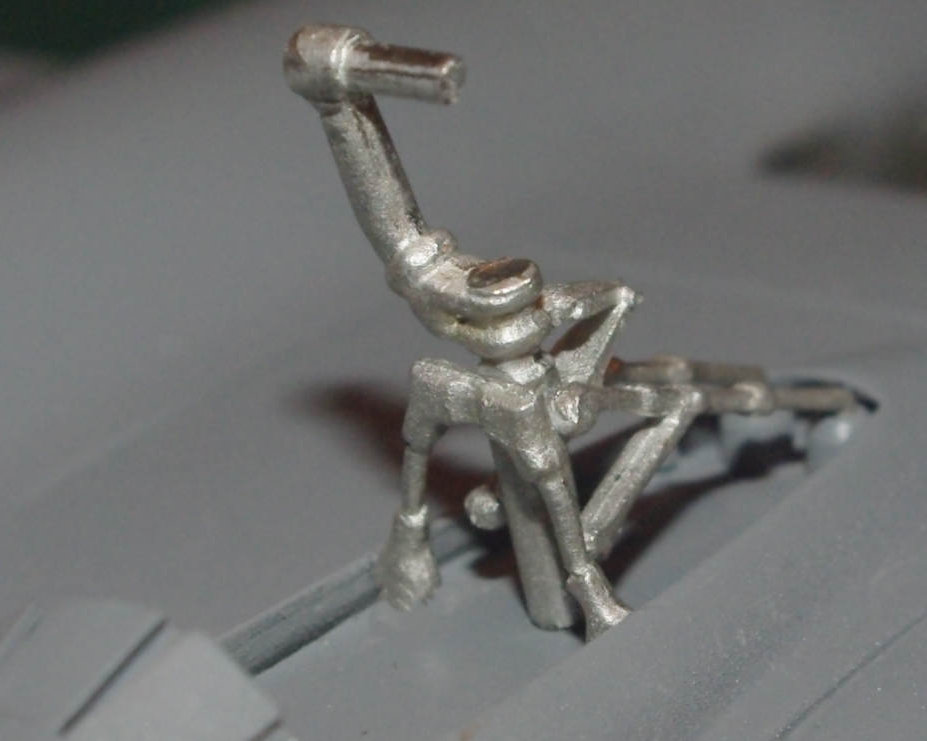
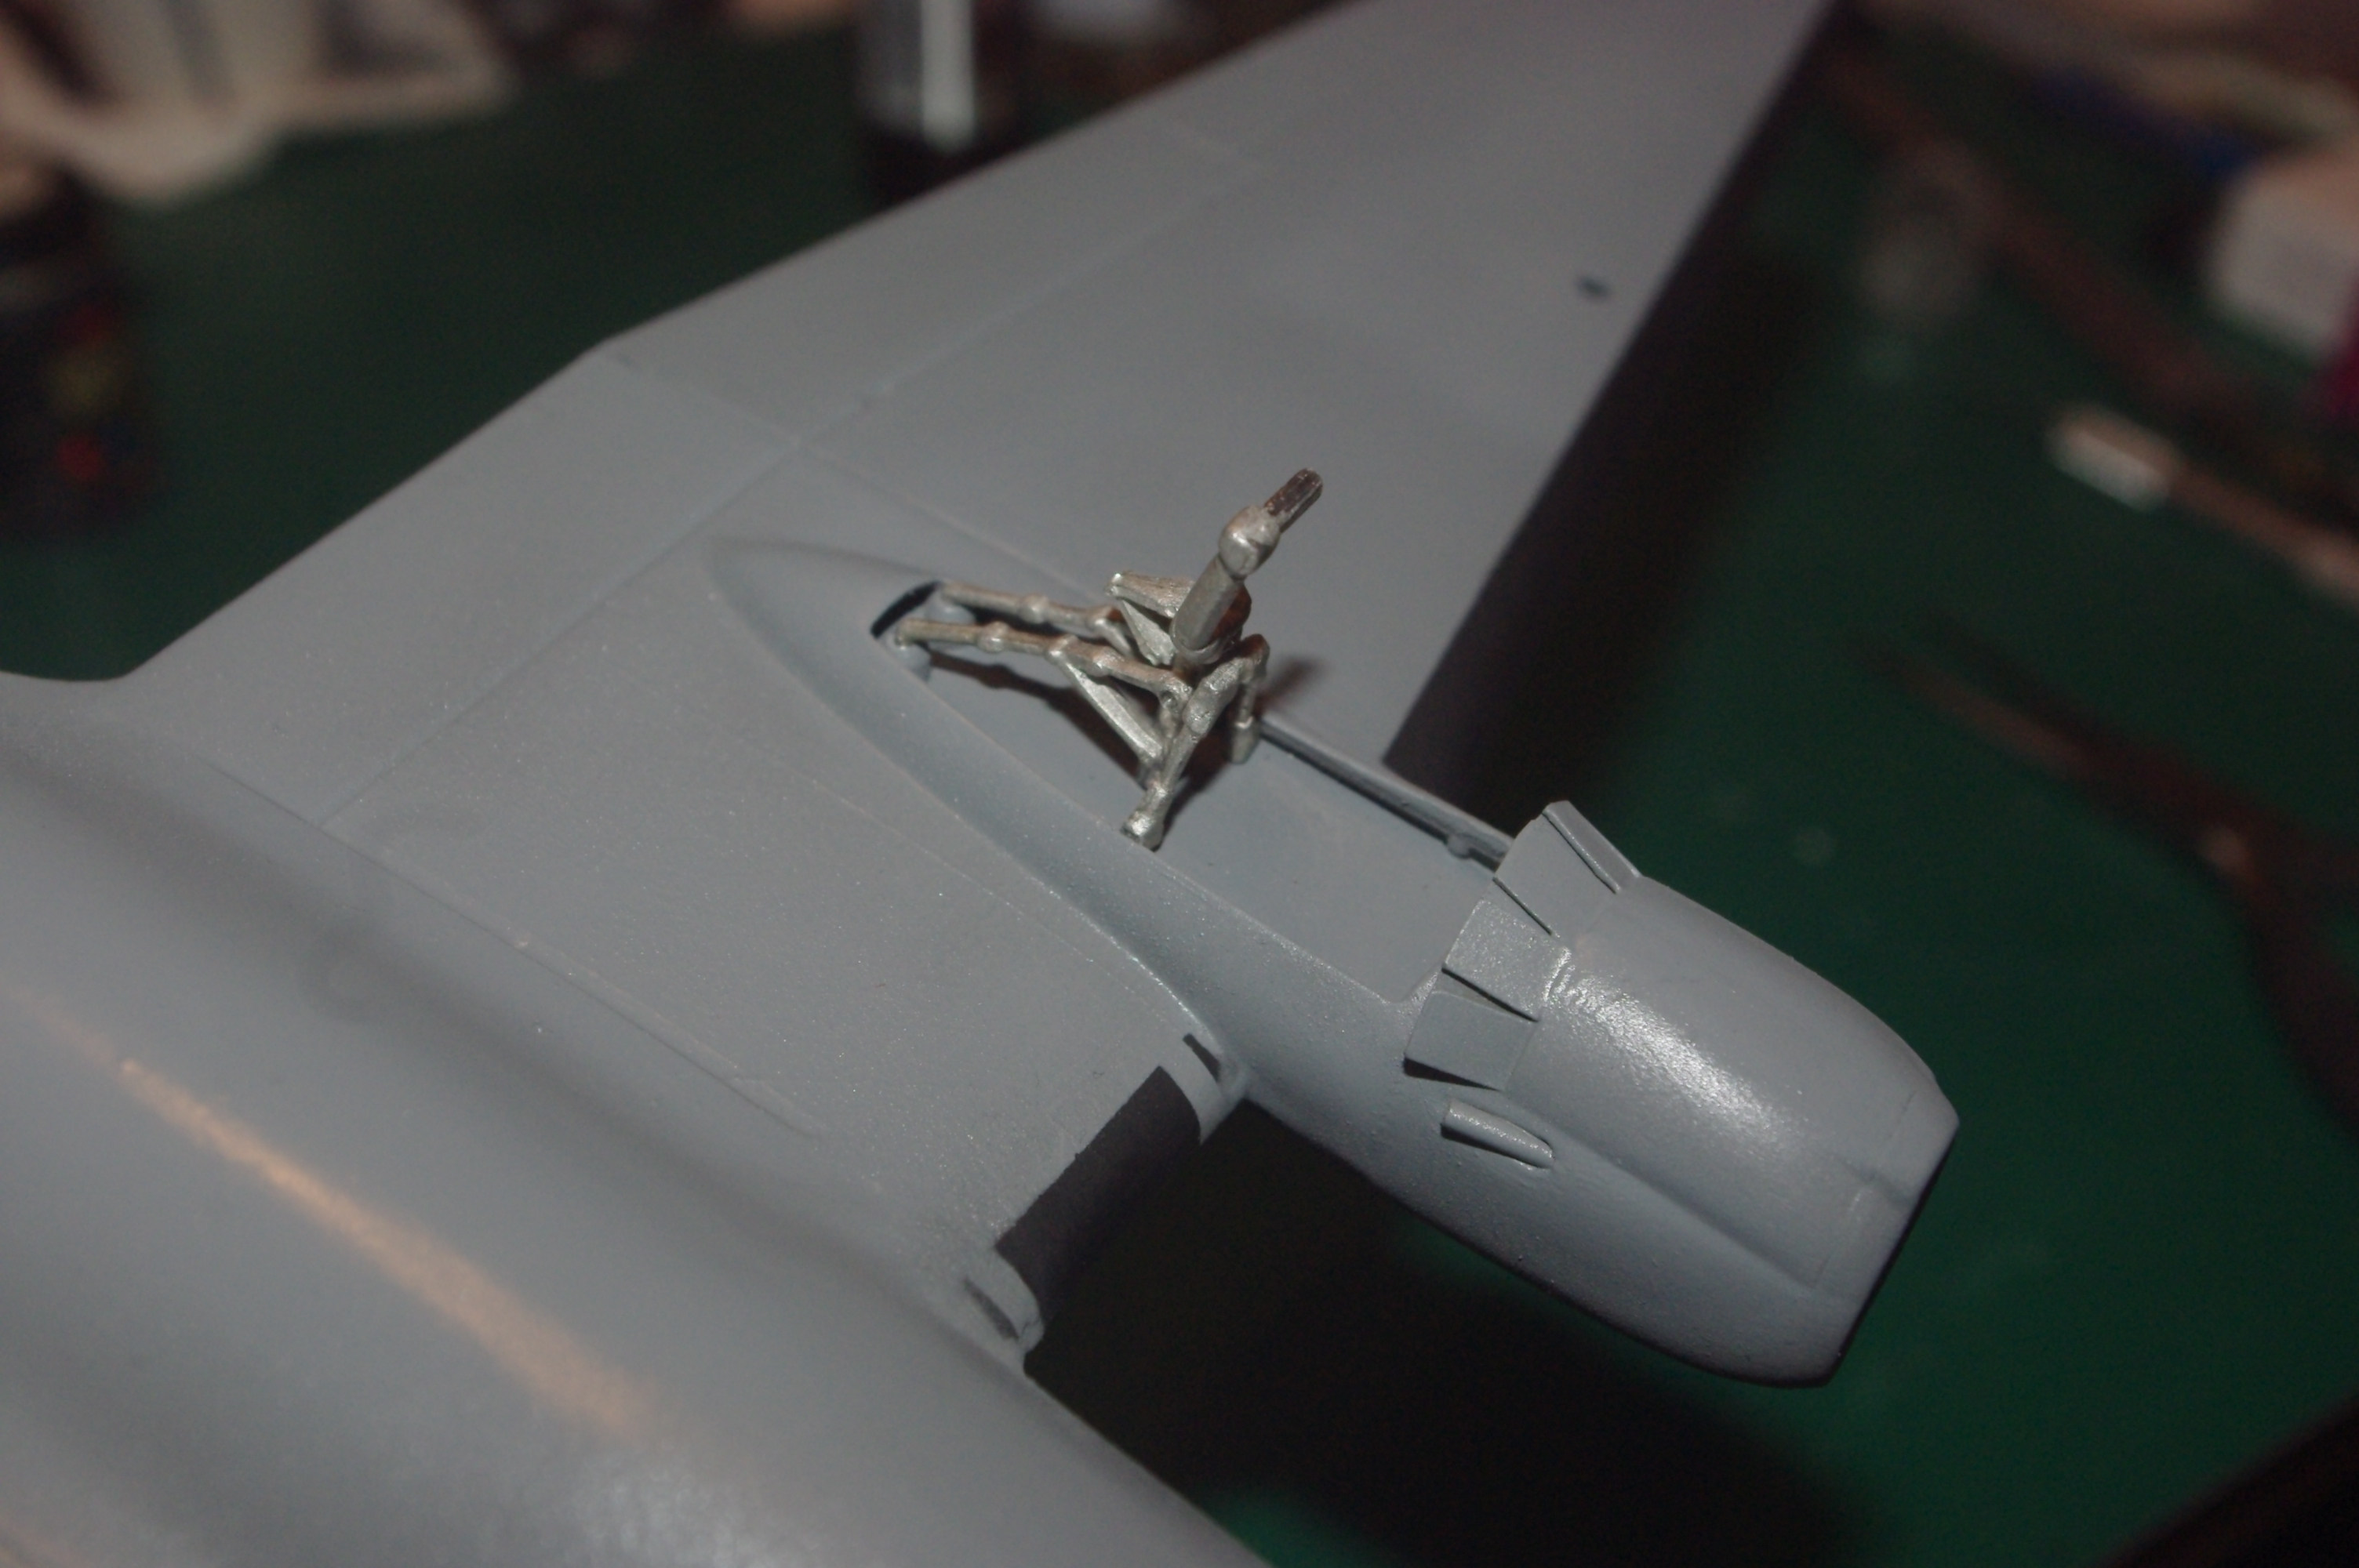
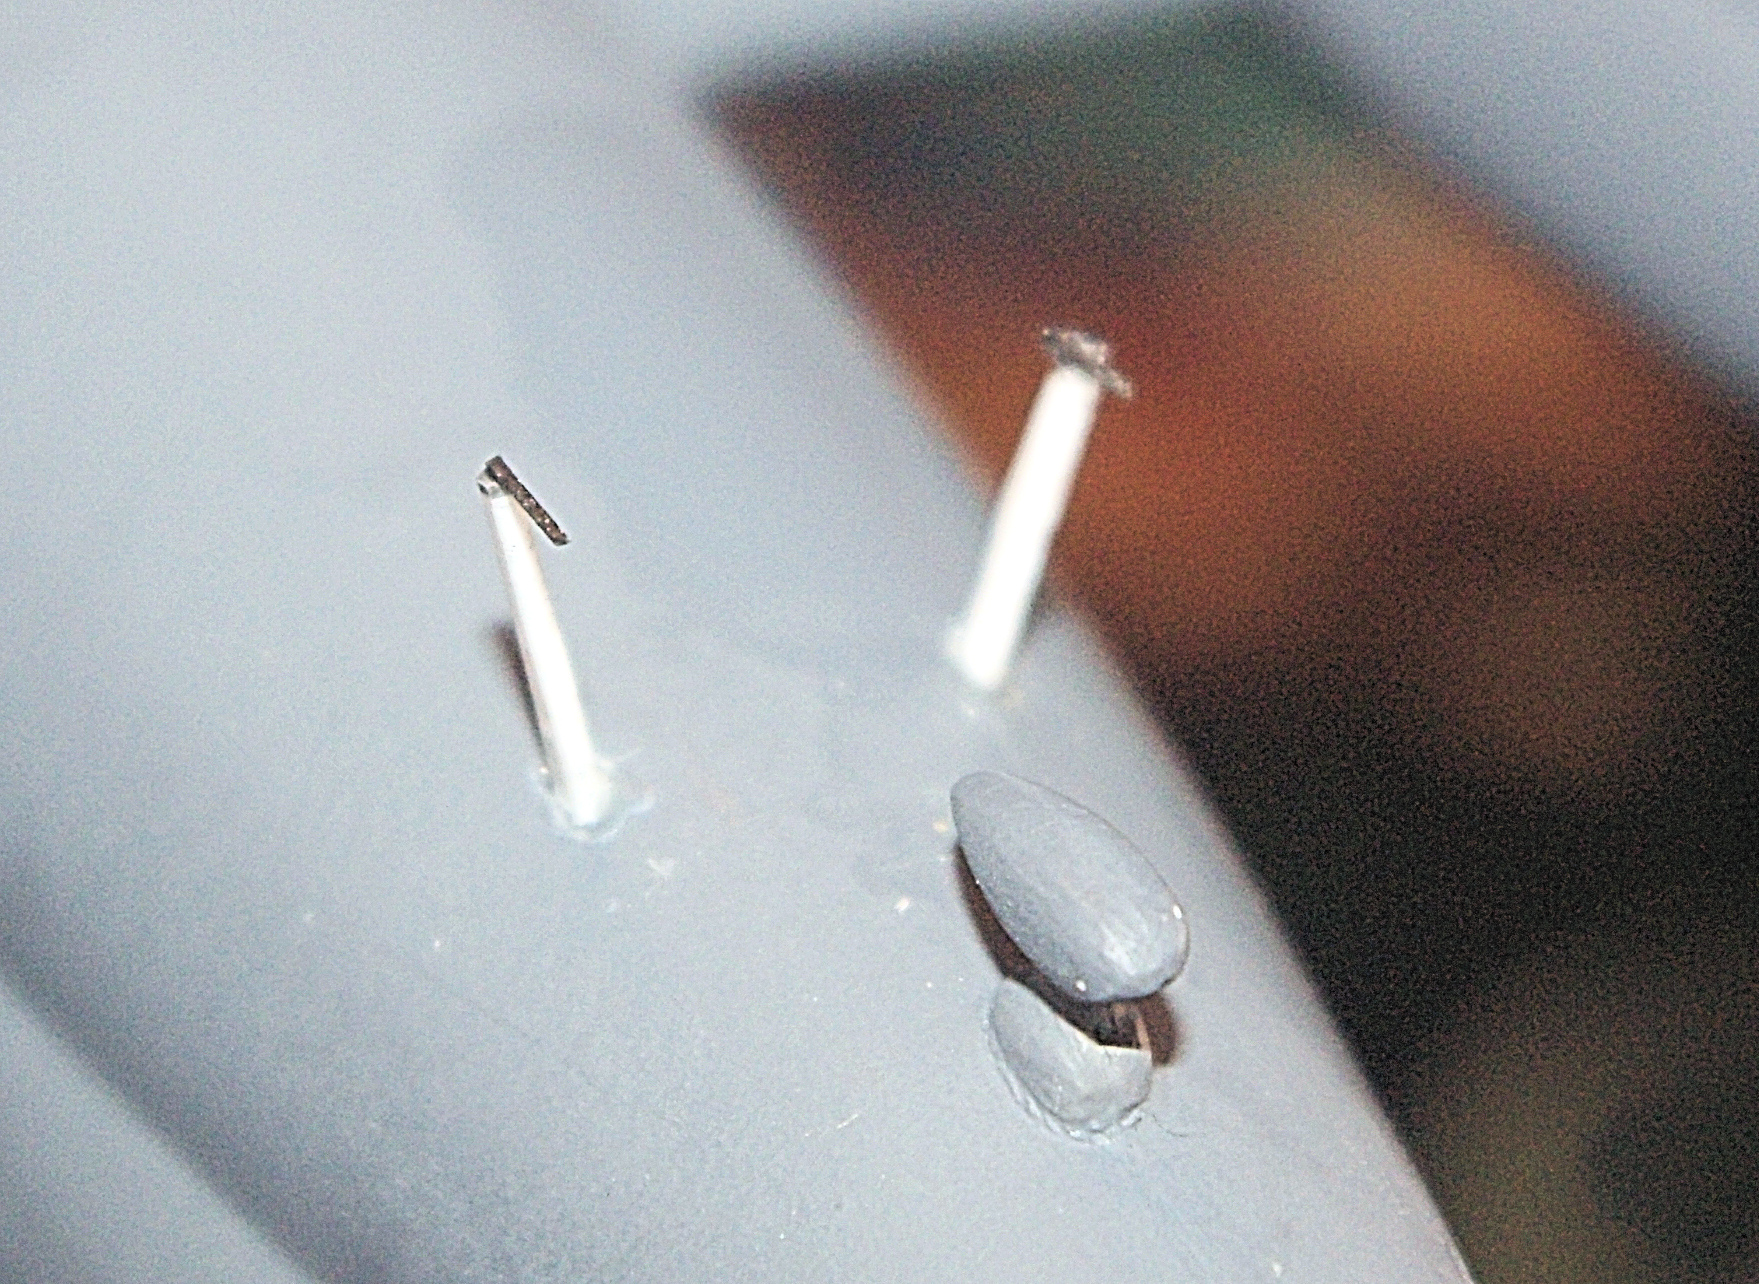
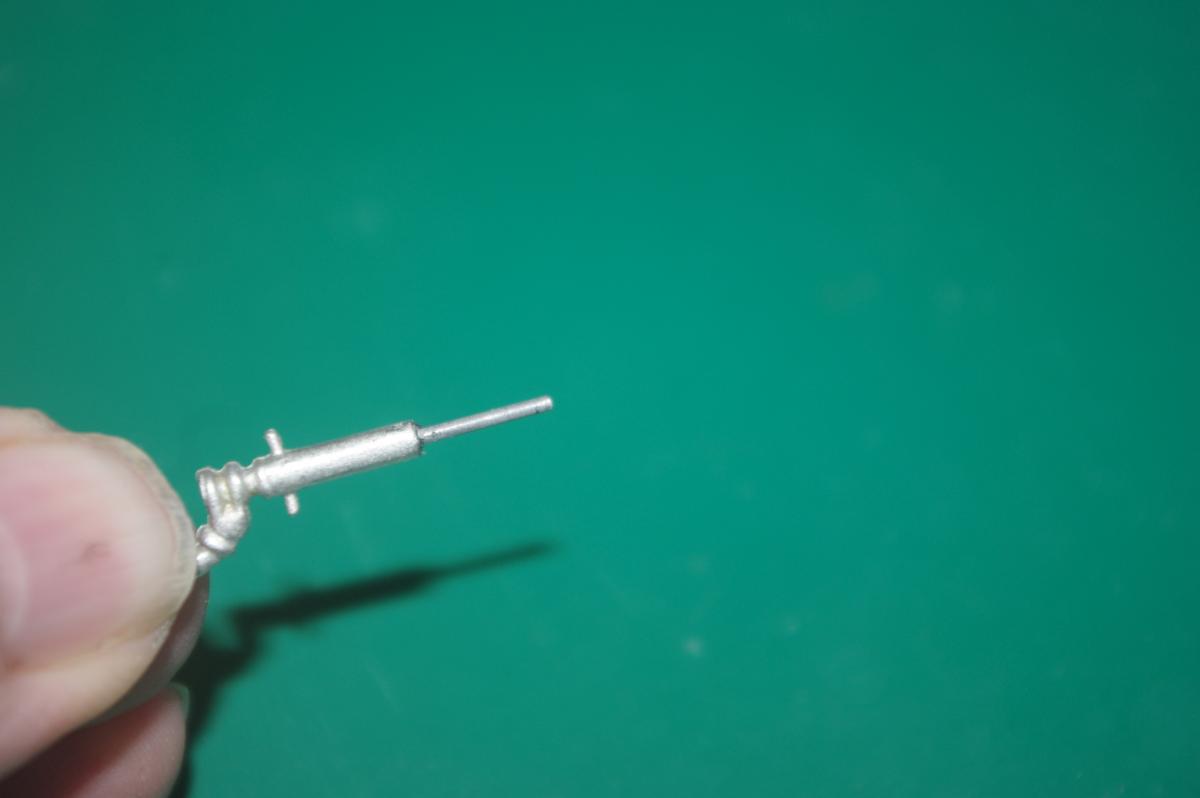
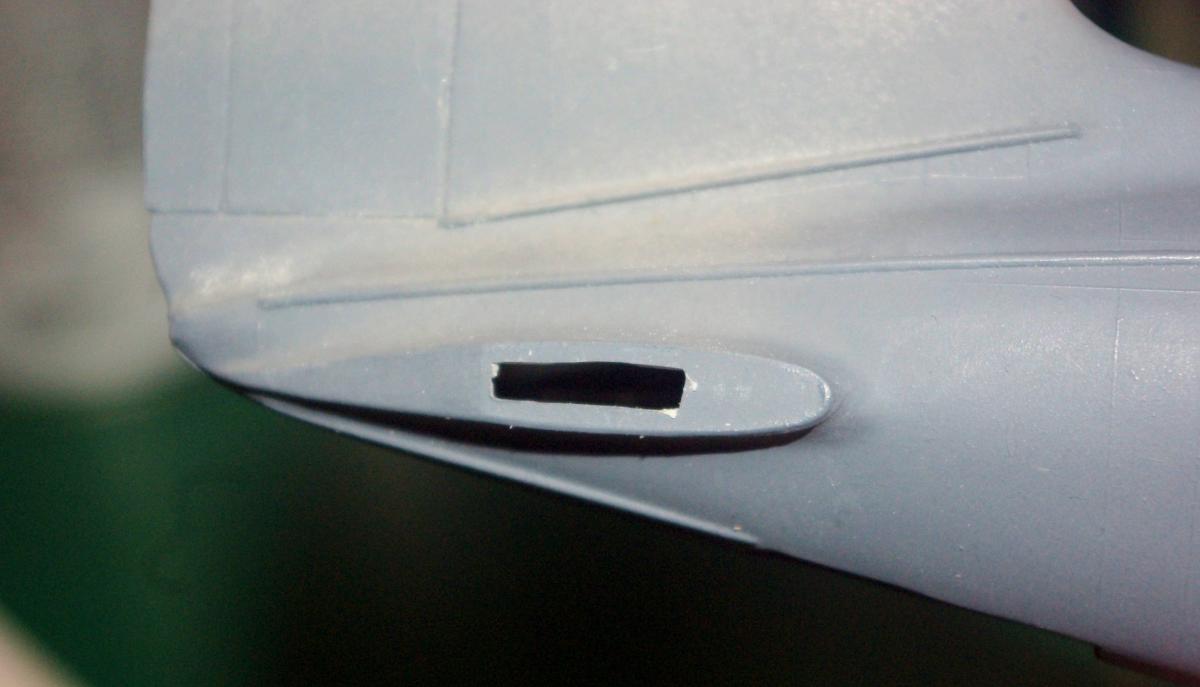
Hi all. Getting close to the end but had to take a breather due to my wife's surgery and an airbrush blowing out on me. Now for this installment: Williams Bros doesn't give you any of the small antennas and masts, which is probably a good thing. This is primarily because of the immense variety that were employed on the C-46. They do provide some reasonably decent patterns on the instruction sheet and tell you to fabricate them from scrap plastic and wire. What they don't tell you is that one of the 'masts' holds a pitot tube at the bottom and you will need two of them. It also doesn't hurt to have experience scratchbuilding minute details and an OptiVisor will be an absolute necessity. This photo shows the two pitot tubes/masts that I built from .030" x .060" Evergreen strip and .016" music wire. The finished pitots/masts are too thin to drill a hole for a mounting pin, so I cut mounting holes in the fuselage. Check you references closely for proper location and keep your eyeball computer nearby. The best I can offer for location is about .40" aft of the rear canopy edge and .90" below the bottom canopy edge. Each mast angles out so that the two form a wide V when viewed from the front. When properly installed, this is how they should look. Incidentally, they are not leaning back. That's the result of the camera angle. You want to be sure that they are perfectly vertical when viewed from the side and form a V when viewed from the front. Almost finished with the basic paint job. Model Master FS34087 O.D. uppersurface and FS36270 Neutral Gray undersurface. With the basic paint job done, a gloss coat of Future (aka PFM) is sprayed prior to decal application. Before the decals go on, I'll also have to install the gear, as well as paint the deice boots and fine details.
-
- 1
-

-
- williams bros
- curtiss
- (and 7 more)
-
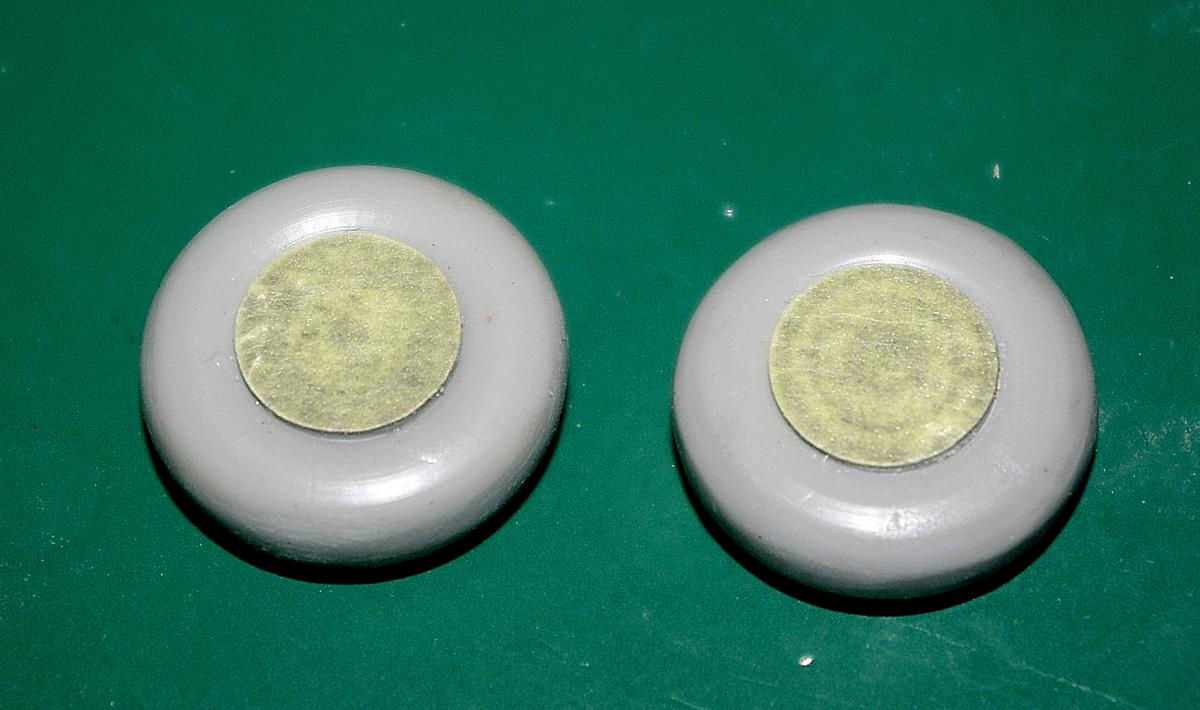
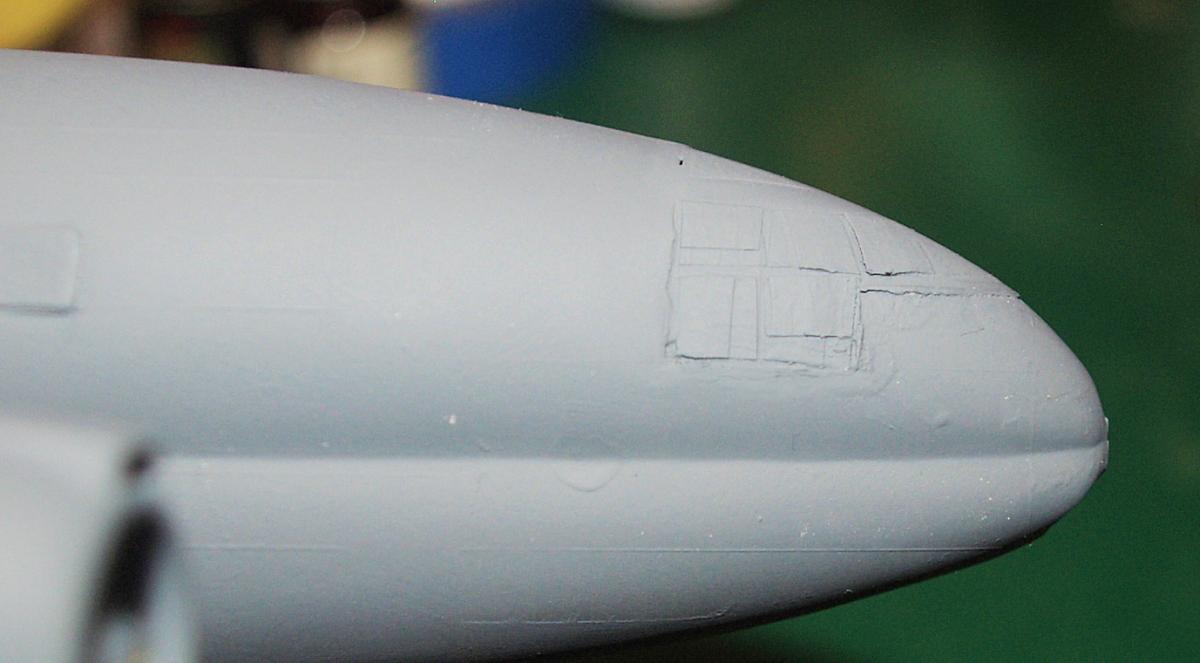
They say it's all in the details, so let's get down to the nitty gritty: Last installment I told you the photoetched tailwheel doors were folded along a center line to provide interior detail. What I didn't include was a photo of a tool that makes the job very easy. That tool? A little item called the "Bug" that is produced from The Small Shop. It takes a lot of the pain out of working with photoetch. One of the obvious features of the C-46 nose is a large opening that leads to the lower fuselage interior. I have no idea what it's true purpose is, but if anyone knows I'd appreciate being enlightened. In any event, there is a recessed structure evident from head on photos. I cut a short length of .190" (3/16") diameter brass tubing and inserted it into the hole, recessing it enough to match the appearance of my reference photo. The RDF housing mounts on the bottom centerline about even with the canopy frame that separates the two bottom side cockpit windows. To make sure it doesn't come loose, I drilled a .016" hole into the housing's mount. Then installed a short piece of .015" music wire. By the way, the best tool for cutting music wire all the way up to .040" is a Hard Wire Cutter made by Xuron. The wire was installed using BSI IC-2000 black rubber toughened CA. A matching .016" hole was drilled in the C-46 centerline and the RDF housing installed with more IC-2000. Four masks from the Eduard mask set actually proved to be useful. The discs that masked the main wheel photoetch details will make painting the tires absolute simplicity. Incidentally, if you're looking at the tires and wondering why I didn't flat them, it's because my client didn't want that feature. Getting ready for painting, the props are given a shot of primer. If you use a Nitrile glove and hold the prop by the shaft, you do a very nice job of masking the shaft without having to use tape.
-
Installment #13 of my William Bros C-46 build series is now available in the Builds sub-forum. Comments welcome as usual.
-
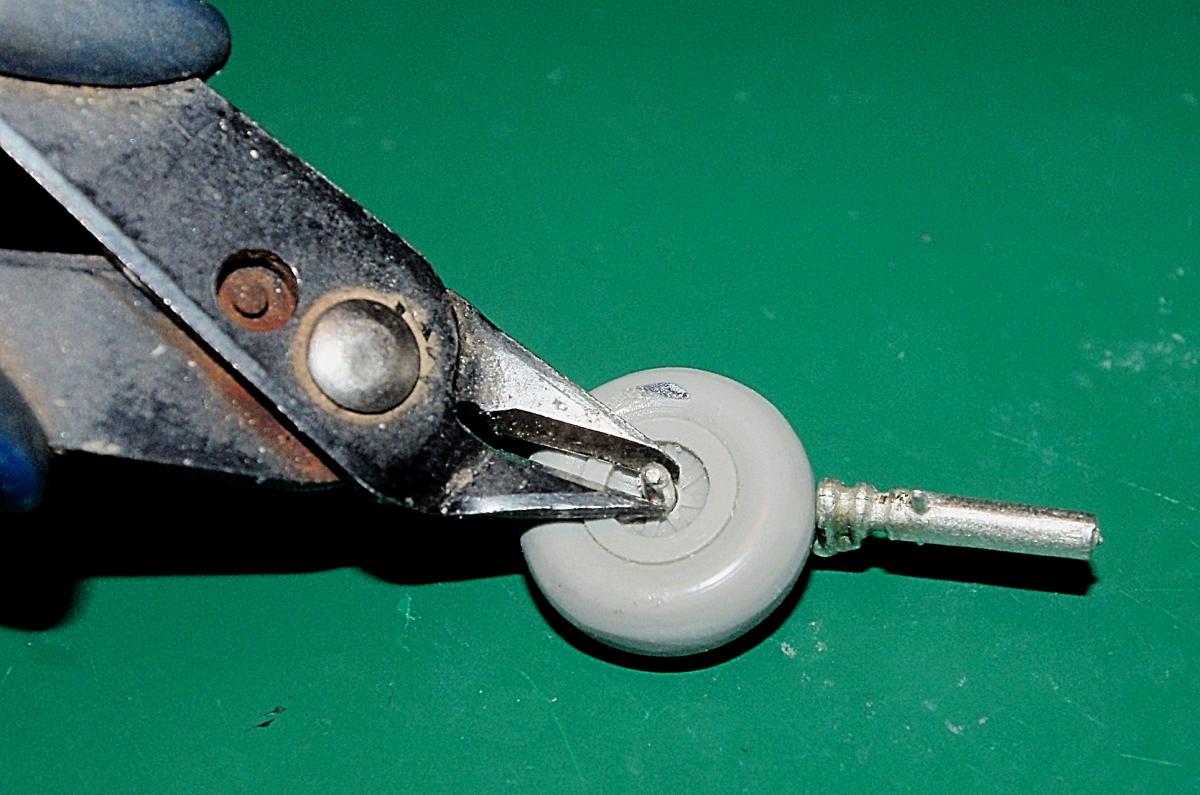
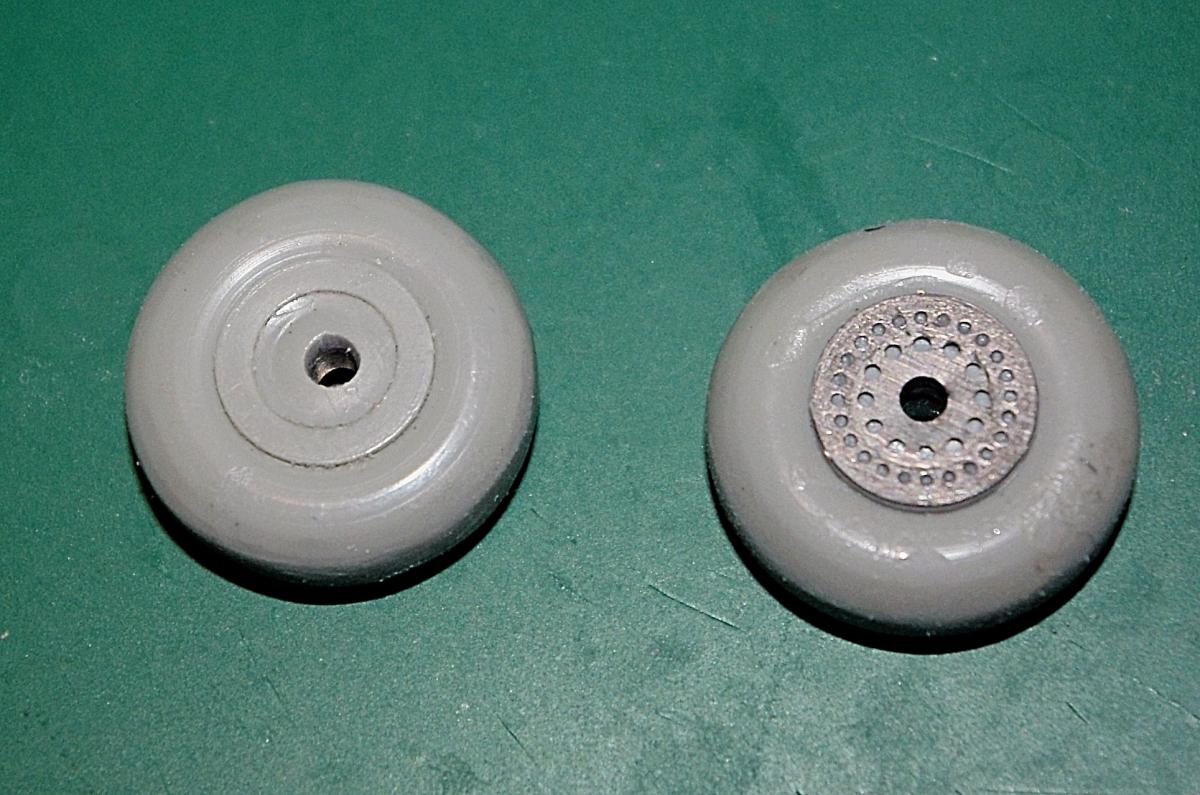
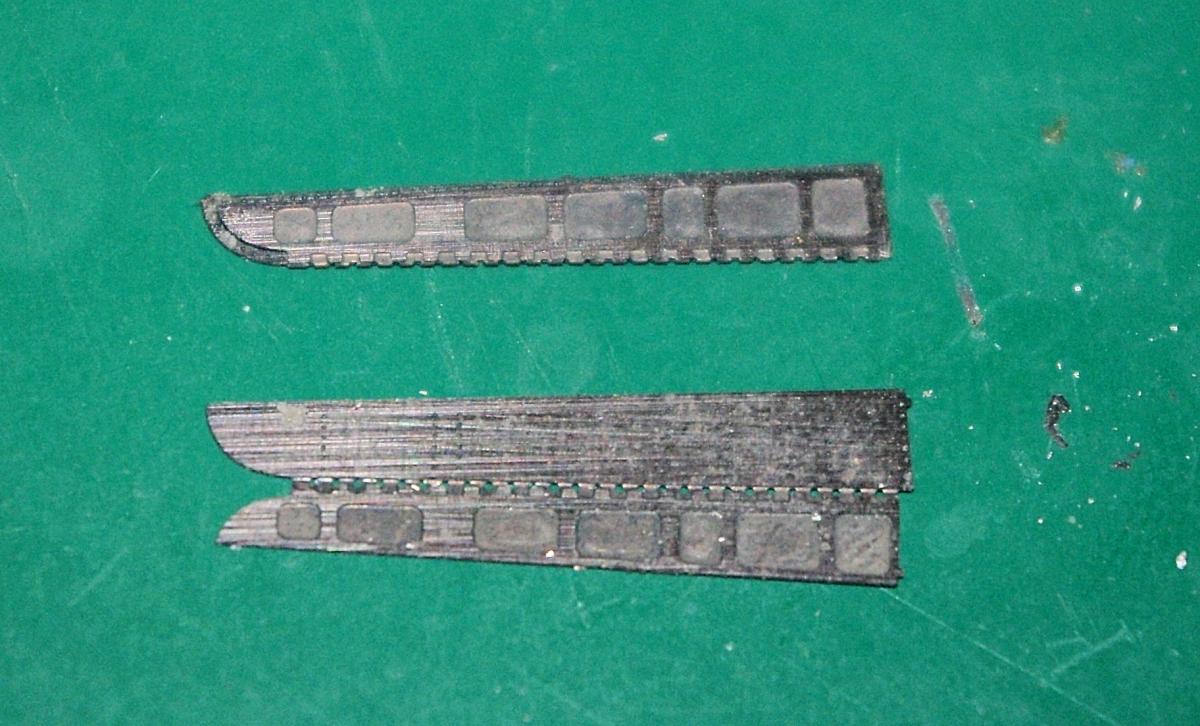
Hi all, Here we go again with more C-46 progress and getting close to the end. I'm gonna be glad to be done with it and I'm sure my client will be! Anyhoo, I hope you enjoy this next set of photos. Comments are welcome as always. The True Details vacuform canopy, masked and about ready for installation. I started out intending to use the Eduard mask set as a base, then filling in with blue tape. That proved not to be a good choice, so I switched over to only blue tape. A light touch and a brand new #11 blade is essential to mask a vacuform canopy, but it can be done. And, yes, John, I know one of the windows is too small. That was corrected before installing the canopy. With the canopy installed, the familiar contours of the C-46 become apparent. I still need to finish fairing in the canopy, then go over the entire airframe for a final cleanup before moving it to the paint shop. The photoetch detail that installs on the outside of the wheel will be interfered with by the Scale Aircraft Conversions axle length. All you have to do is use a sprue cutter to nip the axle flush with the wheel, as seen here. On the left is the shortened axle versus the original on the right. The kit struts have a very poor mounting design, basically a butt joint that relies on the other links and yokes to provide the necessary support strength. You'll find the same problem in the SAC metal replacements, which is not their fault. The replacements have to duplicate the kit parts in order to fit the model. However, there is a way to improve things. I used a 1/16" drill bit to create a small depression or dimple in the top of the metal strut, then switched to a 3/64" drill bit to drill a deeper hole. You'll need a Dremel to do the job since the strut's metal makes for very slow progress if you opt for a pin vise. With the hole drilled, I cut a piece of .047" diameter music wire to about 1/2" long. A toothpick was used to place a small amount of BSI IC-2000 CA in the hole and added the wire. It'll take a couple of minutes or thereabouts to set, so keep making an minute adjustments in order to guarantee a vertical alignment. You'll also want to make sure that no CA accumulates above the top of the strut. If it does, remove it before it sets hard. For those who don't know, BSI (Bob Smith Industries) CAs are a private label product. Whoever you buy it from will have their name (hobby shop, hardware store, whatever) on the front, but the label design and product name...IC-2000 in this case...will always be the same. If you want to be sure it's a BSI product, look at the fine print on the back label. I'm finally at a point where I'll be using that second fret of photoetch...or at least most of it. Before adding the wheel photoetch detail, I ran a 1/16" drill bit thru the wheel axle holes and also did a test fit of the metal axles. Satisfied with the results, parts 31 from the second photoetch fret were added to the back of the wheels. On the right is the stock wheel , with the photoetch part installed on the right. Gator's Grip Thin Blend was used here and the operative application word is thin. It doesn't take much Gator's Grip to hold the photoetch and you don't want to use so much that it'll squeeze up thru the perforations. When the photoetch is dry on the back, the wheels were flipped over and parts 27 were added. Installed detail is on the left and stock wheel on the right. You can see in this shot why the metal axles had to be shortened. The stock main gear doors already have some fairly nice detail molded into them, but the addition of parts 23-26 add a lot. Note that these are handed, so pay attention to the photoetch instructions. A kit door is at the photo top with the photoetch enhanced version at the bottom. As with all photoetch detail used for this build, Gator's Grip Thin Blend was relied on for installation. Williams Bros chose not to provide any extra tail wheel doors, instead requiring you to carefully remove the molded-in doors and reuse them. The photoetch fret provides both replacement doors and interior detail in one. At the bottom of this photo is one door as it comes on the fret. When you bend the part along the center line, you get what you see at the top of the photo, a complete door with interior detail. Since the metal props my client provided did not come with shafts of any kind, some had to be created. I had already planned to sleeve the props so they would be removable and the engine inserts had been previously modified for that purpose. So, I used a 1/16" ...or .060" if you prefer...drill bit to enlarge the hole in the back of each prop. Then a 1/2" long piece of .060" brass tubing was inserted using IC-2000 CA. That's it. All that remains is to paint the props and they'll be ready for installation.
- 7 replies
-
- 1
-

-
- Williams Bros
- Curtiss
- (and 6 more)
-
Installment #12 of my Williams Bros C-46 build series is now available in the Builds Sub-Forum. Comments welcome as always.
-
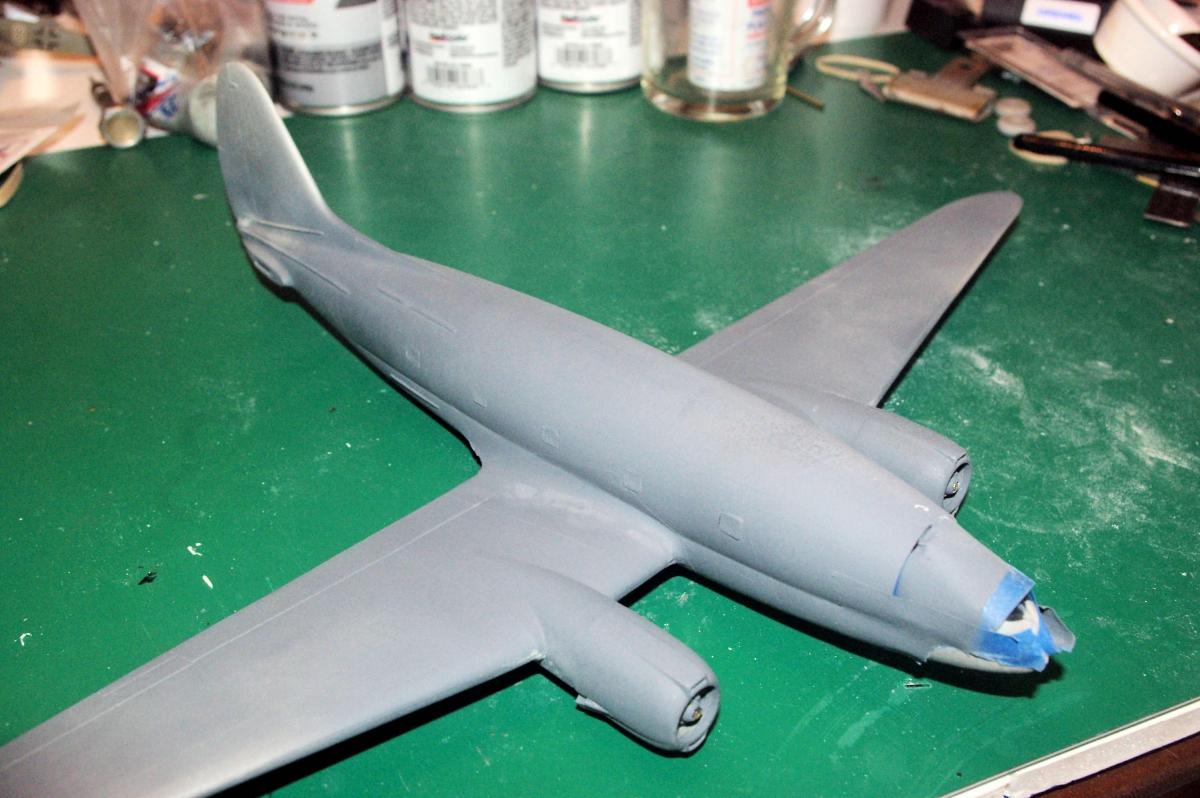
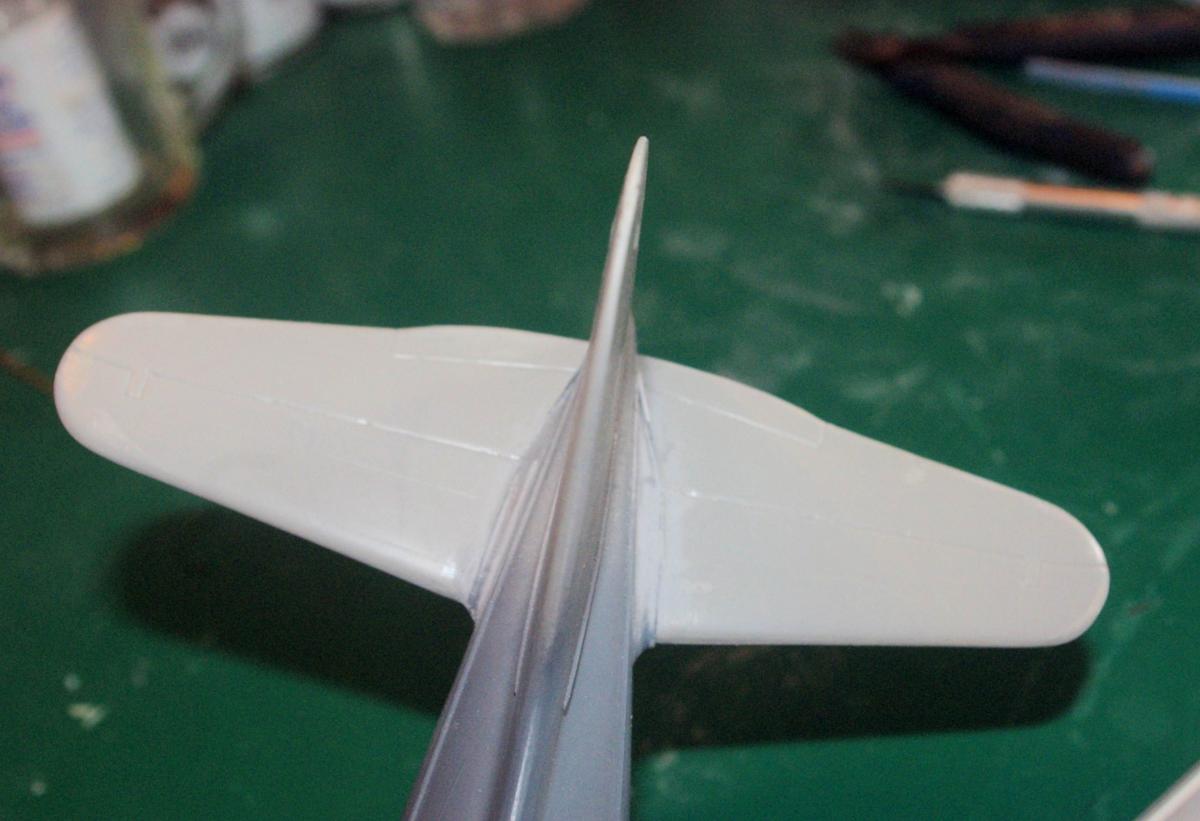
Hey all, Here we go with the next installment. Last time the wing fillets had been puttied and then sanded smooth. Close examination showed a few little pits and cavities that needed attention, so that's were we begin: The starboard wing had the most flaws. Not surprising since it required the most corrective work. The port wing wasn't near the problem. More sanding followed by a light coat of primer and the starboard fillet is finally looking good. Same for the port fillet. Progress! All that's needed for a complete airframe is the canopy and horizontal tails. The port horizontal goes on without a problem. But the starboard horizontal is another questiion. In this case, the horizontal sits about .020" too low, so it needs to be raised. I started by shaving around .020" off the top of the horizontal tab opening. Note that it doesn't have to be perfect. A piece of .020" styrene is added to the BOTTOM of the horizontal mounting tab and trimmed to match the tab shape. Done correctly, it should be a snug fit.,
-
Installment #11 of my Williams Bros C-46 build series is now available in the Builds Sub-Forum. Comments welcome as always.
-
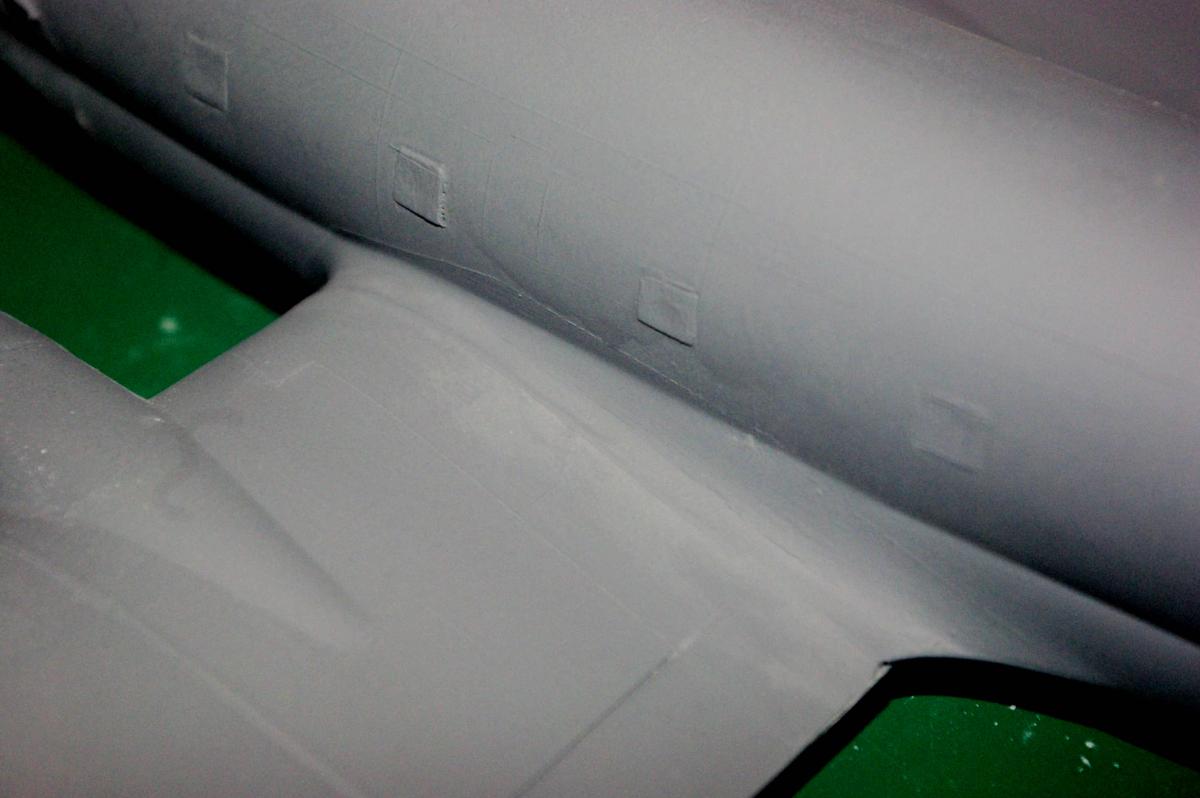
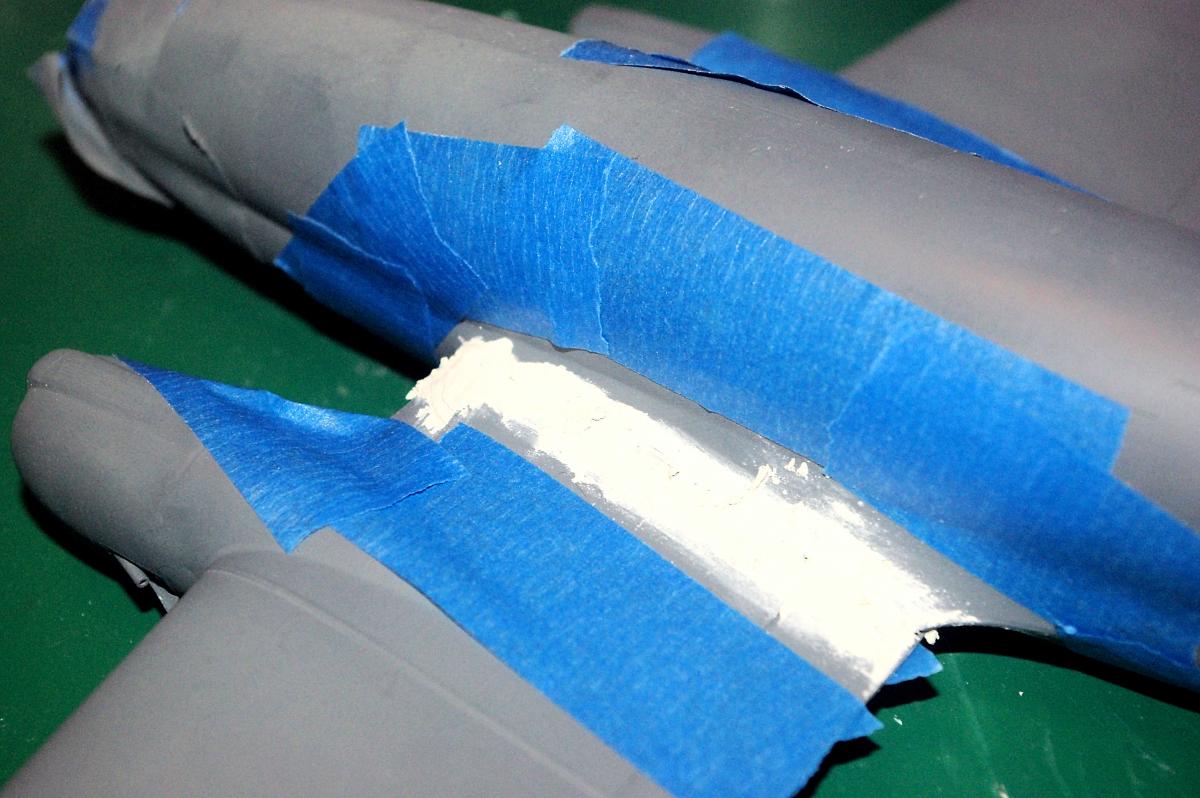
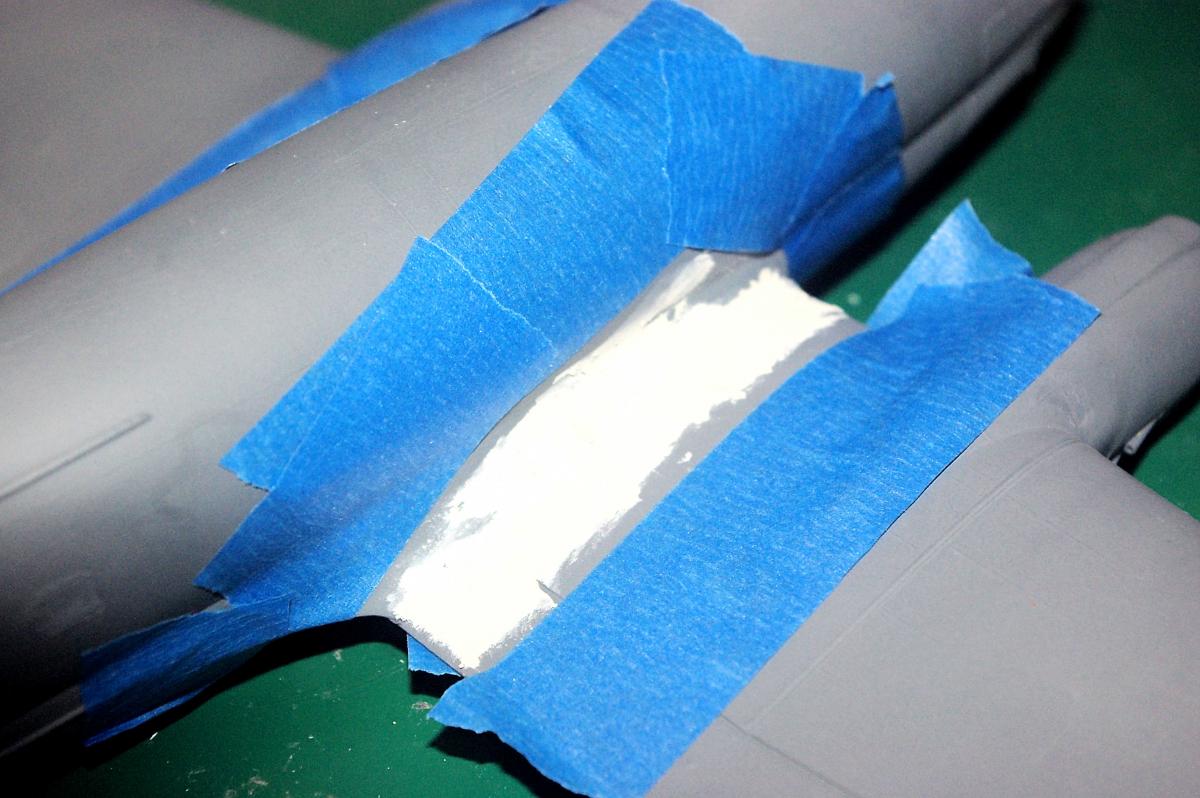
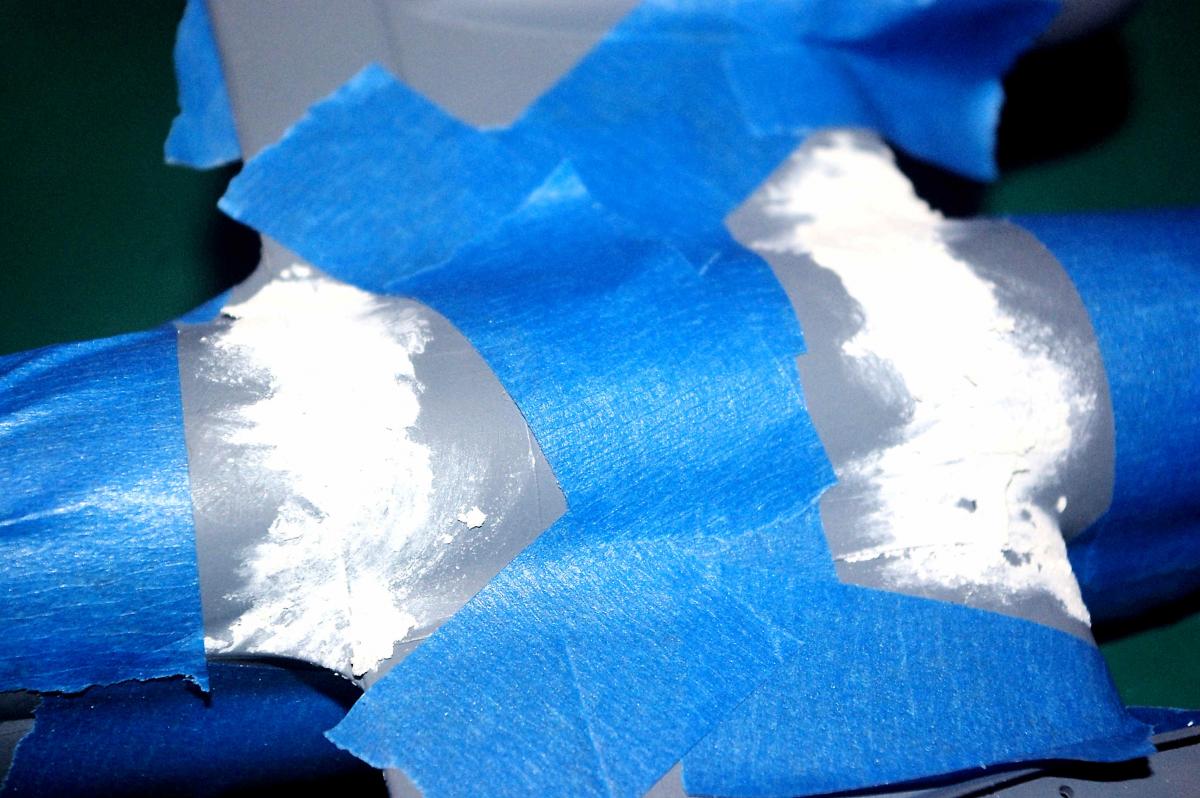
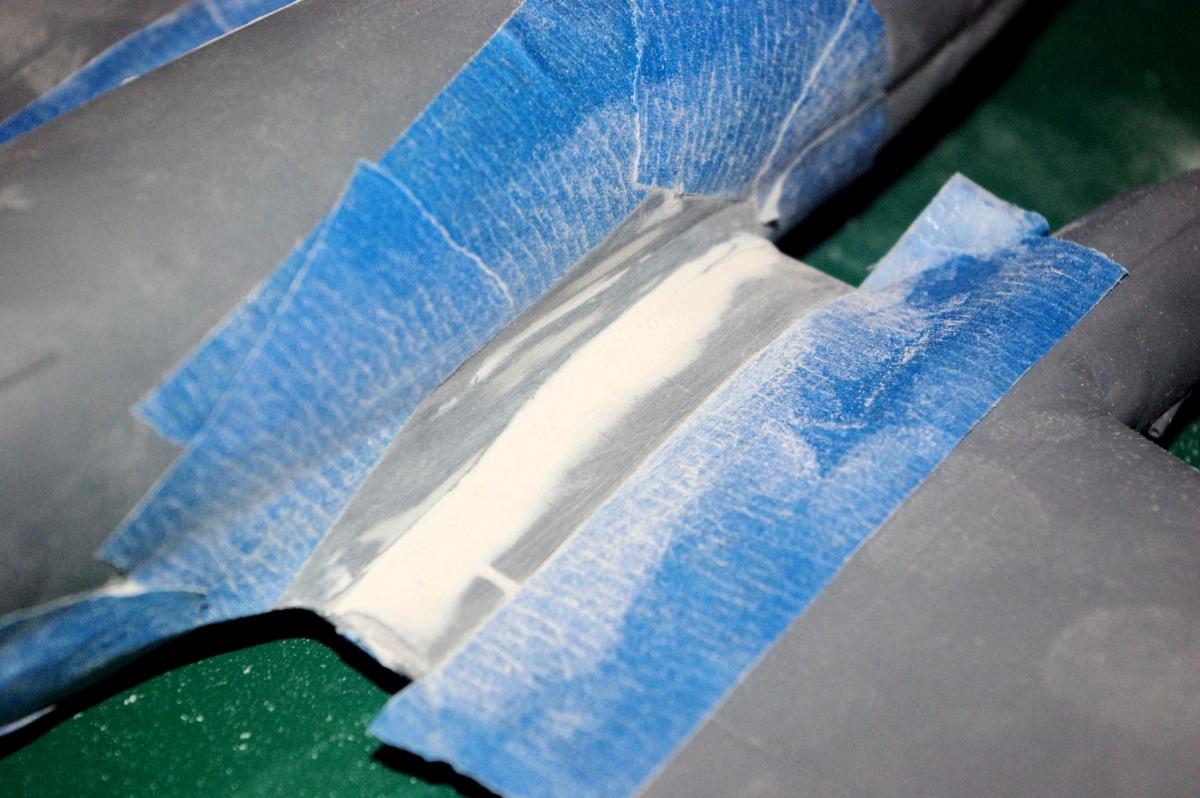
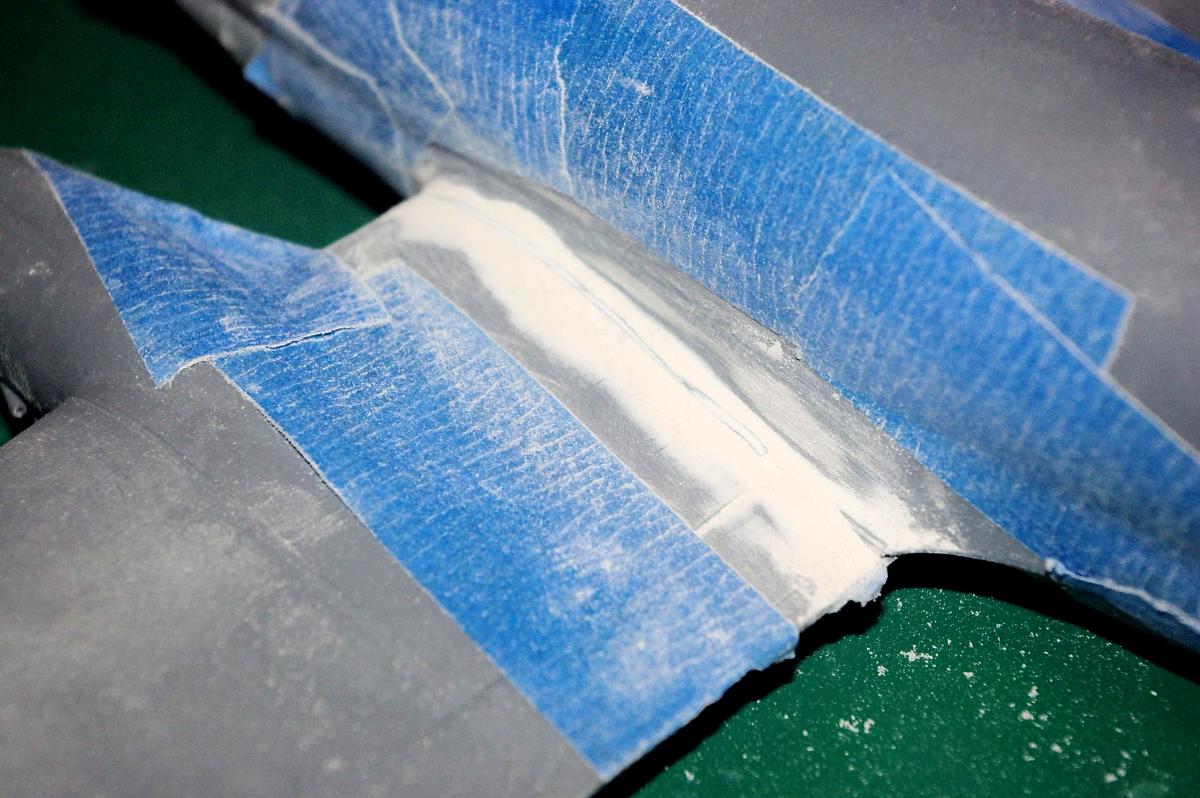
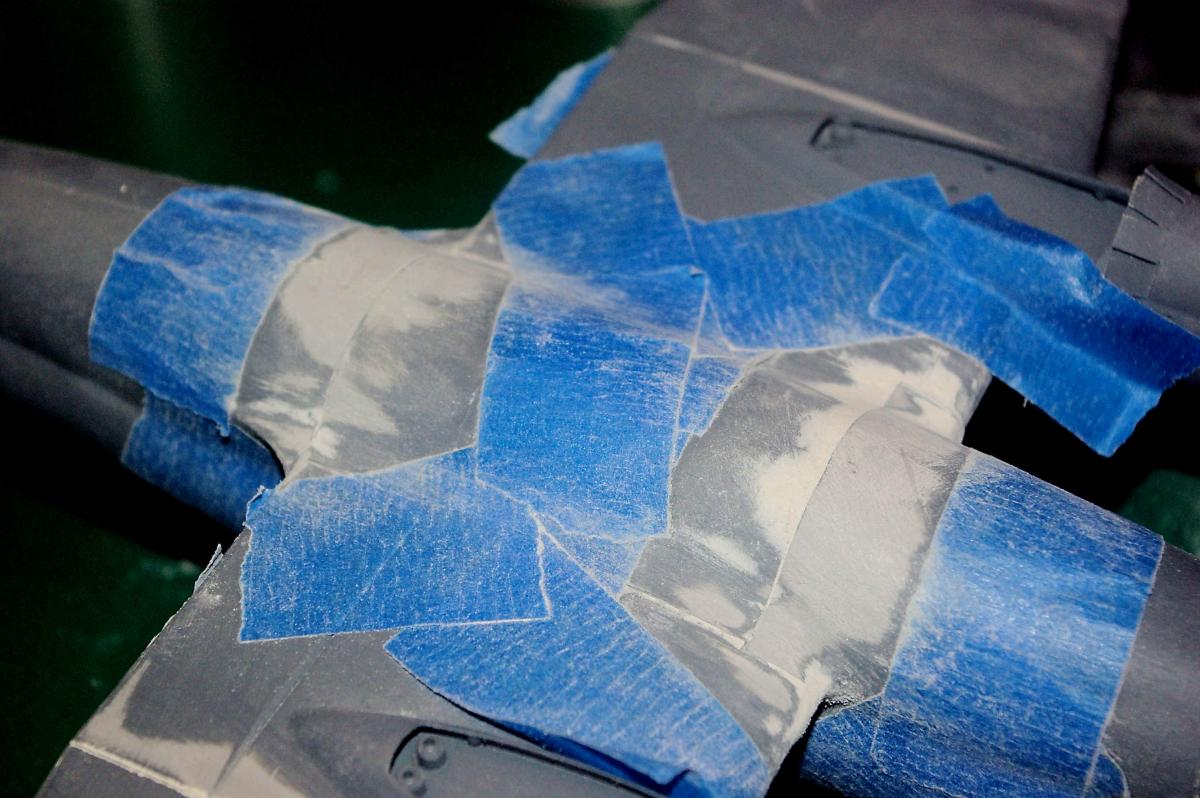
Hey all, After time out for Thanksgiving and a visit to the E.R. for pneumonia, I'm back and making more progress on the C-46. Things are beginning to speed up and with any luck at all, it'll be completed and shipped to my client before Christmas. So, let's see where we are: Shown here is the port wing fillet area that's been roughly coated with Squadron White Putty. Believe it or not, it was simply smeared on with my finger. The starboard fillet misfit was the worst one, so a lot more putty was needed. Just as I did with the fuselage centerline, blue painters tape was used to protect the rest of the wings from the sanding I would be doing. More putty on the belly joints and more blue tape to control the sanding area. Finger application was used here as well. After sanding with 320 down to 600 grit, as well as sanding sticks. the starboard fillet is starting to look pretty darn good. And the port wing after the same sanding treatment. Finally the belly seams. It won't be long now before we have a complete aircraft on our hands, except for the landing gear and props, which are waiting in the wings.
-
Installment #10 of my Williams Bros C-46 build series is now available in the Builds Sub-Forum. Comments welcome as always.