ghodges
-
Posts
7,583 -
Joined
-
Last visited
-
Days Won
299
Content Type
Profiles
Forums
Events
Everything posted by ghodges
-
Thanks for the very kind words! Ed, the chipping was actually done with a silver pencil, which I find easier to control than a brush and paint. You can use the sharp point to apply chips, and you can also lightly "bounce" the edge and/or the tip of the pencil along edges of props and wing leading edges to make "dings", which you can then expand to make bigger where you deem appropriate. Gil
-
It might be at Jaxcon....though I hope to have it in the client's hands before then.... Gil
-
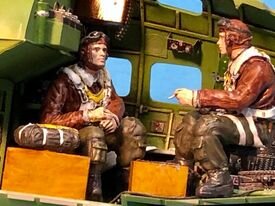
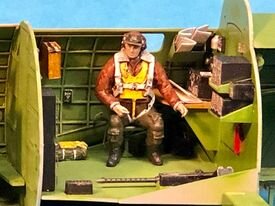
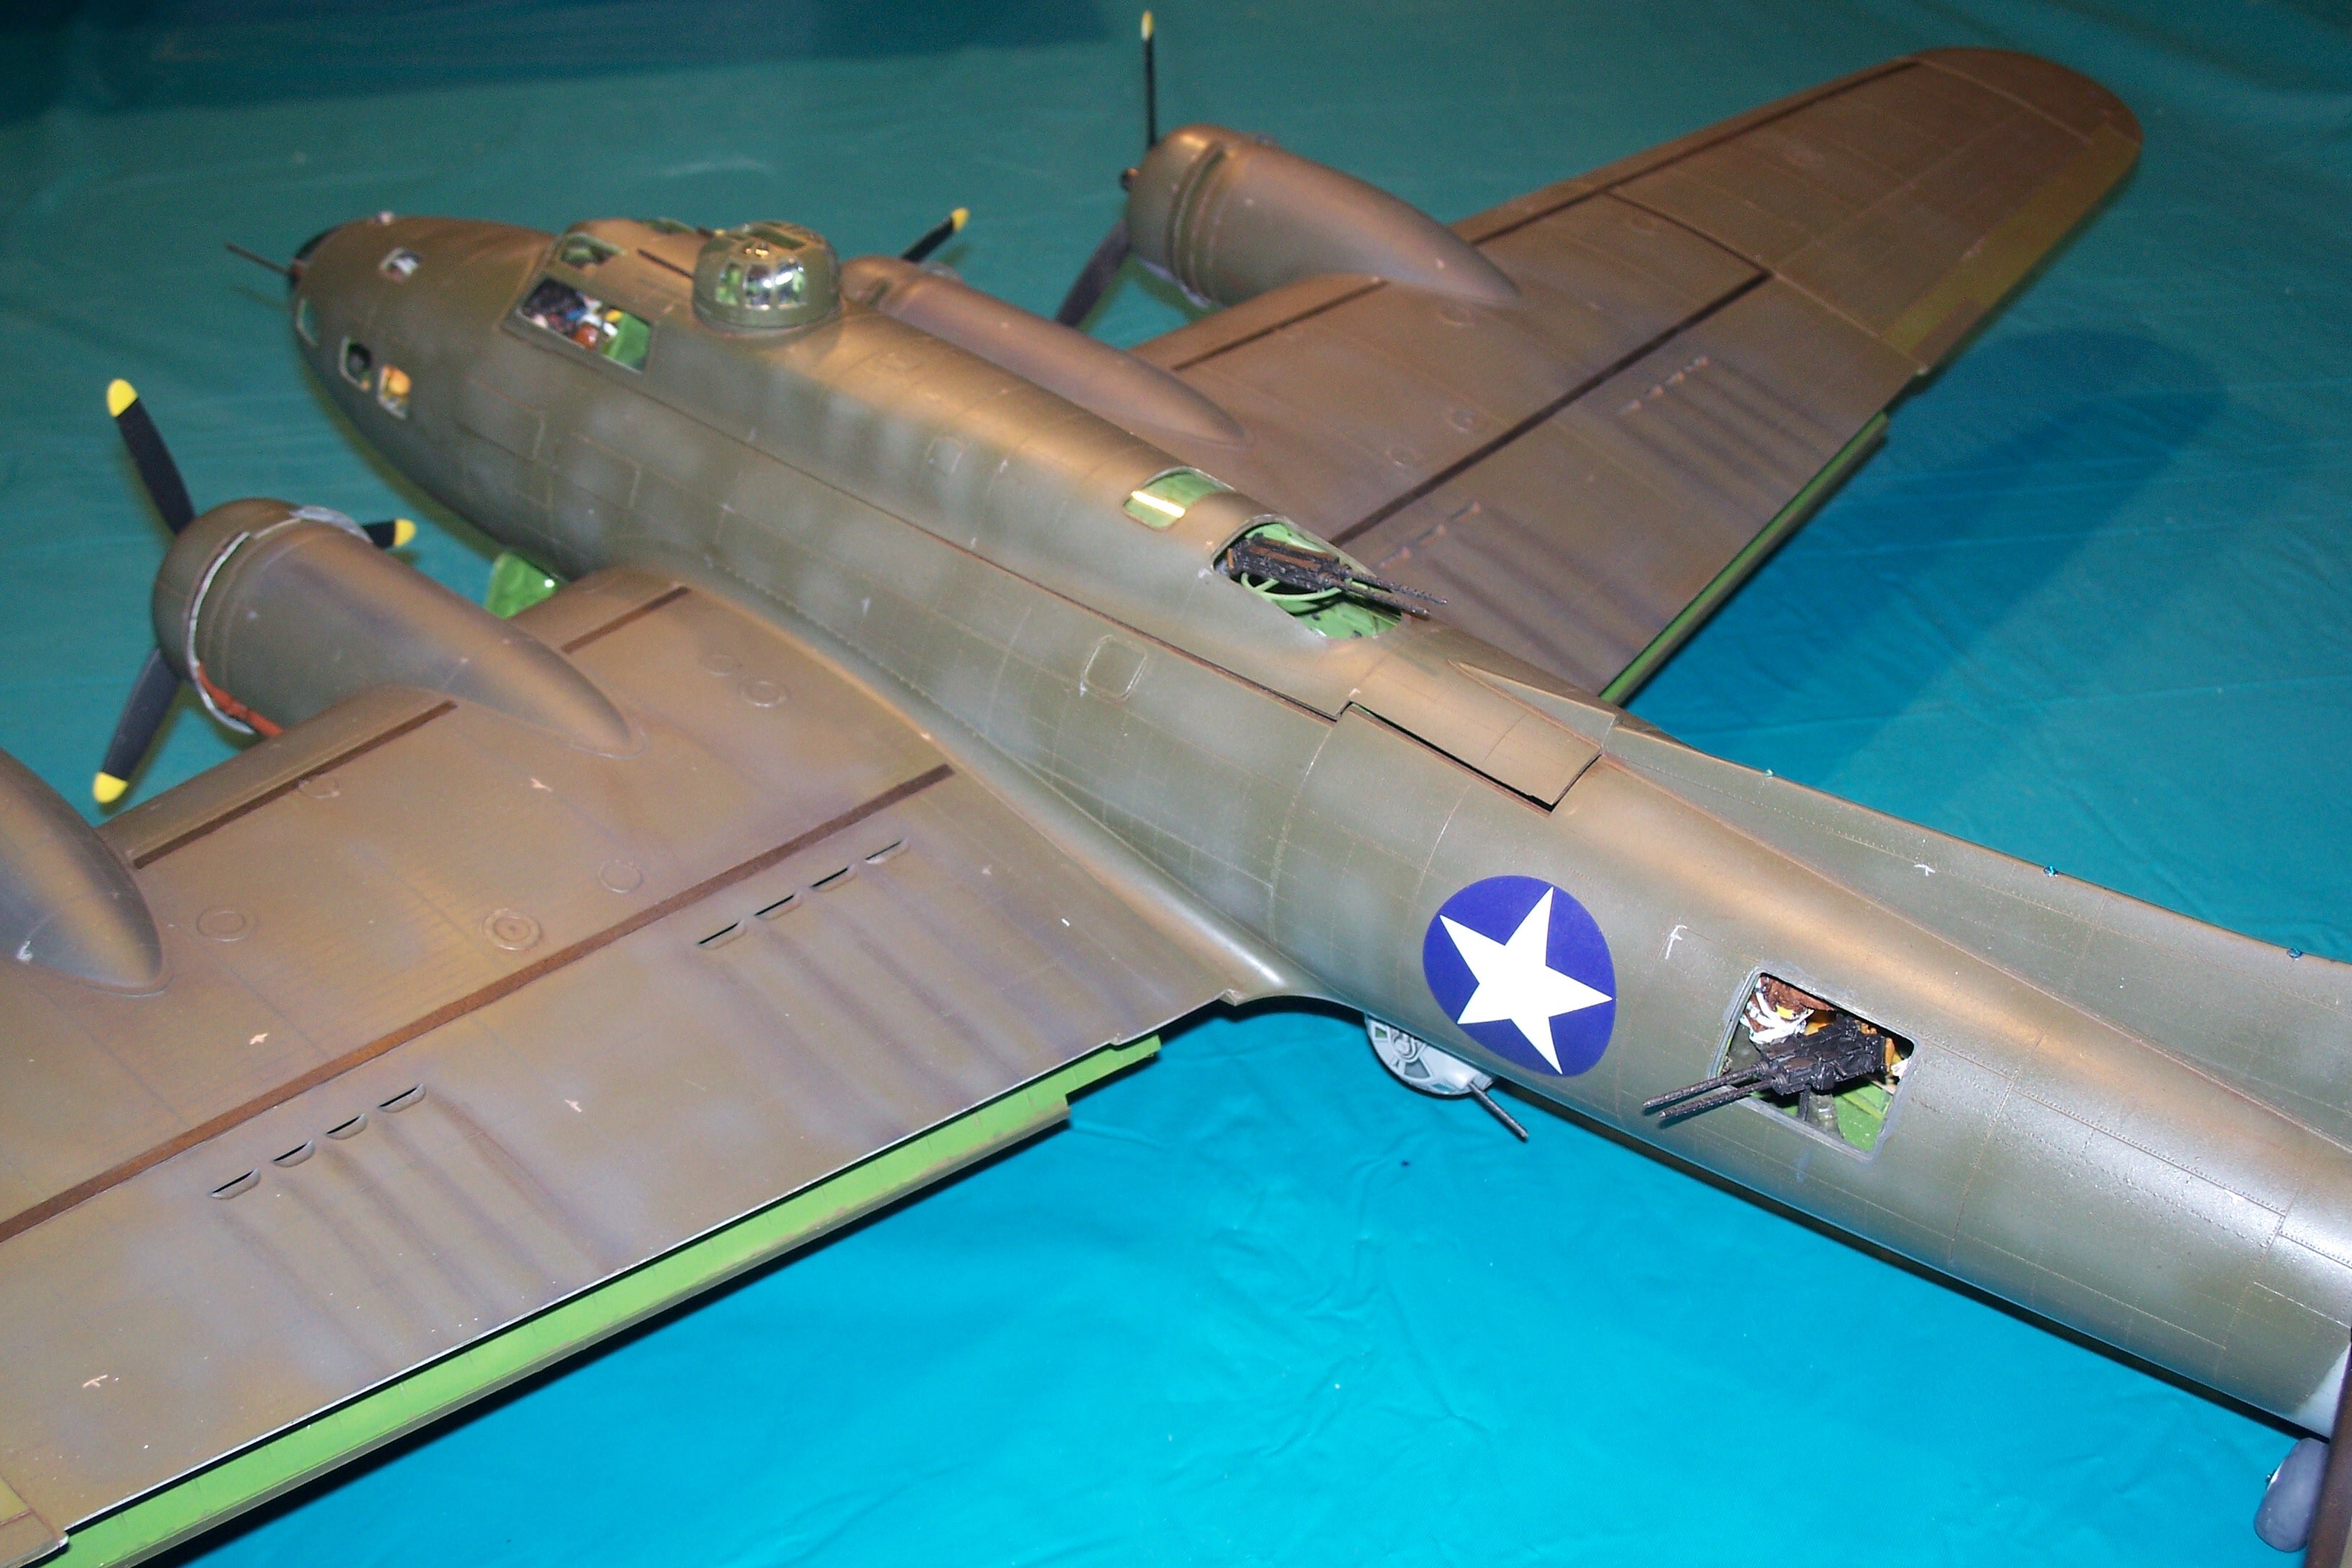
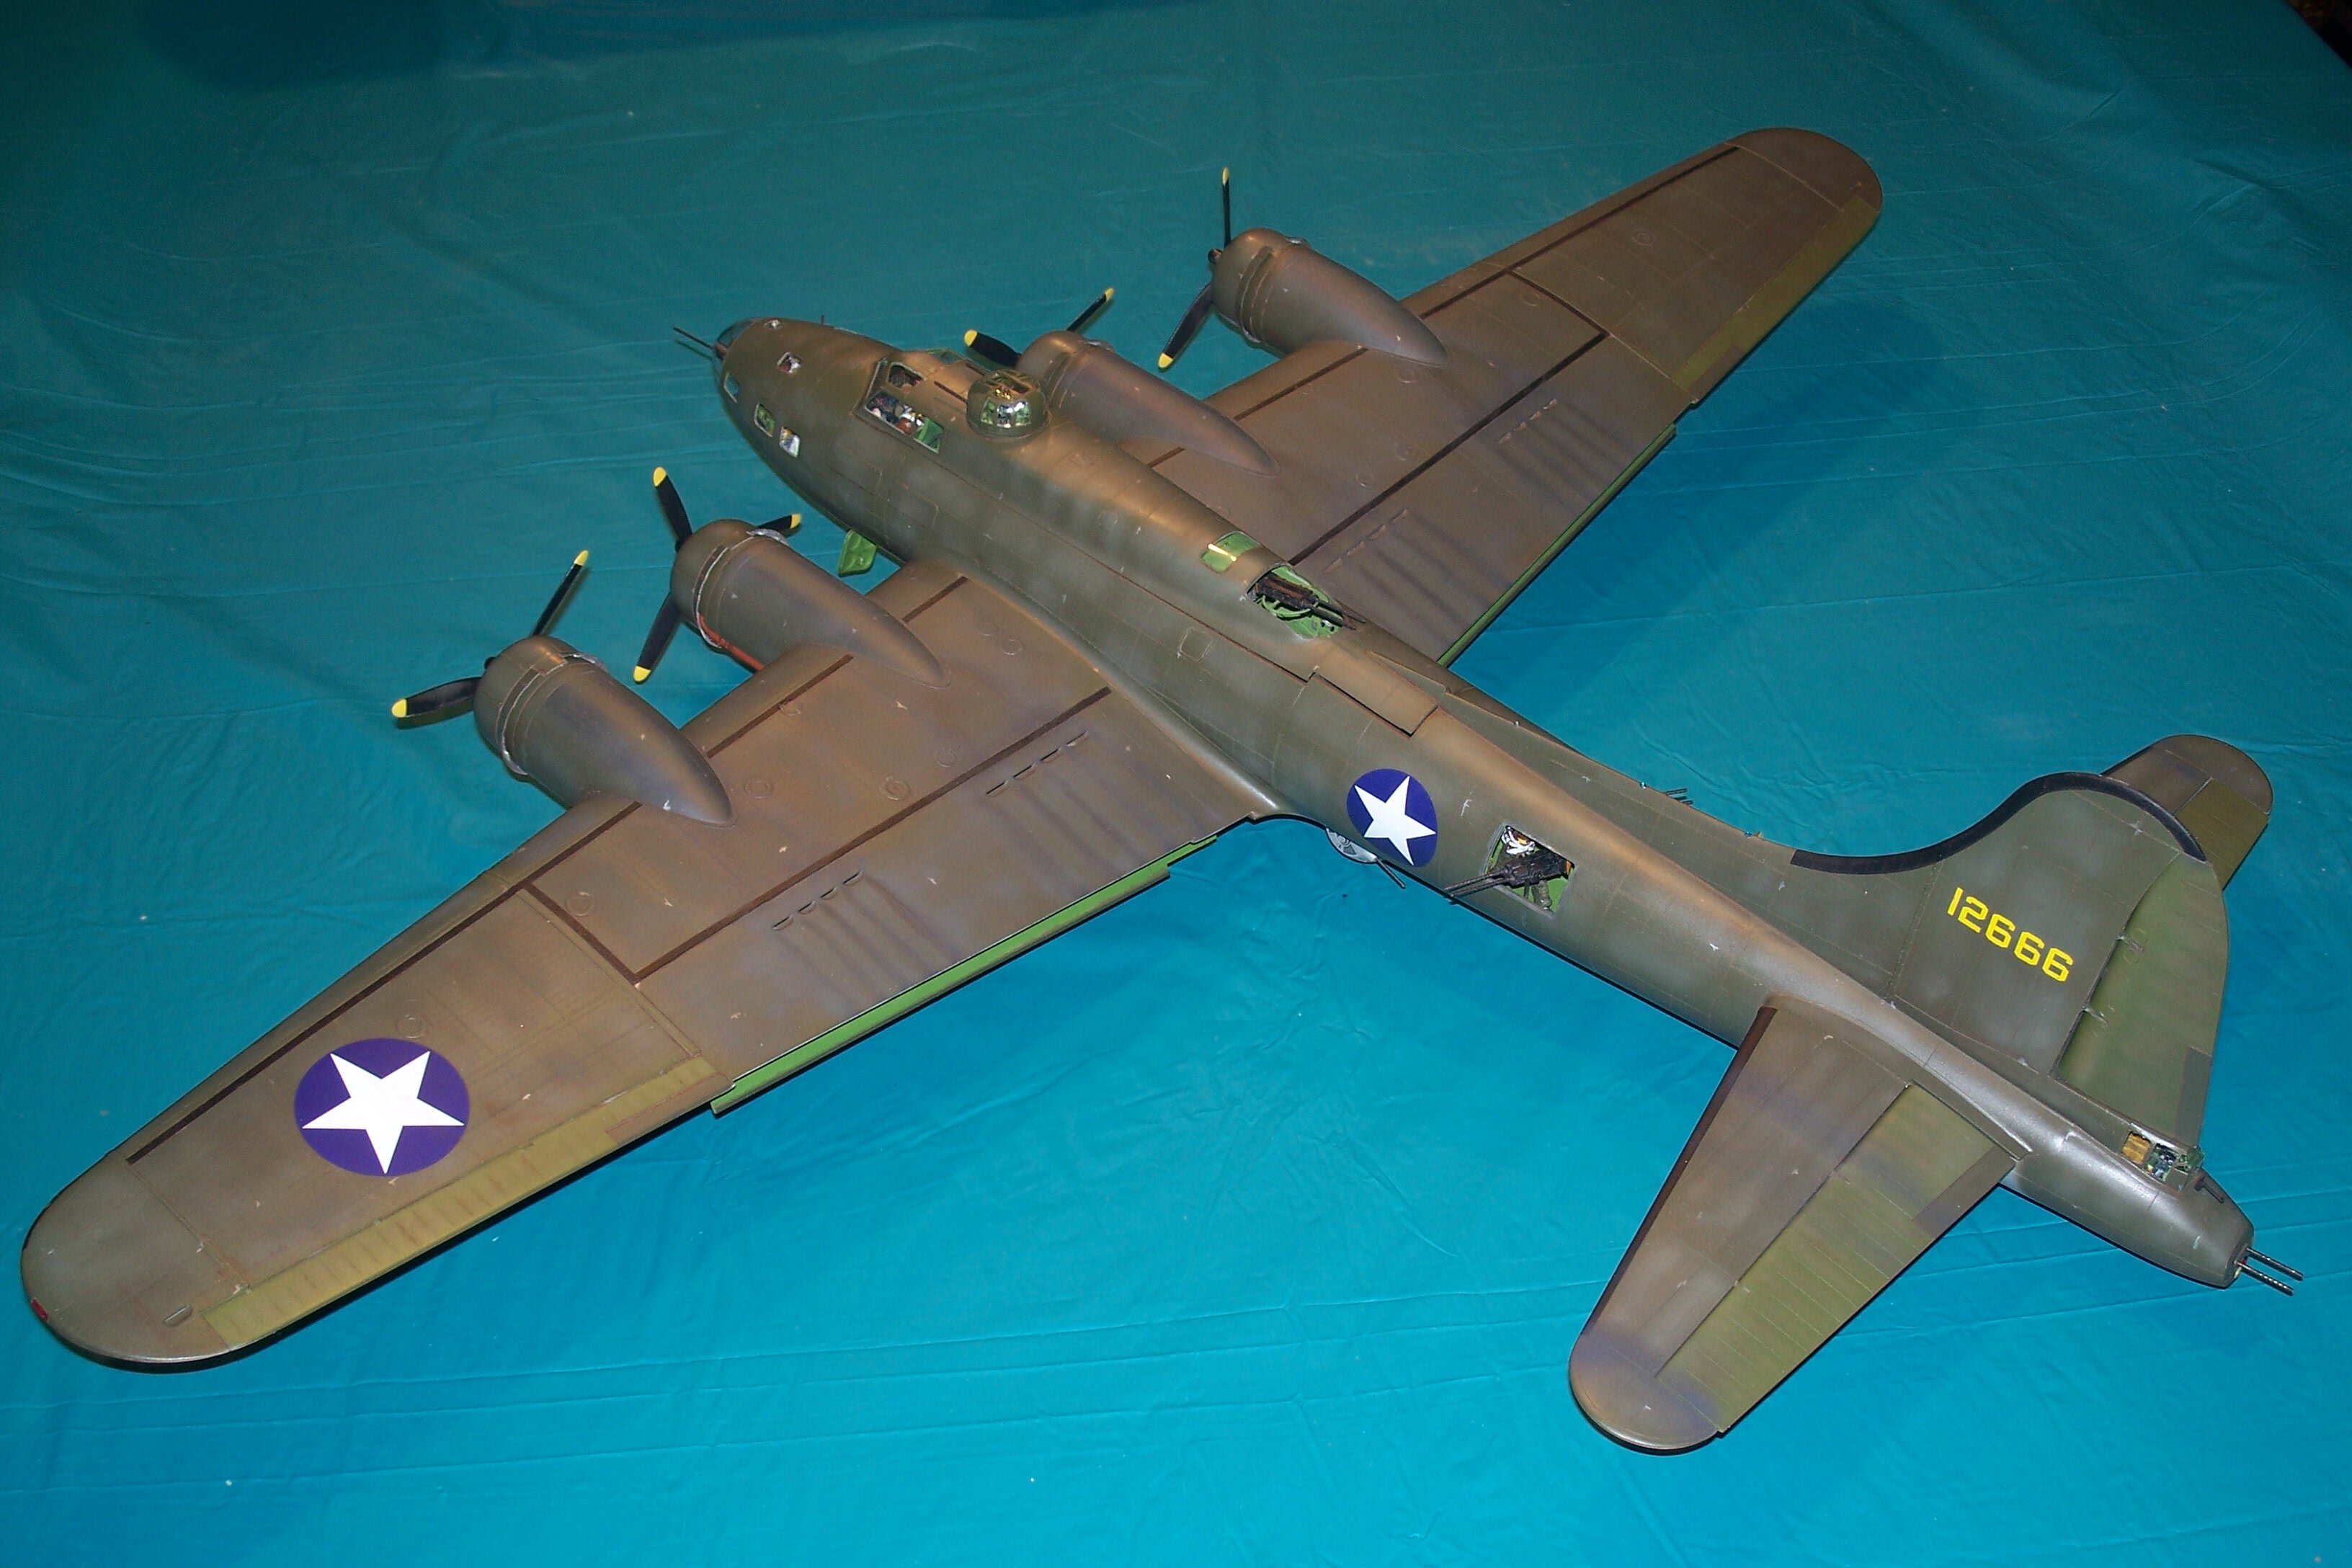
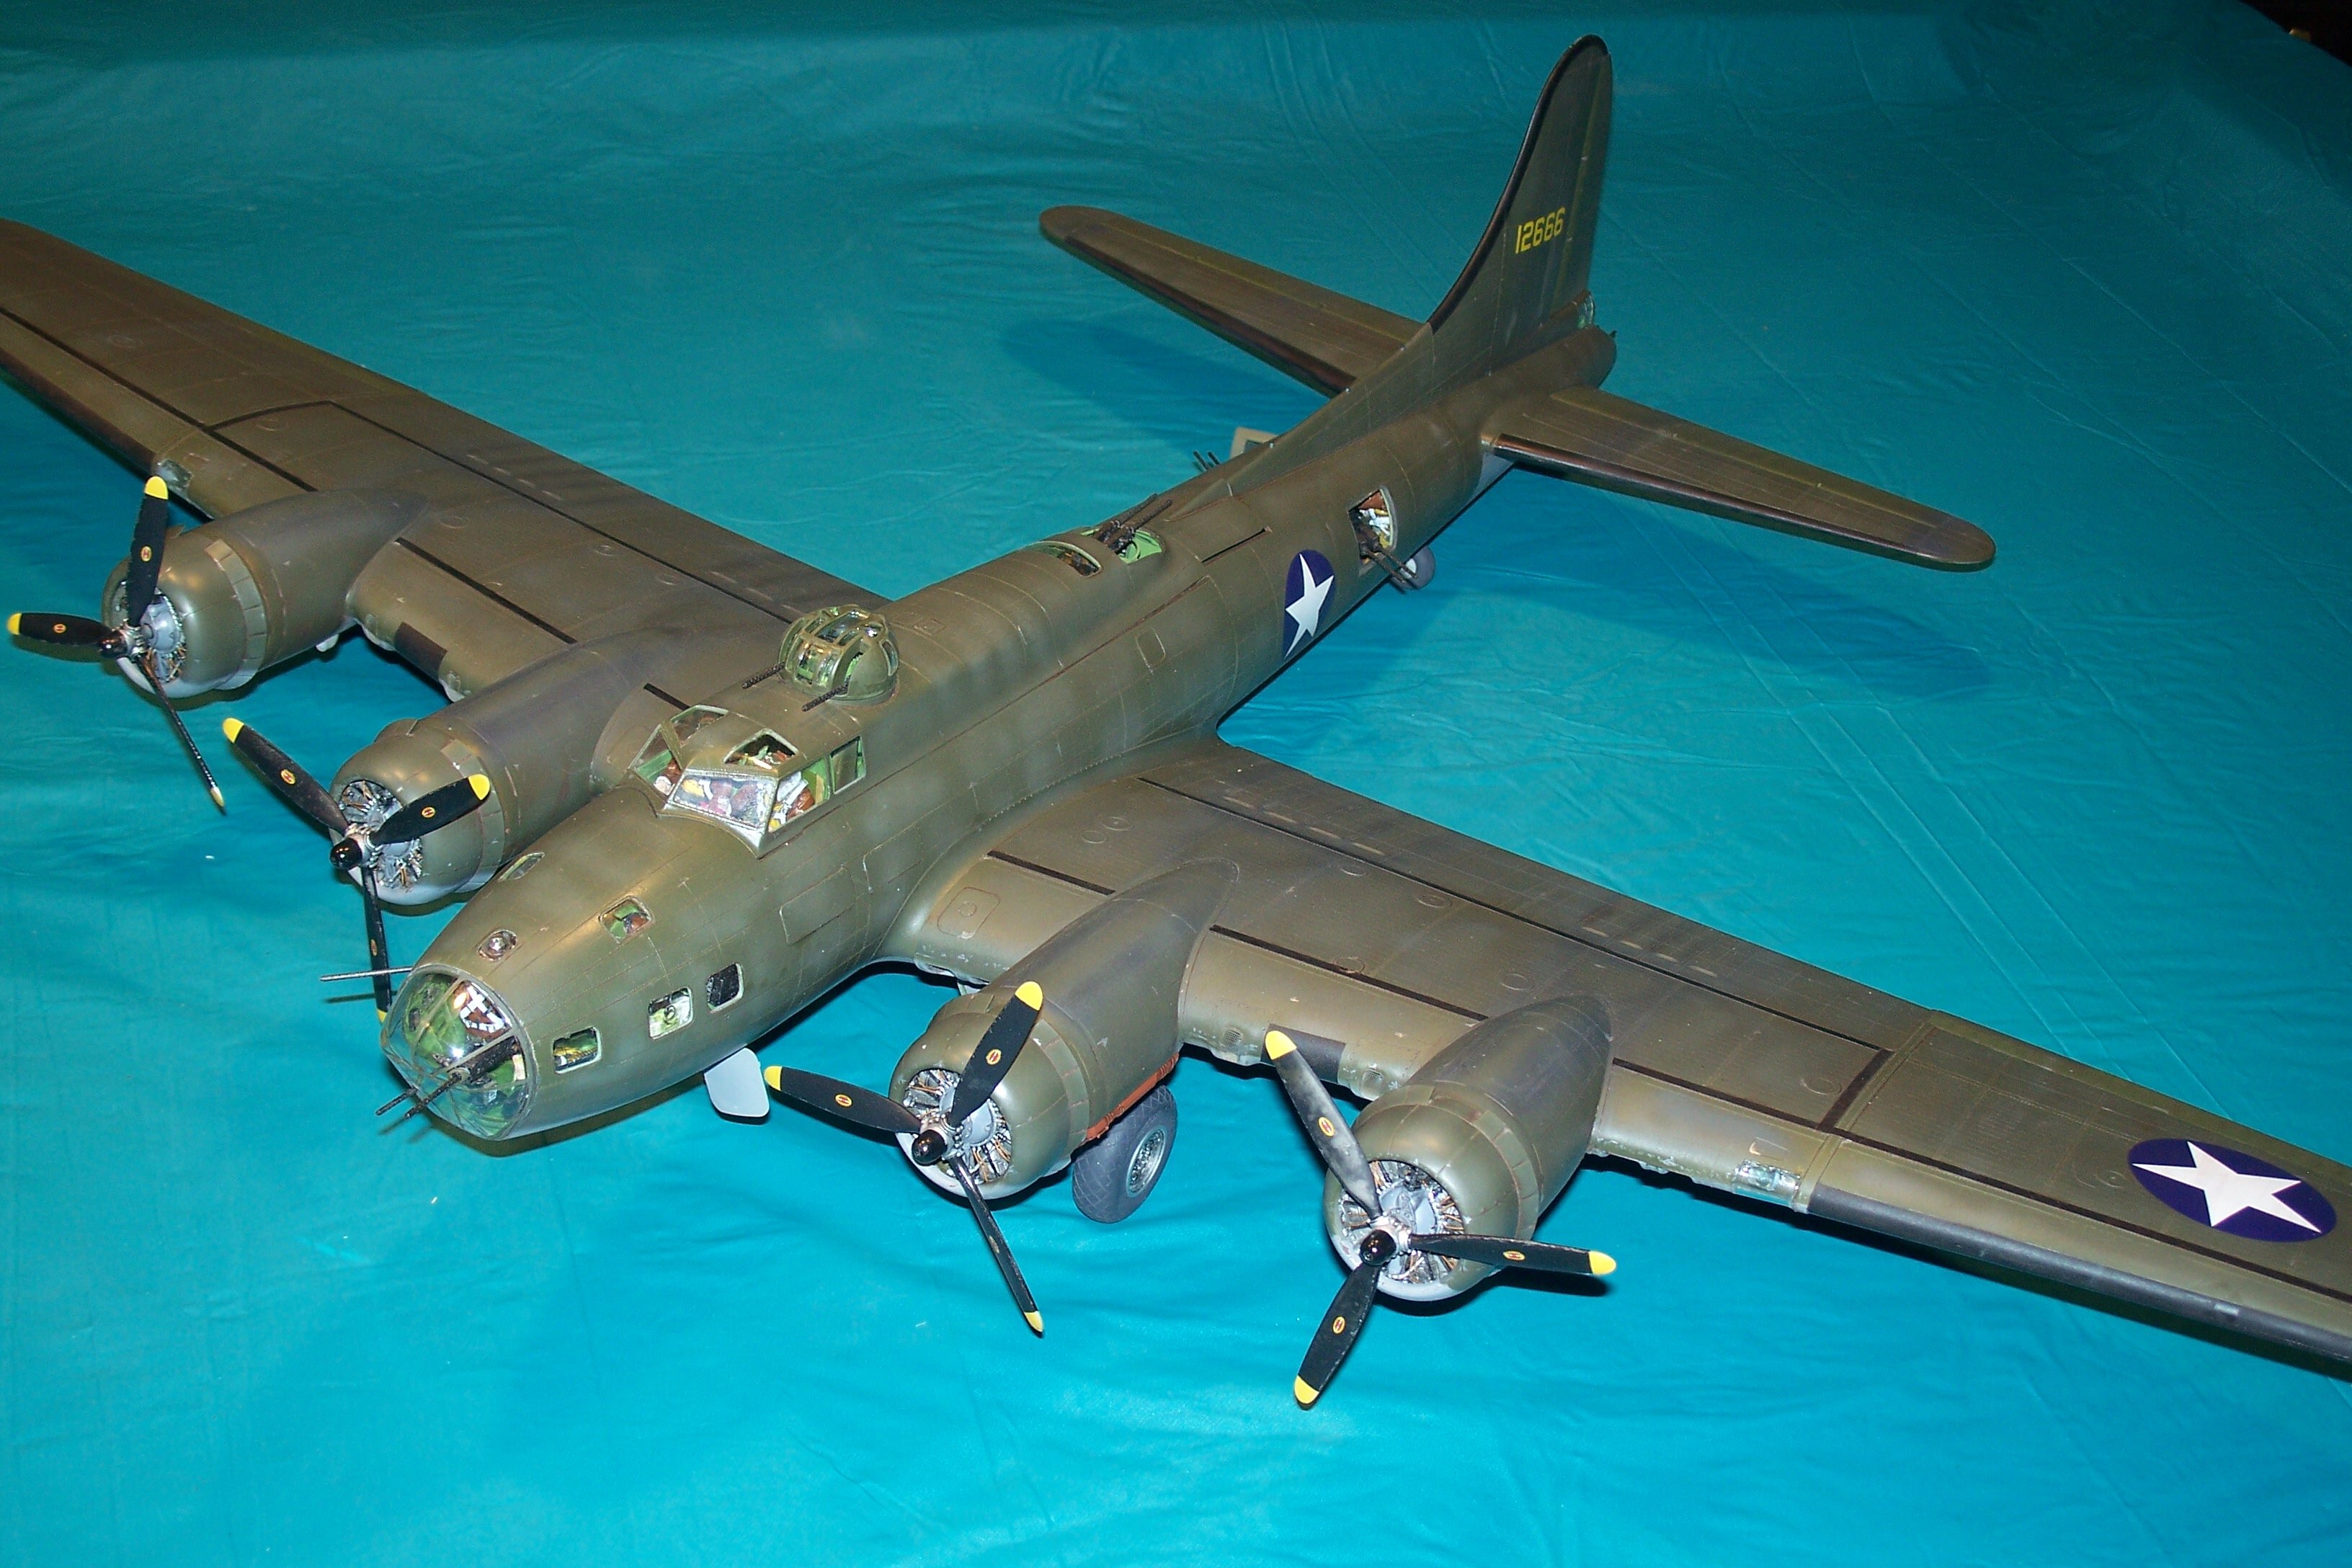
The 1/32 HK B-17E, "Old 666" is done! I still need to make the base for it, but the model is completed. To review, there's no less than 5 Eduard detail sets throughout the interior, plus Brassin' tires, Brassin' engines and cowls, afermarket gun barrels, and a full crew of resin figures. You can see the in-progress pics up in the "BUILD" topic area...note that this plane was modified with extra guns for a mapping mission, including twin-.50s in the waist and radio area, as well as a gun on the floor beside the bombardier wired to the pilot's yoke so he could fire it. It's so big I had to use the pool table for the pics! GIL

-
Yes...even with the removable top the detailing and figures in the waist area will be tough to see...but that's what the in progress pics are for! The model is finished! See the A/C topic for more pics..... GIL
-
Very cool build and collection of one of the most important early jets! Thanks for sharing! Gil
-
Sharp! Gil
-
The weathering is as done as it's gonna be.....I applied a brown sludge wash, airbrushed the exhaust stains (several times), toned them down, and then also used some pastel powders in the end. Some random chipping was added this evening. Might have her on her gear this weekend! GIL
-
I'm guessing that by "coming off" you mean edges are flaking away when you remove the masks, leaving ragged frame lines? Also, since vac canopies are SO thin, they flex easily and the flexing of the plastic can also cause paint to flake off. My best suggestion is to first support the interior of the canopy for spraying as best (rigidly) as possible so that when you do remove the masking the plastic doesn't flex. Next, and perhaps more importantly, your paint may be thick enough to where it's sort of solidly also on the masks. Try gently cutting with the tip of a brand new #11 blade tip around the edges of the masks before lifting them to see if that gives you good, clean, sharp frame edges. Hope this helps! Gil
-
Hi Ed, and welcome to the forum! The ability to build and satisfy a wide range of interests is one of the real pluses of plastic modeling, so don't feel you have to be pegged into any one genre. Remember, if you're building it YOUR way, you're building it the RIGHT way in order to enjoy this hobby! Looking forward to seeing pics of your stuff. Let us know if we can be of any help! GIL
-
Welcome Fred! Glad to have you here with us! You're certainly not faint of heart if you're trying to beat that Czech Model -1 Fury into shape...looking forward to seeing pics of it! Make yourself right at home! Gil
-
Added the de-icing boots, wing walk lines, and the markings last week, as this all needed to be done before any weathering. Starting to see the end of this project! GIL
-
Great looking builds and obviously a very good year! Gil
-
Terrific looking build of a significant airplane! Those perfectly flat seams (like on the top rear) can be a real bugger to eliminate, and yours looks great. Also, whatever aluminum you used for that top wing absolutely rocks! You're off to a GREAT start in 2022! Gil
-
Now we're getting somewhere.....the initial painting is done! Base coated the tops and bottoms (painting the fuselage and wings separately) with Tamiya rattle can OD and Neutral Gray. The masking for the demarcation lines was done with Tamiya tape, rolled up lengthwise; with the big areas behind it masked off with blue painter's tape. I then spent most of this afternoon airbrushing MM 34086 OD and Neutral Gray to touch up the camo edges; followed by lightening both paints to get slightly lighter colors for post shading; which was then followed by a light misting of the original colors to tone down the post shading. A second, lighter OD color from Tamiya was used for the fabric covered ailerons, elevators, and rudder; and they were counter shaded in the same manner. There's still quite a ways to go on the finish with general weathering, panel line emphasis, chipping, and exhaust stains all yet to be done. But that's for next week! Slowly inching towards the finish line... Gil
-
Impressive year, and all I can do is echo the well deserved kudos! Gil
-
You can use anything for seat belts....they "loosened" that rule a long time ago..below is a quote from the 2021 NCC Rules for OOTB... they removed the wording requiring "Tape" belts and generally allow the builder to use any material, and do not disqualify models with aftermarket belts. Exceptions vary from Class to Class, but allow for commonly accepted construction techniques and standards, while still maintaining the general OOB approach. These include but are not limited to: ● Add antennas, rigging wires, seat belts to Aircraft, as may be noted in kit instructions;
-
Hi Paul! Welcome back and glad you're here (nefarious or not)! Make yourself at home and please post some of your builds. Gil
-
Glad you're here Sean! Make yourself at home and show us what you like to build! Gil
-
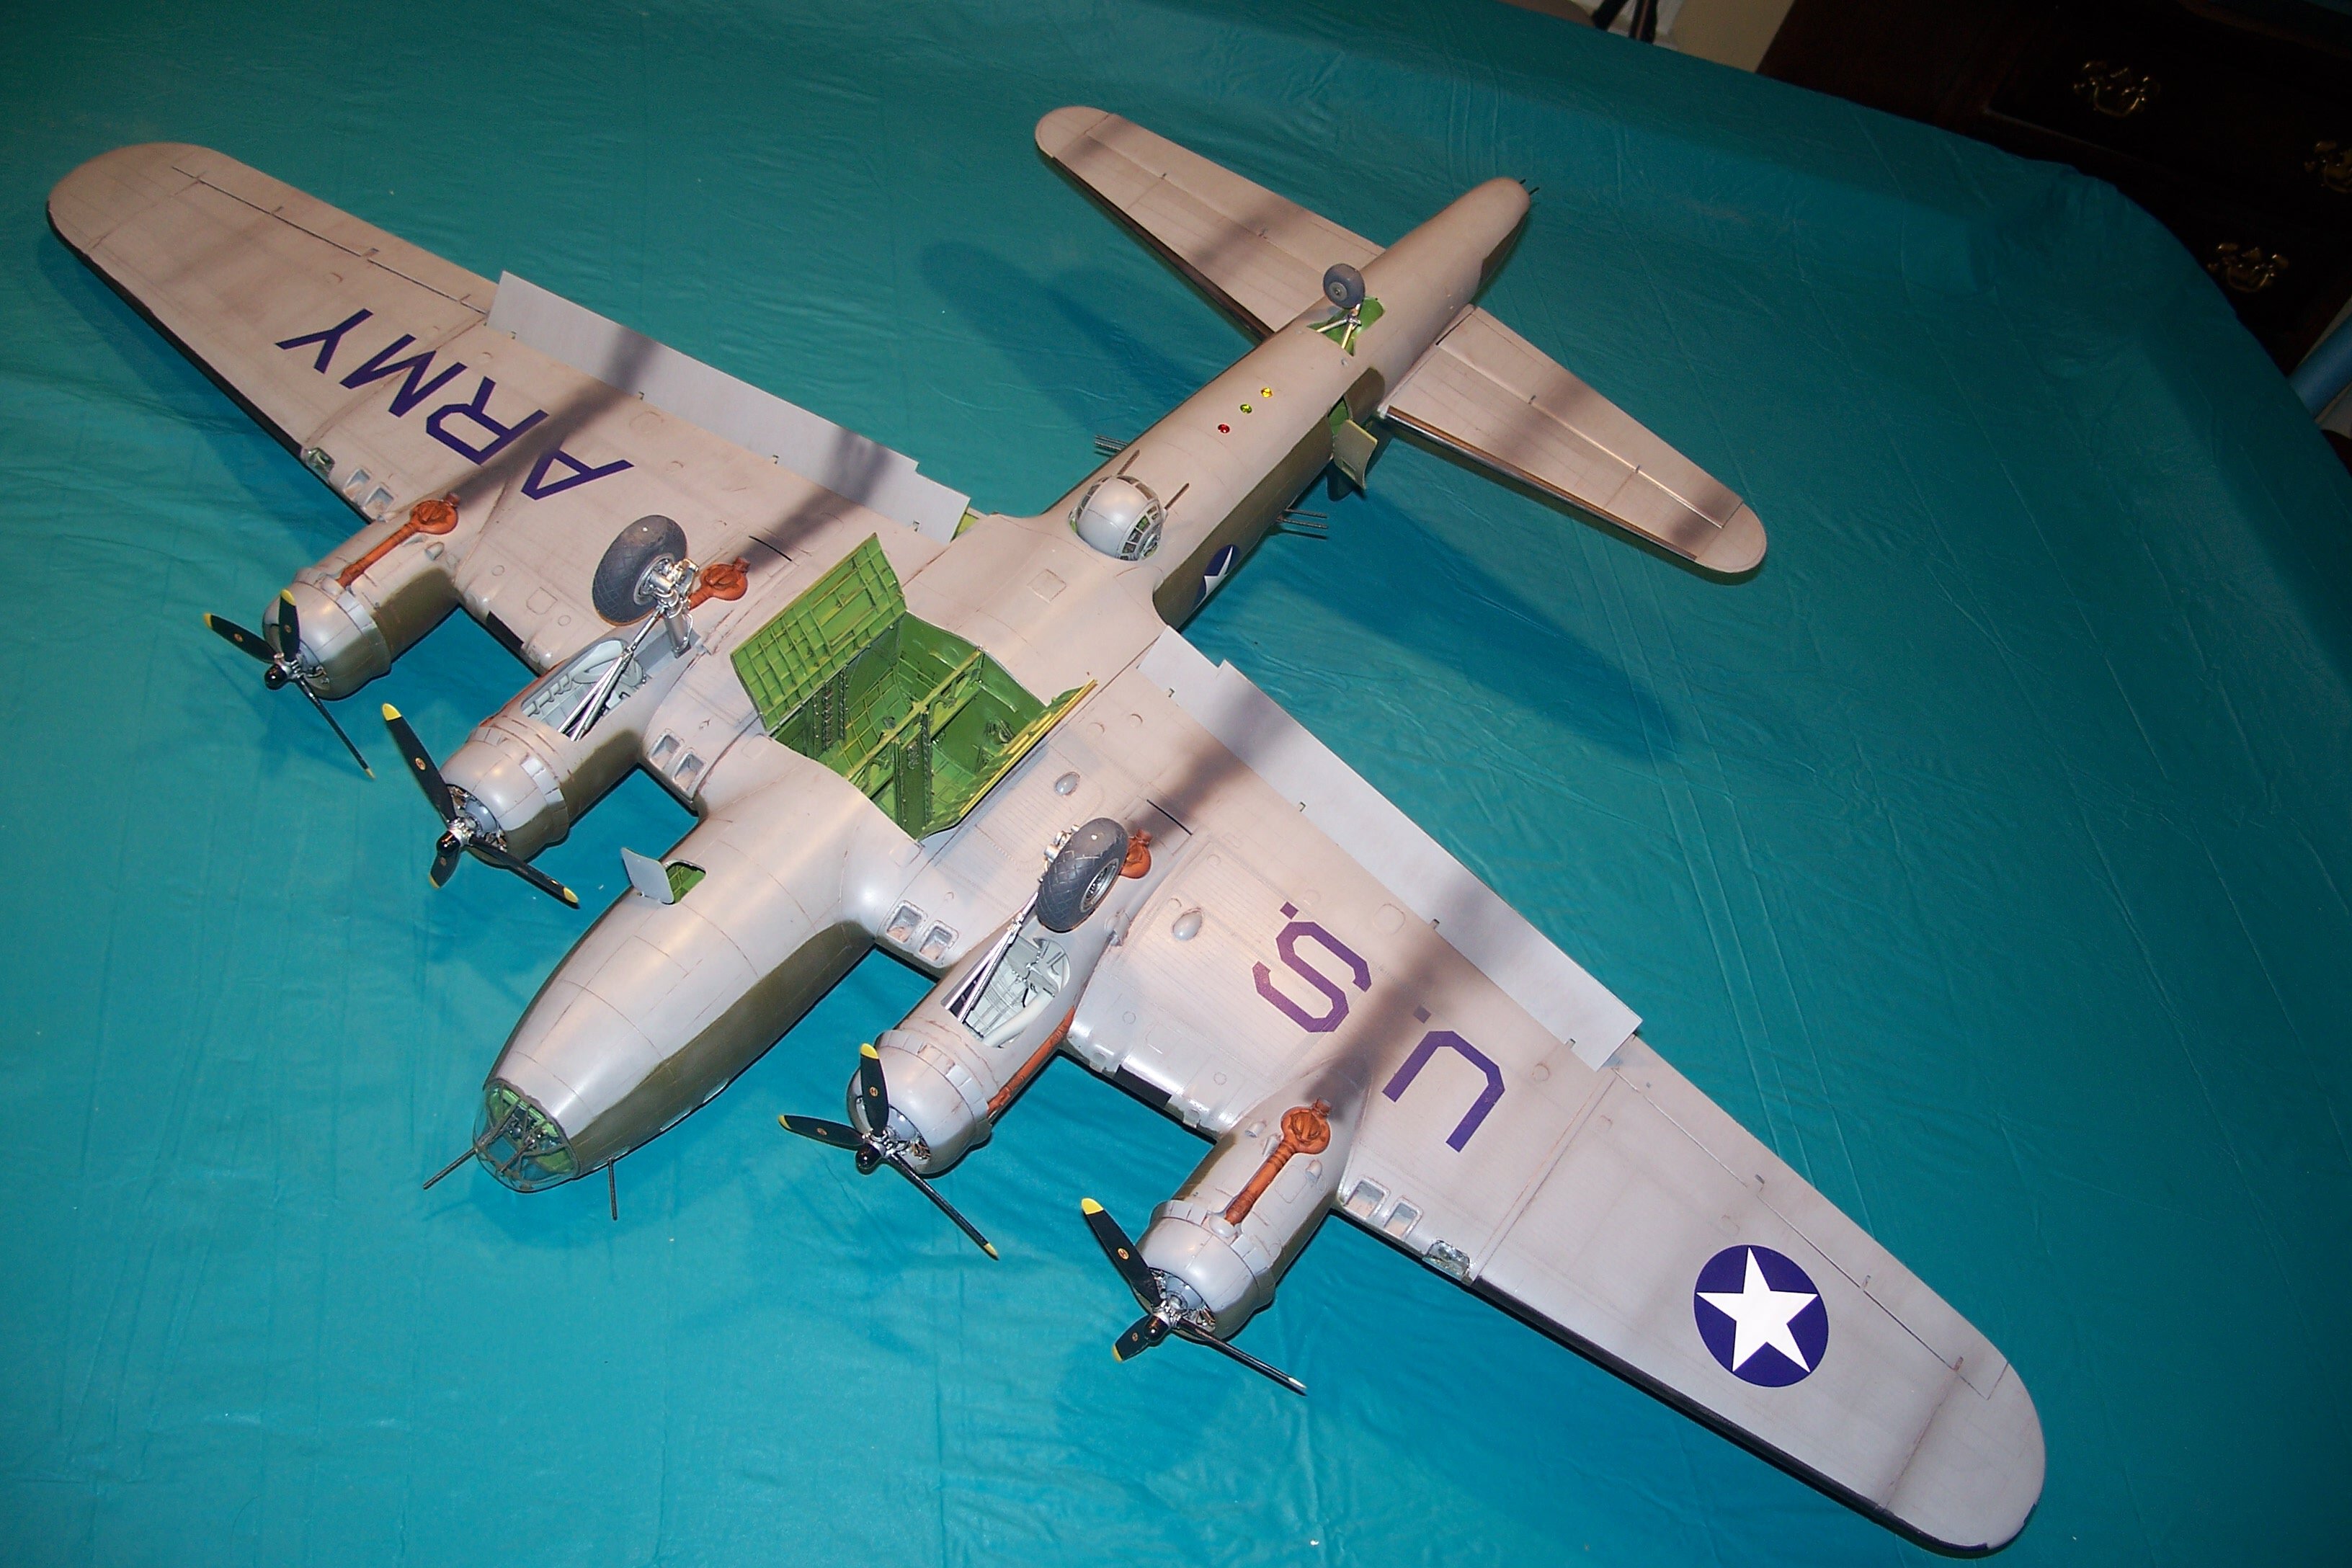
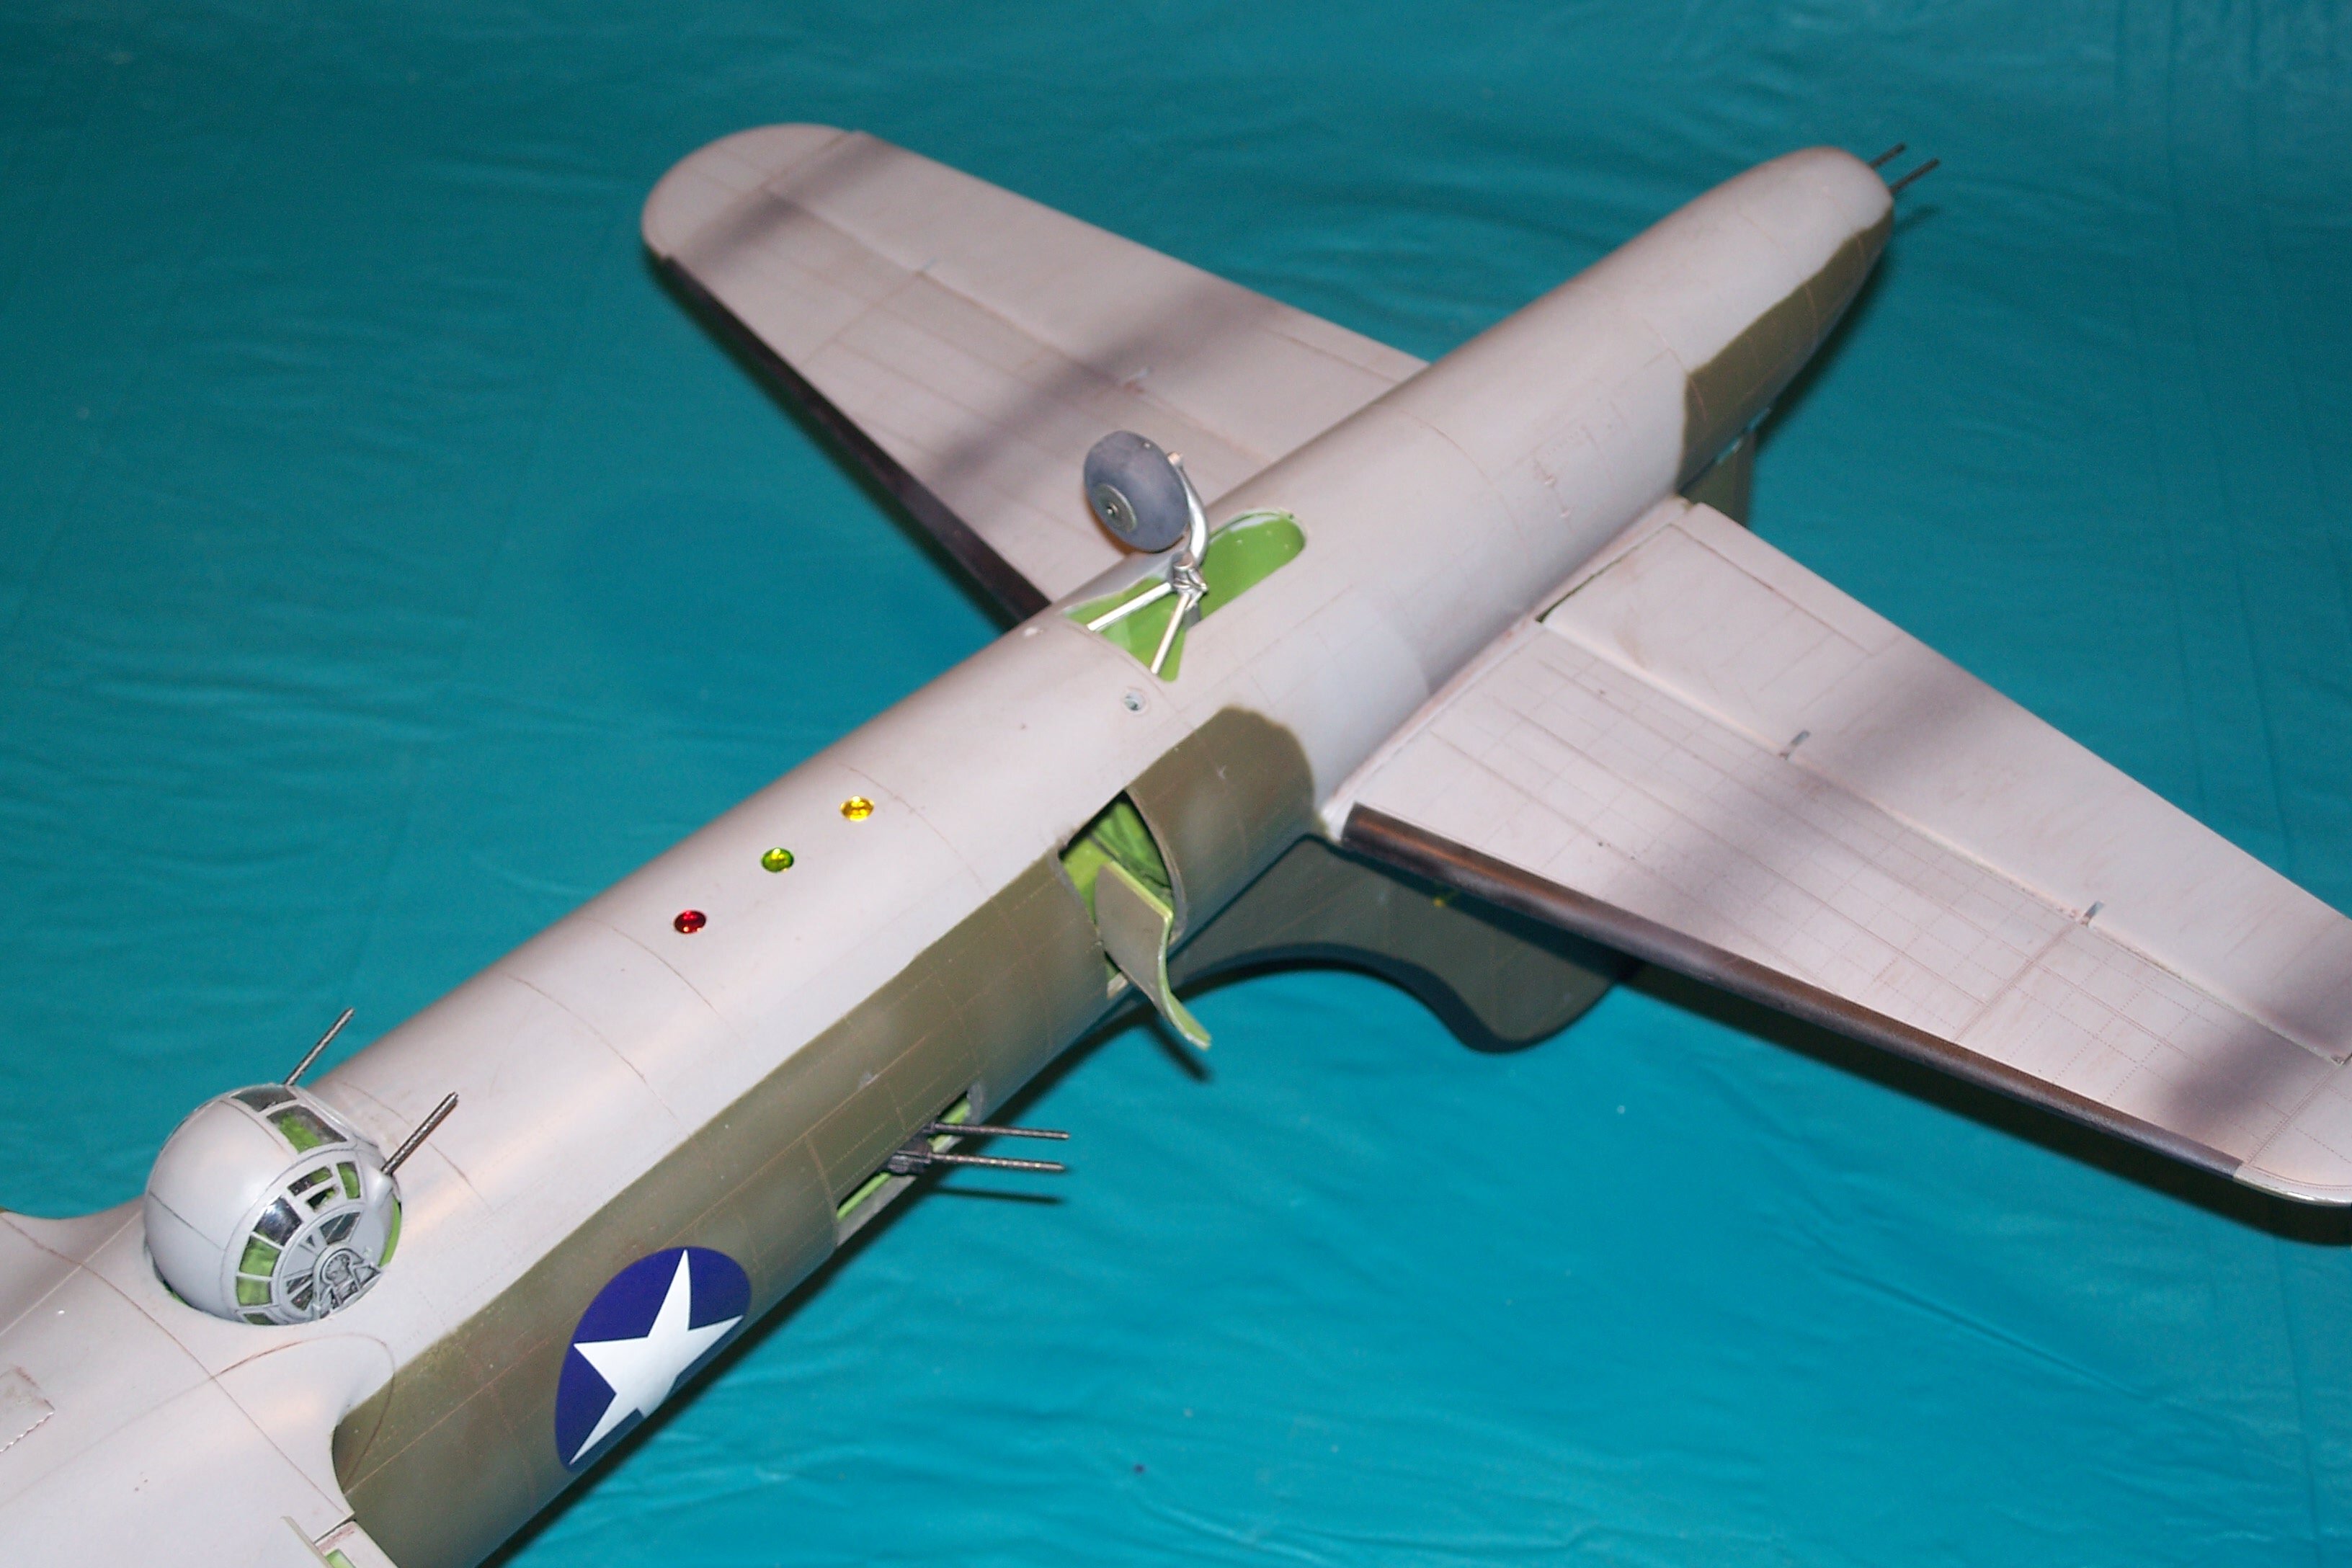
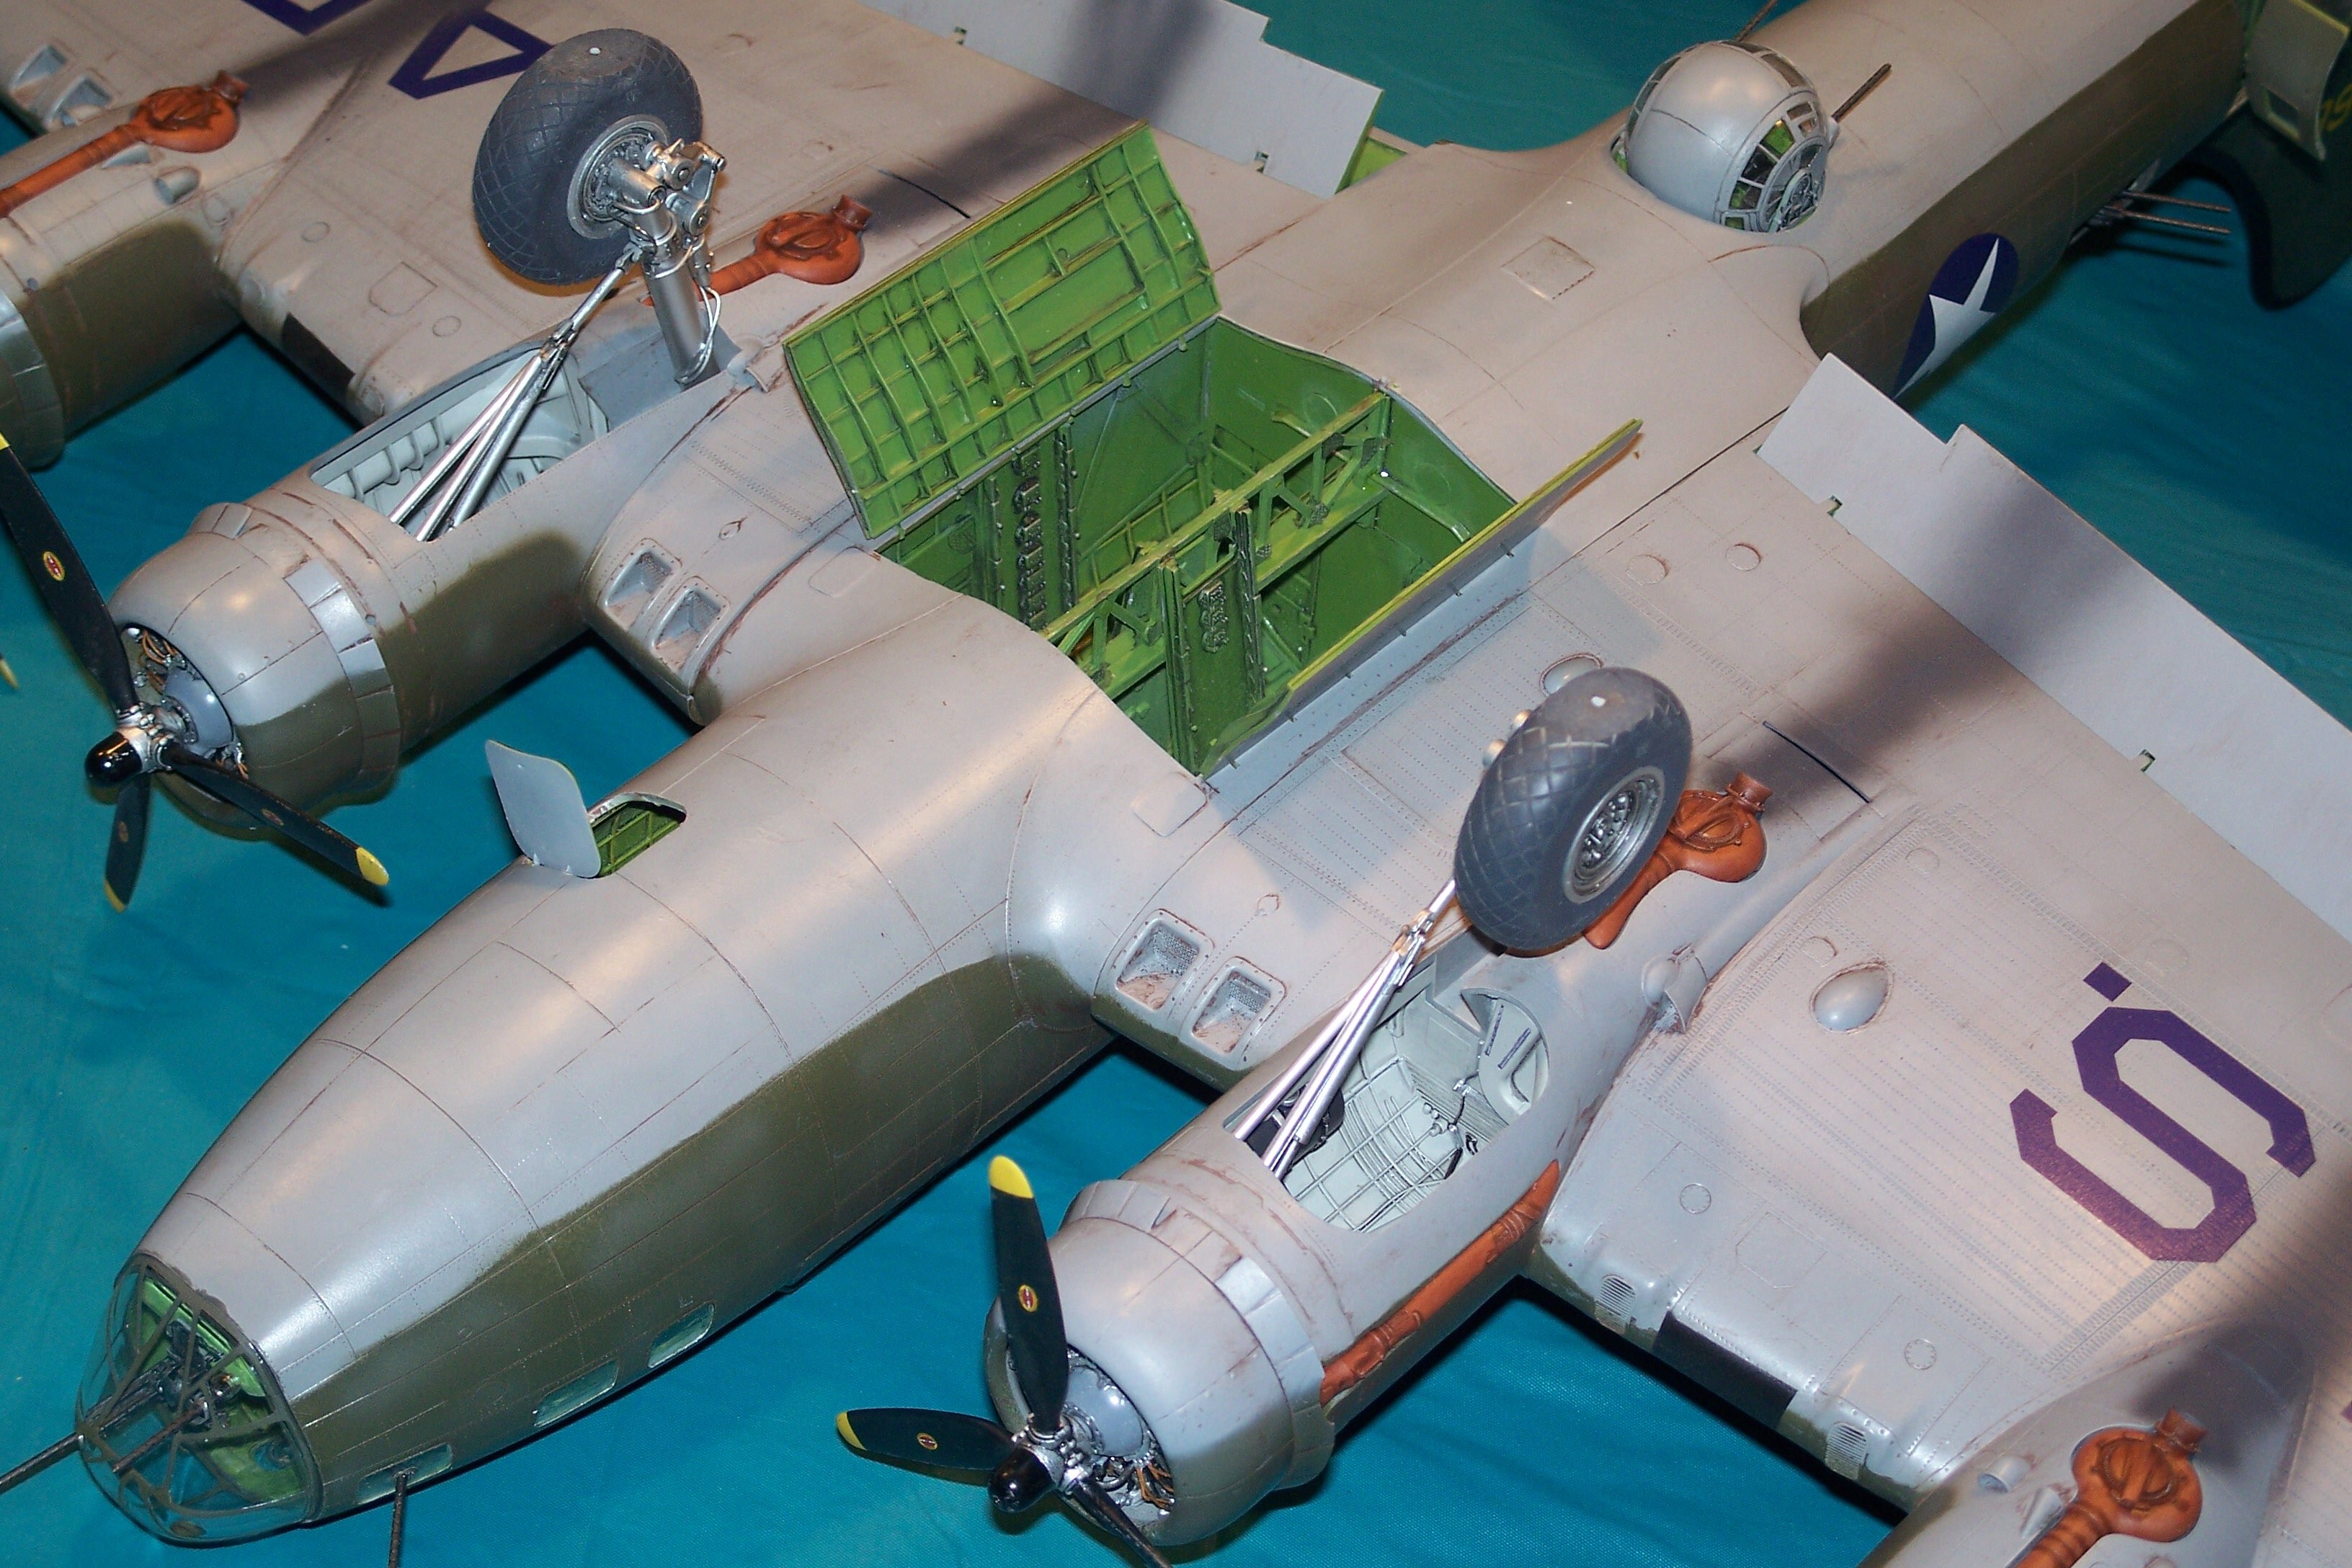
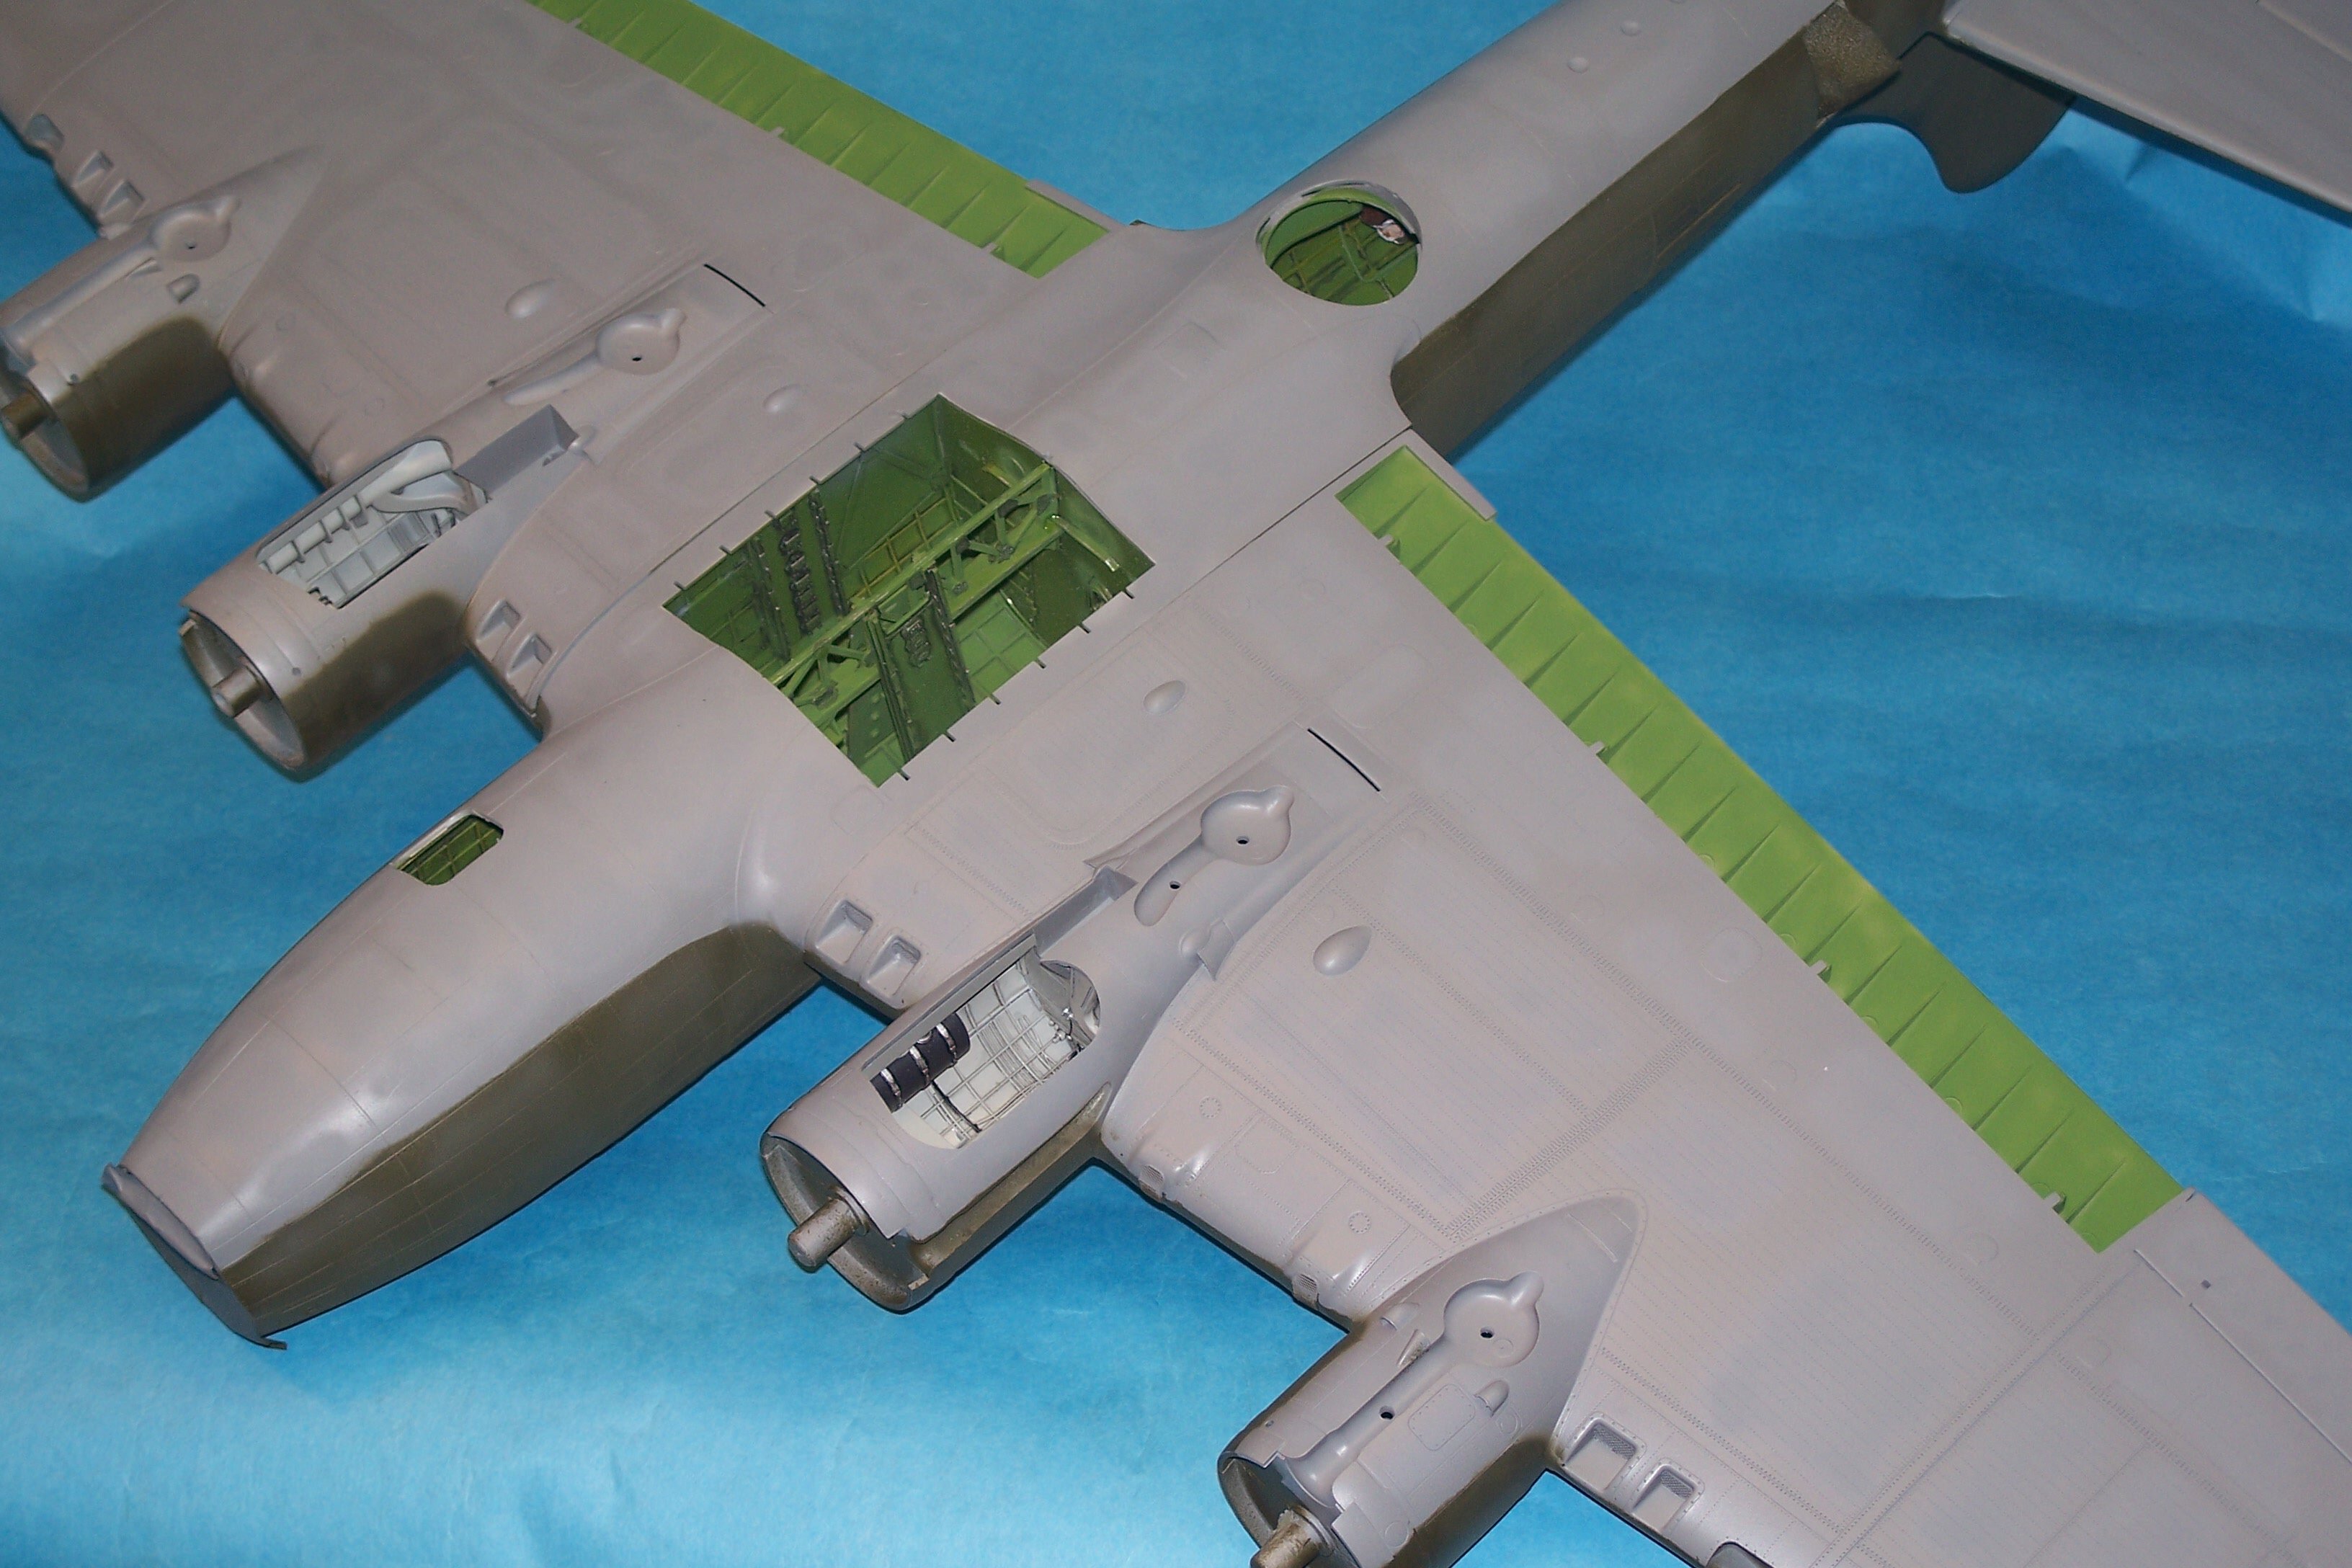
To start the new year I can post a major step forward: the fuselage is now together! The fit of the halves was good to marginal, as can be expected with a large kit with a LOT of interior detail that has to fit inside precisely to get a good fit. Some sections fit pretty well with a "normal" seam, while other sections left 1/16-1/8in gaps. All of the seams were filled with gel superglue and immediately sanded smooth. The separate top section was also worked on, as the client wants it to remain removable. The windshield and side glass parts were cemented in place (EXCELLENT fit for those!) and some trimming and sanding done to get the best "loose" fit when placed on the fuselage, including shaving the outside shoulders of the pilot and copilot. There's still a ways to go to get ready for the tail planes and wings to be added, but at least this may be the first true step towards "finishing this project! GIL
-
Excellent year James! Lots of great looking builds and really good finishes on those tiny 1/144 kits. I too have to echo my disappointment with Kits World decals, as the ones I used for the "Dragon and His Tail" curled up so badly they were a struggle to use and I lost one entire important piece that I had to paint in! Thanks for sharing your phenomenal year with us! Gil
-
Wow! Better than 1 a month is impressive, especially as you obviously didn't cut quality in favor of quantity! Congrats on a super year, and looking forward to seeing what you post in 2022! Gil
-
Excellent! And knocking one off the shelf of doom is a great way to finish off the year! Congrats! Gil
-
Finally finished painting the figures....repositioned the turret gunner to the waist as he was going to interfere with the fit and ability to remove and replace the top fuselage section, which will remain removable. The ball turret is just sitting in position...next step is to close her up and start sanding seams! Gil
-
That's a heck of a year, especially with so many unique subjects and (I'm sure) not so easy builds! Congrats, and thanks for posting! Gil
- 6 replies
-
- 1
-

-
- conversion
- kit-bash
- (and 1 more)


.JPG.6abb1316f761a2753ef228b089279c4b.JPG)
.JPG.f084b4e671736bcf7a91c119ca6071dd.JPG)


.JPG.a90d26eff61d07960282aaa0a01ccb39.JPG)
.JPG.15e2d8e056a710ee5a24f15c4bd279c1.JPG)
.JPG.224e0703768fe207d8d608ac13974100.JPG)
.JPG.72924ab51a6b299df68c07a272a40814.JPG)
.JPG.4bda48e8195c31ab3b513bf026af6d39.JPG)
.JPG.59d83a1b7db328a98769039c22710e58.JPG)
.JPG.38daaa77390117e3ec80ce57449a1a51.JPG)
.JPG.c5b7600c731f04affbf458b378486a9d.JPG)
.JPG.55ce41f8a4a1315bfe3bfacf22856230.JPG)
.JPG.e6ee4e1b7a40be4c1a822f1623aa62cb.JPG)
.JPG.fd23accb6073644e3d83f0aa72f9ae4d.JPG)
.JPG.acf2153f88dbe0ed56f8ae22e3be5a3c.JPG)