


ghodges
-
Posts
7,583 -
Joined
-
Last visited
-
Days Won
299
Content Type
Profiles
Forums
Events
Everything posted by ghodges
-
While not as nice as getting the Kabuki masks from Eduard (precut or not), as long as they're accurate outlines that fit the clear pieces, you're a step ahead. Cut them out and use them as templates on your Tamiya tape! Gil
-
Gotta echo the kudos on that excellent camo job! Good save! Gil
-
Always amazed at the number of projects you tackle at one time....but fun to tag along! Gil
-
GIL

-
Ooooo....(note to self): gotta get those pens! Nice! Gil
-
The last 4 figures have been reposed and positioned! The 2 waist gunners, for which I used standing "top turret" figures needed considerable altering of the legs since the floors are uneven, as well as an arm reposed to help support themselves. The rearmost figure was also slightly bent at the waist to make him a bit stooped and fit in the lower ceiling farther back. The radio man and the other crew member were used almost as is. The 2 standing figures are held in place with the help of a bit of wire in the shoe bottom that anchors them to the floor. So.....next week I'll start priming them and cleaning them up to get ready to paint! Pics of the crew when they're done will be next! GIL
-
Got the pilot, copilot, and top turret gunner placed this week. Once more, it took quite a bit of reposing arms and legs to fit into the cramped confines and fit the controls somewhat... GIL
-
Some other differences..(and I just copied the illustration on the cover of the book for the most part): only 1 gun in each wing, and no pitot on the upper fin (don't know where it SHOULD be). I also used the kit cockpit without worrying about any accuracy issues as this is just to get one more out of the stash and onto my shelf! Lastly, I've been told that the wing support struts SHOULD actually connect from the wings to the fuselage sides, and NOT into the top of the wings.... You may want to pay more attention to accuracy than I did for your build.... Gil
-
Looking good! Git 'er done! Gil
-
I replaced the outer wing pylons with the smaller ones from the Monogram Panther kit, but merely modified the kit inner pylons. I did sand down the armored panels on the fuselage sides a bit, but didn't worry about obliterating them. Gil
-
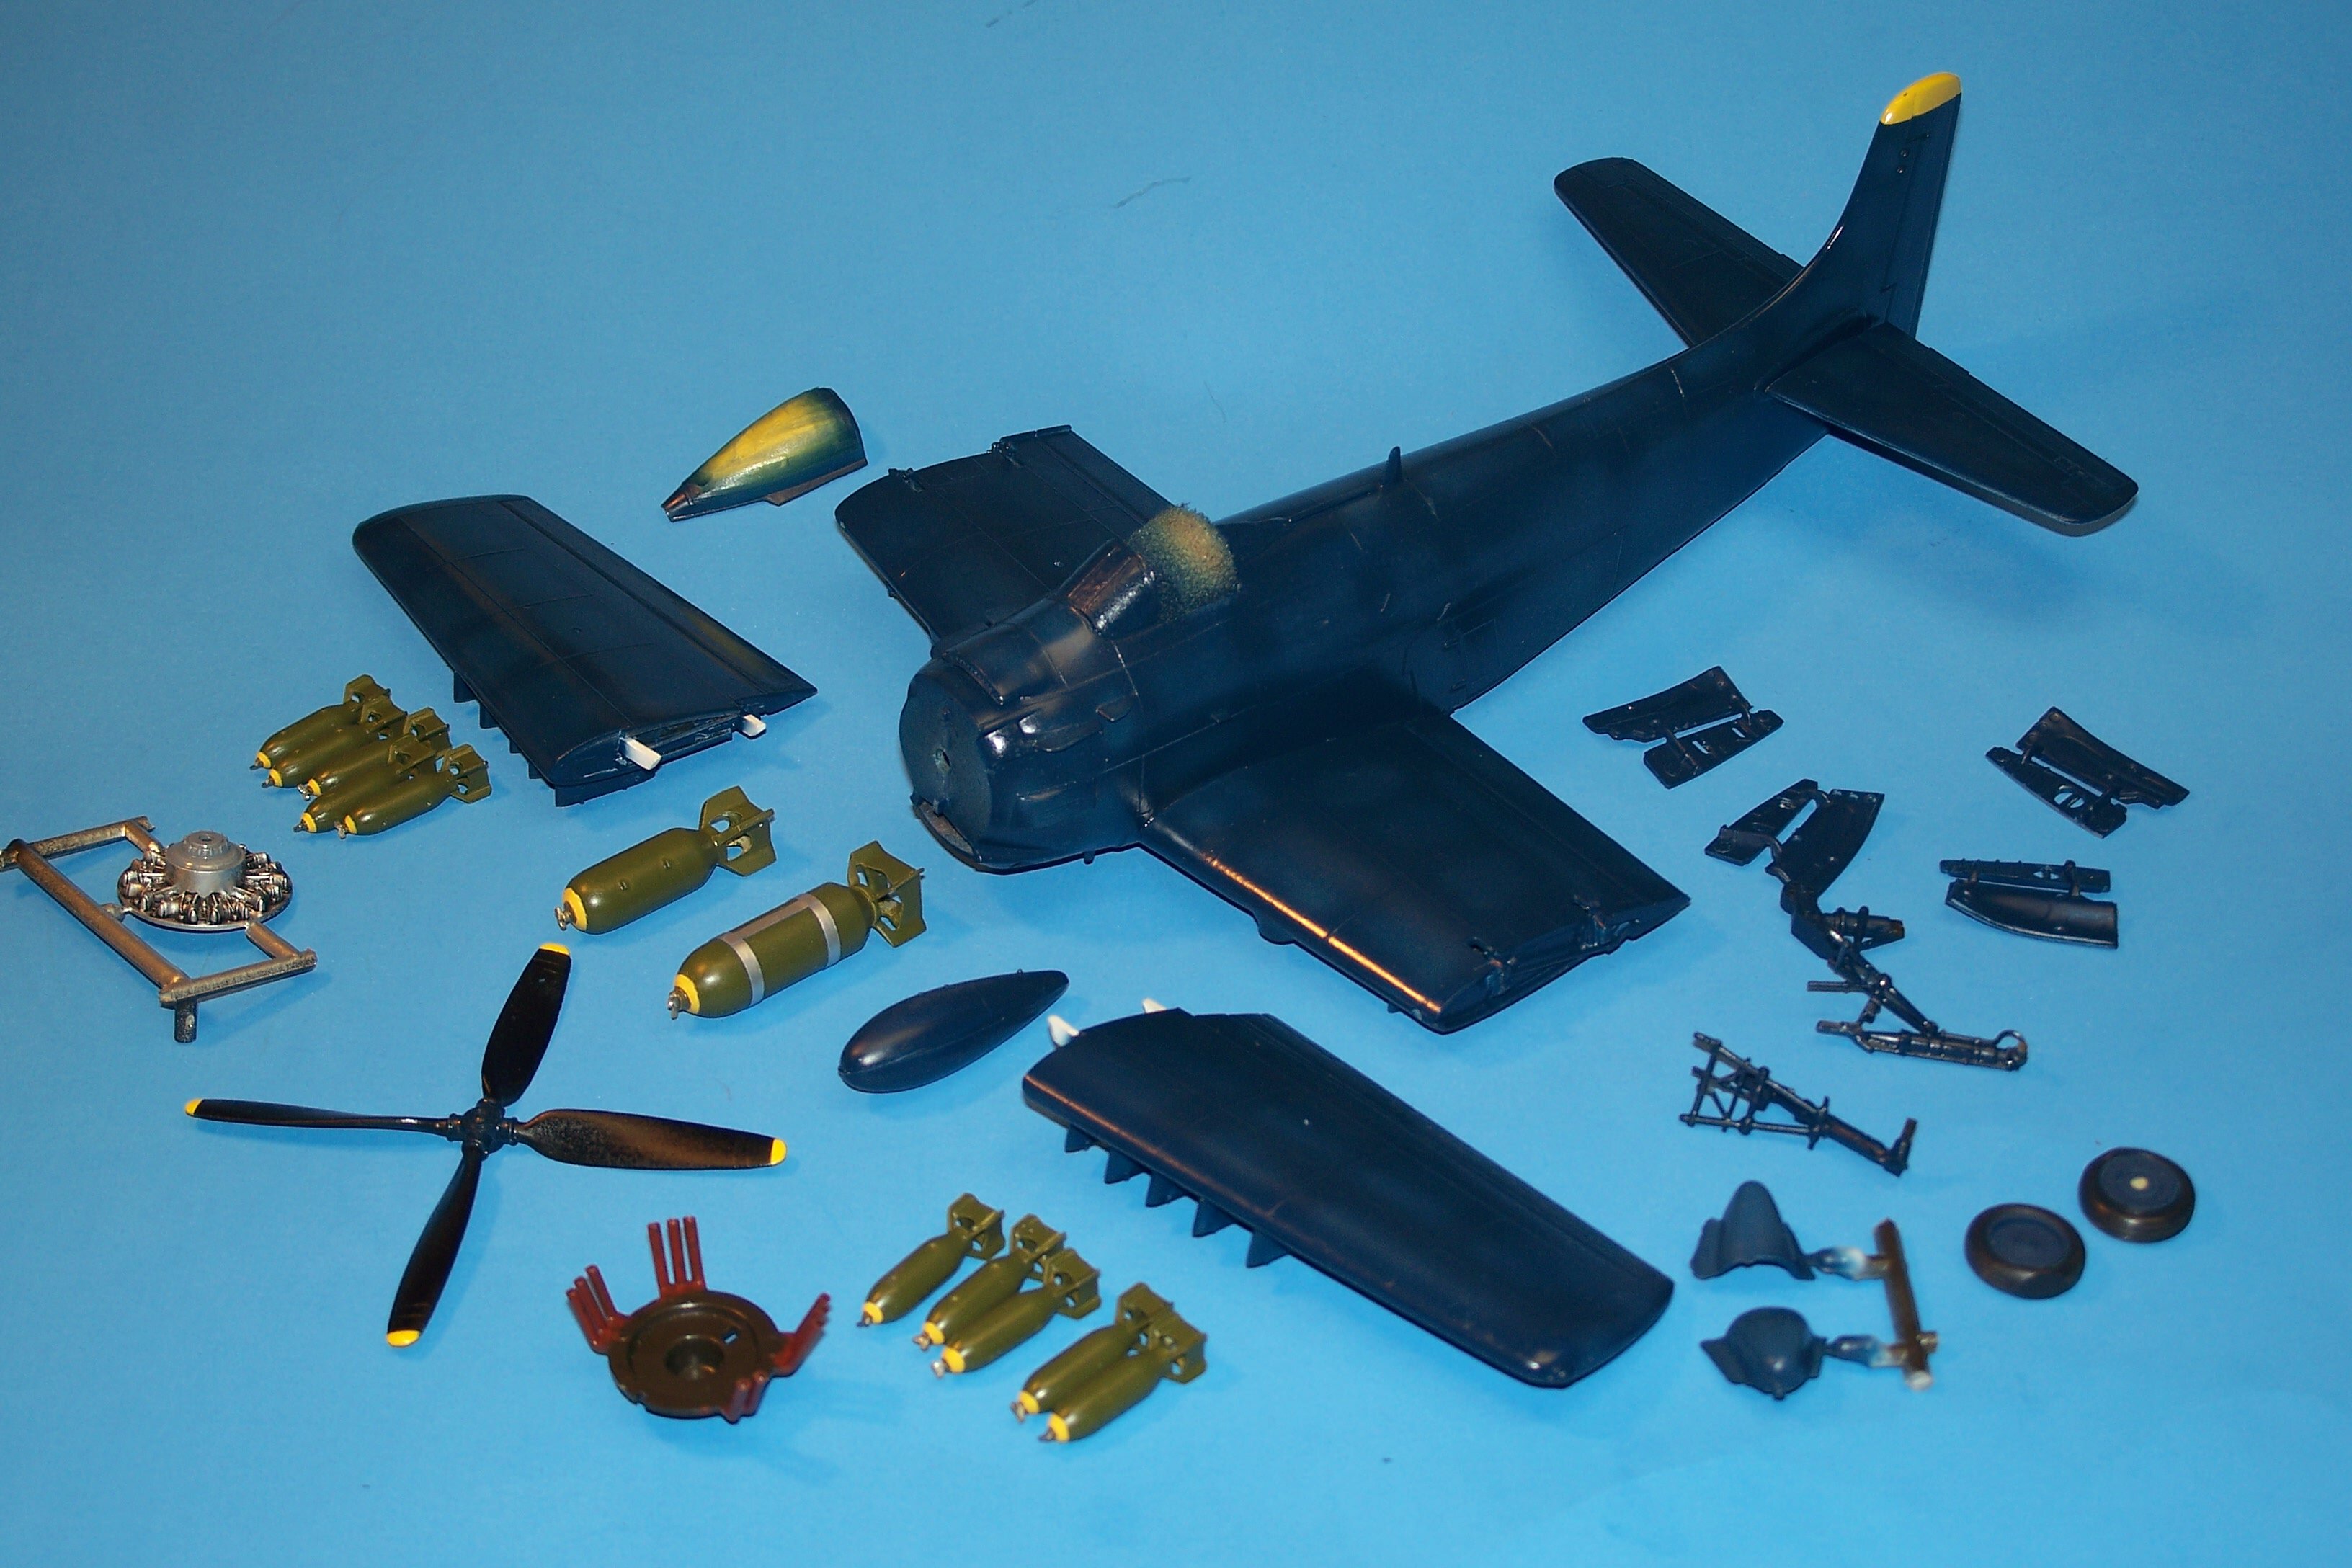
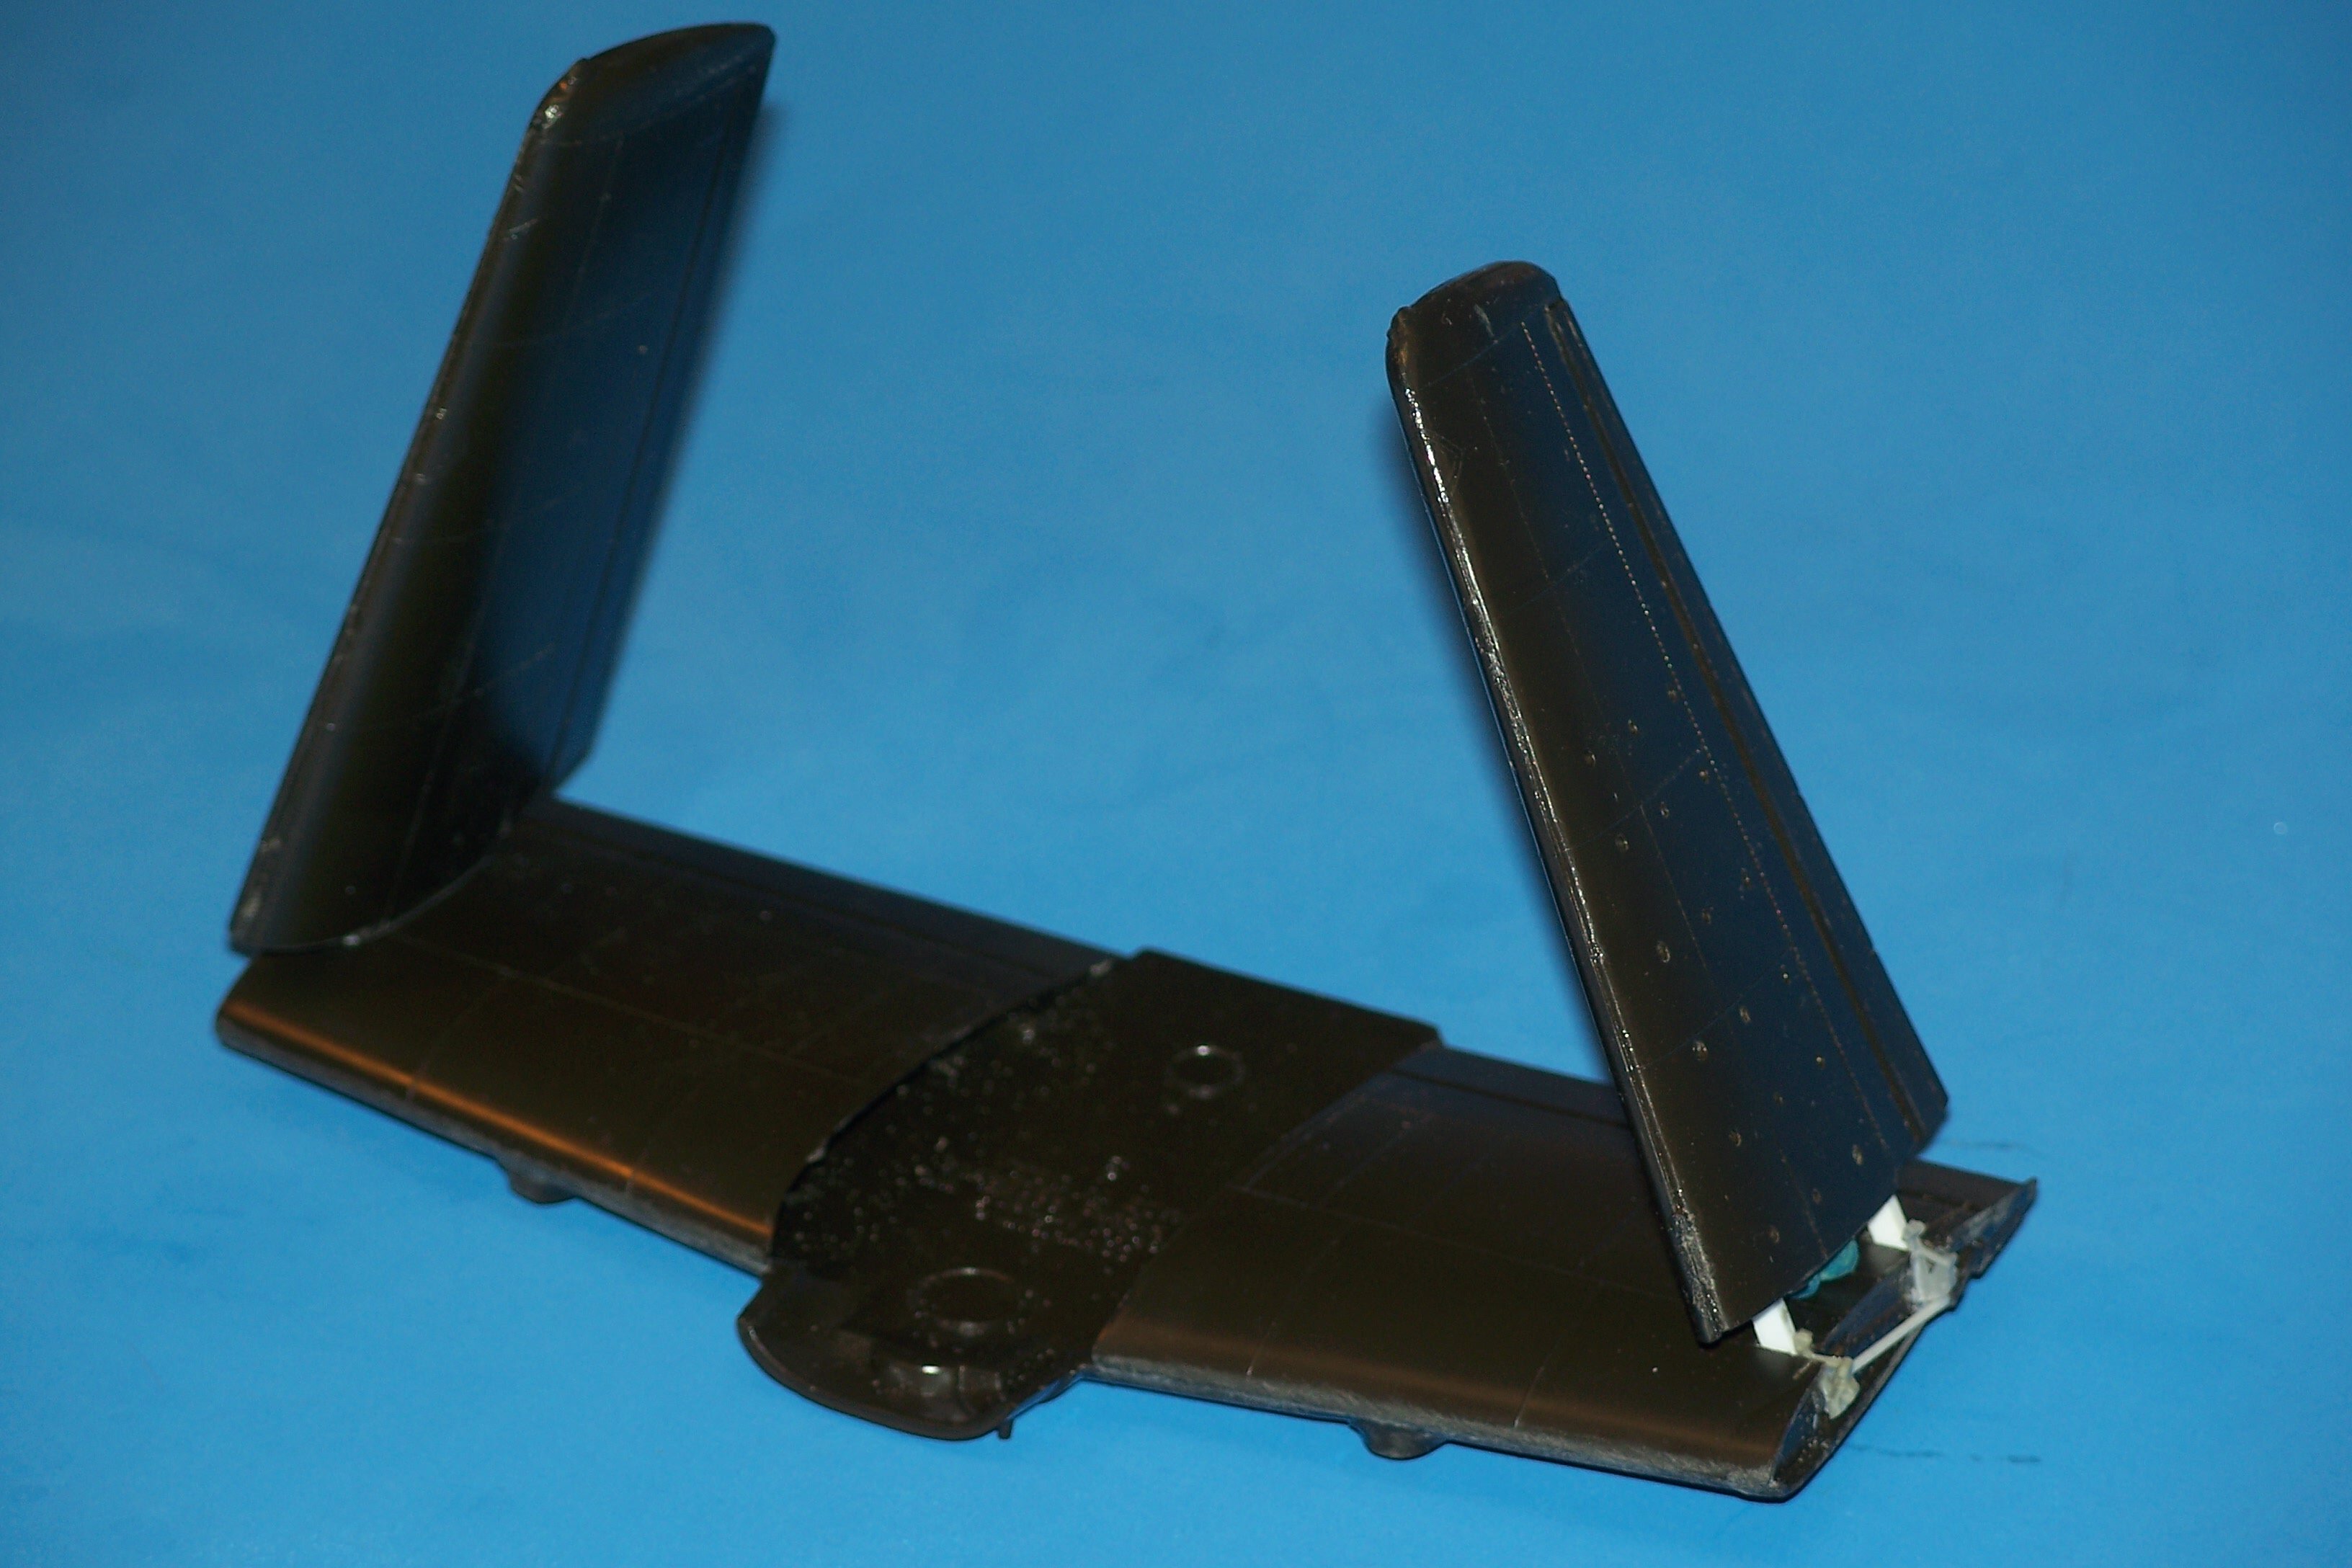
Snuck a build in for myself while working on the 1/32 HK B-17E (see "builds" forum for that one). This is the Monogram 1/48 Skyraider built as an AD-4 in Korea. Folded the wings, otherwise OOTB. Payload and markings done to make the one on the cover of the "In Action" Skyraider book. Oh....and the one wing fold connector rod I forgot to paint is done now! Nothing to write home about, but a fun little diversion! GIL
-
"wasn't it Shakespeare who said "all's well that ends well"?" 😀 Didn't mean it to sound as Cavalier as it does......was just trying to convey how glad I was it wasn't being returned all the way back to me, seeing as how he needed it asap! GIL
-
Nice! Gil
-
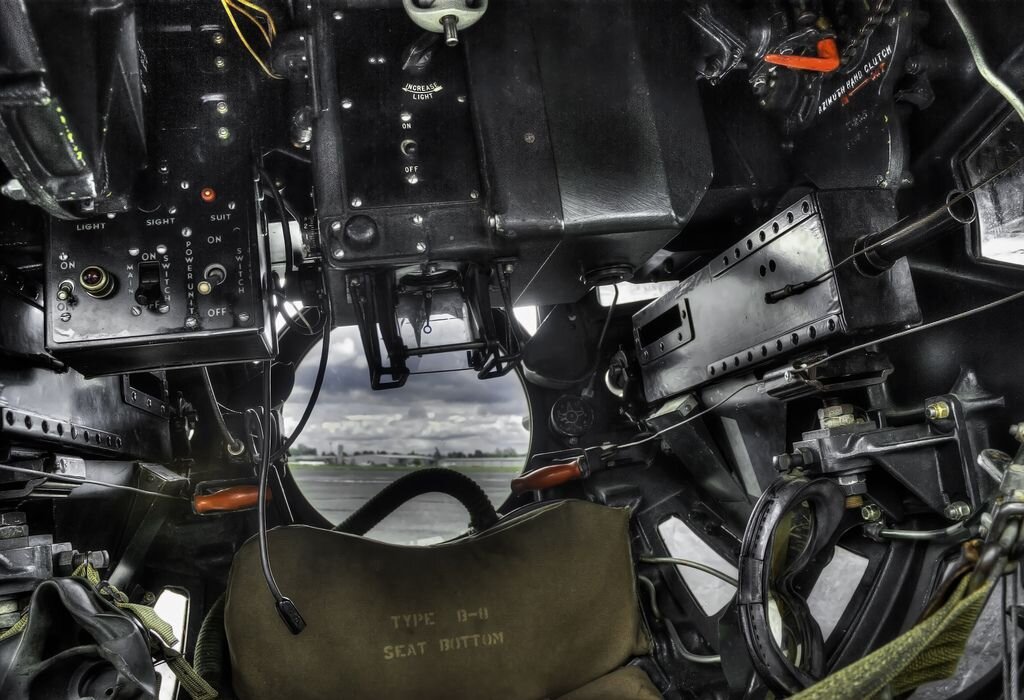
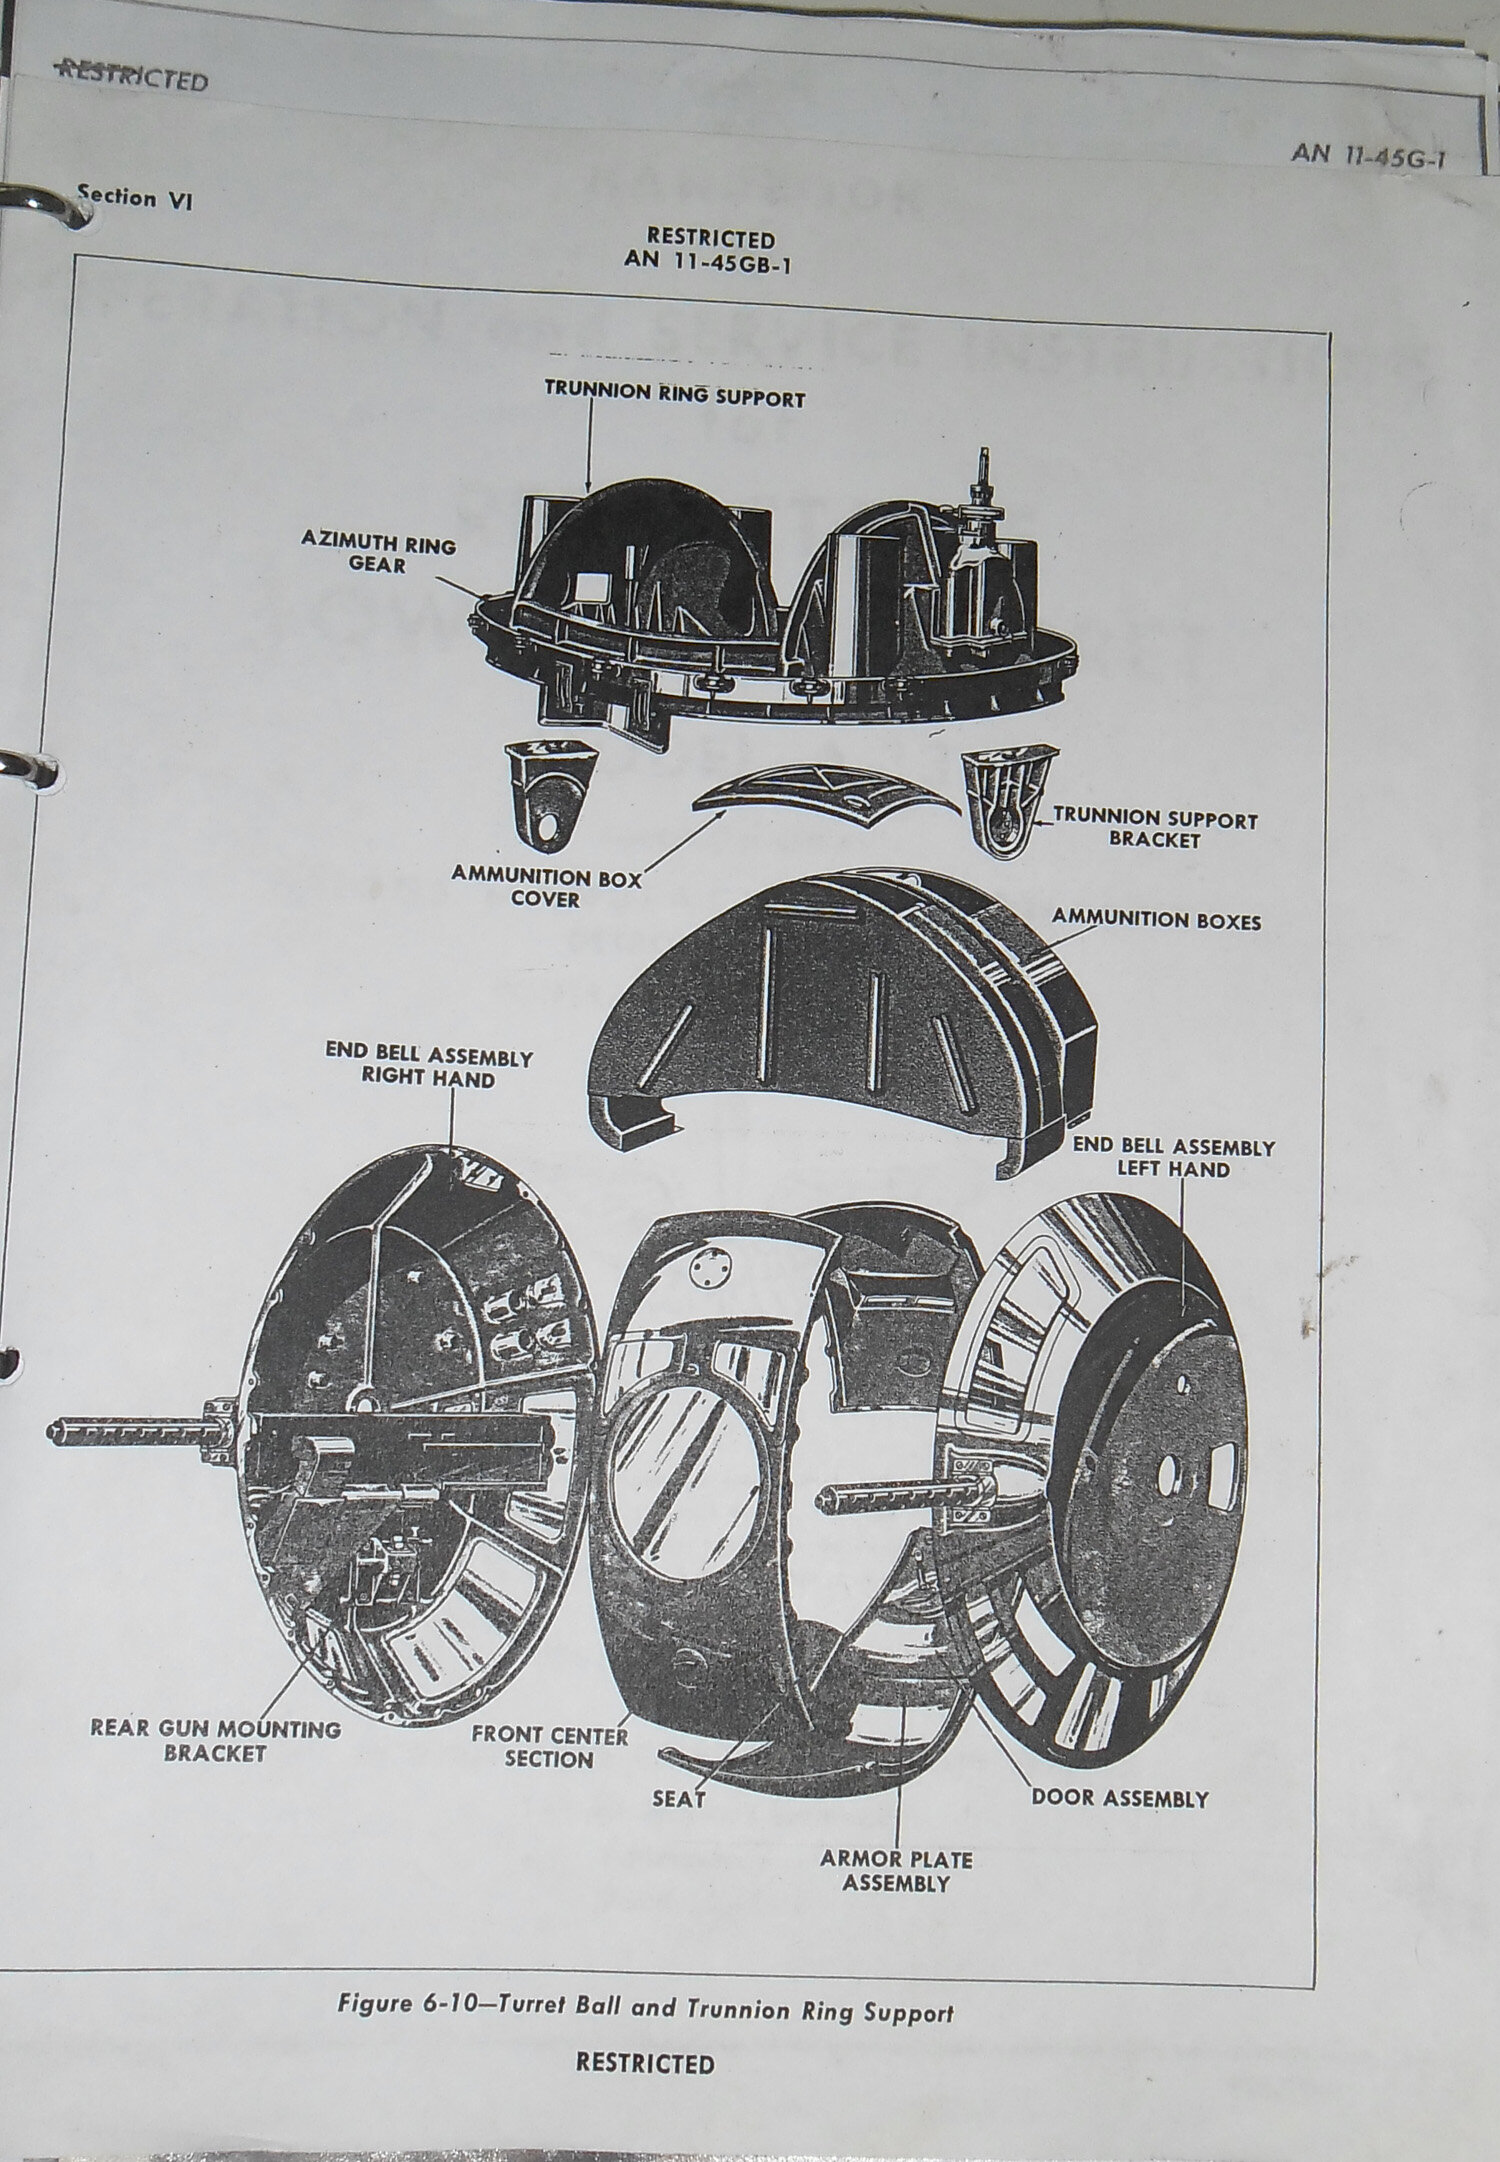
Some more progress....got the ball turret and tail gunner's position done. NOTE: I've since found out the the ammo cans I built and added to the turret support structure is NOT accurate. Almost unbelievably, the ball turret actually had a 500 round magazine inside it (reference pics below)! BUT, some of the Walkaround books show ammo cans on the upper structure....It turns out that THOSE turret supports were made for the B-32 Dominator, but were never used since it never went into full production. However, when private owners started restoring their B-17s and B-24s, THOSE turret structures were readily available and used, making them inaccurate for WWII era 17s and 24s. I've also started to mess with positioning the figures, as that needs to be fully done before I can join the fuselage halves. And again, THESE are technically wrong because they're wearing ETO style heavy, cold weather flying gear. But, these are just about the only 1/32 bomber crews available, and more importantly, are what the client provided, so that's what I'm going with. These are very nice resin figures, and they're soft enough to make cutting and repostioning arms and legs (as I did for the Navigator) pretty easy. Ball turret references..... GIL
-
Very sad indeed.....and there's NO way to understand people like that who do such things. On the other hand....maybe this is the Lord's way of saying "time to retire and relax"? Gil
-
And this is you "without" mojo? God help the supply of Tamiya Thin cement if you ever get "inspired"! 😀 😀 😀 Gil
-
I build in 1/48 and use "6mil" (.06) ceramic wire (Wonder Wire). It looks to me like it'd work well in 1/72, especially as it's "smoke" colored and thus not real bright and harder to see if you don't paint it. It's flexible, will not kink (it would actually shatter or break first!), but stays straight once in place without the need to heat it to make it taut. You simply drill holes for each end, measure and cut a length slightly longer than needed, flex it into each hole and it's done! You can add a spot of glue if you want, but it's not always needed. Wonder Wire is sold by Precision Enterprises (a mom and pop biz) and you can contact them at: 802-885-3094. It runs about $10 for a package with @6ft of the wire. Other than that, there's always the good old standby: stretched sprue.....if you're not familiar with it you can look up techniques on how to stretch it (and its uses) on You Tube. It's easy to use, BUT it does need to be heated to get it to tighten up properly....and THAT'S where the problems can occur (and why i switched to wonder Wire!). The steel wire Chris mentioned is great also.....BUT you do have to cut it precisely, and metal wire can also kink while handling; leading to a strong "learning curve" in using it until you master it and don't waste so much with short cuts and kinked wires that cannot be used. These 1/48 models have Wonder Wire for their rigging GIL.....
-
Welcome Lariliss! Glad to have you here! Looking forward to your posting pics of the models you like to build! GIL
- 1 reply
-
- 1
-

-
Returning to model building and figurine painting after 30 yrs
ghodges replied to TonyFNG's topic in Welcome to the Forum!
Hi Tony! Welcome to the IPMS forum and back to the "active duty roster"! The ONLY contest where you HAVE to be a national IPMS member is the IPMS National Convention contest. All other shows (locals, invitationals, and regionals) do not require IPMS membership, though most of them DO offer a discount if you are a member! Go the the IPMSUSA official website (just hit the "IPMSUSA home" button in the blue band at the top of the page) and look to see where the closest IPMS chapter is to you. I know CO has several well established groups. If you can make club meetings, I think you'll find a group of laid back people who enjoy modeling like yourself, and also have people who can either answer your "how to" questions or point you in the right direction. In the meantime, make yourself at home here and don't be shy! Cheers! Gil -
Sorry I'm late to the game....but I can help you out! Please email me at slowhandshodges@bellsouth.net so we can work out a trade. GIL
-
Phenomenal is the word that immediately comes to mind! THAT is going to turn heads everywhere you take it! I hope to see it in Omaha too! GIL
-
That's some mighty fine work there over the last 18 or so months! I'm guessing they're all 1/32 scale? Could you tell us what scale and kit each one is? Inquiring minds need to know! And congrats on a great looking collection of builds! GIL
-
Made some mundane progress, though progress it is! Got the turret glass into the top turret frame....I used Future to "cement" the glass parts in, and they fit better than I expected. Oddly, the top glass piece fits up inside the framing, while the rest of the glass parts are fitted onto the framing from the outside. I'm not sure why HK used this approach...I'd have preferred a single clear piece with good framing to be masked off, but this does work if you exercise care. I also got the actual turret guts assembled, and this was the first area of the kit where I felt the instructions weren't clear enough and the parts fit was less than expected. It took a LOT of fiddling with all of the parts to see how they'd mesh together, meaning you couldn't really follow the instruction sequencing. This was especially true for the turret gun sight assembly in the top of the turret. It also seemed that assembling the gun breaches into the turret as HK would have it done did NOT allow to check their fit to the top clear piece (and more importantly) the gun turret openings. I opted to glue them place being sure they were aligned well and then add the rest of the turret parts around them. Other than that, I also added some ammo to the ammo boxes and then cemented the ammo boxes into place in the fuselage halves, added the gun button to the pilot's yoke, and got the seat belts onto the radio man's seat. All in all....another kit step is done and I'm a little further along! Comments, questions, and critiques still welcome, as always! GIL
-
Gotta love the Bearcat! Looking forward to more! GIL
-
Hello Harry! Glad to have you here! I have very limited experience with ships, but I do have a 1/350 Saratoga with the wooden deck and all of the PE parts....so I'll be interested in watching your posts to see how you handle things and also the advice given to you. Welcome, and please make yourself at home! GIL


.JPG.315143c2f7733ee128fae84f94282a82.JPG)
.JPG.19973e3a33d3599df33030374b364a65.JPG)
.JPG.f6d706c2baff250efe32175859f45deb.JPG)
.JPG.150f9695cd2a82acad09fd0ba907401c.JPG)
.JPG.89adfae79be2fb06b16cd43412ec602e.JPG)
.JPG.849099c158524892cc2ce6579414d54f.JPG)

.JPG.fc37e5abda67ee772be7648f7a13c0b8.JPG)


.JPG.dff0f6fb5dcbf63fb60bd5923fdd3cdc.JPG)
.JPG.587314ace46190433f6f2a7c59f769cf.JPG)
.JPG.cc868a09ea31e2ae3ac2381ee92fbbeb.JPG)

.JPG.ee2b78050a3fc6e83cee4f5580fbff14.JPG)
.JPG.ea92bd08c8a7bd980212f4c2d57d40f4.JPG)
.JPG.e728bfaf62595fe4f643d43c39ffdbe2.JPG)
.JPG.b6c6d962efdda1fda8f1a0ea25de2057.JPG)
.JPG.84837be68f1f4cdf21e5a34c079346aa.JPG)