ghodges
-
Posts
7,567 -
Joined
-
Last visited
-
Days Won
298
Content Type
Profiles
Forums
Events
Everything posted by ghodges
-
Oooo.... pretty! I think your dropping it and putting the nose on "up" was a happy accident as I agree it looks much more graceful that way. Congrats on your perseverance! Gil
-
Nice progress Duke, as always! You didn't say how you were trying to shape the plastic strips you showed but implied you weren't getting the results you wanted. I've found I can bend thin sheet strips like that around a paint brush handle. BUT, you don't just "bend" it.... you bend it to get a curvature started and then holding between your thumb and forefinger take the thinner end of the paint brush handle and using thumb pressure with the other hand PULL the handle along the length of the strip, causing it to curl tightly around the handle as you pull and (hopefully) imparting even greater curvature to the strip. It'll never curl up as tightly as the handle due to the "straight memory" of the plastic; but it might help you get tighter curls if needed. If you're doing this already... oh well. If not, hope this helps! Gil
-
Welcome back Ron! Although I have a great interest in WWI, I never seem to build as much as I should. Hoping I can live vicariously through a few of yours. Prop your feet up, make yourself at home, and let us know how we can help you have more fun modeling! Gil
-
Phenomenal! The modeling is enough, but the electrical work is also an engineering marvel. Those couple of pics of your interior fuselage shots could double for reference pics from a walk-around book! Gil
-
Very nice builds! I guess I shouldn't be surprised how much the Russian drone resembles ours..... and I never knew the Brits were flying one of our designs! I also like the way you've displayed the one in transport. Congrats, and thanks for sharing! Gil
-
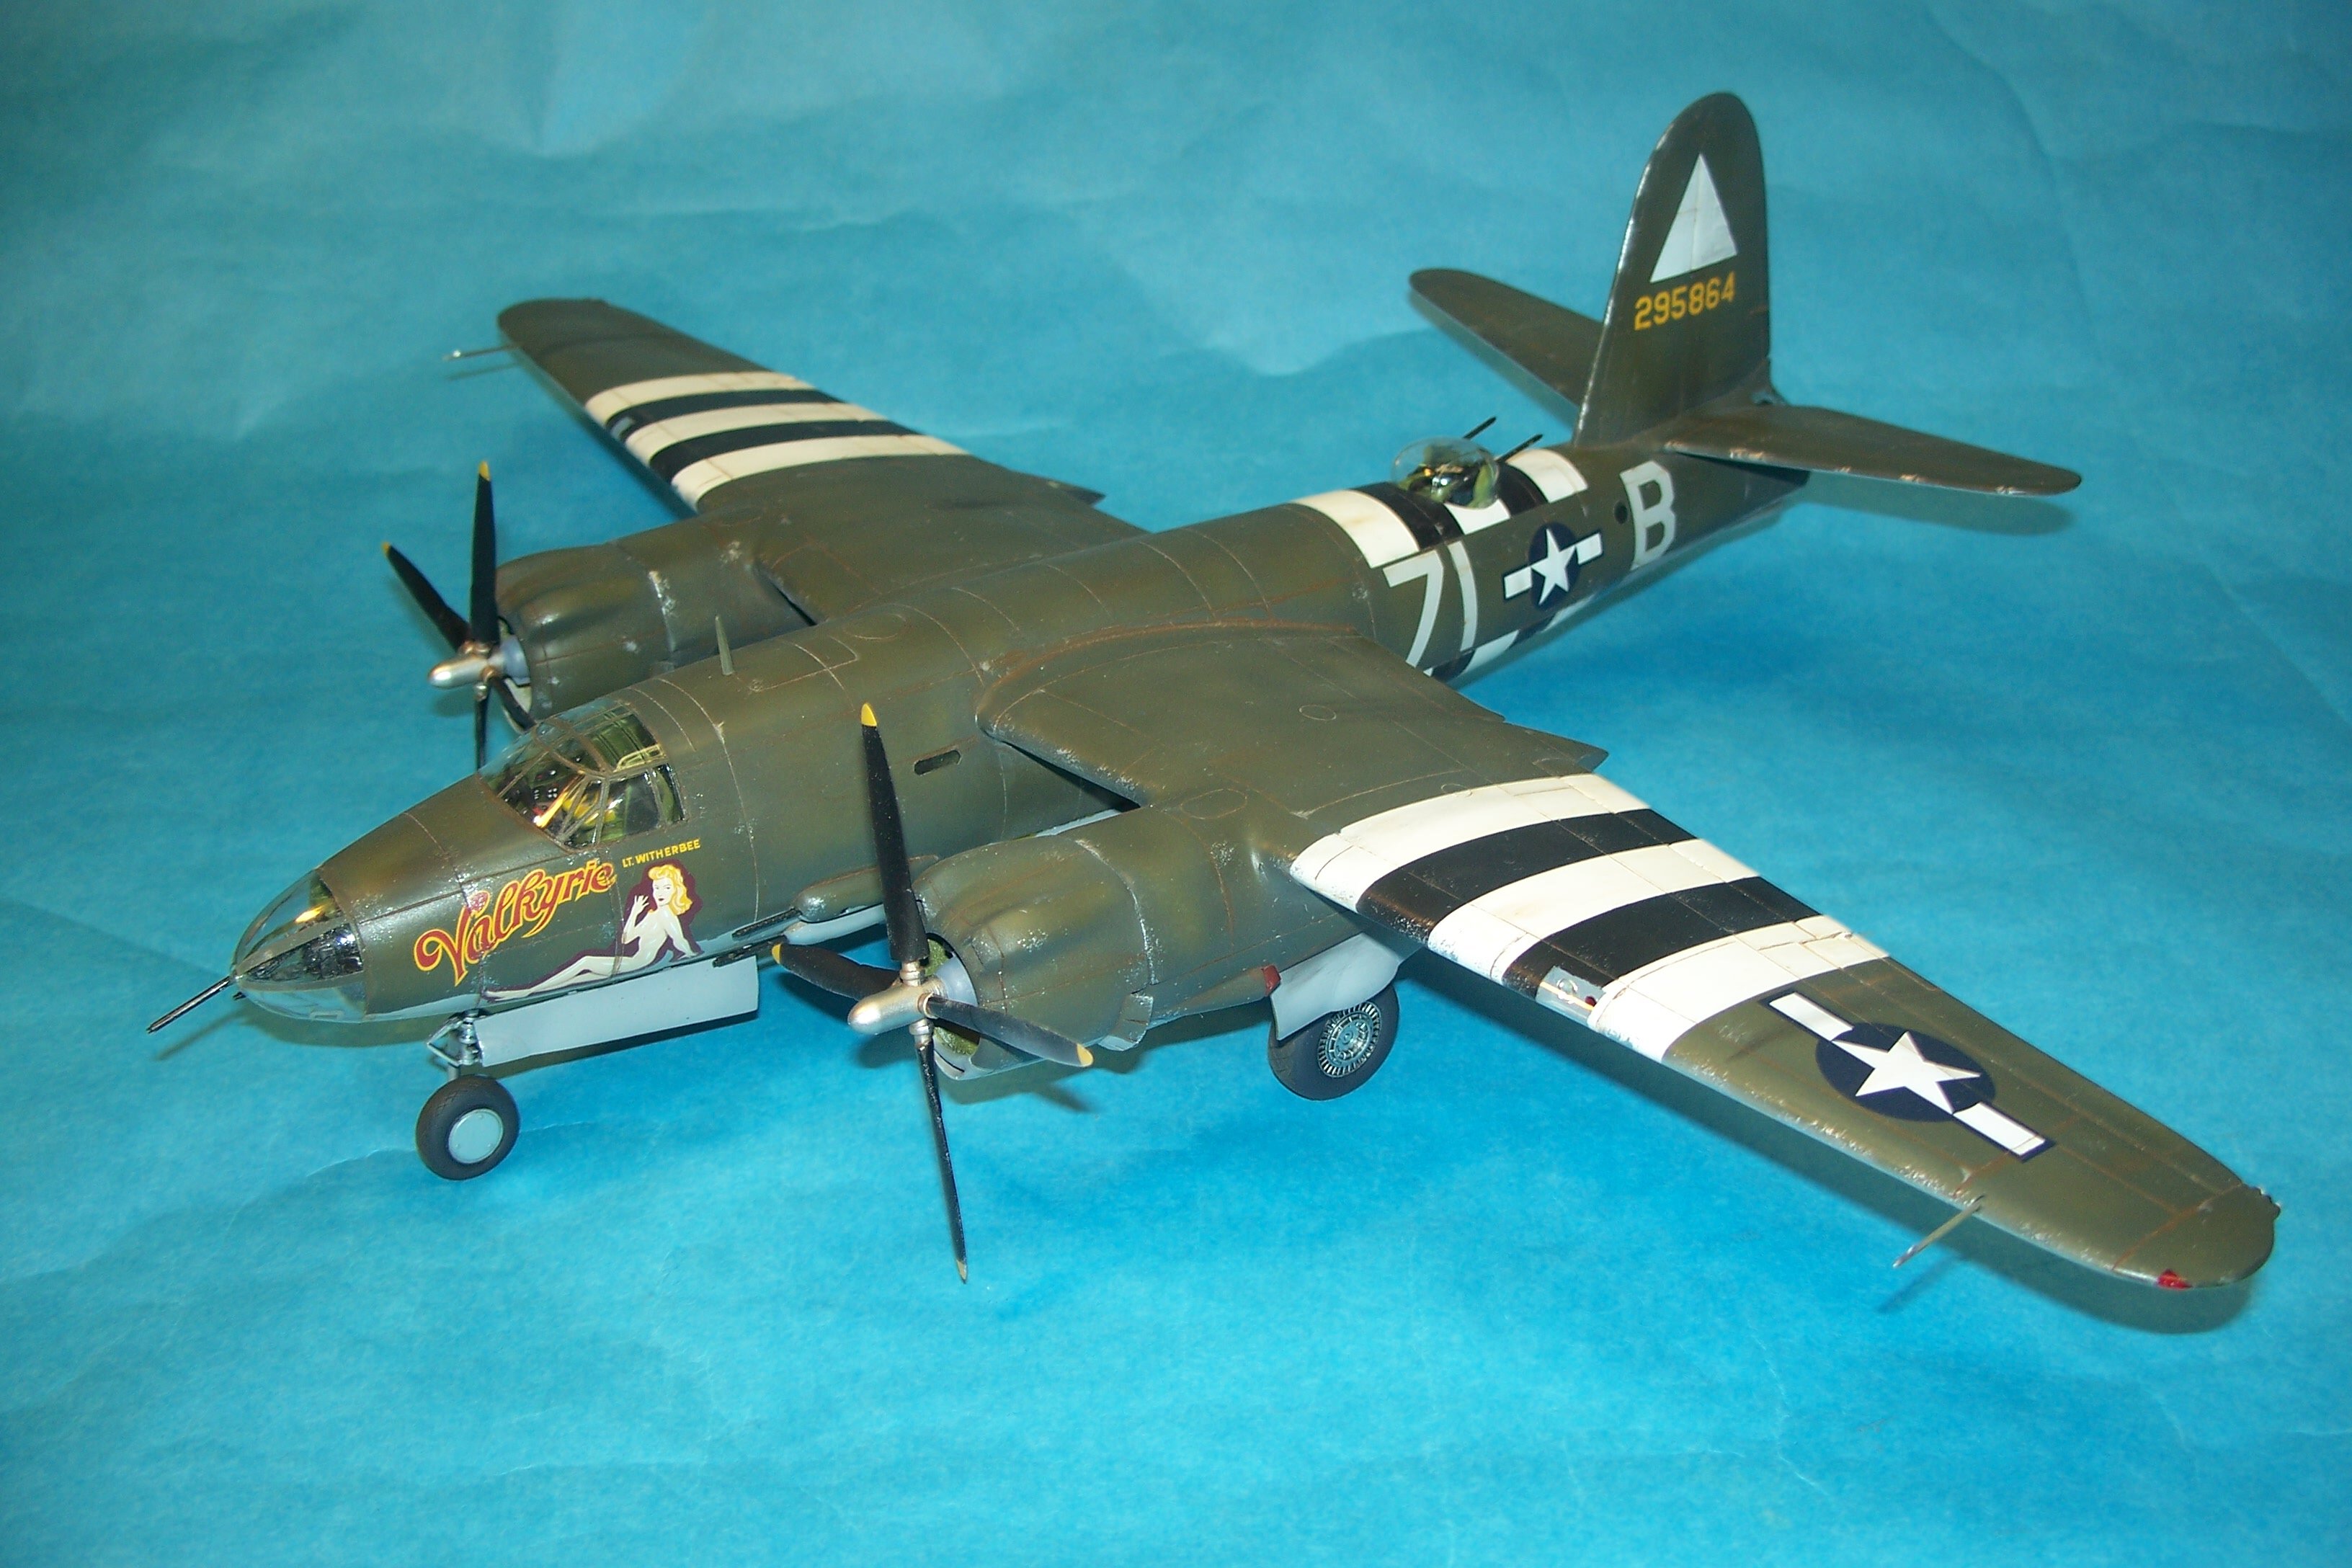
With the news of a new 1/48 B-26 Marauder on the horizon (now just released), I decided I'd build my old Monogram kit that had been languishing in my stash for many years. It's mostly OTB, except for some resin replacement engine cowlings I had in the box' as well as adding some MV lenses for the wing lights and IFF lights, adding clear colored plastic wing tip lights, and substituting some spare resin gun barrels for the kit ones. I also had an Eduard masking set which came in quite handy. The interior is OOTB. The big silver thingy is a Terry Dean nose weight I bought years ago, designed specifically for the kit. The entire model was rescribed using a razor saw for the fuselage and a UMM scriber for the wings and tailplanes. The shiny patches on the kit plastic are due to brushing some Testors liquid cement in the scribe lines to clean them out after the initial sanding. The kit has a bad rep for bad fit, but the only true problem were the extensions on the wing tops for the tops of the nacelles. Both of them simply needed to be gently bent downward (it did create stress marks in the plastic) and then they fit the nacelles quite well. The rest of the seams were average to good, but with no real fit problems, including all of the clear parts. I did, however, use UV cured clear resin for all of the fuselage windows except for the radio/navigator's right side window with the bubble. Also note the wire sticking out of the nose glazing. All of the kit guns were modified with either drilled holes or wire extensions so that the all of the gun barrels could be added at the end of the project. The pink stuff is Silly Putty being used to mask the exposed main gear, which have to be added before adding the underside wing nacelles. The 1-piece replacement resin cowls can also ne seen here. Everything else about the build was straightforward. Clear packing tape was used for the wing leading edges in place of the plastic kit parts. On to the finished pics! I used Alclad Gray Primer for the underside and Model Master 34086 Dark OD for the top, with 34087 OD used for some lighter panel variations. Tamiya brown panel line wash was used and some MIG powders brushed on for additional streaking and for the exhaust staining. The chipping was done with a small sponge and also with a silver colored pencil. I added D-Day stripes because I liked their look, though the decal sheet doesn't show them. The markings for Valkyrie were from Cutting Edge. Got this one done just in time before the new kit is being built by everyone else! Questions, critiques, and comments welcome, as always. Gil

-
Great progress and I have to agree that those resin guns are a very good improvement; well worth the cost! Gil
-
Super cool looking camo striping, especially in 1/72! I can see why the masks would have made things a lot easier, even if they took a while to apply. Did the Eduard masks all fit? I had a few on my current Marauder build that where a bit oversized (side windows), though 95% of them fit perfectly. Thanks for posting this! Gil
-
WOW! The camo work alone is impressive, but being a vac model too just adds to it! Outstanding! Gil
-
Amazing.... Gil
-
Those are some very cool builds! I've always like the markings on that P-47B and the NMF on the XB-51 is sharp! Thanks for sharing! Gil
-
The level of realism you're achieving is mind blowing! Really enjoying this build! Gil
-
Stunning replication of the reference pics..... I vote one side up and the other down for the seating.... though the pic with both sides up does have a very nice symmetry to it. Gil
-
I got an "early private edition" for free as I was involved in the creation of the kit (indirectly). It seems my kit was missing a few parts as well as maybe also missing a page or two in the instructions (no painting/markings guide for the OD/gray War Games markings though the decals were included). That's the main reason I scratchbuilt the gunner's seat and gun ring, the roll over structure behind the pilot, and a new main IP. The down side is I had to rely on more of my own references and build some parts. The up side is I got the kit ahead of most others. It does take a steady hand to do the tick marks in a really neat manner (and mine is not that neat), BUT when you make the marks you can start inside and mark towards the outside and not have to worry about the marks outside the circle since they can't be seen; making the process a little less difficult. Or, you can use instrument decals (as in my example pic), though in my experience the tedium of punching them out is as much work as drawing the instruments. In the end, go with WHATEVER system works for you. If I'd had a good looking spare IP that fit, I'd have used it! Cheers! Gil
-
That’s a beautiful model Gil. I have only worked with resin once and that was figures. Did this require removing large blocks of resin and the accompanying sanding/smoothing? The details you added are incredible. Any chance you might explain the “sandwich” method for us newbies? Most of the parts came as you see in the pic. The only one with a casting block needing removal was the gear doors, and they could be sliced away from the block with only a little cleanup of their edges needed after that. The engine can be put in the cowling without sanding down the thick rear (which I did), but that was a mistake since it was then too close to the rear edge to allow the cowling to fit properly on the fuselage; so I had to grind it down with a motor tool, which was more work than if I had sanded it down earlier. In general, most casting blocks are easily removed with a razor saw or by cutting with a knife blade. Big ones may require a motor tool with a grinding bit or a rotary saw blade, but most don't. However, whenever you do sand/saw resin, wear a mask as the dust gets everywhere and it's not healthy stuff to breathe in! The "sandwich" method for making instrument panels requires two thin sheets of plastic, with the rear one preferably being white. You cut the top one to the shape of your panel. Mark the positions of the instruments in pencil on it and then open up their holes using either a drill bit, the point of a #11 blade (twirled), or using a punch and die set. Add any buttons, instrument bezels, or other detailing to its front that you desire. Paint it AND the second piece of plastic black. Place the top IP piece over the painted second piece and using a pin (or other fine pointed tool) run it around the inside edge of each instrument hole, effectively scratching off the black paint and leaving a white circle for each one. Remove the top piece and use the tool to now scratch the paint off inside each instrument to mark each one, making tick marks and instrument needles for them. Once all of them are made/marked, cut the rear piece to fit behind the top piece. Next, get a piece of clear cellophane (from a cigarette pack or some such source). Cut it big enough to cover the rear instruments. Very carefully glue it to the rear IP part. You can trim it now, or wait and trim it after you add the top IP part, being sure as you glue it that the holes line up perfectly with the instruments on the back part. Trim any excess cellophane (if needed) and you should now have an IP with "glass" over the instruments. Here's a pic from my A-18 Shrike II build that shows what I mean... although in THIS case I glued instrument decals (yet another option this allows) instead of "scratching" the instruments on. Those other things are ammo boxes.... Hope that helps! Let me know if I wasn't clear enough. Gil
-
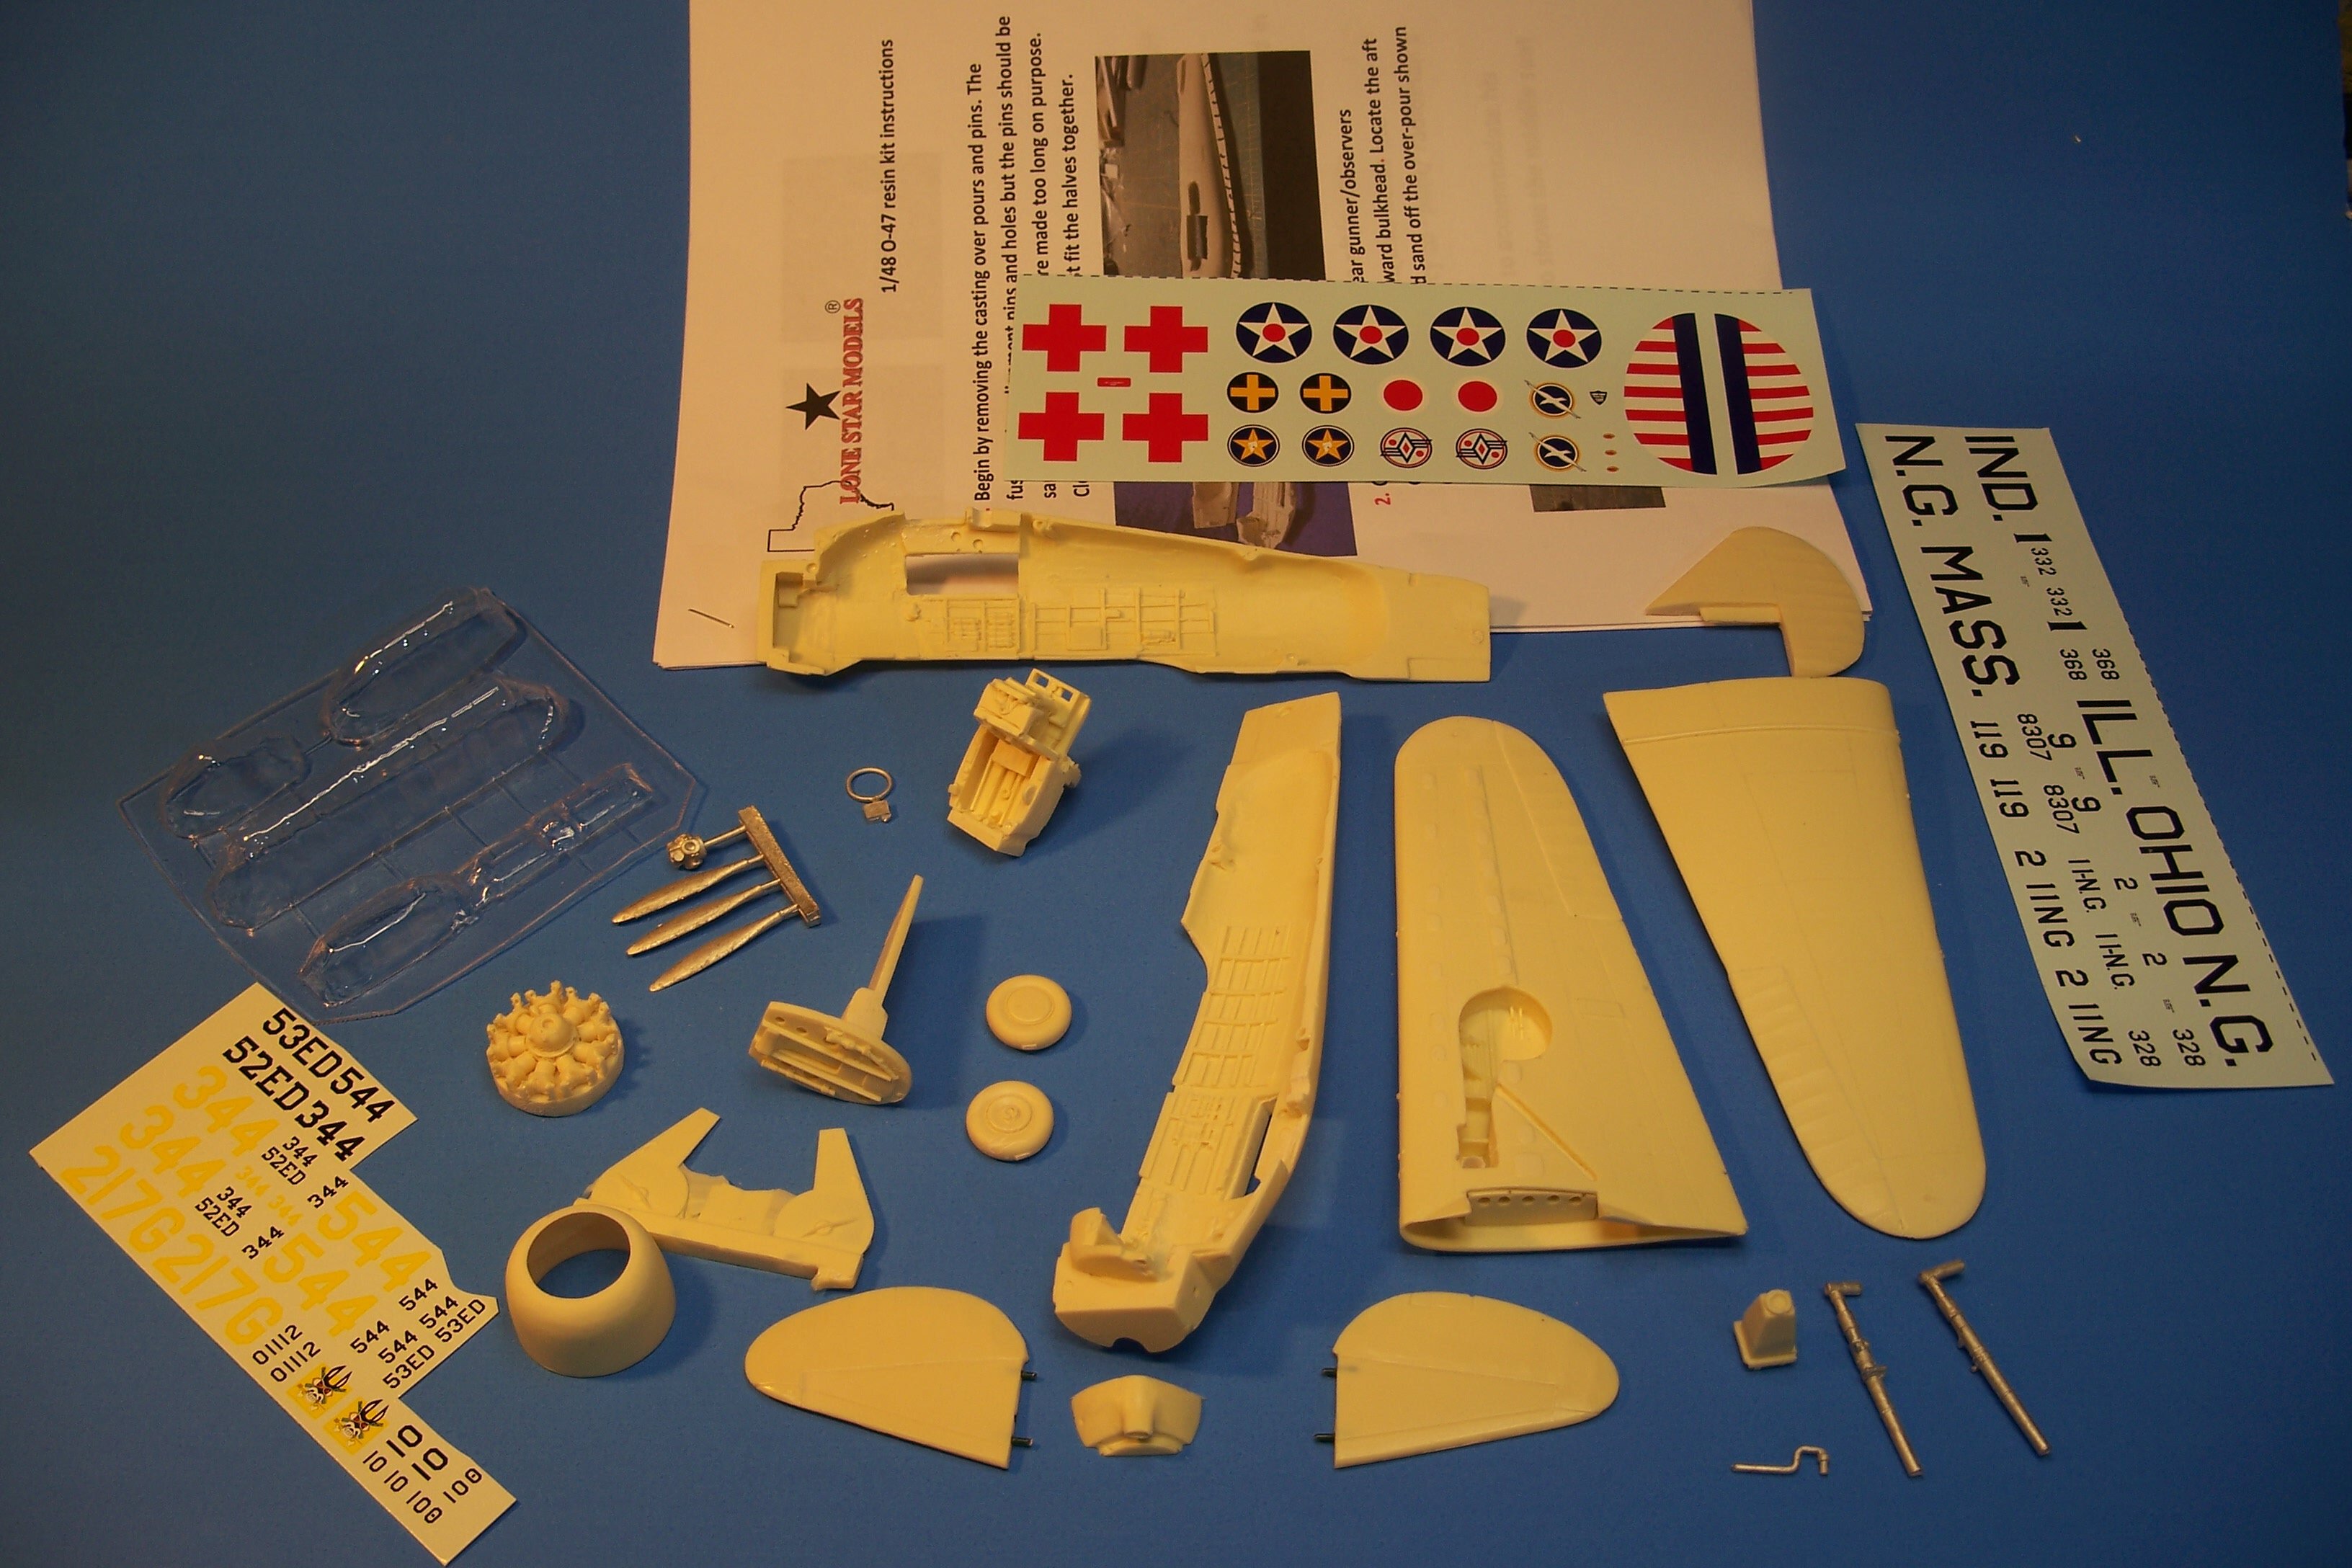
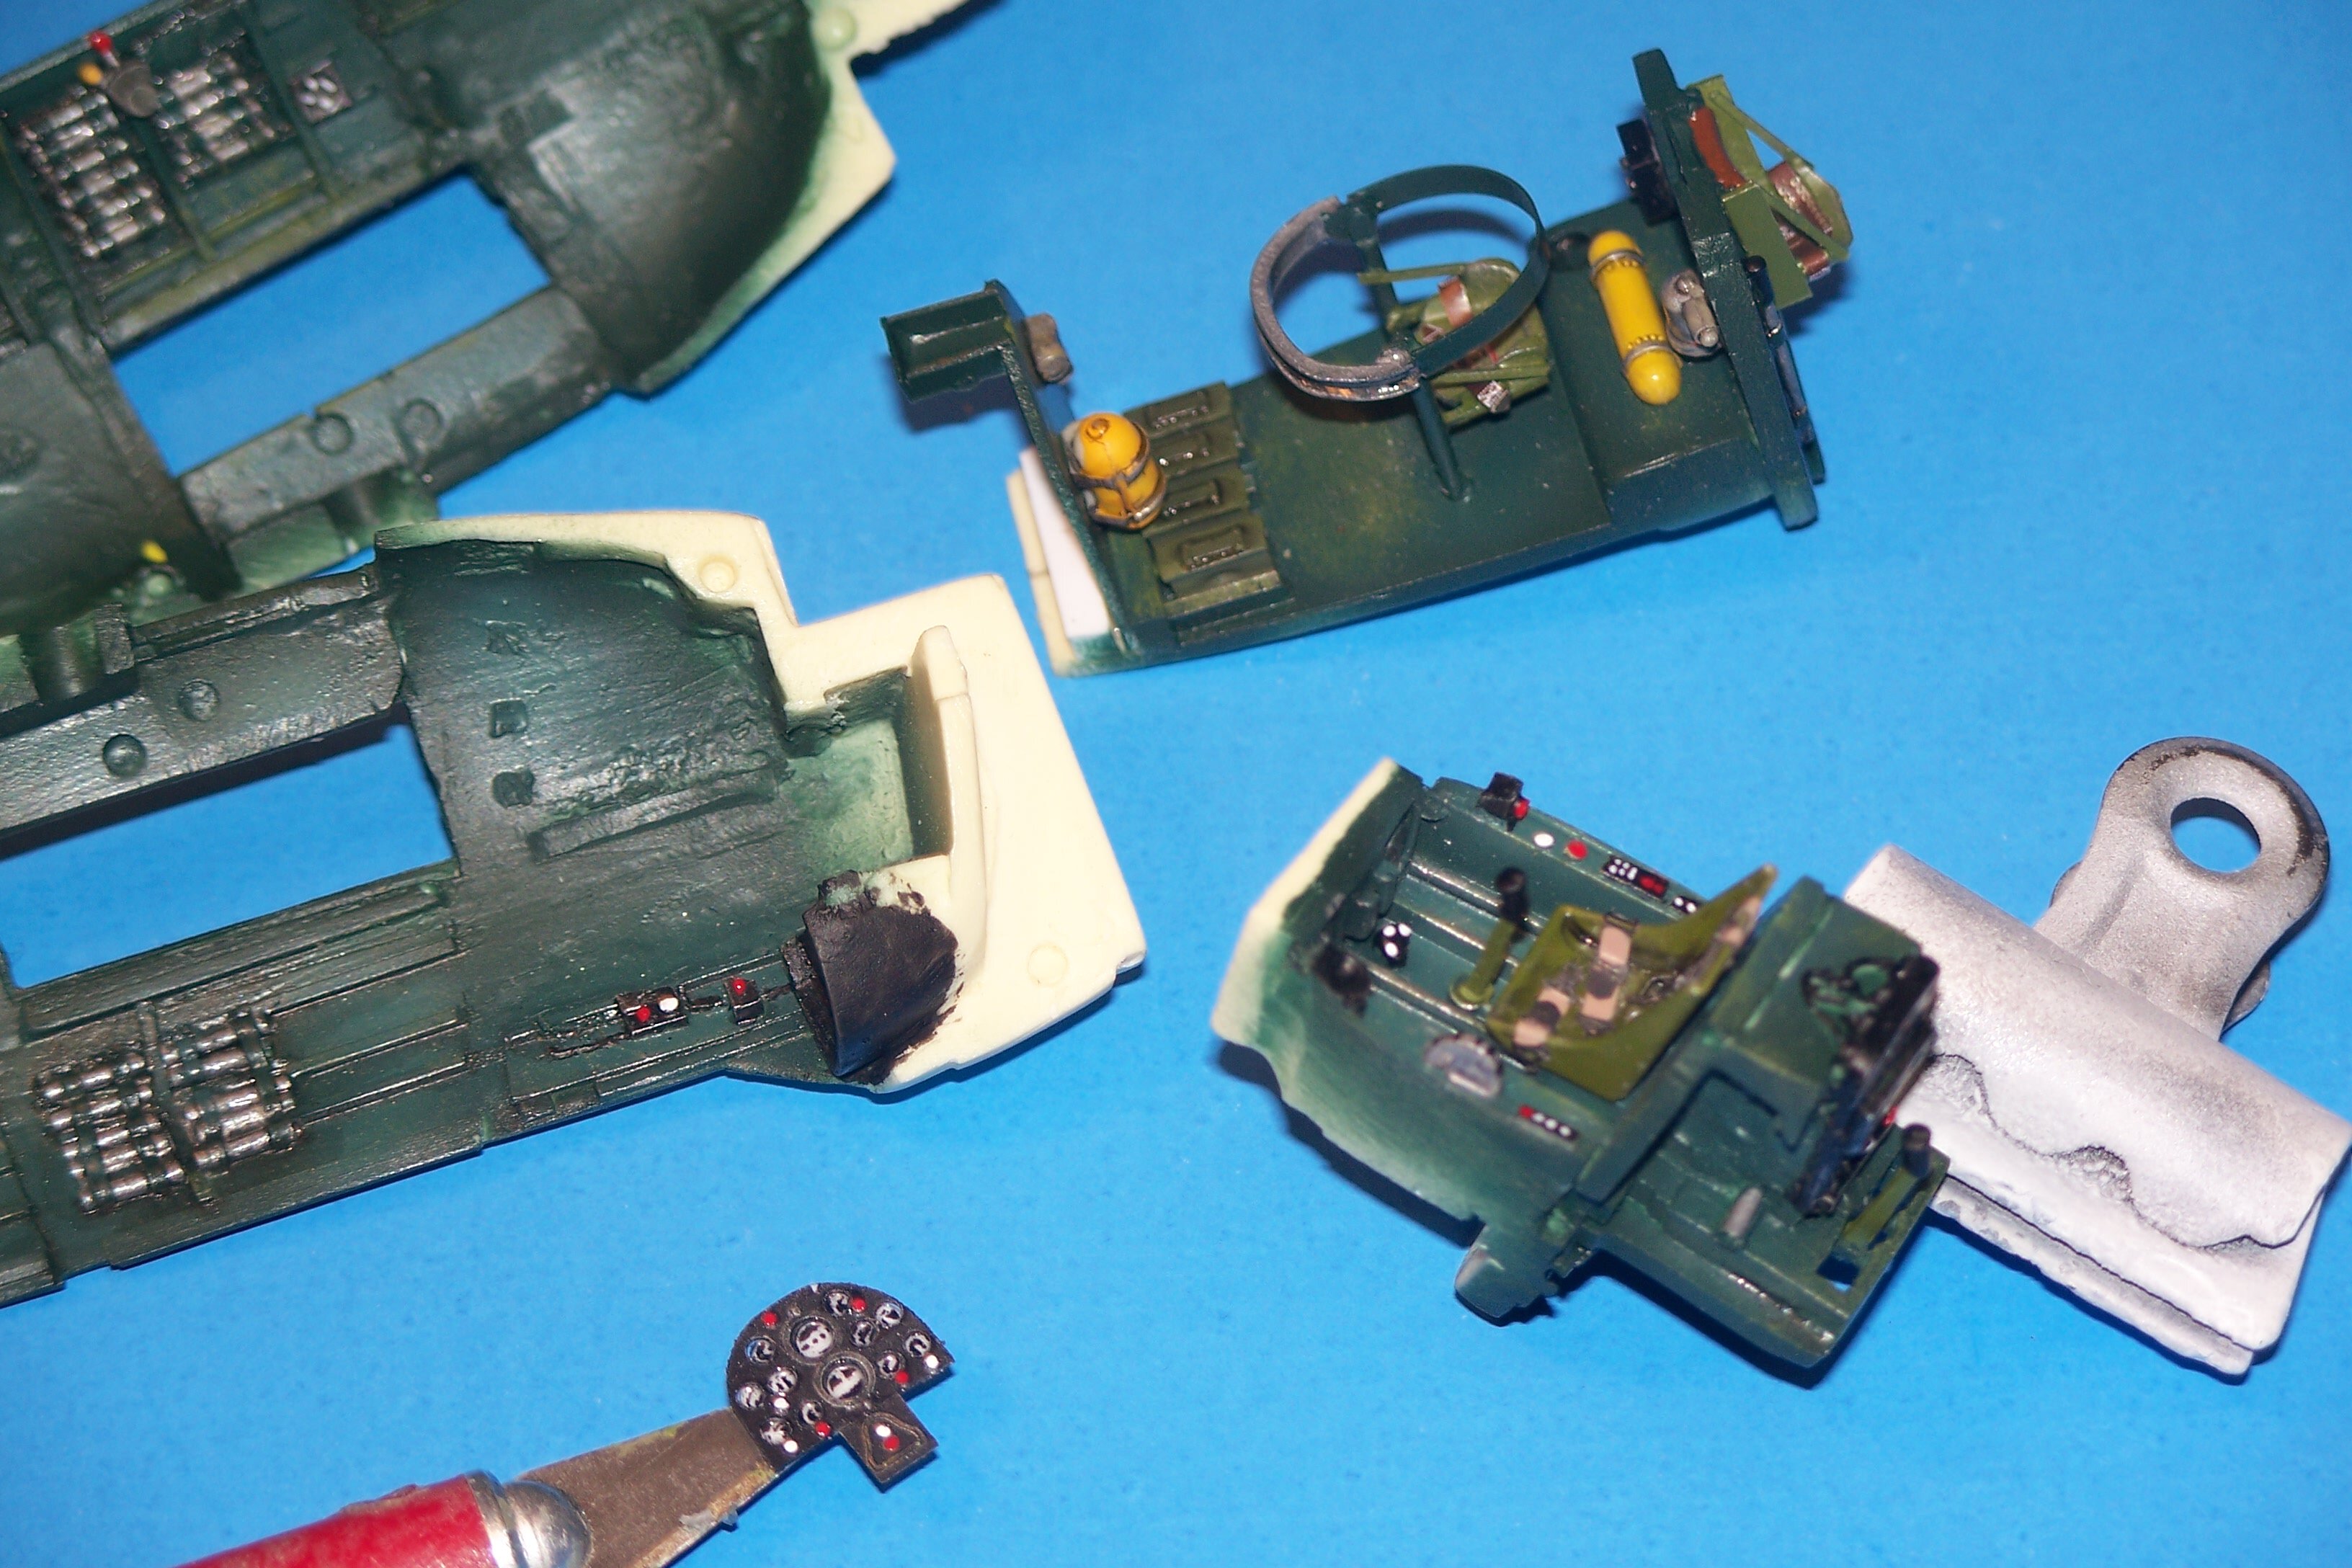
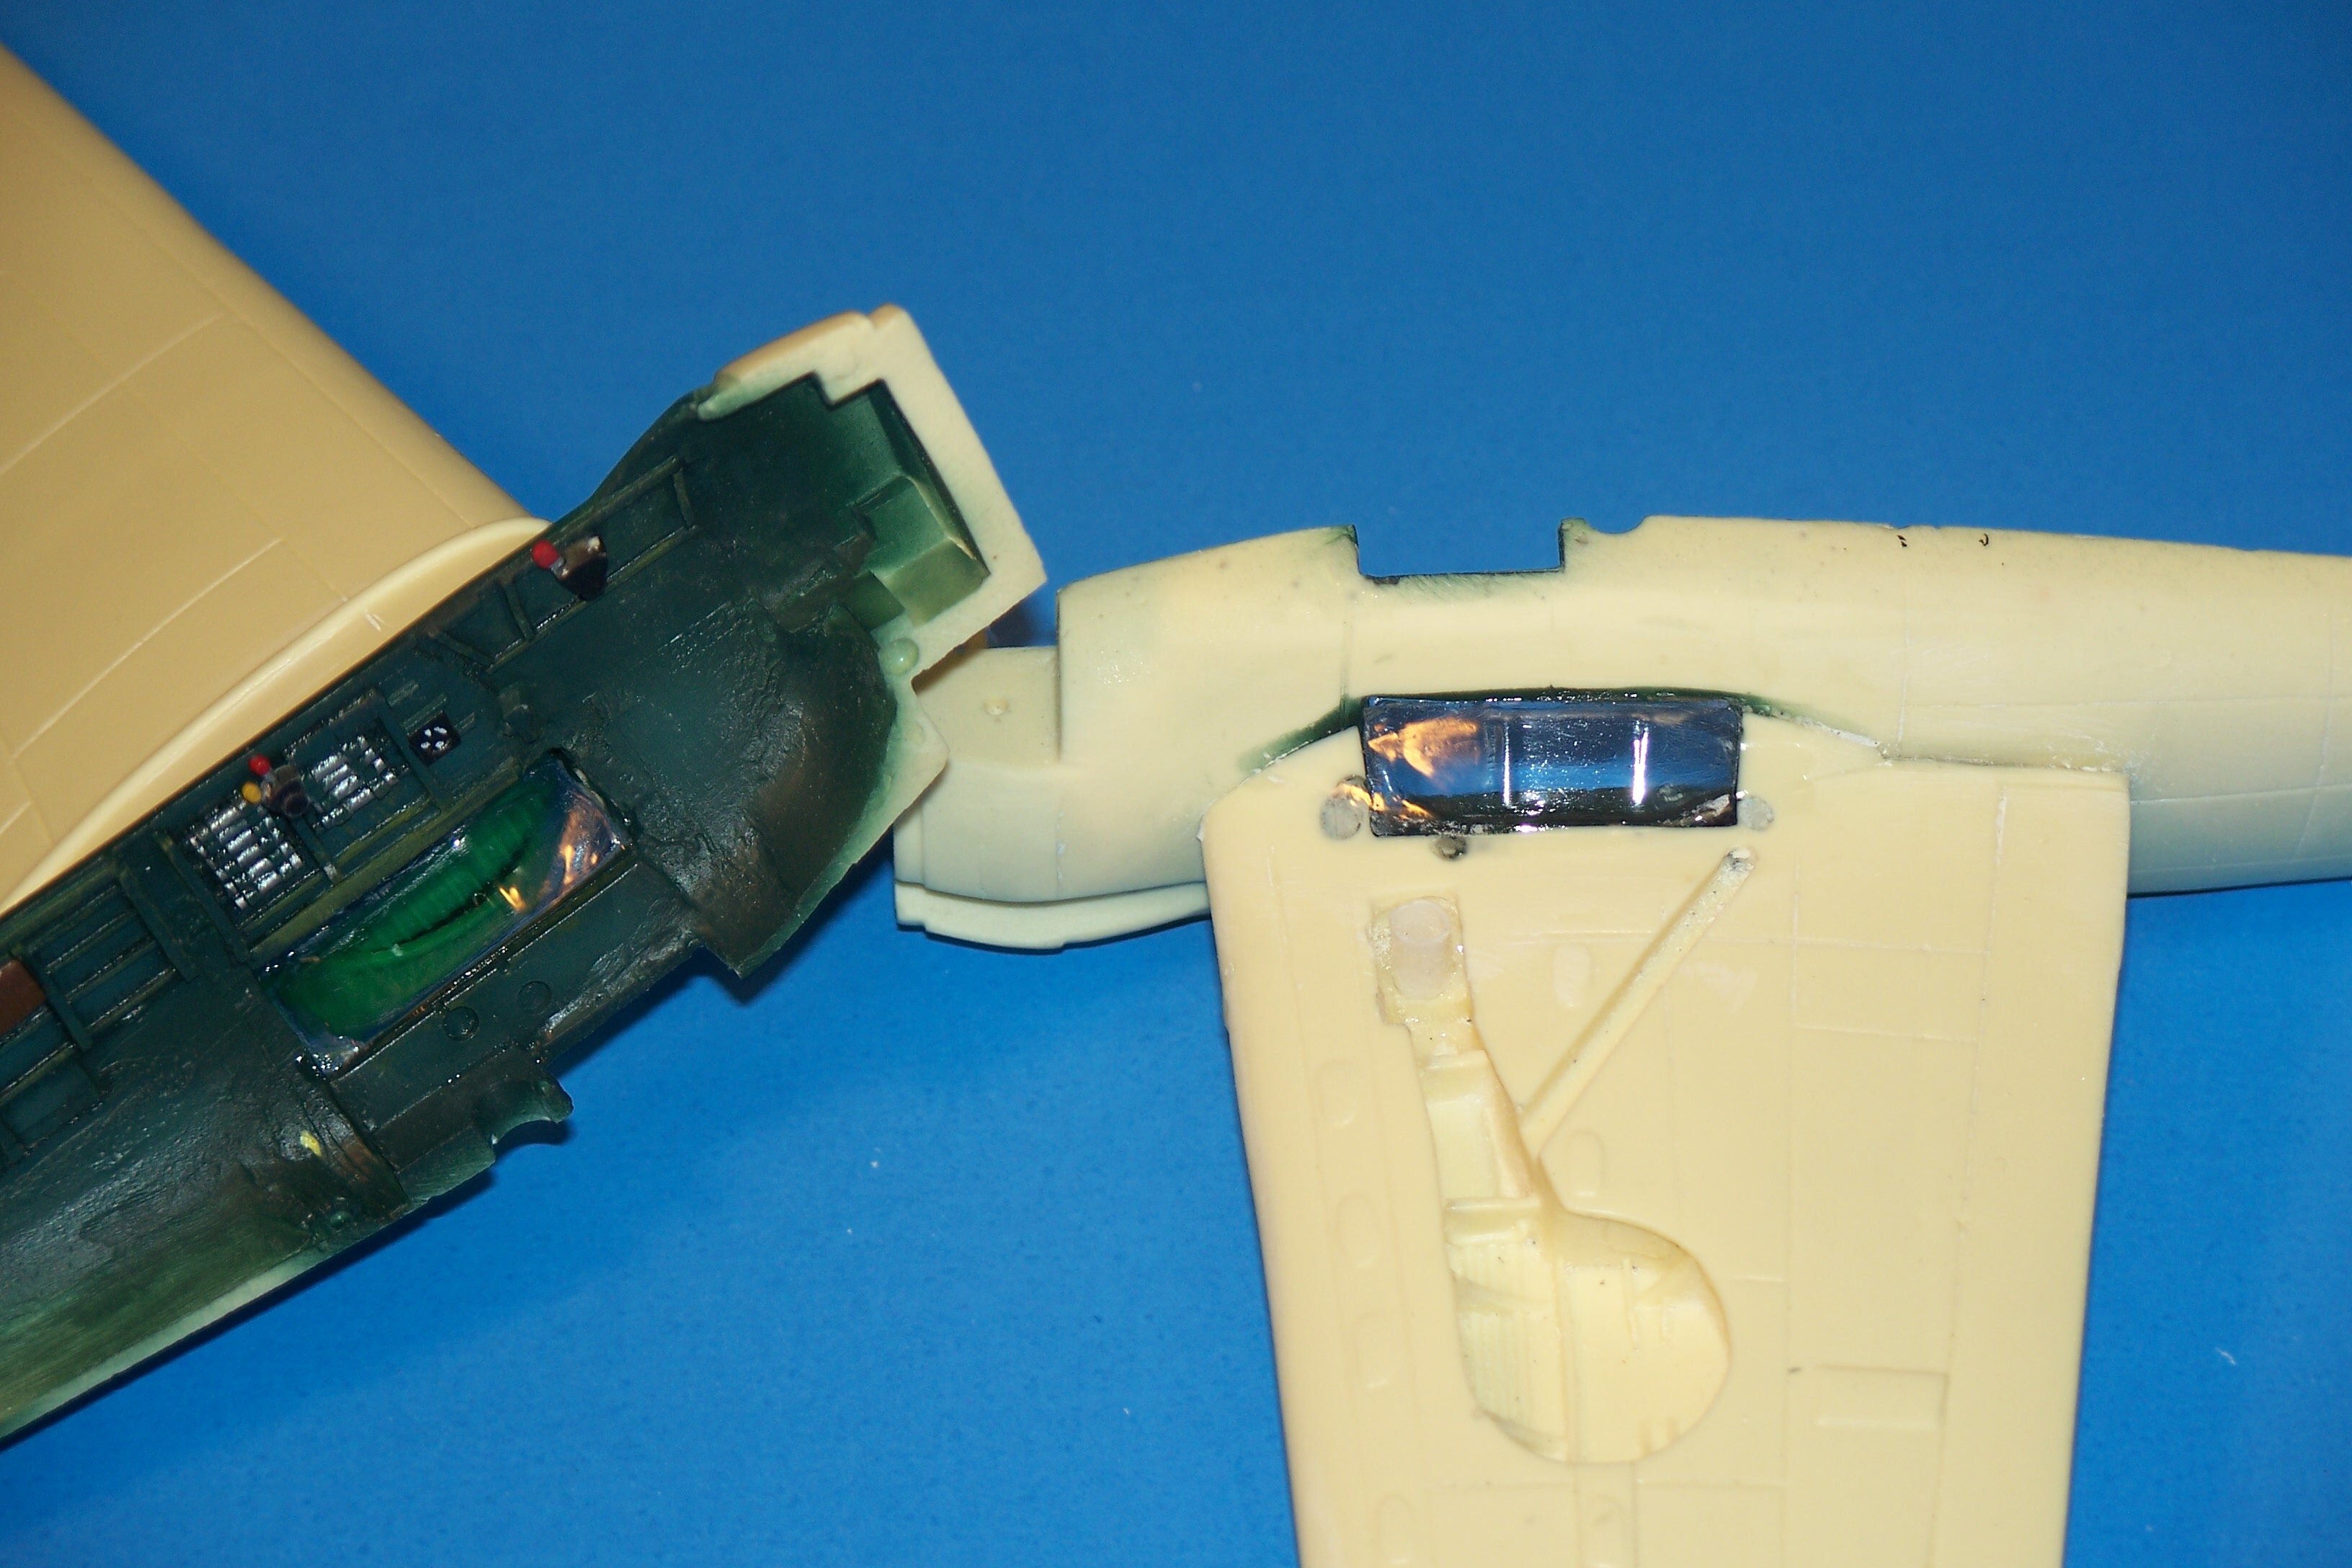
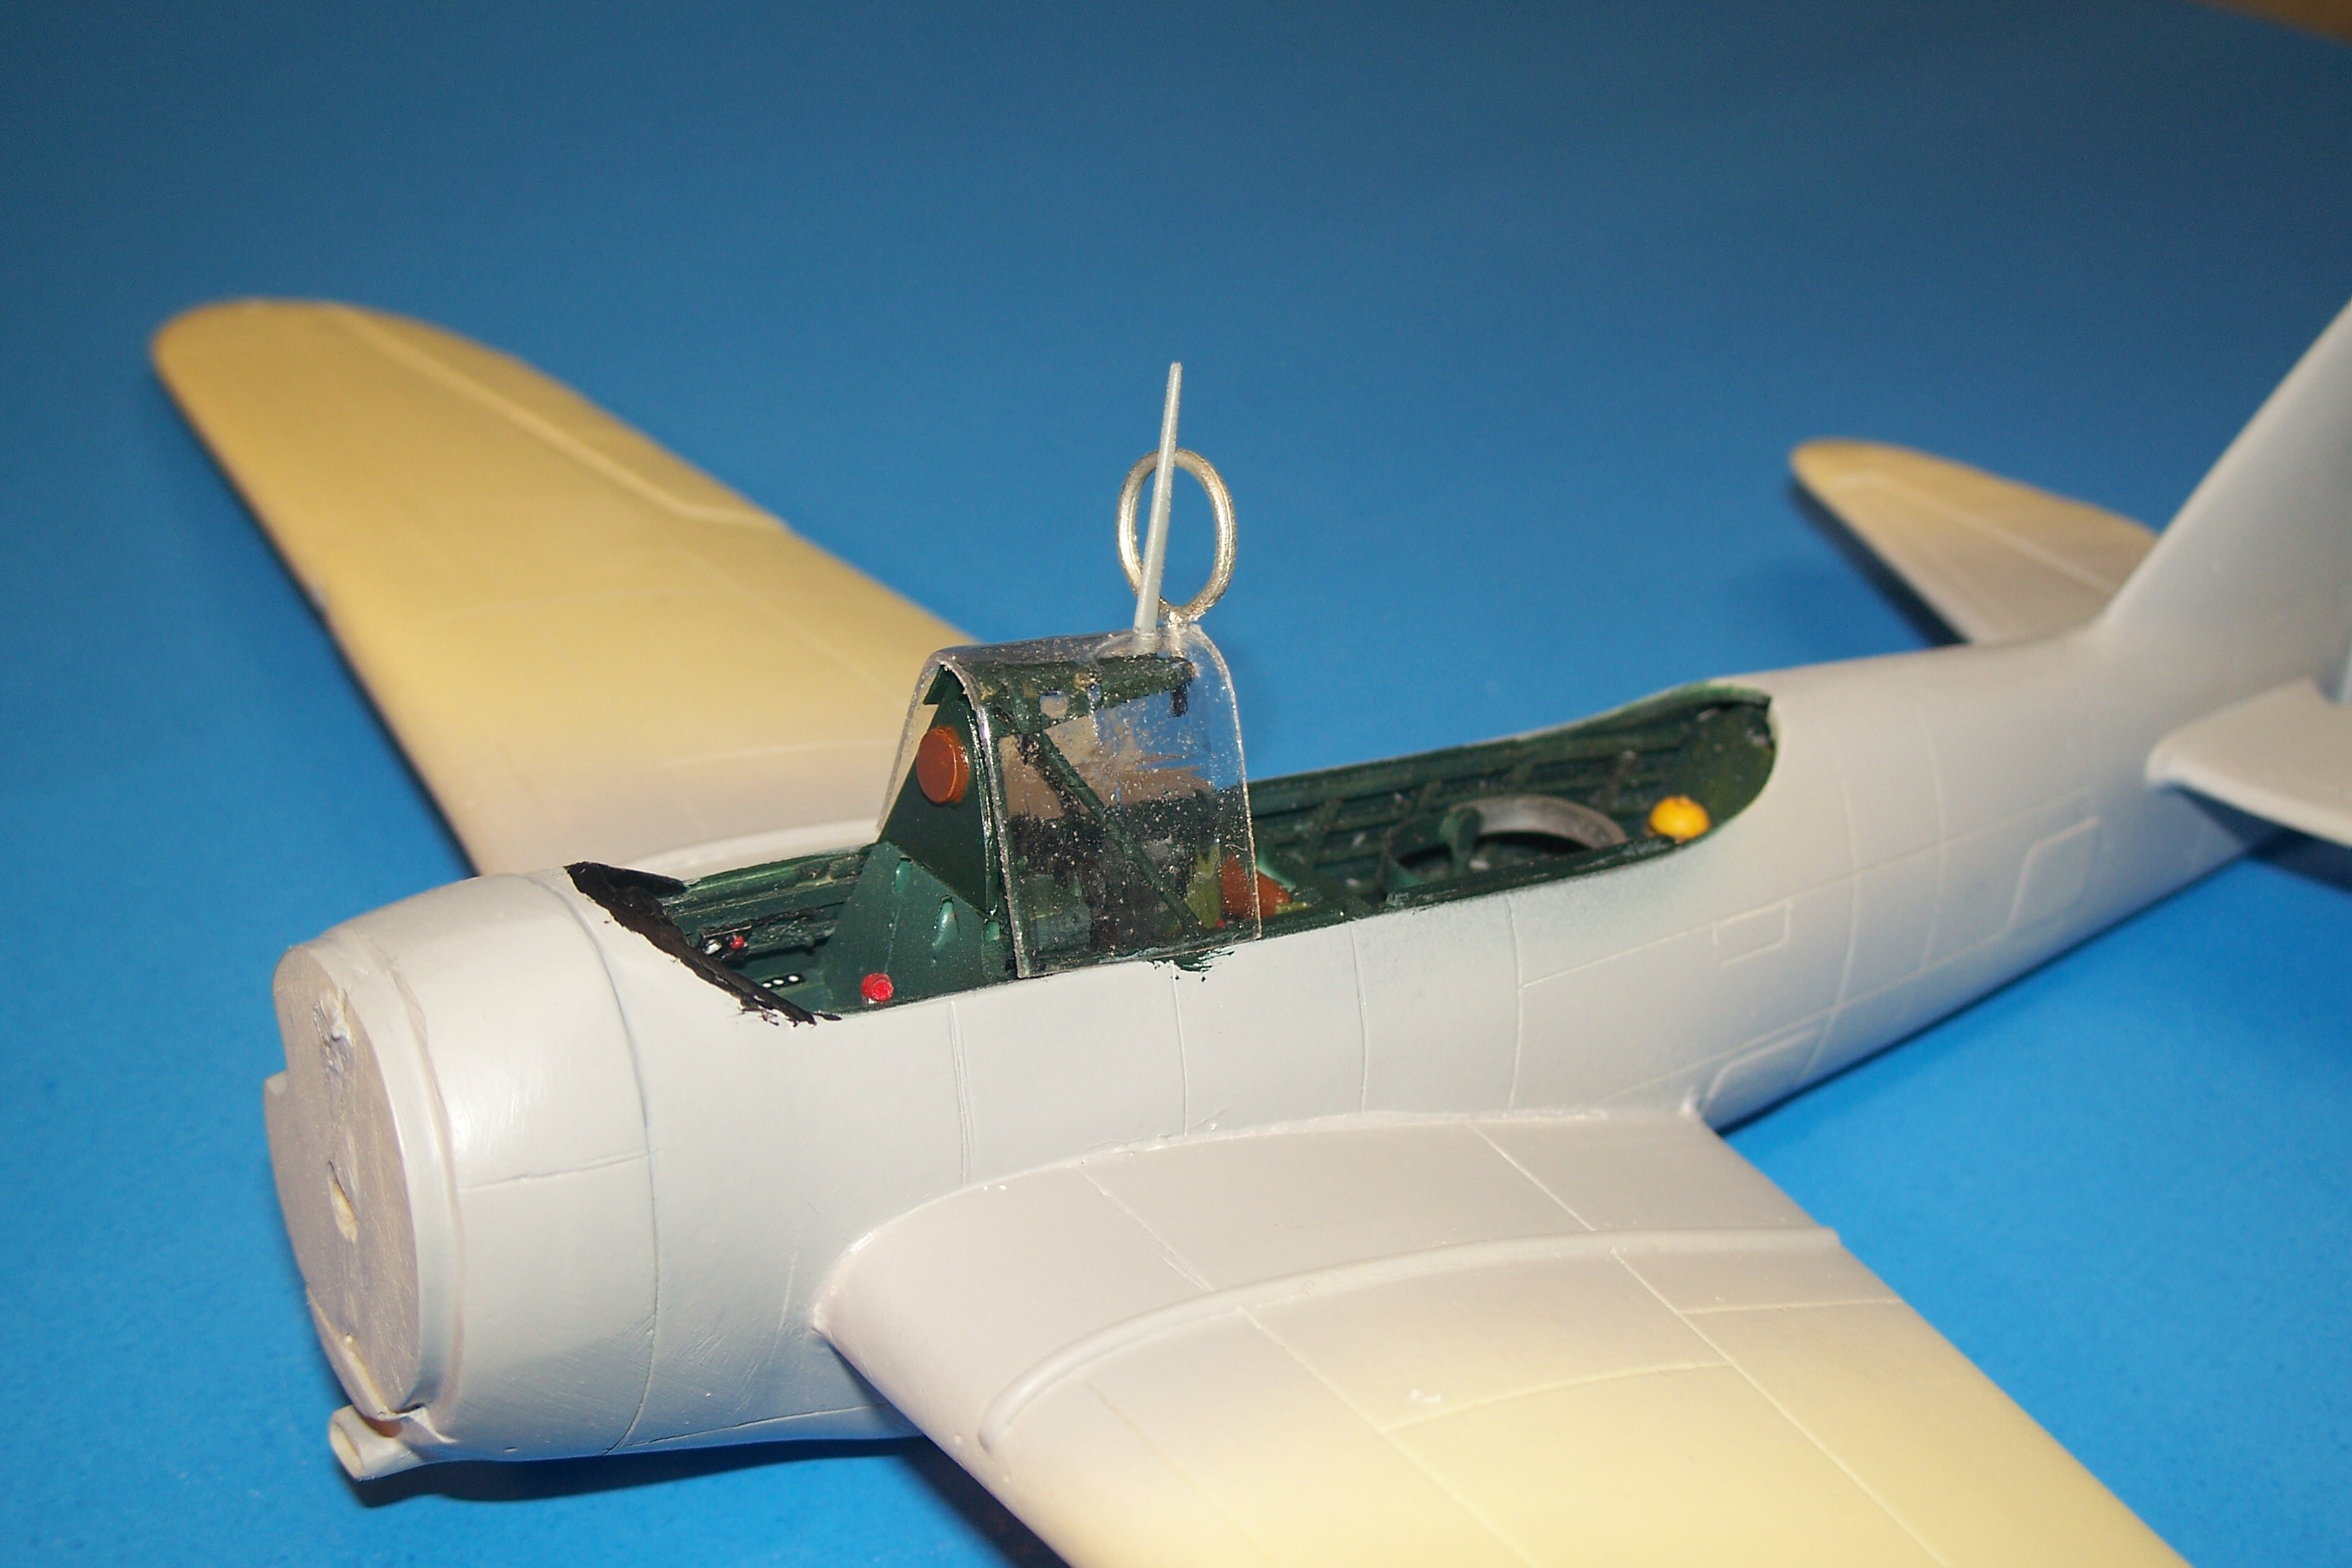
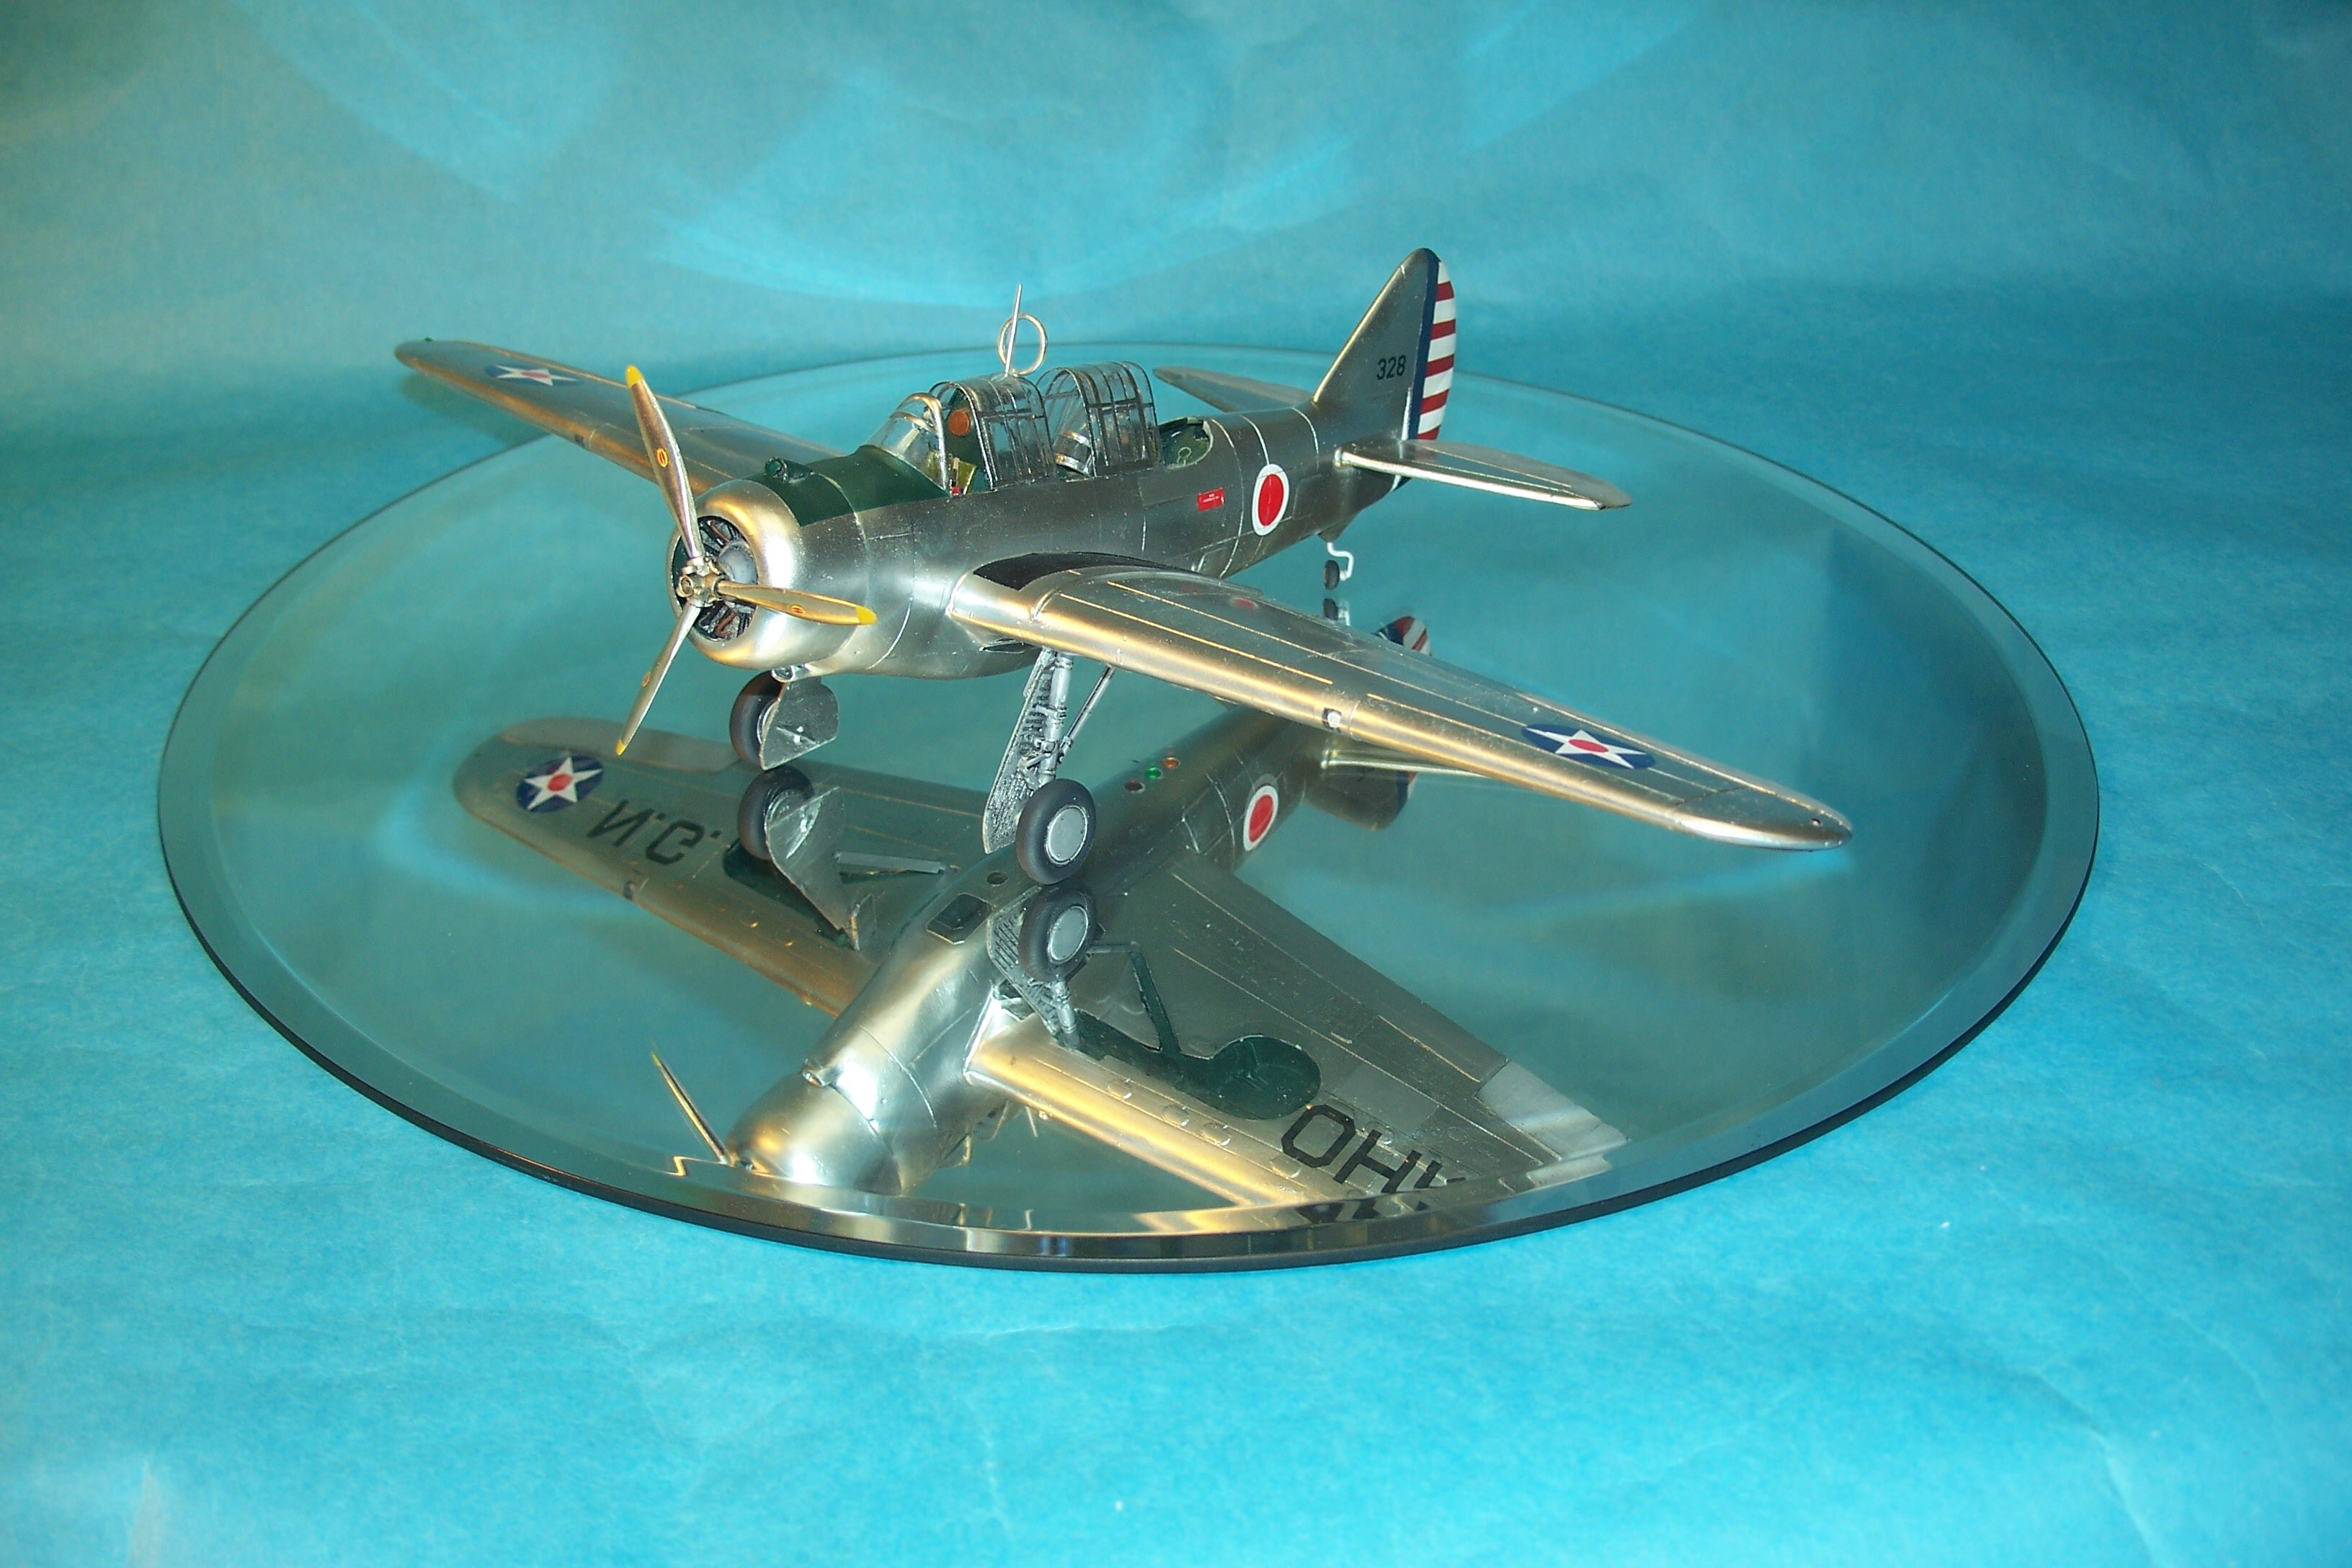
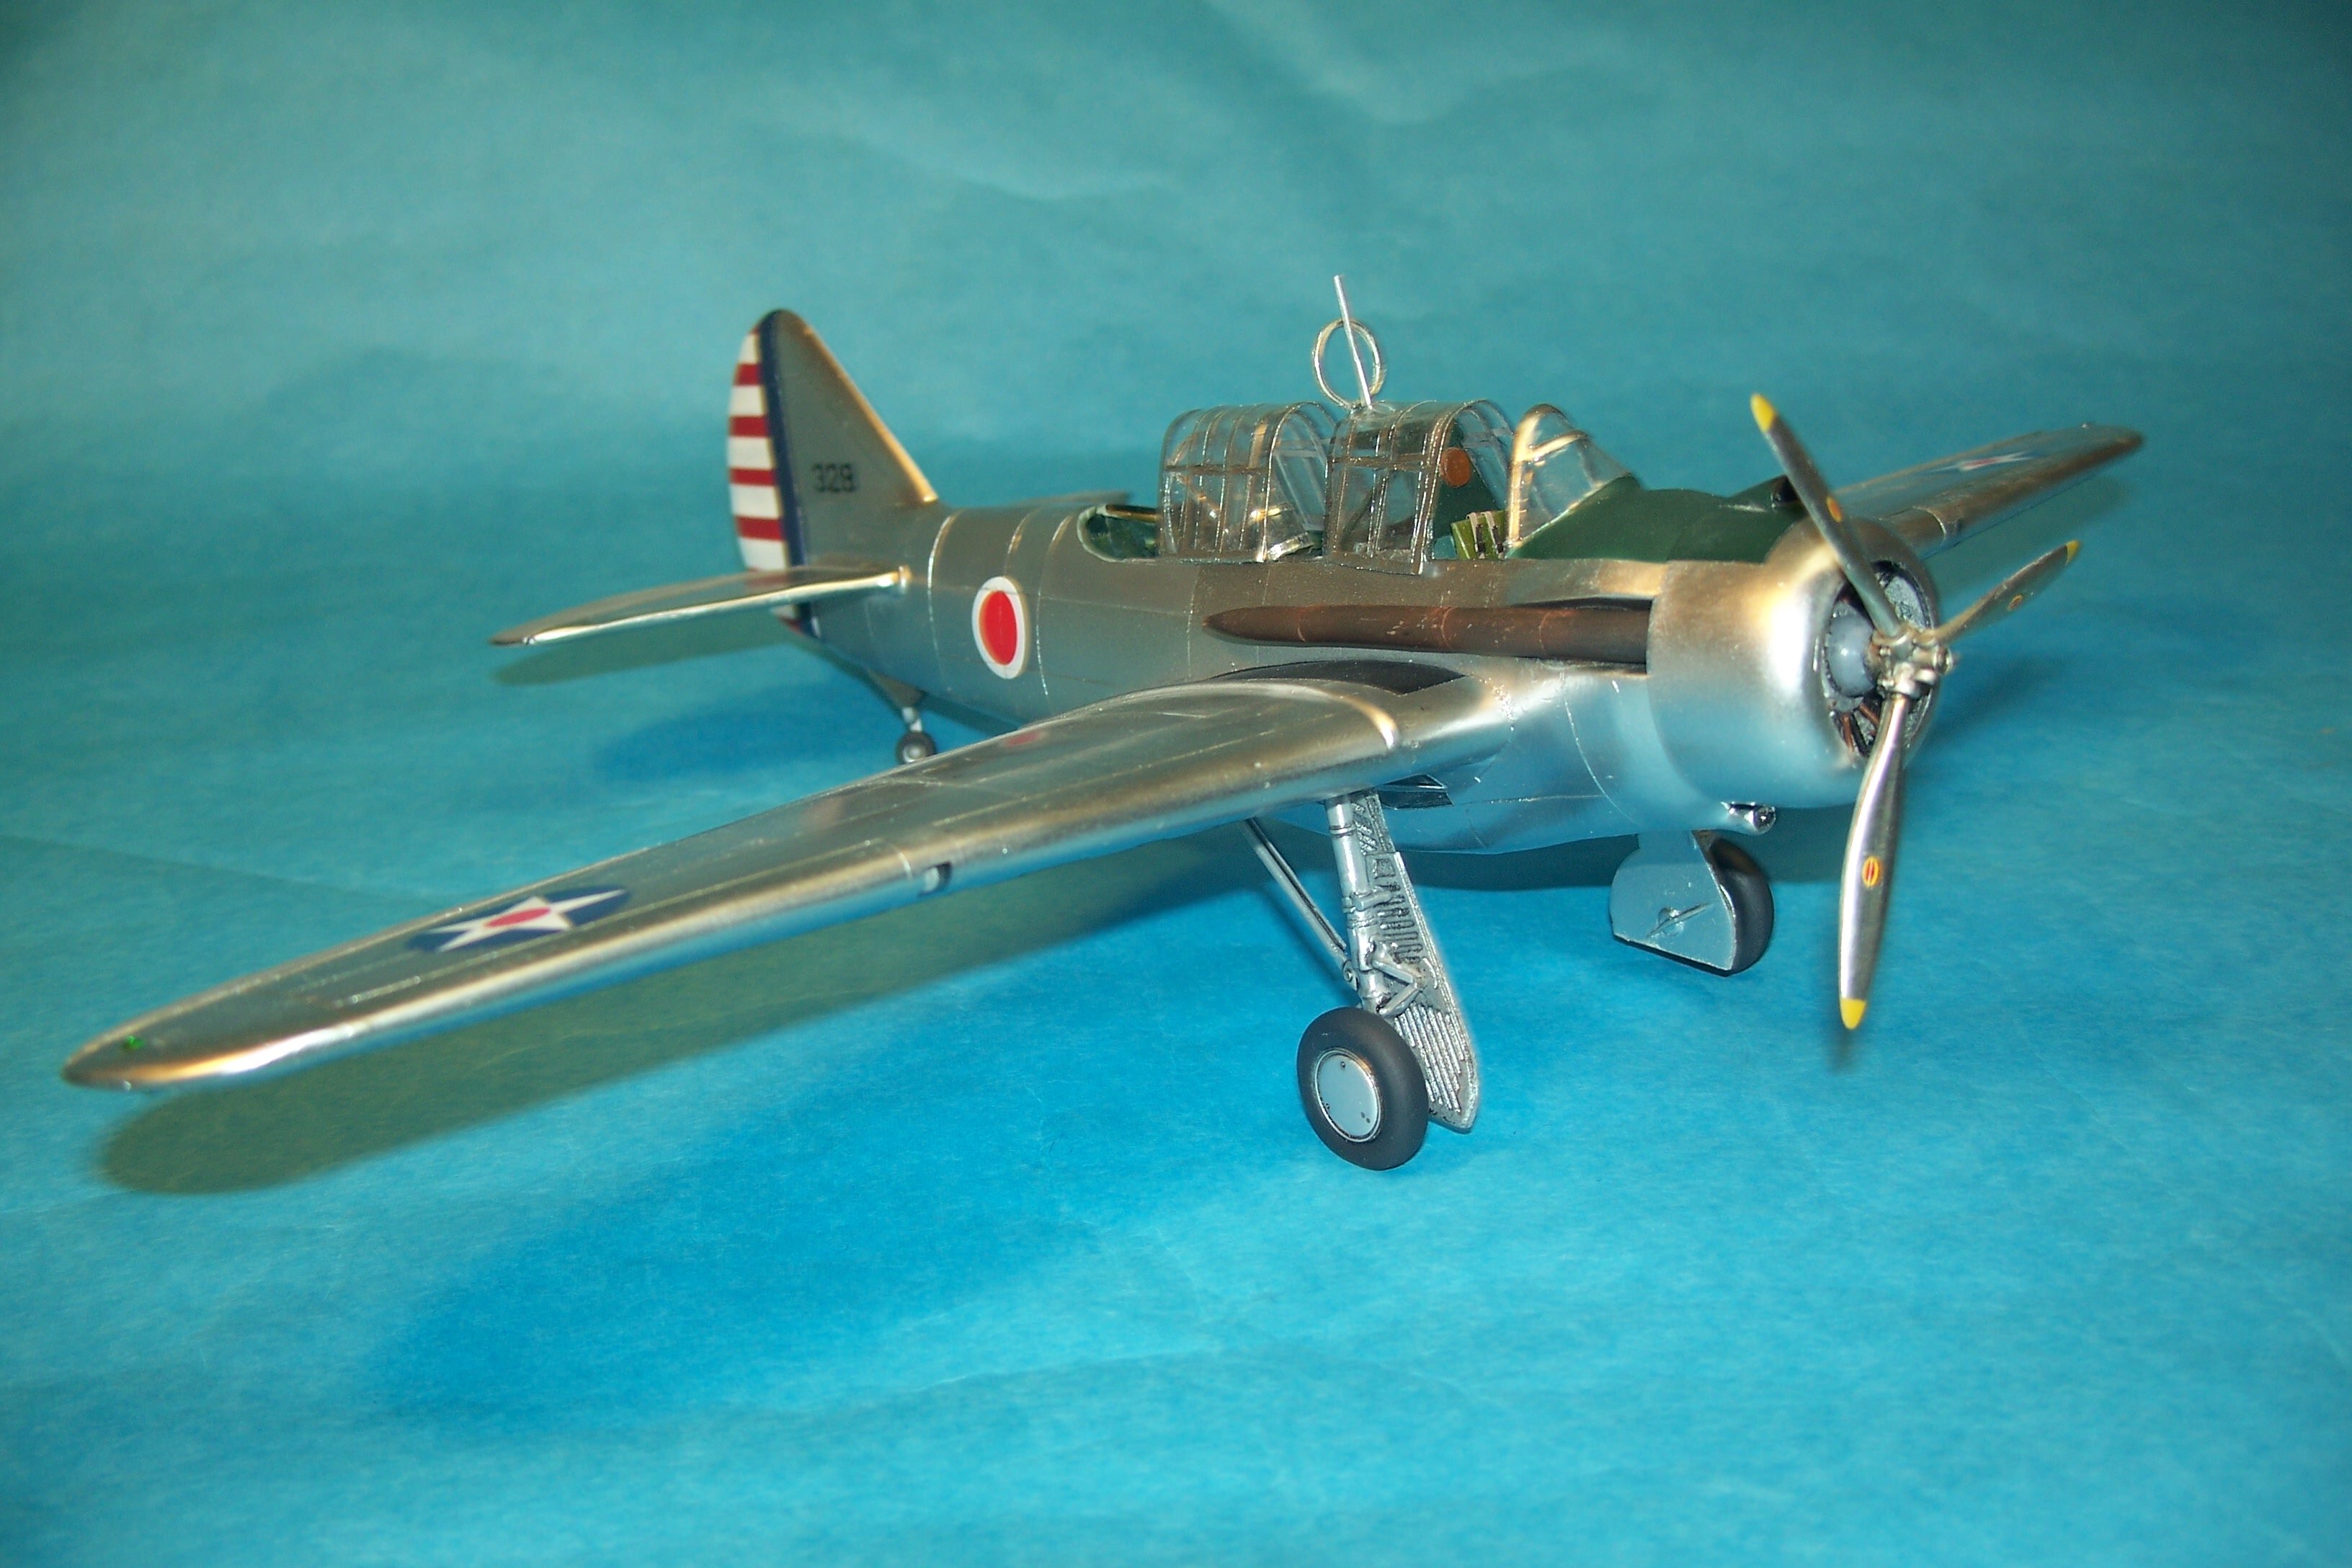
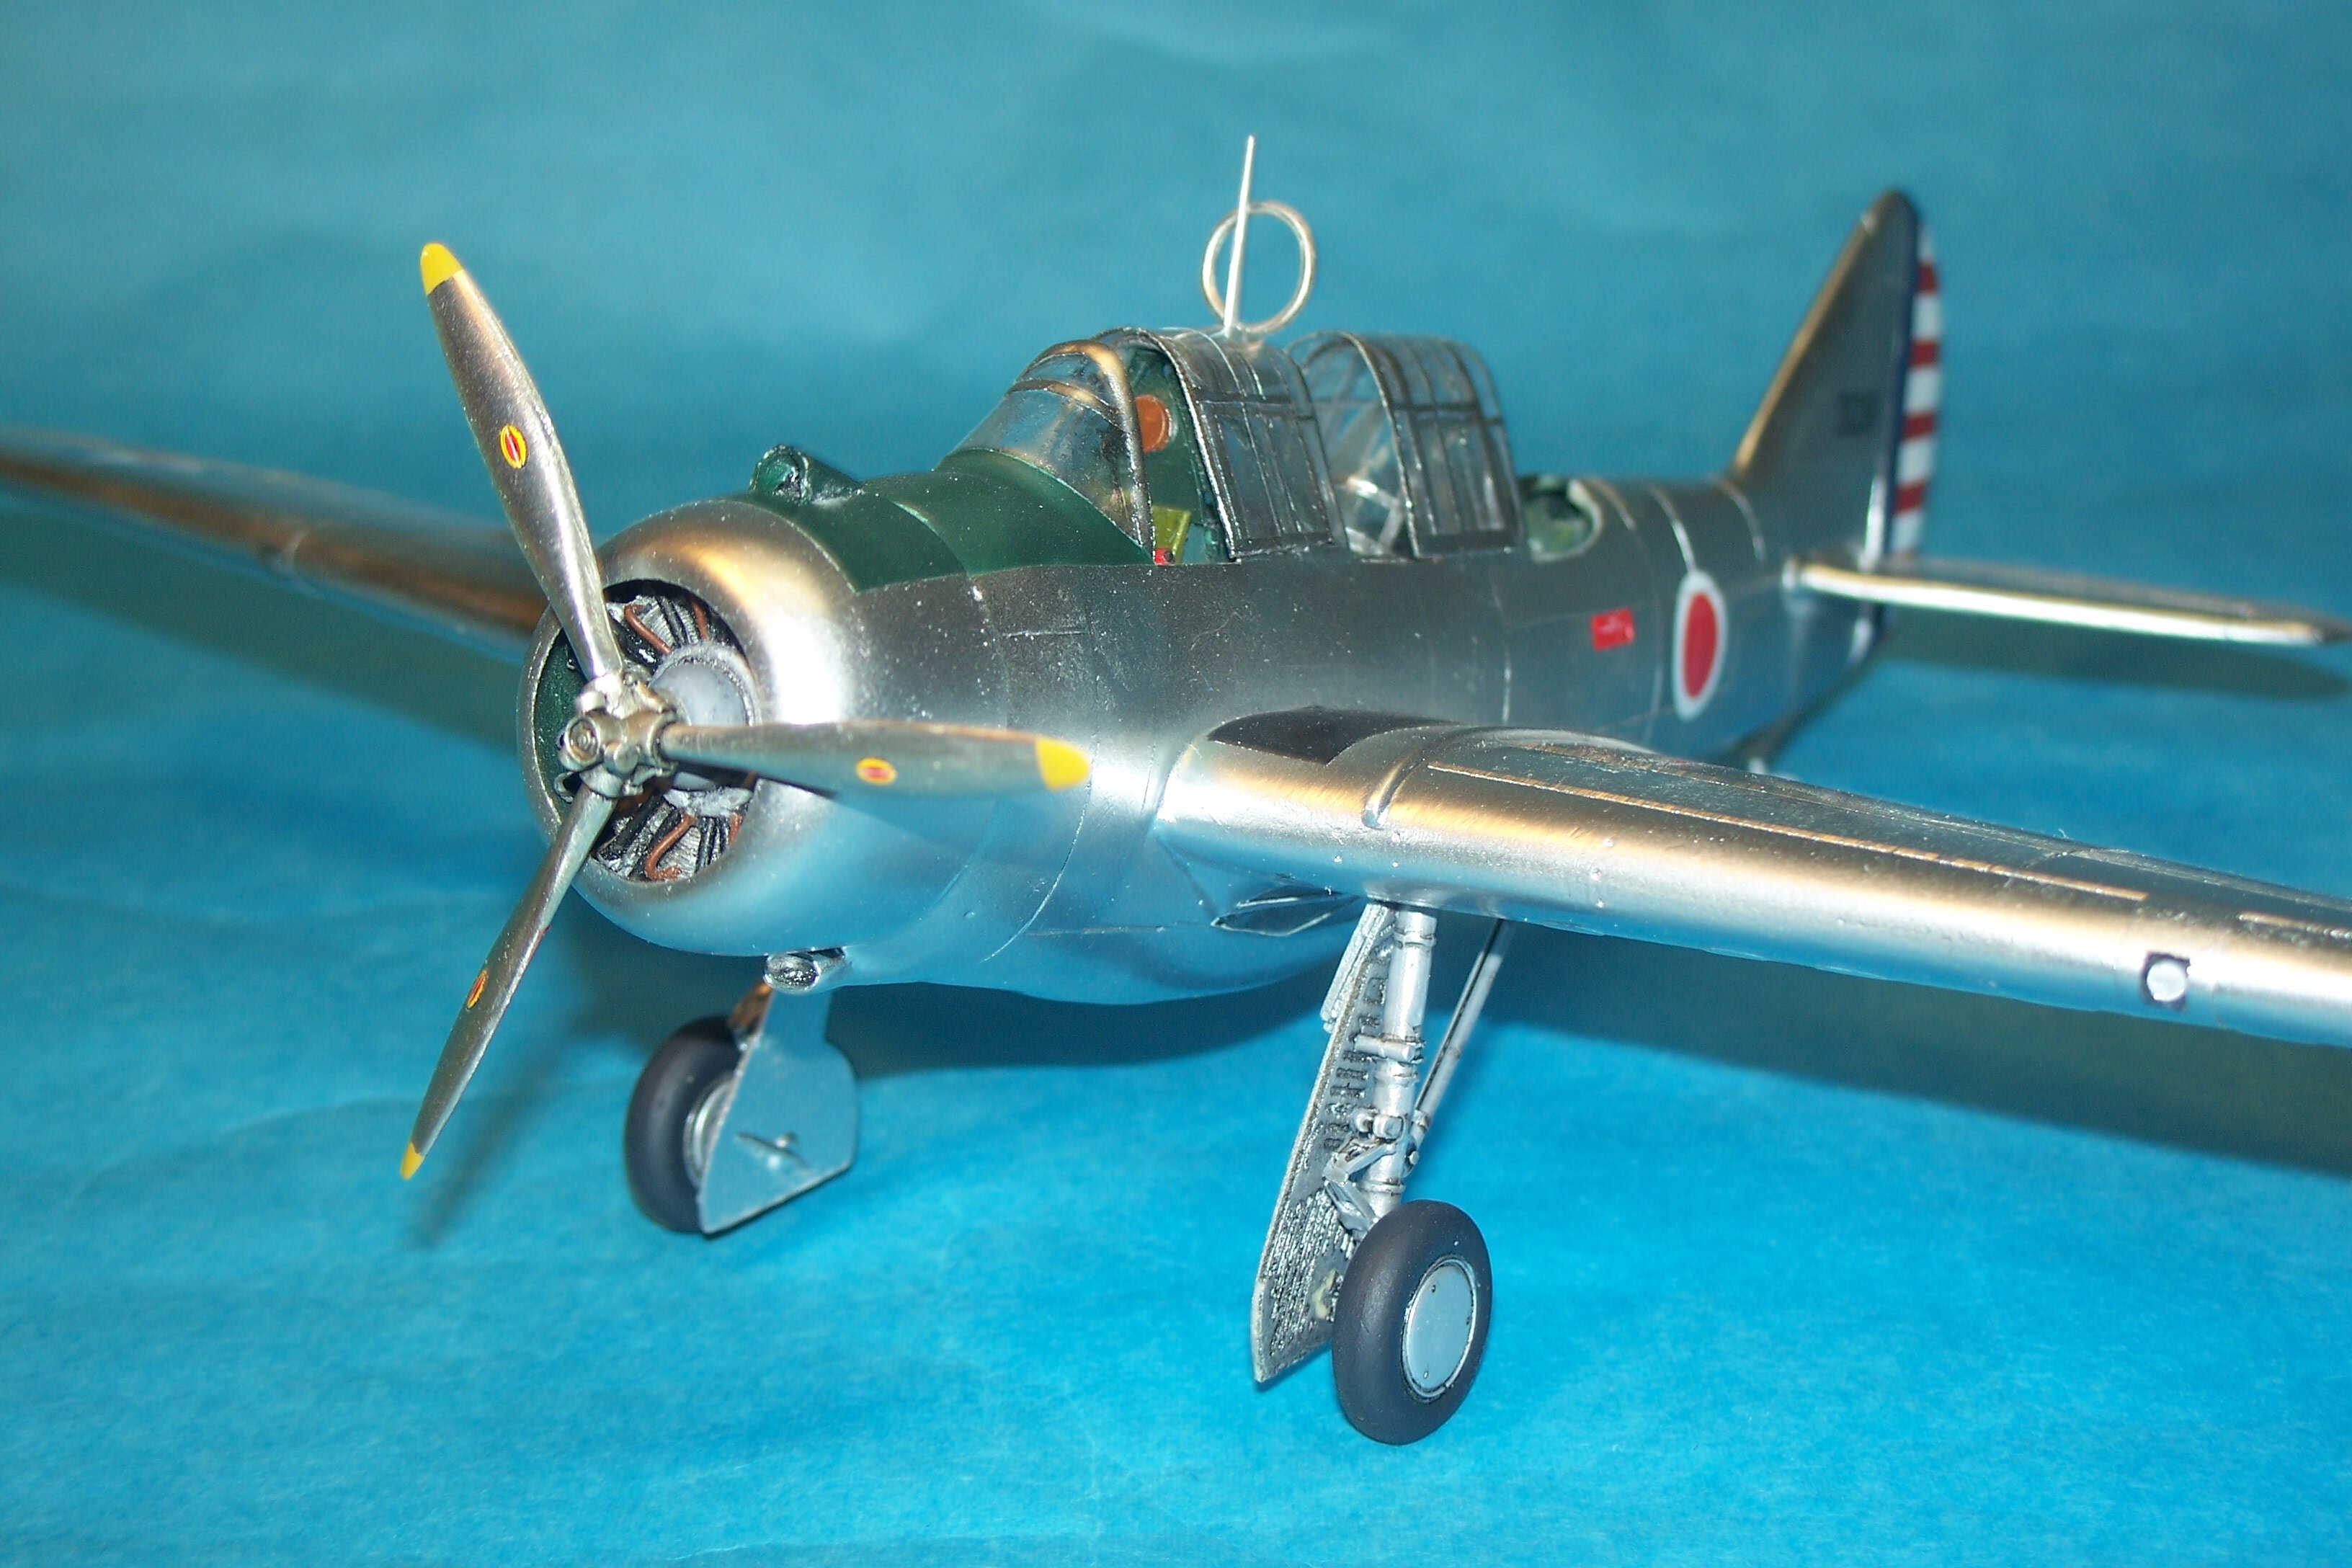
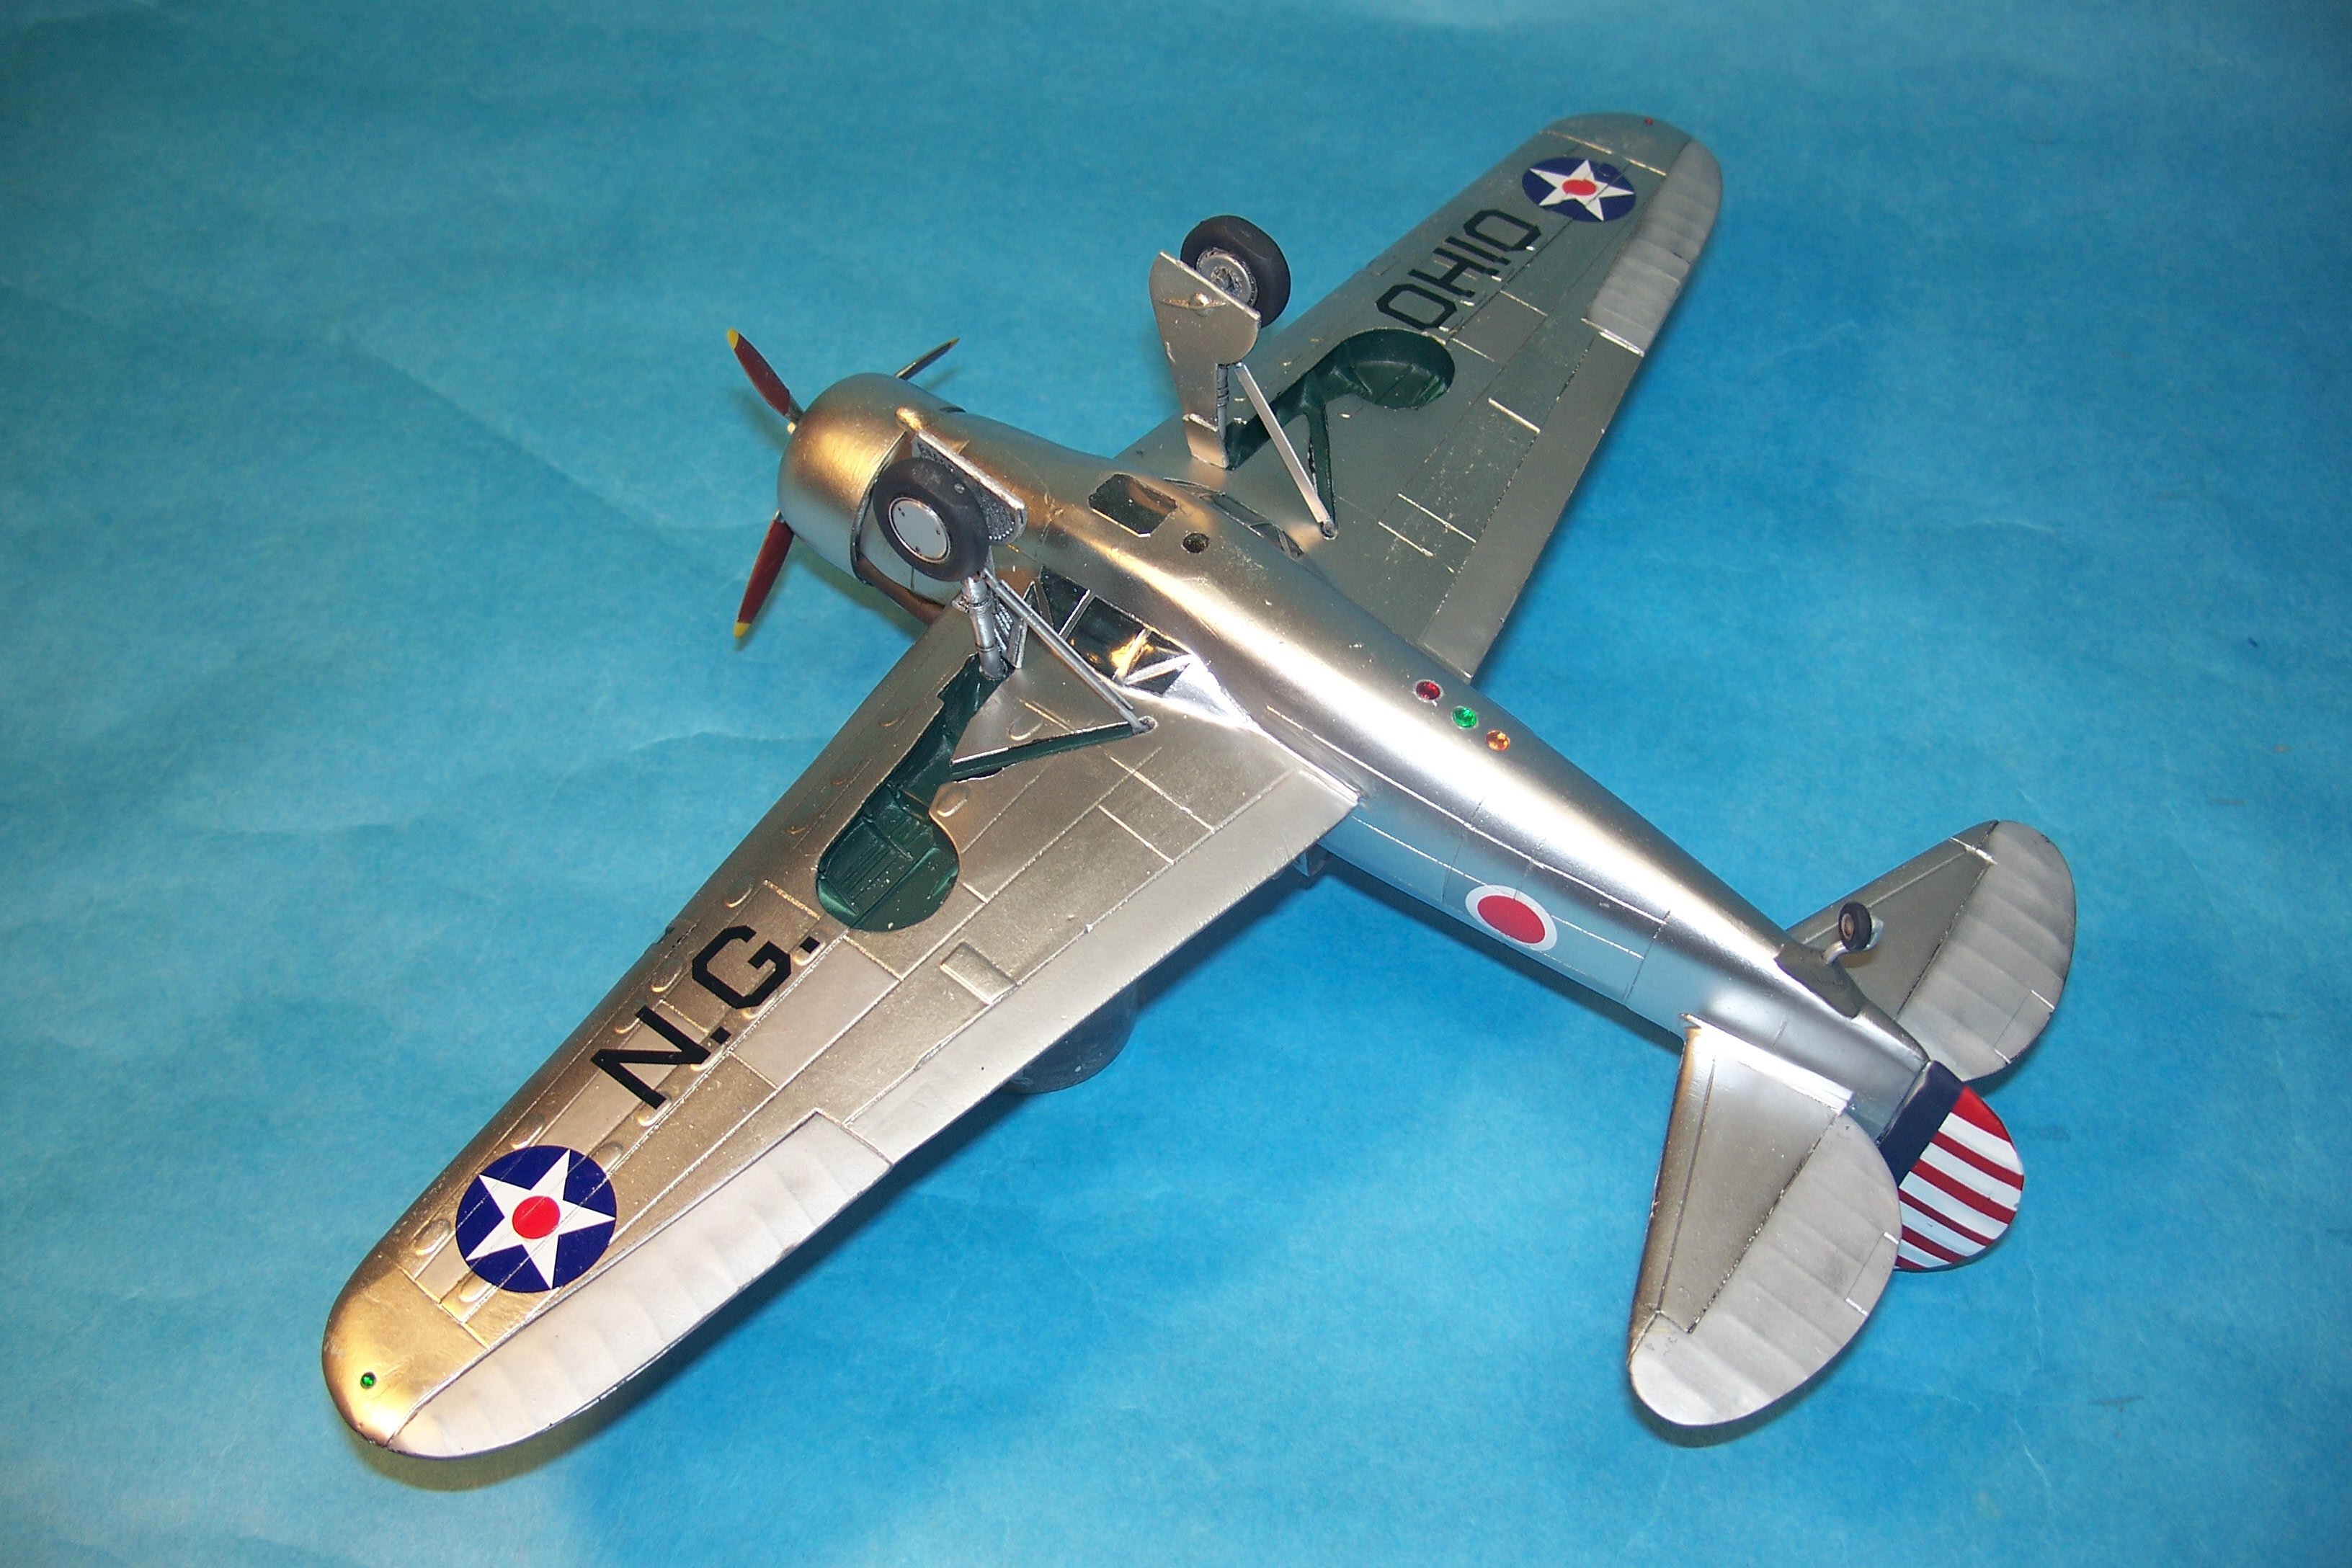
This is the 1/48 Lone Star resin O-47, a late 1930s/early WWII recon plane; and the only kit of this type ever in quarter scale. It's one of their best castings as far as detailing inside and out, and the solid cast wings fit like a glove to the fuselage (a good thing, as you'll see). It includes white metal detail parts for the landing gear, prop, antennas, and other assorted details. This is what you get in the box.... Here's the interior Here's the interior after painting. I did add a few assorted details from the spares box (ammo boxes, O2 cylinders, etc.) and scratchbuilt the rear gunner's seat/gun ring. I also scratchbuilt a new main instrument panel using the old "sandwich" method. The toughest part of the build was having to add and blend in the bottom side observation windows. Since they needed to be added to BOTH the fuselage and wings, each wing had to be glued in place BEFORE gluing the fuselage halves together; a first for me in almost 60yrs of building! Luckily, the wings slide onto the fuselage with excellent fit (improved with some test fitting and adjusting) and at the proper angles. This allowed the side windows to be glued from the inside and outside (for extra security) and also to fill inside and outside along the edges as needed. One thing missing from my kit was the rollover structure behind the pilot's seat that also serves as the antenna mounts. It was built up with tubing and sheet plastic. It can be seen under the vac canopy part, which is in place to drill the holes to test fit the antennas. The kit white metal prop blades were fine sanded and polished to be able to use them without painting, except for their tips and some maroon antiglare paint on their rears. The model was primed overall with Alclad Gloss Black enamel in prep for the NMF. The clear parts were actually painted silver before spraying the black so their interior frames would look silver. It took several rounds of primer to be sure everything was smooth enough for the NMF. I used Floquil Platinum Mist for this, since silver shows scratches very well and it was also the base paint for the "interior" canopy frames and the fabric covered flying surfaces. AK Extreme Metallics Aluminum was used for the base NMF with Alclad Aluminum panels added over it. The fabric covered ailerons and were painted Floquil Platinum Mist and flat coated. The antiglare panel (and interior) were painted with AK Bronze Green. The rudder striping was painted instead of using the provided decals. The kit comes with markings for 6 or more O-47s, including war game crosses. I did an Ohio National Guard bird. Here's the rest of the finished pics.... Critiques, questions, and comments welcome, as always! Gil
-
Phenomenal looking work, even without the lighting! Gil
-
WOW! Where do I begin? Even if this was one of the Robert's Models releases with a few white metal detail parts included that is an ASTOUNDING build! And it's not enough to just build it, but you drooped the flaps and the stabilizers too. I'm assuming the beaching gear is all scratchbuilt and it looks quite the part. But I think the thing that impresses me the most is all of the glass work is superb. Did you have to vack new clear parts yourself? I know the Combat stuff is seldom as nice looking as what's on your model. As a fellow vacuform masochist, I'm standing and applauding! BRAVO! Gil
-
Those look useful and convenient for anyone who's tired of using old coffee cups, cigar boxes and such. Thanks for the tip! Gil
-
The way you have them posed looks good as they seem to be interacting, especially if you have it titled as you suggested. The figures look good and you nailed those green aviators! Since you say they're not quite done my guess is you'll be adding a few highlights/shadows to their uniforms, hands, and faces; though they actually look good for display as is. The only other idea, since you're setting it in a situation to be looked at; you don't have to go with grass if you don't like its look. If you put a couple of stanchions with a rope between them and add a small info sign you can make a museum floor. Or, you can make a short back wall to suggest it's in a hangar and put it on a concrete floor. In any case, unless you plan to compete with it, I wouldn't get too hung up on how "scale" the grass is or what surface you set it on. Gil
-
Nice work! Gil
-
Looks great! I'd proudly sit it on my shelf! Gil
-
This week at MADDOG 1/48 CANADIAN SUBSIDIARY plant ( WEEK # 14)!
ghodges replied to Jmarc's topic in Photos: On the Bench
FLABBERGASTED is the only term that comes to mind seeing the extent of all of your work, including all of the extra scratchbuilt details and accessories! It seems that the Duke now has a rival in the Marquis of Modeling! 🙂 Gil -
That looks exquisite! I'm looking forward to your getting some repairs done and then some pics of it in the upright position. I'm also interested in what method you used to make the airship body.... was it thin sheet plastic over framing, or what? Sure looks authentic! Gil
-
Looks good! The wood framing nicely sets off the interior. Gil