Roktman
-
Posts
1,047 -
Joined
-
Last visited
-
Days Won
78
Content Type
Profiles
Forums
Events
Everything posted by Roktman
-

So, who wants to host in 2024, 2025?
Roktman replied to philp's topic in About the IPMS/USA National Convention
Sad to hear. I haven’t done it in years but I loved doing a Rte. 66 driving tour starting in Albuquerque by Old Town, then thru NM and AZ… -
Cool shopping results. Glad too that Brookhurst is still there. A friend and I used to go to Brookhurst when I visited him in OC. So many other places are disappearing, glad they're still there.
-
Thanks! Agreed Miguel Zuppo does a terrific job with his sculpts.
-
Thank you!
-
I was glad when this kit came along and I was able to add to my classic Hollywood figures and busts. This is Marlon Brando as seen in On The Waterfront. Looking for any color image of the character, I only came up with the colorized movie stills, and of course he's not wearing the same jacket. So I did my best to assign a color to the different hues of B&W. Here's a pic of Brando from the movie. The kit is 1:4 scale and Miguel Zuppo once again does a very nice rendition of the character.

-
Terrific job!
-
Too cool! 👍
-
Very nicely done!
-
Thanks. You're absolutely correct. Misspelling corrected. 😉
-
Thanks! Yes, it is 1:72 scale. I too had no idea this was a real plane in the beginning, and just figured it was one of those "Never made if off the drawing board" concepts.
-
I picked up this RS Models kit a while ago, just because it fit my idea of an odd ball plane. It wasn't mentioned on the box that it was a Northrop design until I started to research. The military, toward the end of WW2 felt they needed a plane that could ram enemy planes similar to what Germany was rumored to be designing. Northrop came up with this design complete with magnesium wings to help the plane survive the hit. One was built and on it's first trial the XP-79B made its first flight on September 12, 1945, however, 15 minutes into the flight control was lost for unknown reasons while performing a slow roll. The nose dropped, and the roll continued with the aircraft impacting the ground in a vertical spin. There are two accounts of the end. One that test pilot Harry Crosby attempted to bail out but was struck by the aircraft and died. The other that in the spin, with such forces, he was unable to open the door open to bail out. The problem was identified, and Northrop was ready for prototype #2, but they were told with the war over, there was no longer a need for a Flying Ram. The pros were the majority of the plane went together very easily. The cons were that they instructions were just exploded type illustrations and determining exactly where the part goes was difficult. Also not mentioned was that despite the plane having 4 wheels, it's still a tail sitter and needs weights up front. My biggest goof was having the Tamiya Extra Thin spill out of the joint and getting a finger print on the clear canopy. Hours of sanding later the print was gone, but a cloudy area remained. So I took some Vallejo Smoke paint and some Future to create a tinted canopy. I made it dark enuff to get rid of the cloudy area, but it's also dark enuff that all the interior is just about invisible. 😞 I also made a little piece of tarmac so I could glue the model to the base. After that I called it done. Thanks for looking.
-
Another cool looking vehicle. But I gotta admit the art work wins the prize. The tank coming out of the dark forest into a bright field really makes it. OK sorry about Jonesing for the box... 😛
-
Happy belated birthday, Duke! Haven't seen the collection since AZ, you're really adding to it! 🙂
-
Thanks guys! To my limited knowledge, it never really got passe the mock-up stage, but yes it has a lot of the characteristics of today's stealth planes. Maybe a fan of old time prototypes was in the designing dept. of these modern aircraft offices? 😉
-
This latest kit is another to add to my prototypes/experimental/ or never was planes. It's the Convair KingFish in 1:144 scale from Fantastic Plastic. The kit comes in 29 resin parts, and is patterned and cast by Anigrand Craftwork[1]. Good to see they they are sort of still in business. In 1957 there was a contest to replace the U2 spy plane. The contest came down to Convair's KingFish and Lockheed's A-12, which would eventually became the SR-71. Giving this little piece of the story away, you know how this ends. Work on the KingFish continued for a few more months afterward, but when the money ran out, the project was cancelled. Thanks for looking. An abbreviated build log is here: http://kevtk.blogspot.com/2023/03/the-1144-convair-kingfish.html
-
VERY nice set of models for the year. I'll be taking an added interest in the build log of your XP-79B as it's on my bench now. 😉
-
That's a very nice job! I'm taking it that that's an older kit from the stash? I've been trying to find out what's going on with them, but nothing definitive emerges.
-
1/72 P-47B Conversion of Academy's P-47D Razorback
Roktman replied to TheRealMrEd's topic in Aircraft
-
Excellent buildup. Looks terrific!
-
Gotcha. Thanks. Very cool. For what ever reason I have a hard time bending clear rod... 😜
-
An odd but entertaining movie. Very nice job on the kit! Did the clear rod come already shaped or did you do it? Kudos if you did! WOW!
-
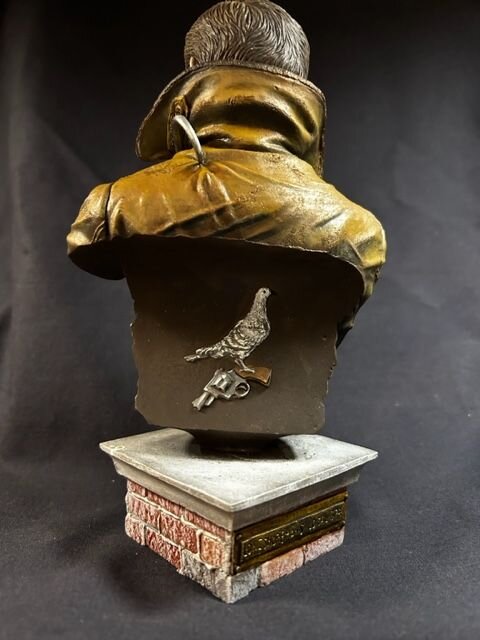
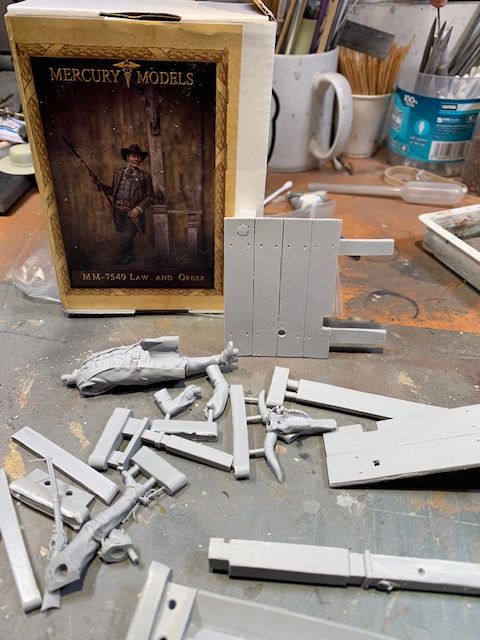
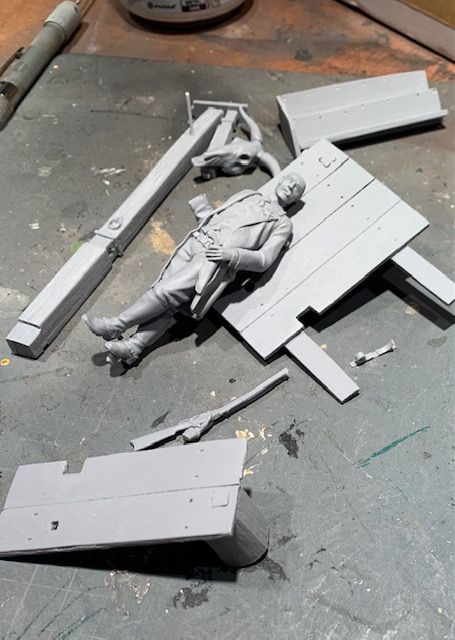
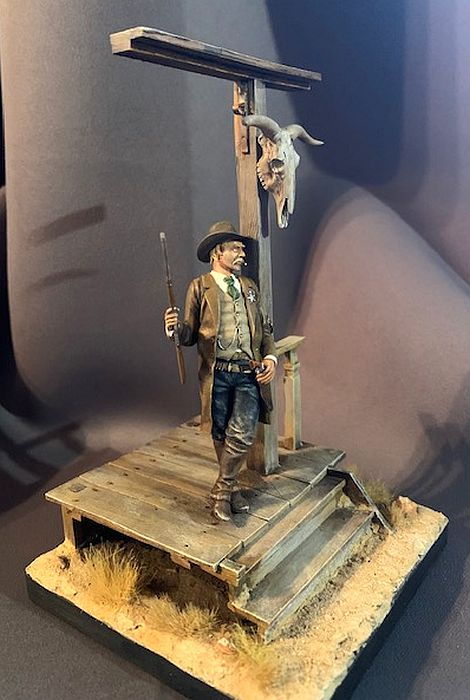
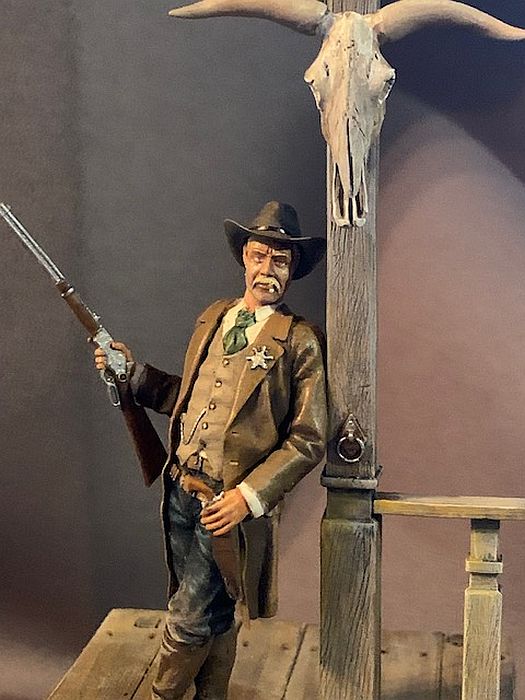
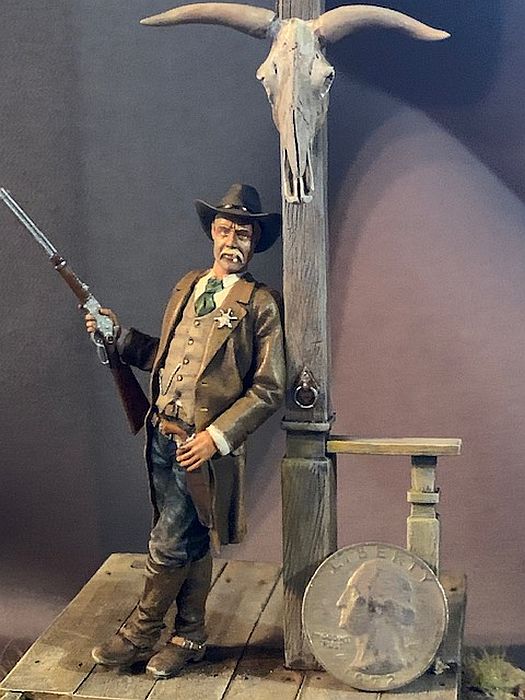
This is a nice 75mm kit from Mercury Models, and st in a fine gray resin. I figured any wood would have been dried and weathered, so painted the walkway and railing as if it had been out in the sun for decades. The total height including the base made from a wooden coaster and some Sculpt-a-mold is 150mm. I included a US Quarter with the last image as a size comparison. Thanks for looking. 🙂
-
It was the '07 Nats in Anaheim that drew him back into the hobby. I don't know if he every joined the local group, but he joined the National group. He only moved a year or 2 ago. He's in SC now.
-
Nice "gets" there guys! Aah Brookhurst Hobbies - every time I visited my buddy in MV, we would always take a trip to Brookhurst. Nice store - a lil bit of everything! Then he moved back east...
-
Bandai 1/48 Star Wars Snowspeeder Build...done!
Roktman replied to Pratt's topic in Space, Sci-Fi & Fantasy
Nice! I like how it's weathered but not beaten to a pulp... 🙂