EdCarr
-
Posts
77 -
Joined
-
Last visited
-
Days Won
1
Content Type
Profiles
Forums
Events
Everything posted by EdCarr
-
That kit looks like it has a ton of parts. Plenty to keep you busy at any rate 🙂 . Did you paint the instrument panel or is it decals? Very nicely done in my opinion either way.
-
Nice, Carlos. I used to paint with Humbrol paints as a kid. Are the Humbrol paints still being made? I would love to purchase some. I really like the effect that your Tamiya yellow green has when applied over the rubber black in the wheel wells. I have a Spitfire model similar to this model in that it has a low part count and seems to simply say, "Build me, please." With Mark's insight on the silly putty as a mask I think I can handle the Spitfire's camo paint scheme. But, I digress... this looks like a fun build. 🙂
-
Get well soon, Mark! I love your camo scheme paint job on your British FV-432. I plan on building one of the two Spitfires in my stash this year with silly putty as my masking. So glad for that tip 🙂 !
-
Carlos, I really like it! Everyone touched on what is good about this build. The weathering is fantastic and the color differences on the stowage items and fuel cans etc make the piece very dynamic overall and plain and simply make the build enjoyable for the eyes to look at. I, too, fret over painting crewmen and the like. Perhaps using artist color pencils and/or pastel pencils or pastel chalks would be somewhat beneficial?
-
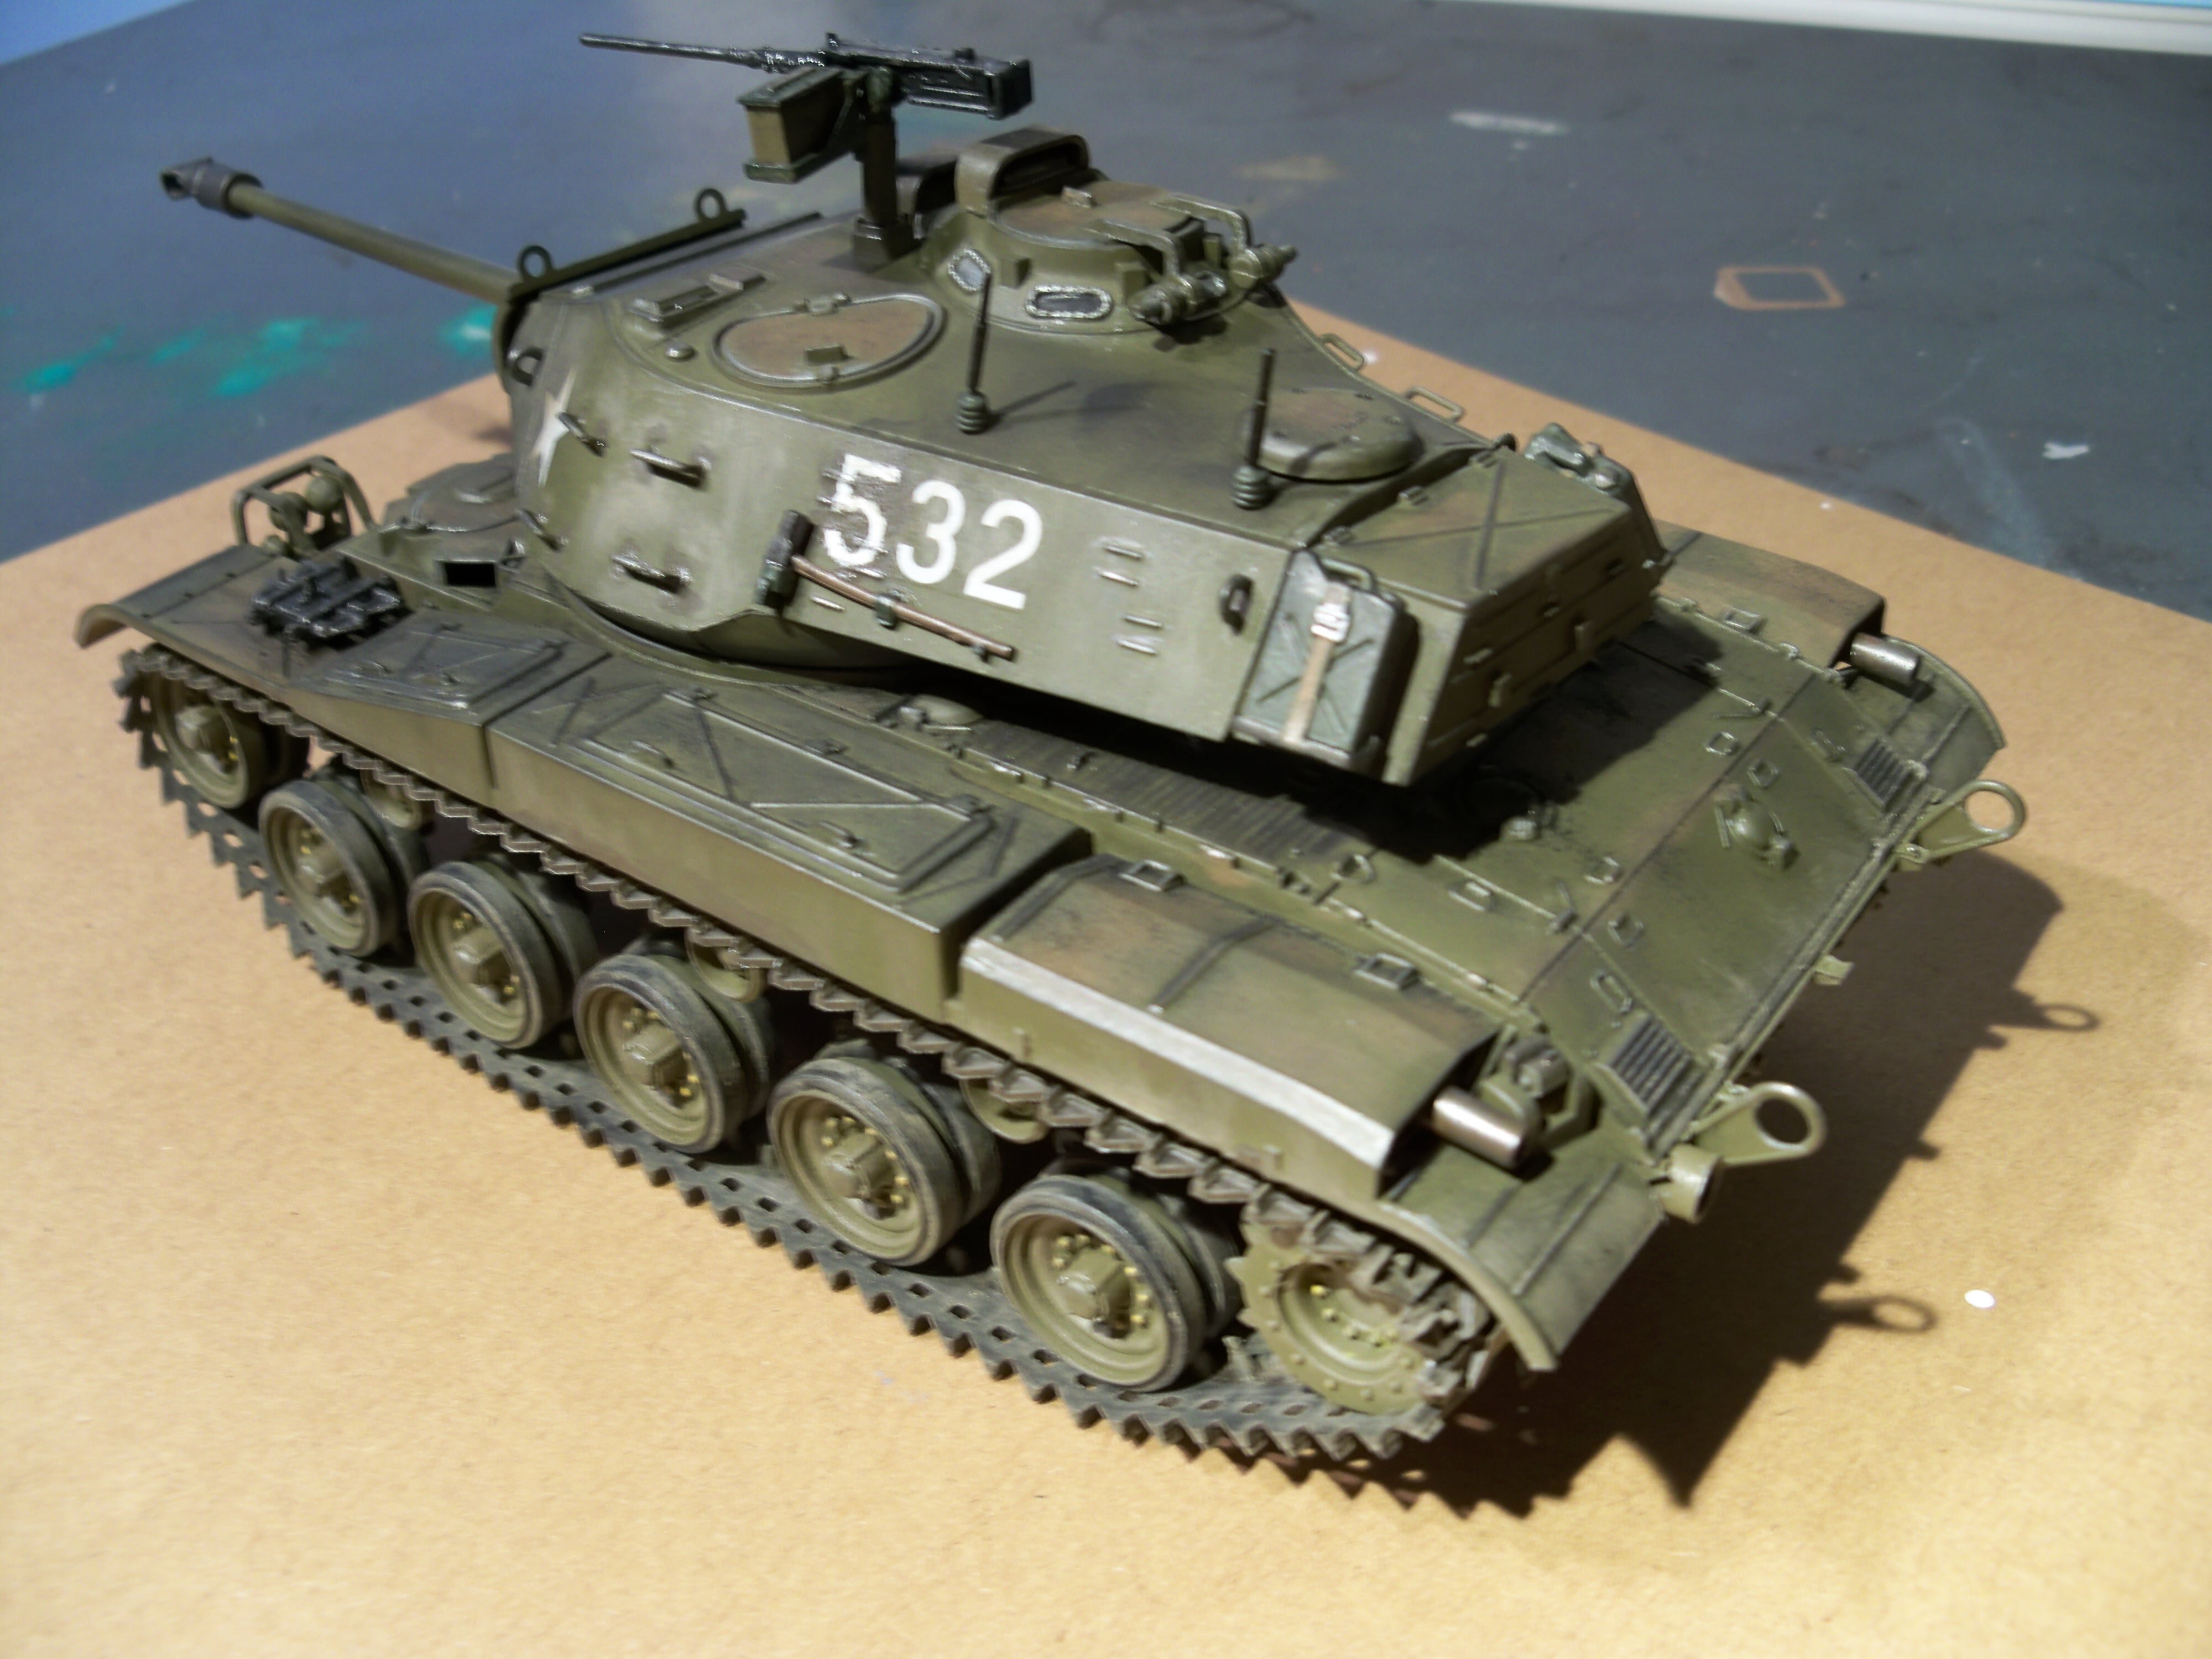
Personally, I enjoyed weathering the model. I used Tamiya Weathering Master tools- specifically the ones with rust, soot, and gunmetal. Those would be Tamiya Weathering Master tools B and C. I also used a graphite 4B artist pencil for a lot of weathering on edges. The kit is a fun build. It is the first tank model I built in my adult life. The decals were easy to work with and I had no silvering problems with them. I also used Tamiya Weathering Master tool A, specifically "mud", on the decals as well and no problems. I used the Tamiya Weathering Master C-gunmetal- to kind of paint the muzzle of the main gun barrel. I did not build the cloth where the tank's main gun meets the turret. I simply did not worry about it, but if you build one with the cloth that goes on the turret then I give you a thumbs up 🙂 ! I also used a toothpick to paint the bolts of the road wheels and sprockets flat yellow from Testors a tiny drop of paint at a time. I also used a silver colored pencil for weathering like around hatches' edges and what not as well as the graphite pencil. I used Model Master's Olive Drab spray cans to paint the hull and turret before assembling them. Also, I picked out different details with different hues of green Tamiya paints including Olive Drab (on the base of the antennas) and Olive Green (The fuel cans) and JA Green (The LMG ammo box). All that said, I never dull-coated the finished model for fear of messing up the Tamiya Weathering Master effects. I do not know if a dull coat messes with them or not, but I did not want to take the chance. Maybe you could experiment with Vallejo acrylic environment effects. I plan on using those for the most part on my current build- a WWI era British "Tadpole" tank. I guess that is it...just have fun with it and do not for any reason ever use a napkin to soak up excess Micro Sol decal solvent 🙂 . I made that mistake and had to pick out napkin parts stuck to my decal (the number 5 of 532) with an exacto blade and then went back over it with a white oil paint sharpie marker from Michael's. Good luck and have fun 🙂 !
-
Thanks for the info, Mark. It is appreciated very much. 🙂 I think I will be purchasing some Silly Putty in the near future and, man, I think it is great that it is reusable. Awesome 🙂
-
I really like how this one looks, Carlos! Love the sand weathering on the decals, the treads, and the gas cans. I was following this build a bit 🙂 Can't wait to see the crew with it.
-
Hey, that looks like a really nice airbrush! I am definitely in the market for an airbrush that does not need to be hooked up to an air-compressor. Thanks for posting the photos of the box and of the airbrush. I am thinking about using my Paasche noob brush soon on a WWI "Tadpole" tank I am just now starting to build. Now, if the weather cooperates...
-
Thanks for the tip, Gil! Awesome 🙂
-
Thanks for the compliments guys, they are appreciated very much!
-
Sorry to double-post like this, but under what forum topic is your Maddog Manufacturing thread?
-
Thanks for the tip, Mark. Much appreciated. I never would have thought to use silly putty but that is a great idea. I used Tamiya tape on the sails of my Roman Warship that I have yet to post pictures of and the Italian Red paint leaked under the tape onto the "white" stripes. I fixed it, but it was a bit of a mess and I am hesitant now to use Tamiya tape for masking, especially on camo schemes like for spitfires which are similar to your Japanese Defense Force APC's. Where do you purchase the Silly Putty? I remember that it used to come in eggs or something similar and in rather small amounts. Can you reuse it by kneading it? I need to hop over to the Maddog Manufacturing thread and check this out. 🙂 Thanks!
-
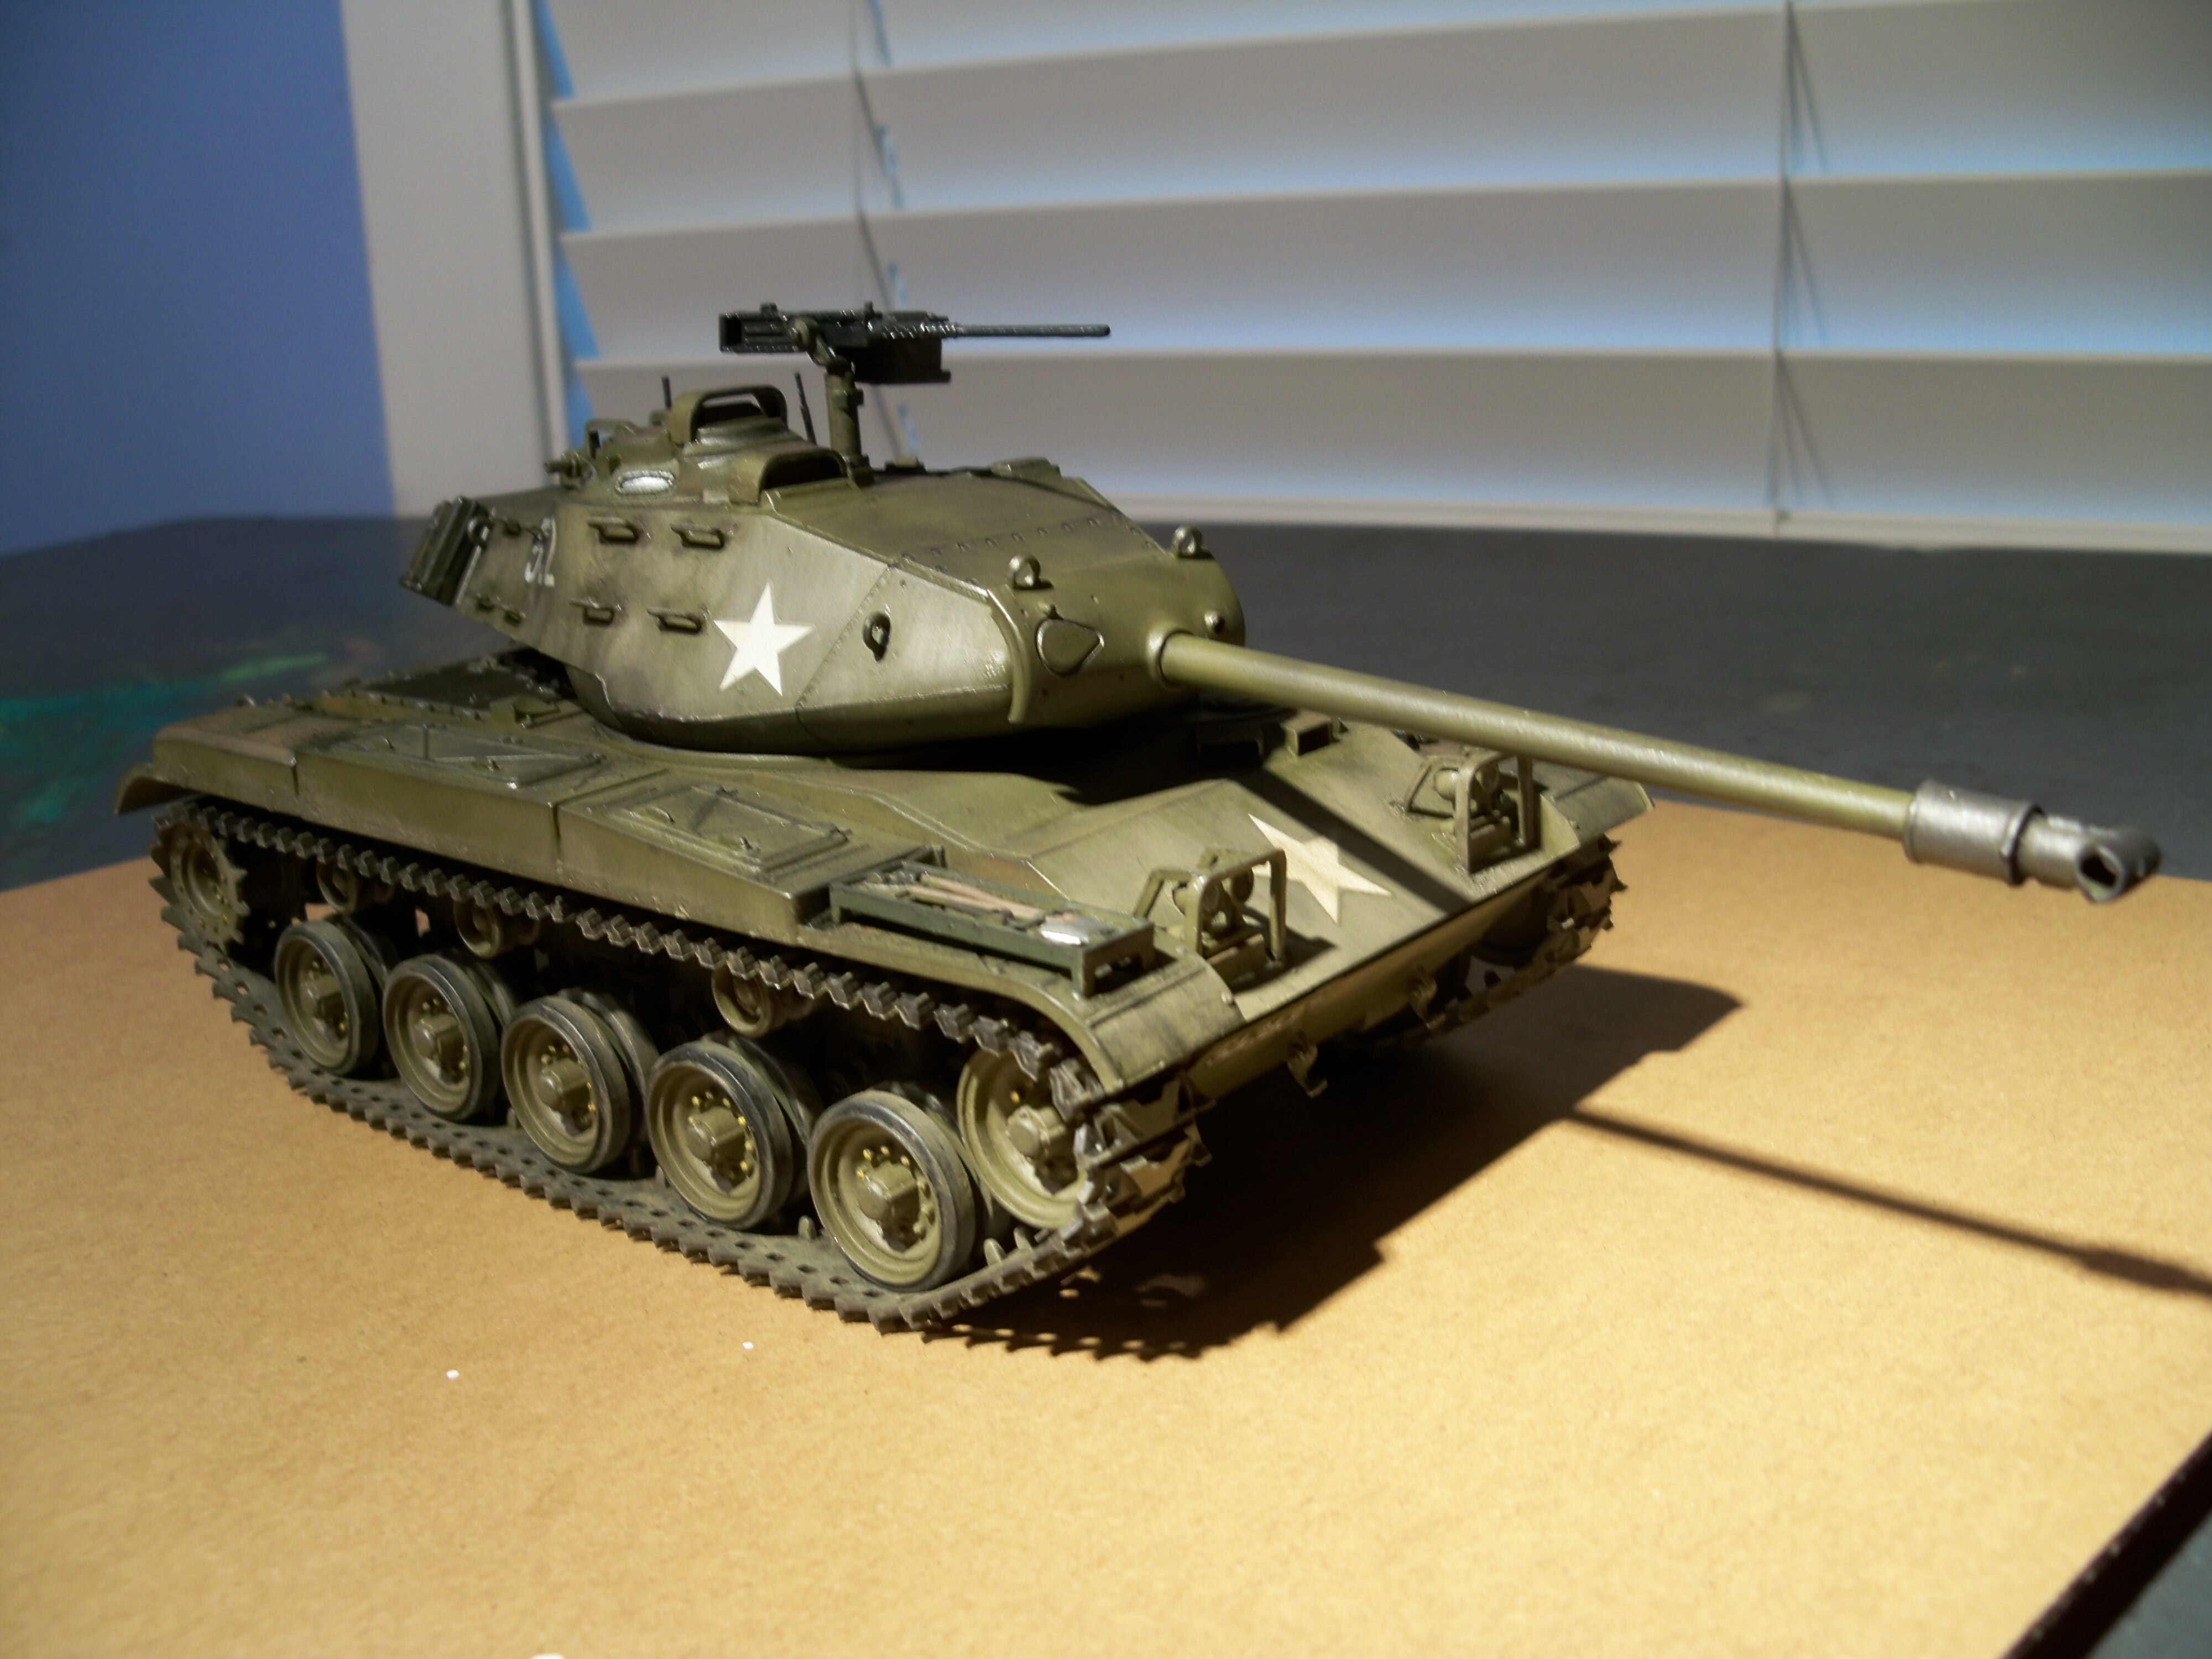
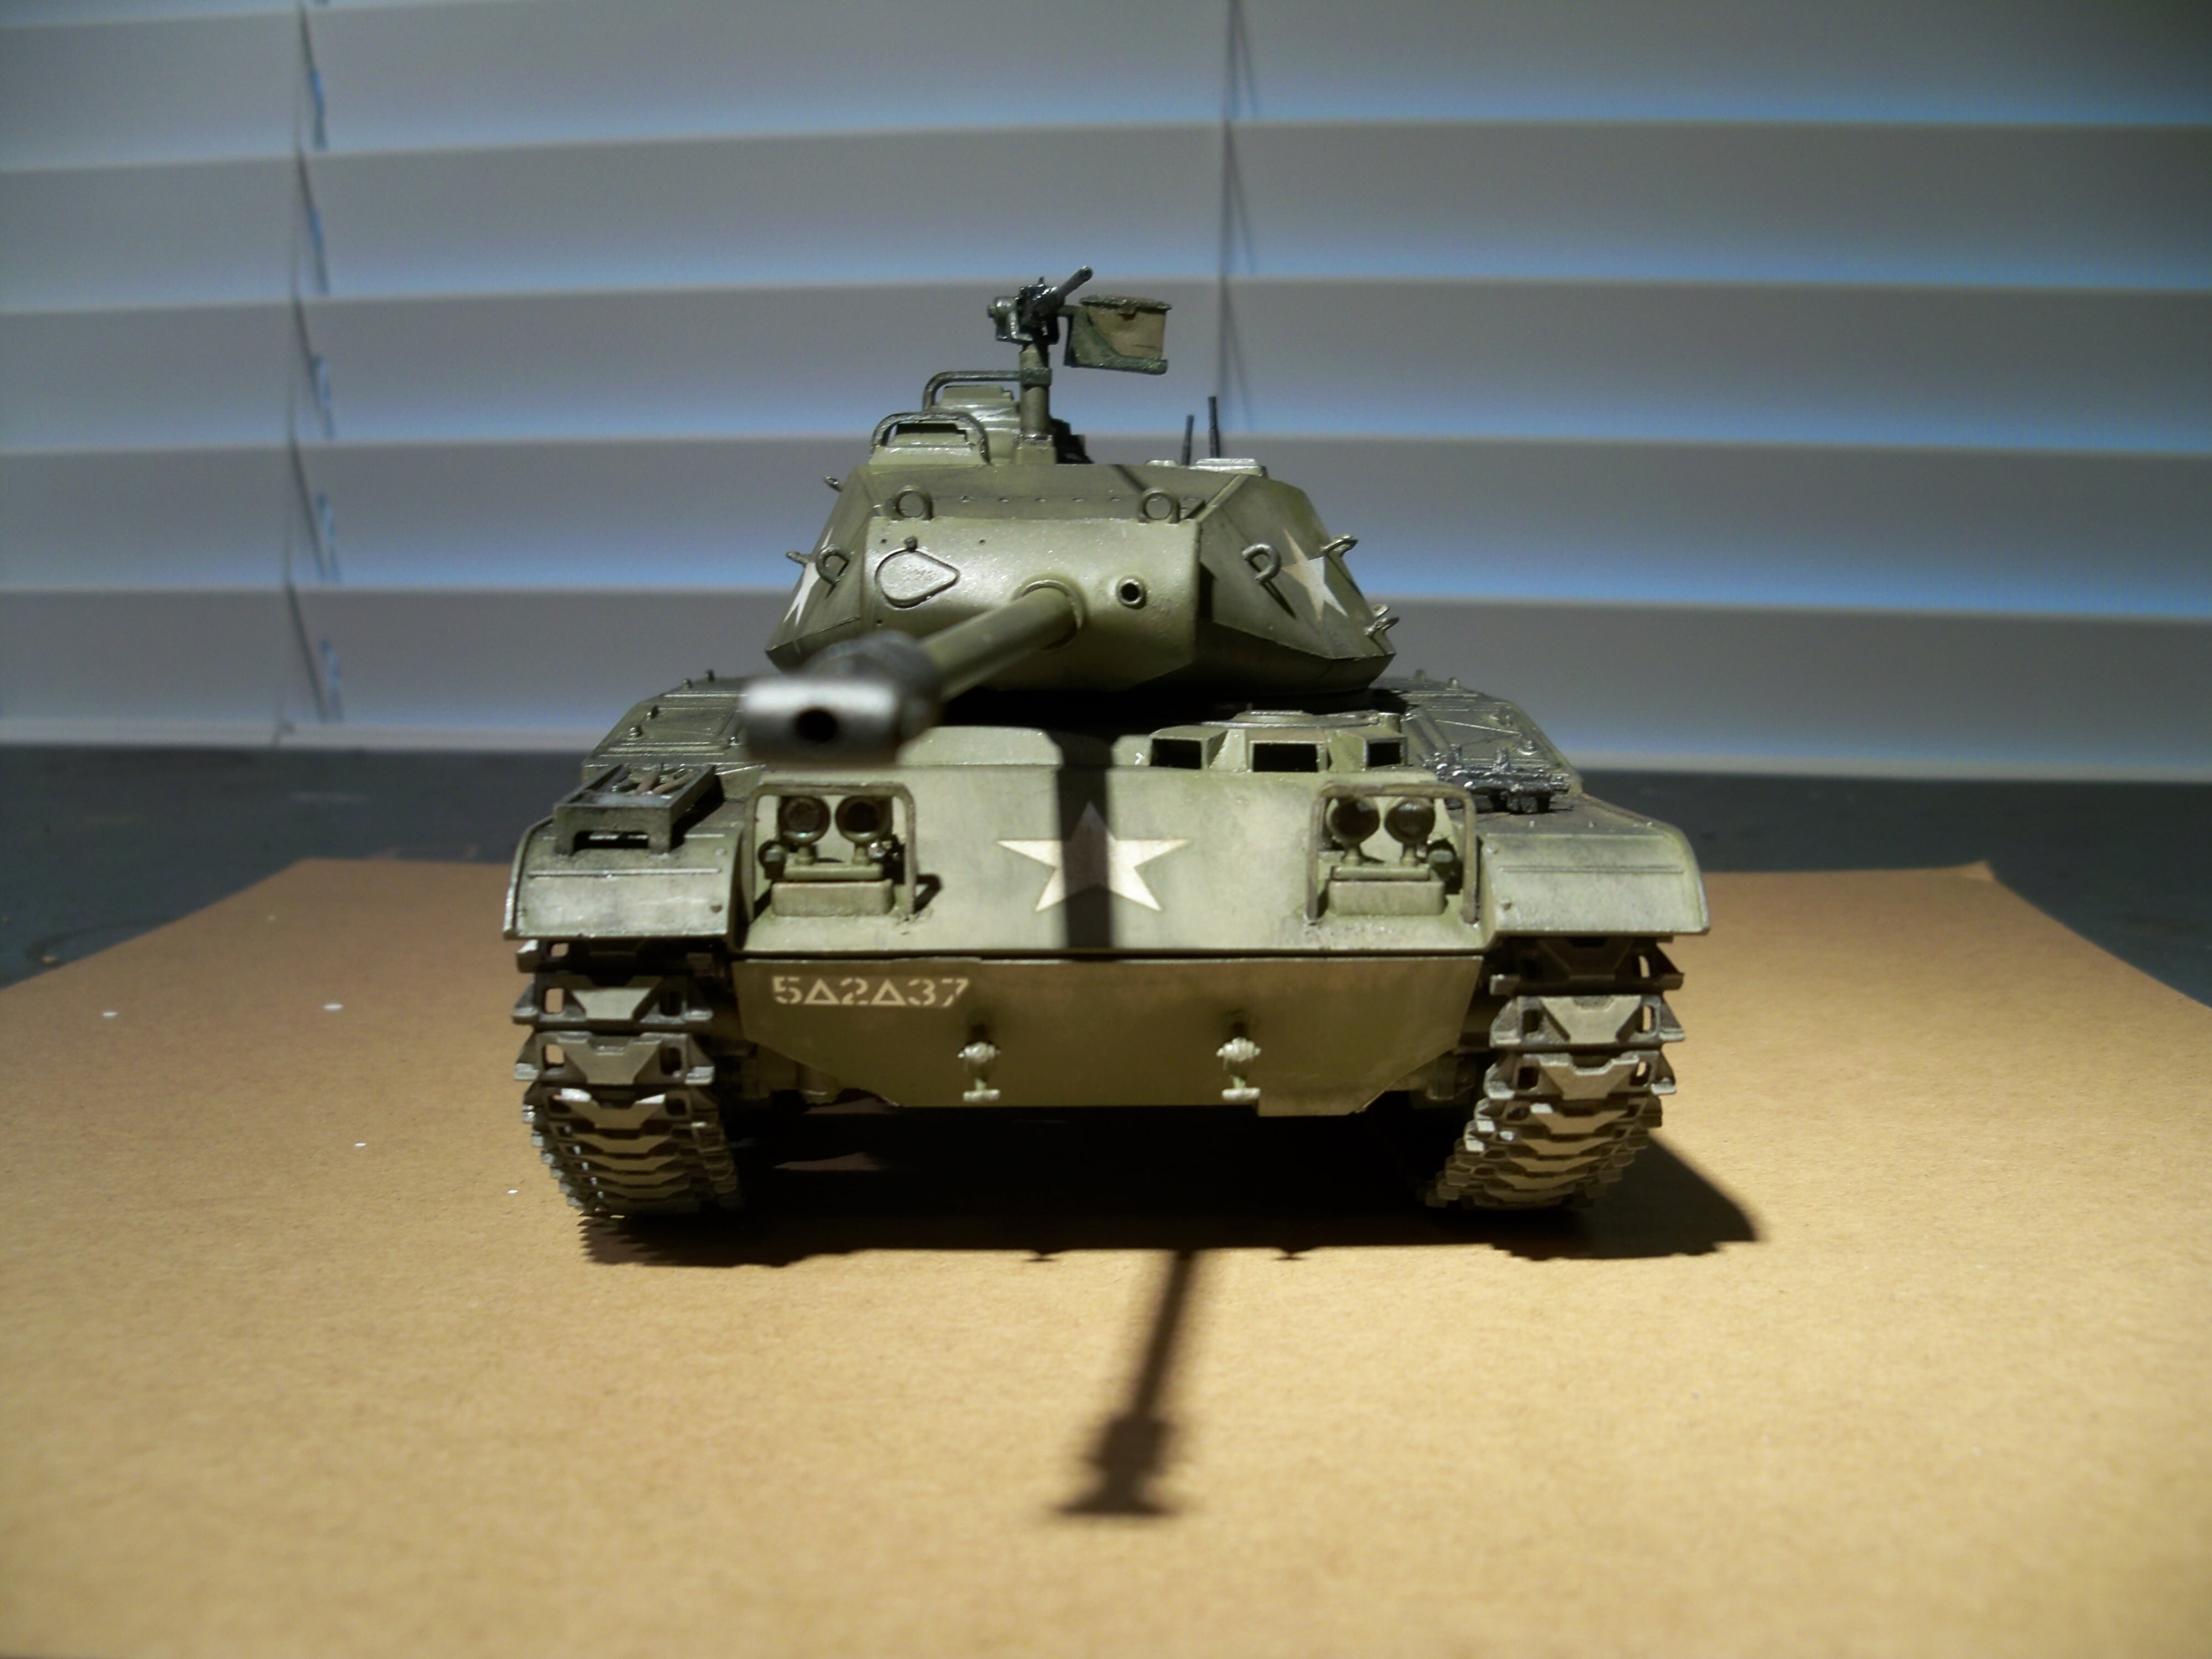
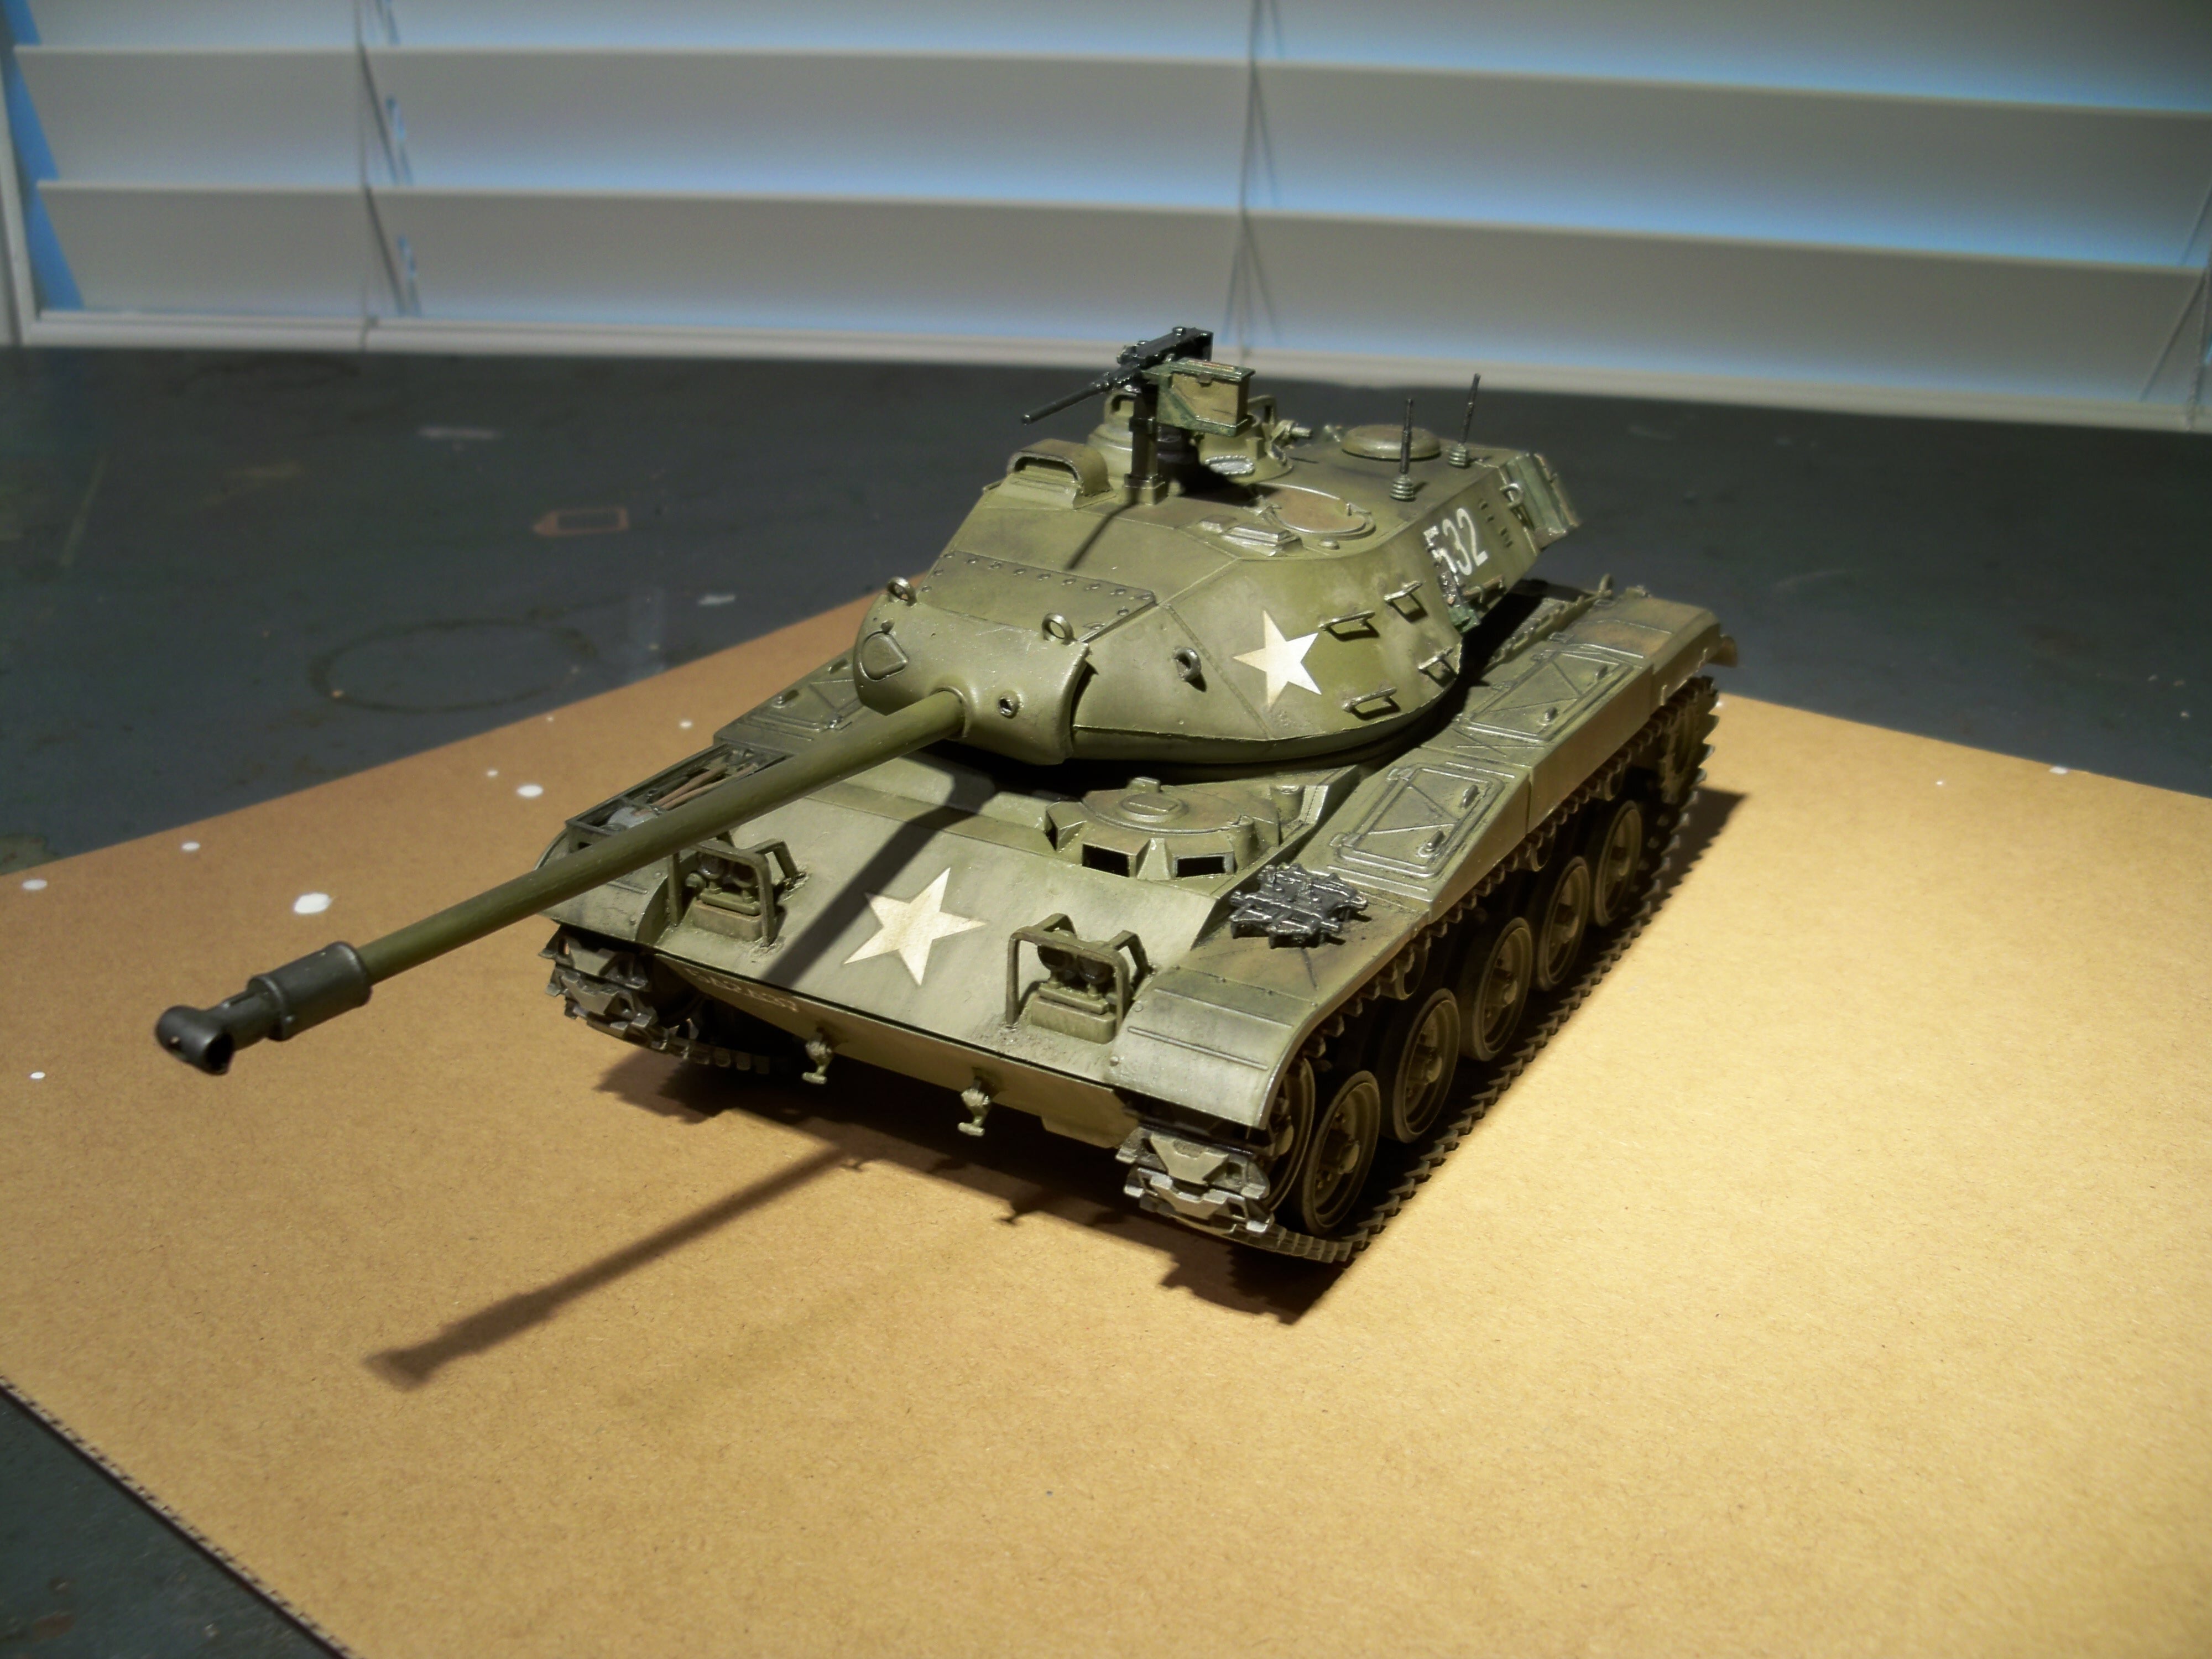
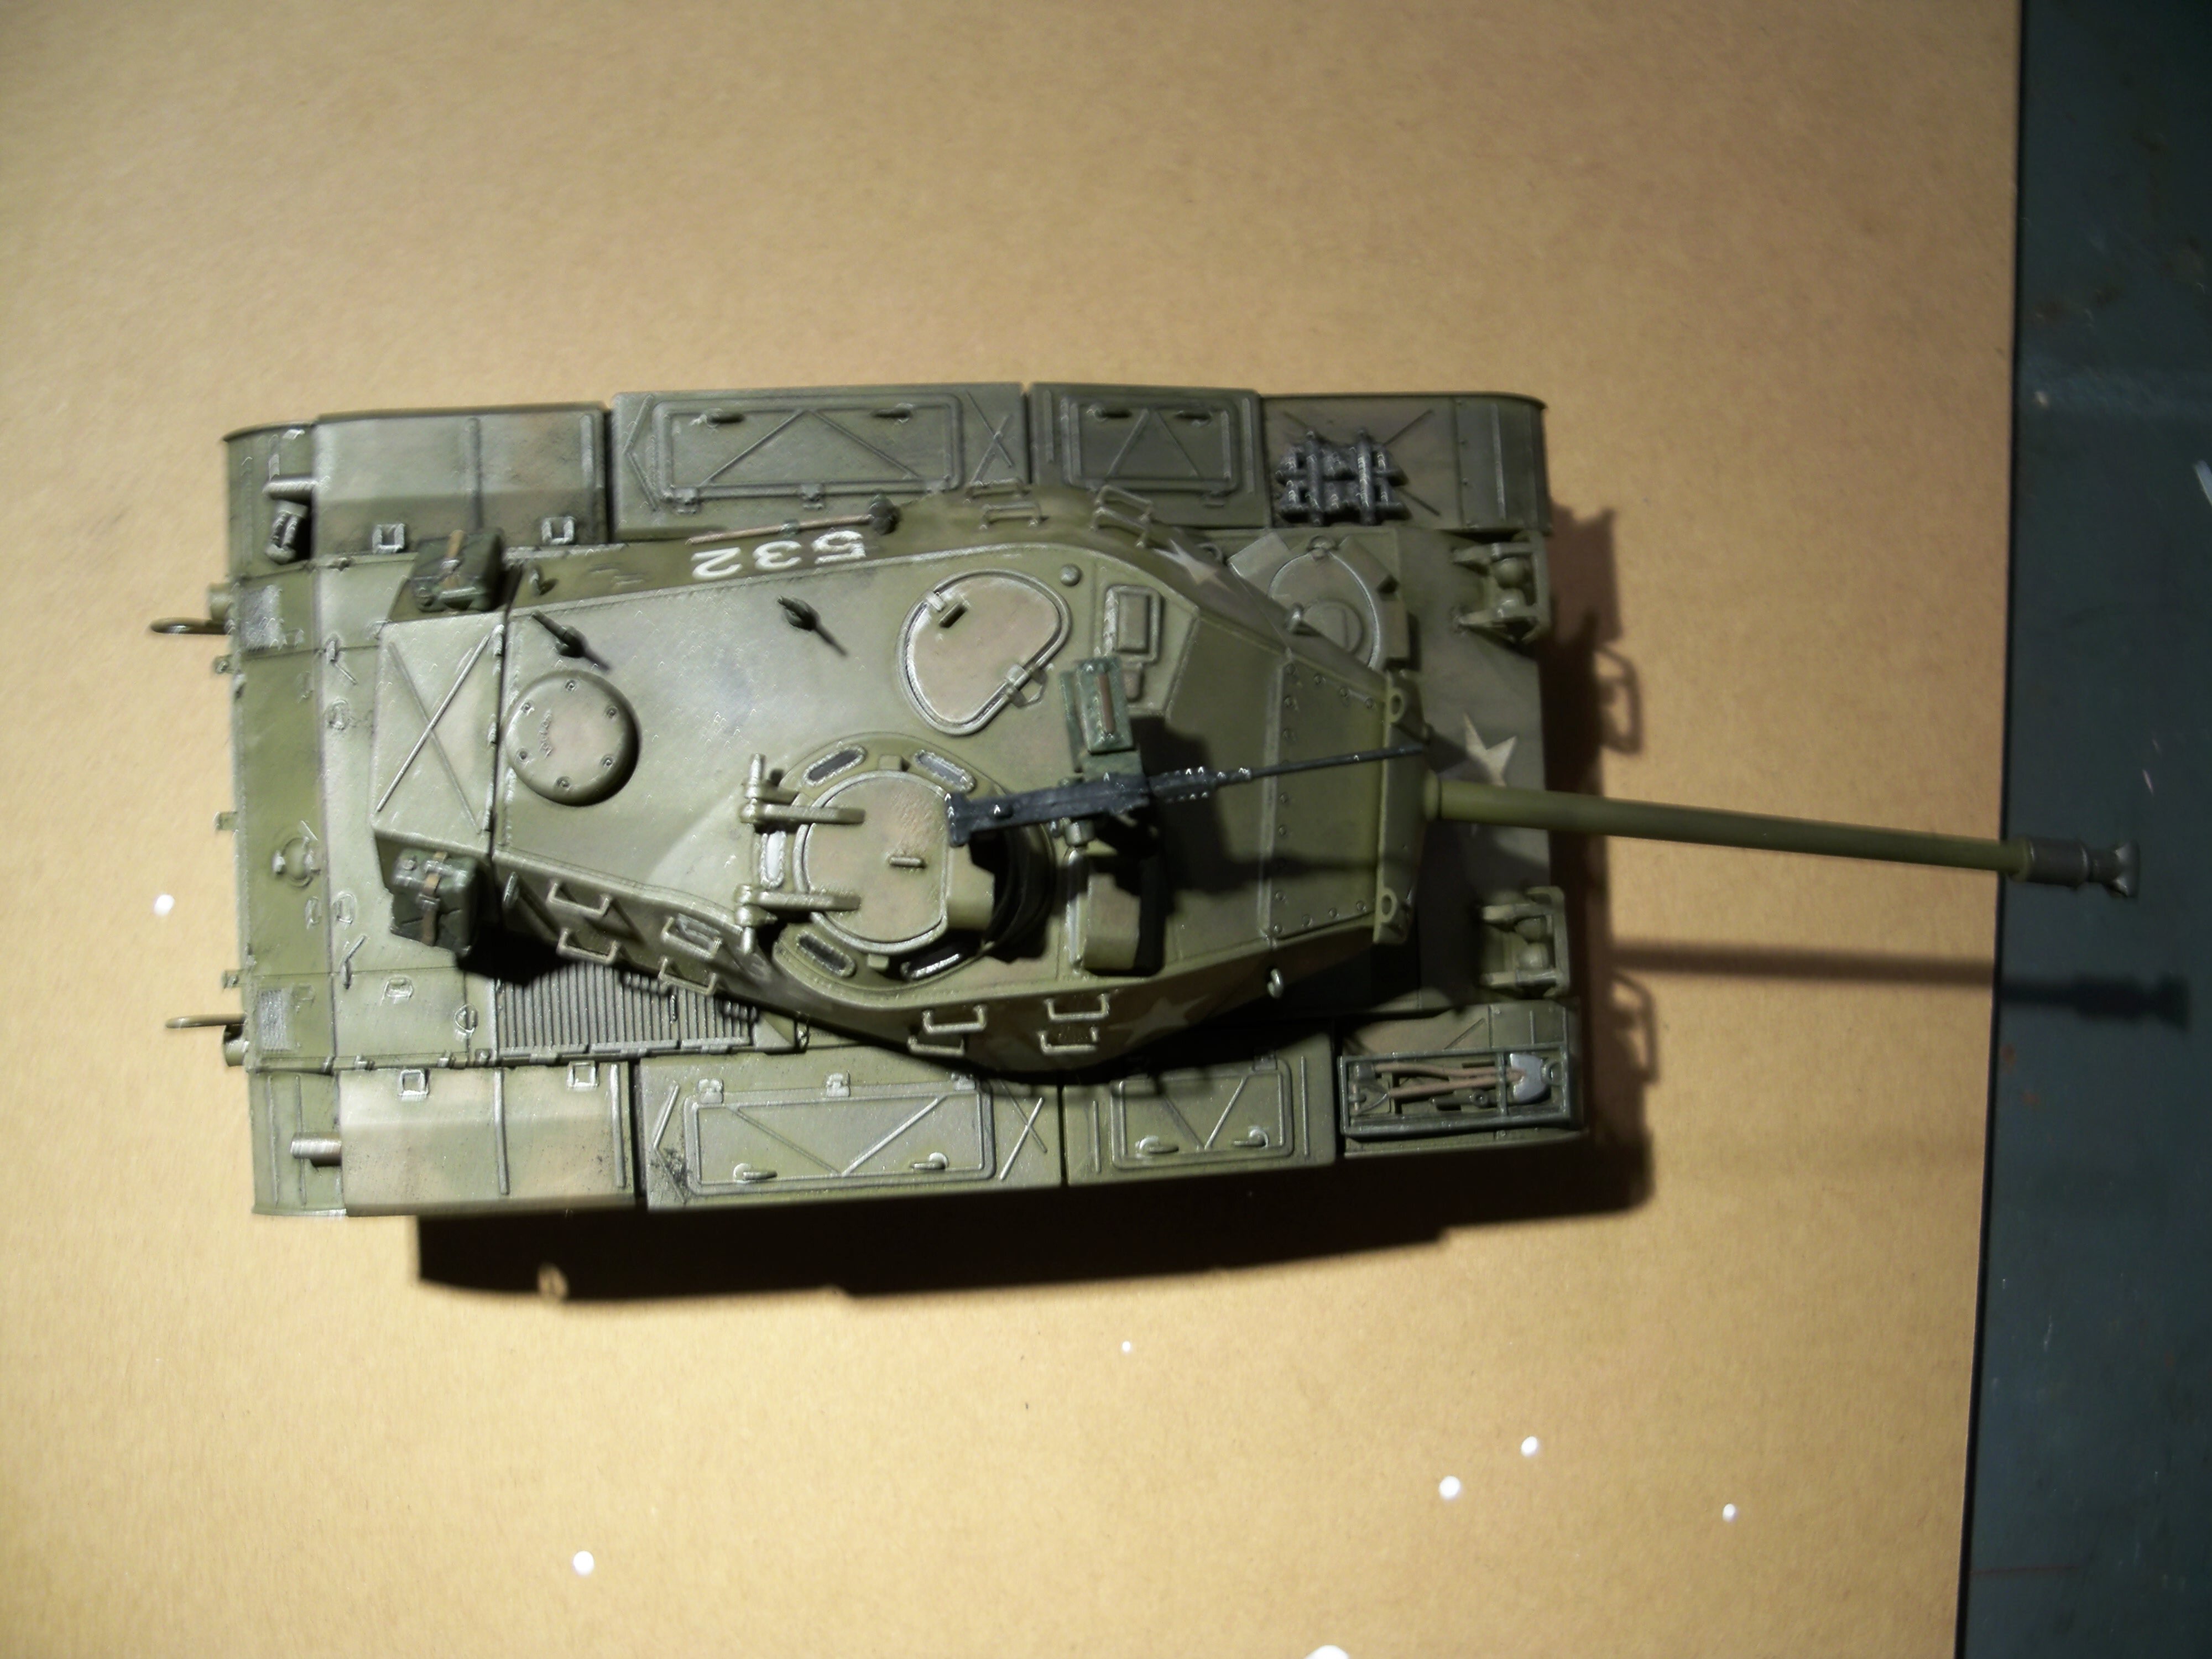
This is my first tank build in a very long while. I do not have any in-focus pictures of its rear, but I may add some to this post later. I really enjoyed building this model. It was fun and I loved weathering it. I believe that was the part of this build that was the most fun. I finished it around October of last year. It is a Tamiya Kit. 1/35 Scale. I know now to do better with mold and seam lines. Also, I probably should have not have glued the machine gun in the position that it is in. I should have let it point to the sky as it does when not being held. Also, I did this build with the commander's hatch closed, as there was no interior detail whatsoever. The kit does come with a commander and some infantry. I am thinking of making a large diorama with the infantry and a 1/35 Tamiya Model Jeep I purchased late last year as well. Ok, here are the pics! Thanks for looking.

-
Yes, I really like the details. Especially the silver chipping on the props and engine cowlings. How did you apply the silver paint? I assume you used silver paint for the chipping. I would love to know. A 1/32 scale B-17. That is a big plane model. I have a 1/48 scale B-17G partly assembled from long ago and sitting in a box. It still takes up a good bit of room. But yes, way to go on a great build! It looks fantastic in my opinion!
-
The camo scheme caught my eye. I like it and I think I really like the base and the black and white photo on it. Nice touch!
-
The stowage items look great, Carlos! I think that your choices of different colors and hues make for a more interesting visual whole of the model overall. Well done!
-
Thanks, Mark. I will!
-
Here is the AT-ST I built almost exactly one year ago
EdCarr replied to EdCarr's topic in Space, Sci-Fi & Fantasy
Mark, here are two photos of Chewbacca for you. I found him and he was still in two parts and still on the sprue. Also, I forgot to mention earlier, the AT-ST comes with red laser-fire plastic if the modeler wants to show it in action. It is in one of the photos here still on the sprue below Chewie.
-
Tony, you might want to check out Microscale.com. They do not have decal sheets in 1/72 scale specifically dedicated to WWII German crosses, but they do have 1/72 scale German Aces decal sheets. About three different sheets I think for 190's and 109's. On them, they include WWII German crosses. There are some other companies out there too like Superscale International that may have what you are looking for. If all that fails, maybe try some online hobby stores or Amazon or Ebay. I searched with Google as I was thinking about continuing a 1/48 FW-190 A6 build from my youth and these results popped up. I hope that helps at least a little bit.
-
Thanks for the invitation, Patrick. Perhaps I will attend a DC chapter meeting in the near future. It would be nice to connect with some local hobby enthusiasts. Thank you for the information concerning the Hagerstown Air Museum, also. I had no prior knowledge of its existence. I will have to check that out as well. Thanks again for your kind attention.
-
Non-slip surface on Armor Vehicles
EdCarr replied to Bradley25mm's topic in Tools, Tips & Techniques
Thanks for this tip for how to make a rust-like patina on a model, especially on armor. Much appreciated. I plan on using it. 🙂 -
I like that Carlos posted that this hobby is supposed to be relaxing. Often times it is, but sometimes, like when I am fiddling with a part of a model that is very delicate and might either break or fall off from my unintentional efforts at simply gluing or painting something in said part's near vicinity and that said part may break or fall off etc. Oh the tension and headache, the anything opposite relaxing, lol. Still, I would like to see the recovery and build of this model. I too have a Cutty Sark in my stash and have just completed a Roman Warship.
-
Very nice, Kevin. I think you did a very nice job on the eyebrows. Yes, she would not have liked right without them. Nor would she have liked right without them being well-drawn or being well-painted on. I think you got them right. No worries. 🙂 But, I think what I really like, and this might be odd, but I like the painting of the movie-film reels. Top-notch in my opinion. Thanks for the post with the pictures, much appreciated. 🙂
-
Nice! The movie was so funny! Where did you get the figures, or models, from it to paint?