Bradley25mm
-
Posts
481 -
Joined
-
Last visited
-
Days Won
33
Content Type
Profiles
Forums
Events
Everything posted by Bradley25mm
-
Thanks guys. As for the paint job, I took a mechanical pencil to draw the pattern for each color. In the middle of the pattern, I would put an initial for whatever color it was. Is that spray section all I did was go to the line and cover it up. Thanks for having a look.
-
Good evening all, I picked this one up at a swap meet, at a price I couldn’t pass up. Academy did a great job on the details of this kit. Tons of options. The weapons, and wheels are Reskit. Quinta Studios in the cockpit. My first time using MRP paints. They are great. Spray right out of the bottle. Airbrush between 15-17 psi does the trick. Clear coat with Tamiya clear. Wash was Tamiya ascent colors, black and brown.

-
That’s a real eye catcher. Not just the subject, but the paint job🤩
-
The metal skin looks great. It’s nice to see a model in old school markings.
-
Outstanding job Gil. Love all the add ons!
-
Always knocking those builds out. Congratulations Mark.
-
Don’t be hard on yourself. The looks ok. If I try something like that for the first time, I practice on a piece of white plastic sheet. You’ll get better with experience. Chris
-
That’s a lot of detail in those bays. Nice paint work.
-
Really nice build Gil. The paint job looks great.
-
Col. (ret) Arnie Franklin is one of the featured aviators at Aviation Heritage Park and Museum. He did two tours in Vietnam. His first tour was flying the OV-10 as a FAC over the ho Chi Minh Trail. His second tour was flying the F-111. Aardvark dropping bombs. A modeler has already built the F-111 that he flew in Operation El Dorado Canyon. The OV-10 I built has the tail number he flew the day he got his DFC. The mission was 5 1/2 hours. The plane made it through the war and was sent back to the states. It was purchased by CalFire as an observation aircraft. While awaiting restoration, it was destroyed as a result of hurricane Andrew. (A hanger door fell from its mounting, and severed both of the tail booms. The kit was a challenge to build. From the wings, to the canopy. Thanks for having a look.
-
1/15th scale Space Shuttle Atlantis
Bradley25mm replied to Bradley25mm's topic in Space, Sci-Fi & Fantasy
Thank you Dick. This was a once and a lifetime opportunity to work on a piece of NASA history. Thanks for having a look. -
1/15th scale Space Shuttle Atlantis
Bradley25mm replied to Bradley25mm's topic in Space, Sci-Fi & Fantasy
Mission accomplished! 611 hours. Thanks for having a look. Meeting Col. Wilcutt was the highlight of my year.
-
That is gorgeous.
-
1/15th scale Space Shuttle Atlantis
Bradley25mm replied to Bradley25mm's topic in Space, Sci-Fi & Fantasy
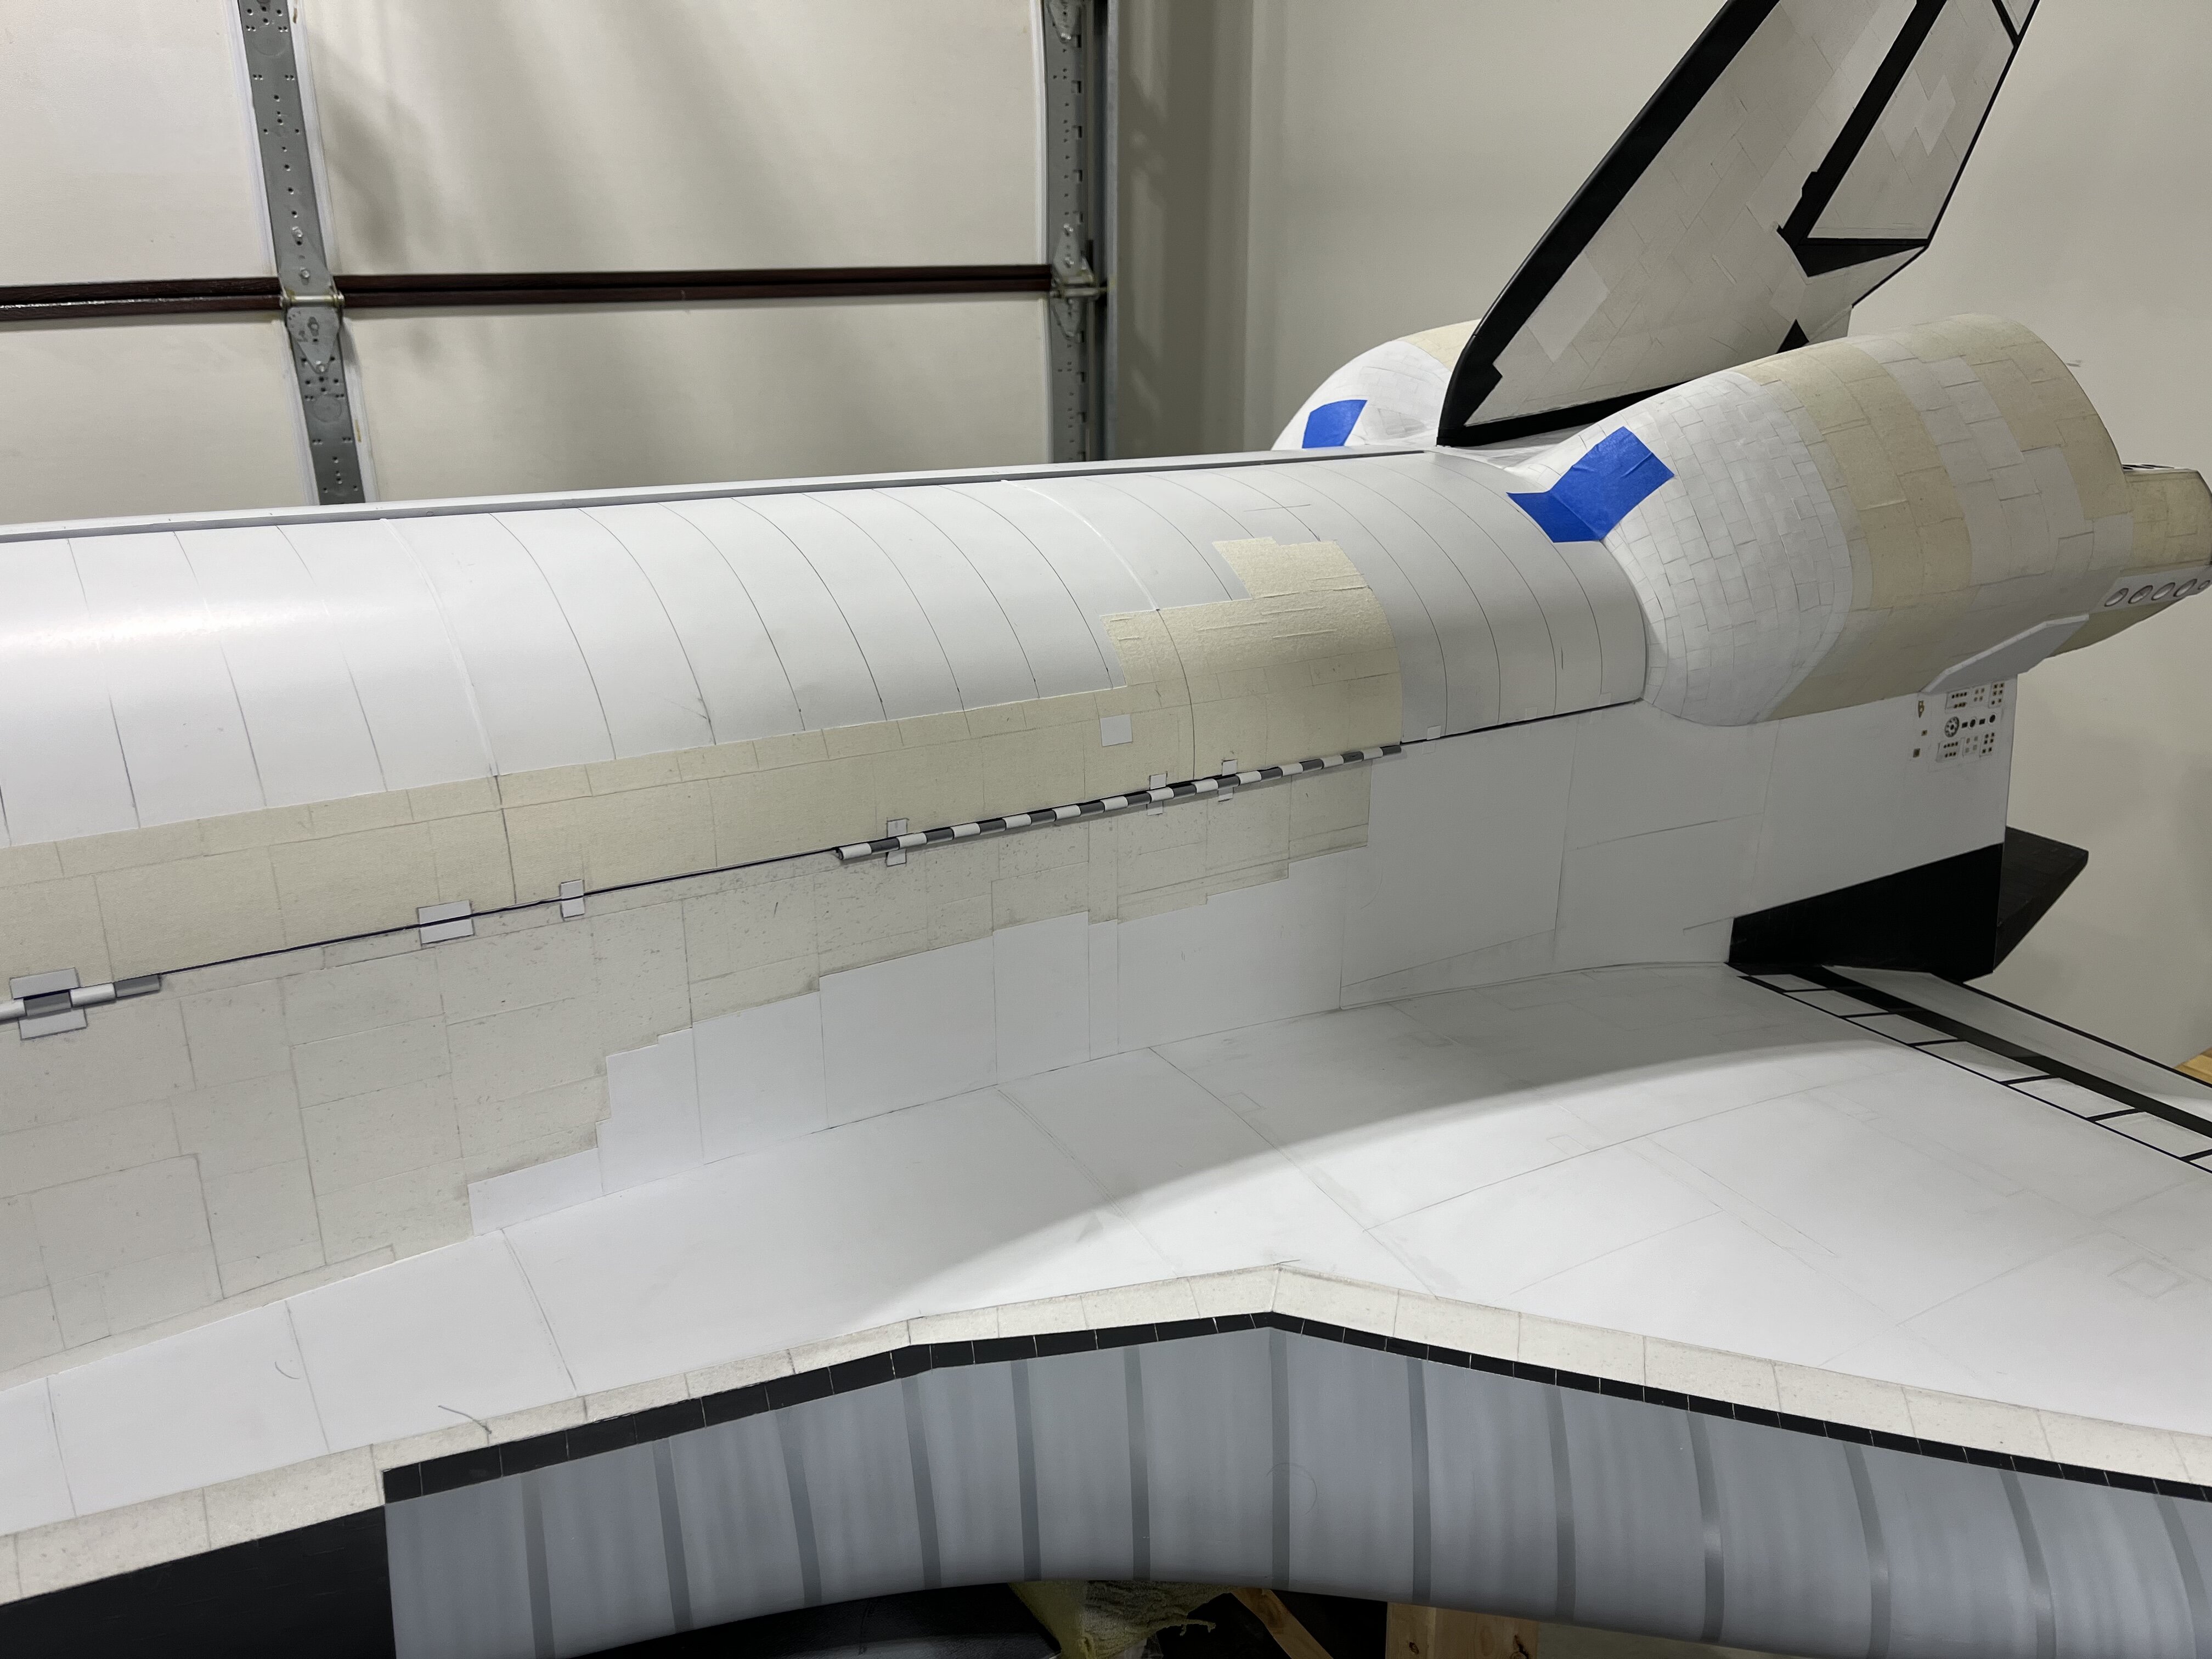
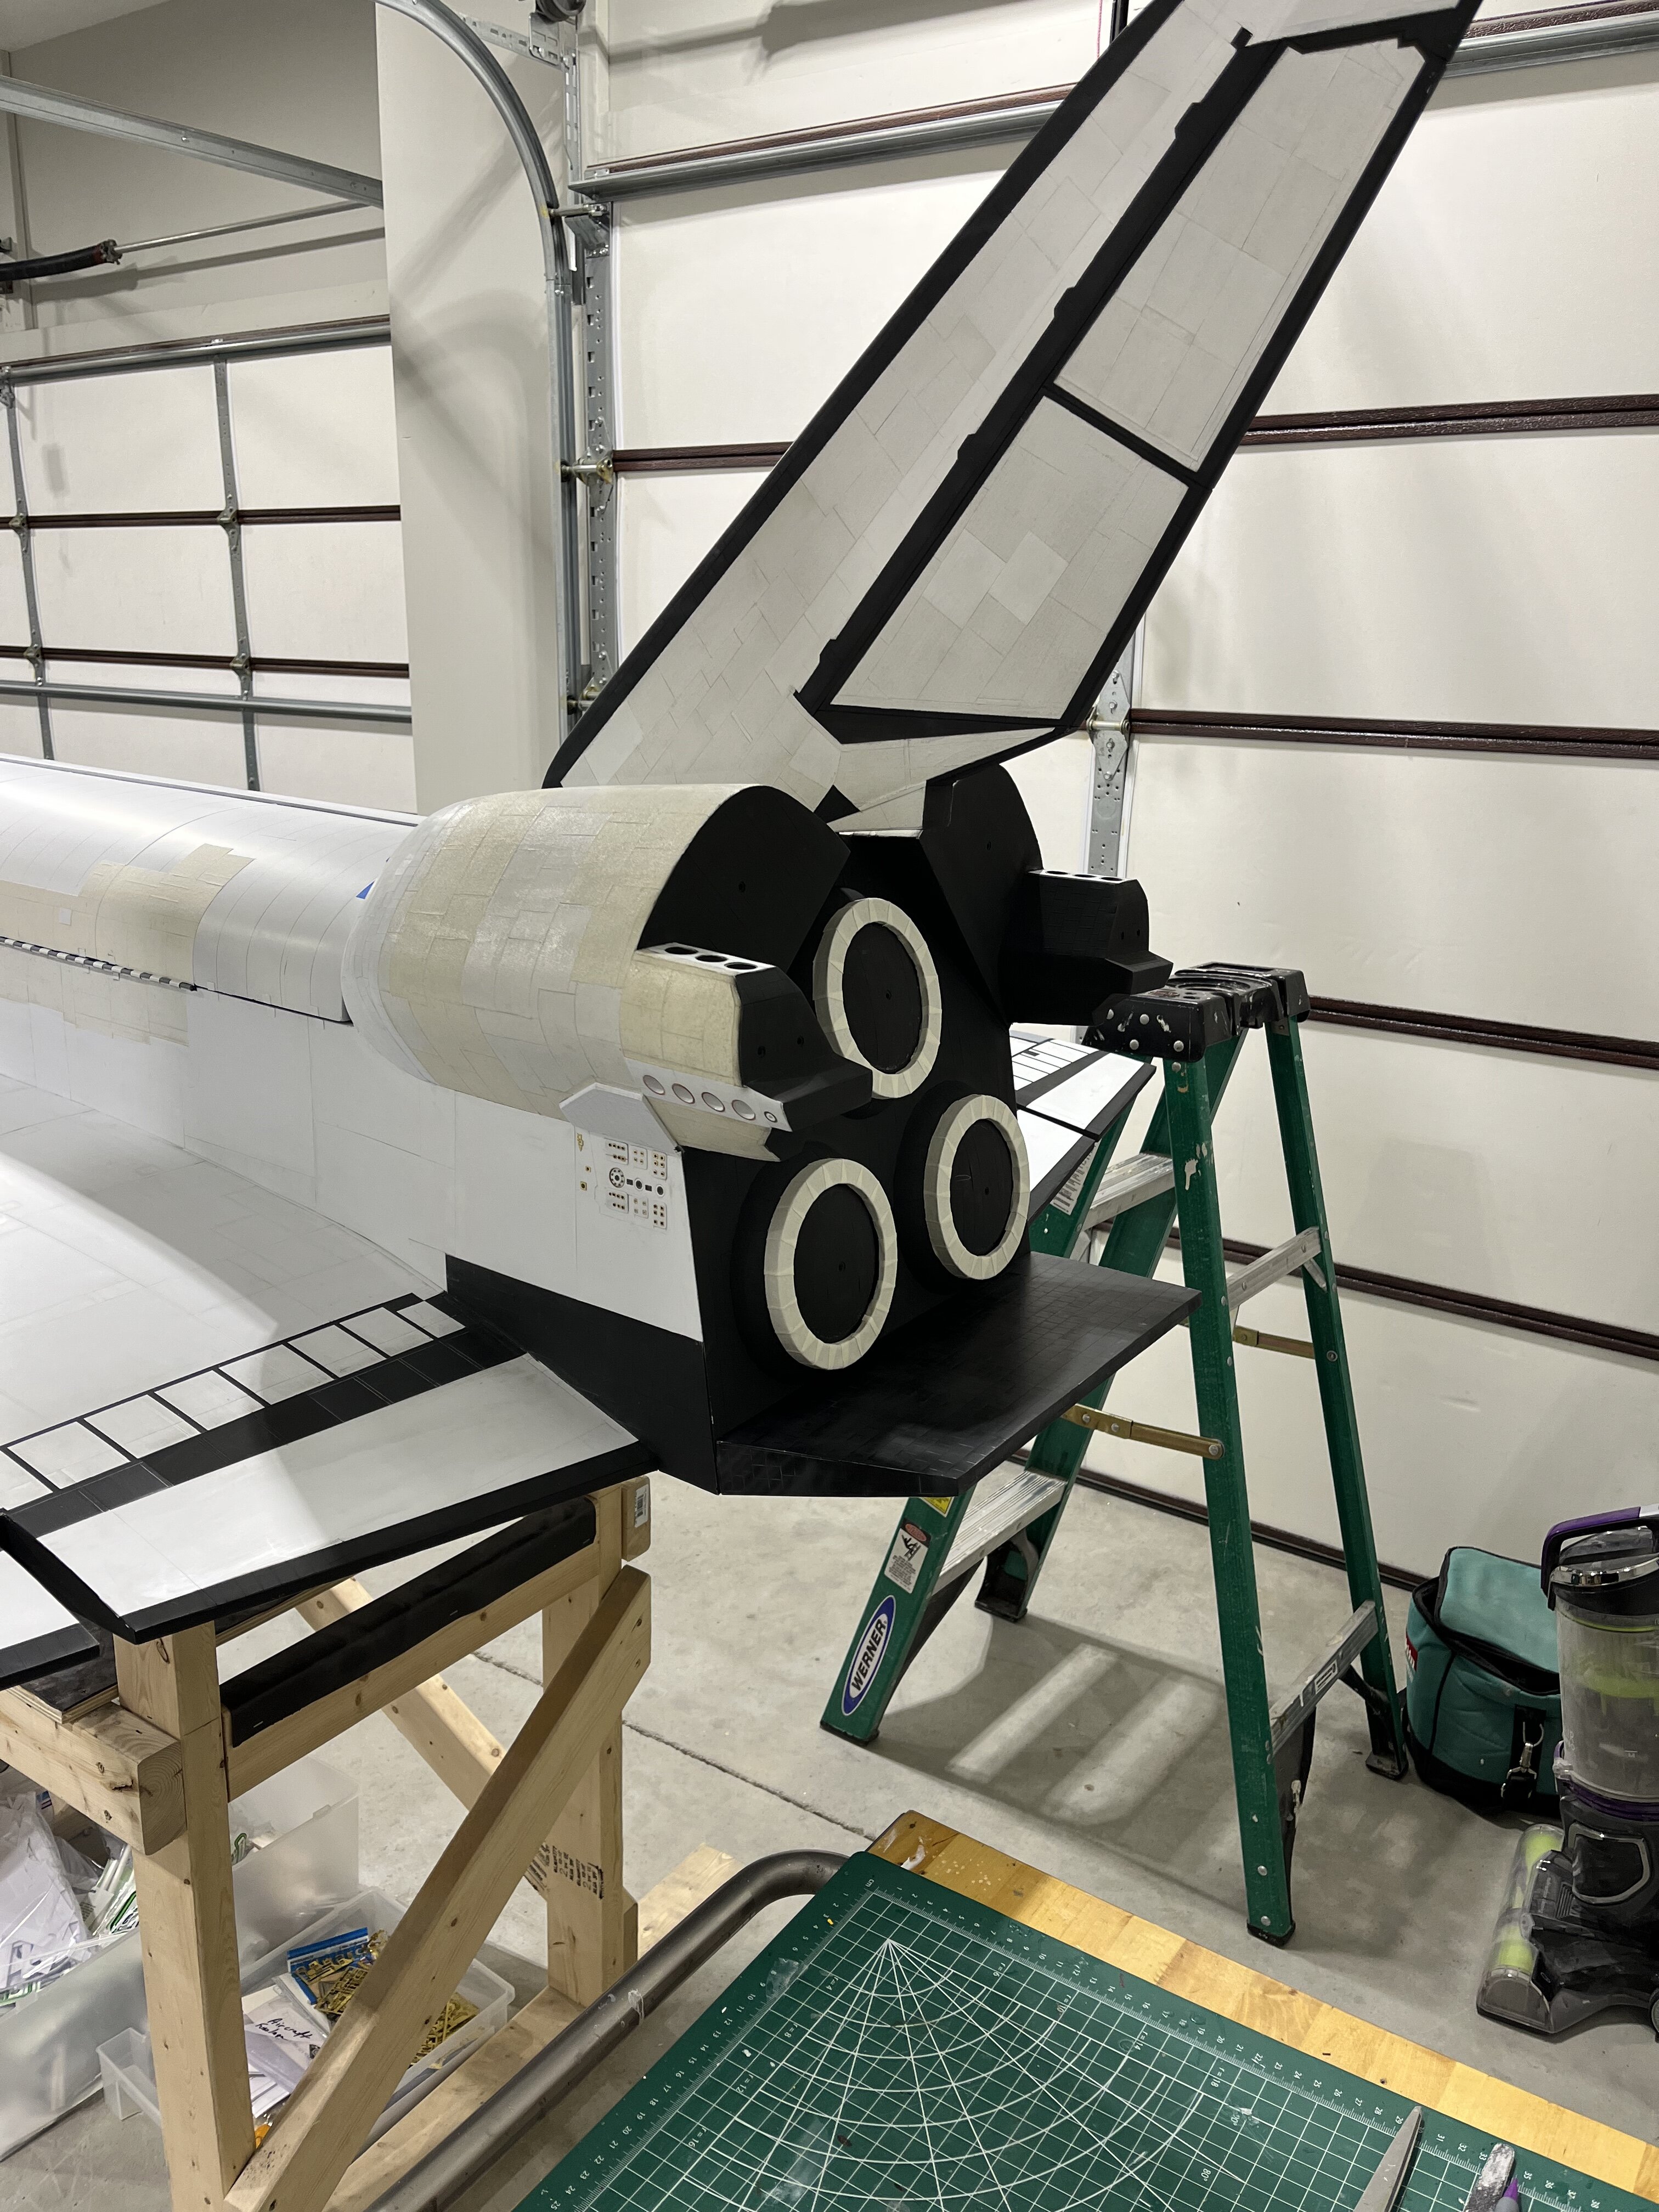
Getting ready to paint. The vertical stabilizer and beaver tail have been permanently attached. Currently working on the payload bay doors. Thanks for having a look
-
You sir, have some impeccable scratch building skills. Thanks for sharing. Chris
-
1/15th scale Space Shuttle Atlantis
Bradley25mm replied to Bradley25mm's topic in Space, Sci-Fi & Fantasy
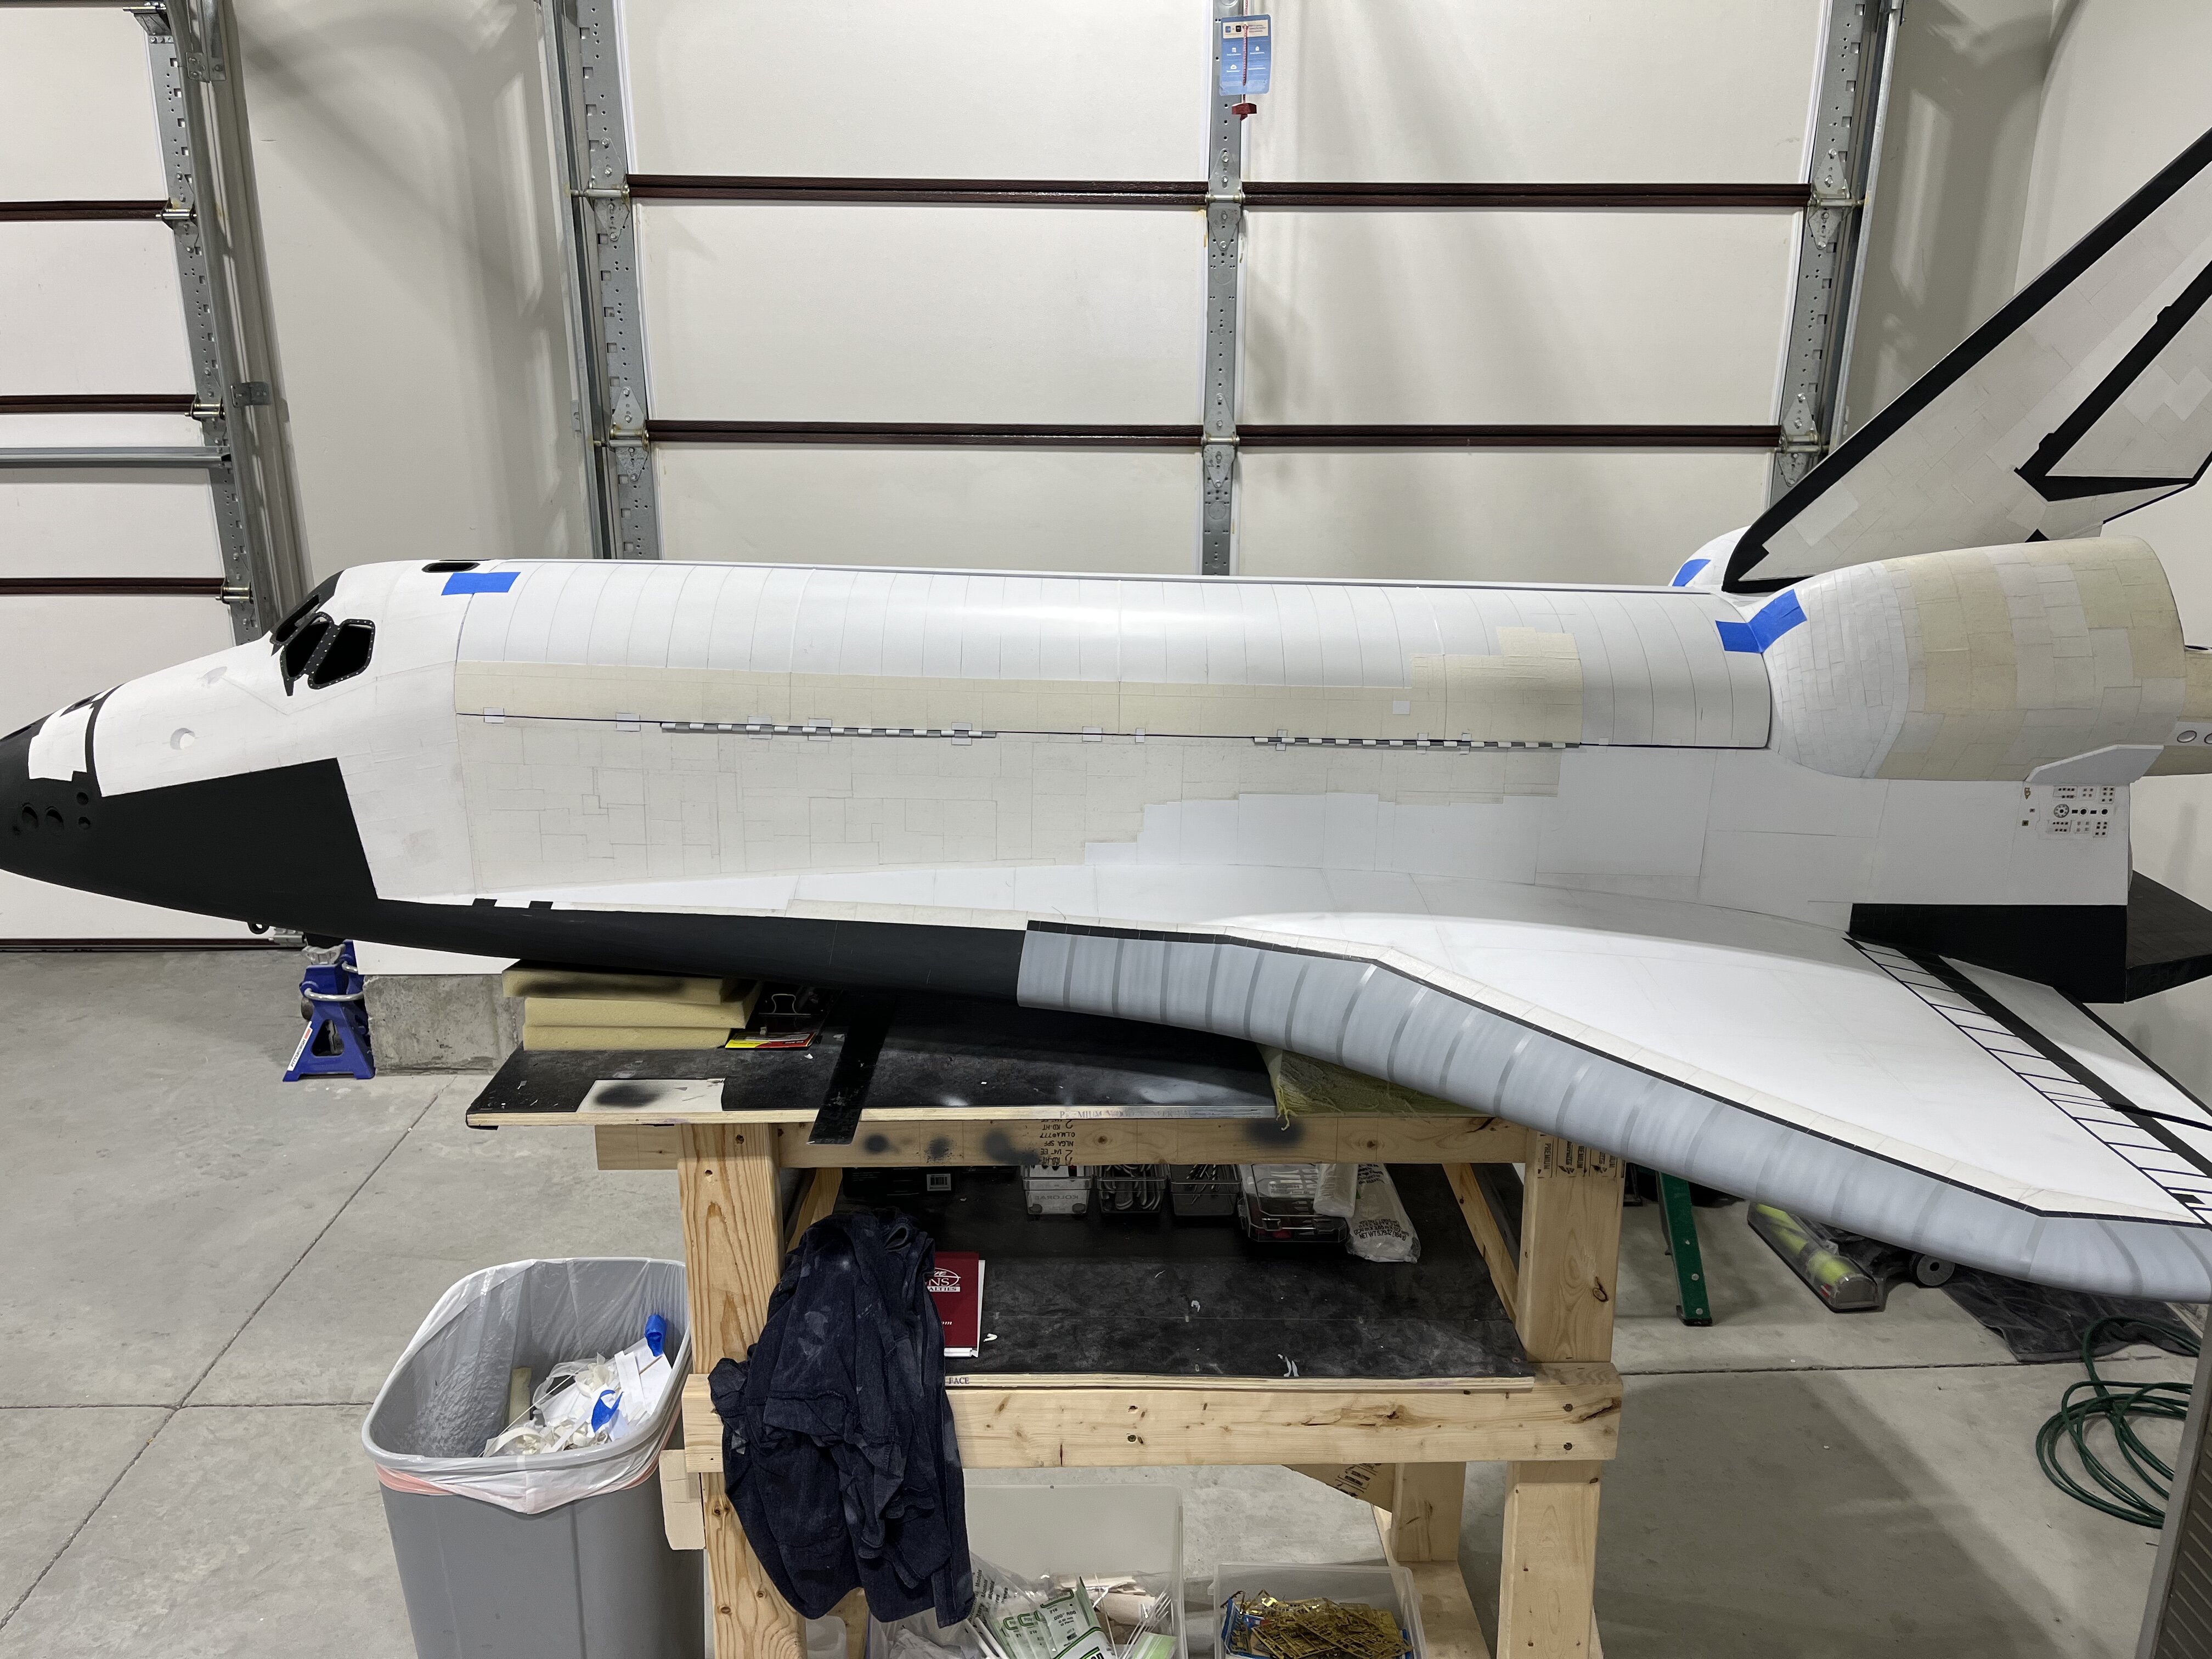
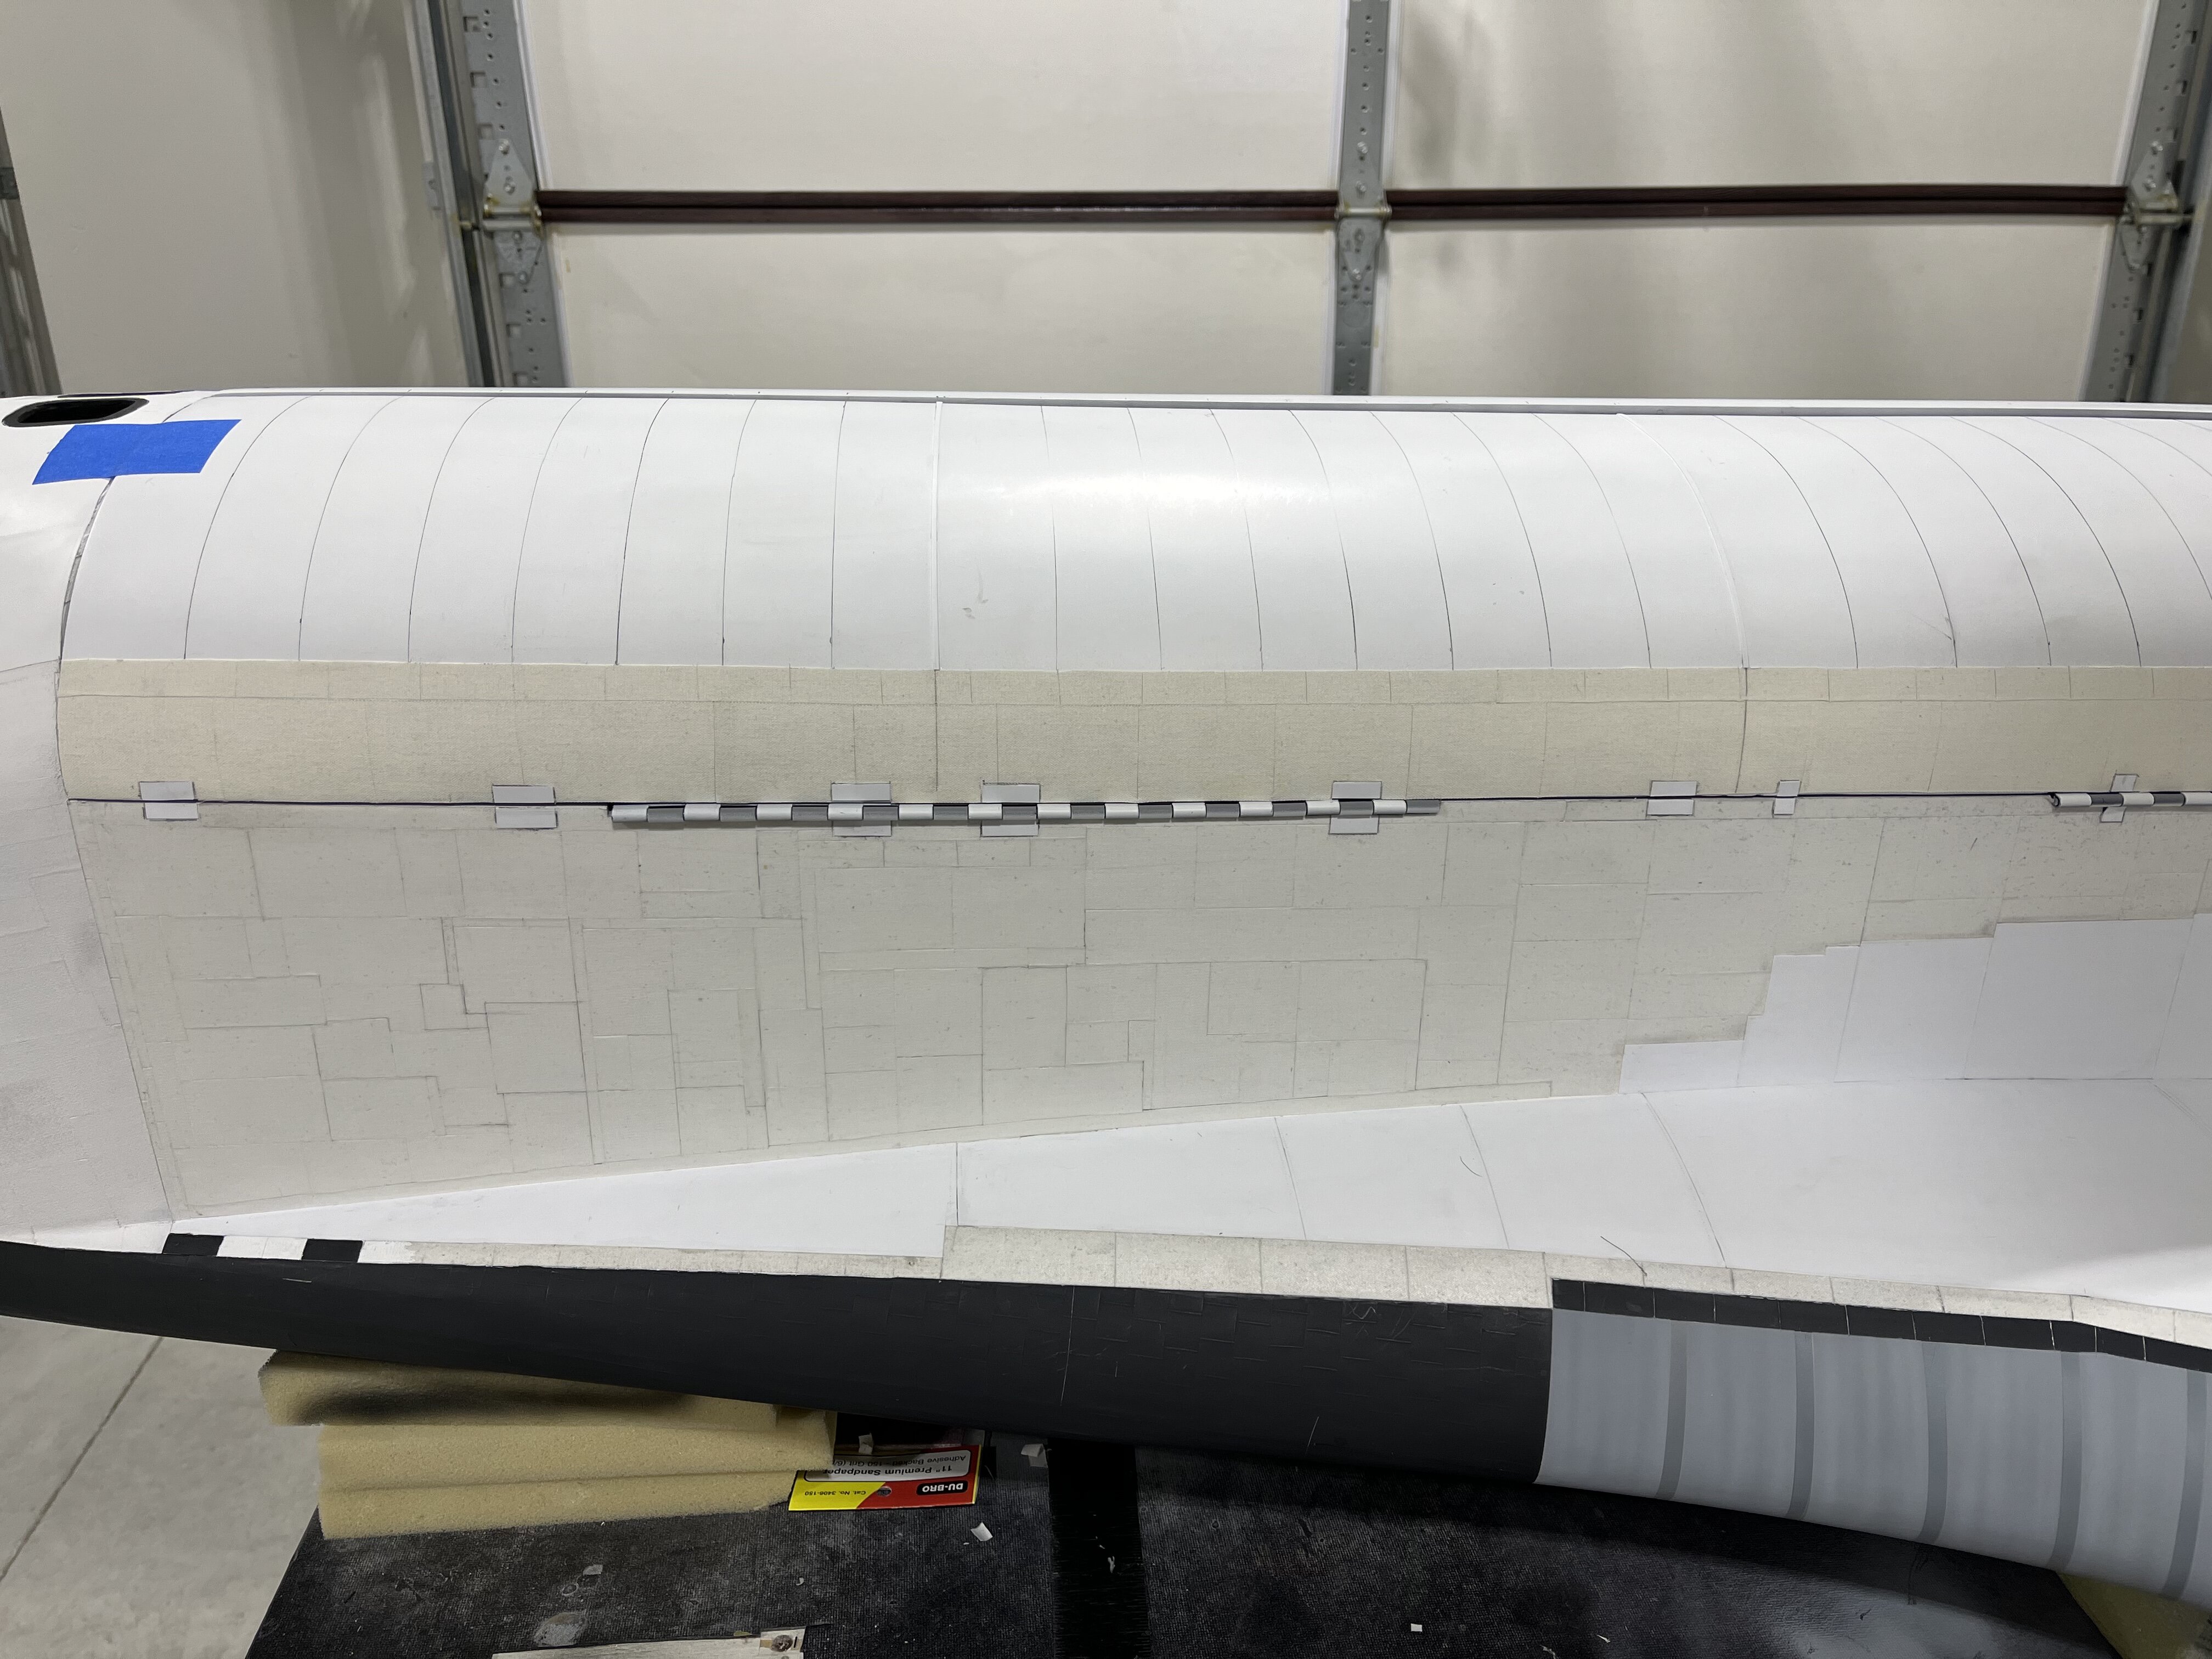
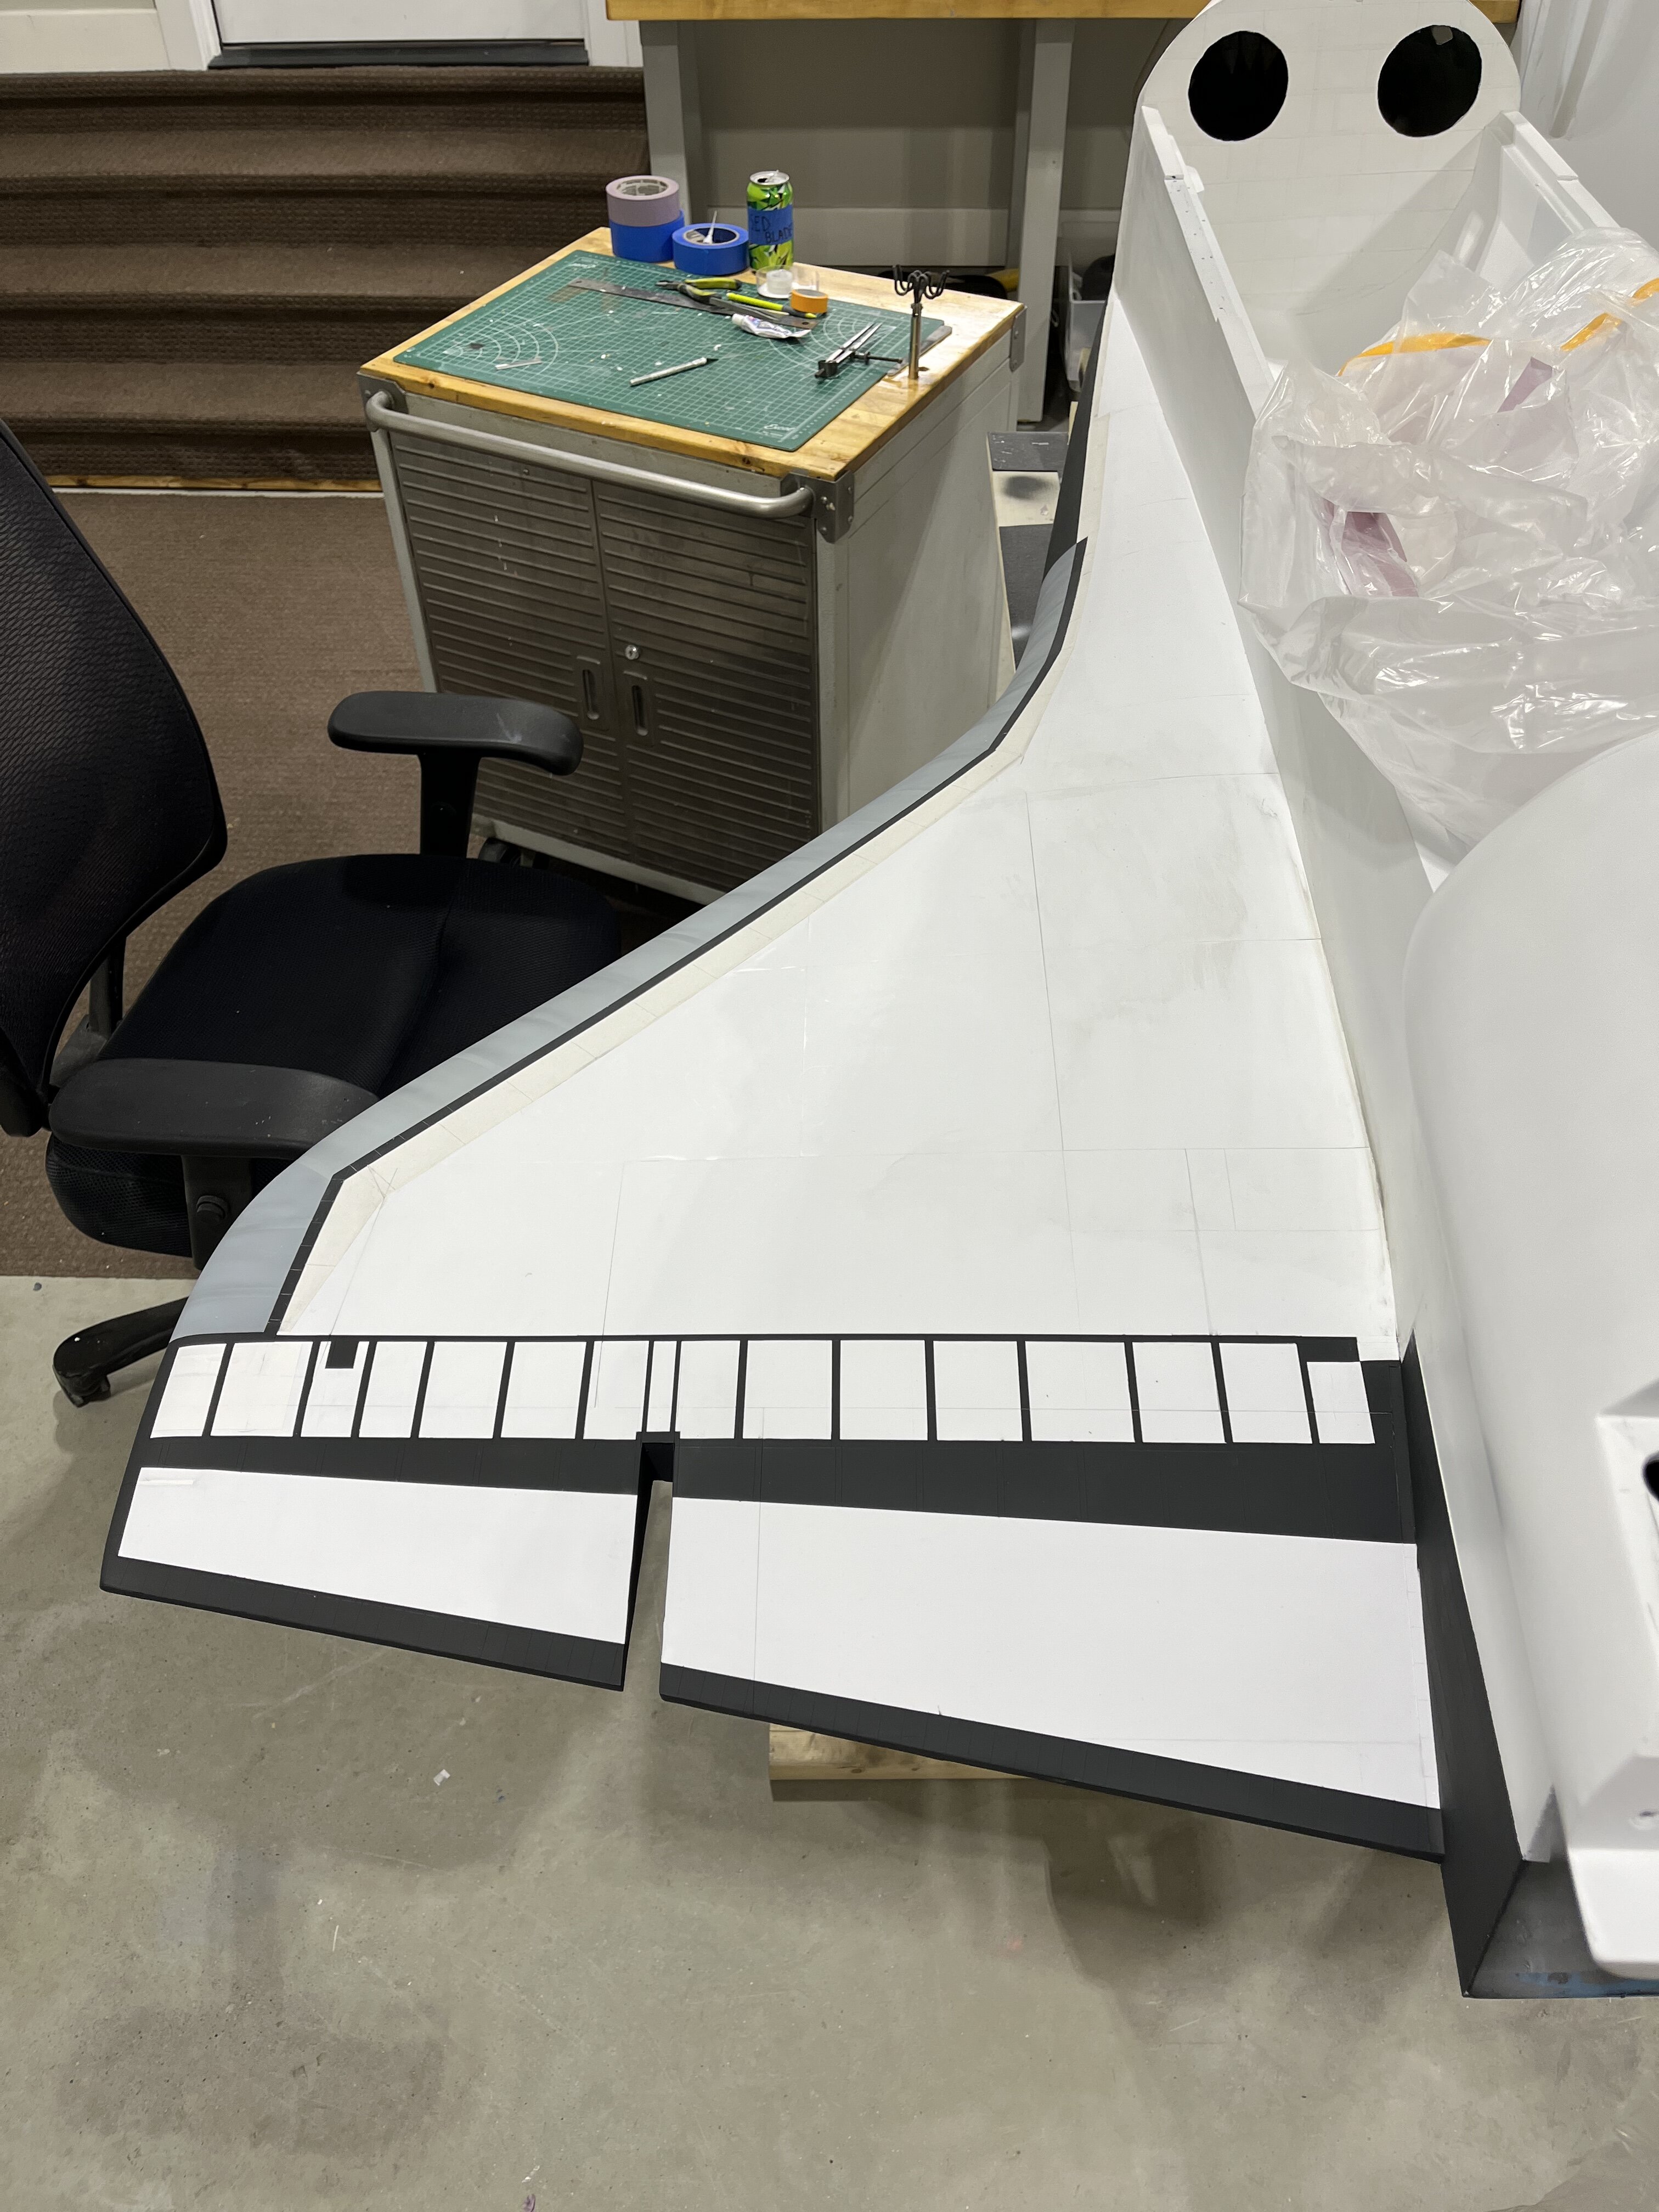
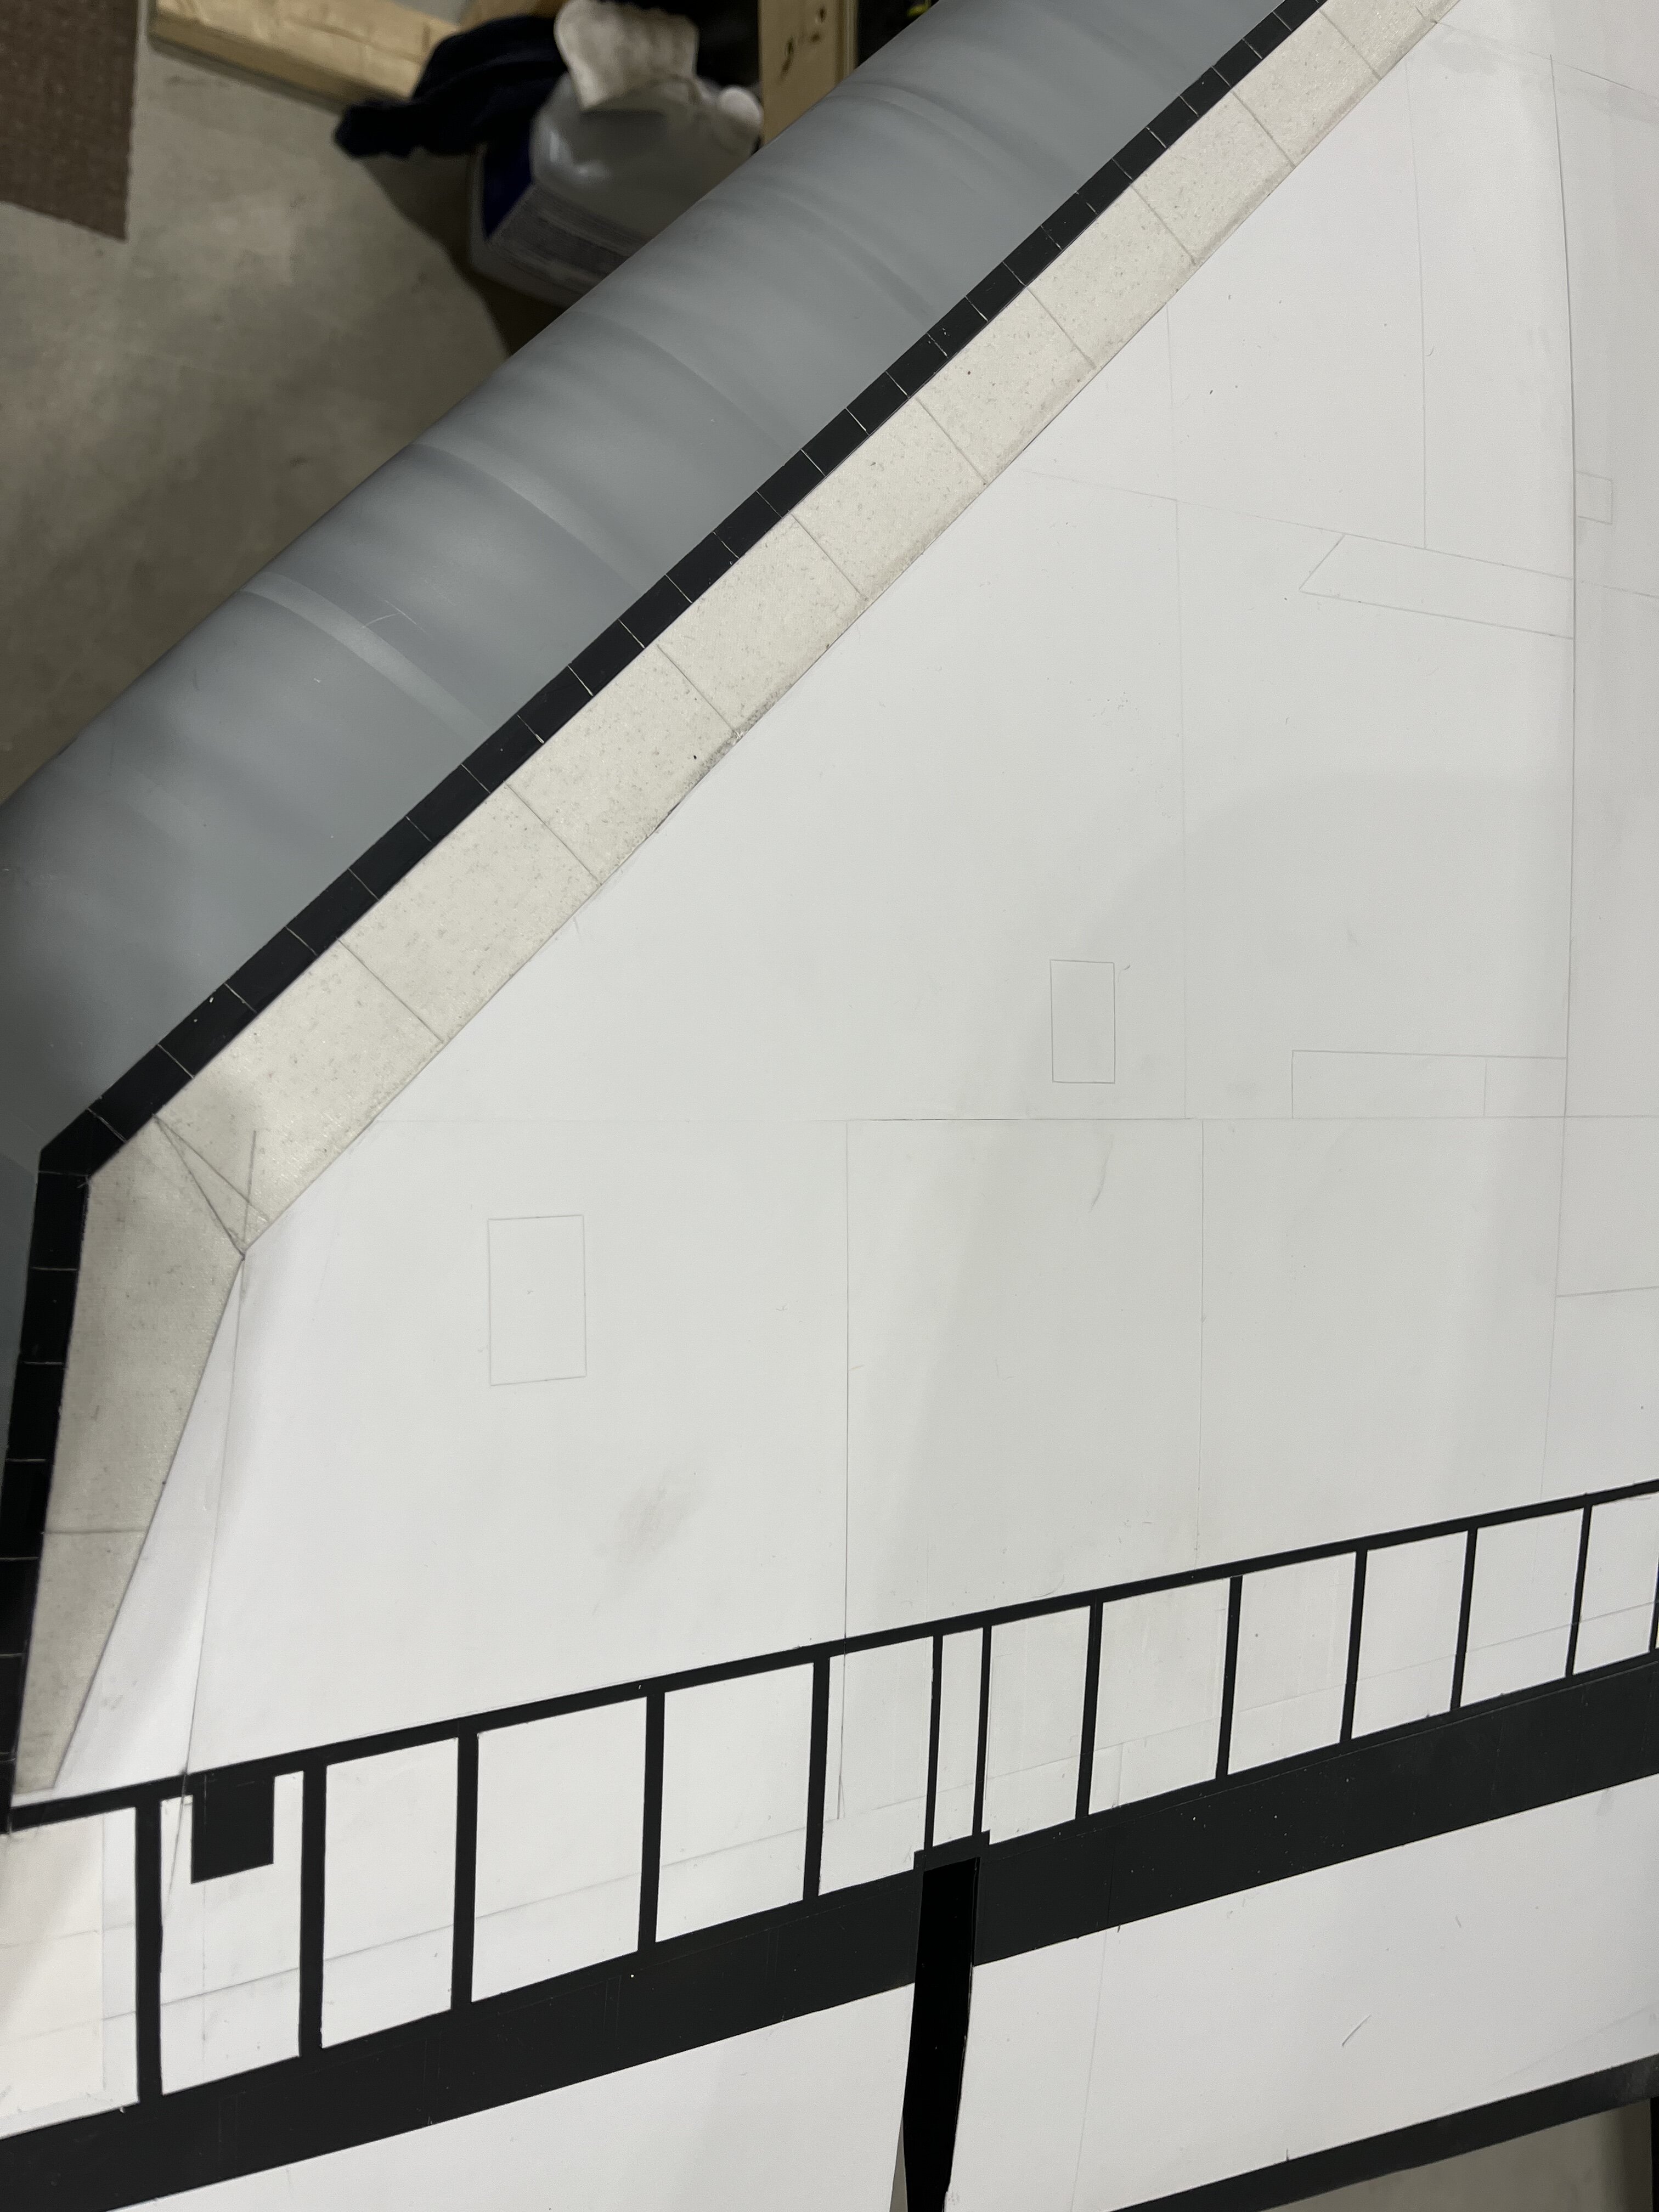
Made a lot of progress the past two weeks. Working myself around the shuttle to the other side. Everything on one side of the shuttle is either covered with plastic, sheeting or athletic tape. To knock down the fuzz on the athletic tape, it was coded with Woodland scenic spray on glue. After this dries , it can be sanded the 400 grit sandpaper. It easily knocks off any roof stuff, or standing fibers. After that, it will get one more coat of straight, seen it glue not cup with water. Thanks so much for having a look. Chris
-
1/15th scale Space Shuttle Atlantis
Bradley25mm replied to Bradley25mm's topic in Space, Sci-Fi & Fantasy
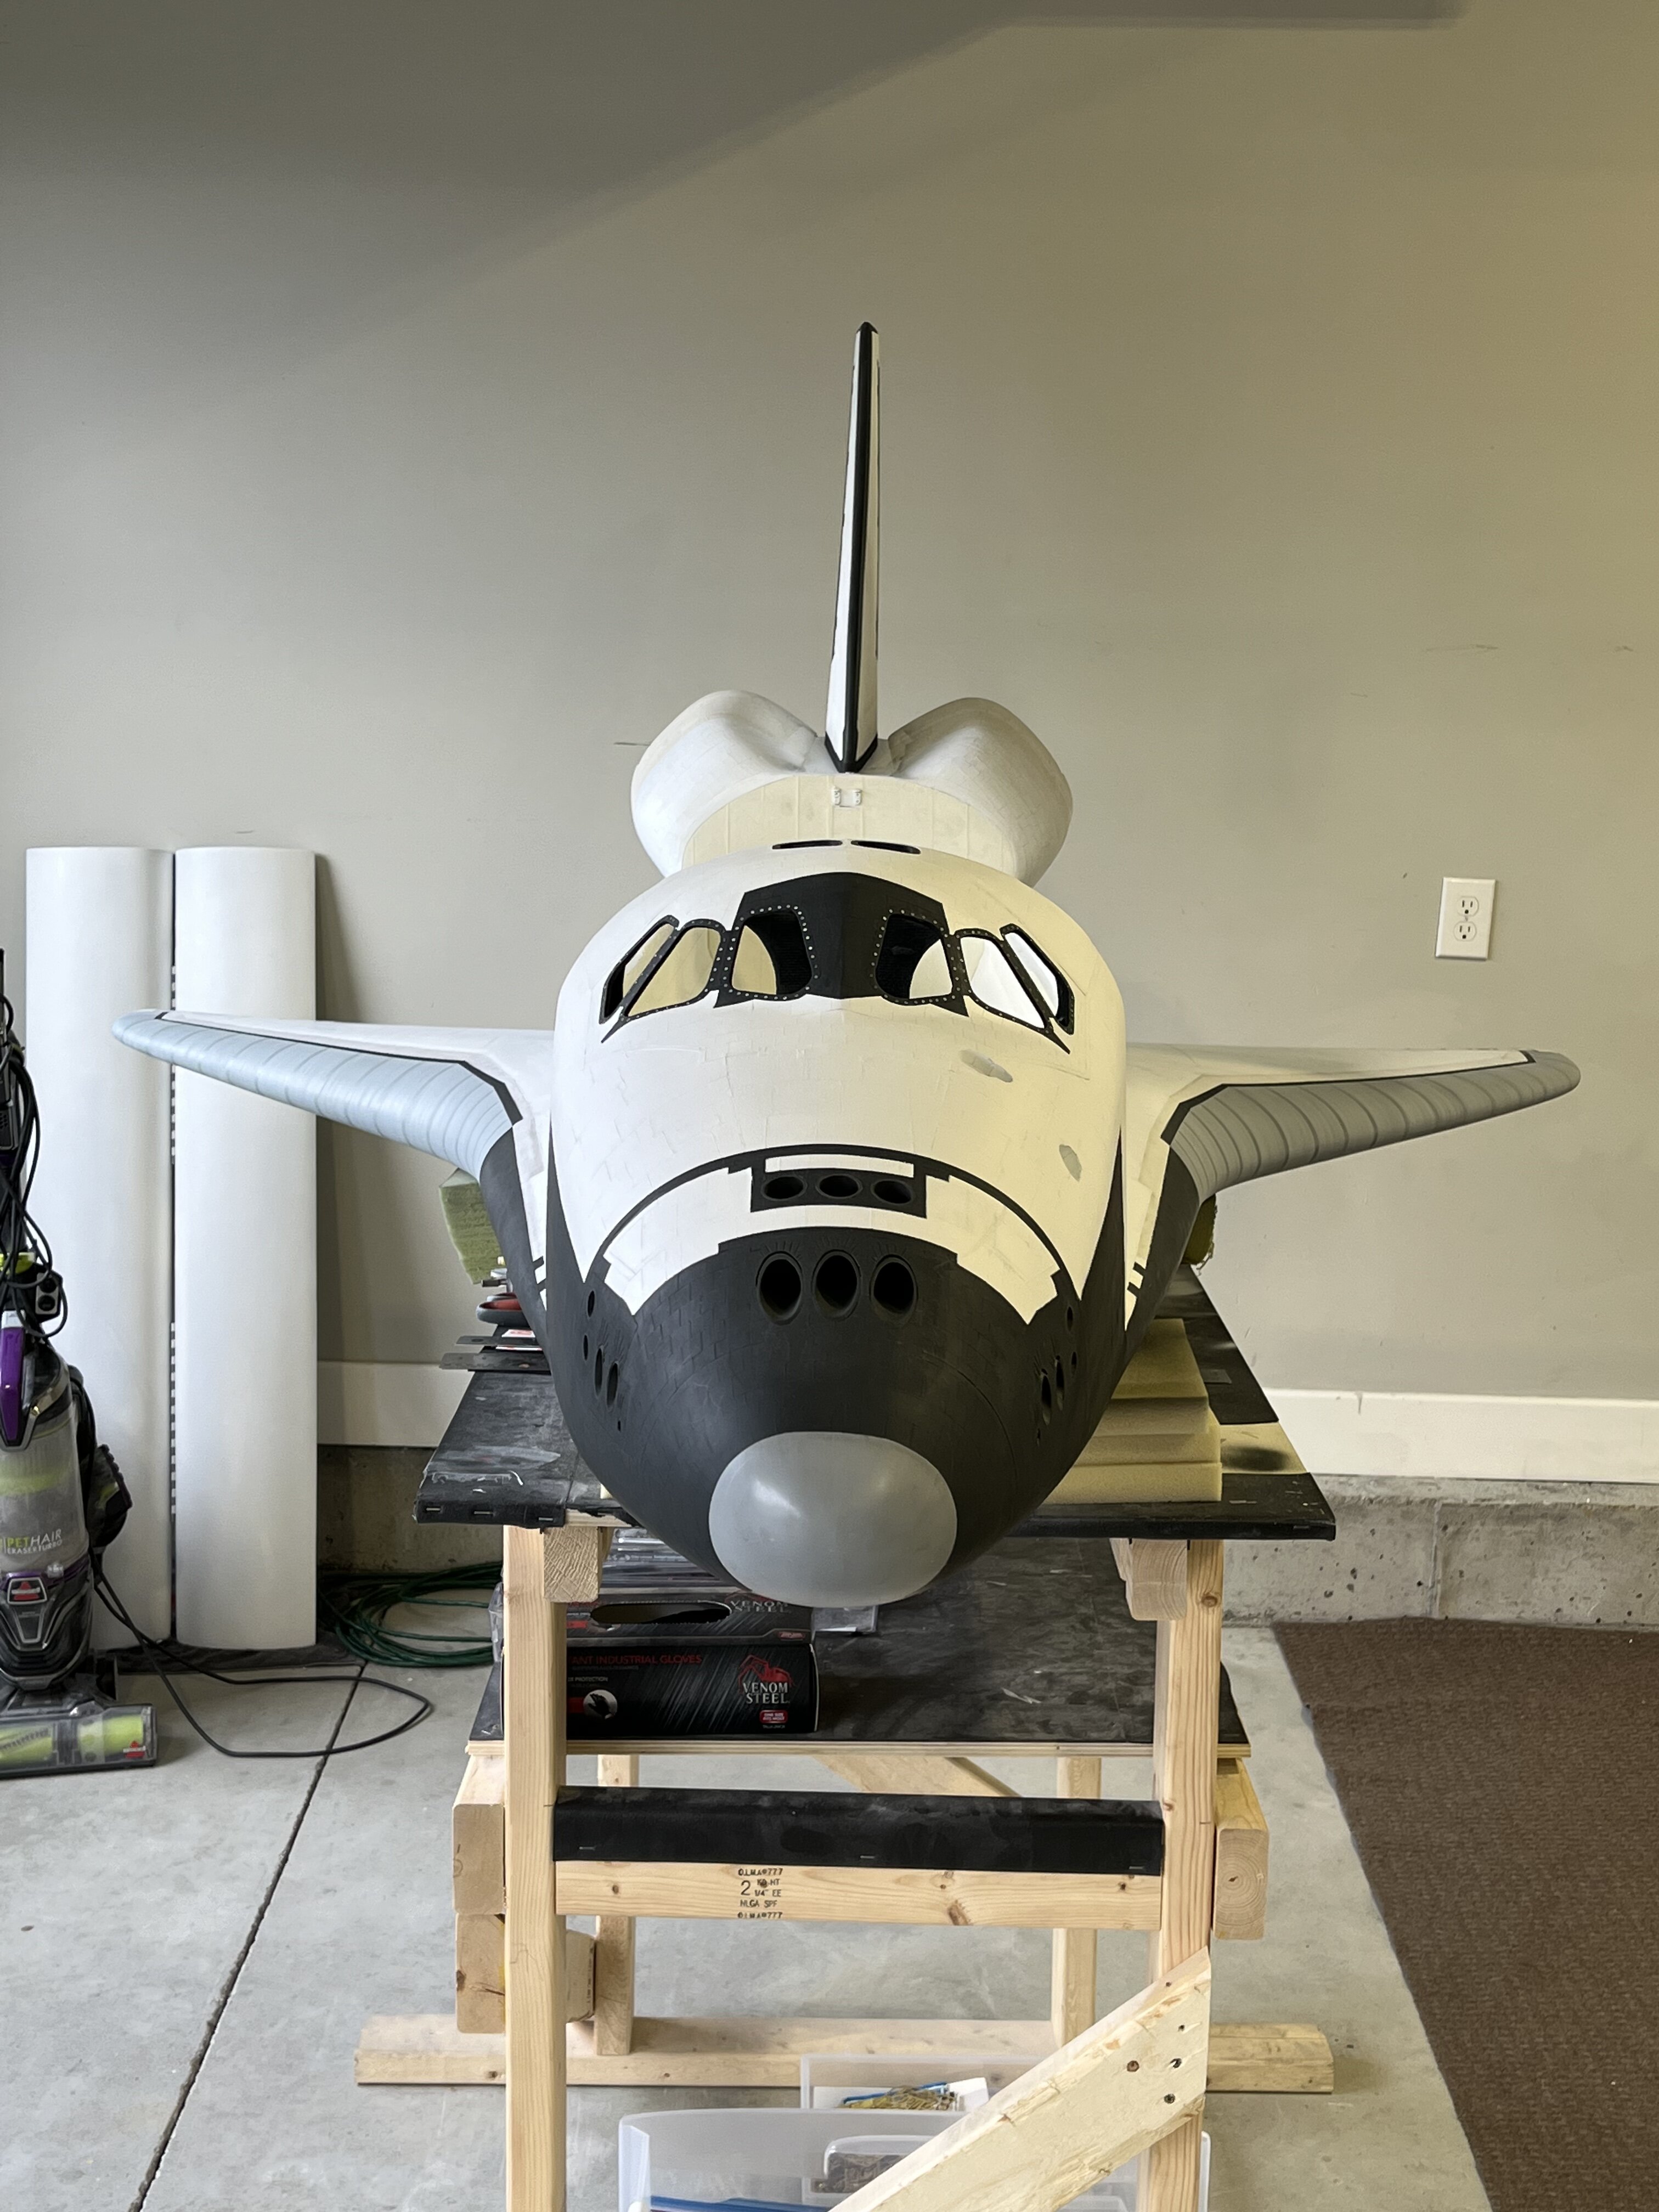
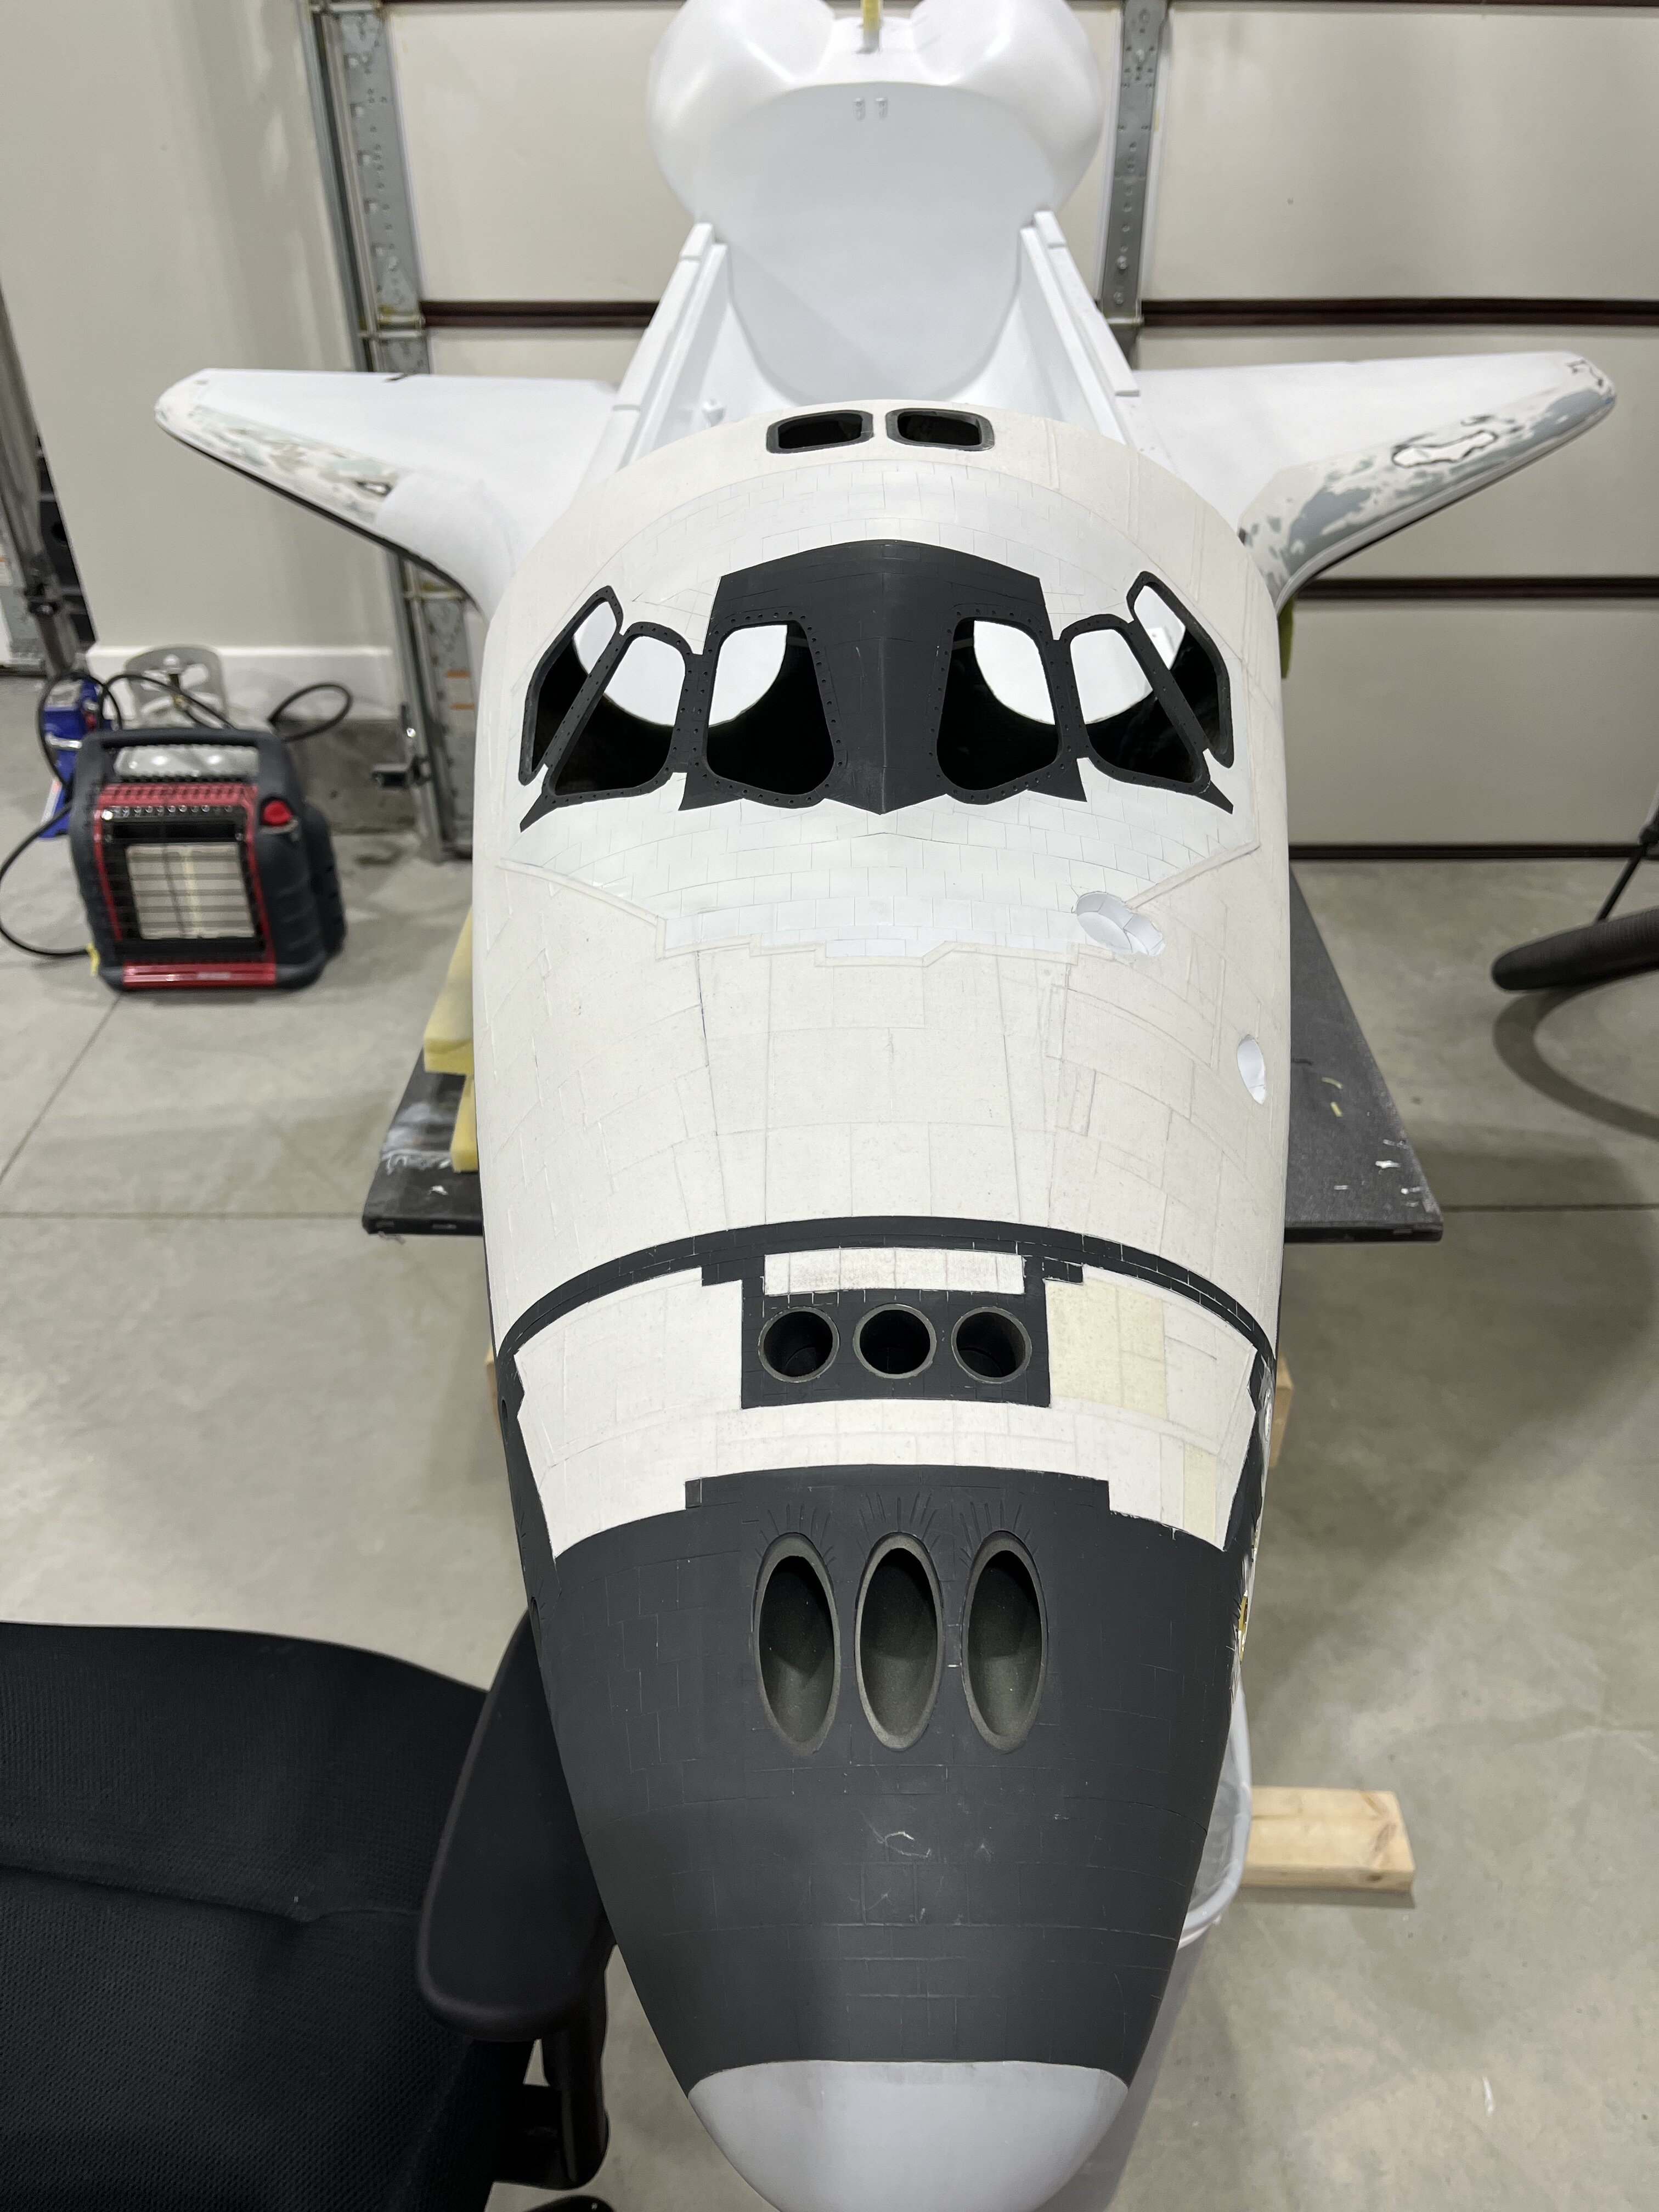
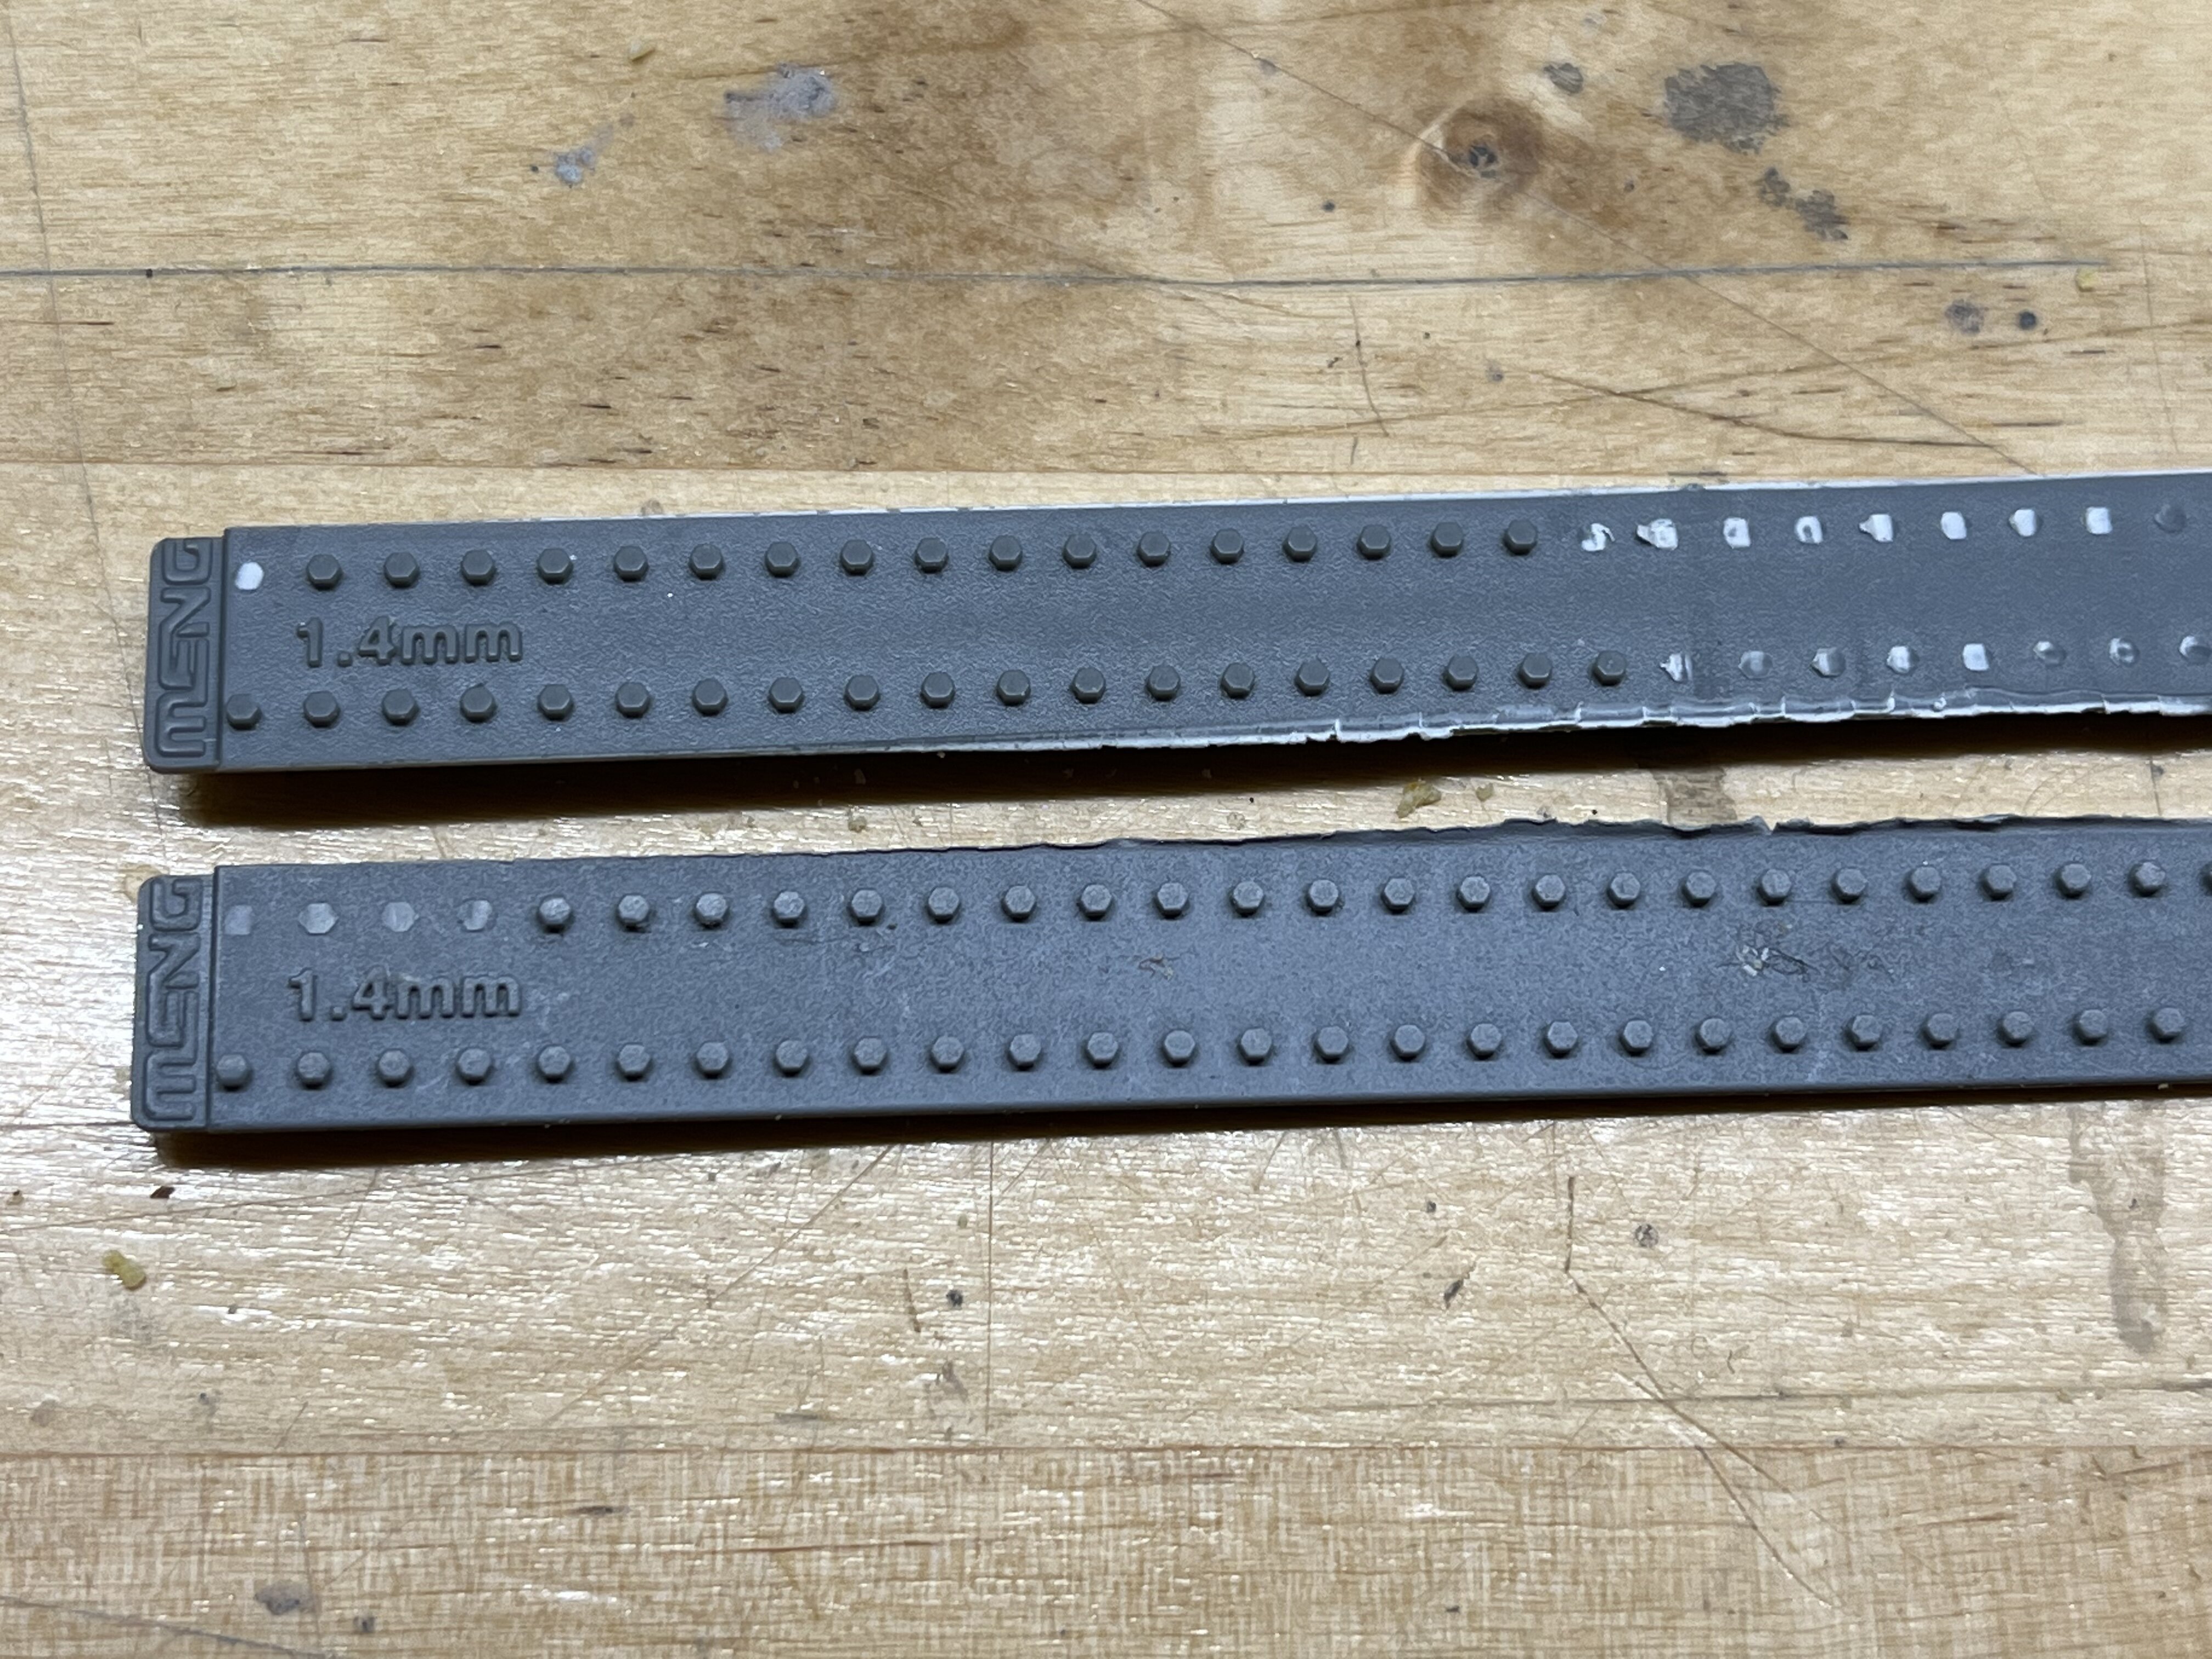
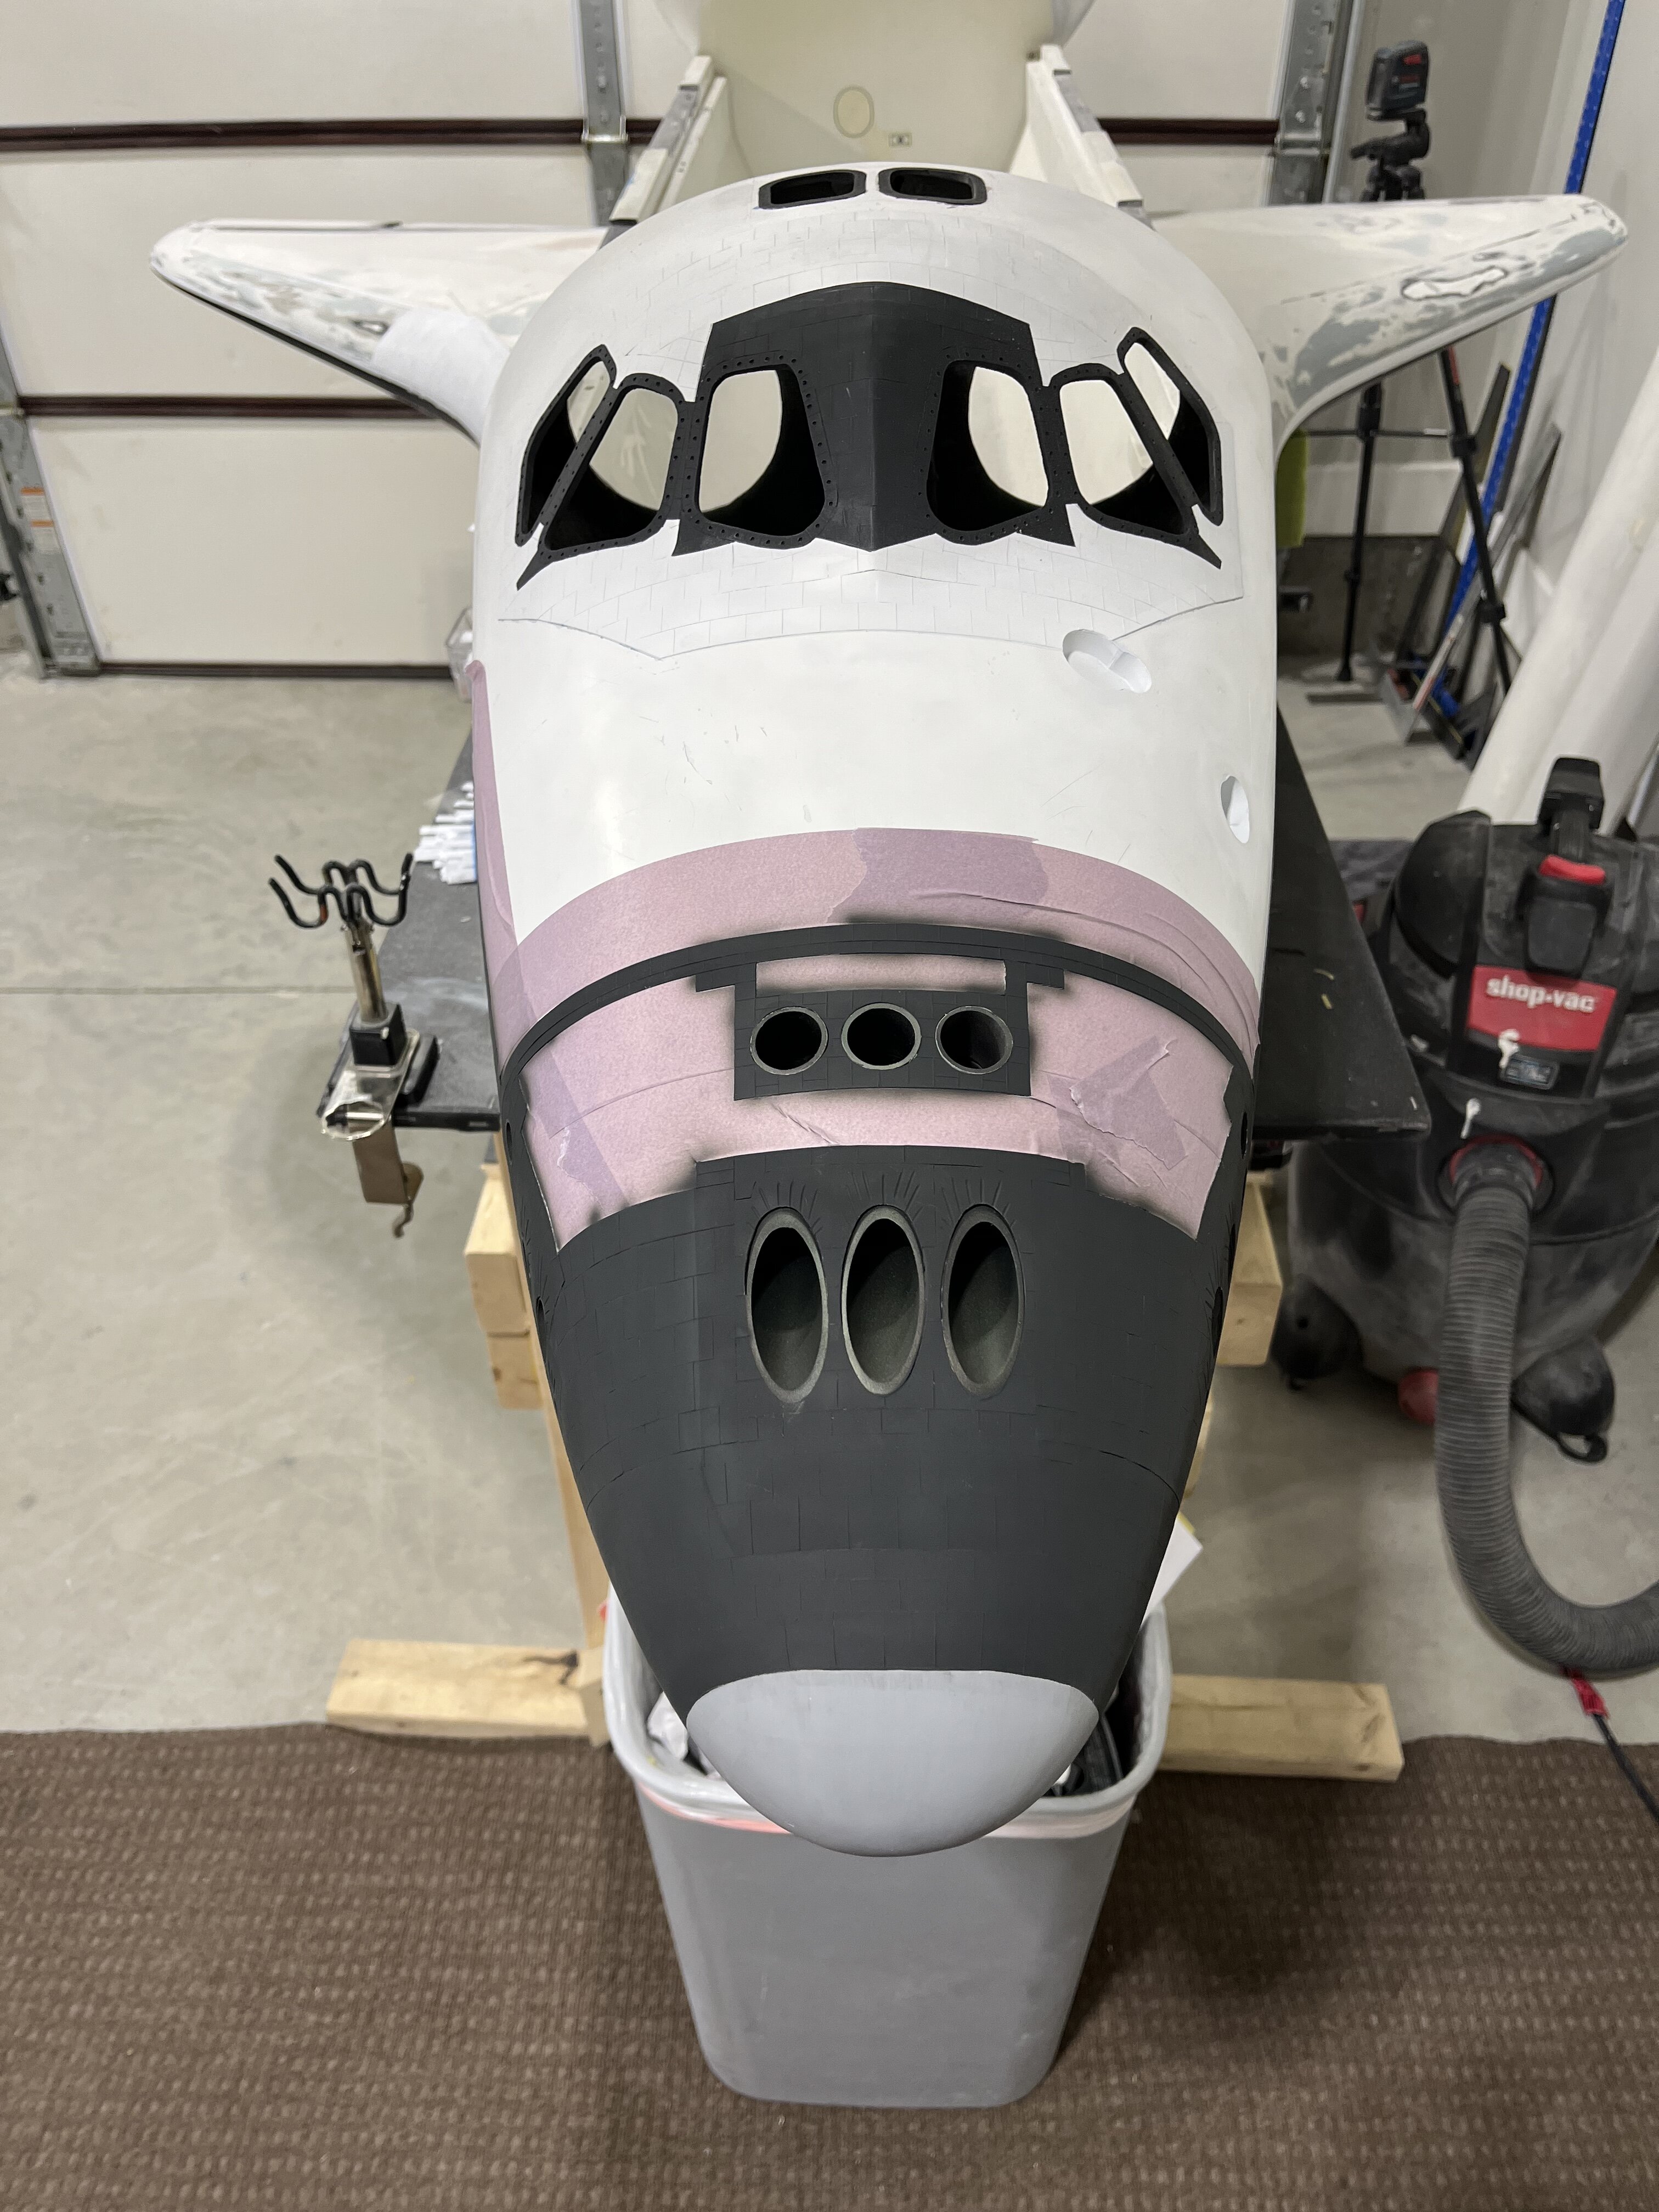
I’ve been fortunate enough to make some pretty decent progress the past few days. Everything from the nose of the shuttle to the beginning of the payload bay has been covered with either plastic squares, or athletic tape that will simulate the thermal blanket shields. I drilled shallow holes around each window frame. Painted all the holes white this morning. When they dry, I will take the bolt heads and glue them in the center of each one. Thanks for having a look. Christopher
-
I’ve been blessed with a wife that is extremely supportive of my hobby. A lot of late nights spent on this one. Thanks Christopher
-
Really interesting build Ron. The paint job is awesome. Christopher.
-
That is some amazing work. I don’t think I would have the patience to do something like that. Thanks for sharing. Christopher
-
1/15th scale Space Shuttle Atlantis
Bradley25mm replied to Bradley25mm's topic in Space, Sci-Fi & Fantasy
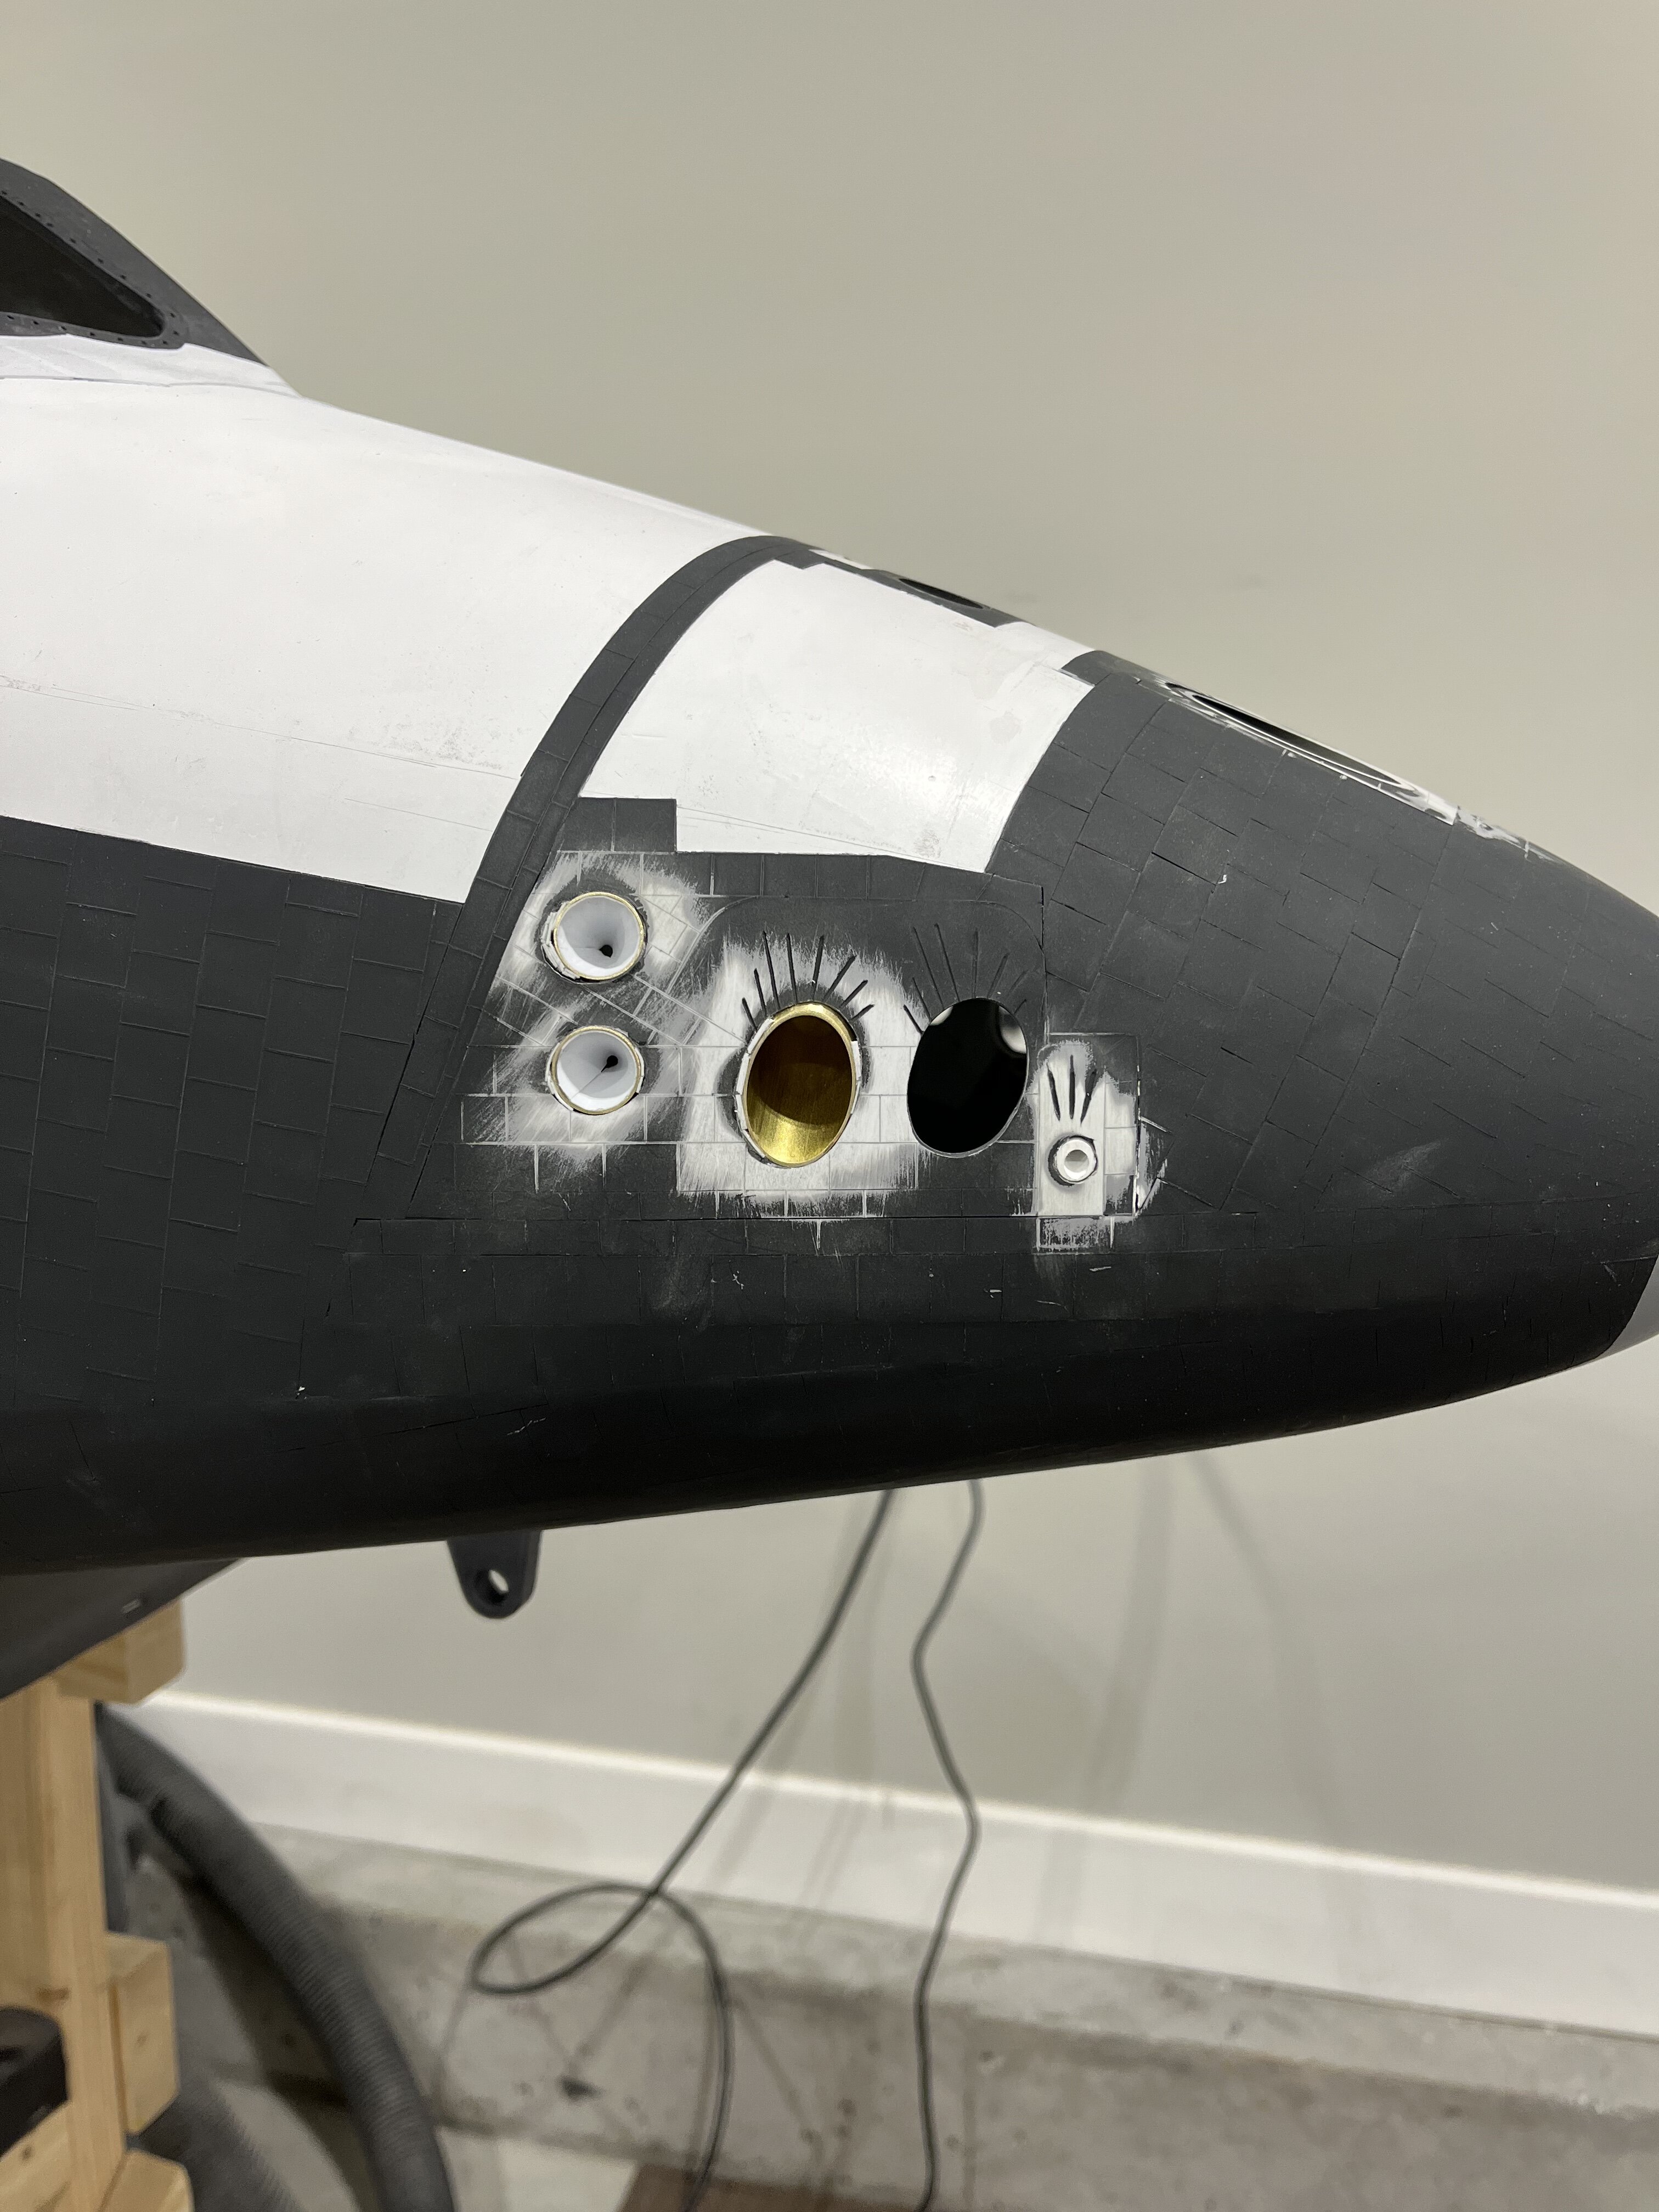
The thrusters have been mounted on the top and sides of the nose. The interior cargo bay doors originally had some type of heavy foil glued on each one. Today, I stripped it off, sanded everything smooth, and glued .015 sheet styrene in its place. Next I move on to applying the athletic tape to the white sections of the nose. Thanks for having a look.
-
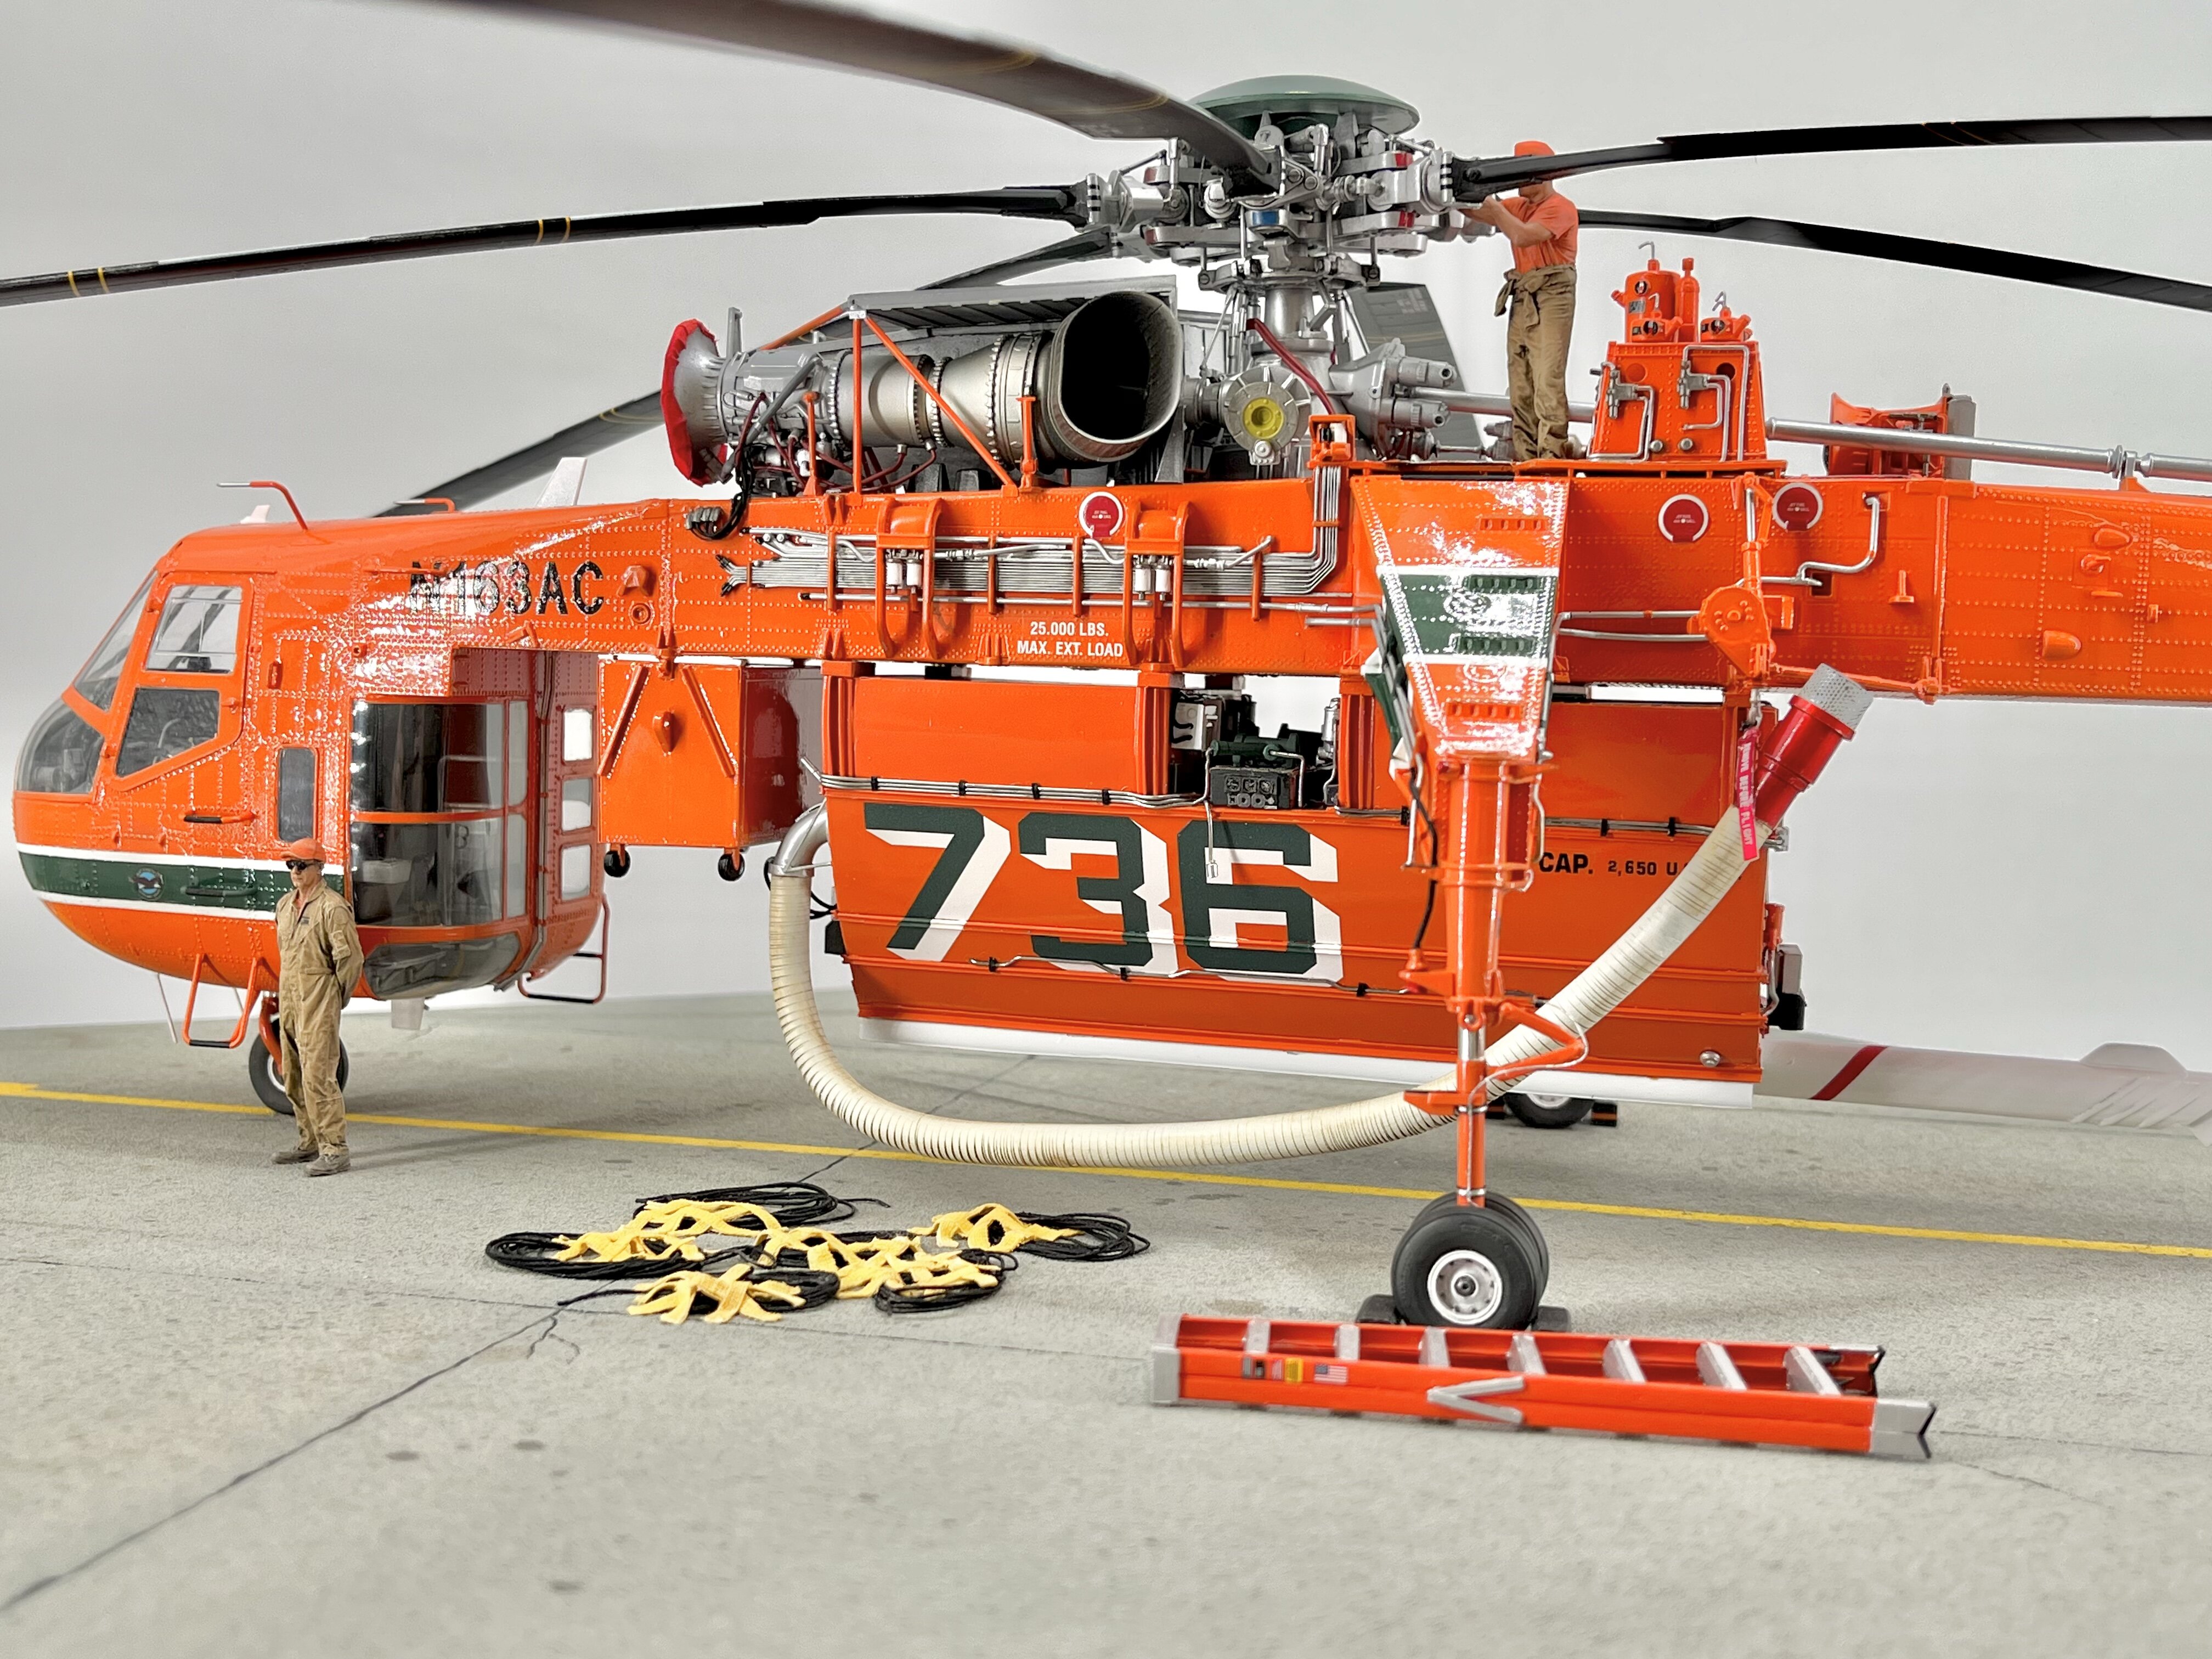
Thanks so much for the compliment. I began the project on 4/25. The final corrections were made on 7/15. The Fire Tank took the most time.( I had to rebuild it after not being happy with the first attempt.) I ran into an issue with the paint reaction to the clearcoat. I used to paint stripper to start over. Thanks again Christopher
-
This is a link to the build. https://erickson.mediavalet.com/portals/model-resources Thanks for having a look. Chris
-
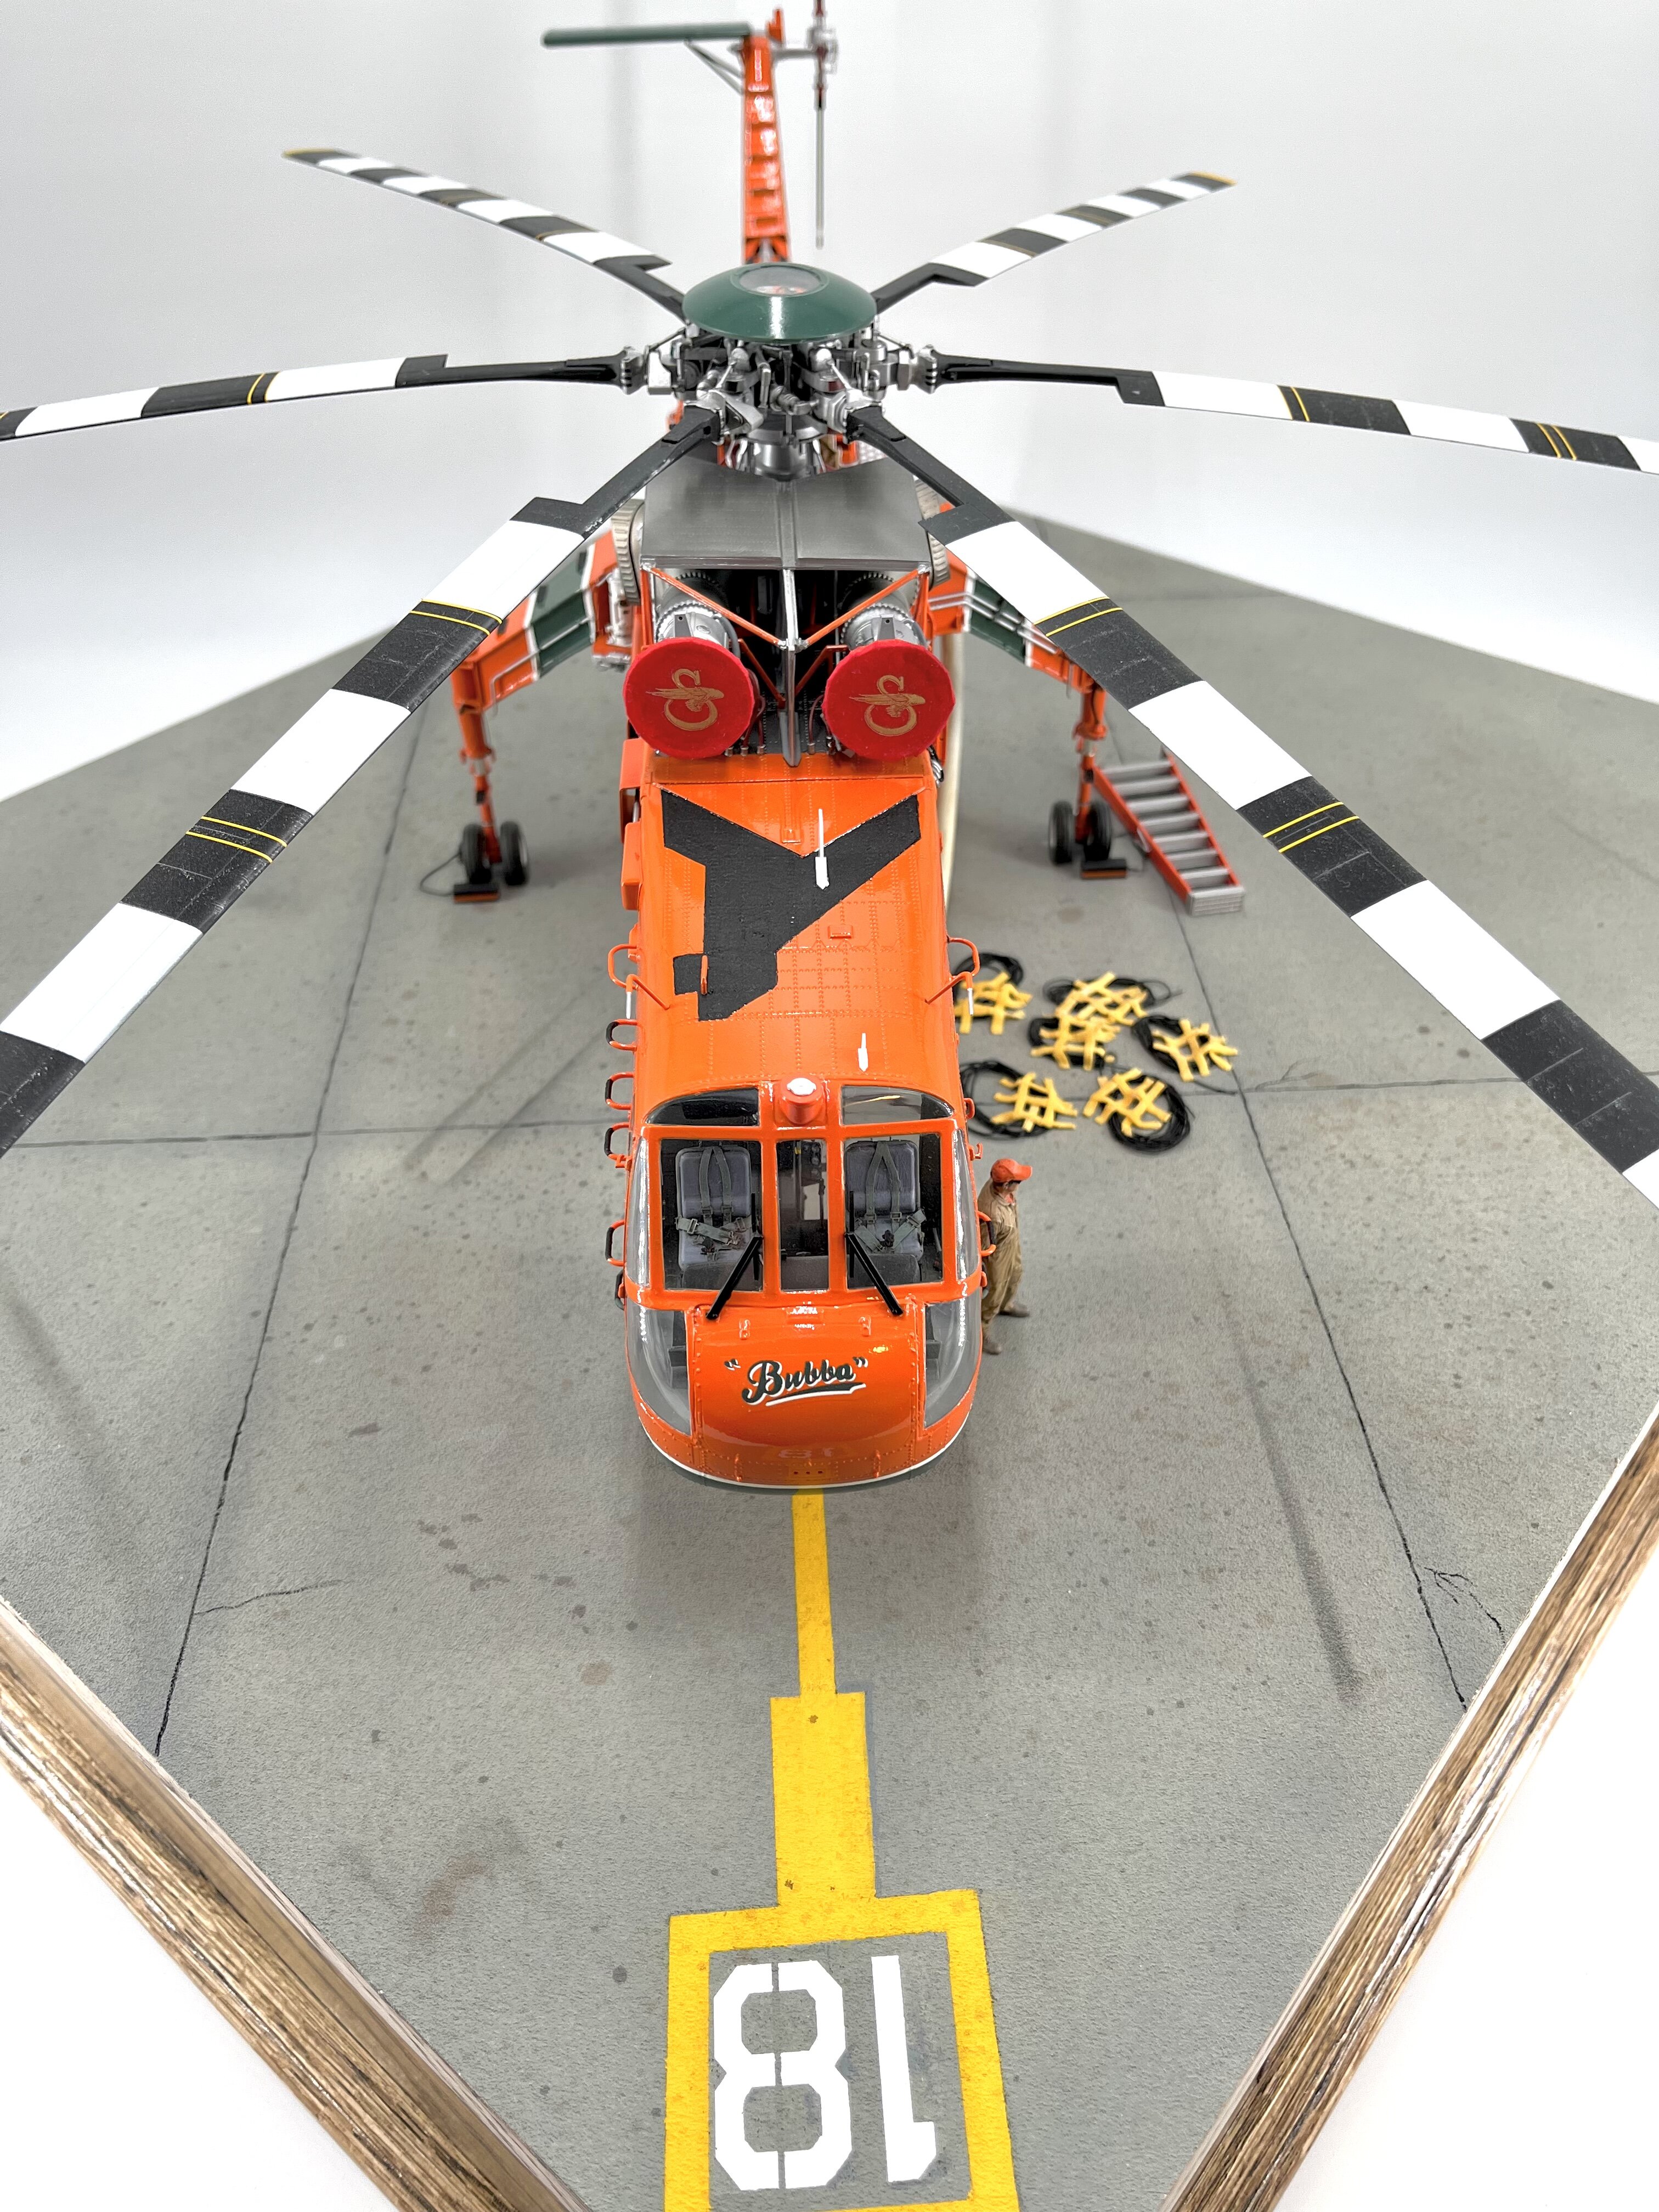
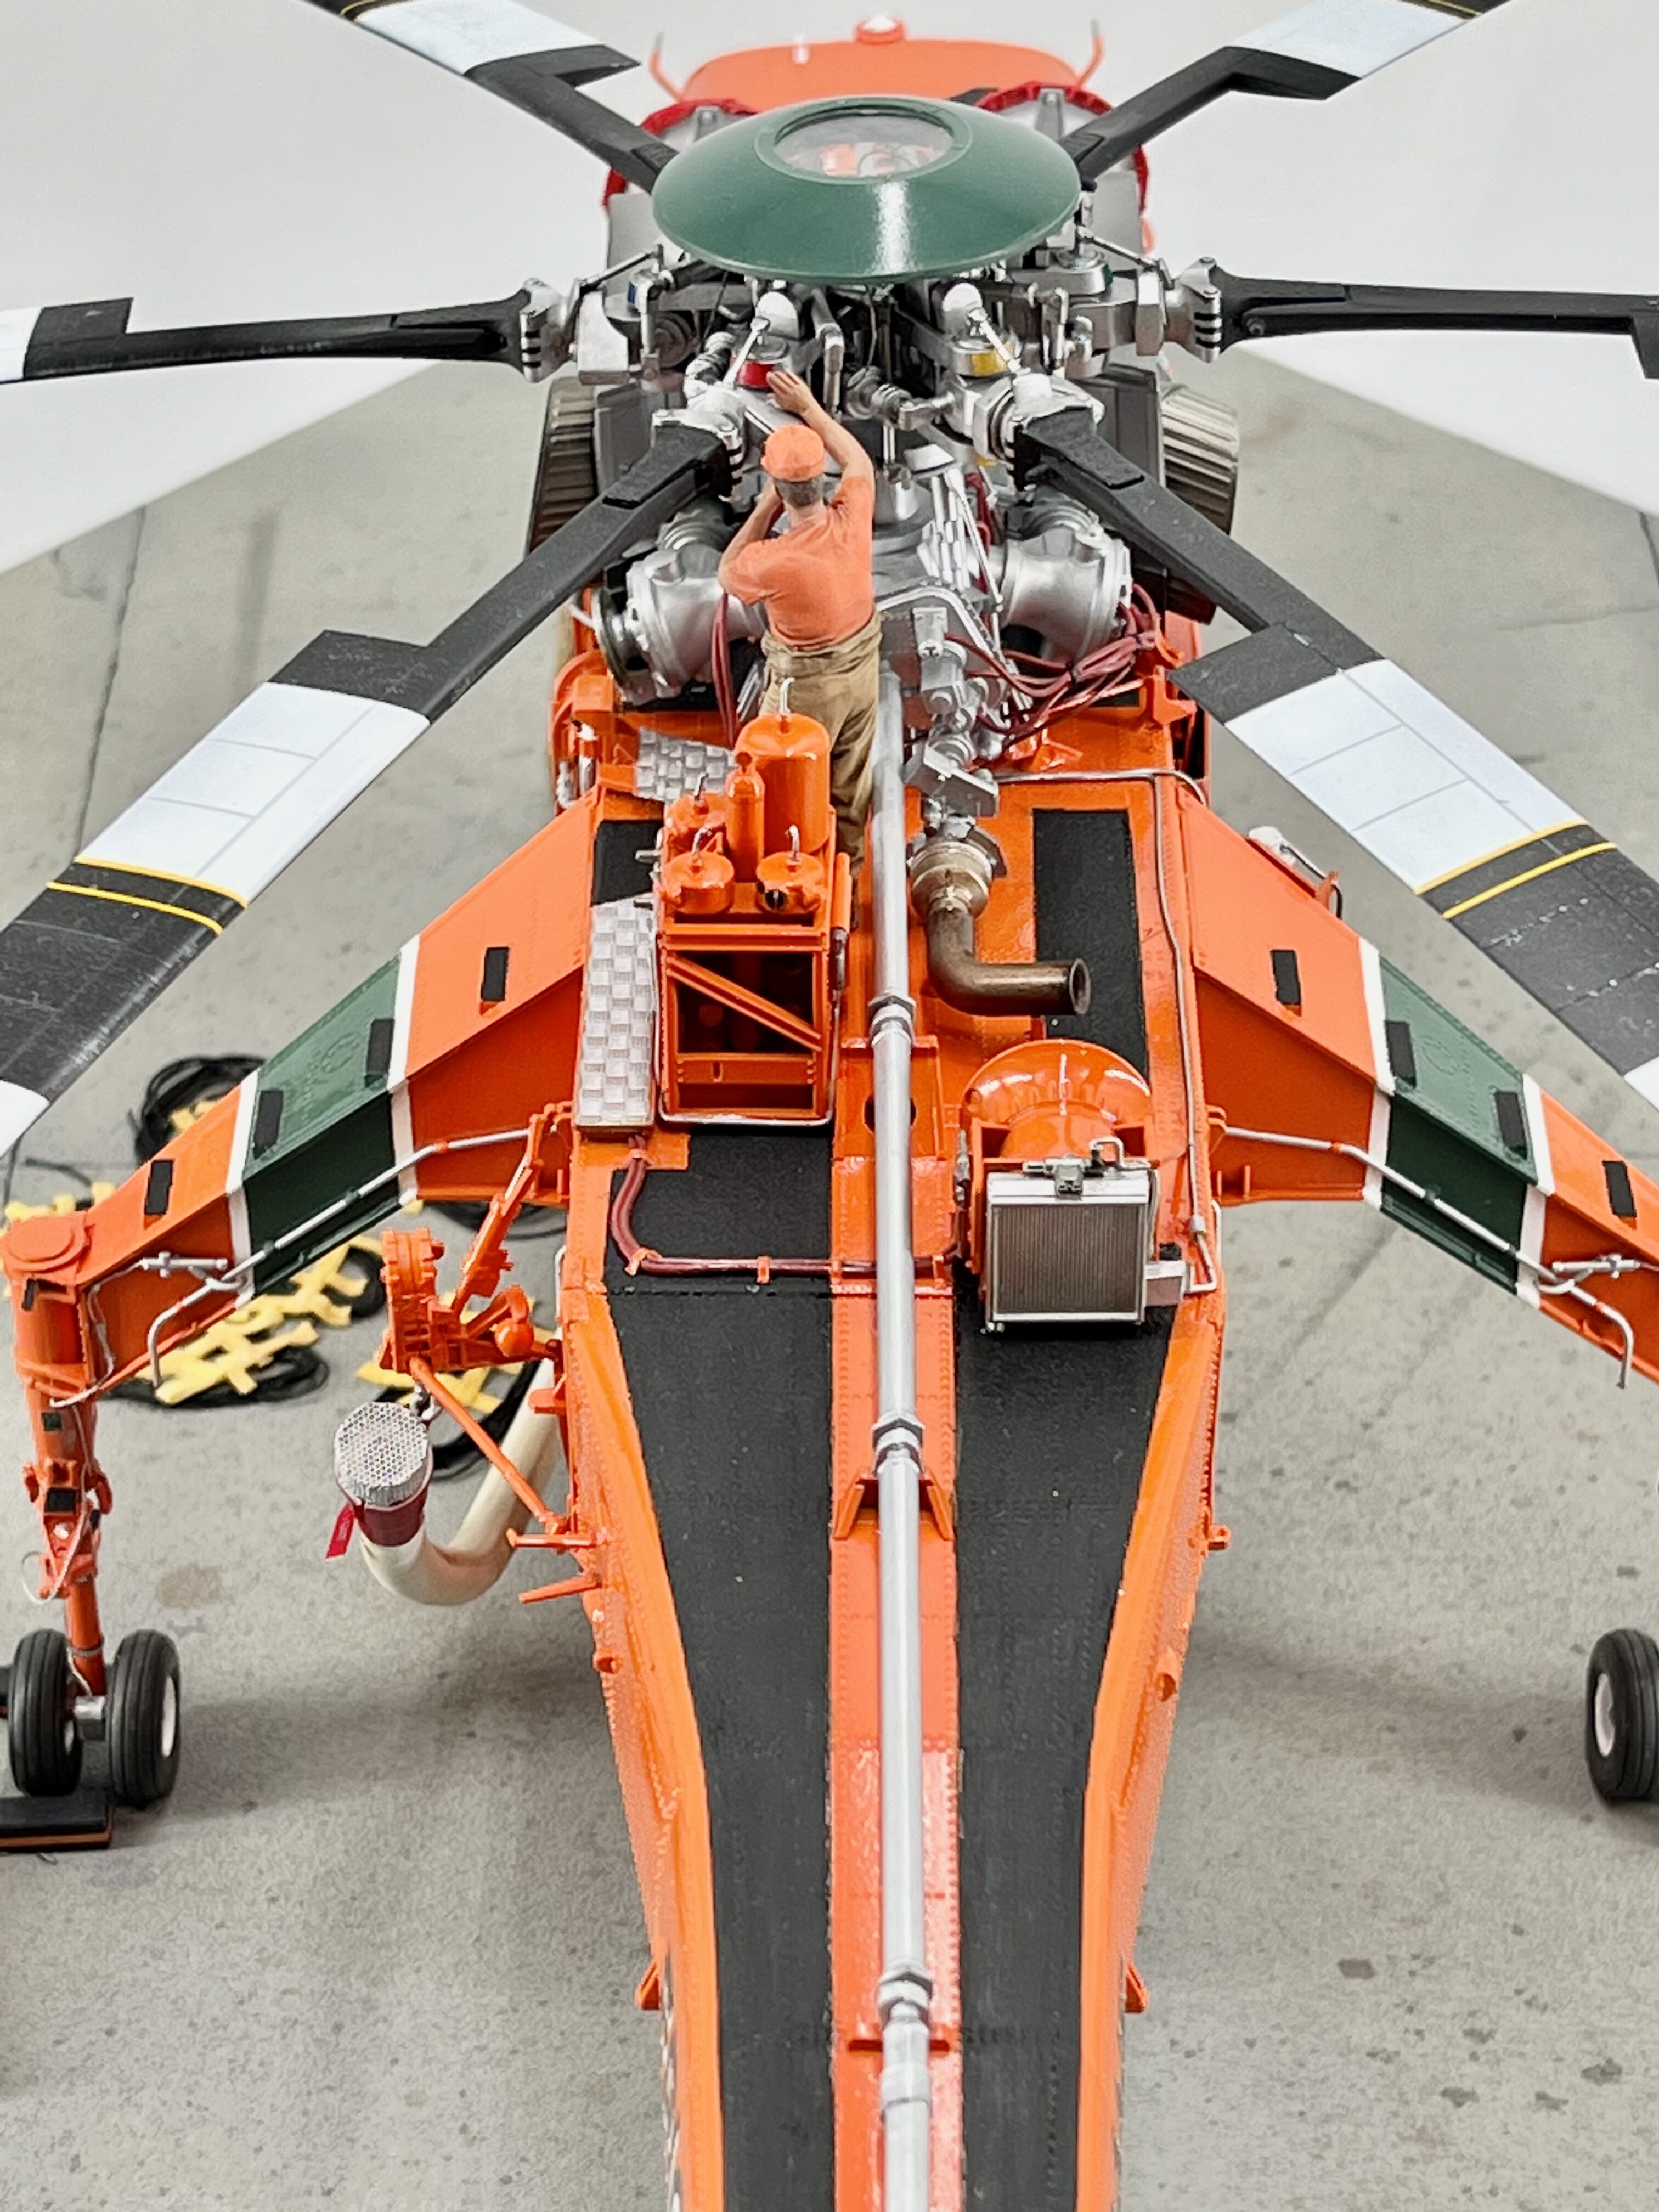
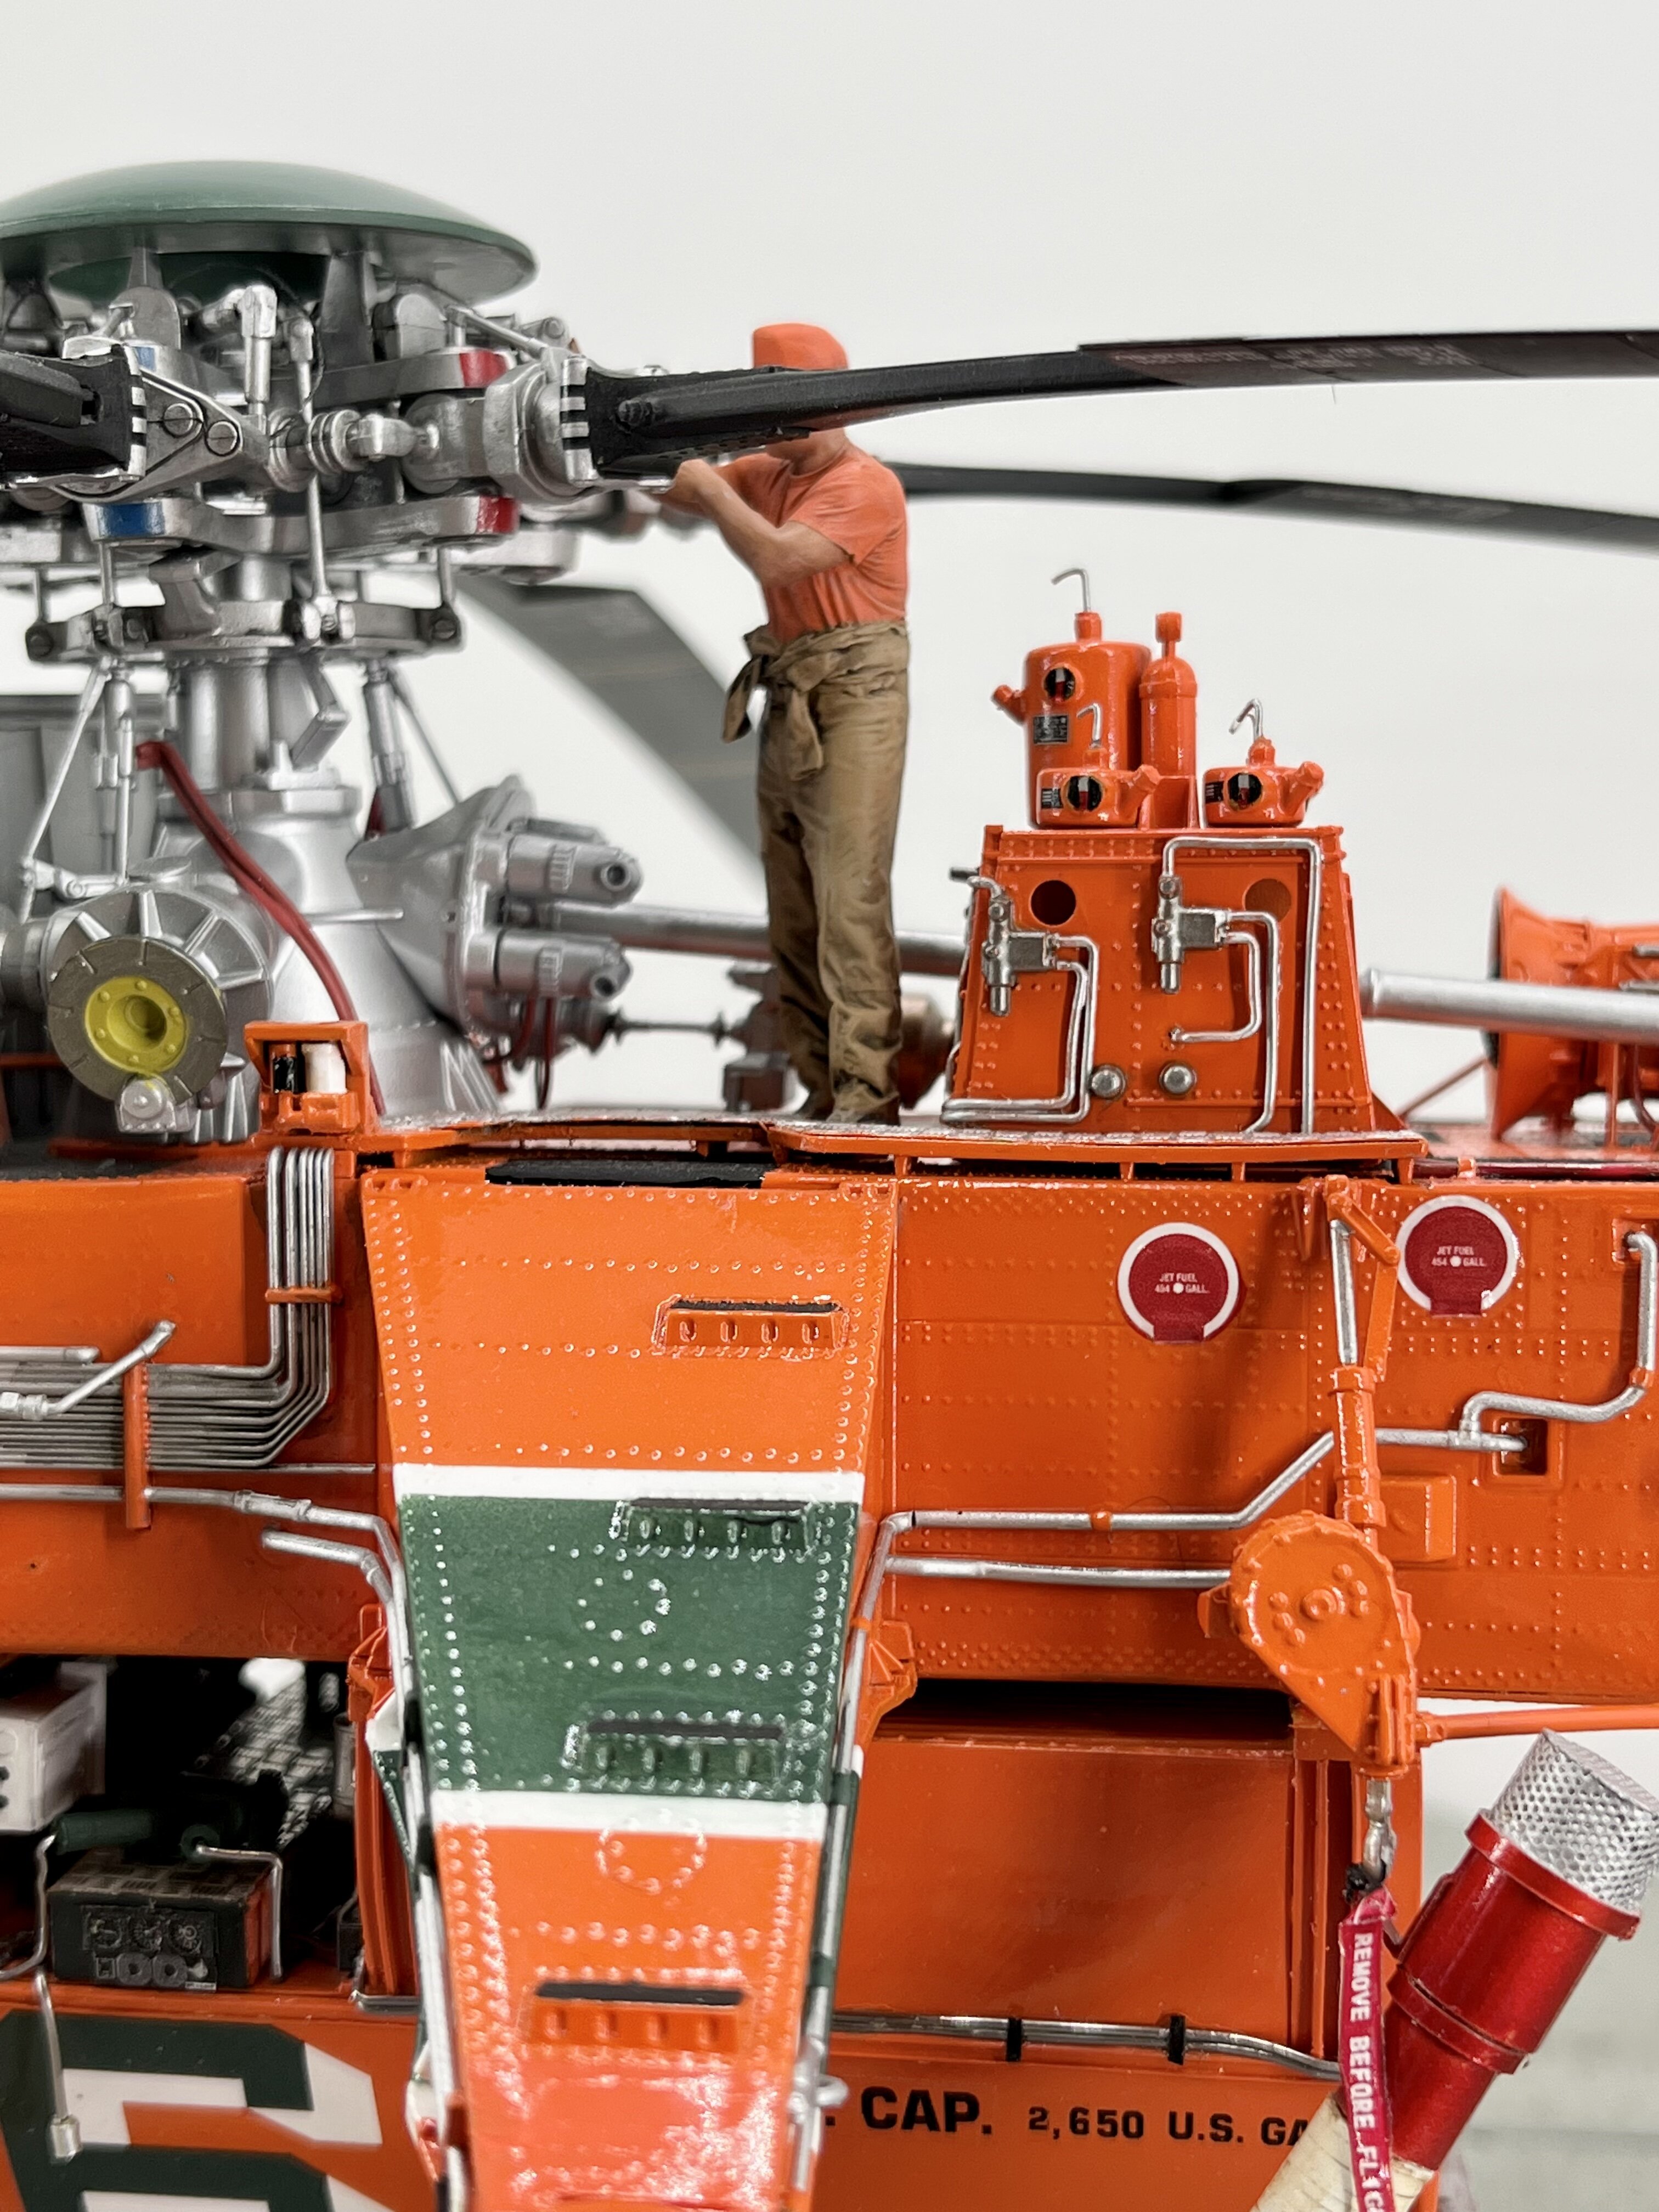
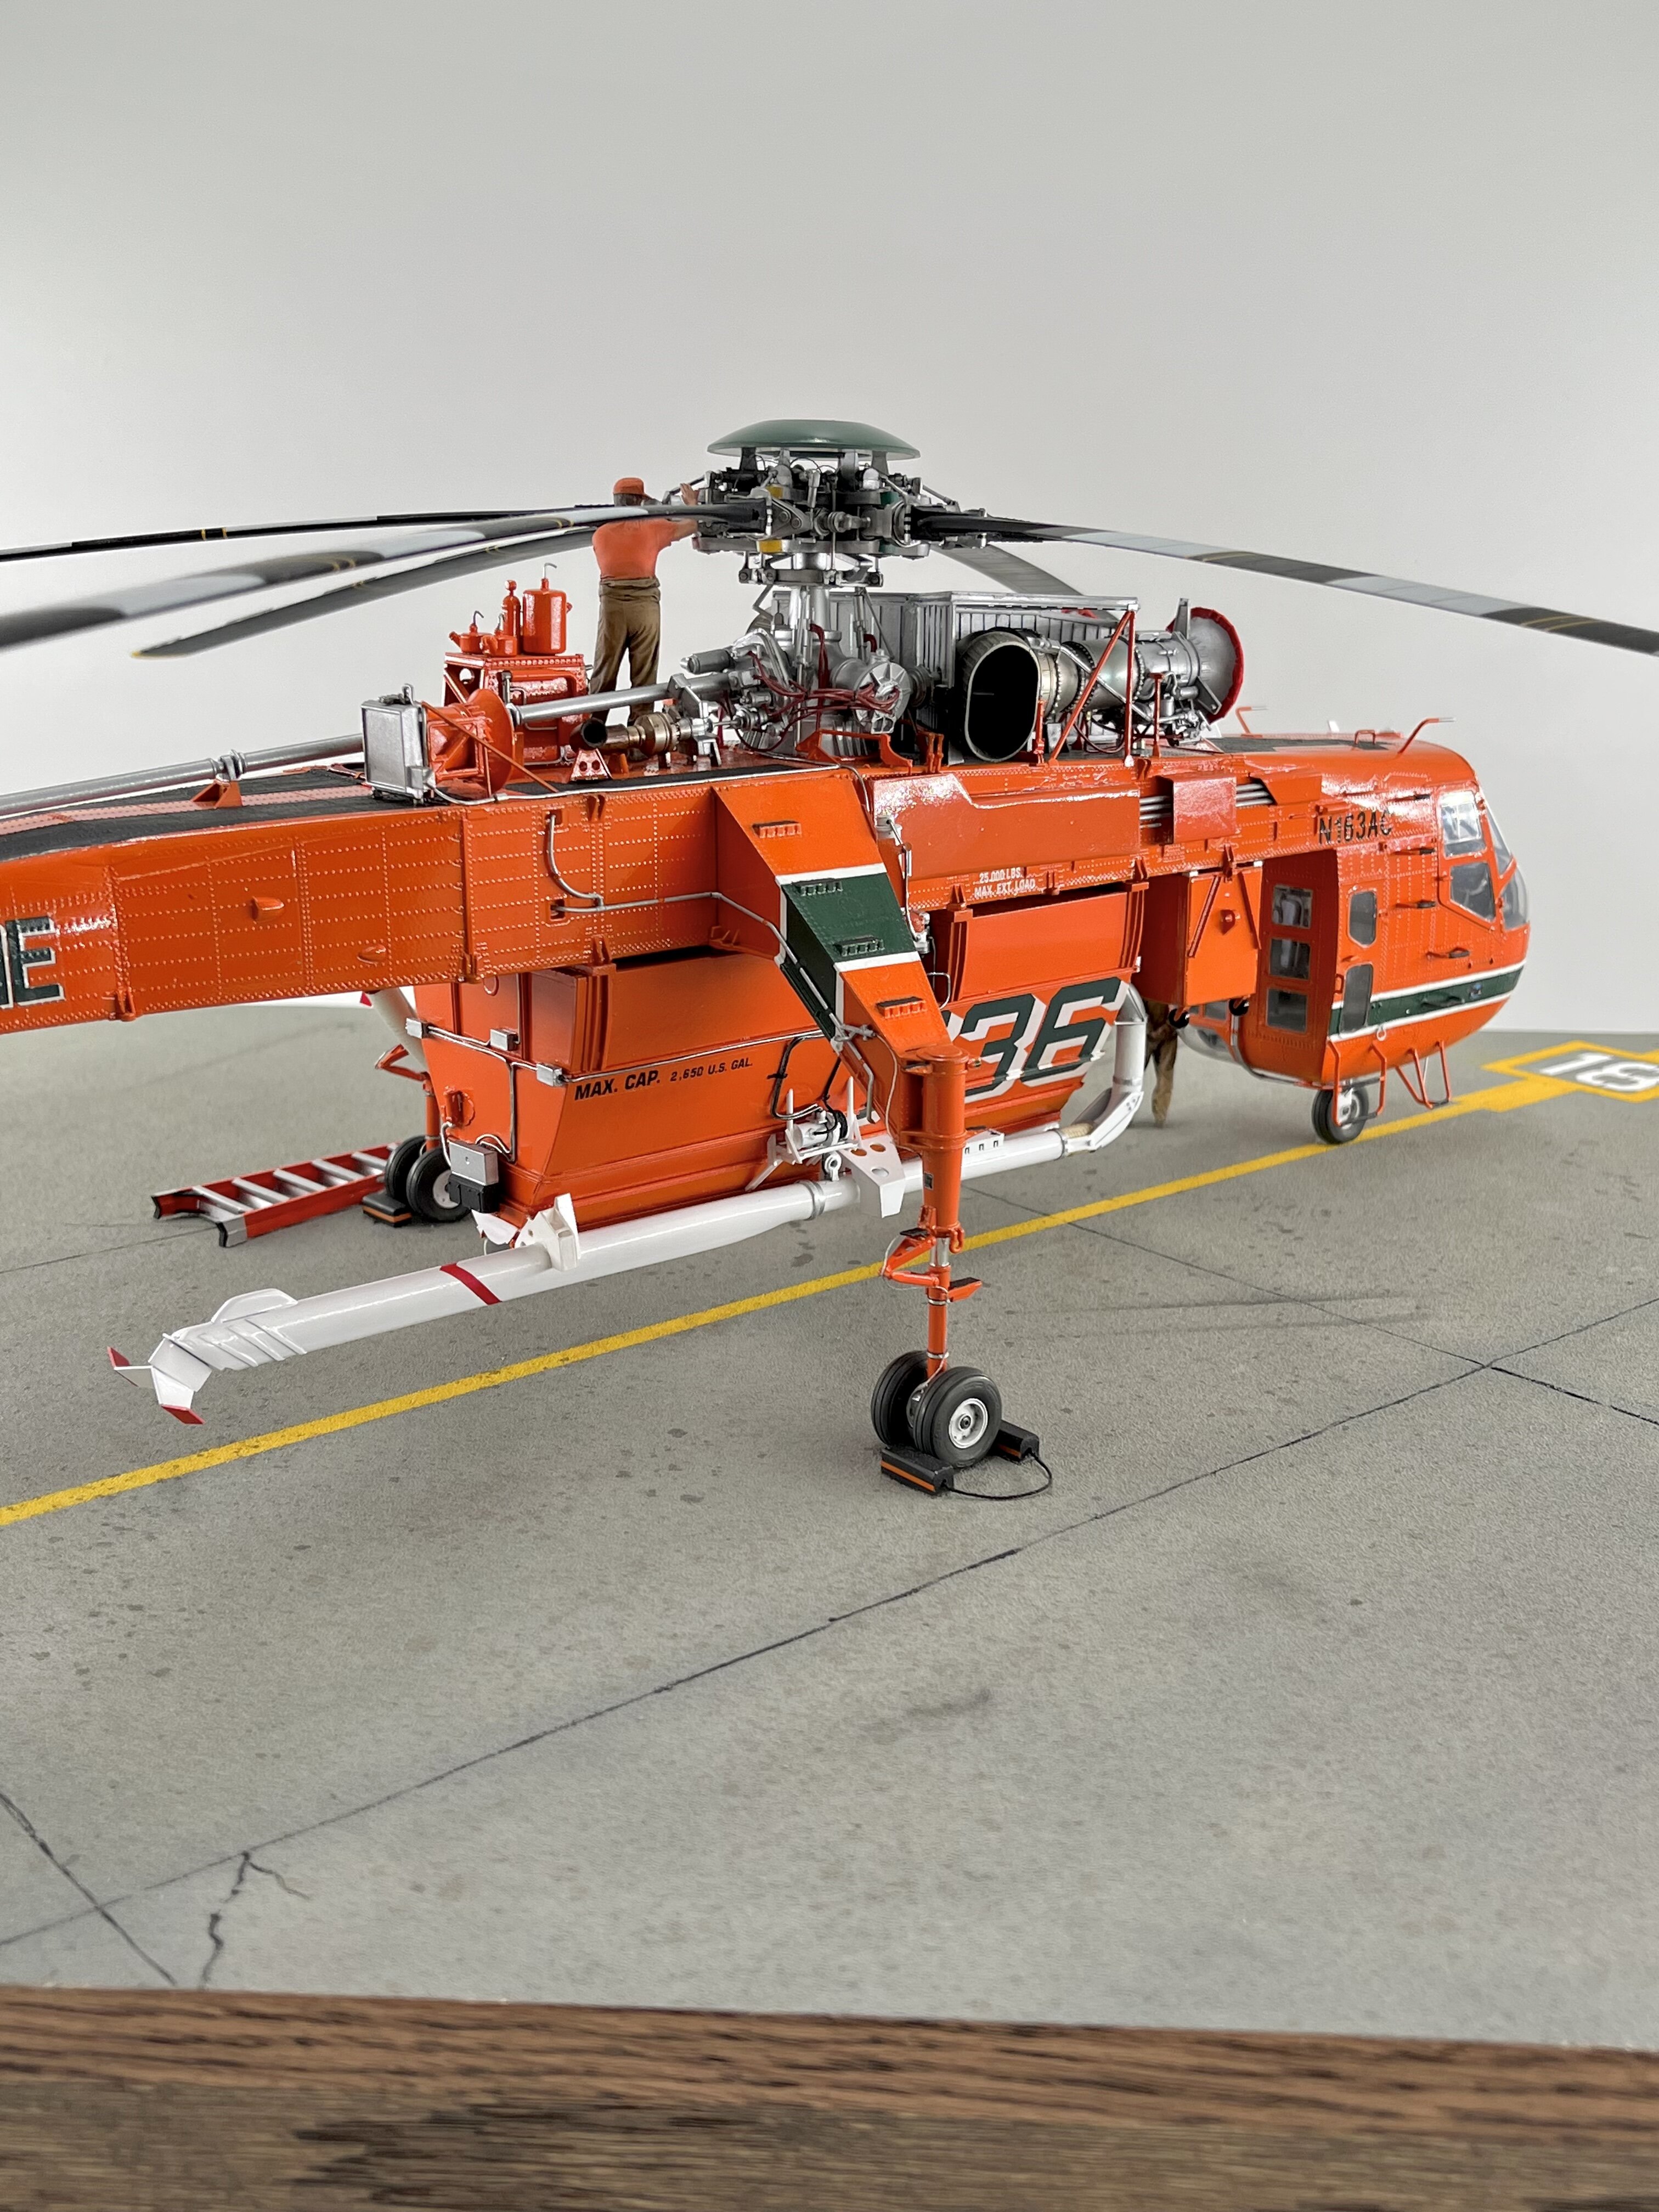
Erickson Air Crane was extremely helpful in making this project possible. Areas that had to be altered/scratch built. 1. Rear landing gear struts. (Bubba has duel wheels) Made from brass tubing, plastic tubing and sewing thread. 2. Cooling unit. The kit instructions has it attached to the transmission housing. Moved it to the correct location. Scratch built the mounting bracket, and air intake screen. 3. Tool box on wheels. Scratch built with resin casters and evergreen plastic styrene. (Needs to be altered, it’s too high). 4. The entire water drop tank. (Erickson provided detail photos to help). 5. The steps leading up to the tail rotor gear box. Evergreen polystyrene and sand paper for non-slip surface. 6. The rotor blade tie down straps. 7. The ladder. 8. Wheel chocks. The figures are from Reedoak. There are some things that need to be replaced when, and if they come available. I’m hoping that a company will come out with these items in the near future. The entire rotor head assembly w/ composite blades. Bulging windows for both doors. It’s been a lot of work, but well worth it. Comments/critiques always welcome. Thanks for having a look.
-
That’s one awesome build!