Bradley25mm
-
Posts
481 -
Joined
-
Last visited
-
Days Won
33
Content Type
Profiles
Forums
Events
Everything posted by Bradley25mm
-
Another masterpiece!! Christopher
-
That is one interesting diorama. All of your builds are very unique, and well executed. Thanks for posting. Christopher
-
1/15th scale Space Shuttle Atlantis
Bradley25mm replied to Bradley25mm's topic in Space, Sci-Fi & Fantasy
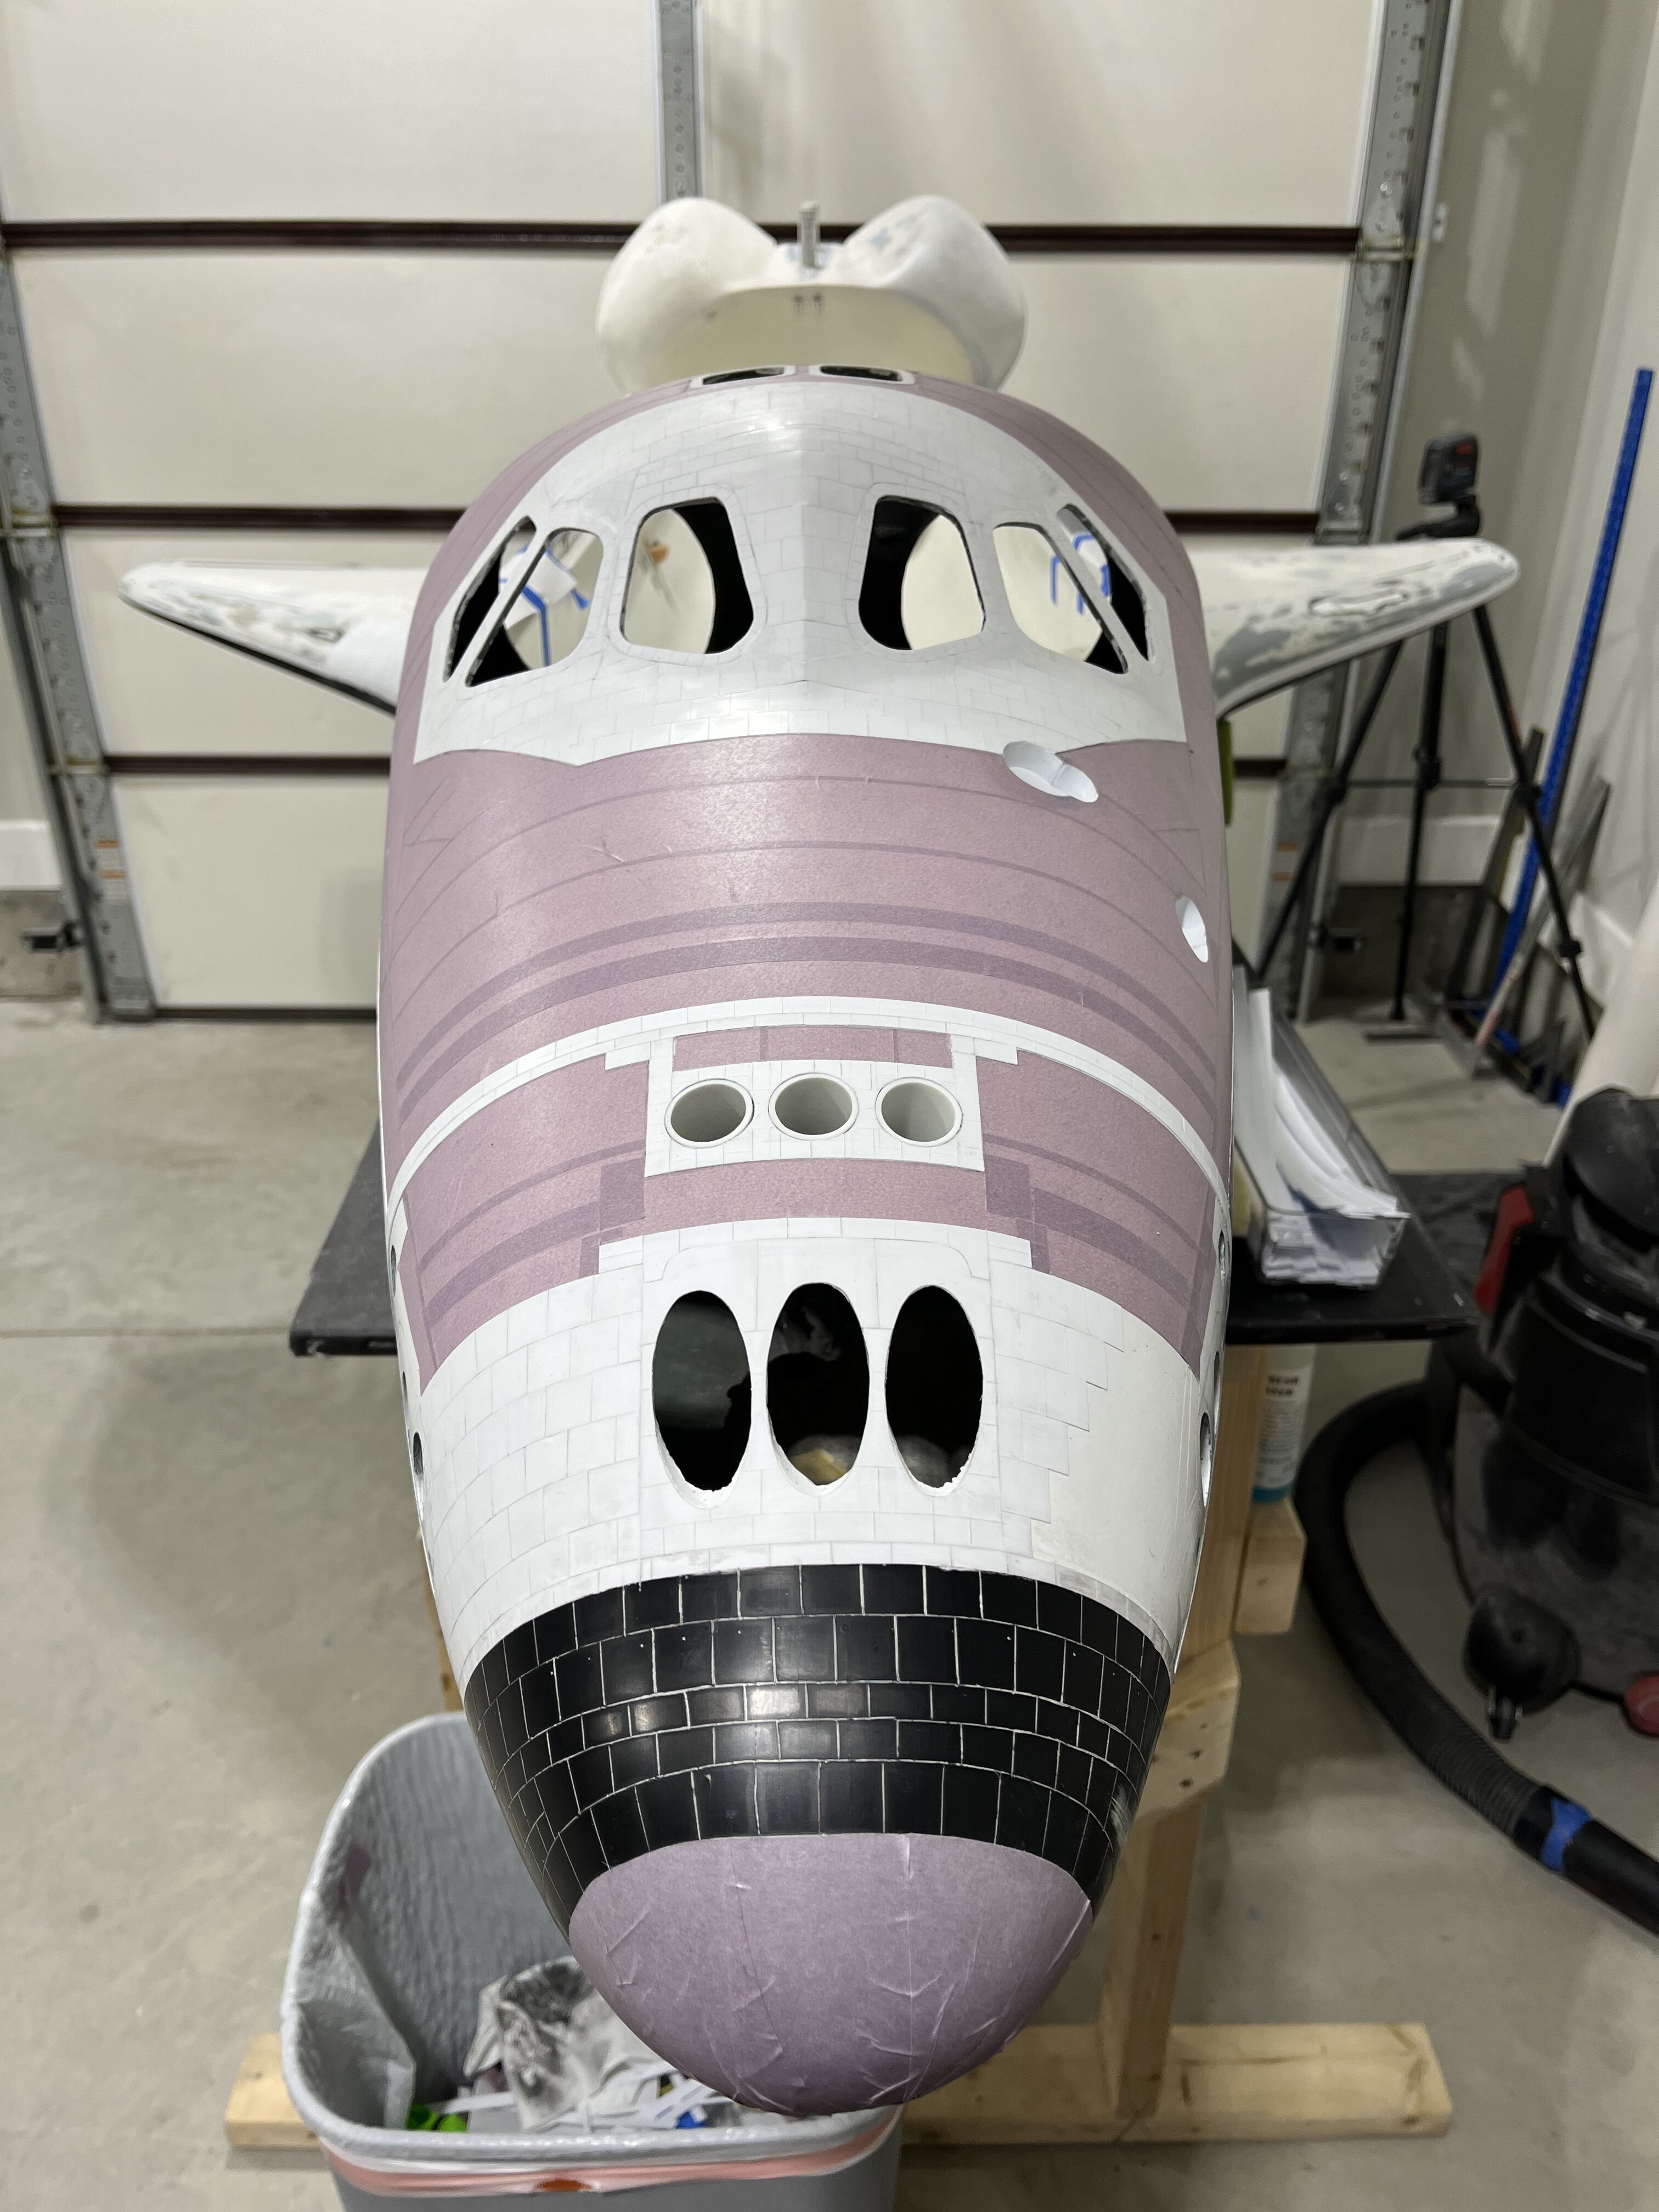
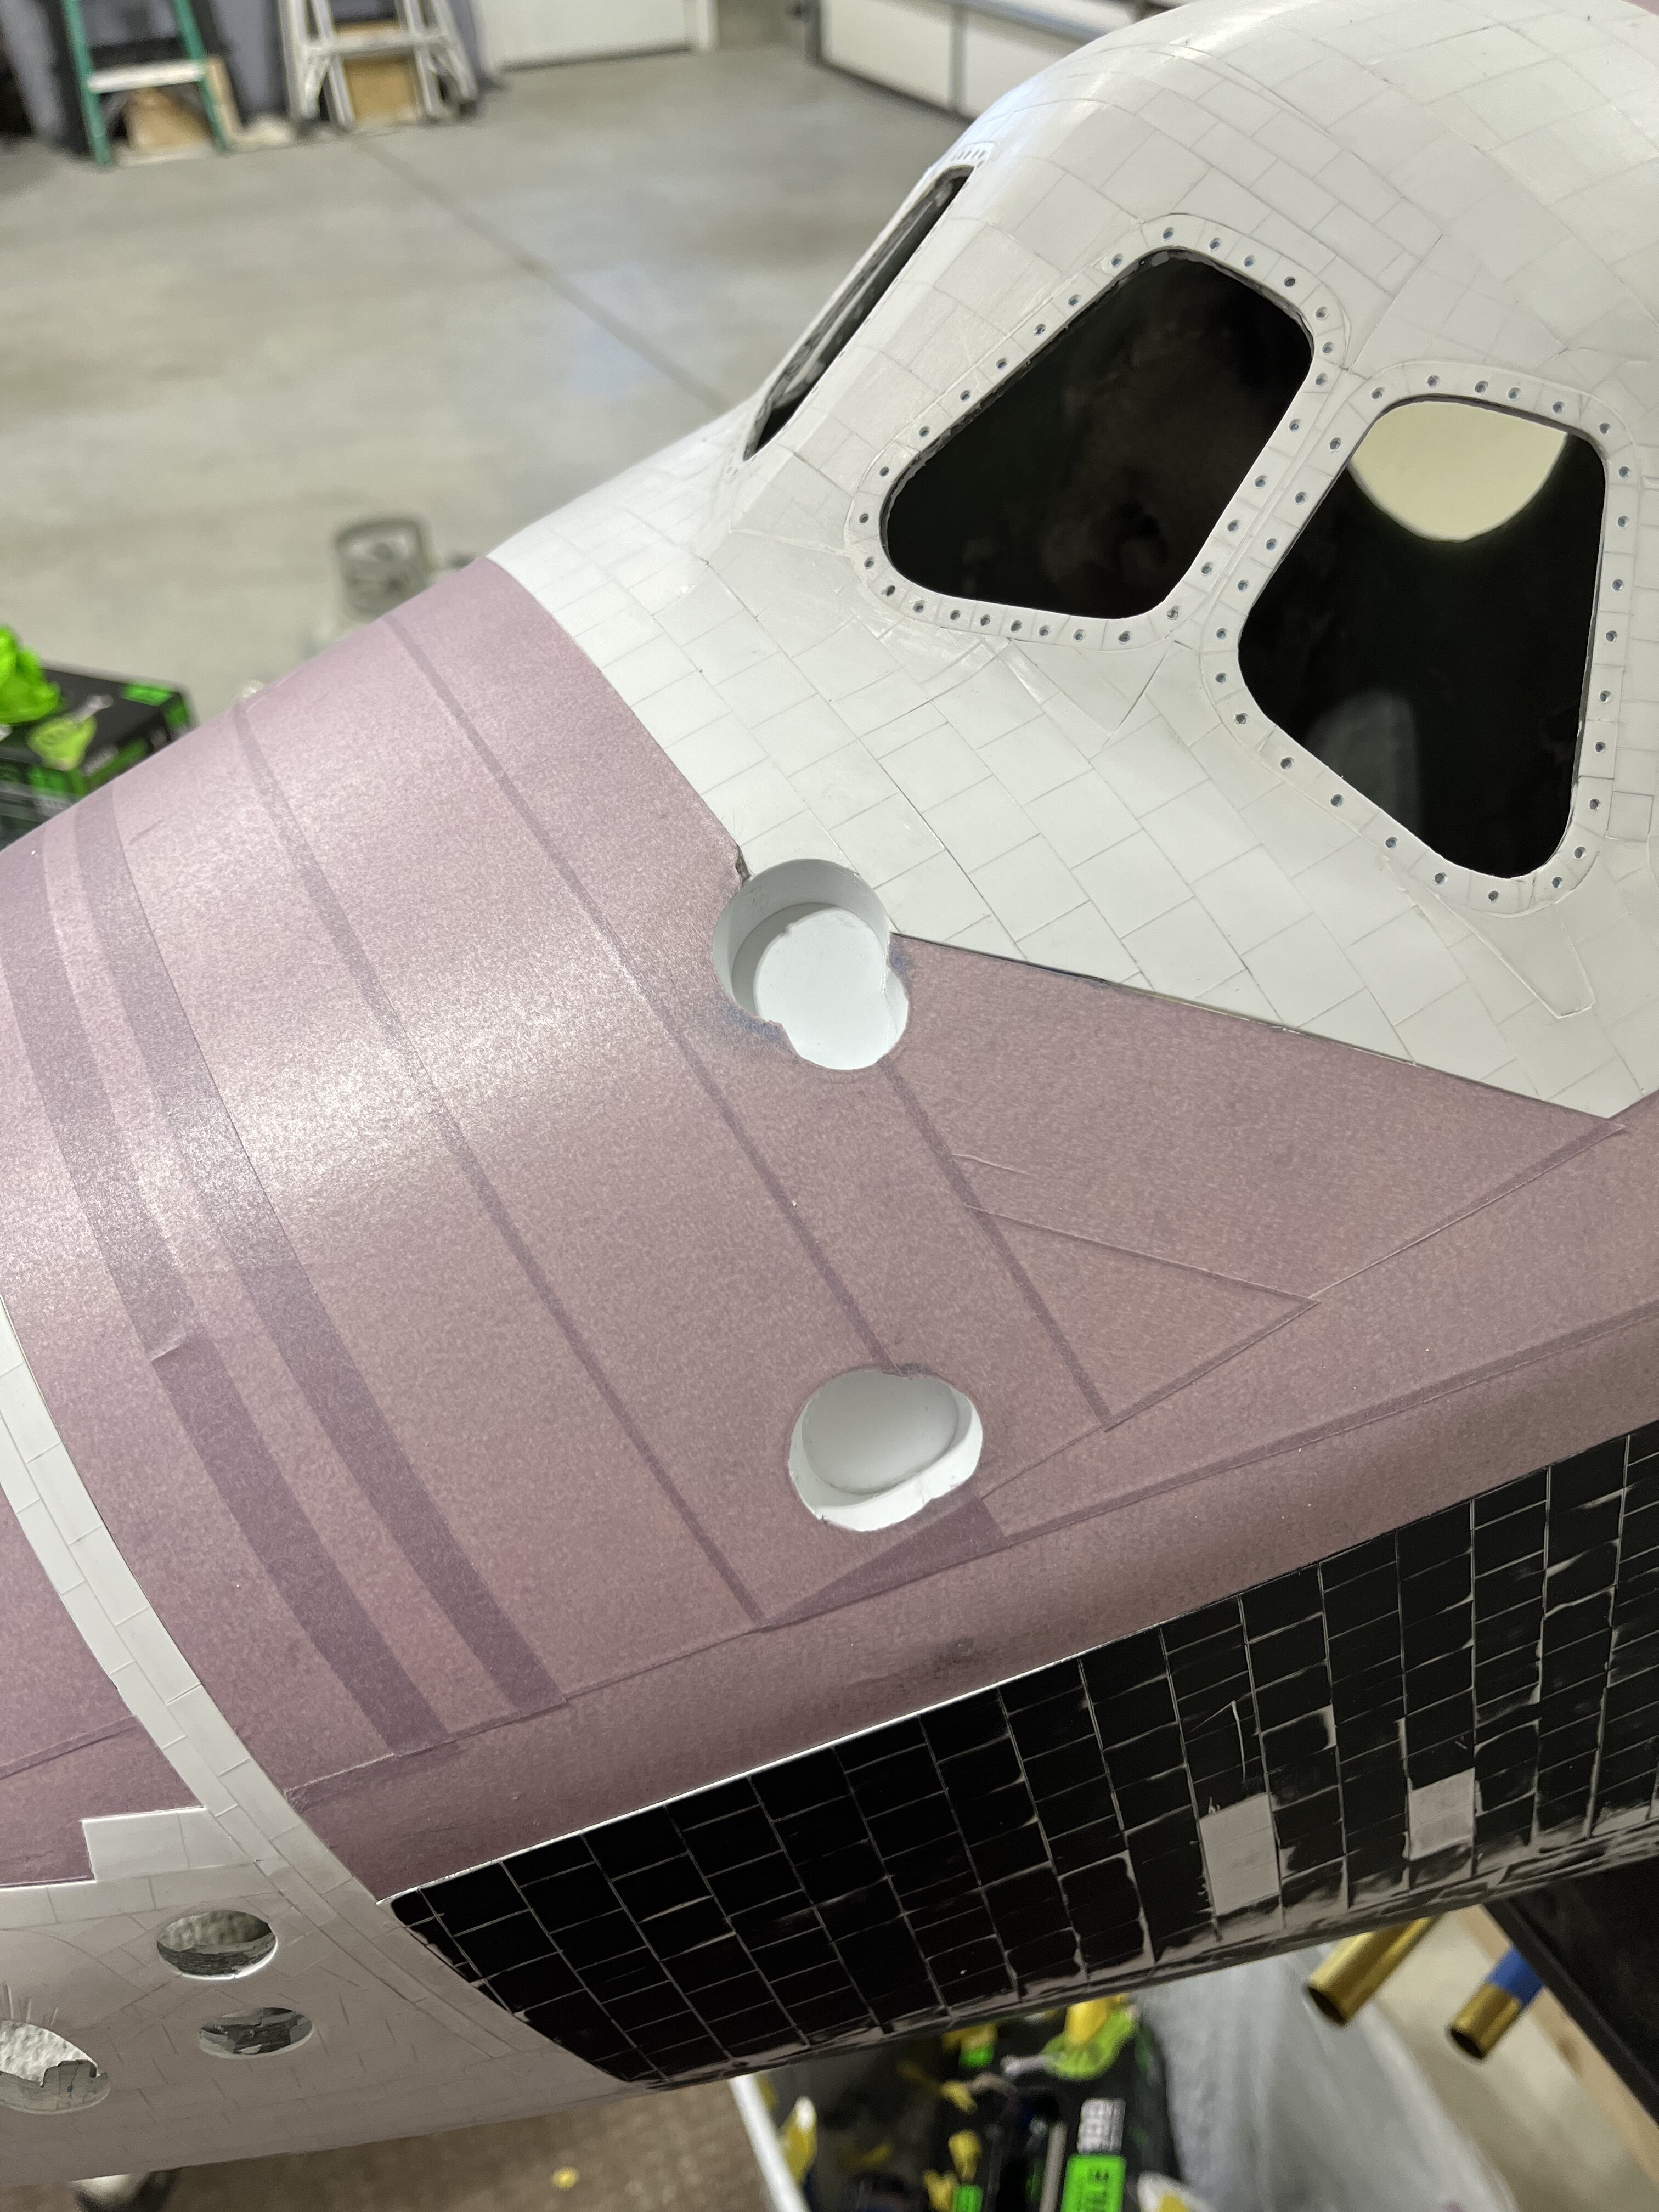
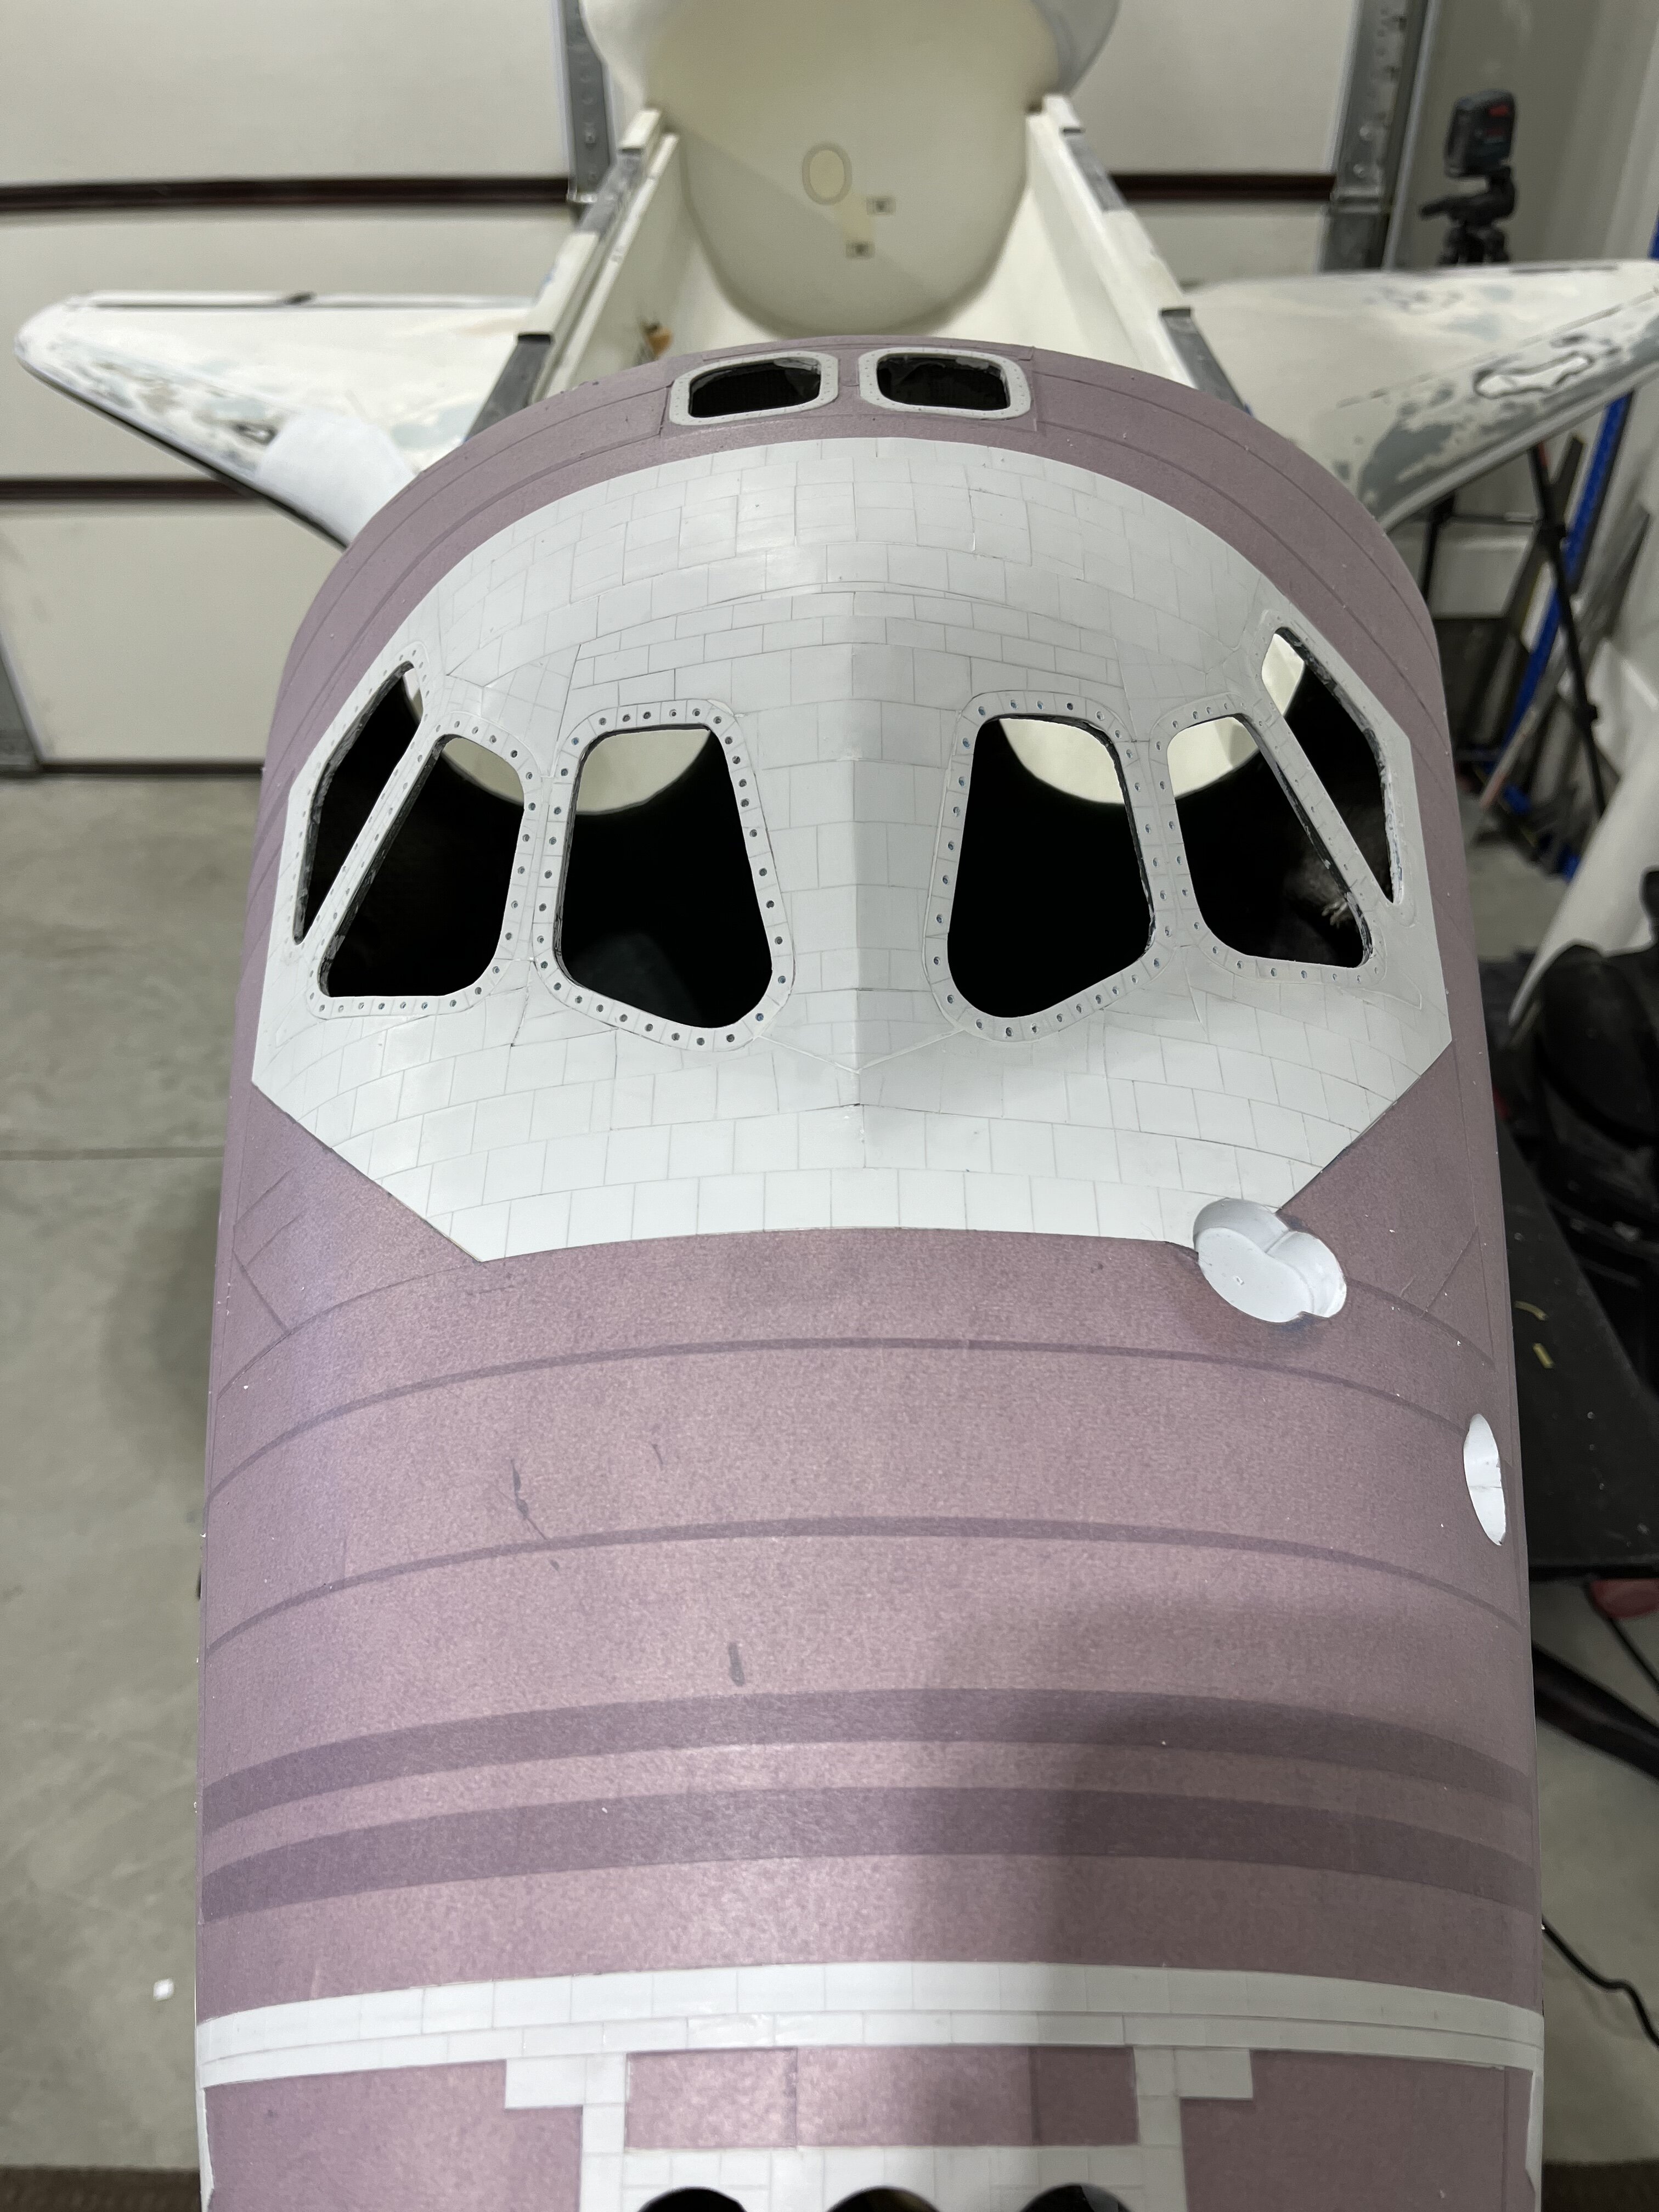
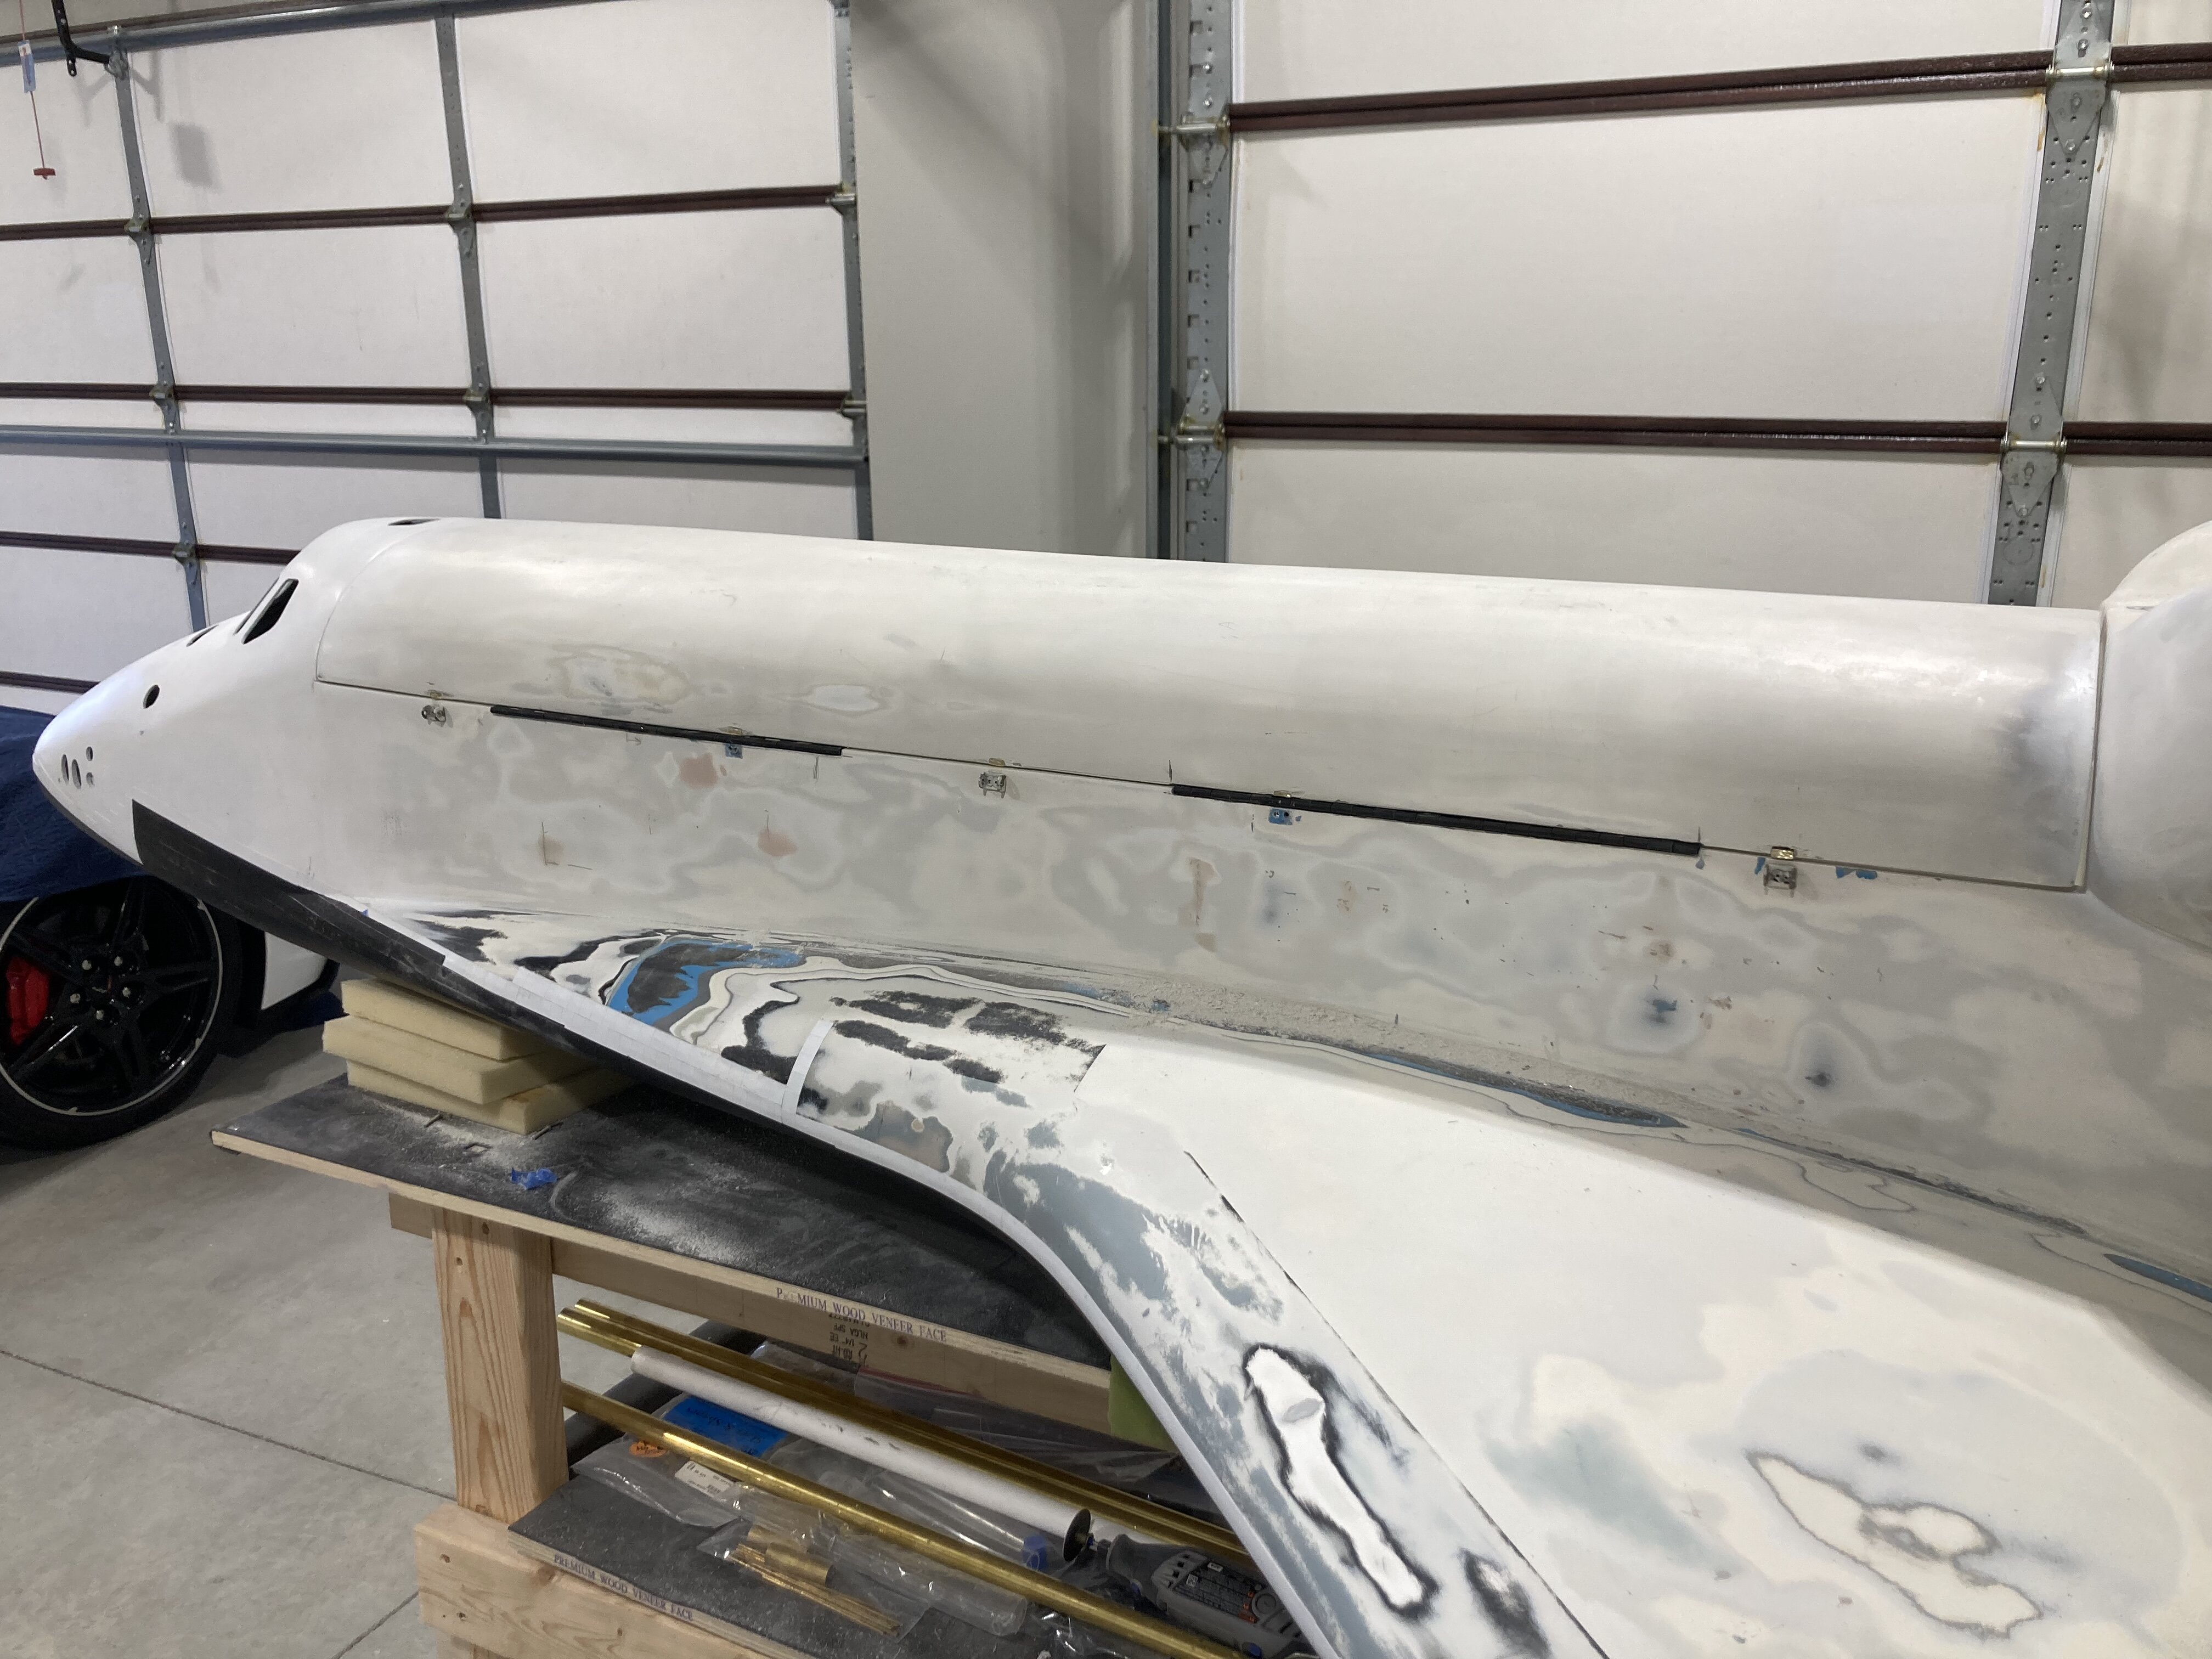
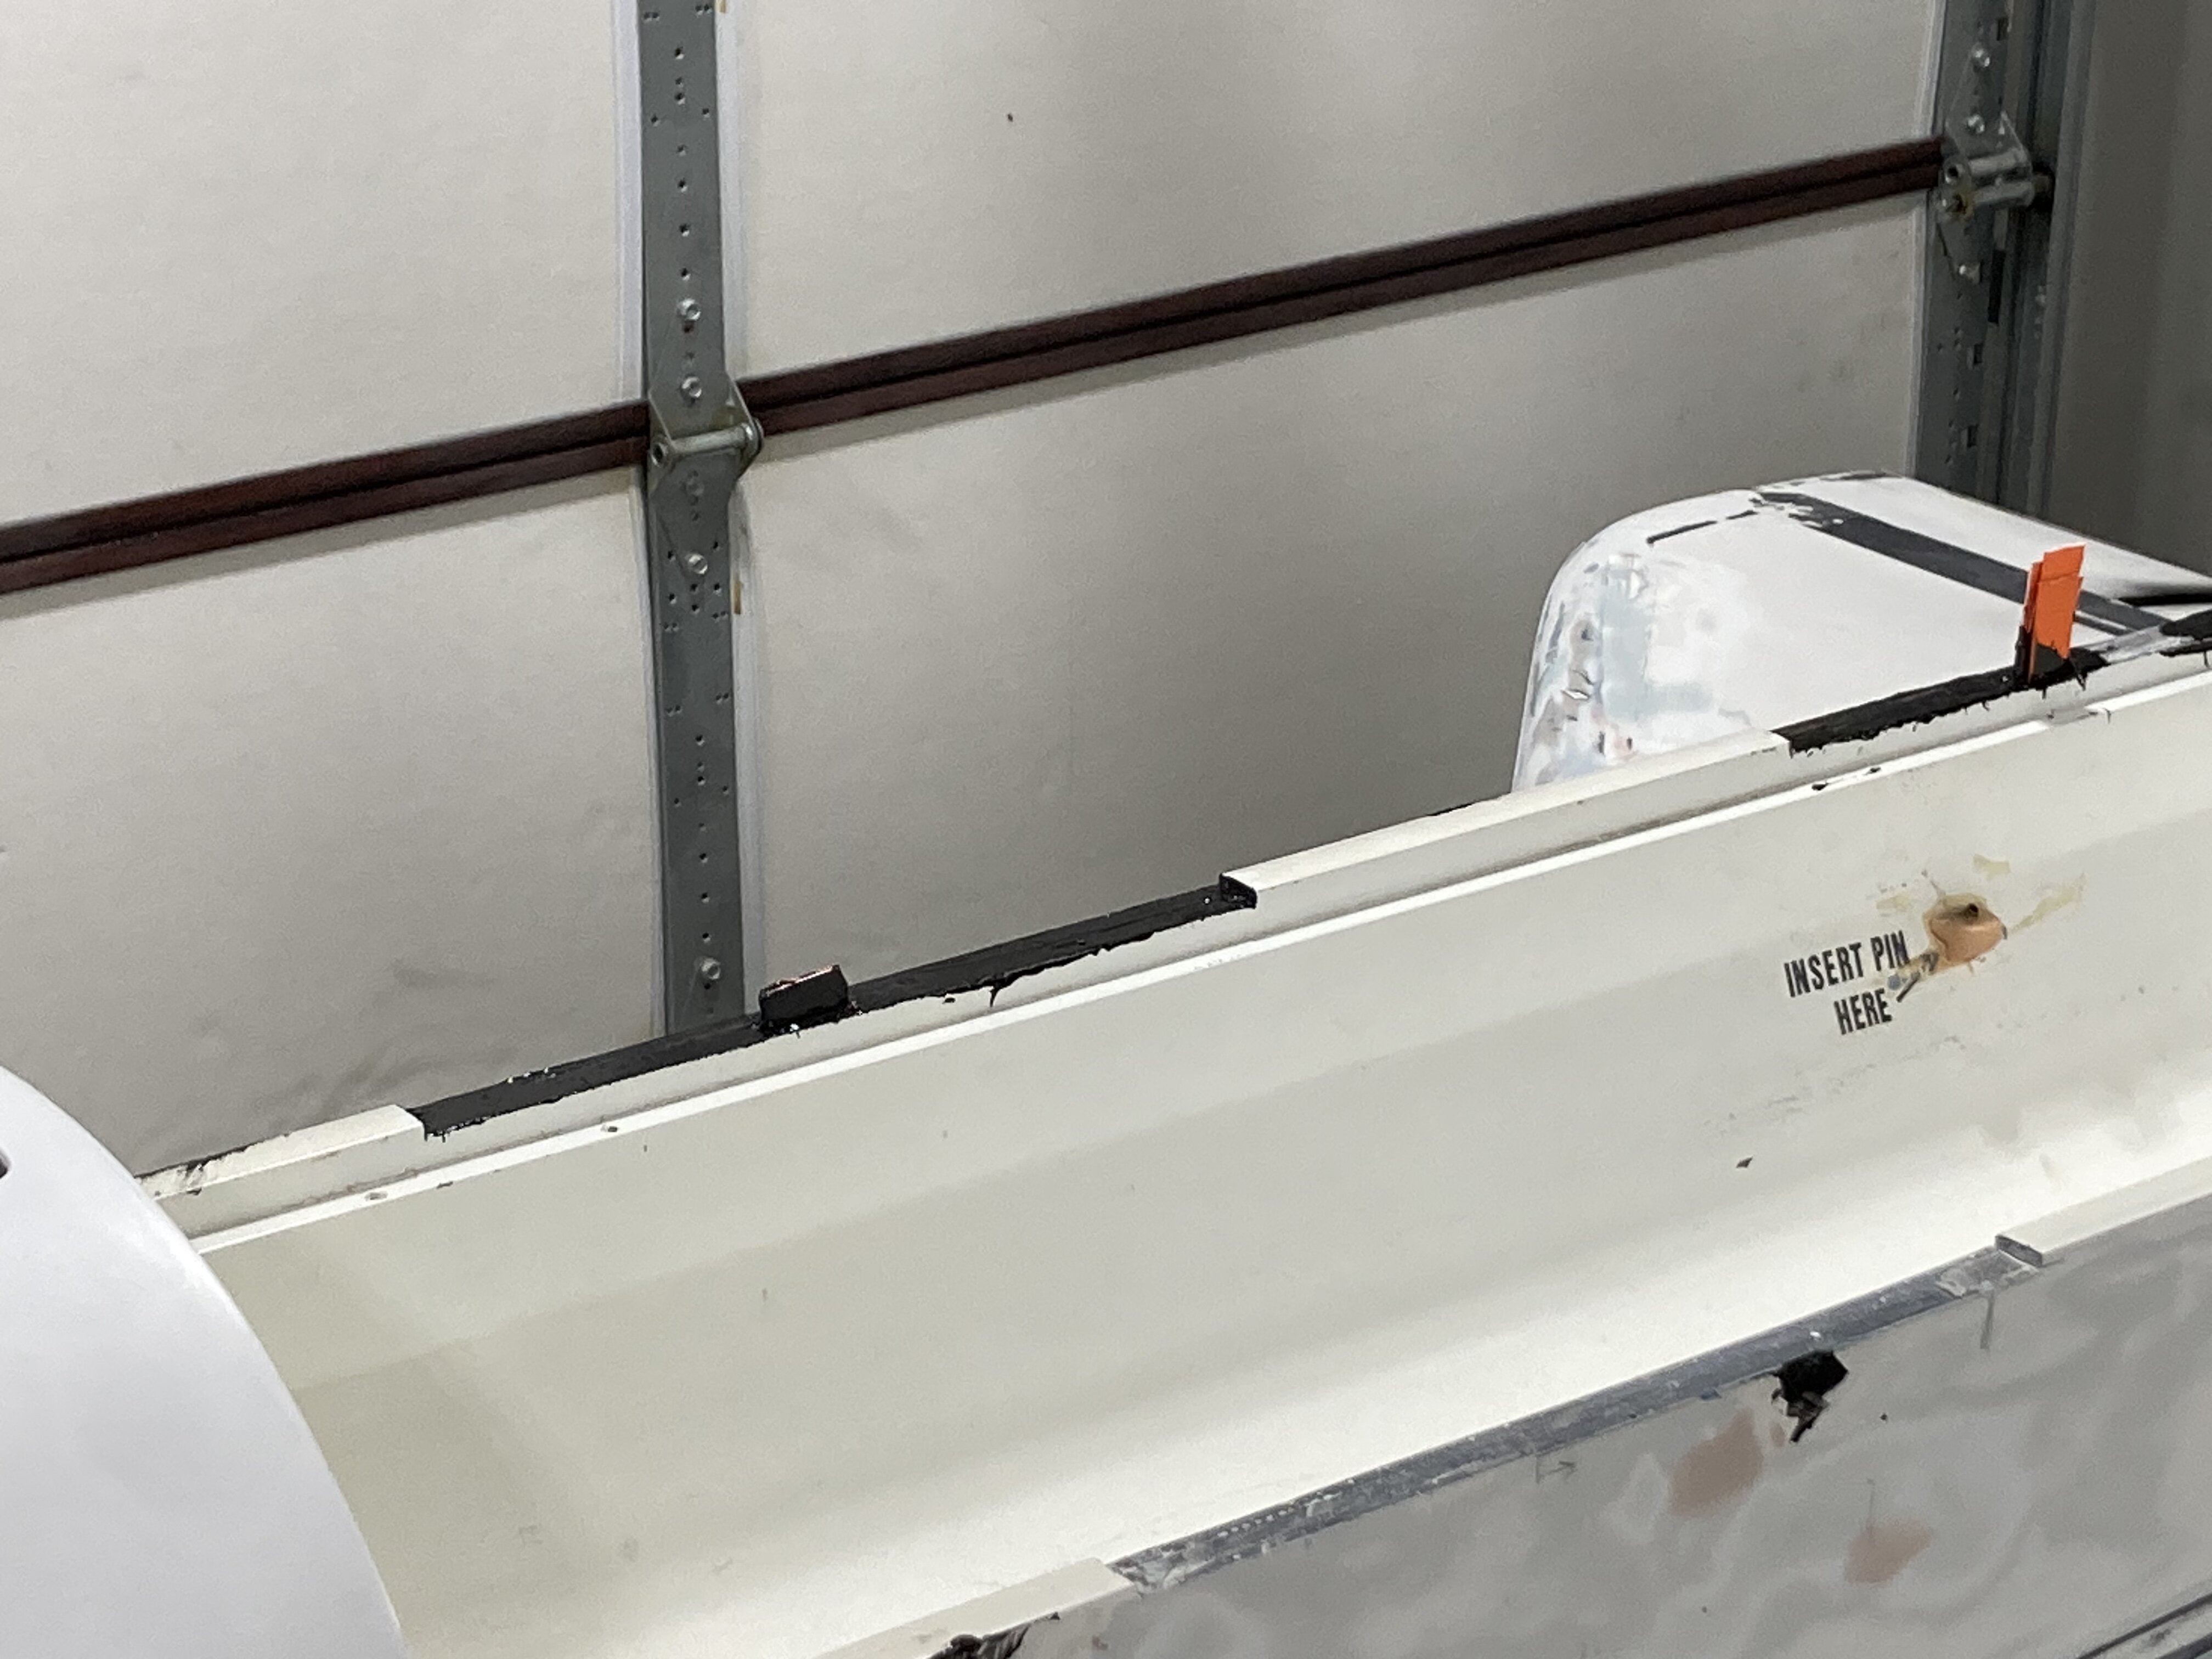
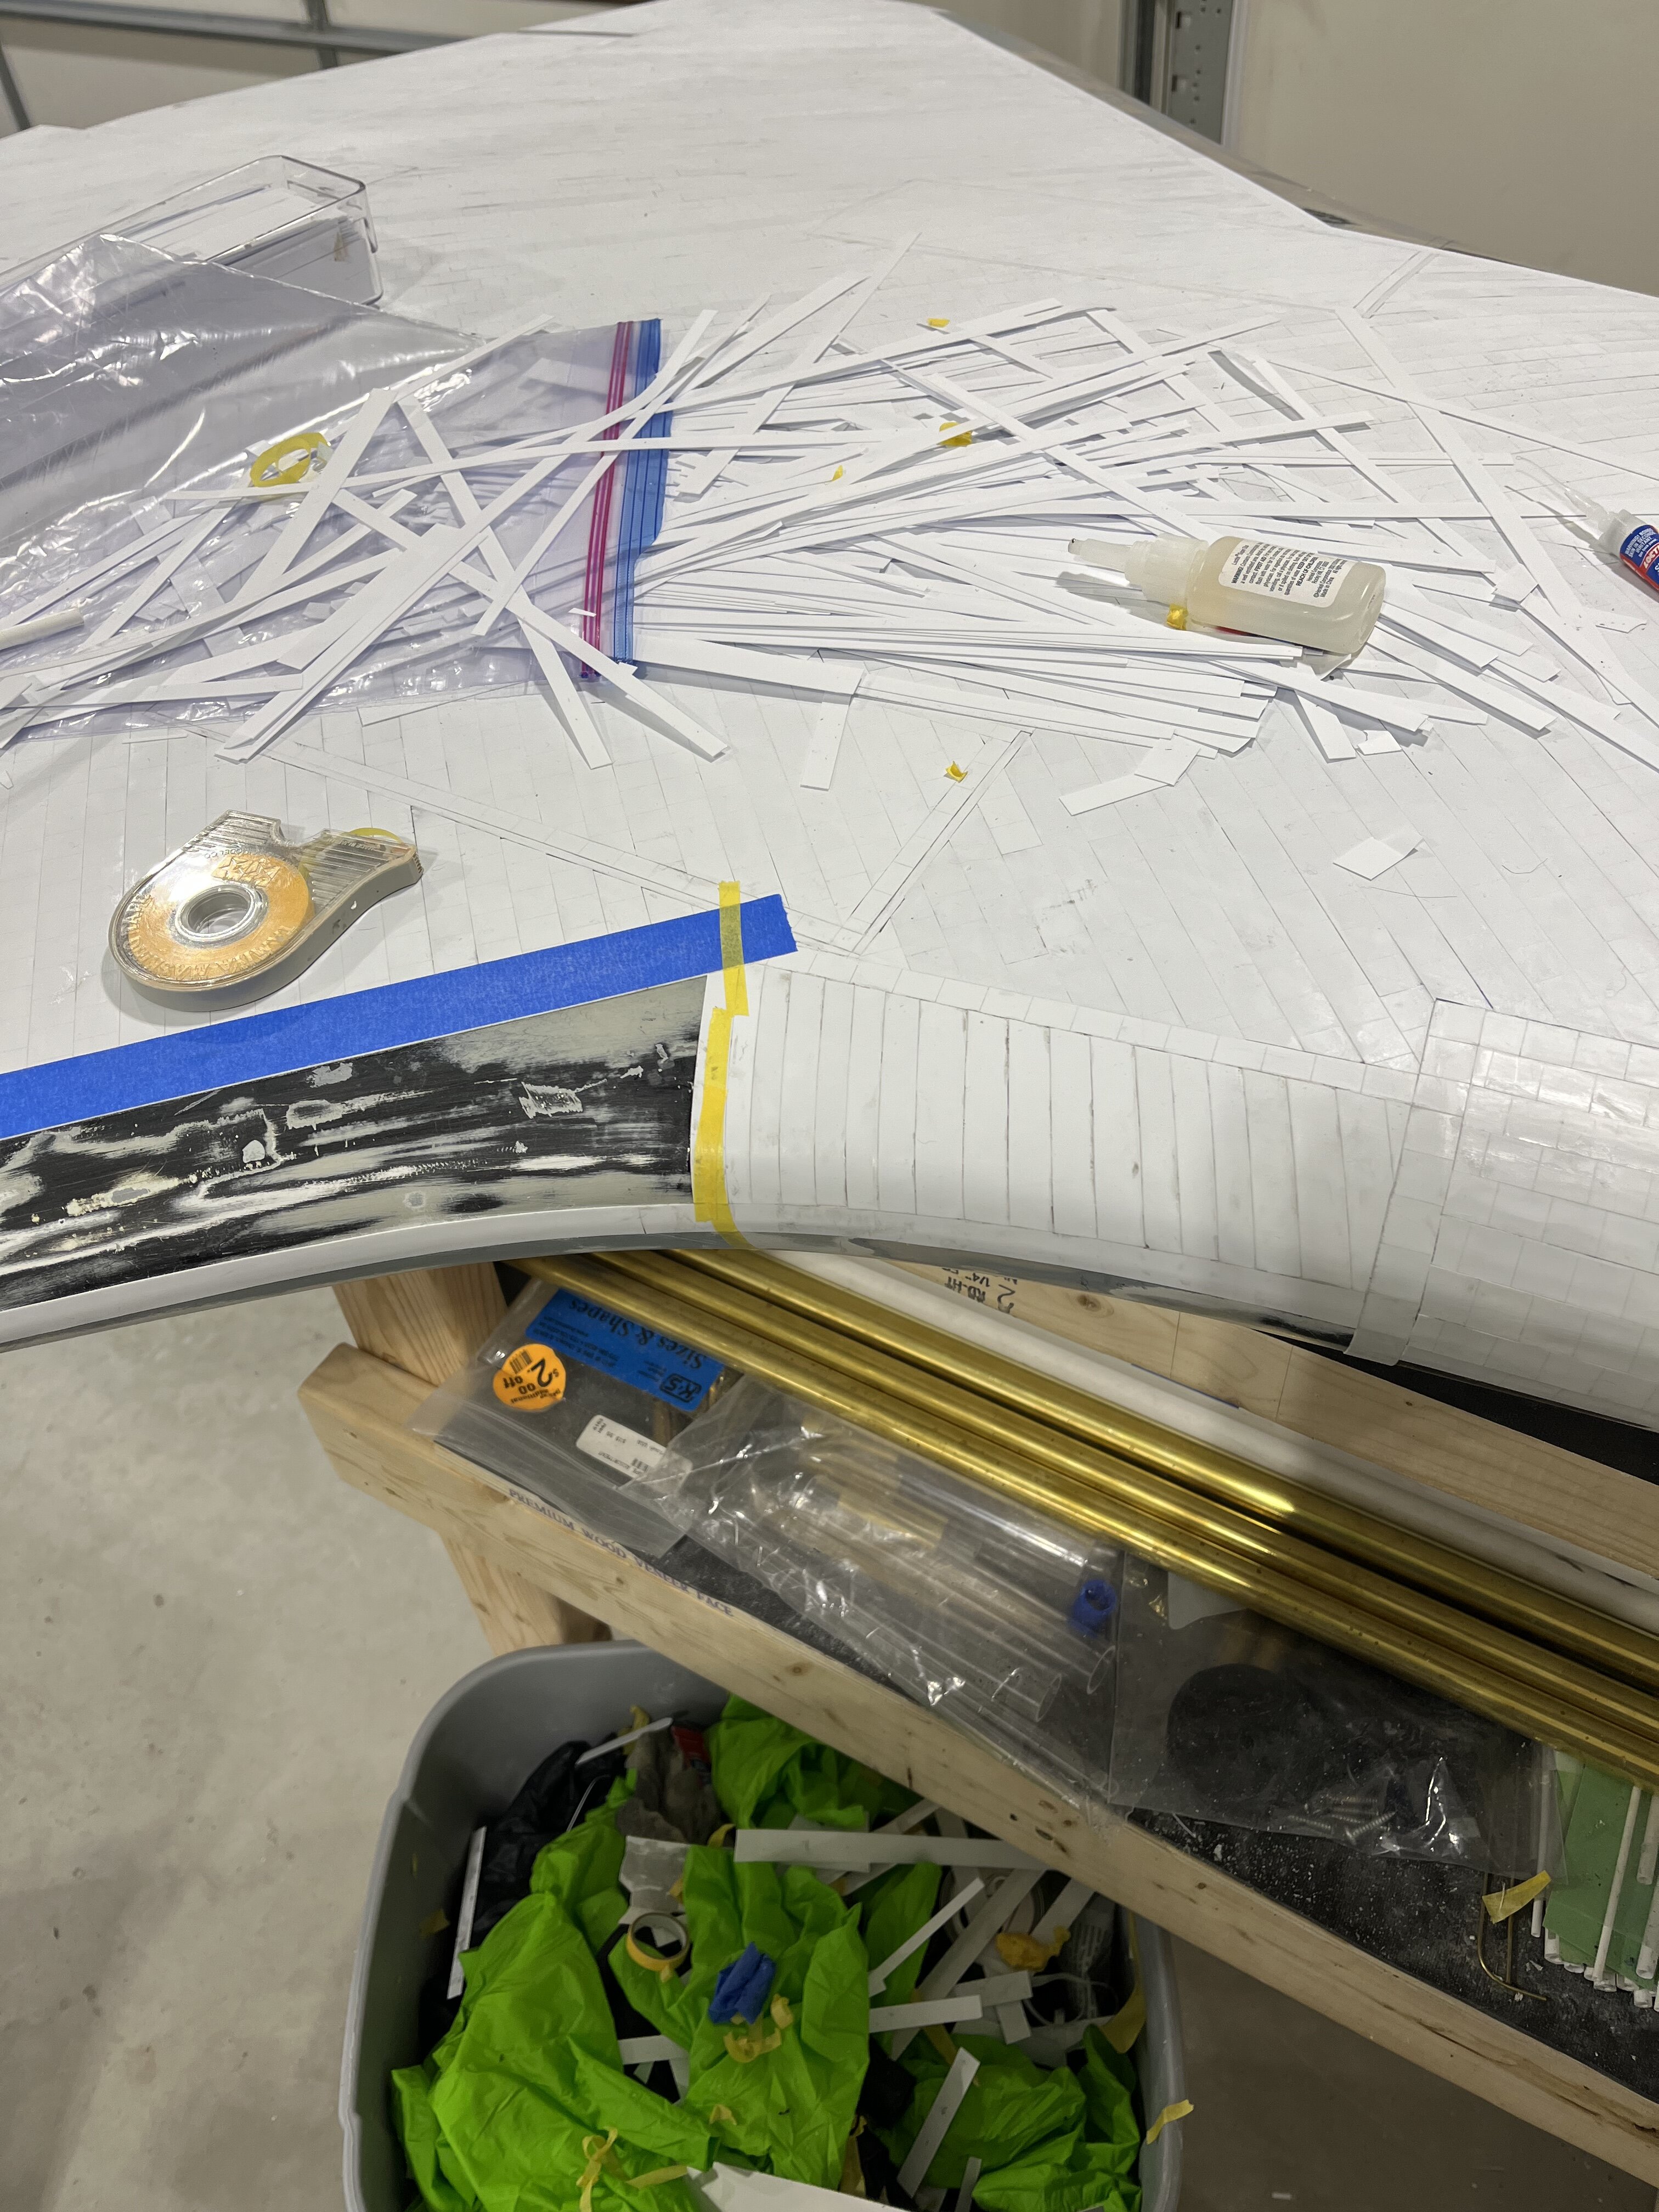
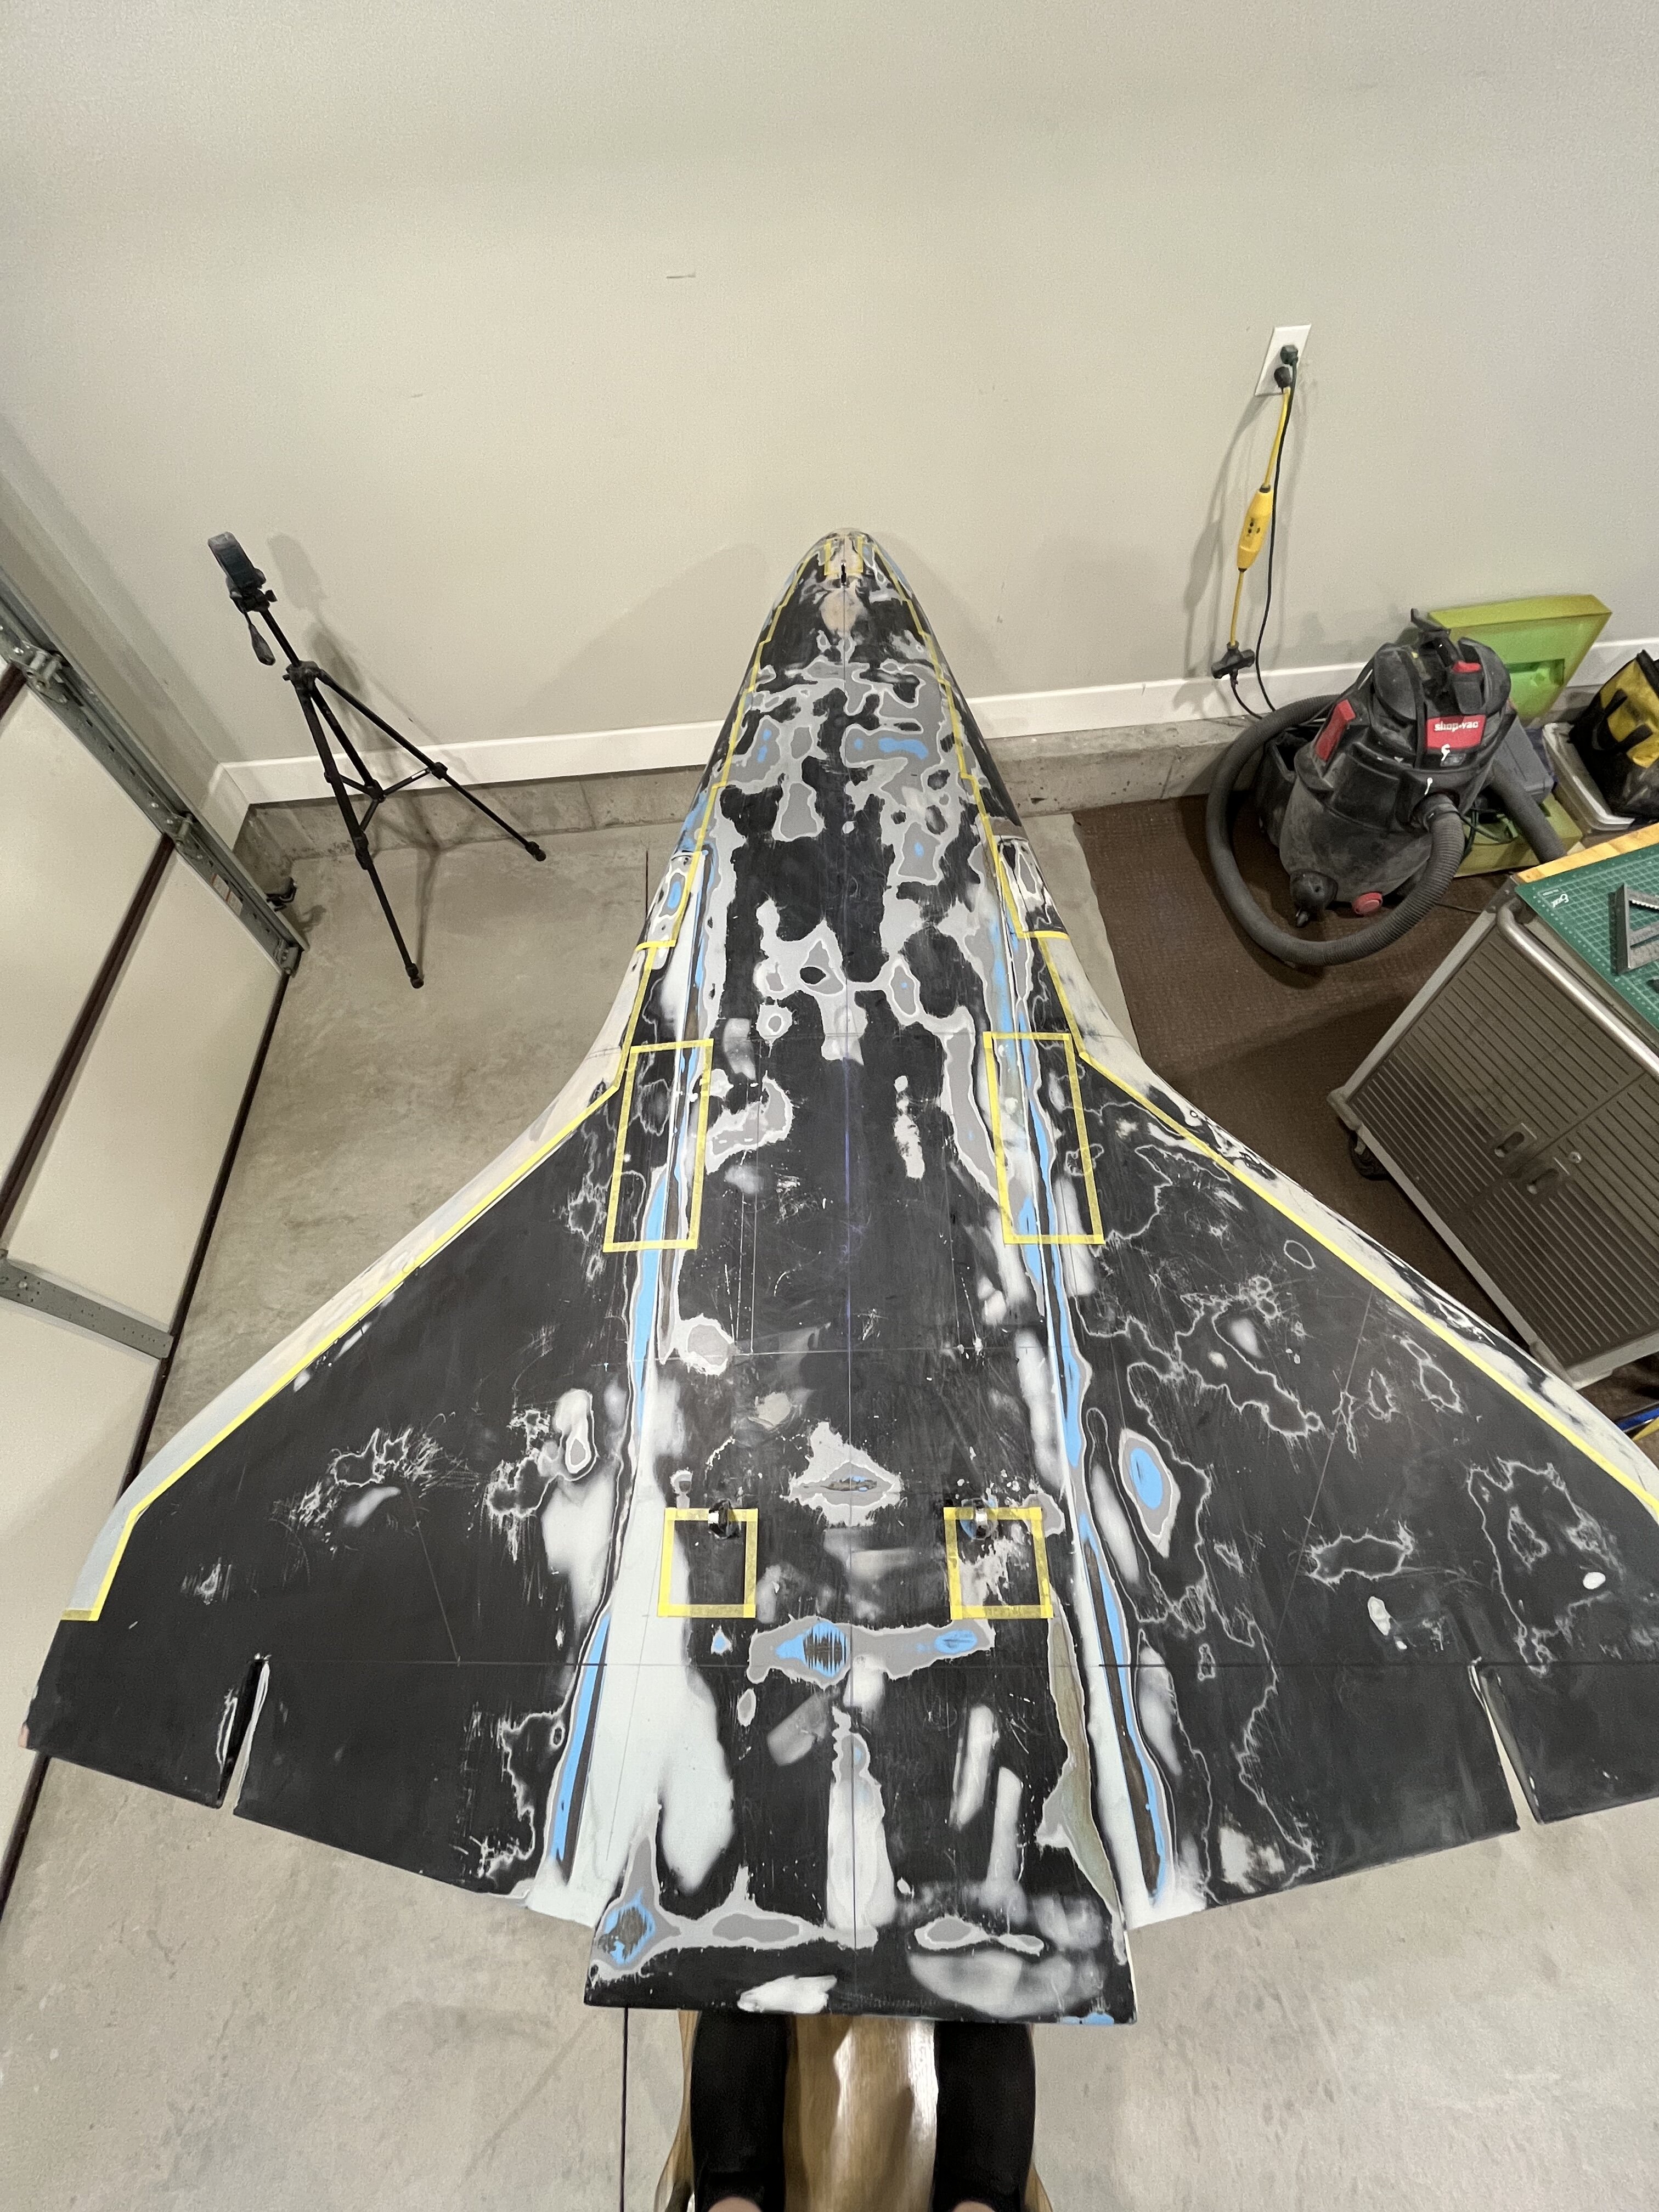
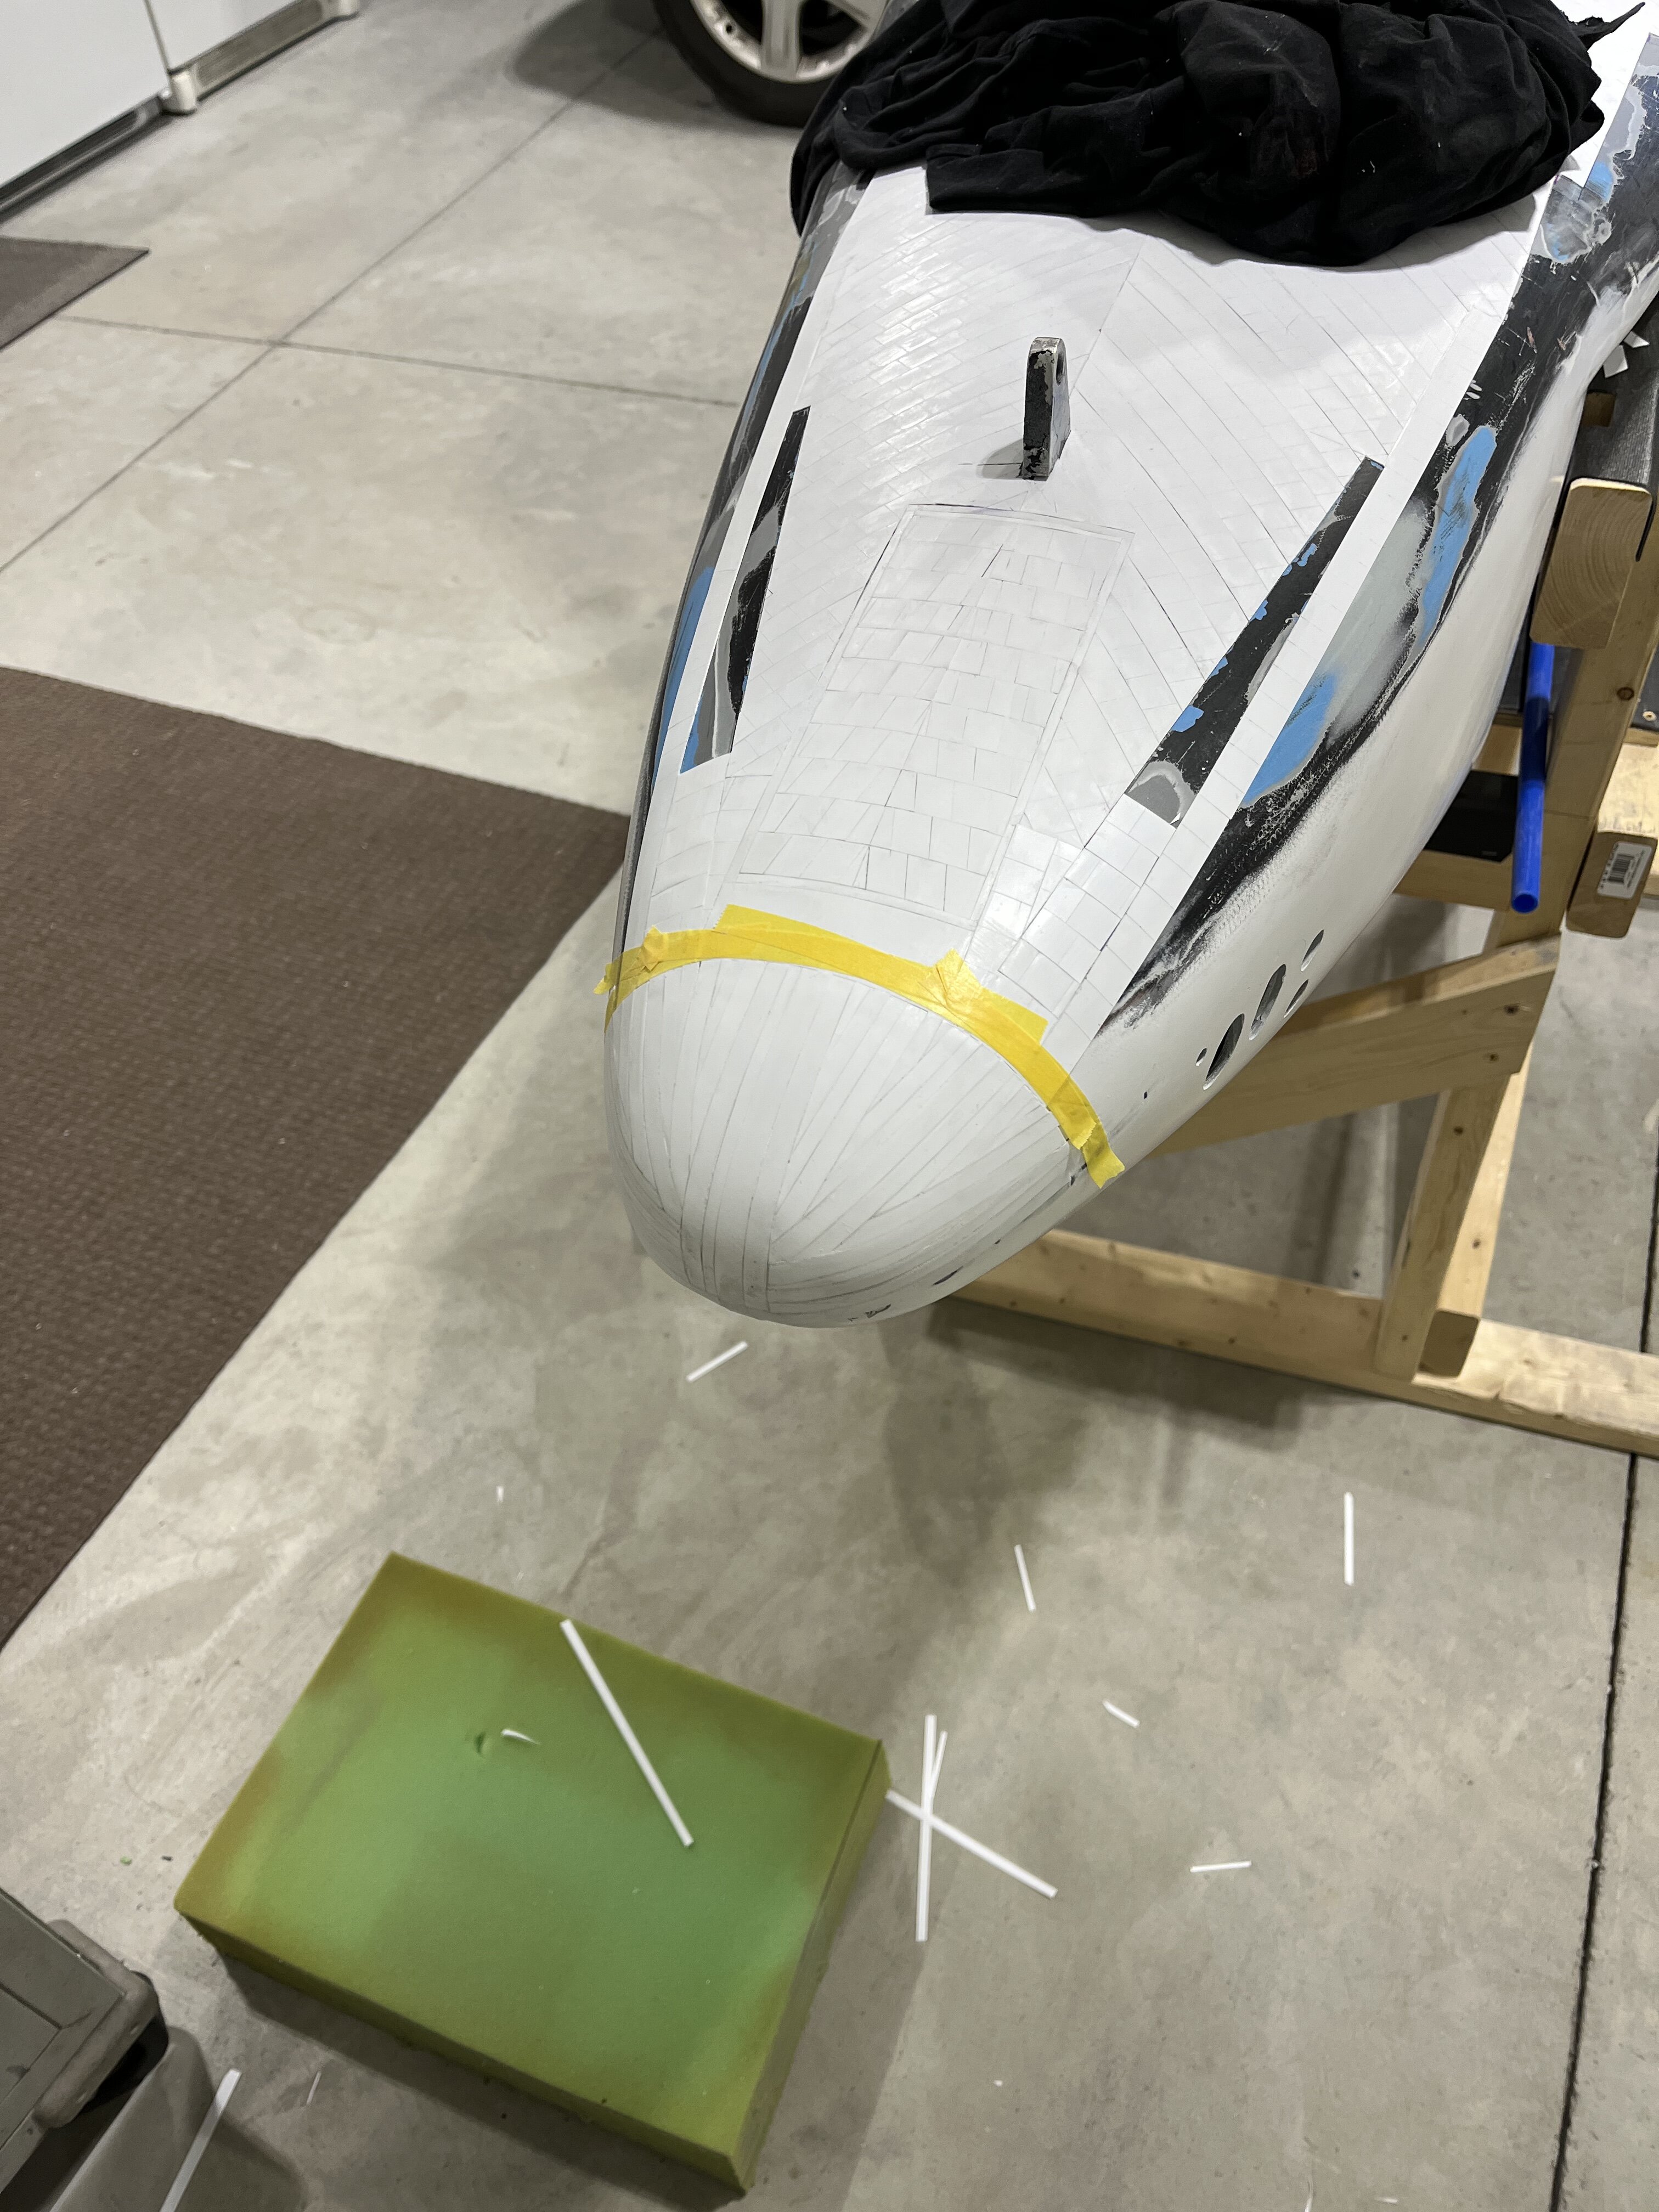
Good afternoon fellow modeler’s I’ve finally made some much needed progress. All of the tiling from the nose of the orbiter to the beginning of the cargo bay is complete. I’ve got a few small areas that need to be puttied prior to primer. Every place that you see purple tape is where the thermal blanket material will go. (athletic tape.) All of the thruster nozzles have been cut. The next step is to make a cone out of very thin plastic and put it in the end of each thruster. The company that is making all the graphics for this project has come up with a very good idea. For the windows, an image of the inside of the shuttle (Crew members, and cockpit), will be laminated on the back piece of plexiglass. This plexiglass will then be installed on the inside of the shuttle. Thanks very much for having a look. Christopher
-
1/15th scale Space Shuttle Atlantis
Bradley25mm replied to Bradley25mm's topic in Space, Sci-Fi & Fantasy
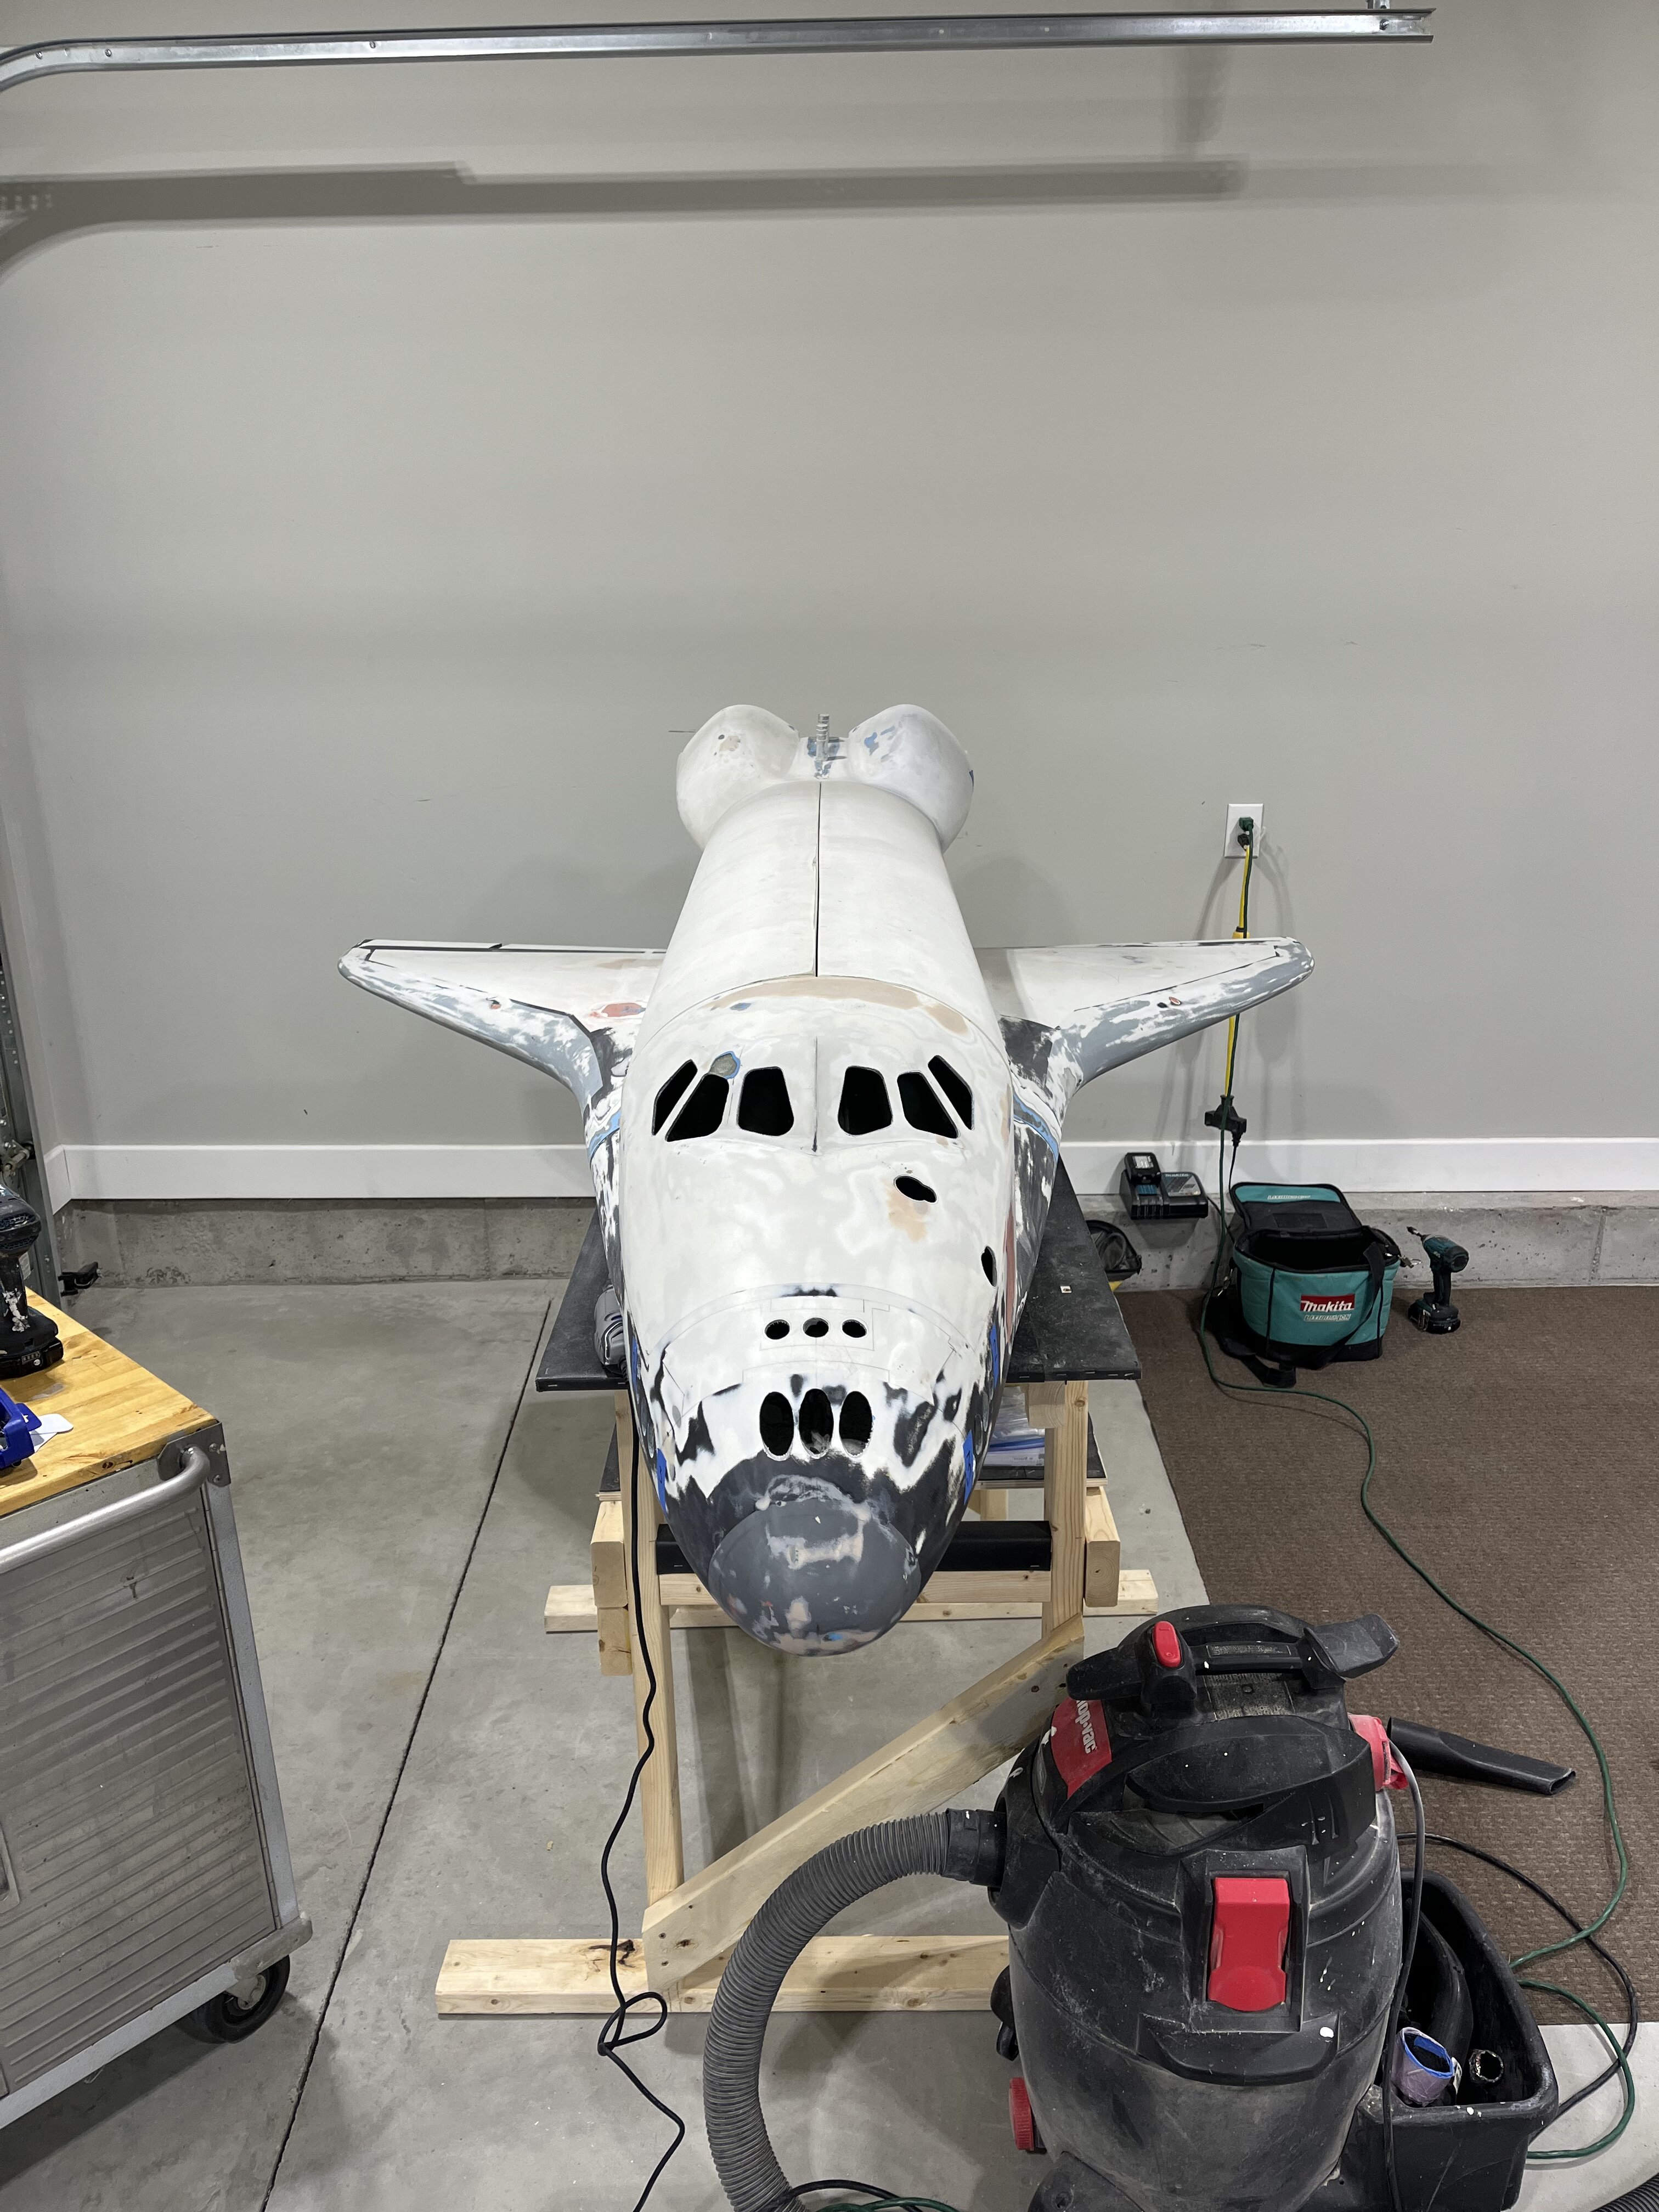
So today, we tackled replacing the original hinges. They were large and very bulky. Chris wanted to make sure that this one glaring eyesore was fixed. Piano hinges were the best option. We move on to getting ready for thruster installation. Thanks for having a look. Christopher
-
1/15th scale Space Shuttle Atlantis
Bradley25mm replied to Bradley25mm's topic in Space, Sci-Fi & Fantasy
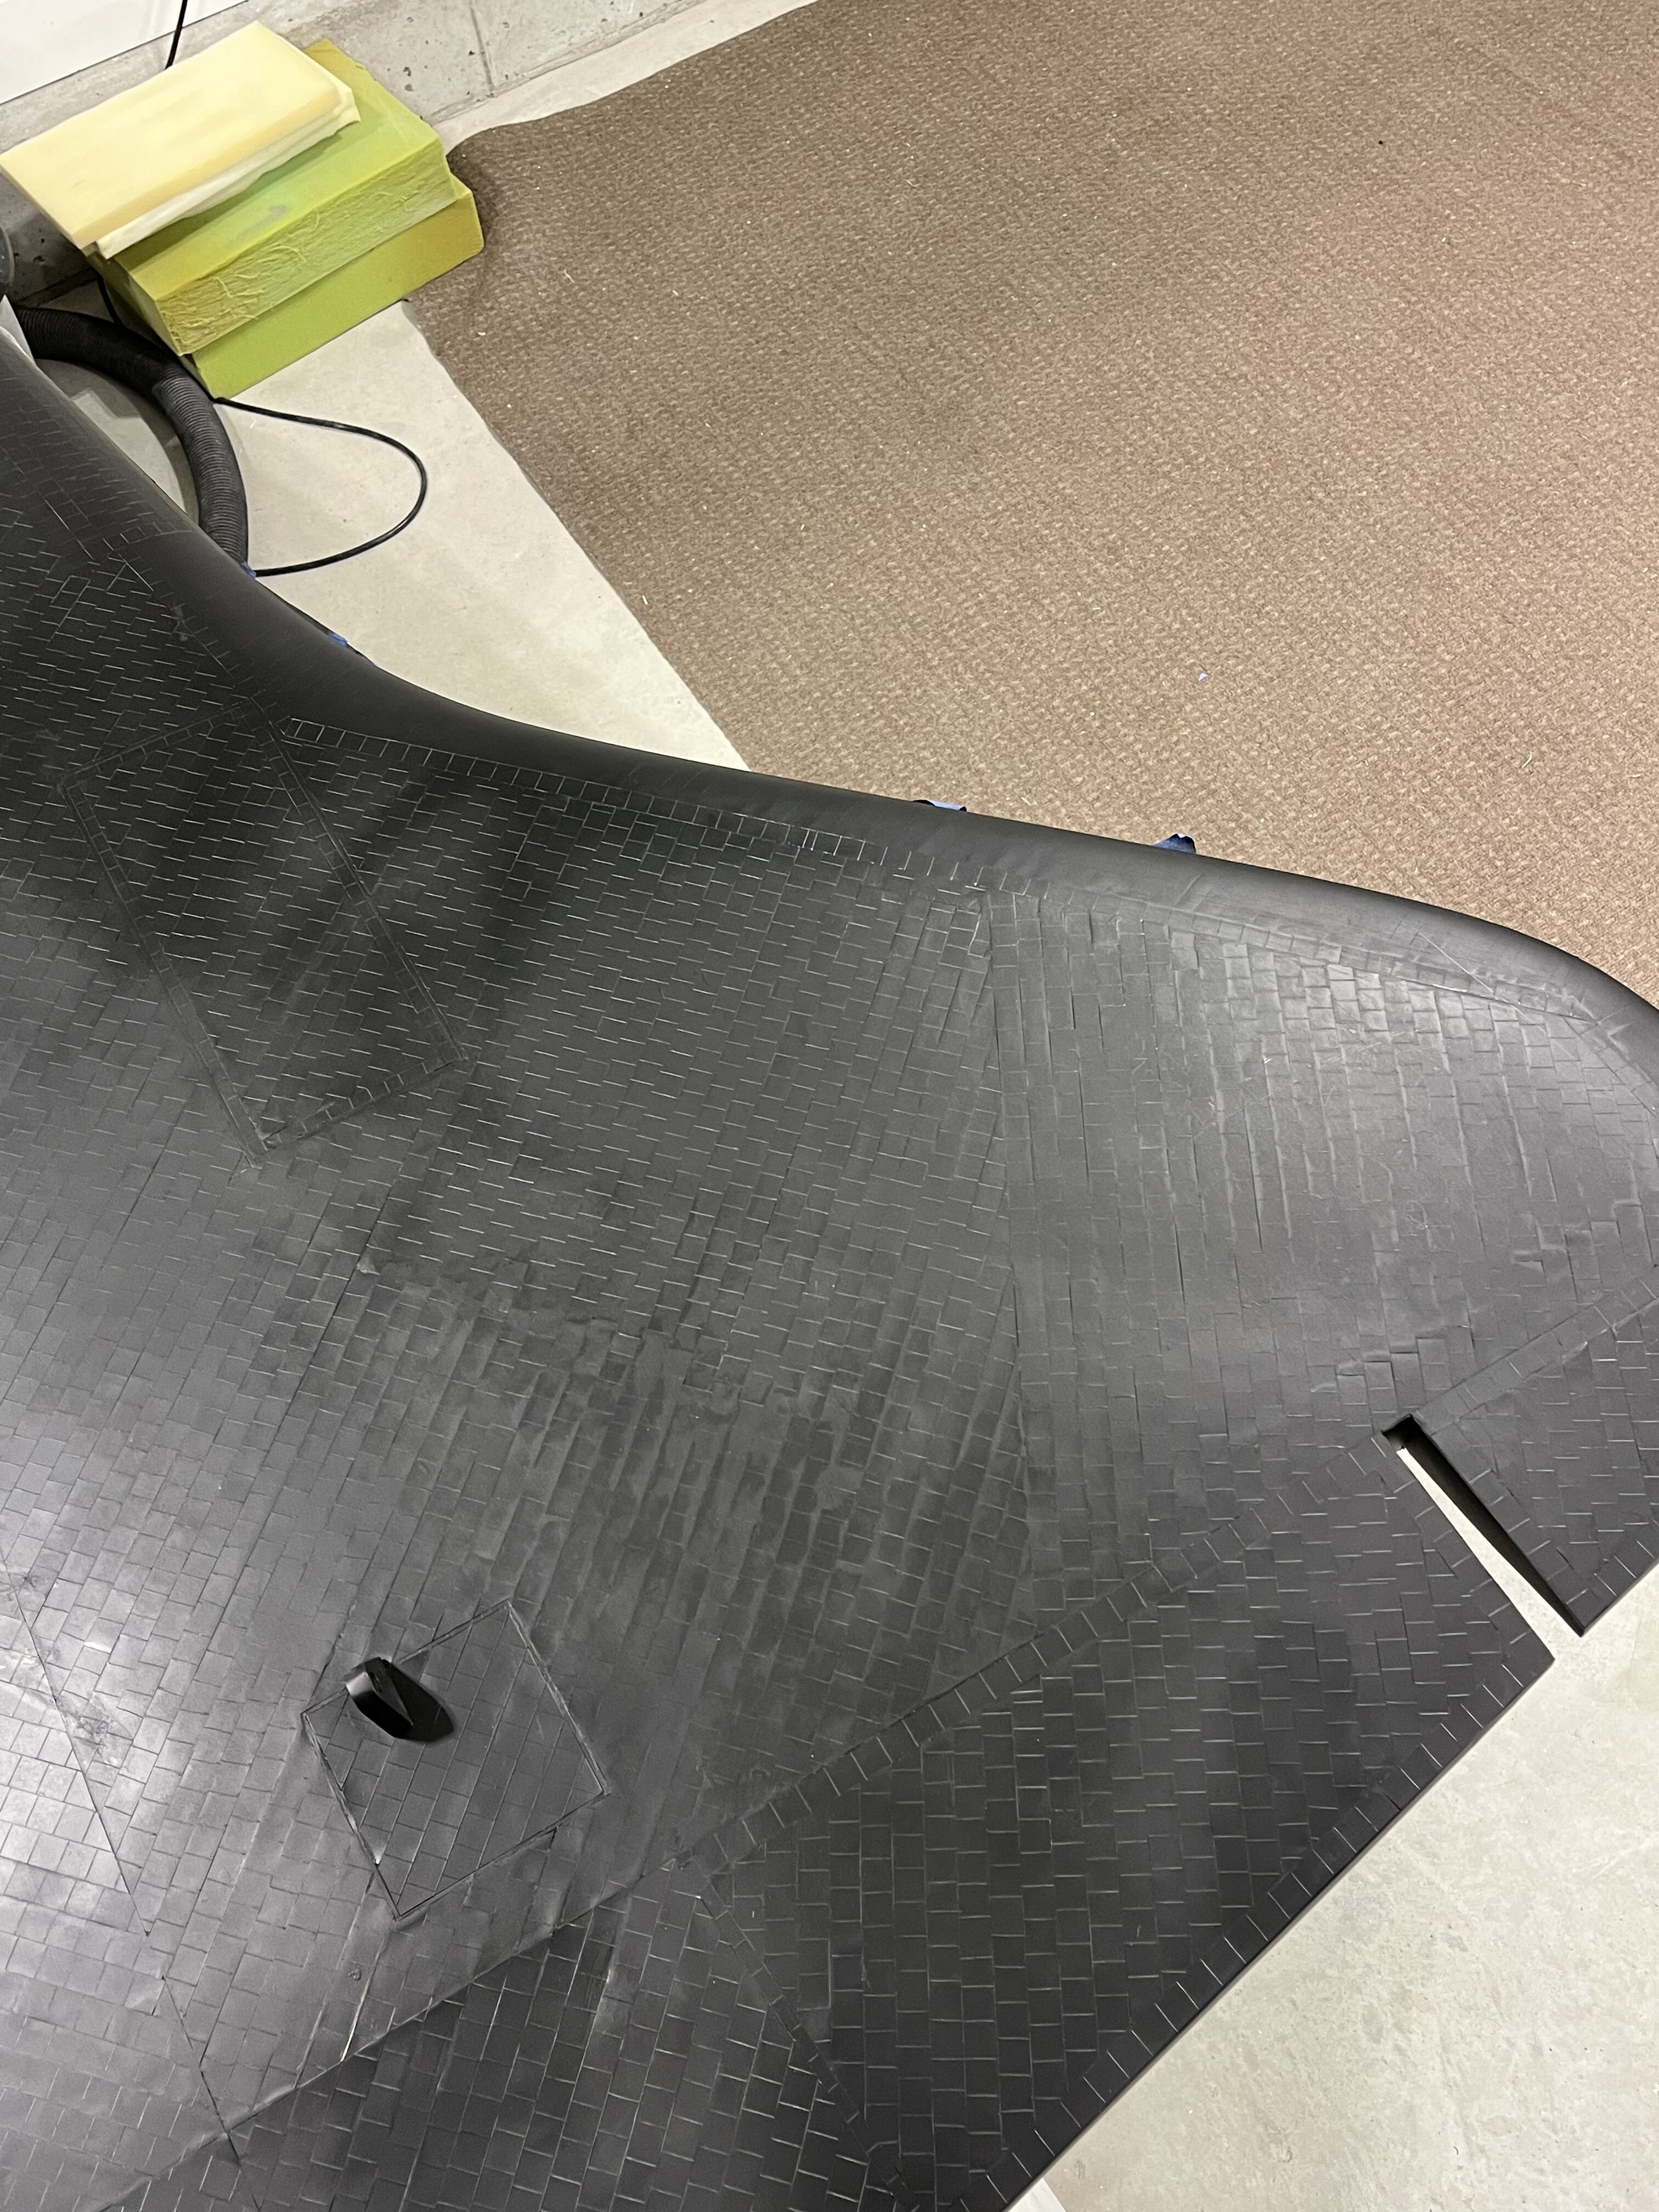
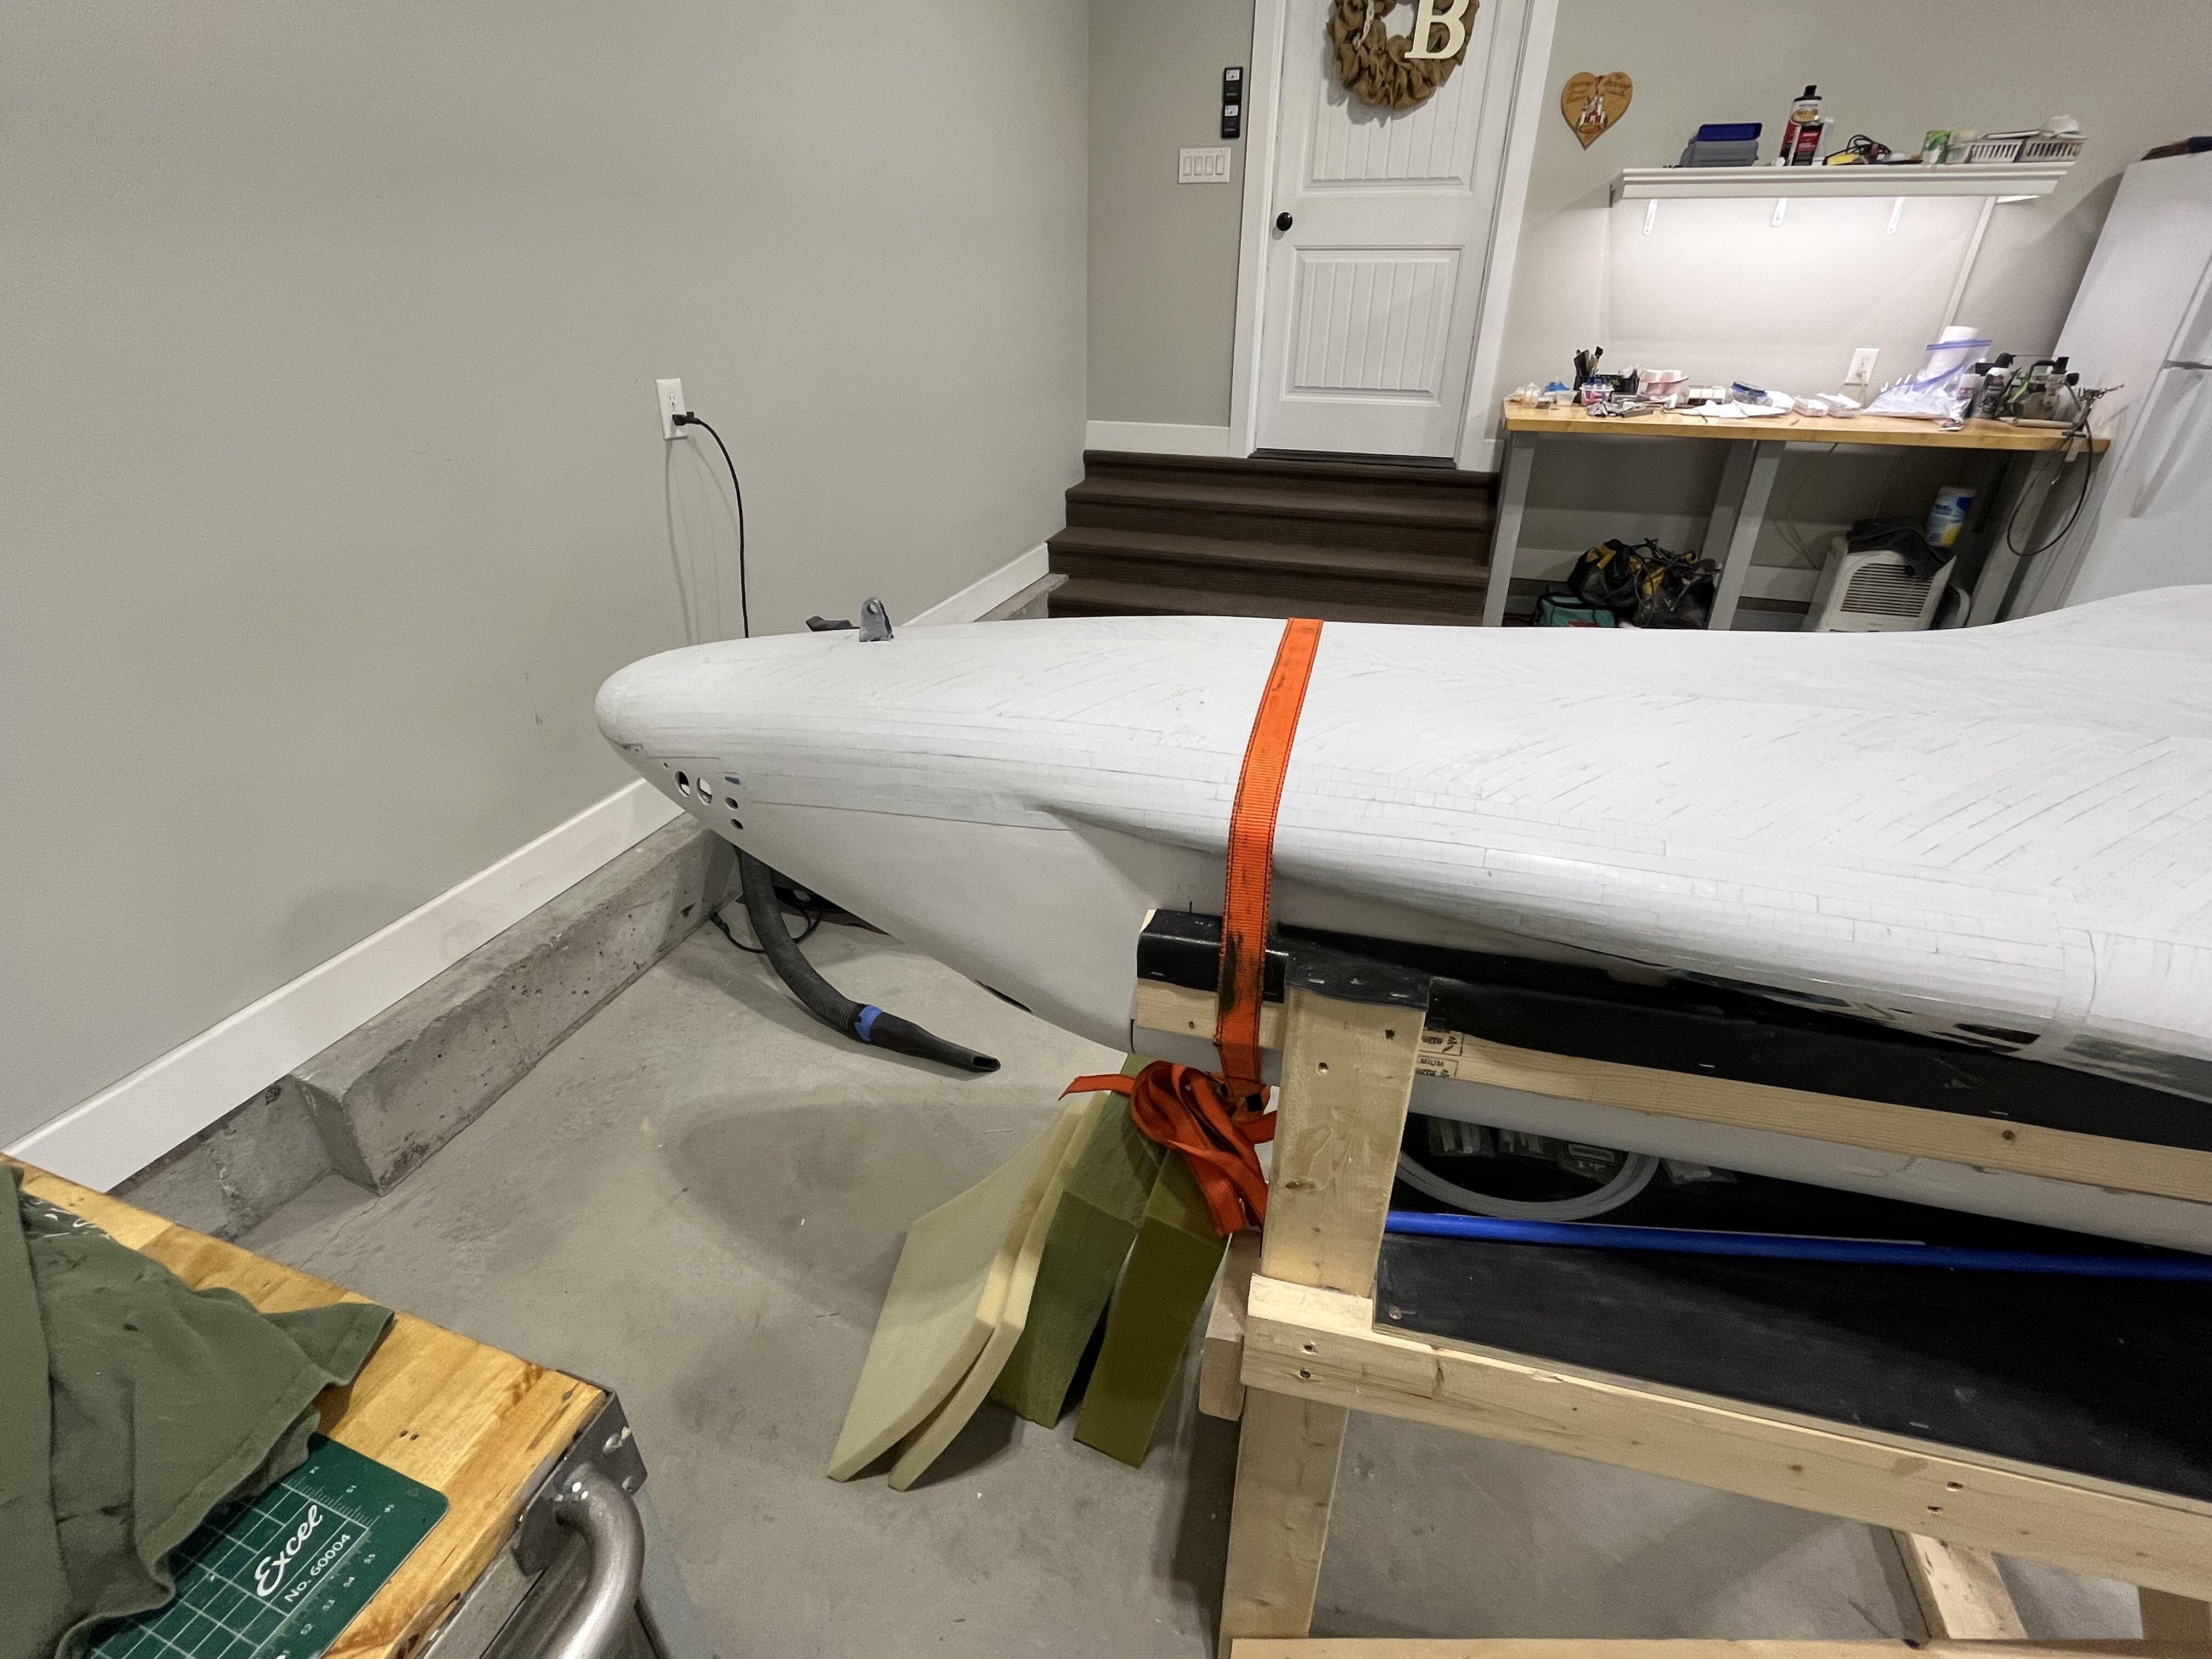
The bottom is now complete. I wrapped the tiles around as much as I could. Tomorrow, I will clean up the glue spots, then blow the entire bottom of the shuttle off to get any dust out of the cracks before it’s primered. It will then be flipped over in the cradle so that we can start tiling the top. My buddy Chris, from Ohio, is driving down for the day to give me a hand. Thanks for having a look. Chris.
-
She’s beautiful!!. And what an awesome paint scheme. Congratulations. Chris
-
1/15th scale Space Shuttle Atlantis
Bradley25mm replied to Bradley25mm's topic in Space, Sci-Fi & Fantasy
Chris and I have made some progress on the shuttle
-
Love these builds Jmarc. Thanks for sharing. Chris
-
Fantastic build Carlos. Love the paint job!!! Chris
-
Hasegawa’s 1/48 AV-8B Harrier Plus – Commission Build
Bradley25mm replied to Wolfman63's topic in Builds
Another amazing build David. Your attention to detail is off the charts. Chris -
1/15th scale Space Shuttle Atlantis
Bradley25mm replied to Bradley25mm's topic in Space, Sci-Fi & Fantasy
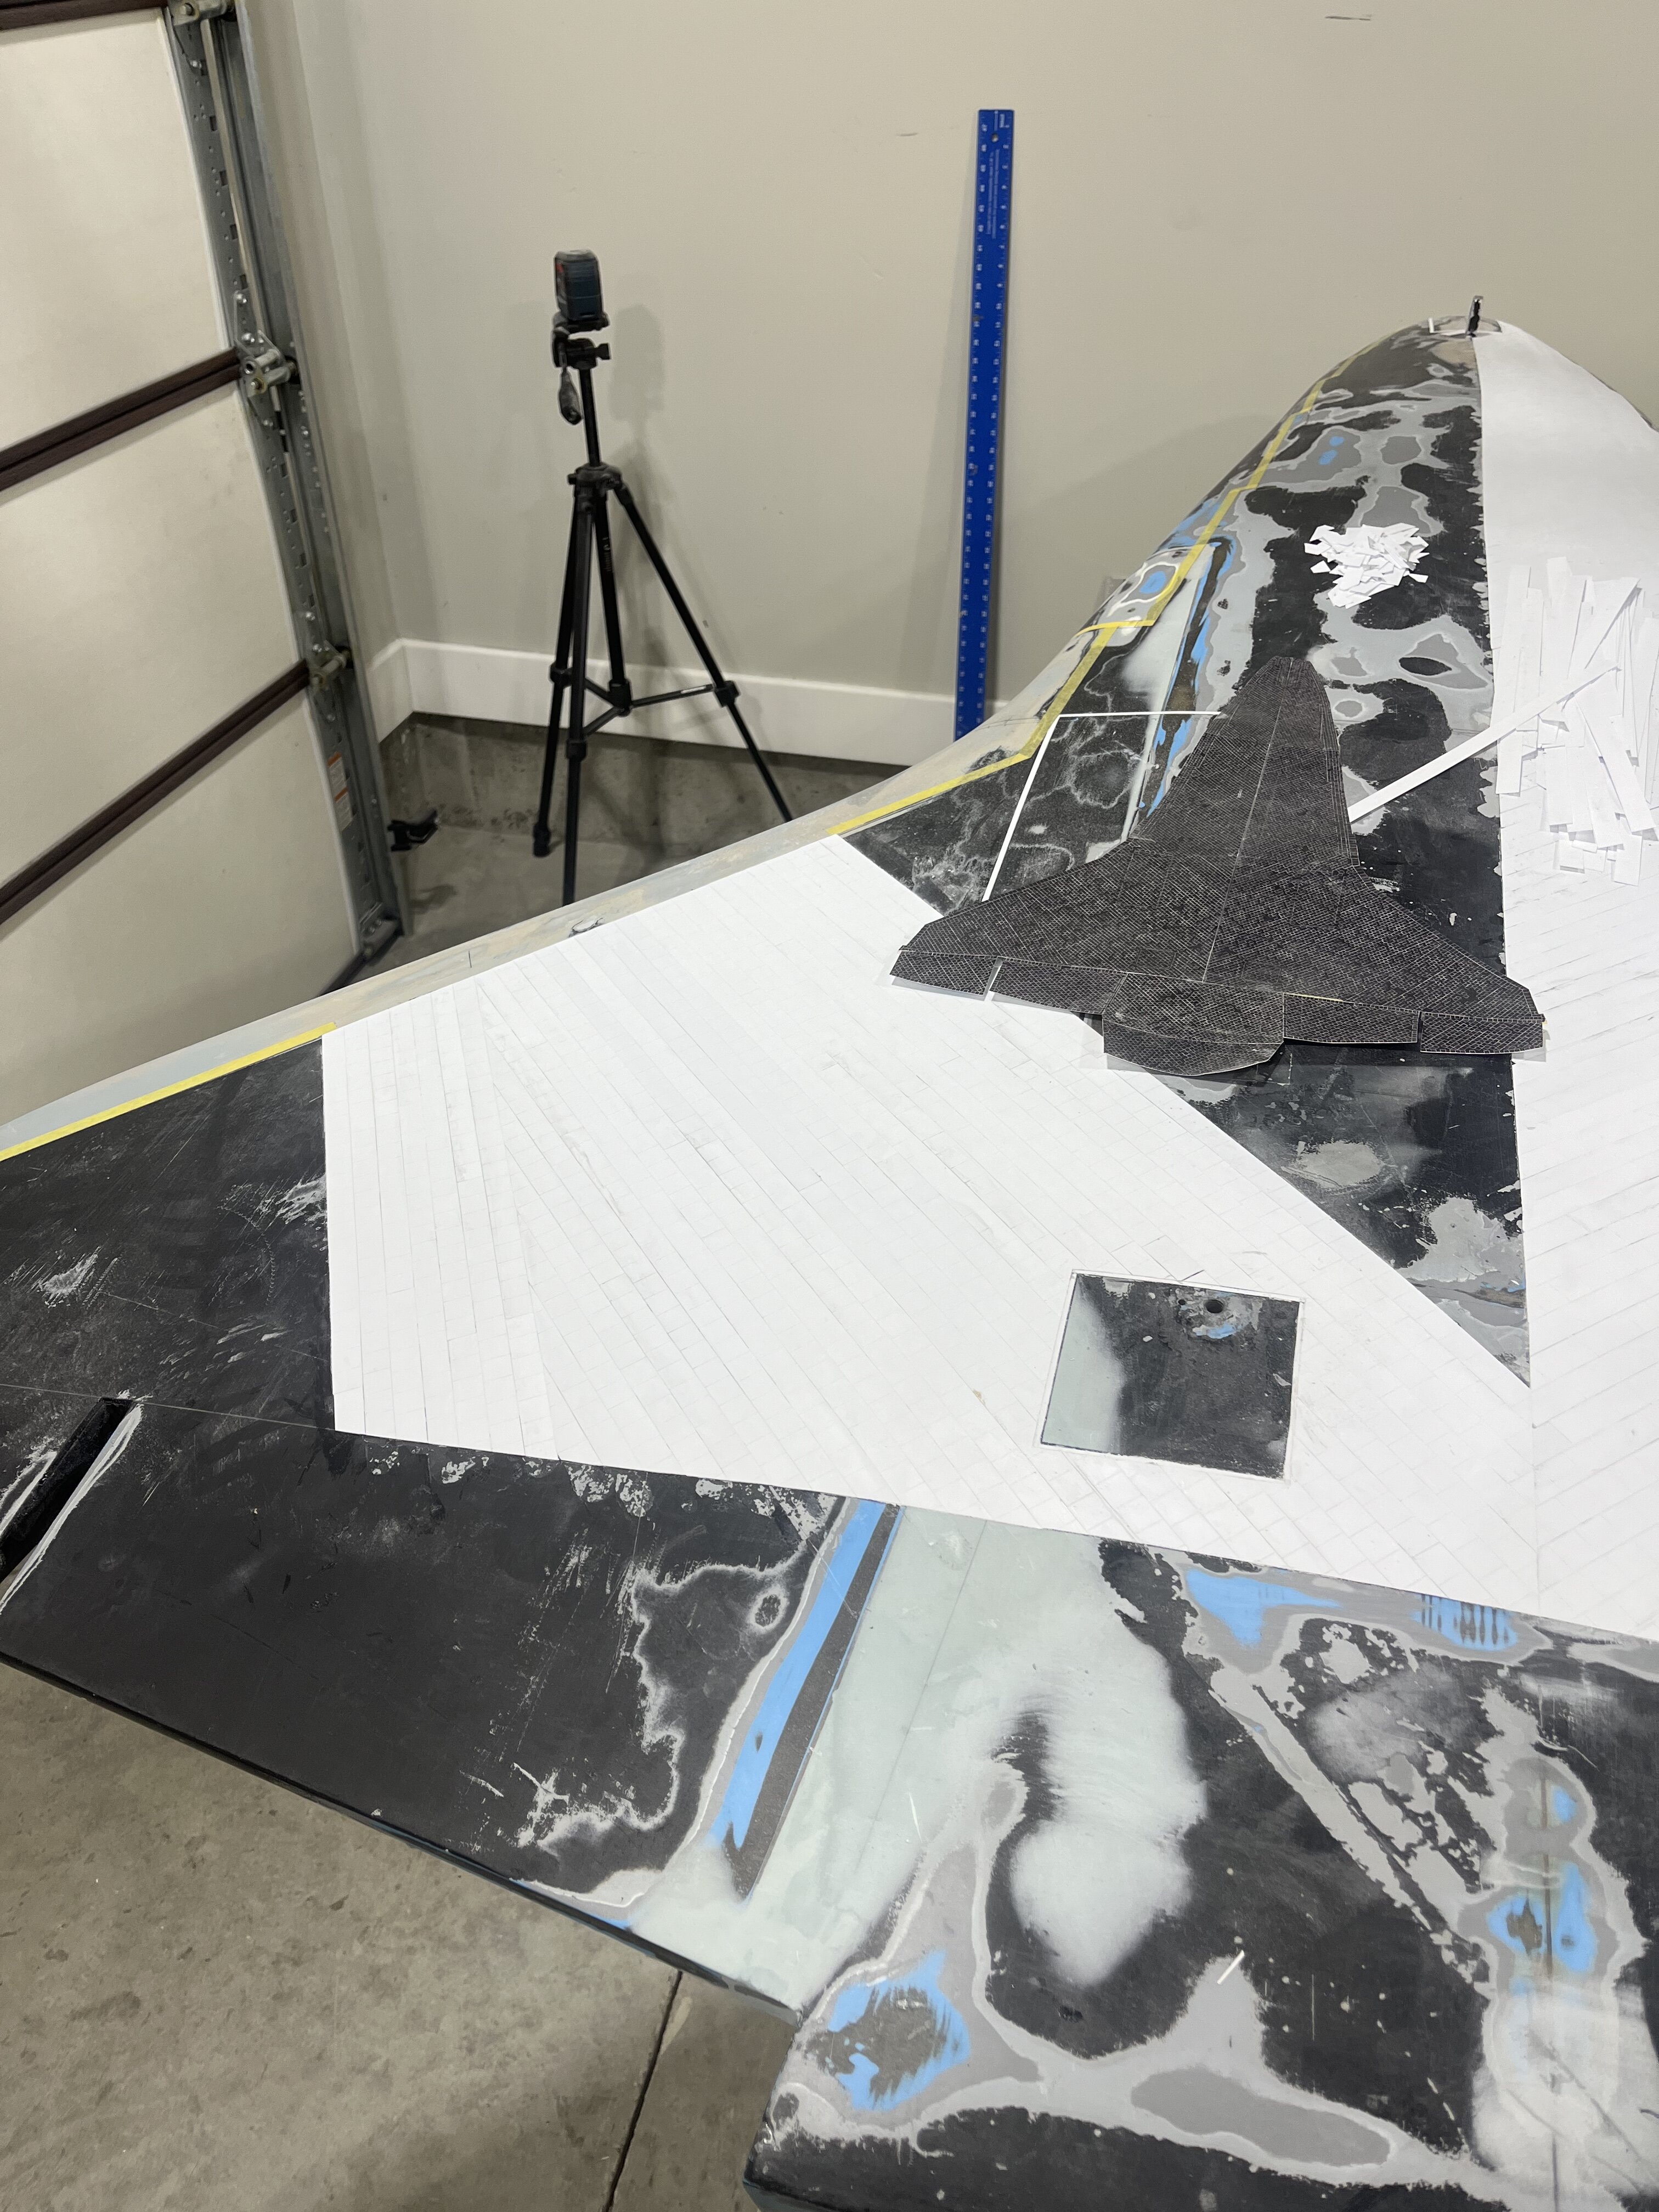
Thanks a lot guys for the comments. One of the most important tools that the Mongoose and I have been using, is my laser level. Once we were able to level the shuttle up, we were able to plot where things needed to go. My friend, Myles Marcovitch, was a huge help in up scaling the decals to 1/15th scale. He would print the upscaled images on paper. We then cut those images out and tape them on the shuttle where they need to be located. My other friend, Harry Fogerty, pre-scored all the Evergreen sheets to replicate all the tiles. He used his cricket cutter. This was also a huge help as we do not have to individually cut each tile. We have several different sizes that we are using. Around curves, we modify tiles that we already have cut. Lucky for us, the top and sides of the Atlantis are about 90% thermal heat blankets. I was able to replicate those using athletic tape, coatex with woodland, scenics, white glue, and then painted. It’s been a tremendous amount of fun to be able to work with these guys. It’s definitely been a collective effort from the get go. The mongoose is going to travel down here from Cincinnati next Saturday so we can put in all the thrusters. (Brass and plastic tubing). Thanks for having a look.
-
1/15th scale Space Shuttle Atlantis
Bradley25mm replied to Bradley25mm's topic in Space, Sci-Fi & Fantasy
The completed engine bells, and finished vertical stabilizer.
-
A few months ago, I was approached by Col. Arnie Franklin (retired) about restoring a Space Shuttle for a museum. The model was built by Rockwell International (The builders of the actual Space Shuttles). They were given as a gift to NASA. NASA in turn, transferred them to the Smithsonian Air and Space Museum. The one I’m currently working on was on public display at the Johnson Space Center. Rather than just paint it, I’ve decided to tile it, and apply the thermal blanket material (Athletic Tape) Christopher
-
1/48 Revell AV-8B Commission Build of “ALAMO 12” from VMA-223
Bradley25mm replied to Wolfman63's topic in Builds
Again, you build on another level. I’m sure your customer will be blow away once they have it in their hands. Thanks for sharing. Chris -
Museum quality work, for sure. Your attention to detail is amazing. Chris
-
Amazing work! Look forward to seeing your progress. That’s one big model. Chris
-
Wow, what a beauty. Very nice paint job with clean lines. Congratulations on an awesome build Chris.
-
Aviation Heritage Park, Bowling Green KY
Bradley25mm replied to Bradley25mm's topic in General Modeling
Gil, Their intentions are to gradually add more aircraft displays. The museum it self, once open, will display artifacts of pilots from each time period. (Generally from Vietnam to current campaigns) I was given a tour of their restoration tent in the back of the museum. They even have “Open Cockpit day”. The River Rats Fighter Pilots Association will hold keys events at the museum once it opens in late October. Regards Christopher
-
Aviation Heritage Park, Bowling Green KY
Bradley25mm replied to Bradley25mm's topic in General Modeling
More pictures!!
-
If you are ever traveling on interstate 65, near Bowling Green, take exit 22 to get to the heritage Aviation Park. You’re able to get up close and personal with some really cool planes. All the pilots that have flown the planes currently on display are from Kentucky. The grand opening for the museum portion of the Aviation Park is is October time frame.
-
Moving/touching models.
Bradley25mm replied to Bradley25mm's topic in About the IPMS/USA National Convention
I’m just glad that this has changed. Regards Christopher -
Moving/touching models.
Bradley25mm replied to Bradley25mm's topic in About the IPMS/USA National Convention
Thanks Gil for the reply. I respect your opinion. However, I speak from experience. 2019, Chattanooga TN Nationals. Left the room for judging. Returned to the table to see if my Trumpeter SU-27 won anything. Noticed that the front landing gear was completely ripped off. Who ever tried to lift it off the base, just put it back down. Left no note as to what happened. All of my models ,as you know, are put on bases. Glued down to keep them safe for transport, and for judging. All of my bases have felt pads on the bottom so they can easily be rotated on any surface. If a judge needs to look underneath, they can use a dental mirror, or even their iPhone (reverse their camera direction so that they can see on the screen what is exactly underneath the model ) I even told, who I believed, was the head aircraft judge that this was the case. When I initially brought it in, he asked me to take it off the base and just put the plane on the table, and put the base underneath. Thought that was kind of weird as that was part of the whole display. And yes I have judged before. Not at the nationals, because that was my first and only time in attendance. I did get in contact with the head judge about this. He not only provided me a room, and supplies to fix it, but offered to give me a newly released Tamiya P-38 for my troubles. I declined the kit and fixed my model. As for your “ shenanigans” reply, I probably could have used a better term, maybe like “Current judging rules”. Have a good evening Gil, and thanks for the reply friend. Regards Christopher (currently a non-IPMS member) -
Fellow Modelers, I was unable to attend this years Nationals in San Marcos TX. My friend told me a couple of days ago about a judge picking u a model up over his head to see the chassis. I did see where the IPSM Board will be making some major changes in regards to this, and was very pleased. This has been long overdue. It should never have come to this. It’s shenanigans like this that turn modelers off to attending contest. Just my two cents. Regards Christopher
-
All, Haven’t been logged on in a while. I just wanted to give everyone a heads up, for those who are unaware of it. This is an extremely detailed kit. Goes together great. The one major downfall, Is the kit supplied landing gear. This is absolutely the softest plastic I’ve ever seen. I would not bother even trying to use them. Even with the model completed, it is extremely unstable, and wobbles a lot. I snapped one of mine off after barely hitting it on something. Aerocraft models has metal aftermarket gear available. Because of a high demand for the replacement gear, it could take anywhere from 3 to 4as production is currently in overdrive to get these produced. ICM produced an amazing kit. The landing gear is the only downfall. Regards Christopher
-
1/48 ICM C-18S “Magic by Moonlight” Air show Aircraft – with lights!
Bradley25mm replied to Wolfman63's topic in Builds
One of your coolest builds From the awesome paint job, to the lights and smoke trails. You hit this one out of the park. Thanks for posting this Beauty! Chris