Bradley25mm
-
Posts
469 -
Joined
-
Last visited
-
Days Won
30
Content Type
Profiles
Forums
Events
Everything posted by Bradley25mm
-
She turned out great. A really good idea to use a sponge to apply the paint. Nice results. I’ll have to try that sometime. Thanks for posting this. Chris
-
Three Aircraft Finished by the Duke in April
Bradley25mm replied to Mark Deliduka's topic in Aircraft
Mark, they all look great, but by far my favorite is the Maritime search plane. Really cool subject! Chris -
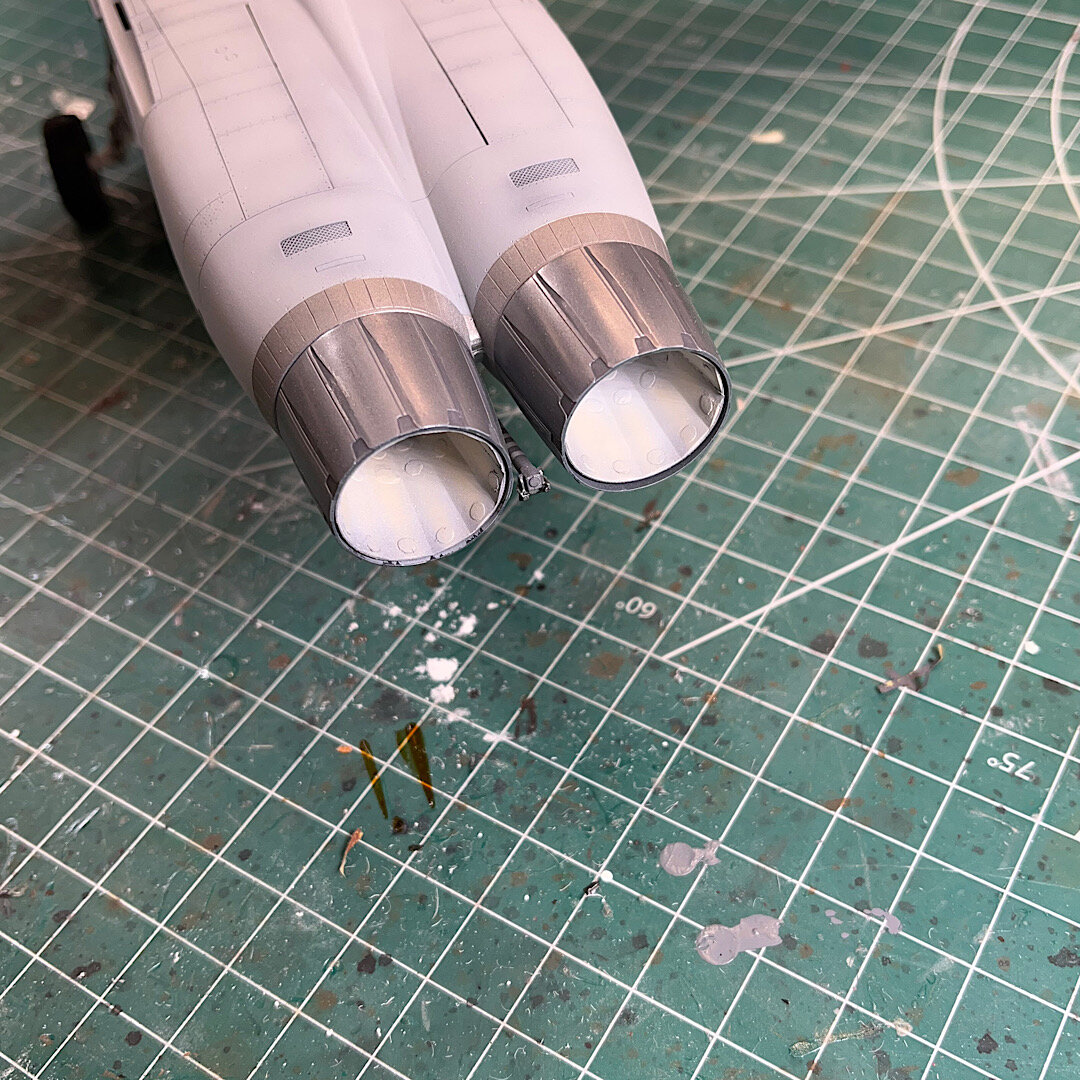
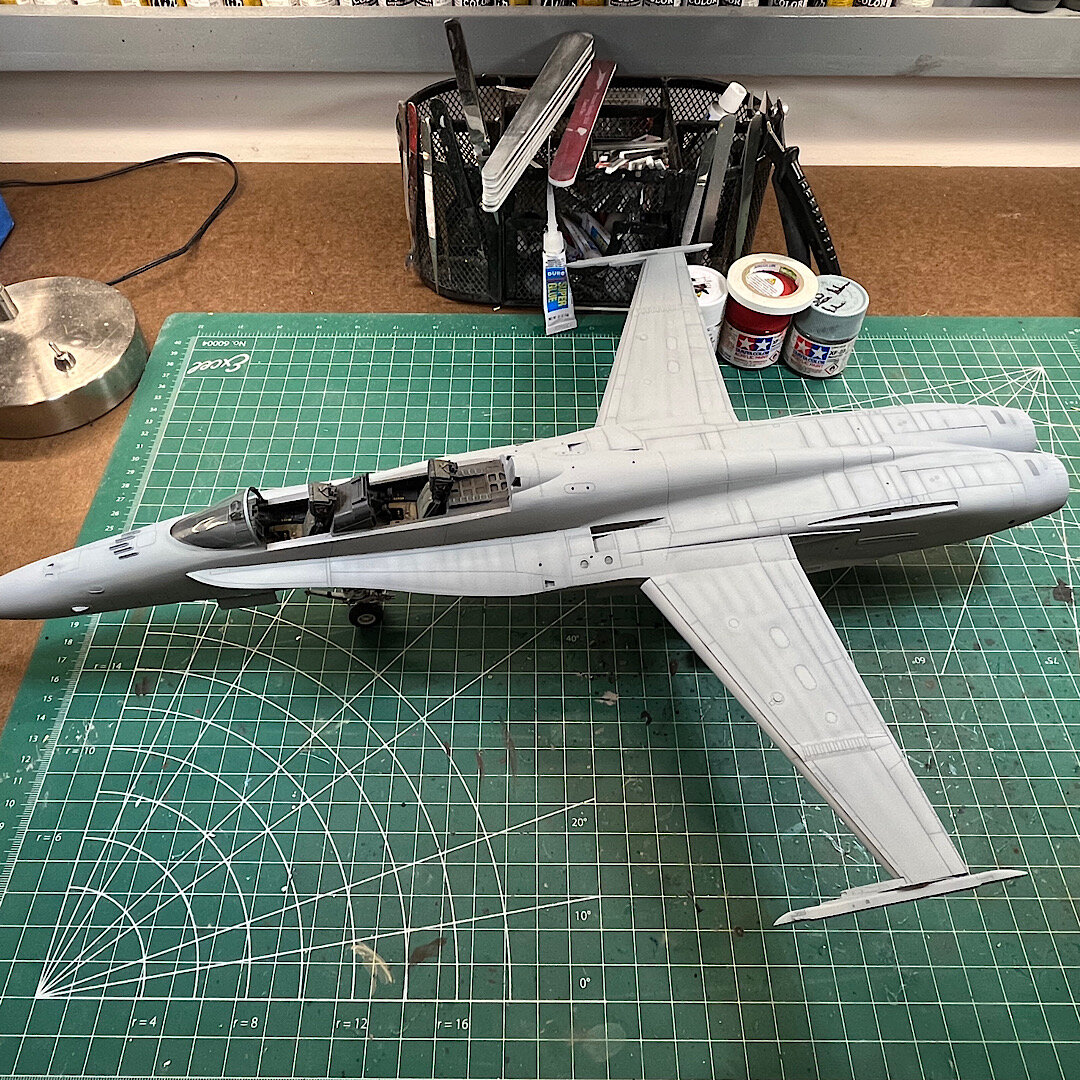
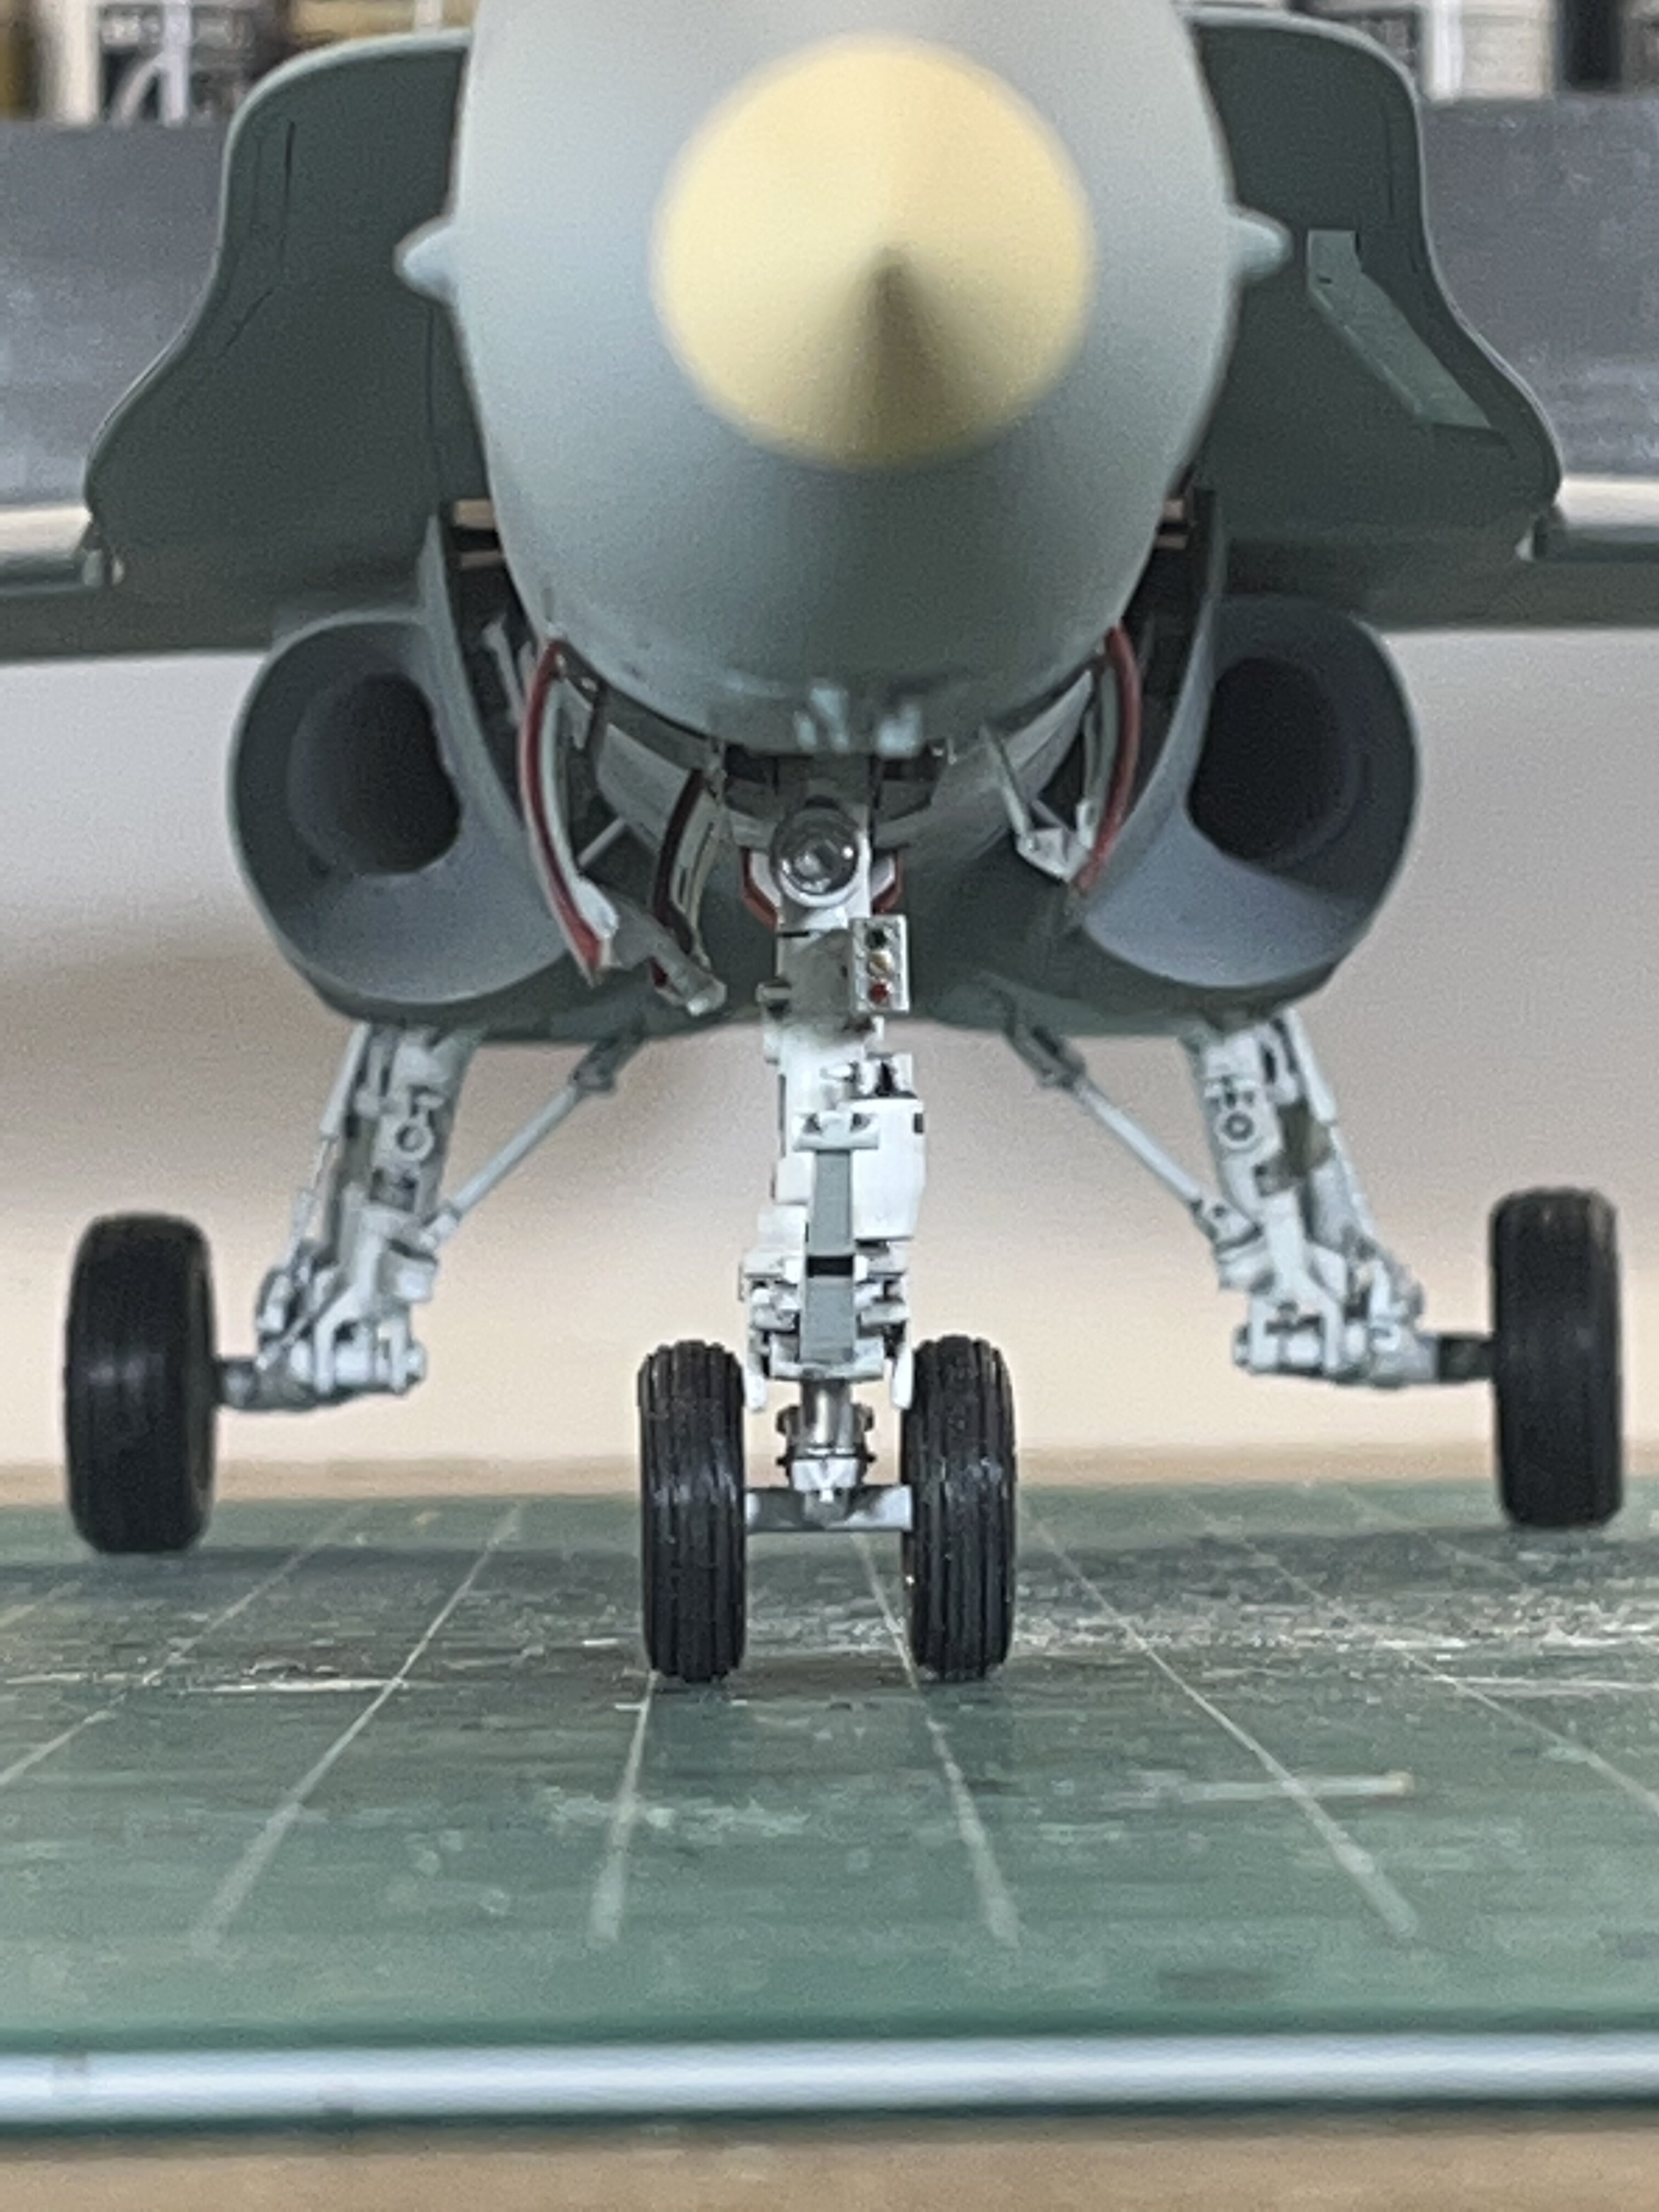
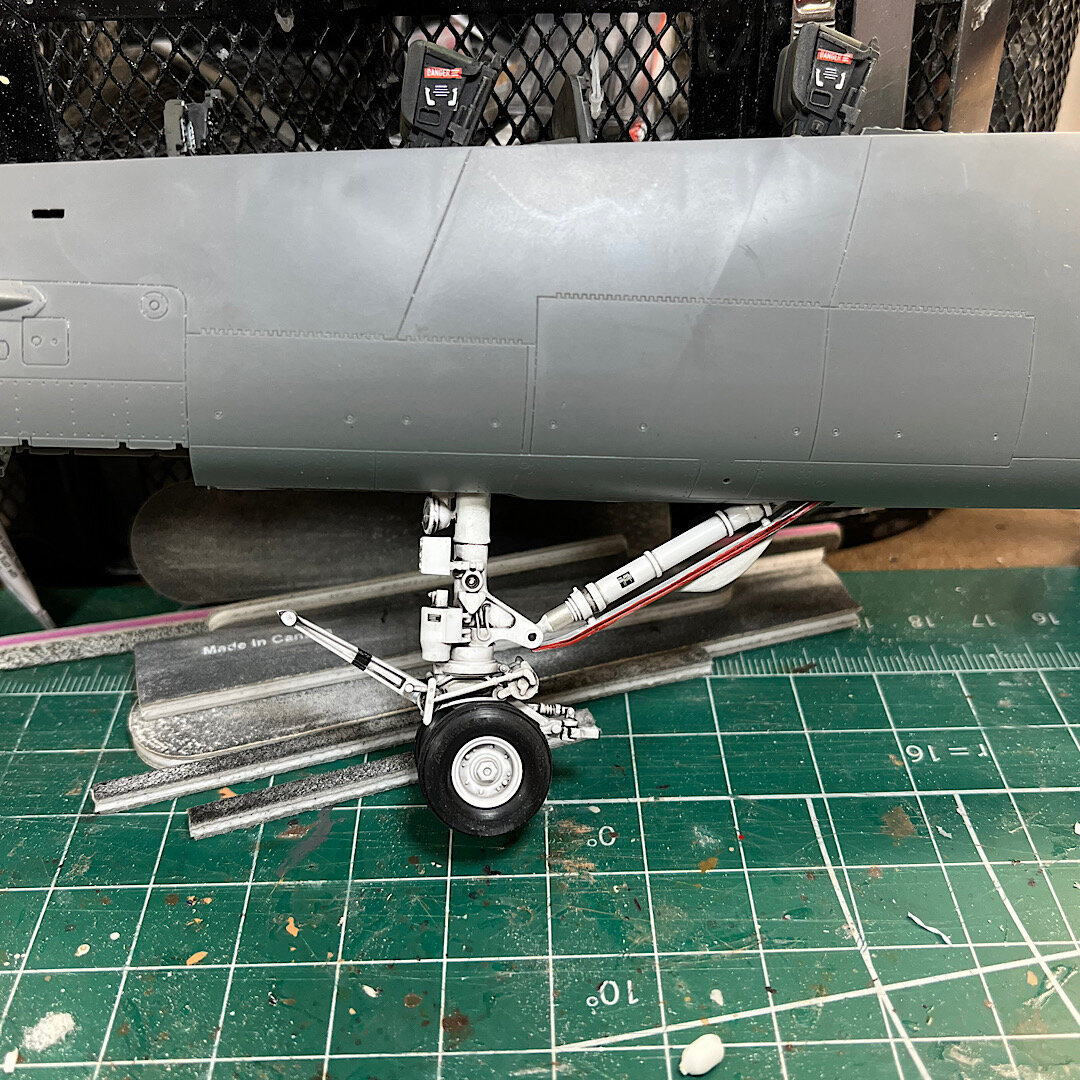
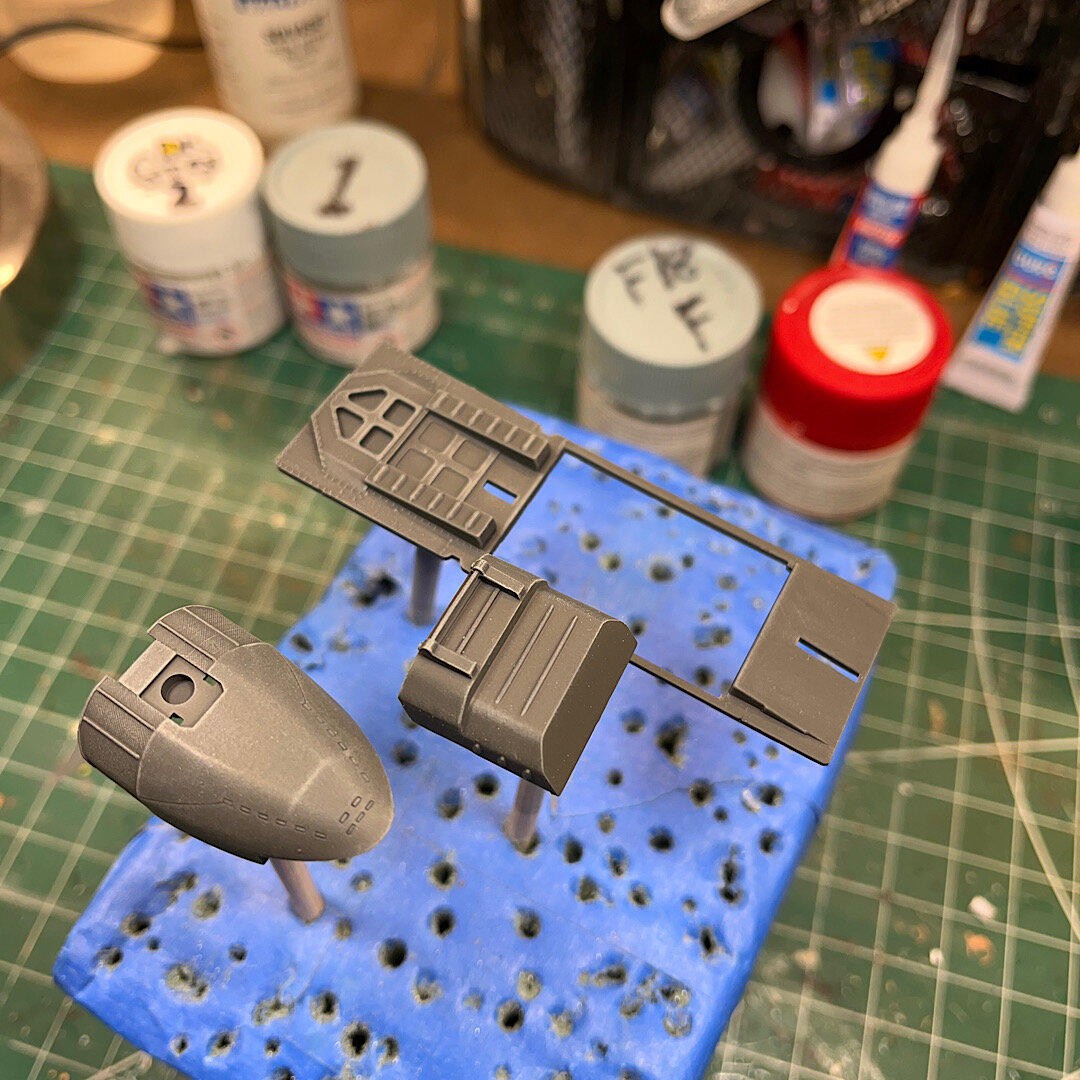
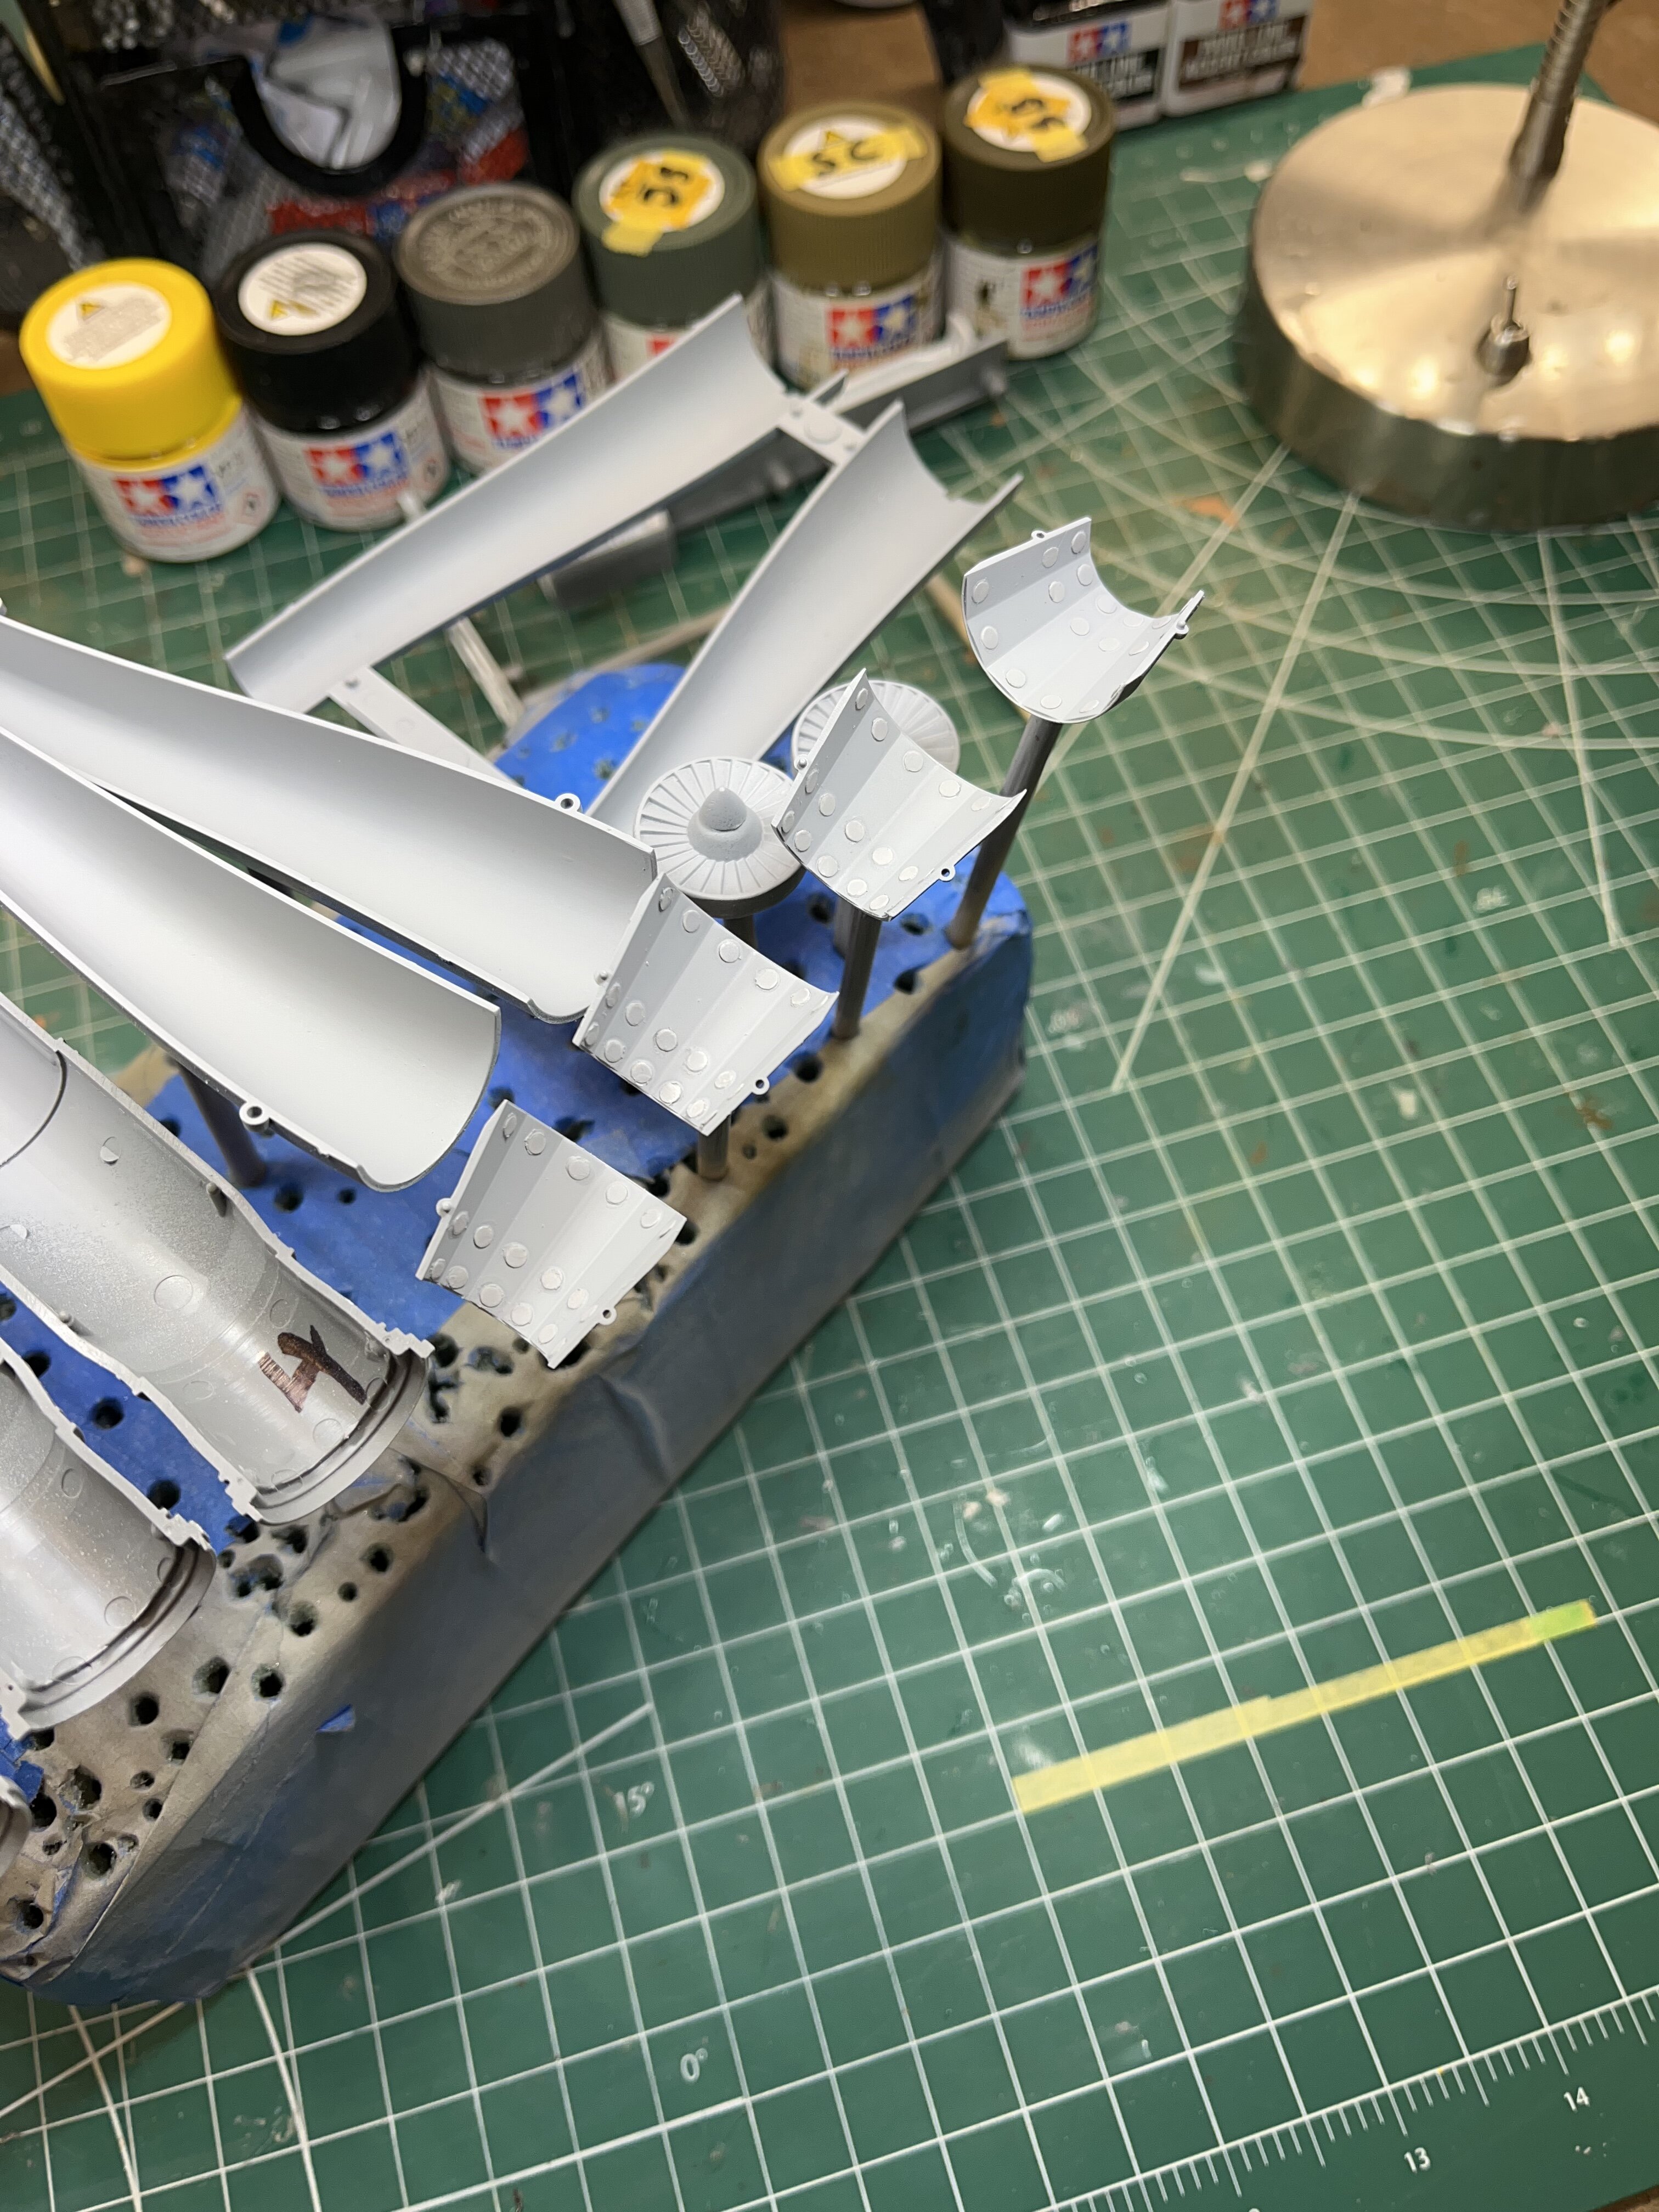
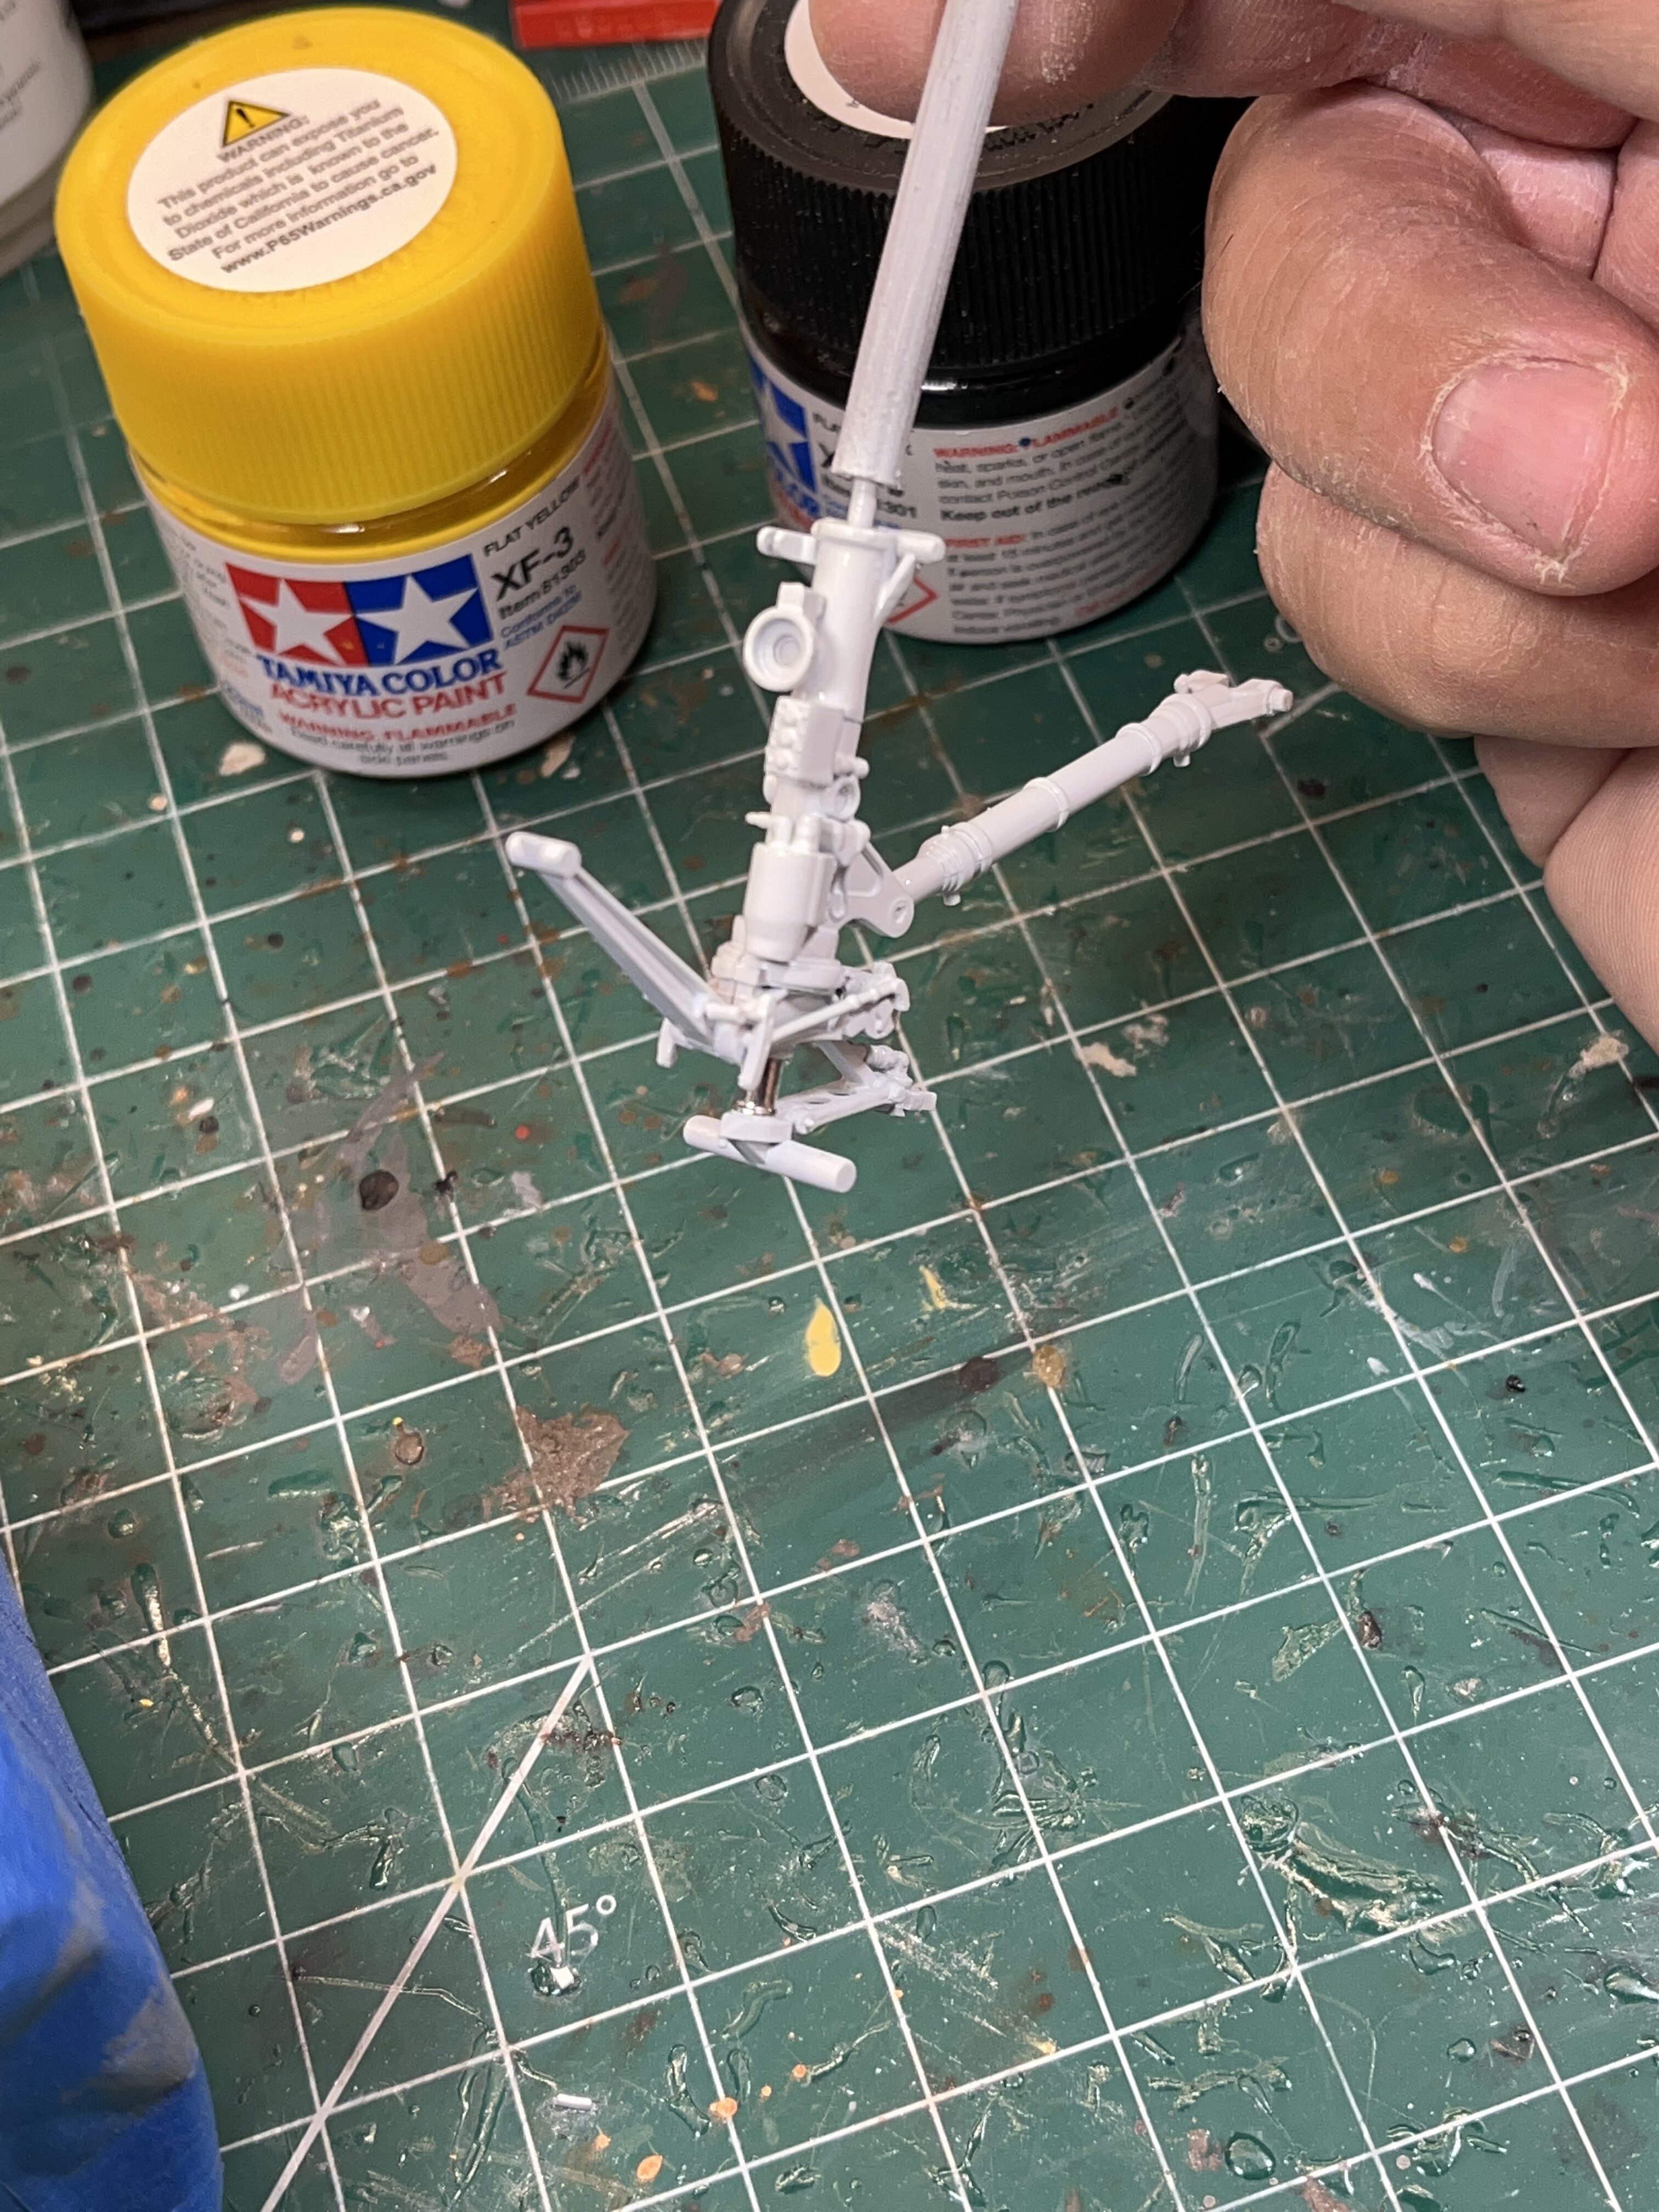
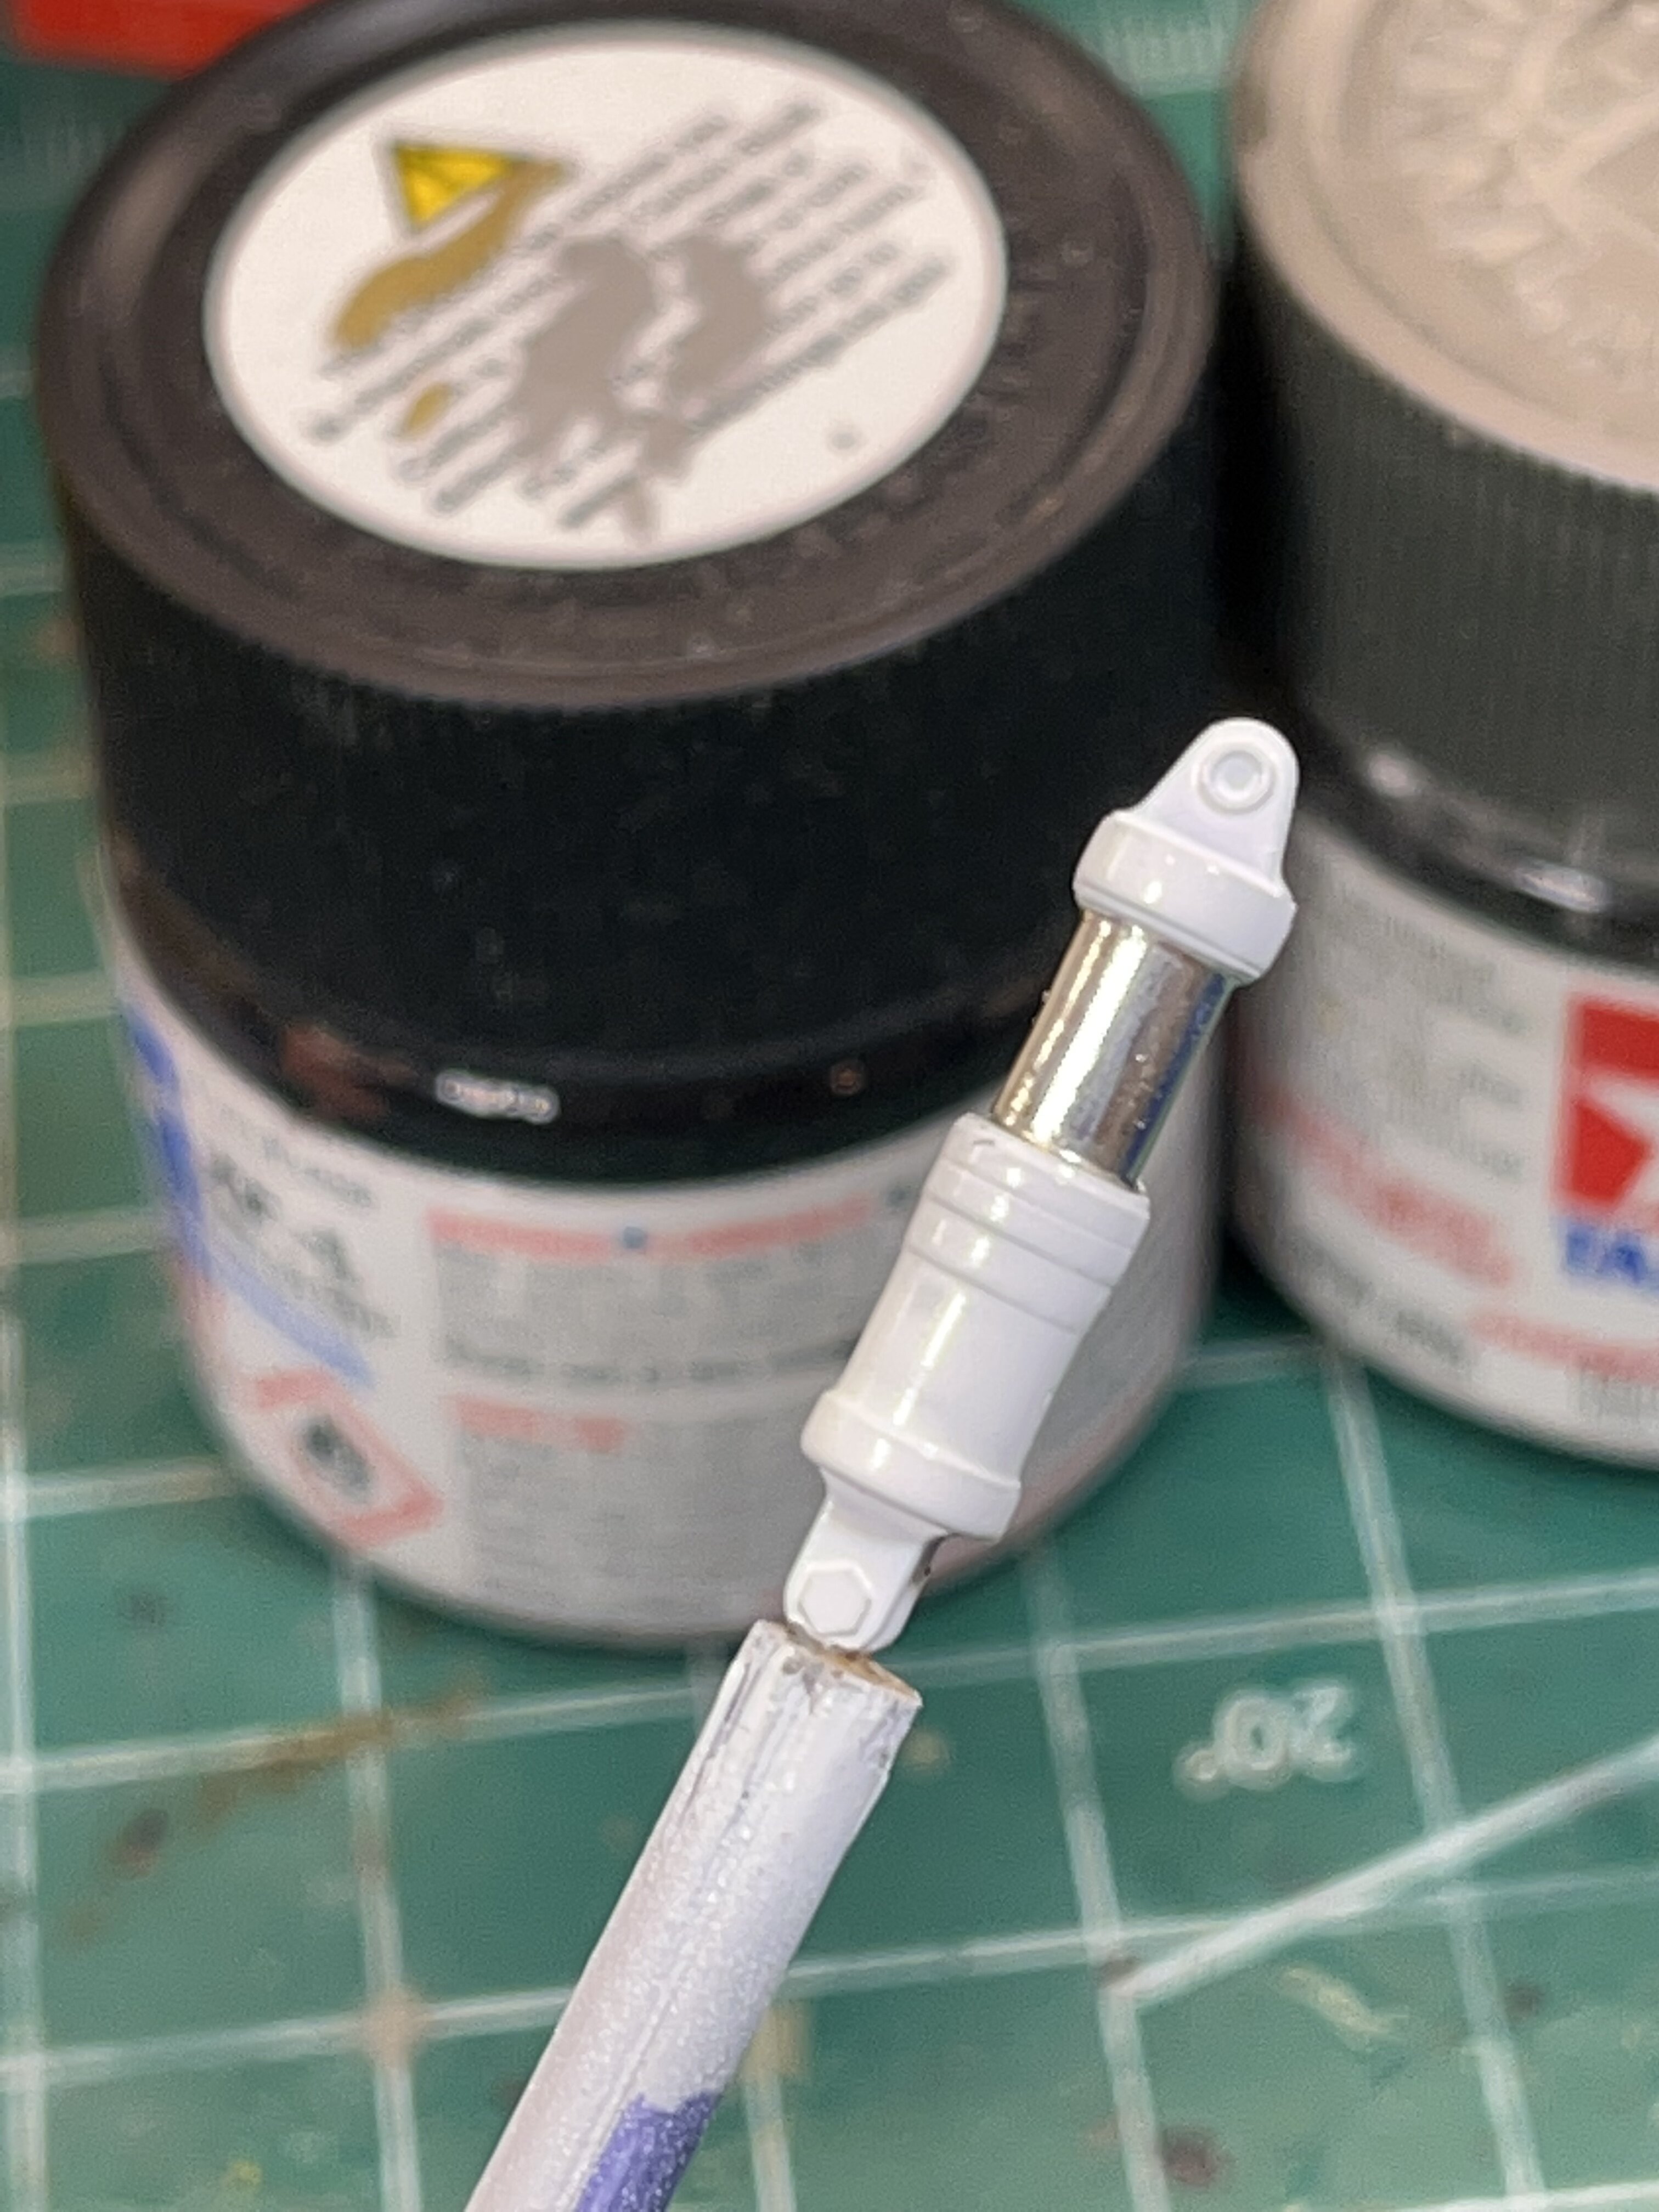
After a small break, I’m back at it again. 1. Assembling the fuselage components. One thing that came to mind from building this kit before, was how well things fix together after a little sanding. Some parts required no filling or sanding. I used Tamiya regular white putty when I did need to fill something. 2. Priming,Paint, pre/post shading. I used Tamiya regular primer for all the parts. Before priming, I wiped everything down with a cloth dampened with mineral spirits. This guarantees that any oil will be removed from the plastic prior to painting. I wore latex gloves while doing this. After the primer was completely dry I applied pre-shading to all the parts. I used Tamiya flat black to go over all the recessed line. There’s no need to paint a perfectly straight line over the recess detail. This can be gradually covered up by your fuselage color. I did not want to go over board with the pre-shading. Slight variations in the panel lines is what I was shooting for. I added the fuselage color gradually so that you could see just the right amount of fading. Once I got the effect that I wanted on all of the parts and the fuselage, I finished with post shading. I simply took the fuselage color and added a little bit of white to simulate really faded spots. 3. Adding the rear landing gear. The gear is more than strong enough to support the model. It went together very easily. When I built the first one, the wheels didn’t sit flat. They were angled out a Little. I made sure that wasn’t the case this time. If you like 1/32nd scale F/A-18’s, this would be a great addition to your collection. Chris

-
1/48 Trumpeter C-47 converted to the R4D-5 “Tropical Tilly”
Bradley25mm replied to Wolfman63's topic in Builds
That is one eye popping paint scheme!!!. Really like everything you’ve done with this one. Can’t wait to see it roll off the assembly line😉. Chris -
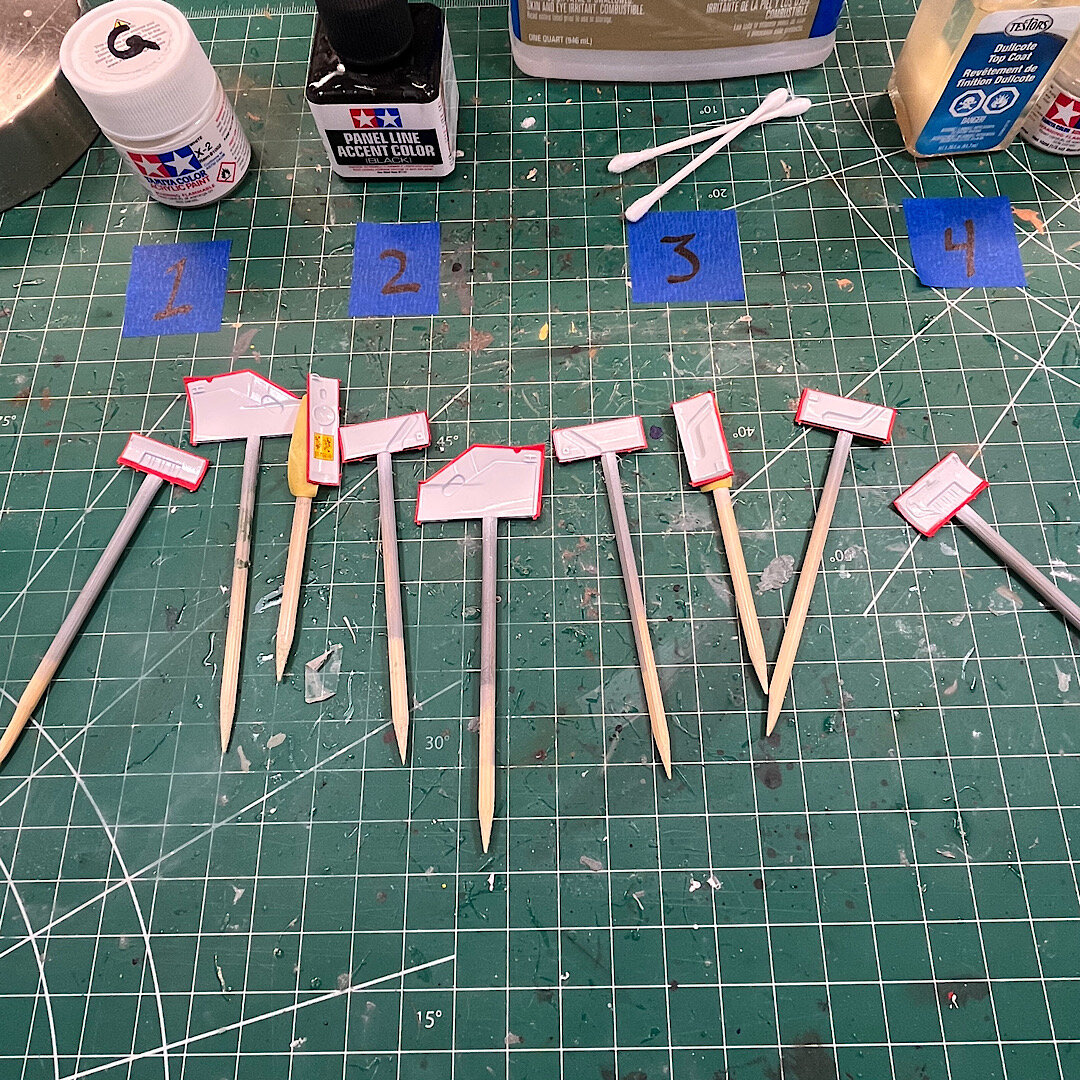
Thanks a lot Ed. Very tedious painting. Gil, here’s the exact process I used. Step one, painted everything was Tamiya white, X-2. Just a few drops of Mr. color leveling thinner. Waited one day for everything to dry well. Step two, applied Tamiya panel line accent color black. Waited for this to dry completely. Step three, took a Q-tip, dipped it in a small bowl of mineral spirits, squeezed the excess mineral spirits out of the Q-tip by rolling it between my fingers. Starting to wipe the wash off in the direction that would make sense. In my case, where each door would attach to the aircraft I would start at the top, and wipe down. Continue wiping the wash off until you get the effect that you want. It’s a good idea to have a couple of Q-tips on hand once the one you’re working with is saturated with the wash. In the event that you wash off too much, go back and reapply the wash, let it dry, then wipe off again It’s a good idea to keep a pair of sharp tweezers, to pick off any strands of cotton left behind by the Q-tip . Step four, Seal it with your preferred brand of flat clear. For me, I prefer Testors dull coat. I hope this helps. Chris.
-
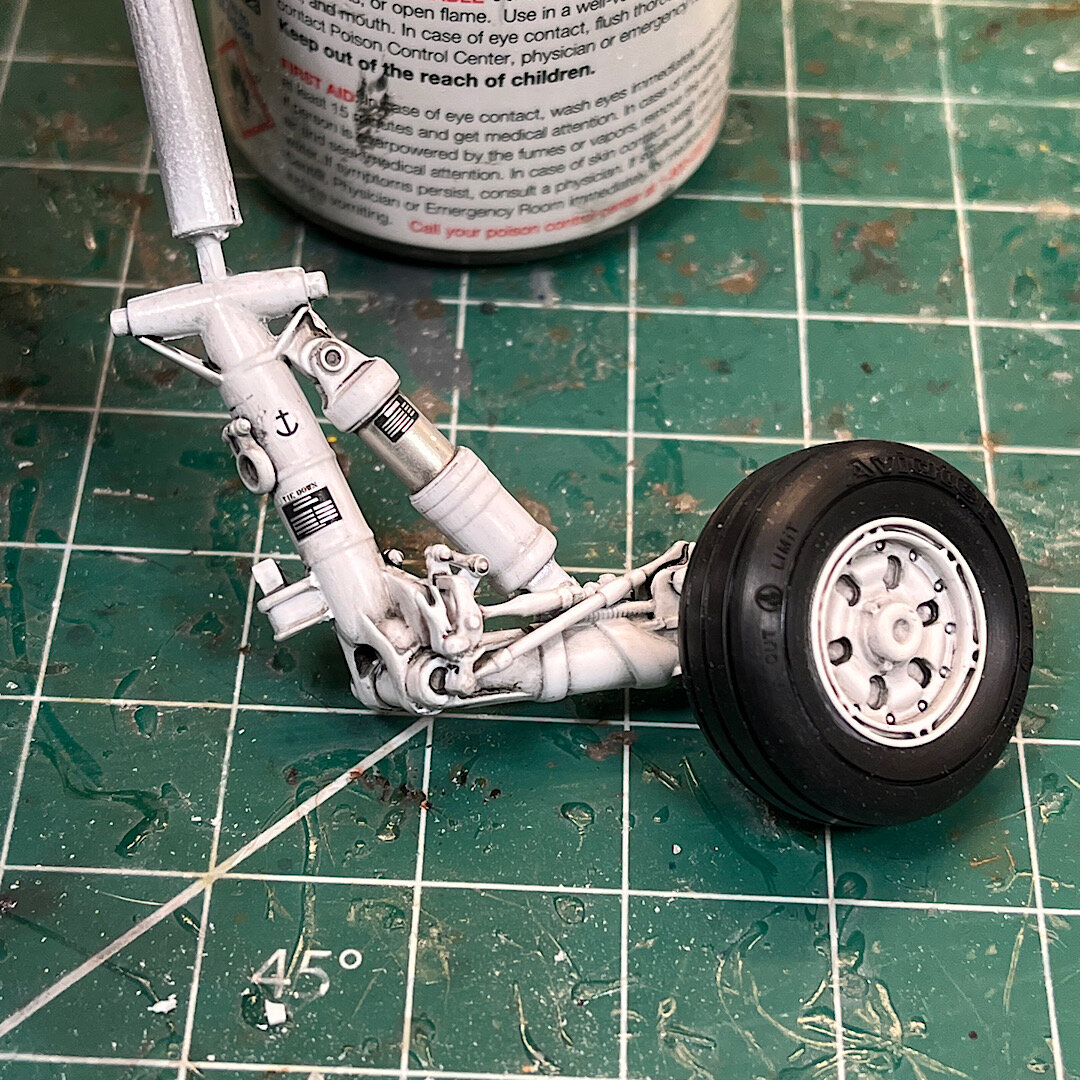
Was able to get a couple more things done this week. All the landing gear was painted with Tamiya Gloss White. A wash was then applied with a small brush. After it dried, I removed the excess with mineral spirits on a cotton swab. Chris
-
Really interesting build Fred. You’ve got a great start on this one. Chris
-
Thanks guys. Carlos, I used bare metal foil. Chris
-
-
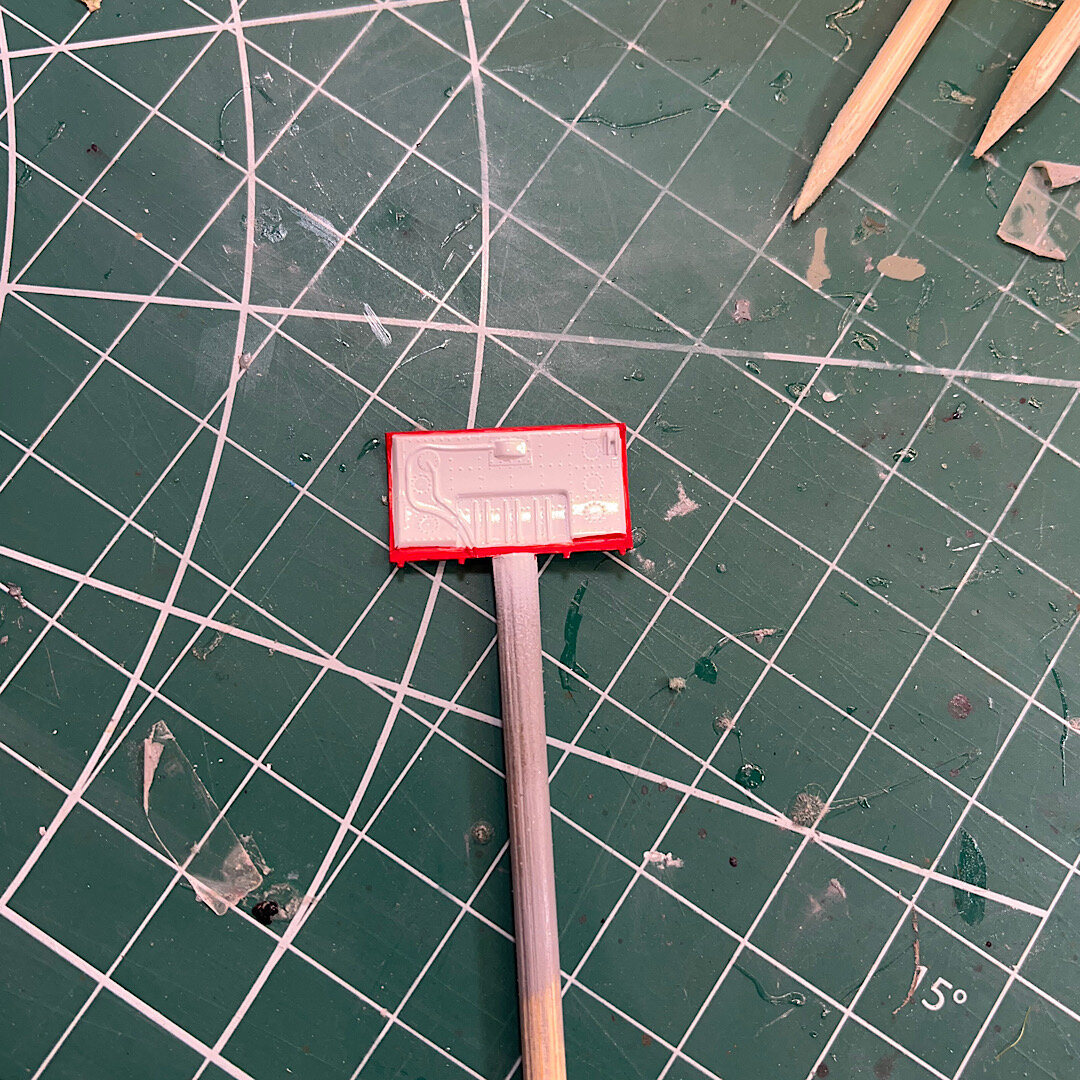
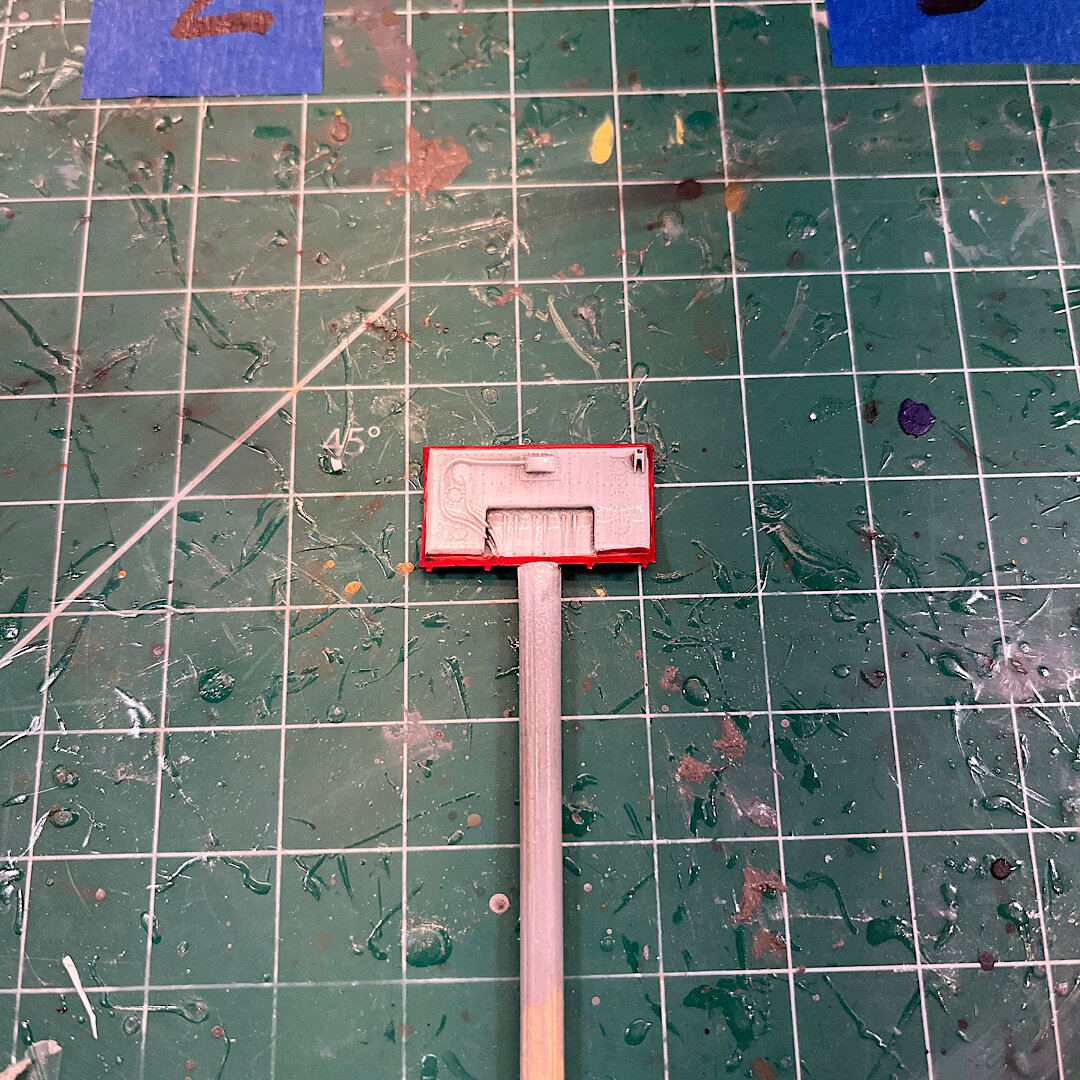
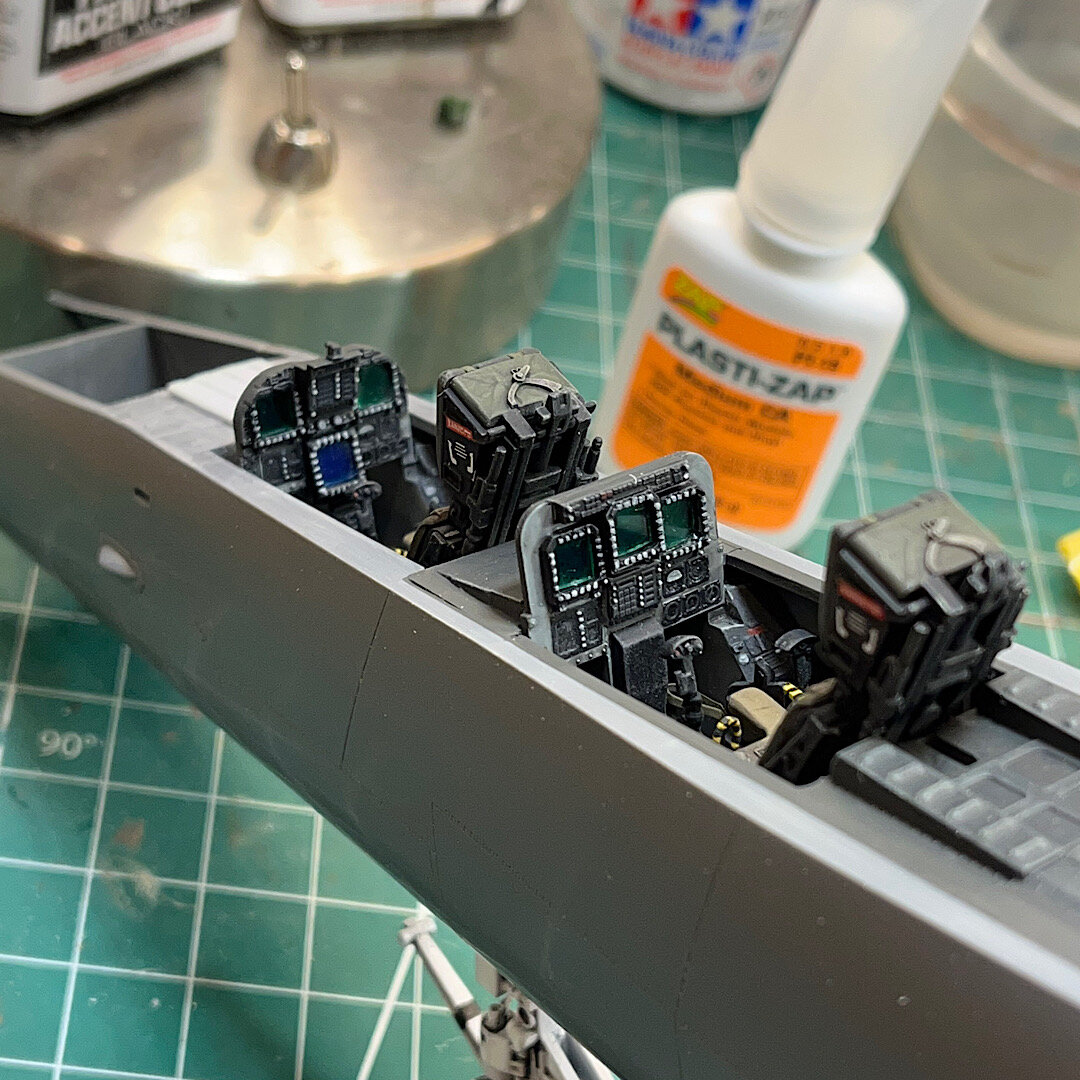
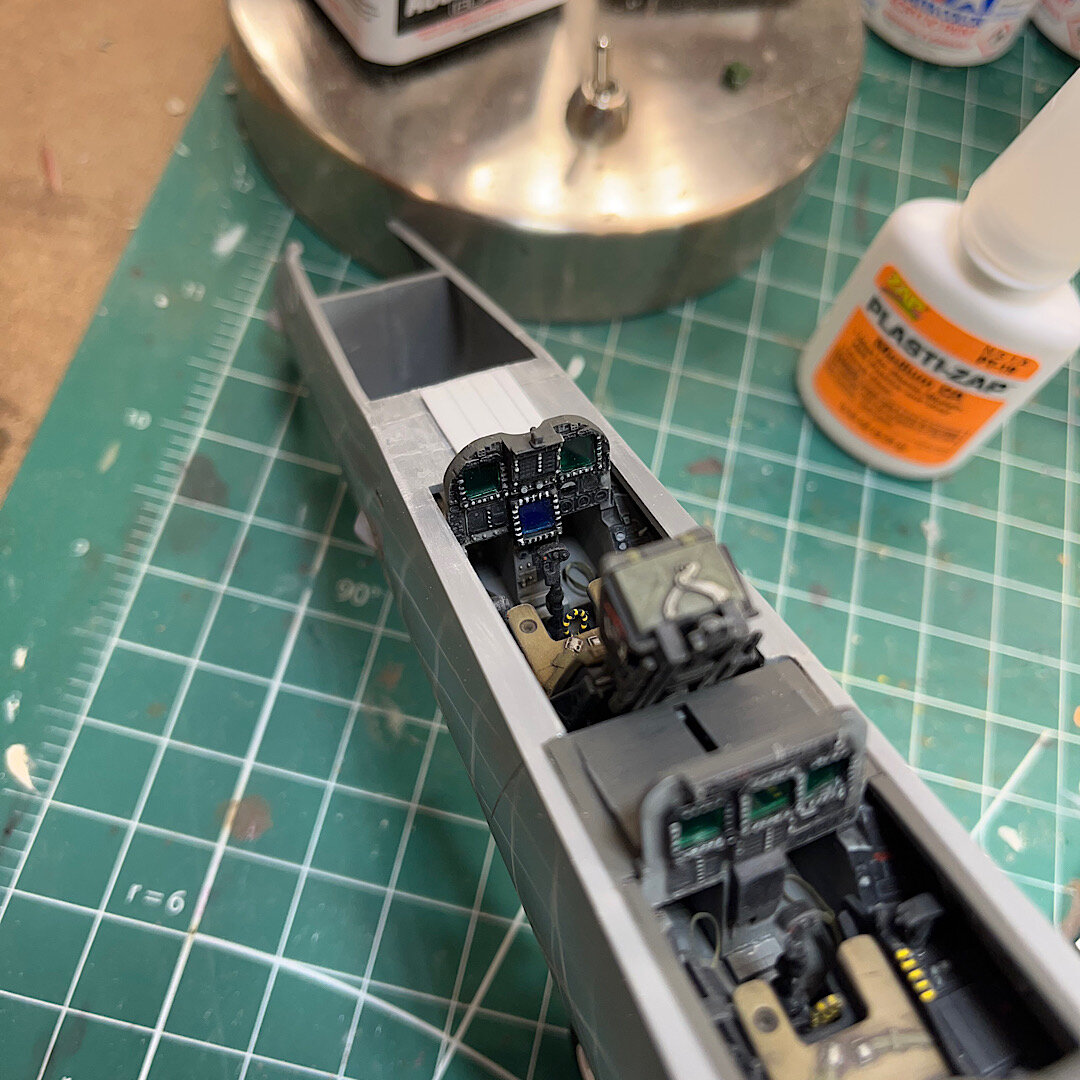
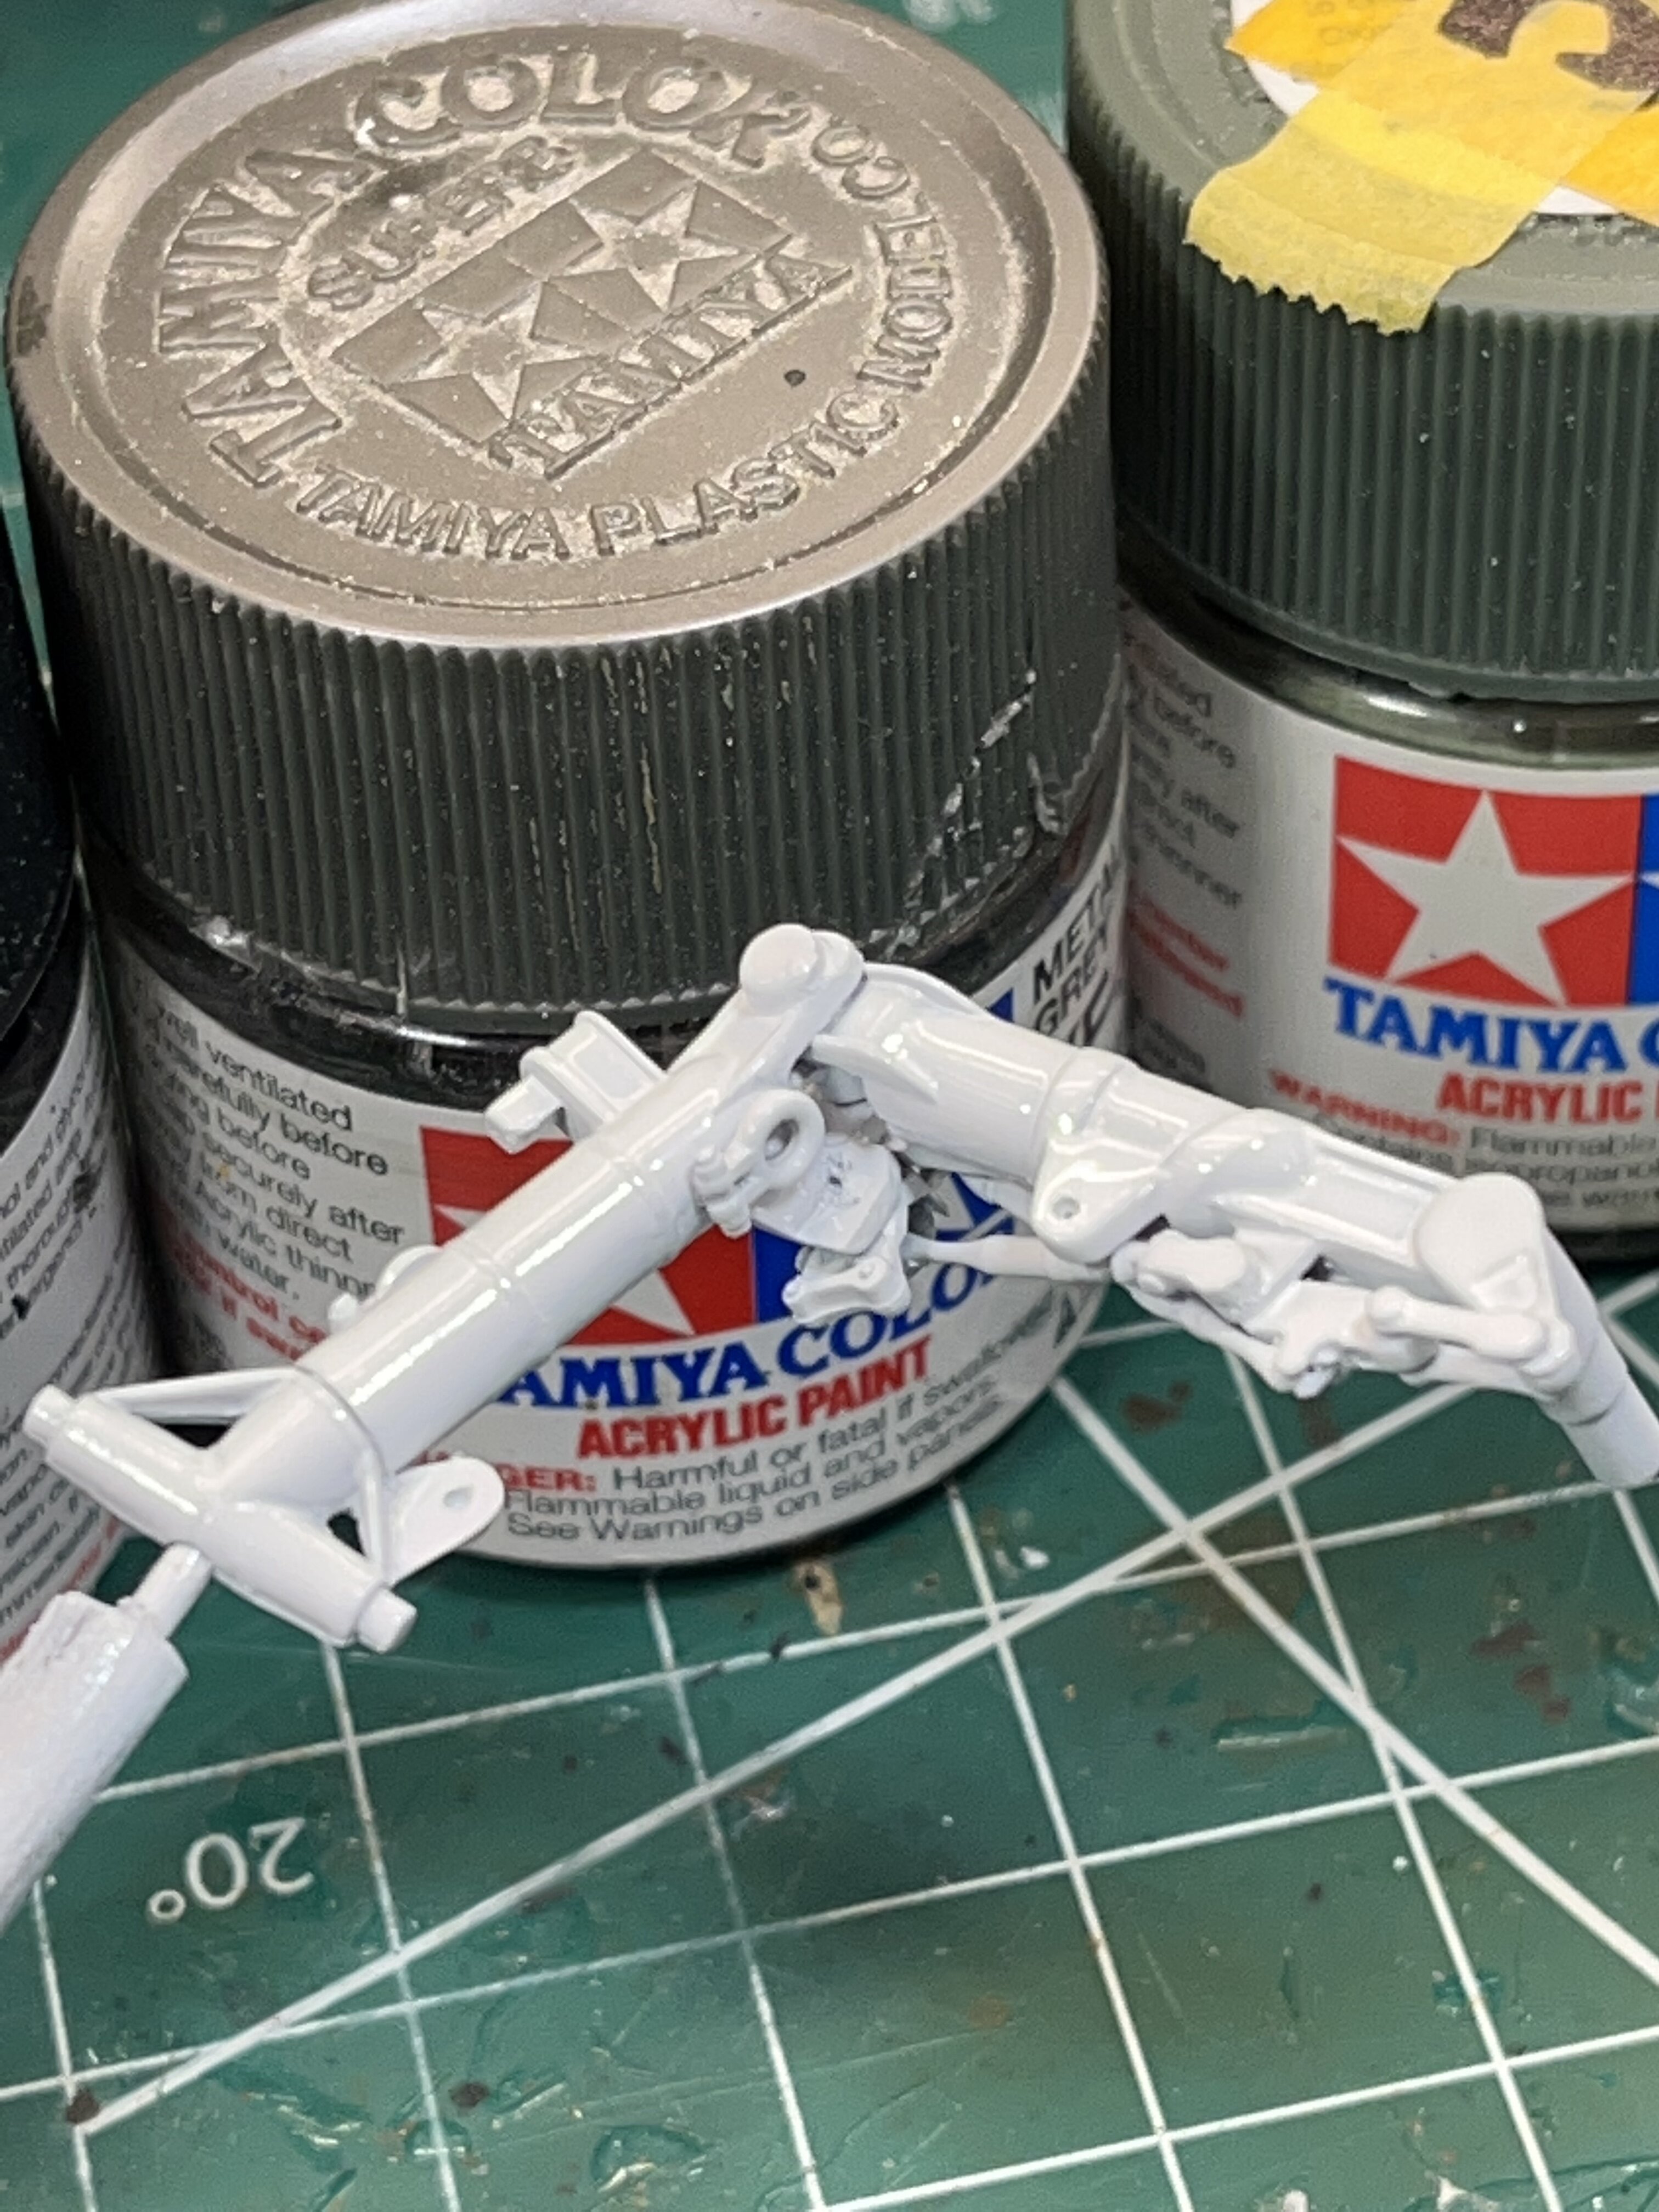
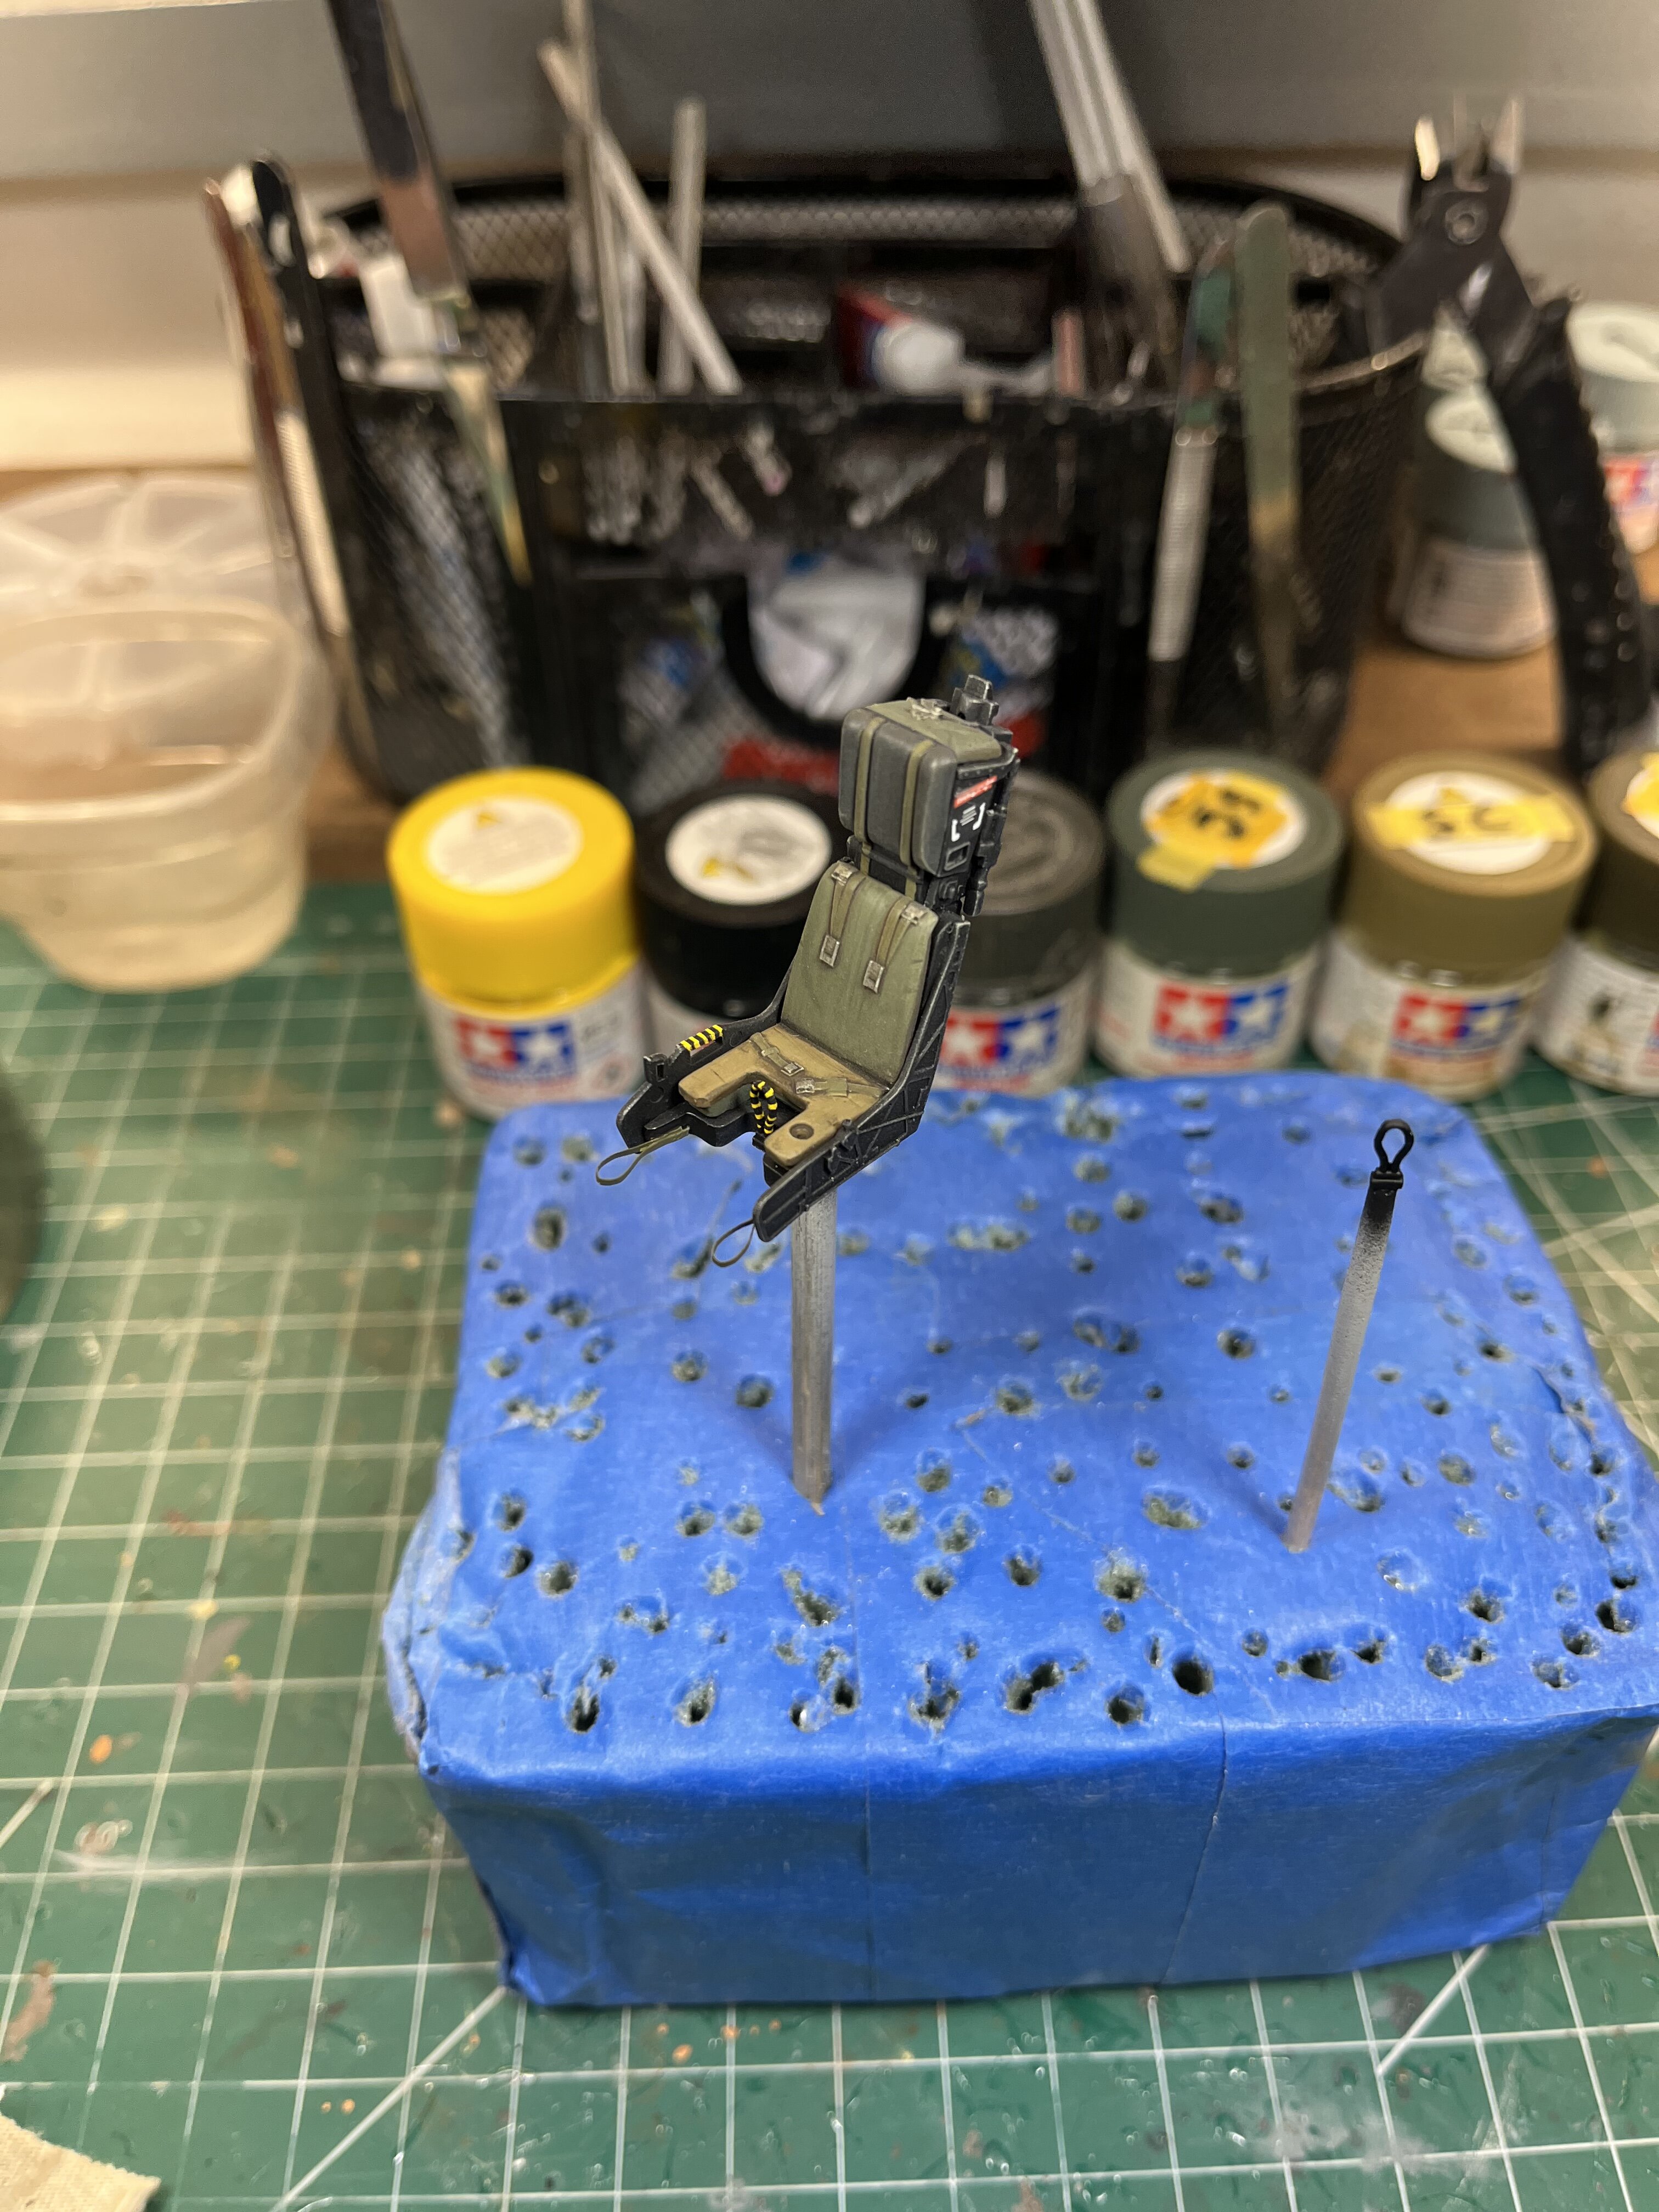
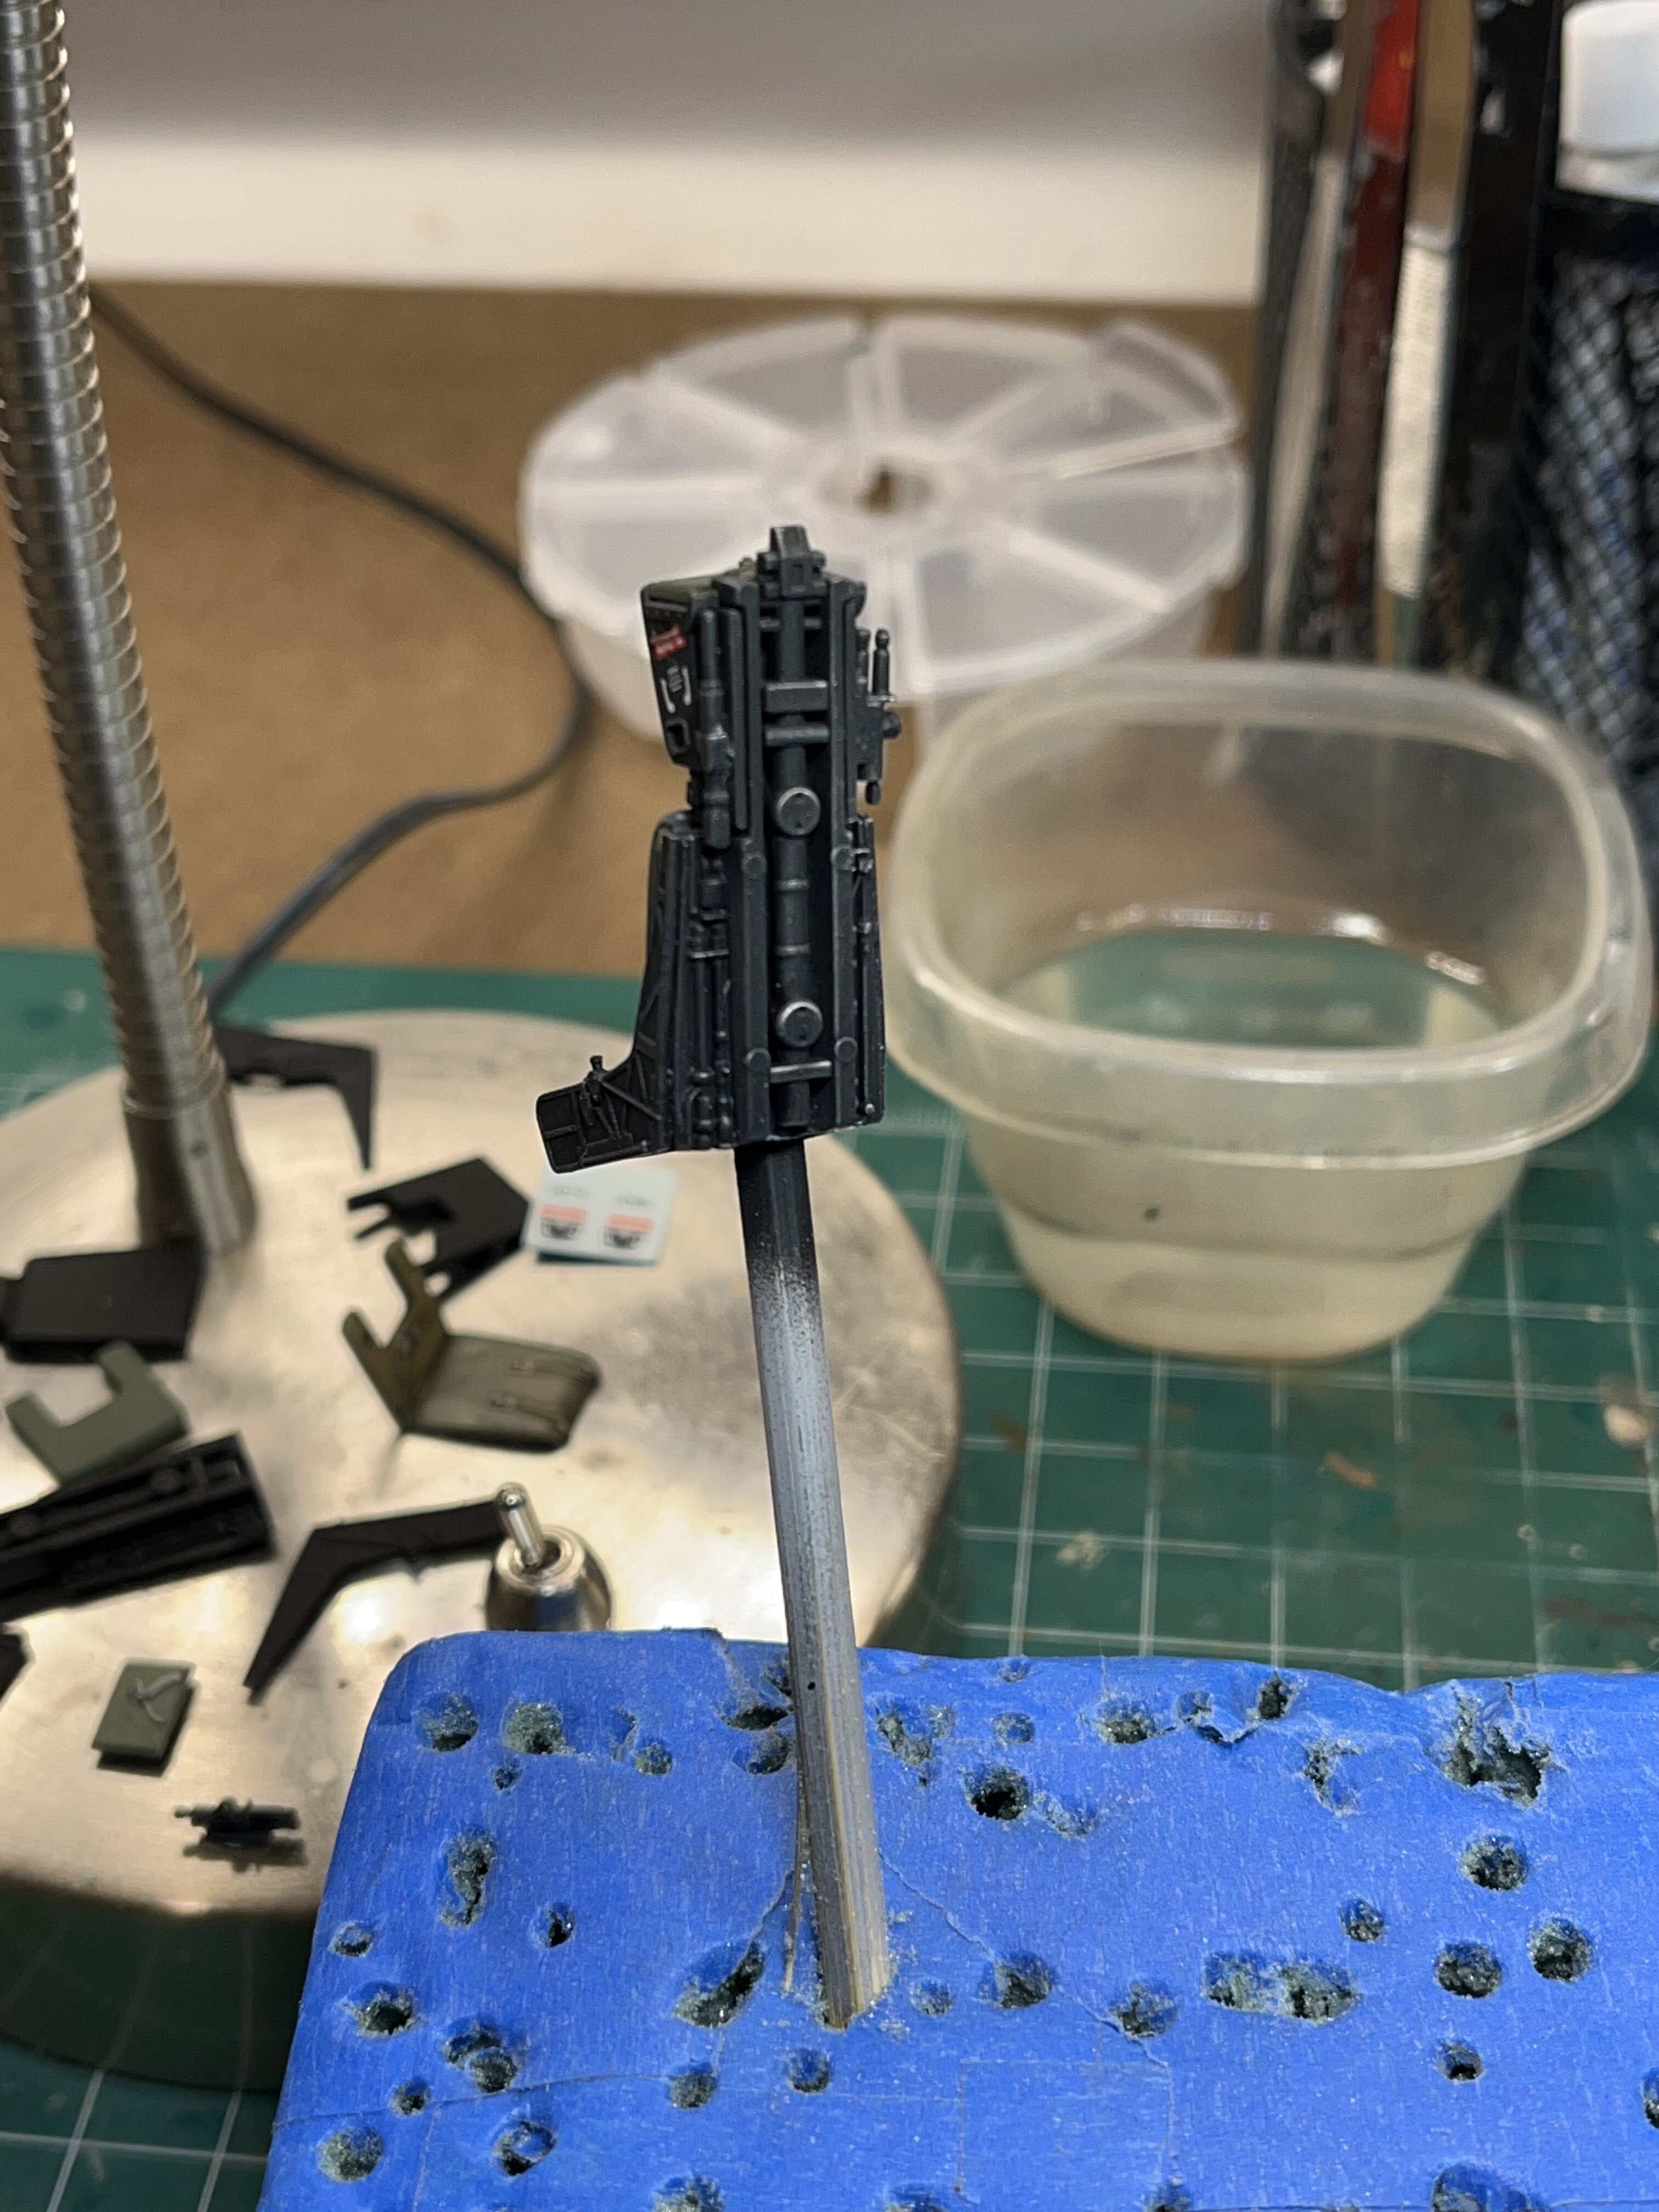
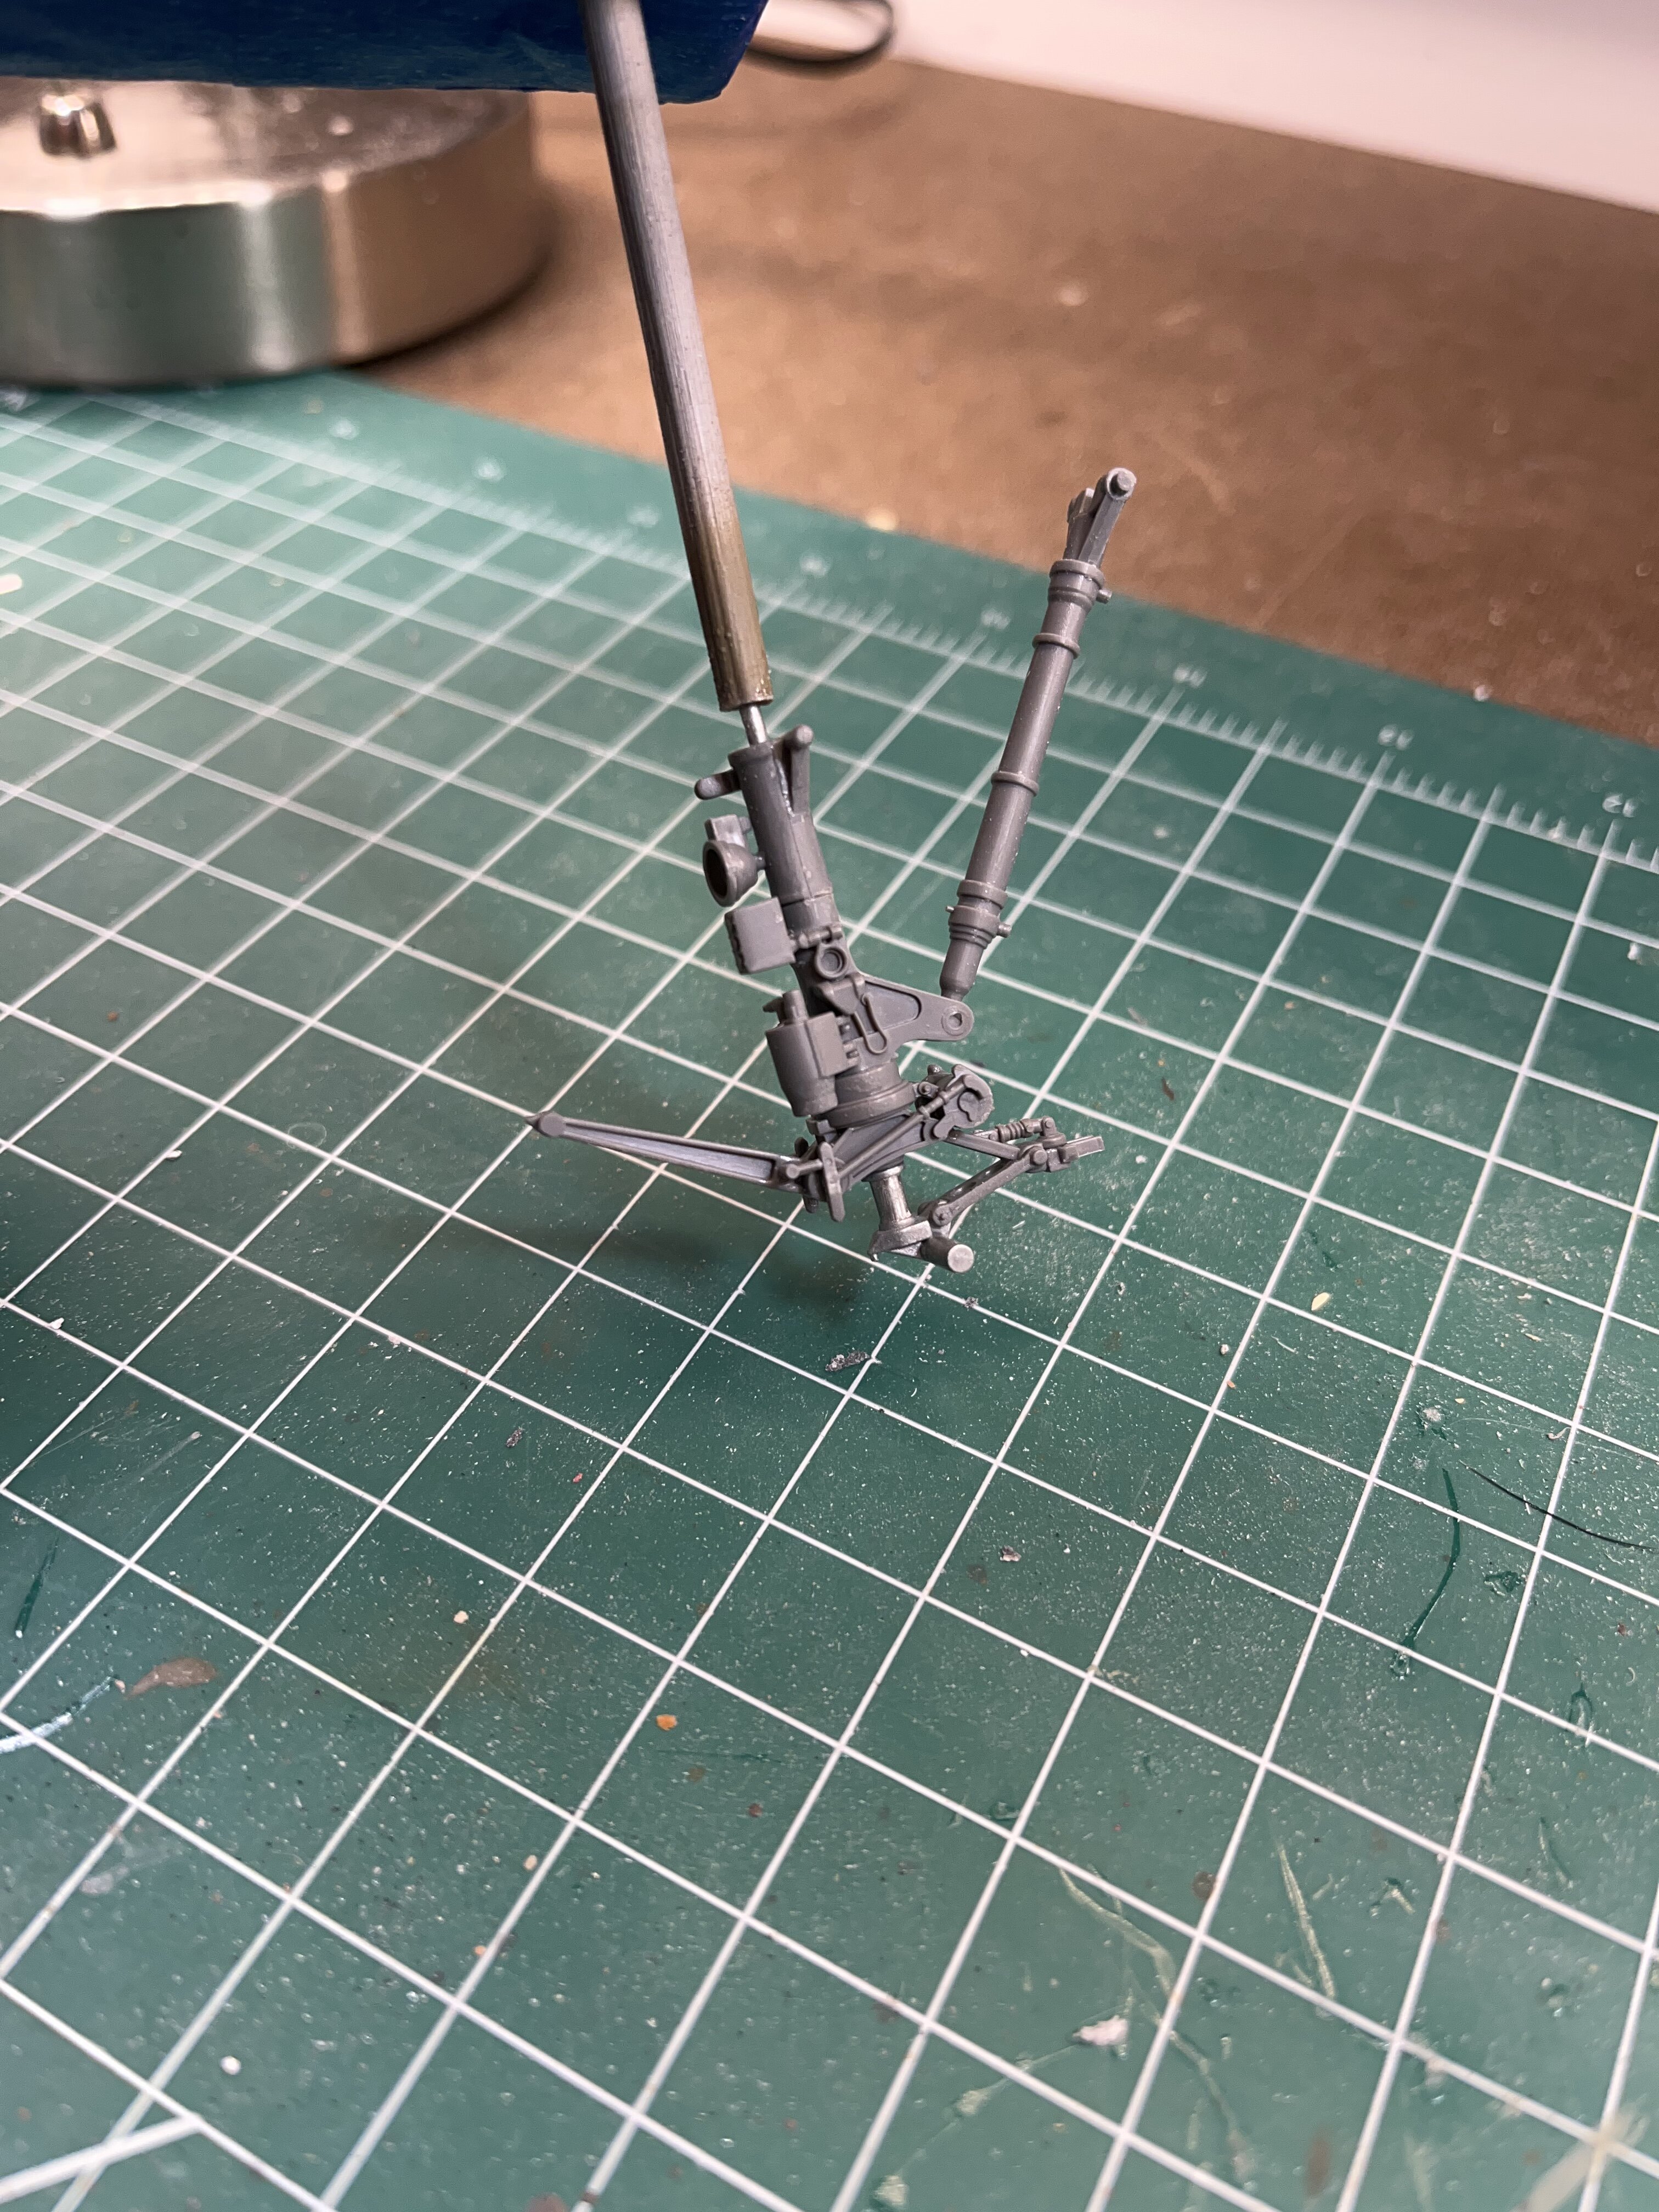
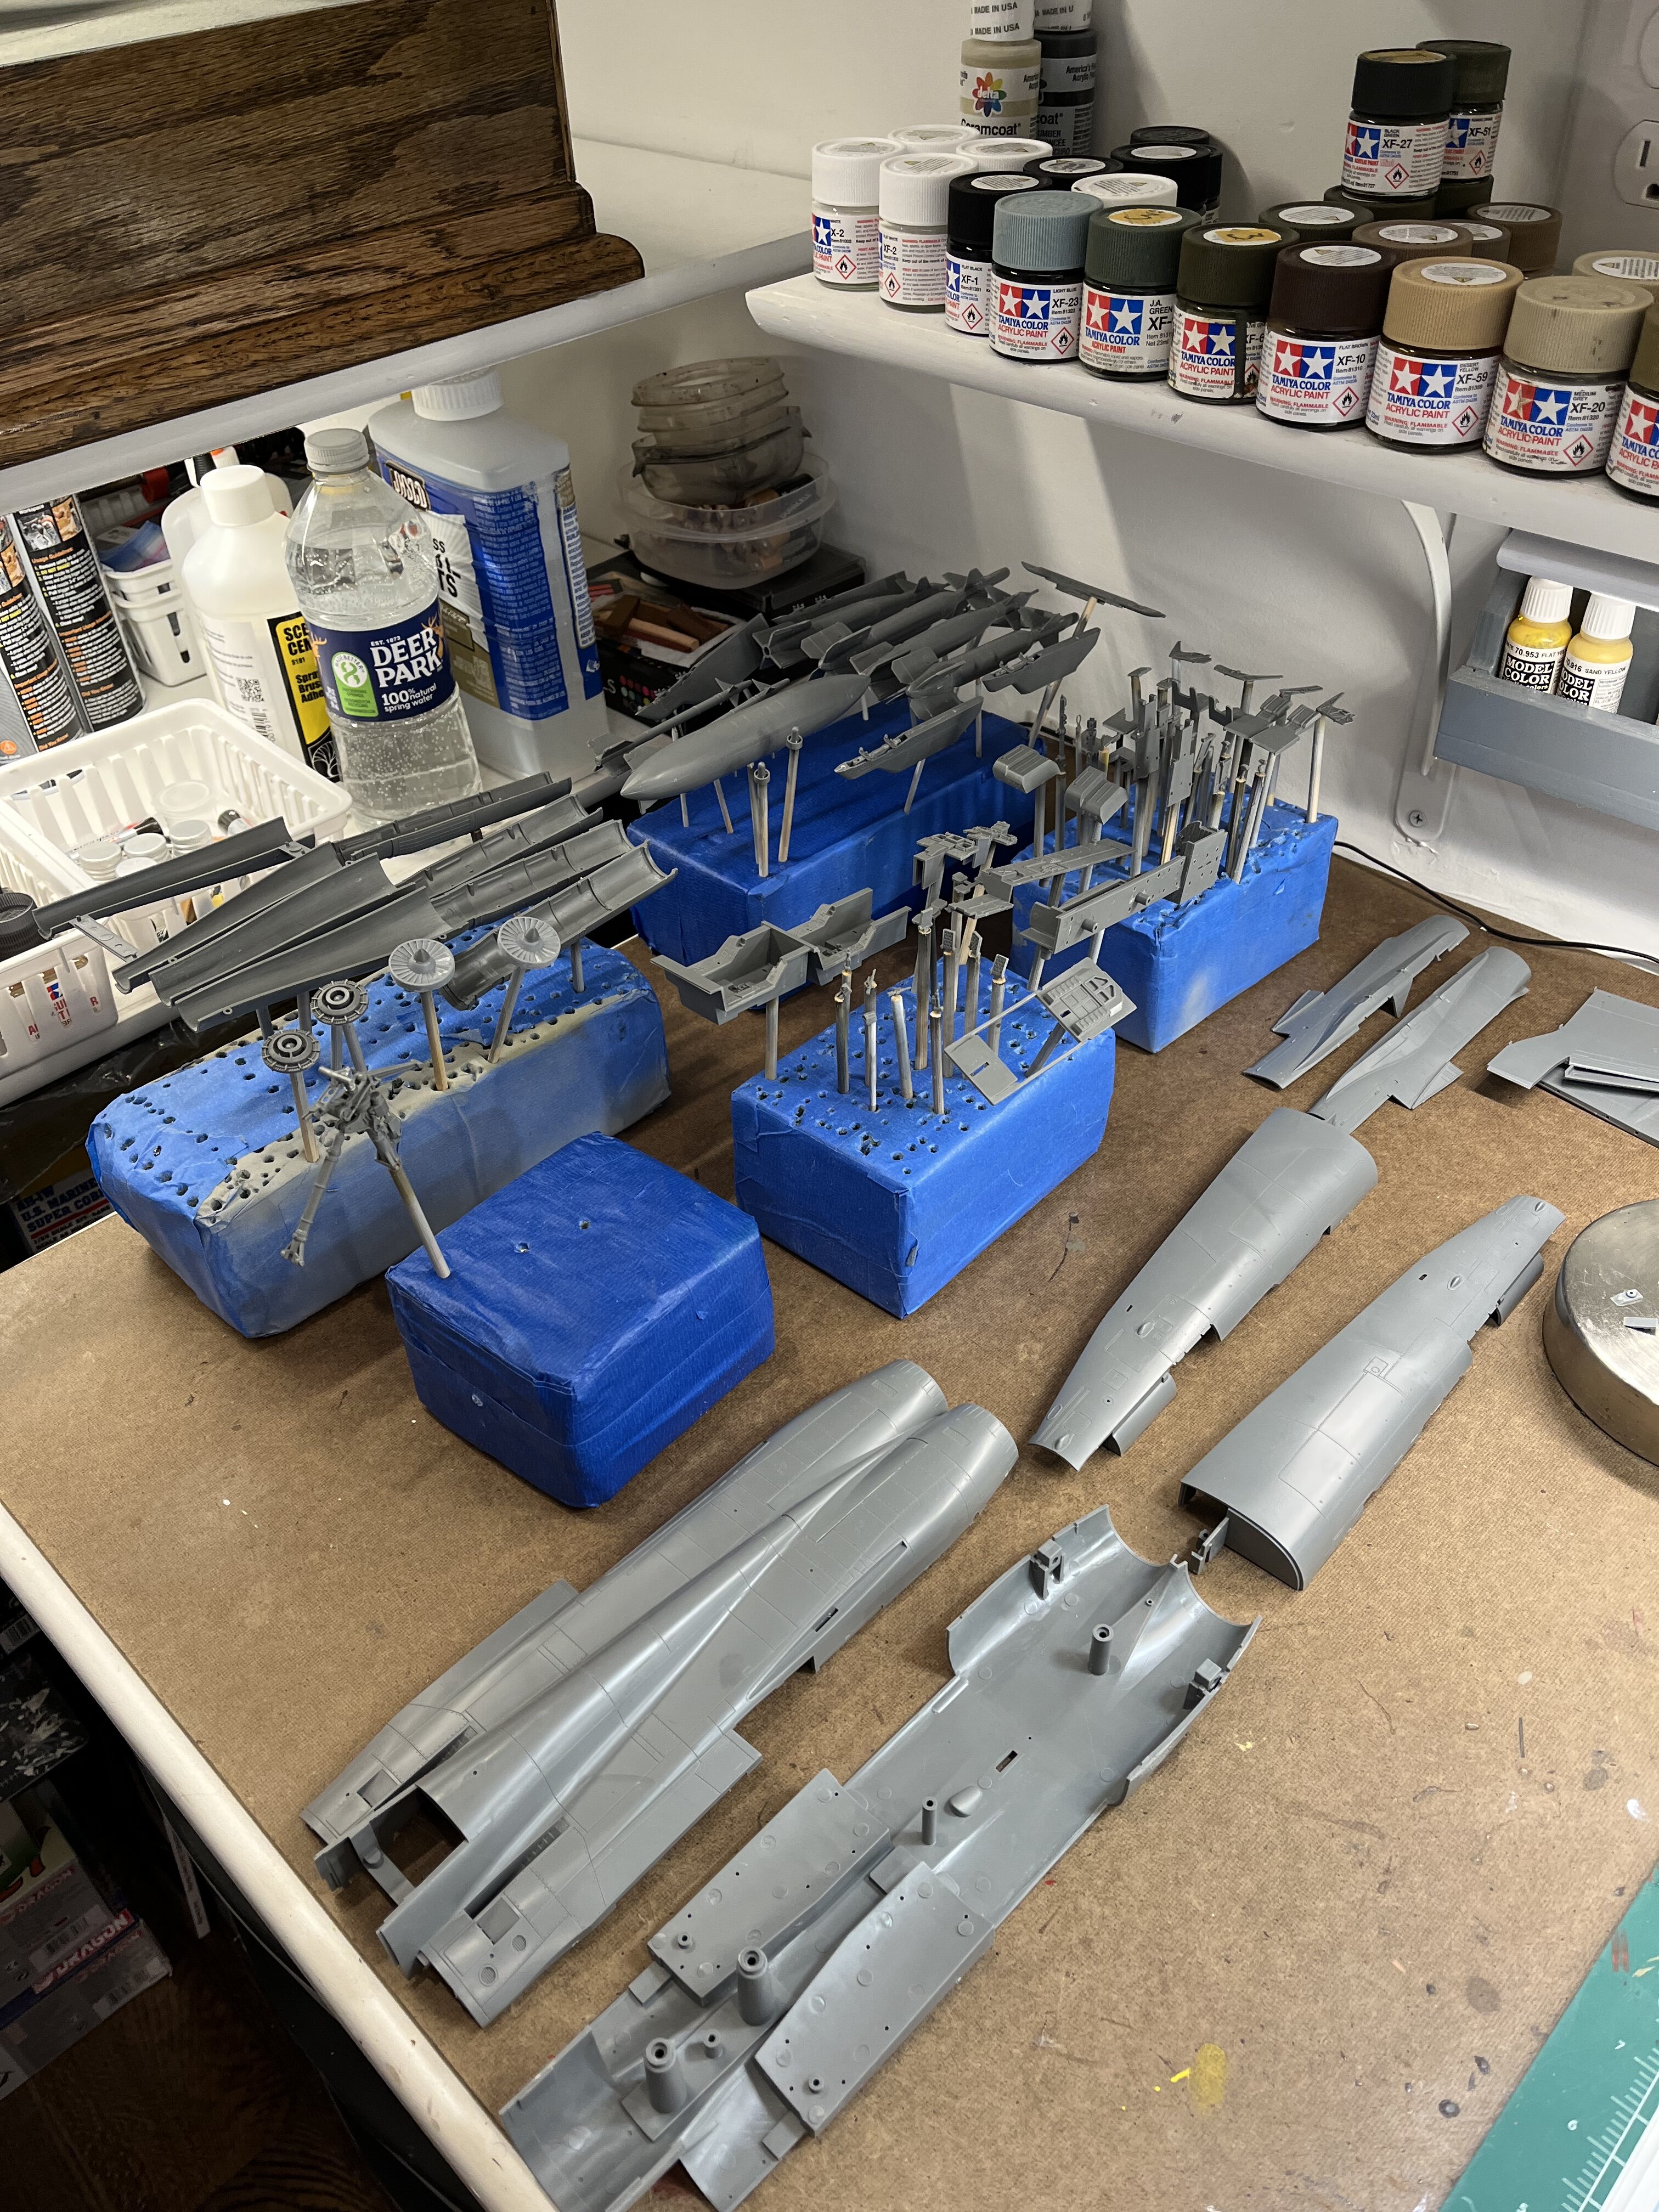
Back at the build table. All the small parts have been removed from the sprues. I’ve built all of the sub assemblies that I could. Personally, I prefer to attach each part to the end of a toothpick, with a very small amount of ca. This helps me when it comes to painting, and adding weathering. When I’m finished, I can easily pop off the parts with an X-Acto knife. This kit is being built straight from the box. The only modifications that I have made are the ankle restraints on the ejection seats , and have added the thermal protective coating to the bombs.I did use Bare metal foil for the landing gear struts. More to come. Chris
-
I purchased mine at Walmart in the arts and crafts section. Hobby Lobby, Michael’s Art Supplies, or Joanne’s would have it as well. Chris
-
Ed, it is florist foam wrapped with blue painters tape. The tape keeps the dust from the foam contained. chris
-
One of the most interesting aircraft subjects I’ve seen in quite some time. Glad to hear your back at the modeling table. Great job on this one. Looking forward to seeing more of your work. Chris
-
Masterfully executed. When I originally looked at the photo, I had to do a double take because it looks so real. Love the pitch that you put in the blades. Chris
-
Some crafty engineering there Chris. Turned out great. Chris
-
1/48 Trumpeter C-47 converted to the R4D-5 “Tropical Tilly”
Bradley25mm replied to Wolfman63's topic in Builds
Absolutely amazing!!!. I’m not sure where to start. Can’t wait to see more. Regards Chris -
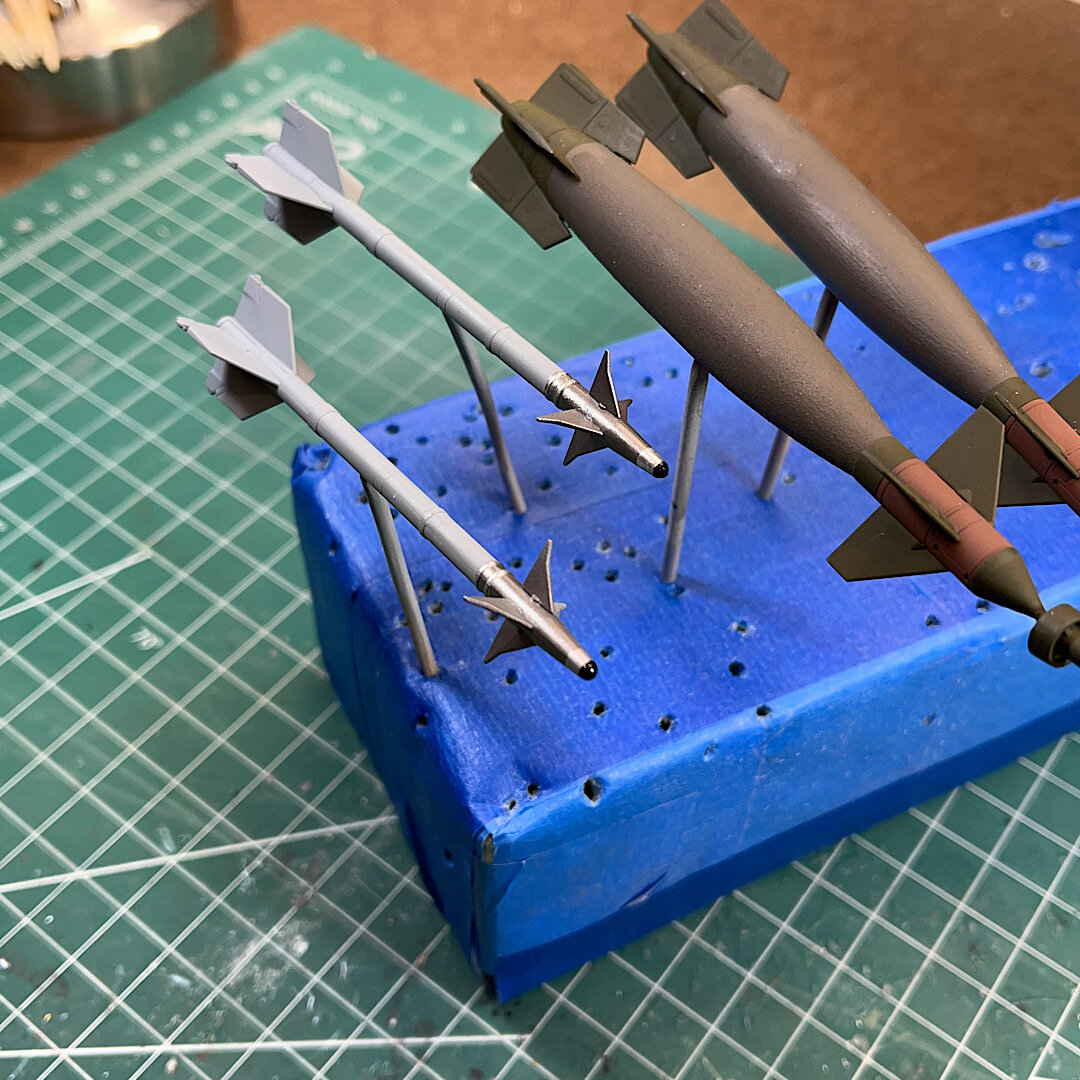
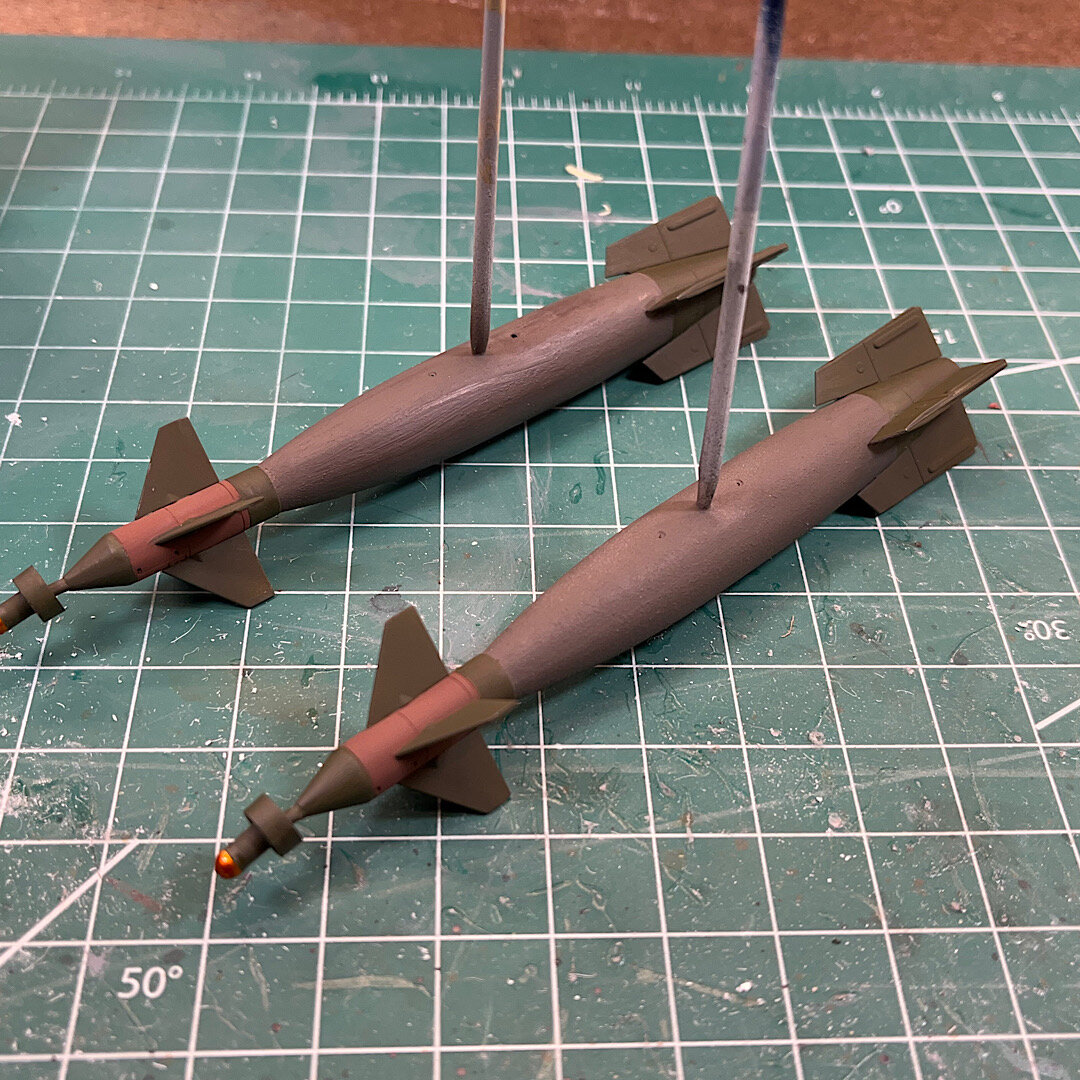
Made some progress today. Getting things ready for primer and paint. Even after I built The air to ground ordinance, I had a boatload left over. If there’s one thing about academy kits, I give you lots of extras. It still amazes me the Landing gear on this kit. It is highly detailed, and has white metal reinforcements built inside it for additional strength. Chris
-
Tony, thank you for the kind comment. Welcome to the forum. Happy your with us. Carlos, thanks my friend. Glad I’ve got this one behind me. Chris
-
Went to the Trophy shop to pick up the plaque without checking it. It wasn’t until after I put it on the base, that I noticed that a word was misspelled.(my mistake). Chris
-
-
-
More photos.
-
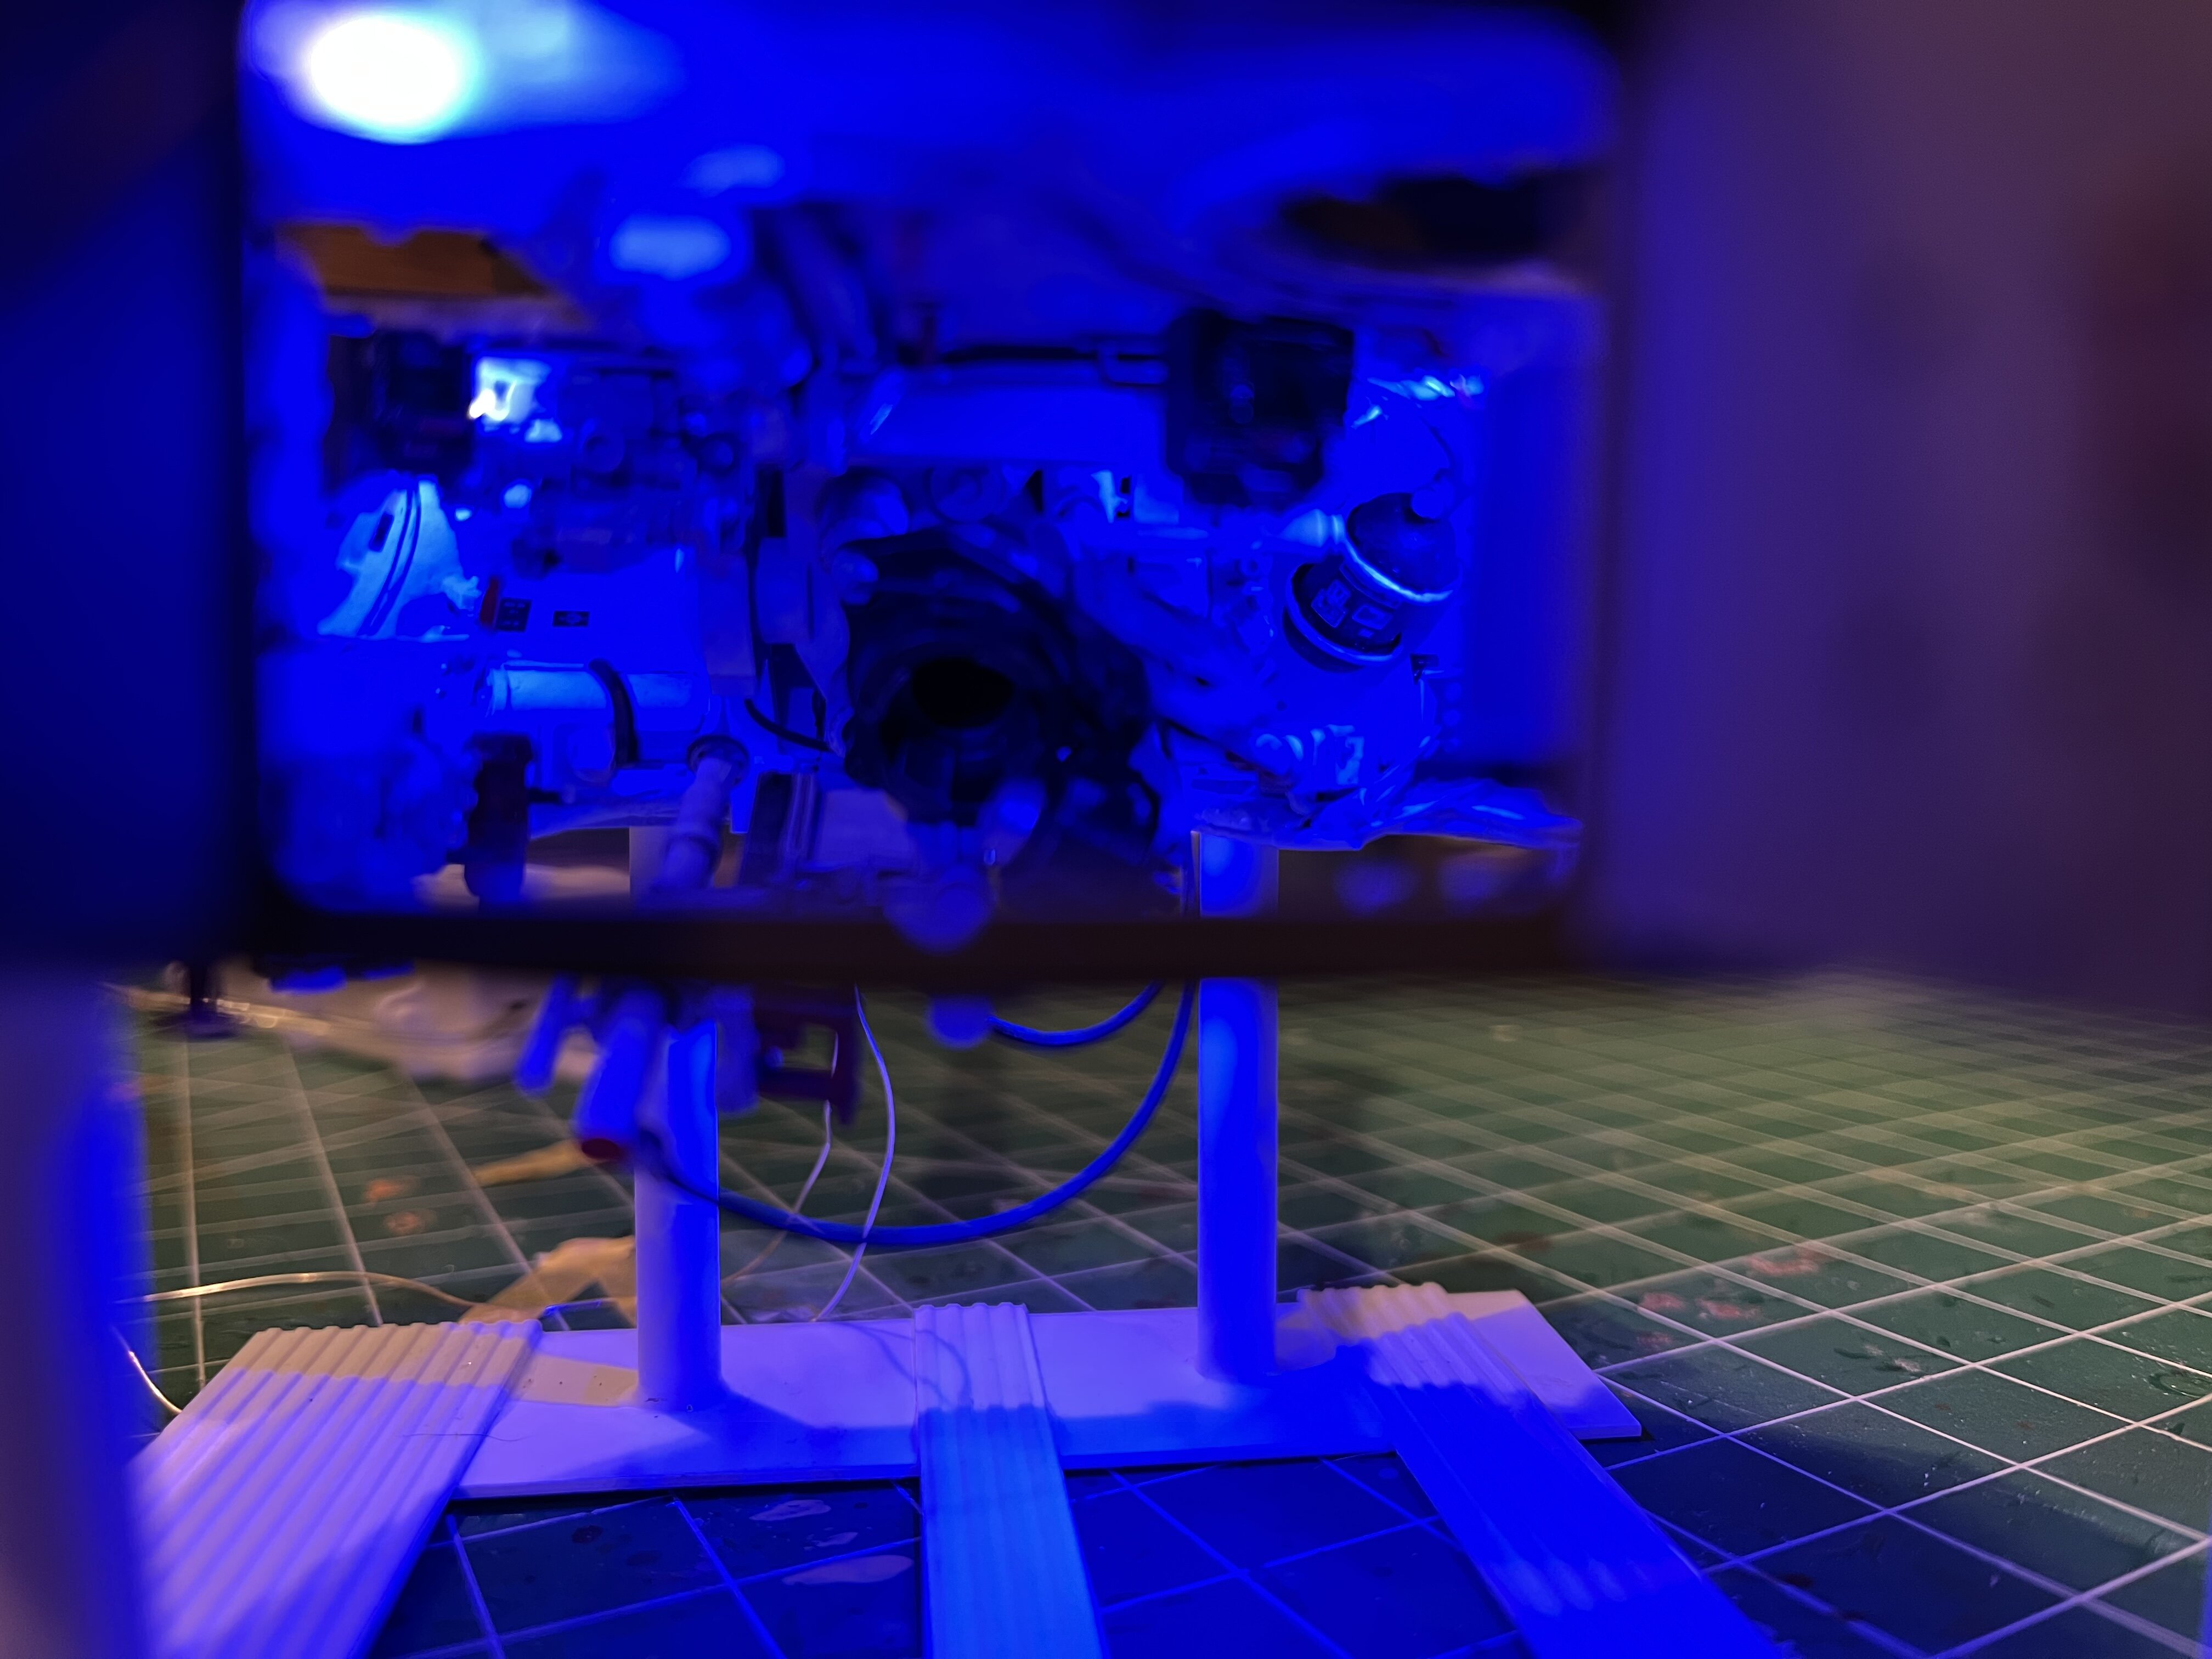
The last time I built an M109, I was in High School. I wanted to go all out on detailing the turret and hull. I’ve put LED lighting in both. White for non-tactical, blue for tactical. I ordered the Legend exterior detail set, and the Blackdog interior detail set. The kit went together great, with out any issues. I ordered the rounds that were palletized from AFV club. The figures were a mix of mini art, and valkyrie.
-
Thanks Carlos, and Ed. Chris
-
Thanks Mark!. The last 3 pictures were the kit I built about 4 years ago. Found out later that this squadron was not carrier, but land based. Can’t wait to start the new one. Chris