Bradley25mm
-
Posts
469 -
Joined
-
Last visited
-
Days Won
30
Content Type
Profiles
Forums
Events
Everything posted by Bradley25mm
-
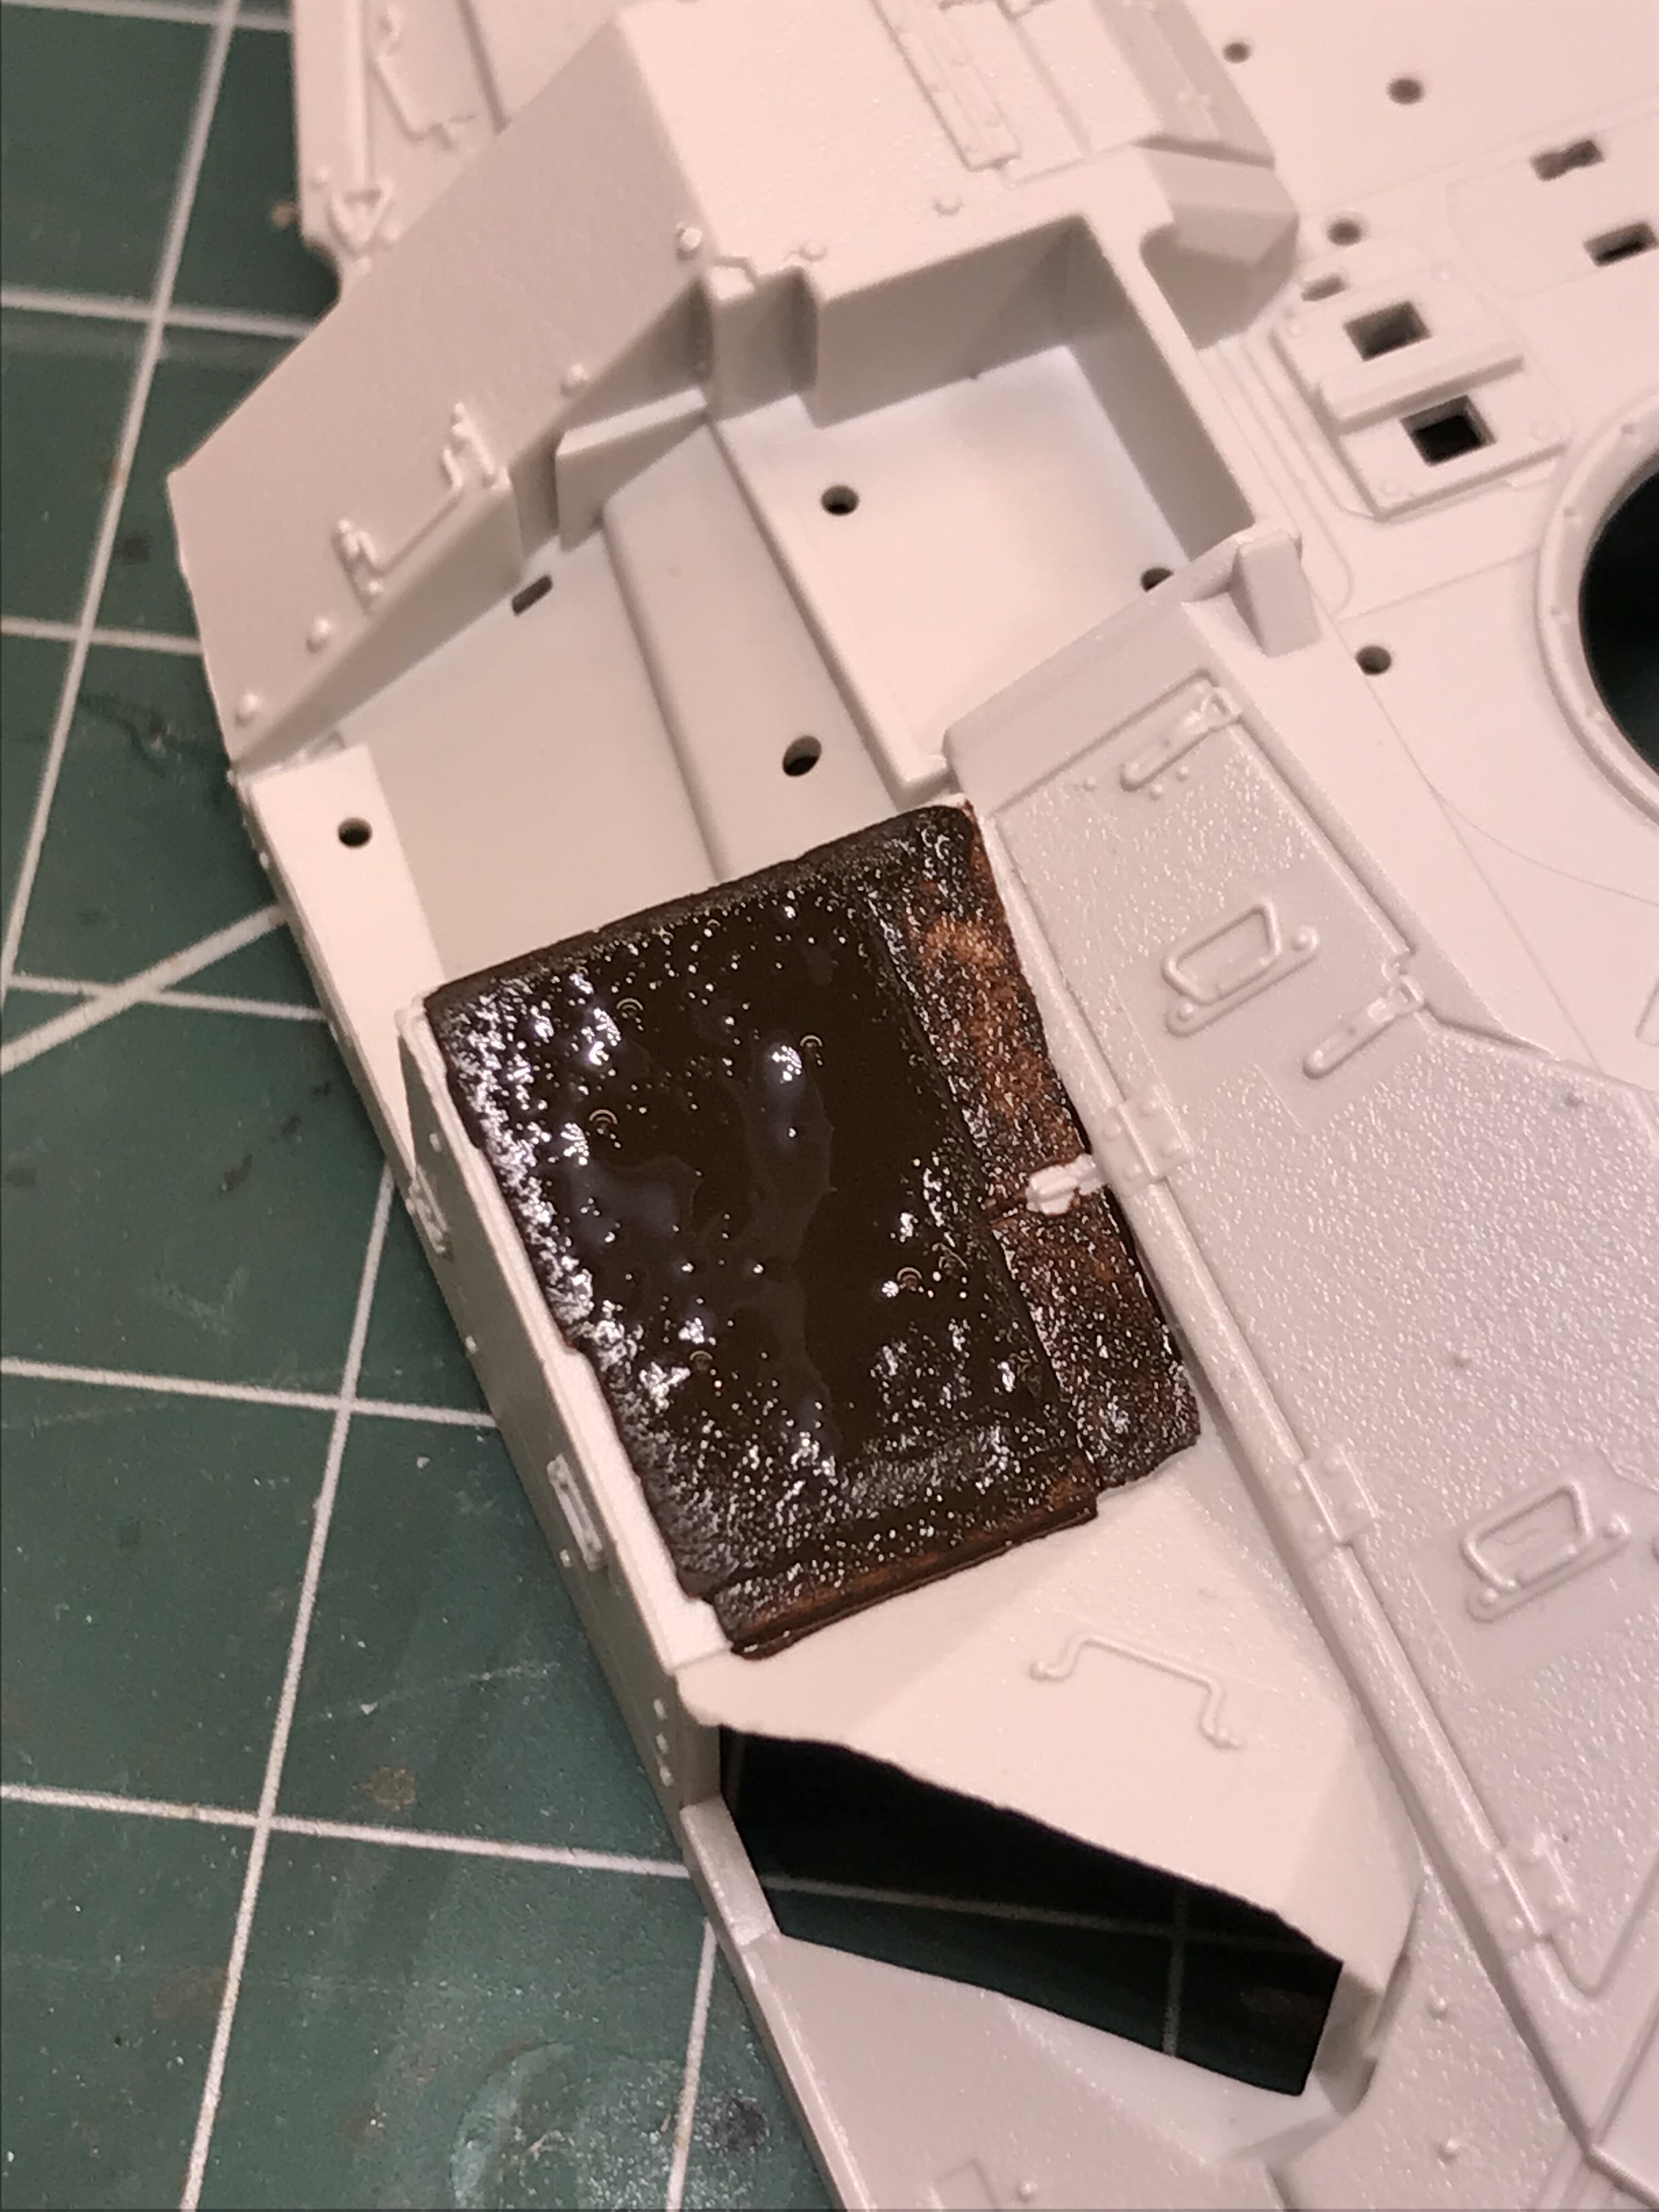
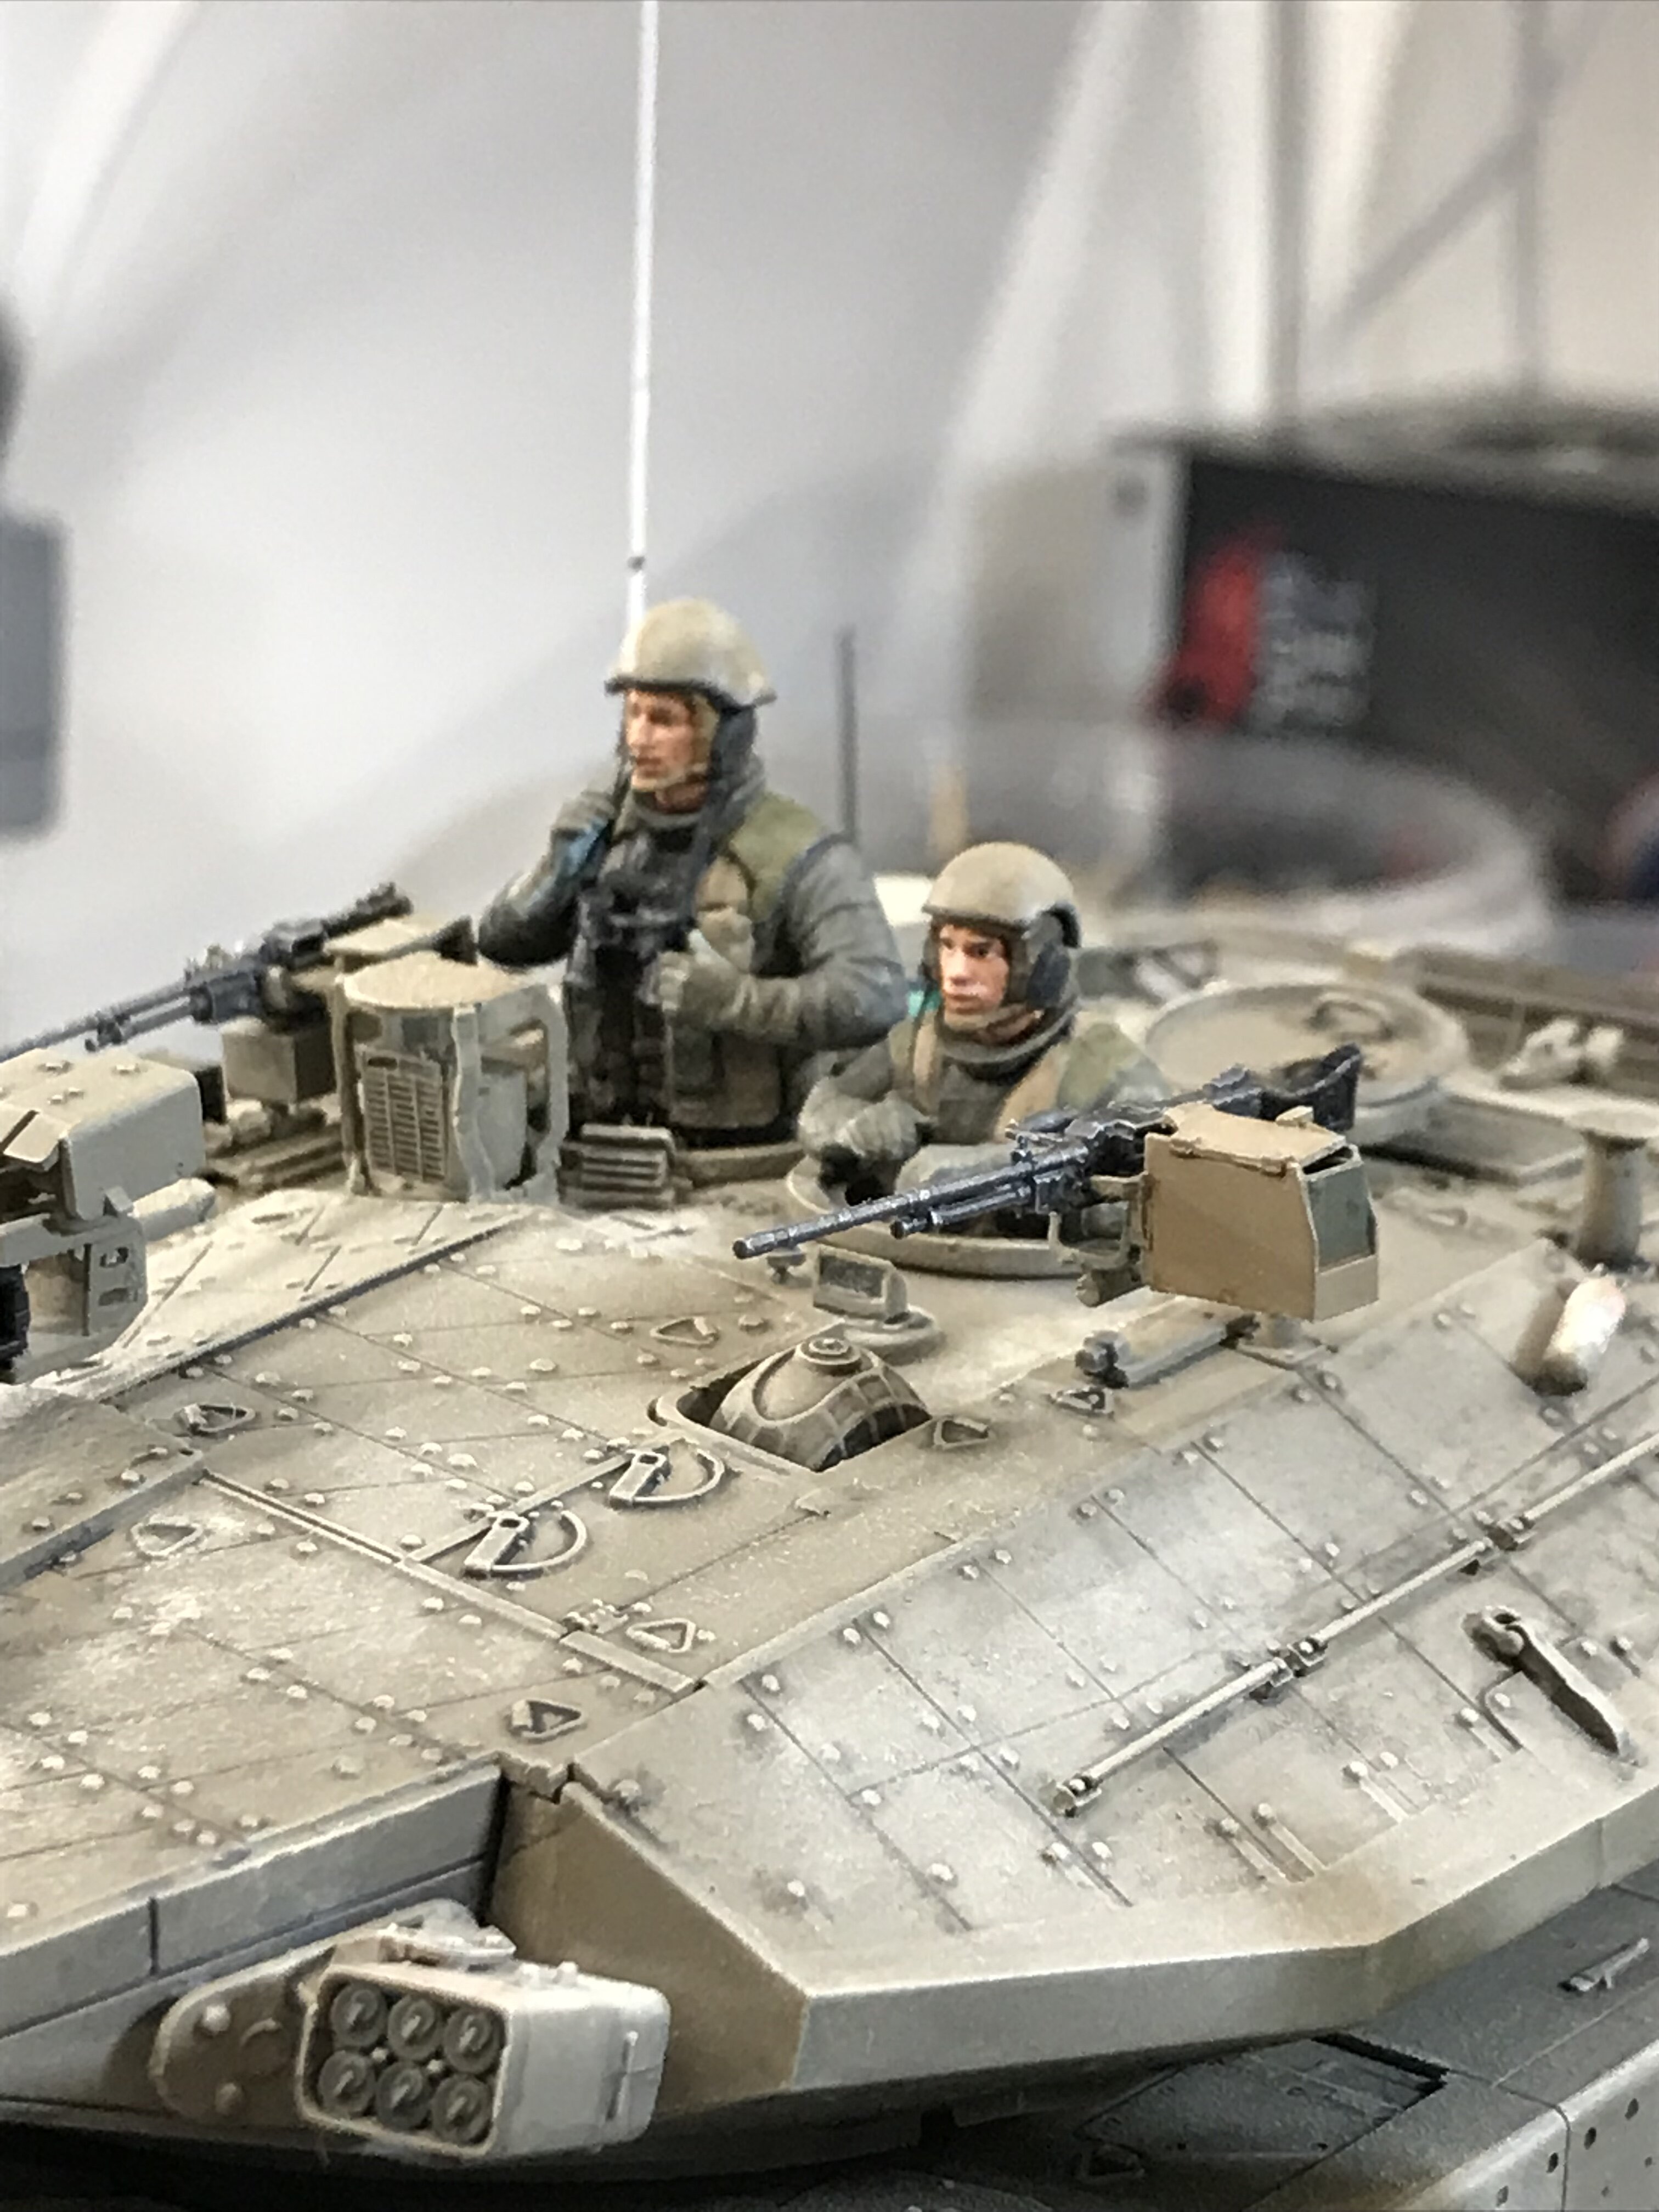
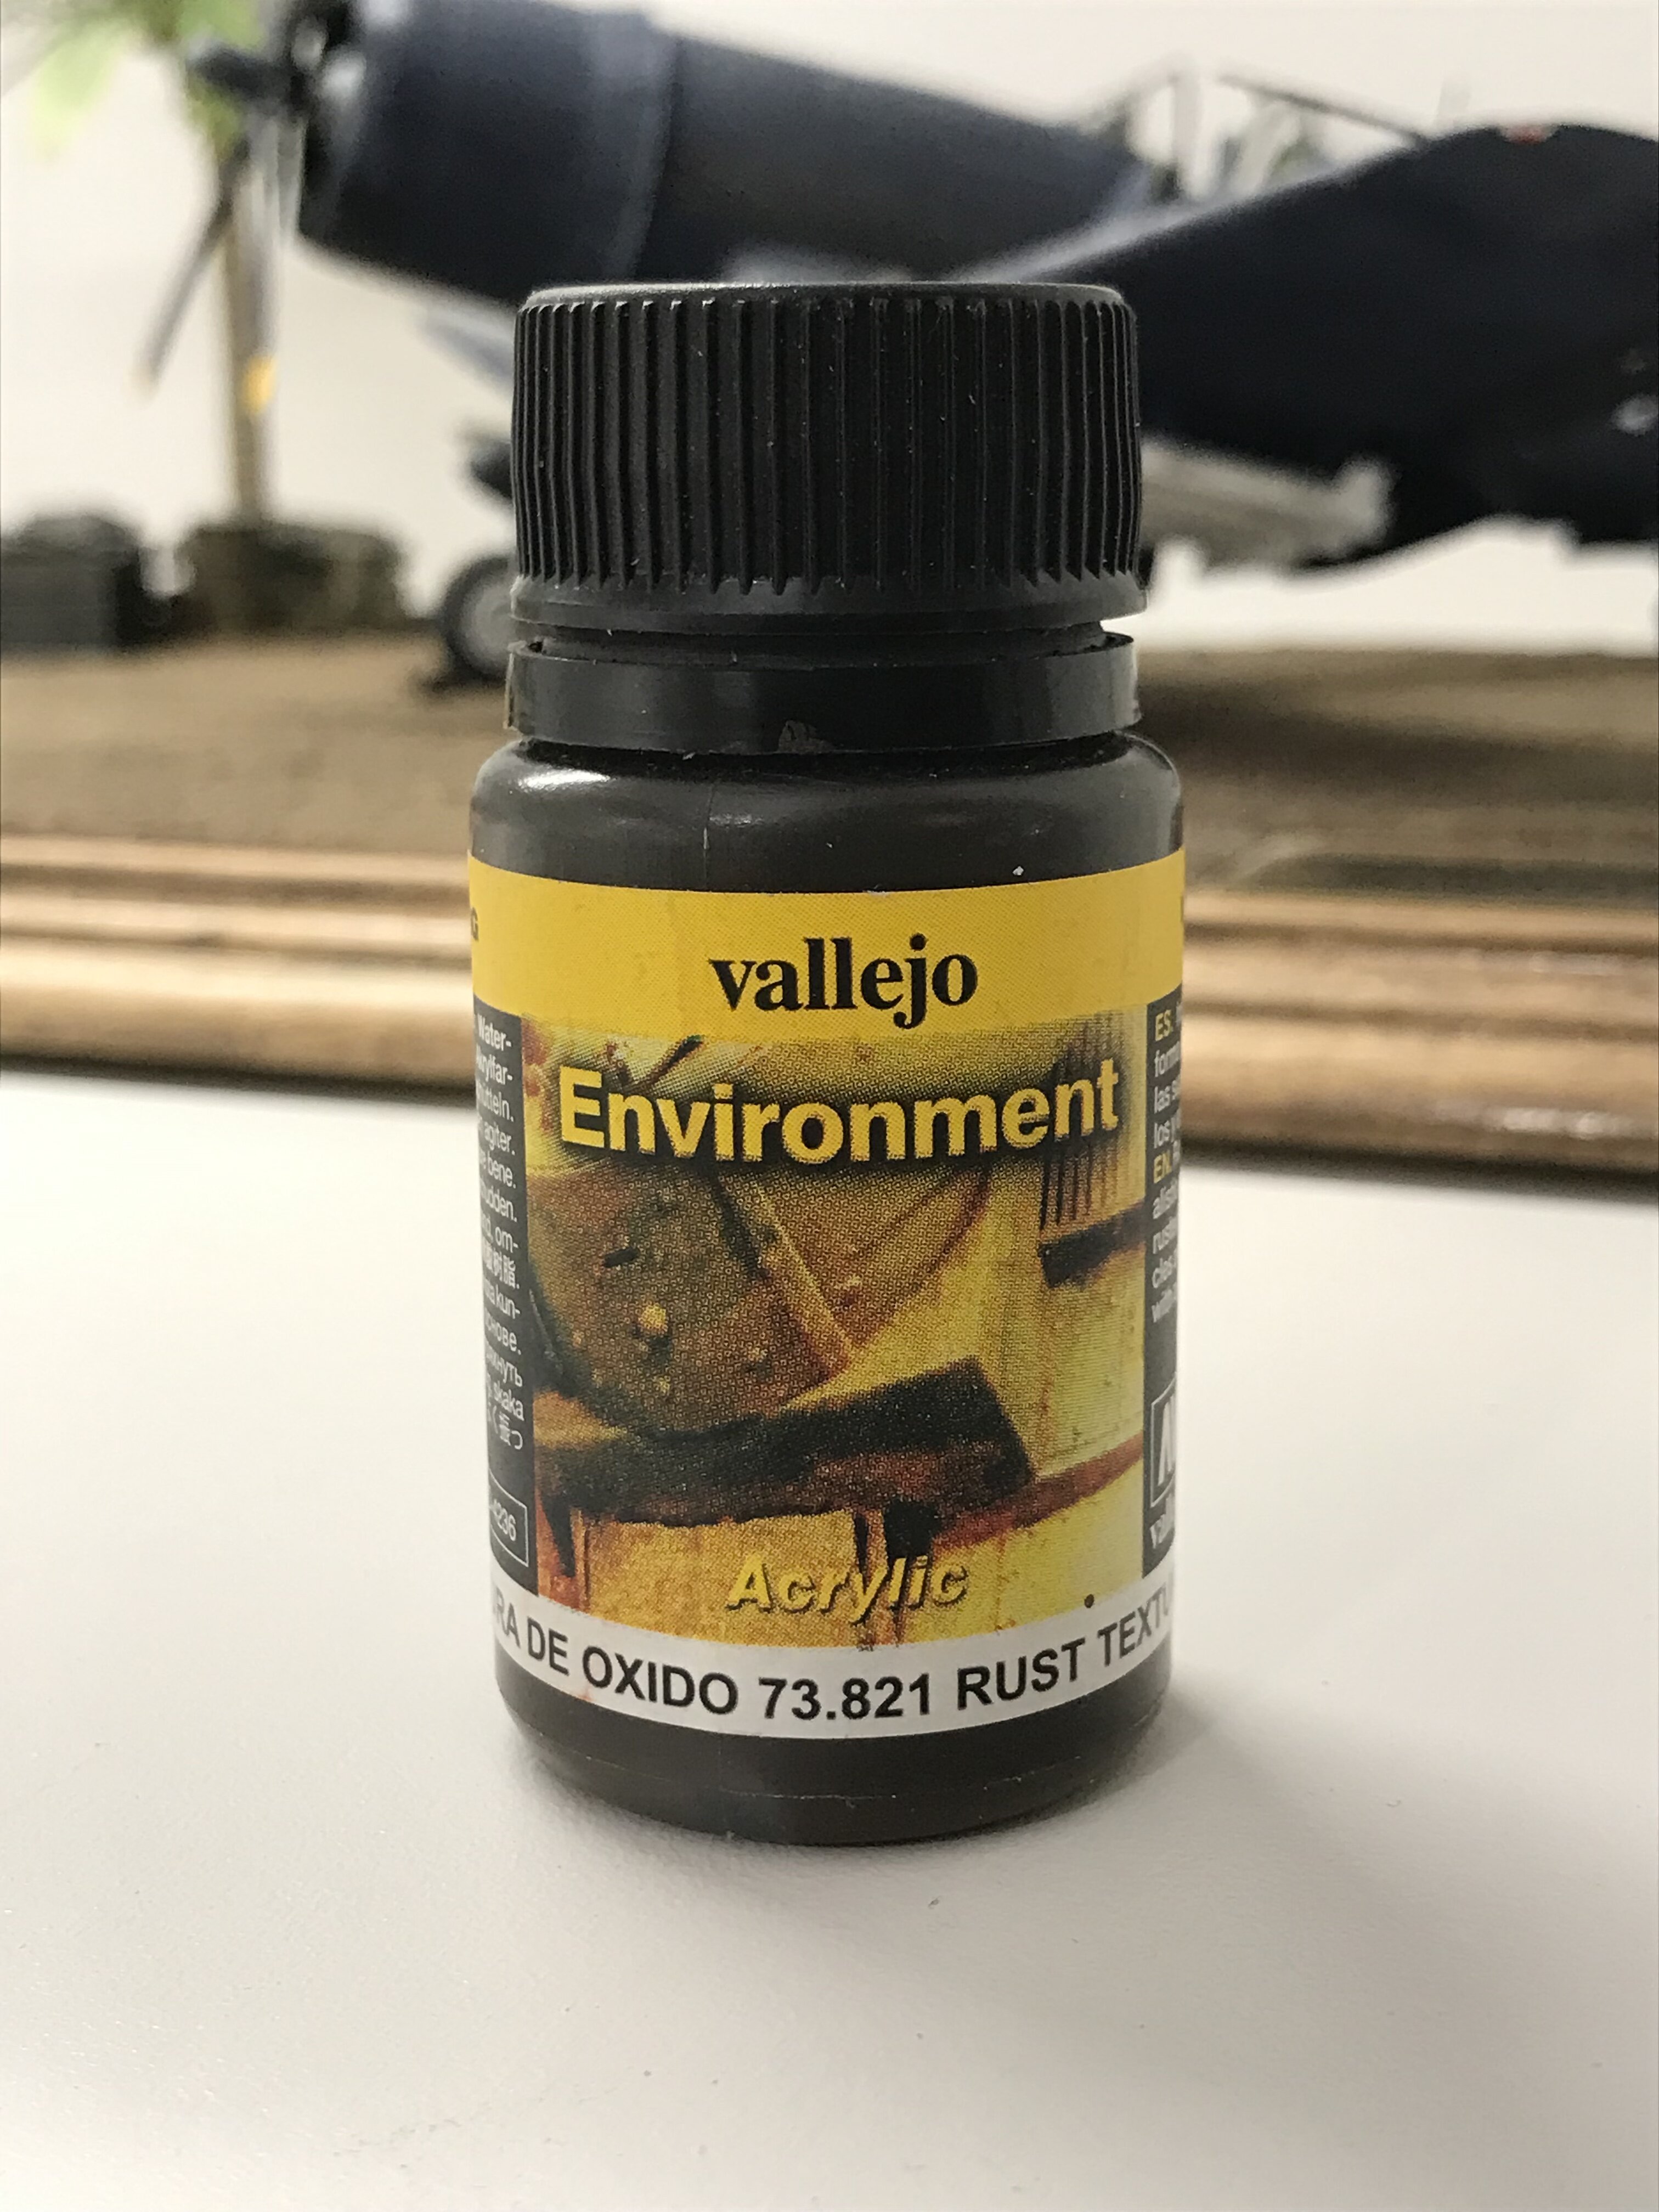
Just started this today. A lot of cool stuff in this kit. This is the third Meng kit that I have built, And they seem to get better and better. This was the first kit that I have seen with the molded non-skid surface. It’s light on texture. I’d have to give them an A for effort. I’m gonna go ahead and re-coat everything with the Vallejo Rust Texture to kick it up a notch. I picked up another set of IDF tank crewman for MiniArt. Chris

-
I think it turned out great Carlos. I love the paint job. Chris
-
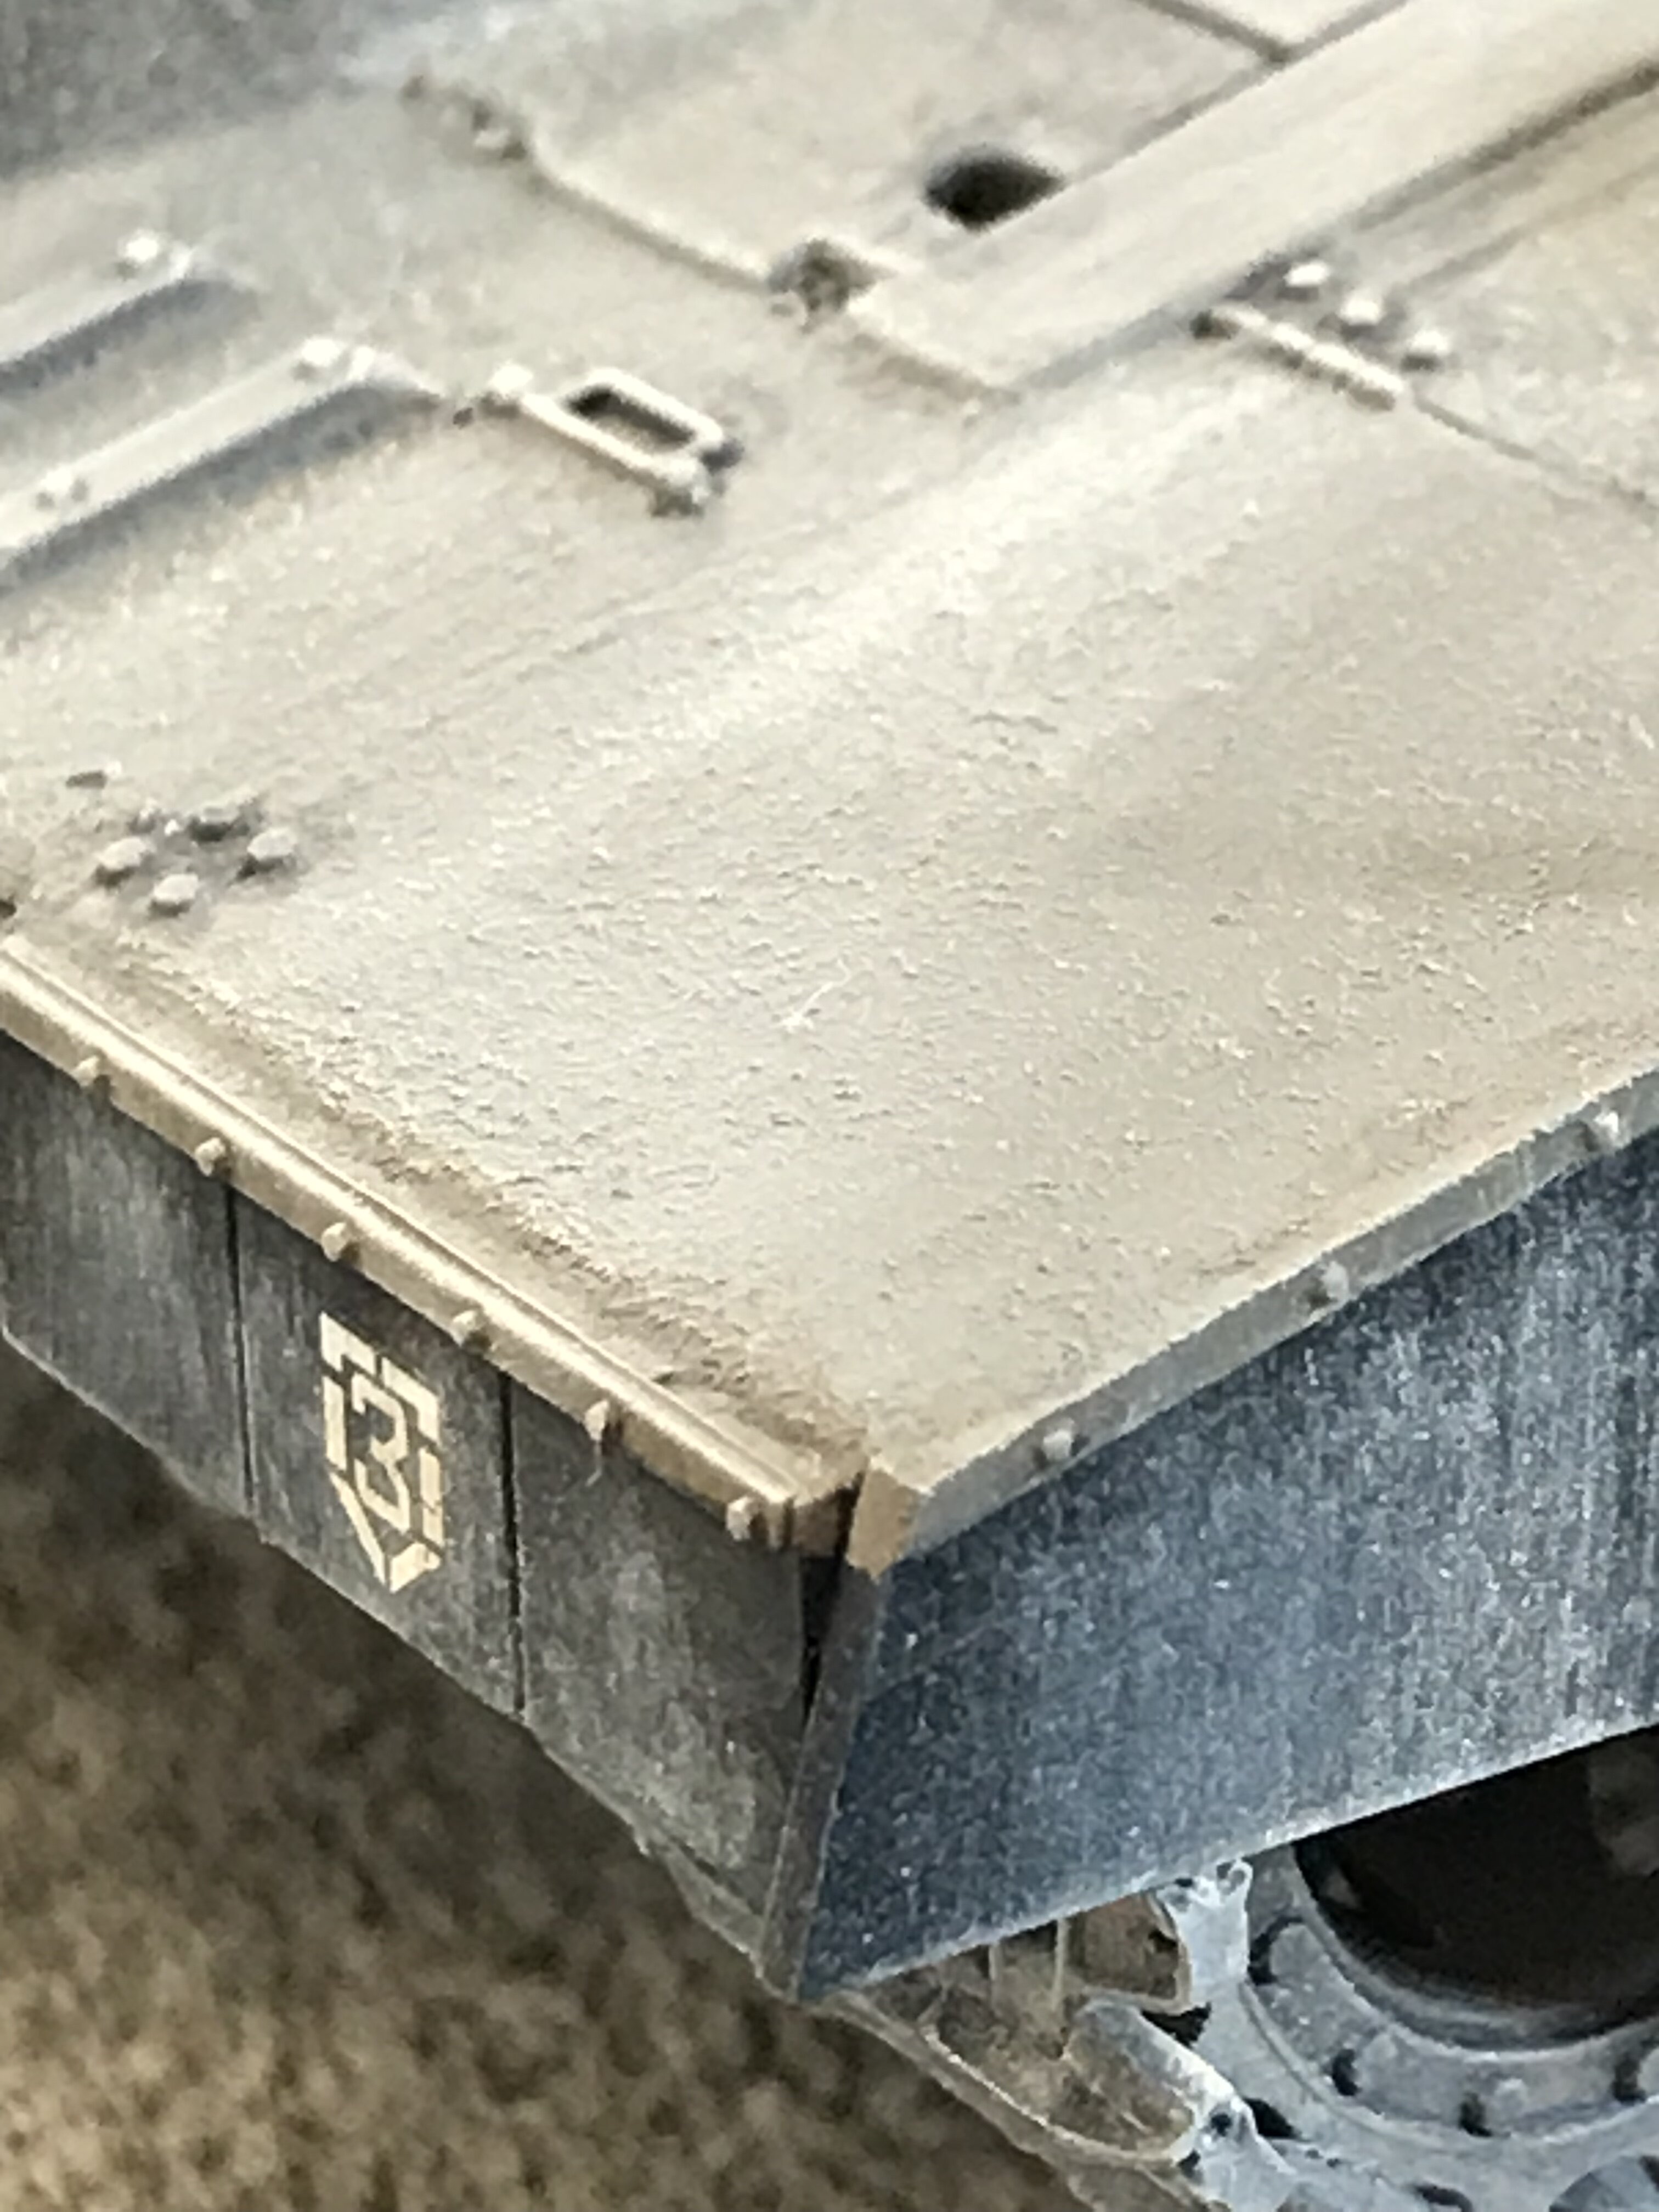
All, This was the first time I experimented with the Vallejo Rust texture. It was a learning experience for sure. The most important thing to do is keep the rust texture stirred well. Because the mixture contains a lot of Solids, it needs to be stirred often. I used the end of an old paint brush to break up the solids in the bottom of the bottle. Once they’re broken up, you close the lid and shake it well. If it is not stirred well, the effect will be a much lighter texture. Simply brush the mixture on the flat surfaces only. On the real vehicle, bolt heads and other raised areas are not covered with a nonslip surface. Once the texture dries, simply airbrush the color that you want right over top of it. I got some pretty good results. There may be other paints out there that will produce the same affect. Hope this helps. Chris
- 1 reply
-
- 2
-

-
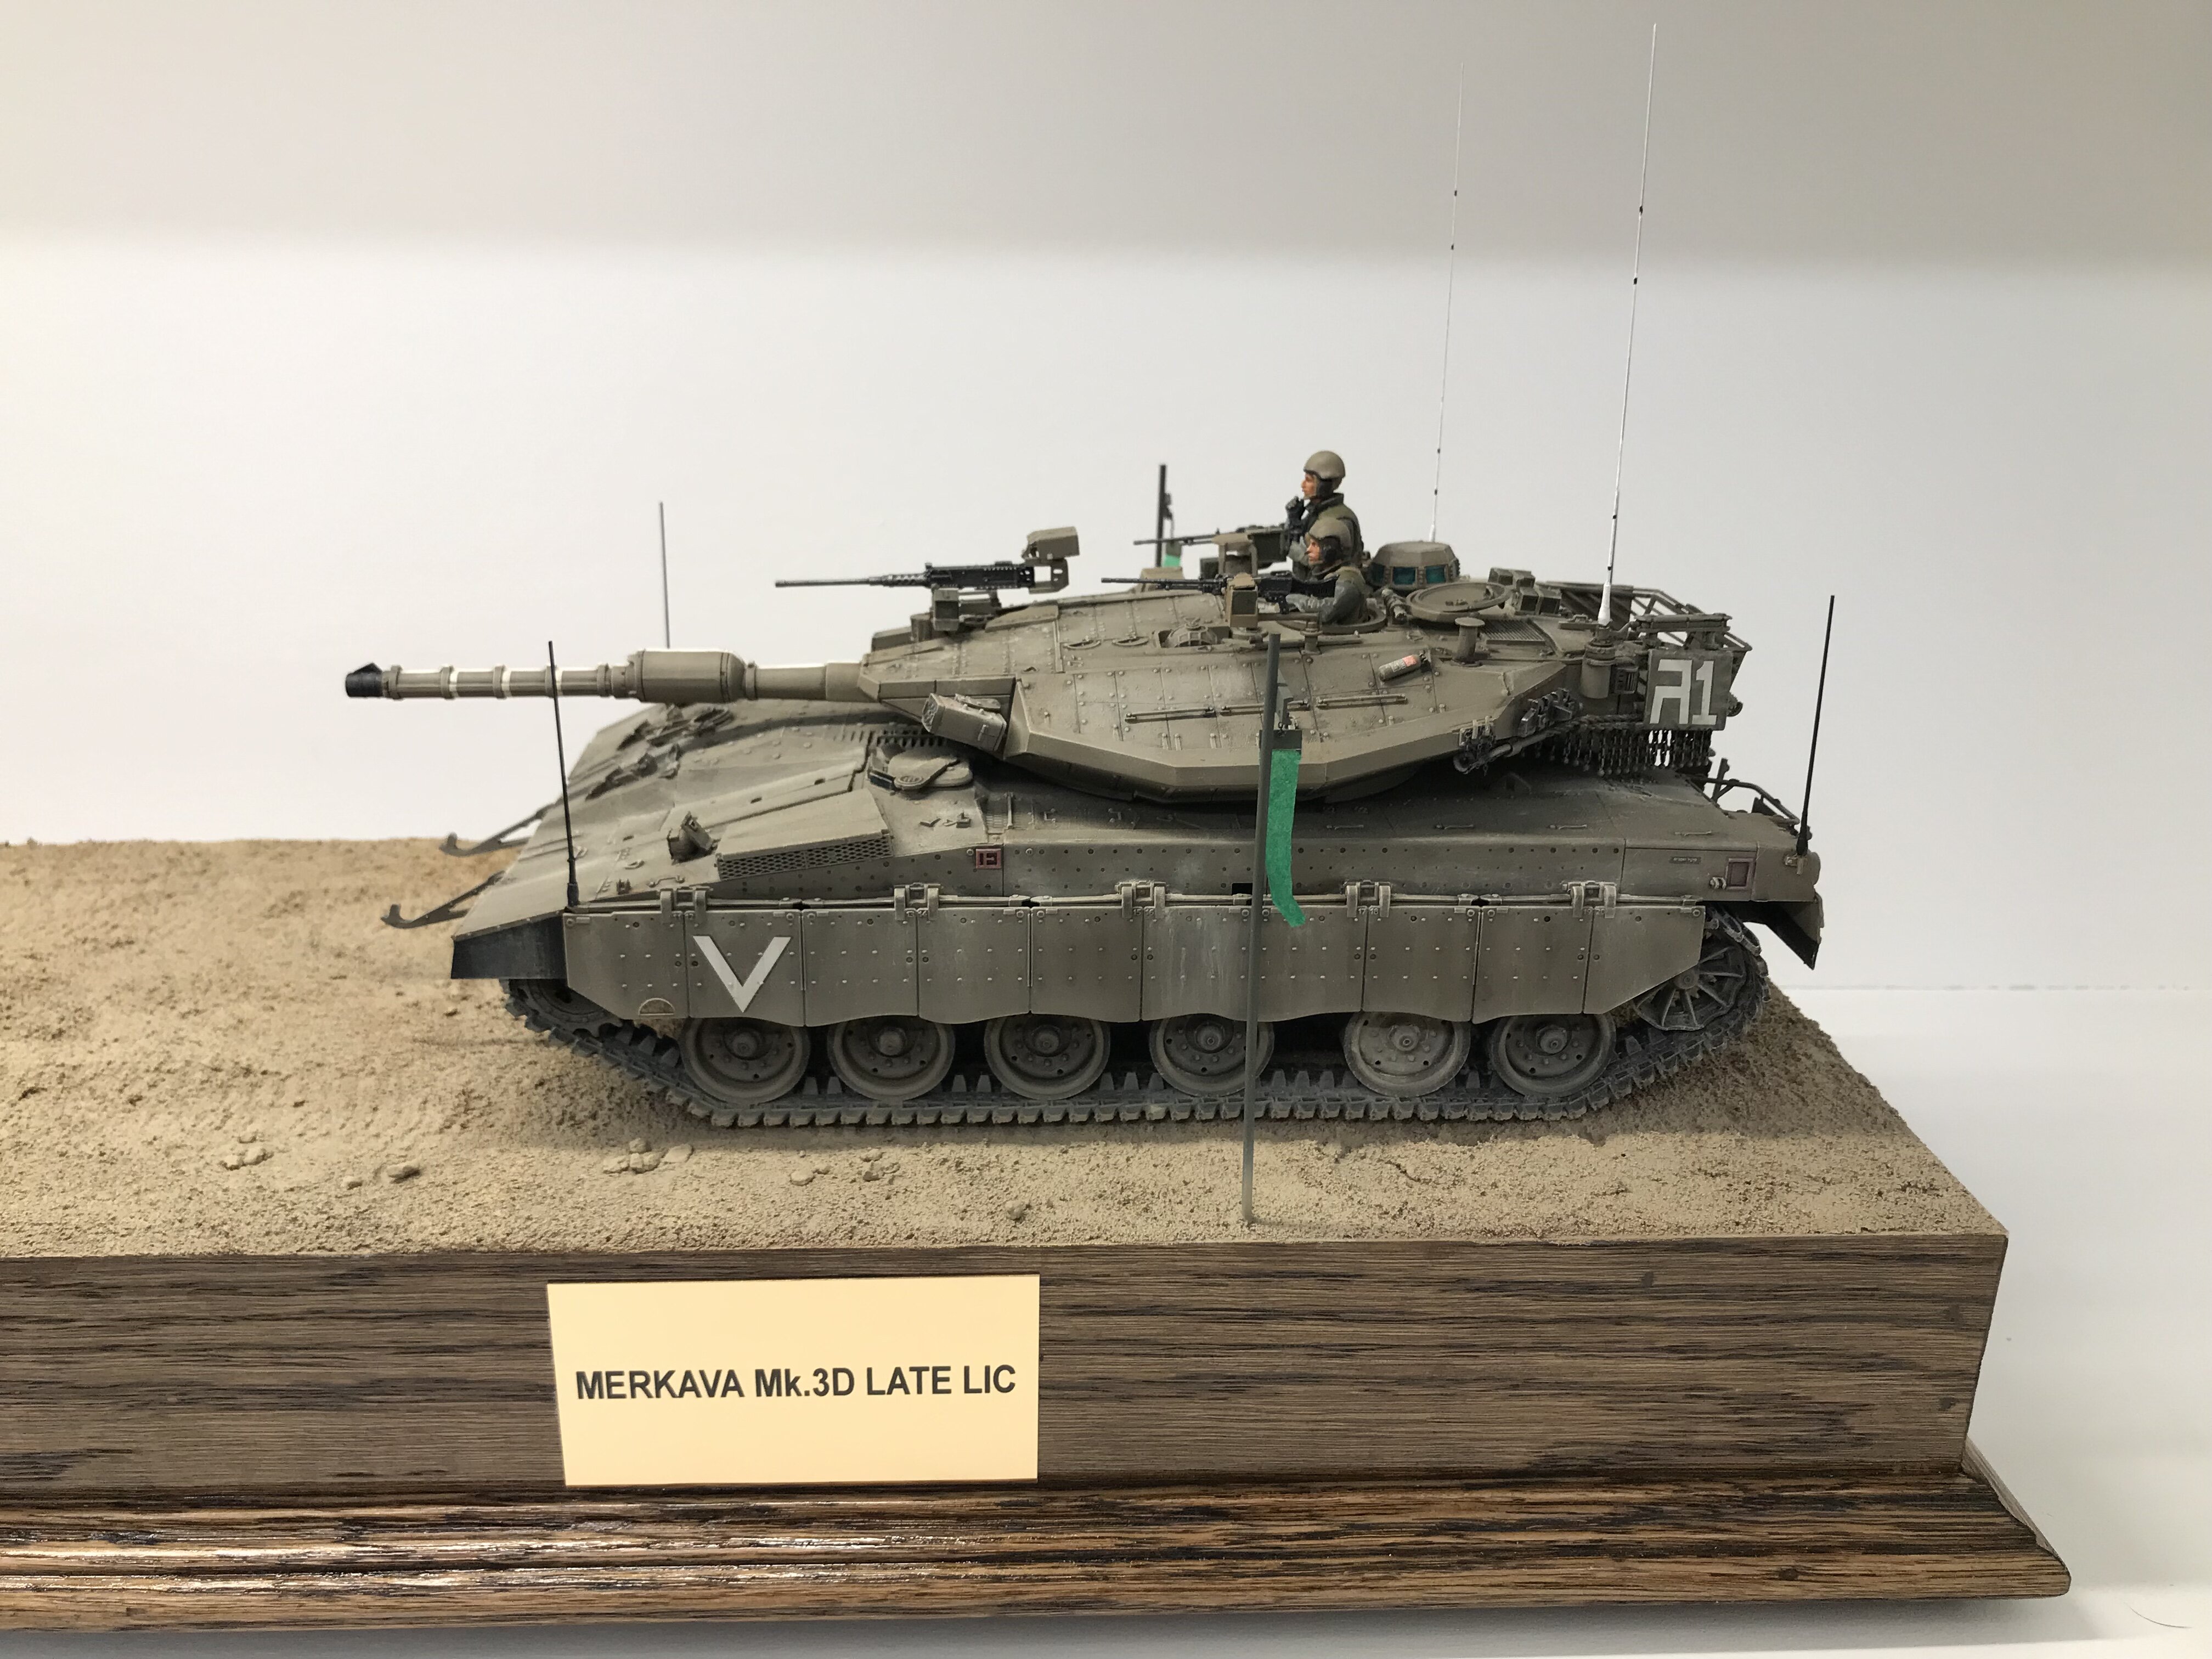
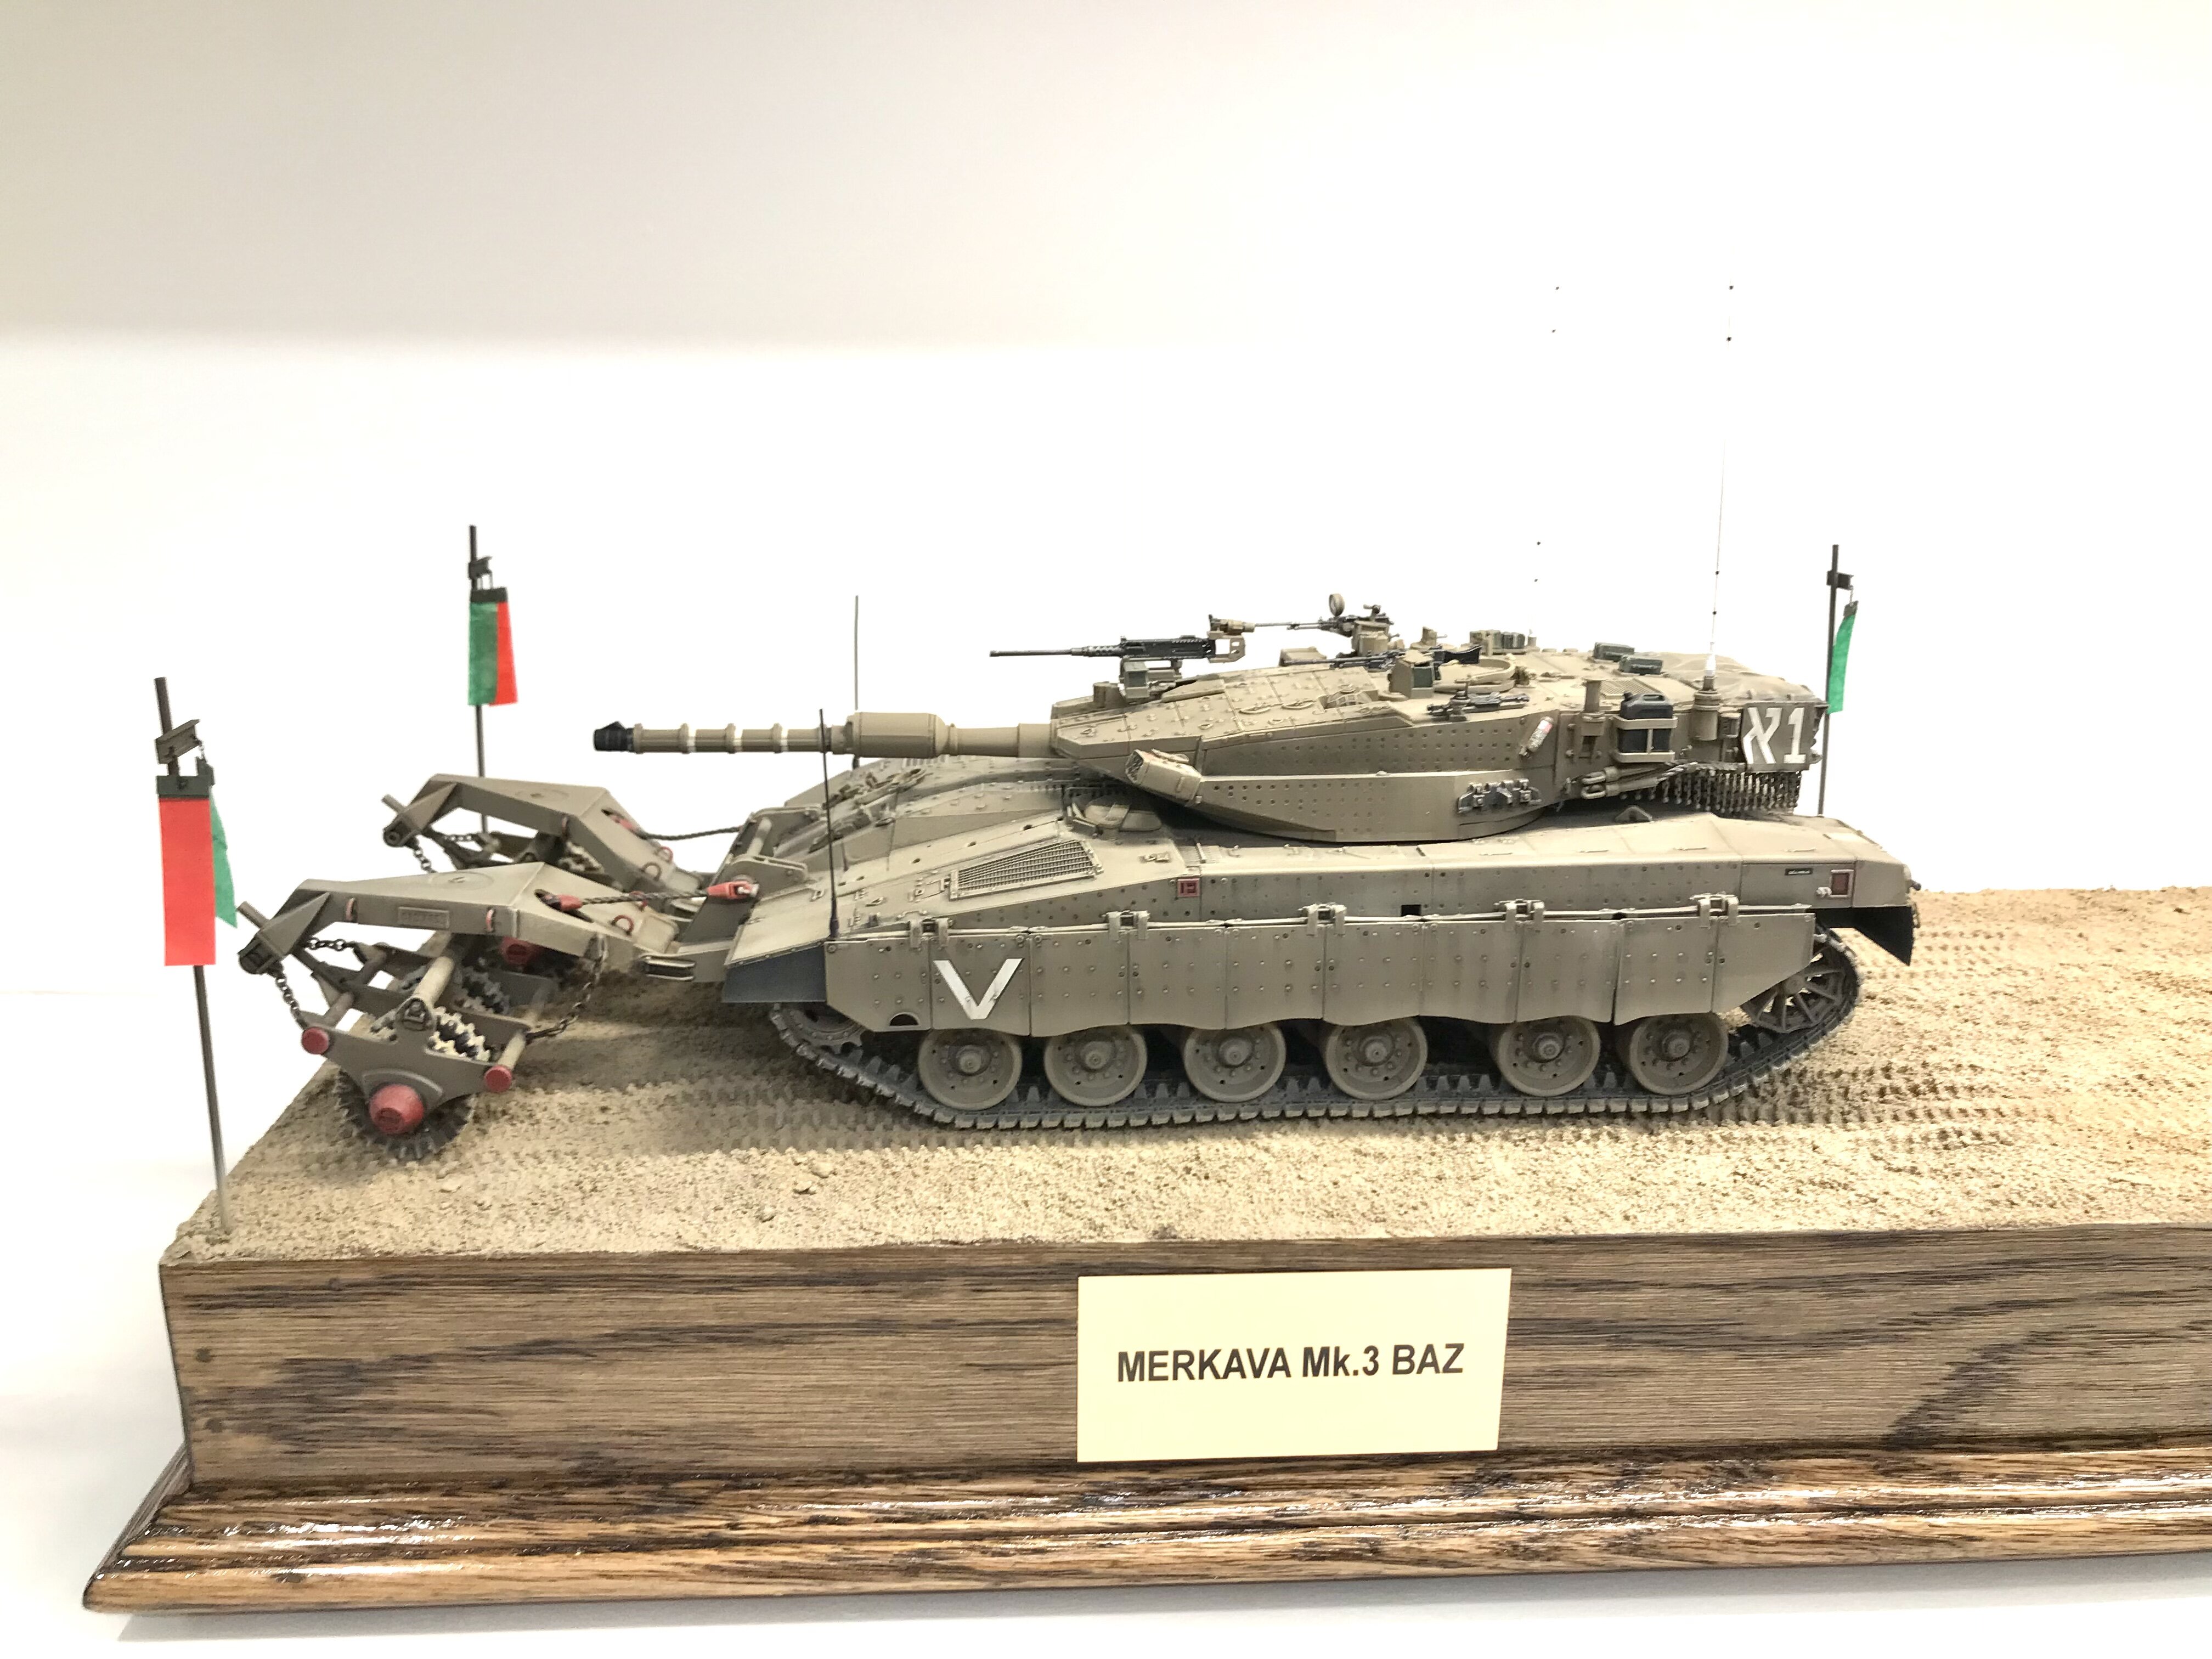
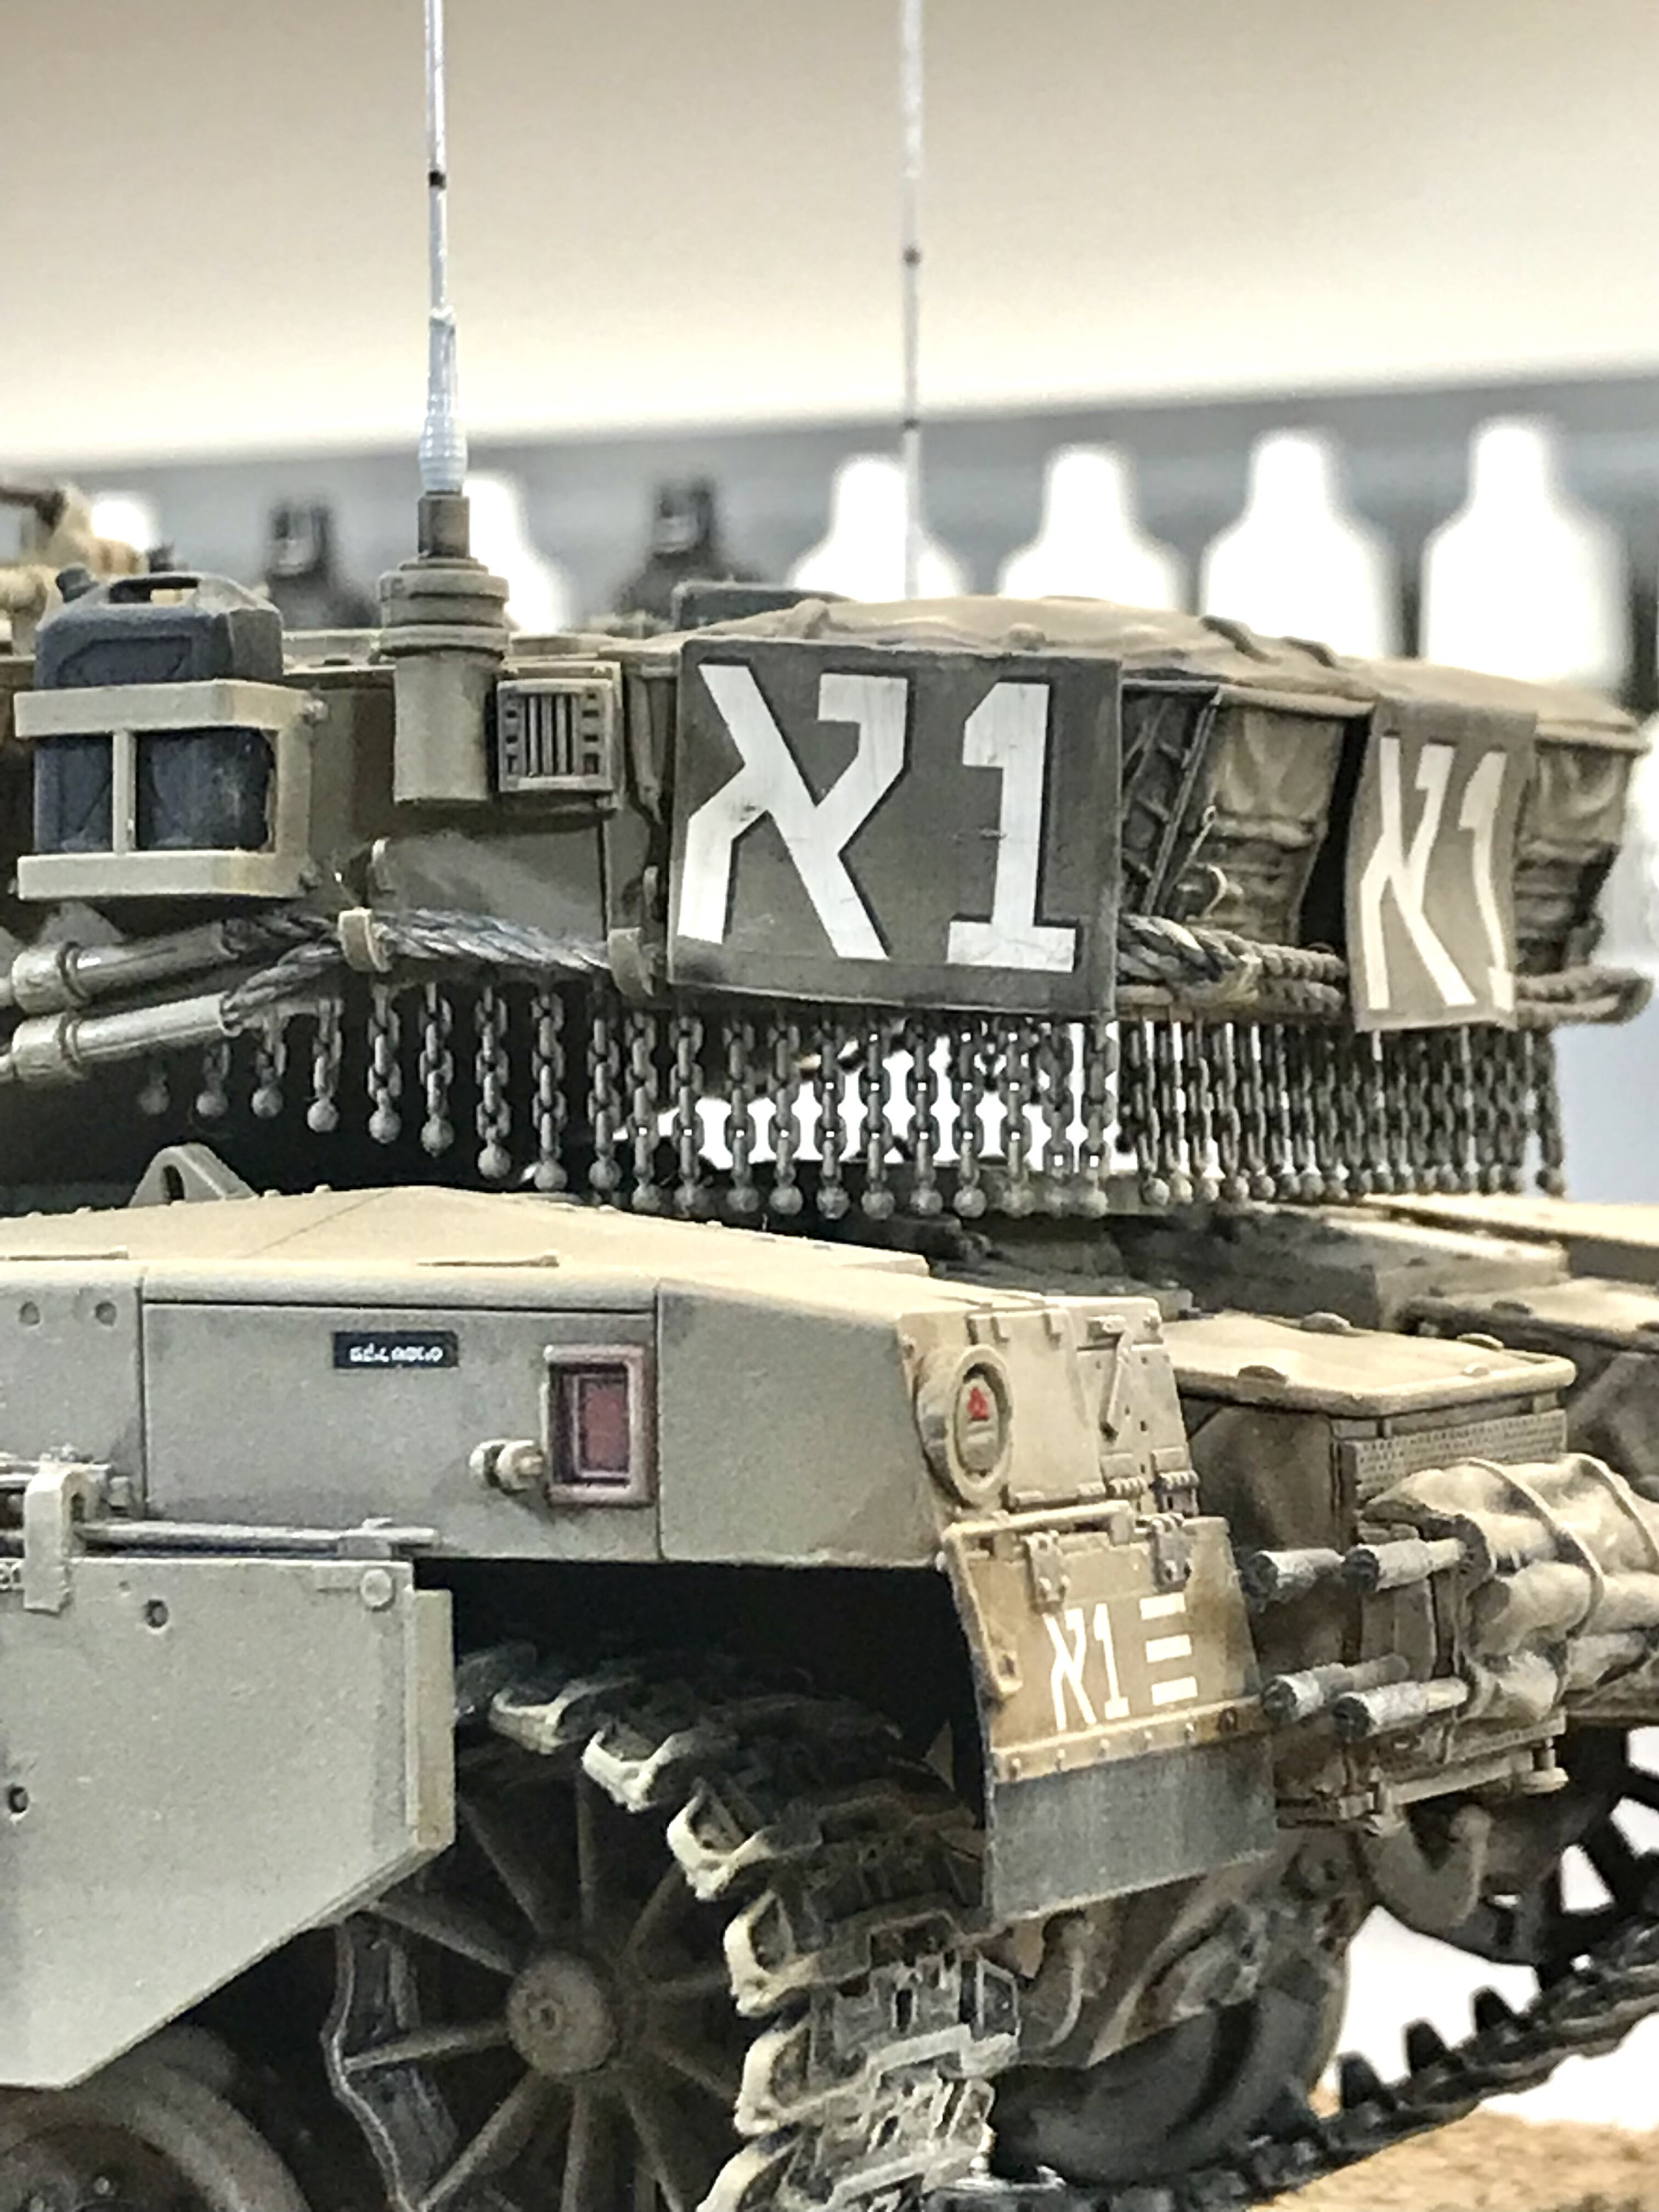
I purchased both of these kits from a vendor at our clubs annual invitational. Both kits are from Meng. This was my first time building Meng kits, and I must tell you, they were a joy to build. I was very impressed with the level of detail, and how well everything fit together. The base was covered with Stucco repair from Lowe’s. While it was still wet, I pressed the tracks, and mine roller wheels into the mixture. I painted the base with several shades of brown, and sand. Once dry, I applied a wash of Tamiya brown, and black. After it dried, I dry brushed Naples yellow hue for highlights. While trying to simulate the nonslip surface on the top of the turret and hull, I ran into some issues. After talking with some of the armor experts in our club, they pointed me in the right direction. Chris
-
Wow!!. She looks gorgeous Gil. Stunning work. Chris
-
IMG_5996.mov Thanks Eric for your help posting this video. Chris
-
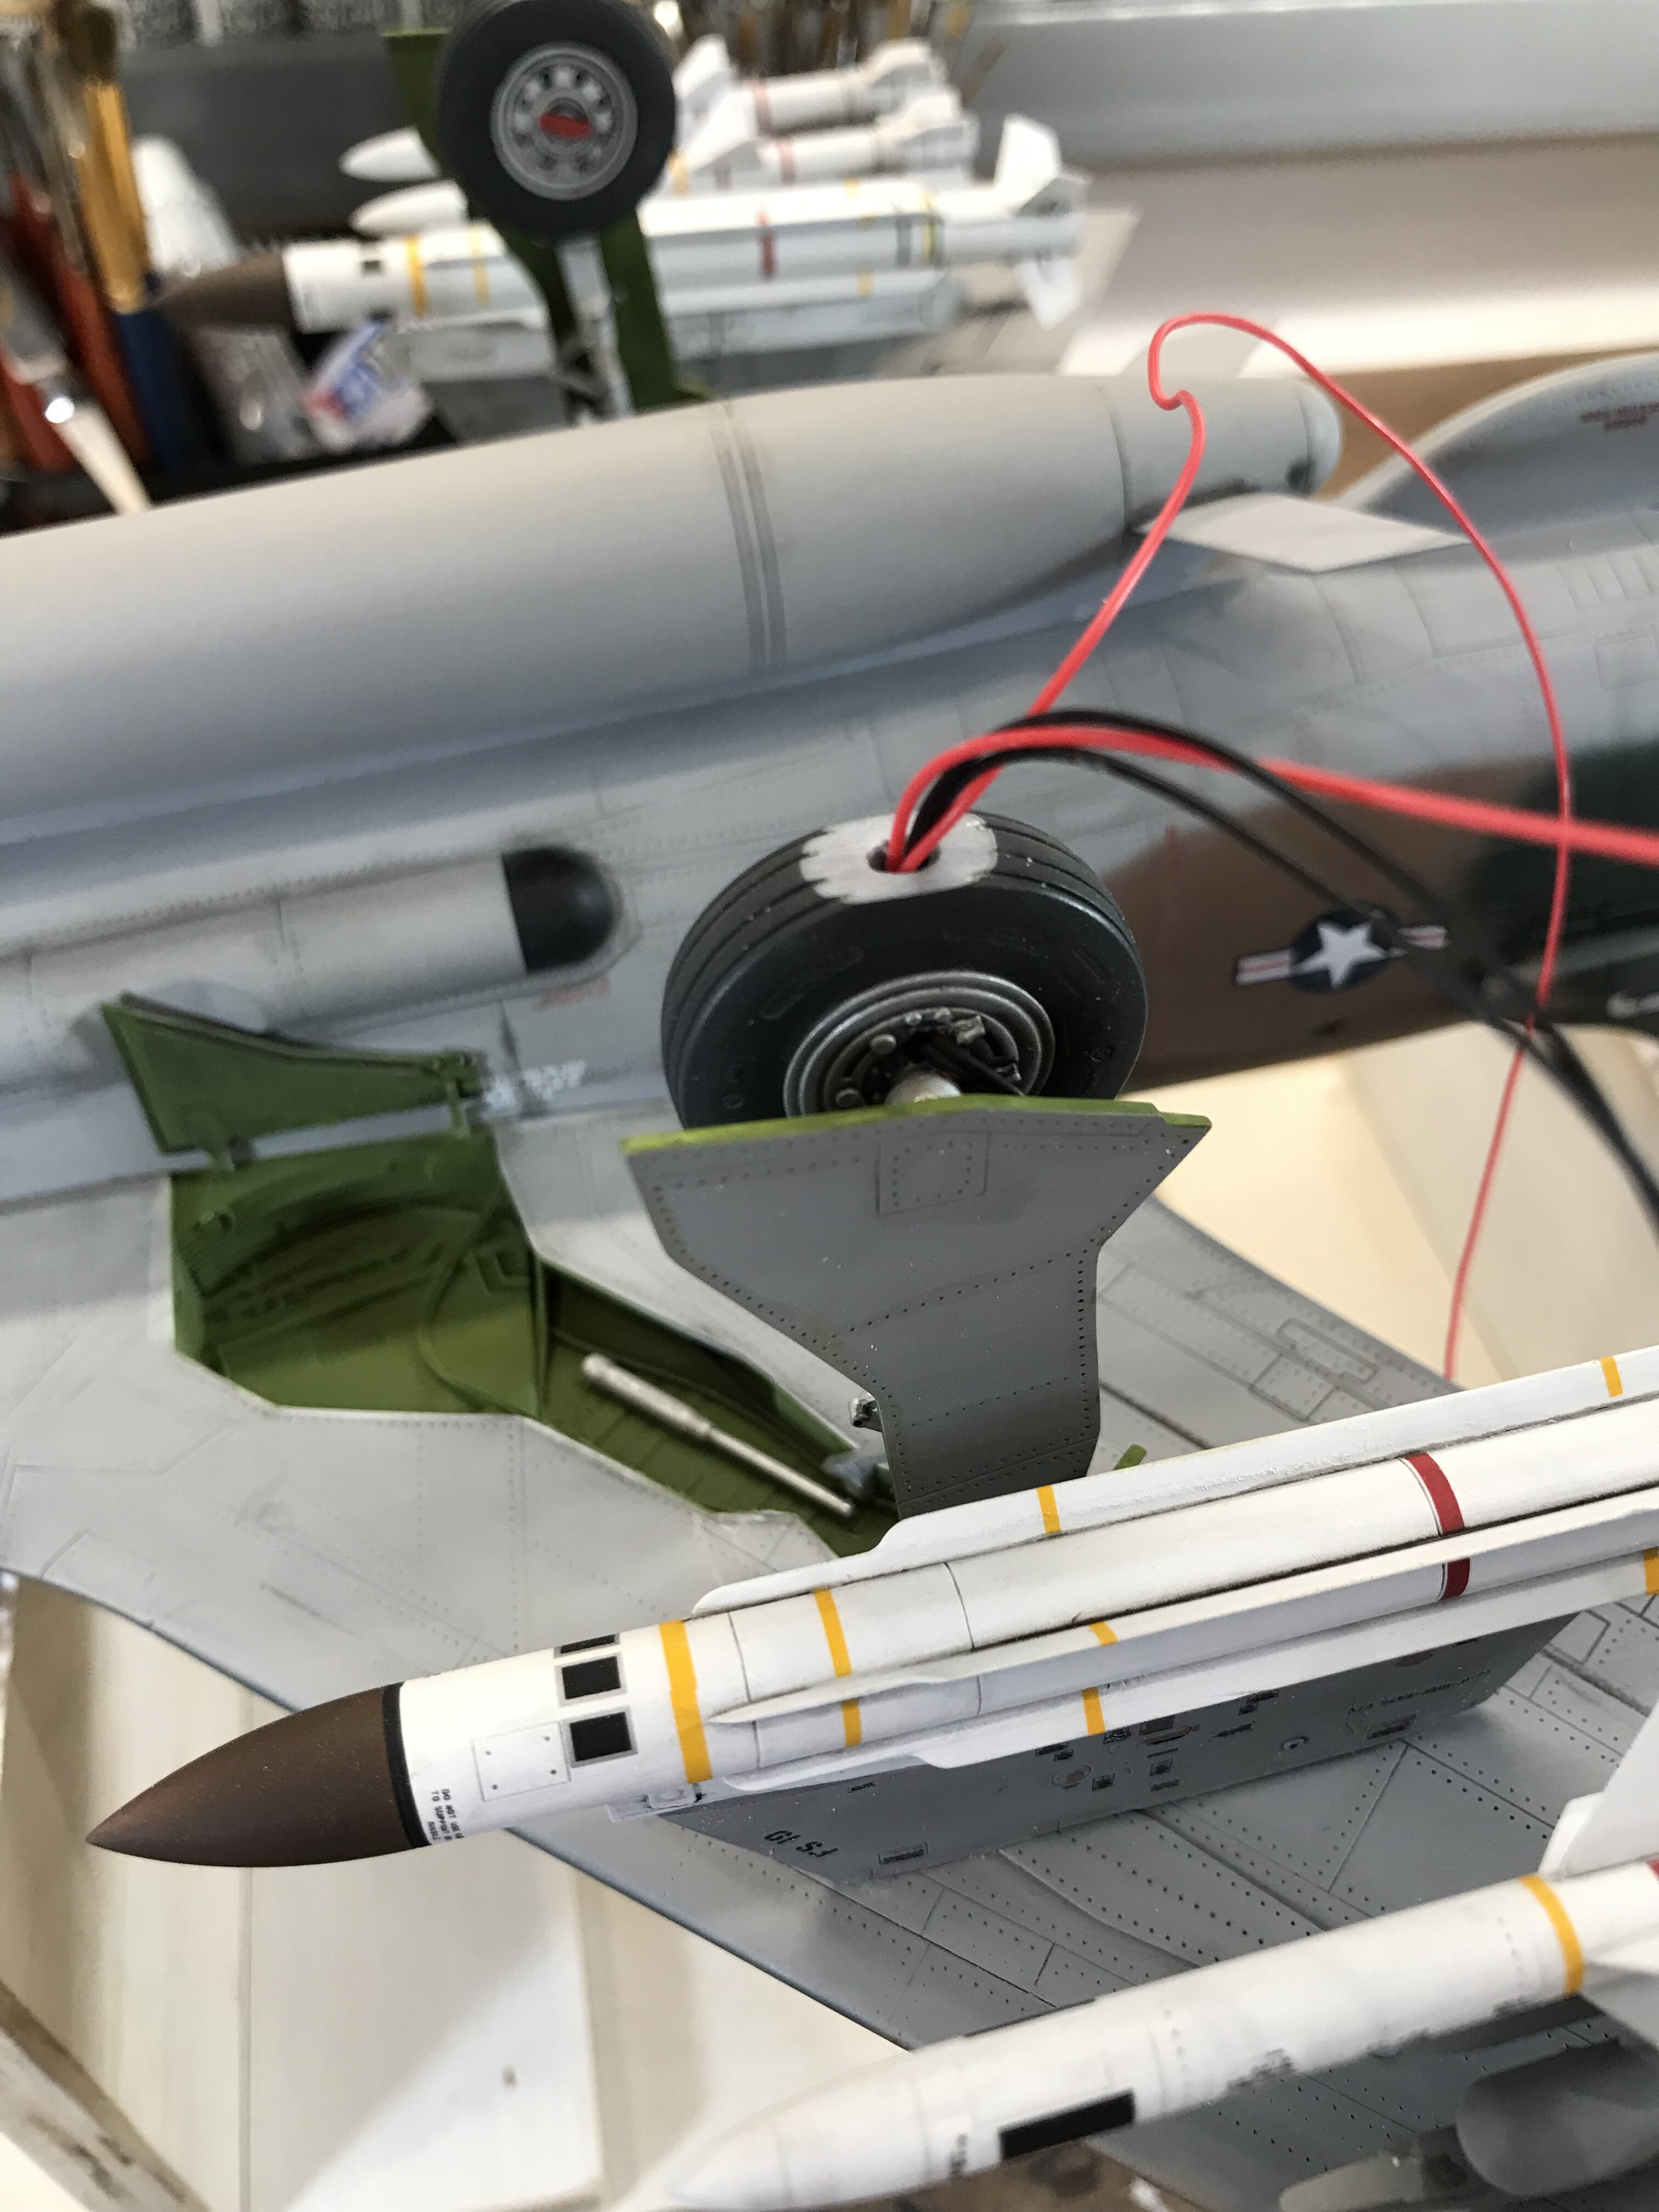
Chris, I had a total of four lines to run down the strut. They were so thin, I was able to tuck them between the strut itself, and the gear door. I painted what you could see black. I drilled a small hole on the outer hub, where you could not see it once the gear door was installed. After that, I drilled a hole in the very bottom of the tire. I hope this helps. chris
-
Richard, Looking forward to seeing your work. Chris
-
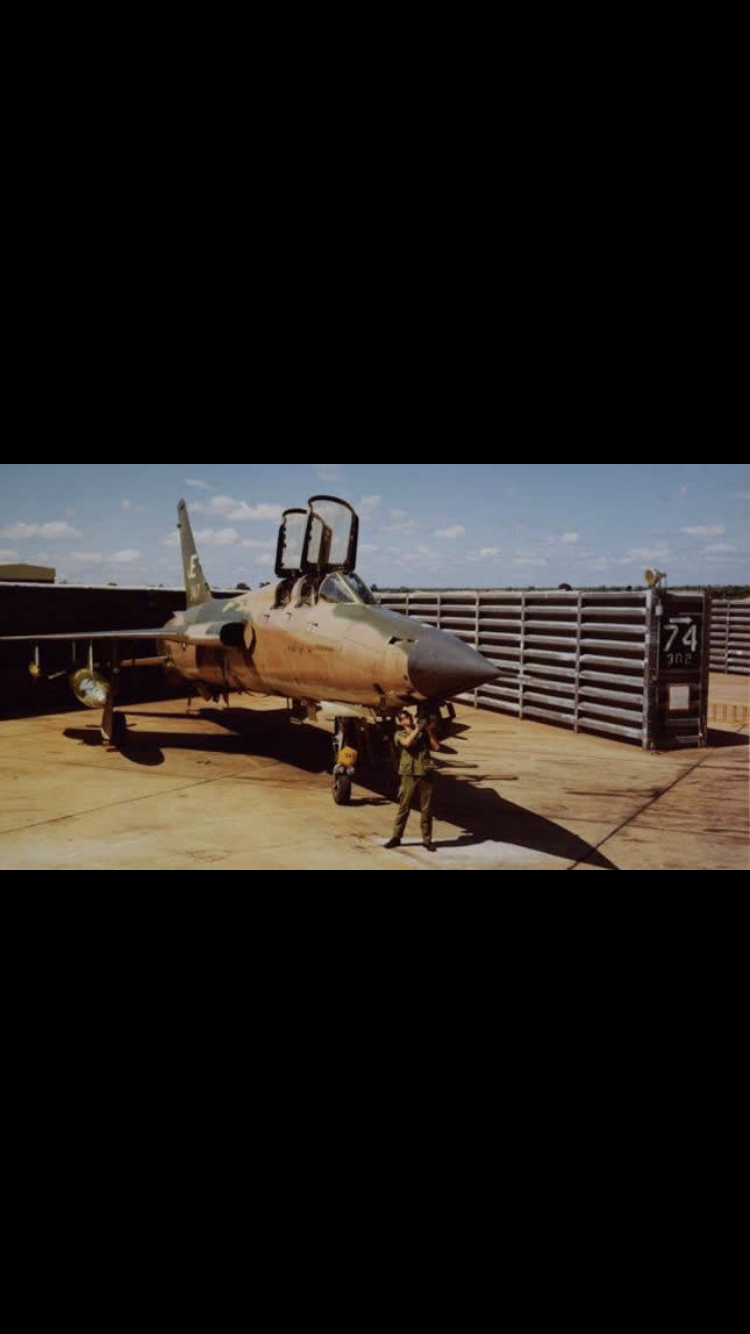
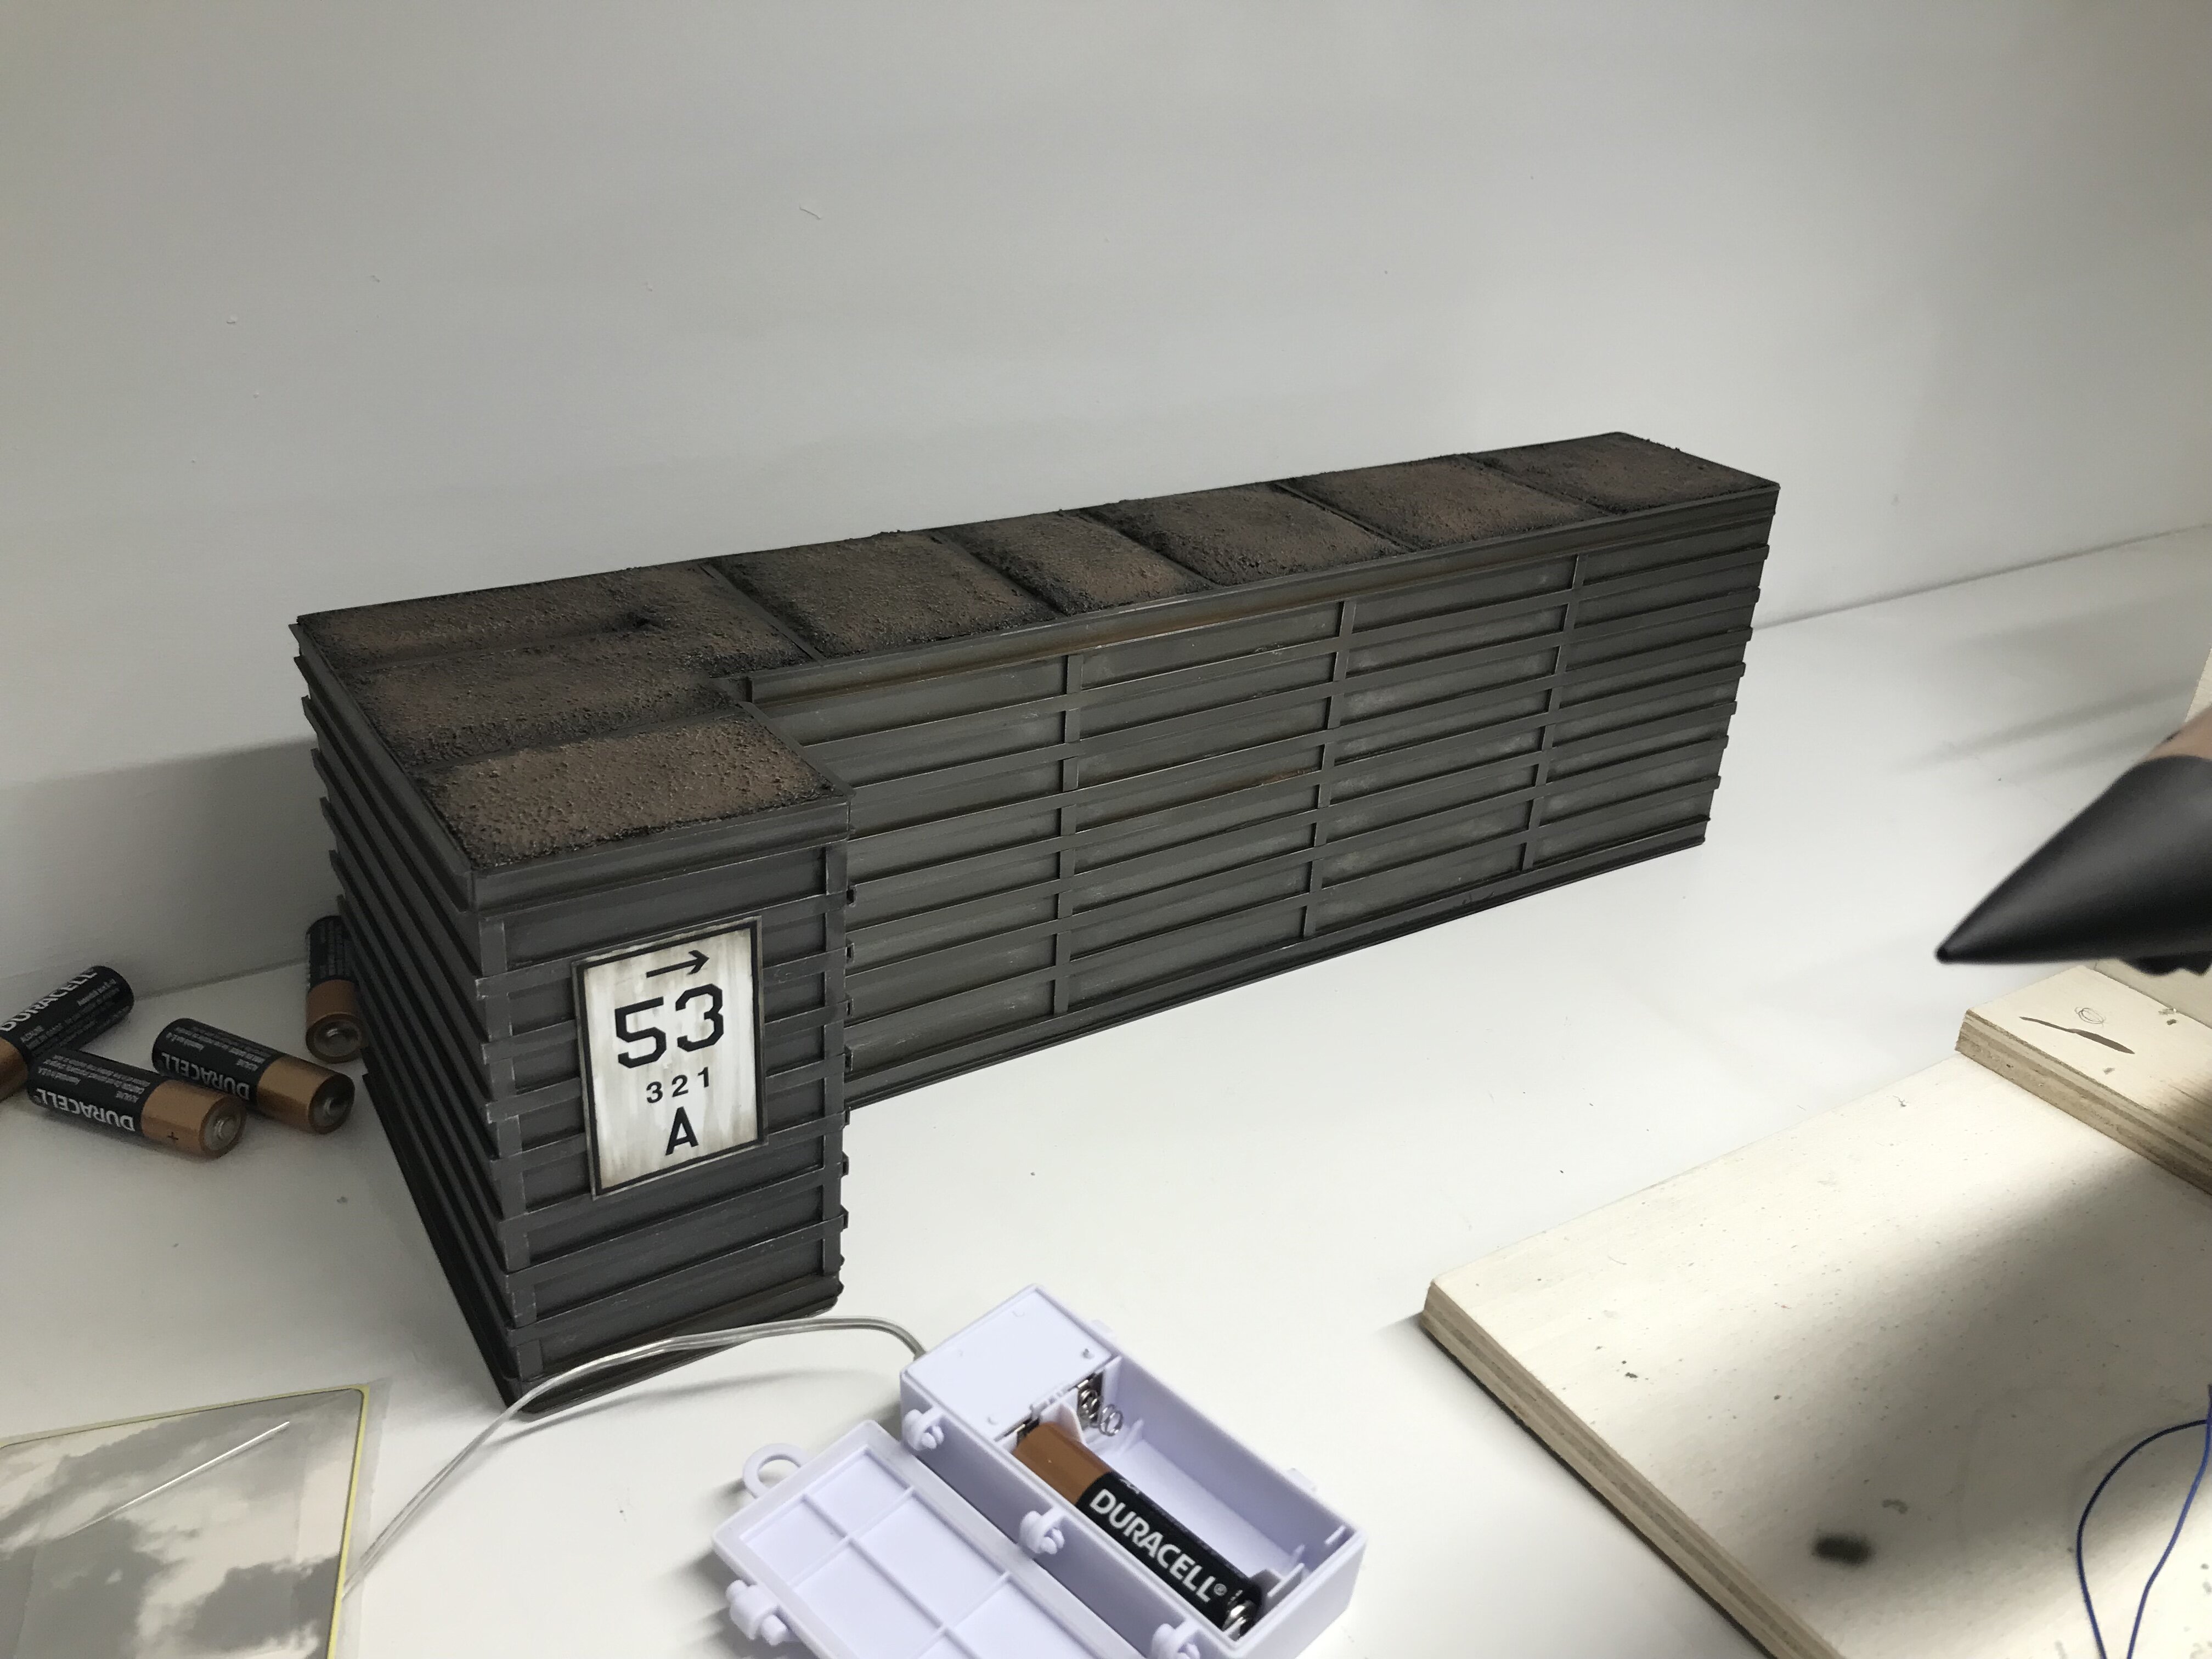
Richard, I’m not sure what the exact dimensions are for the revetment wall. I use the below picture as a guide. If you have any questions at any time, send me a message an I’ll do my best to answer your questions. And yes, they did use bottle jacks positioned under a jack point on each strut. hope this helps Chris
-
Stuart, All very nice builds. My favorite is the F-16. I like how you have it posed. Chris
-
Finally complete! This is probably one of the longest builds I’ve had. I tried my hand at simulating chipped paint (silver paint on a piece of makeup sponge). Really glad to have this one behind me. Chris
-
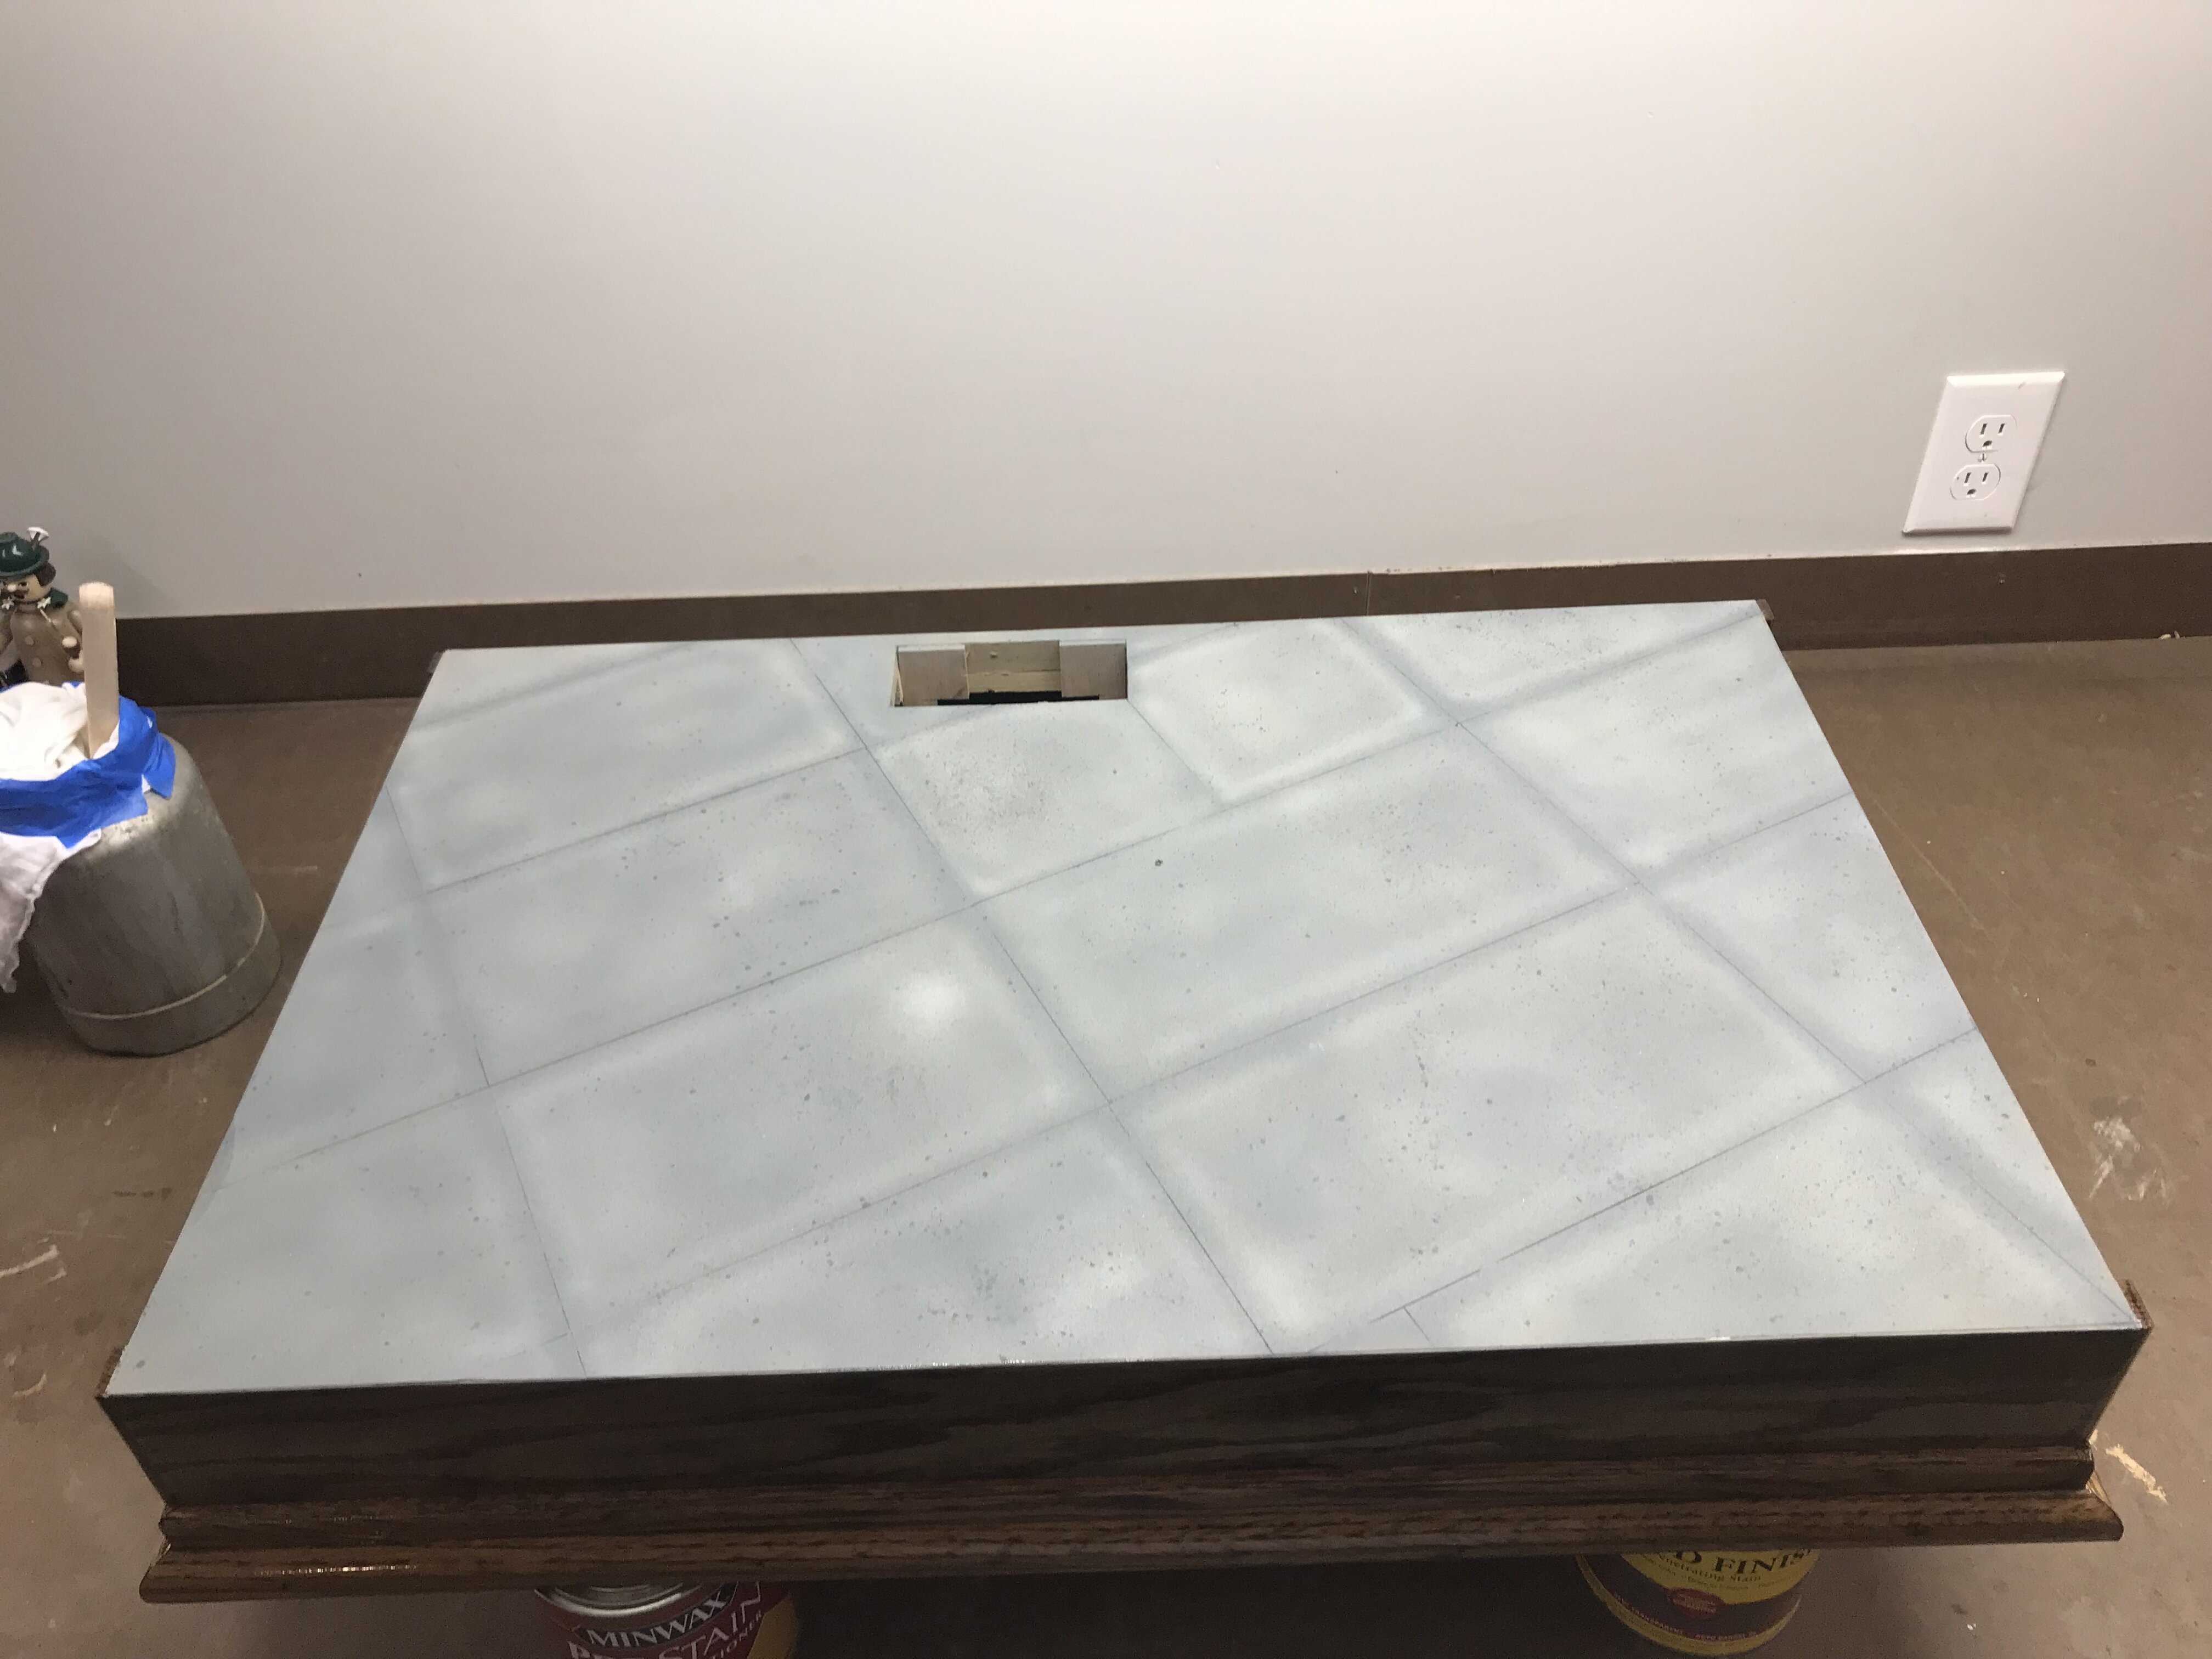
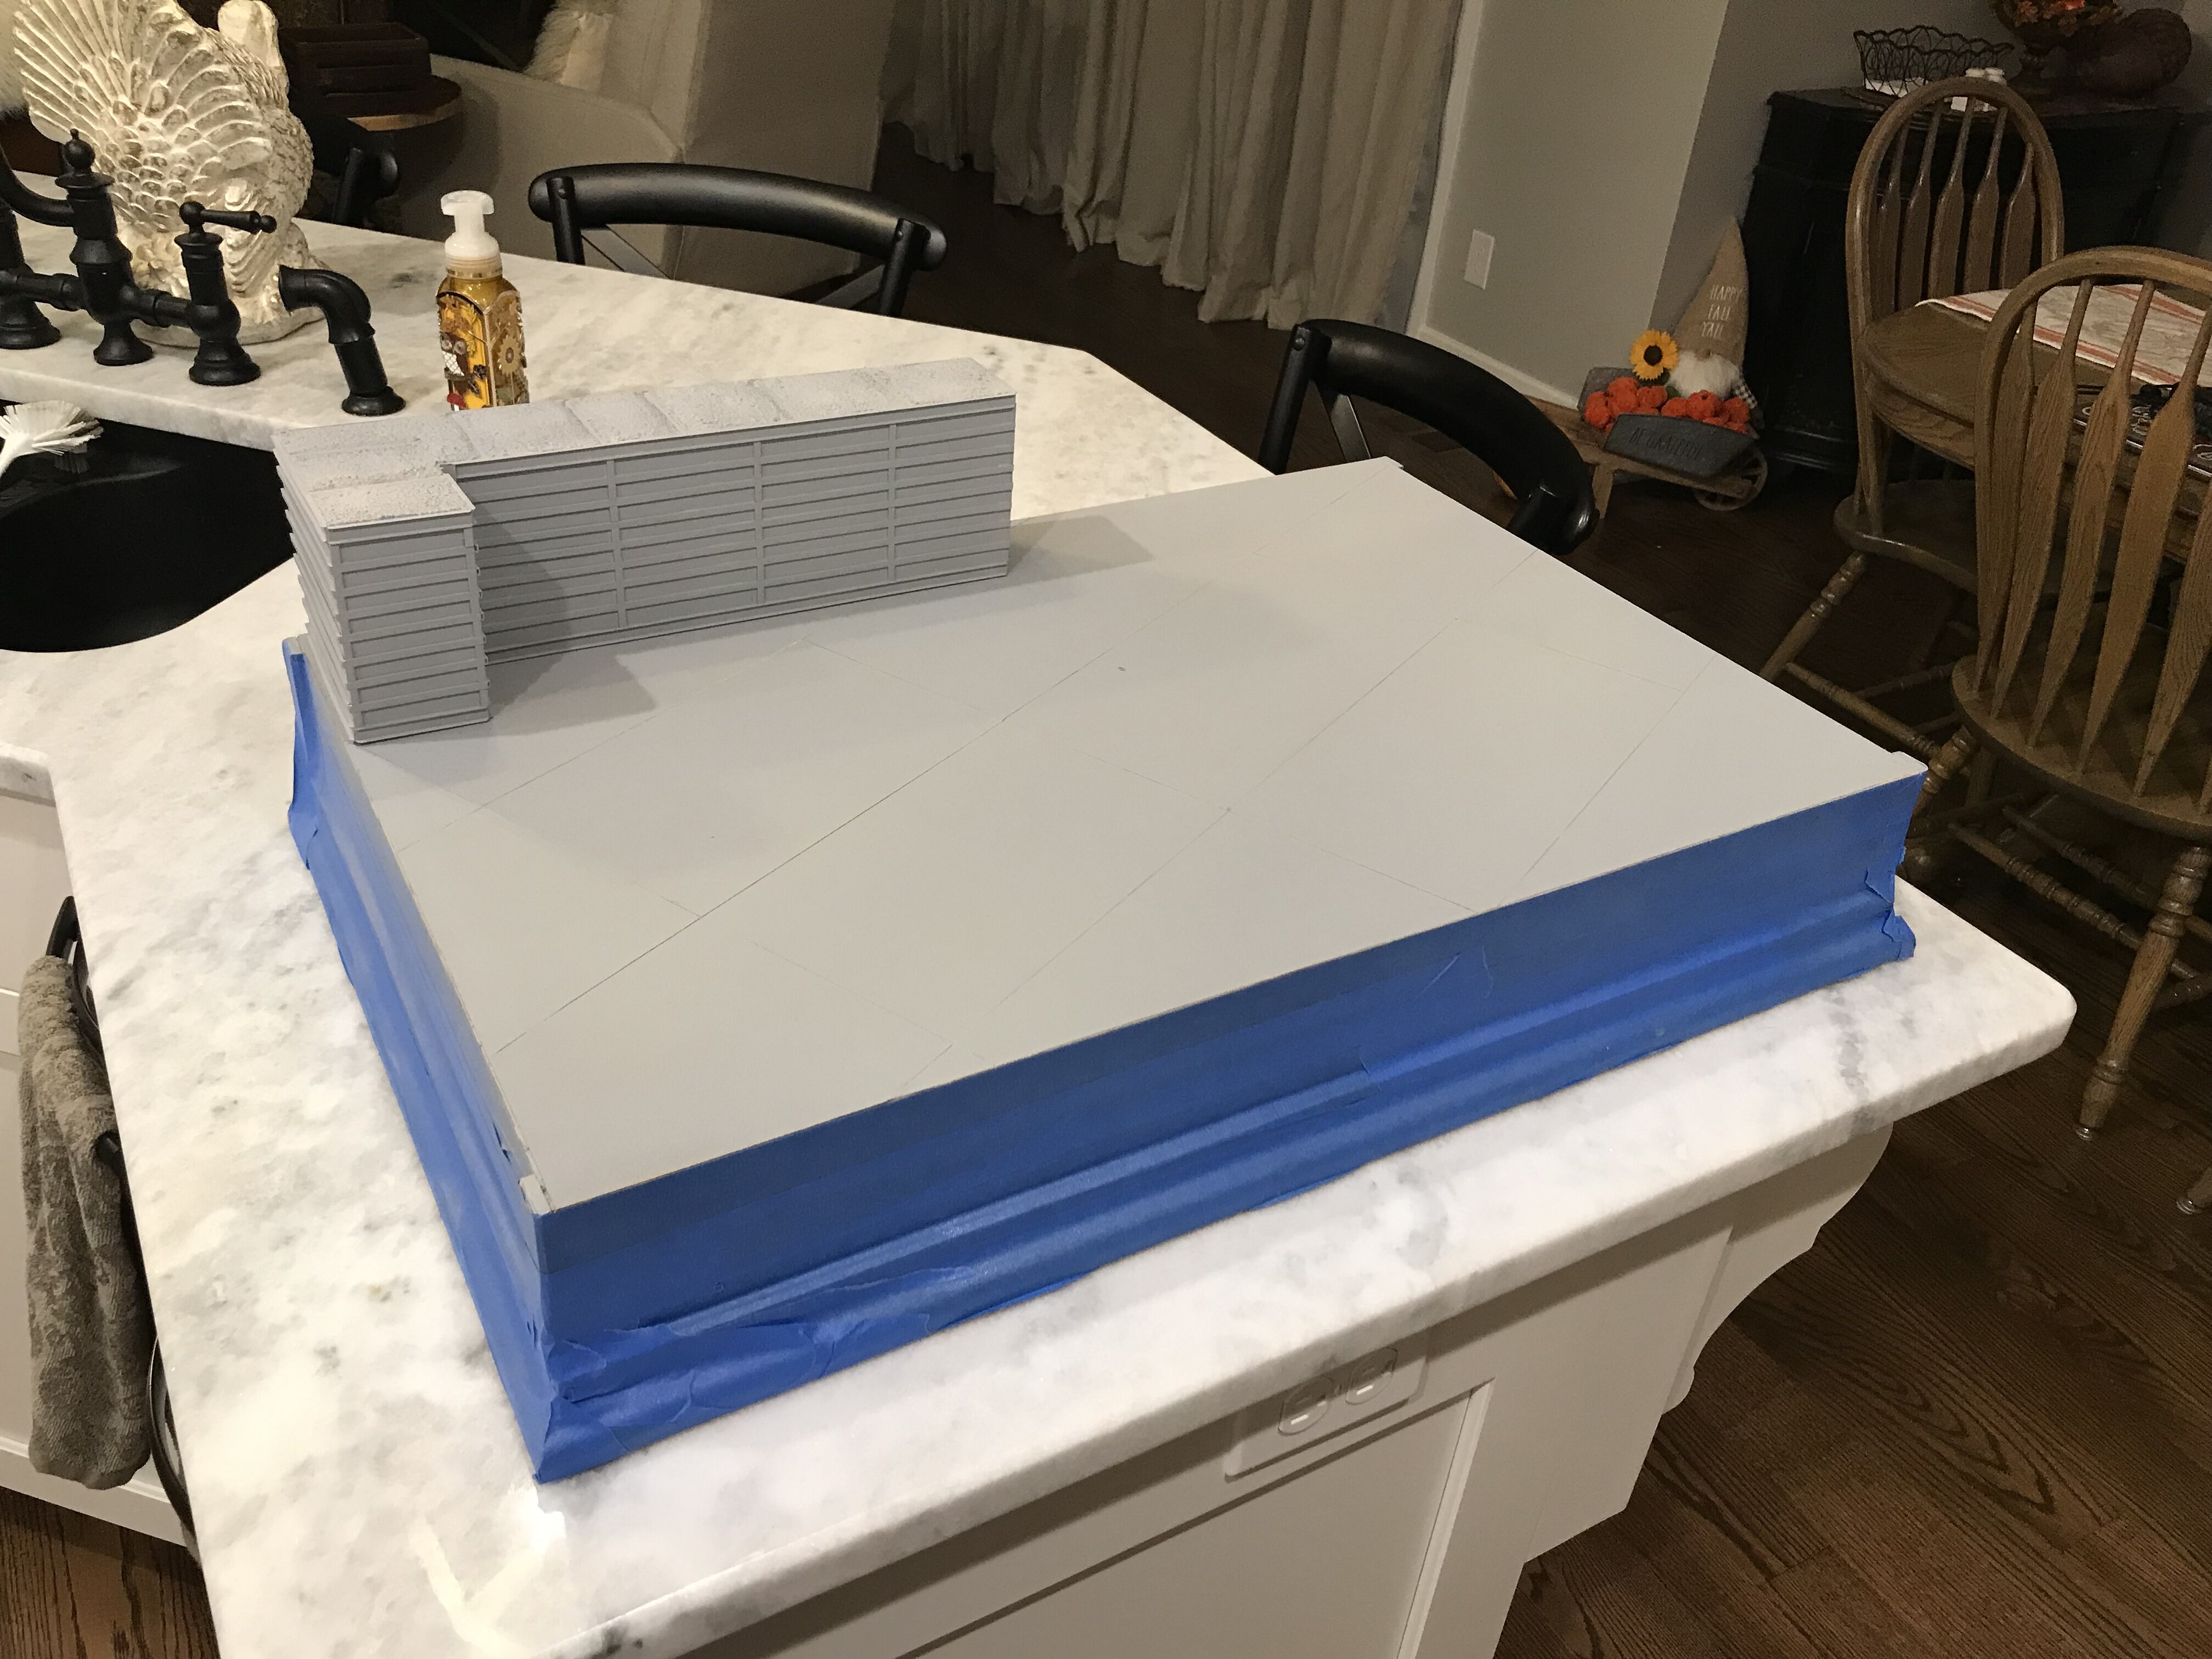
All that left to do now, is mount everything on the base, and get the plaque made from the trophy shop . I hit the first coat of polyurethane with steel wool. Gives you a nice and smooth surface to apply the next coat of polyurethane. The base has the last coat, and will cure overnight. Are used several shades of gray and tan to simulate concrete. I would appreciate any feedback on how I could improve it I used Tamiya black accent to simulate oil and grease spots on the concrete. Chris
-
I’m in agreement with you David. One of the reasons I put mine on a base is better protect it. I generally build them slightly larger the the footprint of the model. Chris
-
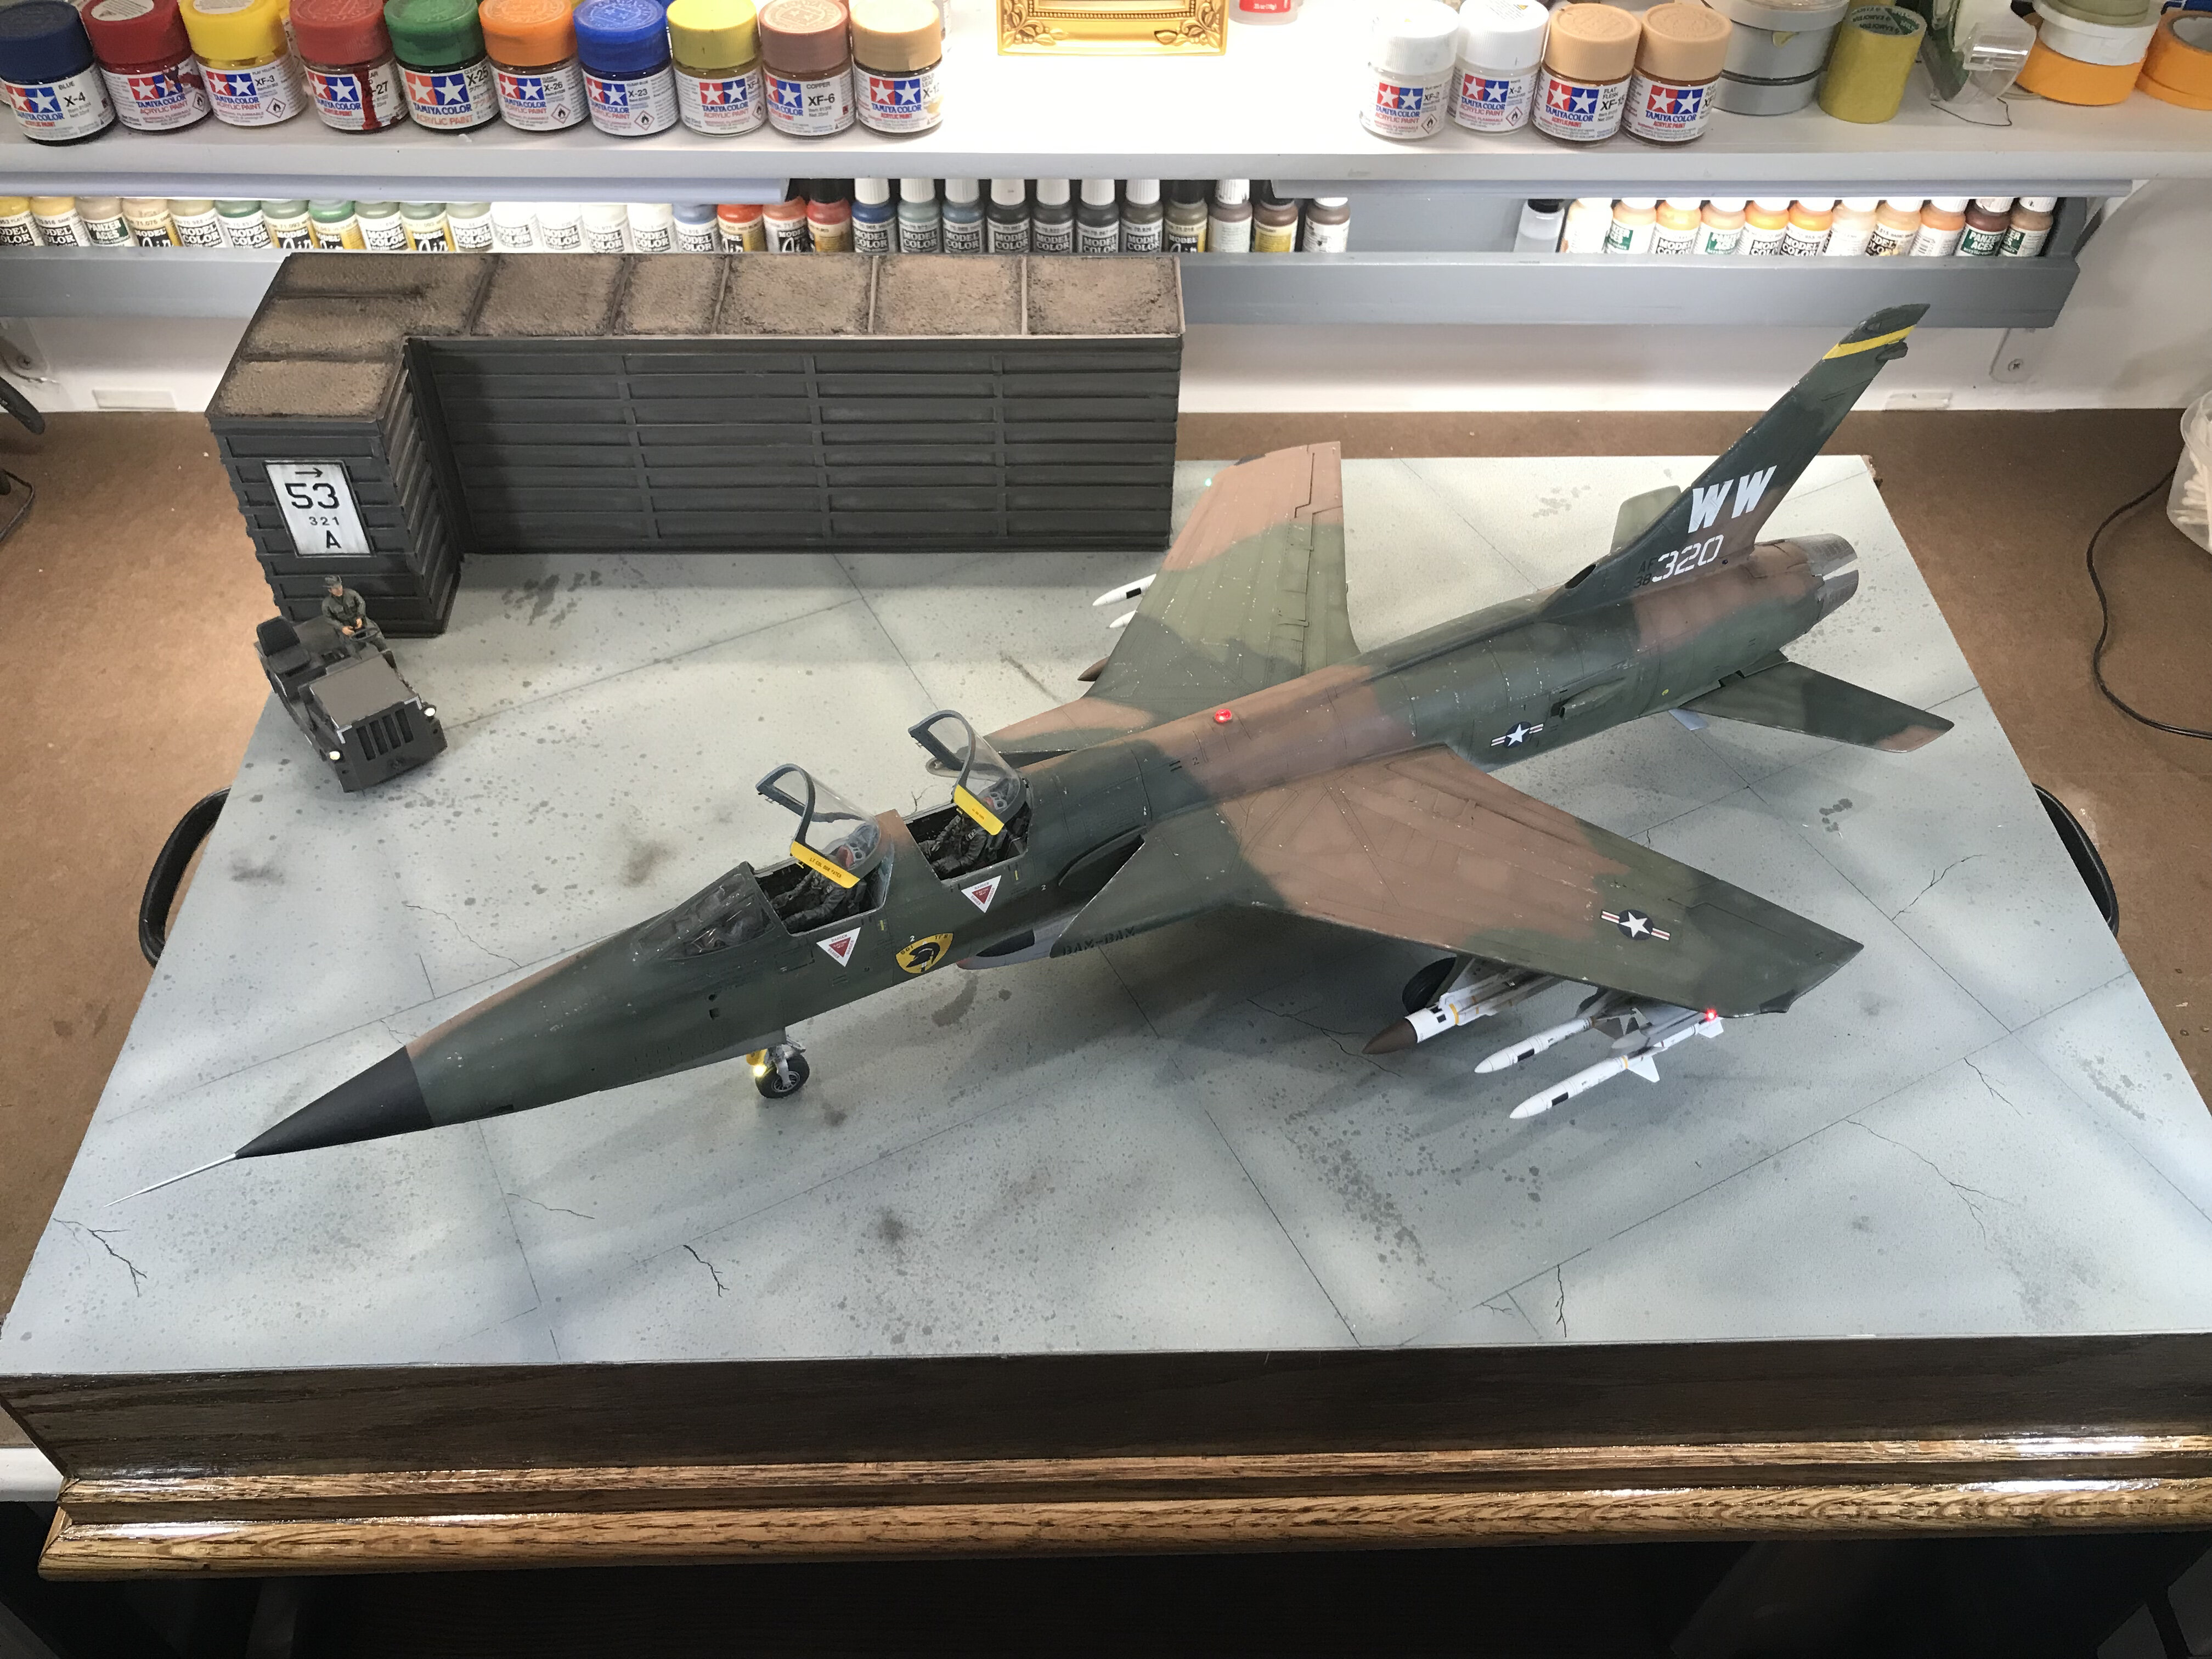
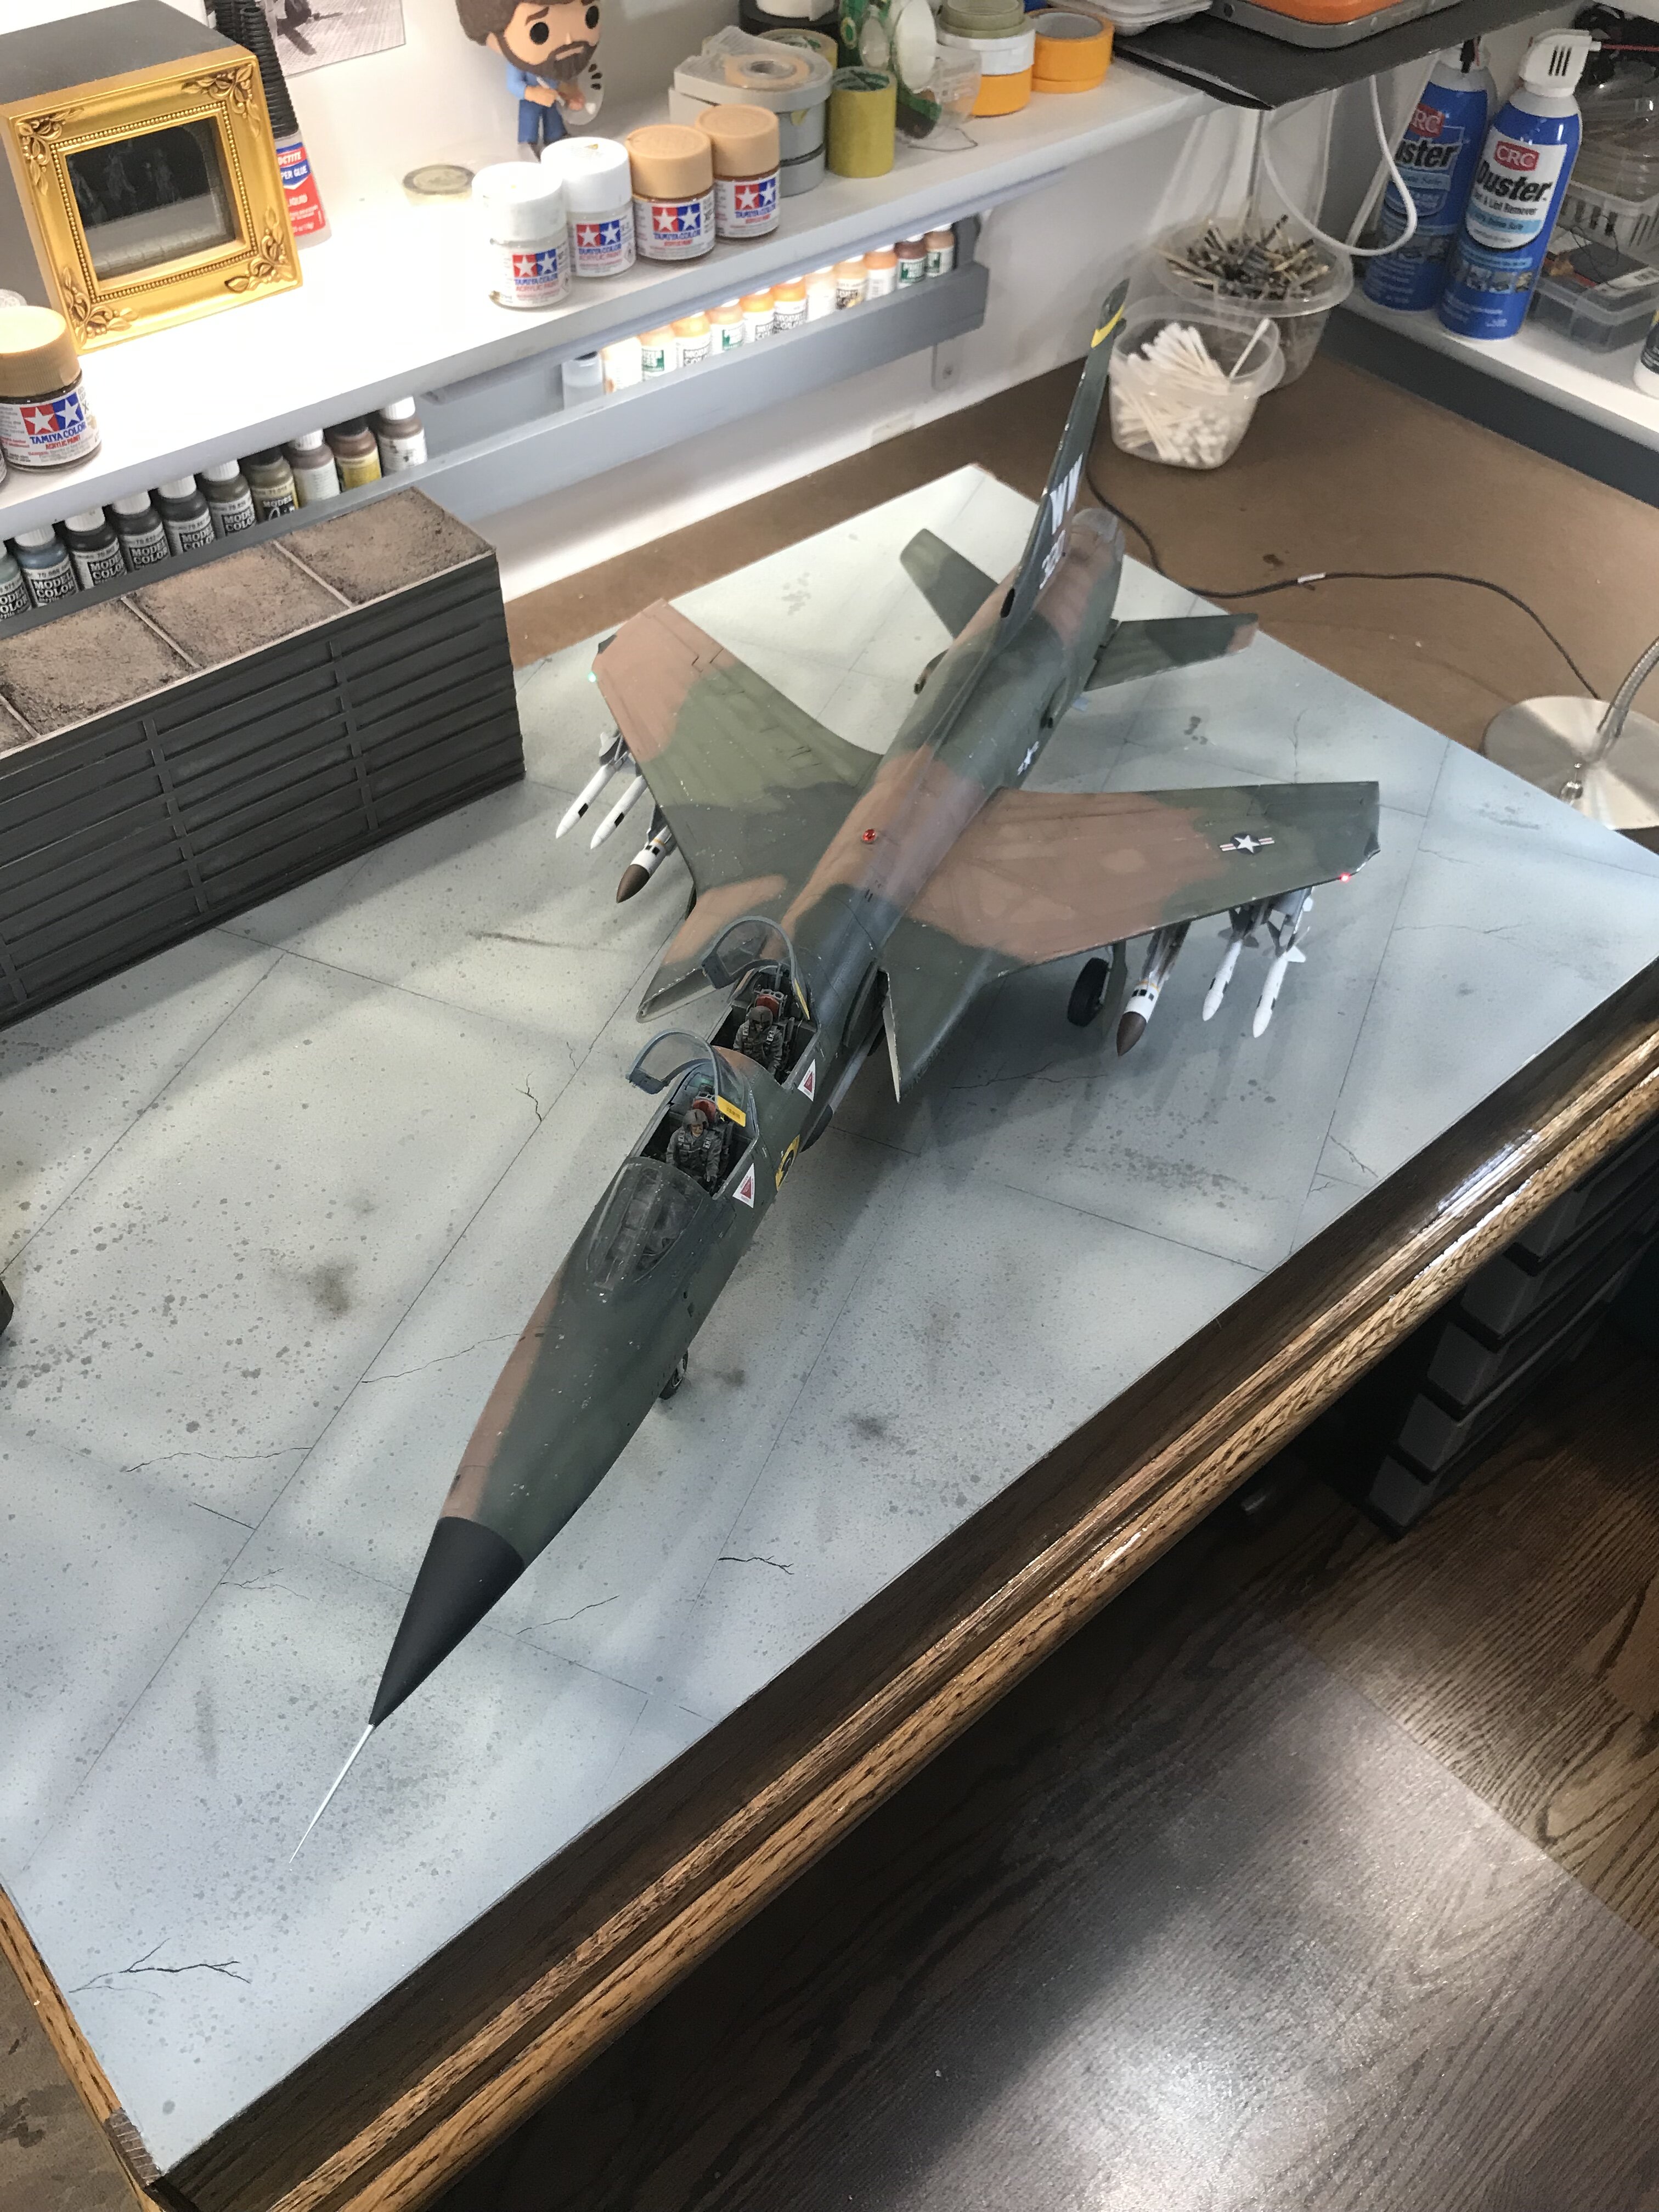
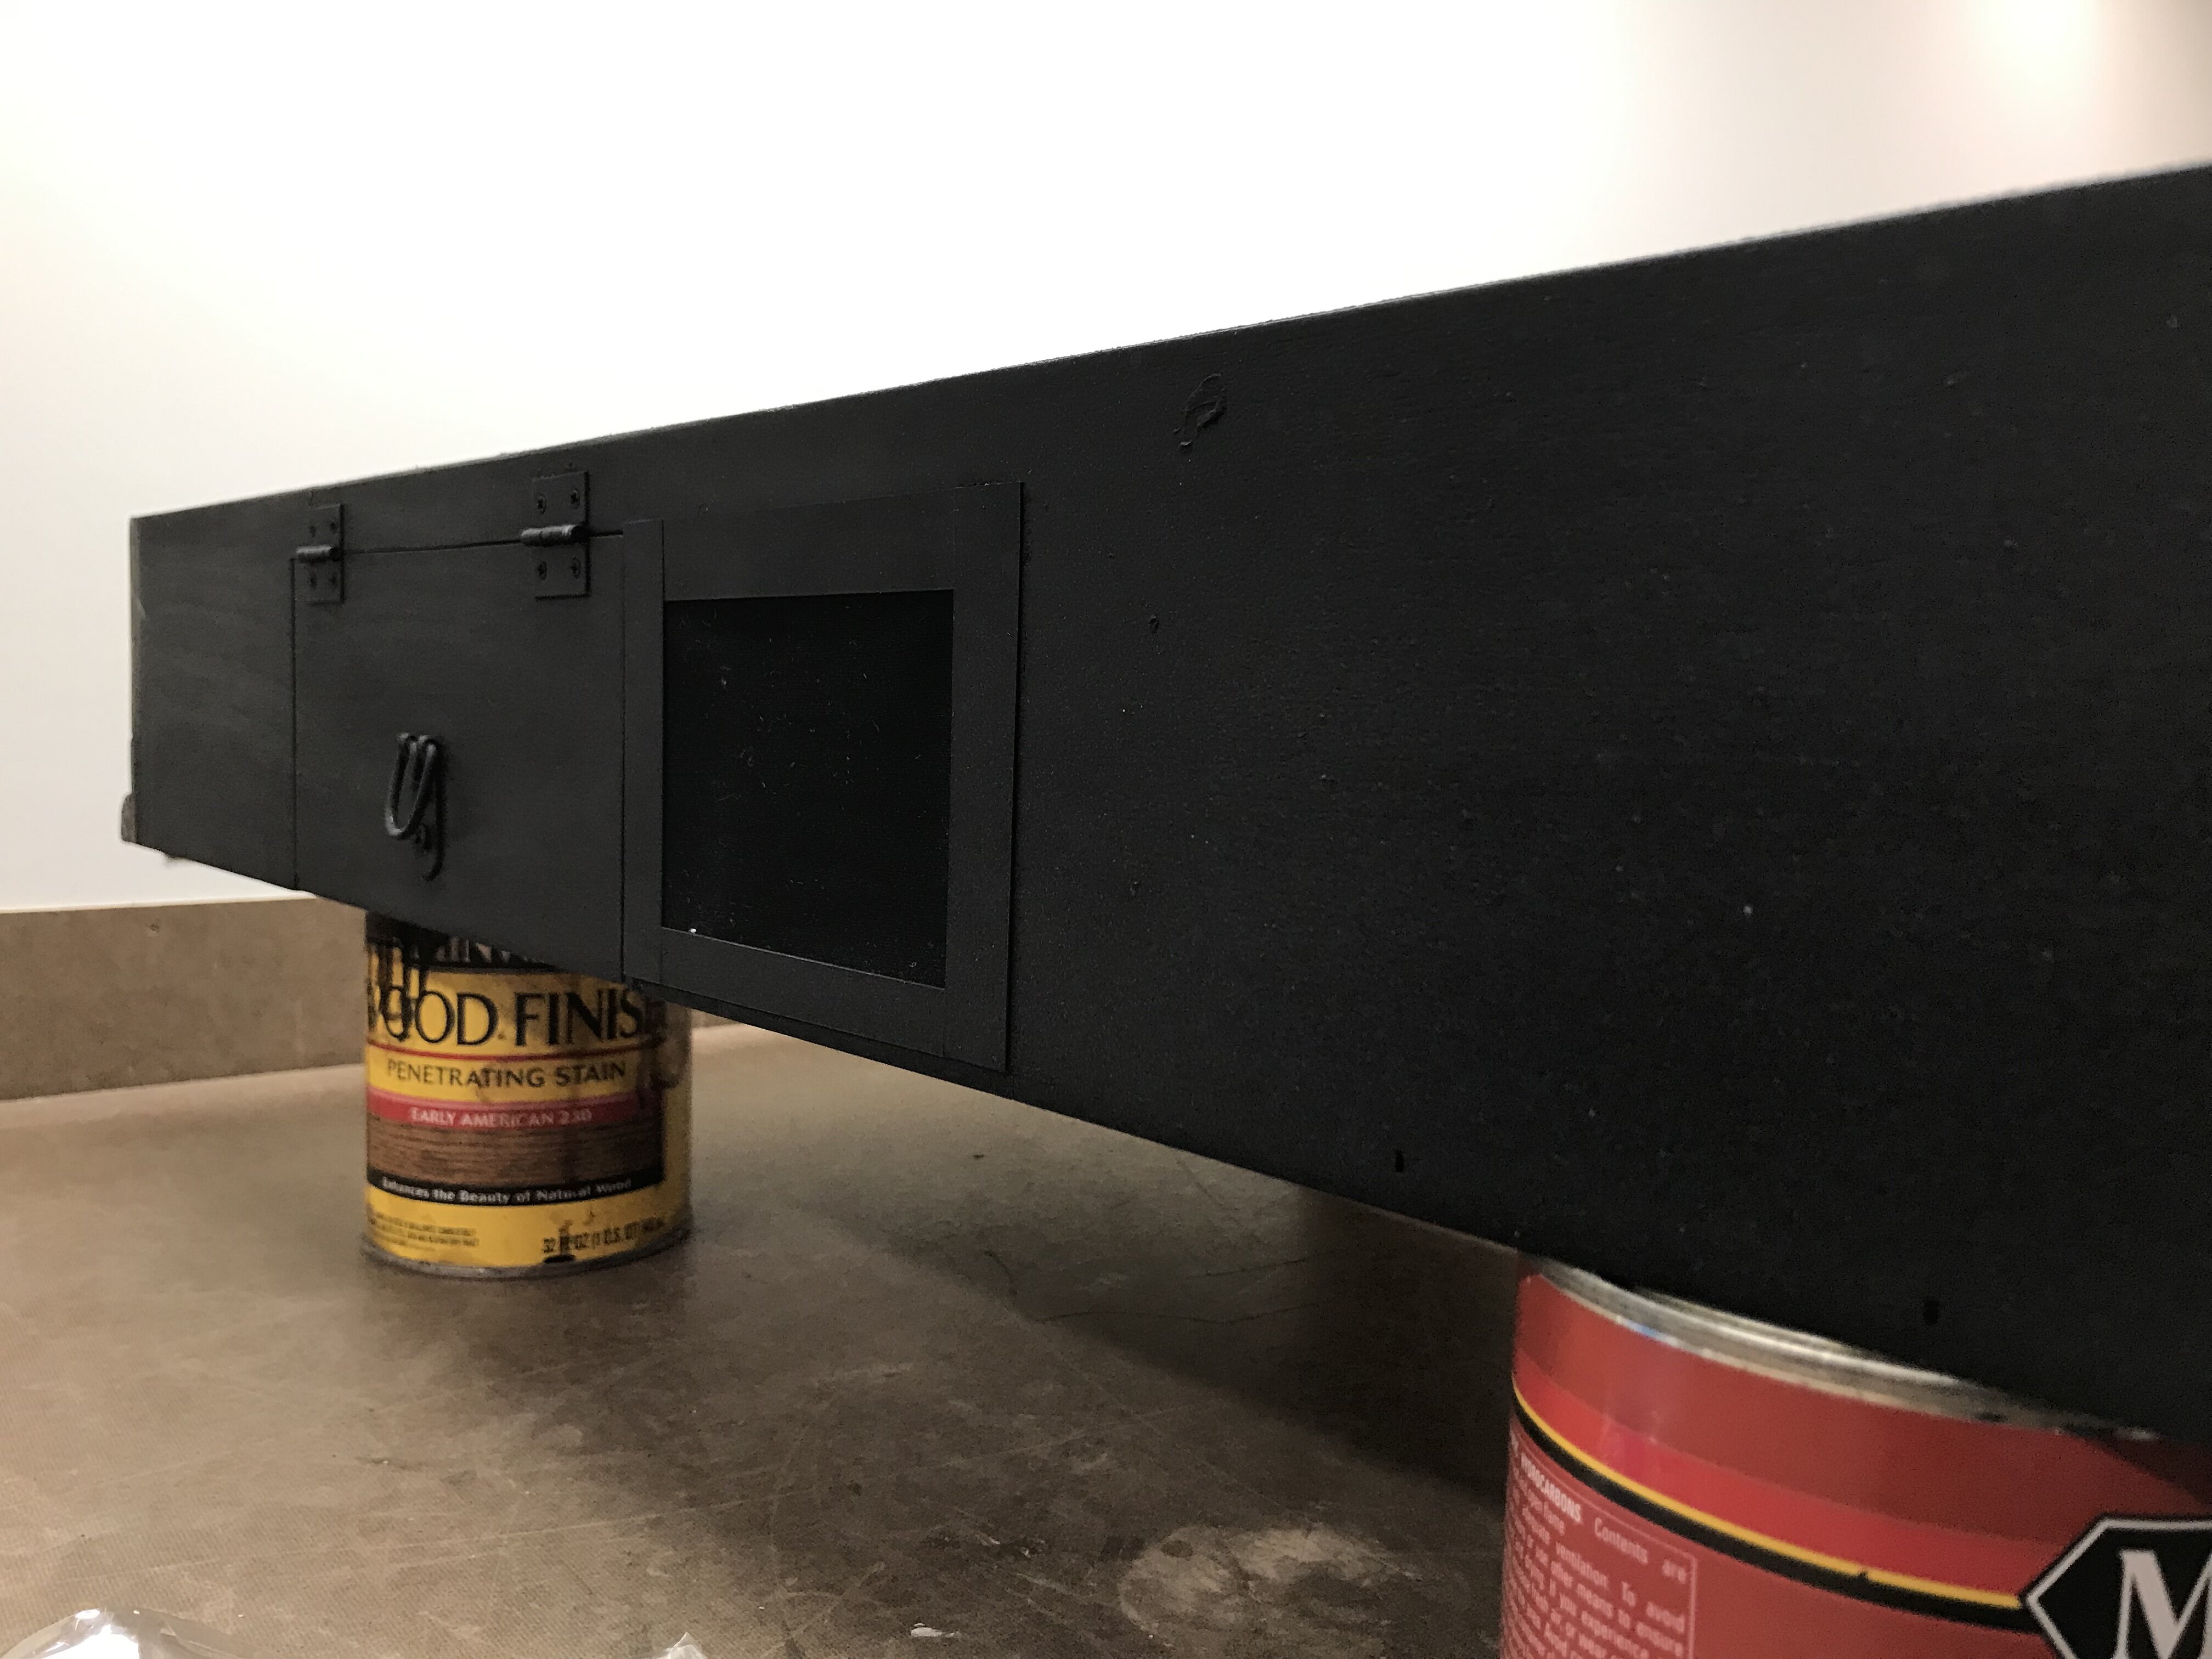
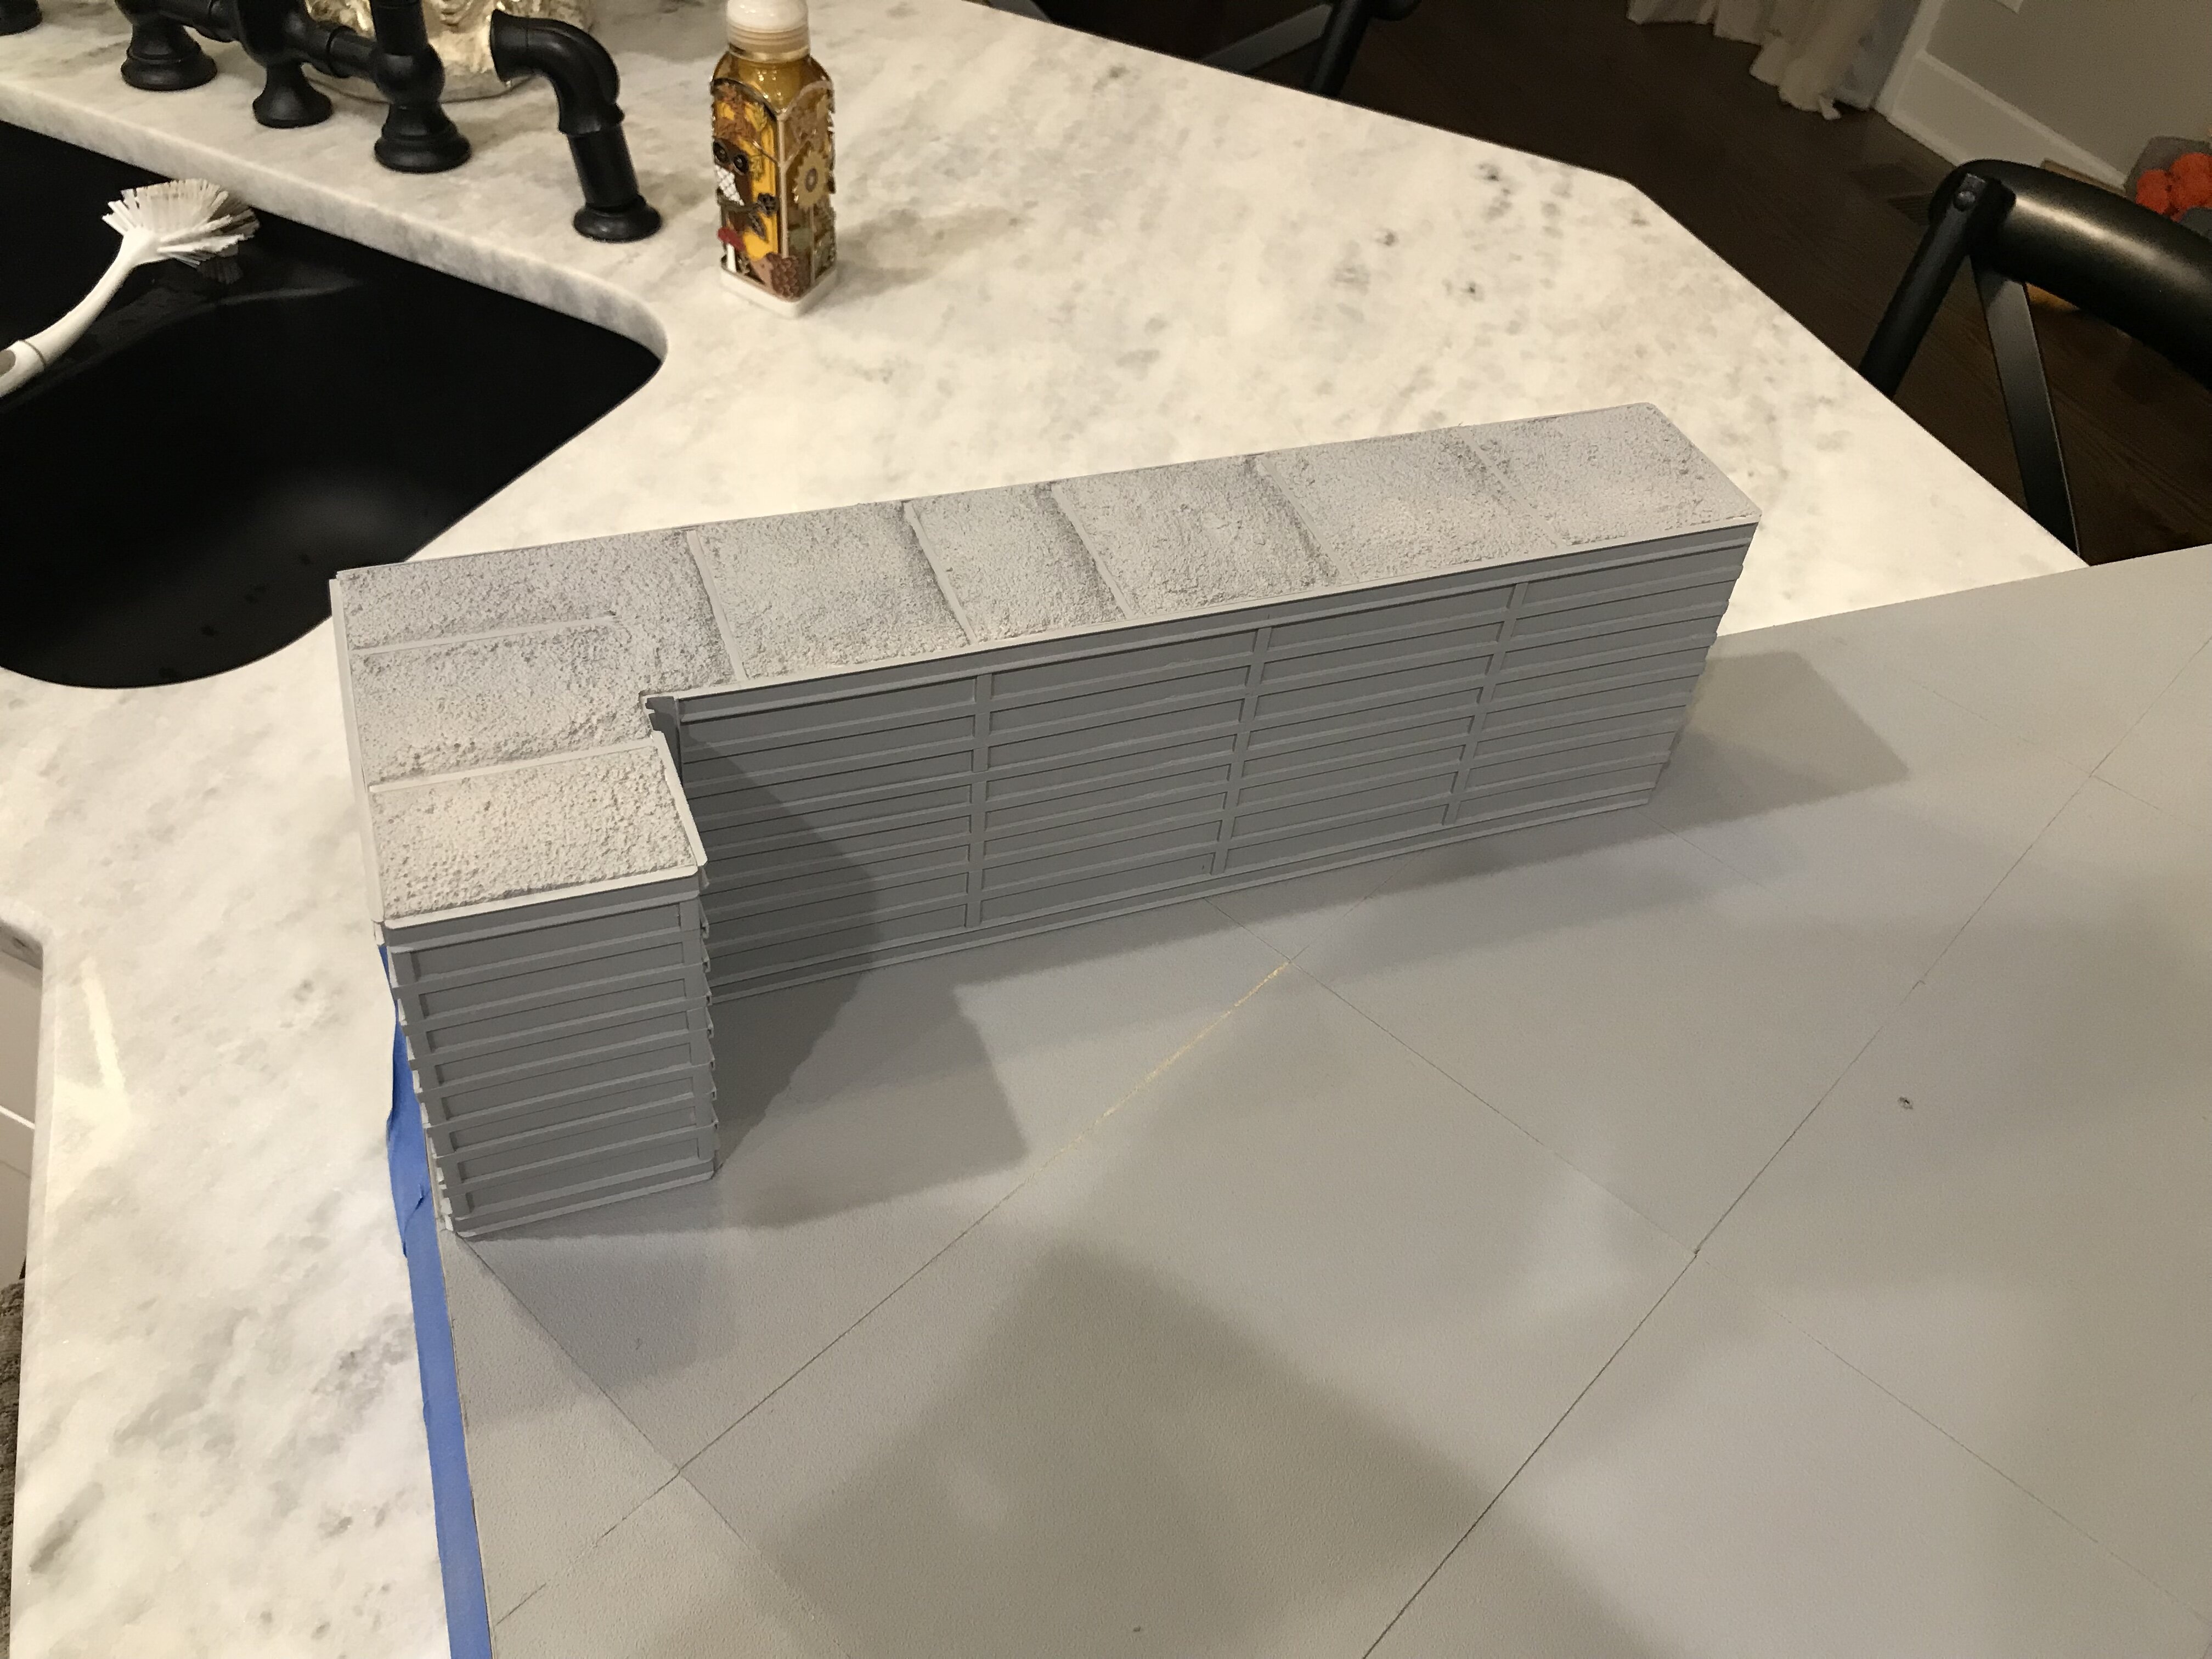
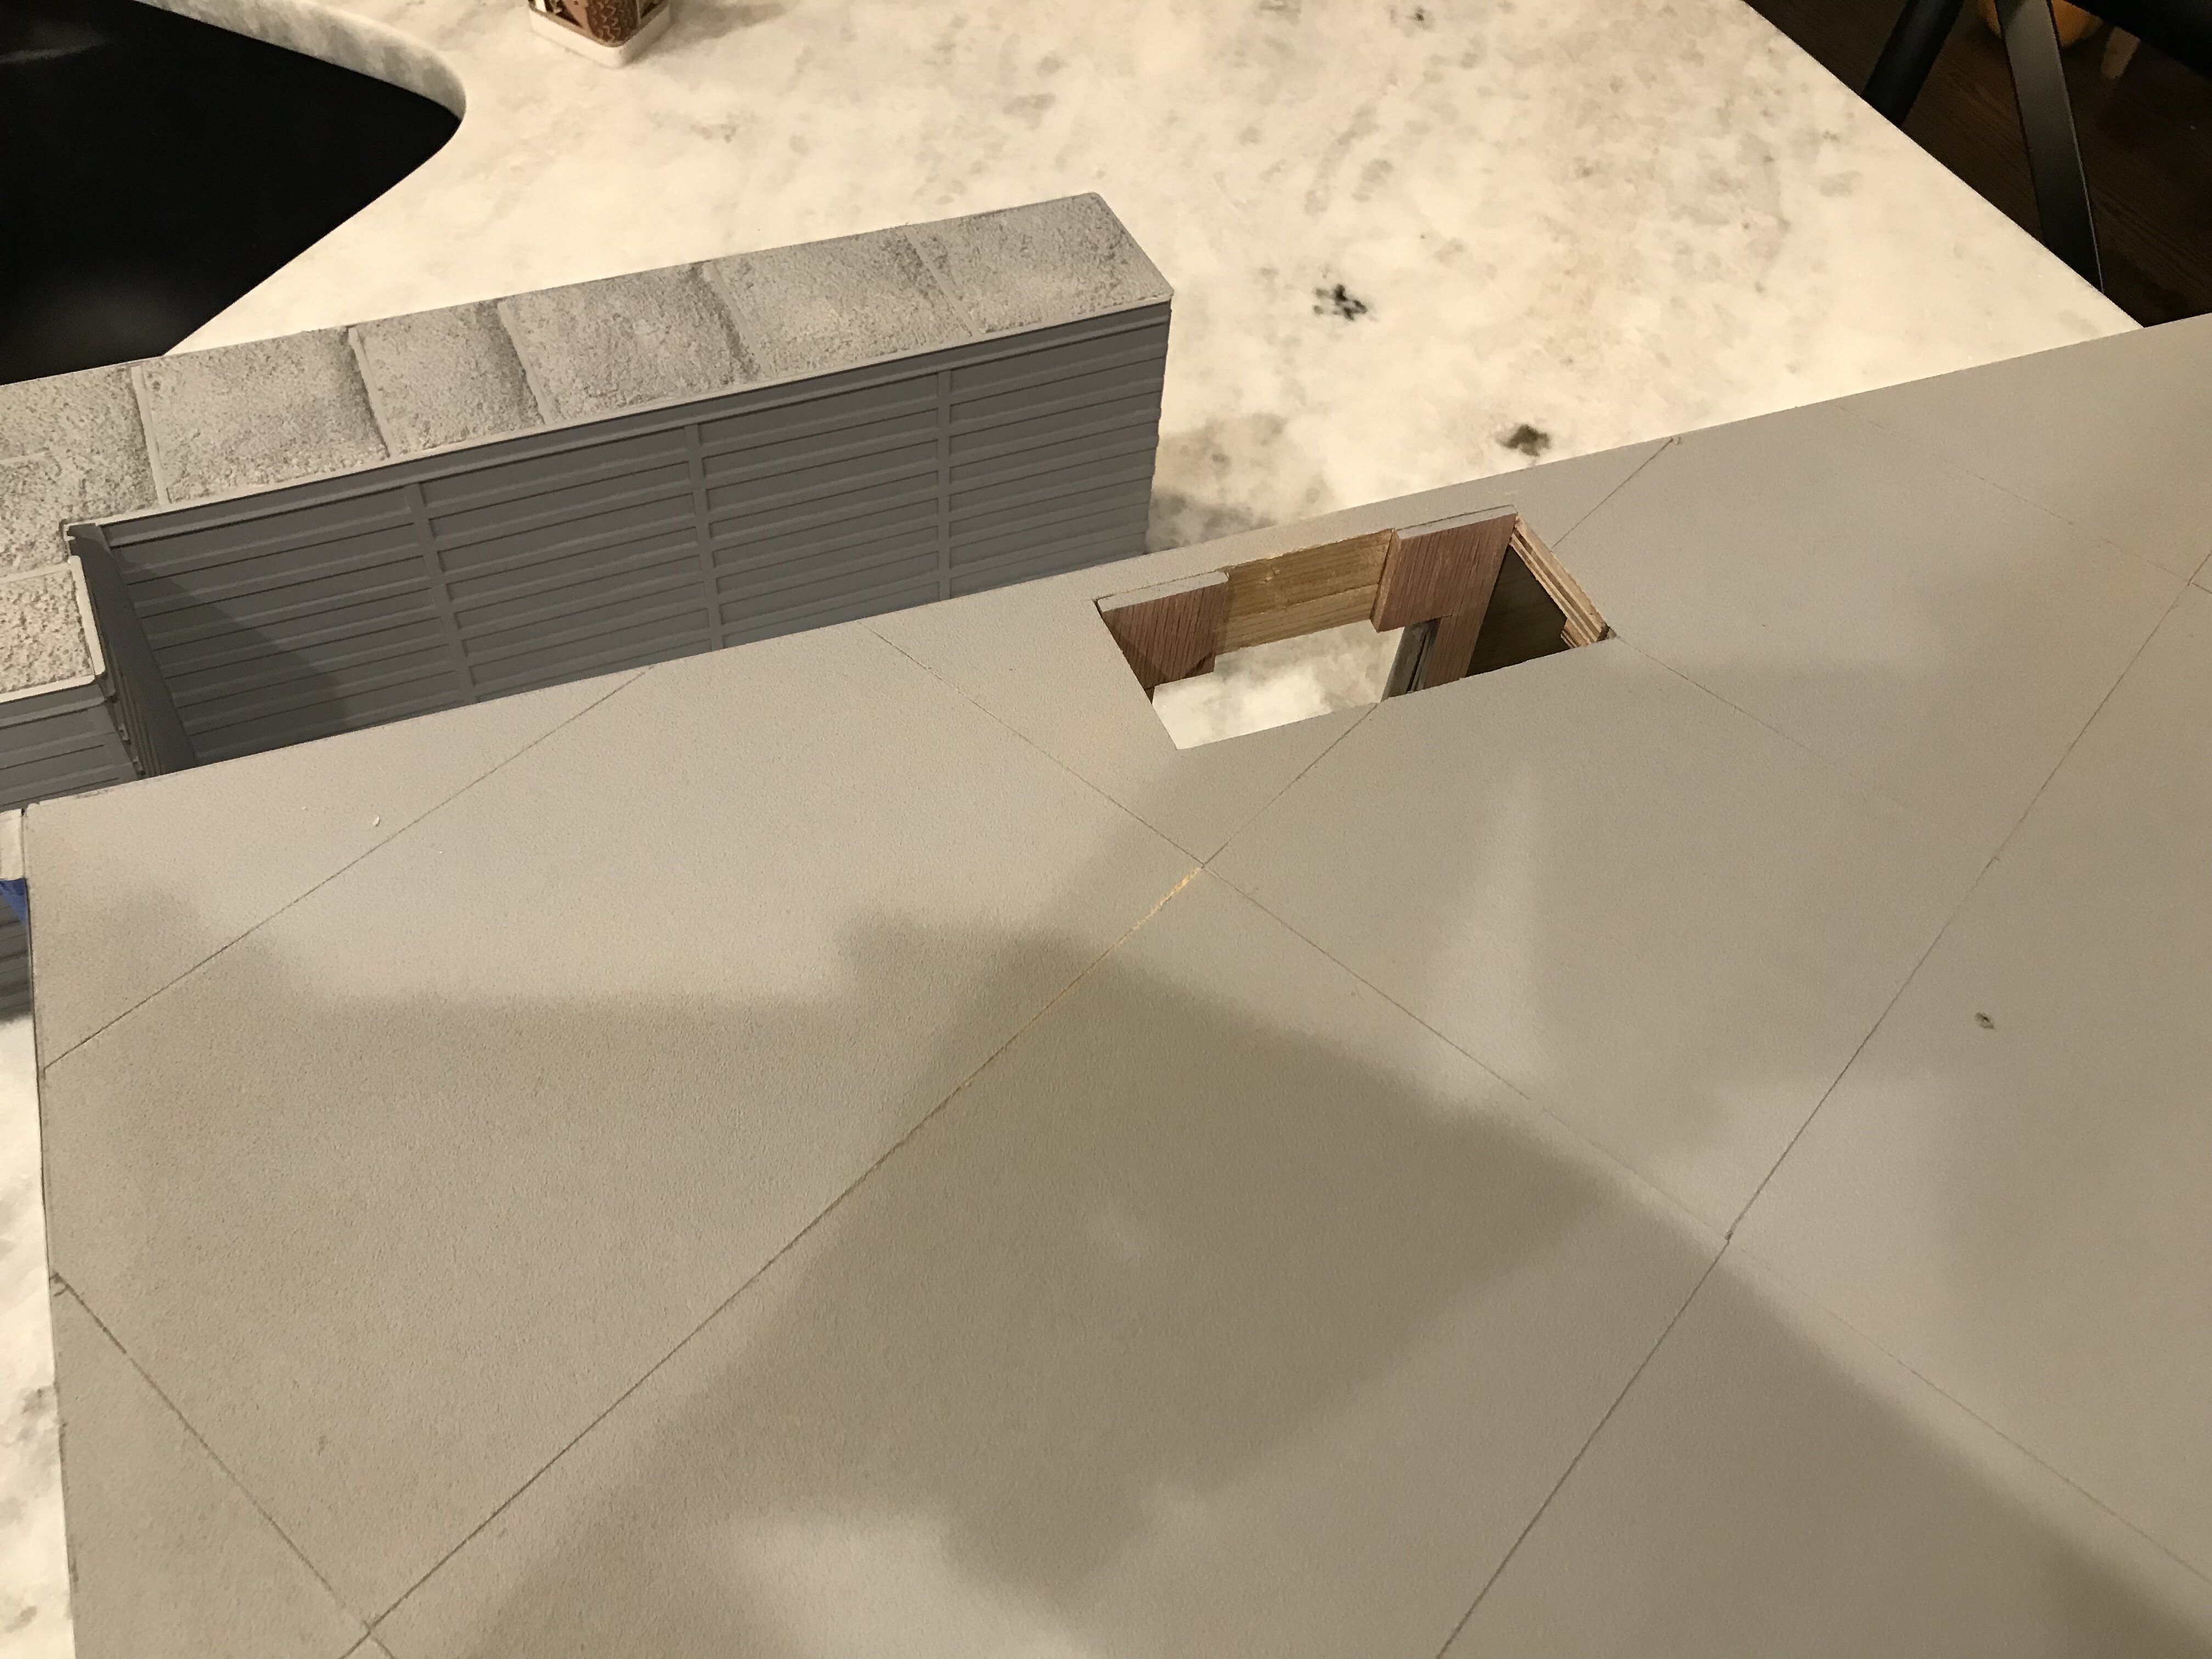
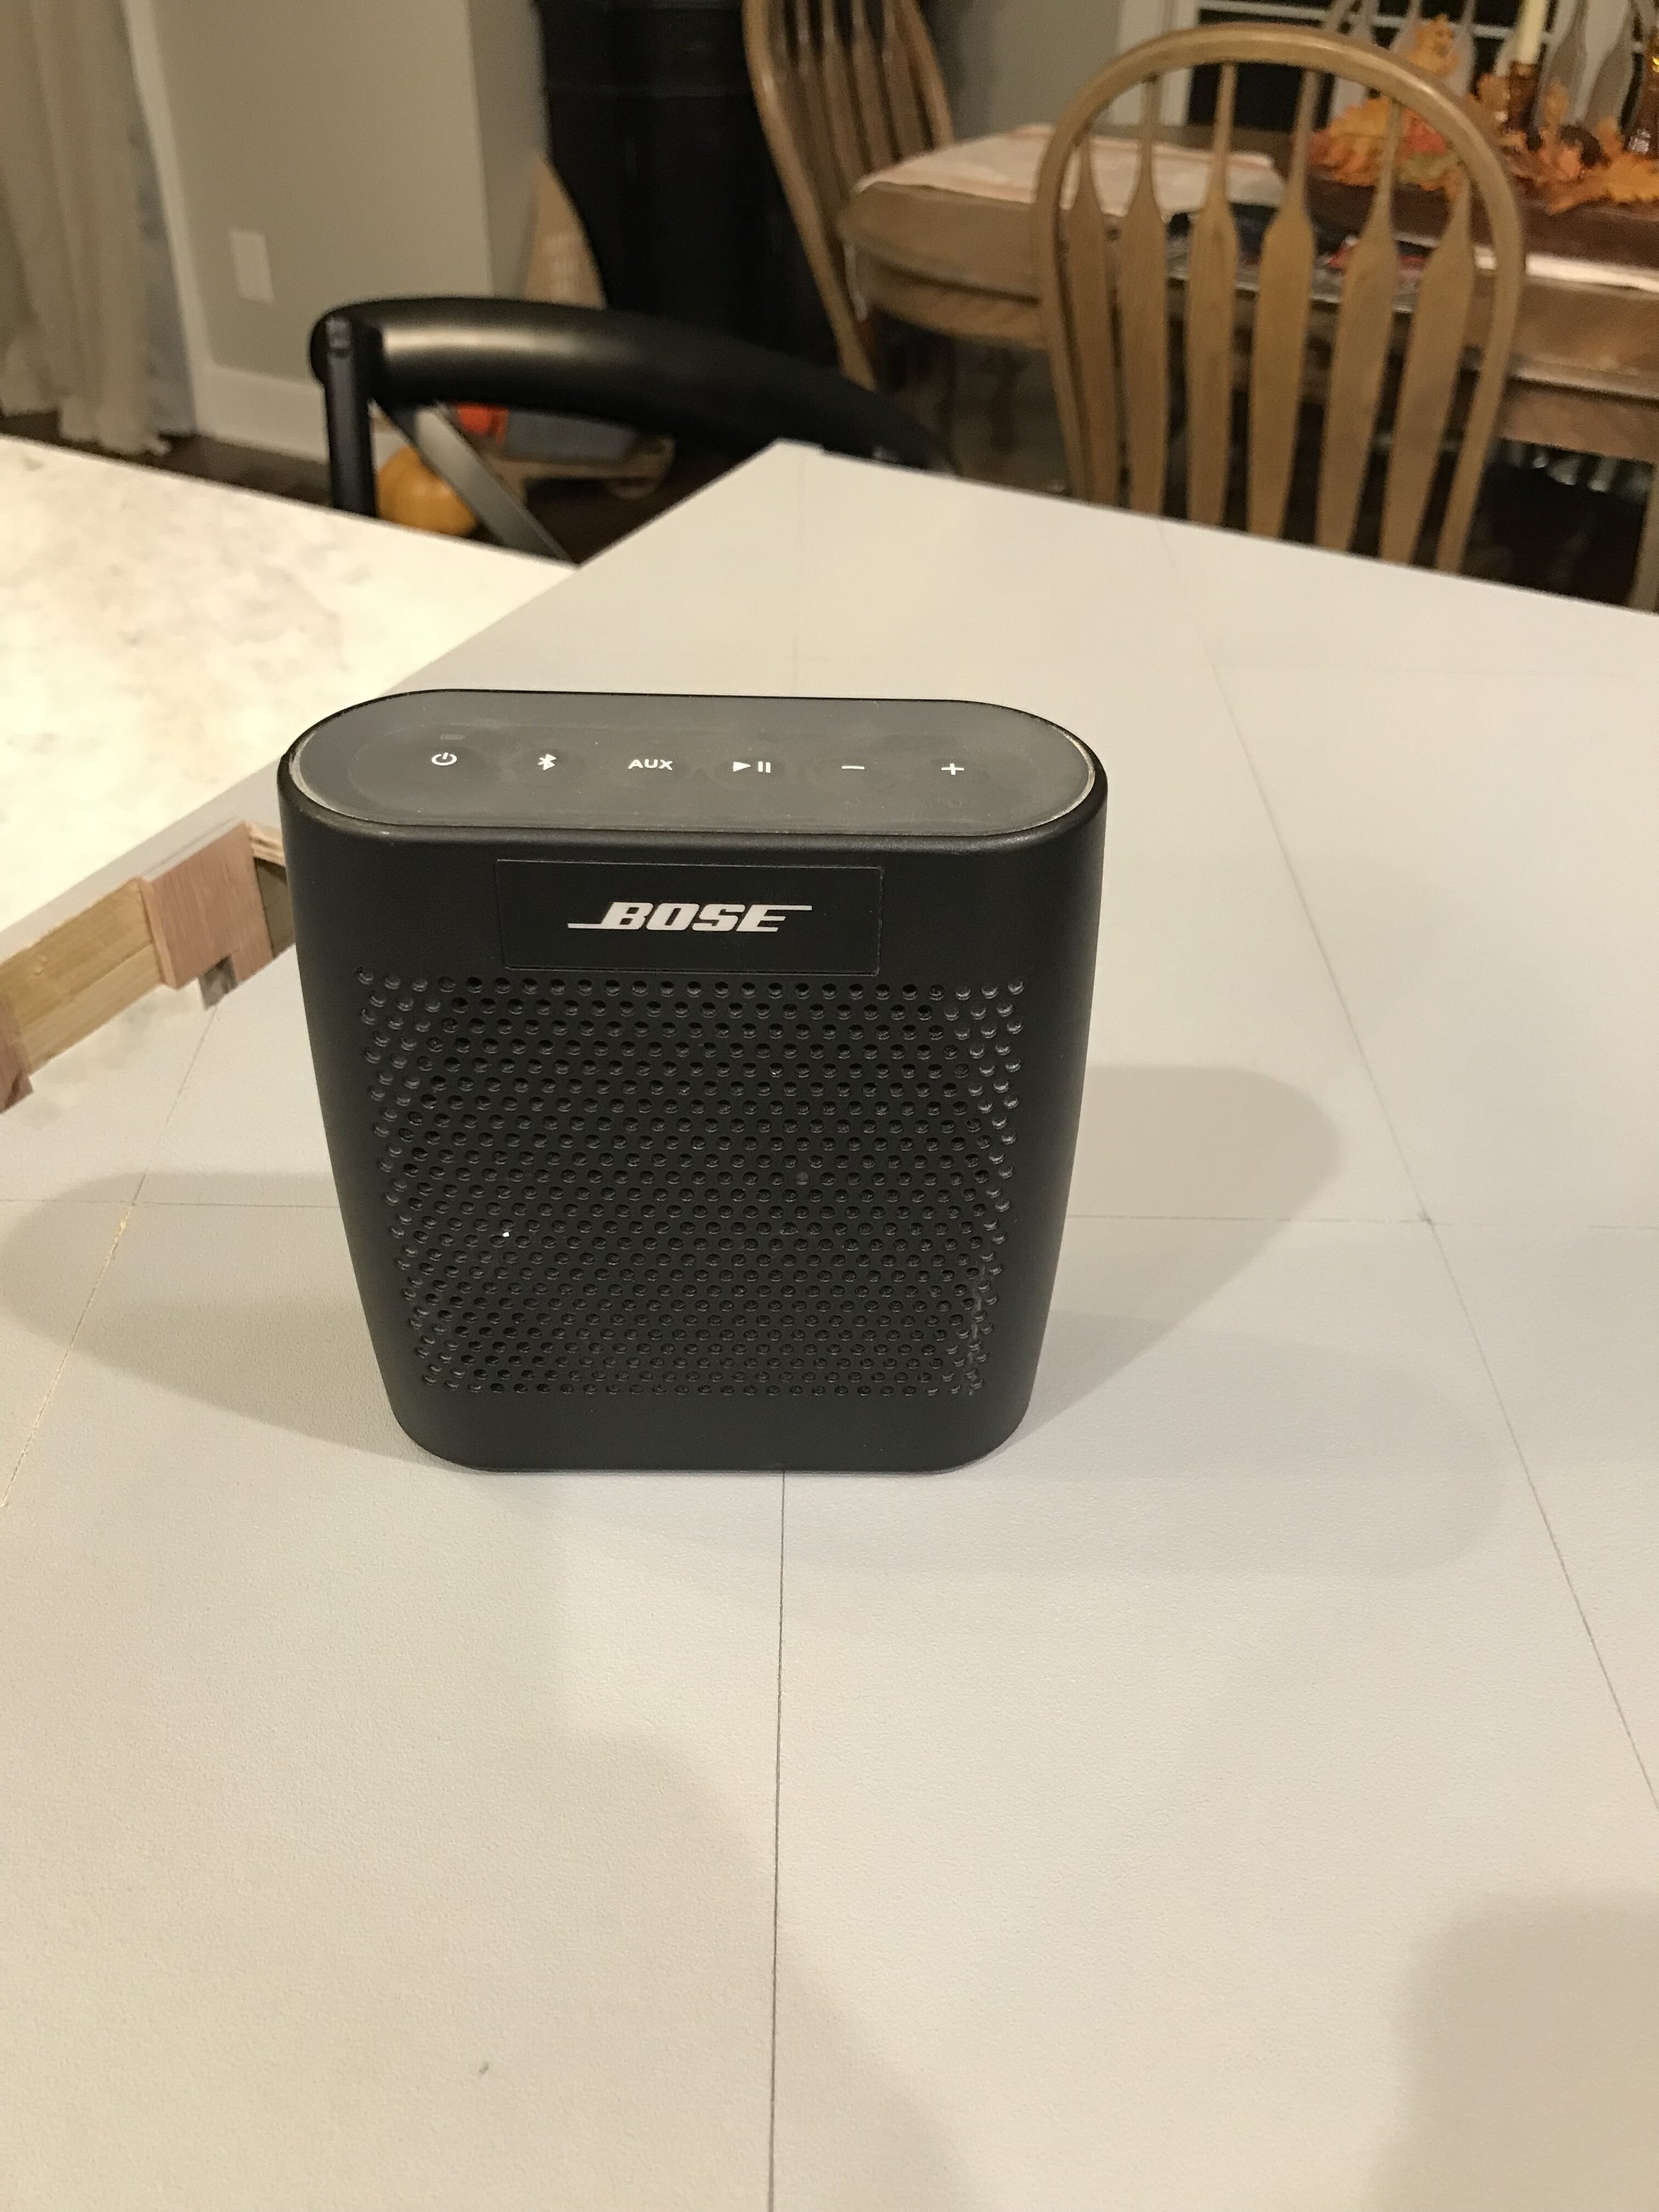
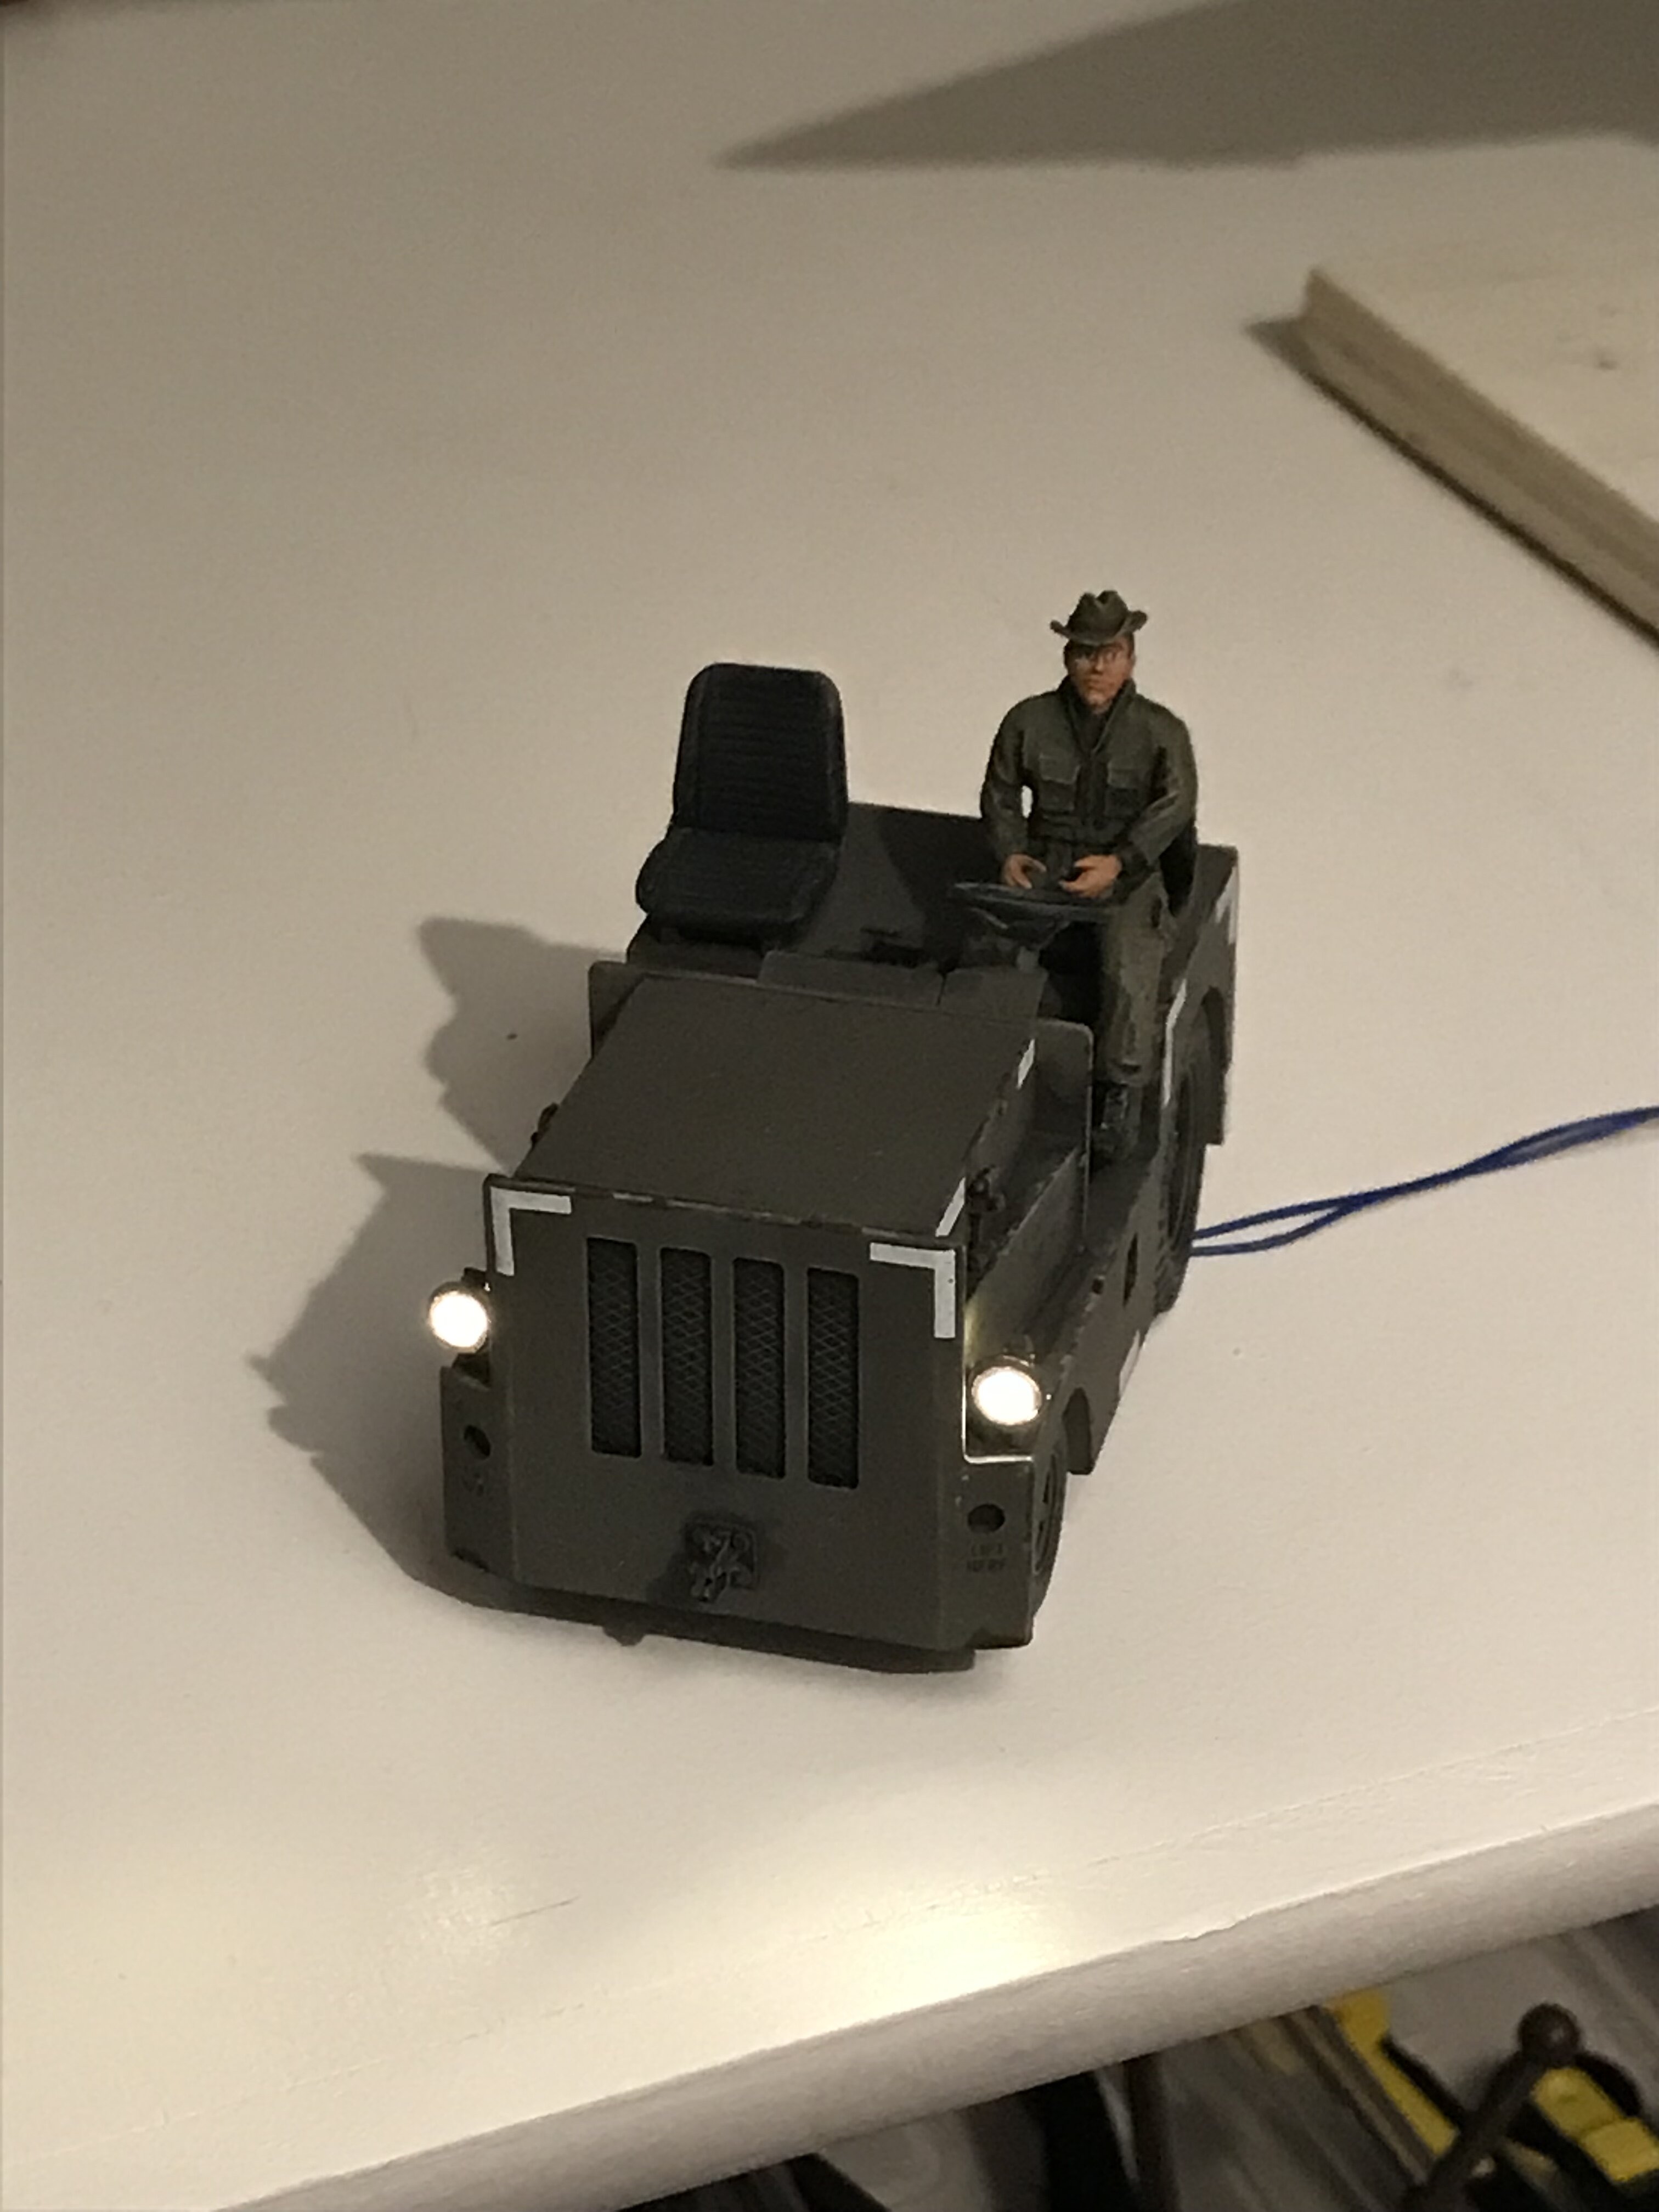
The plane is finished. I started on the base Saturday. Because I had to build a box to hide everything, and it’s pretty big, I used blonde plywood. It’s lighter than most. I used Oak veneer plywood for the sides and front. I used oak shoe mold, and solid strips of oak to add detail. All of it was stained with dark walnut, and currently has one coat of high gloss polyurethane. I’ve covered over the oak with blue painters tape to keep all the paint off of it. i used 120 grit sandpaper to simulate concrete. I used Evergreen plastic to build a revetment wall. Because I needed to hide the Bose speaker, I had to build the wall just a little bit thicker to cover it. I want to easily be able to remove the Bose speaker as simply lifting up the wall. I also didn’t want to make the base any higher. This seem to work out just fineThe aircraft tug is from Aerobonus. Chris
-
I went to the 2019 Nats in Chattanooga. Took my Trumpeter 1/32nd scale SU-27. The base that it sit on measures 24x25. When I got to the table, a judge said that the base was to big. He asked me if I had seen the memo stating this. I said no. He asked me if I could remove the plane from the base, and store the base under the table. I told him that the plane was glued to the base with superglue. To an extent, I can understand that big bases do take up display space, but when a modeler builds a base, like mine, a simple taxiway, removing the base takes away from the overall build. To make matters worse, after judging was complete, I noticed my base was turned 90 degrees from the way I originally had put it on the table. Before I even moved it, I noticed the the front landing gear was crooked. Someone had completely broken the strut out of the gear well. No note was left to explain what it happened. I guess I needed to put a “Model glued to base” sign. It was odd that I had told the judge in the aircraft section that the model was glued to the base, yet someone still tried to take it off anyways. Chris
-
Dave, it’s a really nice build. I know you think the blue may be too dark, and it might be,but it turned out fantastic. Chris
-
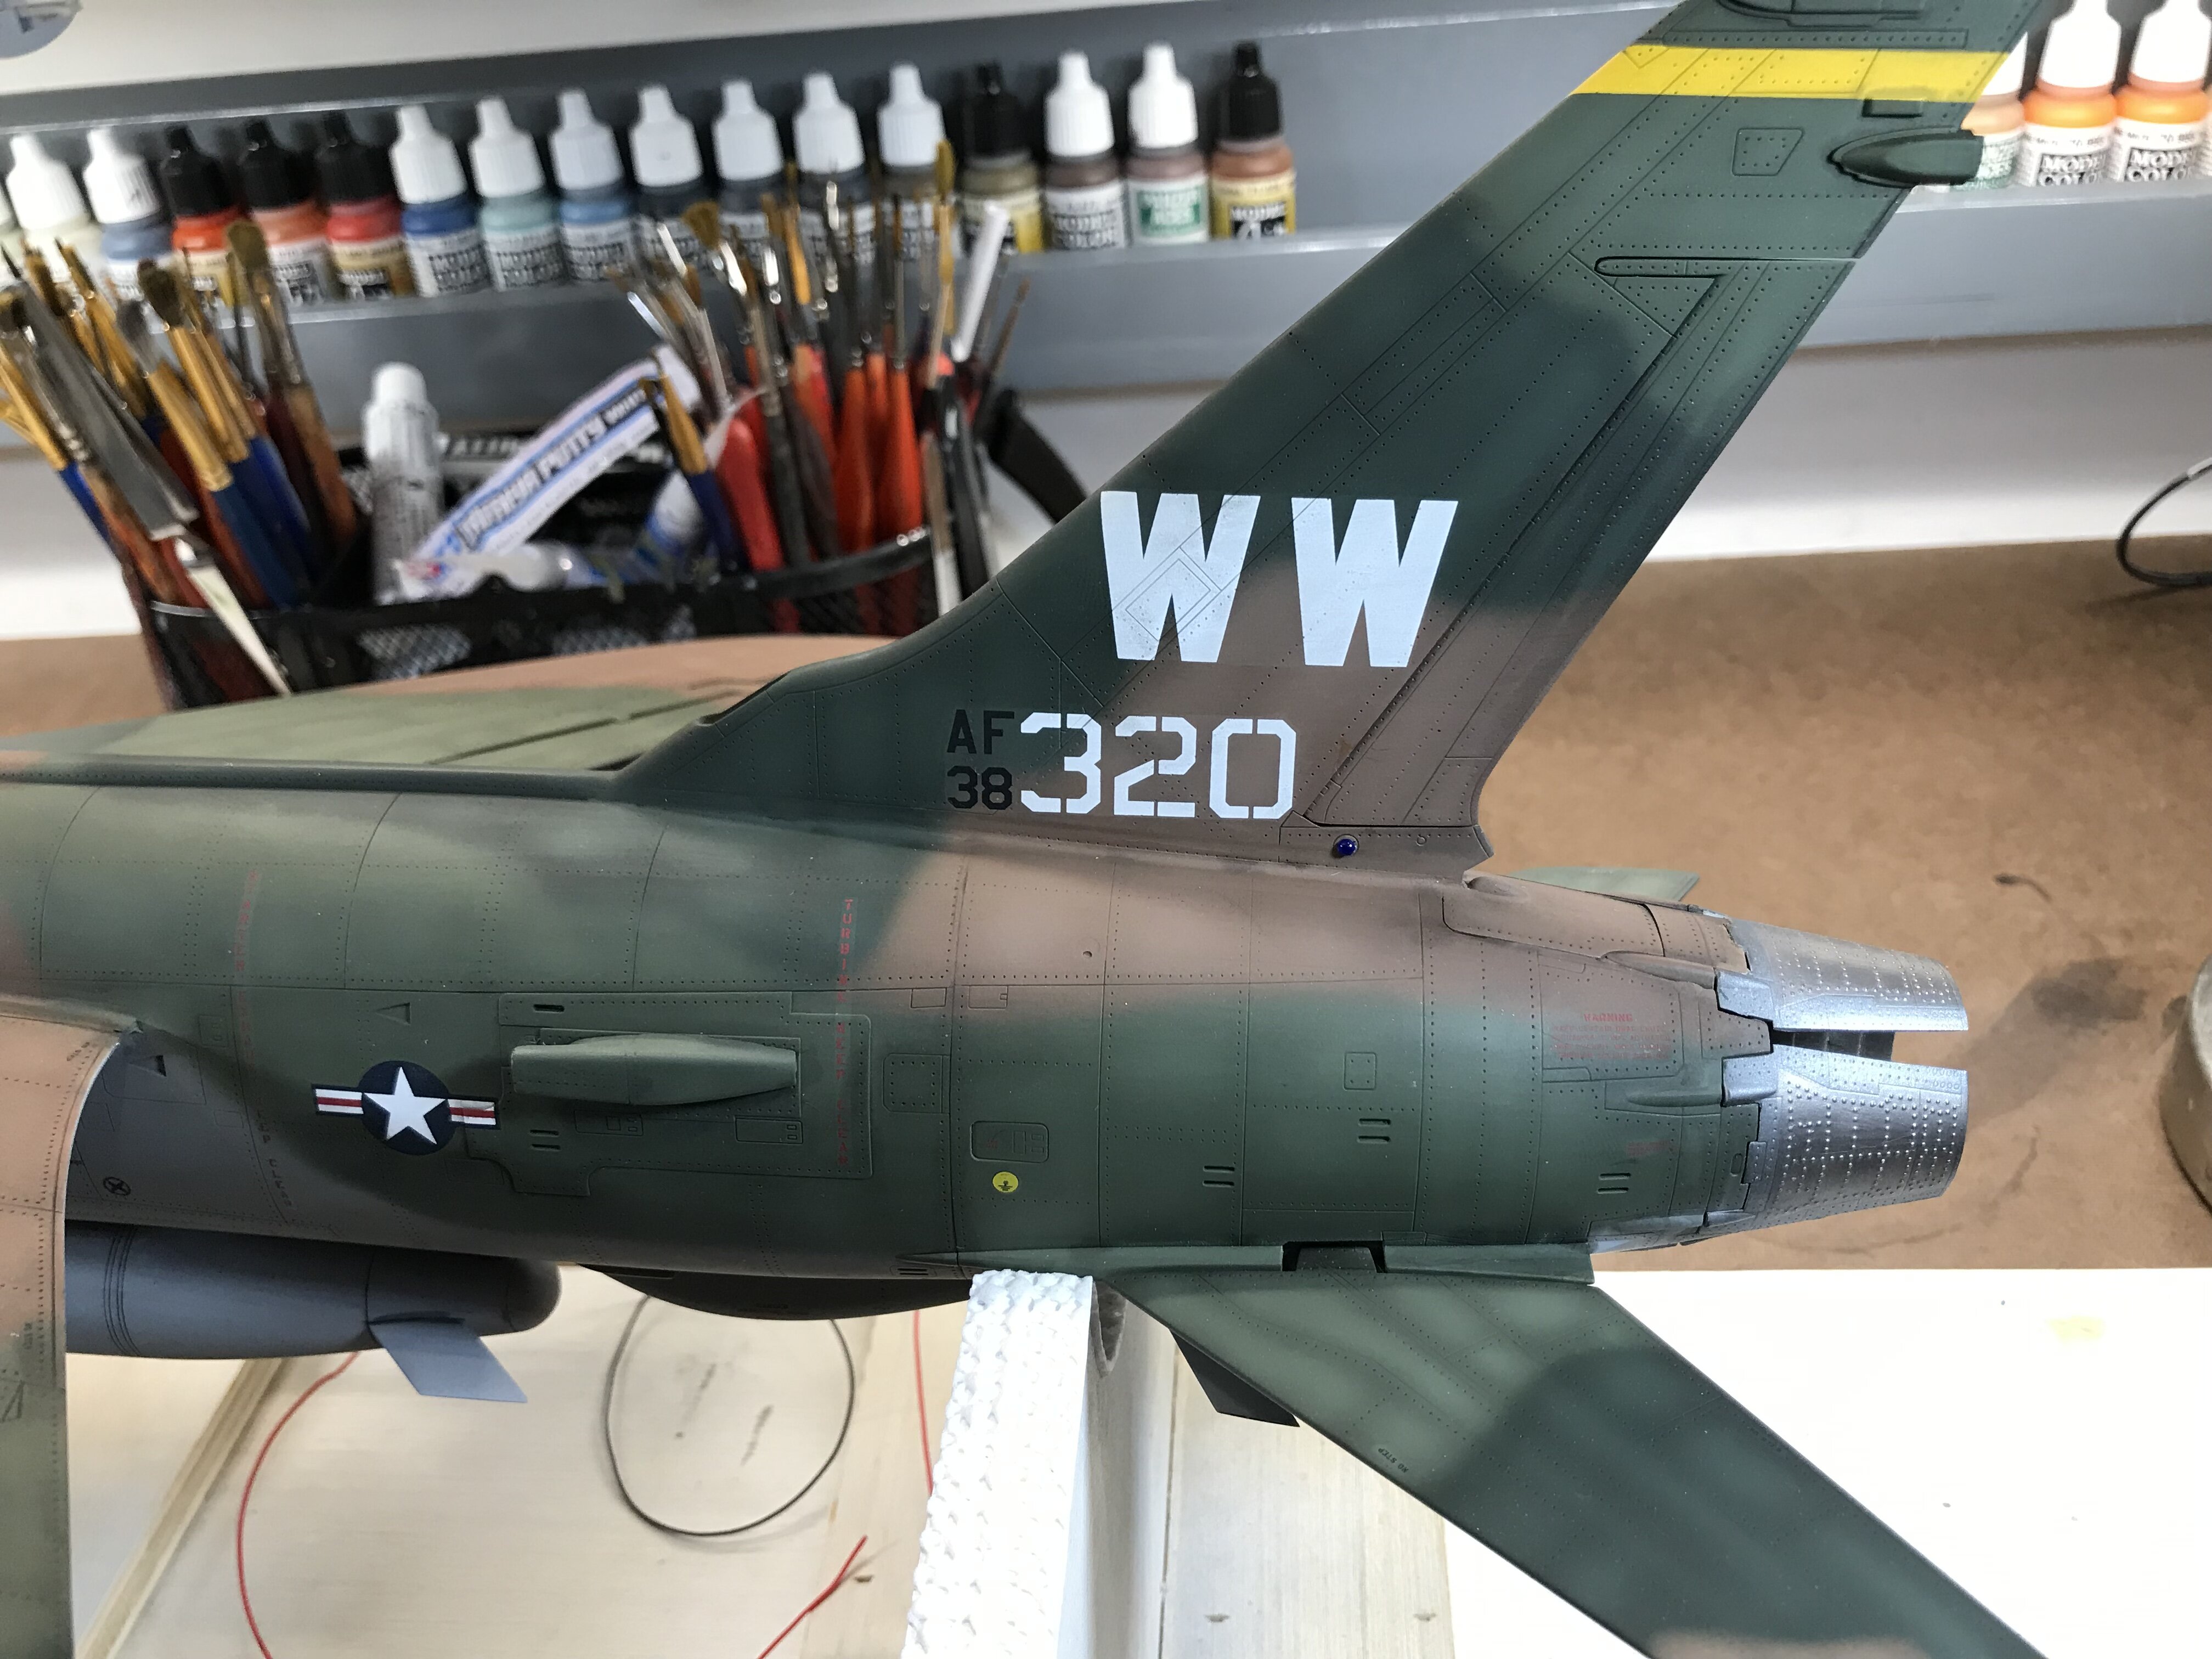
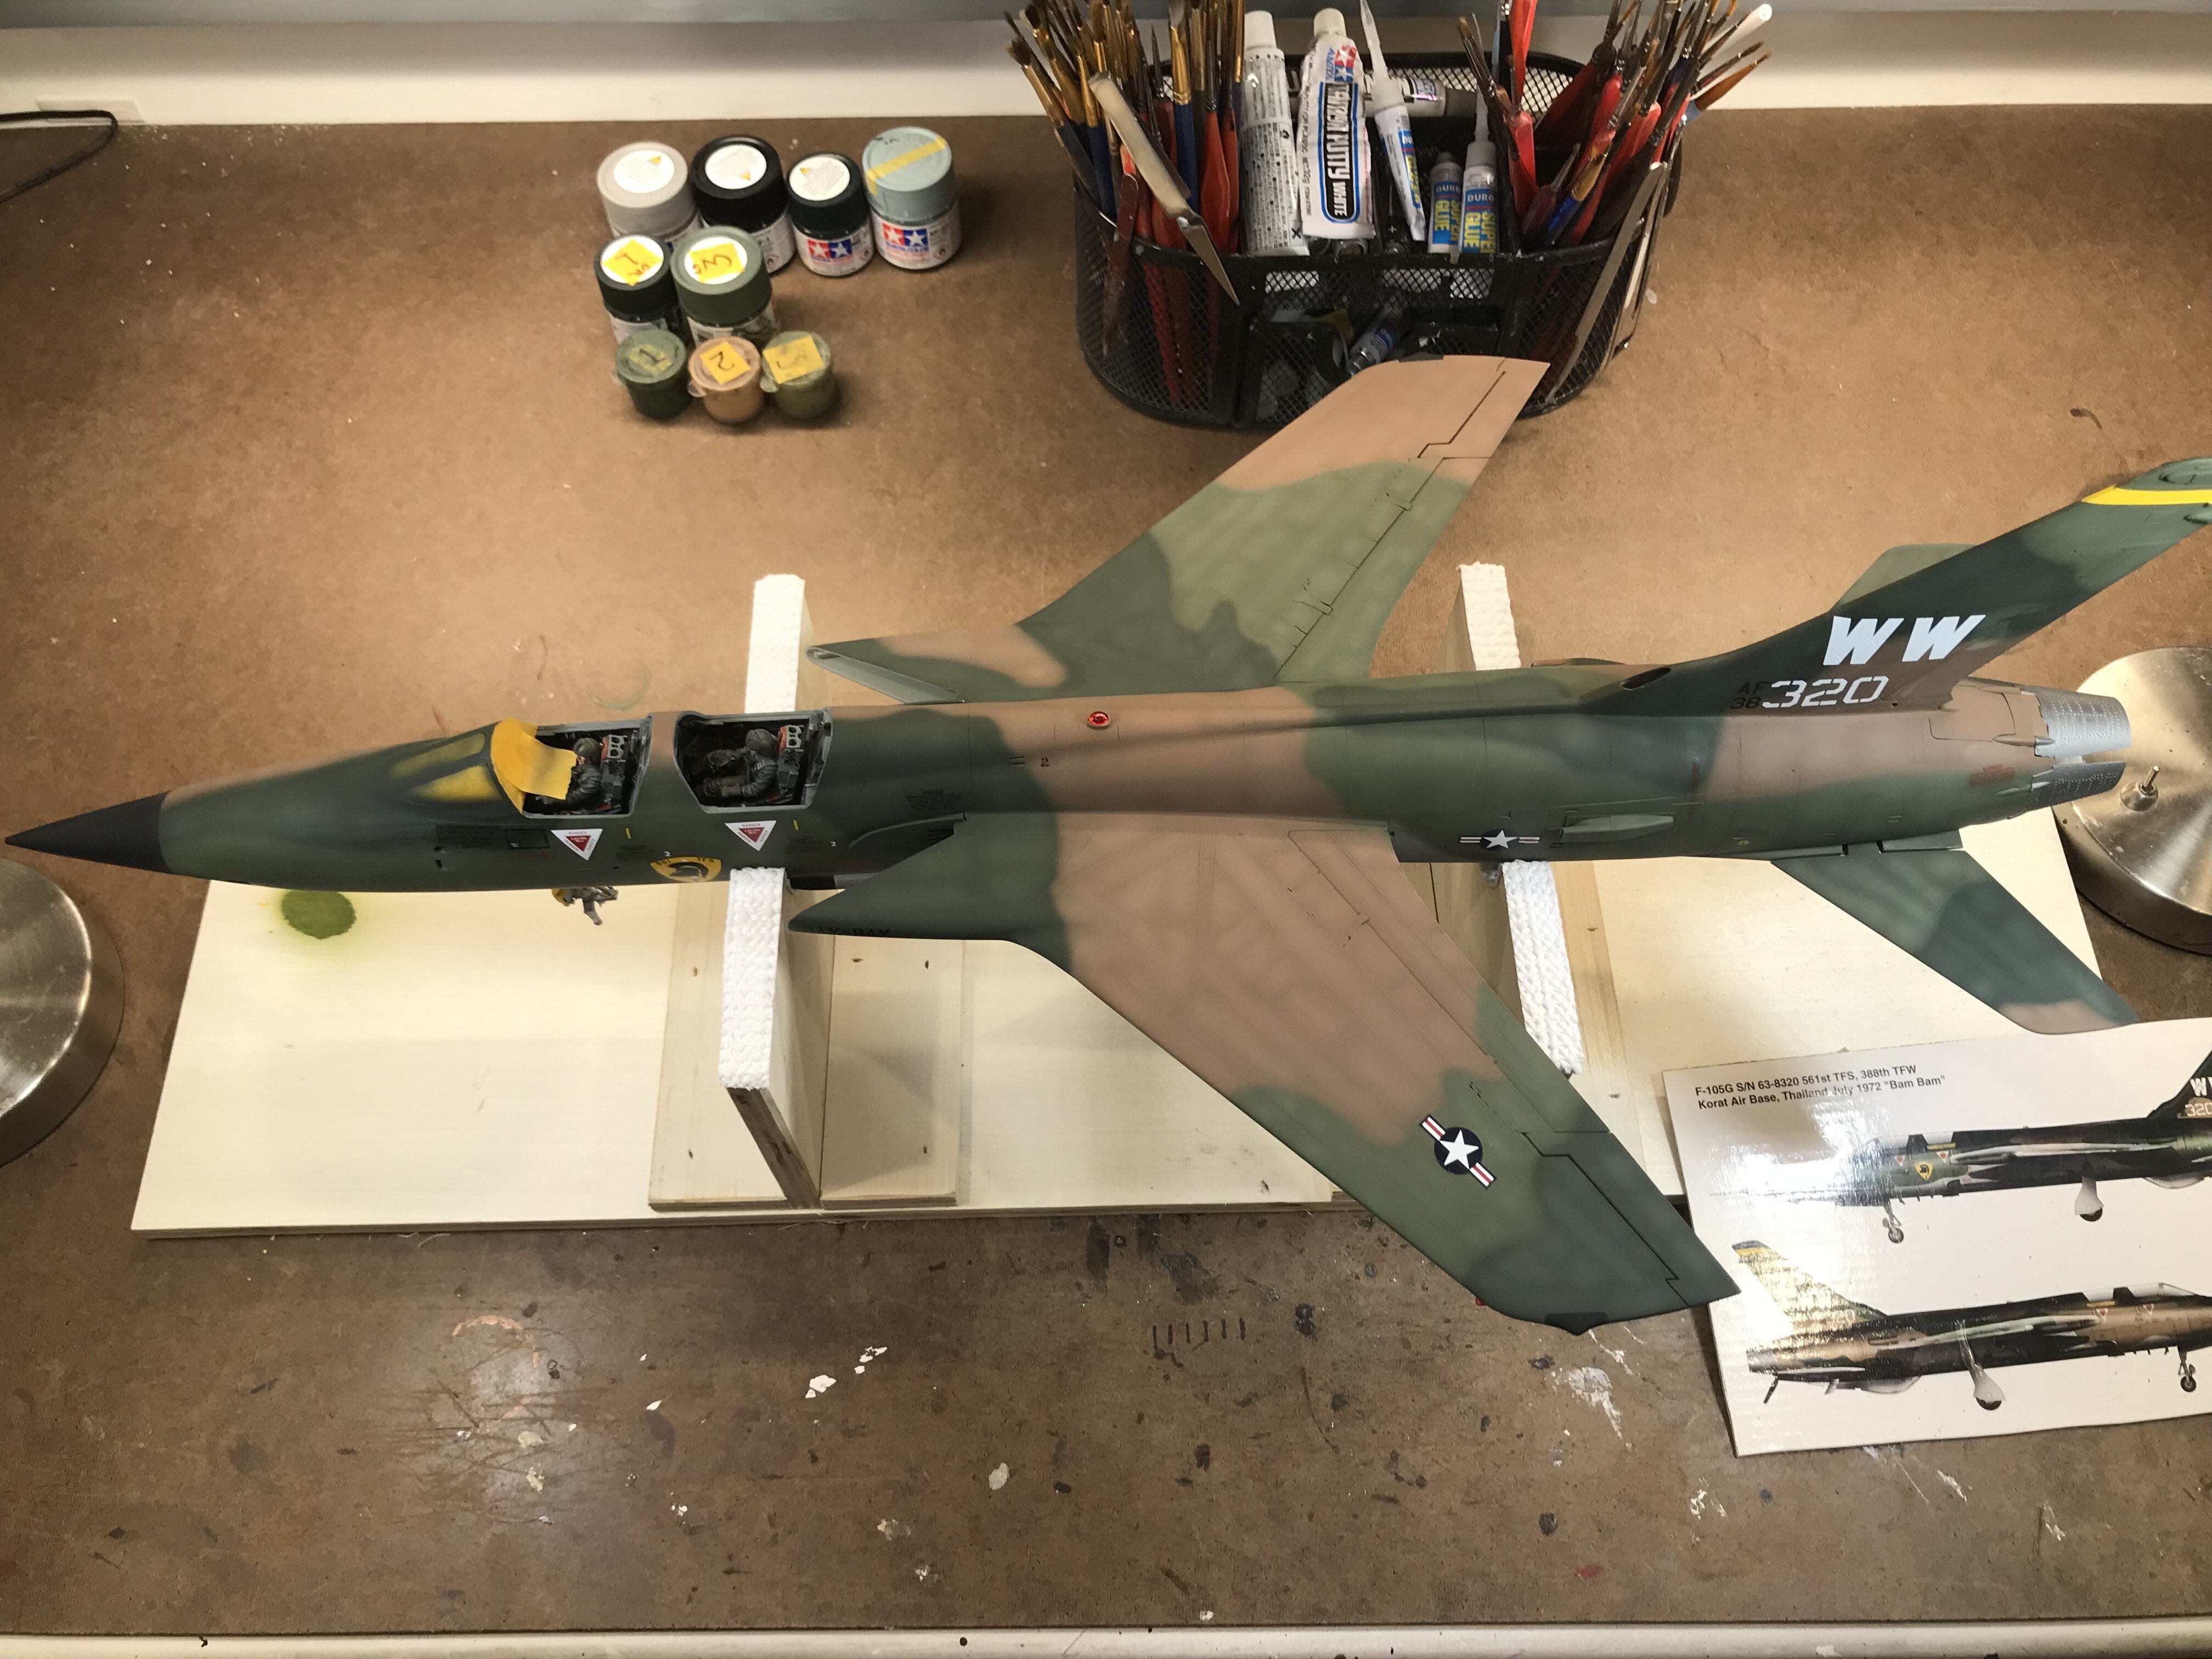
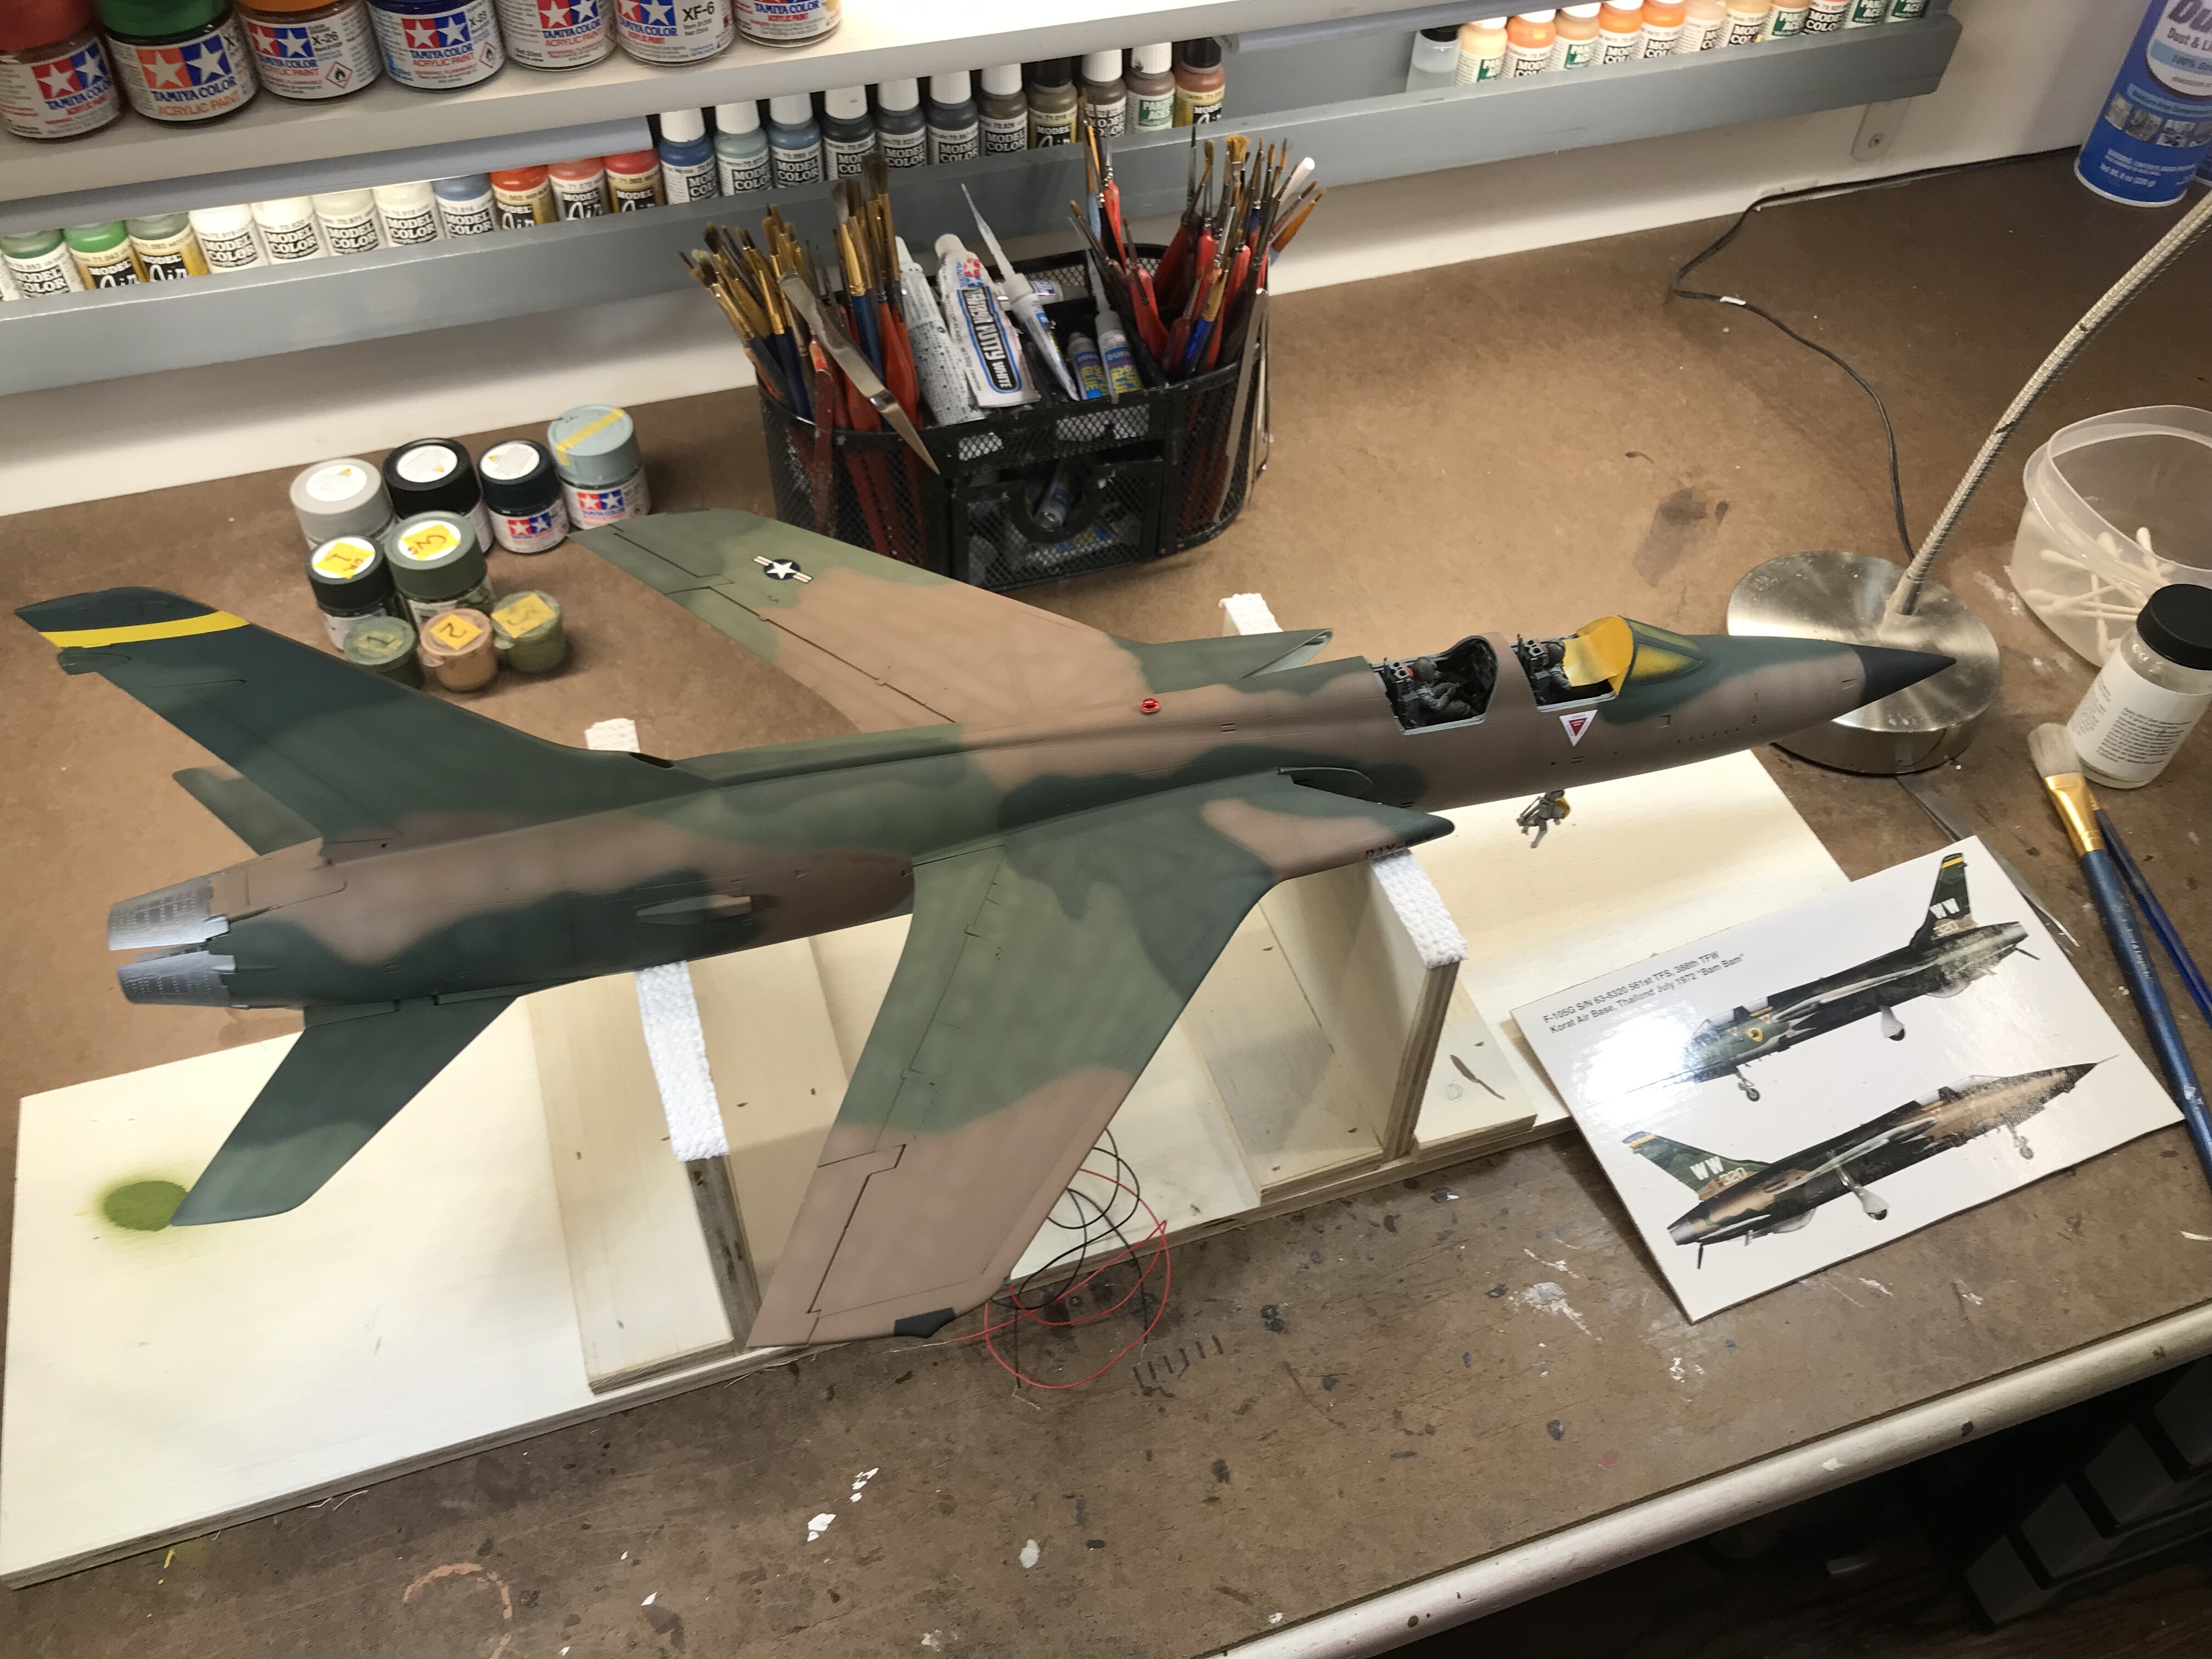
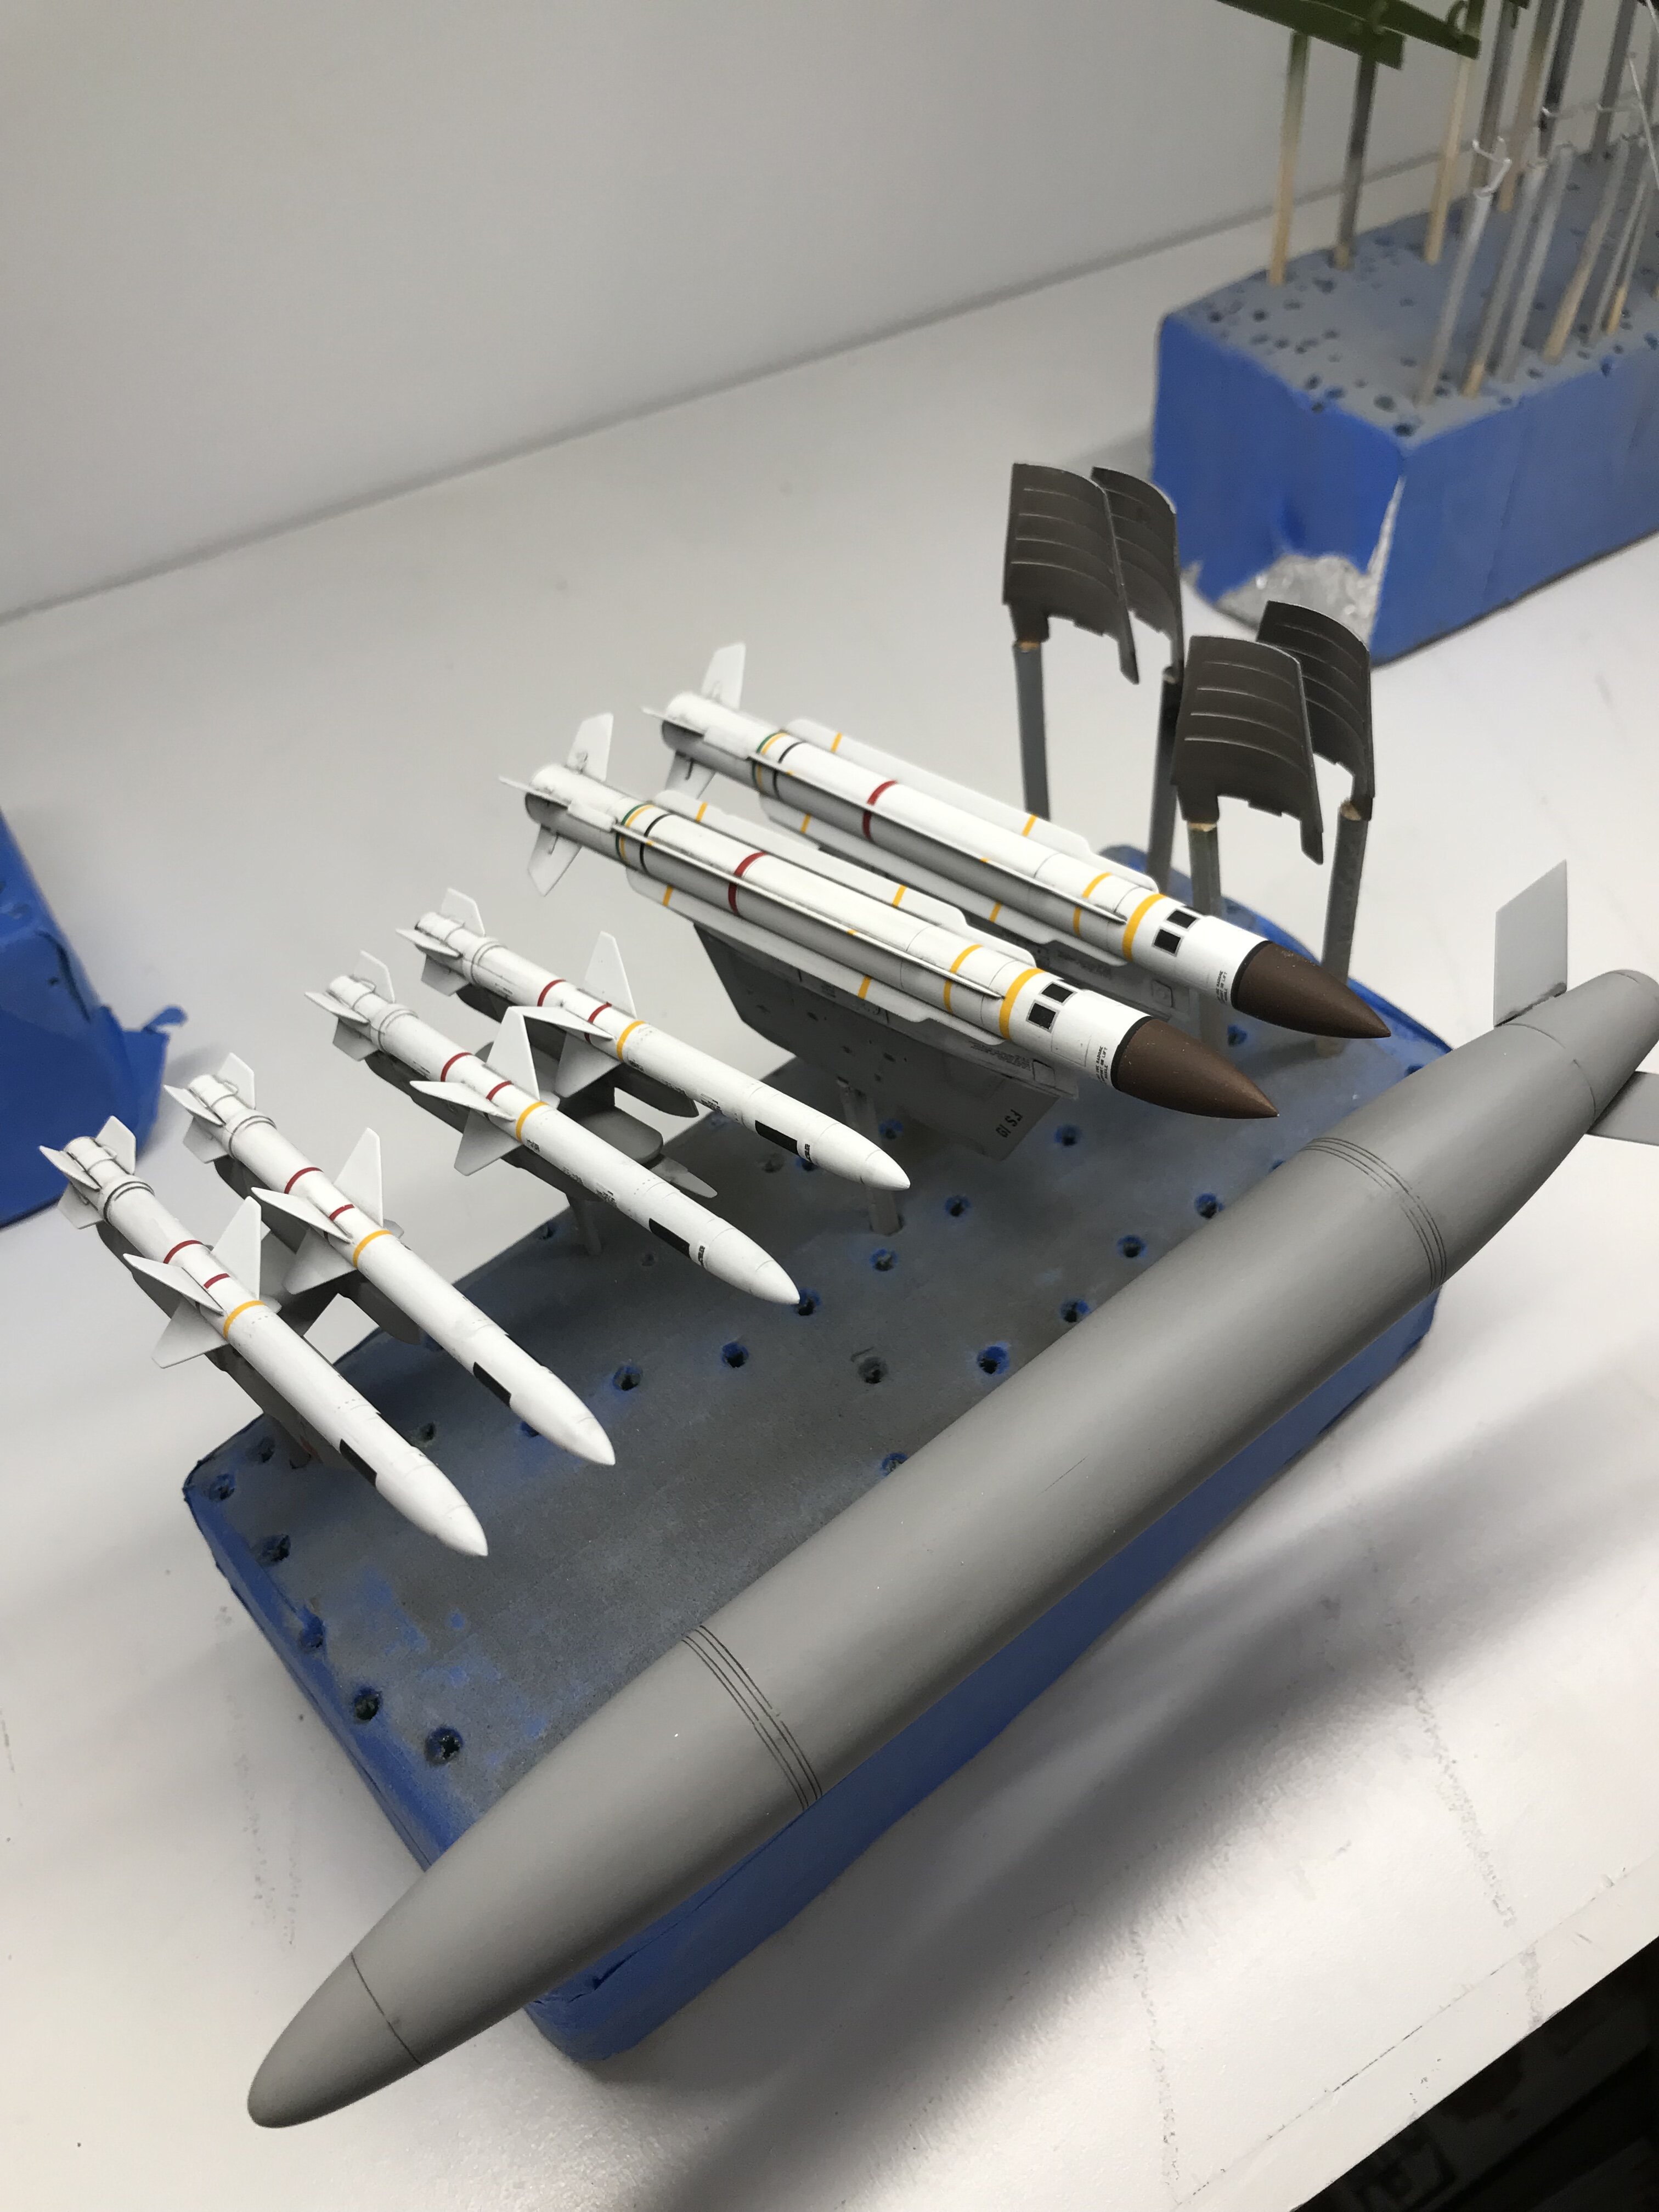
Well, I can see a light at the end of the tunnel. Decals on, and sealed. I did a pin wash on all the panel lines, and rivets. I used Tamiya accent wash. After it dried, I took a clean cotton cloth, dampened with mineral spirits, and wiped the excess wash off in the direction of the airflow. I’m gonna let everything dry really good tonight, then start with some small chipping of the panels, and oil and hydraulic streaks. I picked up an Air Force aircraft tractor from Aero bonus. After it complete, then I will start on the base. chris
-
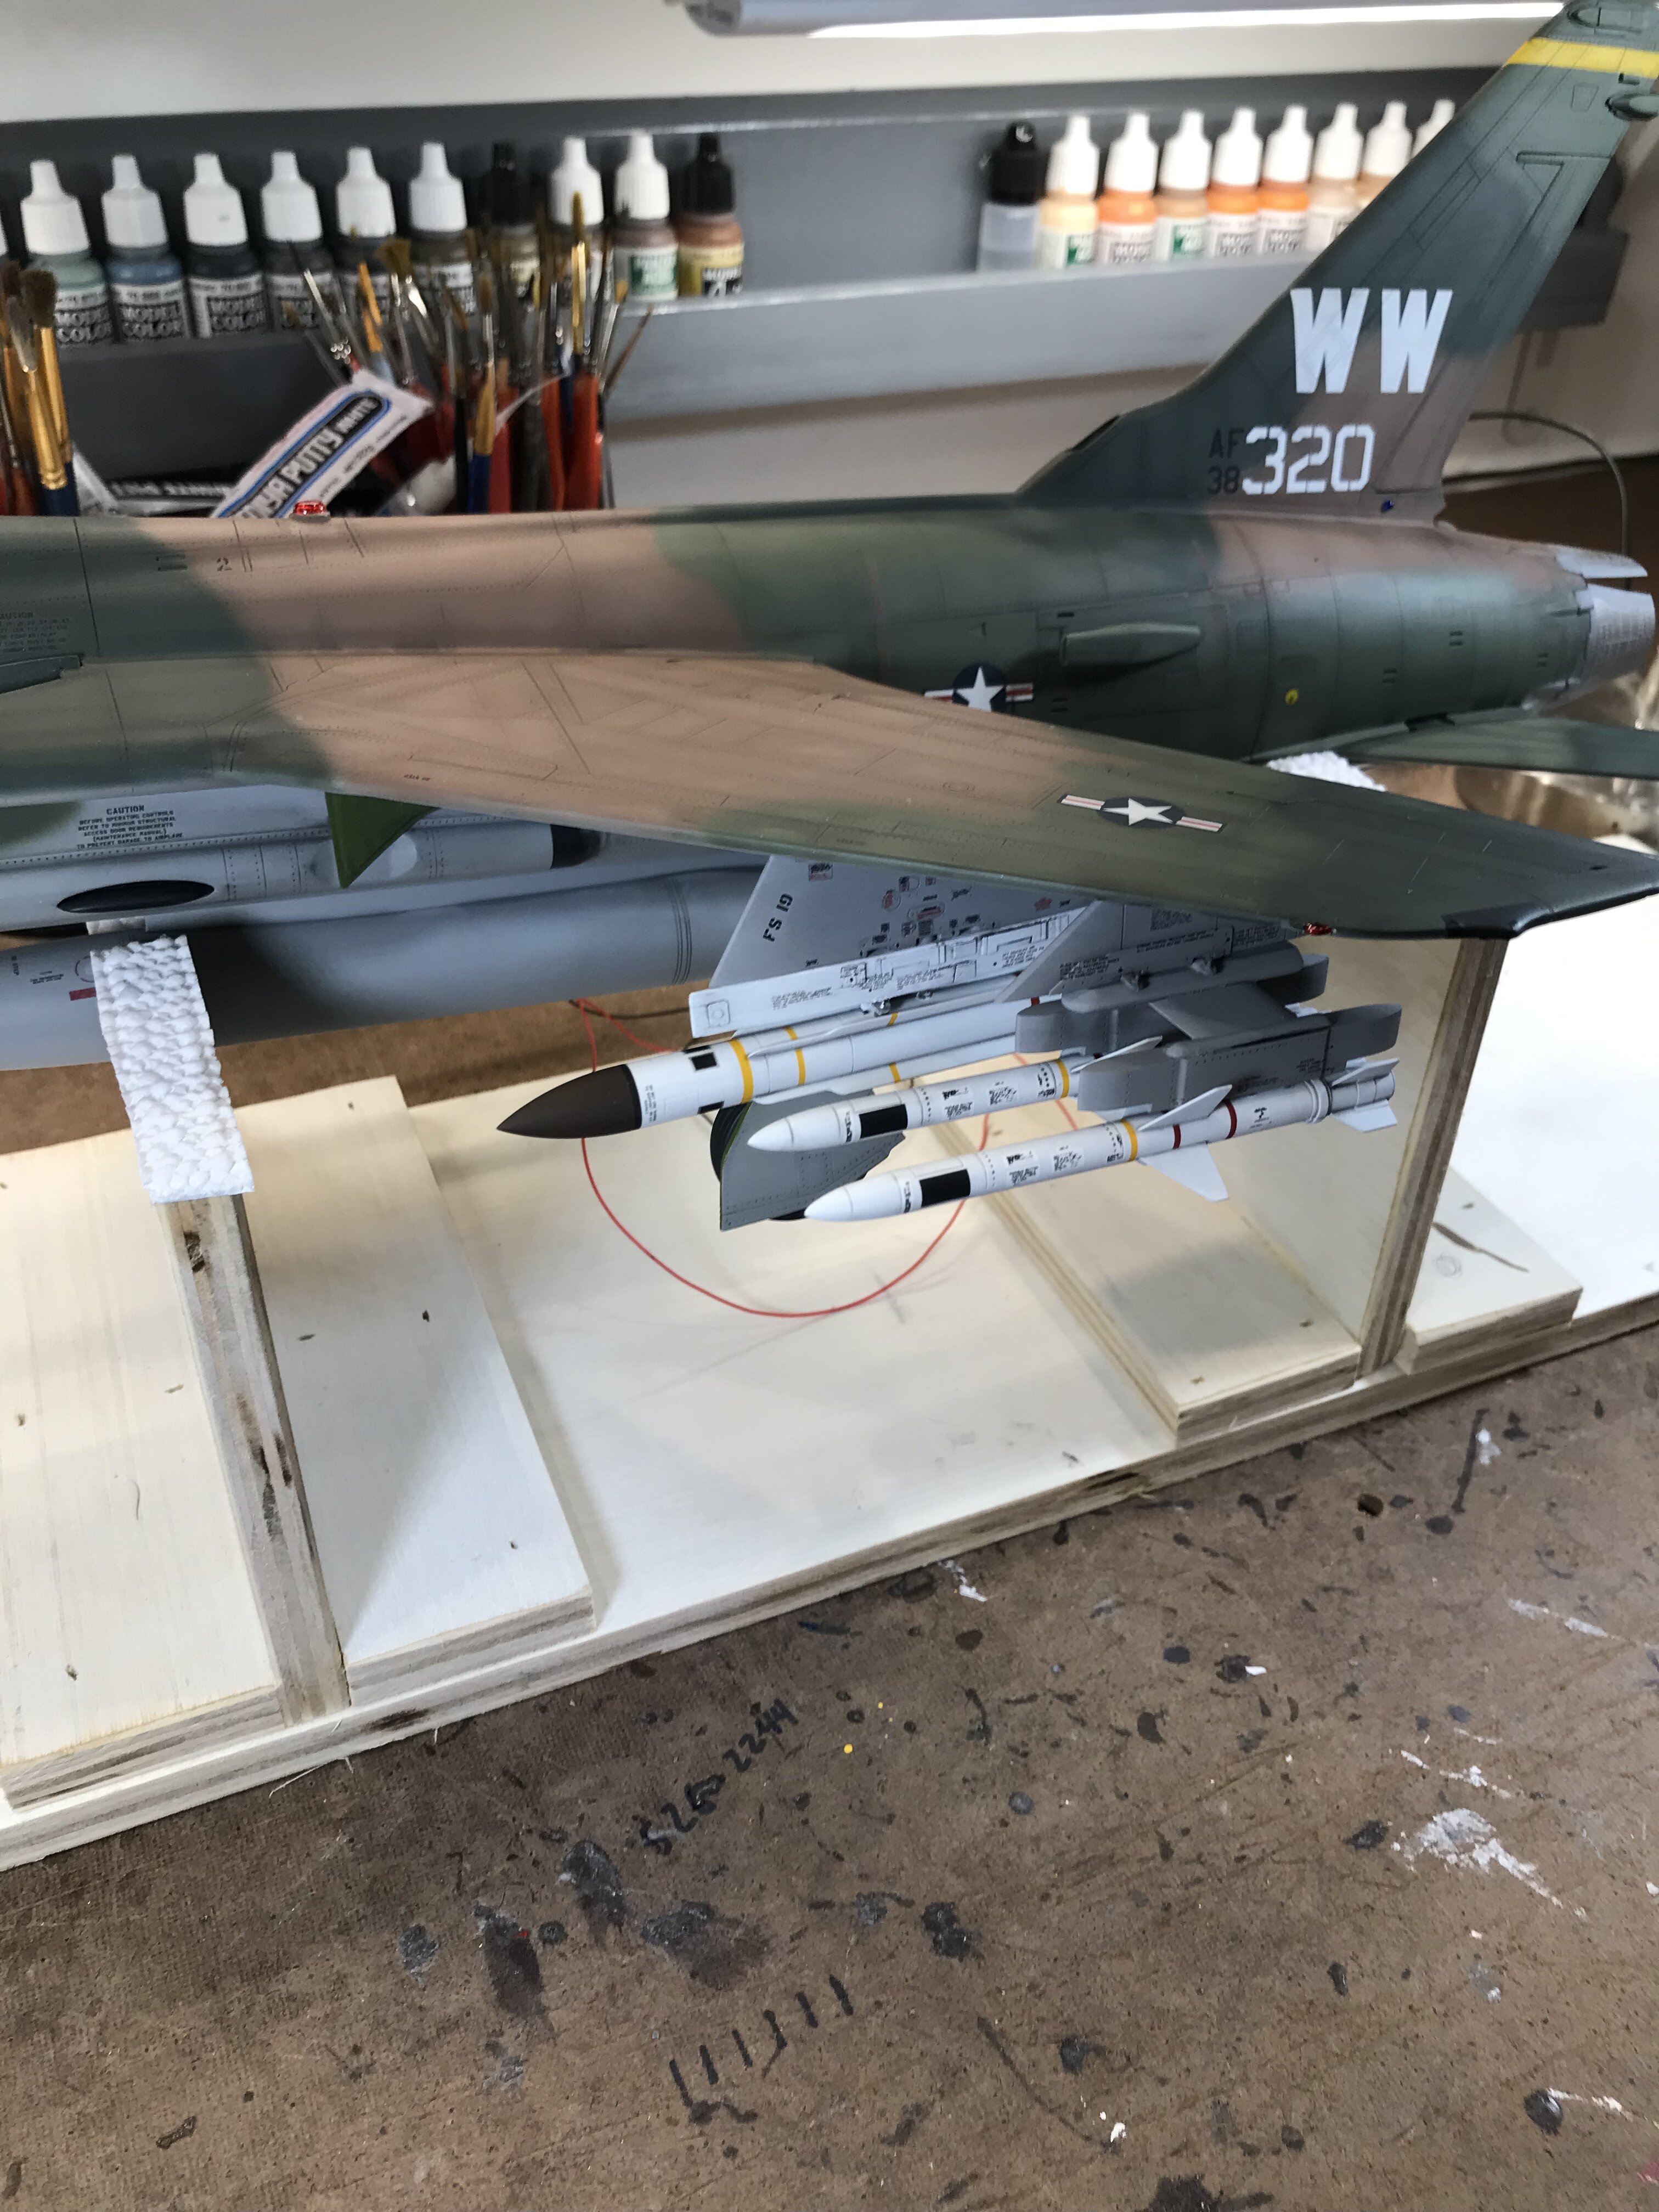
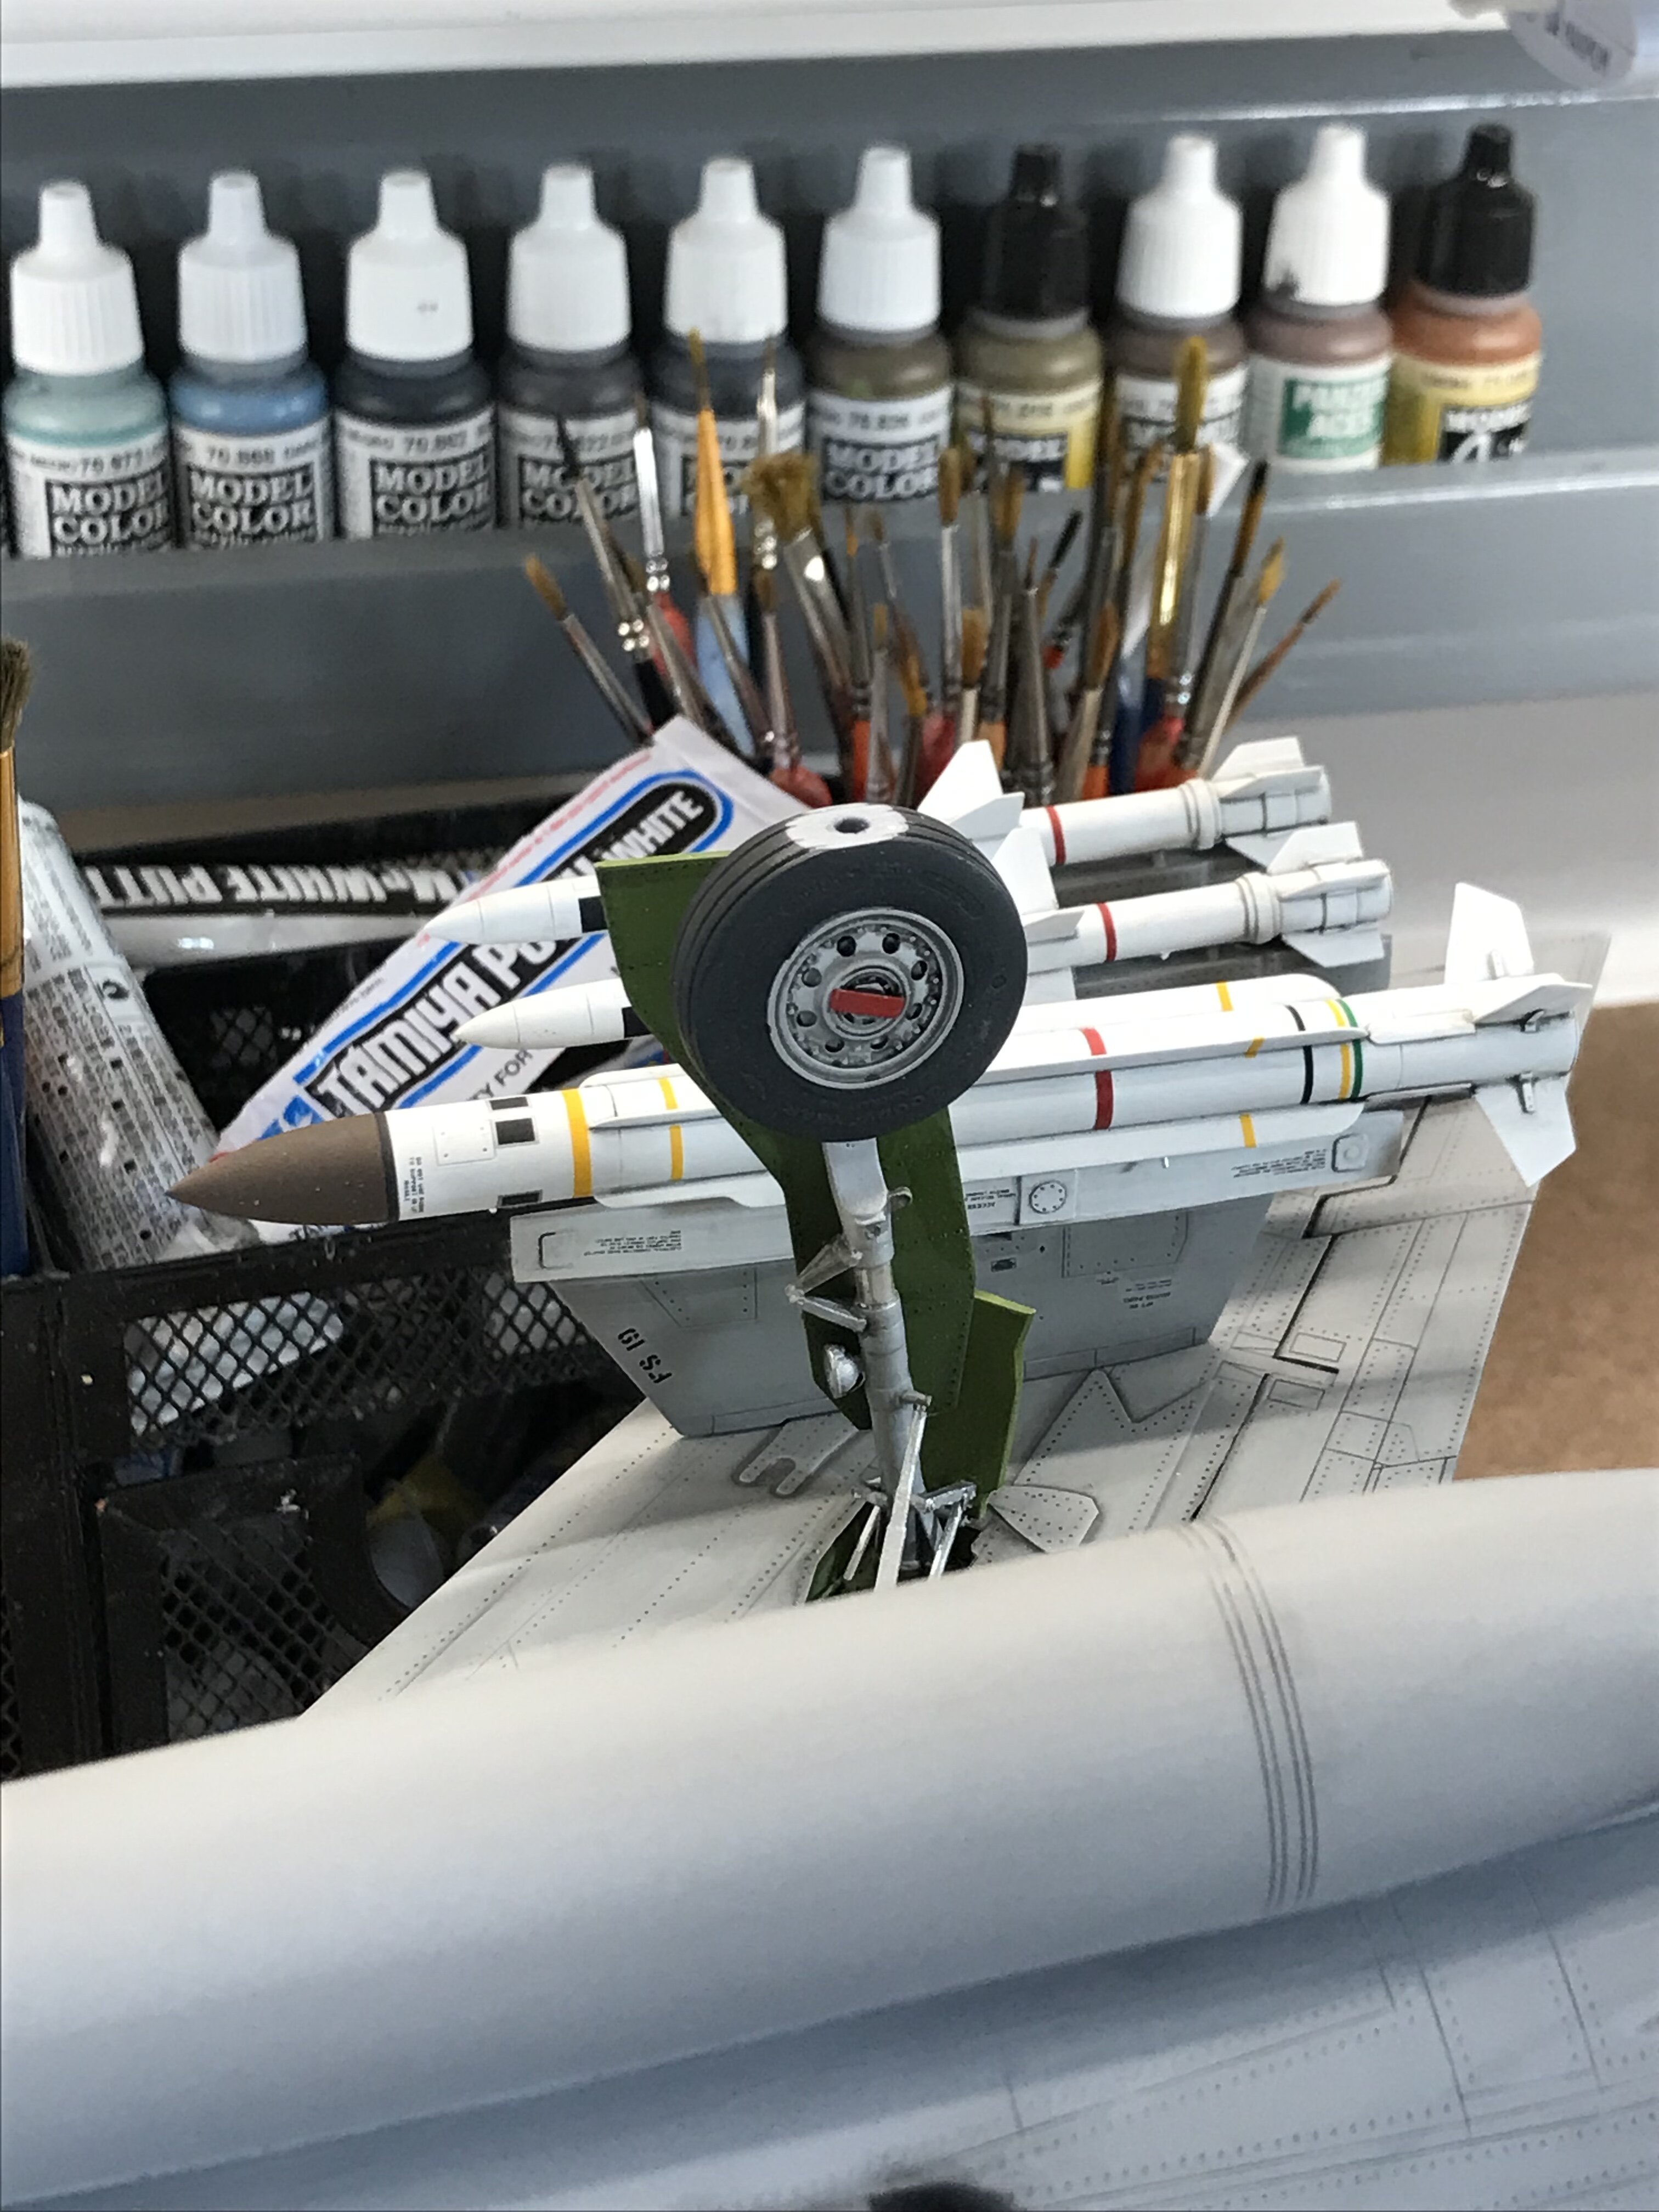
I just started putting on the decals today. The decals that came with the kit are from TwoBobs. They went on without any issues. My first time using them. Amazing! Just to make sure they were nice and flat, I used Walters Solvaset. Took me a while to airbrush this beast. I used Tamiya paints, thinned with Mr. Color Leveling thinner. A friend of mine in our club recommended it to me. So glad I took his advice. To produce the faded section of each panel, I added a few drops of white. Tomorrow, I finish the decals, and start the weathering process. I checked all the lights once again to make sure everything was still operational. If you have this kit, I highly suggest you build some sort of gig to hold it. I got the idea from a YouTuber by name of Primedmodelworks. He Used insulating foam board to make his. This jig has made every aspect of the build so much better. When I’m done with mine, I’m mailing it to a buddy who has the exact same kit. Chris
-
Man, she turned out great. Two areas that REALLY stand out, are the wheel wells, and the cockpit. Glad you posed it on glass to see all that detailed work. Chris
-
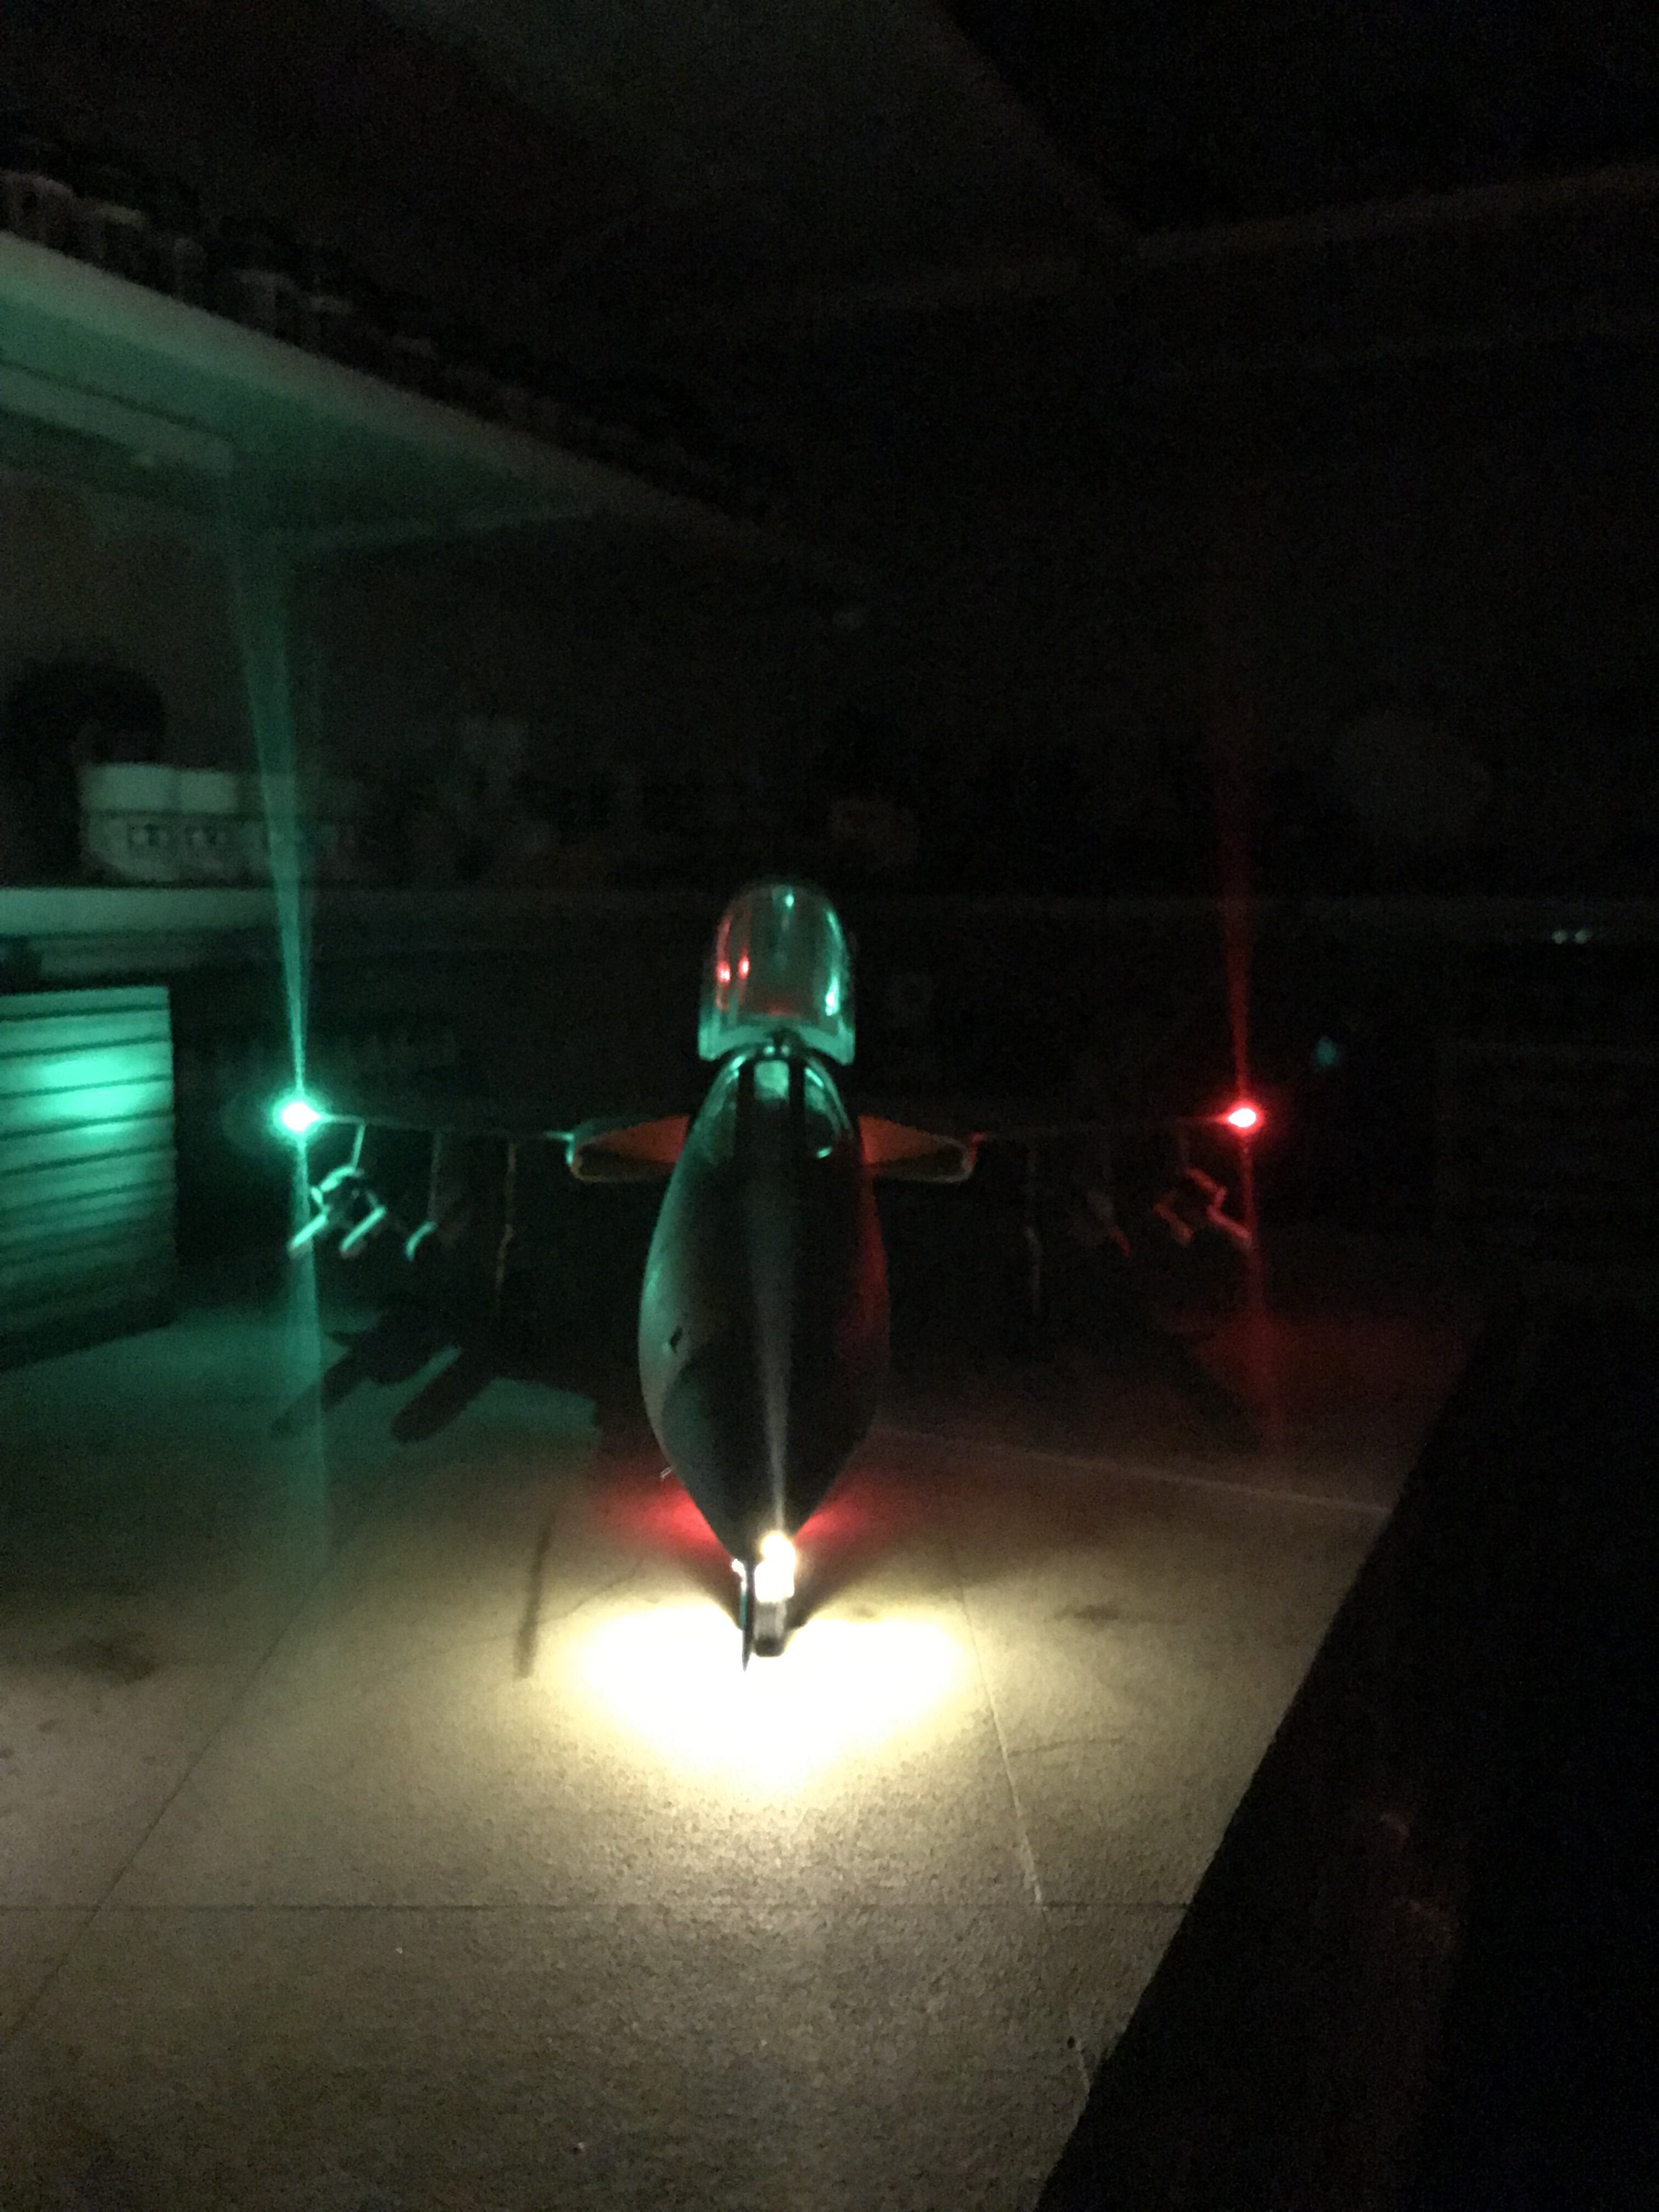
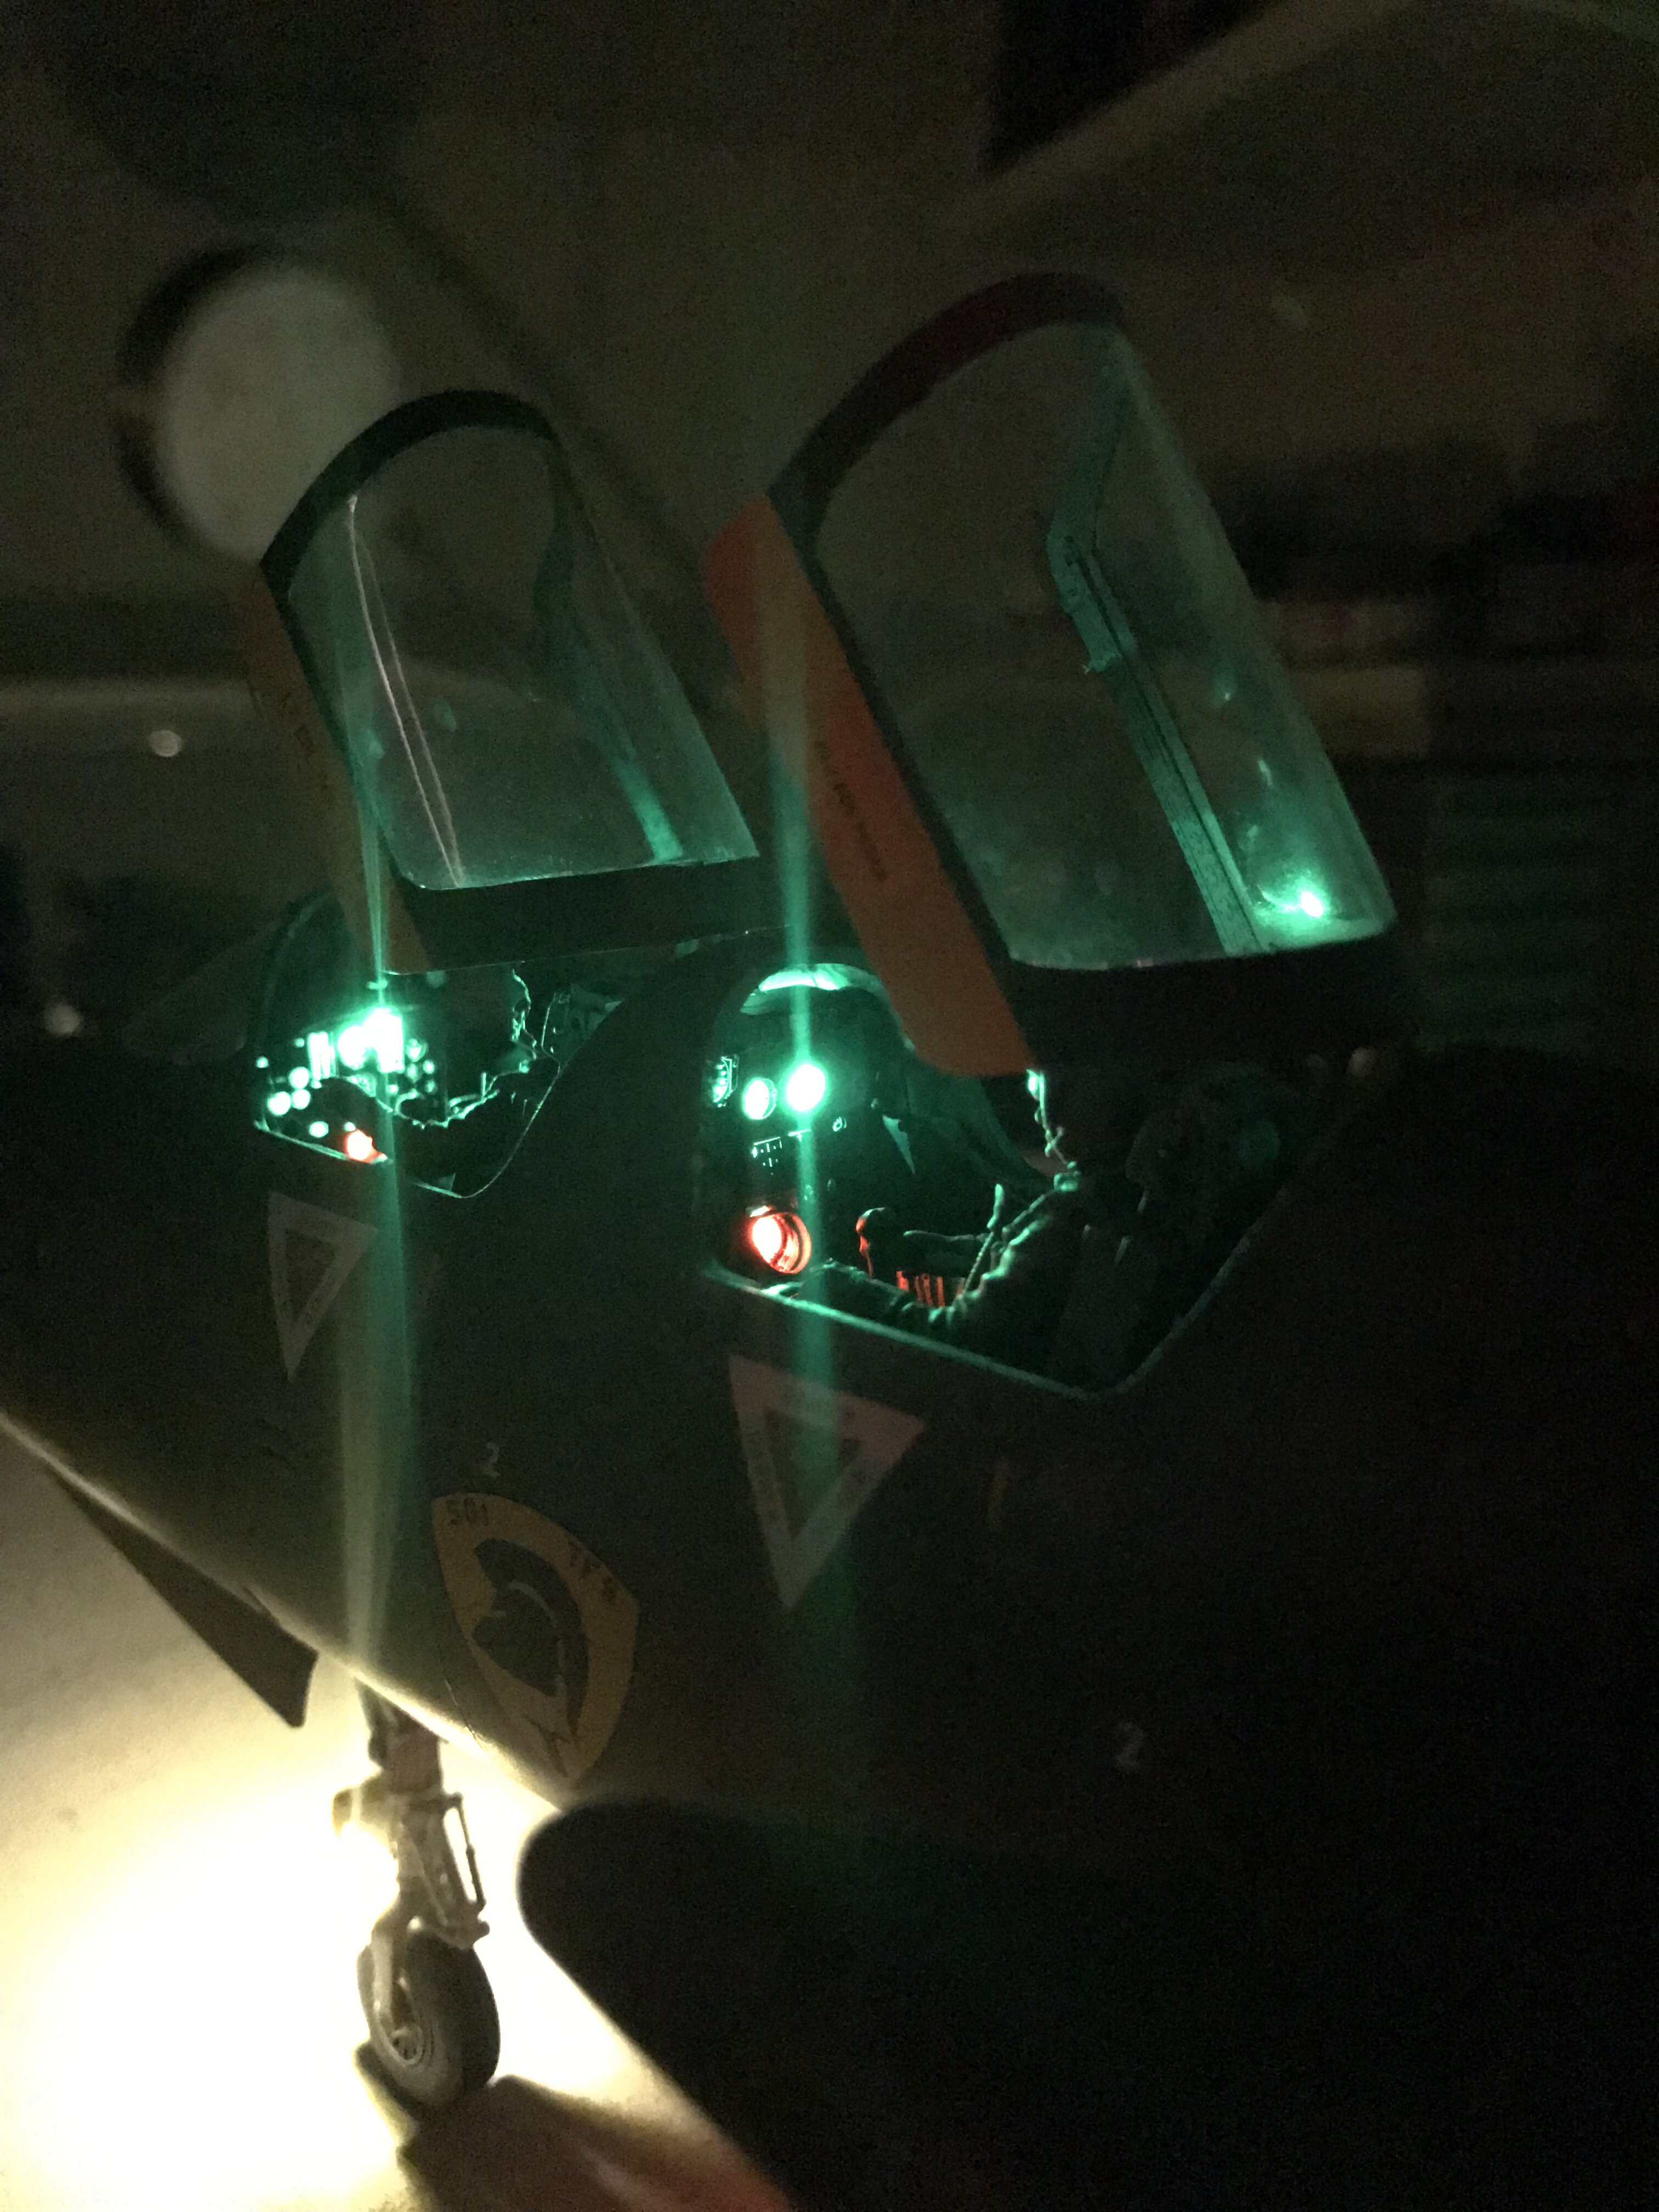
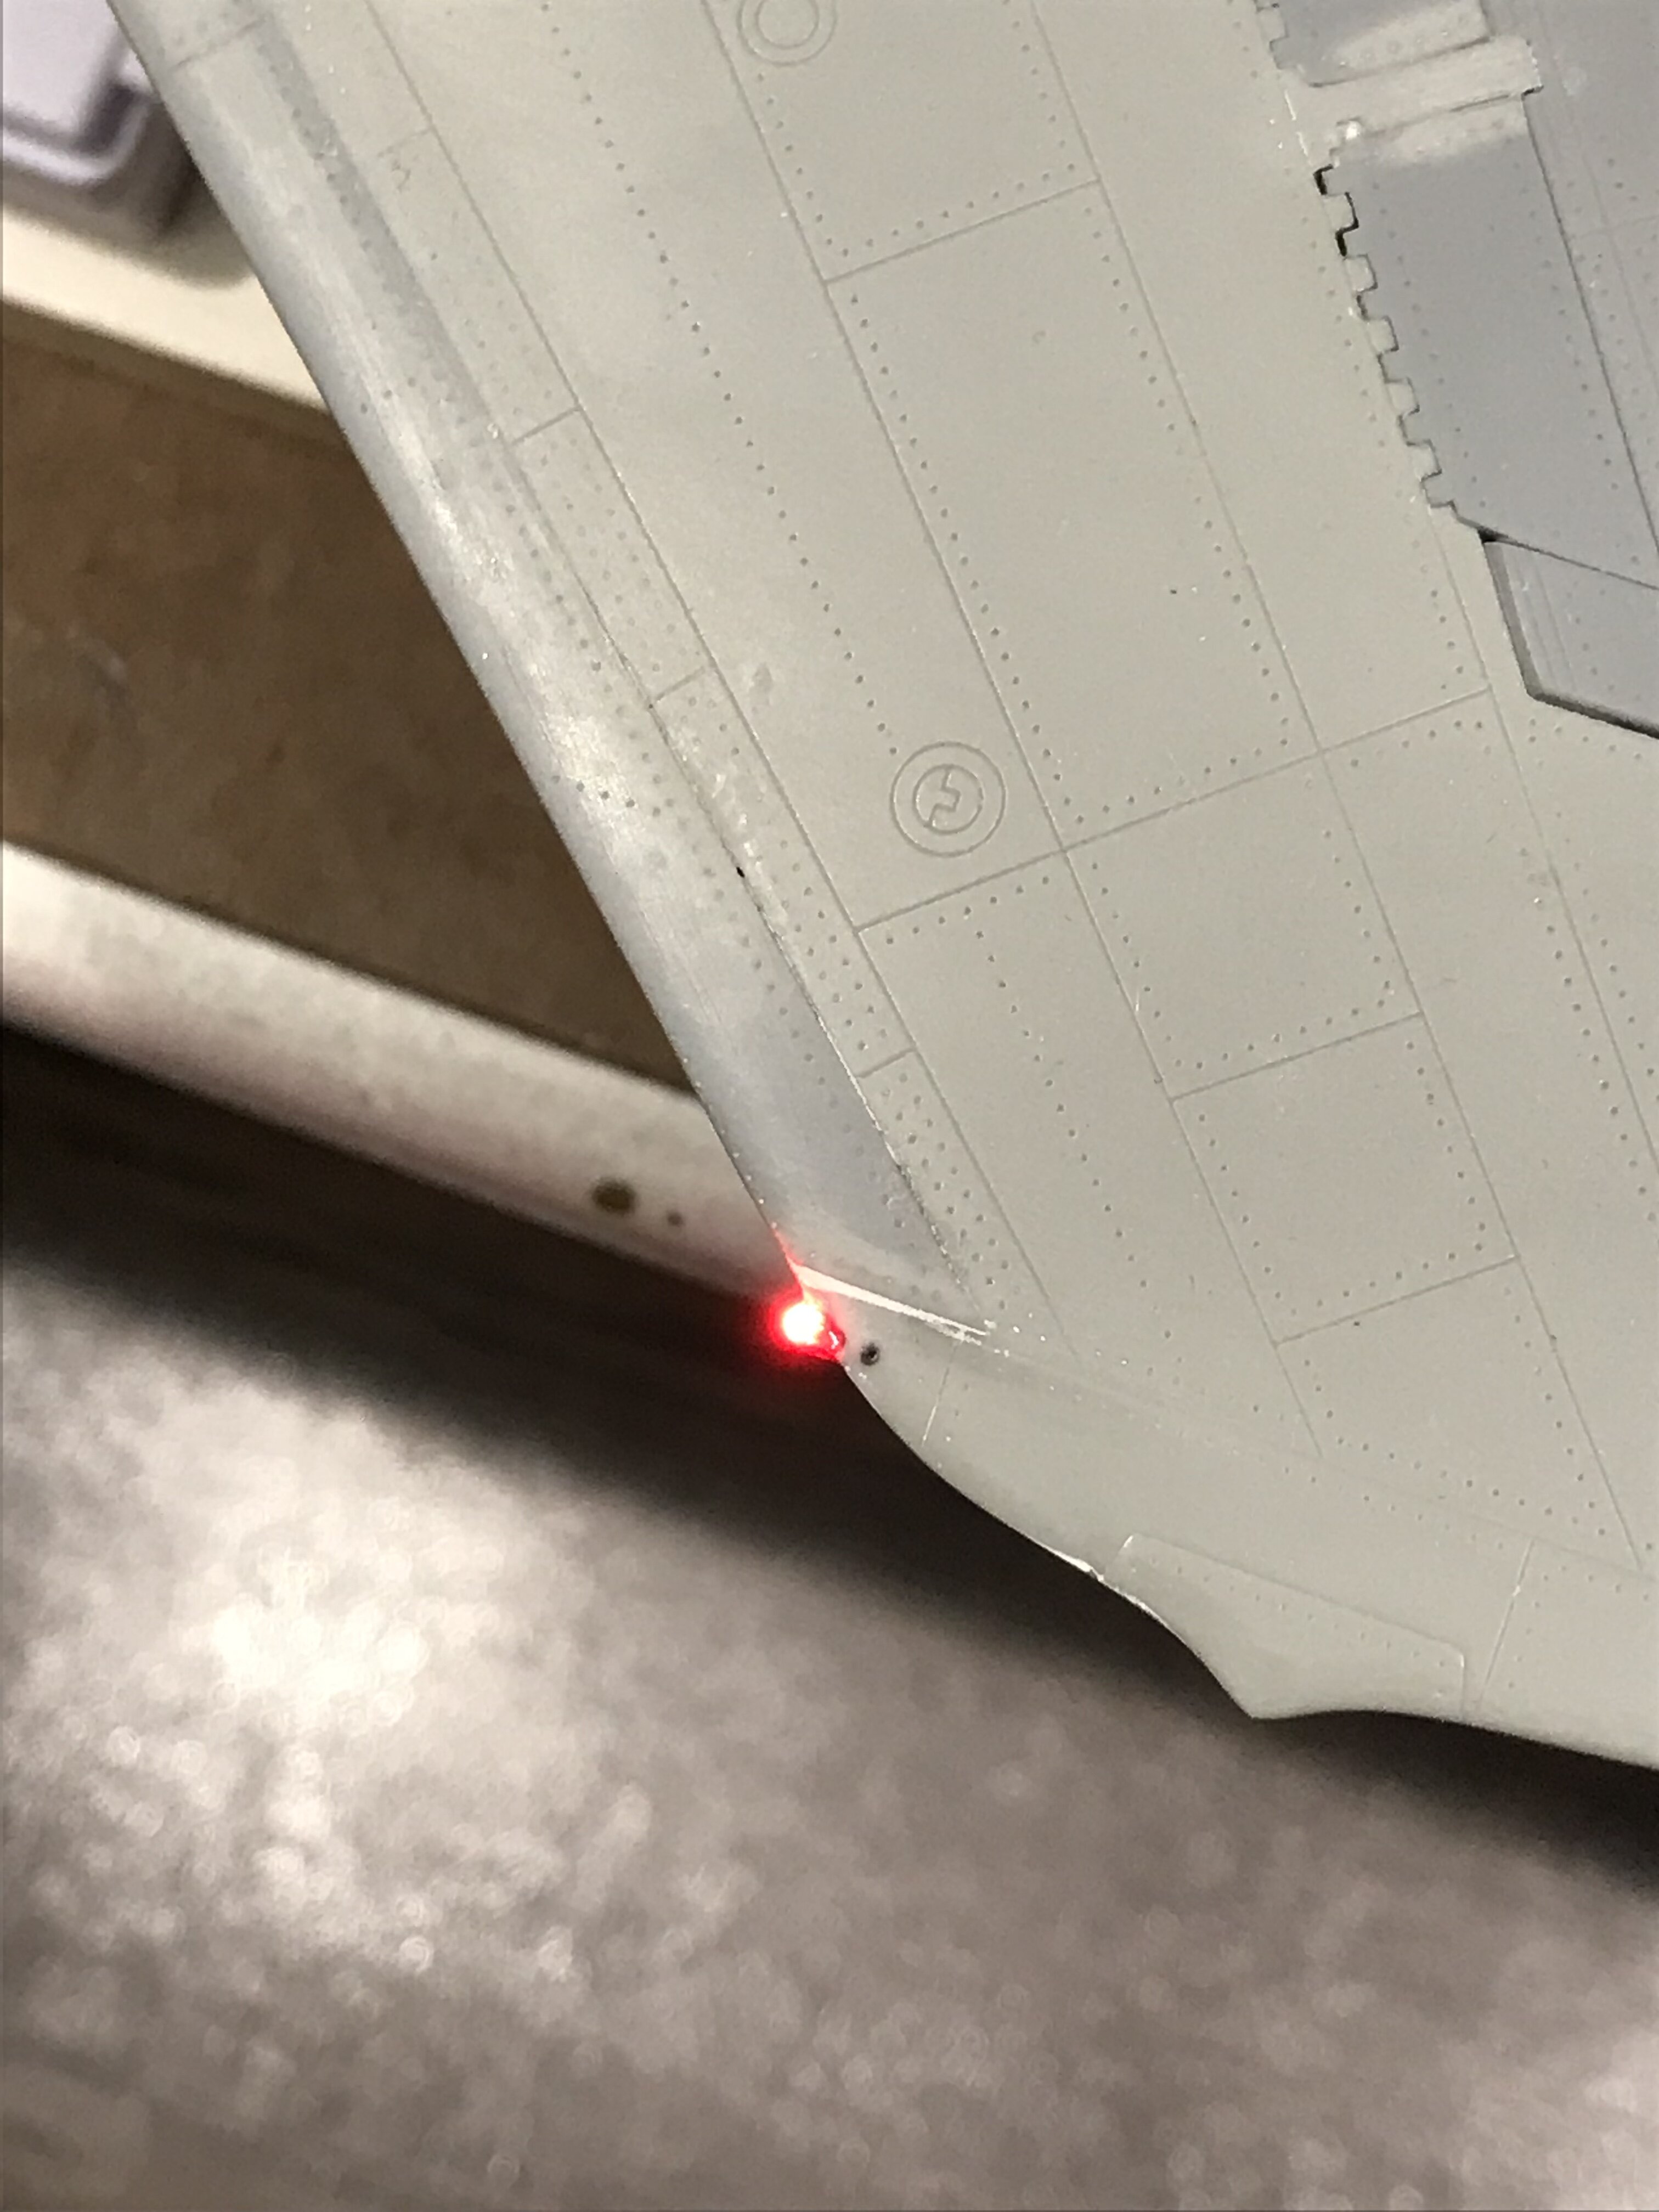
Finally got the fuselage closed up. I tested all the lights SEVERAL times, prior to glueing the halves together. I have two controllers for the lights. The small one lights the anti-collision lights, One on top of the fuselage, and one on the bottom. These are the only two that flash. The larger controller controls the nose gear landing lights, the cockpit dials , the navigation lights, and the engine lights. Chris
-
I really like the wash that you used. Chris
-
Gorgeous work my friend. Keep those pictures coming!!! Chris
-
Bigger, is better. That turned out great Duke. chris
-
Now there’s something you don’t see everyday. Awesome . Chris
-
Truly, my favorite helicopter. Back in the 80’s, Monogram had the Rambo chopper, that was pretty cool. The only 1/32nd scale, to my knowledge ,was the Revell kit with a horrible nose, and main rotor mast. The Dragon 1/35th scale is ok, but need a lot of work to fix all the discrepancies. The rotor head, cockpit hood, the panel on the front section of the tail boom, and the bolt heads, I mean rivets, on the entire fuselage. Kitty Hawk put out some fantastic models, especially their 1/48th scale UH-1H. The best rendition I’ve seen thus far. A guy can wish, can’t he! Chris