ewahl
-
Posts
1,316 -
Joined
-
Last visited
-
Days Won
20
Content Type
Profiles
Forums
Events
Everything posted by ewahl
-
Hi, Kevin, I have never seen this configuration before. I am not a video game player, therefore........ Engineering-wise, a TIE fighter has two panels on the outside and a ball in the middle. This craft is just the reverse--two balls on the outside and a panel in the middle. Saves a lot of confusion on the two assembly lines because the manufacturer has to assemble equal numbers of panels and balls and just connect them one way or the other. Thanks for sharing a unique Star Wars ship with us. Looks great! Ed
-
Hi, Kevin, You made some great logical choices in your color selection. Excellent presentation. Ed
-
Hi, Kevin, Great job on Dr. Z's rocket ship. Isn't it amazing how such a complex ship can be operated successfully with such minimal instrumentation and controls? And virtually no pre-flight training for the crew? And ammo storage and handling for use with the nose cannon? And a compact artificial gravity generator? And fuel storage tanks? And air and food supply and storage and preparation equipment? Yep, those 1930s ships were certainly cost effective and efficient. How long did it take to get from Earth to Mongo (was this a lightspeed ship?)? Now you need a ship from Emperor Ming the Merciless's fleet. Ed
-
Hi, Joseph, This is beautiful. I'm jealous of the finishes you put on plastic. The engine compartment and the undersides show everything that needs to be shown. Ed
-
Kevin, thanks for the tip and link. Rusty, while I would have loved a set of pods and cockpit detail behind the front window, such items are not in the kit. All of the pod bay doors are separate pieces, so one or more doors could be left open and a tiny scratchbuilt interior could be added into the hollow sphere. The front window is clear, so a basic cockpit interior could be added. Figures, of course, would help in the cockpit also. The two main pieces of the front sphere dry fit together so well that the seam was invisible; apply glue through the open inside. The kit is engineered to provide almost all surface detail as separate pieces applied onto the propulsion and engine module to provide sharp details. Moebius did this with their earlier Battlestar Galactica (TOS) kit, and the resulting look of the detail was excellent. There are five different versions of the cargo modules attached to the spine, but there are a LOT of them. The antenna array has very fine details to look accurate. If you want an LED inside the sphere to illuminate the cockpit (and scratchbuilt pod bay, be prepared to get creative on the necessary wiring, battery location, and switch. NOTE: As soon as you scratchbuild all the interior items for the cockpit and pod bay, someone will release an expensive accessory kit with all the needed items. The PE aftermarket people will also be out there with items to "improve" the furnished kit details. Ed
-
I could not resist buying the new Moebius 1/144 Discovery XD-1 from the great movie 2001: A Space Odyssey. I read the recent issue review in FSM and went to my nearby HobbyTown USA to order one. Many years ago, I acquired the Lunar Models resin kit version, which is still in its box because I was so disappointed with the poor detail. The Moebius kit looks outstanding on my first impression from an open-box inspection. Now that I think about it, I can display Discovery next to the 1/144 Boeing 787-8 Dreamliner I built last year for a size comparison. Ed
-
Hi, Kevin, Caricature aside, it sure looks like Vincent Price. Perhaps this bust was designed by a political cartoonist who routinely does this to public figures. Great job! Ed
-
Hi, Kevin, I must admit I have never seen such a vehicle before. I like that you have a figure of the driver/pilot/whatever-title to establish the scale. Now you need the two-seat version for a flight training instructor. The model looks excellent! Ed
-
I recall basic bits about four episodes that I have not seen since they first aired: 1. An Altas missile being transported by tractor-flatbed trailer gets stuck in a viaduct that is too low for the load height. 2. Base airmen returning to base after liberty in the town are repeatedly ambushed and beaten up by anonymous town locals. 3. On a parachute jump exercise from a C-124, one jumper's tether line does not release and the unconscious soldier is dangling behind and below the aircraft such that the plane can't land without the soldier hitting the ground and getting killed. Naturally, the tether line itself is fraying against the edge of the open door frame and the soldier may be lost in that manner. 4. Steve is sent up in an armed fighter jet to investigate and possibly shoot down a B-47 bomber that is acting like the entire crew is unconscious or dead, and the bomber on autopilot will be heading for an eventual crash. I'm amazed I still can remember this TV show. Ed
-
Hi, Kevin, Thanks for checking in. I'm ready to build the Moon Lander. Ed
-
Hi, Rick, Rather than scavenge a tree from a kit, perhaps someone reading this thread has already built an M42 Duster that he/she would be willing to ship to you so you can include it in the VA display. A lot more people will see the Duster in the VA display case than they will in the builder's home showcase or storage box. That means you will not have to build that one. Just a thought. I've donated built models for museum display, and I enjoy the thought that my work is (hopefully) appreciated by many others. I am not an armor builder, so I can't help you here. Ed
-
Yes, some of those bottle paints are still good. I mix them with a battery-powered paint stirrer until the separated pigments and carrier fluids get well blended. I add paint thinner to them to get them usable in an airbrush. No, some of the bottles have turned solid. These I throw out when I come across one. I've noticed some colors all stay good and others all go bad. Heck, they are 15 cent bottles, so no great financial loss if they must be pitched out. Ed
-
Auto World also produced decal sheets of race car sponsor logos with many different products represented. This must have been before lawyers and licensing fees entered the picture. I have several of these sheet from back in the day. I have used some of the individual images, and the decals still work. Ed
-
I just found six different box sets of the Pactra International colors in a storage bin, and I have a Pactra small bottle paint rack that is still filled about 60% with unopened Pactra color bottles. Unfortunately, one of my favorite flat metallic colors that I could apply with a brush without streaks--Flat Metallic Gray--is gone. Testors metallics just do not apply well with a brush to any spot larger than 1/16th inch.
-
#25 Race Team outside pics...3-15-18
ewahl replied to GaryDavis's topic in Cars, Trucks, & Motorcycles
Hi, Gary, Once again you have knocked my socks off with an outstanding build. I do not have your knowledge of the mechanics of a sprint car, so I have been watching your progress reports with great interest. I can relate more to the 1972 Chevy pickup because I am currently working on the 1972 Chevy Blazer cousin. Your painting on the entire project is amazing. Ed -
Hi, Ron, Nice work on making a not-so-nice kit shine. I love the hand crank feature on an armored car. The driver in a combat situation pops the clutch and stalls the engine. Then, with bullets and shells flying all around, the poor sod has to climb out from behind the armor plates to run around the front and turn that crank to get it running again. This is the weakest part of the weapon's design, to be followed by bullets through the rubber tires (or don't enemy shooters ever figure this out?). What am I looking at in the second picture? This escapes me. Ed
-
I thought they were wheelie bars. Shows what I know. Ed
-
Years ago our Chapter had a building theme of "It Ain't My Type." We were supposed to build a model that was in an IPMS/USA Class where we would not ordinarily enter a model. Each member had to identify the Class(es) he did not like to build in, and then pick a kit and build it during the year. I do not know much about military vehicles, so I do not build tanks, field guns, railroad mortars, softskins, etc. I do like automotive subjects, however, and the nearest thing I could find to automotive in military vehicles was this truck kit. The kit represents a series of Firsts for me. This was my First true military vehicle. It was my First 1/35 scale kit. It was my First attempt at a three-color camo paint scheme. And it was NOT my First model to not be finished by the build deadline. Almost fully painted and detailed, it went back into the box and waited for me to tinker with it off and on for almost ten years. Last August, I was burned out on airplanes from the seven I built for The Magnificent 7's project, so I opened this box and decided to finish the assembly before beginning some new model. The camo scheme was the biggest challenge for me. The decal sheet had decals that spread across several color fields, and the lettering changed color in the middle of words, like "FLAMMABLE" for example. I tried to use the camo layout presented in the instructions, but the scheme did not match the provided decals. I had to draw a revised camo scheme onto the kit's pieces that was close to reference photos I had from the internet and also adjusted to accommodate the decals. Thank goodness there were reasonably close Model Master paints available for airbrush application. I actually liked this kit in spite of its flaws and complications. I have the Italeri sister kit of the Oshkosh M-977 Flatbed in my stash, but this one will get corrected resin wheels and tires and lots of Eduard photoetch details (which I have in the box). Some day I might even build it. Ed

-
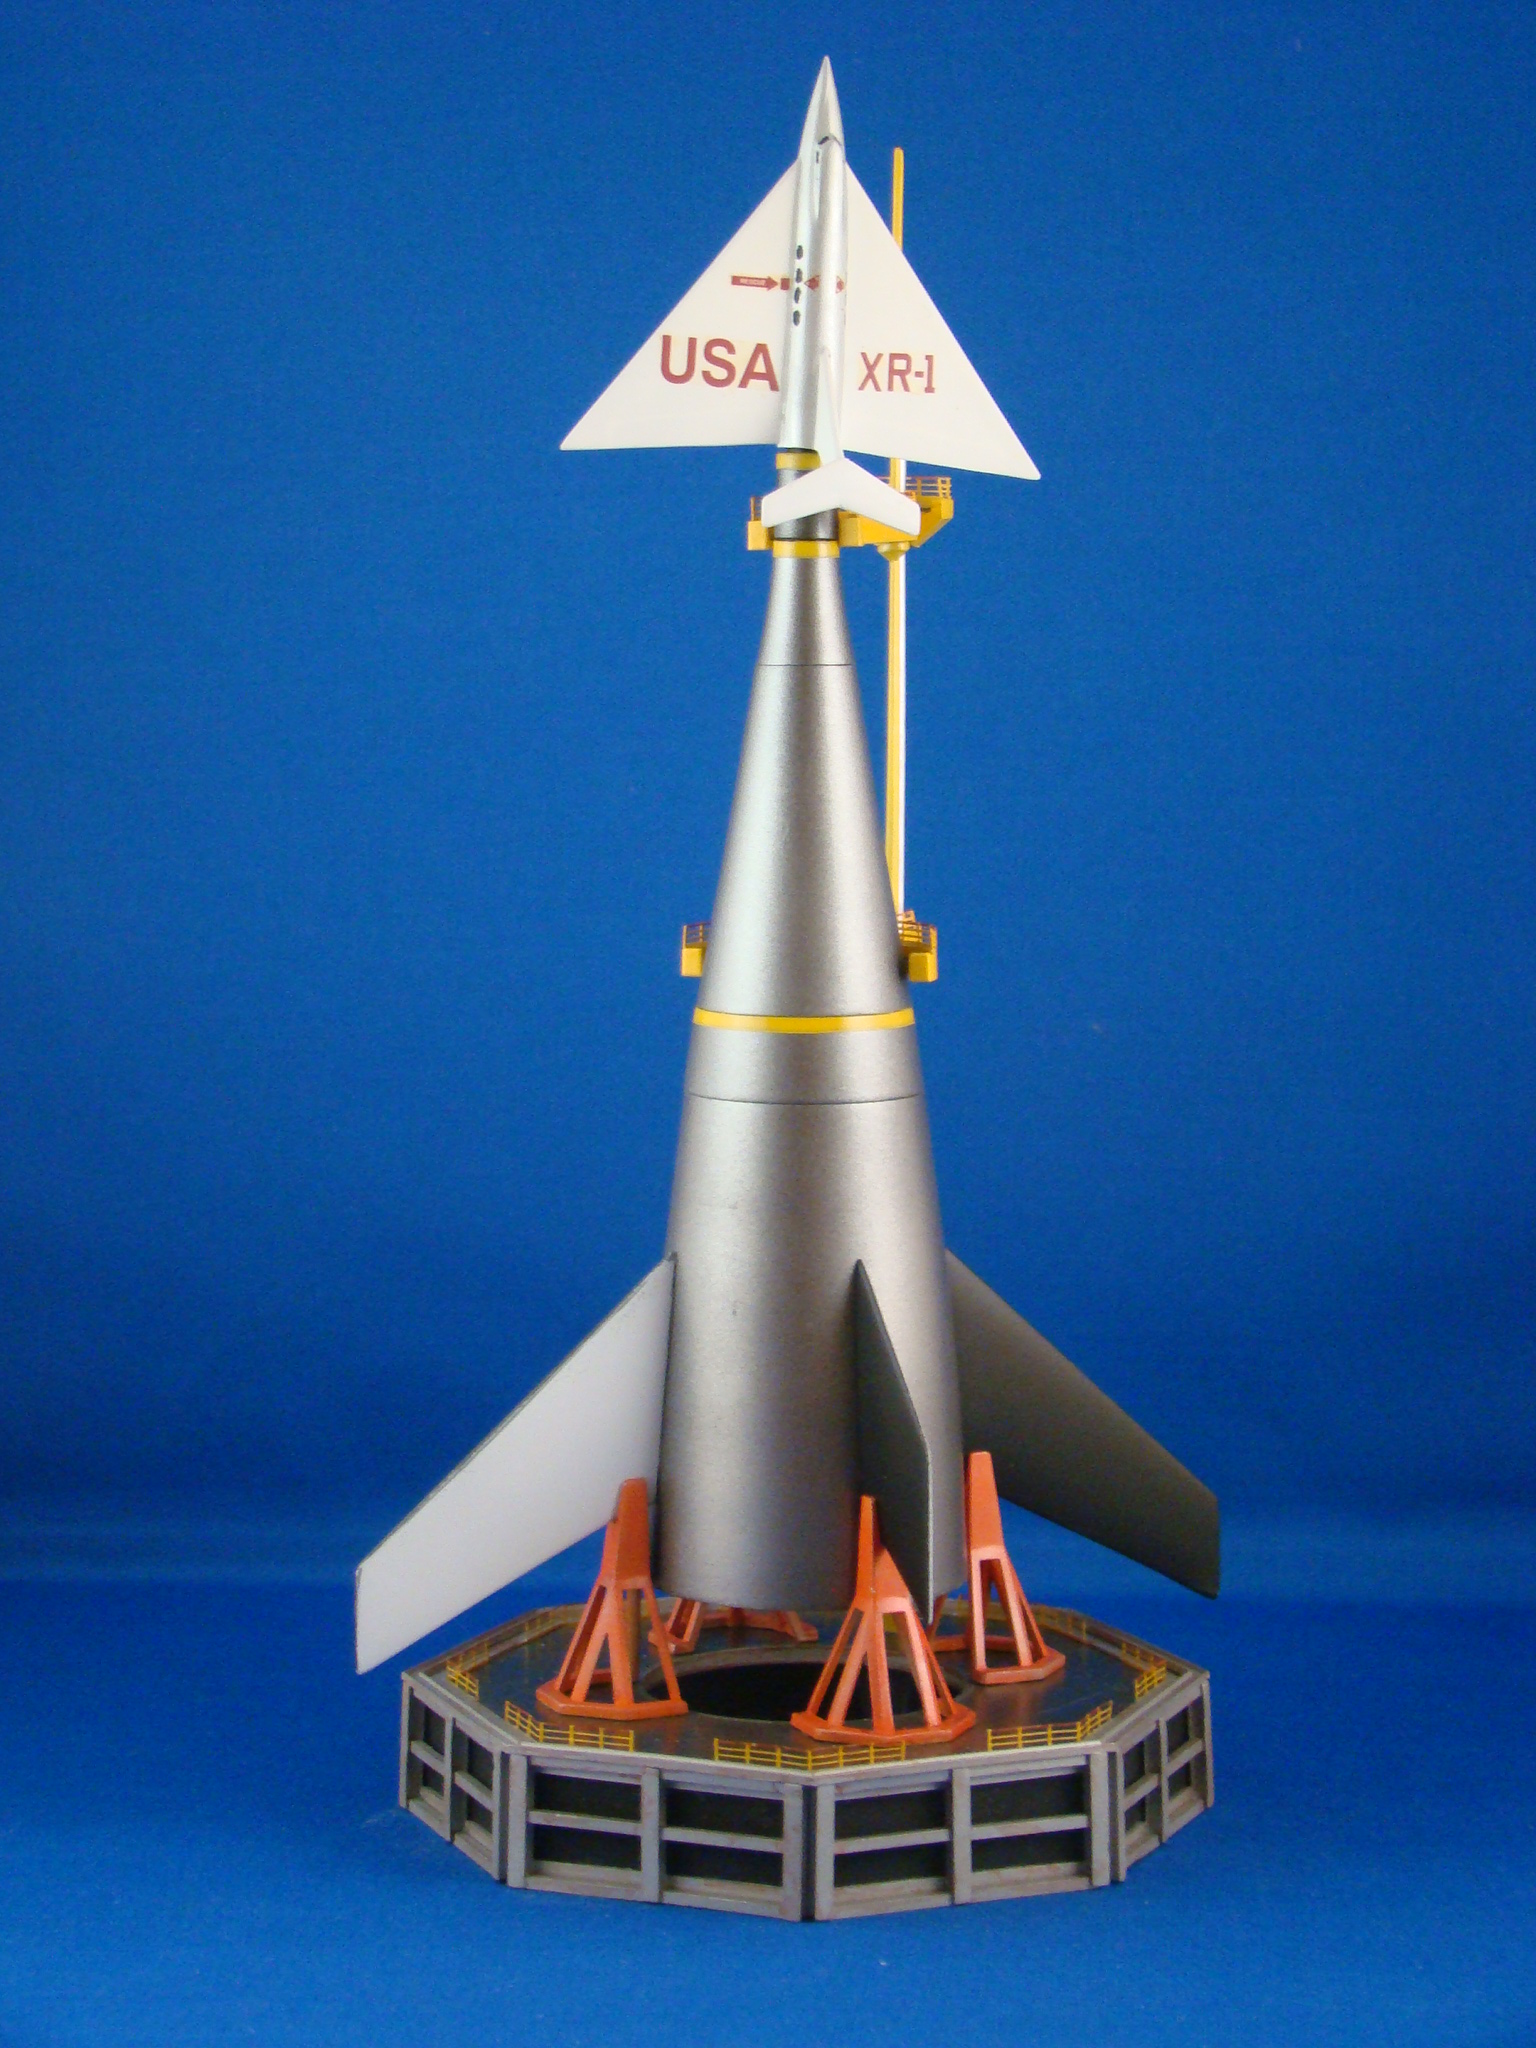
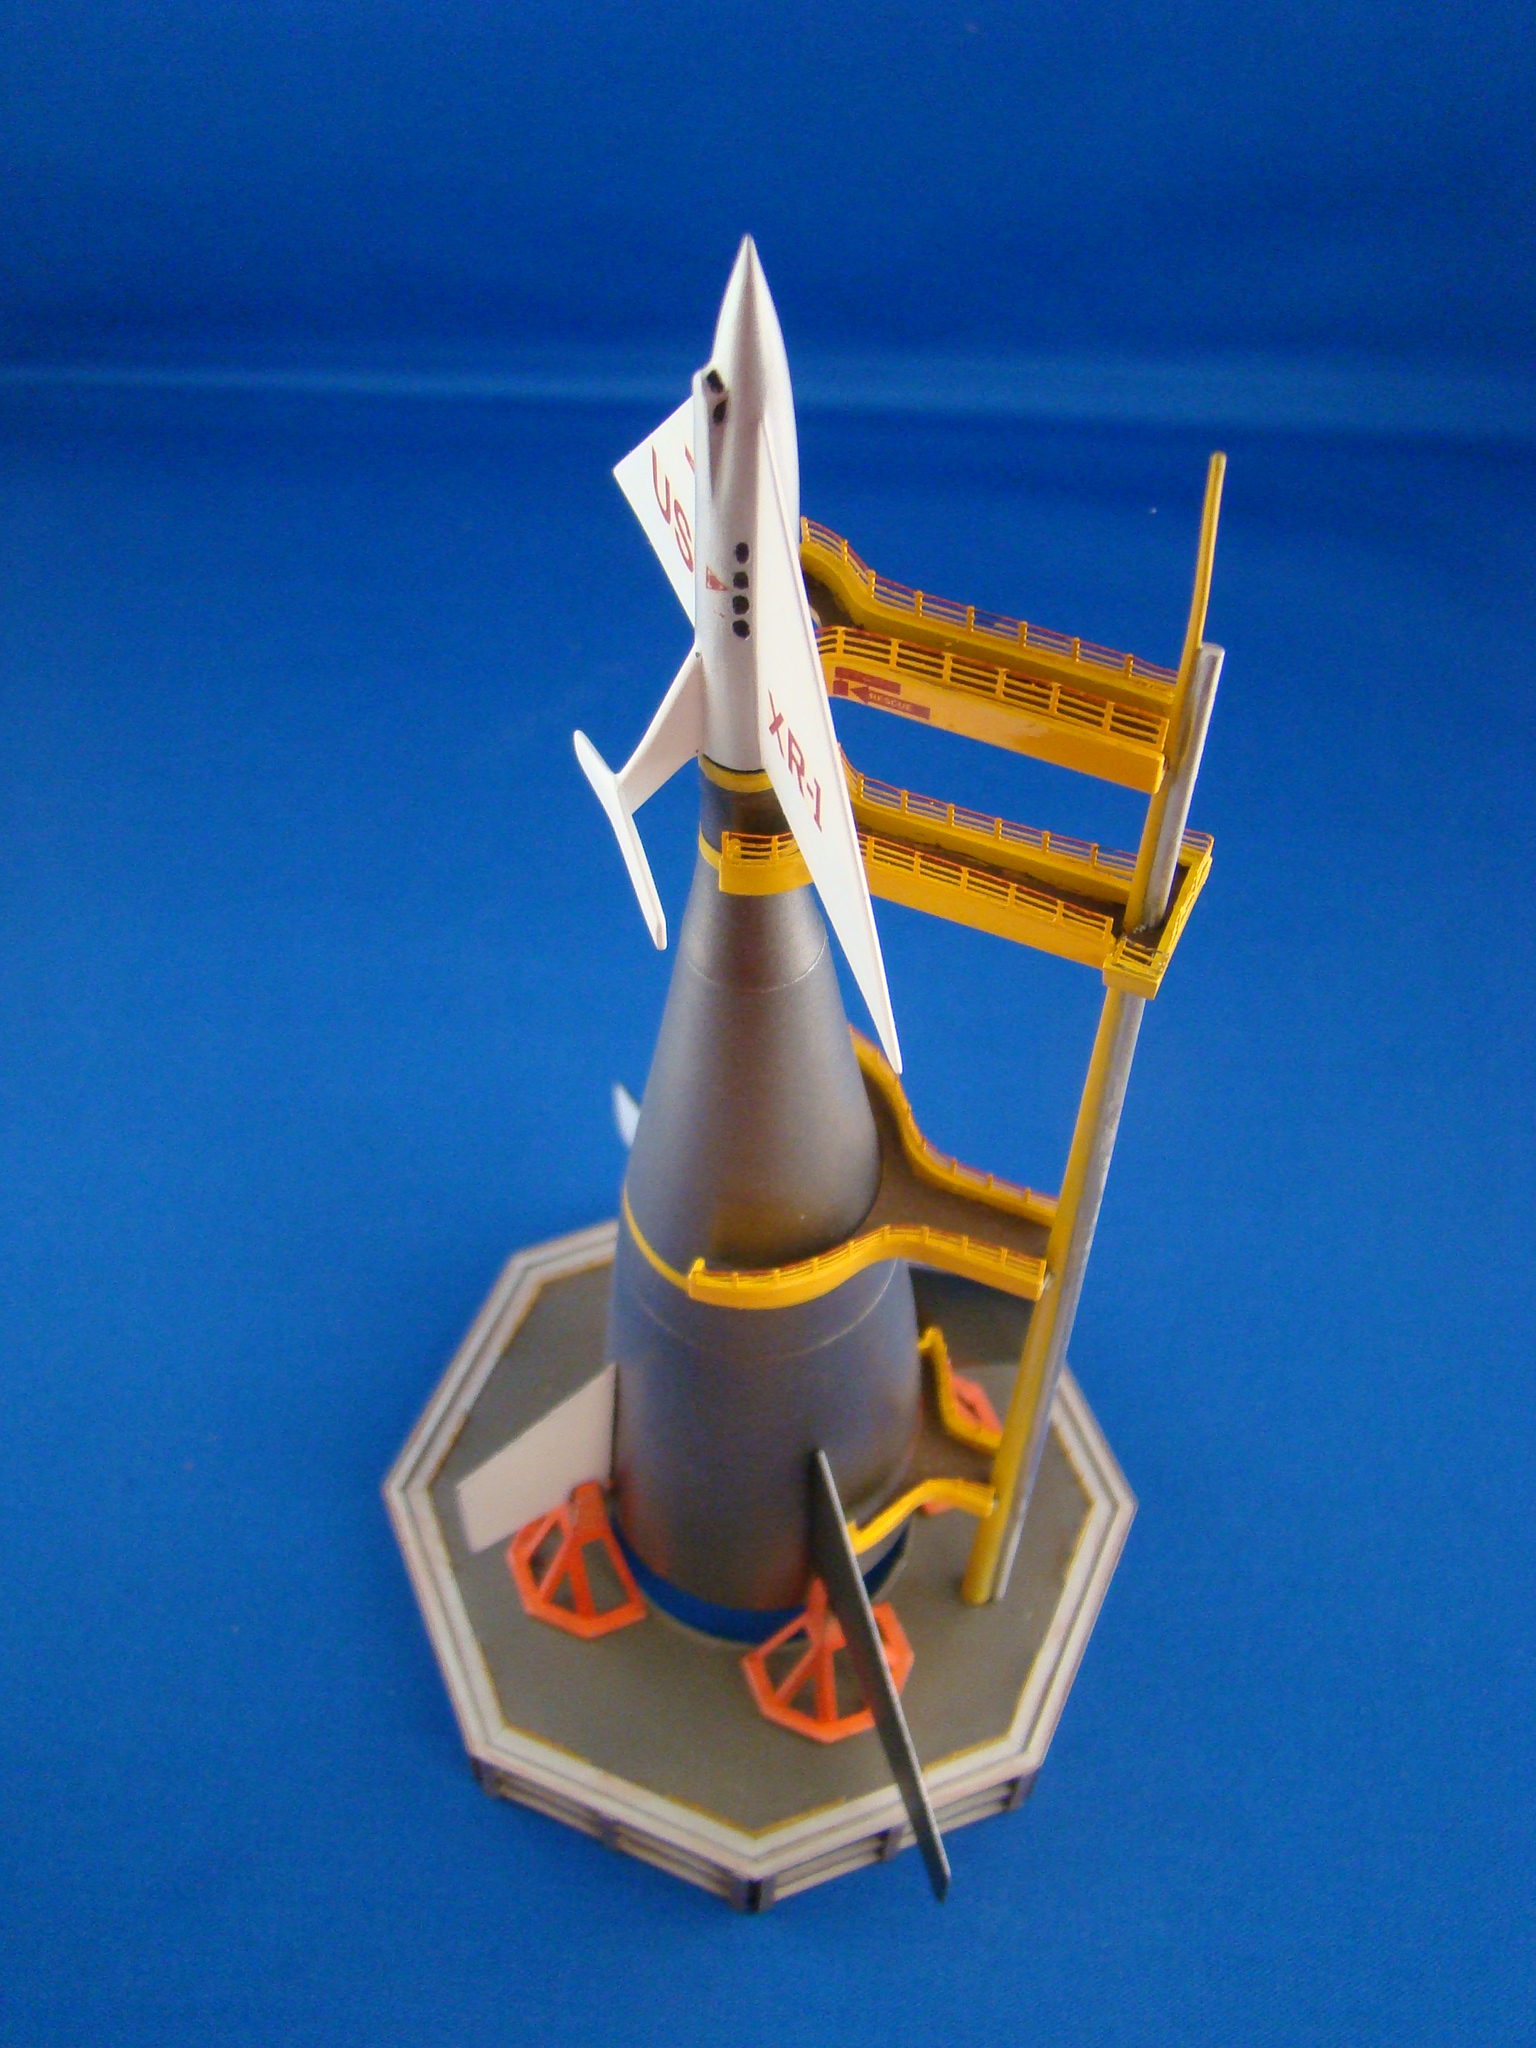
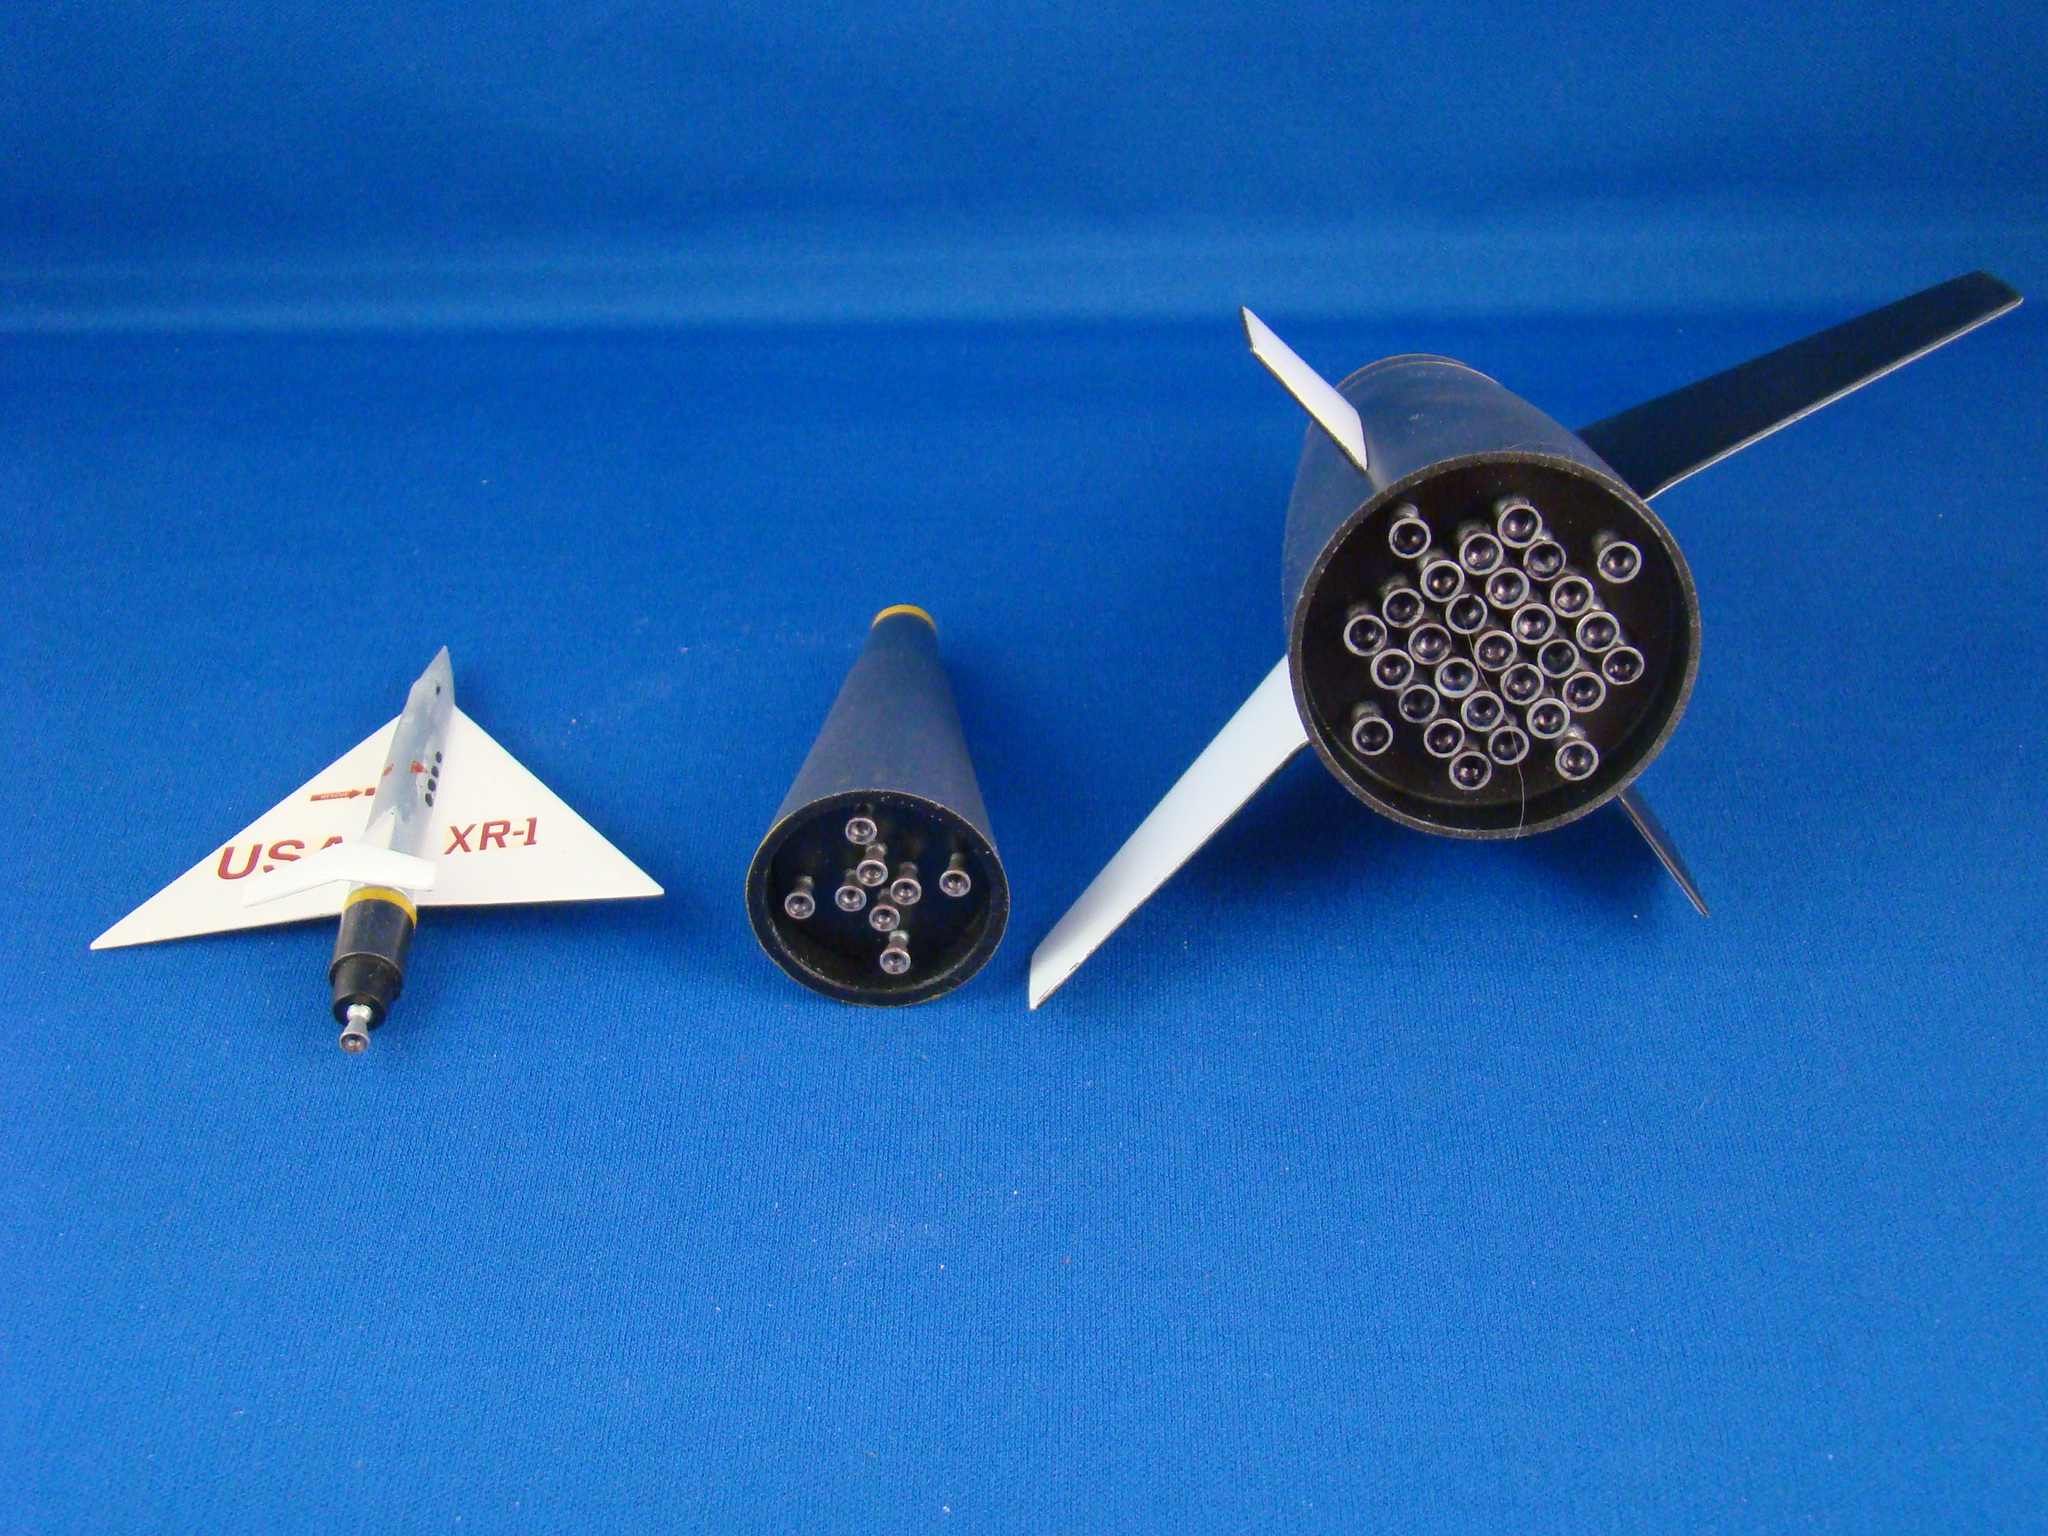
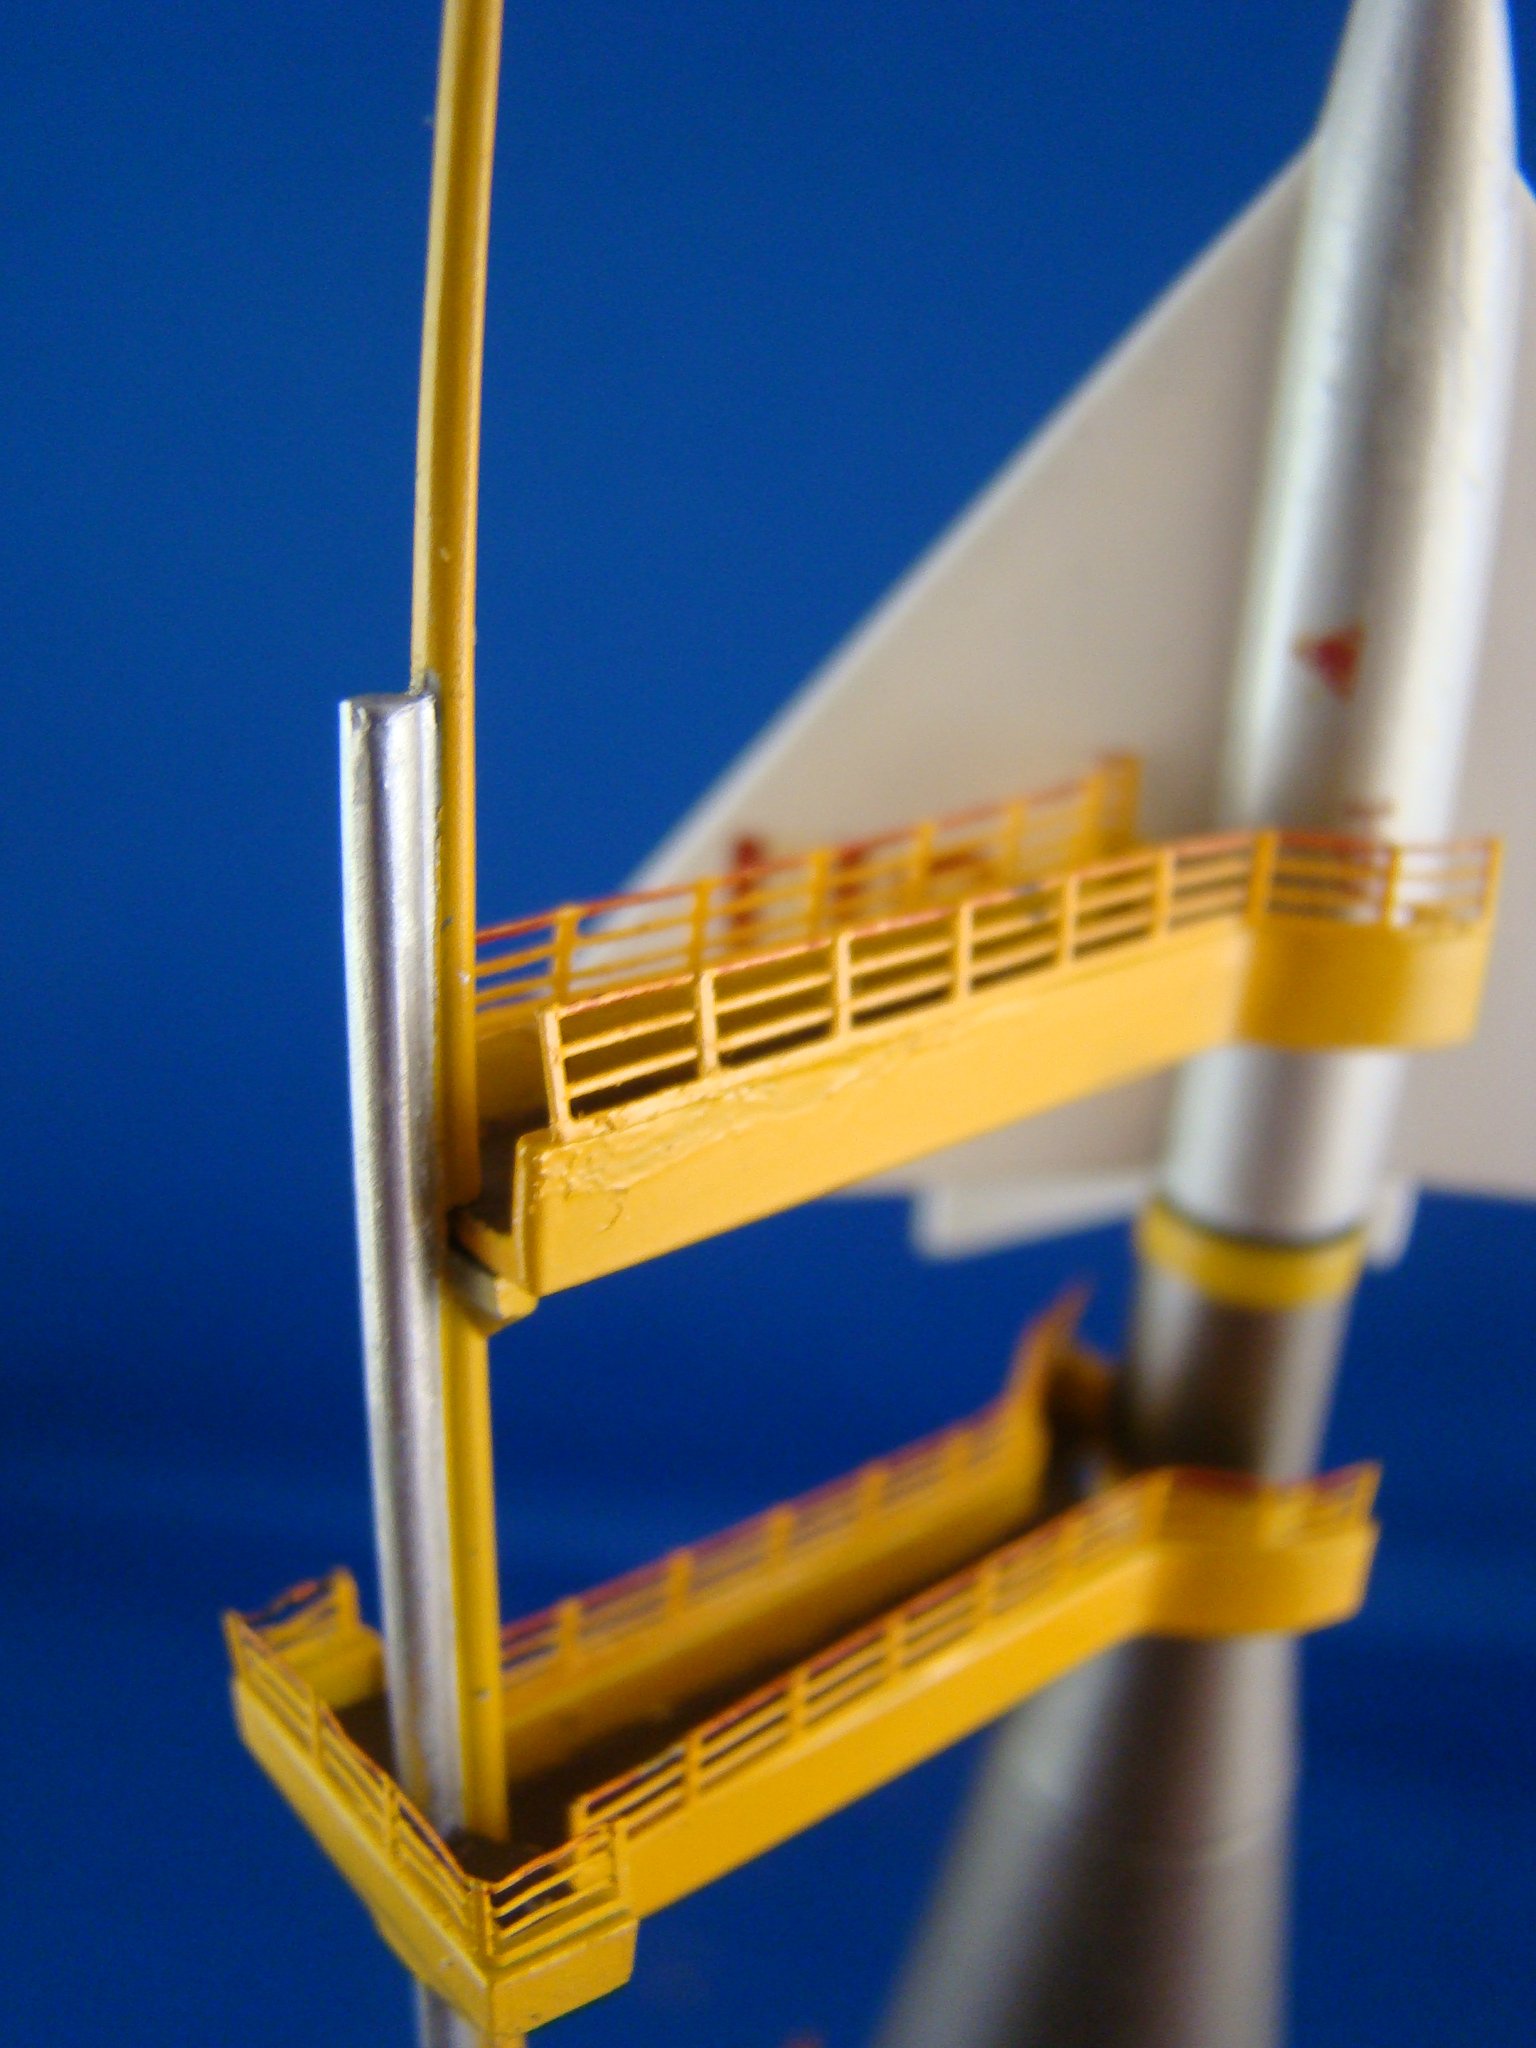
I am old enough to have seen the original March 9, 1955, Tomorrowland episode "Man in Space" on Disneyland. This was the show hosted in part by Wernher Von Braun to introduce the elements of space hardware needed to put us in space and to then build in orbit the rockets needed for both Moon and Mars missions. The key launch vehicle was the 3-Stage Ferry Rocket, which actually was in four stages. The delta-wing glider could return through the atmosphere after a deceleration burn, leaving the single-motor third stage in orbit to be recycled into one of the future ships to be built. The delta wing shape was recommended by the Disney artists who thought it looked more modern (and easier to animate) than Von Braun's earlier design with huge wings that he had proposed back in 1952 in his Collier's magazine articles illustrated by Chesley Bonnestell. Strombecker produced a kit of the rocket, no doubt a scaled down version of the Disney studio model, and I had to have one and build it. I was in high school then. The model survived for many years, but it was destroyed in a house fire. In 1993, Glencoe Models reissued the kit and, again, I had to have one. I took this simple kit and decided to make it hard. The Glencoe kit included the bland smooth-sided octogon base, but I remembered (or thought I did) that Strombecker had included either decals or paper panels for the sides of the octogon to give the impression of structure. I wanted structure, so I made my own with Evergreen H-columns, C-channels, and square strips. The service gantry was a long tapered pole with a single elevator guide on the back. Neither Strombecker or Glencoe did the service platforms correctly; the Disney model had cantilevered flat walkways with simple open pipe railings to keep people from falling over the edge. The kit's platform walkways have solid sides, so I added some PE model ship railings for added visual interest (and safety). The elevator itself is a simple open basket riding up and down the pole. The decal sheet had markings for several combinations of the ship. Use the XR-1 or -2 or -3 markings for the passenger glider. The CR-1 or -2 or -3 markings are for a wingless dry cargo stage that would stay in orbit and get reused there. The Scale Master Invisa-Clear Decals were 25 years old and took forever (10 minutes or so) to release from the backing paper, and two of the images shattered and could not be saved. Enjoy this revisit to the past that was two years before Sputnik I and the beginning of the real age of man in space. Ed
-
Hi, David, Thank you ... THANK YOU ... THANK YOU!!! ... for sharing your work on this magnificent build over the last eight months or so. You have appropriately answered the question: How do I build such a challenging project when I am looking at all these boxes of parts, electrical and fiber optic components, photo-etch details, and tiny airplanes with individual decal markings? One piece at a time. I hope some museum takes an interest in displaying this ship model. It deserves to be seen and appreciated by the public. That's hard to do if you keep it at home. Best regards. Ed
-
Did you notice that the men working on the models dressed properly to go to work? White shirts, ties, and jackets even in a paint shop. :smiley14: Fast forward a century and reflect on how workers (or people in general) dress today. :o Ed
-
It would not surprise me if "Licensing fees" are a significant part of the debt situation, with profits sucked out of the company for every image and logo used on the products. Once upon a time, those logos and images were sought by their owners to be on products as a form of free advertising. Now it is considered a source of revenue by those owners. So, kill the goose that lays the golden eggs. So sad that greed is so pervasive. Ed
-
Hi, Mark, I vividly remember your tale of woe when building your Maquette 1/72 Boeing C-75. I'd go looking for your photos if I did not know they were obliterated by Photobucket last year. I will not pay their ransom extortion. Thanks for your compliment, but I am not a true "master" of bare metal finishes. I'd gladly pass that honorary title to Gil Hodges, who will promptly pass it along to someone else. I used Alclad II Black Base and then Alclad Polished Aluminum for the main bare metal finish. The new chrome paint pen provided the bright accent on the landing gear and on the four propeller hubs. I used Model Master German Metallic Silver on the fabric surfaces. Rub-n-Buff Silver Leaf gave the landing gear legs, wheel hubs, and prop blades a different silver finish appearance. I brushed on a coat of Future to prepare for decals. The decals went on perfectly. They responded well to Micro Set and Micro Sol, with the clear carrier film virtually disappearing. Another brushed coat of Future sealed in and protected the decals. Ed
-
Hi, Kevin. Thanks for the compliment. I have to work with an optivisor magnifier at all times, no matter what scale I am working with. Ed