nmertes
-
Posts
178 -
Joined
-
Last visited
-
Days Won
7
Content Type
Profiles
Forums
Events
Everything posted by nmertes
-
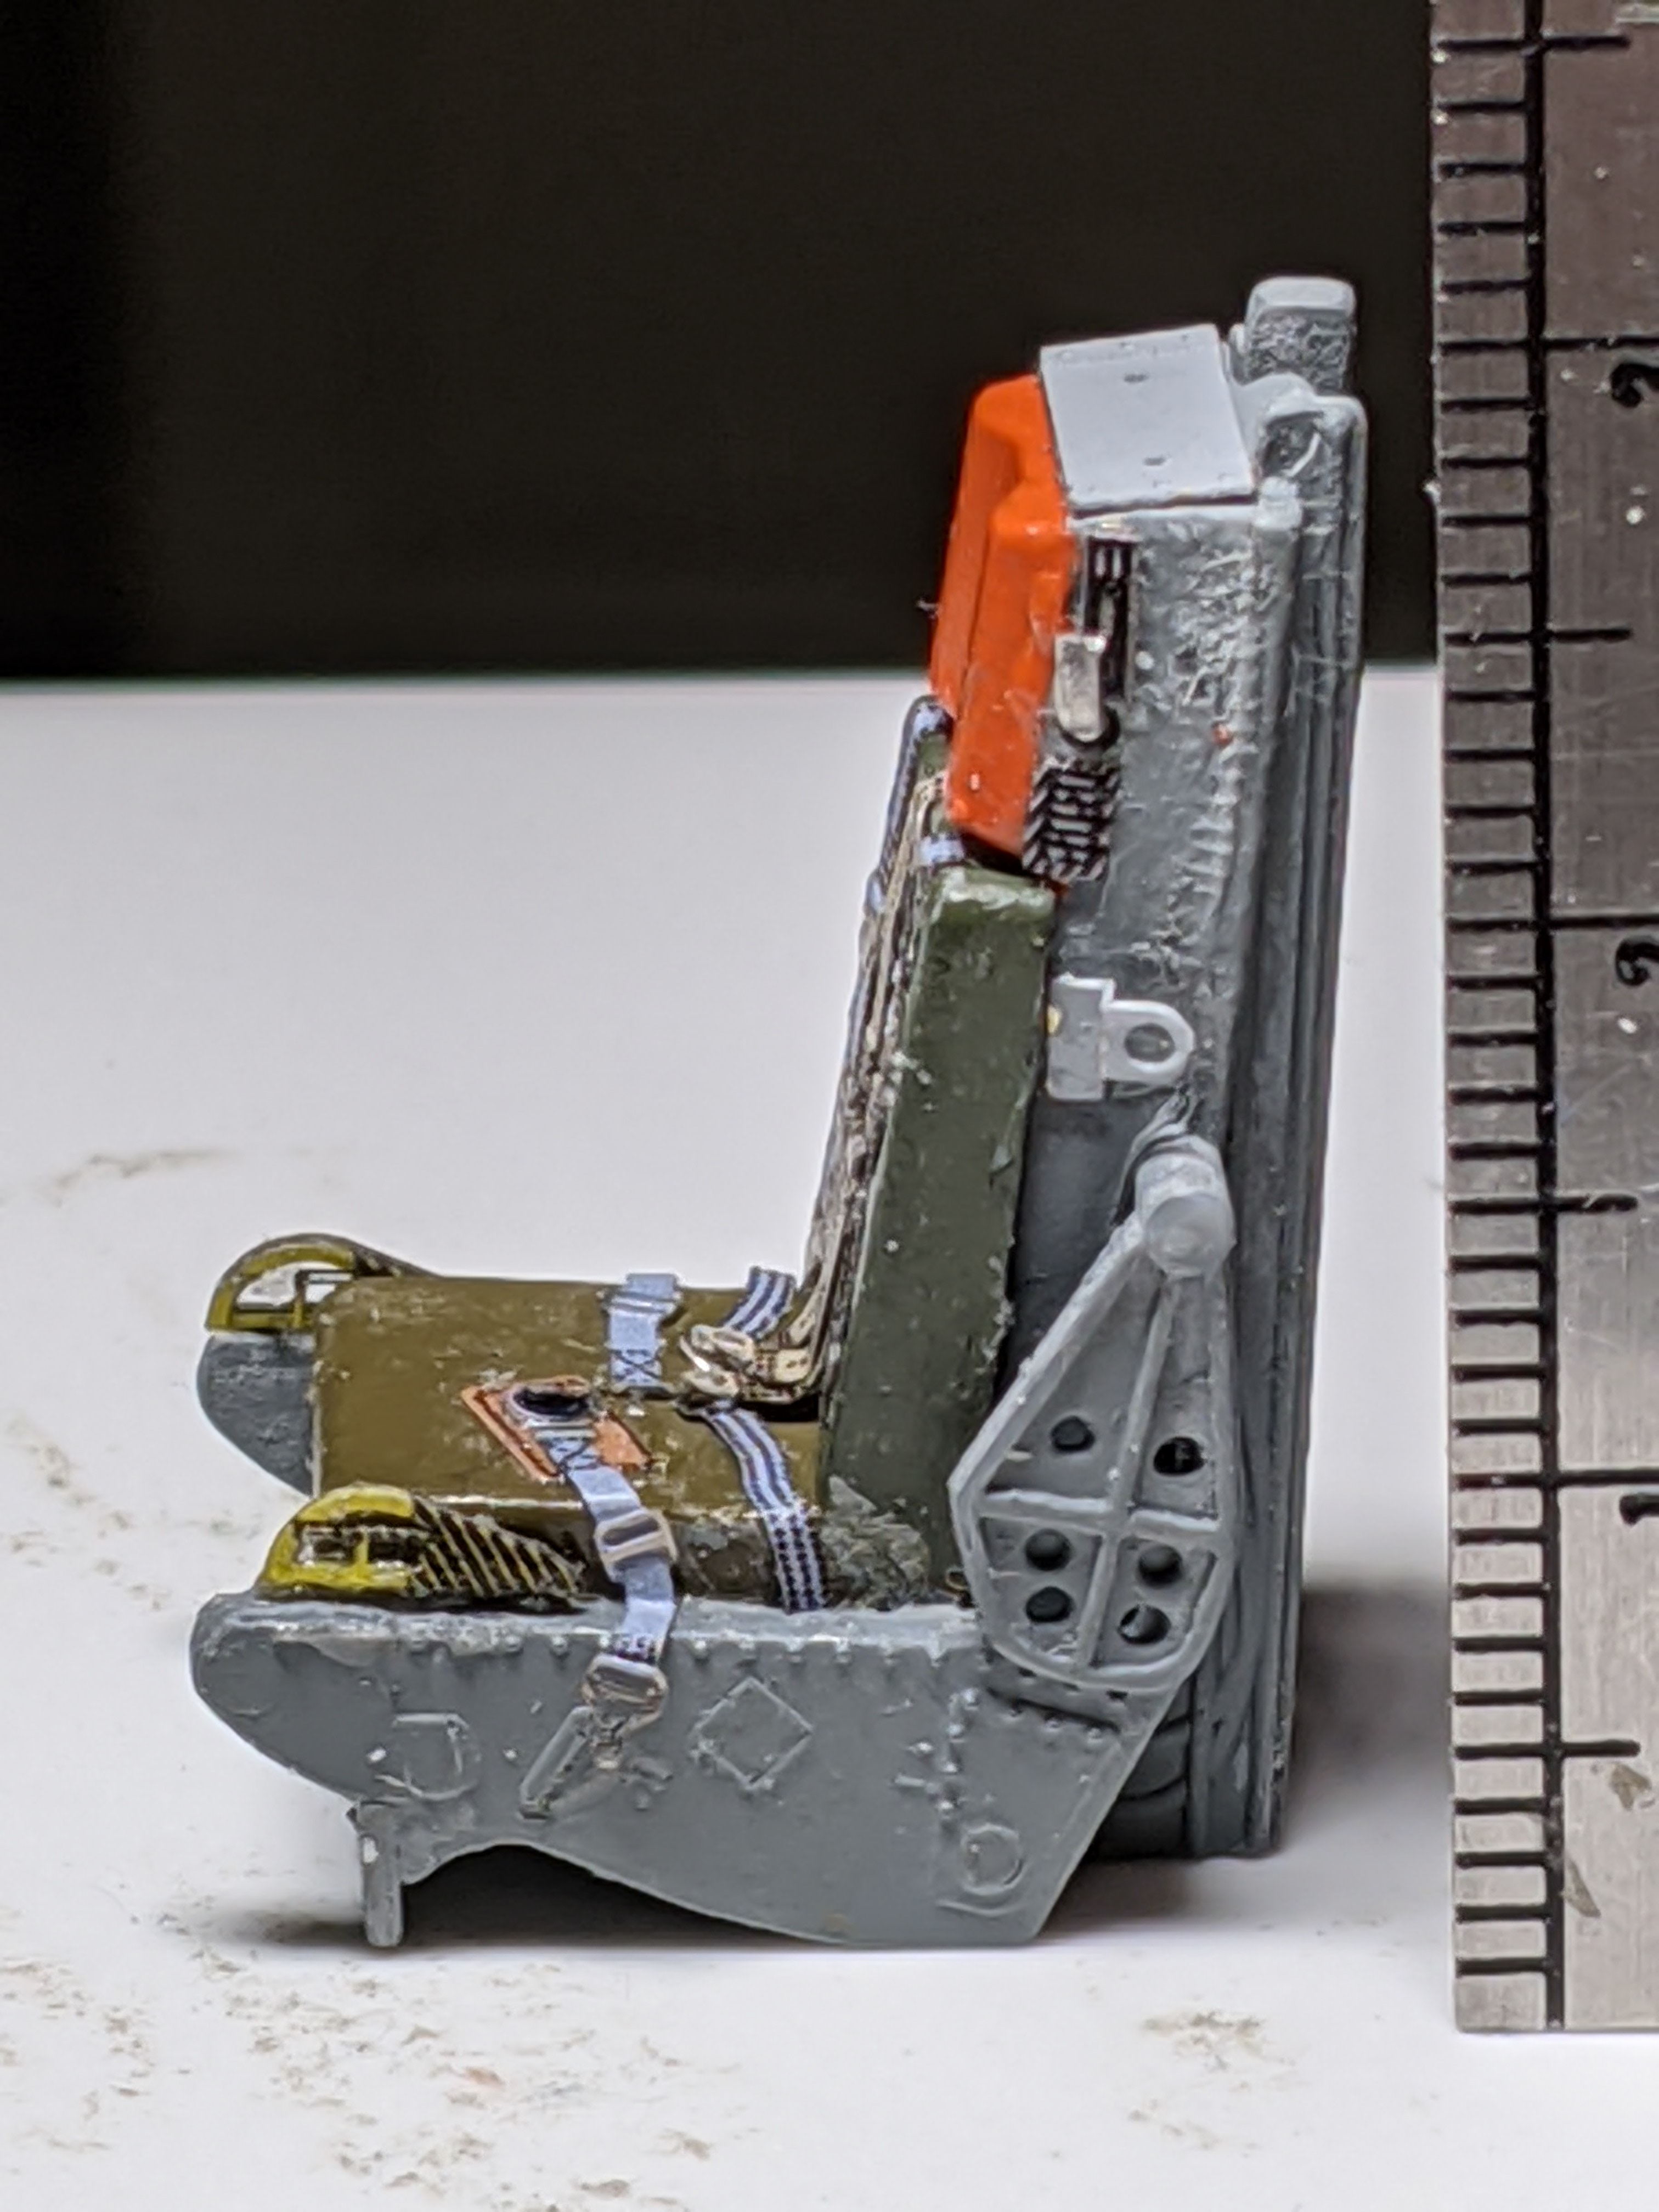
The P-51's are put away for awhile. I pulled out the Monogram & Trumpeter F-106 kits to finish in 48FIS markings. I have Detail & Scale markings that Bert sent me when I was with the 48th 1983-1985. The Monogram seat has good detail but, it's all molded in. The Trumpeter seat consists of 6 parts with no harness or other detail on the seat and there are 2 complete seats in the kit. PE harness is included but has to be painted the correct colors. Eduard to the rescue. Set 49714 was designed for the Trumpeter kit. Most of it should work with some careful modifications. I'm reasonably satisfied with how the seat turned out other than I got too much glue in several places. I tried using CA but, couldn't get parts settled where I wanted them before it setup. Ultra Glue from Ammo by Mig seems to work just fine. It gives the extended working time I like to get pieces settled where/how I want them. The seat now consists of 21 pieces. The 2 small hook pieces on side of the head rest are flattened solder. The PE parts were gobbled up by the floor monster.

-
I keep wondering where you come up with all these unusual kits & conversions. All very nicely done. Encouraging just to see your work.
-
You’ll get lots of good suggestions from this crowd. My favorite is Sprue Brothers (spruebrothers.com). I’ve never had them show an item in stock & then find out they didn’t have it. That has happened several times with squadron.com. There are a number of good overseas online stores but, you have to be prepared for very lengthy shipping times. I’ve had orders take as long as 6 weeks to get here from Eastern Europe.
-
Follow-up on my previous post about Ludwig's Modelers Library. It appears to be back up & working. Not sure what happened but, it's back. The instructions for the Monogram F-106 aren't there but, if you're looking for instructions for almost any kit, check it out http://www.cavallar.ch/model/.
-
Outstanding work, Rick. I'm curious. How thick was the aluminum and how did you get the panel lines so straight?
-
It looks like archive.org saved www.cavallar.ch/model 11 times over the last 5 years. All they have is the home page. There is no link to the instructions.
-
Instructions are posted for SOME kits on Scalemates. Just not the Monogram F-106. If you click on the box art picture & scroll down past the timeline, there is a link to a downloadable copy of the instructions. I checked several other kits in my stash & they show instructions available.
-
I have my stash cataloged on Scalemates, Someone on the Monogram Scale Models facebook page mentioned Scalemates. I'll try the facebook group.
-
I've had responses from some folks on modeling facebook pages with the same result, Gil. It looks like Ludwig took the library down. Not sure what happened. Somebody mentioned that scalemates.com has kit instructions. I haven't figured out how to get to that page.
-
It's been a great site especially for comparing Monogram & Revell instructions of the same kit. The PDF files are downloadable.
-
I've used Ludwig's Modeler's Library several times over the past few years looking for kit instructions that have come up missing. When I attempted to open it today I got a can't be reached www.cavallar.ch/model took too long to respond error. Have any of you attempted to visit this site lately or know what's happened to it?
-
Thanks for the info, Gil. I also have spent a lot of time at the museum in Dayton & have plenty of photos of the RF-86. I found the kit on ebay from a seller in Japan but, he wants $98.00 for it. Guess I'll keep it on the back burner for awhile.
-
In the June 2018 Fine Scale Modeler, Chuck Davis converted an Academy 1/72nd scale F-86E into an RF-86F. Somewhere down the road on my build list is to convert an Eduard (Hasagawa) 1/48th scale F-86F to an recon version. Does anybody know of a conversion kit or plans to do it without spending years in the process?
-
Taking a long shot. I ordered & (finally) received Kasl Hobbies 1/48th scale RF-5E detail set. The only problem is most of the information is in Chinese. I checked the website shown on the instructions. The website is all in Chinese with no option for an English translation. The paint call outs are for Gunze Mr. Color which I should be able to cross to Model Master & Tamiya and I think I understand the diagrams well enough that I shouldn't have any problems. It would be nice to have a translation of the instructions. Do any of you read Chinese well enough to translate the attached.
-
Nothing in the world wrong with that system. I'm making my 1st serious attempt at using Eduard PE on both P-51's. I can usually get 1 or 2 small pieces glued in place. Then I have to walk away from it for a couple hours. I usually paint light to dark colors. That way you won't have a problem with darker colors showing through the lighter colors. The only exception to that rule would be to use a white primer before spraying any other colors. That will give you a good base color to build on. Allow plenty of time for the paints to cure before applying any tape. Otherwise you may windup lifting paint. Since the AIM-54's were overall white, you might start with a white primer, add your other colors, & finish with a gloss or semi-gloss clear finish. I like whatever name Johnson & Johnson is calling Future these days (It looks like Pledge Multi-Surface Floor Finish is the current name).
-
Looking good. I'm in the same boat. I have 2 P-51's on the bench and can only work on them Friday & Saturday.
-
Welcome to modeling on this side of the pond. Looking forward to seeing some photos of your Skyraider.
-
Thanks Pete & Richard. I have acetone & will clean the pieces tonight. Tomorrow evening I will hit them with Tamiya white primer.
-
Continuing work on the Tamiya P-51D which will wind up being an F-6D. I'm having trouble getting enamel to stick to some of the Eduard brass PE pieces. Do any of you have a suggestion on how to get paint to stick to it? Enamel just wipes off even after drying for several hours.
-
I'm with Mark on the popsicle stick carved to a chisel edge. Another option for the same idea is a wooden coffee stirrer. They're about the same thickness but considerably narrower.
-
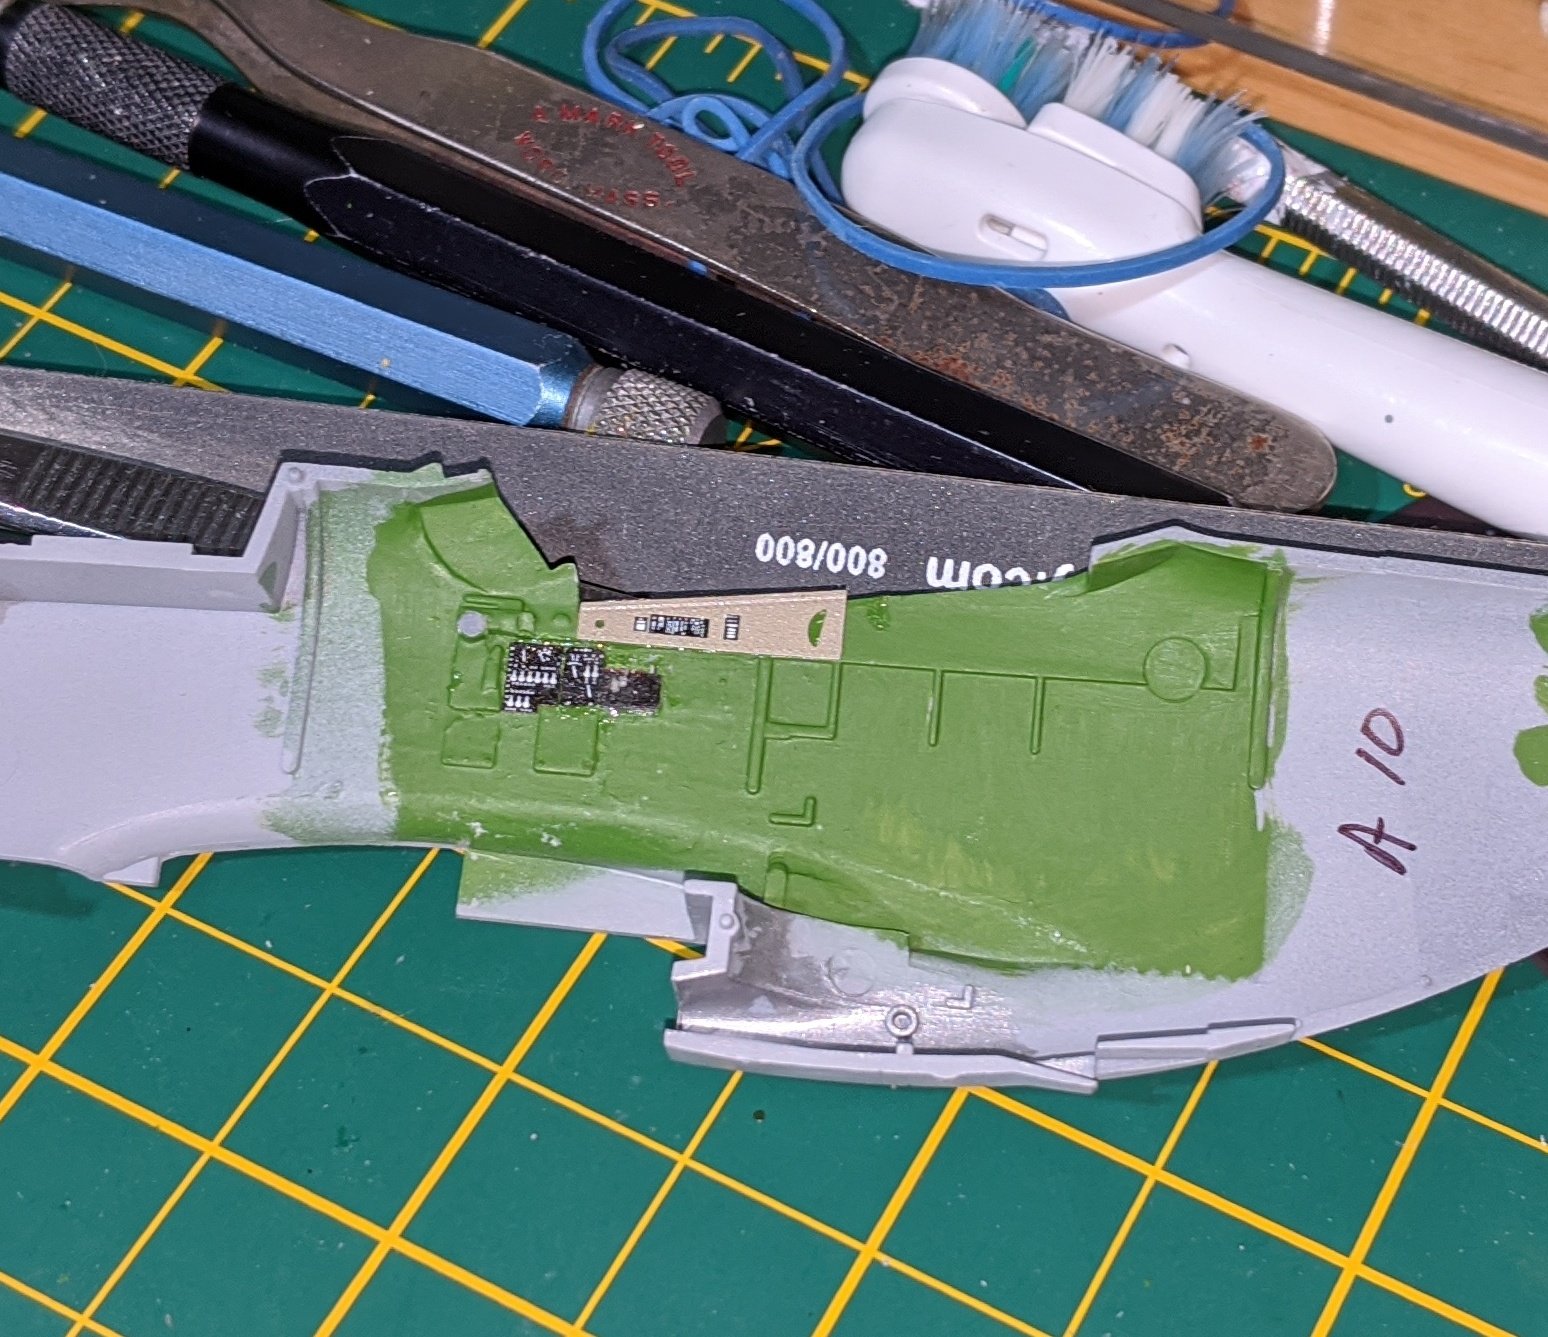
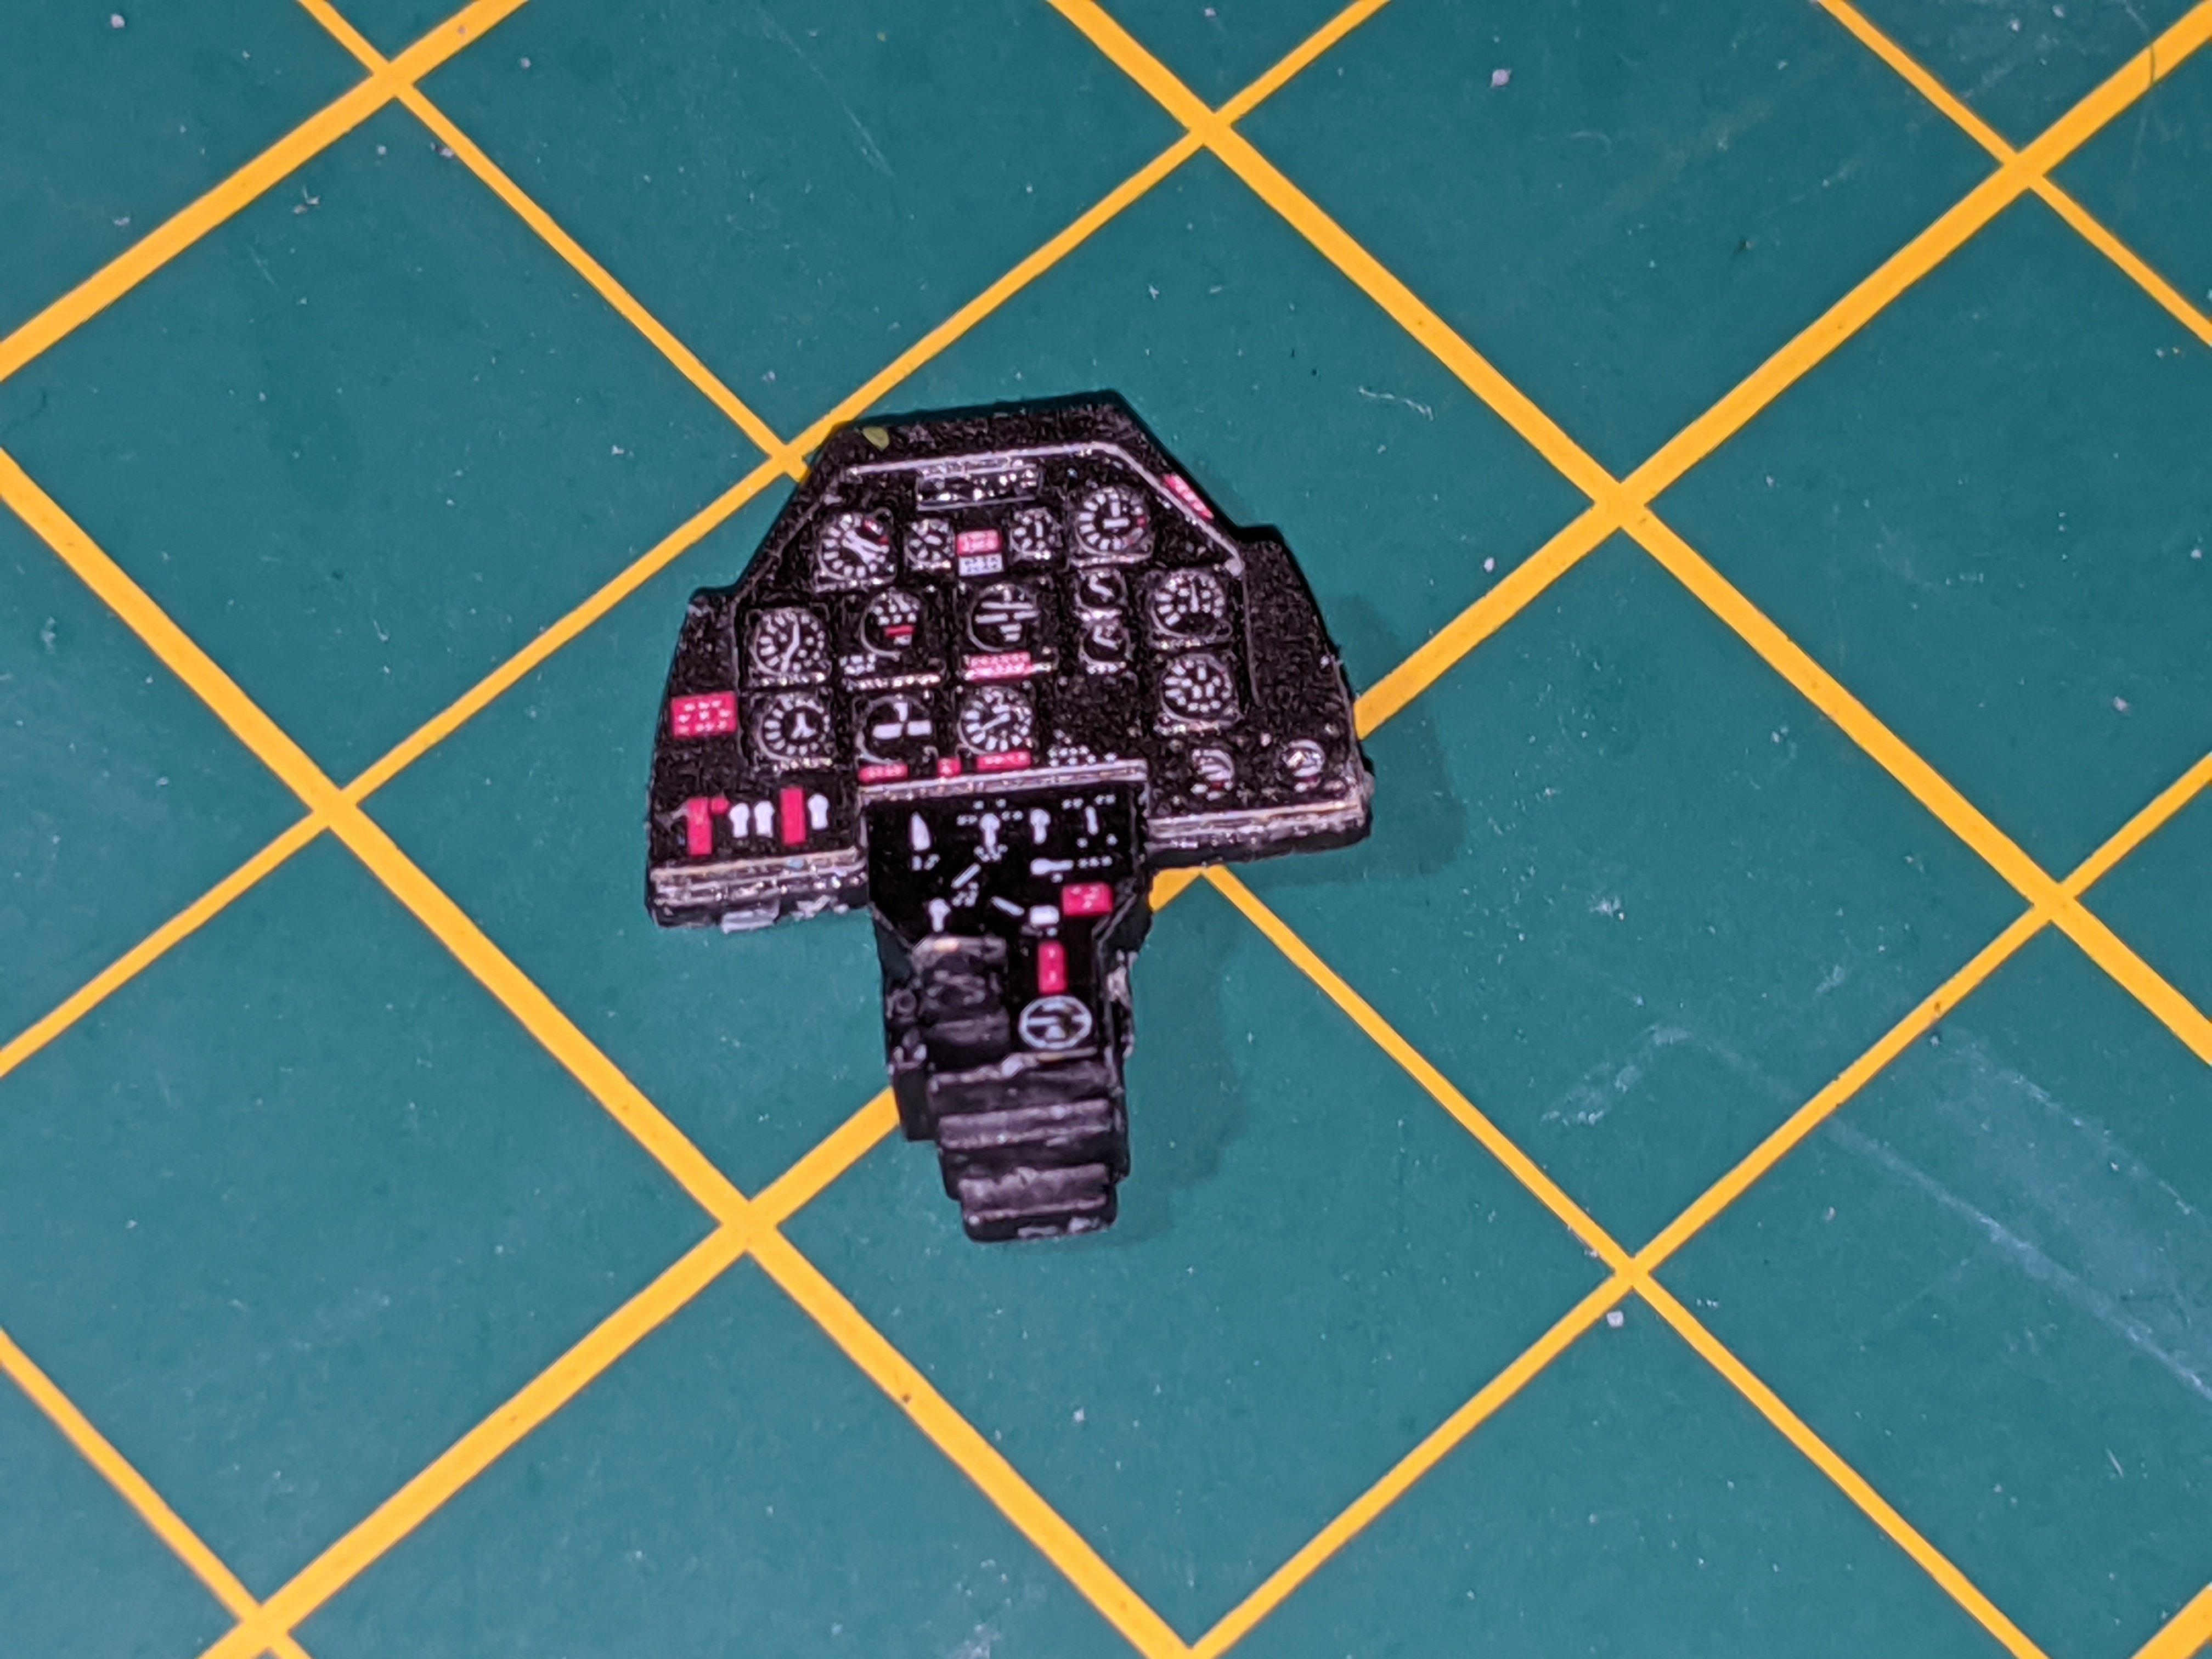
The Accurate Miniatures F-6B that I posted as a WIP sometime ago is almost ready for color so I started on the Tamiya P-51D since it's too hot most of the day to do any airbrushing. I'm using the Eduard PE set that includes the fuselage details. Photo 1 is the left fuselage half. Photo 2 is the right fuselage half. Photo 3 is the instrument panel which includes 5 pieces of PE. Photo 4 is the cockpit floor/battery rack. I've been gluing the PE in place with Ammo by MIG PVA glue except the curved piece on the left side of the cockpit where I used CA. Glued the floor end & let it dry for an hour. Then put a drop of CA on the top section & held it in place for a couple minutes. A question for folks like Gil Hodges or Richard Marmo. How do you remove the stub from PE parts that you've trimmed off the sheet? I've been clipping them off using a small Swiss Army knife scissors then sanding the stubs off with an 800 grit sanding stick. I'm interested in knowing if anybody has a better method. Some of the pieces are extremely small.
-
Very nice work on a very unusual subject, Ron.
-
Thanks, GIl. Your answer is what I'm looking for. The instructions show the zinc chromate further down the intake but not the mouth of the intake.
-
I'm working on a Tamiya P-51D Mustang which will be in Tuskegee Airman markings & an Accurate Miniatures F-6B which will be finished as Little Sir Echo. Does anyone know what color the inside of the intake should be? Neither kit gives a color reference for that area.
-
Welcome back Phil. Glad you found your way to IPMS & the forums.