nmertes
-
Posts
177 -
Joined
-
Last visited
-
Days Won
7
Content Type
Profiles
Forums
Events
Everything posted by nmertes
-
Lookin' good. I have both the Eduard Mig-21MF & Mig-21R kits in 1/48th that I'm looking forward to building when I work down to them. Have all the PE & Resin to go with them.
-
The fan is rated at 110cfm from Lowe's. I don't think it's sealed but, have been shooting enamel thinned with Mr. Color Leveling Thinner for a couple of weeks with no problem. Now I'm going to have to check Lowe's website to see if it is sealed.
-
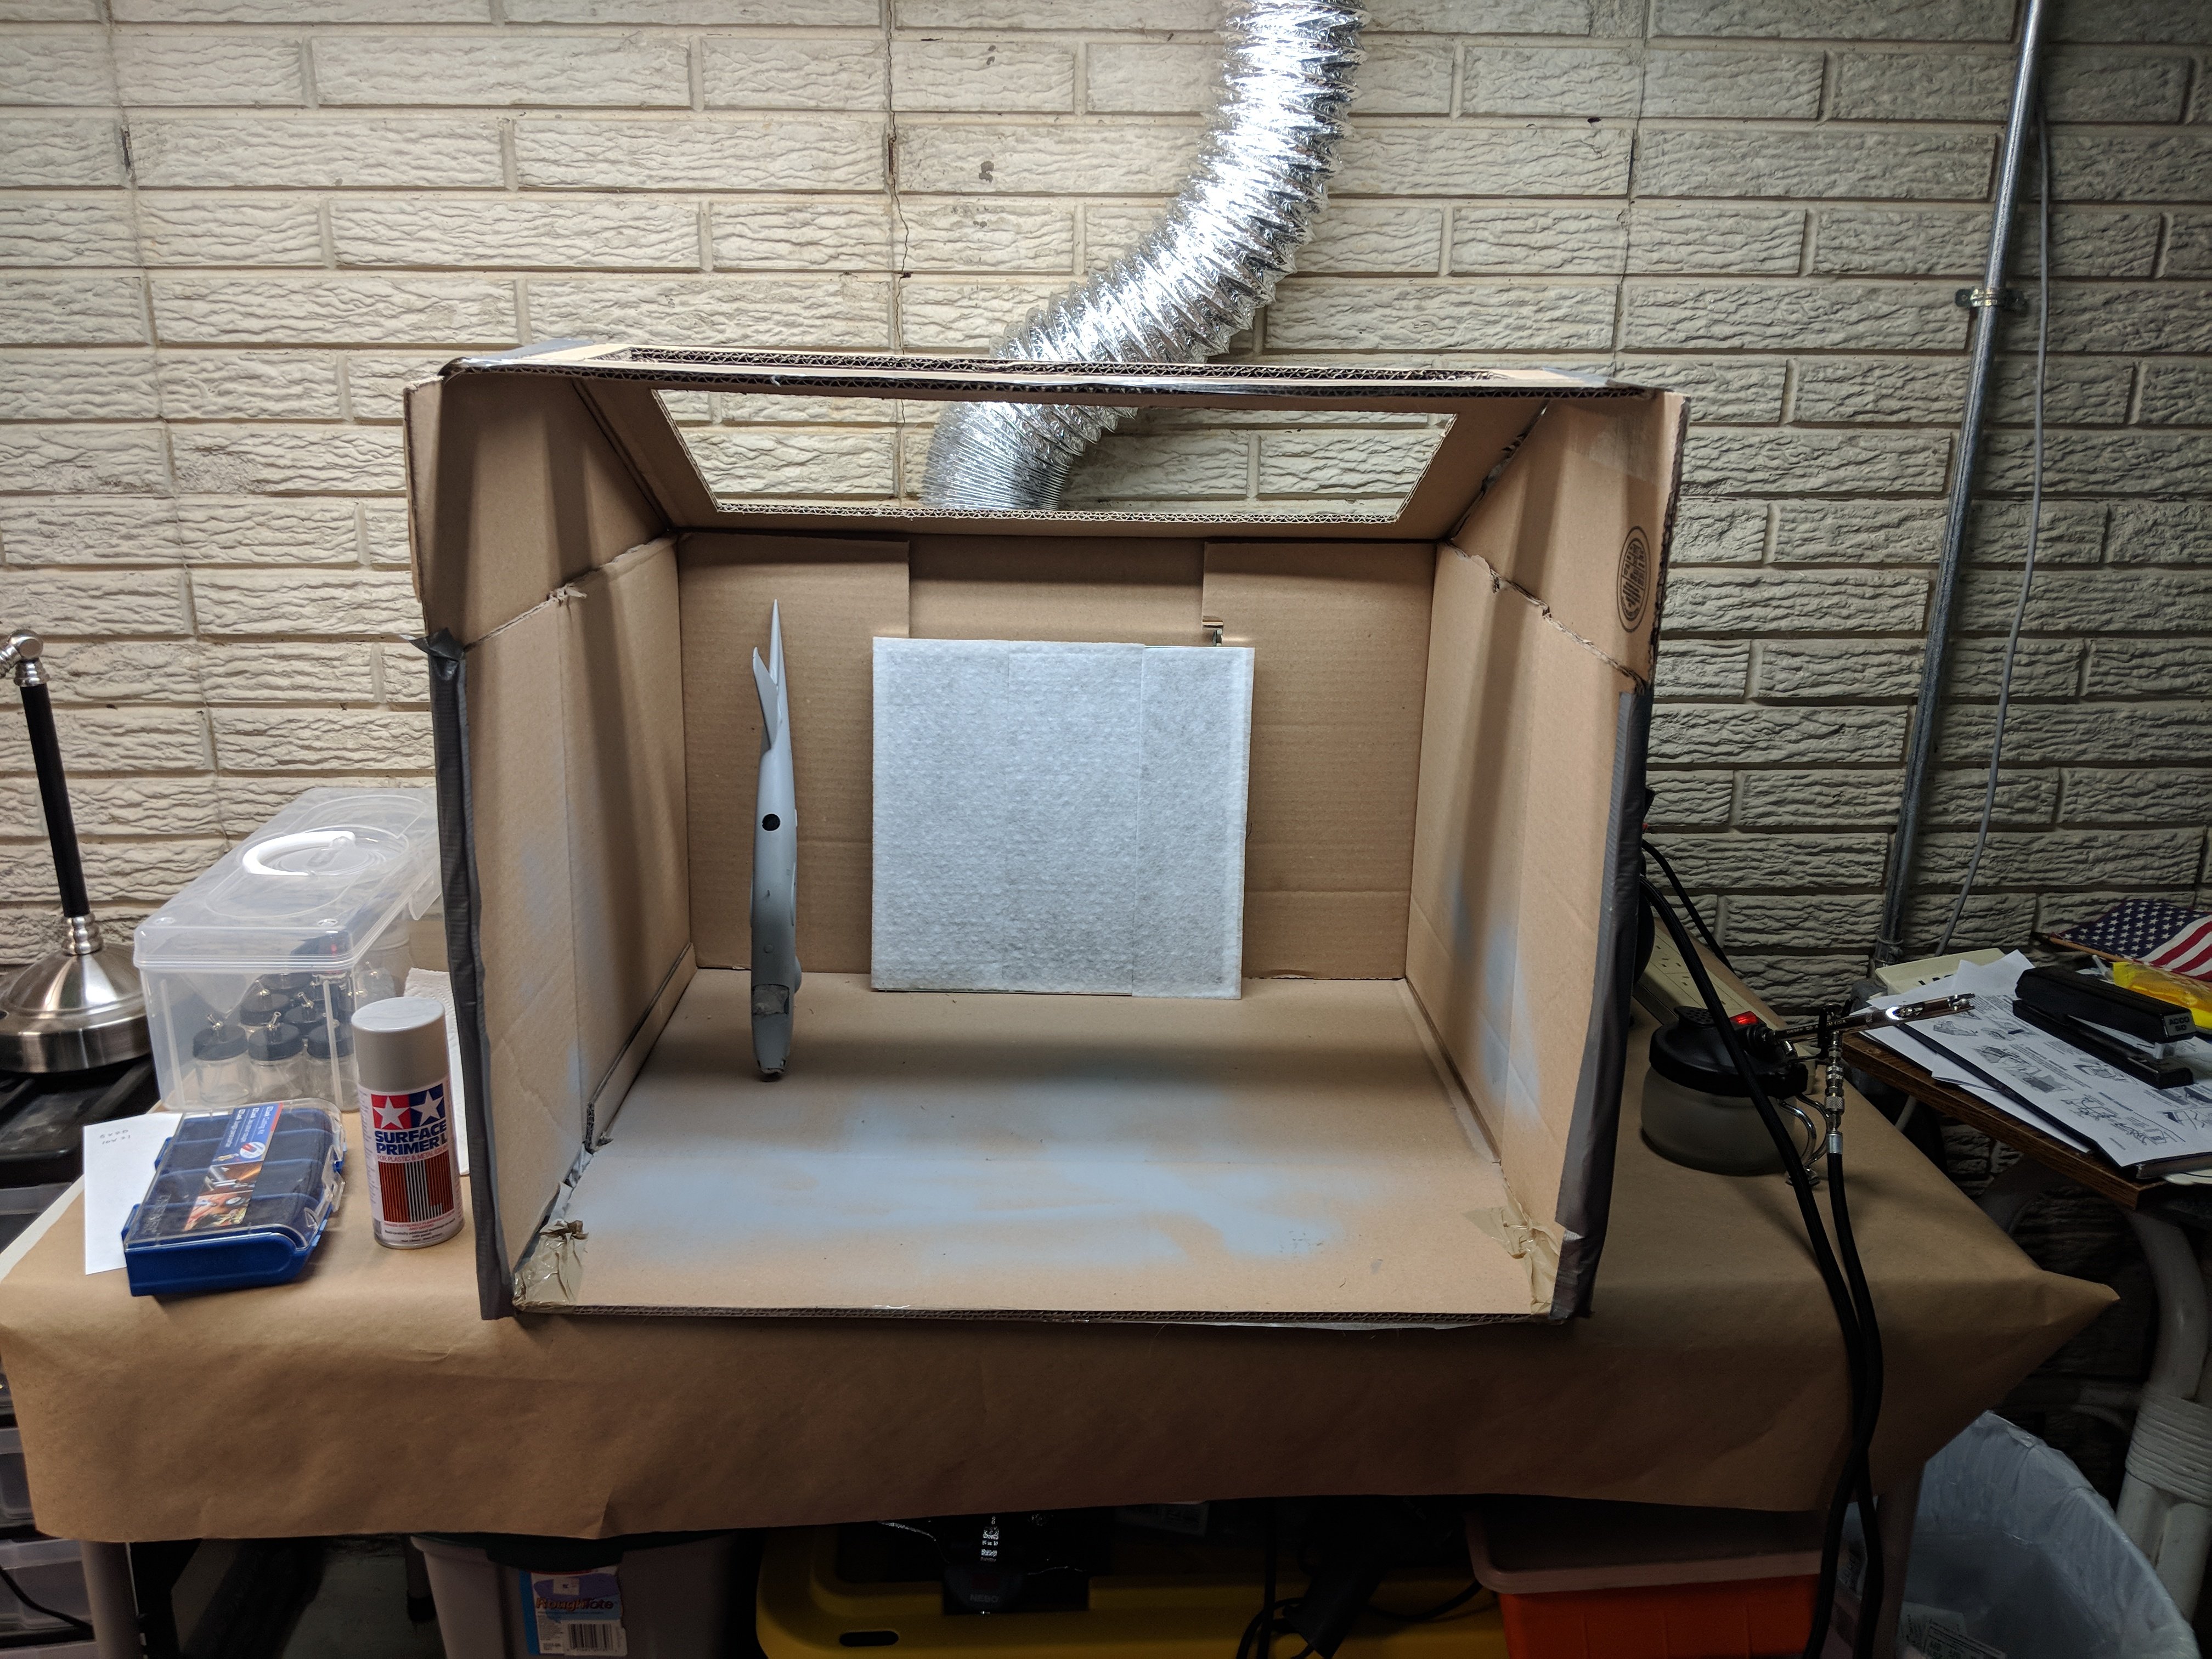
For too many years I've had to do airbrushing in the garage which limited me to warmer weather and enduring dust problems. After looking at spray booths on Micromark.com, I decided to build my own. The 1st shot is the prototype made from large cardboard boxes. The 2nd shot is made from 3/8" plywood. I haven't cut holes for the fan or illumination. The box is approximately 24" square but, only 19" deep. I left the sides & bottom the full length to protect the exhaust fan which would stick out about 4" in the back. I can send the list of materials & dimensions if anybody is interested in building their own. Lowe's cut the pieces. I'll cut in the windows & fan hole.

-
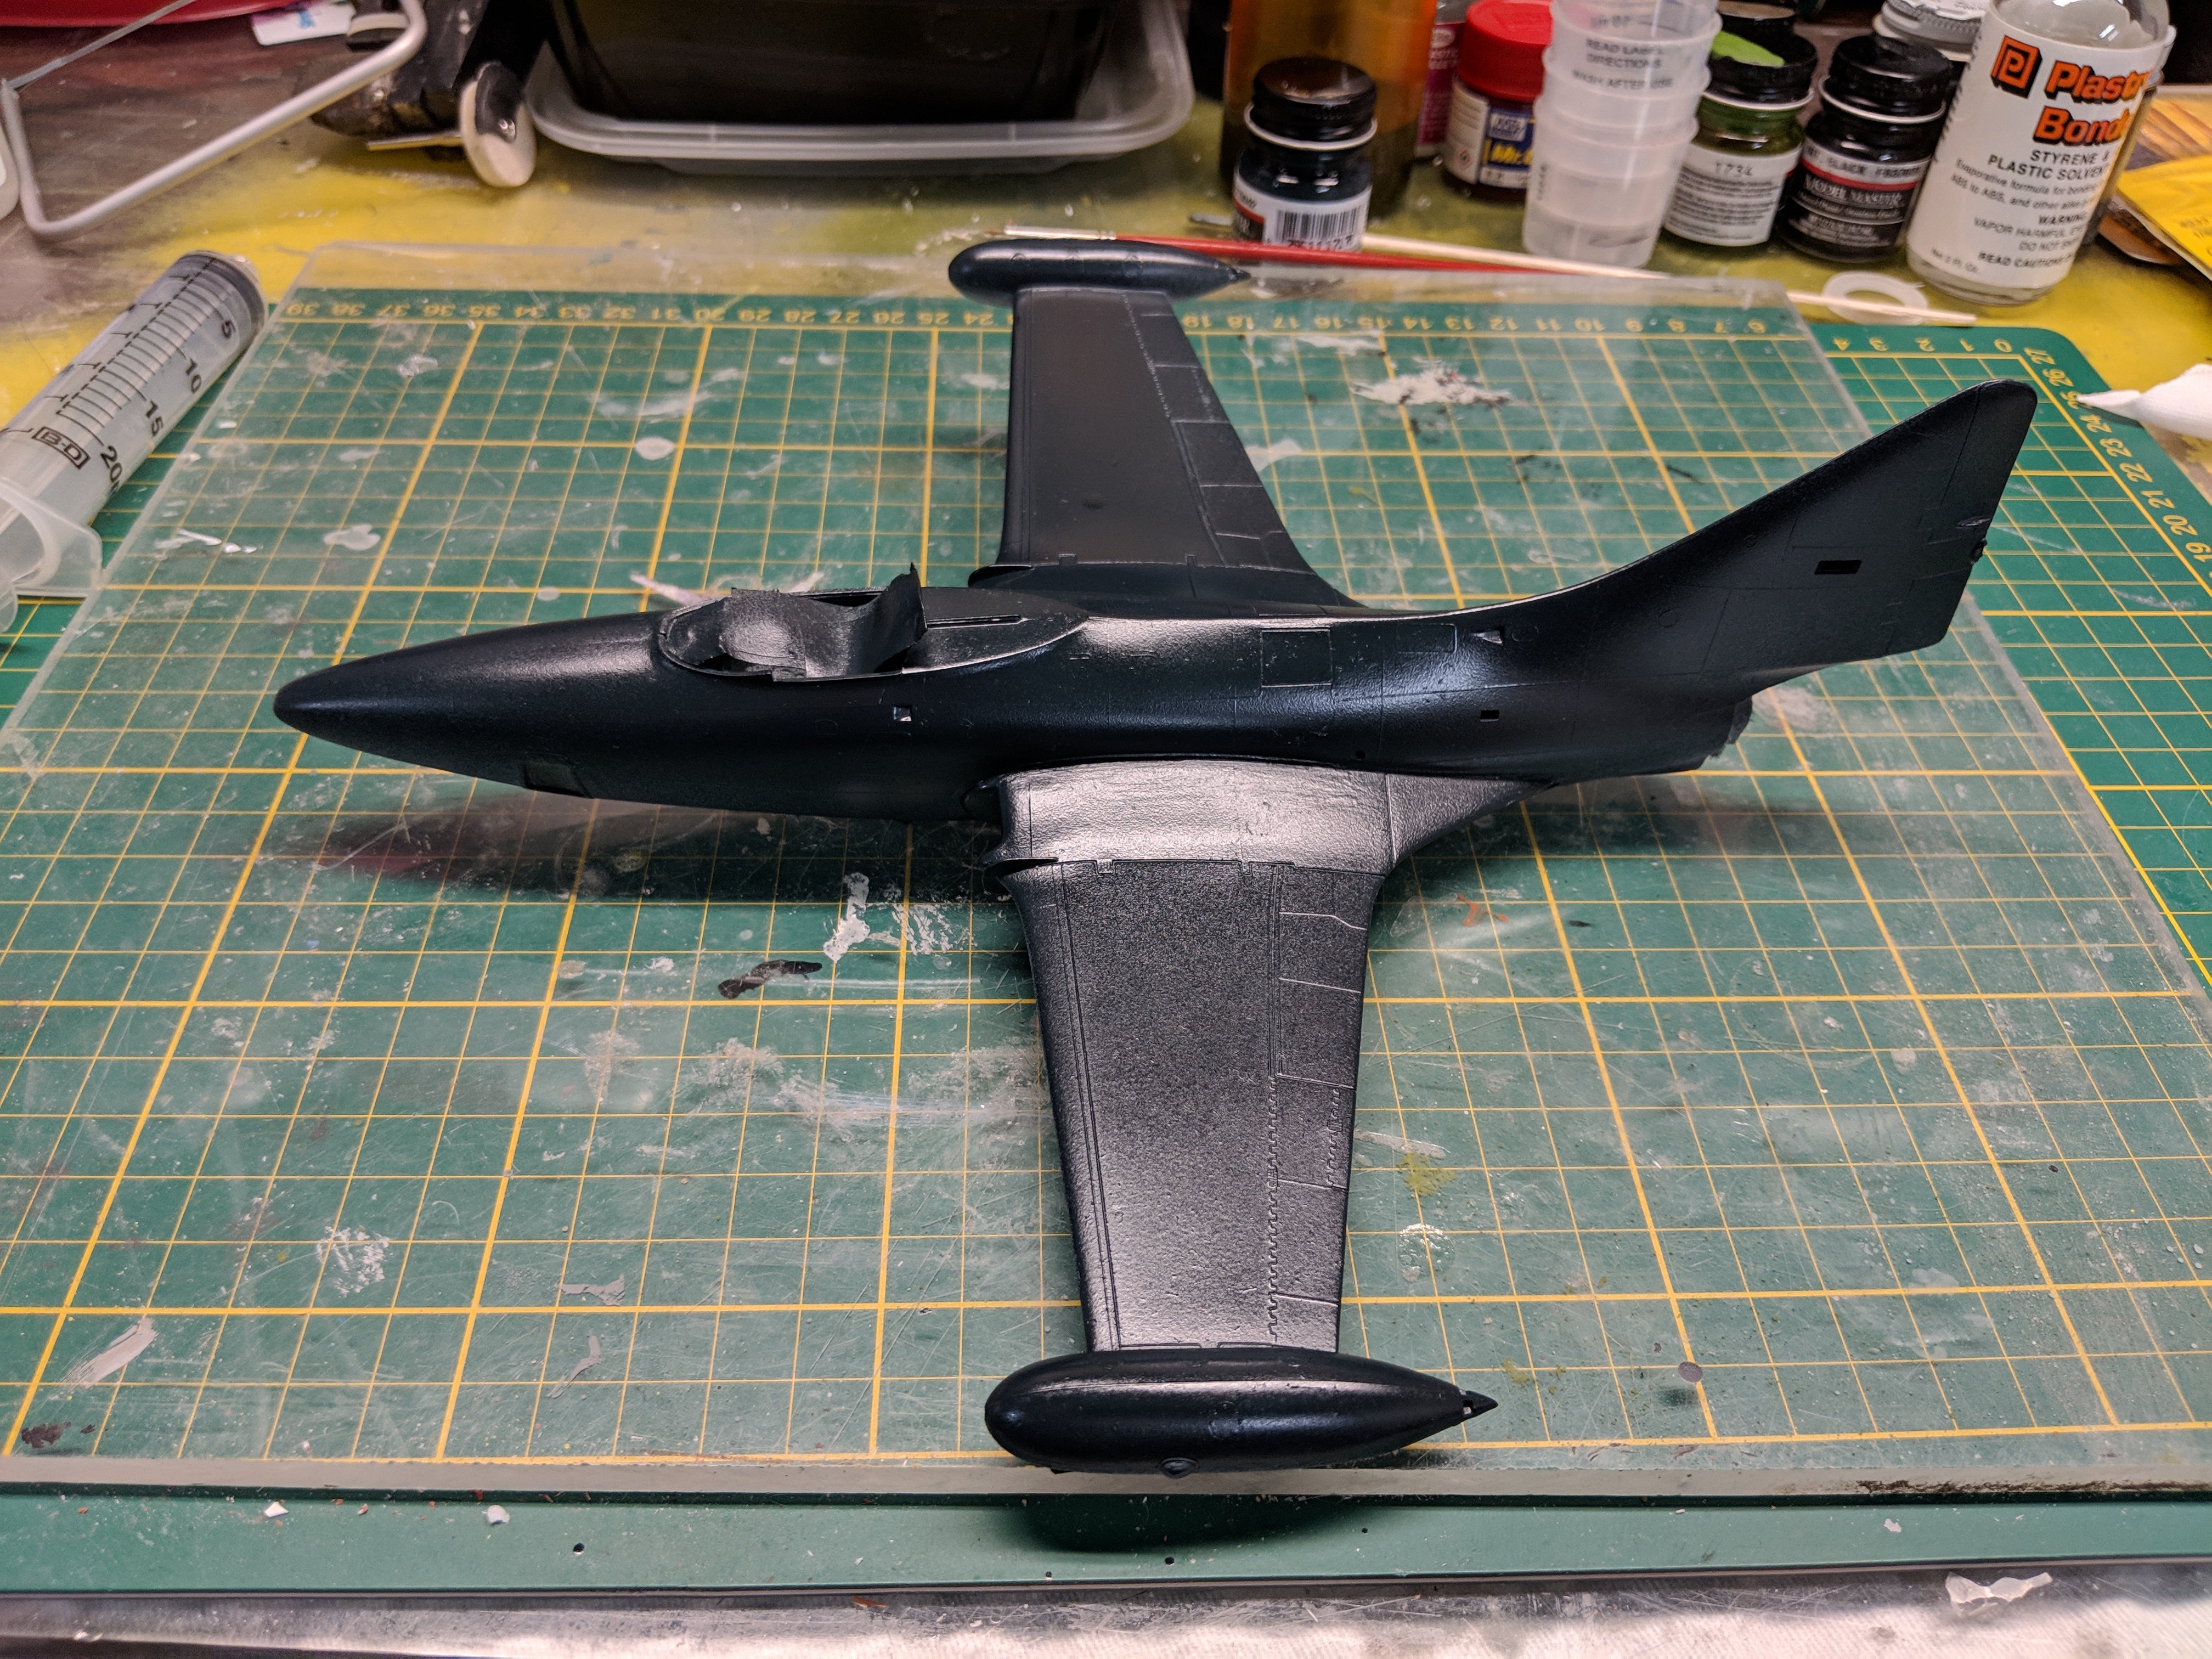
More progress. I missed Gil's recommendation of Tamiya white primer before spraying blue. Next kit on the docket is the Kitty Hawk F2H-2P. I'll remember to use the white for it. Experimenting with Mr. Color Leveling Thinner. Thinned MM Dark Sea Blue 2 parts paint to 1 part thinner. Looked extremely thin. Dropped the pressure on my compressor to 12 psi & moved the needle a little further forward. Guess it's been too long since I've done any airbrushing. The topside will need another coat & a couple days drying time before I shoot the bottom.
-
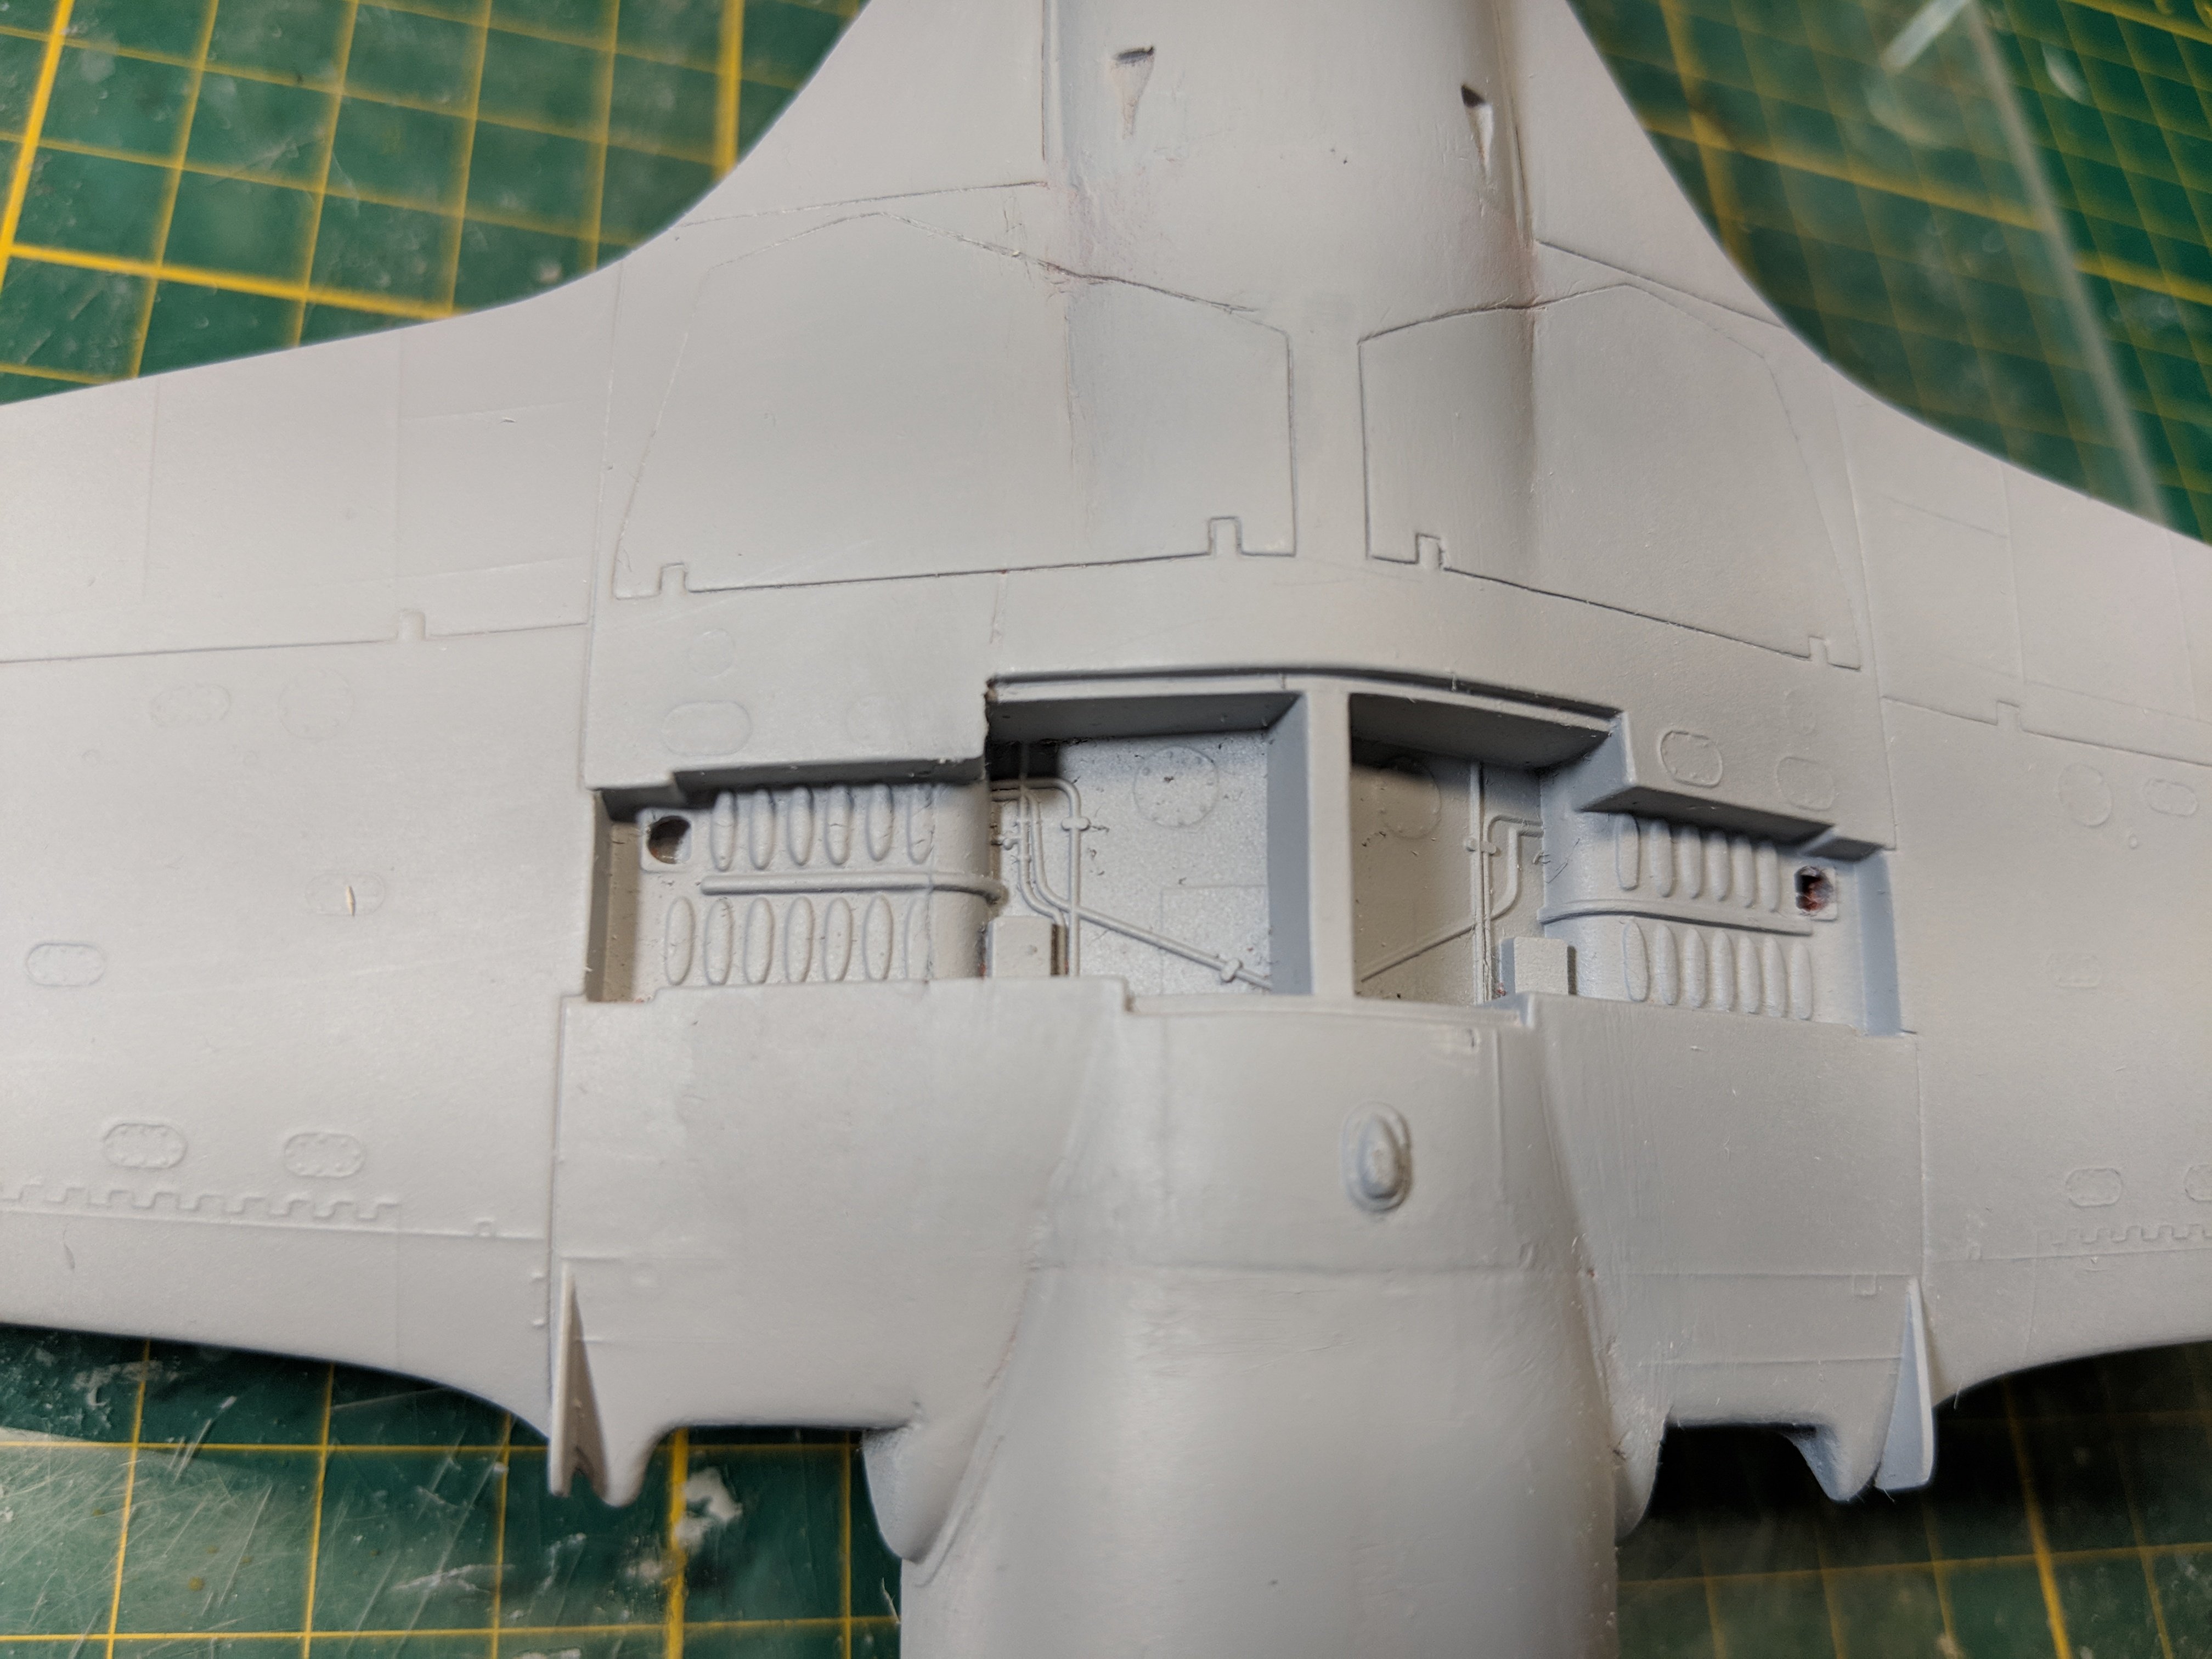
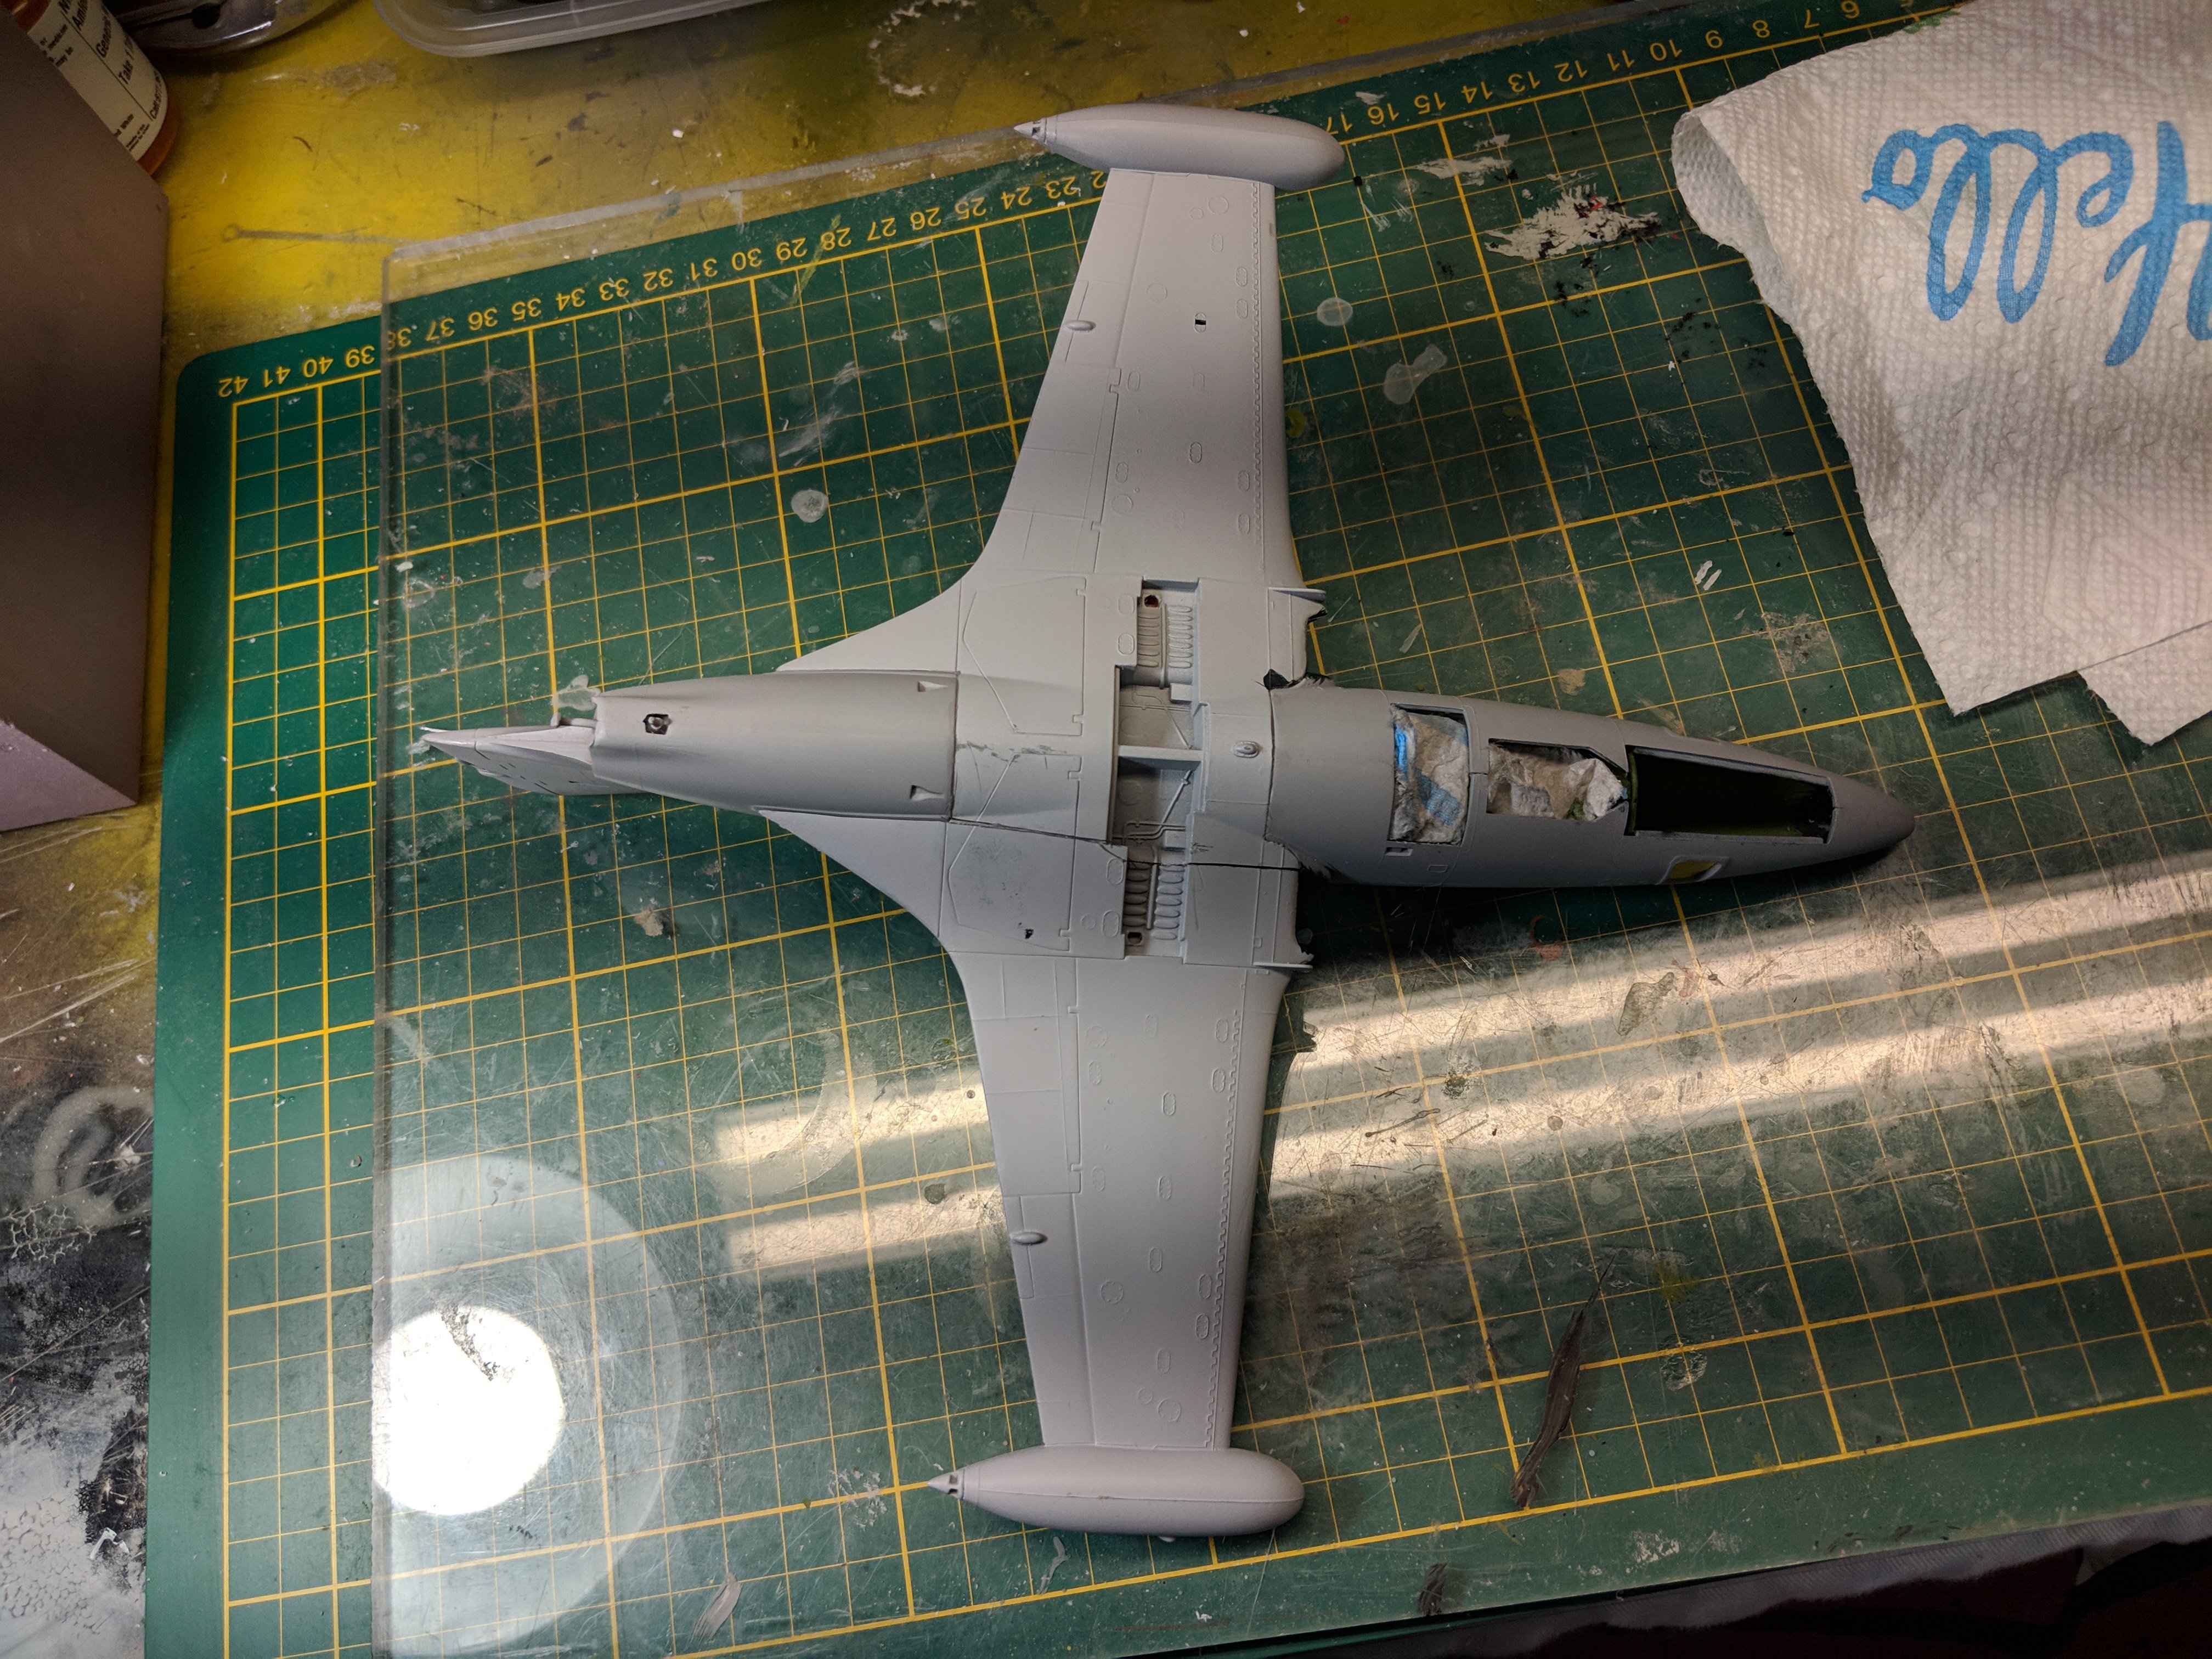
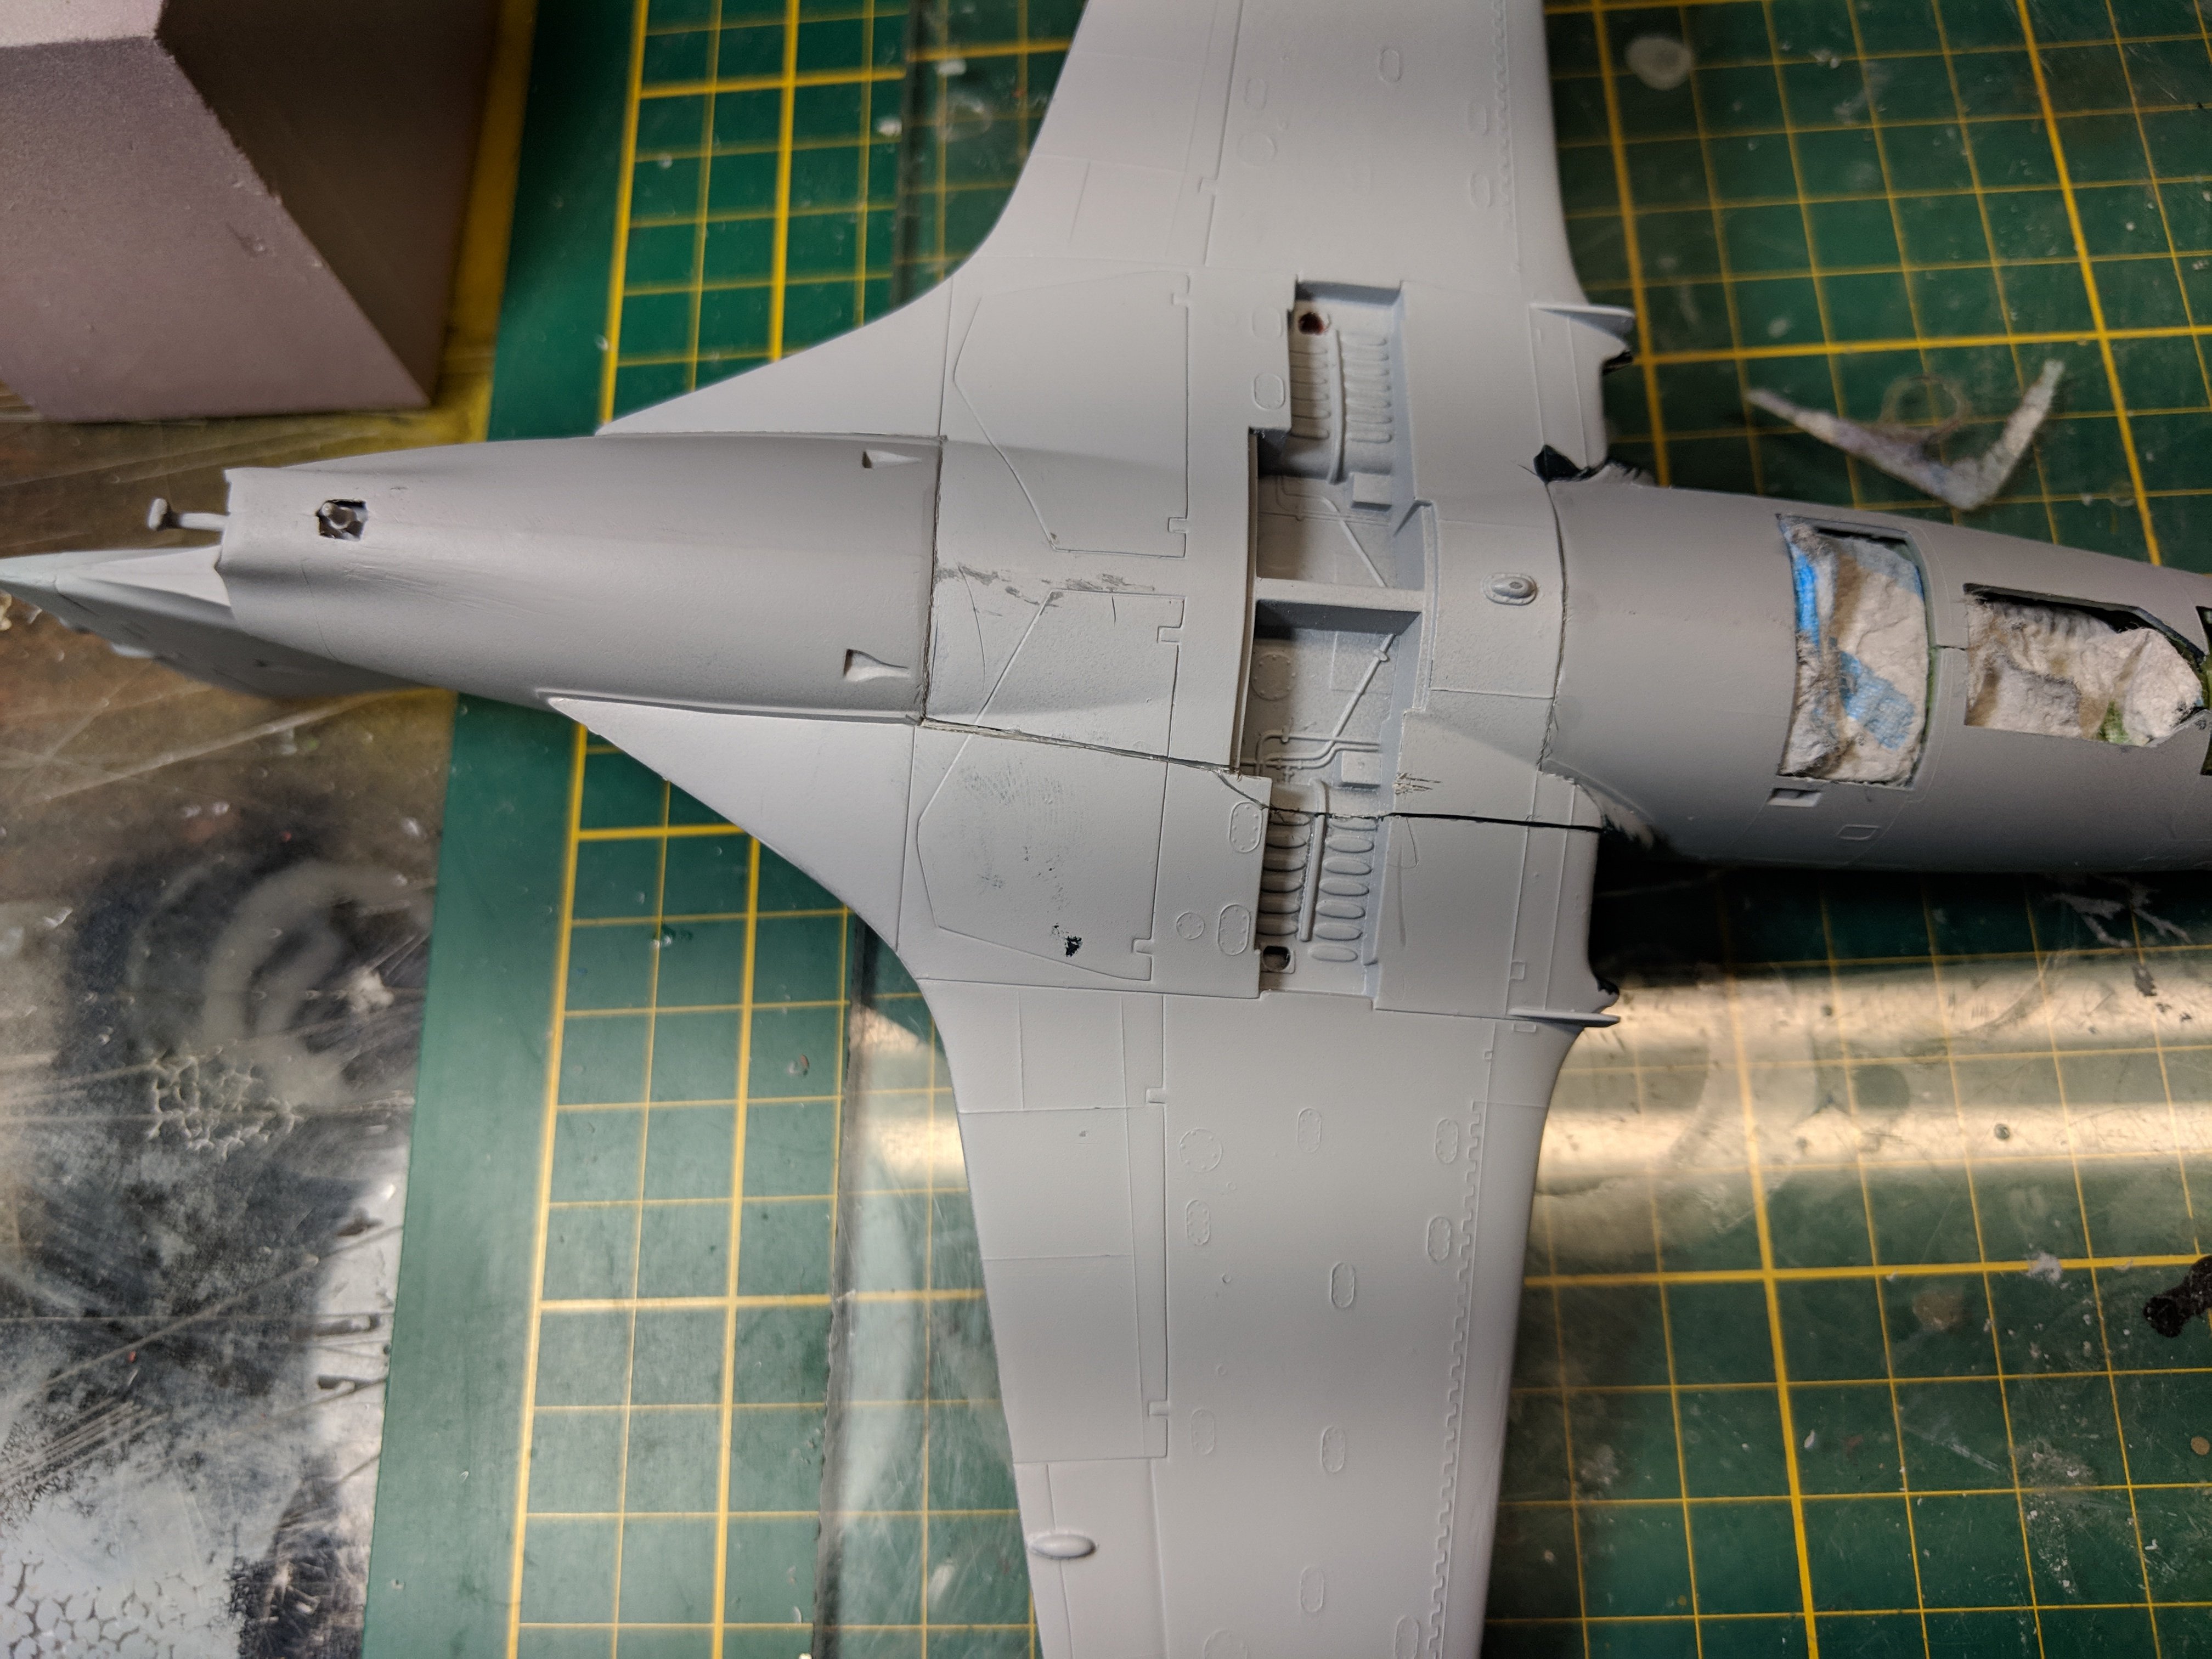
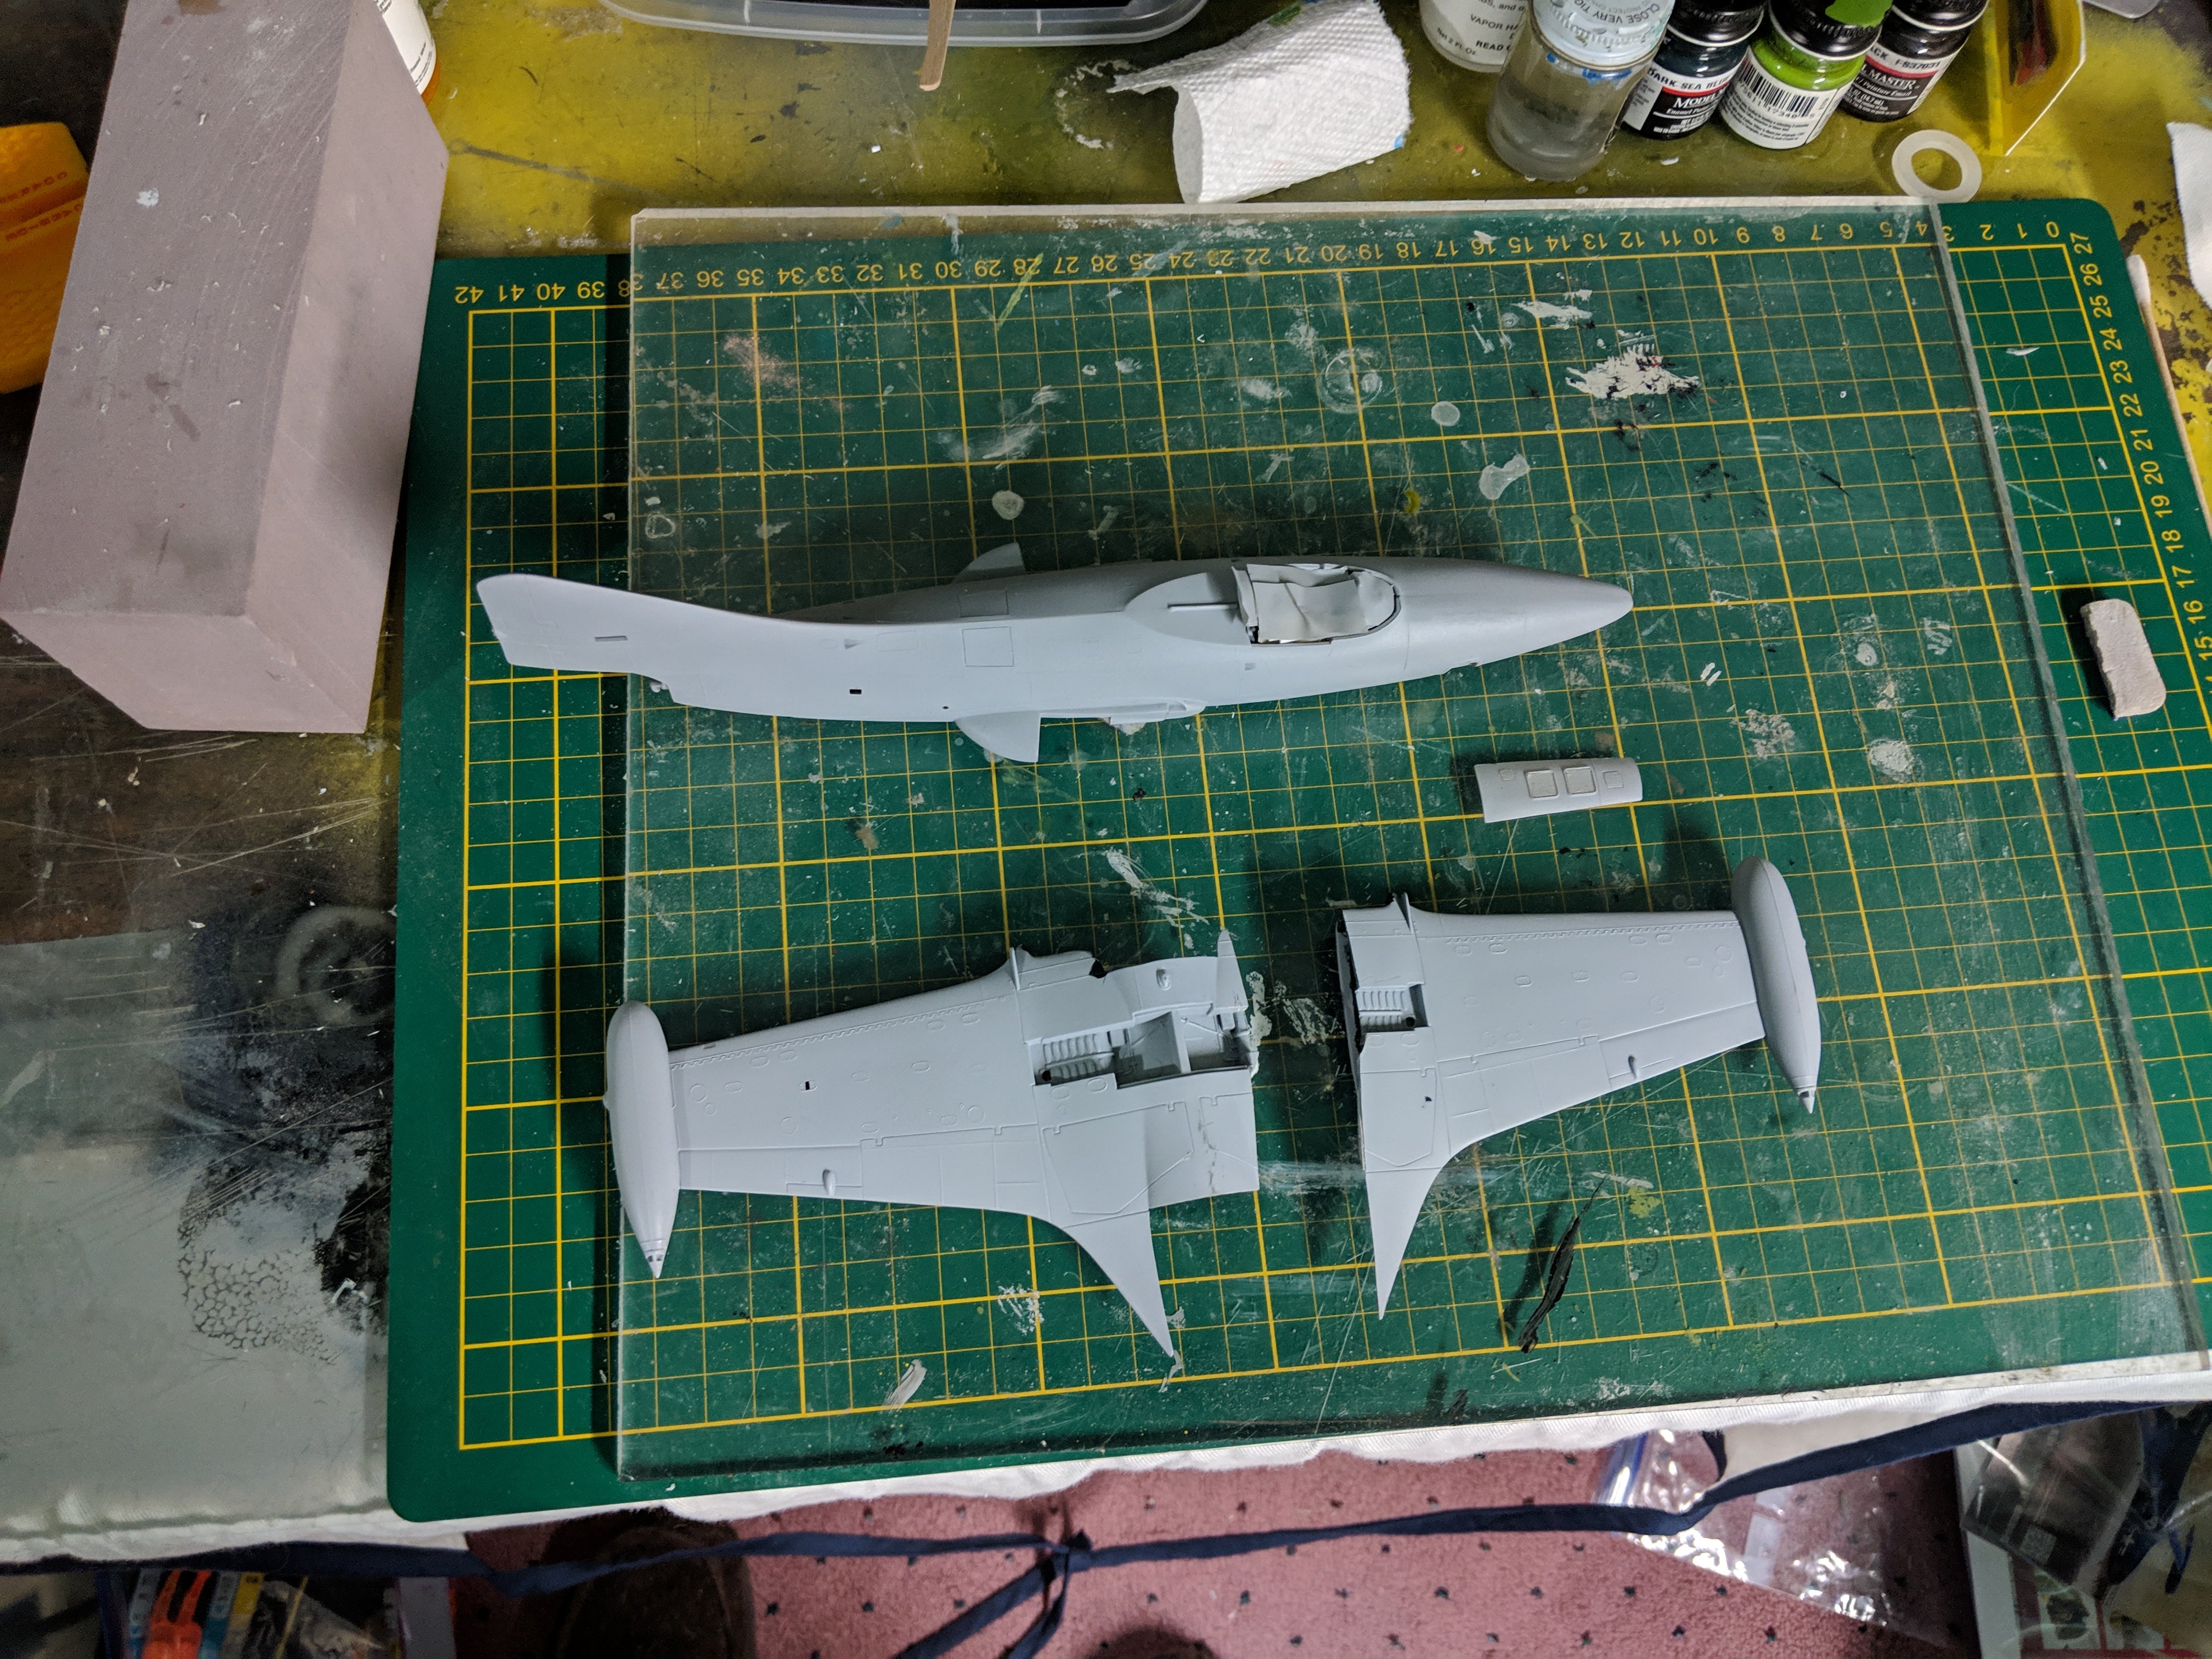
The Panther project is making progress. Some Bondo, sanding, & another coat of primer have it just about ready for a coat of Dark Sea Blue. Hopefully that will happen Saturday. The cut through the port wing root, while not invisible, turned out a lot better than I had expected.
-
Thanks for the comments Gil. I'll remember about the add next time.
-
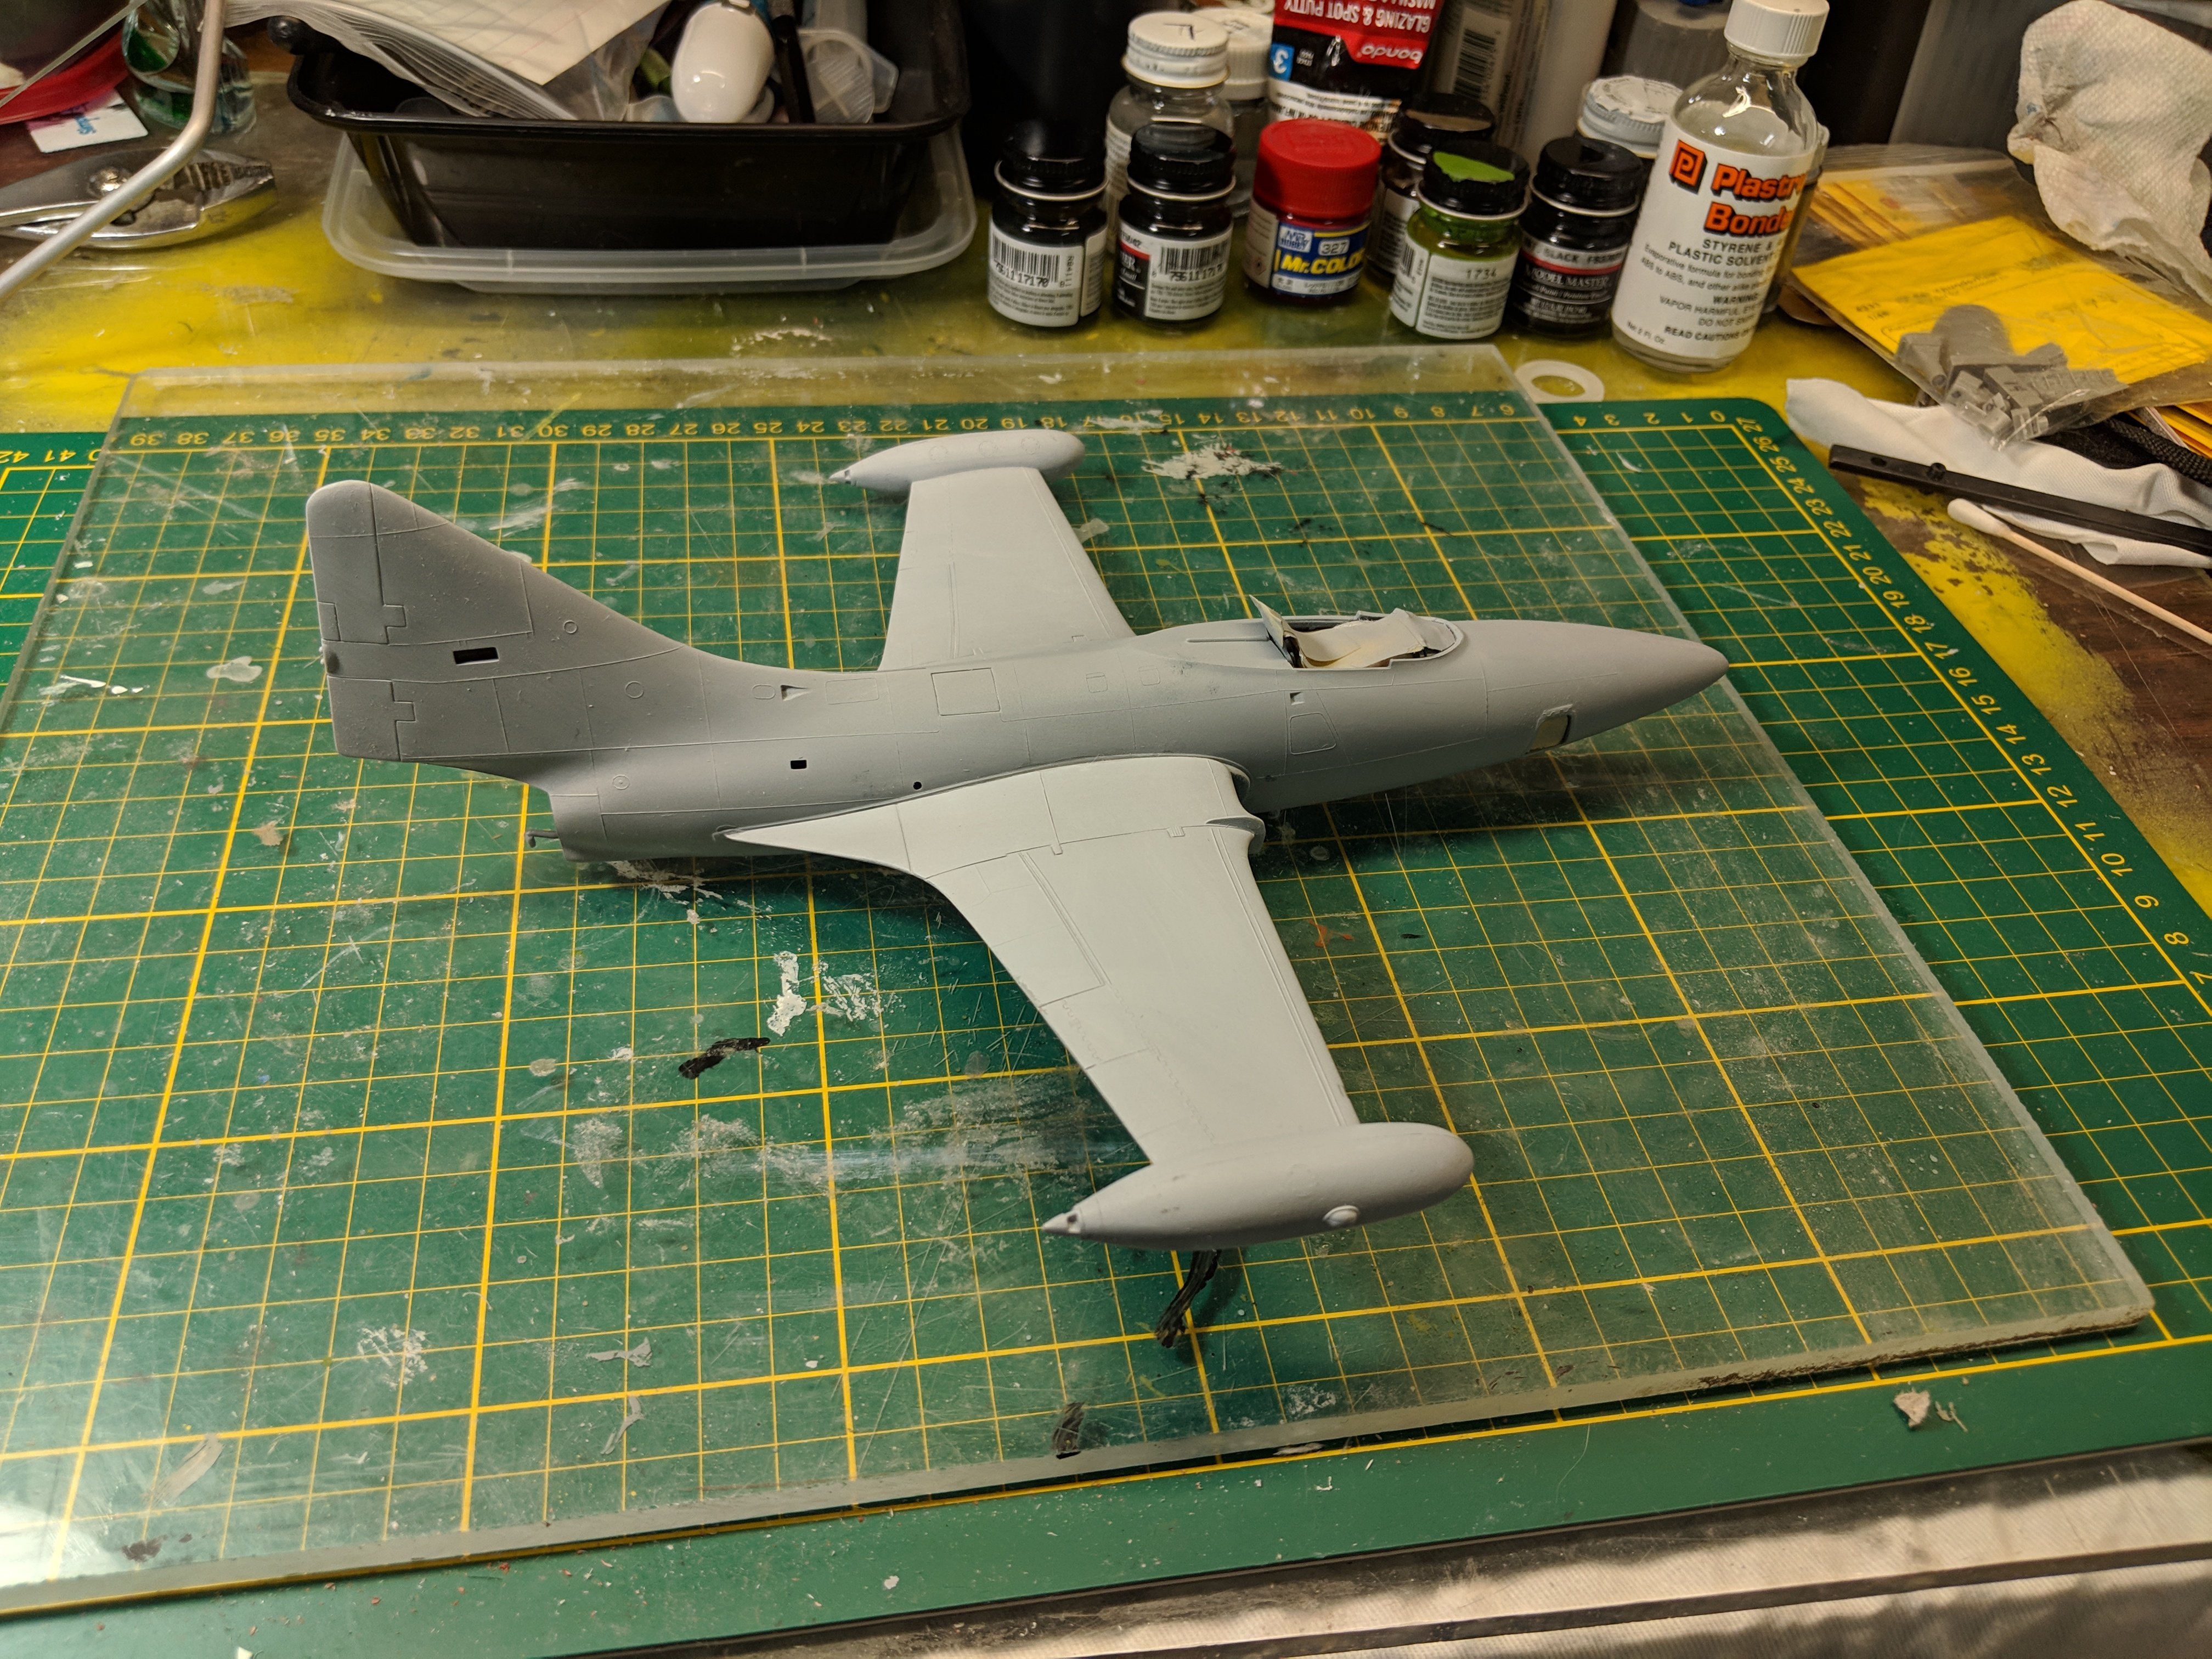
Successfully glued the wings on my F9F-5P this afternoon. A little seam cleanup & some putty down the cut line should make it ready for paint. It will never be a contest entry but, that's not what I'm building it for. The cut line is a lot narrower than I expected it to be.
-
The F9F-5P kit is discontinued. The 2nd one I bought in case my attempted solution didn't work came from 1 of the etsy.com stores. I found it on Amazon. The Revell kit is very good. There's just not a whole lot of detail. It's typical of Revell/Monogram kits of the early '80's. SAC makes a landing gear set and that's about all I've found as far as detail kits go. Your best bet is to check Amazon or do a google search.
-
Gil, I got a 2nd Panther today. This one is the Revell Germany version molded in blue. May have to try your idea on this one.
-
Tell them to stop by & see me at Batteries Plus on Stringtown Rd. I'm usually there Monday, Tuesday, Thursday, & Friday. We have great deals on LED bulbs courtesy of AEP Ohio.
-
Wish I'd thought of that, Gil. It would have preserved the detail I lost cutting the wing.
-
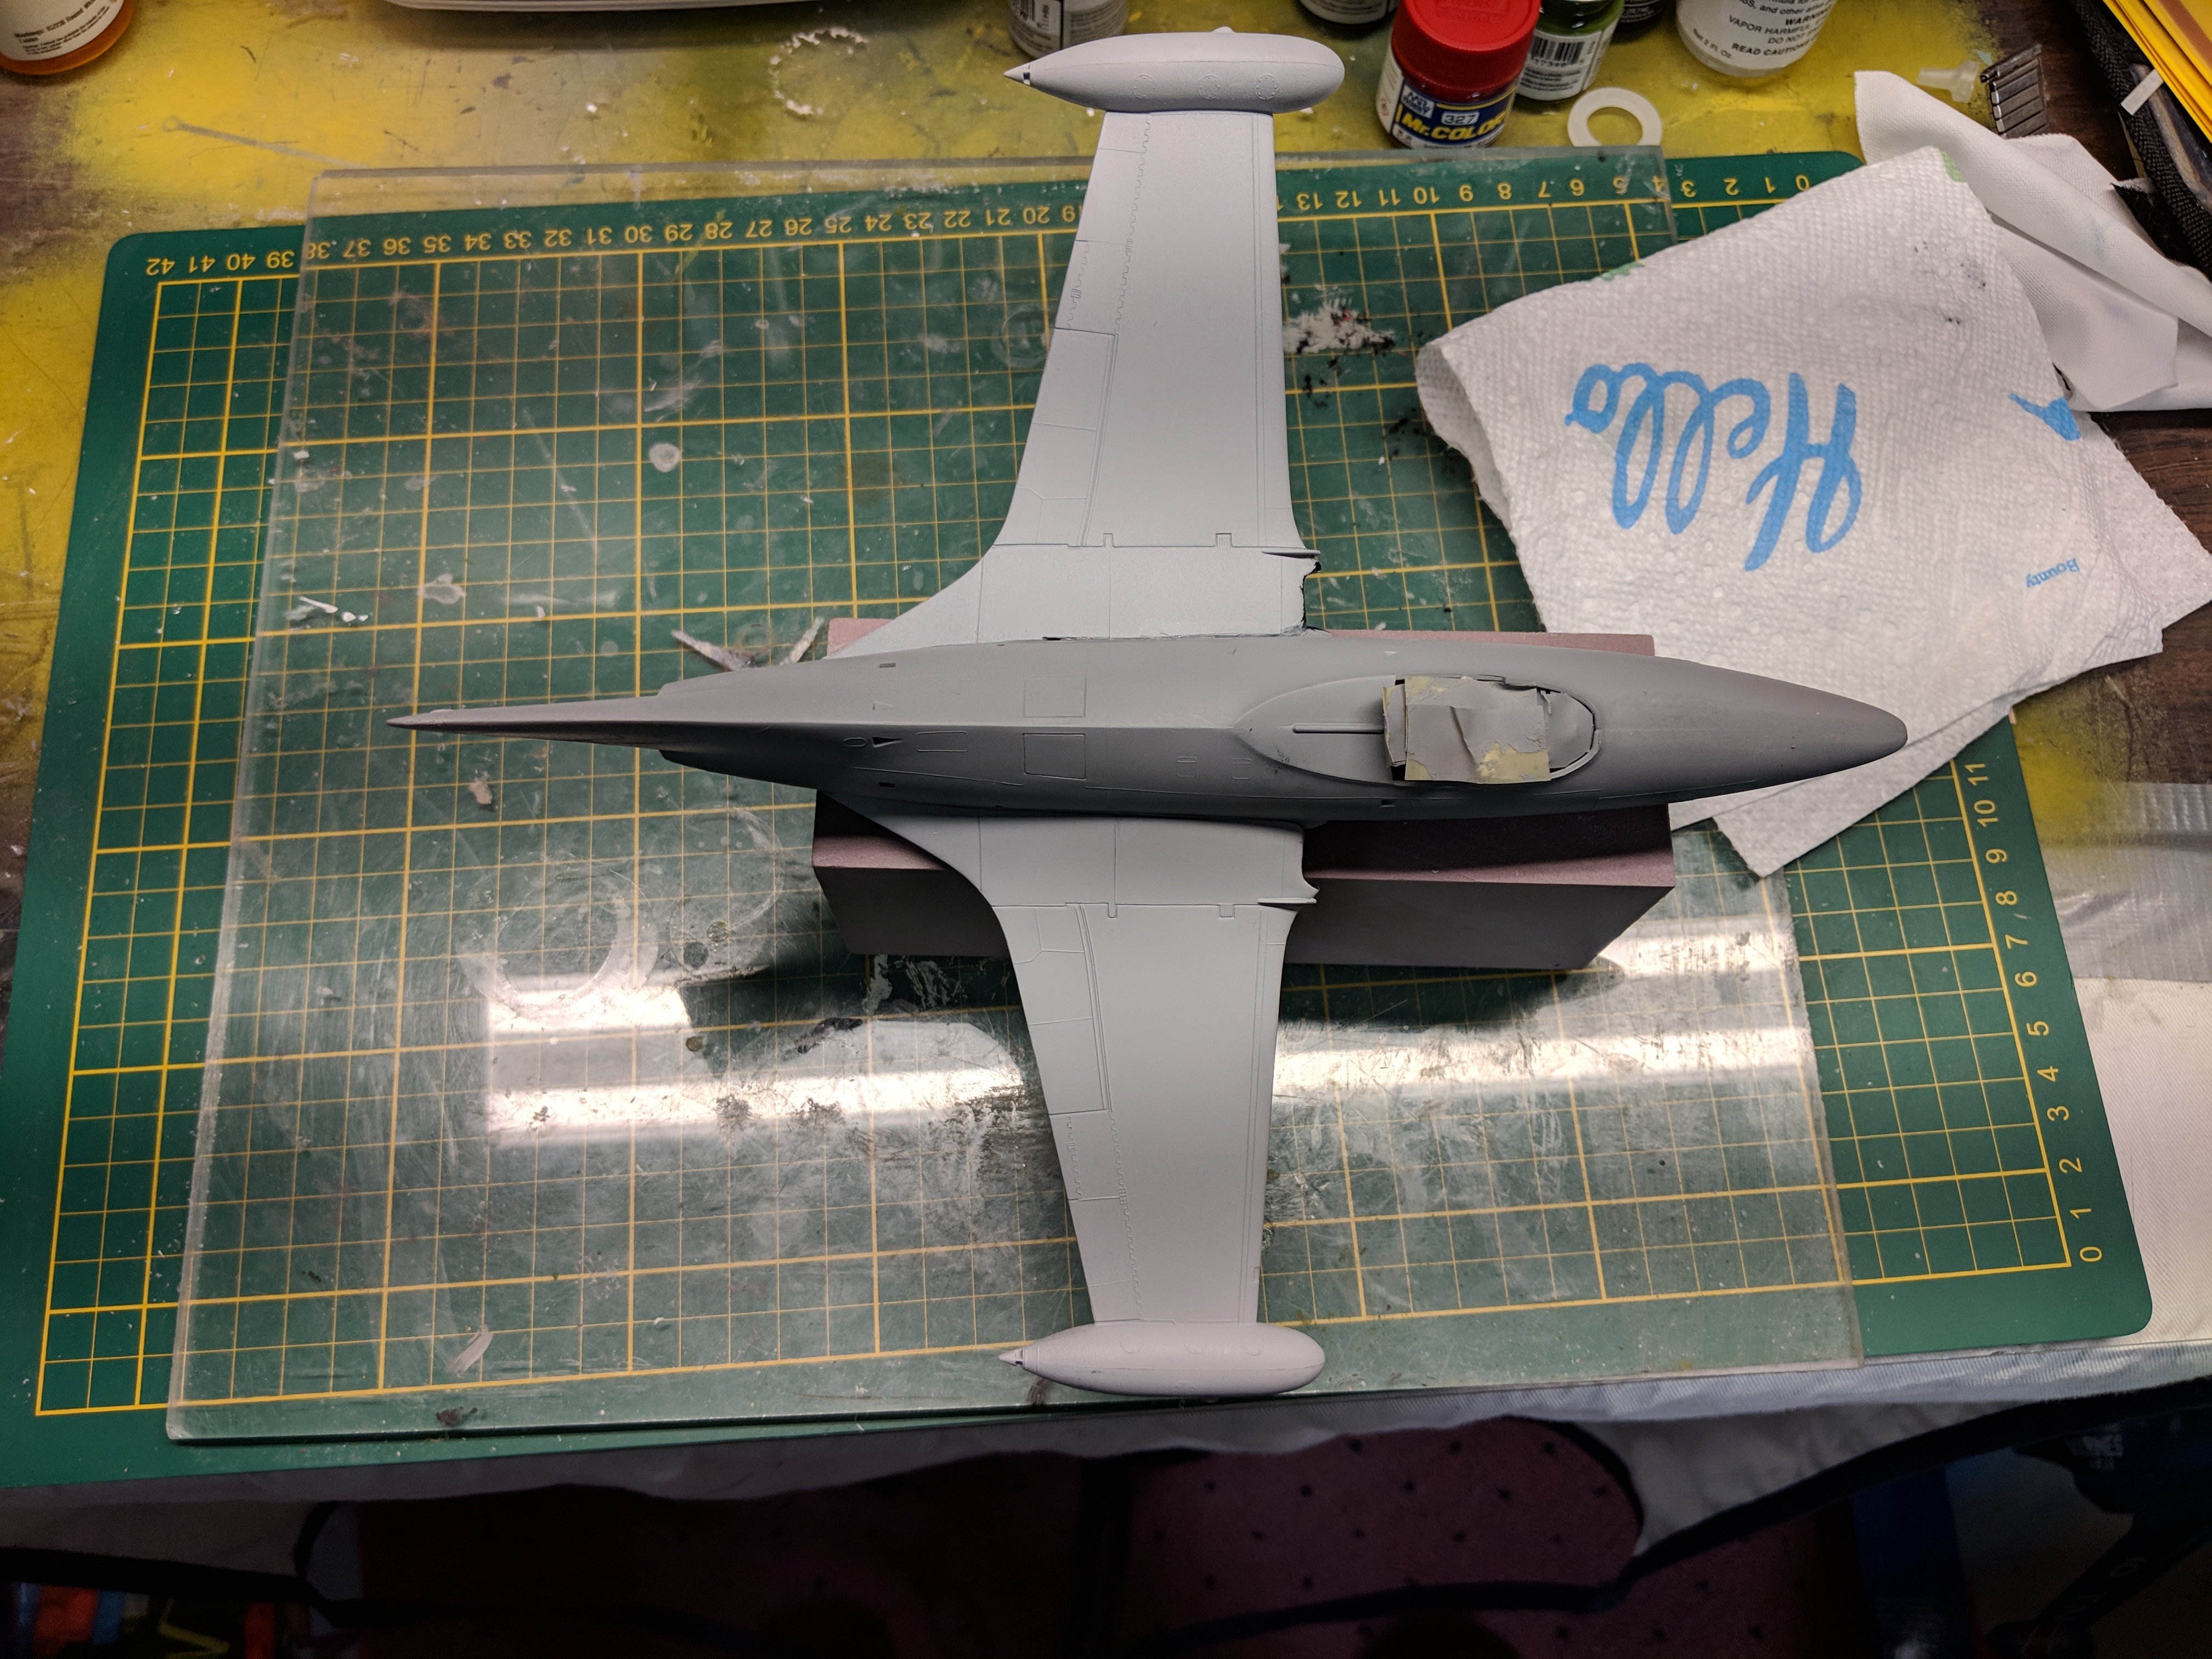
Attempting to get back to actively building with the old Monogram F9F-5P recon Panther. Planning to mark it as VC-61/VFP-61. Will have to finagle the markings from other sheets as the kit only comes with Marine squadrons. Good kit for its age. Not very many parts. Certainly not up to the detail of the Kitty Hawk Cougar or Banshee. I made 1 major error. I glued the upper halves to the lower wing before installing the lower wing to the fuselage. The instructions read to glue the bottom half of the wing to the completed fuselage. I think I've salvaged it by cutting the port wing off. It will require a little putty work to correct. Won't do that again. The initial primer work is done. Will assemble this weekend & shoot the 1st coat of Dark Sea Blue. Had hoped to have it ready for Blizzcon next weekend. Don't think I'll make it.
-
Mark, when you get back this way the next time, stop by Batteries Plus on Stringtown Rd. here in Grovetucky. I'm usually there Monday, Tuesday, Thursday & Friday.
-
I have a Monogram F-106 that I purchased in the mid-80's when I was stationed at Langley AFB, VA with the 48th Fighter Interceptor Squadron. About the same time, Bert Kinzey came out with the F-106 Colors & Markings book with a painting of 1 of our birds on the cover. The pilots name on the plane was Capt. Malcolm Emerson. He was our Assistant Director of Operations & had been promoted to Major at the time. I wrote to Bert & he sent me several copies of the decal sheet with 48FIS markings. Built 1 for Major Emerson & put 1 in my stash which is still there. Got to meet Bert at the 2015 Nationals when they were held here in Columbus & had him autograph the book.
-
Bondo has worked for me for many years. I've found the main factor in getting it to stick is surface prep. Always wipe the area down with alcohol or paint thinner to make sure you have all the grease & dust removed before applying putty.
-
Proud member of the Rickenbacker club. Unfortunately, I don't remember where I found the kit. I just remember it was less than $20.00 & it's solid resin. Spent 4 years in the Navy as a still photographer & 18 years in the Air Force working in/managing aerial reconnaissance labs & gun camera labs. Had lots of drawings/photos of the spook in the labs. Found him. I did get the kit from Sprue Brothers. http://store.spruebrothers.com/product_p/arsab100001.htm $17.99.
-
Found a model of the Spook almost a year ago & finally finished it. The colors are not according to any scheme. If you do a google search, you'll even find him wrapped in a British flag & bowler. The blue is Tamiya Flat Blue; the cape & mask are Model Masters Gunship Gray; his hat band is Model Masters Light Gull Gray; and his hair is Tamiya rattle can primer. I mean, he's 57 years old. He has a right to gray hair. The glossy finish is Future or whatever they call it these days. Had to show that I could actually finish something even if it did only have 4 parts.😊
-
Thanks, Gil. That solves the mystery. Nick
-
I have 6 1/48th scale F-4 kits in my stash that keep calling out to be built. They're going to be waiting quite awhile longer until I get caught up on other projects. One of the add-ons I've acquired for my Navy F-4's is Steel Beach Accessories Trunion Plate set. I've searched all my references & online to no avail. Can anybody tell me where on the wing these plates go. I queried Darren (Steel Beach Accessories). His response was that they're to give extra clearance so the LG doesn't hit the wing.
-
Sorry to hear that Richard. I was looking forward to seeing the final product.
-

SECRETS OF THE NEW 1:24 SCALE AIRFIX F6F-5 HELLCAT
nmertes replied to Eric Aitala's topic in Aircraft
Can't wait to see this one at a Nationals. Can you imagine what Shep Paine could have done with this. -
Check out http://www.cavallar.ch/model/. Click on the Sort by Manufacturer's link on the left side and work your way down to Dragon. You'll find the instructions sorted by kit number. Your Tiger instructions can be downloaded as a .zip file. The file includes pictures of the sprues & instructions.
-
Just got an email from Maria, the lady who really runs this outfit ;} (no offense Ron). She said the printer didn't start mailing the Sep/Oct Journal until 10/31. We should all have our copy by the end of the week.
-
Thanks, Ron. Hope you have a good trip. I'll email Maria.
-
I haven’t gotten mine either Bob. The Prez is a member of our chapter. If he or one of the other e-board members doesn’t reply fairly soon, I’ll query him at our club meeting on the 11th.