

MikeH
-
Posts
316 -
Joined
-
Last visited
Content Type
Profiles
Forums
Events
Everything posted by MikeH
-
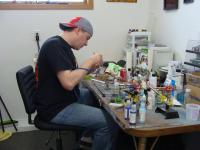
Here's where my enthusiasm left off today. This thing's got annoying mold seems, fit issues... This took me the better part of an hour. When I saw the header assemblies I decided to move on to something else.
-
LMAO!!!! I couldn't grow a 'stache like that if my life depended on it. I go 5 days between having to shave. :lol:
-
It's a beautiful ride Gooch. I would recommend anyone to build a Tamiya motorcycle kit. Sadly, I've only built one, but I've got several more in the stash. Yours came out great!
-
Dang it feels good to be back at the bench and inspired! I'm building this one for a TV/Movie car CBP on another forum. Plenty of annoying mold seams and sink marks. And now painted red!
-
Well, she's all done. I finished up the little items with a fire extinguisher on the concession stand. There also had to be some duct tape holding on the poster. :D I finished it off with my new Grex Tritium airbrush and shot the base red to match the wagon. Lastly a close up of the torched weeds next to firemarshall Bill. :D
-
Thanks Chris. This one was a ton of fun to build. I enjoy humor in modeling as well, and the idea for this one just crept up on me one night. I have thank a fellow modeler Jim Fernandez for getting me the hot suit fire fighter figure. Without it, the dio would never have been.
-
I've got some weathering and things left to do, but it's 99% done. A fire extinguisher is definitely in order. LOL
-
I know him through the Mad Modeller. As stated previously, he's on vacation in Hawaii.
-
I'm building the Revell 62 Impala kit next. It'll be the straight-line version as on the box cover. Here's shots of the kit contents minus the tires, and front, rear, and side windows. It looks like a very well done kit thus far. The build will tell more.
-
Here's the Camaro project my daughter and I have been working on. She picked out the colors and I assisted her with the airbrushing. I did the final assembly and stickers. Since brother bear finished his model today, it was time to get the little girl's done to.
-
I've got a concept Camaro downstairs that my baby girl and I started on. After the paint was on it's all my job to finish. LOL. She just wanted to paint with the airbrush. lolol I'll get some ambition and finish it tonight. You'll see what a 5 year old girl does to a car.
-
We finally completed the 350Z this morning. I still have to print off #8 decals for it. Here's the last in-progress shots and the completed unit.
-
Great graphics. It certainly adds a lot of life to an otherwise simple car.
-
Clean looking build. I like it.
-
UPDATE! After losing interest for a bit, my boy came downstairs tonight and started to poke around with his model and so I let him paint the brake & calipers. We were starting to glue them on when my friend came over. So, hopefully Friday night he'll want to get this guy standing on wheels again. His favorite part is putting the wheels together. so happy
-
Per his description and instructions, the white stripes are now on as well. Next will be the interior and chassis pan.
-
The black stripe has been added!
-
My son's been after me to build a model lately, so I thought this would be a simple enough curbside kit for a 7 year old to work on with some guidance. :D While driving in the car today, I asked him how he was going to paint it. His response was "It's going to be silver with a black stripe and a black number 8 and white stripes along the black stripe." He's got an eye for color - I know first hand. We airbrushed the silver on tonight. I helped with the first couple rounds, then he did the last one by himself. :D
-
Great eye for a color combo. That is the toughest looking Ferrari I've ever seen. Well done.
-
Haven't looked at the Prius' at all recently. They've actually made it somewhat stylish. Nice job on the paint. The color looks good on it.
-
Beautiful color choice. I plan to get at least three more of these kits in my stash. I love the car itself, and it's a beautiful build.
-
This is the A=pillar after paint. There's a slight curve where I had to rescribe the weather stripping. The body you can't tall other than the twist from the rear to front after I lined it up and stuck it.
-
All done! The kit isn't really great, and it's a shelf model for sure, but fixing the big problem was the point of the build and making it look like nothing happened.
-
Body decals are done! They're not the greatest decals. Obviously the contingency decals are transparent on the front fender. They were also pretty ridgid.
-
I needed something to take my mind off of work, the water intrusion in my basement, and things in general. So I commenced to decal the front of the baby.
