

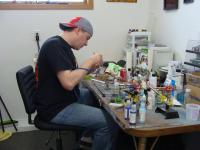
MikeH
-
Posts
316 -
Joined
-
Last visited
Content Type
Profiles
Forums
Events
Everything posted by MikeH
-
Welcome to IPMS James. Glad to see your work here. I recognize you from a couple other forums.
-
Well, ambition finally struck yesterday. I got some beading crimps and some line to make fuel lines off of the firewall. The engine's still in a holding pattern until I can get it wired, and the boom & axles have been installed/mocked up. I also went over it with makeup applicators and some roof brown for more rust colors and depth.
-
Not much progress. I got the main parts of the engine together and test fitted. I'm waiting on detail parts before I can really get it done.
-
A diorama idea popped to life for my circus wagon so when I get the stuff together it'll be moving.
-
All done. I've got a couple small spots to touch up, but a fun box stock build. My 5 year old daughter asked if she could have it. She even offered to pay me a dollar for it. LMAO
-
160 miles round-trip later, I got some red paint and got it standing on the wheels!
-
Hey Ed, this is a "for fun" build for me. I'm not sweating the details etc. Yes there's a touch up spot needed when cut from the sprue, but it's going to be a shelf model and nothing for a contest. It's a kit I've always liked but didn't want to pay the $300+ people were pitching for them when they were out of production etc. Some of the sprue attachments will be hidden in joints, others will be exposed and fixed at the time. To answer your question whole-heartedly, I've patched paint blemishes before on builds. It's a PITA but it can be done with patience and some fine sanding and blending with the airbrush. One build I did it on was my '67 GTO. I screwed up the top of the front fender and had to sand & paint the blemish as I was building it for a contest. I know it's there and I can barely see it, but it's good enough where the judges missed it. LOL On that note, I didn't place with that build either. LMAO.
-
Sounds intriguing. It's sounds like it'll be one of those love it or hate it colors. Never seen one in gray so I'll stop back often...
-
Not a lot of progress tonight, but noticeable. I remembered I had gold BMF sitting around so I used that to do the scroll work and lion head on the side of the cage. I also got the hinges and lettering done.
-
The masking went well, and now I've got a clown-car to be.
-
Since my 34 Ford project is on hold until I get detail parts, I thought I'd jump on this one. These things are quite refreshing to build. I got the dragon together and painted, and a nice healthy coating of Blue Angels yellow on the main body parts. The tough part's going to be the masking for the red parts on the cage, tub, & frame rails. Engine's together too.
-
Well, I thought I had parts that I didn't, so this one's in a holding pattern until I get the detail parts. Why do I do these things to myself?
-
Uber cool! That thing's gonna look like it's hit 200mph standing still!
-
That's the plan, but the Lindberg motor has all the detail molded in to it for the exhaust headers etc. I don't want to use it, but could be a good challenge to detail paint.
-
A bit of progress tonight. The salt mask is off and still picking away at the liquid mask. I laid the decal over the salt mask and dried it well. Then picked it away with the salt to give the rubbled door sign as well. I'm still trying to figure out which engine to use.
-
Holes applied, rust color shot, and liquid mask applied. Next another color of rust and some salt... It may end up with some bullet holes here and there too. LMAO I'm also going to try a new techniqu with decals that should pay off (I hope).
-
Here's my next endeavor with wheels from Ma's Resin. It'll be a tow truck when done.
-
Here's the finished product. The kit's from Forge World UK and not worth the money I paid for it at all. However, the subject matter is what I wanted and got my money's worth out of it on the creative side of things. First out fearless pilot, and real ladies man...
-
You've got my attention! Love the Lemans cars. There's an Aston Martin from MCH that I would love to get my hands on.
-
2 1/2 hours tonight of masking, airbrushing, and brush painting has yielded this. The main portion of the base paint is done, now for the details and all the other stuff...
-
Masking tape and silly putty yielded the engine being painted. I also got the interior painted and began with the gun belts and wings. Being a salvage bunch, the "wood" repaired panels on the wings seemed appropriate. Tomorrow I'm going to start with my fine airbrush and hitting it with some blast marks. I'll also be adding some yellow to the pearly whites up front.
-
Here it is after a few coats of international orange and a fogging of box car orange. Tomorrow will reveal the rusty parts. Then on to the detail painting and other mischieviousness..
-
Primed and base coated rust, the salt's been applied. Next is the orange base color and then a fogging of boxcar orange on the top for some heavy weathering.
-
Yeah, I hear you on the prices. But it's a necessary evil unfortunately.
-
In the words of Monty Python "and now for something completely different"... :D When I don't build autos, I love the sci-fi stuff. A friend of mine is in to Warhammer 40k table top gaming. We ordered some stuff from Forge World Europe and got it today. I'm building the Ork Fighta Bomba. Essentially the Orks (my friend plays them) are the kings of the junkyard. Scrap it, strip it, build something out of the junk and go to war. I'm planning to roll with this color scheme below and do the same dasterdly thing I did the snow plow blade for wear and tear. Plus with all the panel lines and rivets on this beast, there will be plenty of places to drag rust about. ;) It's a very simple kit, but the painting is where it's at on these things. Stay tuned...
