Search the Community
Showing results for tags 'hasegawa'.
Found 8 results
-
At a recent swap meet, I bought the Minicraft boxing of the Hasegawa 1:32 Boeing F4B-4 kit (JS-066:350). I opened it up to find two copies of the second sheet of instructions, which includes steps 1 through 13, plus the part drawing and part numbers. I have most of the instructions, but not all. Does anyone out there have this kit and can copy the other sheet of instructions for me? It would be most appreciated. Message me for contact info. Bob
-
 For those interested, the build thread is HERE Here are a few finished pictures, of a model that I've always wanted, built by kit-bashing a 1/72 Hasegawa F4B/N Phantom II kit, that eventually used NO aftermarket parts, NO resin parts, and NO vacuformed parts. I only used the parts in the Hasegawa box, some decals from the spares box, and of course, some decals printed on my inkjet printer at home. I should mention here that all the needed artwork is provided in the build thread, free for any NON-Commercial use, if you would care to try one yourself. The pictures: Give one a try -- you'll like it! Thanks for looking, Ed
 -
Selling some of my collection of plastic kits. This is just a small sample... more to come later There are lots of data entry and research to do to get it in Excel Price (negotiable) + Shipping I can send pictures of box conditions when asked....

-
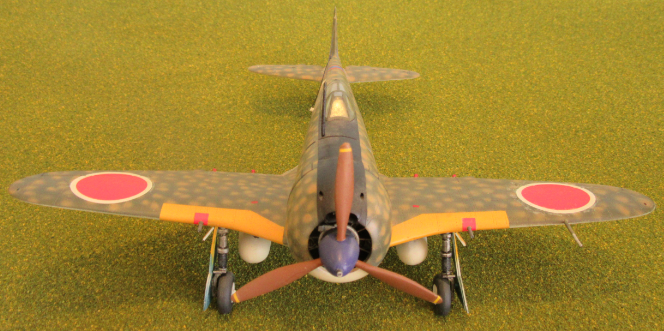
Nakajima Ki-44. Eduard Cockpit PE, Eduard canopy mask, True detail resin wheels, WEM colourcoat, Testor model master lacquer spray semi-gloss.
-
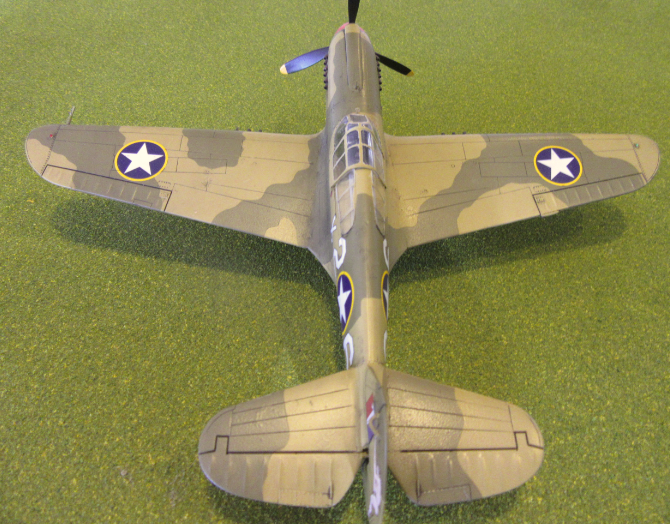
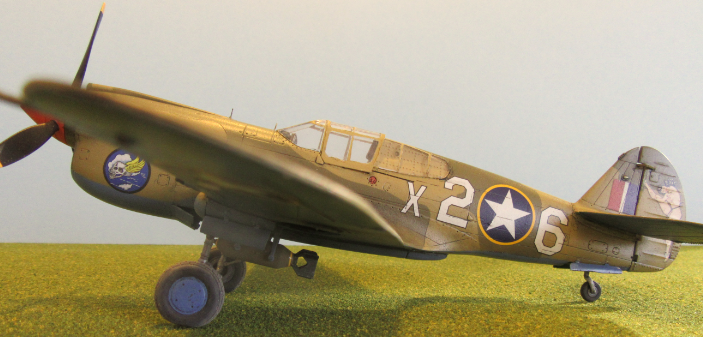
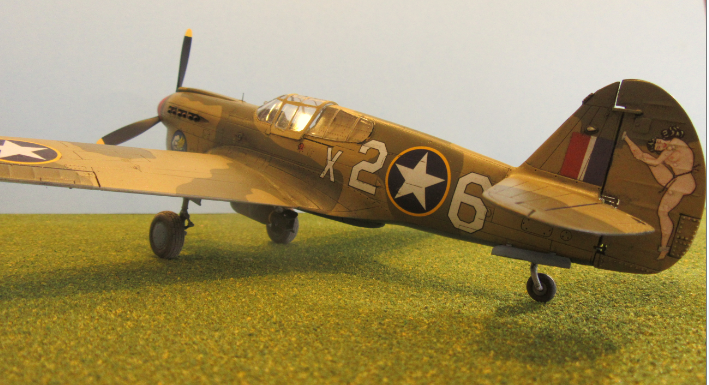
This model is a P40E. The model represents a P40F (do not think there is much of an appearance difference. This plane represents a P40F of the 85th FS /79th FG, MTO, North Africa 1943(High Kicker). Vallejo paints, Eduard PE cockpit, Aries resin seat, Quick Boost exhaust pipes, Eduard canopy mask, Eduard Brassin resin 500lb bomb, CMK resin main wheels and tail wheel/tail wheel cover, CMK resin under carriage covers, AK panel line wash. Oops, just noticed the 500lb is crooked.
-
Hello friends Although the scale 1/72 does not usually work, with this model I had no choice because of lack of space thanks to its actual size. This German mortar attracted my attention when I saw it and I decided to do it. The hasegawa kit comes quite well and its size could be worth it. https://youtu.be/FKrT3_sobfY Greetings and I hope you like it
-
Good friends Here I bring you one of my first dioramas that I made several years ago. The main model is the F-16C Fighter Fighting Falcon which is being reviewed by operators. The whole set is made to 1/48 scale of the Hasegawa brand. To make this representation I wanted to include a set of missiles and another of track technicians. Greetings and I hope you like it
-
This is the excellent 1/24 scale Hasegawa kit of the famous Ferrari Testa Rossa 250 pontoon fender as she appeared in the 1958 24 hours of Le Mans race. I spray-painted the body shell Tamiya Racing White, and polished her up with Micro Mesh abrasive 3200 grit before giving her a couple of coats of Tamiya Clear. Once the clear was dry, I polished again with Micro Mesh in increments up to 12000 grit, with a final rubbing using Novus #2, then #1. Next I applied the most excellent Cartograf decals that were included with the kit. The upholstery was spray-painted with Tamiya Dull Red. Seats were piped with Detail Master ignition wire bent to approximate shape, taped at increments, and then fixed to exact shape and clear-glued between the taped points. The ignition wire proved to be a perfect scale for the piping application! Seatbelts are made from masking tape spray-painted with Tamiya Gunmetal, with Studio 27 P/E hardware installed. (The texture of the masking tape and the paint color make for a convincing seat belt) Windscreen was trimmed with Bare Metal Foil. The power plant replication is a work of art by those craftsmen at Hasegawa! Engine block & timing cover were given a couple of coats of Alclad II spray-paint over gloss black, and the valve covers are Tamiya Italian Red with a satin clear top coat, and the Ferrari emblem and rib details were rubbed with a silver pencil. Throttle linkage is .005 guage wire from Studio 27, fuel line is clear/yellow rubber tubing from Model Factory Hiro. Ignition wire is from Detail Master, and the plug boots were cut from parts-box hollow rubber tubing. Headers were painted Tamiya NATO Black, and soft-polished with a Dremel tool. P/E hood & trunk pins are from Studio 27. The P/E wire wheels and real rubber tires are from Model Factory Hiro, and are the finest I’ve ever used, but sadly, are no longer available due to some license disagreement with Ferrari.
- 4 replies
-
- 3
-

-
- ferrari
- testa rossa
- (and 6 more)