rossjr
-
Posts
33 -
Joined
-
Last visited
Content Type
Profiles
Forums
Events
Everything posted by rossjr
-
Gil, Thanks for chiming back. This issue is actually fine, but the July/August only listed until Mid October. I think the issue lies not in where it's stopped by why. We have fewer shows in the winter so the current issue can take you into '16, but during the summer months they have more and we seem to be limited by real estate in the magazine. This only gets two pages and some times I think it needs 2 and half or three. Based on how you publish the journal, I almost think you need to be publishing for the next two months so Sept/Oct should have Nov/Dec since the journal isn't published until Oct. and not delivered until late Oct. Yes I agree you can get all this information on line, if you are on line. A number of my club members don't have internet access, don't want it and won't learn it, so this is how they learn about things. As an event organizer, it's extremely frustrating to not have your listing published until just days before the event. Our event NordicCon, which was on 10/24 did not show up in your listings until your Sept/Oct issue, which arrived on my door step on 10/15. We did place a quarter page ad in Jul/Aug issue so if someone happen to see that we'd be covered but if you just look at the listings it should be more inclusive and reflect when the issue is publish not just how much fits on a page.
-
Let me start by saying I love the newsletter. The content and format are wonderful and I enjoy reading it very much. That is not to say that there isn't anything I would look to change or improve upon. My biggest issue is that I get my September/October issue on the 20th of October, Coupled with that is our listing of events that show events that are passed and don't show far enough into the future. I can live with calling it September/October issue and then not getting it until the end of the later month, but what I'd really like to see changed is the listing of events, If I were looking for an event to attend later in October I have to wait until late in October to find out about them. In the previous and most issues, you get a list of past events, but with in the listed months for that issue and then whatever there is space for. So in the issue before you had listings of October events until mid-October. I would suggest that we try to get in tune with when the issues are published or delivered so that they contain timely information for the readers. So in this example if you are publishing an issue called Sept/Oct but wont get to your readers until mid Oct, maybe it would not be as valuable to list the Sept shows and it might be more beneficial to list deeper into Nov and Dec... Thanks and keep up the good work! John Ross
-
I can also confirm this, I have bought many items from Tracy over the years and he has always provided great service and taken car of me even when I was the problem...

-
Well I finally got her done in time for the "Hope it Doesn't Snow" show in Rochester (It is forcasted to snow though...) This is a great kit and I wanted to put in a display that would allow me to incorporate a mirror so you can see the bottom. The base and mirror are from Michaels for less than $10, snow and rocks are from the Hobby Store. Enjoy!
-
Great Job! I really like your NMF and the decals!!!!
-
The special decals ended up just being the big skunk works logo on the bottom but even in 1/72. decals of this size rarely fit well and these were really brittle... Here are a couple more shots of that Cockpit... Enjoy!
-
The rest of the kit constructions was pretty neat and straight forward. It even came with it's own nose weight...
-
So the last couple of weekends I've been working on this, it's the Hasegawa 1/72 F-117 with special decals and an Eduard Color PE set. The Cockpit is really nice and replaces most of the kit detail.
-
Here she is, finally complete... Enjoy! Here is a close up of the pre-shading I was talking about... Finally the office....
-
1. This is painted as a night fighter and the bottom is painted Black... 2. This is still a work in progress so the windows are still masked, so no they are not currently transparent... I am going to try and wrap things up this weekend...
-
I have one I have not built yet, my Father has the 205 and another kit he built. They are not bad kits but you do have to watch what kind of glue you use on them. That and they have keyed covers for the screws and little putty work that goes with it. I am also told the decals are a little thick but will lay down nice with setting solution. Enjoy!
-
Since I already had two posts promising more pictures I thought I better get a liittel caught up... As everyone that has buit this kit has told me the biggest issue is the fit of the nacelles. Here are a couple of pictures of what I ended up with for fixes: So those are a couple of befores and here are a couple of afters, ready for paint: These last shots are after I have painted the model put a coat of clear gloss and the decals. It's ready for it's second coat of clear before I start with the washes and everything. A couple of suggestions for others building the kit 1) My decals were a bit brittle so besure to use lots of water and patience. 2) Follow the instructions regarding the installation of the exhaust stacks. I tried to do mine after the fact and it made it a lot more difficult than I thought it woud...
-
Sorry it took so long... Interior Green is FS34151 Zinc Chromate is FS 34227 Reading my instructions it says to use Interior Green, now mine is a TBM and not a TBF which means that they were manufactured by different companies so that could account for the differences. I would bet someone here could tell you the differenece between M and F as to which companies built them...
-
Great Job on everything!
-
I should just be Interior Green and Zinc Chromate Green, I don't have the FS numbers at work with me but I can look it up when I get home....
-
Sorry no pictures at this point. I got the nose closed up and the seams on the fuselage cleaned up. After talking with a lot of people on this kit, I had gotten to the point everyone warned me about, fitting the nacelles to the wings. I found that one of mine fit just fine and the other looks like it went through the dryer too many times, it a bit short, so I have some filling to take care of... I am going to try and take some before and after shots so bear with me....
-
Thanks, I don't have an issue with Radios and other items of interest, I am referring to things like the ammo cans and having to glue a small disk into it. Part of the support bar that needs a tiny small plastic rectangle added. Not listed as an optional part and you cut up your fingers trying to clean the part, or worse yet you launch it... Other than it's a really nice build so far...
-
OK, so I finally got some time to get some work done today as well as some pictures. Things are moving along... So I mainly worked on the section that sits behind the cockpit. The kit fits pretty well so far, however they do drive me nuts with some of the parts for the sake of parts they do... With both of those sections complete I can now button up the fuselage, but first a couple of shots...
-
Wow! Great pictures, can't wait to see the finished product!
-
I am an administrator over on forums.scalehobby.com, we have a Recession Buster Build Along started and the theme is pretty open. It's any Pre-Vietnam War Military Aircraft. That leaves quite a bit of an opening from WWI, WWII and even Korea. After many times looking through the stash, I decided on the 1/48th Scale Eduard Bf110E Profil Pak. I just got the C kit from Dad in a trade so I thought I'd build my open kit. So this weekend I took and sprayed most of the interior pices I could find with RLM02 so that they would be ready for construction. I finished the first step which is basically the cockpit so here are some pics... This is out of the box so far and I have yet to do any washes or dry brushing. Just some basic paint and construction at this point... Probably won't get anything don tomorrow night because of bowling and the Vikings/Packers Game.... Go Vikes!!!
-

Seaview & Voyage To The Bottom Of The Sea
rossjr replied to Korsair62's topic in Space, Sci-Fi & Fantasy
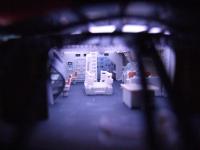
It really isn't that complicated of a model, just a lot of big parts... I added the Just an Illusion (JaL)light kit to my model this came with everything to light the Seaview. I added the stuff for the Flying Sub, but nothing too difficult, 2 3mm bright white LED's. The JaL kit contained a photoetech ceiling and many clear cast resin parts to light up the instrumentation and the FS bay. It also contained all the LED's and fiber optics so you can light up the cadillac fins... Yes, control rooms did change from season to season, but for how much you see and how much space you have, you can only do so much... -
This looks fantastic. I have the kit and have picked up soemthings to correct the kit like a new floor, but I have not started it yet. Actually mine is the Monogram repop. They had a thread on this someone did one Hobbytalk, I got to see it at one of my first Wonderfest events about 5-6 years ago. He did such a great job I didn't touch mine because I know it wouldn't measure up. I found the link for it if you are interested.... http://www.hobbytalk.com/bbs1/showthread.p...ighlight=flying
-
Seaview & Voyage To The Bottom Of The Sea
rossjr replied to Korsair62's topic in Space, Sci-Fi & Fantasy
How's this.. more pictures at: http://gallery.scalehobby.com/view_album.p...m113&page=1 -
I remember watching it at home, this was between 1st & 2nd grade for me, then for the landings that occured during school having everyone file out into the hall so 3-4 classes could watch on a big 25" TV screen.... Yes, I does evoke memories with a lot of people and sparked the imagination of a lot of people...
-
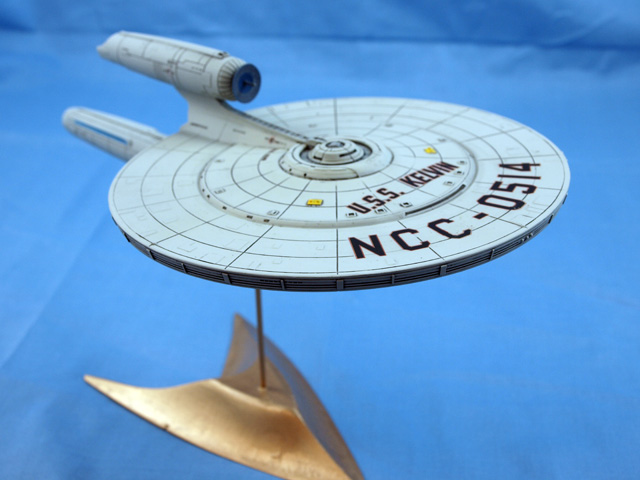
Just thoguht I would throw this out there for anyone interested. I finished the Moebius 1/32 Flying Sub along and added the Just an Illusion lighting set. This would be avitar I use for the moment... I have a ton of pictures for the build at this link if you are interested... Enjoy! http://gallery.scalehobby.com/view_album.p...m123&page=1