thevid
-
Posts
179 -
Joined
-
Last visited
-
Days Won
7
-
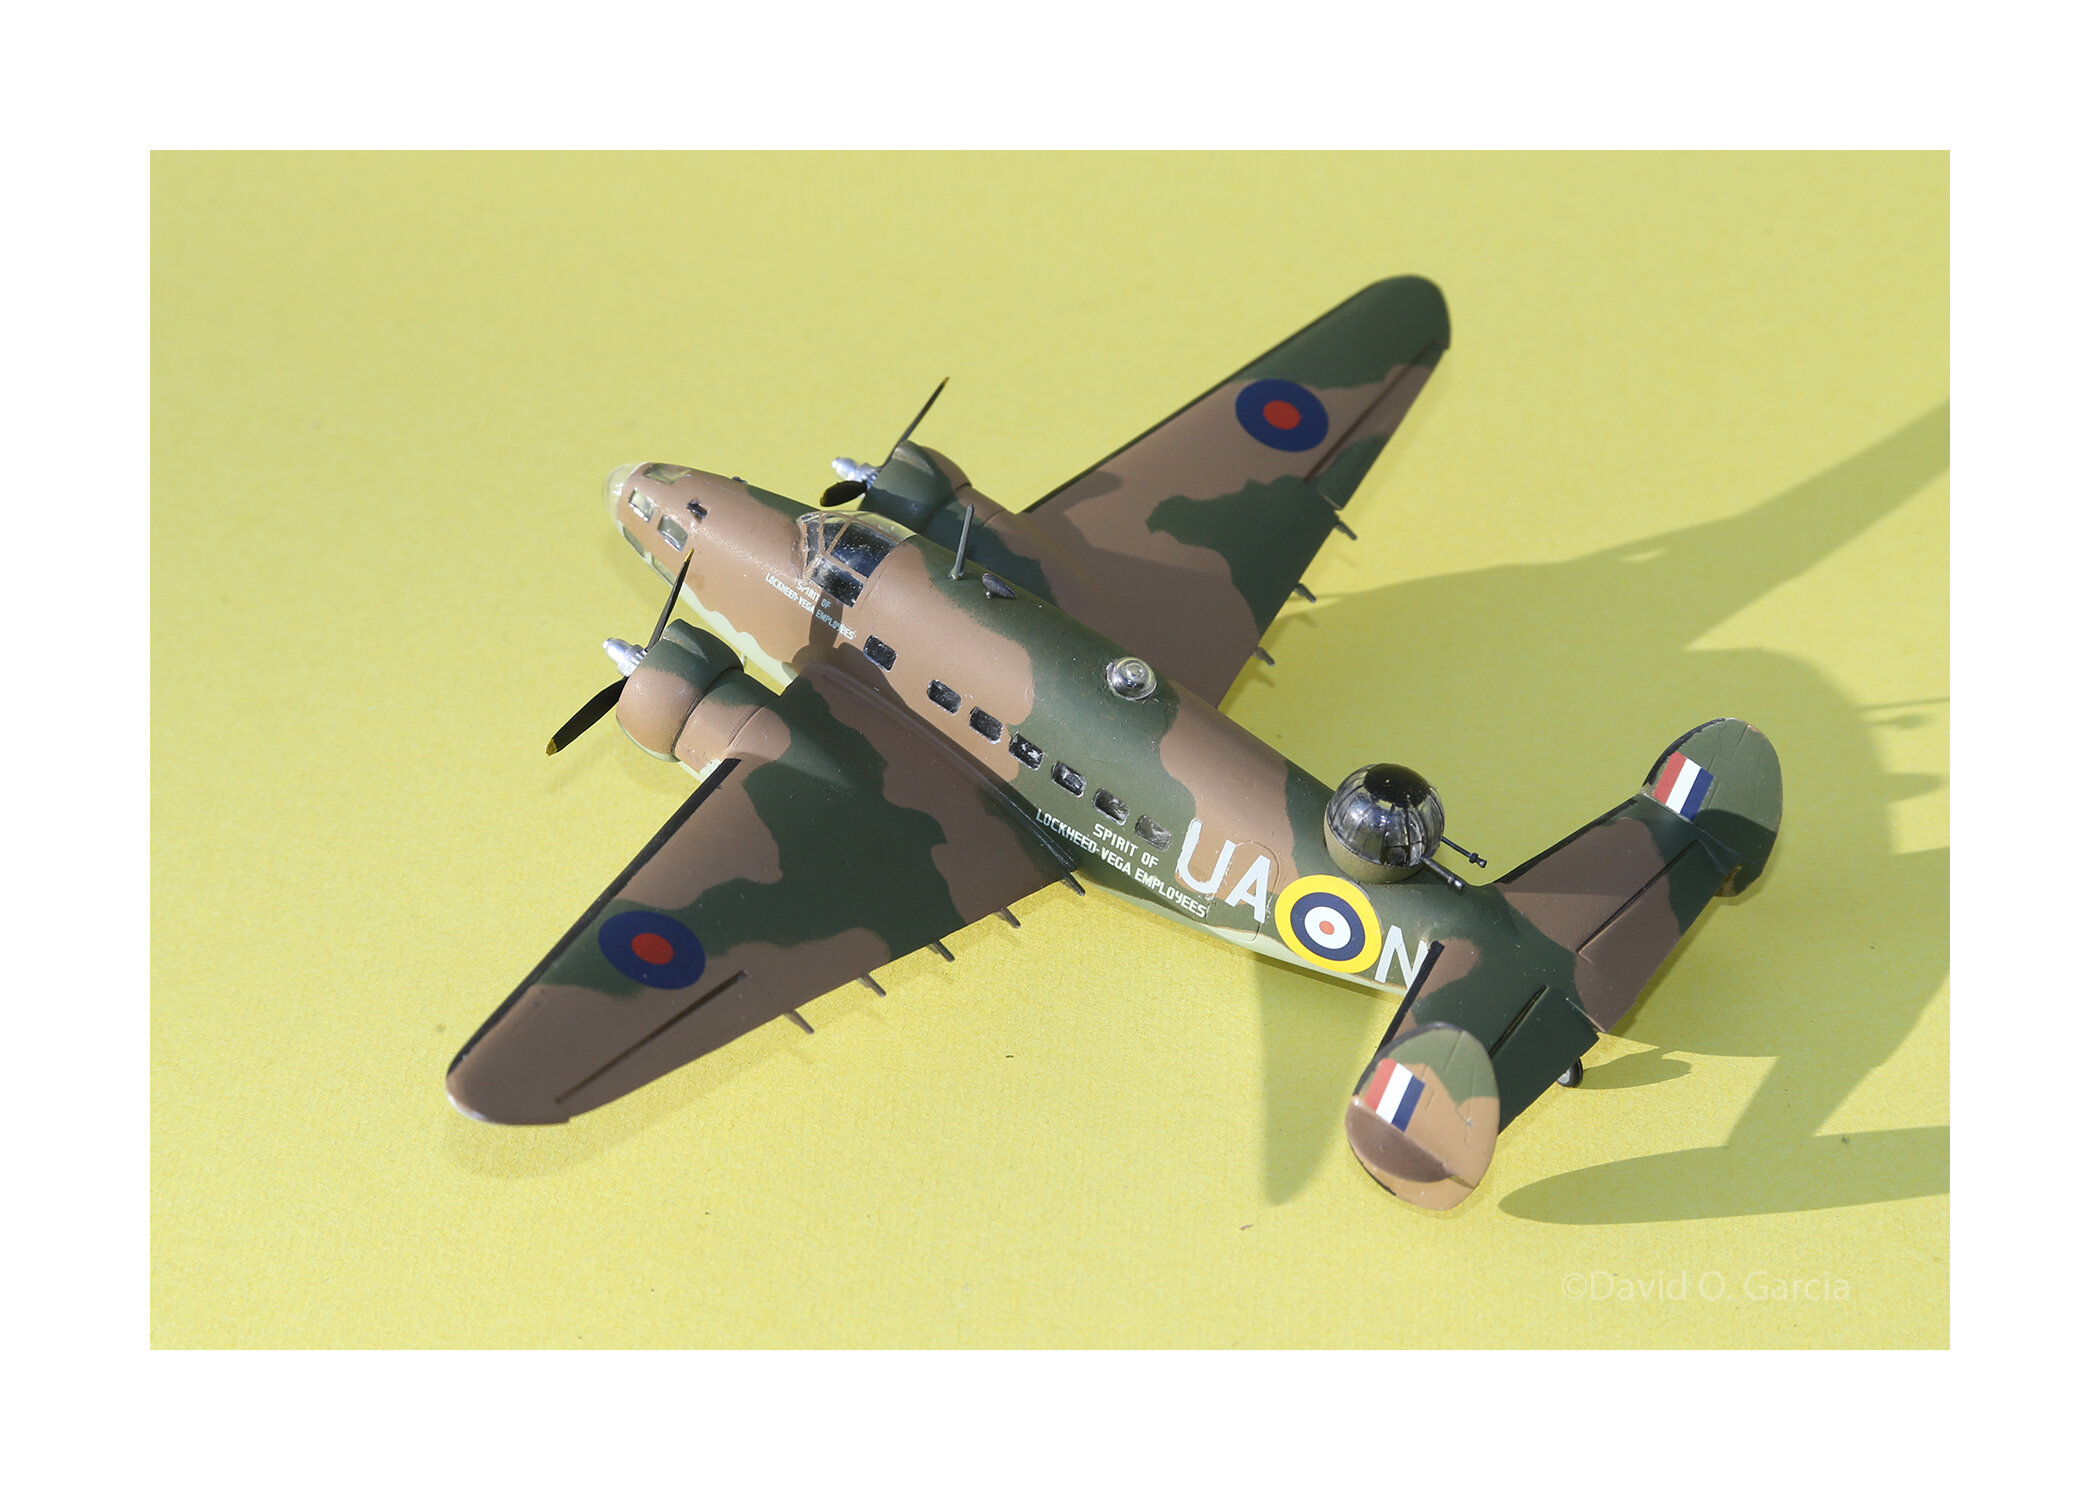
Last year iModeler member Tom Bebout sent me some classic kits with the request I would build them. I told him I would and here is the first one of them. It is an older Airfix kit with the original first issued in 1963 as kit 386. As I began to build it I soon began to like this pudgy little fat fellow. First thing I did was sand down the rivets and second thing was to figure out how to improve the clear parts. Common with Airfix kits with cabin window is that there is always a nice big sink mark in the middle of the clear piece. For the nose windows I used Microset Clear window glue which worked OK. On the side fuselage windows I sanded and polished out the parts hoping to remove the sink mark. It worked on some and others it didn't. To seal the side windows I experimented with two kinds of clear glue on the inside to prevent them from popping off. Unfortunately the interaction between the clear gorilla glue and the other clear glue caused some white specks on the windows. Lesson learned. Practice on a test kit before using it on a build. I masked the fuselage windows with a mask ordered off eBay. The canopy frames are thin strips of decal painted with the correct color. The paints are from Tamiya (sky), AK (Dark Earth) and Mission Models (green). I used blue tac to mask the camo pattern and it worked well. The decals were slightly out of register so I replace the roundels, codes and fin flash markings with decals from my spares binder. I flattened the finish with Dullcote. The motto on the side of fuselage is supposed to be on each side. I screwed up the starboard side ones so only the port side has them. The nose cap, lower clear part and turret are glued in place with clear Elmer's glue. Somewhere on the floor or on my bench is a small landing gear door that popped off, but is not noticeable. The next one will be the Monogram 1/48 TBF.

-
My condolences to his family and thank you for letting us know. David
-
Hi John, Thanks! I think I began with simple Airfix kits 30 years ago when I realized that in their simplicity a decent model could be made with care and modern tools. Now I've regressed to much older kits that are as old or older than me.
-
Thanks, after this I have no fear of attempting any more rebuilds.
-
Thanks!
-
Thank you Gil! I really appreciate it.
-
Thanks Carlos, it's not quite IPMS compatible but it sure was a pleasure to get it done. I have other rate kits that a club member gave me that will see the light of day. One is the Revell box scale P2 Nepture and the other is the Convair Tradewind. Both vintage 1950s kits.
-
Man that's a nice model! The engines look so real and the crew really make the model stand out. Excellent work Gil.
-
Lovely build there Duke. That wing is huge. I tried building it once but gave up on it. I have another that I will finish. Yours looks great. Did you use kit dekkels or replacements?
-
I really like the collection of F/P-80s. Well done sir.
-
Hey Fox, Thank for you very much. I'm happy with the results. I saw a better restoration in a now defunct retro modeling group, The best thing I did was fair the canopy to the rear spine. It was way too big. I used Magic Putty and it sanded smoothly.
-
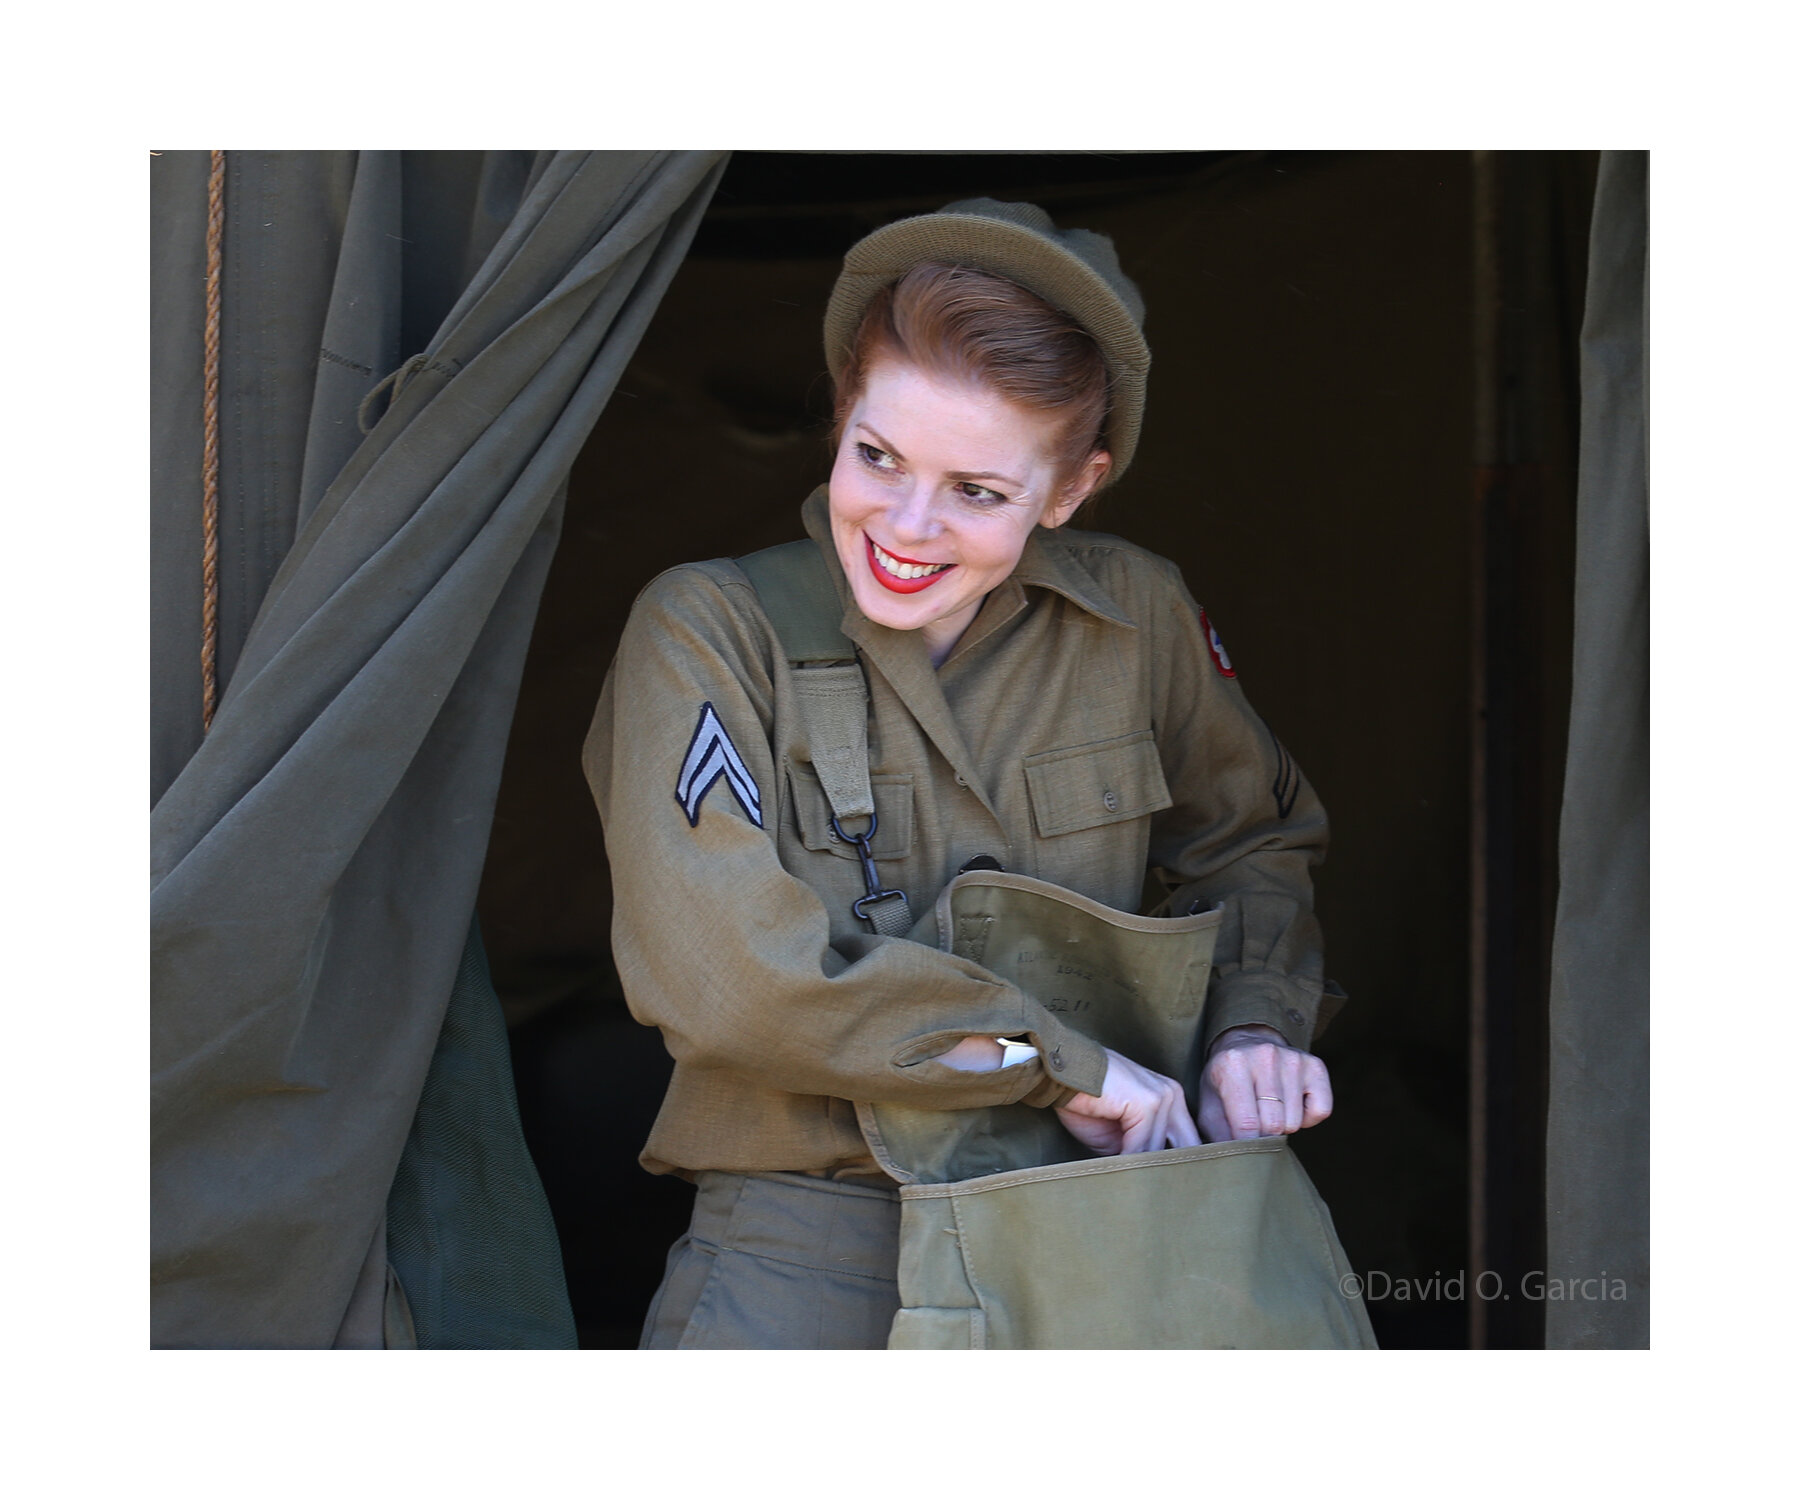
 I put the photo of Amanda just on general principles. 🙂
 -
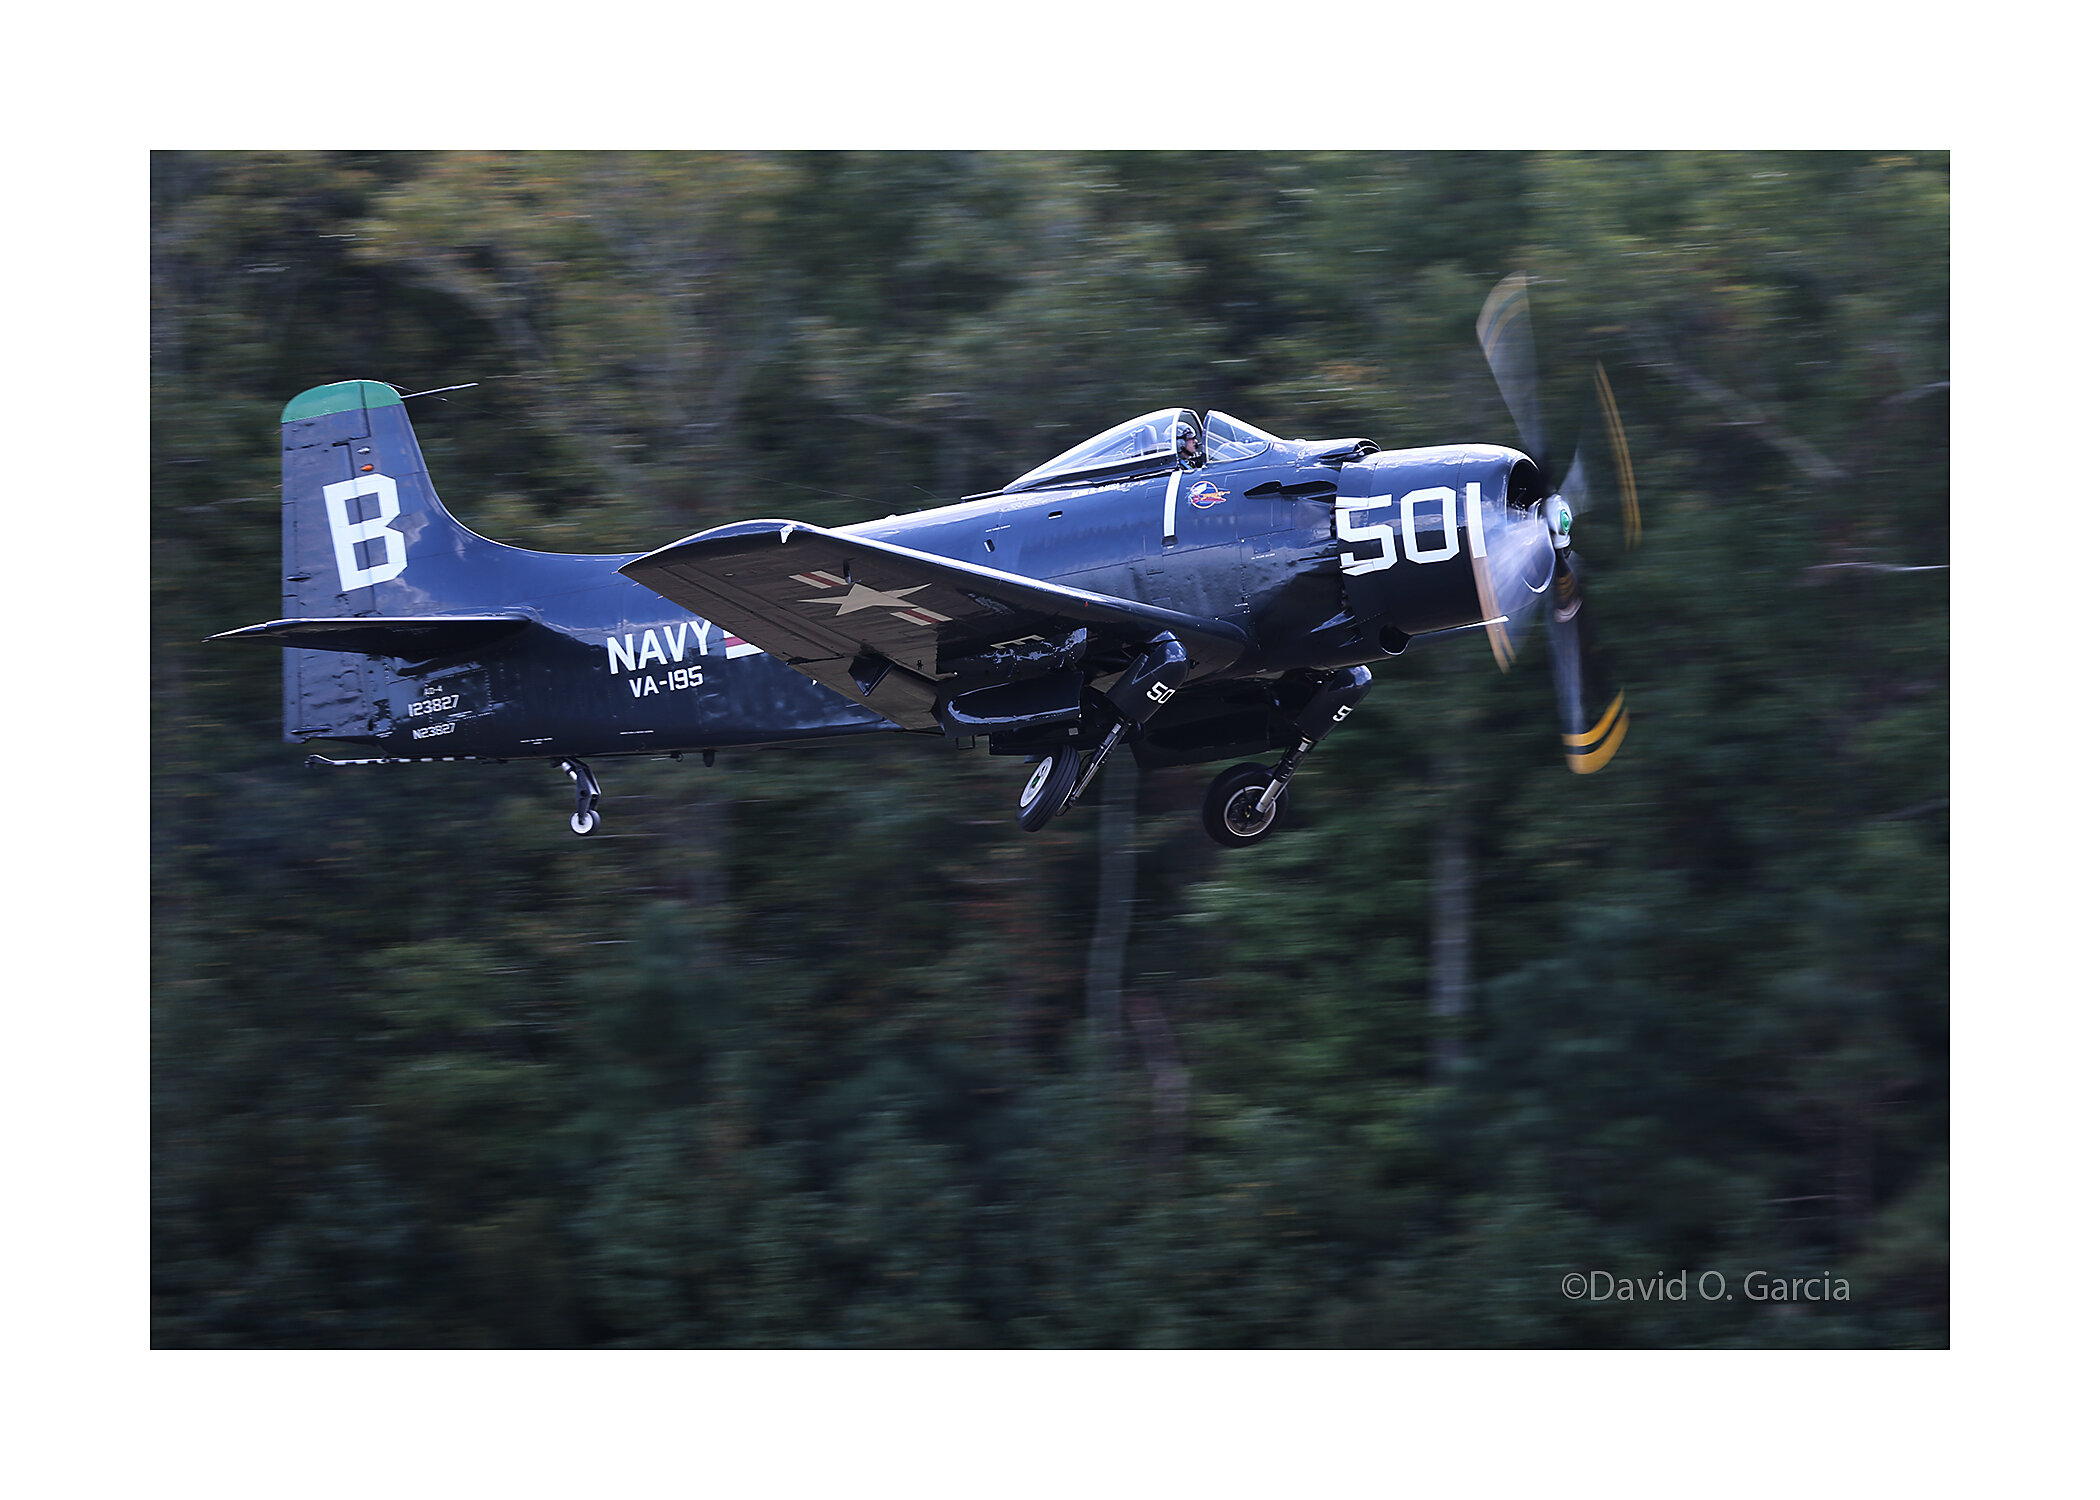
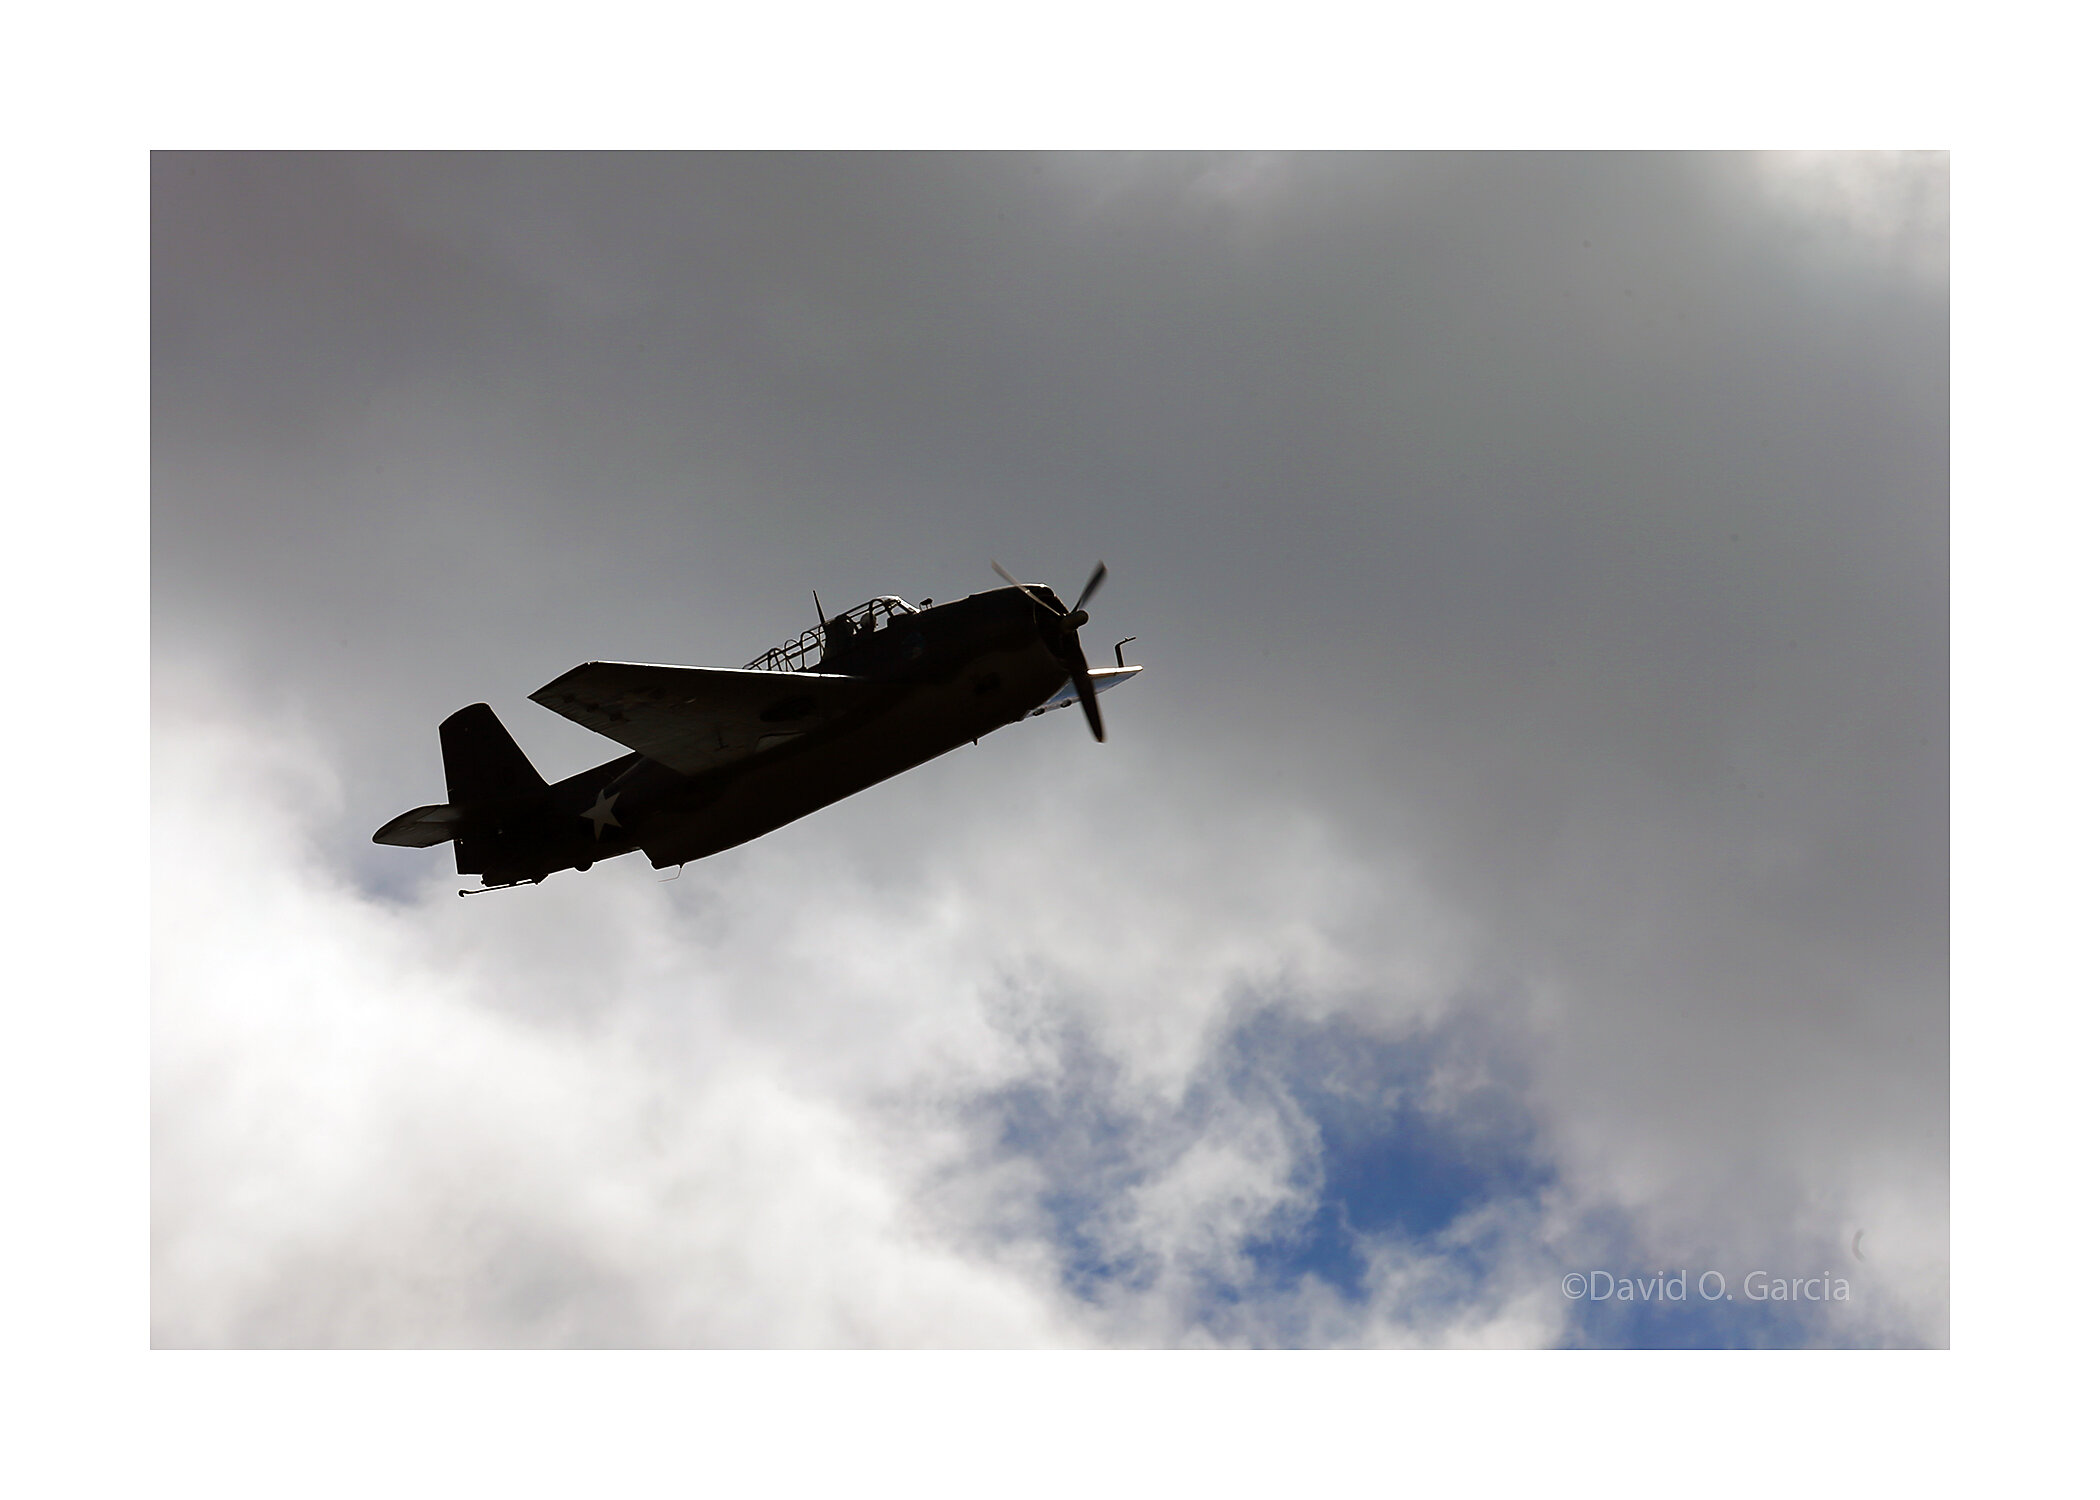
The annual show at the Military Aviation Museum in Pungo, Virginia took place on Oct 1-3. Here is the Skyraider on takeoff. I photographed other aircraft as well. I used my 1DX with 100-400mm f4.5-5.6 lens for this shot.
- 1 reply
-
- 1
-

-
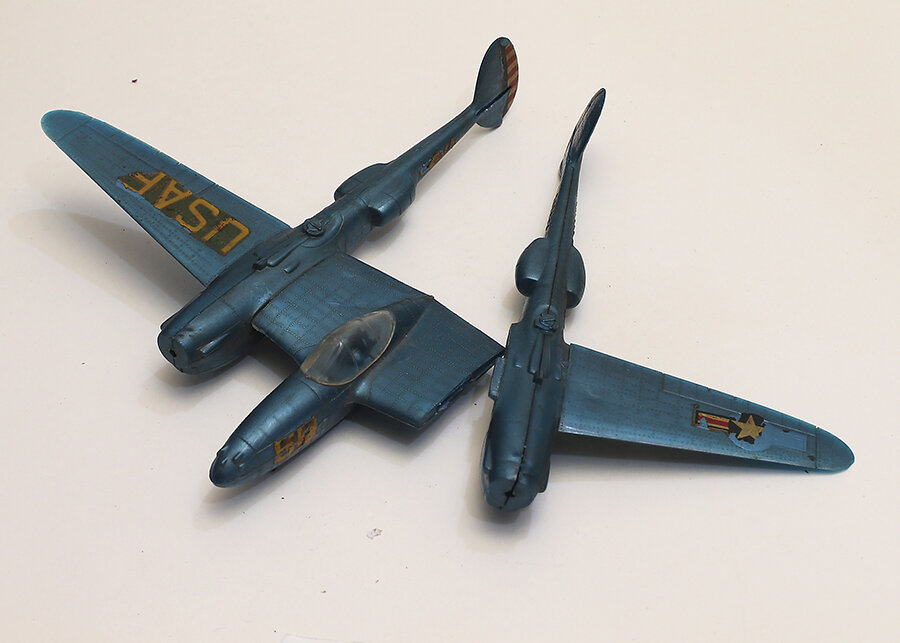
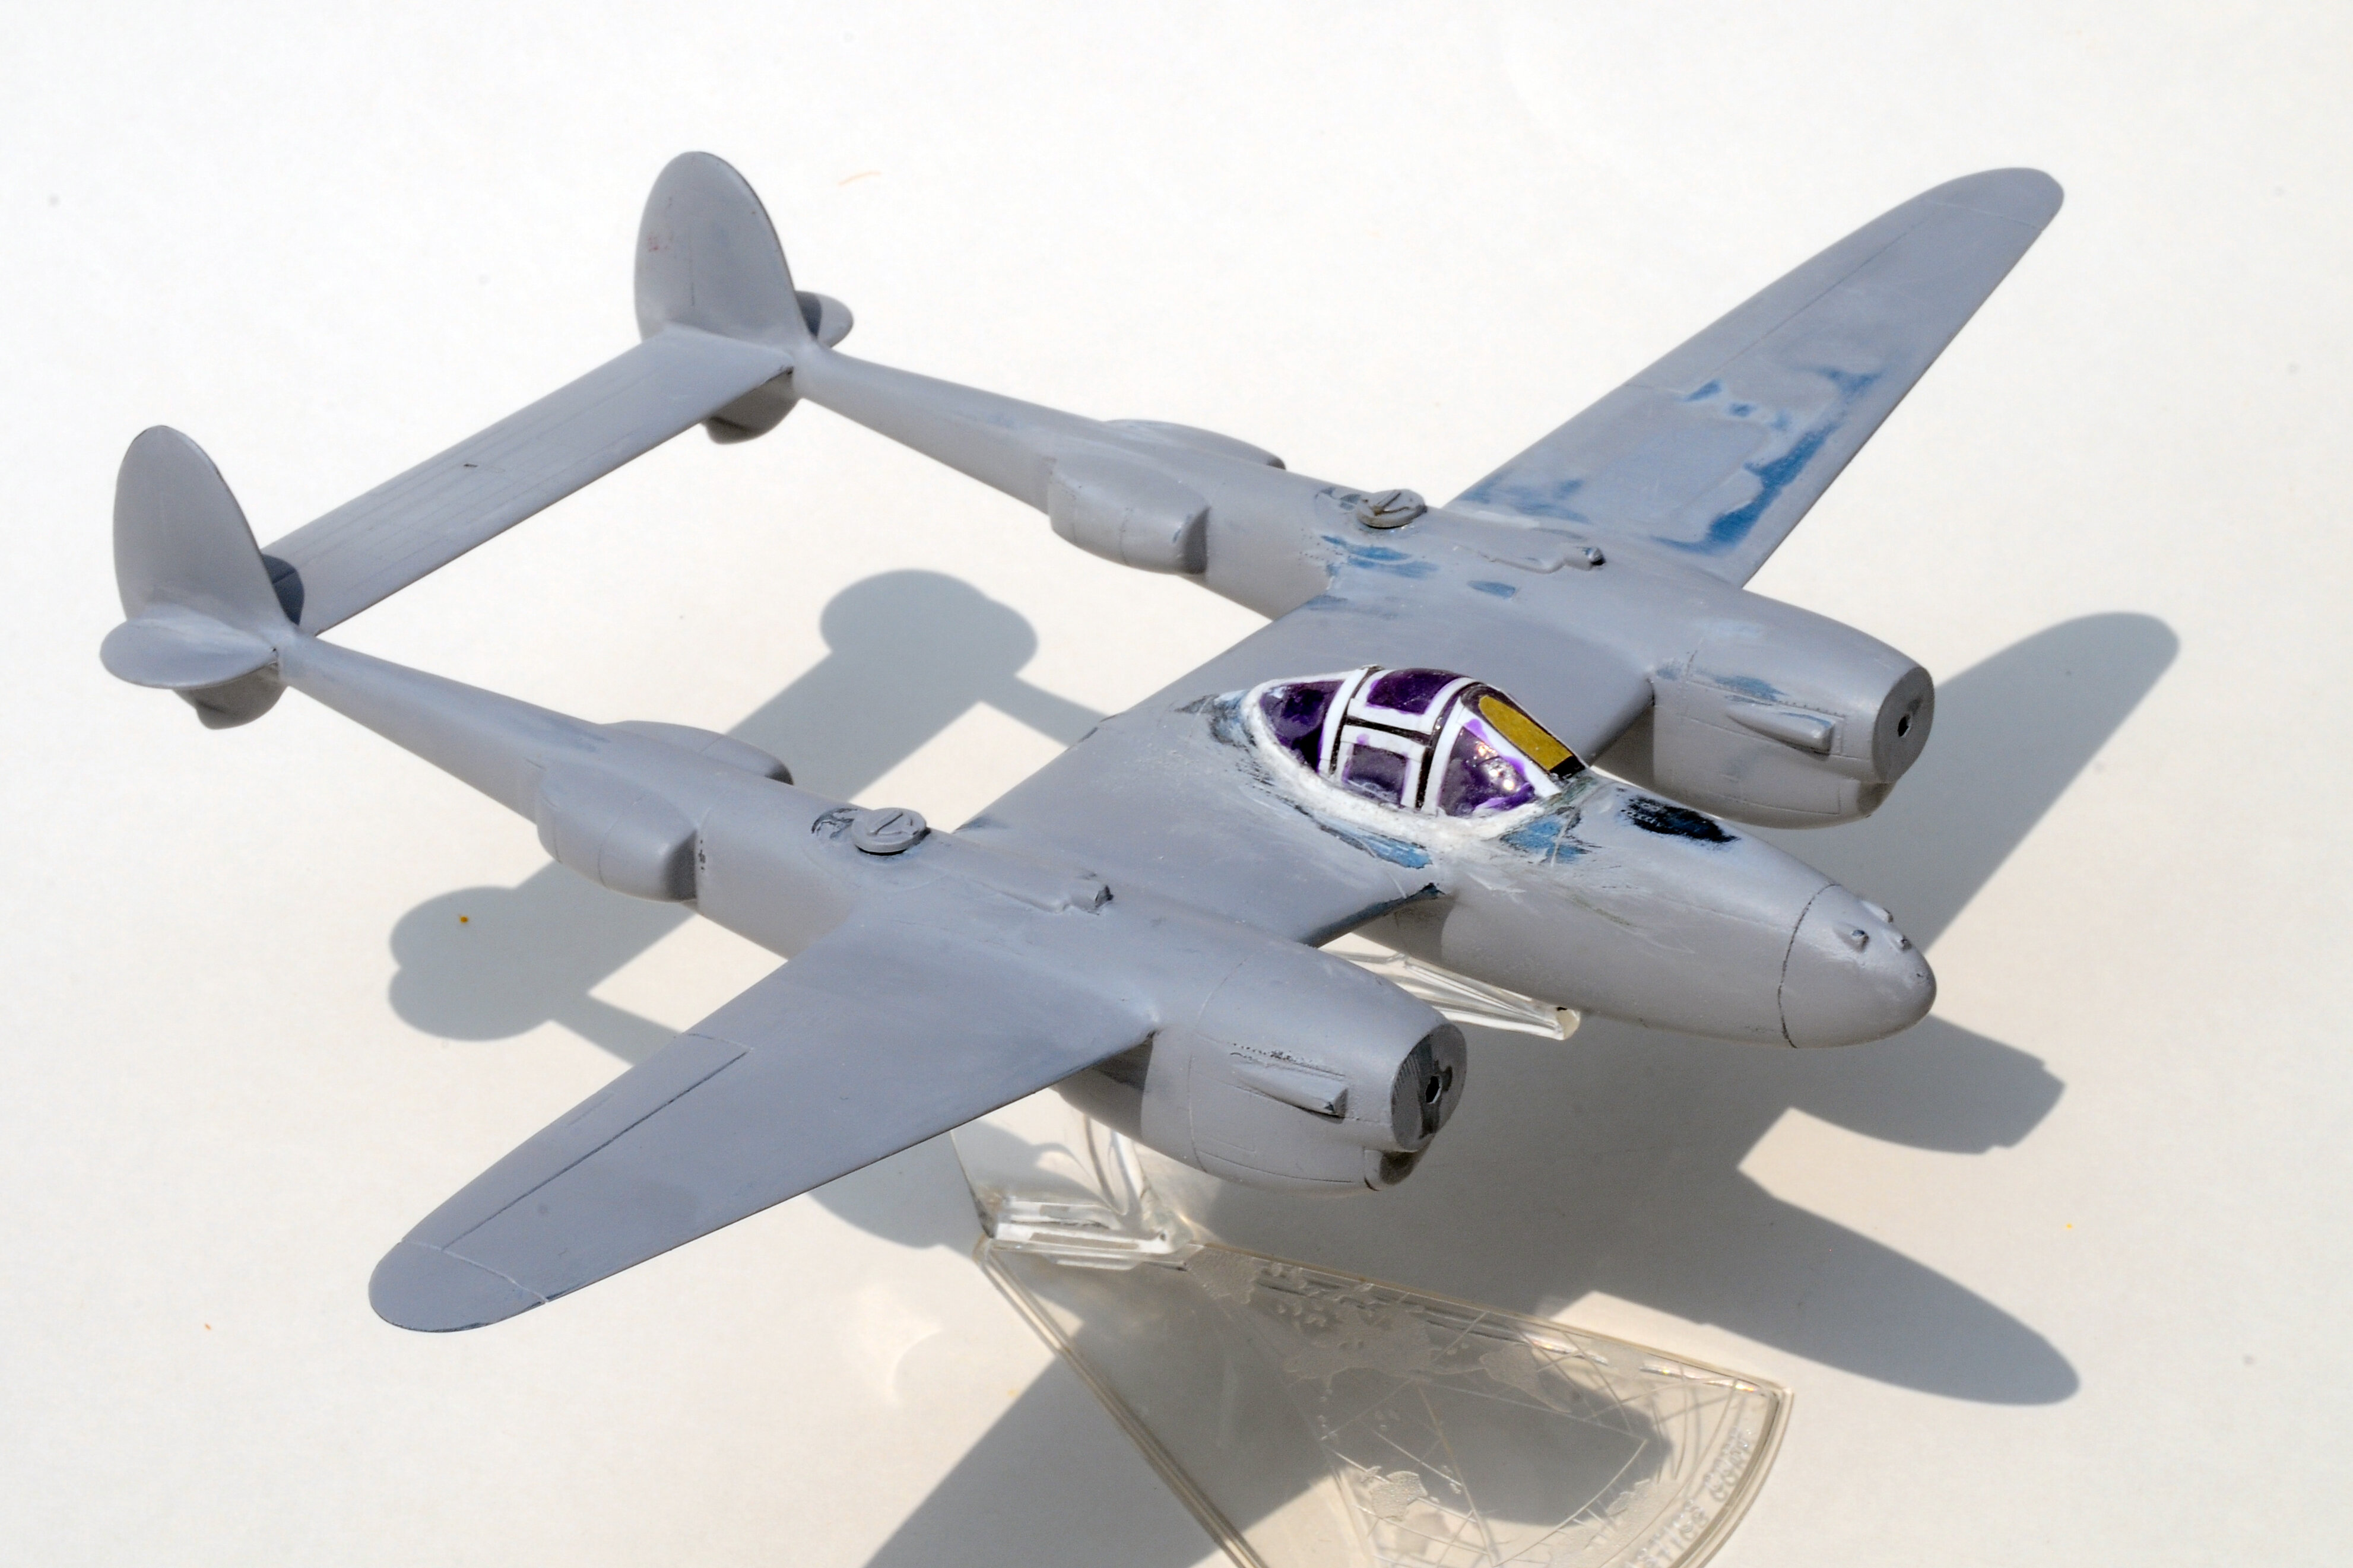
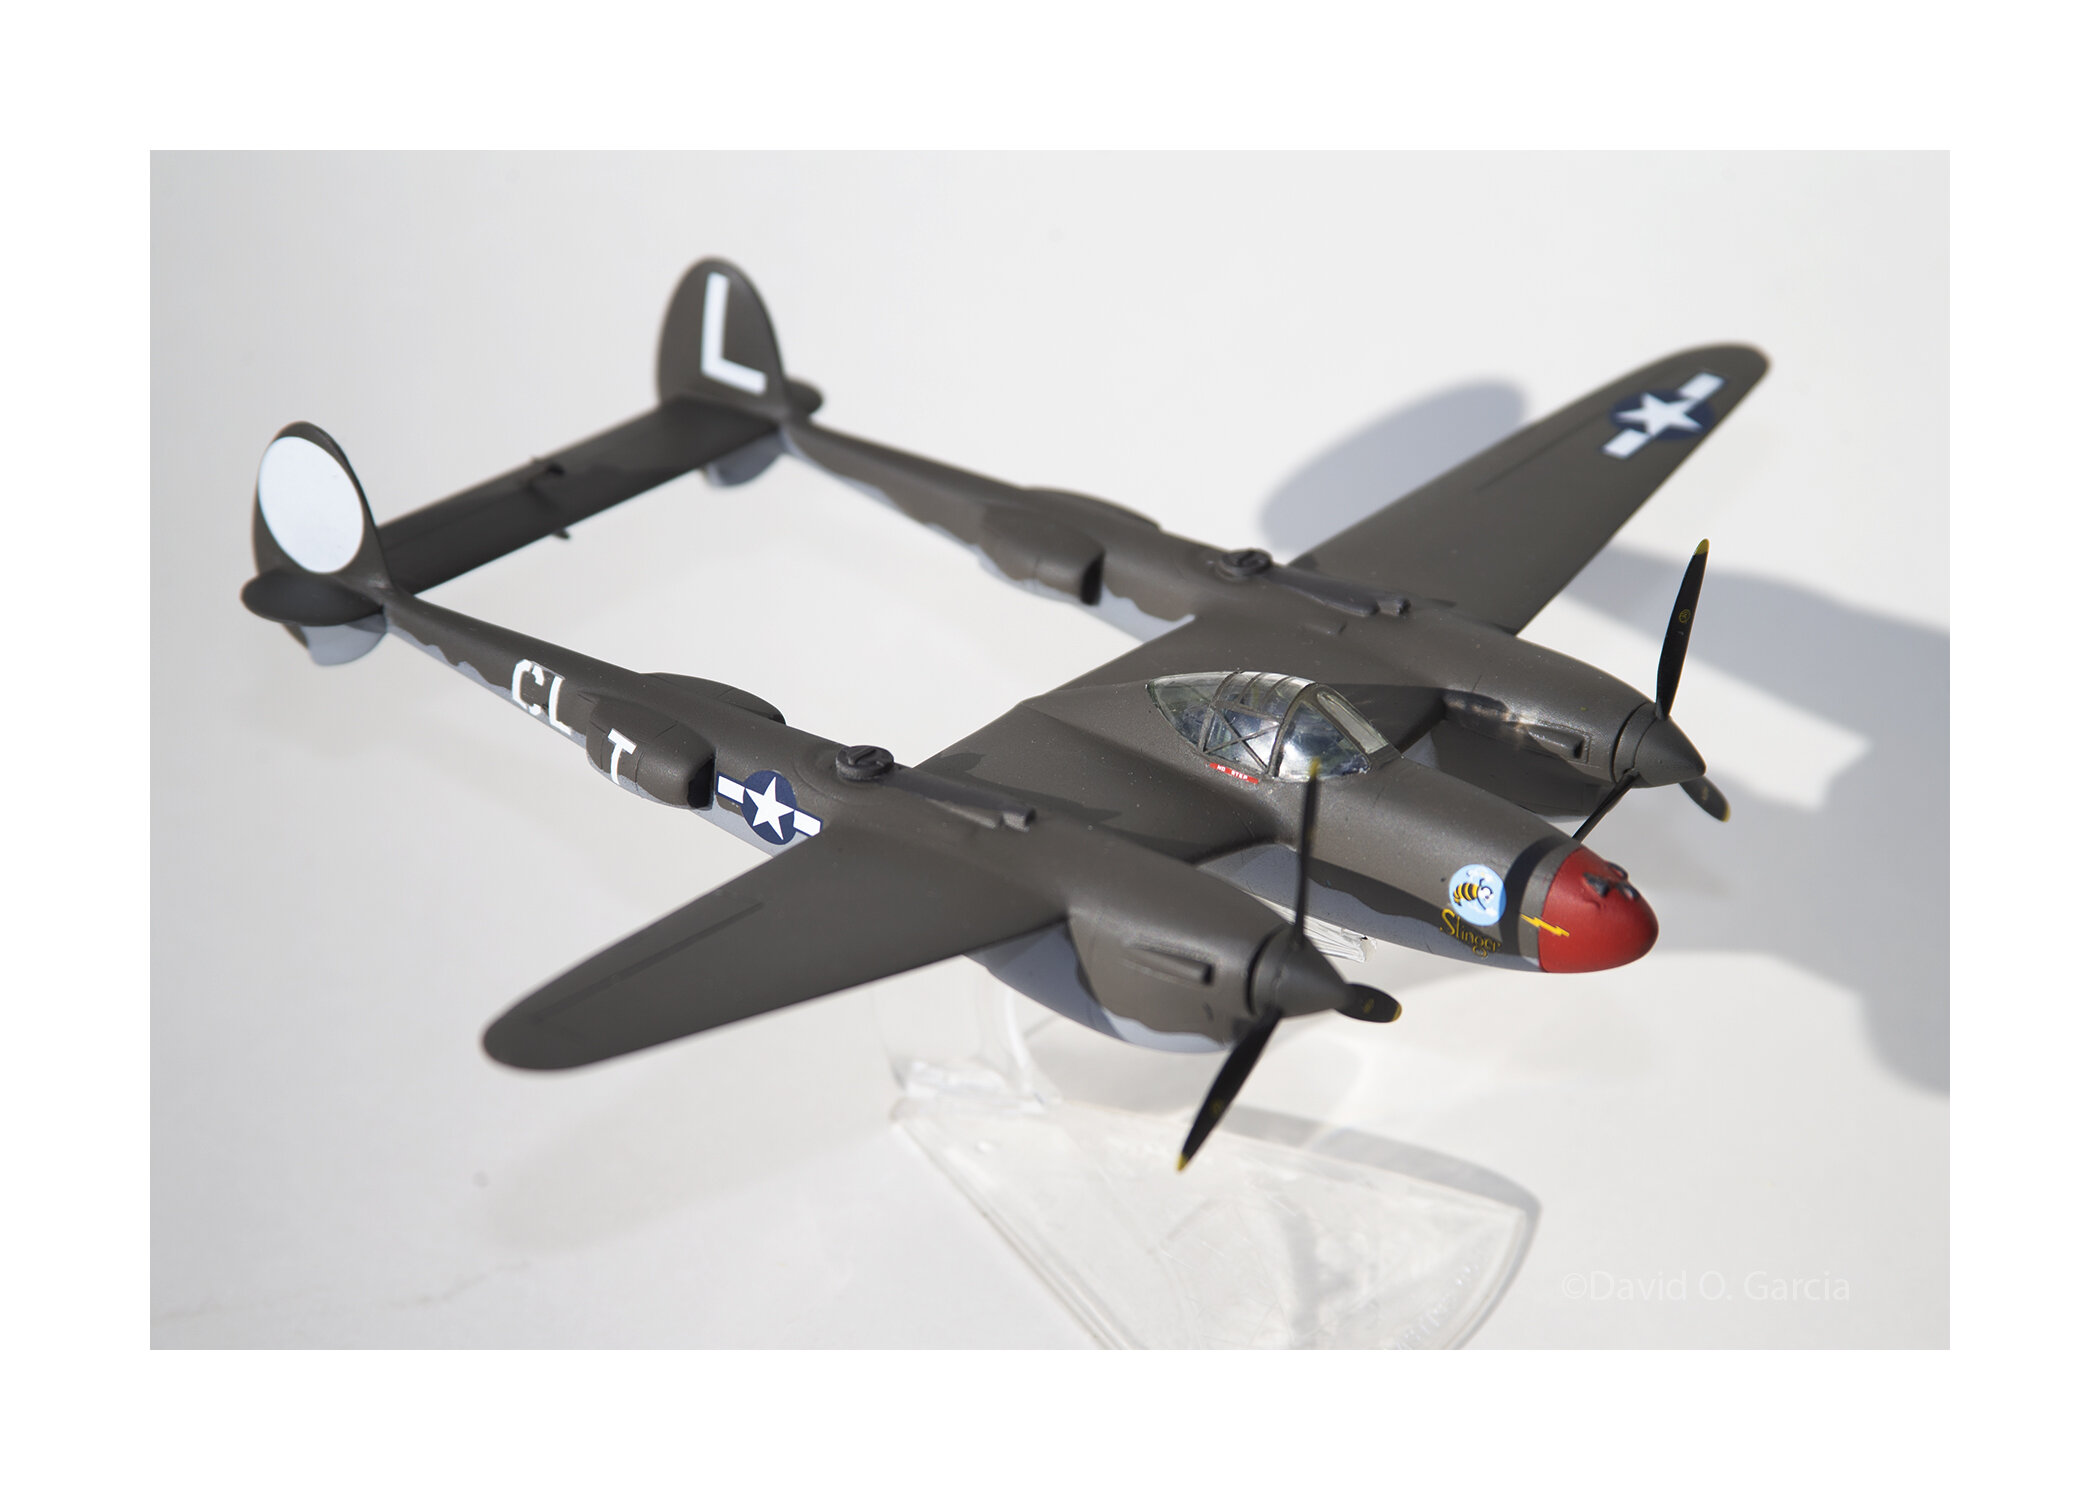
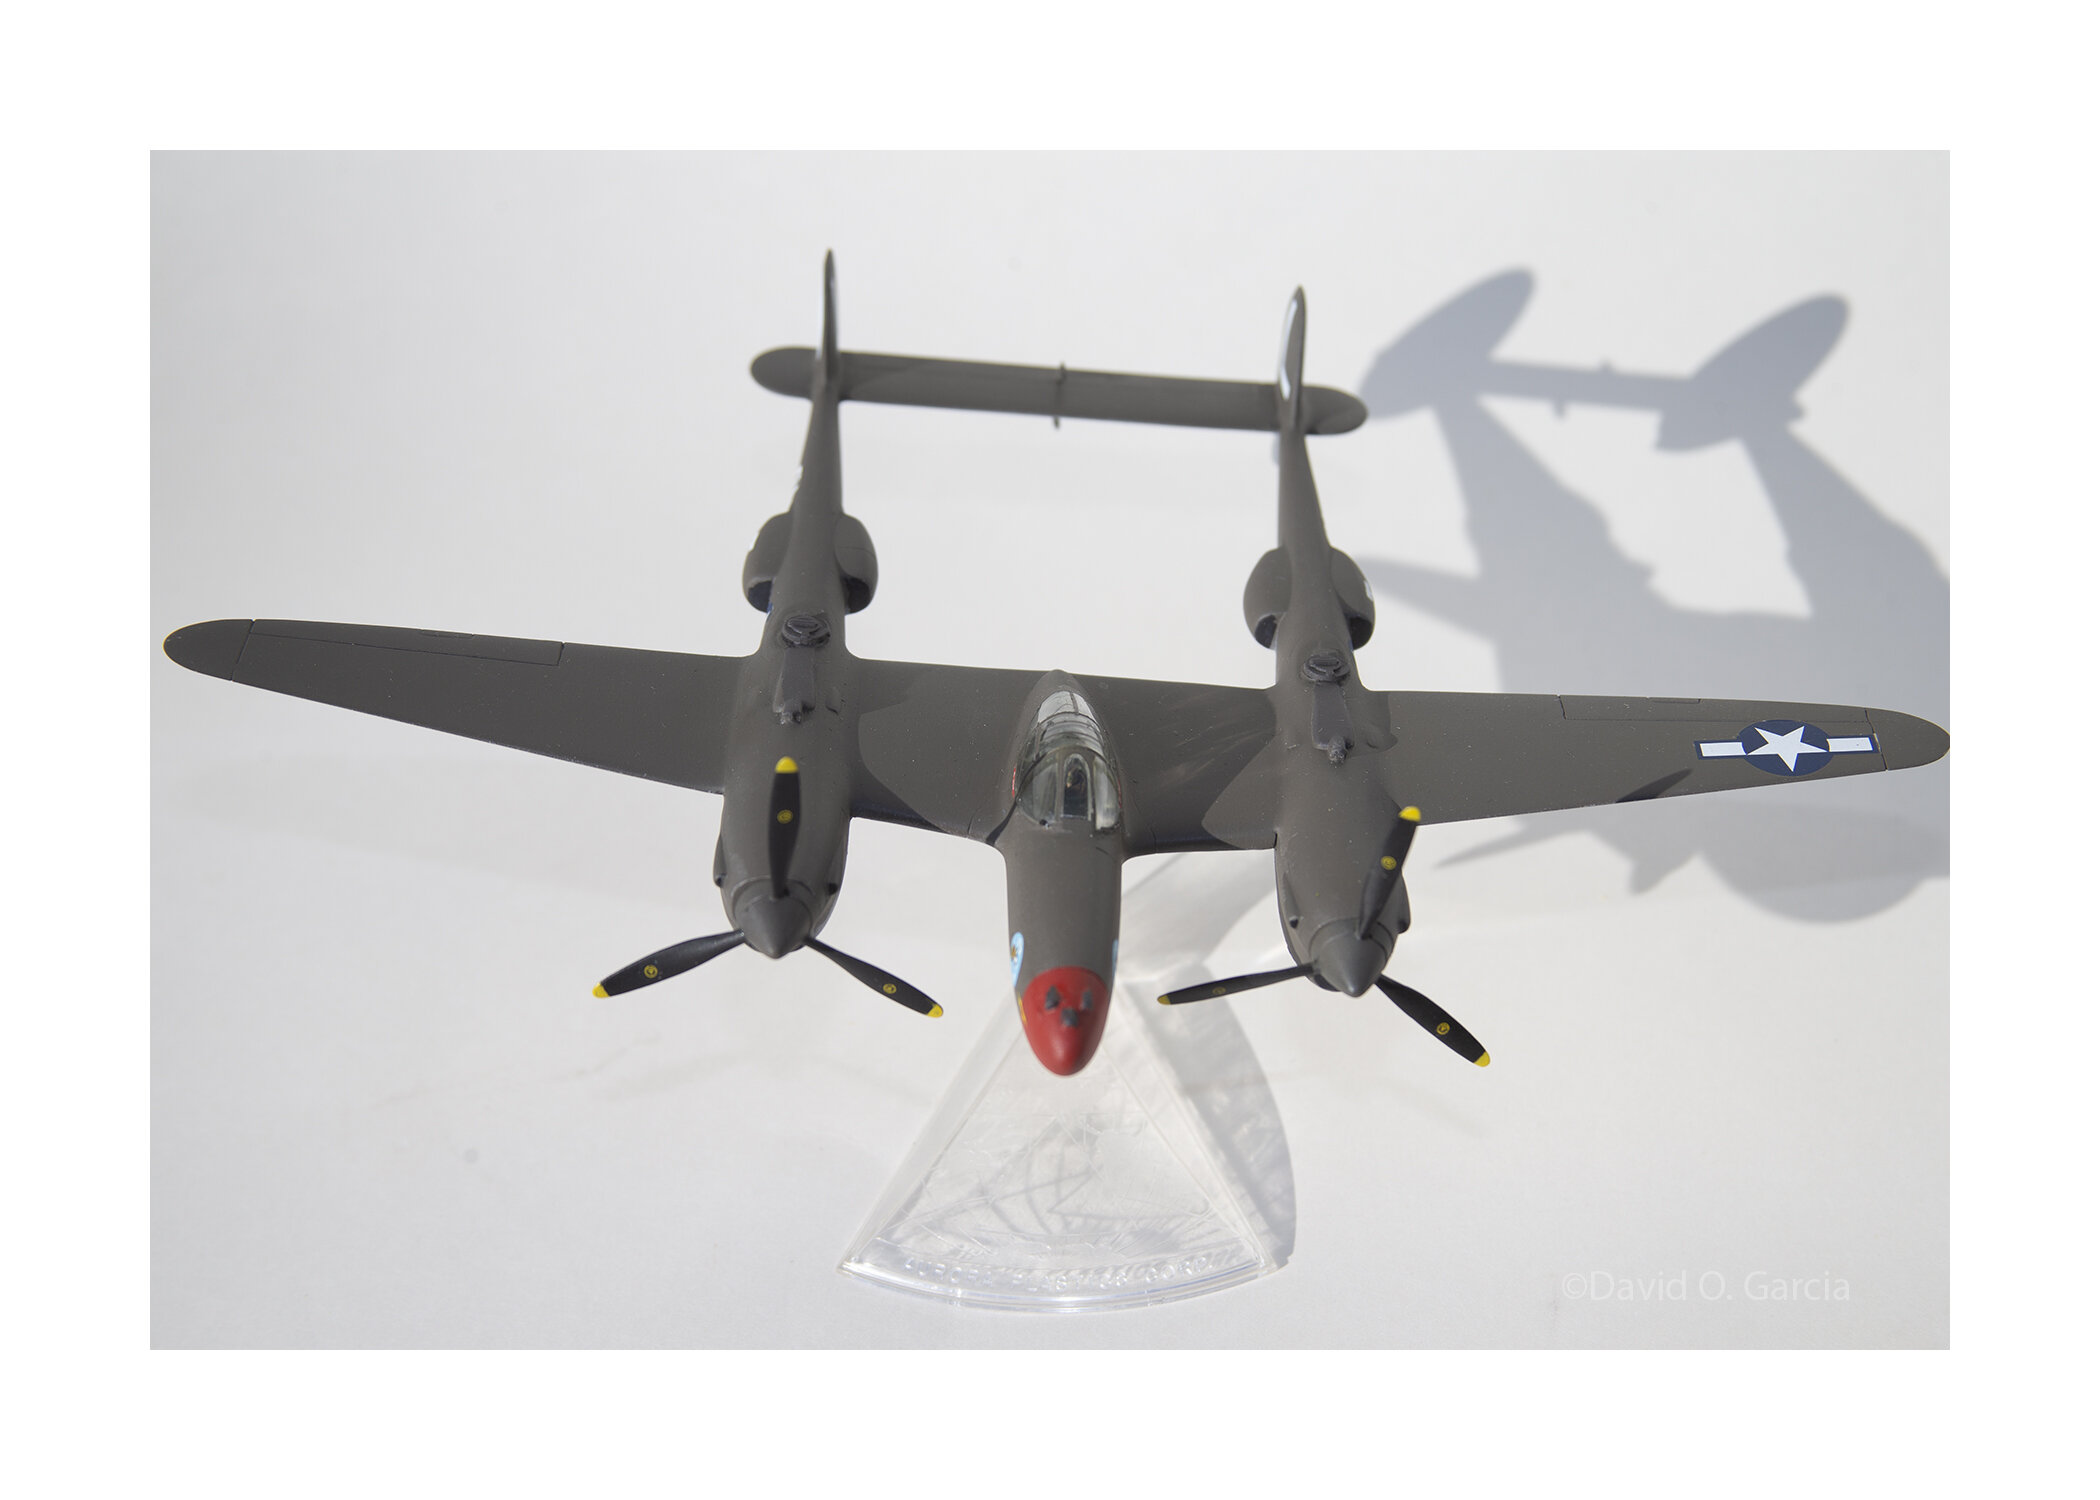
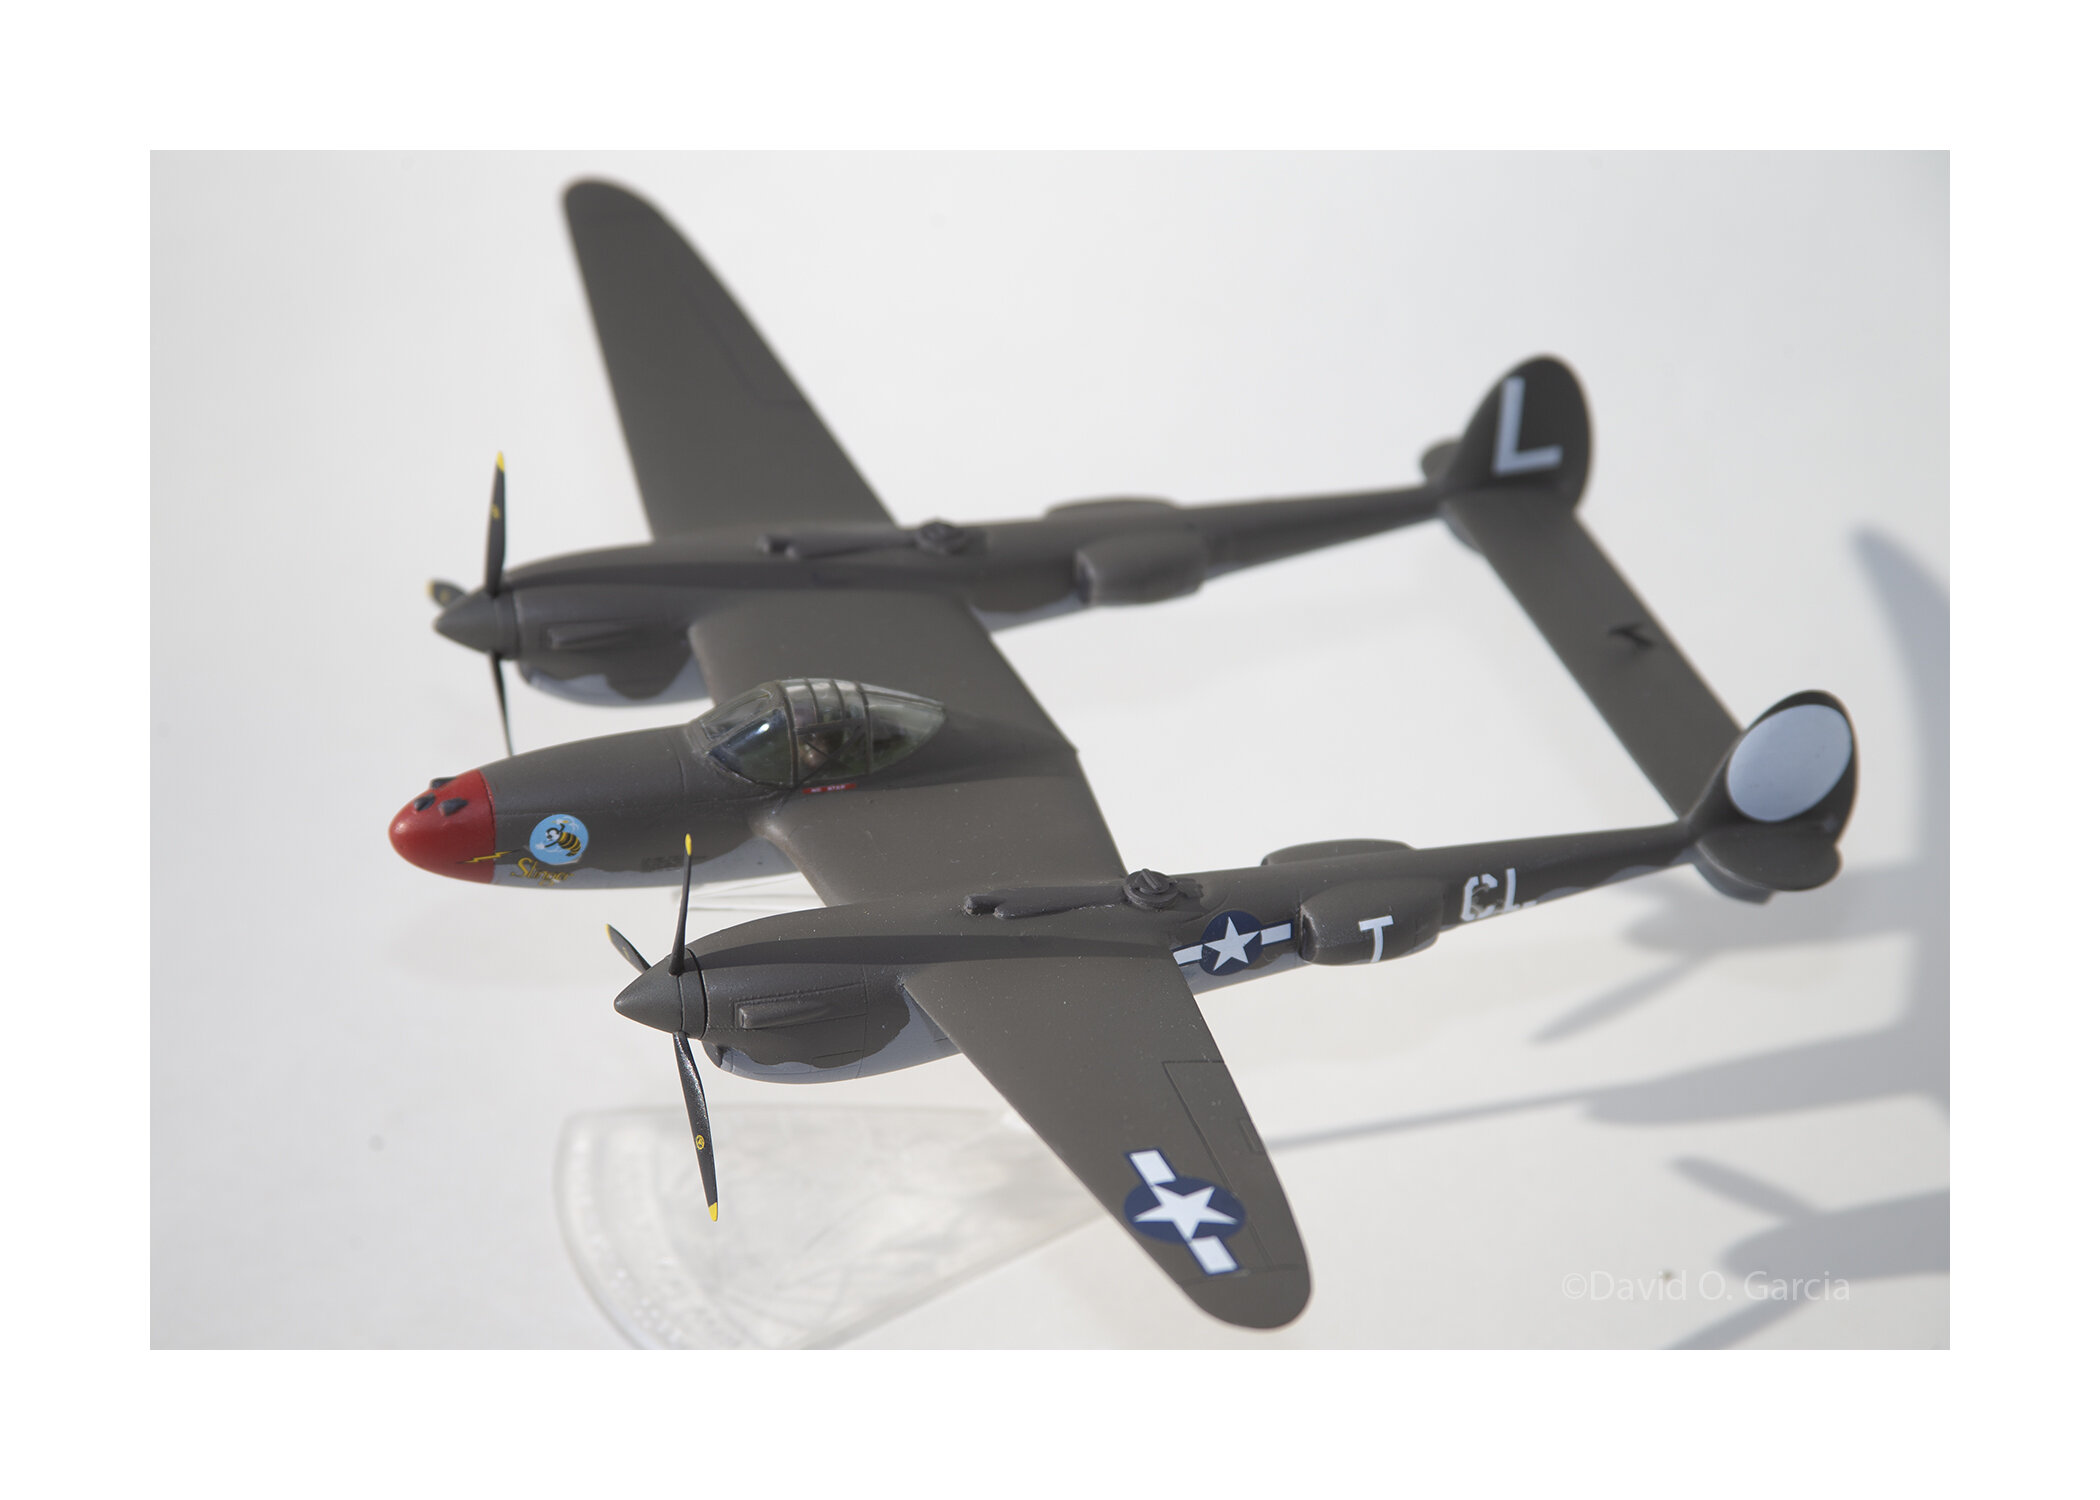
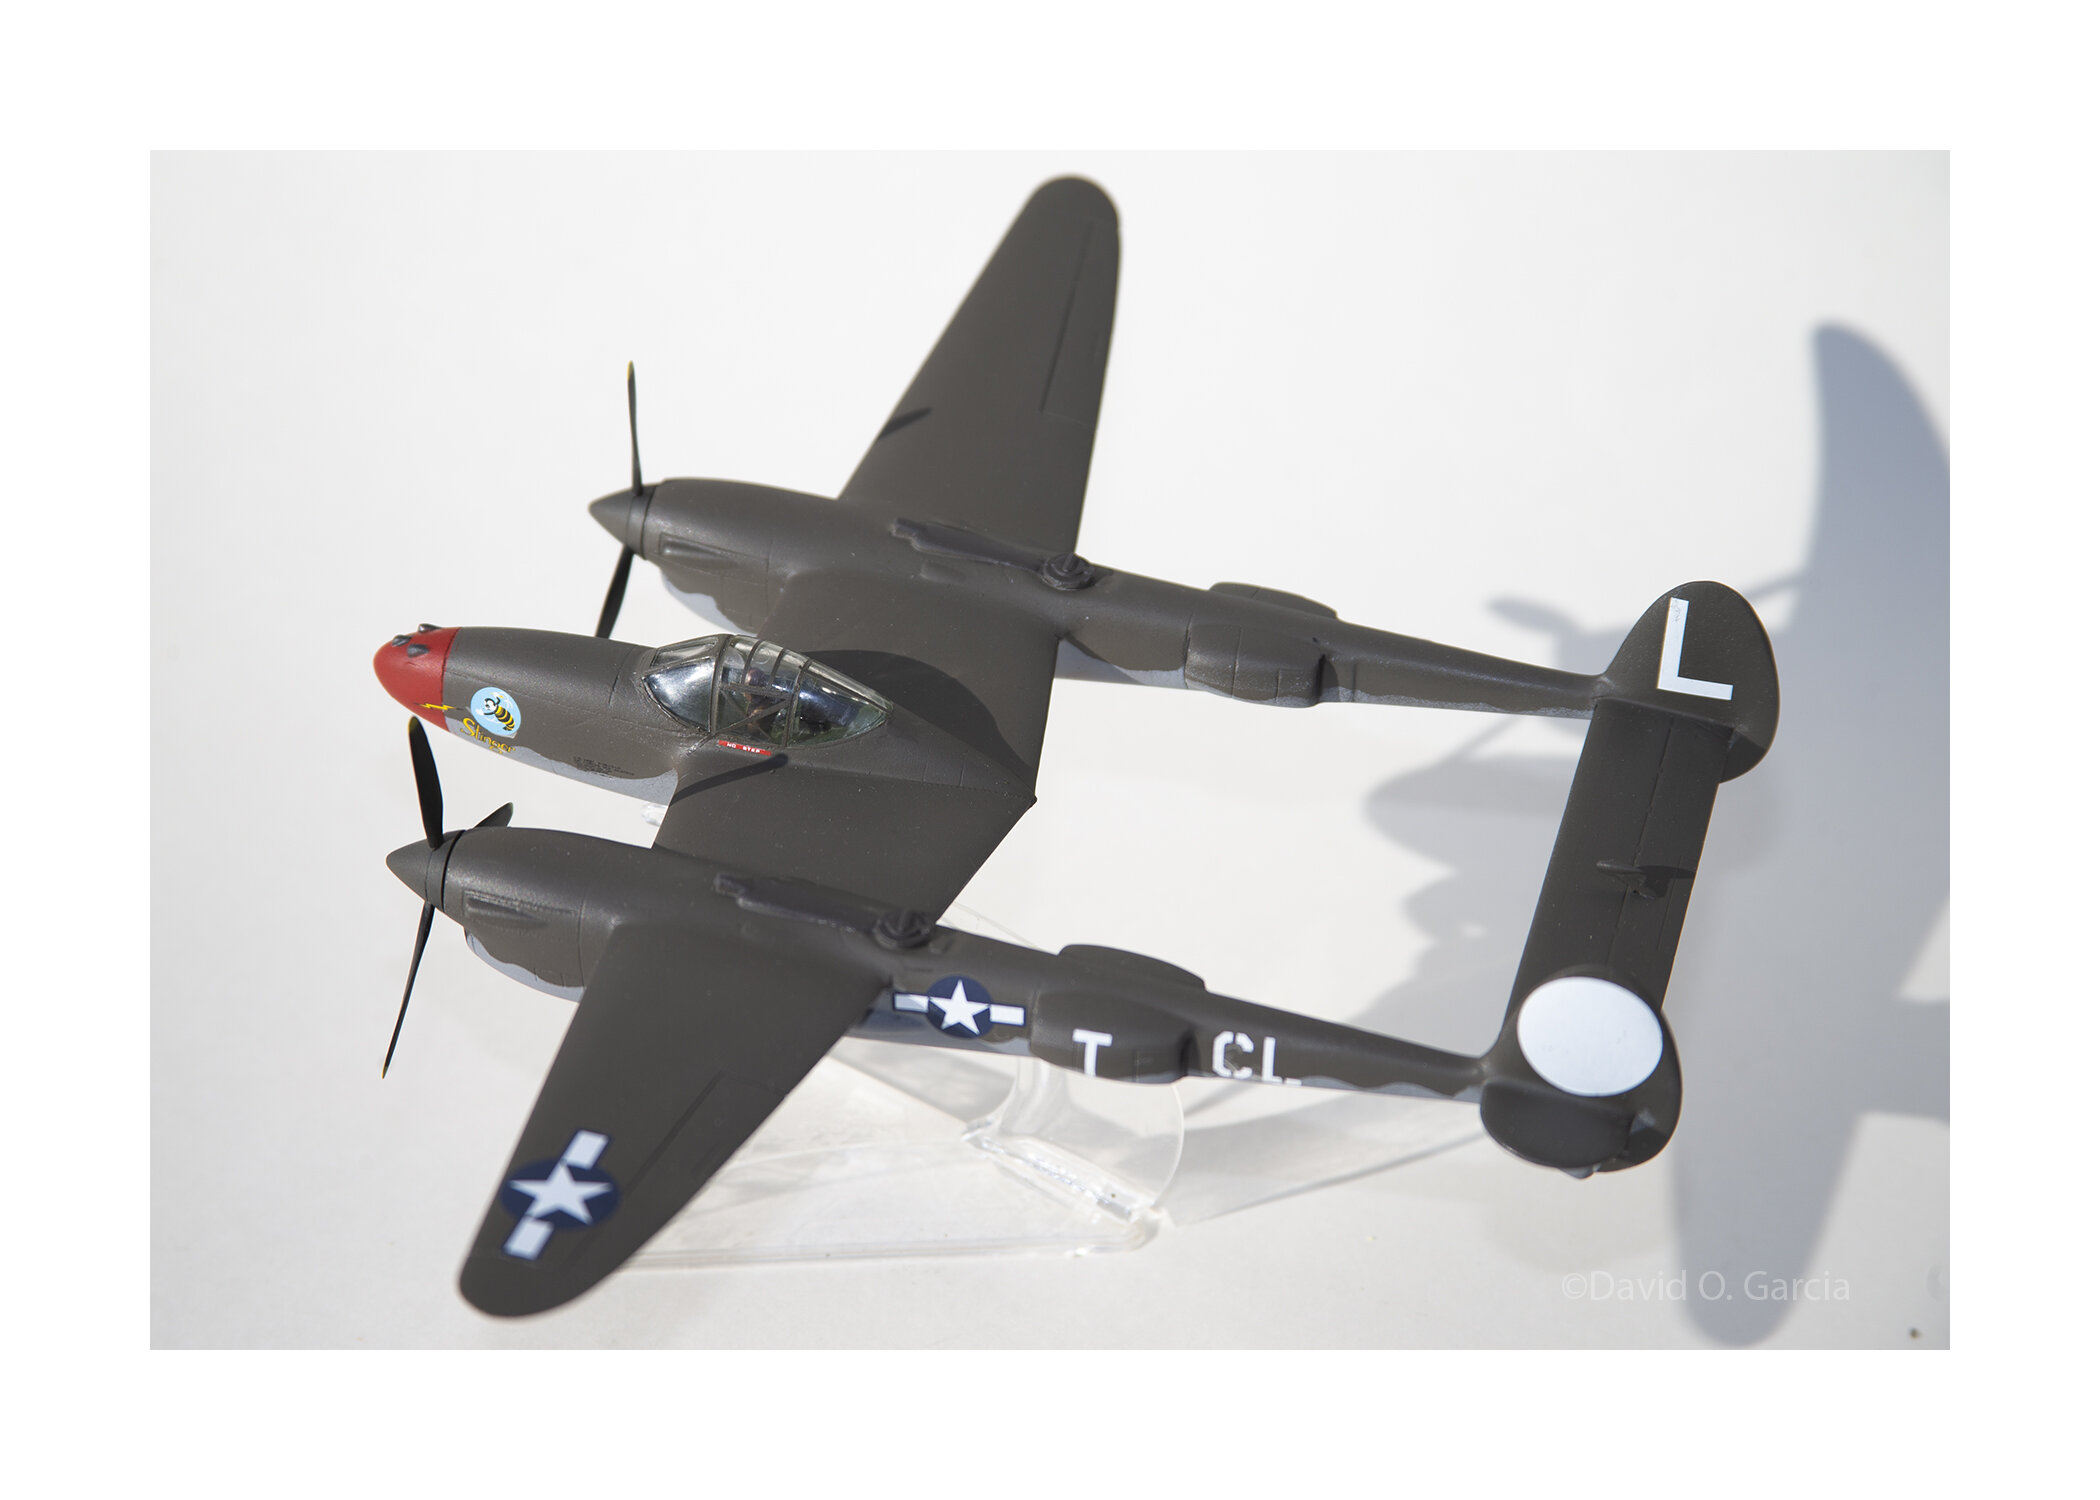
I wanted to see if I could build a broken relic into something presentable. I learned about the P-38 when I build this kit as a child and I would fly it around outside shooting down me109s and what have you. The copy I had at that time was molded in glossy OD plastic. I decided to find a copy and I did. I found some busted up kits for sale on eBay. The P-38 was one of them and is molded in metallic blue. It was missing the tail plane, props and spinners and balance weights. I asked for parts from the club membership and a member sent me a complete Monogram P-38 kit for parts. So here are photos showing the progress. It is one of Aurora's more accurate 1/48 models and I wanted a simple stand build; but, there was lots and lots of sanding and filling. To my surprise the Monogram replacement parts fit perfectly. I carefully removed the yellowed canopy and polished it. There is no cockpit just a molded on pilot, and rudimentary instrument panel and radio. The canopy is more like a helmet in that it sits atop the cockpit and is oversized. The only thing I could do at this point was adding putty and sanding down the sides so that it fitted properly. I glued the canopy with clear Gorilla Glue and it made a good bond without crazing the plastic. The clear canopy is missing some frame lines so I used decal strips to create those missing frames. None of the intakes are open so I just used a large sharpie to paint them black. I painted the model with Tamiya Green Drab and Mission Models Neutral Gray. The markings are from an Aeromaster sheet on OD P-38s. The props are held in place with blue-tac putty. Thanks for looking. 12 additional images. Click to enlarge.
-
That is a real nice model. The figures make the presentation. Excellent Sir.