All Activity
- Today
-

Stikpusher Scale Defense Industries
Stikpusher replied to Stikpusher's topic in Photos: On the Bench
I’ve been working on a few rebuilds/overhauls since my last update here, this one being the most recent, my old Tamiya M5A1. I originally build this back in the mid 80’s in my barracks room and painted it with Humbrol enamels. a couple of years ago I decided to overhaul it and have been plugging away at it here and there… first I removed the old decals then added some Evergreen angle stock and more resin sandbags to the glacis… Then later I decided to add more sandbags to the front and open the second turret hatch In this past spring, since I was airbrushing some OD No.9 at the time I gave it a nice base coat of that color and that is how it has sat for a few months until last week. Since I had my airbrush out the other day, I decided to do the black camo bands on my M5 overhaul the next day was another paint session I went and painted the sandbags on the frontal area Next up I need to add the gloss coat for the decals and in preparation for weathering… -
 Thanks for not only the detailed answers, but also the impressive response time! That's a real confidence booster for the show. See y'all in a couple of weeks! Gil
 -
 Coming to Fort Wayne, Indiana for Nats? We're two and a half weeks away! If you are bringing a model to the contest, please pack it carefully and register it in advance using the model registration system. The seminar times are set, so it's time to check out what you might want to learn. And as we all start to pack our bags for Fort Wayne, just remember to leave space for all our fantastic vendors. For all details, visit: https://nats2026.ipmsusa.org/
 -
Grand Wayne center layout
McGovernM replied to RJackson's topic in 2026 IPMS/USA National Convention
You beat me to the punch, Bill. Many thanks! -
Rato, Wow! You're a traveler who enjoys taking the scenic route, yes? The short answer is to use your computer to search for hobby shops in each city. Each of the places you name are very large so, including the suburbs, they'll have many stores to visit. I hope your phone is equipped with a GPS app to track them down. But of course, if you absolutely can't find any hobby shops - don't worry! Your destination will include the USA's largest hobby store for a couple days. Several of our vendors have been posting about themselves on our Facebook page. You might save some driving by checking them out: https://www.facebook.com/groups/ipmsusanationals/. See you in Fort Wayne!
-
Having a few collections to complete I decided that Childs from the 1982 movie The Thing was desk on the table. He is part of the Childs/McReady controversy in that who was the Thing at the end... The kit came in 7 parts - the bust, base, gloved hand, whiskey bottle, and 3 appendages. The likeness is spot on and the casting as usual with Gillman is nearly flawless. With this piece, the Yagher, the sculptor, gives away two of his ideas of how things ended. Number one the base is created to look like a generator, which answers McReady's question :How's the generator," and Garry answers "It's gone, MacReady!" As a sidebar Garry was his last name. On the character list he was M.T. Garry. The Yagher also gives his opinion of whether Childs or McReady, neither or both were infected. From the front Child's portrait is spot on. But from the back you see his head is split open and all sort's of gooey things are emerging. As usual I start with the portrait. I don't get to do dark skin all that much so I was glad I picked up a number of Army Painter skin double triads (6 colors that all blend) . I started withe the darkest one, and then I really didn't like many of the companion colors as they seemed too desaturated. I had seen another painter use oranges to highlight the skin, so I turned to my set of rust paints. A few different layers and I was liking what I had so far. Turning to the back of the head I added various reds and oranges to make the wound. My thoughts on wounds and blood is that a little goes a long way. I went too far, so I got some Agrax Earthshade to darken down the crevices and ended my session there. Coming back to it the next day to see disaster struck. I had angled the bust face down at an angle so the wash would dry in all the recesses. What it did was to rundown the head and then gravity would take it around to the bottom which from that angle was the face. I now had this dark stripe running across the face and down to the chin where it dried. I tried lightly getting it off. It didn't really work that well. So I got out the paints and had Take 2 of doing the portrait. After getting it fixed, I sprayed it with a matte clear to protect the new paint (which I didn't do the first time). Tragedy struck again as the matte clear coat instantly frosted. I had heard that if you quickly spray it with a gloss, the frost goes away. The frost did go away - mostly. Disgusted, I chose to walk away rather than whip it off the wall. With everything that happened I was so disgusted that I forgot to take WIP pics, so all I have left is the finale shots. Thanks for looking.
-
Reskit has issued a 3D printed cockpit for ICM’s 1/35th scale CH-54A or S-64E Tarhe. There are versions of this from Reskit primarily with and without 3D printed instruments like the ones I reviewed last in my Reskit F-111E review. This set does not include the printed instrument panels but does includes more than 30 3D printed parts. Also included are acetates for the instrument panels, decals and small printed sheet for magazines that can be added. These are all packaged in a well-padded box containing the parts and their supports and boxes. View the full review

- Yesterday
-
 Hi Gil, Love your enthusiasm to help :). Thanks for your feedback. simple answer. before papers for model registration are put on the table, attendees will be checking-in at model registration (where we scan the code and we are also checking for registration check-in) Since our team is at that checkpoint and we are also training the check-in team over meetings this week and next (Volunteers), I can tell you yours are ok and good to go. Happy to add you to the training call Thursday. To alleviate your concern for Keith's number, Ive email sent (and ccd you for reference to help alleviate the concern (Keith had a little more models to print) RE: his problem is even further compounded IF Keith and I aren't the only ones with duplicate registration numbers. (I have a nice table view to see all the entries, happy to walk you through it w/ a Teams /Zoom call we can have Nancy set us up with. It shows all of the contestants, registration numbers and sub-models. thanks for for the continued feedback Gil. Looking forward to seeing you there! Regards Mark
 -
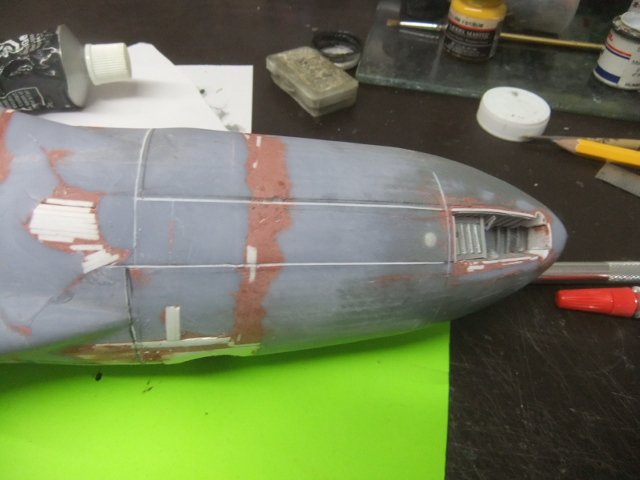
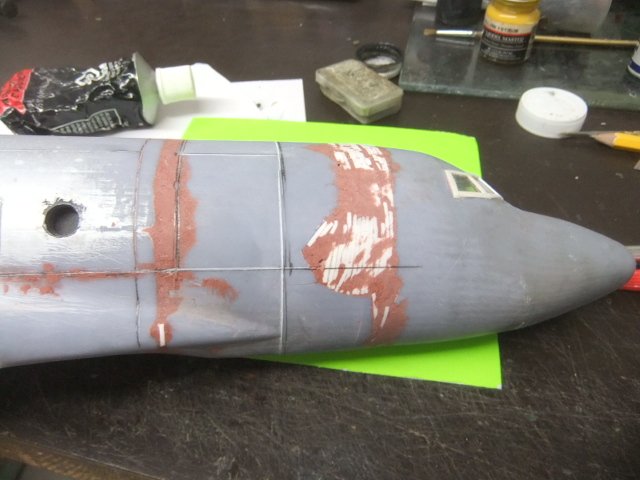
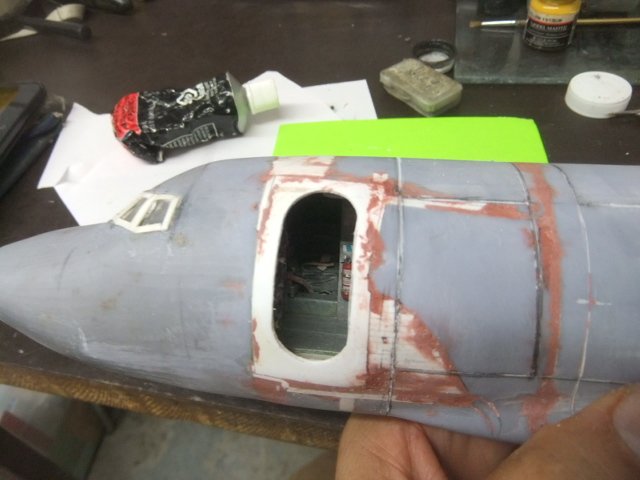
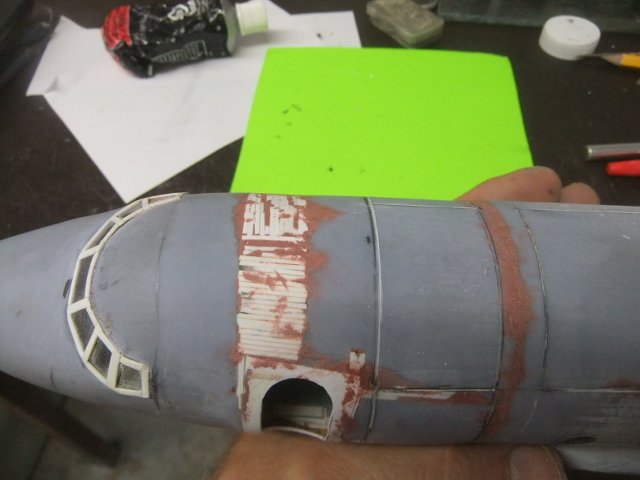
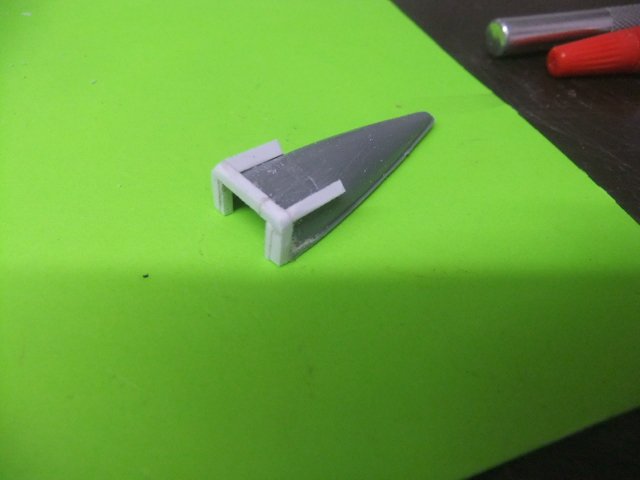
Thanks for following the WIP on this project , it's quite appreciated !, here the latest update AVRO C.102 JETLINER (3D +SCRATCH) (JUL 20th ) Today , I continue ingraving the front section and finally and the work on the airframe intake ! If you like to view the complete WIP on this project , just follow this Google link : https://photos.app.goo.gl/uvk6ymGqZHgpWDaR9 If you like to view what I have completed so far on the AVRO CANADA project , I have set up an GOOGLE page for them , here the link: https://photos.app.goo.gl/FpZs5m3ic3c3eL329 Enjoy and it's an 'rendez-vous' next week for more on this particular project..!. Jmarc
-
Ok...... I understand the reasoning to use the registration numbers assigned to us for the show, and that our IPMS# is NOT a part of our model registration process. I also get that YOU and your team seem to have straight in your mind and (evidently) within your computer data bases everything that's going on, so that to you it seems there is no identification problem. BUT..... I have 4 printed model entry papers that will be under my models in the room with the #1237-(1/2/3/4). Since no one has mentioned asking either Keith Redman OR myself to redo out paperwork, HE will have at least 1 of his models in the room WITH THE SAME ENTRY #1237. Our models will not likely be in the same class, let alone category; so I also understand that there's not much likelihood for the judges to get confused with duplicate numbers. I guess I'm not following how you will differentiate within the records when searching for #1237 if needed, since you'll have at least 2 identical entries (1237-1) for two different contestants and models. Also, it COULD cause problems for the photographers who will be seeking the models needed to be photographed using a paper with just a category#, description of its type, and that registration# and who might not be very familiar with the subjects they're taking pics of. This problem is even further compounded IF Keith and I aren't the only ones with duplicate registration numbers. I'm glad to hear that y'all seem to have a handle internally on identifying models with the same numbers. But how will it be handled IN THE CONTEST ROOM??? Gil
-
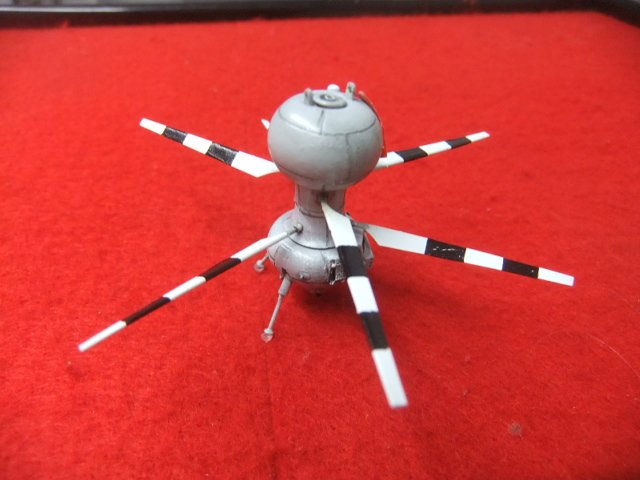
Thank you for following the 'WIP' on this project ,it's quite appreciated ! (JUL 20th)...Today I start working on the armement and presentation base ! f you like to see the complete WIP on this project , just follow this Google link : https://photos.app.goo.gl/1W6Eu6c7EvJeyLGT6 If you are curious and like to view the SCI-FI kits I have done in the past ,just follow this link : https://photos.app.goo.gl/D2FAQcJCoNhHNjkdA Enjoy ! jmarc
-
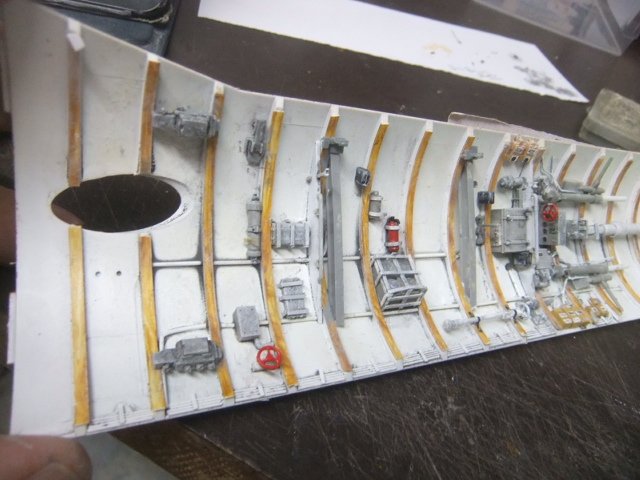
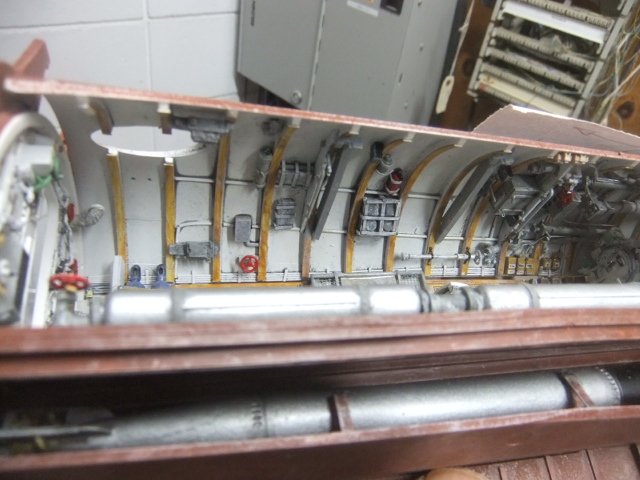
First I'd like to thank you for following this WIP it's quite appreciated ! (JUL 20th...Today .I continue adding the missing details on the ceiling of the sub ! If you like to see the complete WIP on this project , just follow this Google link : https://photos.app.goo.gl/EZKenssCafCXix326 If you are curious and like to view the other WWII GERMAN sub I have done in 1/48 , just follow this link : https://photos.app.goo.gl/BcwASAzLsZRq5mQf7 Enjoy ! jmarc
-
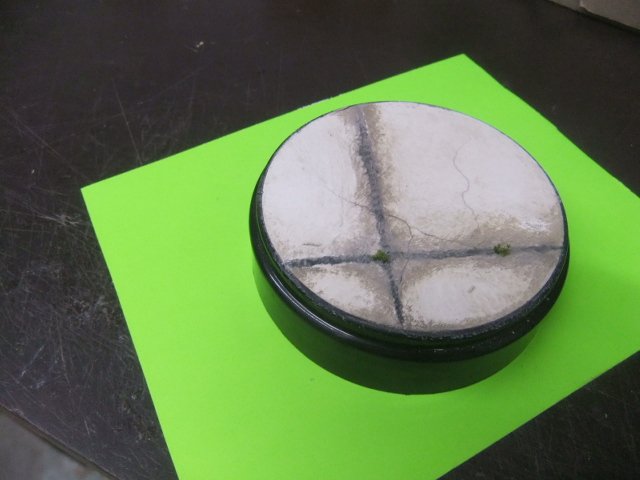
First I'd like to thank you for following this post ,it's quite appreciated ! Time to complete another WHIPPET CANADAIR CL-327 ( 3d PRINTED) (JUL 20 th ) Today ,I strat to work on the base details ! If you like to view the complete WIP on this project , just follow this Google link : https://photos.app.goo.gl/3QPU8Ntb4dt57CuH6 If you like to view all the DRONES I have done so far in 1/48 , just follow this link: https://photos.app.goo.gl/mjGm69hDKYaDuFNX6 Enjoy ! Jmarc
-
First I'd like to thank you for following this post ,it's quite appreciated ! BOEING INCITUS MQ-27 / CU-169 SCAN EAGLE 1/48 ( 3dPRINTED +ADDITIONS) (JUL 20th ) Today I continue adding the last details ! If you like to view the complete WIP on this project , just follow this Google link : https://photos.app.goo.gl/jrWyBiNZSJHCUknZ9 If you like to view all the DRONES I have done so far in 1/48 , just follow this link: https://photos.app.goo.gl/mjGm69hDKYaDuFNX6 Enjoy ! Jmarc
-
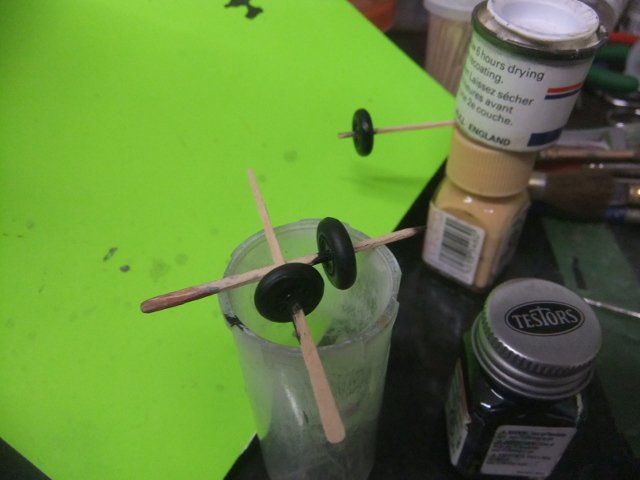
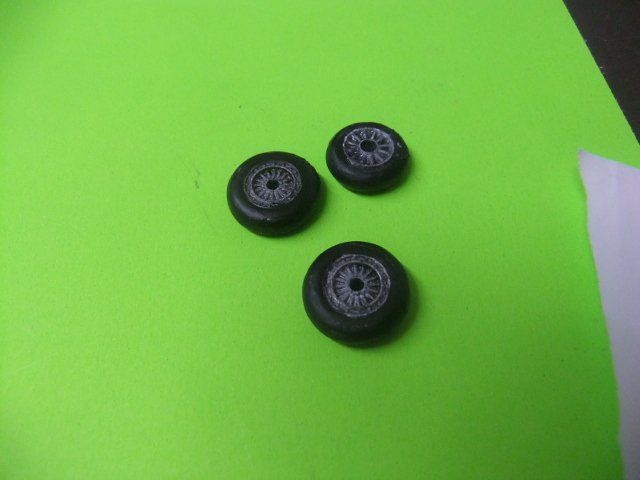
First I'd like to thank you for following this post , it's quite appreciated ! 1/48 LOCKHEED T-33 SILVER STAR (TESTOR) (JUL 20th ) Today I located a set of wheels in my spare box and start working on them ! If you like to follow the complete WIP on this project , I have set up an GOOGLE page, just follow this link .. https://photos.app.goo.gl/mCtpo97pwYCFaYE39 If you like to view the complete STASH PARTS done so far ,just followthis GOOGLE link .. https://photos.app.goo.gl/NtNSgh1zJgx9jRSx5 Enjoy ! Jmarc
-
HI Gil, Thanks for sharing and pasting answer here as the facebook ( for those who want to follow-along in two places) https://www.facebook.com/share/g/1EpDVuAEMi/ @ghod RE: "I thought we'd switched to USING our IPMS# as our Nats contest entry number; or was I mistaken about that? Is the model registration number assigned on our paperwork some sort of "Ft. Wayne" tracking number that serves a separate purpose?" I've been workign w/ the NATS planning team since last year and we implemented the numbering scheme awhile back so that is mistaken info. The IPMS number is the source for member accounts (as we pull from the Wild Apricot system )but the numbering scheme was recommended by the judging team. There are 1300 as of today and pacing about 200 @day (i have a full table of all of the entries that we are reviewing and we have a few that w/ the group entries or deleted, we can see that the printouts had the same but the backend database is updated. we are workign on a few as we speak to print out update ones this week before the event (which is still 2 weeks away ). Fysa we did some updates w/ the group registrations last week where we updated w/ a couple of members to reprint theirs ahead of the actual event. " Gil Hodges Hi Gil, there is a D appended in the backed that isnt shown on that list. also the QR code is a different number and currently with all the registrants coming in we are reviewing the entries and testing (I'll be there at the model check-in too and we are still 2 weeks away (there are 4 entries we have right now that I'm working w/ the members on reprinting while we adjjust some of the models coming in. if you would like a deeper technical discussion (or scientific), happy to jump on a call with you as we'll make sure this event will be great and all feedback is welcome! (i'll post this same reply to the duplicate question so we arent confusing people). regards Mark Stevens (832-594-0613)
-
I registered my models yesterday (7/19) for the Nats. I then posted on Face Book on the NATS FB page about doing so along with a comment about how my registration #1237 boded for a very good model turn out at the show this year. Another member, Keith Redman then posted that HE was #1237 (he'd also "just" registered that day) along with a screen shot of his entry form confirming it. I also posted a pic of MY paperwork showing MY #1237 (see below). I then asked for someone from Ft. Wayne to look into this. Mark Stevens replied that he did so and was able to a "test check in on both" (whatever THAT means) and from that implied that we were good to go despite that with no need to change either my or Keith's number(maintaining our duplicate registrations). Here's my reply to Mark: "Glad to hear that our model registrations SEEM to be "ok".... but I'd still like an explanation as to HOW the system is giving out duplicate numbers AND ALSO why this will not be a problem in the record keeping. I'll be helping the judges/photographers with tracking winners during the judging on Friday night and duplicate registration numbers would appear to be a potential problem for that, as well as for when trying to find the proper models (from the records) to be shown during for the awards program." SO..... as I've stated above this COULD be a potential problem for the show and raises questions. Is anyone else getting assigned a duplicate model registration number? Also, since we ALL must be IPMS members to enter the contest, I thought we'd switched to USING our IPMS# as our Nats contest entry number; or was I mistaken about that? Is the model registration number assigned on our paperwork some sort of "Ft. Wayne" tracking number that serves a separate purpose? There may indeed by some good, simple explanation to allay my questions and put to rest any qualms about problems with record keeping due to the use of duplicate numbers, but would someone PLEASE take the time to address that here FULLY? Thanks! Gil Hodges #10803 Reply
-
Agora Models Agora Models is a UK company based in London, England that specializes in high-quality large-scale models. This is the third part of the review of Agora Models’ Jeep Willys SAS, describing assembly and finishing of the Jeep. Agora distributes the Jeep kit monthly in 12 Packs. Summary Agora’s Willys SAS Jeep is a fantastic kit that will please Jeep lovers and fans of large-scale modeling. Assembly of the big kit is straightforward with detailed, clear instructions. There are many tiny screws used in the build, which is the only challenging part of the assembly. Pre-finishing of the parts allows building the kit without additional painting steps and even less experienced modelers will find the build enjoyable. View the full review
- Last week
-
Glad you like it GIL !..As the title say it's in 1/48... All the stuff I build is in 1/48 except for a couple that are challenge from fellow club members
-
Wow! What scale is that? Gil
-
Hi ! Here another project I have built in the past , of course it's SCRATCH ..if you like to view more pics, Just follow this Google link: https://photos.app.goo.gl/3nTShbbboiZmwKkC8 Enjoy ! Jmarc
-
The seventh week of the F-35C was spent detailing the canopy and preparing all the landing gear, tail hook, weapons bay, and boarding ladder doors. Starting with the canopy I detailed it using the kit photo etch details. After the photo etch was installed I was reviewing the instructions and noticed there was no way to mount the canopy! The instructions do not show or call out the part that mounts onto the front of the canopy to represent the hinge. I looked over the part trees and located the part that looks like a similar part used on the Tamiya F-35 kits and installed it. Next I turned to the wing tip sections. These required some putty to fill the seam in the middle of the flaps. The wings were then mounted onto the aircraft. I should note that the kit has instructions for wings down and wings folded. I opted for wings down. The mounting of the wings down takes some work to mount and align them as there are no guides for them to mount to. I also assembled the small center fuel tank and putty the seams as the fit was not the best. I then began cleaning up all the doors. The first issue is the multiple mold marks on the inside of nearly all the doors. These needed to be filled with putty. The second issue is the two side doors for the tail hook. Only one of the doors had one hinge molded on. The other hinge and both on the other door were not molded on. I located some spare photo etch hinges I had and will use these. The third issue is the weapons bay main doors. The weapons bays have three locations for the main door hinges and the kit has three hinges for each door. However the main doors have four cutouts to mount hinges. The fourth cutout (if it had a hinge) would interfere with the small door in the center of the weapons bay. All reference photos for the “C” show three main hinges and the small door. I filled the extra hinge slot with putty. I am now working on the starboard nose gear door which has some avionics boxes that need to be scratch built and hooked to the wiring I added previously to the nose gear bay. I am hoping to start the painting later this week once all the doors have been installed. You can see all the photos and details from the start in the build log at: https://davidsscalemodels.com/build-log/1-48-f-35c-vfa-86-sidewinders/
-
Stikpusher Scale Defense Industries
Stikpusher replied to Stikpusher's topic in Photos: On the Bench
Today was good progress on my Johnson Jug… I got the seam filling all cleaned up and sanded smooth Then after that I added the horizontal stabilizers and a few other small bits to finish up the main airframe construction I have the cowling almost wrapped up and ready to add to the airframe. Next week, more progress… 😉 -

Searching for an aircraft identification
Nick Filippone replied to Nick Filippone's topic in Ask the IPMS/USA
Mystery solved! It’s a Culver Dart G. -
Following the base and paint modifications, the rest of the build is finishing the model and taking the pictures. To finish the build, you need to finishing the left arm and leg; these are built the same way of the previous right arm and right leg. I did paint and modify most of the cylinders in the arm and leg as per the previous sections. Once these are attached, we need to build the torso. The torso is constructed from the inside out with plates being added. The connections of the “hydraulic” lines also occurs. The parts are precut and glued in place and I used the recommended super glue here sparsely. These are attached to the head and shoulder section. The plate sections are heavy plastic or metal. The process continues with the back and cylinders being added. Follow the instructions and read them thoroughly and you should be good as fit is precise and great. View the full review





(2).jpg.eae205f0f9032c8767a6c72e30c366d4.jpg)