All Activity
- Past hour
-
Thanks for following the WIP ..here is the latest advance on the project ! (MAY 14th) Today , I start working on the wings bottoms panel lines ! If you like to view the complete WIP of this project https://photos.app.goo.gl/89TgFWzqzKY6KcjE6 ........You been following this post and like to view all the AVRO CANADA projects I have completed so far .. just follow this Google link: https://photos.app.goo.gl/FpZs5m3ic3c3eL329 Hope youl,le enjoy the built Jmarc

-
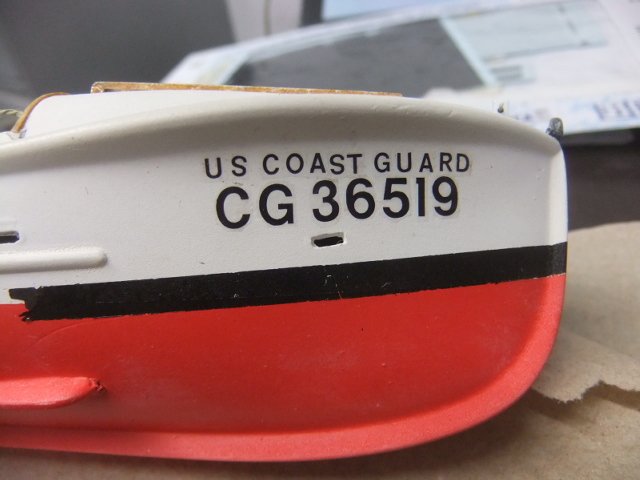
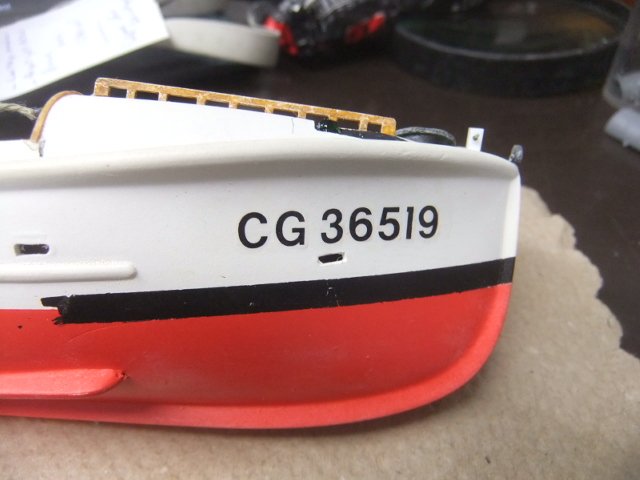
First ,I'd like to thank you for following this WIP , it's quite appreciated GLENCOE 1/48 USCG 36 FOOT RESCUE BOAT ! (MAY 14th ).....Today , I continue working on the side decals ! If you like to view the complete WIP of this one , follow this GOOGLE link... https://photos.app.goo.gl/EfNcXnQDo6g2vL5B7 If you are curious and like to see the other 1/48 ship ,I have built , just follow this Google link to my personal page : https://photos.app.goo.gl/cpC5Q6puZkJTQ2mHA Enjoy Jmarc
- Today
-
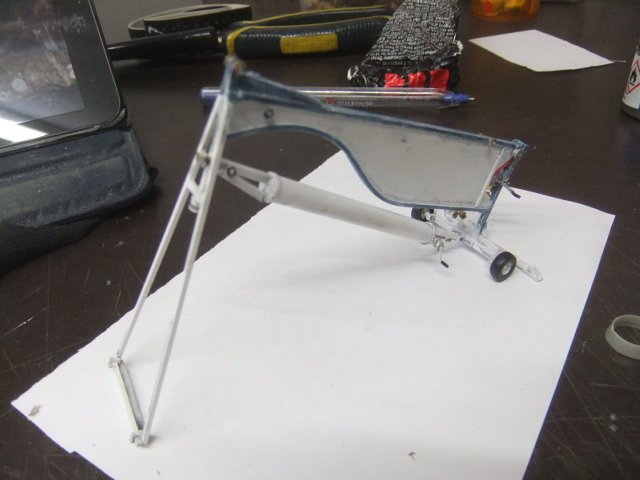
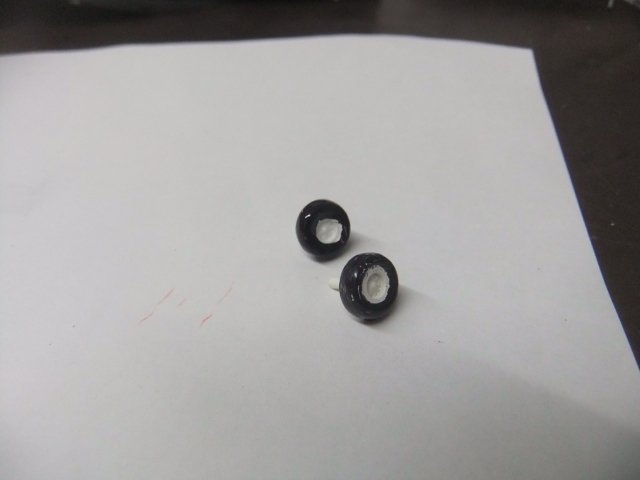
First I'd like to thank you for following this post ,it's quite appreciated ! BOEING INCITUS MQ-27 / CU-169 SCAN EAGLE 1/48 ( 3dPRINTED +MODIFICATION) (MAY 14th ) Today I complete the back wheels and glued them into place , started the work on the prop protector !! If you like to view the complete WIP on this project , just follow this Google link : https://photos.app.goo.gl/jrWyBiNZSJHCUknZ9 If you like to view all the DRONES I have done so far in 1/48 , just follow this link: https://photos.app.goo.gl/mjGm69hDKYaDuFNX6 Enjoy ! Jmarc
-
First I'd like to thank you for following this post , it's quite appreciated ! 1/48 CONSOLIODATED B-24J LIBERATOR (MONOGRAM) (MAY 14th ) Today I continue the modification of the floor ! If you like to follow the complete WIP on this project , I have set up an GOOGLE page, just follow this link .. https://photos.app.goo.gl/NtNSgh1zJgx9jRSx5 If you like to view the other BELL UH-1 HUEY projects I have done so far .,just follow this link : https://photos.app.goo.gl/DqxAFqjkYiFPMMY47 Enjoy ! Jmarc
-
In the case of the OKB Grigorov kits, the only "building" is usually gluing on photo etch propellers. That's it. Most of the submarine kits I build are resin, now many also have 3-D printed parts. It's really not very complex, a few different types of cyanoacrylate glue (quick set thin, thicker and gap filing). The field is currently transitioning to all 3-D printed pieces, including hulls. So the older solid resin hulls are going out of style. To fill gaps, I recently bought some liquid resin that is UV cured and a 365 nanometer wavelength flashlight. Great for treating gaps in both resin and polystyrene kits. Put the liquid resin in (slightly viscous, remove excess with isopropyl alcohol, and hit it for 60 seconds with UV light. I paint with a Paasche VL airbrush and Badger Marine acrylic colors.
- Yesterday
-
Good to know, thanks!
-
That's the nice thing about solder wire..... it bends easily but also holds the shape well. Glue one end into a socket hole, bend, apply a dab of superglue at the next juncture, and keep going from there. It was tedious, but not too taxing from a "holding" standpoint. Gil
-

D-15 SHUTTLE from START TREK next generation in 1/48
Jmarc replied to Jmarc's topic in Space, Sci-Fi & Fantasy
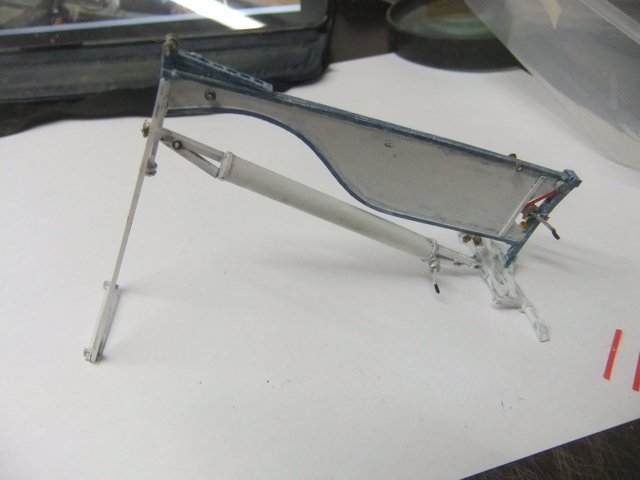
Thanks for following this WIP, it's quite appreciated ! (MAY 13th )....Today ,I continue working on the landing ponton ! If you like to view the complete WIP on this project, just follow this Google link : https://photos.app.goo.gl/UECshHgpHyfRTFHJA Enjoy ! Jmarc
-
First ,I'd like to thank you for following this WIP , it's quite appreciated GLENCOE 1/48 USCG 36 FOOT RESCUE BOAT ! (MAY 13th ).....Today , I continue working on the side decals ! If you like to view the complete WIP of this one , follow this GOOGLE link... https://photos.app.goo.gl/EfNcXnQDo6g2vL5B7 If you are curious and like to see the other 1/48 ship ,I have built , just follow this Google link to my personal page : https://photos.app.goo.gl/cpC5Q6puZkJTQ2mHA Enjoy Jmarc
-
First I'd like to thank you for following this post ,it's quite appreciated ! BOEING INCITUS MQ-27 / CU-169 SCAN EAGLE 1/48 ( 3dPRINTED +MODIFICATION) (MAY 13th ) Today I start painting the back wheels and look into my spare parts and locate a part that I will modify as the prop protector !! If you like to view the complete WIP on this project , just follow this Google link : https://photos.app.goo.gl/jrWyBiNZSJHCUknZ9 If you like to view all the DRONES I have done so far in 1/48 , just follow this link: https://photos.app.goo.gl/mjGm69hDKYaDuFNX6 Enjoy ! Jmarc
-
First I'd like to thank you for following this post , it's quite appreciated ! 1/48 CONSOLIODATED B-24J LIBERATOR (MONOGRAM) (MAY 13th ) Today I continue the modification of the floor ! If you like to follow the complete WIP on this project , I have set up an GOOGLE page, just follow this link .. https://photos.app.goo.gl/NtNSgh1zJgx9jRSx5 If you like to view the other BELL UH-1 HUEY projects I have done so far .,just follow this link : https://photos.app.goo.gl/DqxAFqjkYiFPMMY47 Enjoy ! Jmarc
-
 sharg16 joined the community
 -
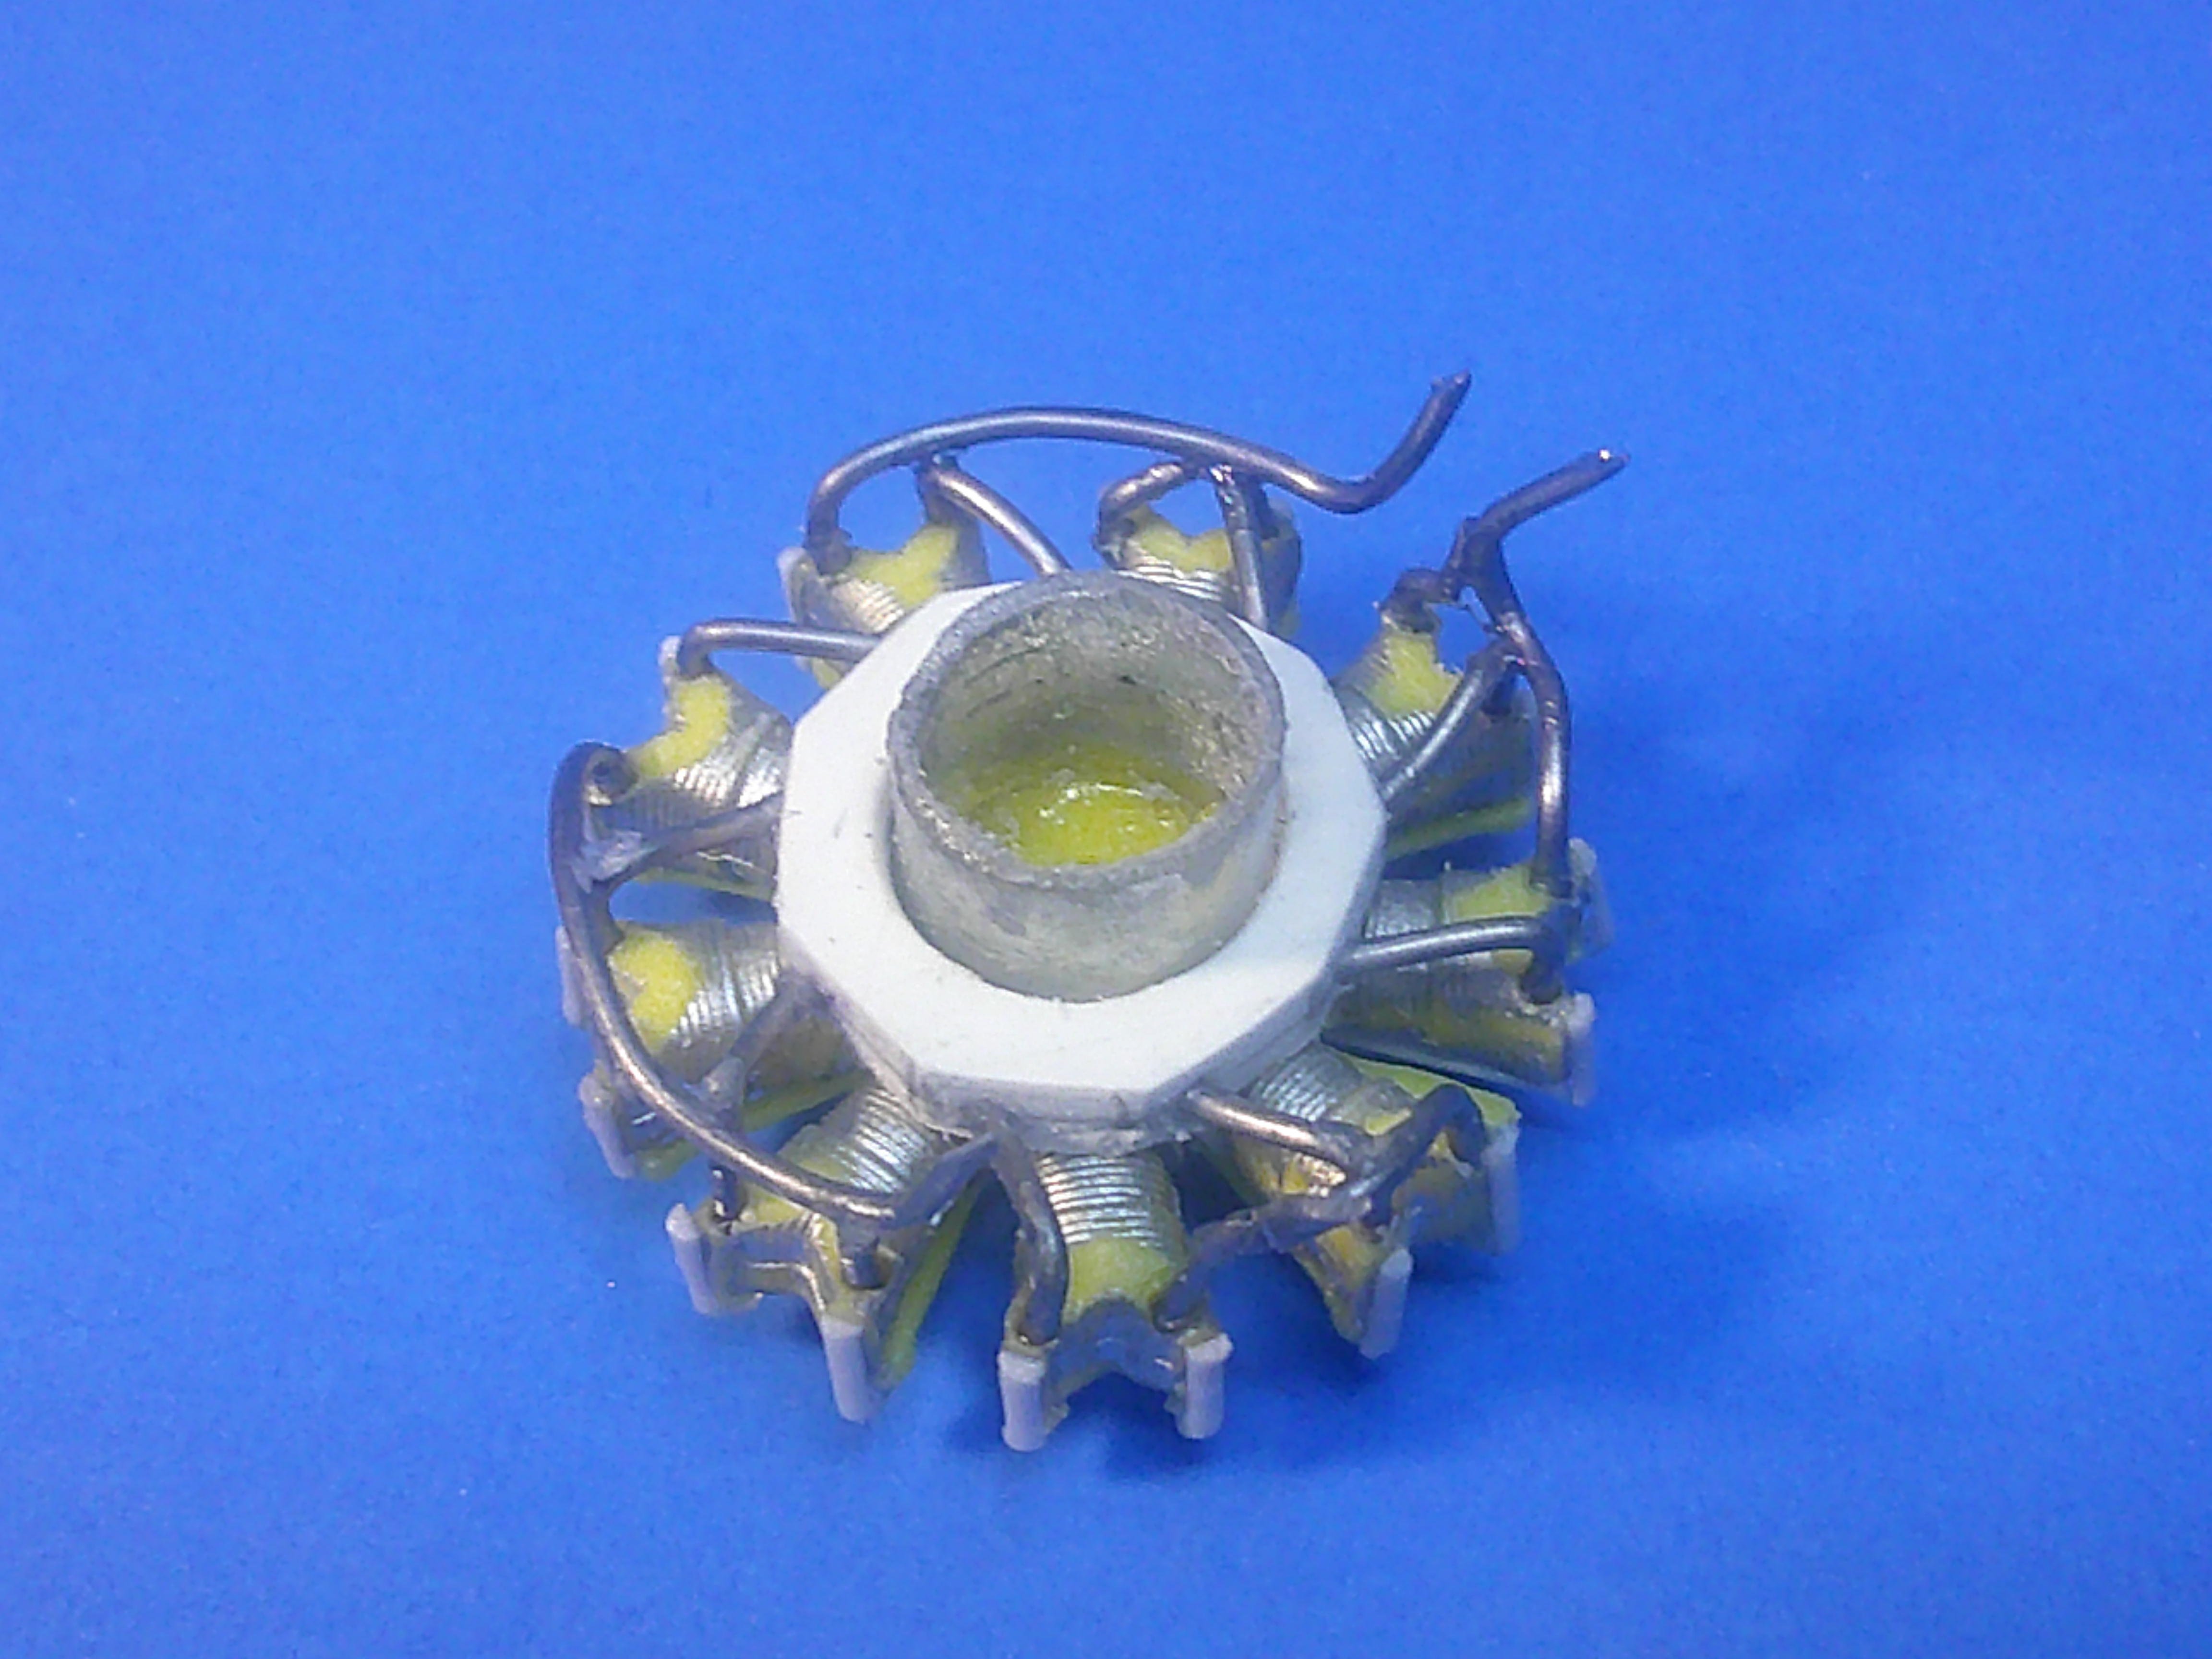
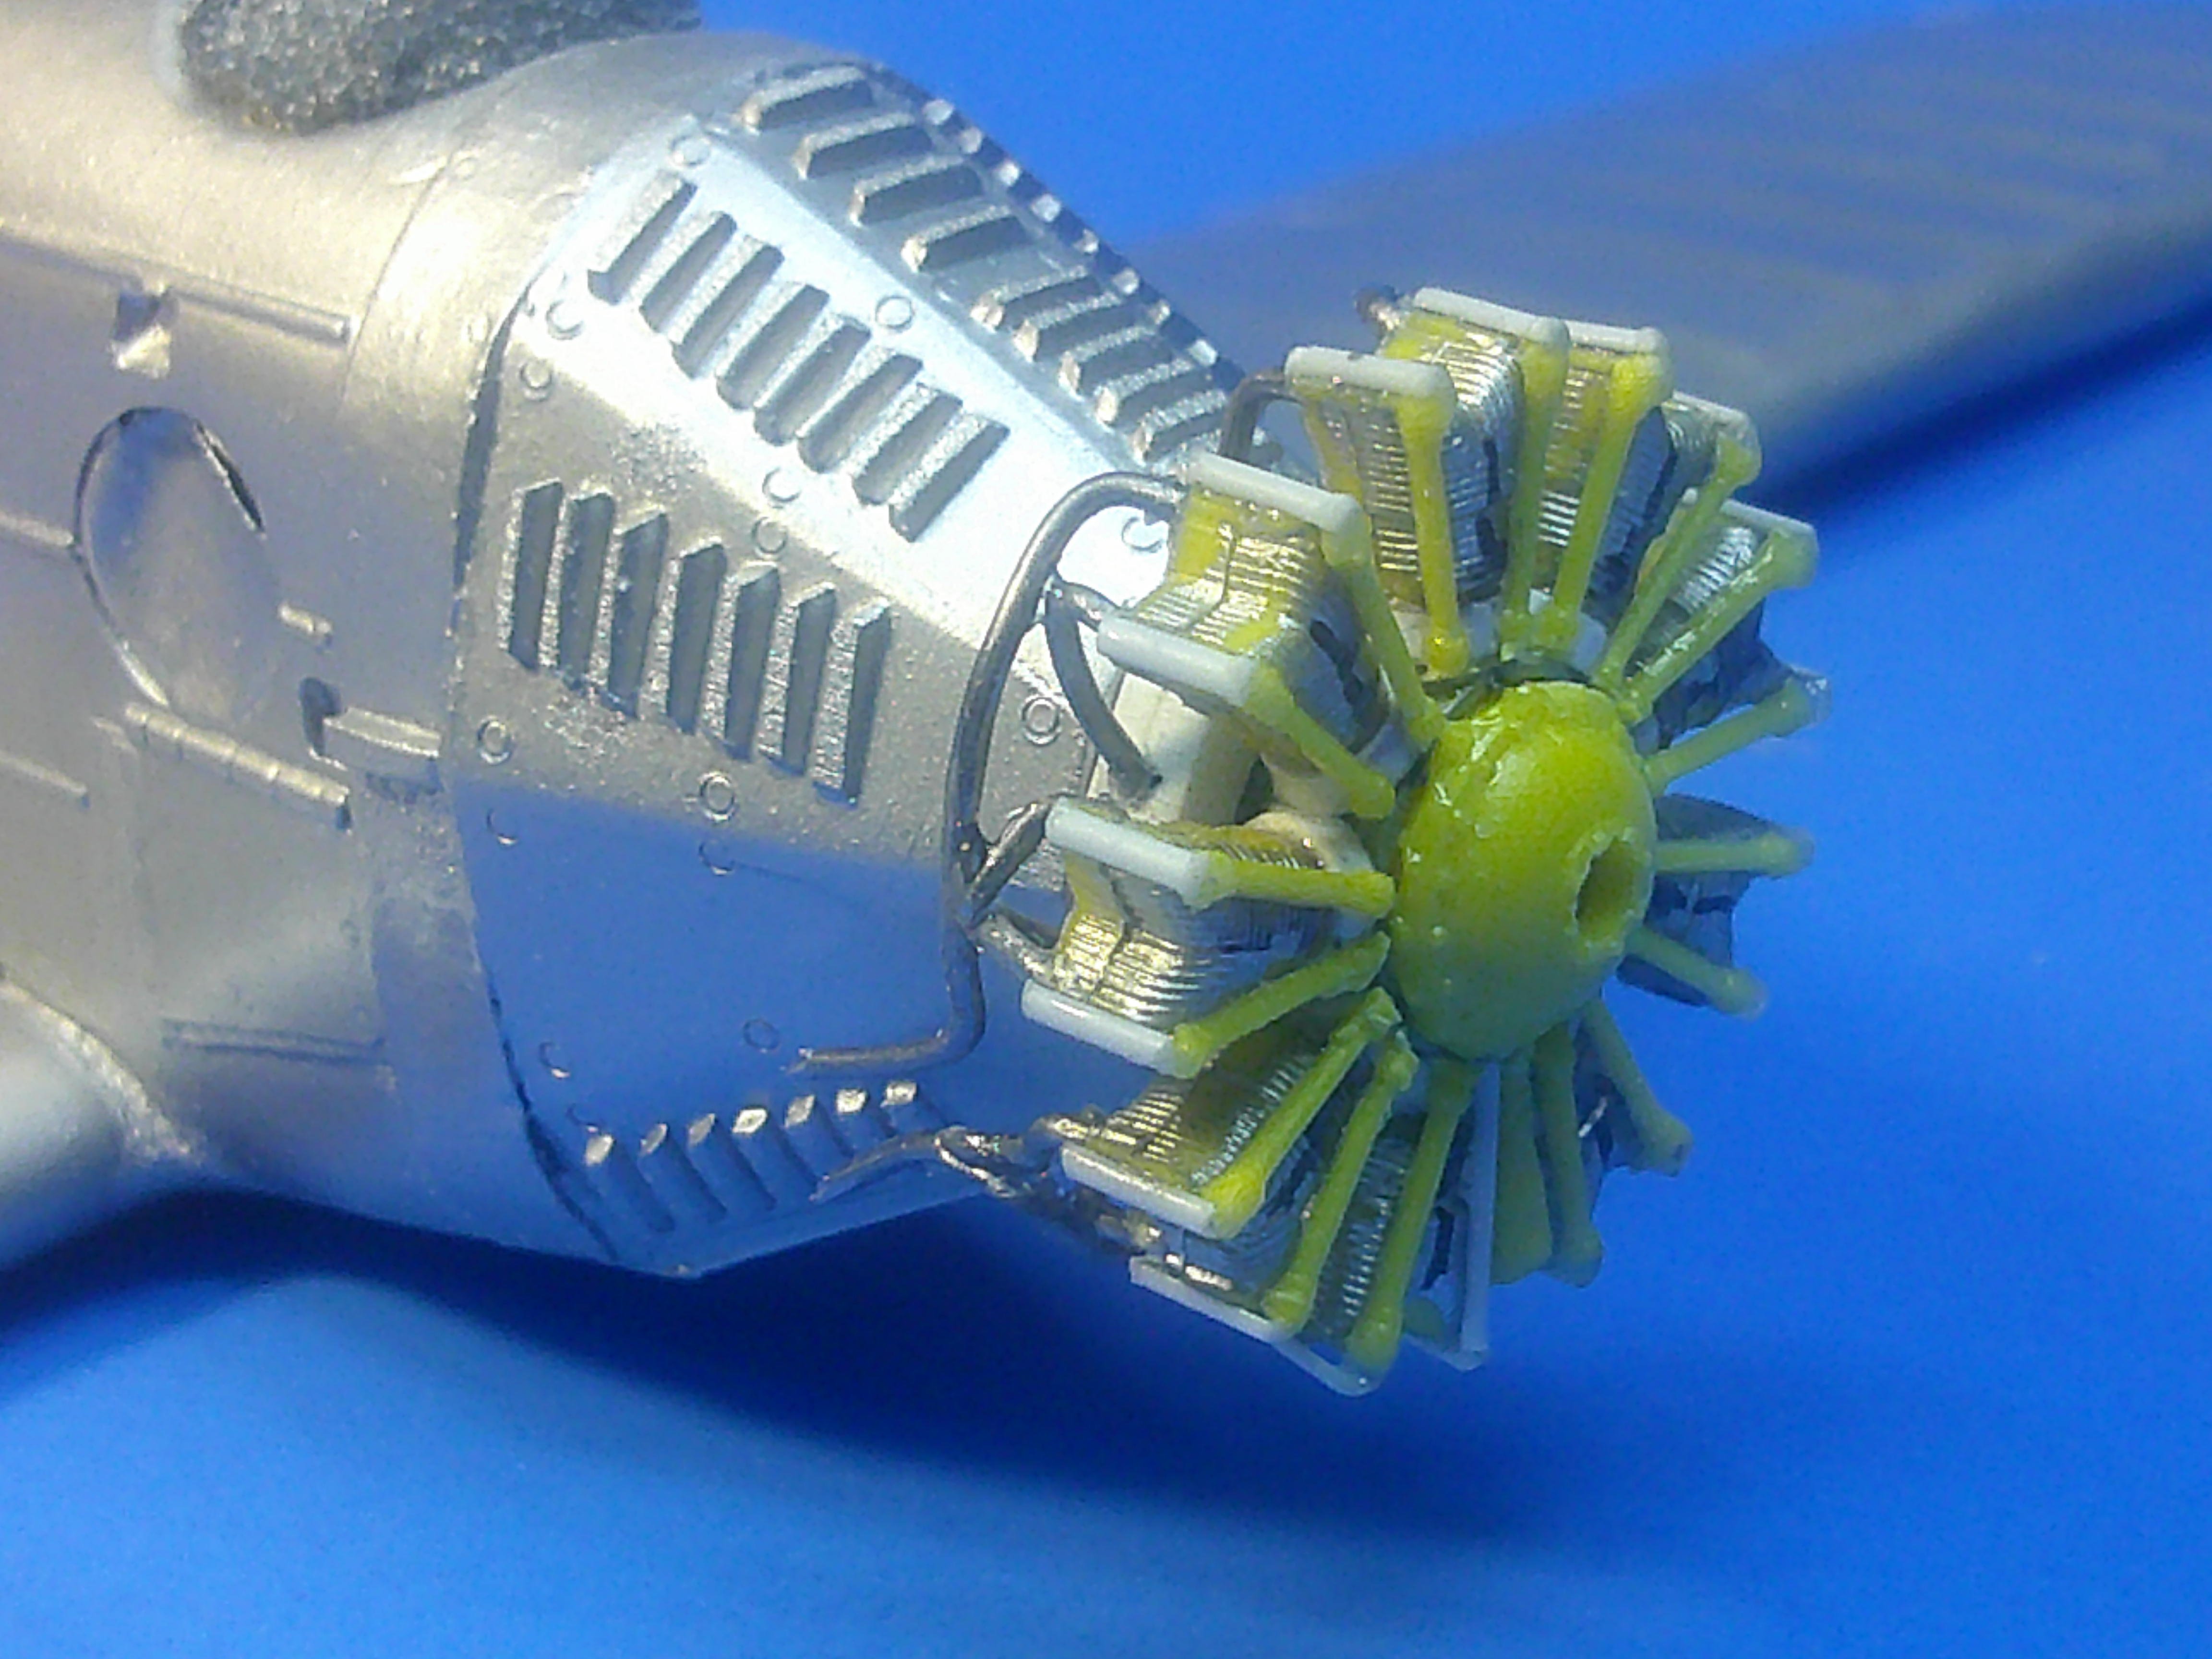
Could that engine have been more fiddly to do? While doing all that piping where did you get the extra hands/fingers to hold stuff in place?
-
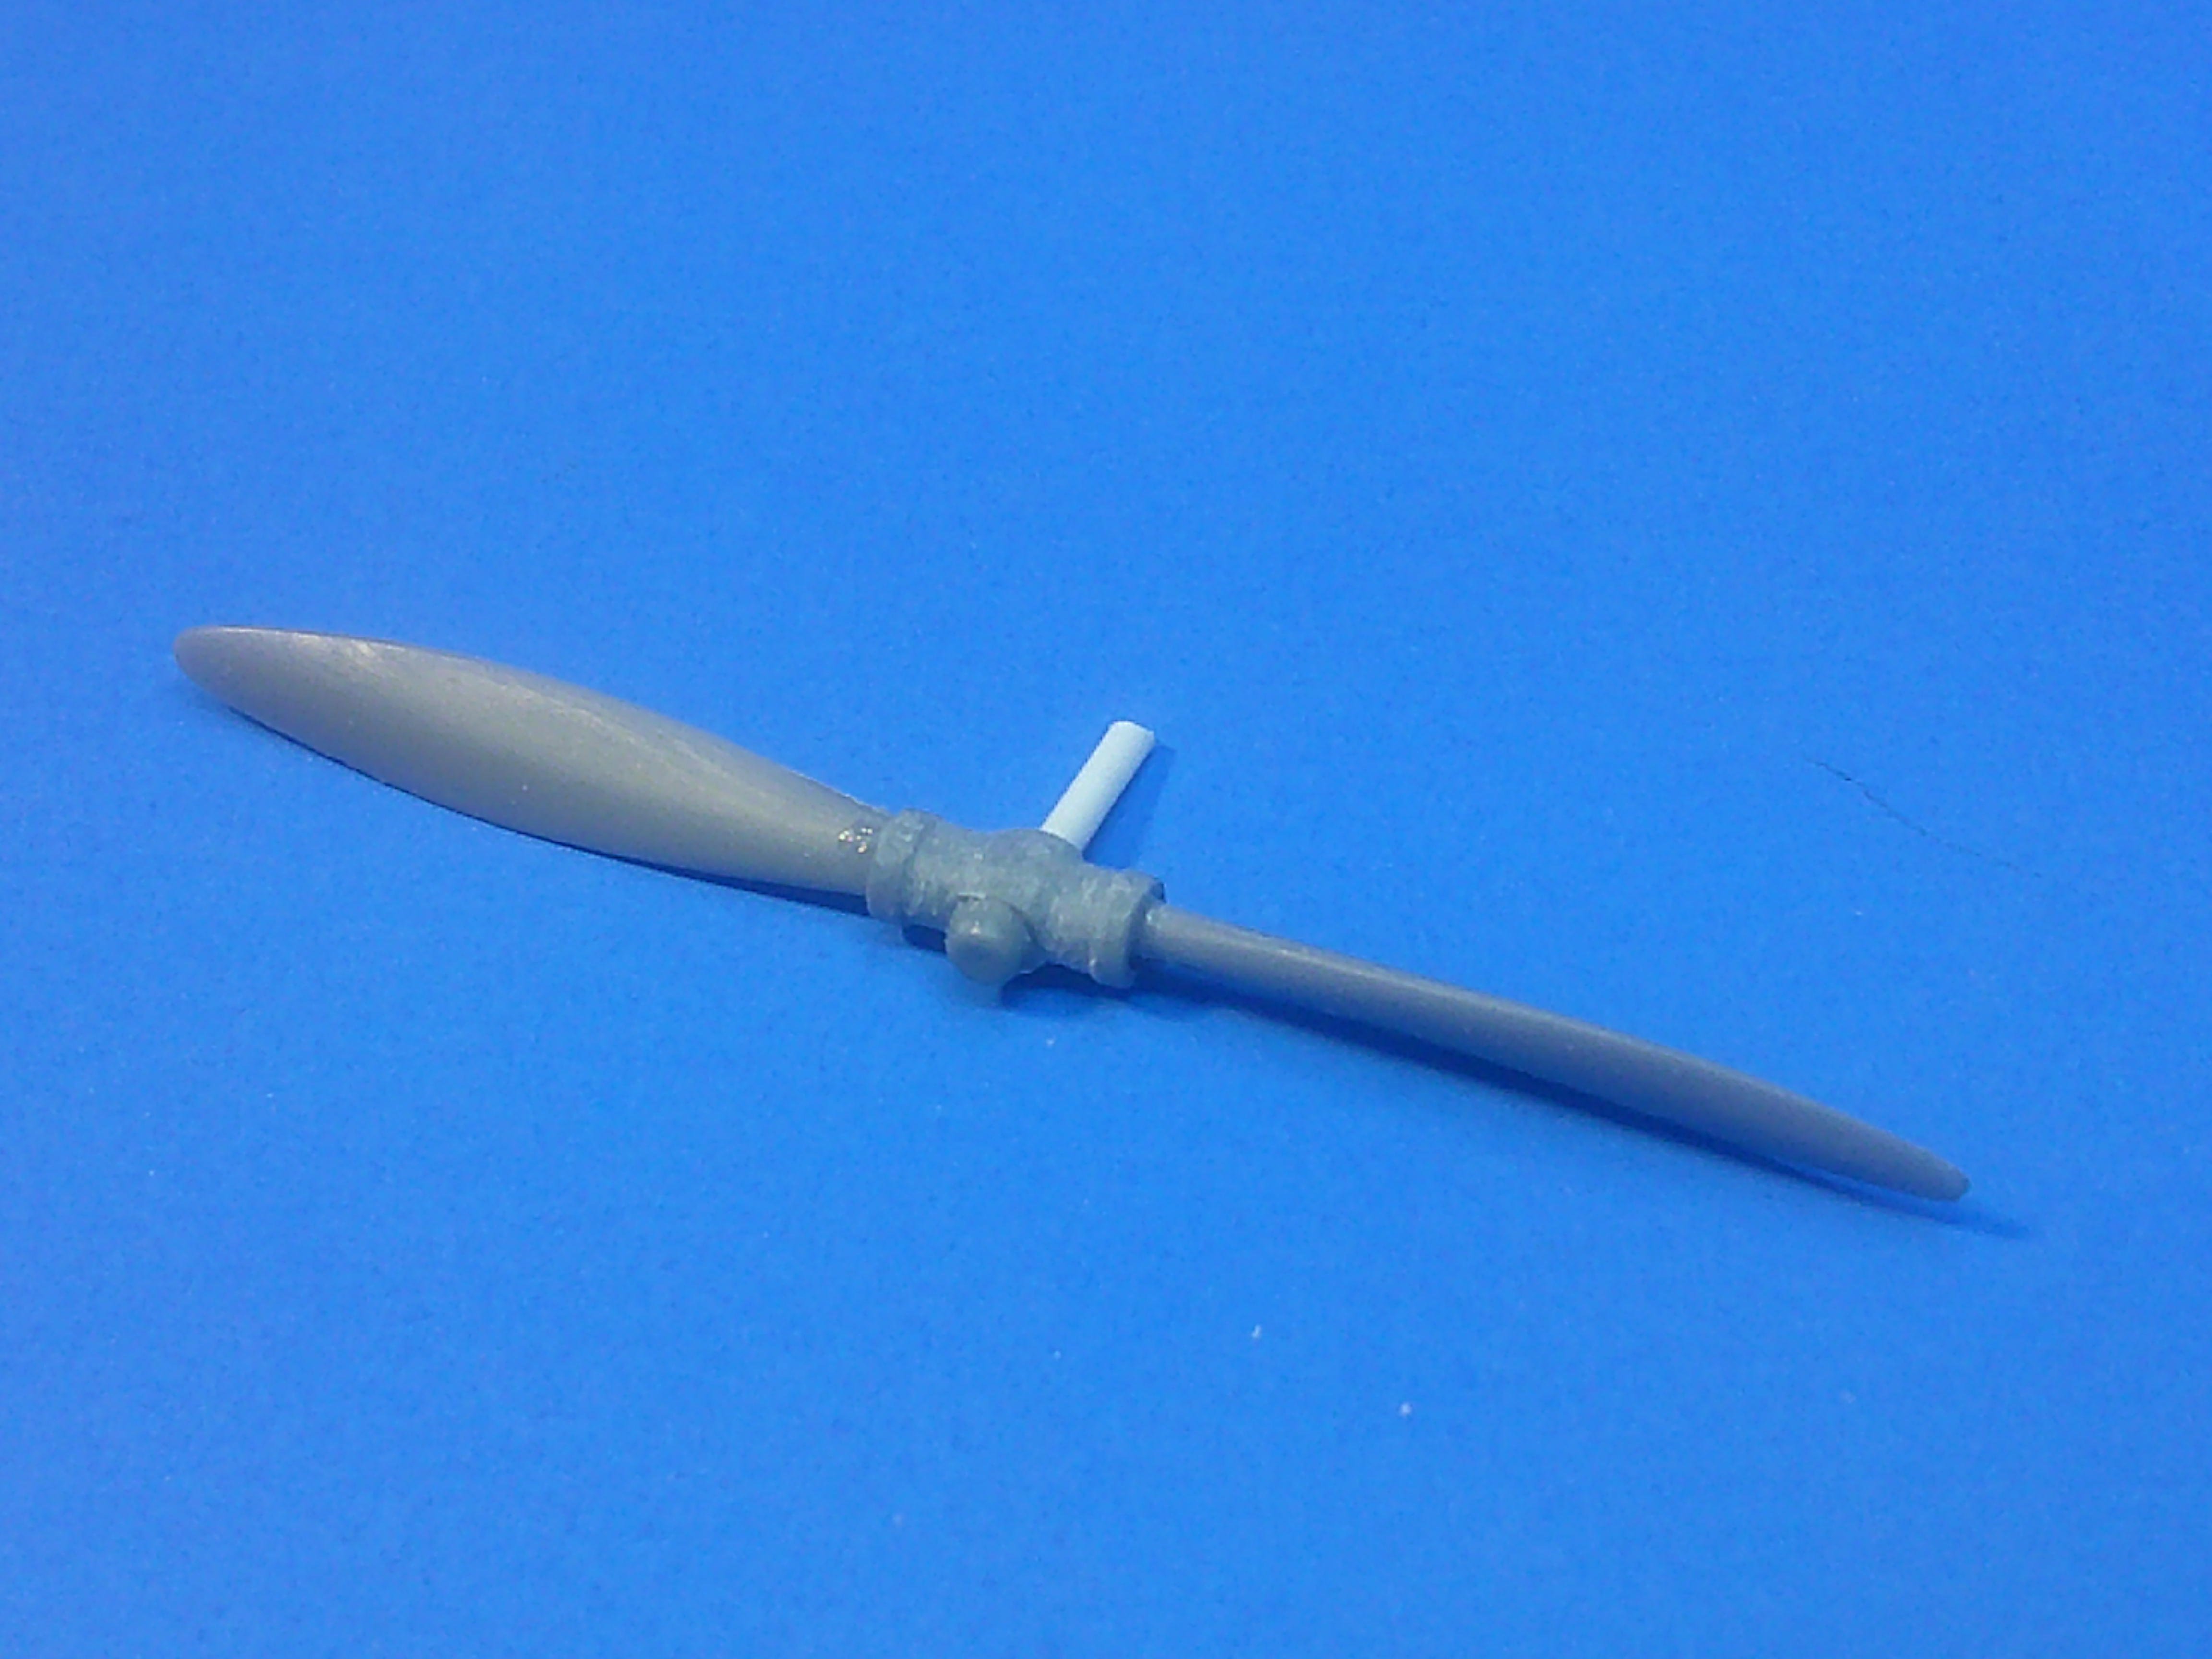
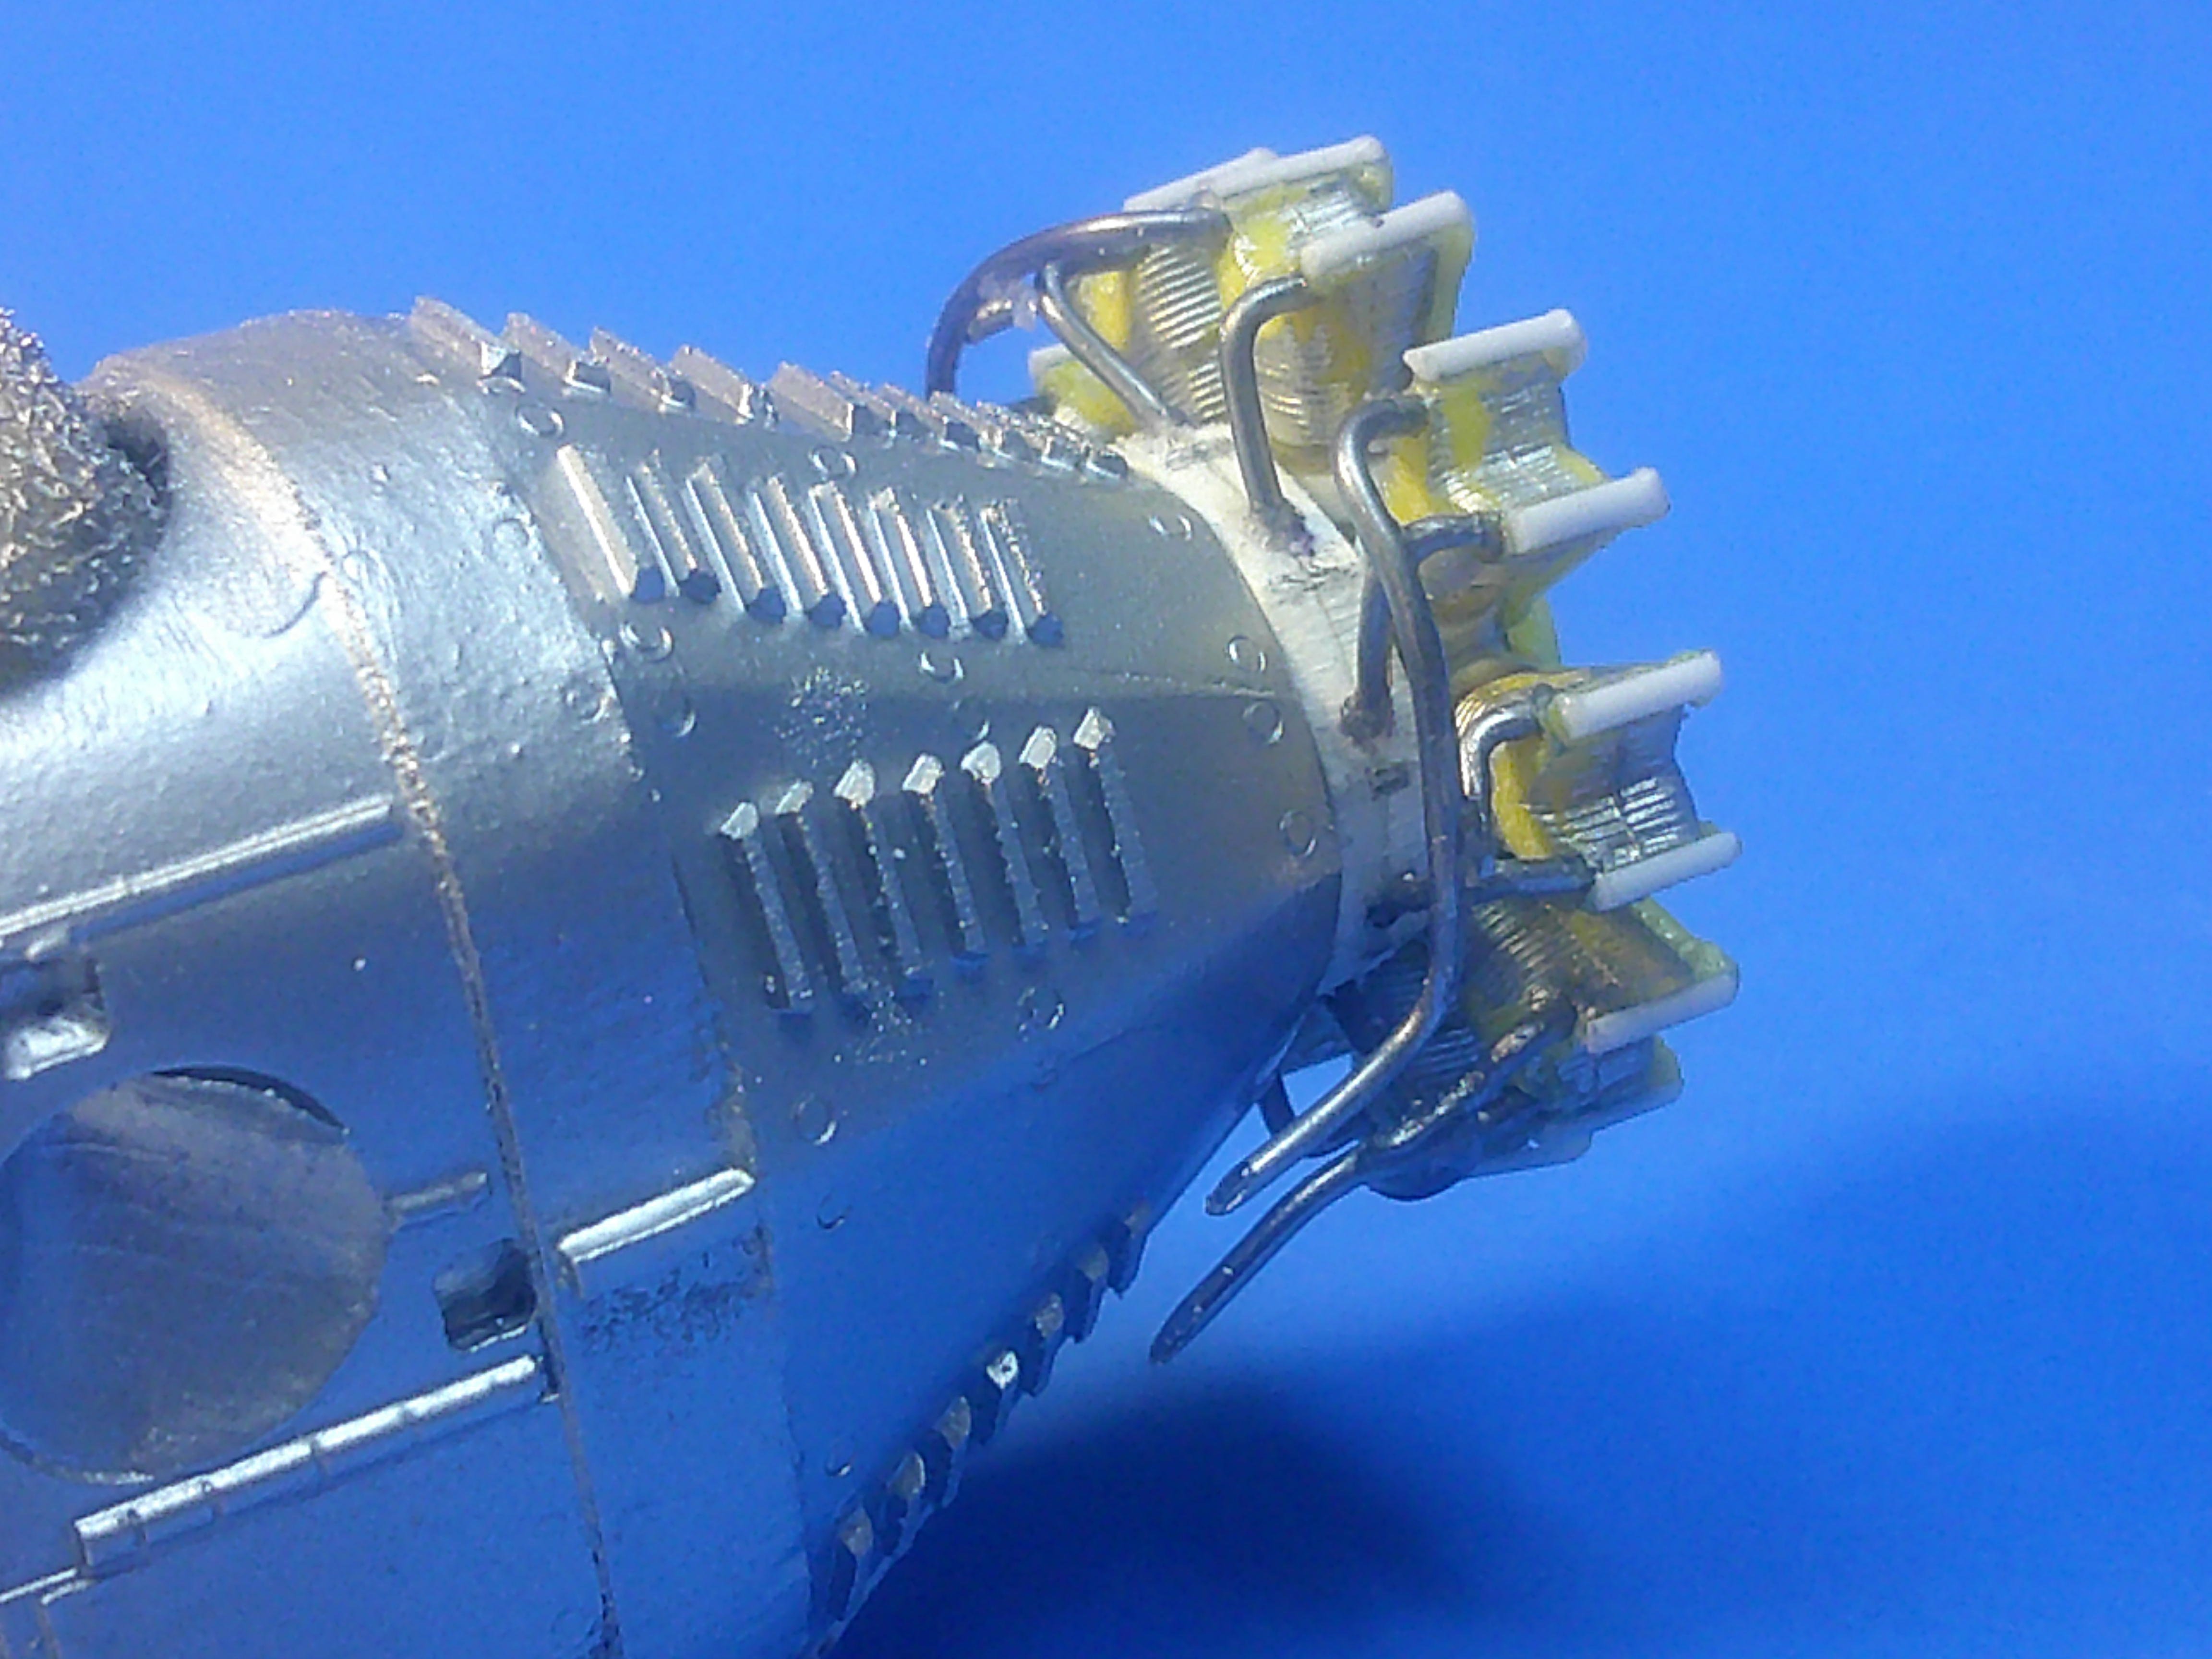
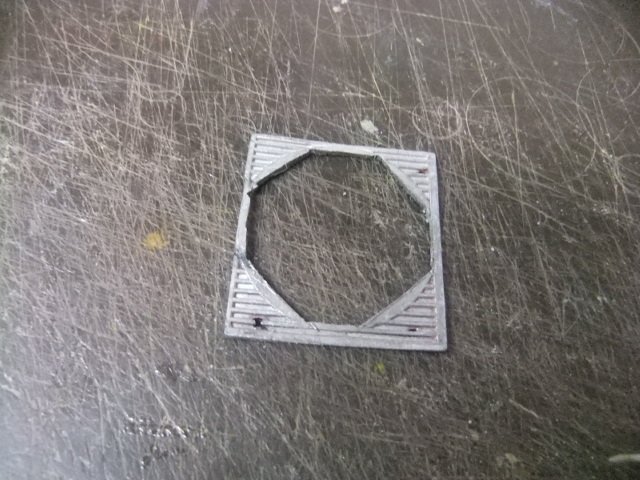
With the fuselage and wing in the filling/sanding/priming stages, I turned my attention to the engine and the prop..... For those of you old enough to remember when Saturday Night Live was funny, as Rosanna Rosannadanna said: "if it's notta one thing, it's a somethinga else"! Turns out the engine I had wanted to use (and every other engine on hand) was `1/4" too small in diameter. That's a scale foot too small! Since no one makes a resin P&W R-1690 that meant I'd have to "enlarge" the engine on hand. It was enlarged by first removing every cylinder from the crankcase and then installing thick punched discs at the bottom of each one. This pic shows the plastic sheet used to make the discs and the half round rod used to detail the tops of each cylinder. I used my trusty (and now rusty) old Waldron punch set to do the job! Since the cylinders were now longer, the original push rods had to be cut away from the crankcase cover and individually installed to fit. Since they'll all be covered by the oil cooler cover, those gaps at the bottom of each one won't be seen. Once the engine was the proper size and the front and cylinder tops detailed, I worked on the rear side.... The white intake/exhaust manifold ring was made by first drawing it on paper in order to get its 9-sided design and then copied onto sheet plastic laminated to the proper thickness. Holes were drilled in its top edges and into the rear or each cylinder for the intake and exhaust piping. Solder wire was then bent to shape and cut to length to make each set of pipes. Drops of superglue where pipes join will resemble "welds" after painting (I hope!). By the way.... as for the exhaust pipe arrangement.... I've seen at least 3 different "ways" in various pics and so felt free to make this design with 2 sets of pipes for each side of the plane since I couldn't pin down any "one" accurate design. The 4 pics above show how the finished engine and exhaust piping looks when mounted. I may add a few more small bolt heads here and there for additional detailing, but it's essentially done. I had no prop of the proper size either in my spares box and couldn't find one to order either so I "Frankensteined" one from spare prop hubs and blades. It still needs some cleanup here and there (the blades will be chromed!) and I may also add some counterweights for detail, but it's also essentially done. I have to say I was a little bummed out when I realized I'd have to modify the engine, but it went much smoother and faster than I thought it would in the end, all of the above work (including building the prop) taking about 4-5hrs. Now back to the fuselage! As always, critiques, comments, and questions are welcome! Gil
-
What is in the Box4 gray injection molded plastic sprues [247 parts total]1 clear sprue1 decal sheet with 6 markings options1 3d printed instrument panel (three parts)2 Etched Brass frets1 canopy & wheel hub masks1 elastic vinyl tubing1 brass wire1 instruction book in FULL colorConstructionThe construction begins with the cockpit and the fuselage interior and this makes up the majority of the early construction sequence. Extra time spent here will pay dividends later in the build and I recommend a thorough reading of the instructions since they will alleviate most if not all construction problems. The sprue gates are on the mating surfaces, so it is imperative to cut them from the sprues with care and be sure not to over sand the sprue gate nubs. View the full review
-
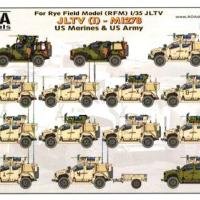
From AOA Decal Manufacturer’s Notes14 options for JLTVs in US service: 2x Army Reserve (Fort McCoy)12x USMC - Additional decals are also included without the tape/exercise markings that cover some various unit markings. Decals for an M1102 trailer are also included for one JLTV option.Includes full JLTV stencil data set (enough for two vehicles) with variations.For Rye Field Model (RFM) 1/35 JLTV.Background and Historical NotesAs one of the military’s most important decisions, it put out a bid announcement for a replacement for its basic utility vehicle, what was to be called the ‘Joint Light Tactical Vehicle.’ View the full review
- Last week
-
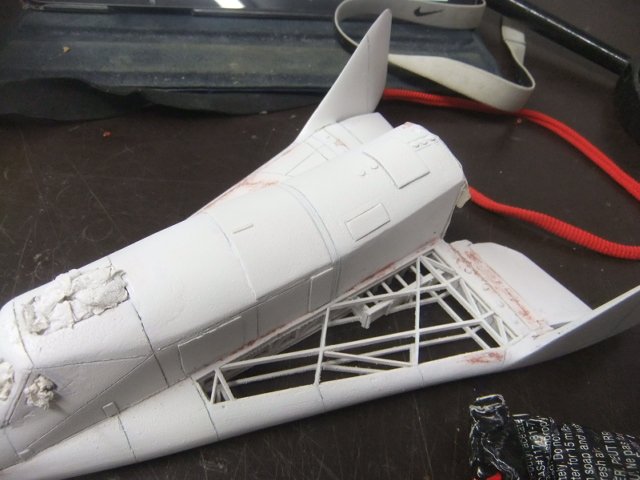
First I'd like to thank you for following my WIP , it's quite appreciated ! Here another space related project I been working on , its the COLLECT-AIR BOEING X-20 DYNASOAR ! (MAY 12th) today ,I I repair the panle lines and gave another coat of primeur !! If you like to view the complete WIP , just follow this Google link to my personal page: https://photos.app.goo.gl/Rjsjms9BhTrbnhYDA If you like to view the other space related project I have done so far , just follow this link: https://photos.app.goo.gl/ov2R8HFSA26iDpms5 Enjoy ! Jmarc
-
First ,I'd like to thank you for following this WIP , it's quite appreciated GLENCOE 1/48 USCG 36 FOOT RESCUE BOAT ! (MAY 12th ).....Today , I start the side decals ! If you like to view the complete WIP of this one , follow this GOOGLE link... https://photos.app.goo.gl/EfNcXnQDo6g2vL5B7 If you are curious and like to see the other 1/48 ship ,I have built , just follow this Google link to my personal page : https://photos.app.goo.gl/cpC5Q6puZkJTQ2mHA Enjoy Jmarc
-
First I'd like to thank you for following this post ,it's quite appreciated ! BOEING INCITUS MQ-27 / CU-169 SCAN EAGLE 1/48 ( 3dPRINTED +MODIFICATION) (MAY 11th ) Today I continue adding the details !! If you like to view the complete WIP on this project , just follow this Google link : https://photos.app.goo.gl/jrWyBiNZSJHCUknZ9 If you like to view all the DRONES I have done so far in 1/48 , just follow this link: https://photos.app.goo.gl/mjGm69hDKYaDuFNX6 Enjoy ! Jmarc
-
As you hear from them government types: I cannot confirm or deny that report either..... after checking several of my books...... I guess it may boil down to how much do you trust the researchers at Eduard? The last thing they'd want is to put decals in a kit that they could be gigged on by the modeling community. If you trust them, you can use them and always fall back on the "fault" lying with the manufacturer IF and when someone questions the insignia. The red surround star/bar was not in use for a long time, and generally added around existing stars, so the lack of white in the star portion of the insignia implies this was a totally fresh painting and not an addition to an existing insignia. BUT, the gray/white Atlantic scheme was also relatively new then too, so a repaint of the entire plane and then also of all of its insignia isn't all that odd sounding. Operations may have dictated the plane getting flown before painting the white in that last insignia was finished, but then it would've been nice for Eduard to specifically mention that to allay suspicions like yours. Unless someone here can provide a better answer, my only suggestion is to email Eduard and ask them what specific reference they based their kit markings on. Best of luck! Gil
-
First I'd like to thank you for following this post , it's quite appreciated ! 1/48 CONSOLIODATED B-24J LIBERATOR (MONOGRAM) (MAY 12th ) Today I continue the modification ! If you like to follow the complete WIP on this project , I have set up an GOOGLE page, just follow this link .. https://photos.app.goo.gl/NtNSgh1zJgx9jRSx5 If you like to view the other BELL UH-1 HUEY projects I have done so far .,just follow this link : https://photos.app.goo.gl/DqxAFqjkYiFPMMY47 Enjoy ! Jmarc
-
Show Shout Out and Bench UpdateView the full article
-
They did--in 1944. The markings in question were in 1943, when VC-13 still flew F4Fs. VC-13
-

RTS Annual Model Kit Exhibition Contest & Marketplace
IPMSUpdates posted an event in IPMS Event Calendar
until50+ vendor tables 27 Model Contest Classes FIVE Figure catagories addded this year! Additional awards for: Best Police Vehicle Best TV OR Movie Vehicle Door prizes award all day! -
If I remember right....and that's big IF, VC-13 had FM-2s.
-
 The Gateway Chapter of IPMS will hold its 20th annual Invitational model contest and swap meet on Saturday, September 19, 2026. It will be held at the Madison County Fairgrounds, located at 2025 Park Hill Dr. in Highland, Illinois. This is a new location for the Invitational. The show opens to the public at 9 a.m. and runs to approximately 3 p.m. (All times are Central Time.) Admission is $5 for adults and free for children aged 12 and under. Admission plus unlimited model registrations are $10 for adults and free for children aged 12 and under. Model registration and viewing are from 9 a.m. to noon. The contest has 35 categories, including juniors, and there will be 10 "Best of" awards. The Special Contest Category is "Red, White, and Blue," for any model with a paint scheme or markings including those colors. This references America's Semi Quincentennial Anniversary. Additionally, there will be hobby vendors, a display-only area, and a model kit raffle benefitting the club. Show chairperson Bill Wagner may be reached at 314-951-4936 or at startechbill@gmail.com. For more show information, please visit the Gateway Chapter IPMS Contest website: https://sites.google.com/view/ipmsgatewaychapter/contest Show flyer is attached. (NOTE: The 51st anniversary on the flyer refers to Gateway Chapter, NOT to the Invitational.) 2026 gateway.pdf