All Activity
- Today
-
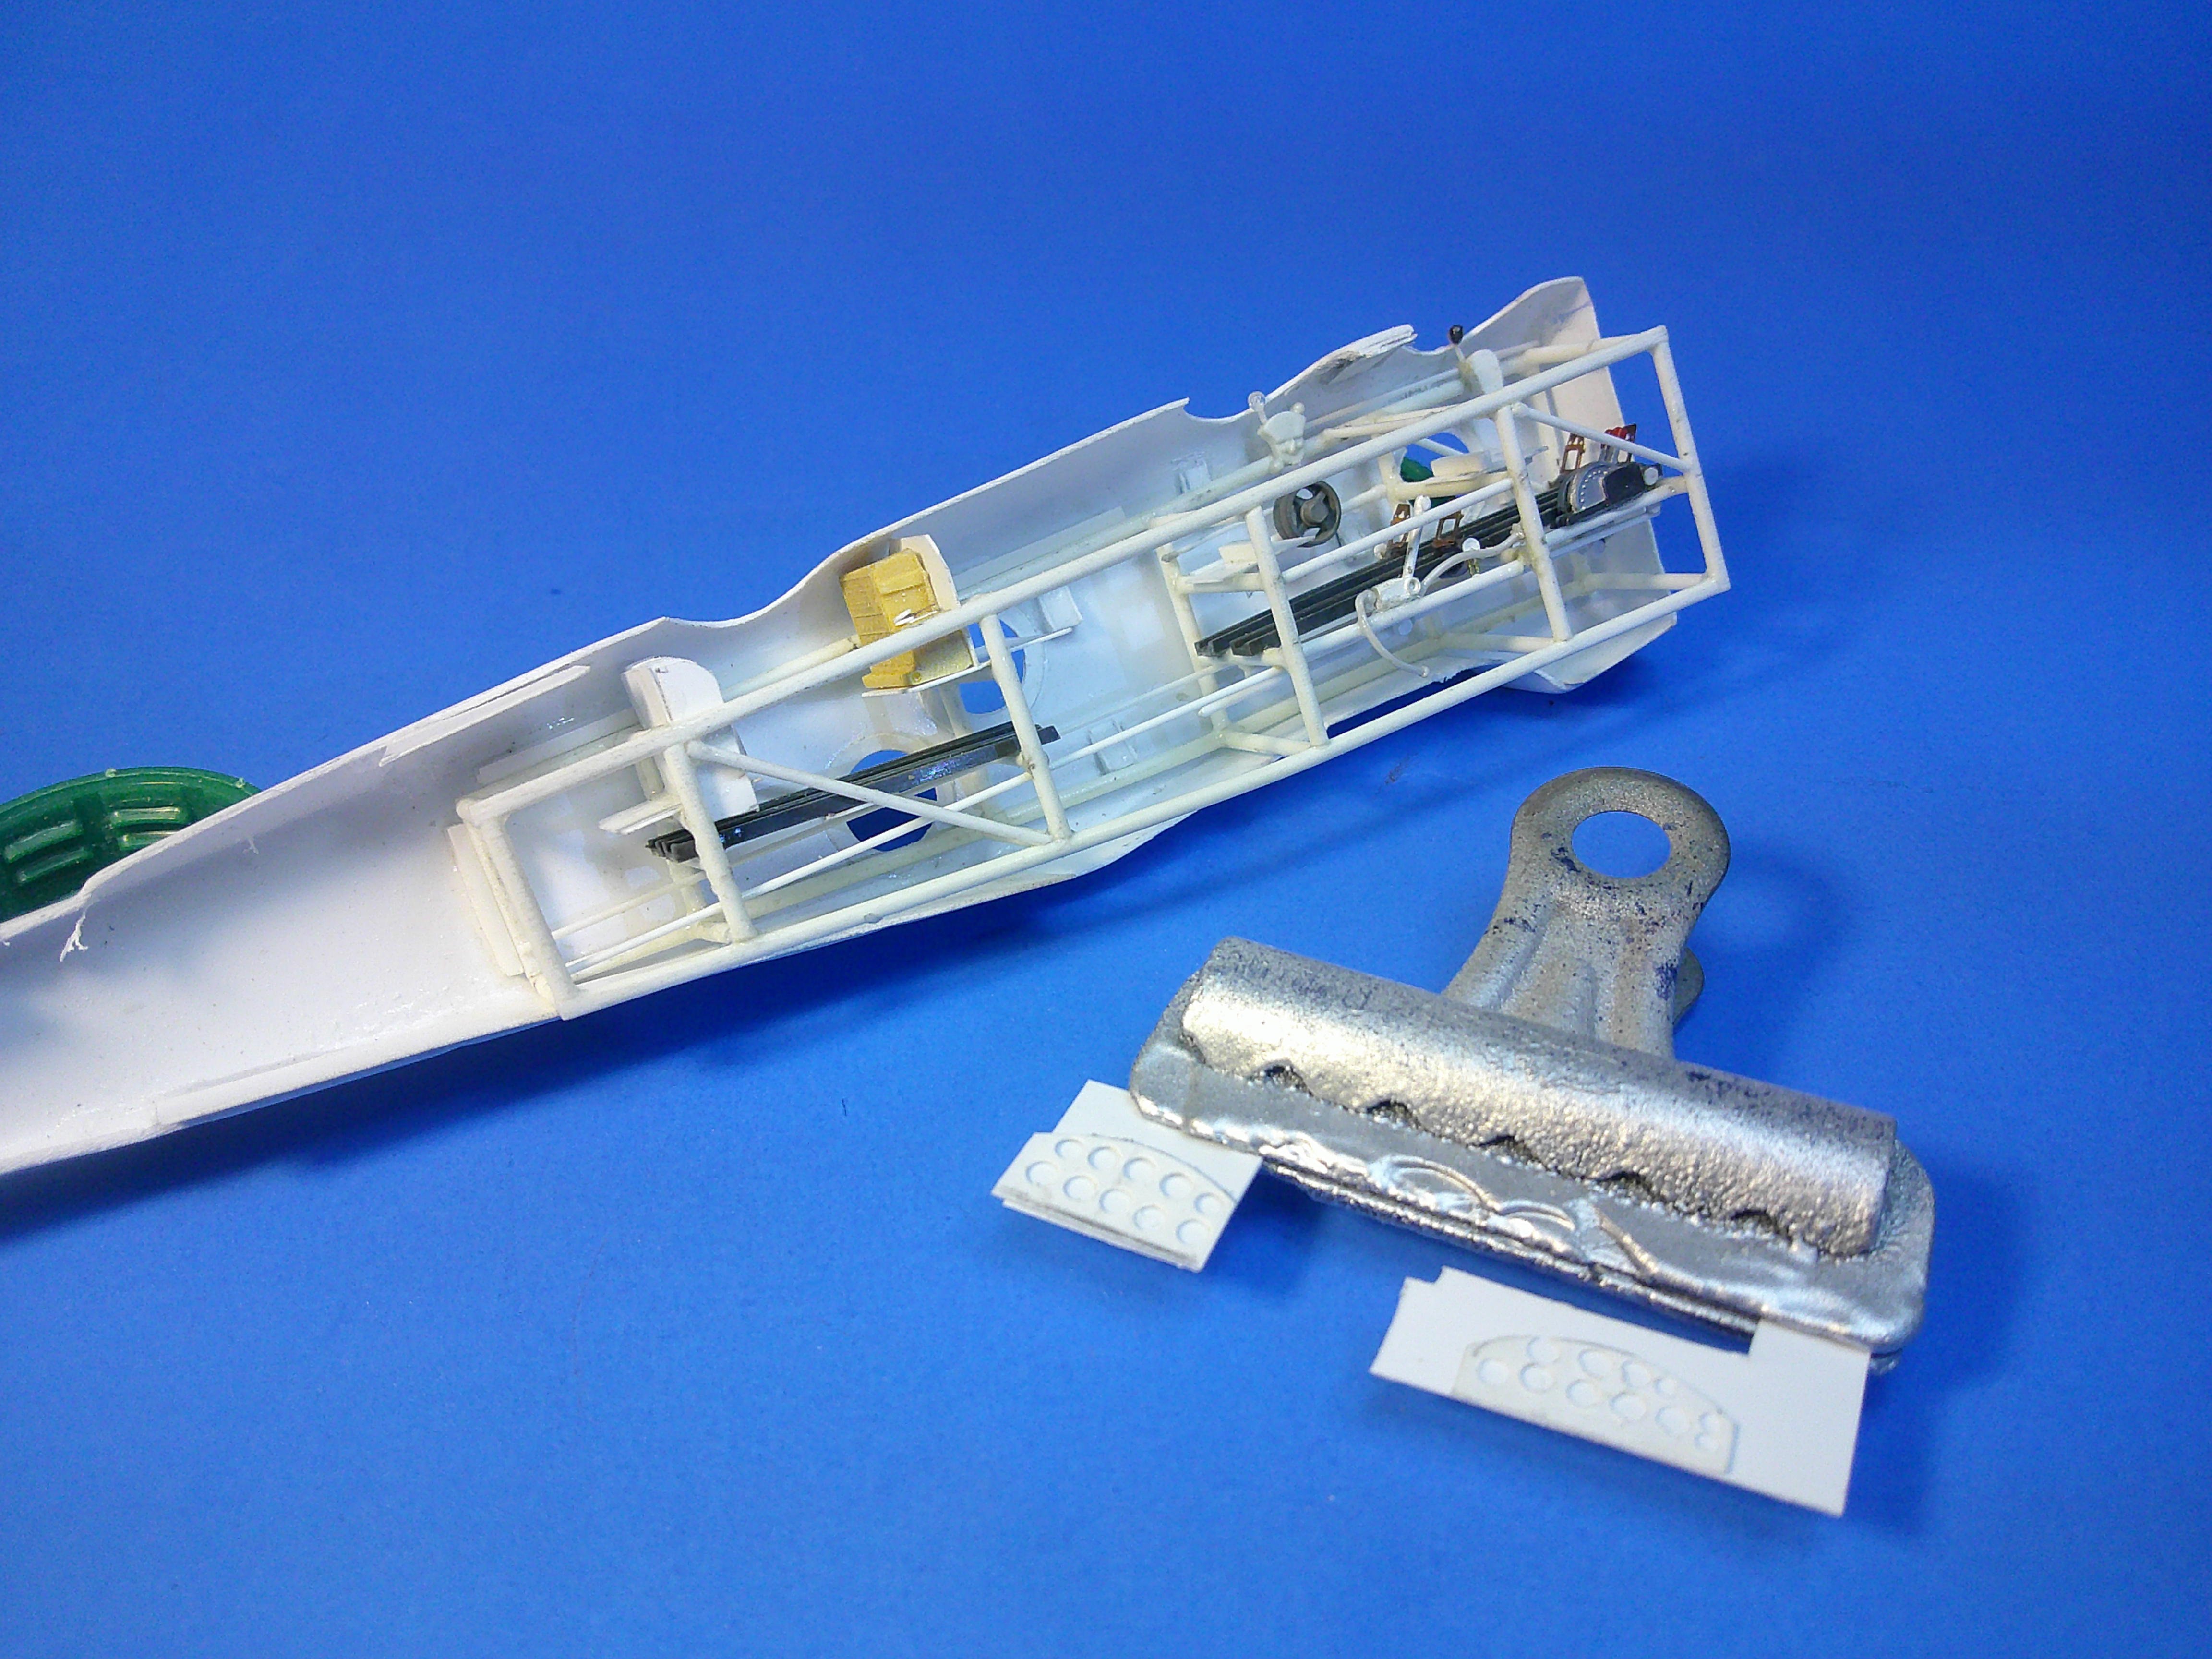
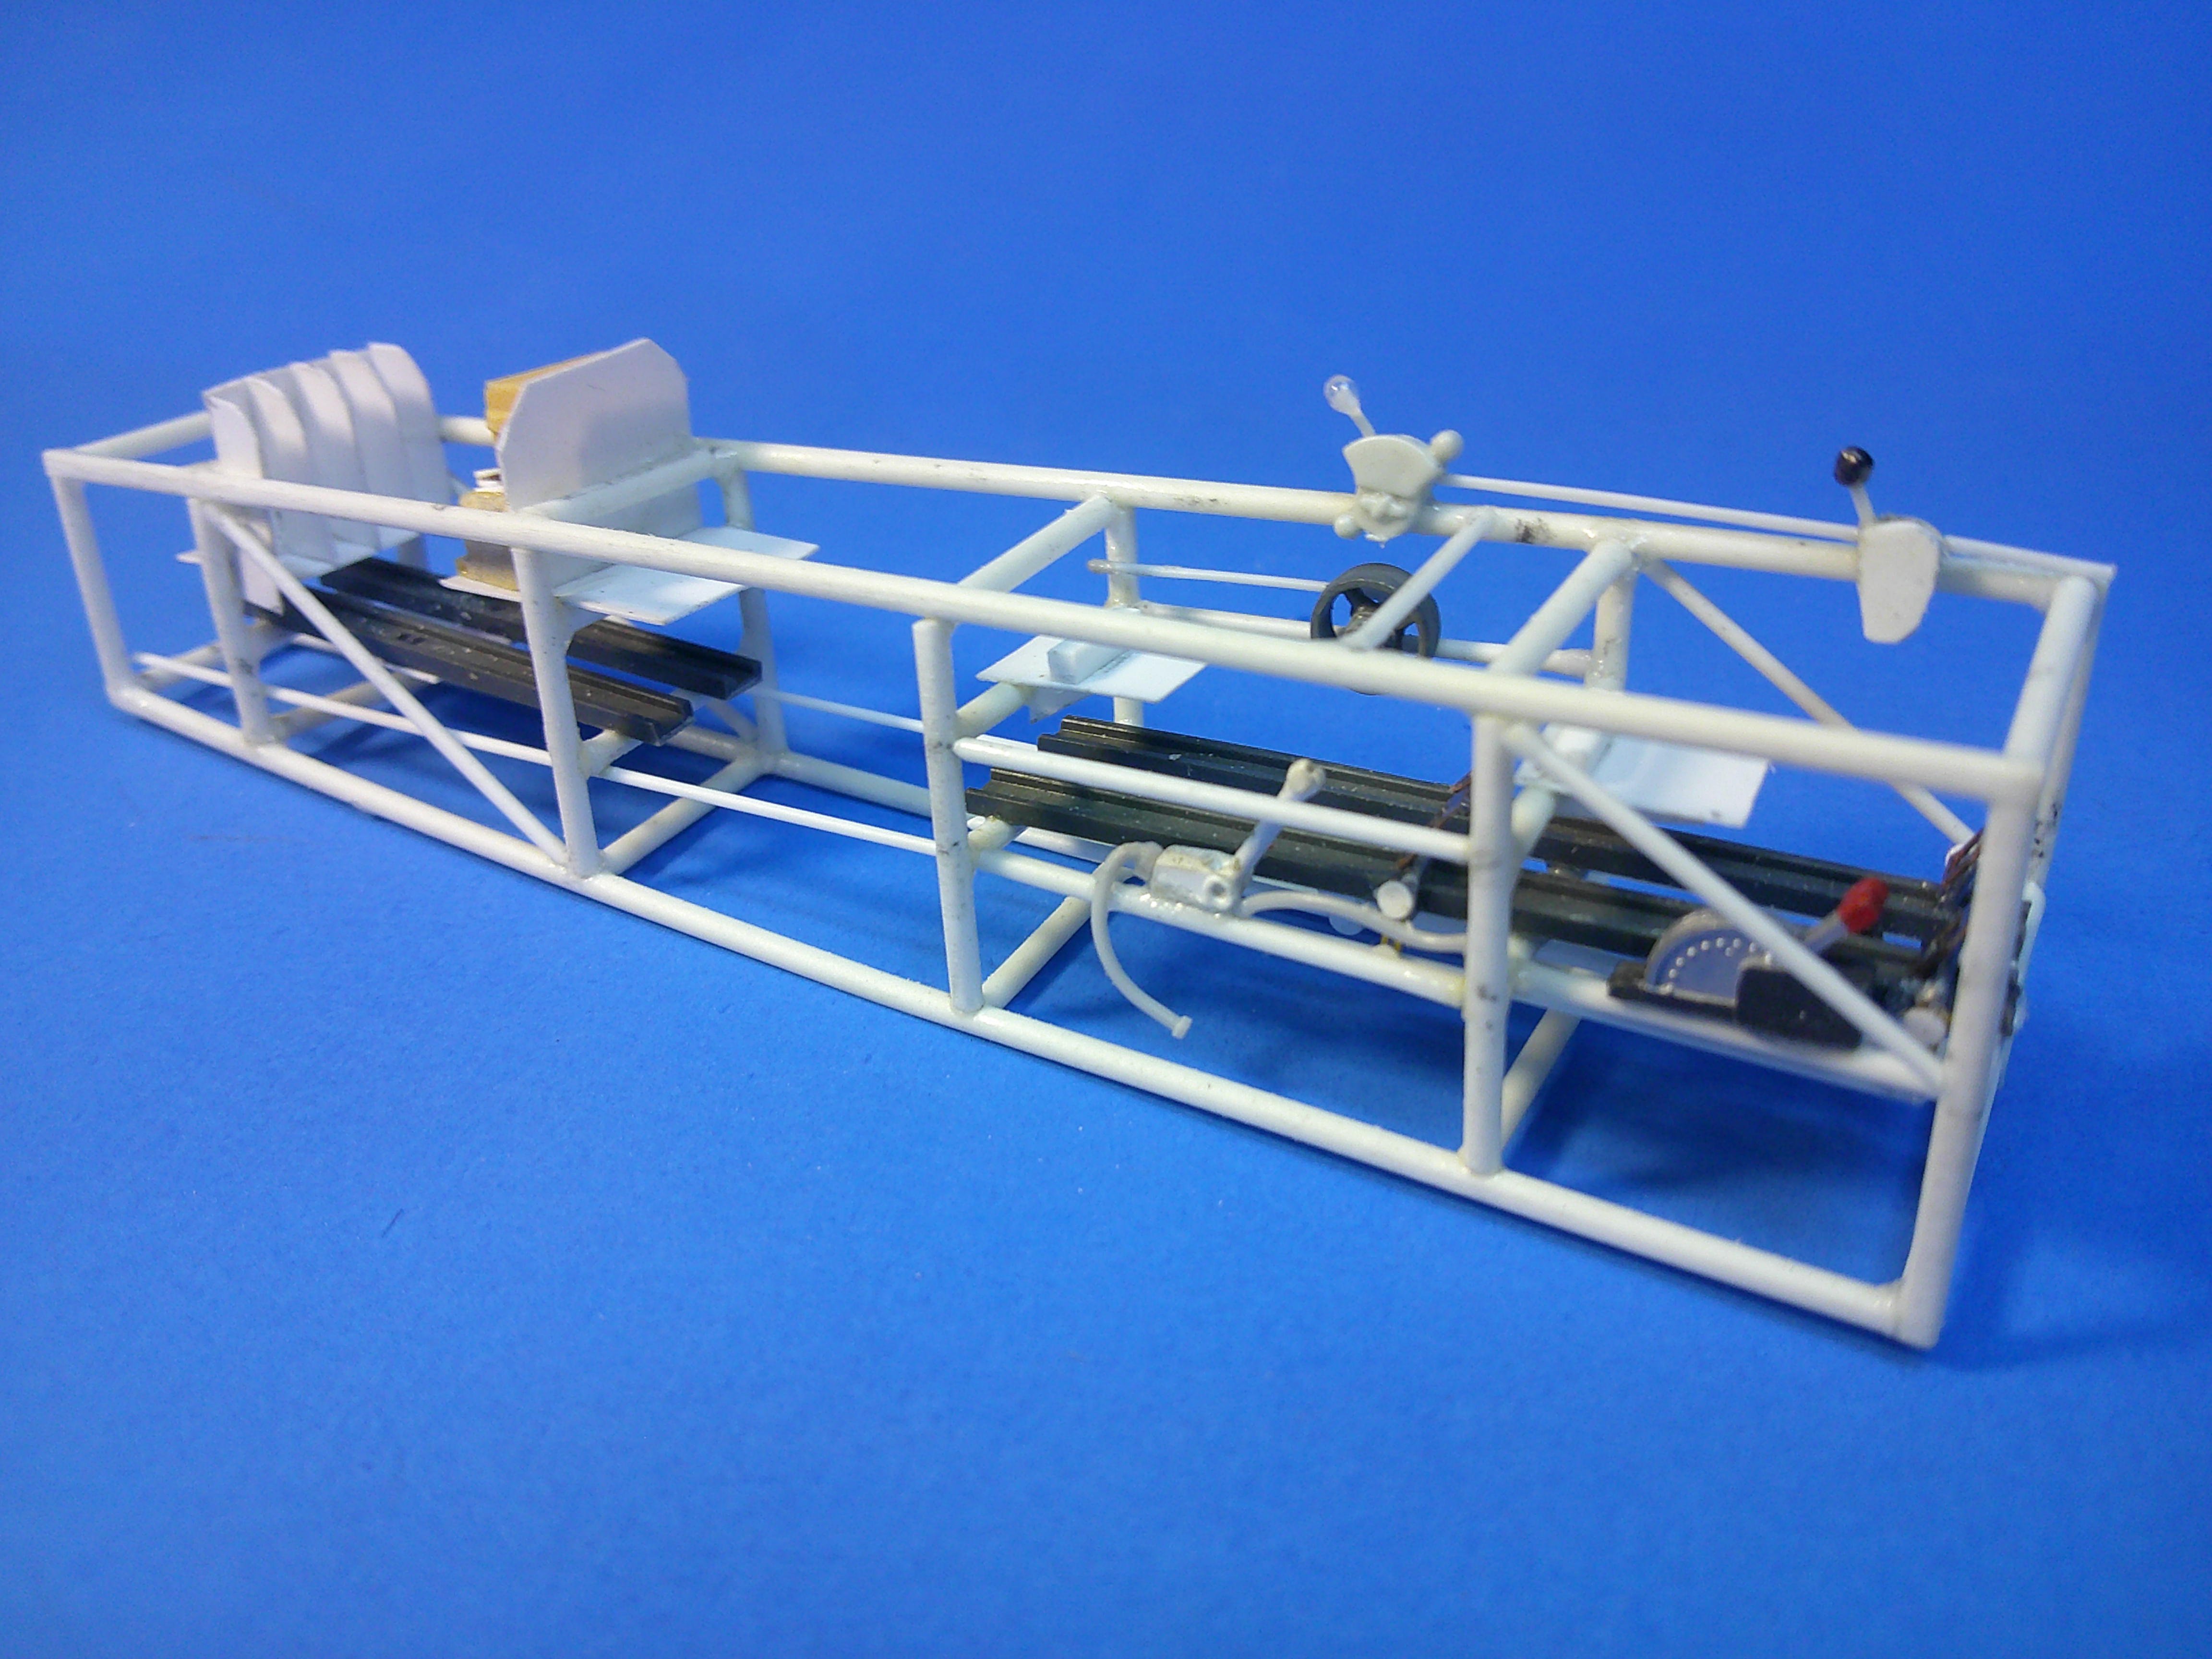
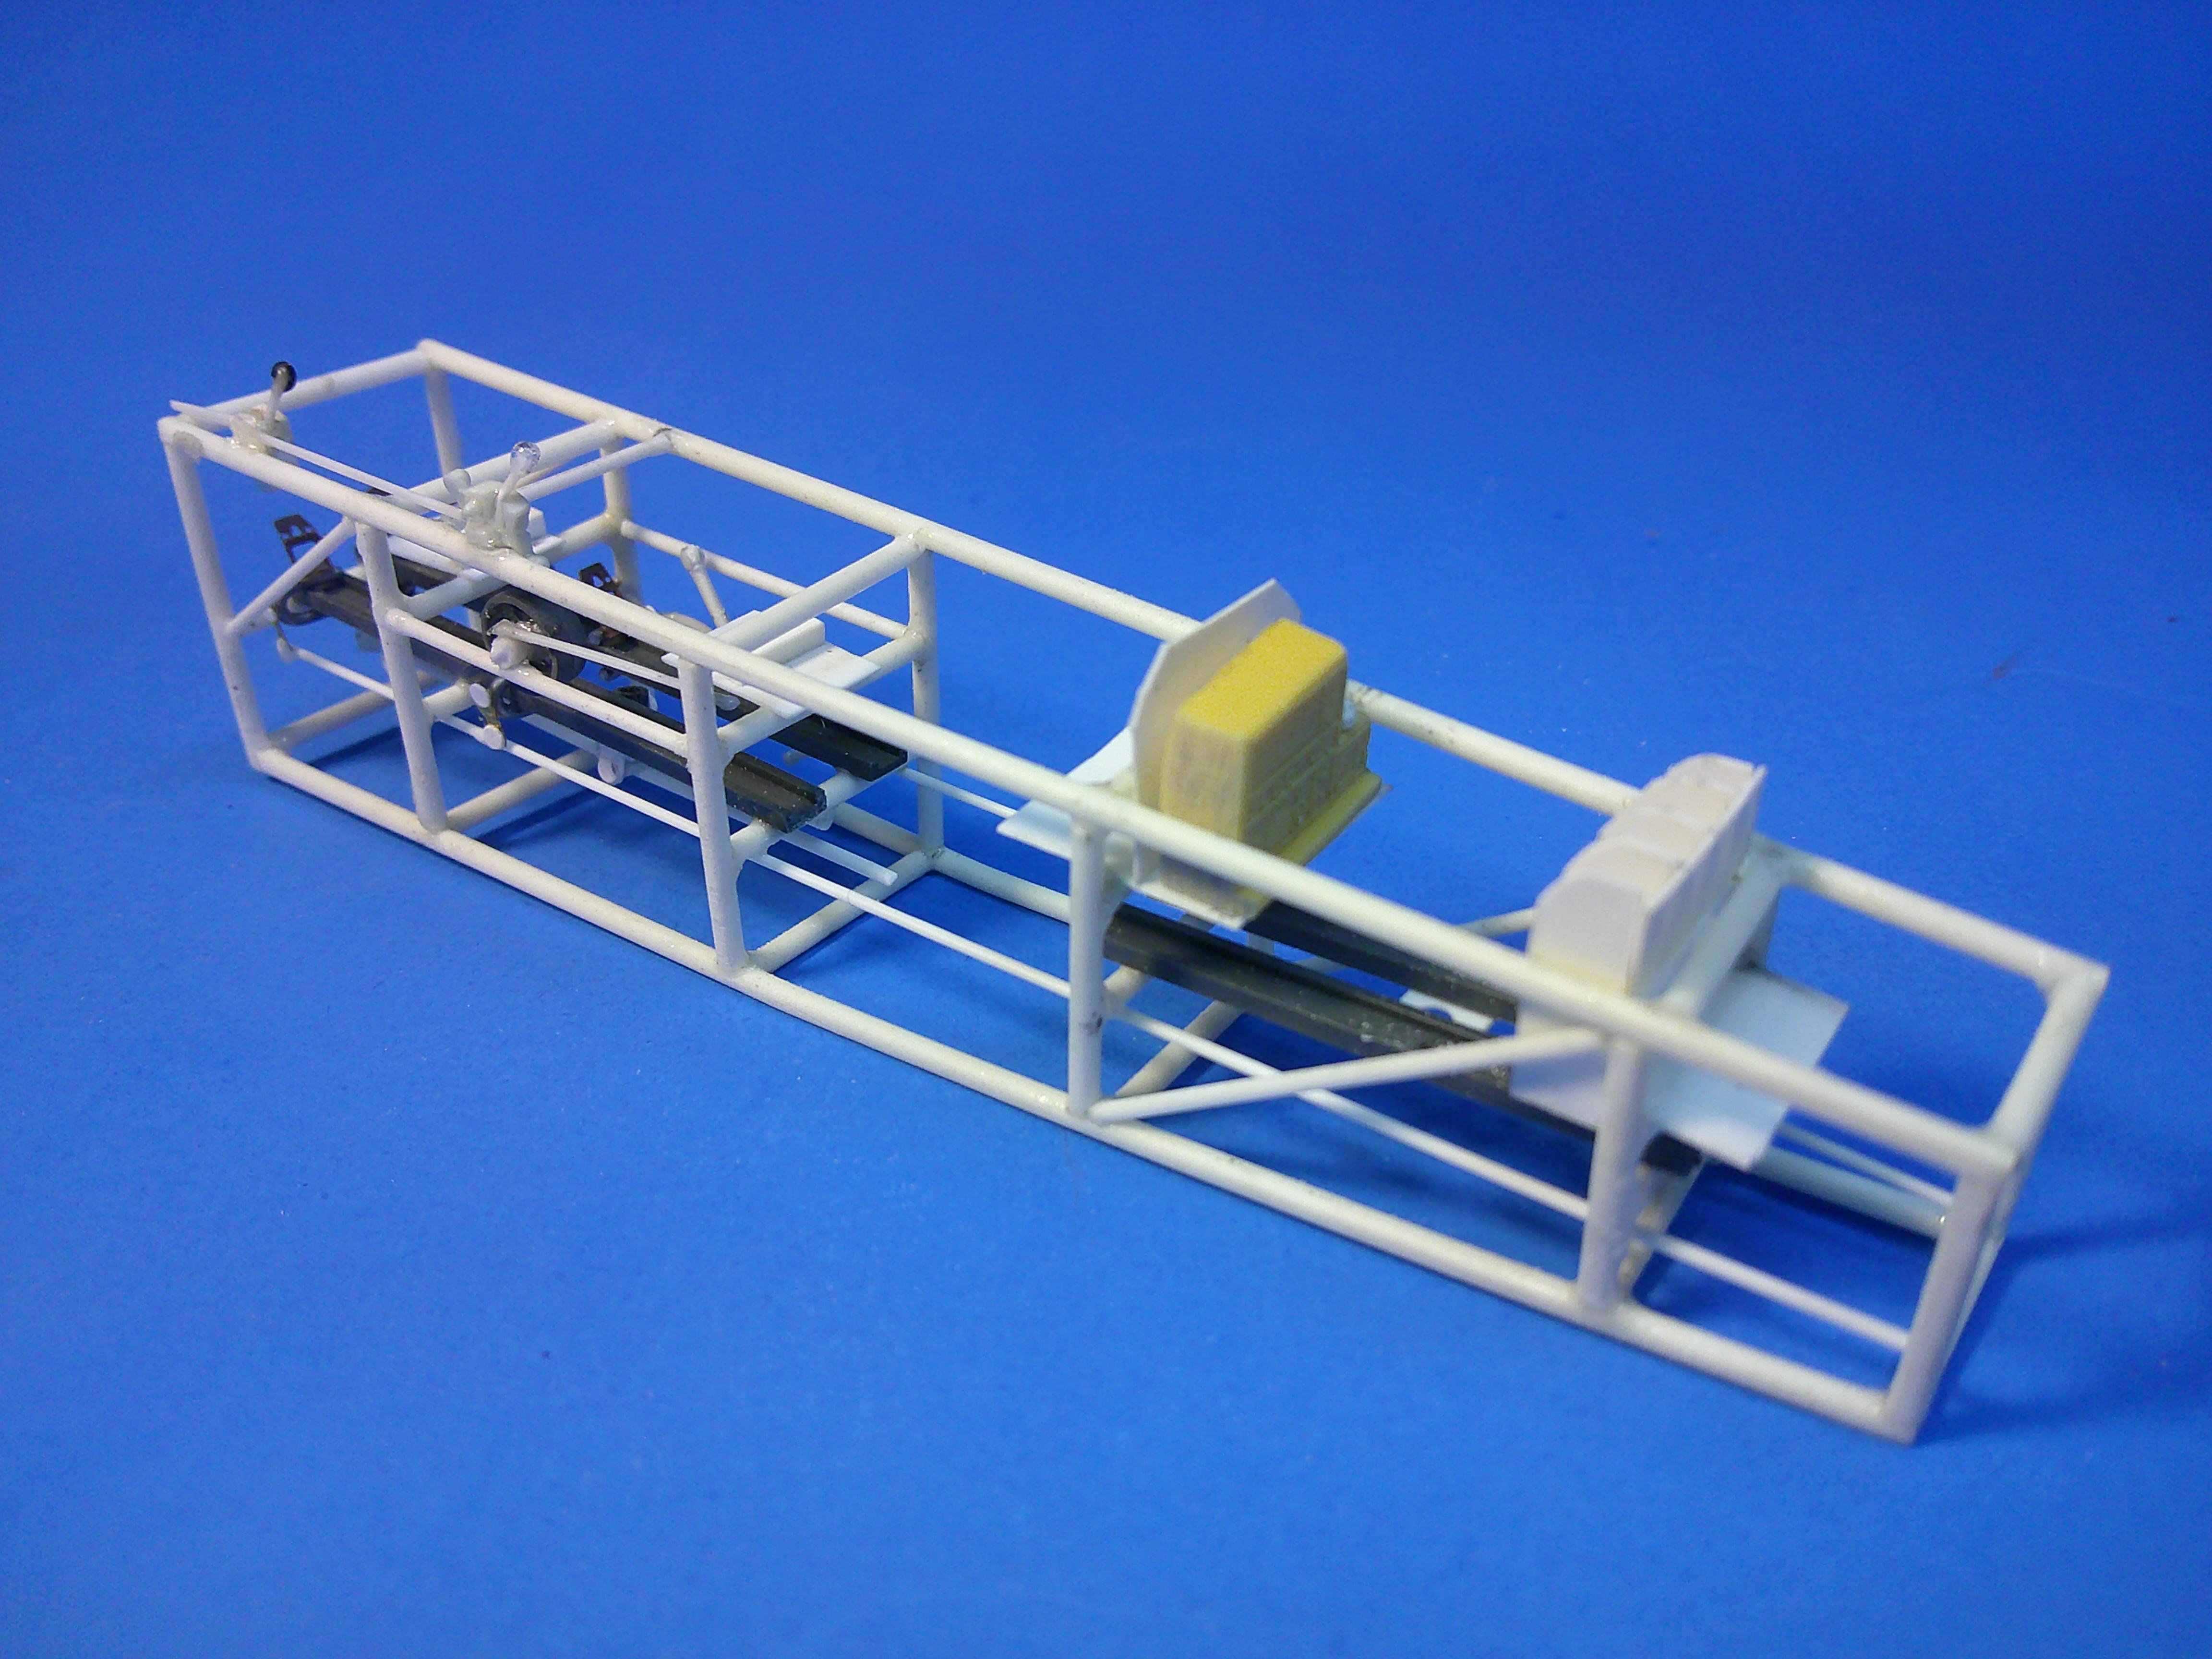
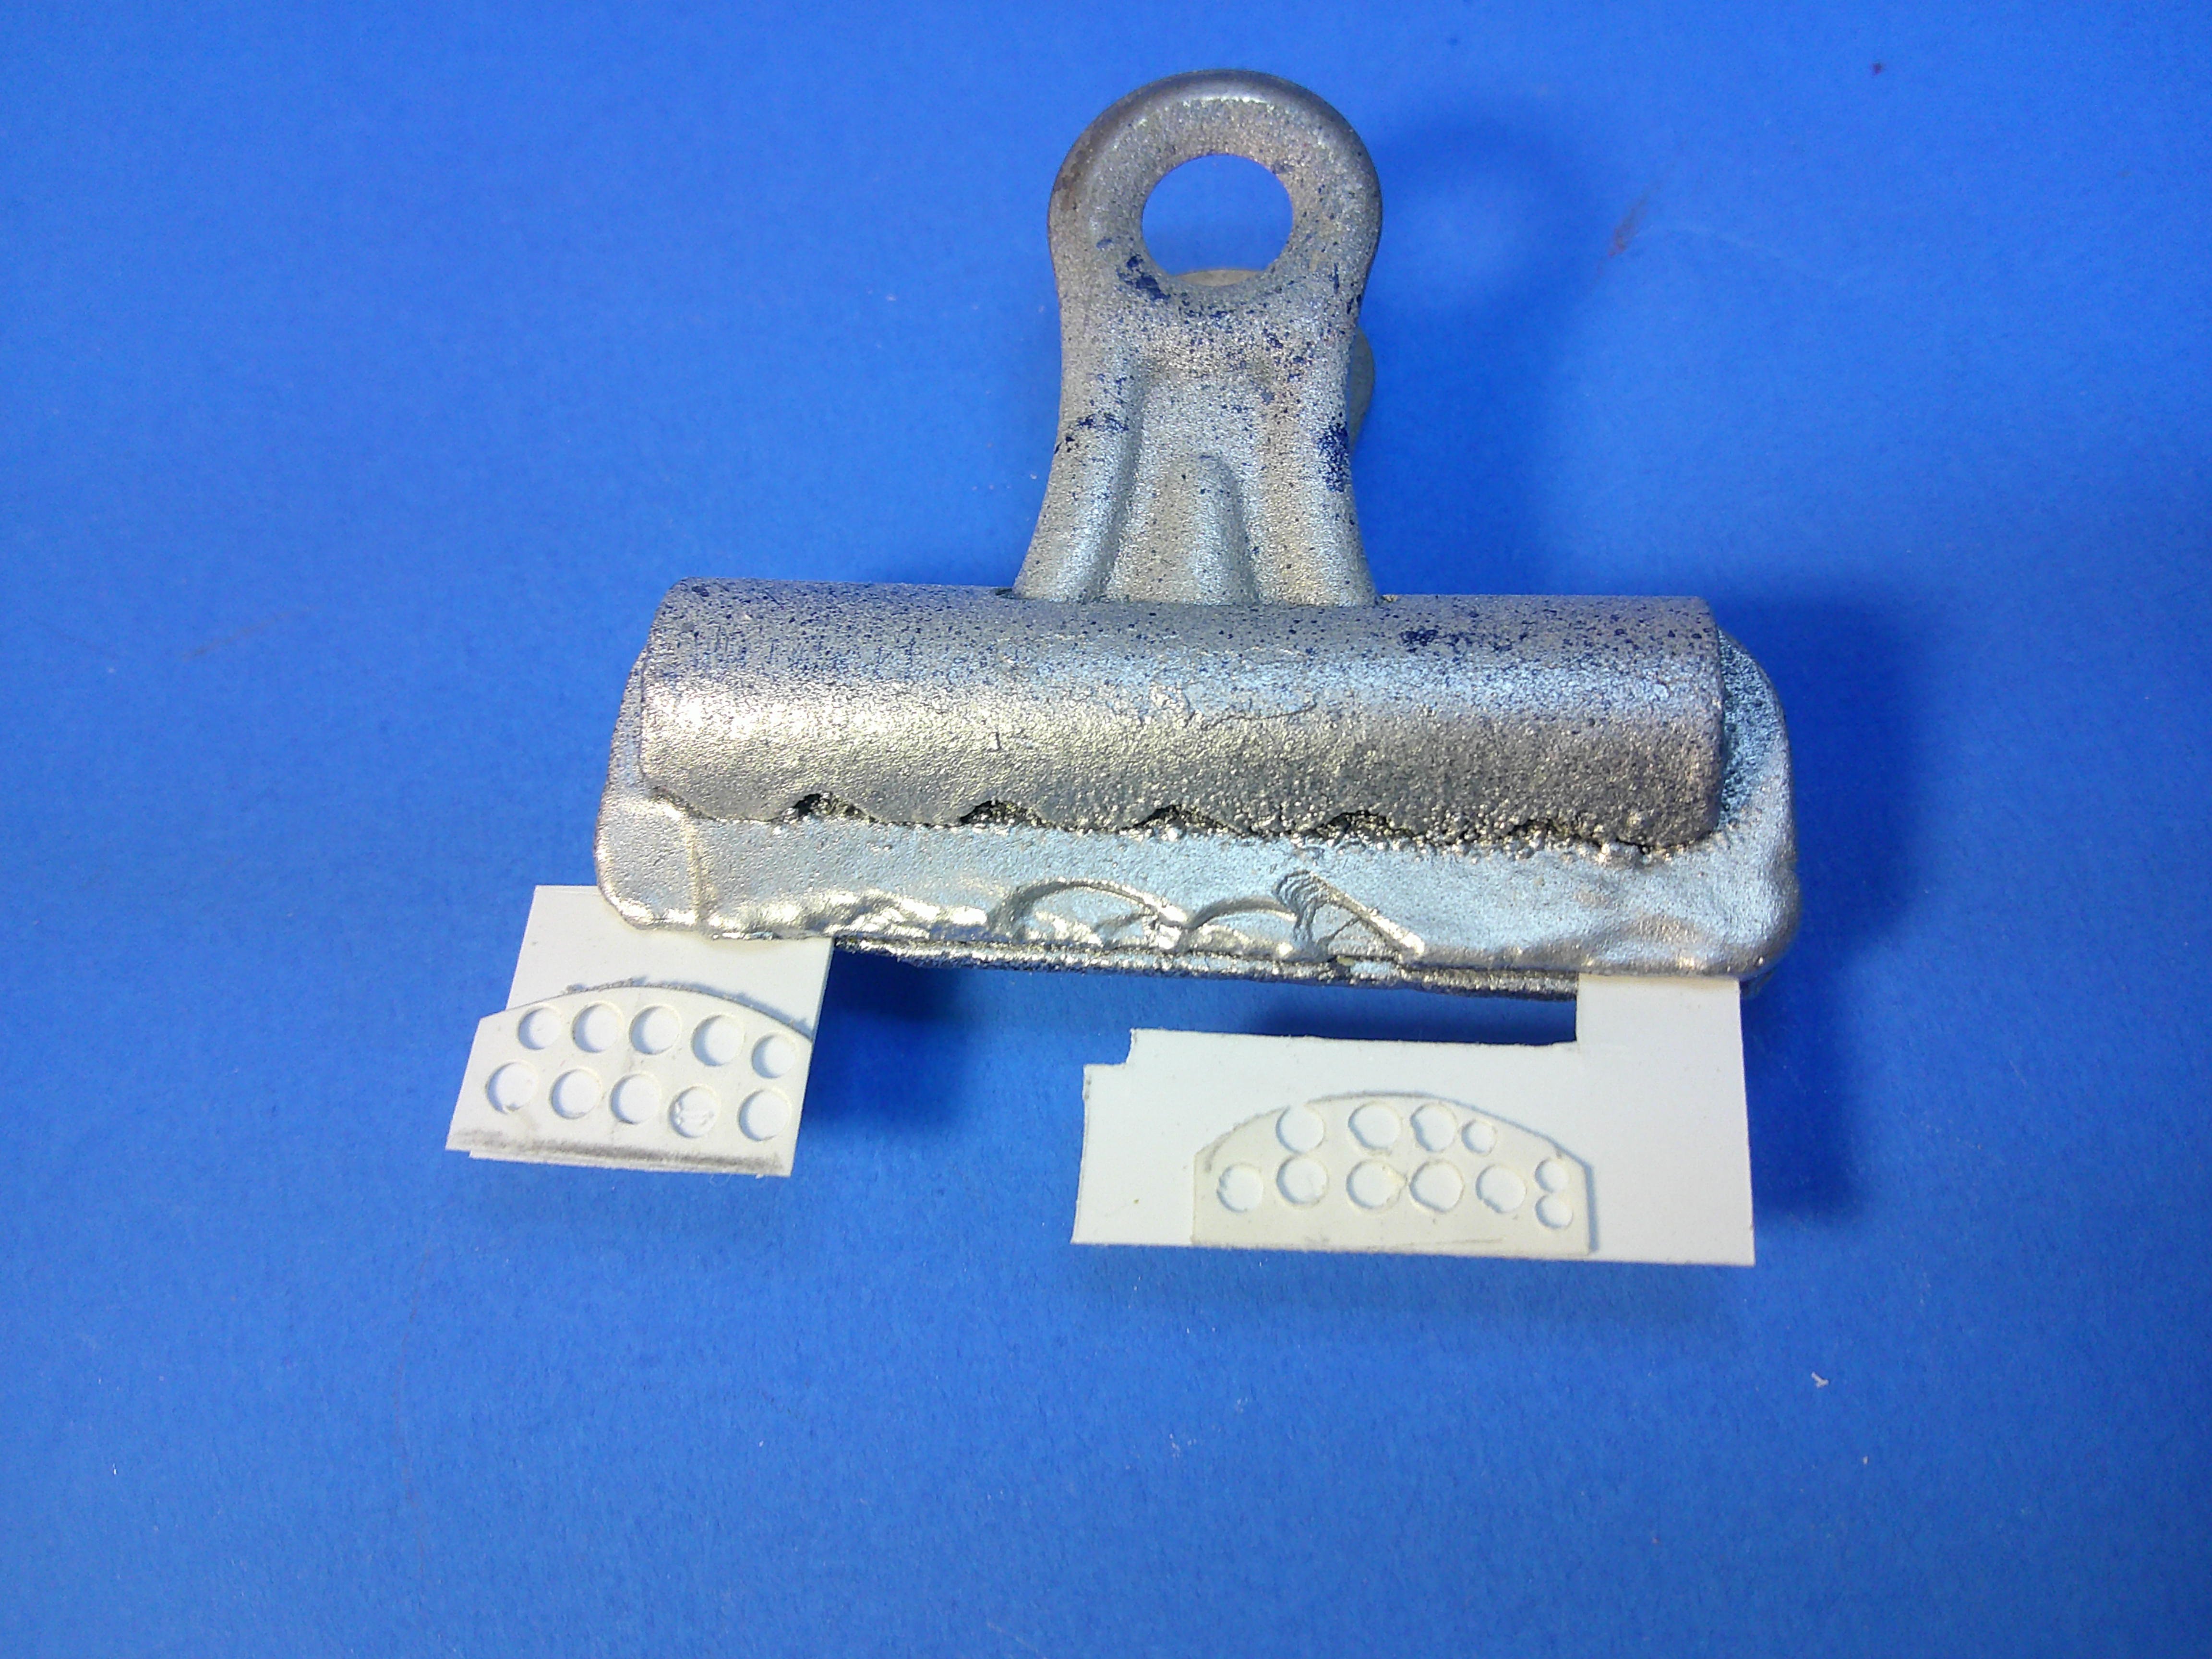
Most all of the interior parts are built now.... Overall view of this week's work.... If you look closely you can see (front to back) the PE rudder pedals and cables, both of the throttle quads and their cable, the torpedo drop control console/handles bottom right front, the trim control wheel on the left center of the middle cockpit along with an emergency hydraulic pump on the right side, and the Lewis gun ammo drum racks in the back of the rear cockpit. This is a view from the other side where you can see the radio (with a sending key out of view) on its rack in the front of the rear cockpit. Not seen is the pivoting seat for the rear cockpit. The main IPs are being built using the traditional sandwich method. The holes for the IPs where made using a Waldron punch and die set. These assemblies will be sprayed black and then the fronts pried from the backing sheet so the black instruments can then have their individual markings scribed in place. More pics of that when they're done. Gil

-
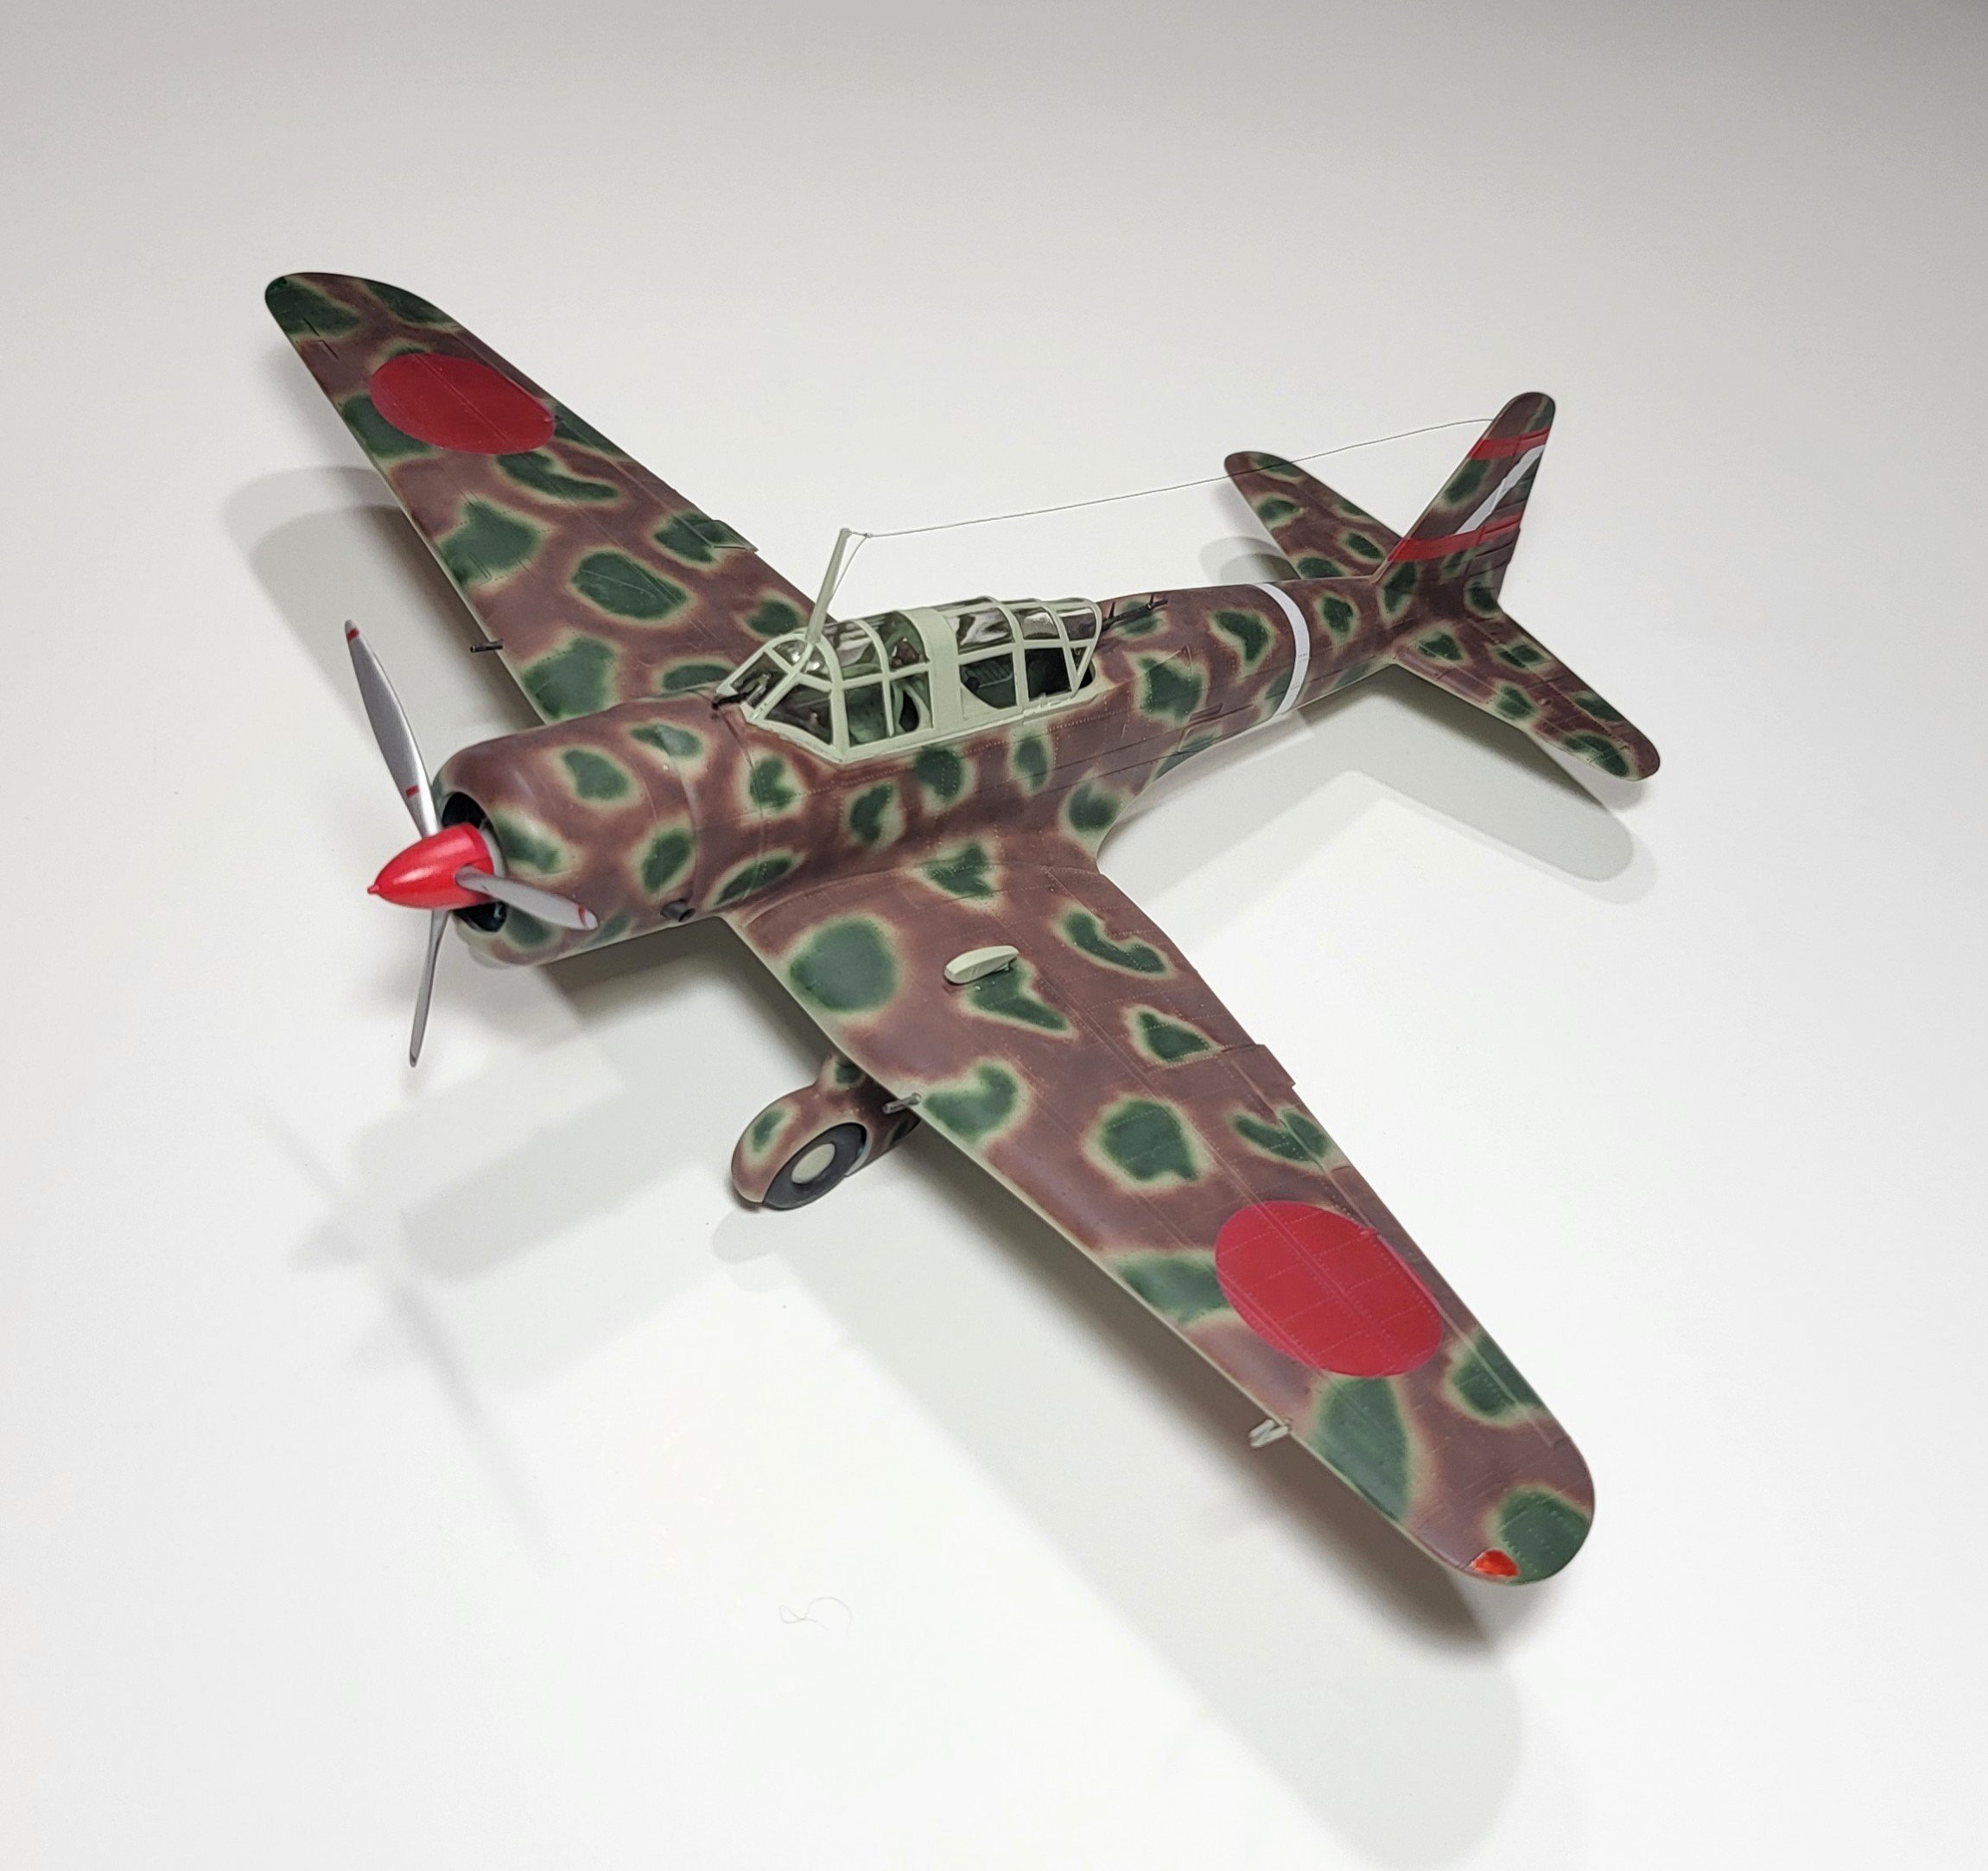
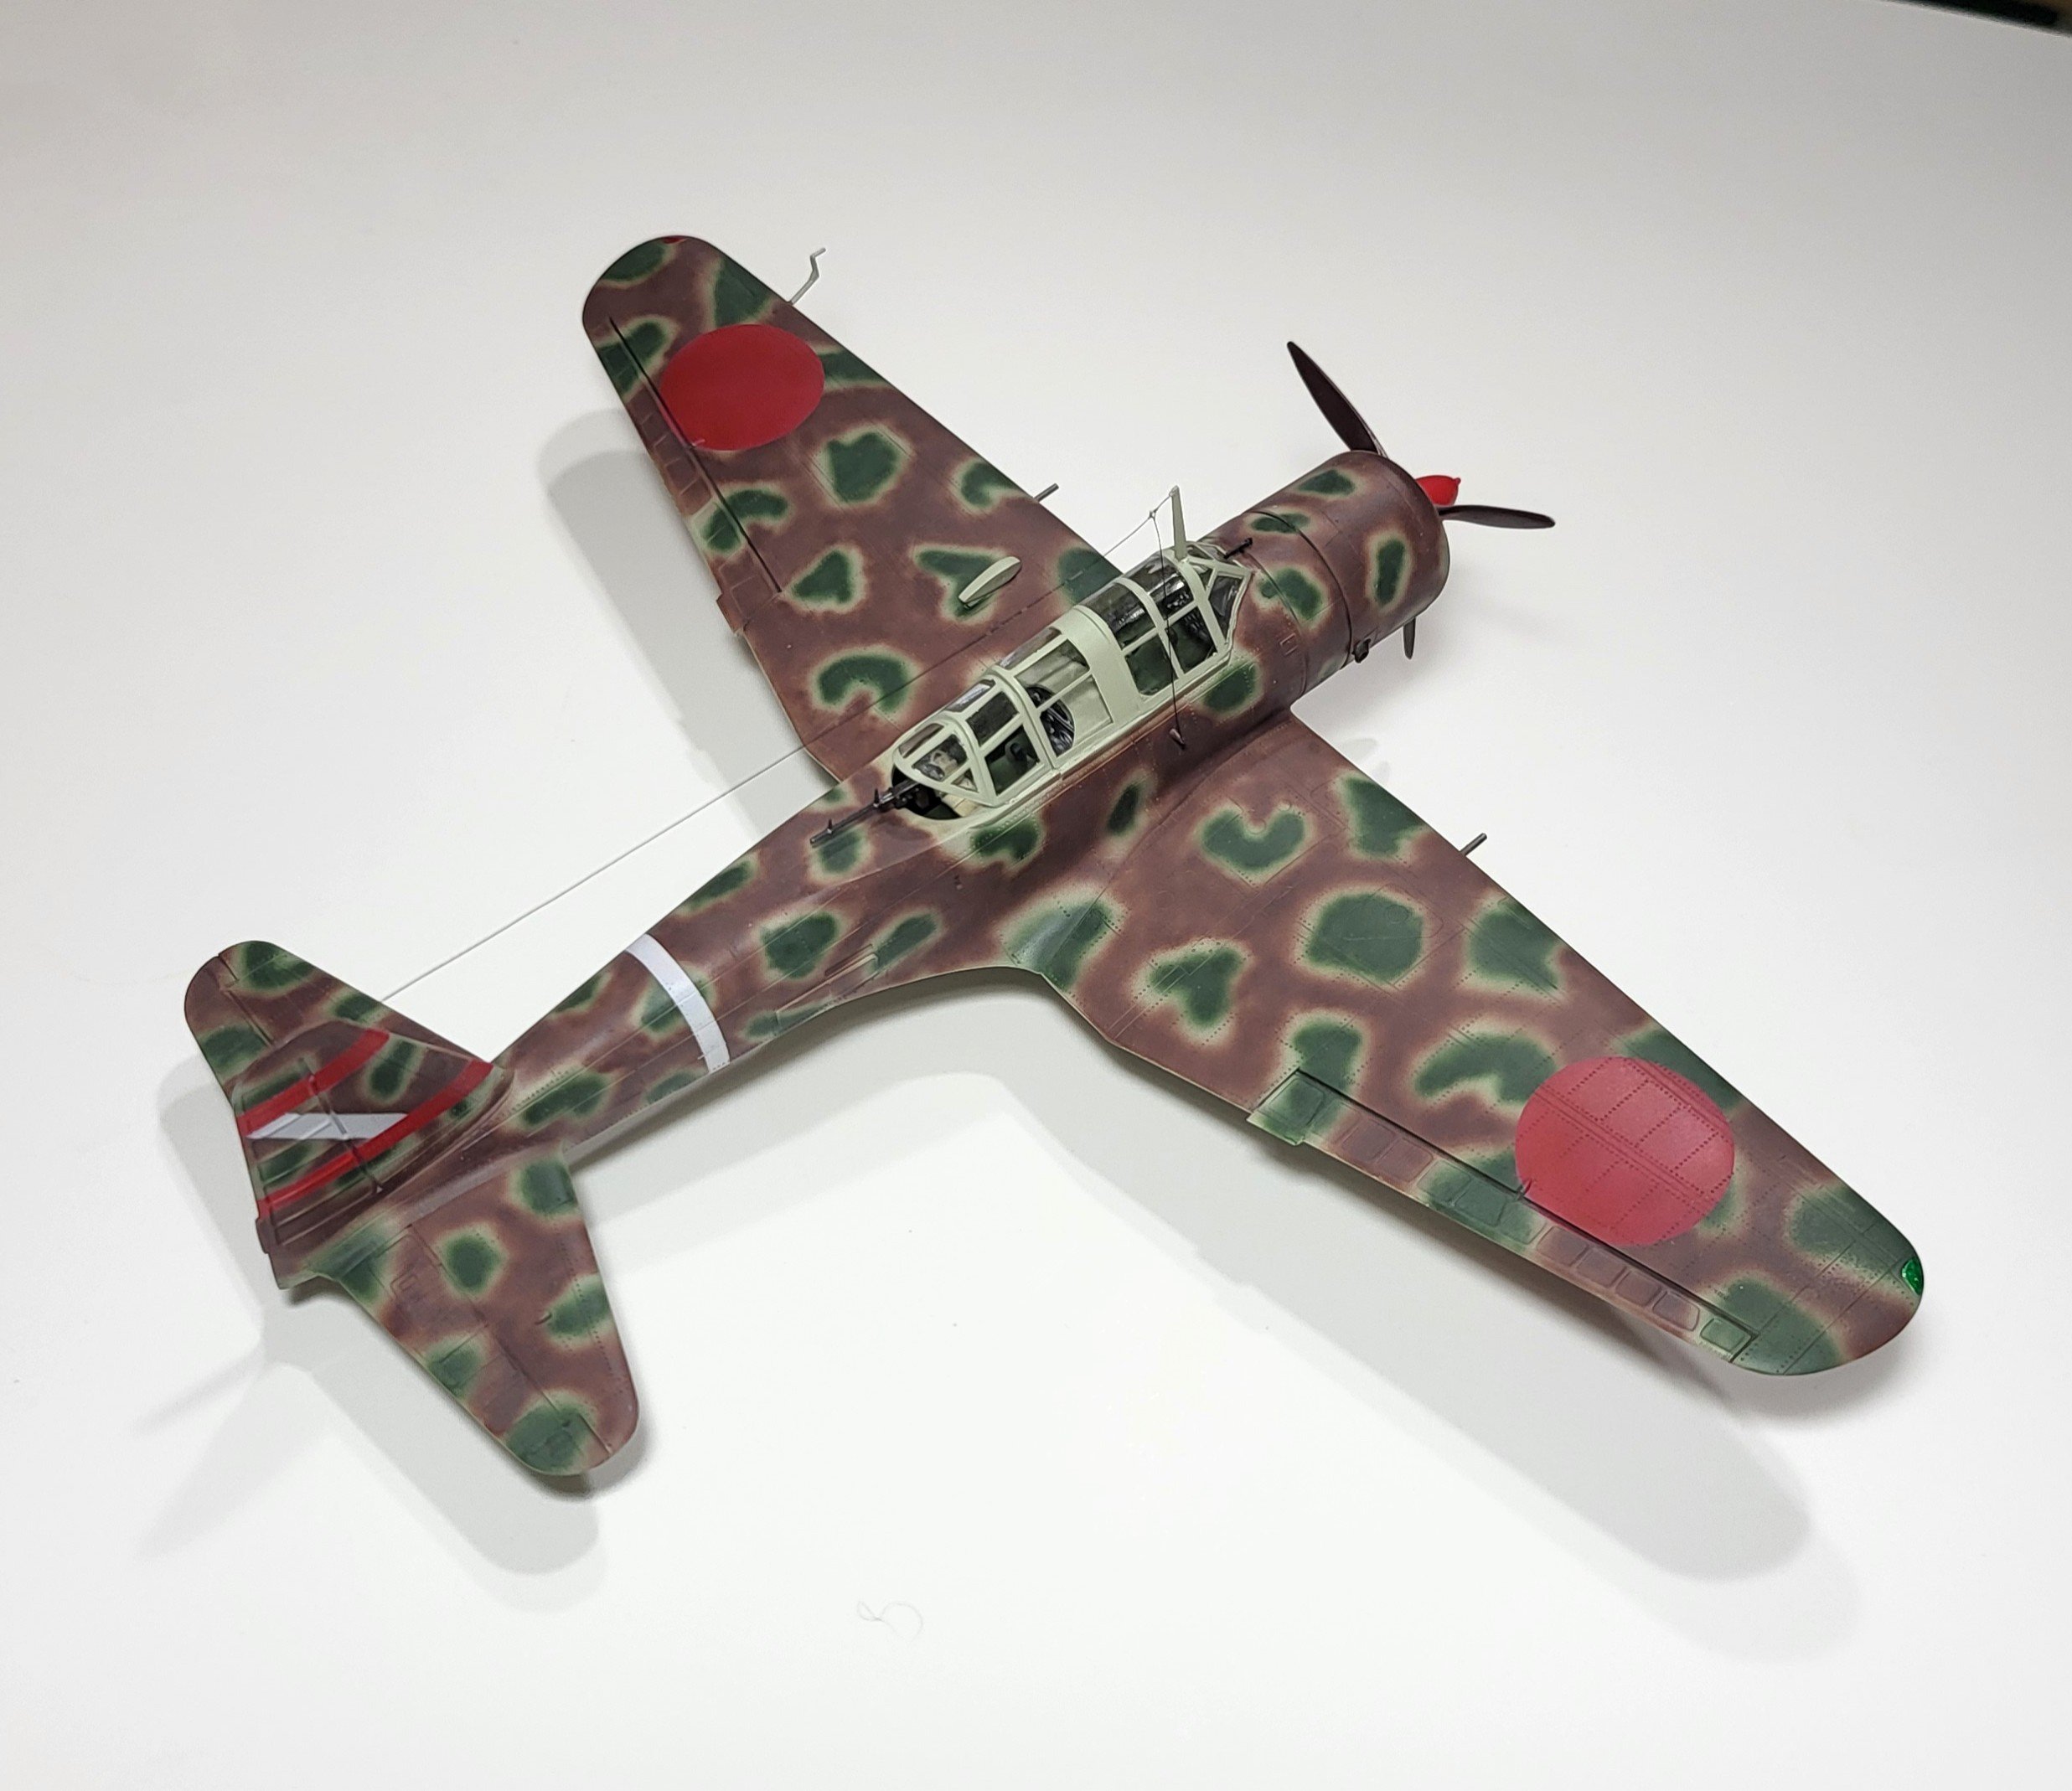
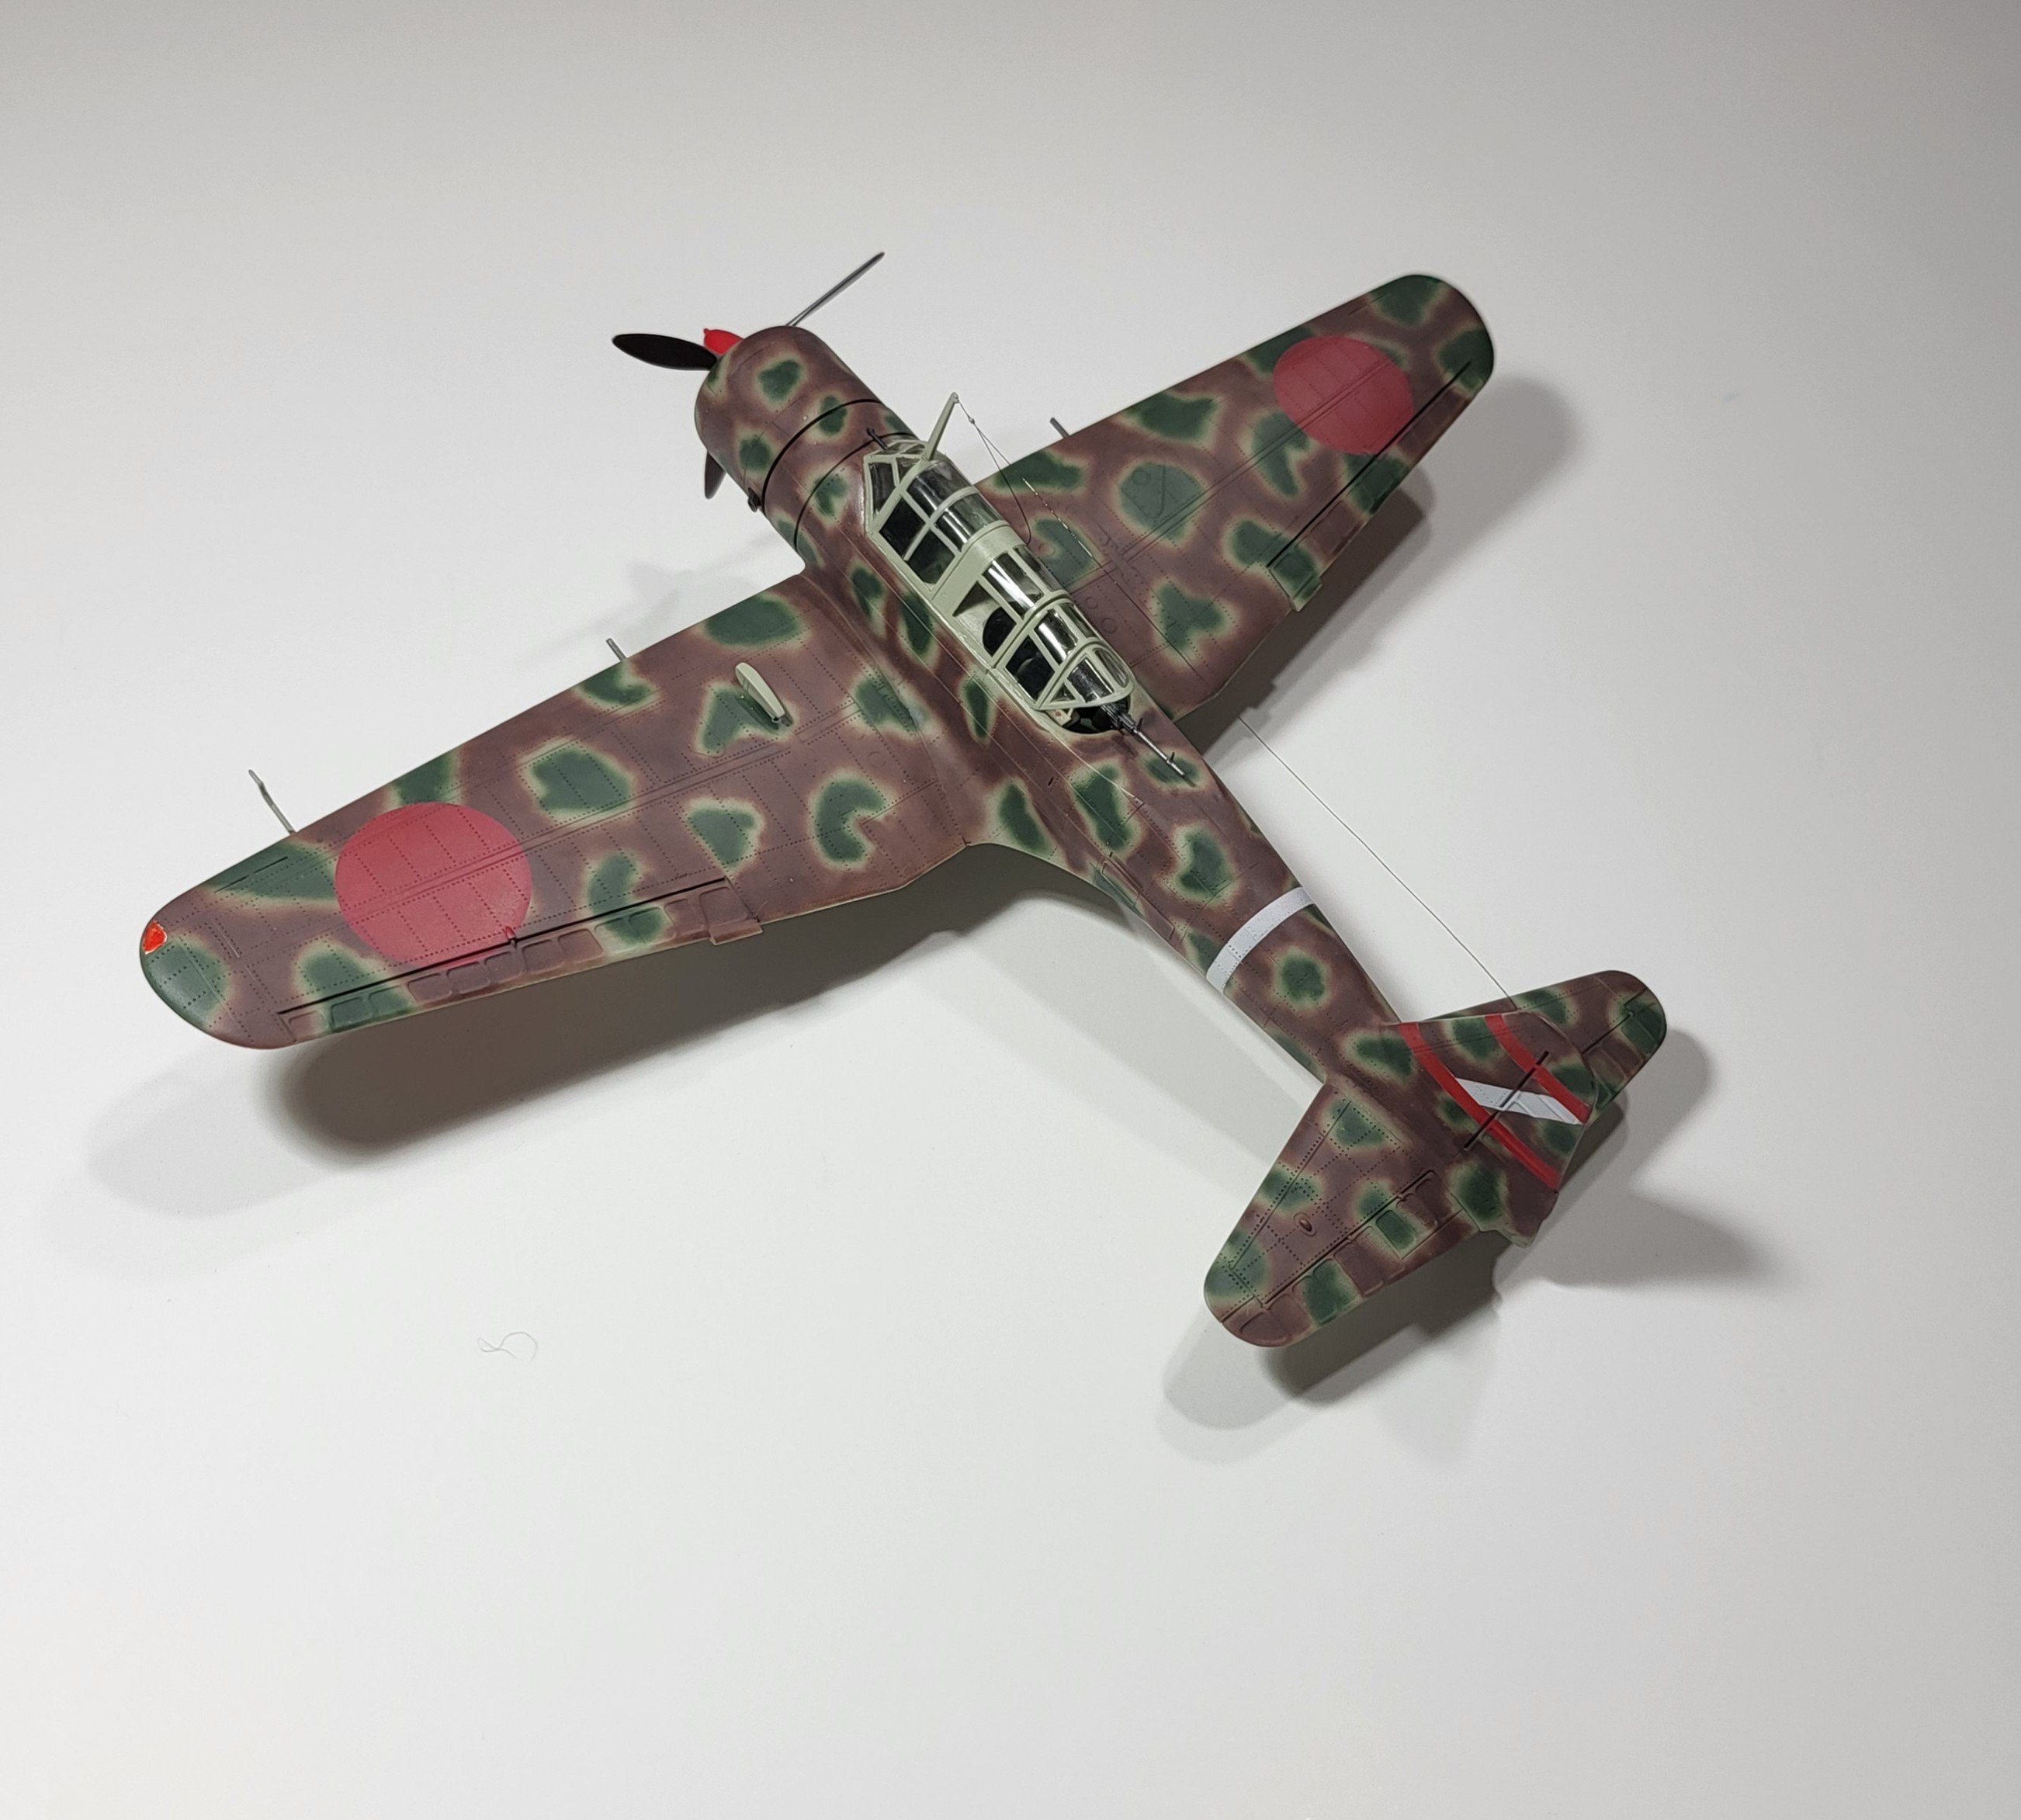
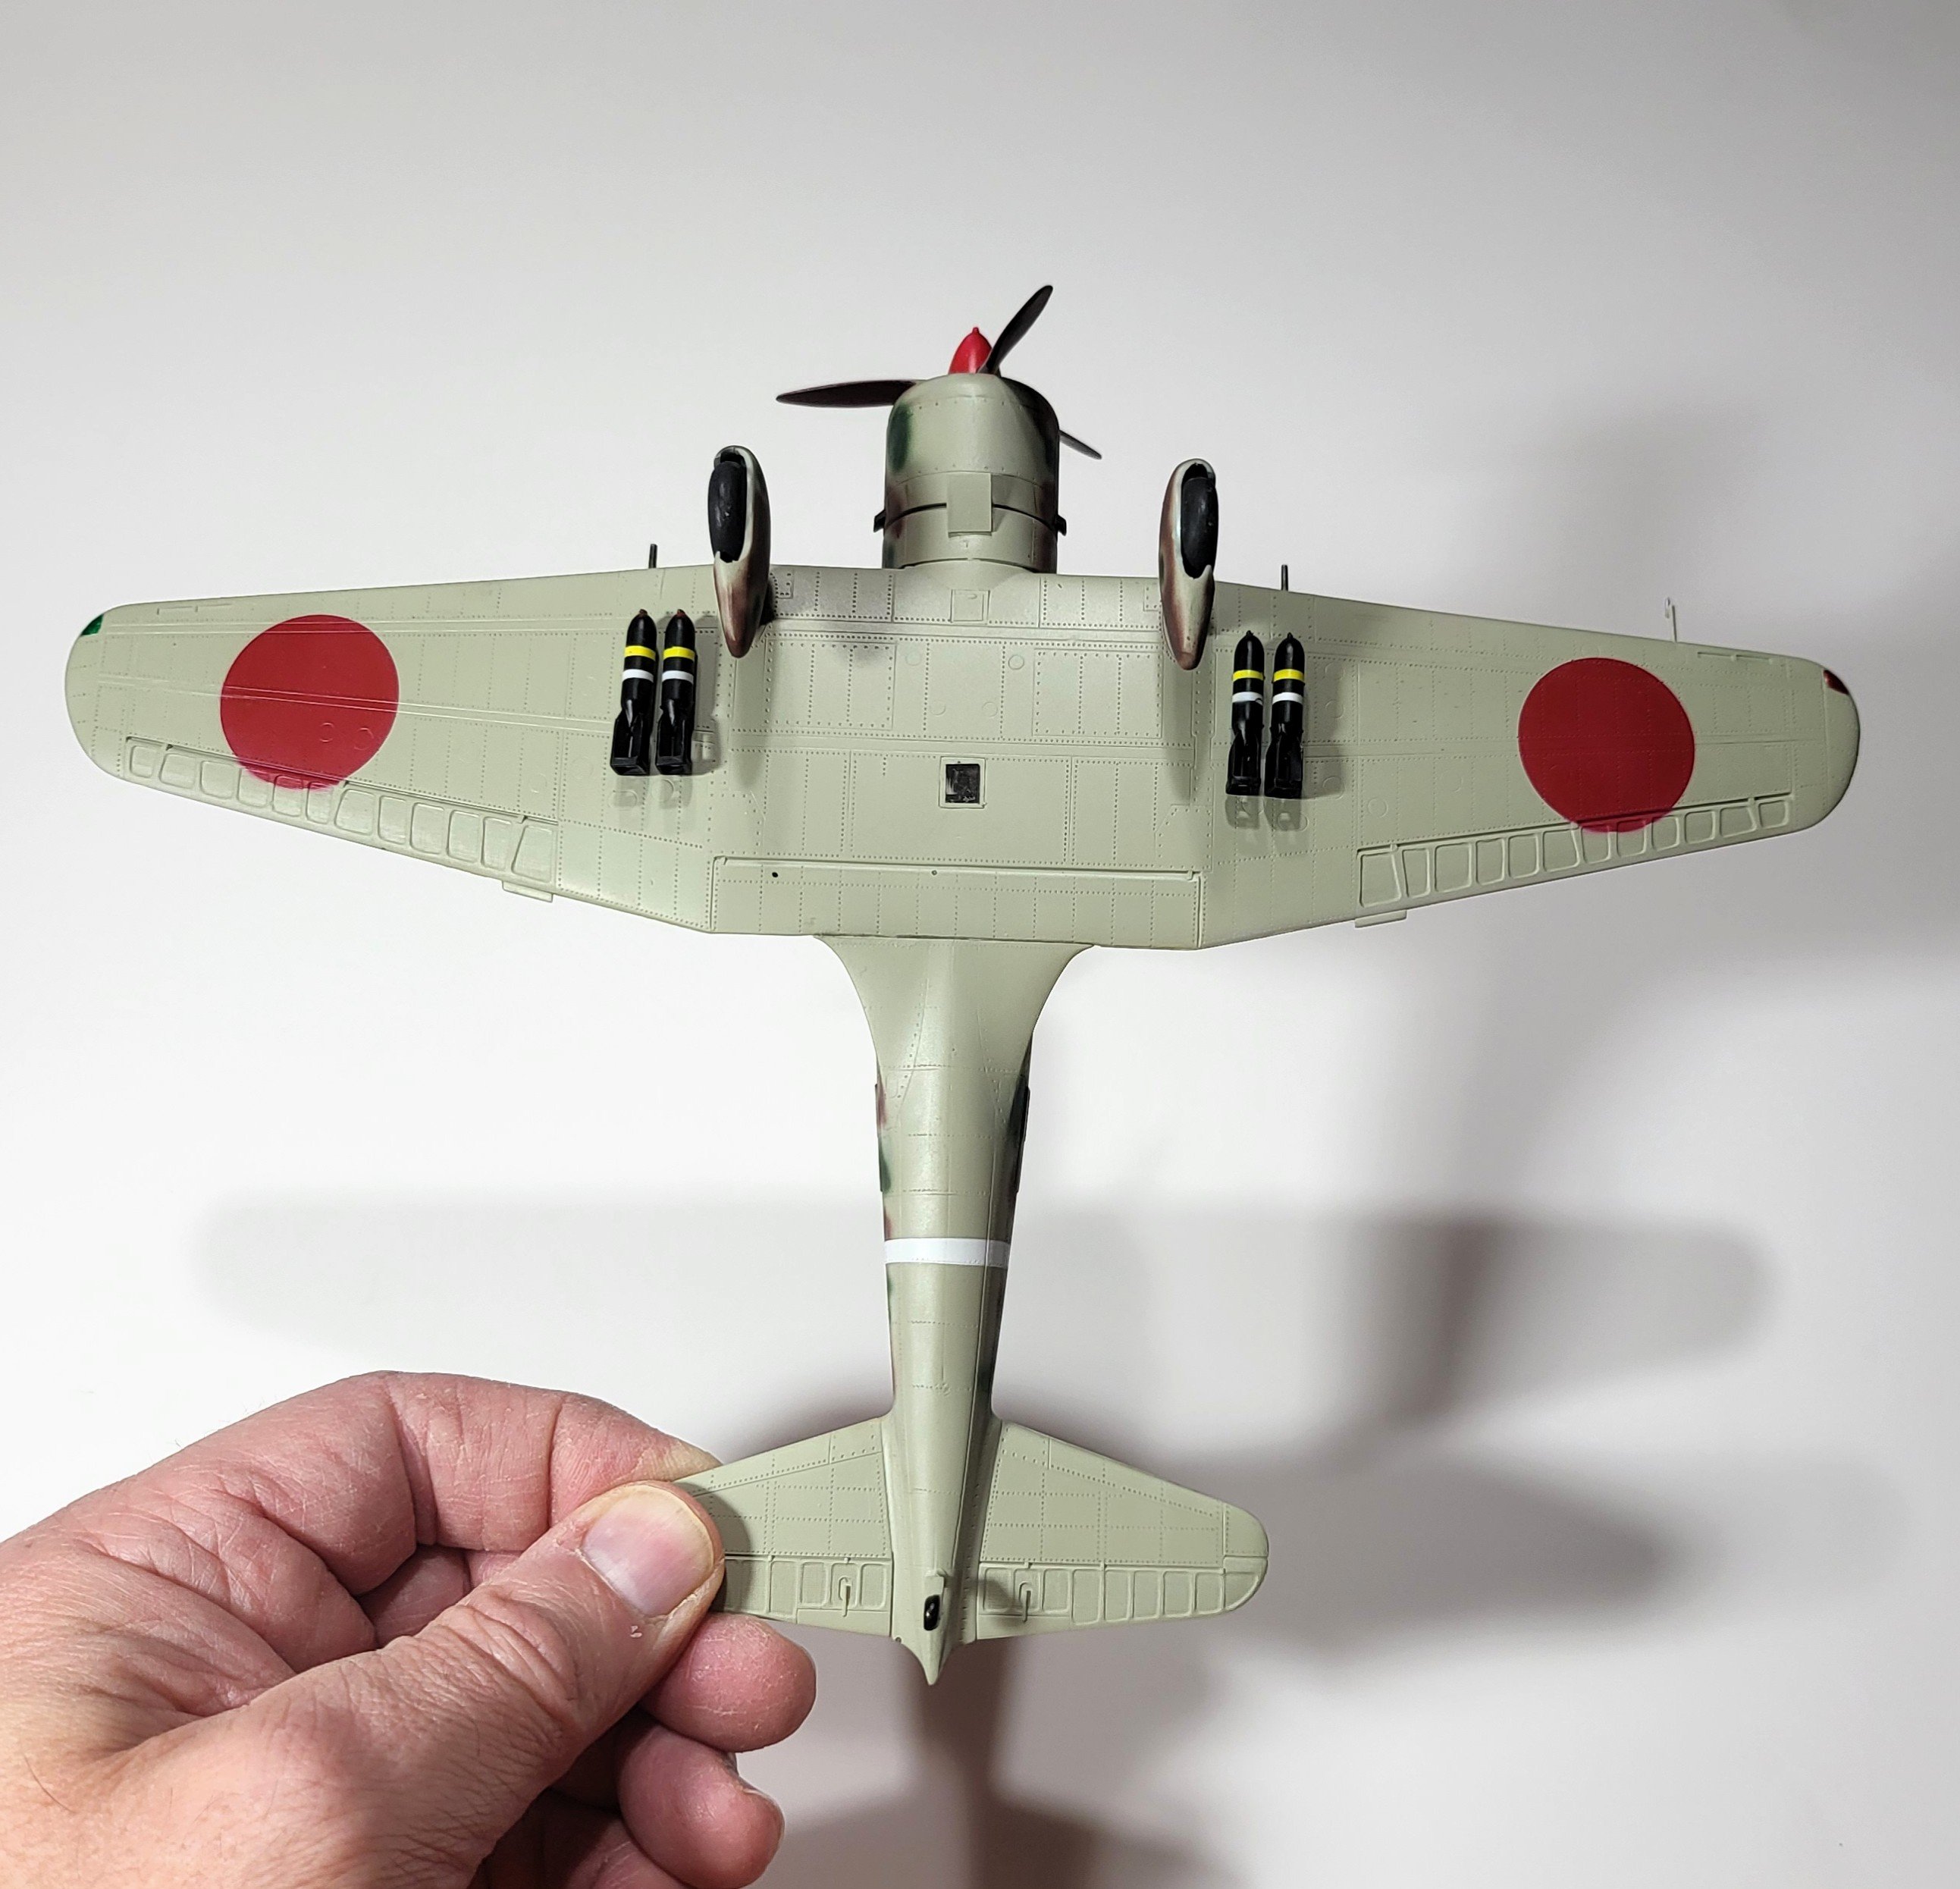
Impressive camo job! Was it all free-handed or did you do some sort of masking? Very sharp work in either case! Gil
-
From a friends estate that was missing instructions and decals so I painted the markings (Chose an easy squadron to do!). The kit still builds up well and has very few fit issues. Biggest one for me was the canopy that did not fit without a bit of elbow grease. May not be accurate but I'm happy with it.
- Yesterday
-

This week just off the bench in 1/48 scale ( update # 115)....
Jmarc replied to Jmarc's topic in Photos: On the Bench
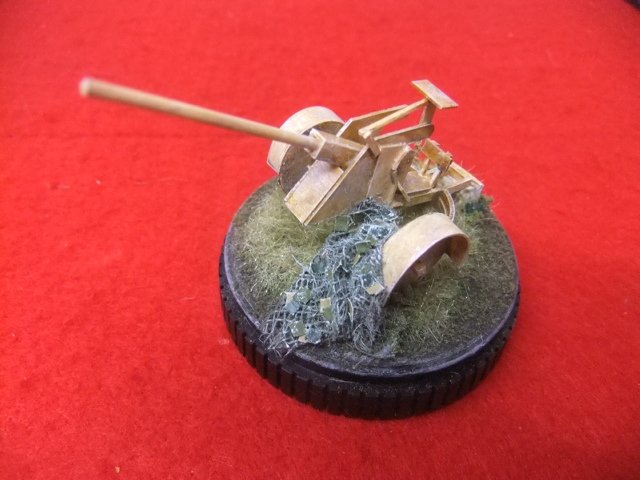
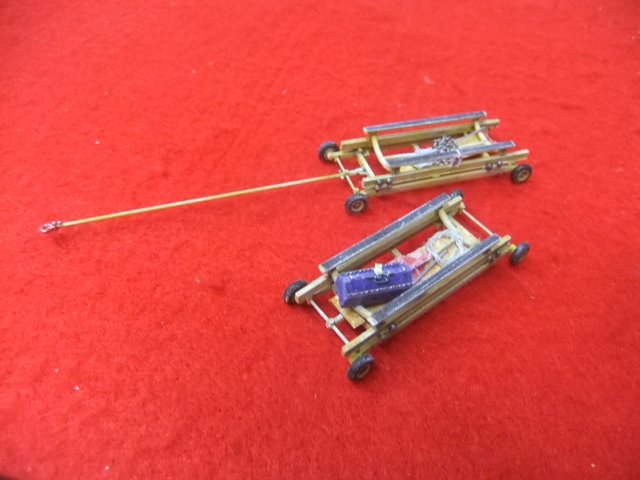
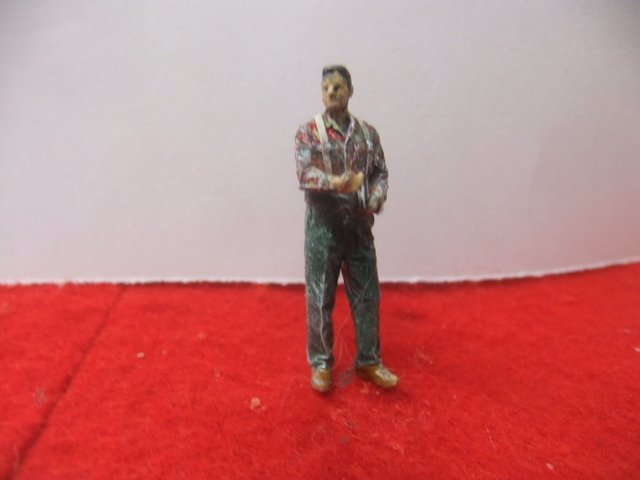
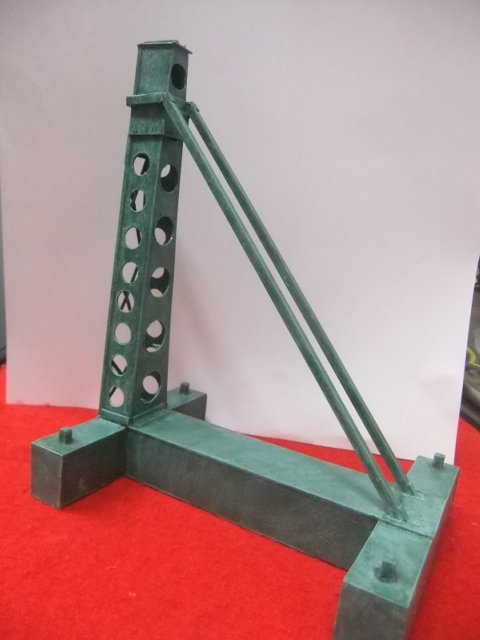
UPDATE 115.. Hi , here a pic of the project i completed this week..it's in 1/48 scale WWII WERHMATCH WOOD ARMY https://photos.app.goo.gl/TS6URFADMnV78e4a8 MODERN USAF BOMB TRAILORS https://photos.app.goo.gl/yicnkV5hrMBWAF2X8 AVRO CANADA EMPLOYE https://photos.app.goo.gl/nmSZrGimois7RV9c7 AVRO CF-105 ARROW PARTIAL OUTER WING ASSEMBLY JIG https://photos.app.goo.gl/y7fd6KMxL1xMLm9q7 Like to view what I have done so far in 2026 season , just follow this Google link : https://photos.app.goo.gl/dJwnAmhVD15JPt9w8 Like to see more of my previous completed projects in 1/48 scale ..................... Like to see what I have completed so far this season 2025 (143 projects) , just follow this GOOGLE link: https://photos.app.goo.gl/zKmRkgK19W2fPoin7 Like to see what I have completed so far this season 2024 (103 projects) , just follow this GOOGLE link: https://photos.app.goo.gl/4d3DYFCkVLL64imq8 Like to see what I have completed in 2023 season (100 projects) , just follow this GOOGLE link: https://photos.app.goo.gl/Wbzocz4nrbgcPuAQ6 Like to see what I have completed in 2022 season (148 projects). just follow this Google link: https://photos.app.goo.gl/WniLxX42pzCF6JYH9 Like to see what I have completed in 2021 season (110 projects). just follow this Google link: https://photos.app.goo.gl/d89Abe6NeE8LJUEeA Like to see what I have completed in 2020 season (65 projects) ,just follow this Google link : https://photos.app.goo.gl/piTfBCtMXvf6g5zG8 Like to see what I have completed in 2019 season (35 projects) ,just follow this Google link : https://photos.app.goo.gl/wX42Q8pKRqwR7APR9 Like to see what I have completed in 2018 season (52 projects) ,just follow this Google link : https://photos.app.goo.gl/SnL7aiYFfHrV5JbA8 Like to see what I have completed in 2017 season (33 projects) ,just follow this Google link : https://photos.app.goo.gl/1RxEF7q89HnJUjGA6 Like to see what I have completed in 2016 season (33 projects) ,just follow this Google link : https://photos.app.goo.gl/299uiMnC7C2PDaABA Like to see what I have completed in 2015 season (33 projects) ,just follow this Google link : https://photos.app.goo.gl/e9kY3Gg1D3fxECtC9 Enjoy !
-
Maddog Manufacturing Opening for 2026
Jmarc replied to Mark Deliduka's topic in Photos: On the Bench
YYYYYYYYES SIR !...More interesting stuff to look at ..my favorite on this turn it's those dozers.....Keep them coming ! Jmarc -
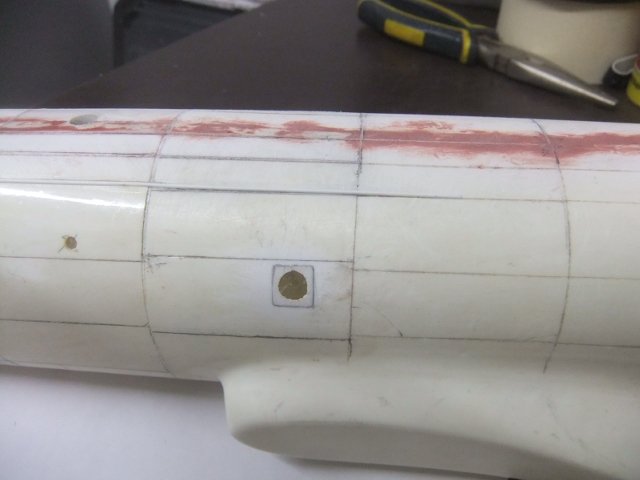
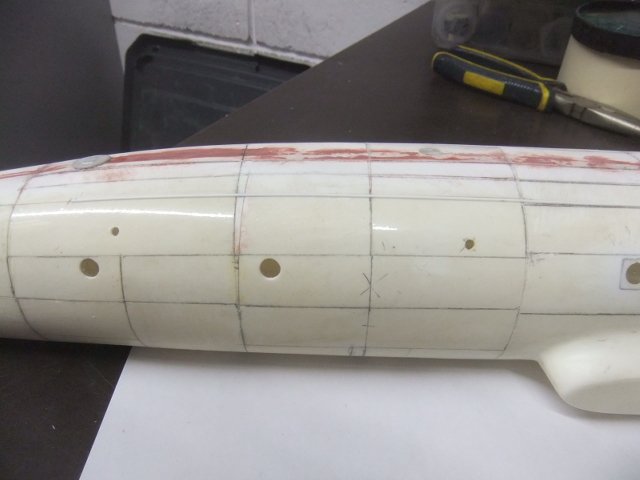
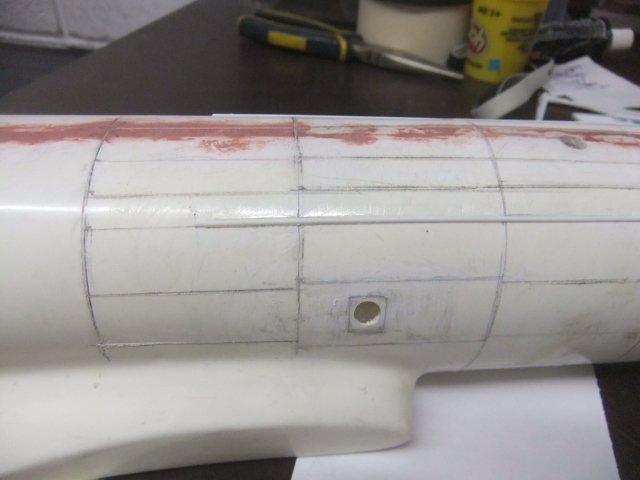
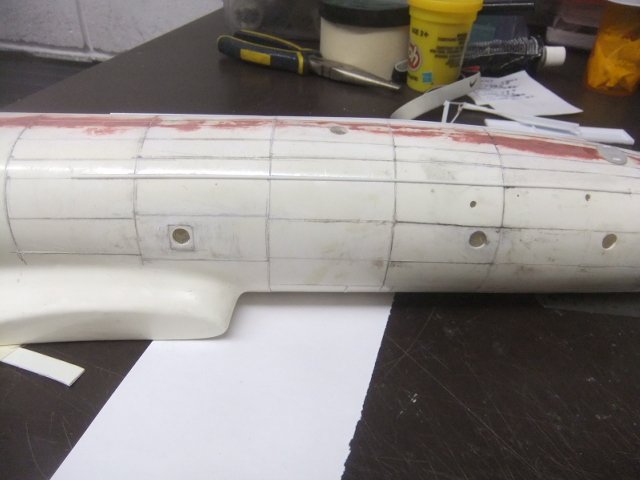
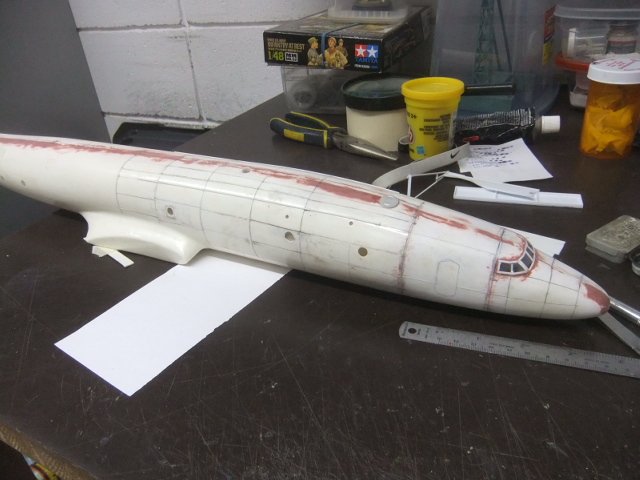
First I'd like to thank you for following this WIP , it's quite appreciated ! LOOCKHEED WV-1 CONSTELLASTION in 1/48 (APR 17th ) ..Today I continue ingraving the panel lines on the fuselage and add the top side details strip ! If you like to view the complete WIP on this project , juts follow this Google link : https://photos.app.goo.gl/GZvfX8dsdnYnsQ2W7 Here a pics of both projects Enjoy Jmarc
-
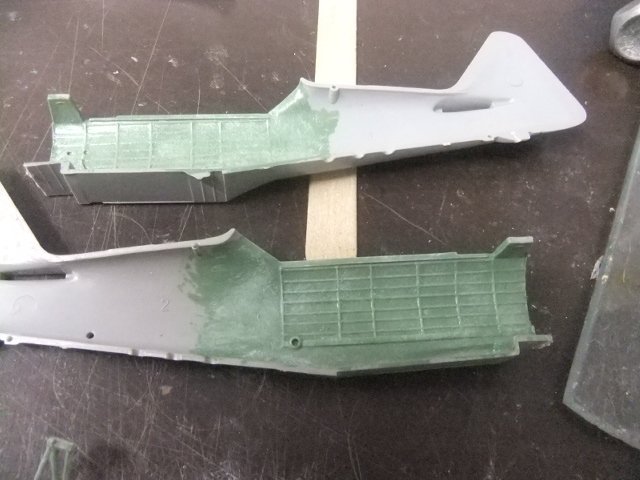
First I'd like to thank you for following this post , it's quite appreciated ! NORTH AMERICAN NA-64 YALE (BELCHER /MONOGRAM) (APR 17th ) ..Today , I painted ther inner fuselage and continue adding the detail to the cockpit side wall ! If you like to view the complete 'WIP' of this project , just follow this GOOGLE link. https://photos.app.goo.gl/FnKKnenRobnokJtSA If you like to view the T-6 TEXAN project I'm working on , just follow this GOOGLE link https://photos.app.goo.gl/Hk6hkr5HVKEz8rpk8 A big Thank you for following the project it's more than appreciated. hope my weekly update meet your expectation ! ! Enjoy .. and it's an 'RENDEZ-VOUS for more .... Jmarc
-
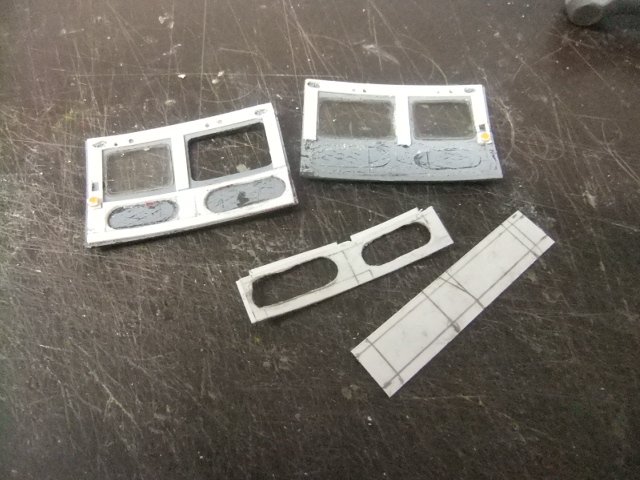
First I'd like to thank you for following this post , it's quite appreciated ! 1/48 BELL UH-1D (ESCI) (APR 17th ) Today I continue working on the inner details of the doors ! If you like to follow the complete WIP on this project , I have set up an GOOGLE page, just follow this link .. https://photos.app.goo.gl/NtNSgh1zJgx9jRSx5 If you like to view the other BELL UH-1 HUEY projects I have done so far .,just follow this link : https://photos.app.goo.gl/DqxAFqjkYiFPMMY47 Enjoy ! Jmarc
-

Maddog Manufacturing Opening for 2026
Mark Deliduka replied to Mark Deliduka's topic in Photos: On the Bench
Once again, another tour is in the making. Some started projects, continued work on others, there's lots to see. All those wishing to see this tour, please board the trams and buckle in. Tour is starting...... Here in the Hangar, we have the Russian An-2 Colt finally getting the engine and cowling on as well as some additional detail parts: The complicated canopy went on next, I don't think I did a very good job on this but it's staying as is: Later, when it was dry, filling of the prominent canyons and steps was done: That was all for that, so moving on to the next bay, we started a CH-47 Chinook that will eventually be delivered to my Italian Forces. The cockpit and interior was built up first: Later the interior was painted up: That completes the short tour of the Hangar, now on to the Shipyards.... Here in the Shipyards, further progress was made on my two Japanese capitol ships under construction. In this first slip is the Japanese carrier Shokaku, which received it's first coat of paint. I apologize for the washed out look of this, the light slipped lower and really brightened everything too much. Anyway, the hull got it's grey and the deck was painted a tan color: Later the deck was washed with a light brown wash, details were painted and the lower hull was masked off and painted: Finally, the flight deck and island were glued into place: Next will come the armament, antenna, additional detail parts, and decals, before the air wing gets done. In the next slip, we laid the keel for the Japanese battleship Nagato; which I found out later;, I already have this model built. Oh well, it's getting built again since nobody ever bought it from me. First, all the deck guns and additional parts were added to the main deck and a very rough painting was applied: Then the main bridge and superstructure was built up: Additional smaller sub-assemblies were added to the main deck and a more refined paint job was applied: You can see above how warped this main deck was. The main bridge and superstructure was then dry-fit to see where and how it fits: In this pic, you can see even more how warped the main deck is. The first two and a half inches were glued together and set aside to dry before trying to glue the rest of it: Once that was dry, we slowly went down the side of the hull, gluing down a few inches at a time to make sure the two hulls lined up properly: Eventually, we got all sides of this glued down, all lined up. Despite being fully dried, the bow section still pulled up a bit so a small amount of filler will be applied. The main superstructure is still dry fit in place. I'm gonna paint the details on it first, before gluing it down to the main deck: That's all we got done on that, there's a lot more still left to add, so hopefully soon we'll have this finished. In this last slip which just opened up earlier, we laid the keel for for a Skipjack Oyster Boat. The deck and cabins were built up and installed, the bowsprit was added and some additional details were done. Some preliminary painting is slated to be done soon: That concludes the Shipyards portion of this tour, now on to the Motor Pool.... Here in the Motor Pool, a lot has been happening. To start with, in this first bay is the Stryker engineering vehicle. The mine plow in front was assembled, waiting to dry before being attached to the vehicle itself: While that was drying, the additional detail parts were added to the vehicle: The wheels were added next; the plow was then installed; additional painting was done and now this is almost ready for weathering: In the next bay, we started a Canadian 15CWT Ambulance, starting with the chassis: Wheels were later added so that additional part for the chassis could be installed, like the sideboards, fuel tanks and other accessories: The driver's cab was built next, leaving it partially open to receive paint: Next the rear cabin was built: Paint was then applied to the interior of both before closing them up: Once they were closed up, they were installed on the chassis and the photo-etch parts for the spare tire holder and fuel can holder were built and the mud flaps were installed: All that is now drying and later the windows and decals will be applied before this is weathered and delivered. In the next bay, another vehicle was stared, this one is the UM Sherman with the dozer blade. All the bogies had to be built up first: Everything was then installed on the lower hull afterward: While that was drying, the upper hull and turret were worked on: And then the dozer blade was built up: Here it is all mocked up to show what it's going to look like: Later on, the photo-etch track slides were bent and cemented into place. I had also added the lower run of track to help keep the bogies steady: And that is as far as we got on that one, so on to the next bay. In this next bay we started the Foreart M19 Gun Motor Carriage. First the suspension was added to this: You can see that some of those posts were too delicate to handle installation and needed a replacement. Naturally these tiny, delicate pieces made aligning the wheels up properly almost impossible: Later the upper hull and turret were built and installed on them lower hull: Because several wheels had fallen/broken off, I installed the tracks to help hold them into place. Here you can see the near impossibility of aligned wheels: Here it is all mocked up with the tracks in place: After that the gun mount itself was built. This kit gave me the option of using the supplied metal barrels so I chose to use them: After that the gun mount was added to the turret. Yes, it does elevate as it should, being an anti-aircraft vehicle: Now this vehicle is ready for paint: That concludes our tour of the Motor Pool, so we'll take a small detour into the Miscellaneous shop to see that the two Dueling pistols are almost done. The only thing keeping me from declaring them done is the missing butt-plate piece that you can see missing: That concludes this tour, I appreciate all those who stop in to see this. Comments are always welcome too. We'll see you on the next tour. - Last week
-
untilEvent is a Swap Meet where modelers can bring their unwanted kits to seel or trade with other modelers and vendors in attendance. Scheduled for 19 September 2026 at Veterans of Foreign Wars Post 670, address is 3928 Doc Bennett Road, Fayetteville NC 28306. Their will be a display are for those who wish to show their latest or past modeling creation. Vendor set up is 0900-1000, doors open at 1000.
-
First I'd like to thank you for following this post , it's quite appreciated ! T-6 KOREAN FLOAT PLANE (OCIDENTAL + MODIFICATION) (APR 16th ) ..Today , I start the work in the flap ! A big Thank you for following the project it's more than appreciated. hope my weekly update meet your expectation ! ! Enjoy .. and it's an 'RENDEZ-VOUS for more .... Jmarc
-
First I'd like to thank you for following this post , it's quite appreciated ! 1/48 BELL UH-1D (ESCI) (APR 16h ) Today I continue working on the inner details of the doors ! If you like to follow the complete WIP on this project , I have set up an GOOGLE page, just follow this link .. https://photos.app.goo.gl/NtNSgh1zJgx9jRSx5 If you like to view the other BELL UH-1 HUEY projects I have done so far .,just follow this link : https://photos.app.goo.gl/DqxAFqjkYiFPMMY47 Enjoy ! Jmarc
-
In the early 1970's, two submarines were modified to carry out covert missions to recover discarded Soviet missile pieces and to tap underwater cables in the Sea of Okhotsk. One of the submarines, Halibut, had a large hanger previously employed for Regulus Missiles. It was outfitted to tow and service a camera and sonar tow body, timed The Fish. It also received a saturation diving chamber on its stern to allow saturation divers to install cable taps and recover items at depths of 400-600 feet. A second submarine conversion was perfumed on USS Seawolf, the second nuclear submarine constructed by the United States.. Originally equipped with a liquid sodium cooled reactor (which had some unique problems), it was conveyed in the late 1950's to a pressurized water reactor. In the early 1970's, it became the second Special Operations submarine. In this case, the hull was cut forward of the sail, and a 52 foot hull "plug" installed. This section had both an internal saturation diving chamber as well as a compartment to service and launch towed body "Fish". The submarine also received fore and aft thrusters (installed between the upper deck plates and the pressure hull) and later a set of skids to enable it to sit on the ocean floor during cable tap operations. A prior incident in which the submarine had just "bottomed", ended up settling into the ocean floor, with sand and bottom creatures entering the reactor condenser seawater cooling openings. Hence the installation of the skids. Seawolf operated in this guise to 1986, sharing Projects duties with Halibut and later when Halibut was retired in 1976, with Parche, which received Halibut's saturation chamber. The 1/350 scale model is an Iron Shipwrights resin hull and 3-D parts kit which depicts Seawolf in her later configuration.
-
First I'd like to thank you for following this post , it's quite appreciated ! 1/48 BELL UH-1D (ESCI) (APR 145h ) Today I continue working on the inner details of the doors ! If you like to follow the complete WIP on this project , I have set up an GOOGLE page, just follow this link .. https://photos.app.goo.gl/NtNSgh1zJgx9jRSx5 If you like to view the other BELL UH-1 HUEY projects I have done so far .,just follow this link : https://photos.app.goo.gl/DqxAFqjkYiFPMMY47 Enjoy ! Jmarc
-
 Model Car Parts Mounting Techniques For PaintingView the full article
 -
Learned that Model Motorcars Ltd was placed into voluntary dissolution on March 18th. The company traded for more than 25 years supplying CD instructional roms and books and a large range of after market items for builders of the 1/8th scale Pocher brand, both older Rivarossi and newer Hornby kits.I Marvin Meit the principal owner passed away in December 2025, probably triggering the eventual closure by any partnered left in the business.
-
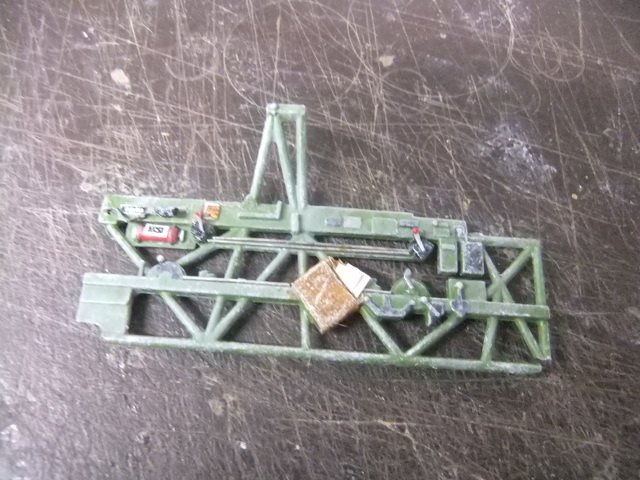
Thanks for following the WIP on this project , it's quite appreciated !, here the latest update AVRO C.102 JETLINER (3D +SCRATCH) (APR 14th ) Today , I complete the filling of the empty space ! If you like to view the complete WIP on this project , just follow this Google link : https://photos.app.goo.gl/uvk6ymGqZHgpWDaR9 If you like to view what I have completed so far on the AVRO CANADA project , I have set up an GOOGLE page for them , here the link: https://photos.app.goo.gl/FpZs5m3ic3c3eL329 Enjoy and it's an 'rendez-vous' next week for more on this particular project..!. Jmarc
-
Thank you for following the 'WIP' on this project ,it's quite appreciated ! (APR 06th)...Today I continue the work in the FLAP section ! f you like to see the complete WIP on this project , just follow this Google link : https://photos.app.goo.gl/1W6Eu6c7EvJeyLGT6 If you are curious and like to view the SCI-FI kits I have done in the past ,just follow this link : https://photos.app.goo.gl/D2FAQcJCoNhHNjkdA Enjoy ! jmarc
-
First I'd like to thank you for following this WIP it's quite appreciated ! (APR 14th)...Today I continue adding the missing details on the ceiling of the sub ! If you like to see the complete WIP on this project , just follow this Google link : https://photos.app.goo.gl/EZKenssCafCXix326 If you are curious and like to view the other WWII GERMAN sub I have done in 1/48 , just follow this link : https://photos.app.goo.gl/BcwASAzLsZRq5mQf7 Enjoy ! jmarc
-
First I'd like to thank you for following this post , it's quite appreciated ! 1/48 BELL UH-1D (ESCI) (APR 14th ) Today I continue working on the inner details of the doors ! If you like to follow the complete WIP on this project , I have set up an GOOGLE page, just follow this link .. https://photos.app.goo.gl/NtNSgh1zJgx9jRSx5 If you like to view the other BELL UH-1 HUEY projects I have done so far .,just follow this link : https://photos.app.goo.gl/DqxAFqjkYiFPMMY47 Enjoy ! Jmarc
-
I got a small pay so I ordered some decals I needed to finish my USS Albany, and picked up a couple extra models that were on deep sale: This has two ships in here, one to make the Z-37 and the other the Z-39: I've been wanting a Sherman with a dozer blade forever, and now I finally have one: Time to get back to the bench, I have another tour to start.....
-
The title says it all. This book is a comprehensive look at air campaign over Guadalcanal from November to December 1942. The text is organized into eleven chapters, conclusion three appendices, sources/acknowledgements and an index of names, ships, and military units. View the full review
-
untilTri-Fecta Model Show 4530 Spikes Way, Milton, FL, 32583
-
This is volume 2 of this series, Vol. 1 of which focused on the process of how the current Royal Army has evolved since WW II. The subject of this volume is the current and possible future structure and equipment of this army. View the full review
-
For a hobbyist like me, there’s nothing more exciting than opening the box from a new manufacturer. The anticipation of learning what they did differently, how the plastic cuts, what level of detail did they achieve and myriad others questions we all banter back and forth are answered when you open the box. The new Beacon Hobby multimedia ship kit of the Jack H. Lucas and their associated upgrade kit is the subject of these very questions. This appears to be Beacon Hobby’s first ship kit as far as I could see. They came out swinging with this release by not only launching the Arleigh Burke flight III ship, but an upgrade kit designed and produced by the manufacturer. This was really exciting for me because I expected everything to fit and be designed to mate up exactly. I can tell you that they did not disappoint me! View the full review