


ghodges
-
Posts
7,575 -
Joined
-
Last visited
-
Days Won
298
Content Type
Profiles
Forums
Events
Posts posted by ghodges
-
-
Nice Spit! While the WWII versions are the "classics", the later Griffon engine ones like yours look a little meaner in my opinion! Congrats, and if you have 2 weeks left that has to be at least 2 more models you can finish! 🙂
Gil

-
Thanks for the very kind words!
The time on the finish had more to do with overcoming painting problems than anything else. If you go to the "Build" topic area and scroll to the bottom there's a complete explanation of the problems. It took about 7-10 days to paint including the various primer stages, but generally about 5 days when it was in the final painting stages for the yellow and blue and final gloss coats, and that was due to time needed for paint to dry and then the time needed to mask off all of the yellow areas. In the end, it looks good on my shelf and in the pics, but wouldn't survive 30secs in a contest setting due to the various rough patches here and there.
As mentioned above, no one makes decals for the 1/48 Connie (but they do in 1/72 if you want to build one). I found a set of 1/32 DRAW decals for the BA Cutlass that had the number 8s for the tails that I needed. However, when I got the sheet, the numbers looked "less yellow" than the CAM Blue Angel decals I had and planned to use so I wasn't sure if I wanted to use them. Therefore I used the 8s on the Draw decal sheet to trace out stencils and paint them along with all of the other yellow trim. By the way.... those 8s aren't really "accurate" either..... if you look at pics of the real plane they were much larger on the fins! But, I also think they looked ugly and out of balance so I scaled them back on my model to a size that I thought looked good and how I think they should have applied them on the real one!
It turned out my qualms about the Draw decals were for nothing.... I had to use their block US NAVY on the bottom of each wing, and when I applied them they were plenty yellow enough, though they looked less so on the sheet. The decal 8s would have been just fine!
If nothing else this model taught me a few things, but I'm glad I've no need to build another one! Cheers!
Gil
-
Very cool idea and a scene that conveys a lot in a simple setting. I built 2 Texans and a BT-14 earlier this year using both of those kits, and I have to say I really preferred the Monogram kits over the Occidental, though get the job done. Looking forward to more!
Gil
-
A very good start indeed! I plan on doing a recce Mosquito too whenever I finally get around to it and look forward to taking notes from yours!
Gil
-
Sad news indeed..... Praying that the Lord focuses his family on their lifetime of loving memories of him to buoy them through their grief.
Gil
-
 3
3
-
-
Wow.... you've got my 6mos to a years worth of projects going in just the last month!
As for the vac clear parts..... here's my advice:
1) Coat or dip them entirely in Future. You can do that while they're on the sheet or after you cut them out; but BEFORE you try to glue them on.
2) I've found it easier to cut out clear vac plastic with cuticle scissors rather than with a knife. It tends to be on the tougher side as compared to plain white vac plastic and is also harder to sand its edges. The scissors give you greater cutting control.
3) Initially trim close to but not quite up to the part outline. It sometimes helps to use a fine tipped black sharpie and draw your intended cut line around the part so as to better see and follow the outline.
4) Once cut out, test fit, trim, test fit, trim, and repeat until you get the best fit possible. Remember it's MUCH easier to cut away more material than to fill and blend in a gap.
5) Once you're satisfied with the fit, put the part in place and tack the corners with a drop of superglue to hold it.
6) You can now use any of the following depending on how strong you need the joints to be: Super glue applied with a wire if it's going to be bearing any load and needs to be strong; liquid cement if you just want to be sure all the edges are somewhat welded but won't be subject to much strain; white glue/canopy glue to simply glue/fill/seal the seams; or even some Future for the same purposes if the seams won't be subject to any strain.
The main idea is to take your time, get the best fit, and glue slowly and carefully. Hope this helps!
Gil
-
Sharp!
Gil
-
Quite impressive and it looks perfectly at home in the setting you created! Thanks for letting us ride along!
Gil
-

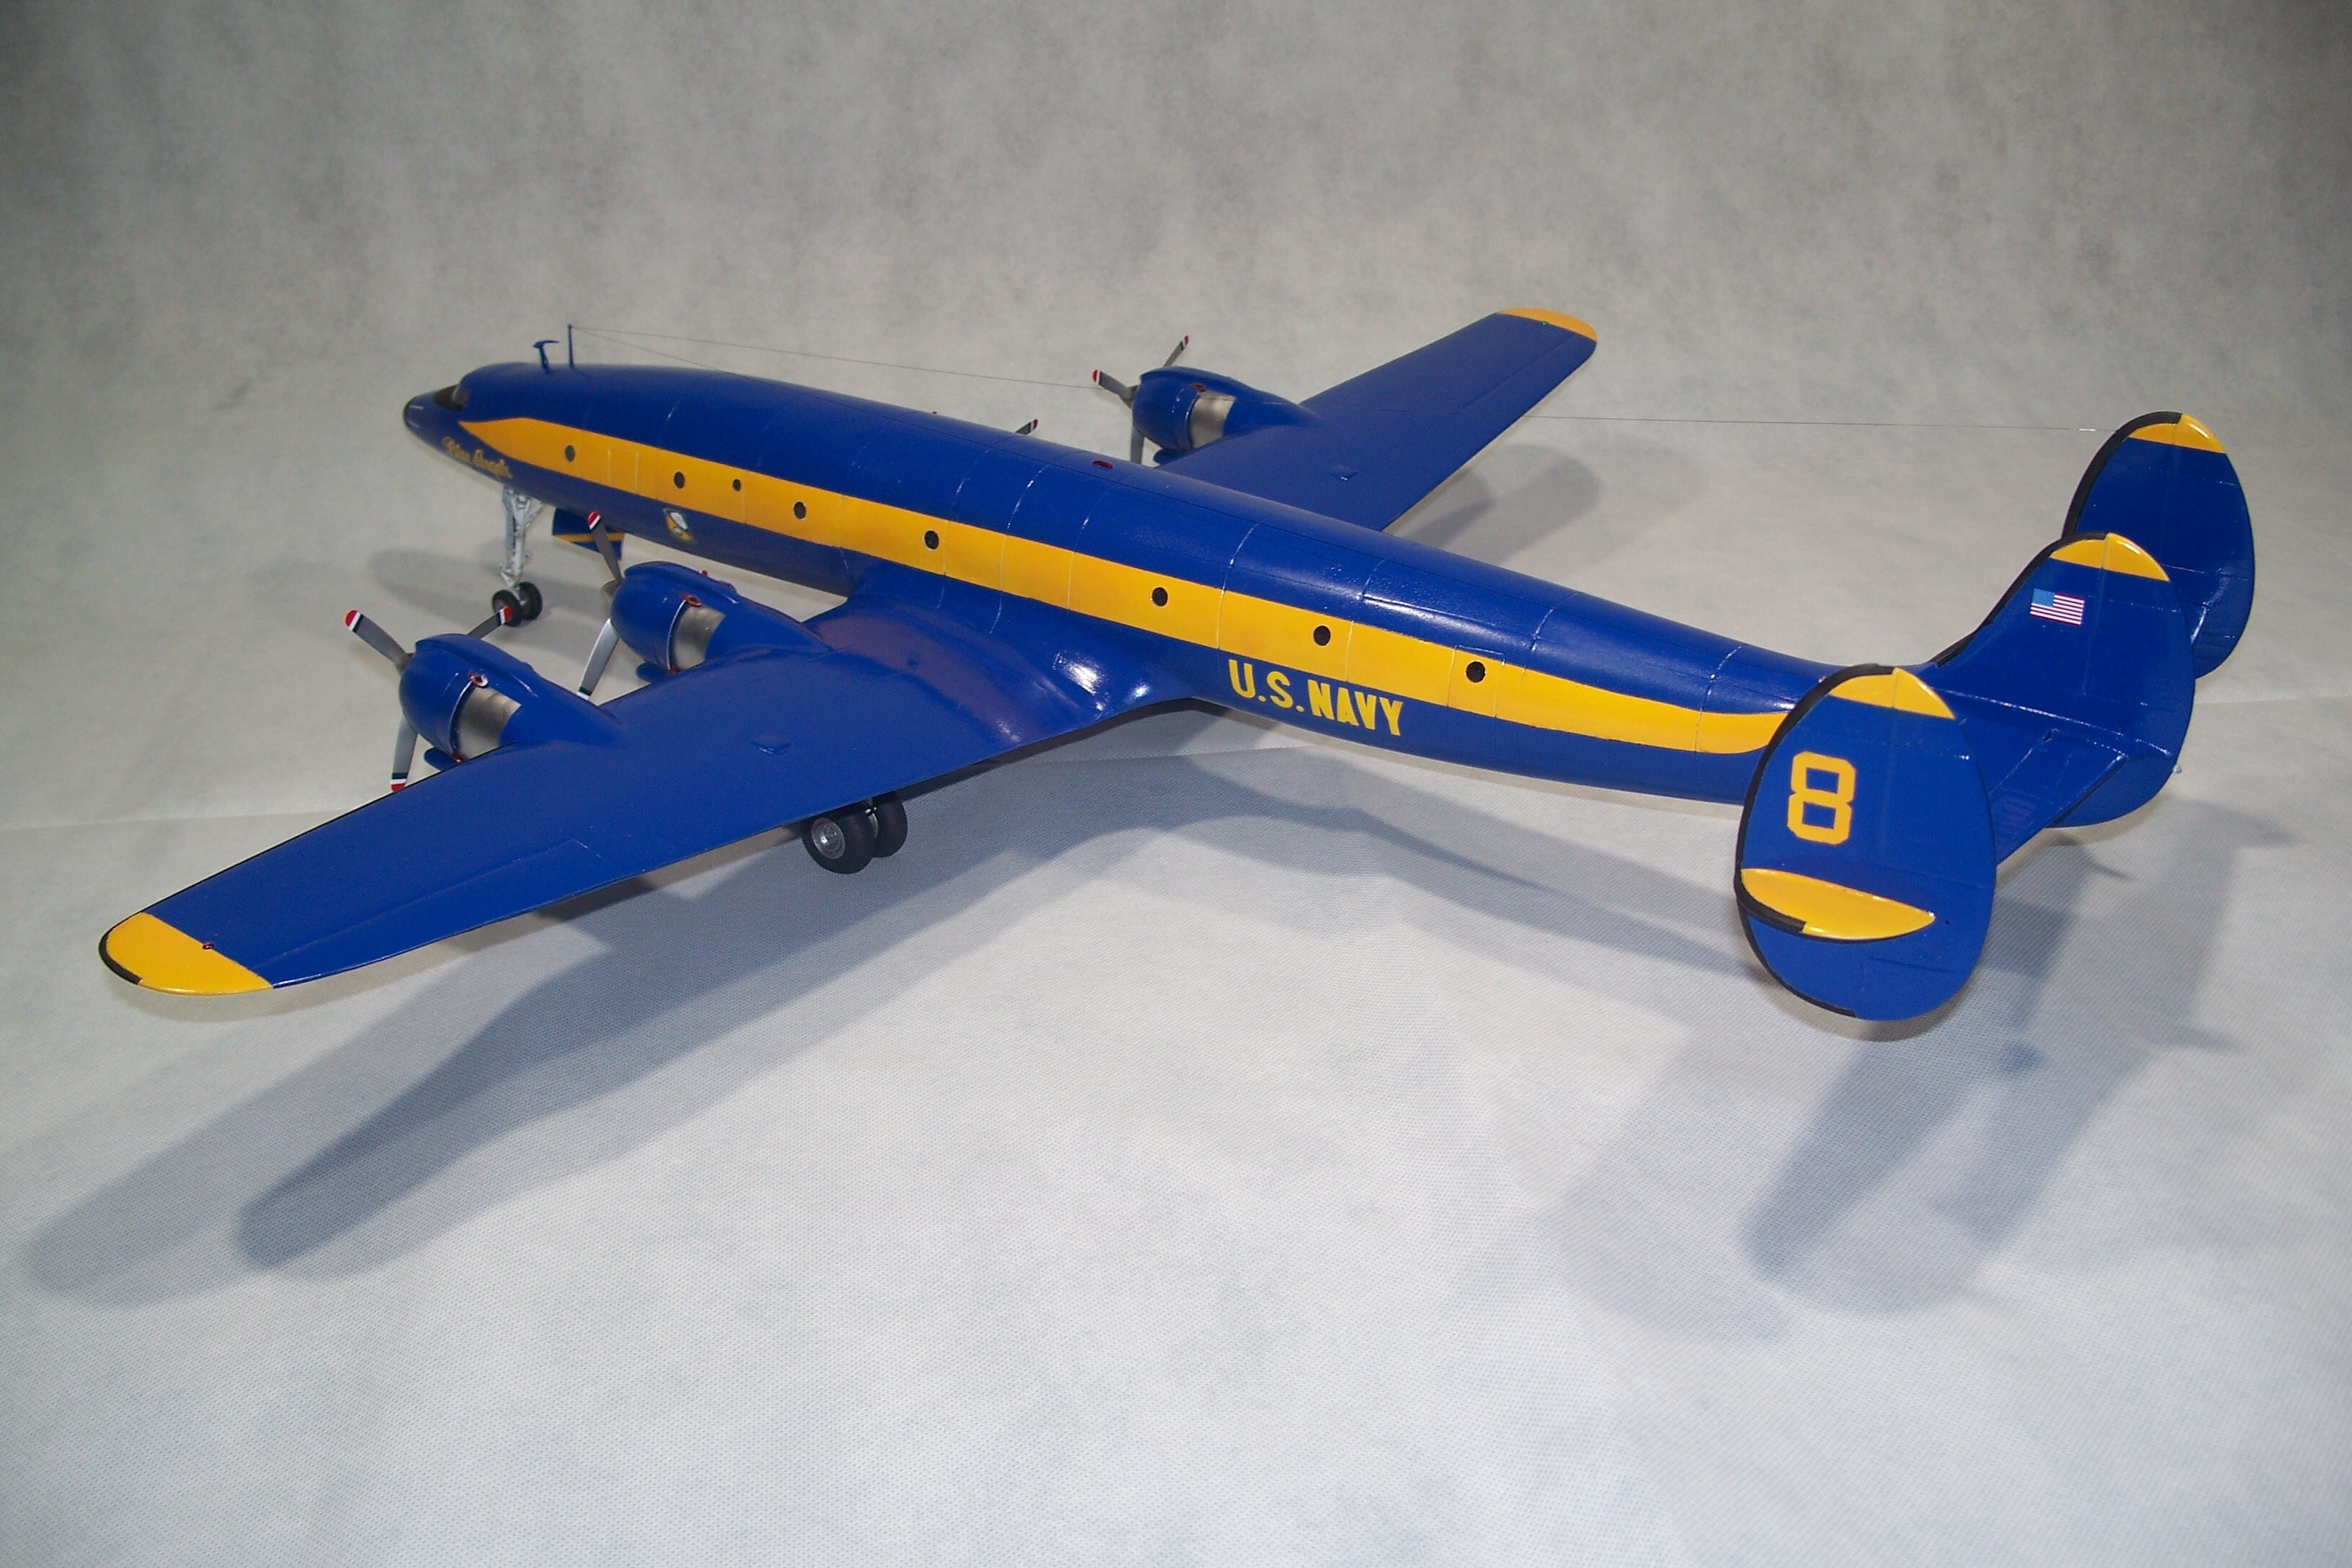
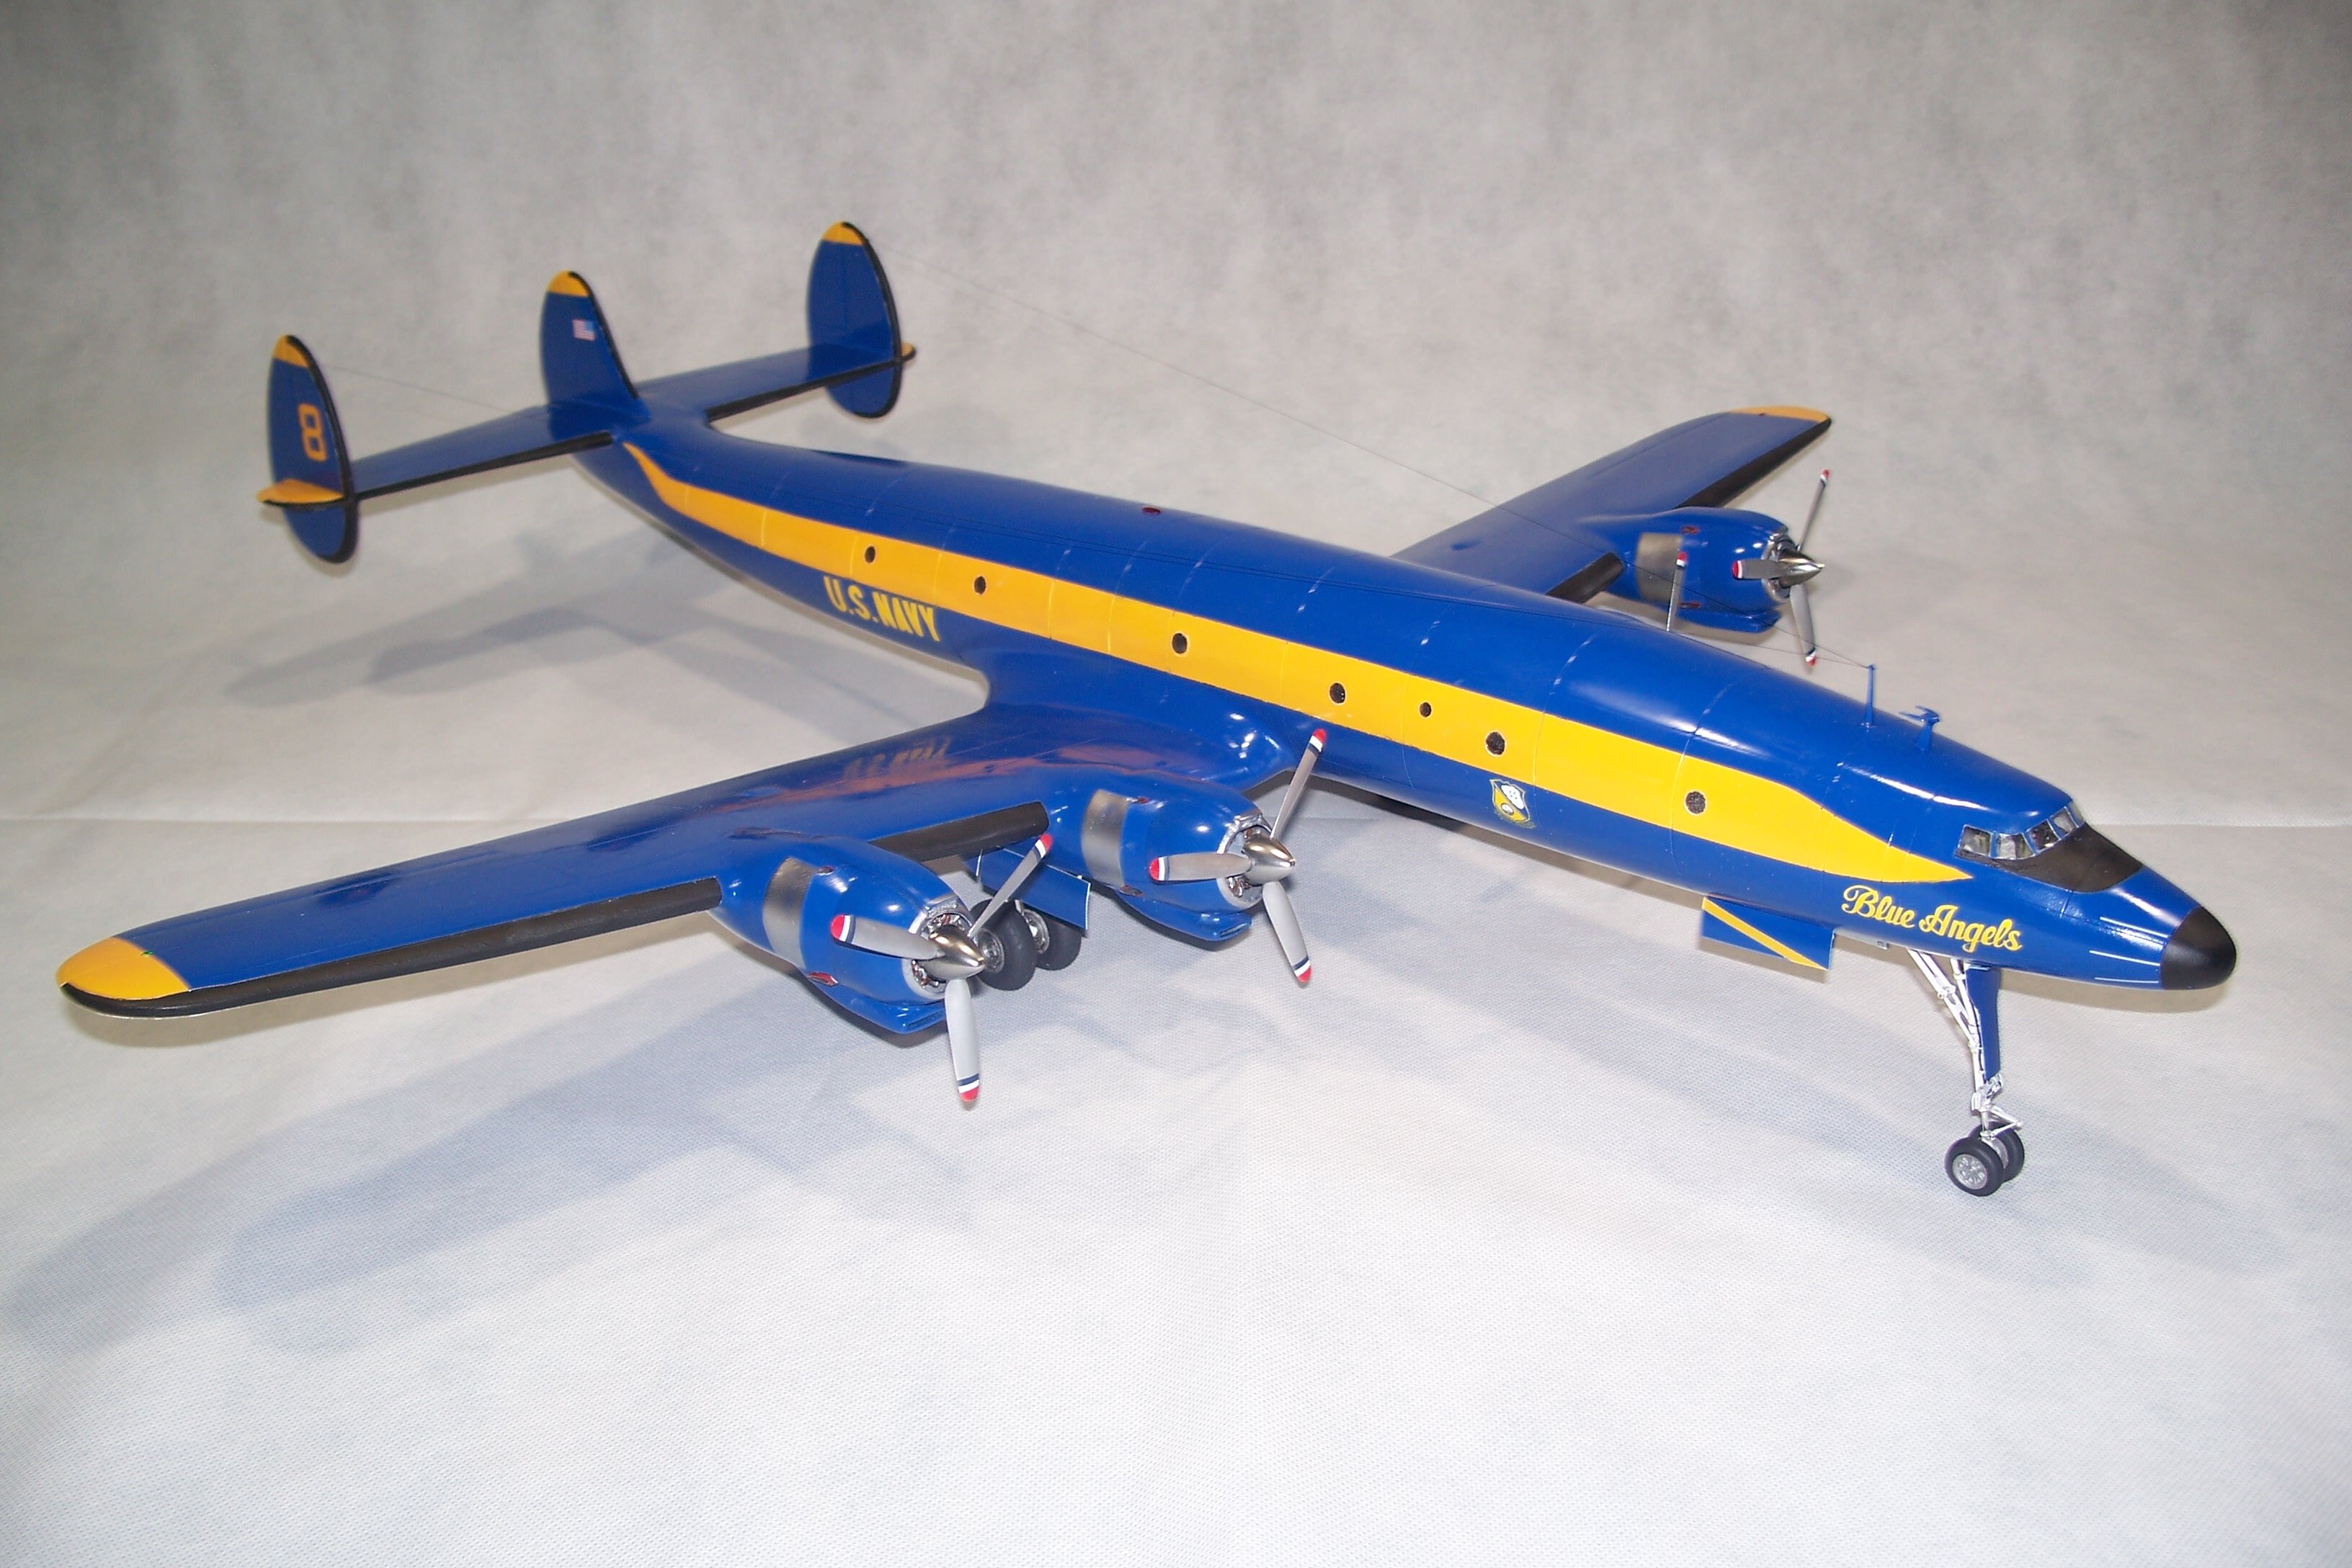
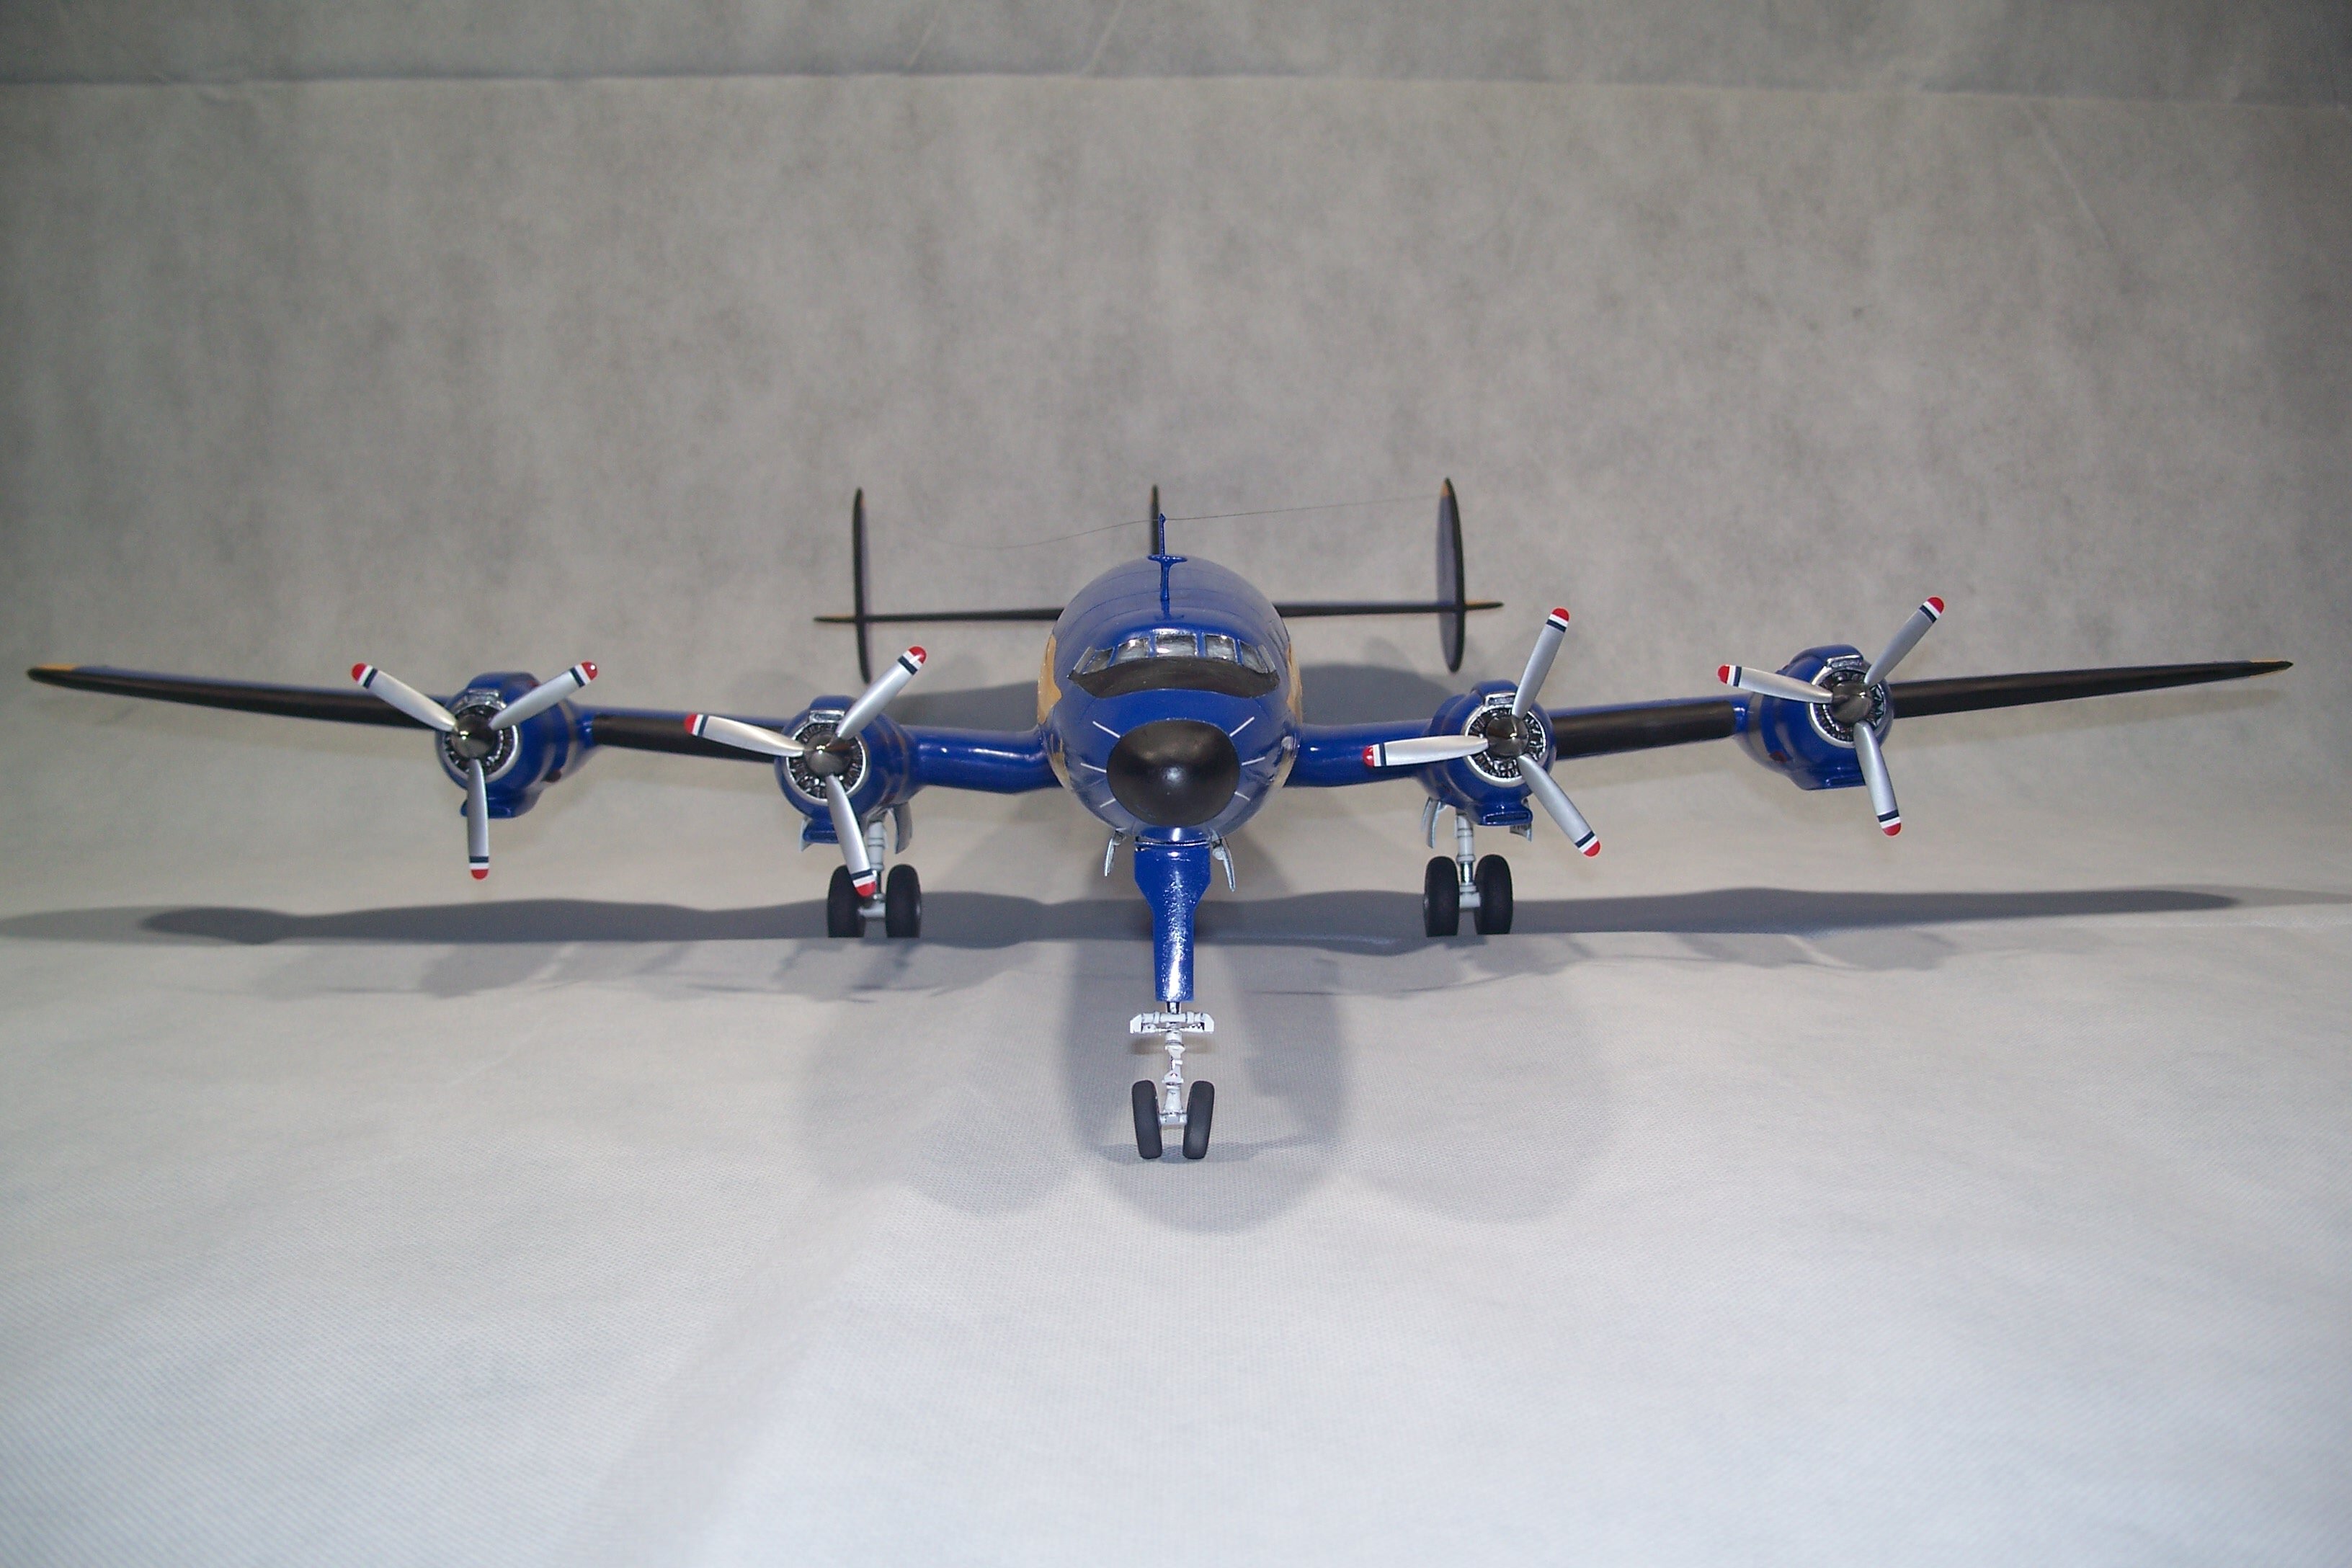
This is the ID/Combat vacuform kit of the EC-121 Constellation built instead as the Connie used by the Blue Angels in the late 1960s. Everything except the basic airframe had to be scratchbuilt or grabbed from spare parts or repurposed aftermarket. There's a complete "in progress" post on building it and its components in the "build" topic area for anyone interested in the gory details. All of the small round windows were made by using UV cured clear resin that was then sanded and polished with a final coat of Future to brighten them.
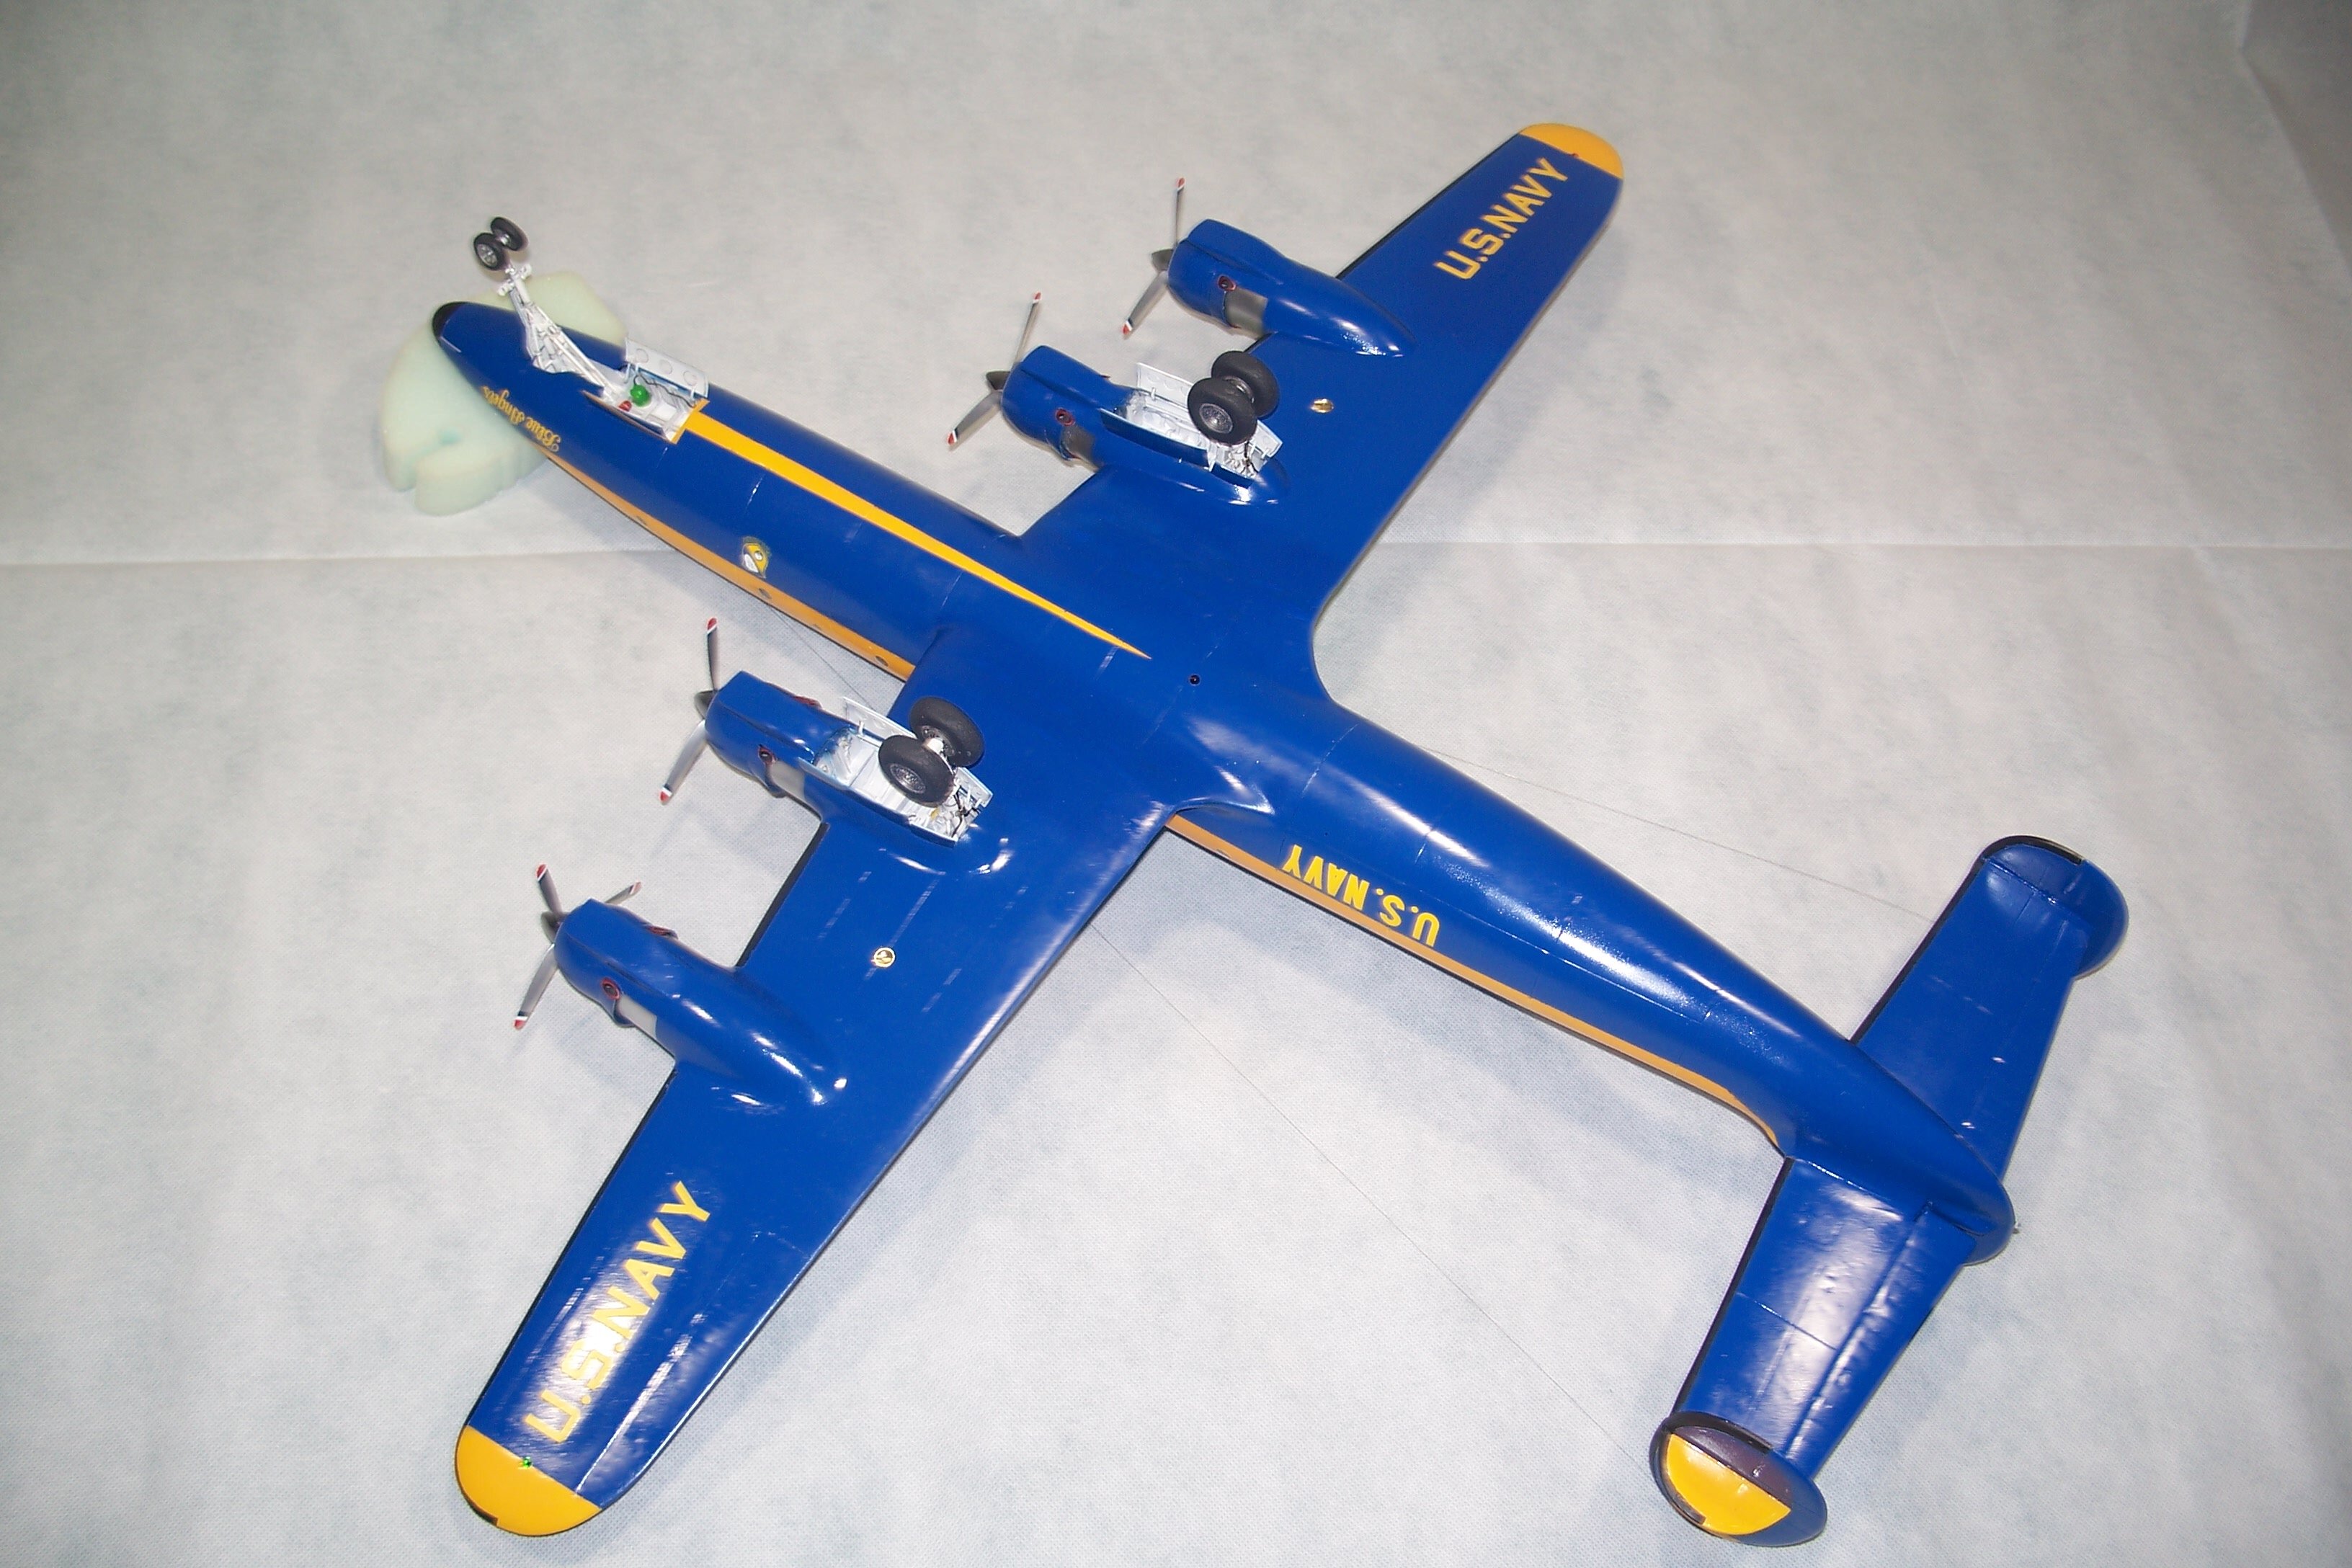
The model was (in the end) painted in Testors Gloss Dark Blue for the BA Blue (I was out of MM BA blue!) and the BA yellow was done using Tamyia rattle can Camel Yellow applied over flat white primer. The bare metal areas on the cowl sides are Alclad Airframe Aluminum while the prop spinners and cowl leading edges were sprayed Alclad Chrome. The Blue Angels markings came from 2 different sheets, BOTH of them 1/32 scale (to allow for the larger 1/48 aircraft lettering); a CAM A-4 BA Skyhawk sheet and a Draw Decals F7U-1 Cutlass Blue Angels sheet. I did, however, make stencils and mask and paint the yellow "8"s on the tail fins. The American flag decals on the center fin are actually ship decals from the spares box!
And now on to the rest of the pics!
And... just to answer the question "where would you put it'? I have a display case purposely built big enough for such models. The others currently in the case are a 1/48 B-29 and B-50, as well as a 1/32 B-24D, F-86H, and F-84G.
Questions, critiques, and comments welcome, as always.
Gil
-
5
-
 1
1
-
-
The paint? Therein lies a tale.......
The idea was to use KRYLON BLUE, which is what's recommended on the CAM B.A. decal sheet since it's (supposedly) what the team uses to touch up the jets during the show season. HOWEVER, SOME pics from the 60s (Tigers and Phantoms particularly) seem to show a slightly darker BA Blue than what you see on the later Skyhawks and Hornets the last 40 years.
Thus, I decided to prime the entire model in gloss BLACK and then apply the Krylon Blue to darken it down a bit. The problem is that I could NOT get the Krylon Blue to spray on without reacting and crinkling in some places (2-3 times sanding and repainting). SO.....
I fell back to plan B/C, sanding out the problems as best I could (but not all were eliminated), repriming in black, and then I used the SMALL bottles of TESTORS GLOSS DARK BLUE (I'm out MM BA Blue), thinned with lacquer thinner and airbrushed on in as "wet" a coat as I could. That worked well enough, though the color (to me) looks more "modern" than I'd planned.
The good news is that IF you cannot still find MM BA Blue in the bottle, you probably can find the small Testors bottles of gloss dark blue, and it seems to work well for the Blue Angels color, especially applied over gloss black.
By the way..... the BA Yellow trim was done with Tamiya rattle can Camel Yellow, applied over a flat white primer, which seems to match the decals decently if not perfectly. Hope this helps!
Gil
-
1
-
-
Thought I'd post my in progress pics of my 1/48 vacuform Connie as I should have her done by the end of the week. To begin with, instead of doing any EC-121 version I decided to opt for Blue Angels markings, as used by them in the late 1960s. This not only made the color scheme a bit easier, but also allowed me to skip using the tip tanks and any of the radar domes, saving me some vac work.
Keep in mind that everything but the airframe had to be scratchbuilt or pirated/adapted from spare parts or other aftermarket sets not meant for a Constellation, since no one makes stuff for this old vac kit. More info is by the in progress pics below.....
This is what you get.......
The basic wing assemblies. Note the brass tubing spars and how they're boxed in inside the wheel wells.
This is the main wing spar bulkhead built to strengthen that area when finally assembled.
Here it is in place....
The nose gear well was a little more complicated than the usual rectangular box
This is the bare bones starting point for scratchbuilding the landing gear. The nose tires are from the spares box and the main tires are Eduard Brassin B-29 tires.
These are the finished landing gear as detailed with soldering wire, tape, and plastic rod. Note the main gear now have aluminum tubing for their oleo sections.
This is a test fit of the gear to the plane to check its sit.... the wings and tail planes have yet to be glued on...
Oddly, my kit did not include a clear canopy, so I had cut that area out and glue it together to make my own mold.
Here's a couple of the clear shots made using my old Mattel vacuform, which was just big enough to get the job done.
I decided early on to skip building any interior except for a very rudimentary cockpit since the windows are so small.
I also decided to wall off the interior so as to prevent see-through and help blacken the interior. The round windows have all been filled at this point with UV cured clear resin. Save your plastic fiber yard signs as they can come in handy!
The assembled engine cowls and the assorted fuselage parts. Almost ready to close it up at this point. Note the epoxy putty on the cowls to help correct parts of them.
The cowls have been primed, the engines selected from the spares box, and the vac prop spinners are now being worked on...
The kit cowlings were too plain and simplified, needing cowl flaps, exhaust pipe holes, and a curved indention dipping in behind the cowl flaps. This shows how I made the cowl flaps after carving their sides down and opening them up.
Test fitting the finished nose gear and the nose gear door....
All of the gear doors had to be scratchbuilt. Their interior detailing is bogus for the most part, but at least they look "busy". The hinges were made by punching out concentric rings of sheet plastic and cutting them in half.
Test fitting all of the main gear doors.... note at this point their interior "skins" have yet to be added.
One of the problems with a 3ft long fuselage is how to hold it for painting and drying. The model was too big to add the wings and then try to paint the entire model, so the fuselage and wings were painted separately. The wings were then added, the wing roots filled and sanded, and then the wing roots were repainted to blend them in. Here, the fuselage black primer is drying.
Here she is as of today... decaled and awaiting final assembly of all of the fiddly parts over the next couple of days. Final pics will be posted then!
Questions, critiques, and comments welcome, as always!
Gil
-
2
-
-
Nice progress, and that interior could pass for pics of a museum restoration underway!
Gil
-
I used to have that kit, but no longer do.... however, I found a video "in box" review including close-ups of the parts on the sprues, so try going to this link, scroll down to the video, click on it, then Fast fwd to 13:28 and stop it there. You should see parts 22/23 and if you look just above there, a shot of the back of part #24. That at least shows were it is approximately on any sprues you may have, and with further viewing maybe you can see the other side (perhaps earlier when he's showing the un-numbered side and you know where to look for it). Hope this helps!
https://www.scalemates.com/kits/airfix-a16001a-focke-wulf-fw190a-5-a-6--262863\
Gil
-
2
-
-
Heck of a nice looking Harrier! Looking forward to the finished presentation!
Gil
-
I'm actually doing this Blue Angel Connie using a combination of 1/32 and 1/48 BA decals....
Gil
-
What a coincidence! I too am working on a 1/48 vac Connie, though yours will obviously be much more detailed than mine! I'm finally in the painting stages and with luck will have it done in a couple of weeks.
Gil
-
1
-
-
(In my best Obi-Wan voice) Oooo... "By-Plane".... now there's a name I haven't heard in a long time......
Good looking build and very nice display! What did you rig it with?
Gil
-
Good looking Grumman!
Gil
-
Good work, especially overcoming the problem of the too low wing that would have had the prop swinging through the canopy! The shelf of display is as good a place as the shelf of doom if and when you ever want to revisit them for more work. Congrats!
Gil
-
I haven't used them myself, but here's a link to a full review of them using an airbrush and a brush:
http://www.modelwarships.com/reviews/misc/True_North/TrueNorthPaints/TrueNorthPaints.htm
Hope this helps!
Gil
-
Excellent progress and a good tip on using the silly putty to secure and align a model for assembly!
Gil
-
Truly impressive little jewels, even more so when you look at all of the corrections and body work done to the airframes that came out so smooth that it's not evident without seeing the in progress pics! Thanks for sharing!
Gil
-
Great job on getting info out..... in fact, I got TWO notices! Also, kudos for opening the hotel reservations on a Saturday afternoon so more working folks have an equal shot at them.
Gil
-
Actually, though James is close, I was fired as RC-11 for vocally (here on the DF) opposing the Eboard's proposal at the time to force ALL Regional contests to be 1-2-3 shows. I knew there were some GSB shows around the country who hosted Regionals from time to time, (Pittsburg, etc.), including one show in my R-11 that I rotated the Regional through every 3-4 years. Their rule, if implemented, would have hampered RCs from having more clubs to pick from, would have prevented clubs with years of successful contest experience from hosting a Regional, and all despite IPMSUSA having no financial stake in ANY of the shows. I wrote my dissenting opinions on this forum under my name only as an IPMS member and never as "RC-11". The irony was that after I was fired, the rule was never implemented!
Oh well! If there's anything to take away from the above, it's simply that we as members have the obligation to oppose what we see as poor decisions made by the Eboard. We have a more limited ability than the Journal editor or the president, since they have columns. However, you can send them emails, inform your fellow IPMS club members (at least the ones interested in the running of IPMS) to be sure they're aware of issues, and contact your RC to let him know where you and your club stands on things. If you attend the Nats, I encourage you to attend the IPMS business meeting because it's your one chance to stand up and question Eboard members face to face to let them know that although they are in office, they are accountable to the membership.
IPMS is like any other club, locally and nationally. Only a very few of the entire membership are interested in how things are run and/or volunteer to help run them. That's not going to change and those who volunteer have to accept that (which is why the President's labeling everyone else as "freeloaders" was a waste of time). It's even more frustrating when this is all about running an "hobby" organization who's sole purpose is supposed to be to help the members have fun. That, however, doesn't make any of these issues we have to tackle unimportant to those of us who want a better IPMS in the future. We'll just have to suffer through some rough times before we get back to the fun!
Gil
-
3
-


MONOGRAM 1/48 GRUMMAN AVENGER x 2 !
in Aircraft
Posted
Very nice pair of Avengers the hard way!
Gil