All Activity
- Today
-

This week at MADDOG 1/48 CANADIAN SUBSIDIARY plant ( WEEK # 17)!
Jmarc replied to Jmarc's topic in Photos: On the Bench
WEEK # 17.. # 7 Échelle d'AÉRONEF ( SCRATCH ) Si vous désirez voir le montage intégrale visitez ce lien Google https://photos.app.goo.gl/EuBvS2ZXrUBh9Bq8A (MAI 02) Cette semaine j'ai terminer la structure, l'es peinte fait les dernier détaille et le projet es compléter ! #36 Petit NIC NAC ... (SCRATCH) Si vous désirez voir PLUS ,visitez ce lien Google https://photos.app.goo.gl/mzzBBq5WxJKEVh1v9 Si vous désirez voir l'intégrale de tout ls projet fabriquer a date , visiter ce lien Google : https://photos.app.goo.gl/8h1ExuE1BfxczTHP9 (MAI 02) Cette semaine j'ai fabriquer les dernier détailles et le projet es compléter ! On the CANADIAN SIDE .. # 2 .....Le BOMARC IM-99B et sont HANGAR de lancement (project REVELL + MODIFICATION +scratch) si vous désirez voir le montage intégrale de ce PROJECT visitez ce lien Google: https://goo.gl/photos/q4rxkYiwrrbd8Tmi8 (MAI 02) Cette semaine j'ai laver le wash , assembler les moteurs ,retoucher les ligne de panneaux et fait les décalques , J'ai aussi ajuster la pole de protection et l'es peinte , j'ai fait le dry-brush sur les protecteur des échappement et trouver la forme pour ceux des entré moteur , en es mouler/ caster 2 ! finalement fait un dernier dry-brush sur le lanceur et fait un test de fit sur le lanceur Agrandir cette imageCliquez ici pour la voir à sa taille originale. Agrandir cette imageCliquez ici pour la voir à sa taille originale. Agrandir cette imageCliquez ici pour la voir à sa taille originale. Agrandir cette imageCliquez ici pour la voir à sa taille originale. 3...JIG D'ASSEMBLAGE DU AVRO CF-105 ARROW (PROJECT SCRATCH) Voici le lien Google pour le montage complet du projet (c'es la phase 2) https://goo.gl/photos/d6TczBBAmLeLeeGRA (MAI 02) Cette semaine j'ai terminer les dernier détaille et le projet es compléter ,il ne reste qu'a le mettre sur la présentation ! # 4 MOULE MAÎTRESSE de la section extérieure des ailes (kITBASHING +SCRATCH ) si vous désirez voir le montage intégrale de ce project visitez ce lien Google ' Phase 3 ': https://photos.app.goo.gl/3pBpv8FH0OhzQalQ2 (MAI 02) Cette semaine j'ai compléter le moule maîtresse et débuter le travaille sur les échaffaudagges , terminer la première et l'es peinte ! Enjoy ! Jmarc -
Hello all! I'm Ethan - I spend my summers (for now) in the Detroit area, and go to school in East Lansing (go green!). I'm not a member of IPMS (maybe one day when I have a bit more time), but I figure it couldn't hurt to get on here when I do have time to build a model or two. I mostly plan on building 1:35 armor, although a little bit of aviation and navy can't be ruled out. Have a good one all!
-
 spartymodeler joined the community
 - Yesterday
-
 rojo joined the community
 -
This week just off the bench in 1/48 scale ( update # 21)....
Jmarc replied to Jmarc's topic in Photos: On the Bench
Update # 21 Hi , here a pic of the project i completed this week..it's in 1/48 scale AIRFIELD MAINTENACE BOXES/ FOD https://photos.app.goo.gl/mzzBBq5WxJKEVh1v9 CIVIL AIRCRAFT LADDER https://photos.app.goo.gl/EuBvS2ZXrUBh9Bq8A AVRO CF-105 ARROW LANDING GEAR ASSEMBLY JIG https://goo.gl/photos/d6TczBBAmLeLeeGRA Like to see what I have completed so far this season(2024) , just follow this GOOGLE link: https://photos.app.goo.gl/i4zDpQbmY5qENSmV6 Like to see more of my previous completed projects in 1/48 scale ..................... Like to see what I have completed in 2023 season (100 projects) , just follow this GOOGLE link: https://photos.app.goo.gl/sBr6P2kZXZedUQhV7 Like to see what I have completed in 2022 season (148 projects). just follow this Google link: https://photos.app.goo.gl/aY5nhWFbhBh3VA2S6 Like to see what I have completed in 2021 season (110 projects). just follow this Google link: https://photos.app.goo.gl/KszWEo2c9QT5RMGNA Like to see what I have completed in 2020 season (65 projects) ,just follow this Google link : https://photos.app.goo.gl/e4xhKXkQZmqdxwu48 Like to see what I have completed in 2019 season (35 projects) ,just follow this Google link : https://photos.app.goo.gl/nu4YRwUuE6yuWxLT6 Like to see what I have completed in 2018 season (52 projects) ,just follow this Google link : https://photos.app.goo.gl/dgegdRPaYR3VLHwm9 Like to see what I have completed in 2017 season (33 projects) ,just follow this Google link : https://photos.app.goo.gl/qjSfLvyMCPDpg5EH7
-
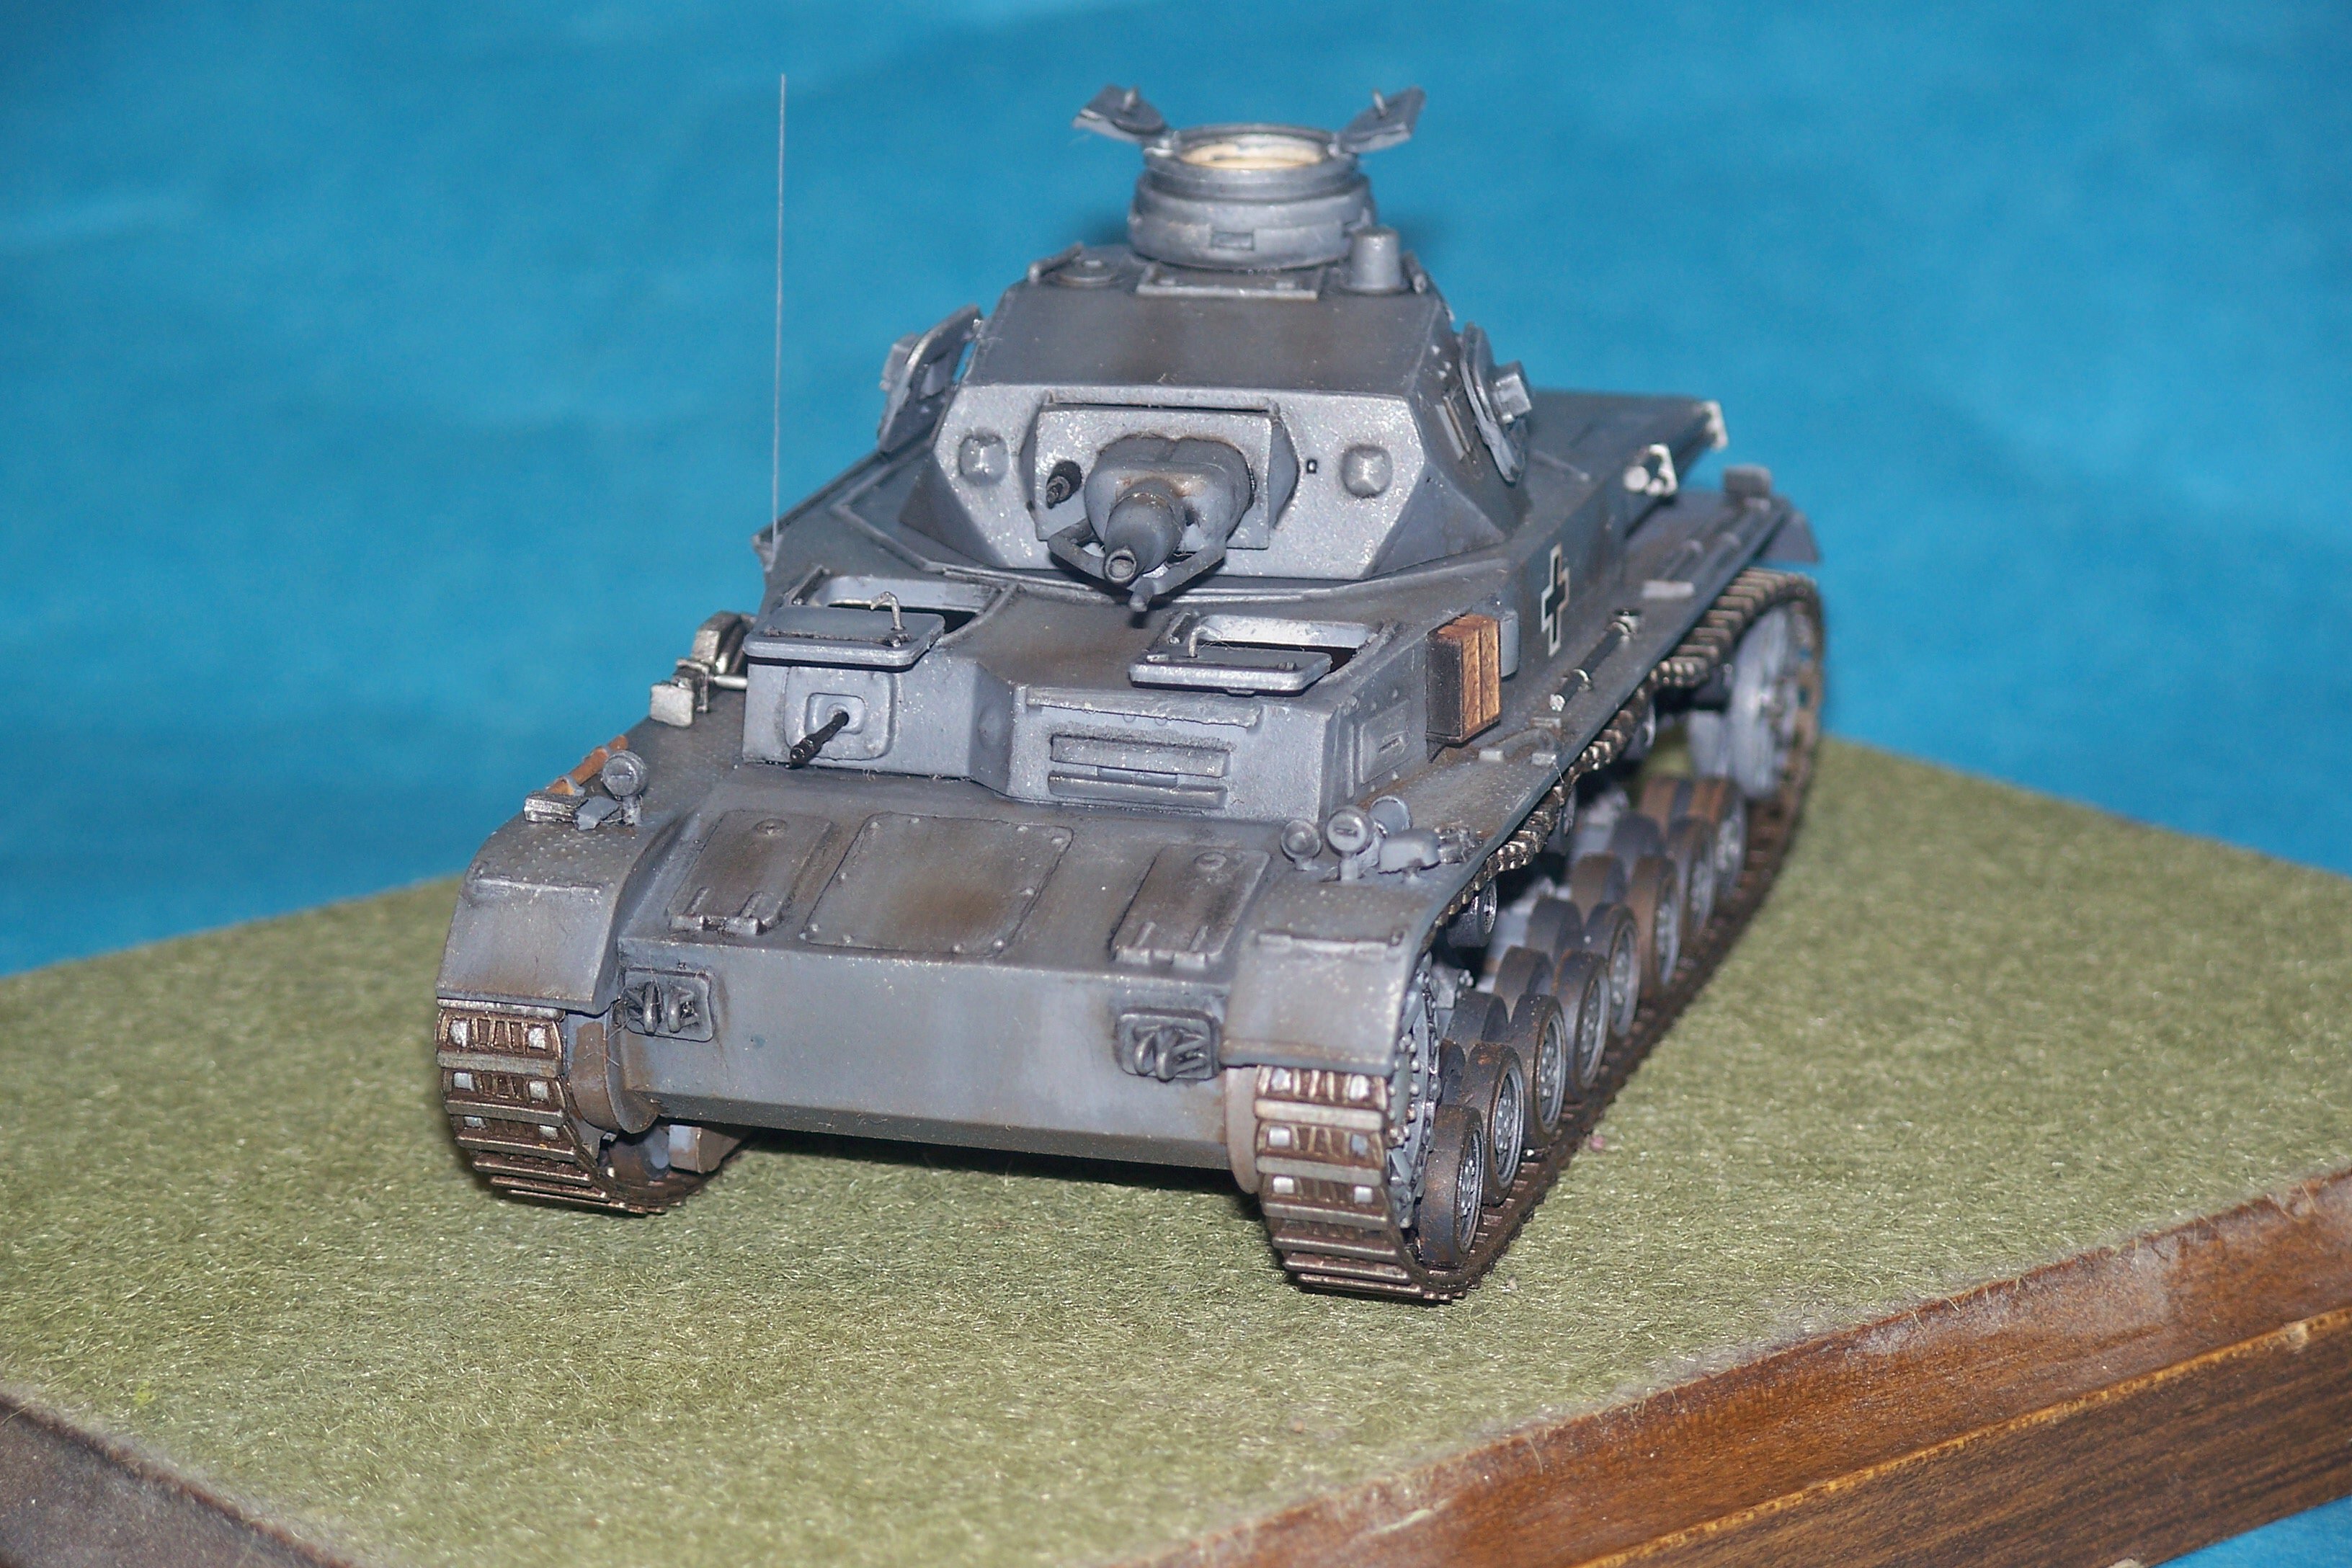
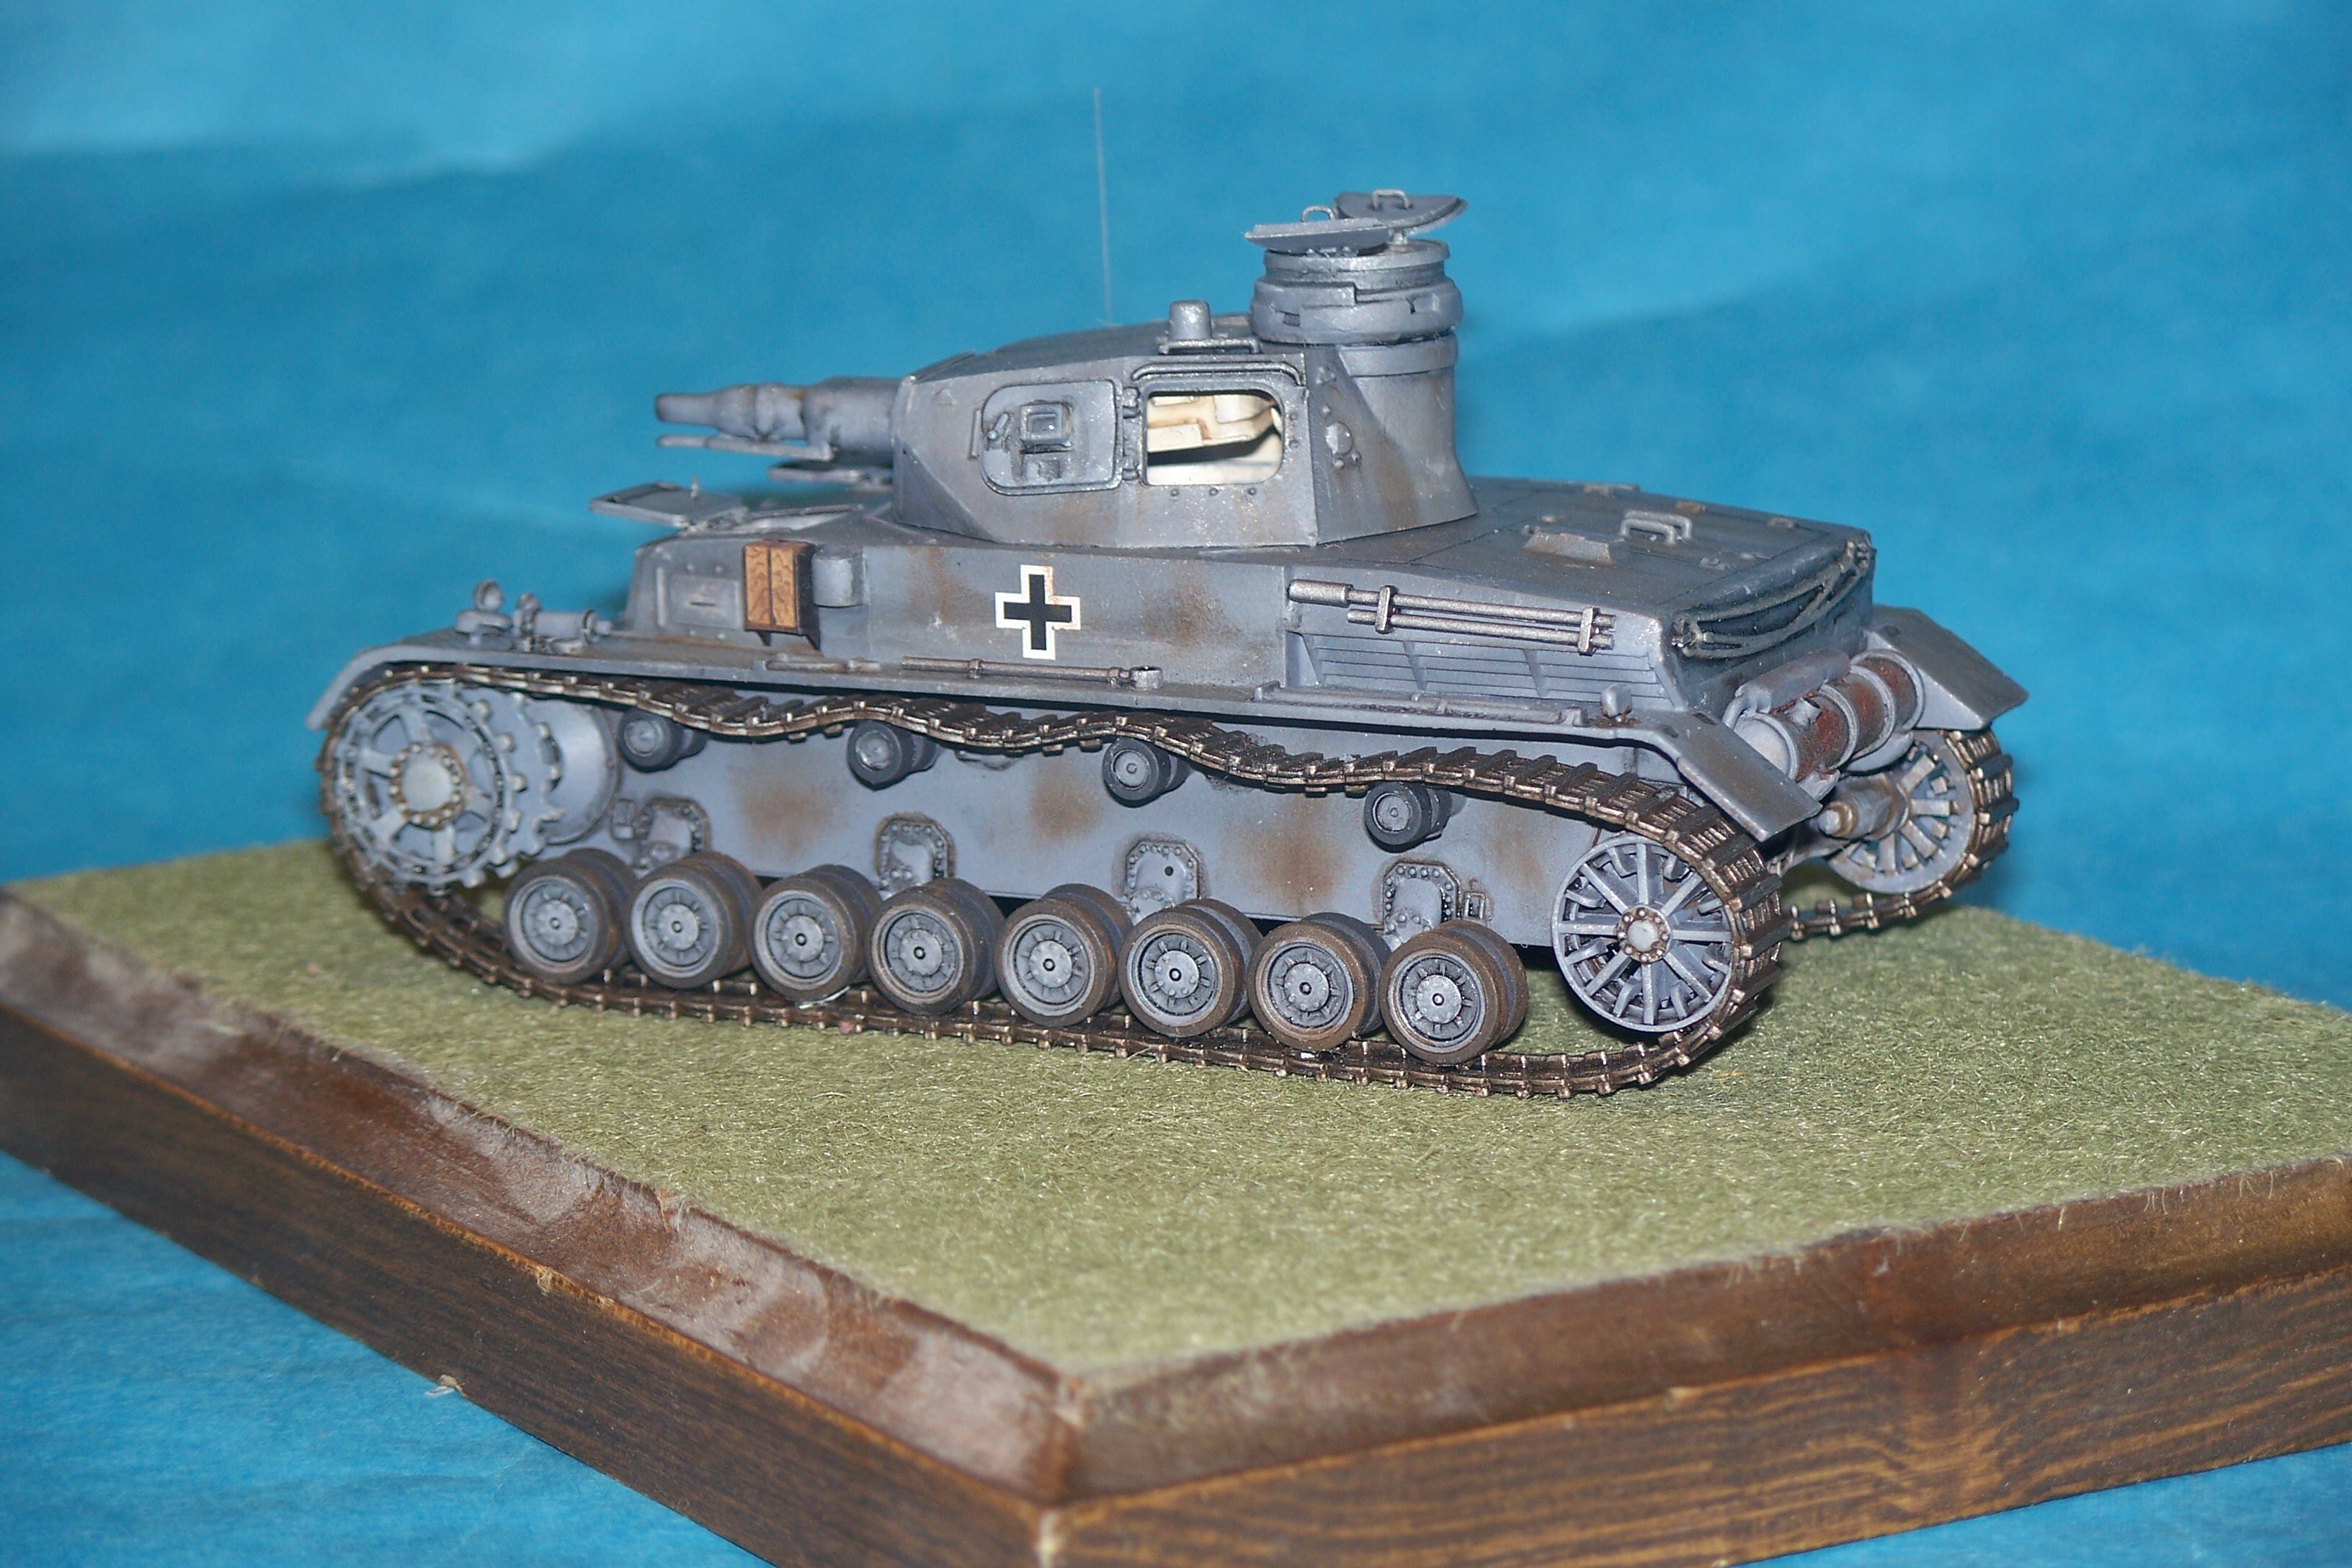
Although 1/48 aircraft are my primary gig, I do build 1/48 armor every so often. Our club currently has a "50 Shades of Gray" build theme going so I decided to tackle the old 1/48 Bandai Panzerkampfwagen IV Aus D; rubber band tracks and all. The kit comes with some interior parts.... I enhanced it by adding the radios and coaxial machine gun breach on the right, and some rudimentary (but not "accurate") controls for the driver on the left along with the instrument cluster on the top of the transmission housing. I also built up a floor and ammo rack behind the driver as the kit had nothing but the circular turret floor. I left out the kit engine as I closed up the engine inspection hatch on the back and it wouldn't be seen. I decided not to try to add any stowage or extra tracks except for what the kit provided. Other than that, I just tried to add some color variations and some moderate weathering since these were mainly used in the first half of the war. On to the finished pics! Considering my lack of true experience with armor, this suits my shelf just fine and also satisfies the club theme. Critiques, comments, and questions welcome! Thanks for looking! Gil
- Last week
-
 ICM first issued a Gloster Gladiator in 2019 and a Sea Gladiator in 2020. For 2024 the Sea Gladiator has been issued again with a set of three Royal Navy figures included. Except for the figures and the box art, this new kit is the same as the 2020 Sea Gladiator kit. The kit includes six trees of grey plastic parts, one tree of clear parts, decals, and instructions. View the full review
-

Maddog Manufacturing Open for 2024
Mark Deliduka replied to Mark Deliduka's topic in Photos: On the Bench
Thank you Jean-Marc and you're welcome! -
Thank you Gil! It feels great to build something like this for a relative.
-
Got a small update on progress. Tires and wheels have been cast and work has commenced on the suspension. The rear suspension consists of active springs, torsion rods and two floating axles. The springs are made of strip brass, soldered together at the ends starting with the shortest first. The torsion rods are made of brass tubing. With those done front springs and the front axle will be next. After that the cab will be worked on. One door is done including the brass hinges. The cab itself will take some additional alteration before the doors can be hung.
-
WWWWWWWWWWWWWWhat a treat !.... Thanks MARK for the update and motivation !!!
-
Thanks for responding Gil, always great to hear advice on how to improve! Too much paint on the brush in this case I think. I’ll look into the use of chalk powders. Stuart
-
Good looking build and a very nice legacy! Gil
-
Thanks to some extra time and mojo, I have managed to finish off a few extra vehicles. One of them is a model I've been wanting to do for many decades, and I finally have it in my collection. This is a 1/72 scale Syrian Panzer IVH from the ancient ESCI kit and modified with a scratch built machine gun mount. The 12.7mm machine gun came from Modelcollect: This next one is a Syrian StuG III from a Dragon kit. It has Arabic writing on the sides, so it is not accurate, but I had those decals soaking. They were originally for the PzIV but I realized they were wrong for that kit so I decided not to waste them and put them on this StuG: The final one is the UM Models Egyptian Su-100 that had extra resin parts to more accurately make it an Egyptian vehicle: And there they are. My latest vehicles so far. I have more coming down the pike so stay tuned. Thanks for looking in comments are welcome.
-
After final information came in from my nephew, I had enough information to see what markings I could use on my last MQ-9 Reaper. Once decals were applied, I now have a replica of one of the MQ-9 Reaper drones he flies the most: I apologize for the quality of some of these pics. My camera seemed to be unable to focus on this little model. Thanks for looking in, comments are welcome.
-
Maddog Manufacturing Open for 2024
Mark Deliduka replied to Mark Deliduka's topic in Photos: On the Bench
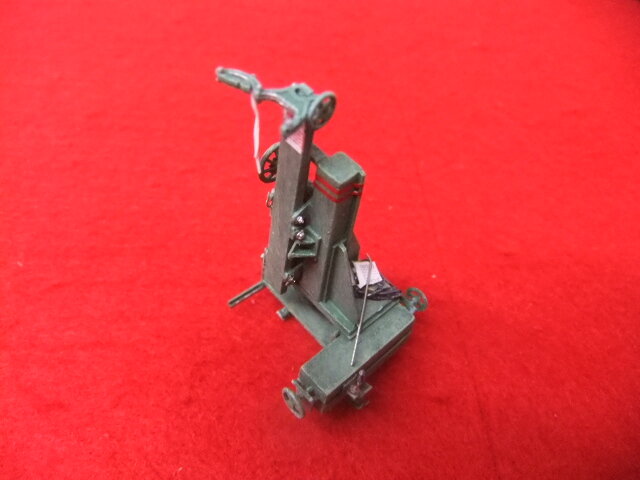
Another couple weeks of work on the Hobby Room and at Hobby Days, and there's loads to show. It's time for another tour so all aboard the trams and remember to keep hands and feet inside at all times. Our first stop again is the Hangar. Our first bay shows the work done on the P-38 gifted to me by a friend and fellow IPMS member. Basic assembly was fast for such an old kit: It was found to be a tail sitter so we added weight to the nose, hit it with Gator's Grip Glue and left it to dry: The landing gear was then added and when dry, tested. More weight was needed inside: The shiny you see is from the accelerator used to speed the CA glue. After that dried, we shot a neutral grey on the bottom since we were also using that color in the Shipyards: Time to let that cure for a bit and so moving on to the next bay, we have decals applied to the Israeli S-199. I chose the least colorful version because it was the only one of these birds to score two air-to-air kills in the 1956 War: In the next two bays, we have the two Tu-16 Badgers. All the hatches were installed and the bottom color re-sprayed: This was later masked off and the base color for the two were sprayed. First the Iraqi Badger: Followed by the Egyptian Badger: We went back to the Iraqi Badger and free handed the blotches with the airbrush: While that was drying, we went back to the Egyptian Badger and started on the more complicated pattern. First, out came the Silly Putty and rolls were laid down to cover the base coat I wanted to remain. The second colkor was then sprayed on: That color was then covered up with the Silly Putty: ....and the third color was sprayed on: When all that was dry, the Silly Putty was removed and this is the result: Both these Badger birds are ready for gloss coat and decals now. The Bear also got some needed attention in the next bay. The bottom of the wings needed a "burnt iron" color applied to it and then a dark Sea Grey over everything not "burnt". So, we shot a dark metallic color on select areas and then masked them off to spray the sea grey. The lighter greys on the nose radome and select panels was also painted and then masked when dry. Then the Sea Grey was sprayed: Now that all that is done, additional masking will be done so the final silver/alminum coat can be sprayed. Hopefully that will be soon. In this next bay is the start of a new aircraft model. It's an old Airfix 1/72 scale F-84F with Greek and Italian markings. This wil be an Italian bird for my Italian Air Force. The cockpit was done, just needs paint: This final bay in the Hangar is another large model that I've been wanting to build for awhile, the Super G Constellation from Trans World Airlines. The cockit, wings and tail were all assembled: That completes the Hangar portion of our tour, now on to the Shipyards.... Here in the Shipyards, we have a good bit of progress to show. In this first slipway, the Japanese PT-15 got the torpedo tubes installed finally: While installing them, we realized that the deck was flexing too much and the superstructure/cabins would not stay snapped in place. Some reinforcement was then needed so thick styrene sprue posts were cut to fit and glued into place to allow the deck to be more solid: Later the two cannons were added, the cabin again is just dry fit: Since a lot of the torpedo tubes and the guns were not painted, more grey paint was shot on this boat: Moving on to the next slipway, the Shangi-La got the first part of the deck painted: This was then masked off to spray the blue-grey color next: The next color was shot and left to dry: Finally all masking was removed: This deck was ready to be installed on the hull. Naturally it took a bit of persuasion: That isn't all! We opened another slipway and laid the keel for this next model. It's the Revell 1/72 scale Sunseeker Predator 108 luxury cabin cruiser: And the final slipway was opened to lay the keel for the Mirage 1/400 scale German Tarantul-class missile boat "Hiddensee": This was quick and easy to build so it got to the paint stage very fast: And that completes this section of our Shipyards tour, now on to the Motor Pool.... The Motor Pool tour today has a good bit to show as well. In this first bay, we had to improvise with the British Achilles since the photo-etch set disappeared. With the help of a Dragon Sherman kit, and some strip styrene, we got this vehicle ready for paint: The next bay shows the Egyptian Su-100 with it's base coat of paint: Decals were applied next: Additional detail painting was done after that: That one is about ready to be finished off. The next bay we have to see is this one with the Syrian Panzer IV. Decals had gone on this one as well: This and the Egyptian Su-100 got washes but they didn't show up well in these photos. After the decals and wash had dried, here is my attempt to scratch build a mount for the 12.7mm machine gun: Later on, I found a 12.7 mm gun in my parts box and on it went: I have to admit that just looks so cool! In the next bay, decals went on the Syrian StuG III: In this next bay, we started this Trumpeter 1/72 scale BTR-70, which will be made into a Syrian BTR. Assembly for this went fast: That completes our portion of the tour in the Motor Pool. However, here in our miscellaneous assembly yard out back, we started a 1/24 scale Lindbergh 1910 Model T Ford. I've always wanted one of these and everyone should have a model of the first mass produced car ever: And that completes the whole tour, thank you all for looking in, comments are welcome. -
Here's some items that have been gifted to me. First, from a very generous Canadian, here are 100 3-D printed chairs in 1/72 scale. Some are complete, others will need to be assembled: Thank you Jean-Marc! One of my fellow Orange County IPMS friends gifted me these and more: In addition to the above, he also gifted two, possibly three other 1/72 scale P-51D models in baggies,, all complete. I'm planning on keeping the P-38 (it's already started as you can see soon in my next tour) and the egg plane. I'm still debating whether I'll build the P-51B, but all the -D Mustangs I'd like to sell. Anyone want a herd of Mustangs, give me an offer. Try not to low ball me too much though; we are insolvent here and I could really use the money. That's all for now. I'm going to go prepare for the next Maddog Manufacturing tour now.
-
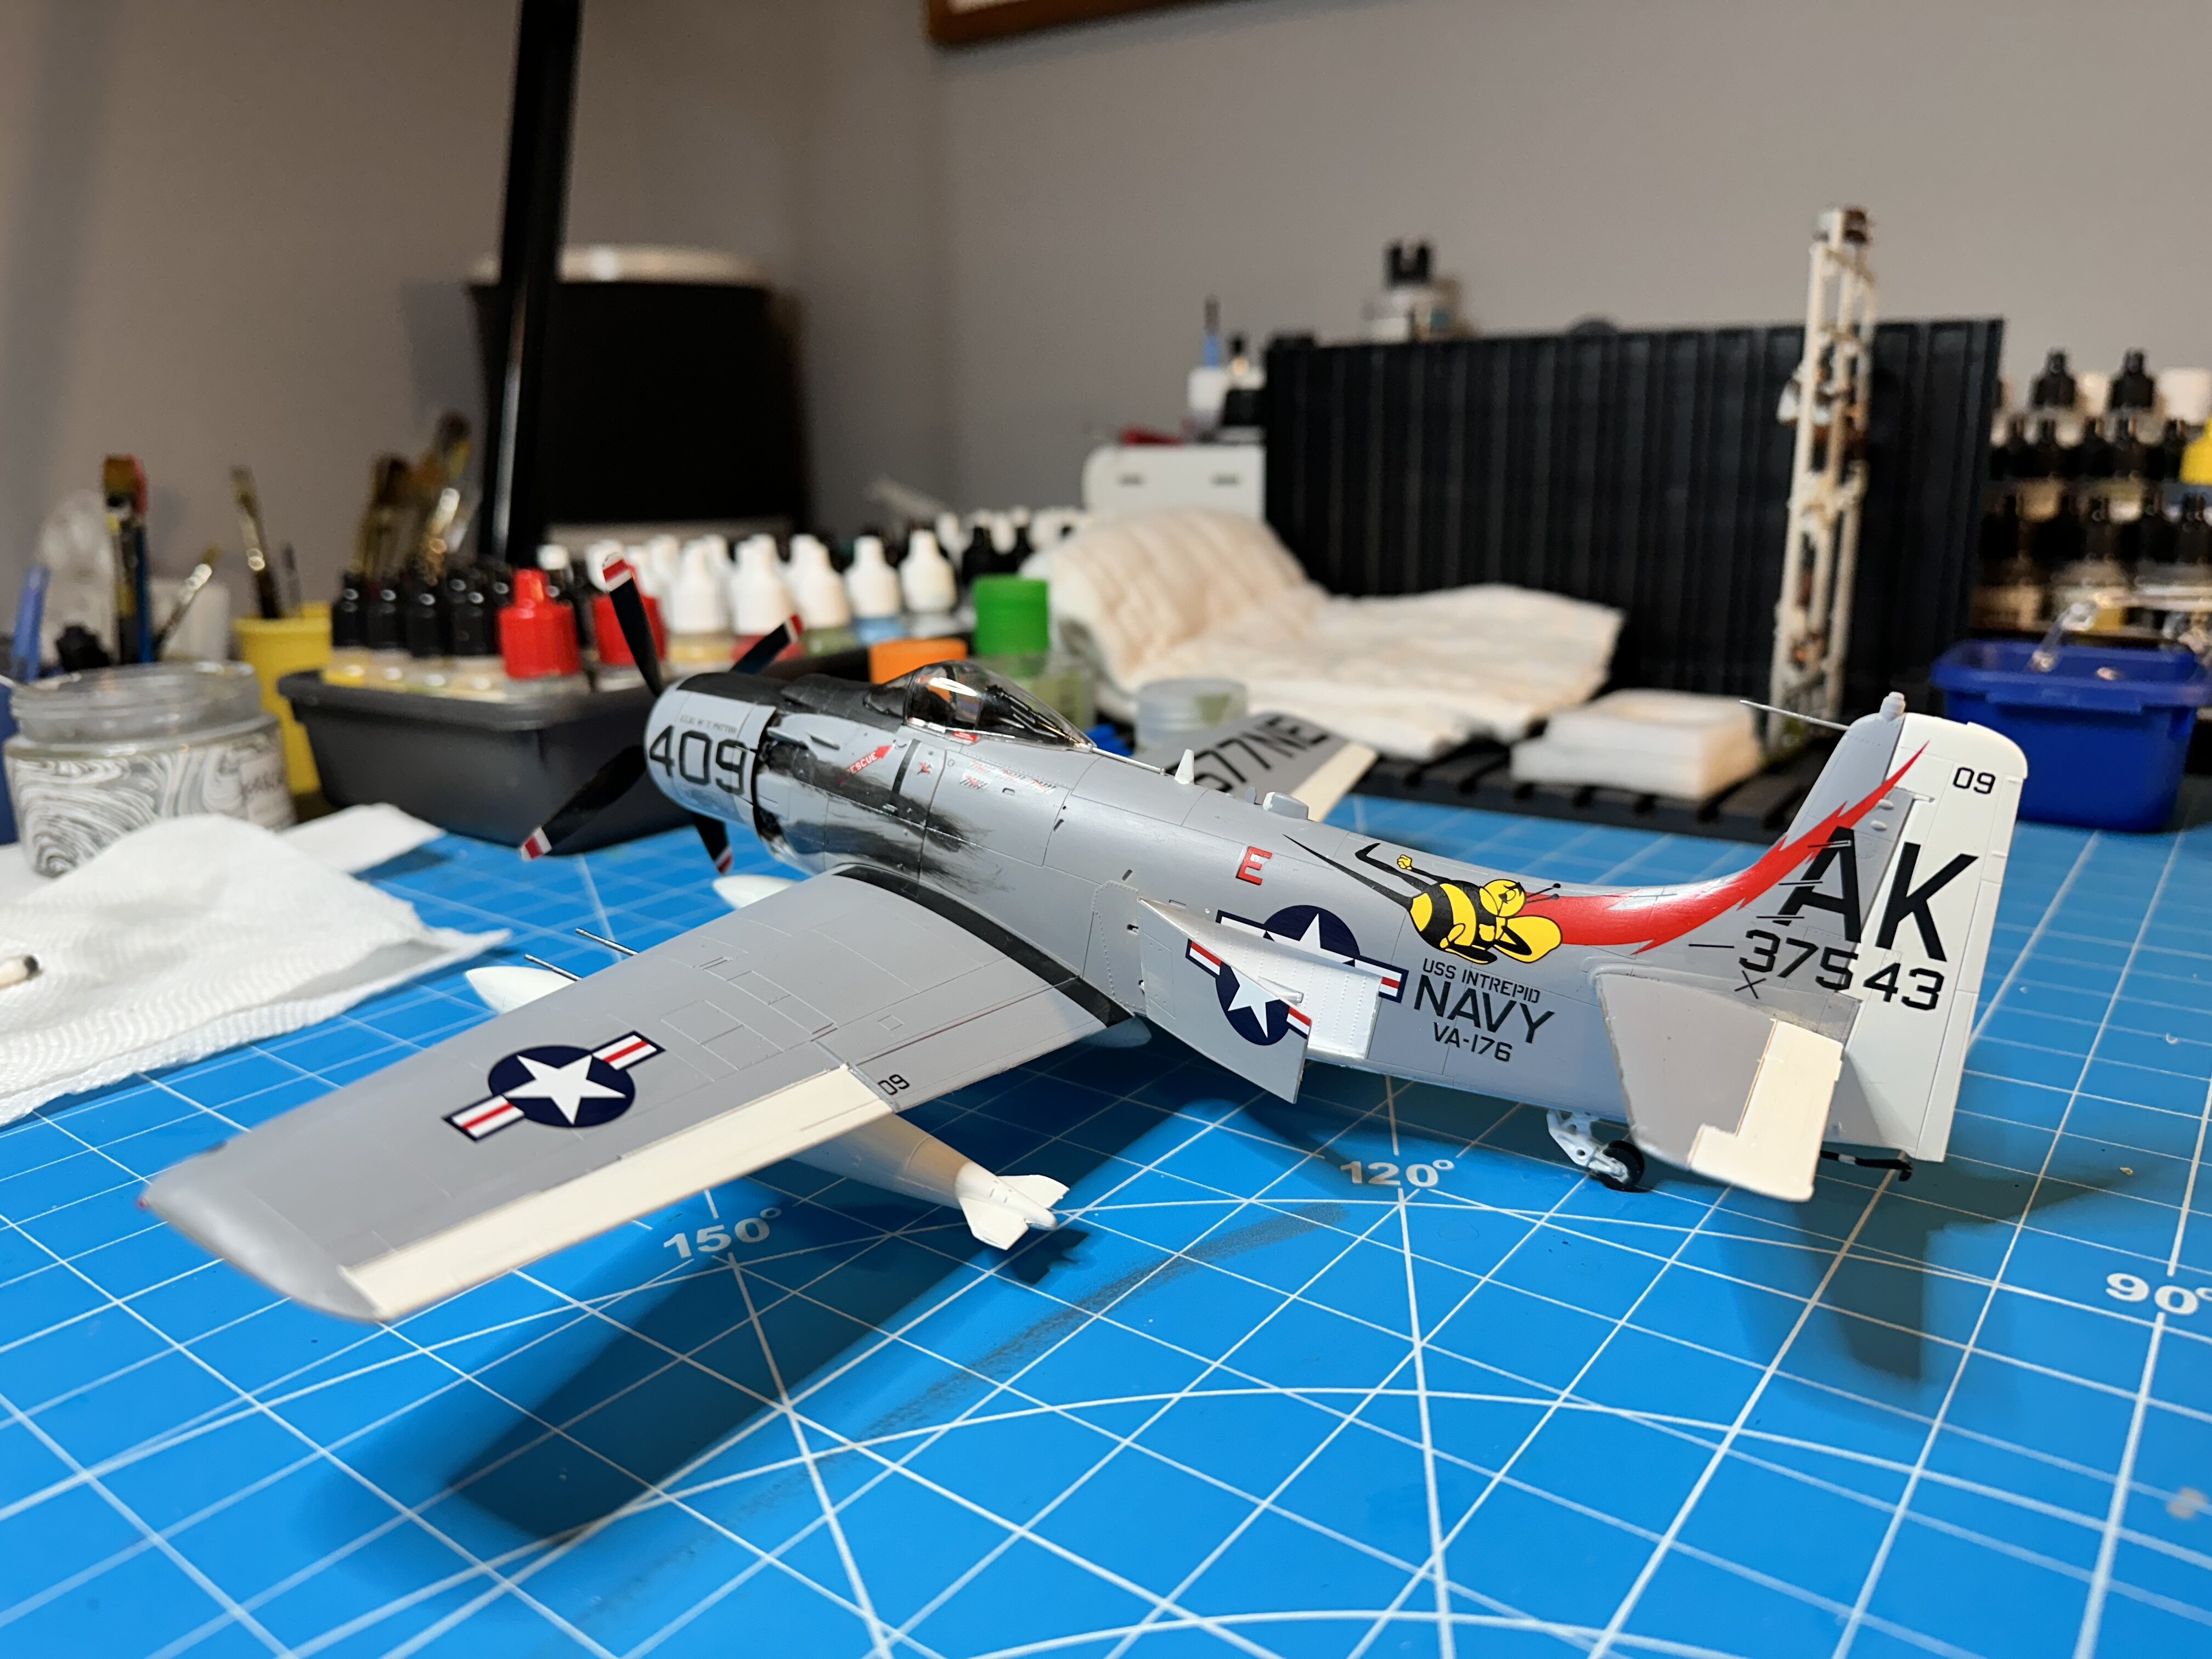
It may not have come out how you wanted, but Skyraiders got pretty dirty with heavy exhaust staining, so it doesn't look outlandish at all. I've had pretty good results building up exhaust stains using (brushing on) chalk powders instead of trying to airbrush them on. You can keep building them up until you get the look you like and they wipe off with water if you mess up. The only down side is they need to be sealed in place with a flat coat or they're susceptible to fingerprints, and sometimes the flat coat will seemingly tone down the look you got. But then.... you just add more and flat coat again until you're happy! Gil
-
Well I tried . . . couldn’t get the staining to look very realistic. I kept messing with it and that didn’t help. Thanks for looking and commenting. Stuart
-
Now that is cool.... especially with the deflected flaps. Imaginative too! Gil
-
I do use acrylics Gil but thanks, as always, for taking your time to provide advice. The lack of proper ventilation and more difficult cleanup being the only reasons. The propeller decals are quite disappointing so moving forward I will paint them instead. Stuart
-

Embassy Suites room reservations
patd replied to ghodges's topic in 2024 IPMS/USA National Convention
Agreed! If the communication aspect of the convention chair is any indication of how the convention will go, we are in good hands indeed. I think it speaks well of the convention chair and his team with the way the Embassy room openings and relocation of the Hilton rooms for the RNC "grab" was handled. Pat D -
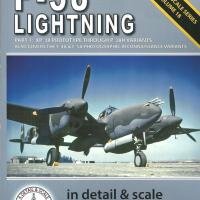
Detail & Scale has already published two books on the P-38, back in the 1990’s. These books have been long out of print but this is not just a re-issue but rather a revision and update to the original books, including pictures never seen before of the restored P-38F “Glacier Girl” and the scale model section includes details and recommendations for the more modern P-38 kits that became available since the publication of the original edition. The P-38 traces its lineage to Clarence “Kelly” Johnson and it was a revolutionary aircraft from its time, given its size, speed, and climb rate. For each mark indicated below, there is a brief chapter explaining the details from previous marks, period pictures (some in color, most in B&W) and excellent line drawings. View the full review
-
This is a reissue of the Brengun Extra 300L with new markings and sporting a four-bladed prop. Introduced in 1988, Walter Extras' creation is a mainstay in the aerobatic training and competition world. Regular readers of this site will recognize this subject had been done before by me a few years ago (see Extra 300L/330LC published May 3, 2022). This time around I was provided the base kit. Brengun does make a PE set, vacuform canopy, and canopy masks for this kit. There are separate reviews for each on this site. View the full review