K2Pete
-
Posts
36 -
Joined
-
Last visited
-
Days Won
1
Content Type
Profiles
Forums
Events
Everything posted by K2Pete
-
SkyKing, thanx for stopping by. I can't agree with you more! The first contest I entered ( A Regional event up here near Toronto ) with this Shuttle, it lost to a fictional Star Wars model of a Y-wing. A fictional vehicle is in competition with an actual, Designed, Engineered, Flown vehicle ... oh well, that's Life eh? I participated in the 2009 NATS in Columbus and we Real Space modellers had 53 models entered and we, for the first time, got the category split! Rusty, many Thanx! ;^ D Stikpusher, that's how I felt researching this model, all those images of Challenger and Endeavour and Columbia being built, wow ... such a shame it is no more ... ;- ( Mark, thanx for your wonderful comments! Looking at this model again gives me a sense of accomplishment. The end result is most satisfying and I learned a whole helluva lot about this vehicle. It's a lovely feeling when someone who has built this kit or is familiar with the Shuttle and has the curiosity to look at this model a little closer to see all the detail they expect and they're pleased to see it included ... well, that's my goal! One more thing, the kit has something like 25 or 30 parts (not including it's payload) and my version has over 2,500 pieces ... ;- D Thanx again Gents! Pete
-
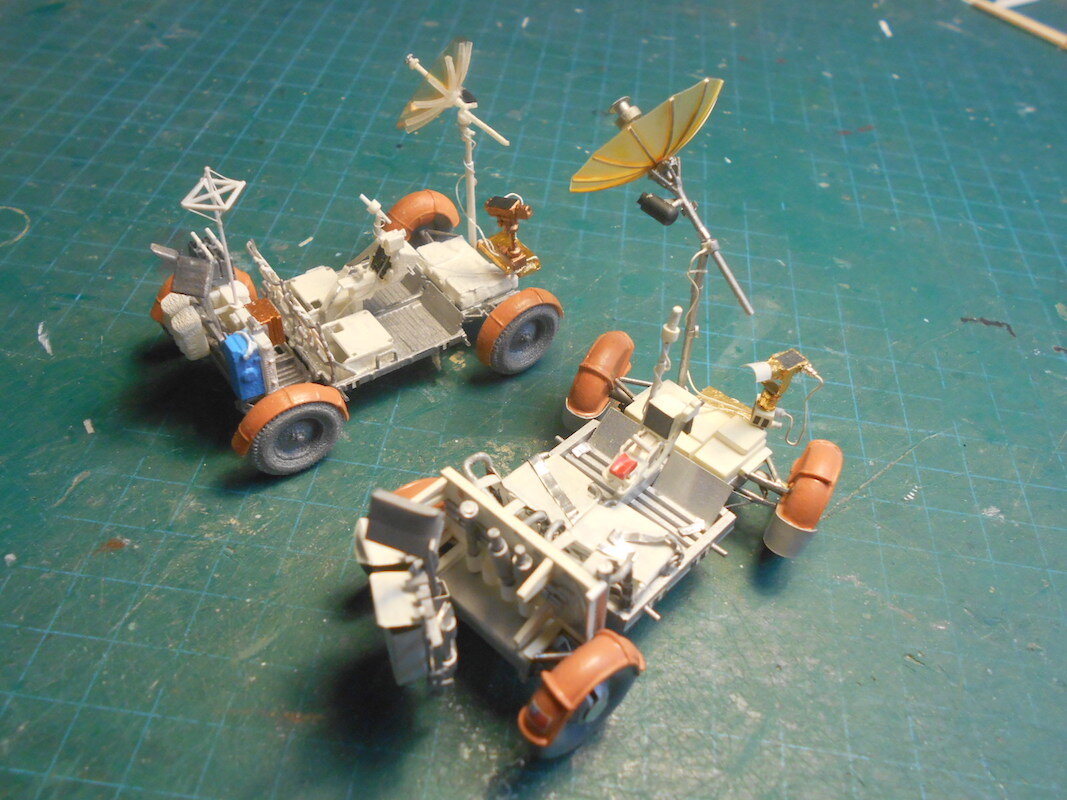
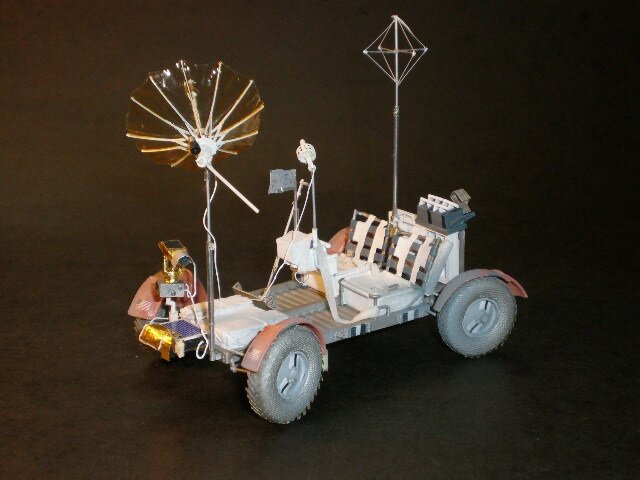
Firstly, I've read your other comments on my other threads and just want to Thank You for taking the time to view and comment on my builds! Stikpusher, I only had a couple pix of the LRV build. I like to visually show what I did rather than use words, so I'll be brief. Everything was made from styrene, Aluminum Foil and such ... except for the wheels. I found them in my local LHS, since closed ... ;- ( ... and they are wood and the exact correct diameter for me! What luck! I determined the scale dimensions and got to it. For Reference, I watched a lot of Spacecraft Films EVAs, viewed photos from Apollo Lunar Surface Journal and the book Virtual LM, which has a section just on the LRV ... the High Gain antenna was remade using a Zip-loc baggie coated with Future. The one pictured was just painted with Gold paint and I didn't like it. This poor photo shows the frame and the steering/driving links as well as the centre control console. I also made a 3D LRV from Vincent Meens and Shapeways in 1/48 ... more out of curiosity to see how mine fared in comparison ... My scratch built version is on the bottom ... and it compares really well. you can see the High Gain is a little more transparent on mine. Plus my scratchbuild represents Apollo 15 and the 3D version is Apollo 17 ... that little antenna on the rear end is the clue. Mine's on the bottom ... the little 3D print was a quick build but pretty fragile. Now, I did it 2 or 3 years ago and the technology and material used, have improved, so it may be much sturdier now. And they BOTH look really good! I hope this helps Stikpusher .... and if you have any other questions, just fire away! Pete

-
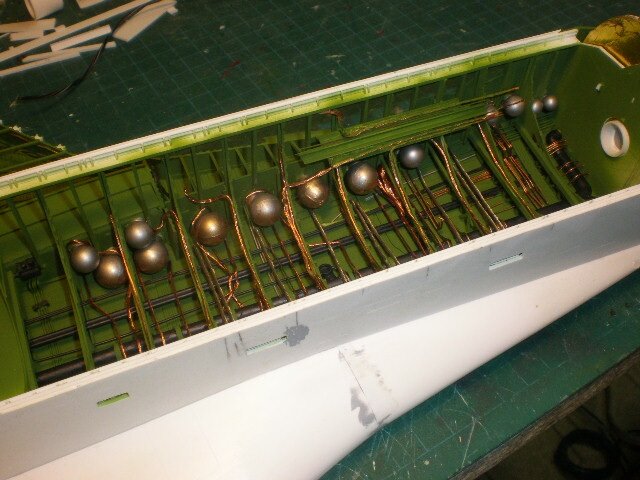
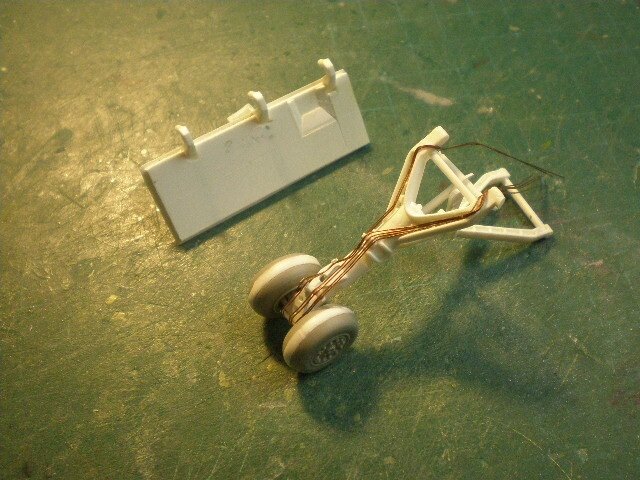
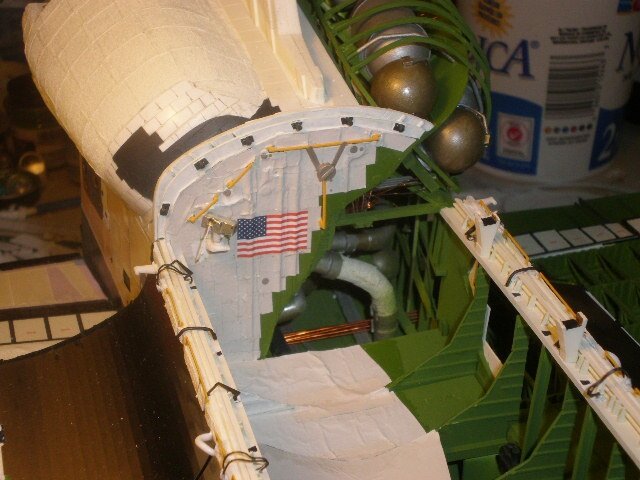
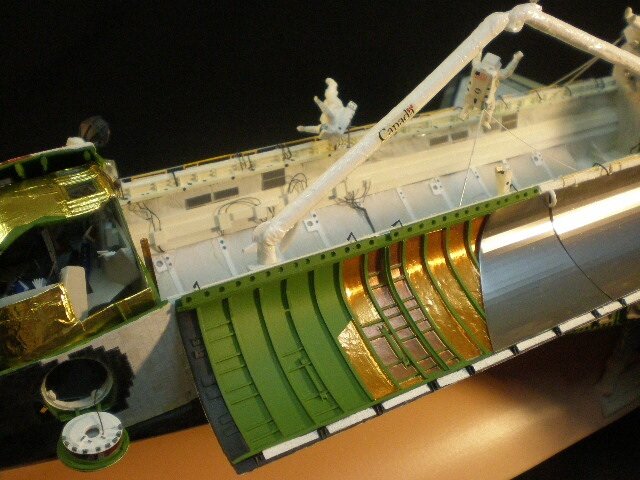
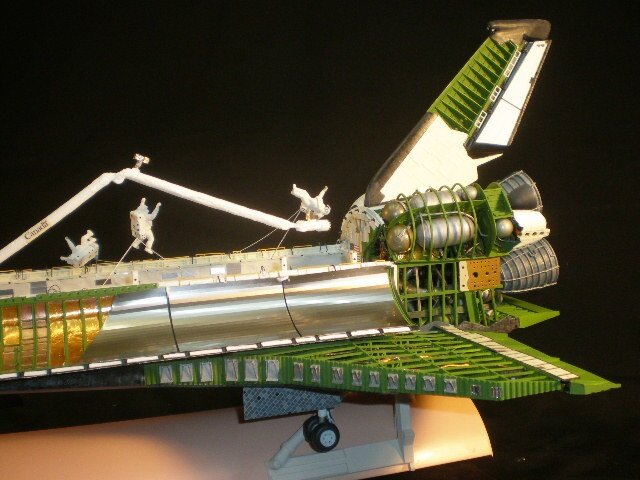
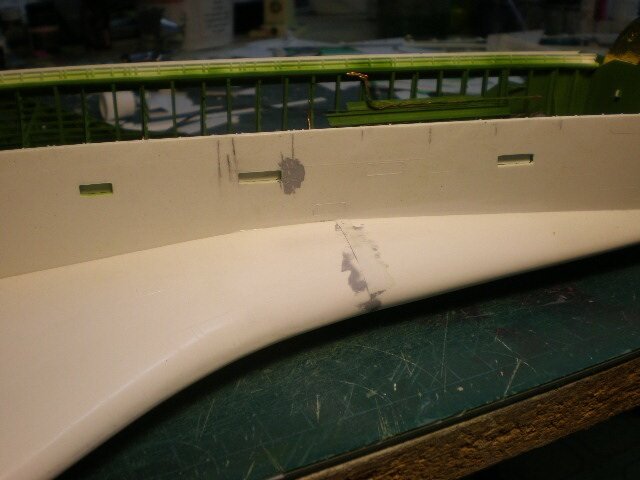
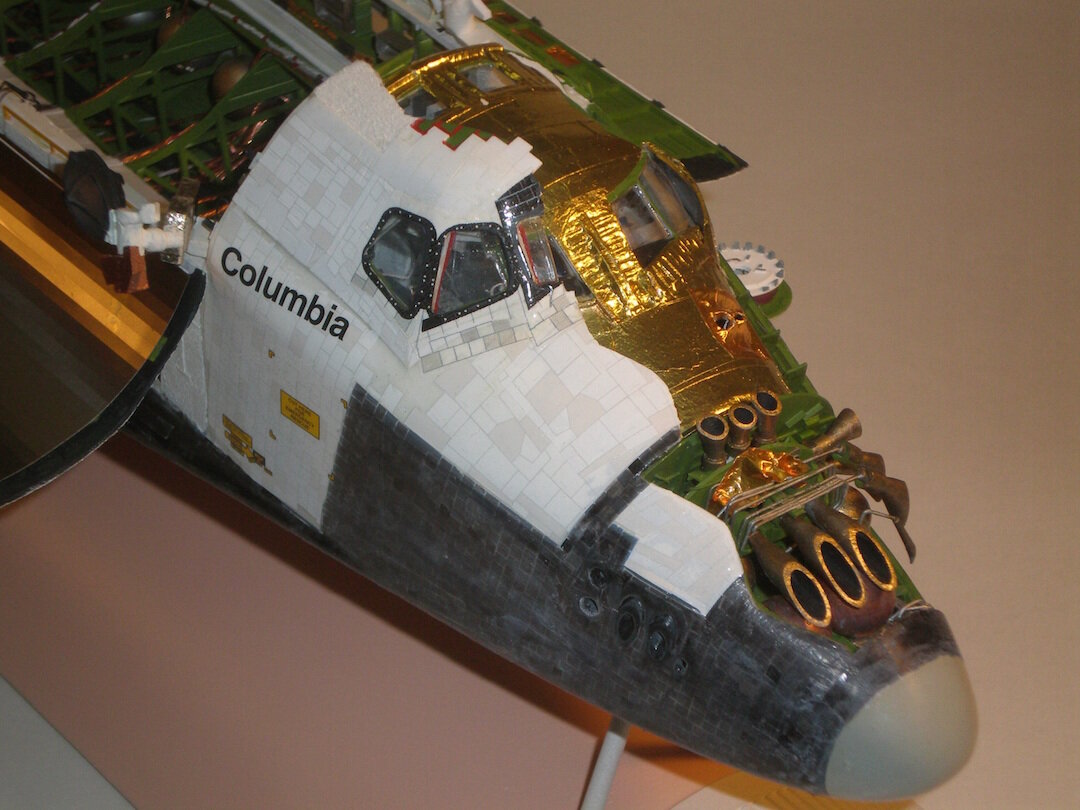
I'm really pleased these are all getting posted ... continuing ... ... adding Fuel tanks and wiring to the PB ... ... I had just one MLG deployed and detailed it too ... as well as it's open door ... ... the Cutaway Payload Bay door with gold Thermal insulation ... still more details to include ... the Radiator panels are from Real Space Models ... even the RMS, Canadarm, got detailed ... ... a new End Effector, cameras and decals ... ... about to install the SSMEs ... and you can see a few clamps used to attach the PB Doors ... almost done ... the Aft bulkhead ... notice Hinges, Handholds. The surface texture all over this Shuttle and seen on the OMS pods, are First Aid tape. ... some of the First Aid tape on the Starboard wing ... it gives a really nice, accurate look ... with SSMEs installed ... Okay, I think that's enough for y'all ... if you're still here! ;- D Was this a fun build? YESSIRREE! The amount of research I did was very satisfying! Which is one of the reasons, this is ONE of my favourite models. I've got just one more model to post on these pages, and it's one of my faves too! Till then ... Thanx for lasting this long! Pete
-
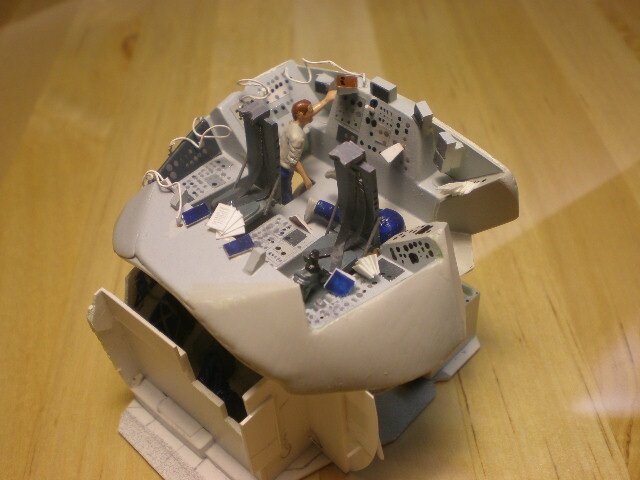
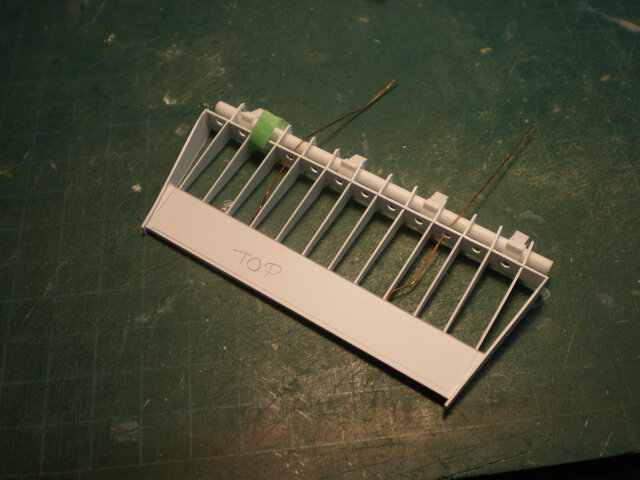
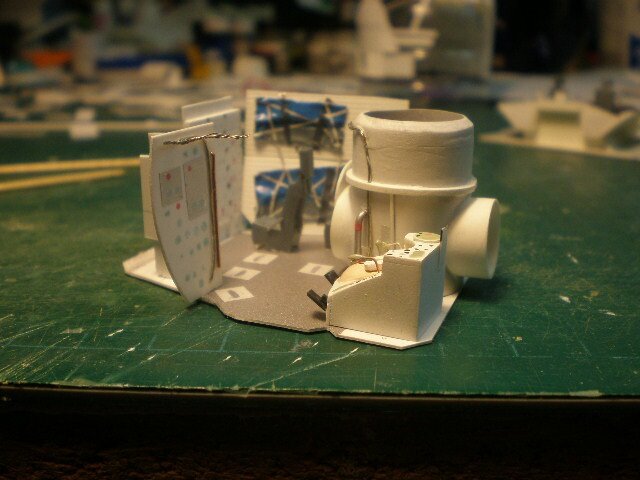
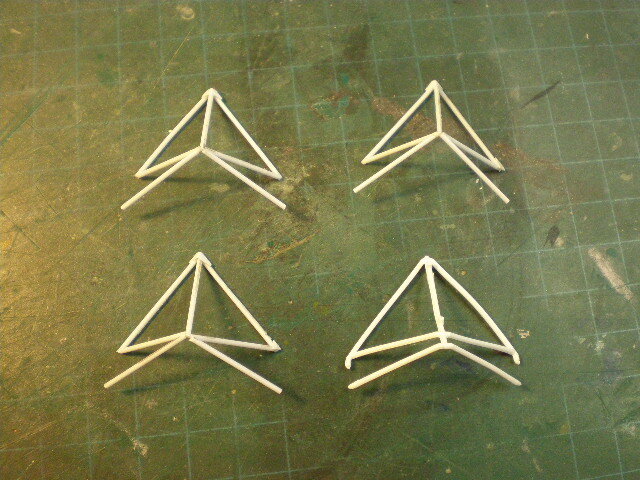
Oh ... good. They all got posted ... to continue ... ... the Nose RCS section being started. I stretched some tubing ... ... getting there ... ... and dry fit ... ... building the Aft Structure ... ... starting the Port Wing structure ... ... a Sub-assembly dry fit ... ... Crew Module dry fit ... Startracker Bay and Hatch too ... Notice the Payload Bay door structure too ... starting to install the Payload Bay details. These are just dry fit, I had to install the Purge lines first ... ... installing the Plumbing which will attach to the SSMEs ... ... the Crew Module almost done. I've included open manuals, accurized seats, stowage bags on the ceiling ... even though they're almost not seen ... ... before it got glued in ... ... more Payload Bay details ... ... I even opened up the Payload Bay vents even if they're under the opened doors and not seen ... ... are there too many pix? ... let's see if these get posted ...
-
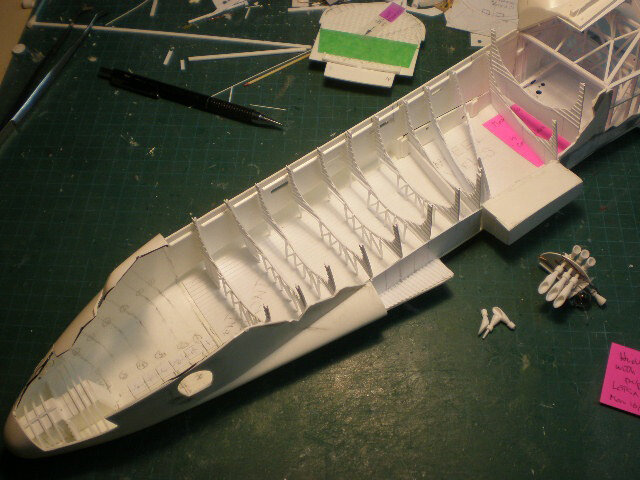
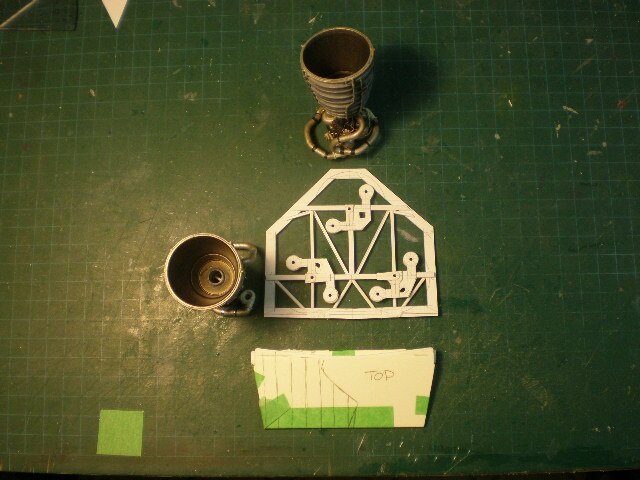
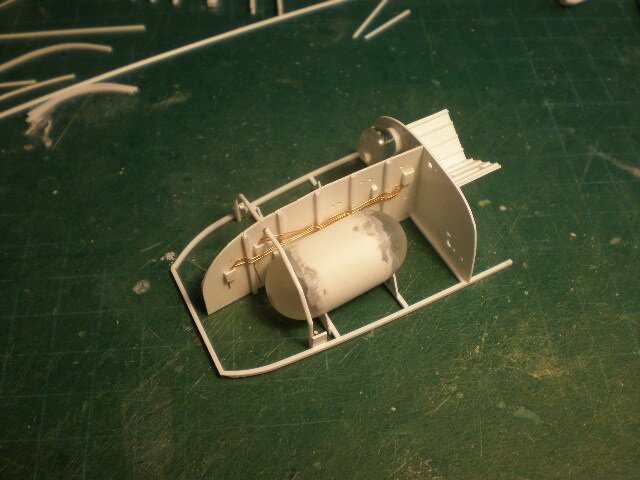
This is one of my favourite models ... it took over a year and a half to build. Here's a couple overall views and then I'll show a few of the build images ... tell me something, do you guys ever post WIP threads here and if not, where on IPMS USA are they posted? I had started by building the guts of the SSMEs (Space Shuttle Main Engines) The Engine Bell is from Real Space Models, the rest is copper wire, styrene rod and tube and various other materials. The Aft structure had to fit and support my Engines ... and it did. Every bulkhead had to be built ... ... the Aft bulkhead and to the right, the body flap partially done. ... the Body flap ... ... one of the OMS pods with a Fuel tank ... ... the Vertical Stabilizer and Rudder ... ... the Mid-Deck, with Airlock and toilet ... ... and with the cockpit ... ... let's see if these all get posted ...
-
Mark you're very generous with your positive remarks and I really appreciate 'em! Thanks! I only have 2 more models to post on these pages and they are BOTH my favourites. Both took a lot of time and when they were done ... man, what a good feeling! Till next time Pete
-
A lot of other items had to be scratch built too, like ... the CMs Docking Probe ... the Plume Deflector supports ... ... the High Gain antenna ... ... the Large Radiators and Handholds for the SIM Bay plus all those new surface details ... ...another view of the new surface details. Using styrene disks and Aluminum foil ... ... the Umbilical Connection cover had to be built and installed ... ... and DONE. This was another satisfying build ... plus it tapped into those old, old memories which was a really nice bonus! Thanx for popping in and taking a peek! Pete
-
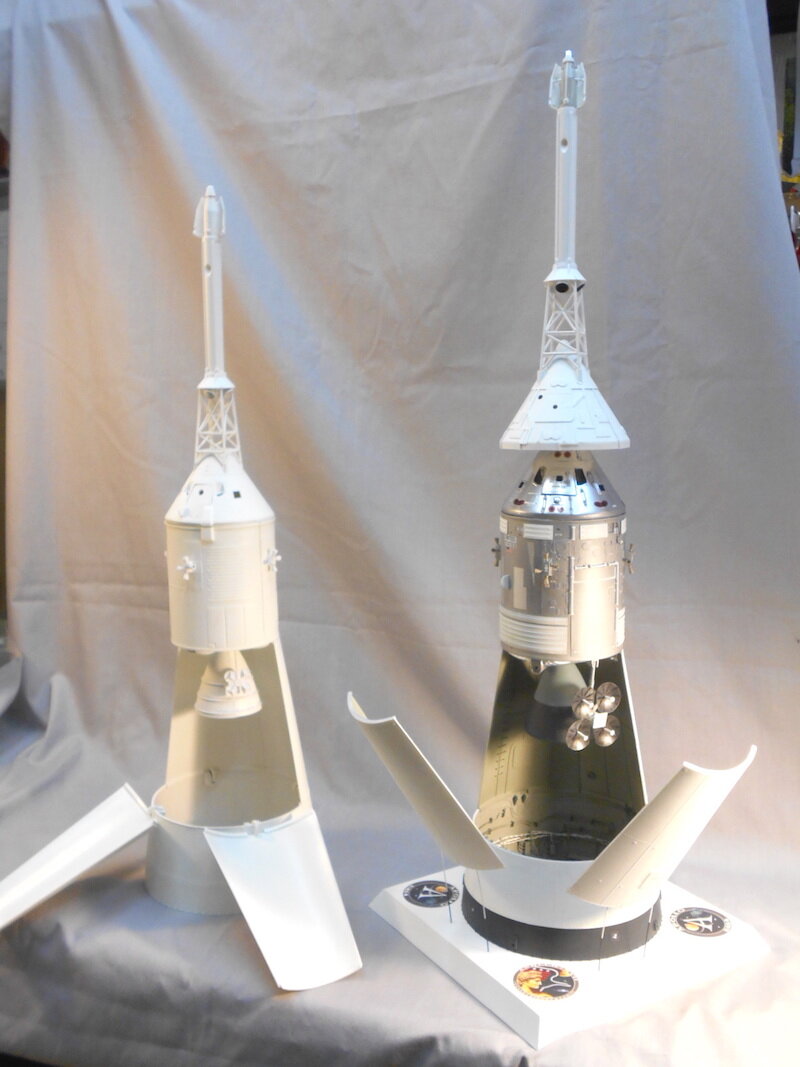
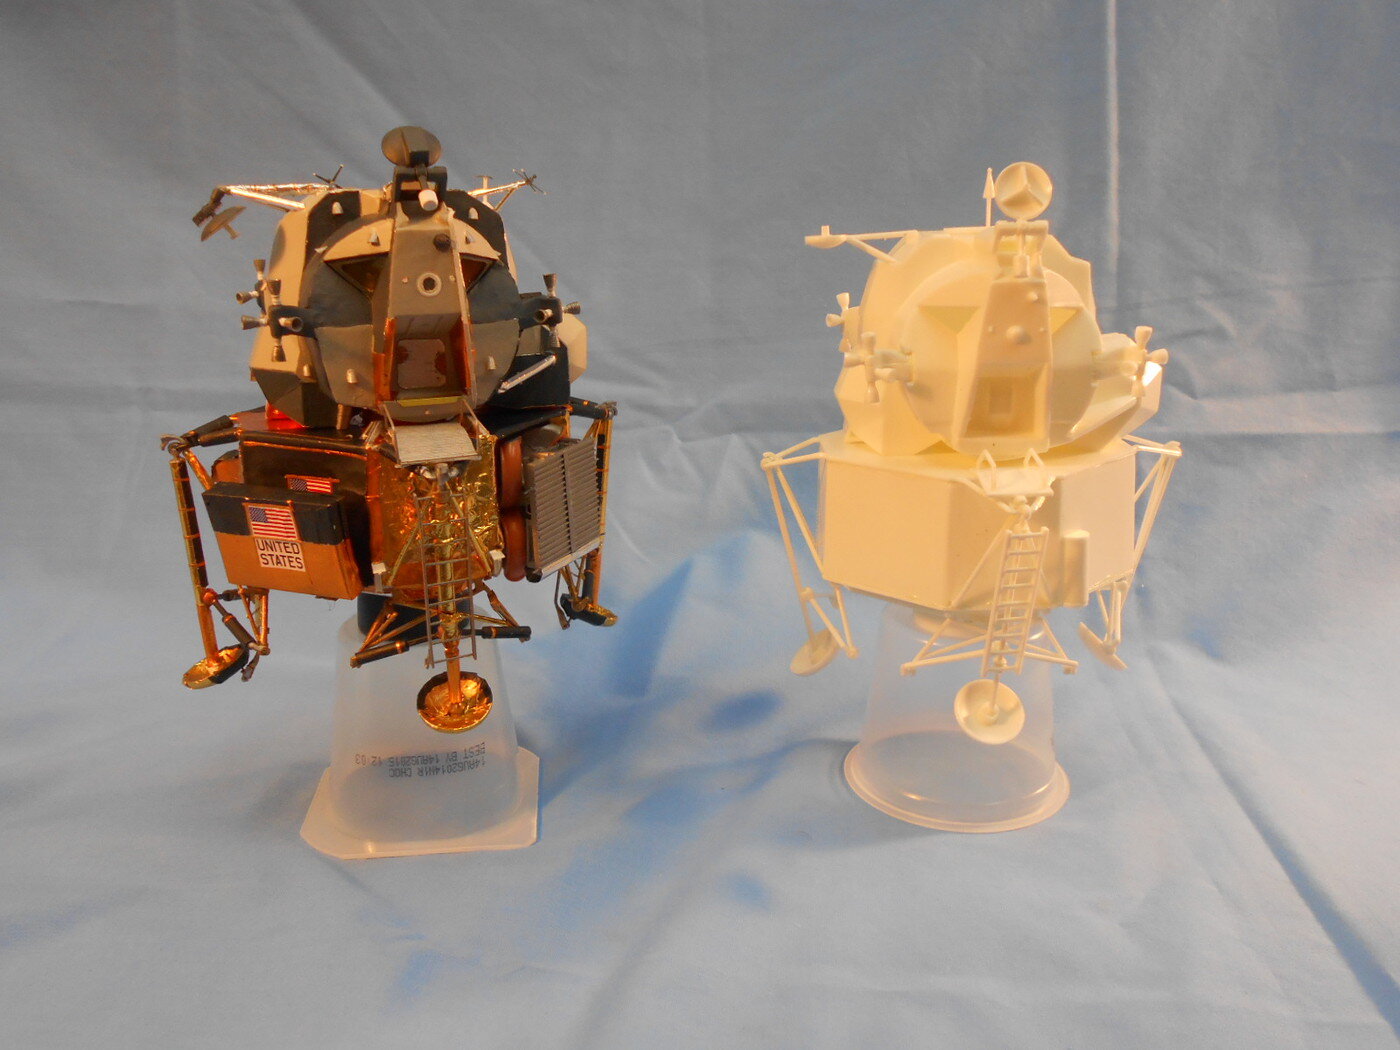
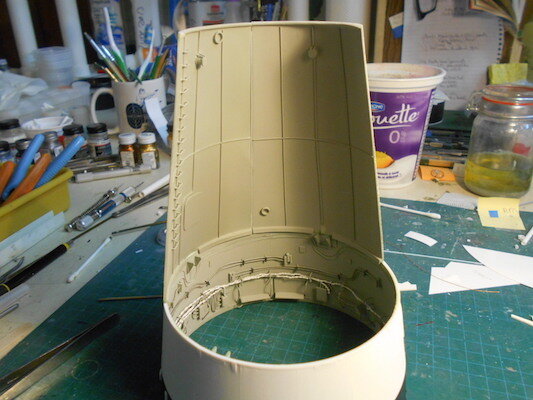
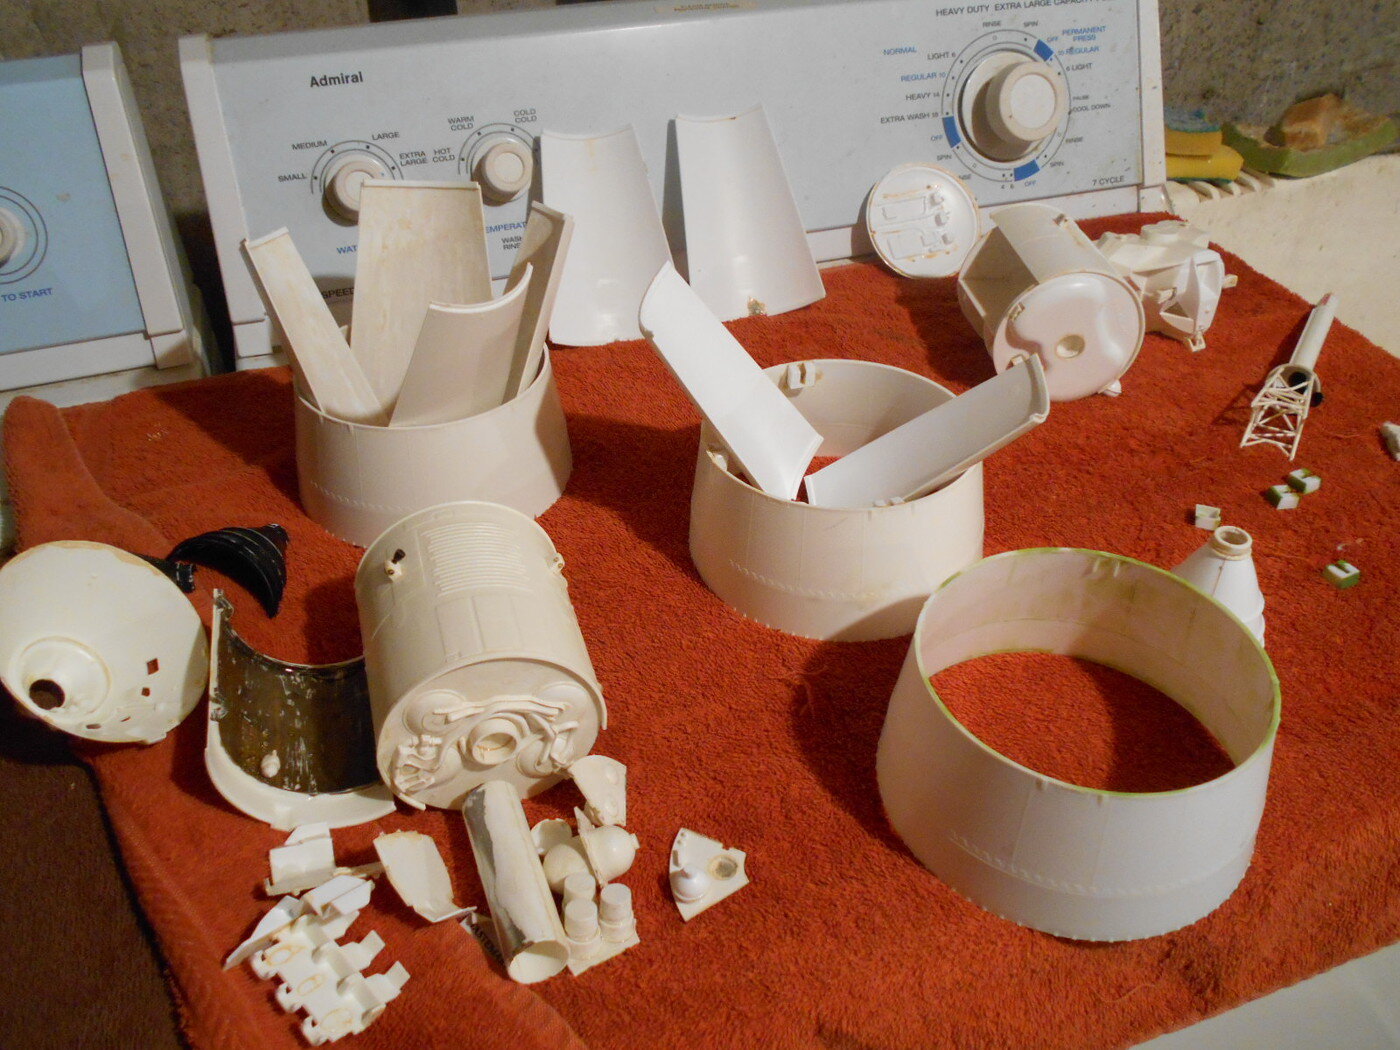
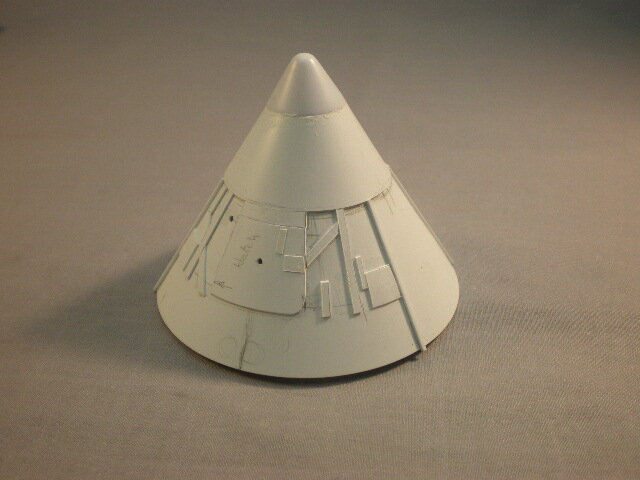
When this kit was re-released a few years ago, I bought one. I had built this kit in 1968, on a Saturday afternoon, while listening to WKBW and Simon and Garfunkel's brand new song, Bridge over Troubled Water. This was always my favourite model and played with it constantly ... back then. ;- D I also had scored a trove of old LMs and parts off of eBay and thought of displaying the original kit, and my heavily modified version, side by side at Model Shows I wanted to show the viewer a Before and After of the same kit. They could compare the fit of the original kit and see what can be done, hopefully to inspire kids into the hobby I was also intrigued by the folding Landing Gear of the old kit's design and wanted to keep that feature ... so I could play with it! ;- D This was gonna be depicting Apollo 17 so a lot of scratch building was involved ... for instance the folded up LRV on the side of the LM was included. I used the New Ware Update set as well, but little details like the RTG, and Landing probes, had to be created. I also wanted it to fit inside the SLA ... The inside of the SLA was highly detailed too ... This is the ebay score ... after using Easy-Off to remove old paint ... and then after being washed ... A new Heat Shield had to be built ... ... and the BPC was made ... and off to page 2 ...
-
Okee dokee Mark ... I'll take a look! :- ) Pete
-
Thanx Mark ... Thanx John ... with little bits of wire, or tape, or strips of this and that, our imagination interprets these as correct and enhances the overall look of our little miniatures. Plus, for me, when these events were televised, in B&W, over 50 years ago, I was one of those that were up at 3 am to watch these EVA's, so building and researching these models takes me way-y-y-y back to when I was just a kid ... but this process, and their completion, really gets those Endorphins firing! ( wasn't Endorphin a character in Buckaroo Bonzai? ) ;^ D Thanx again Gents! Pete
-
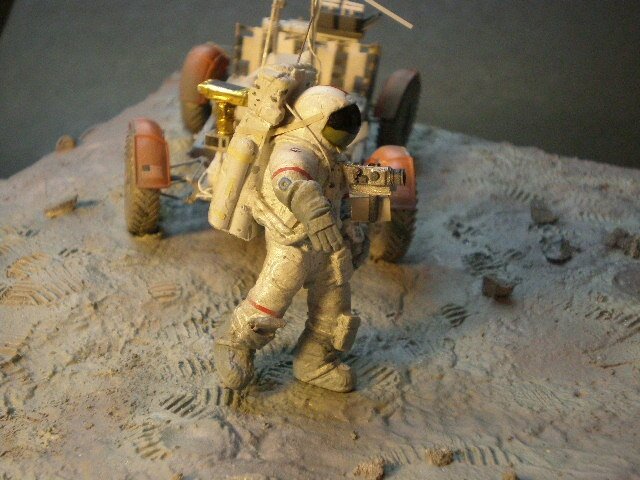
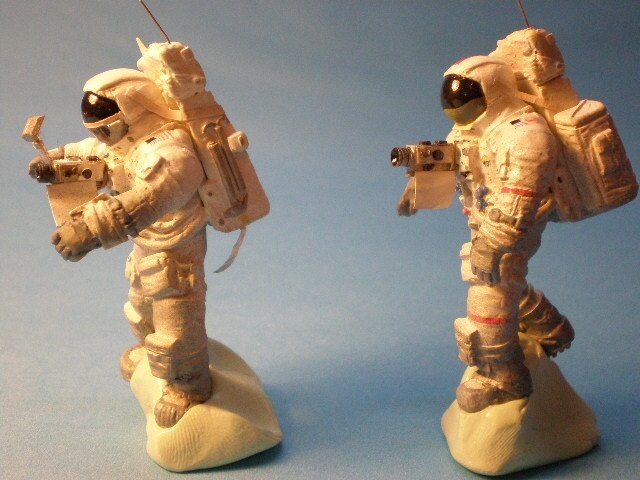
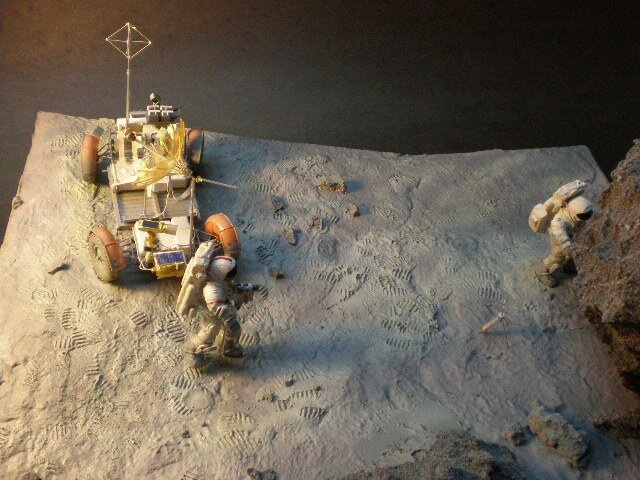
This is the EVA Models 1/35 LRV, Resin and PE kit. It was my first Resin and PE kit and is still holding up well, a few years later ... The S- Band antenna was made from a Zip-loc bag. It replaces the kit's wire mesh item. The tall antenna on the rear end is specific to Apollo 17 and was made with styrene and an Aluminum tube. It's a Diorama depicting a specific Station on their EVA. I also added a few more details form various materials for seat belts and covers on the Batteries and stuff like that. Both Schmitt and Cernan ... Schmitt's visor was scratched and he had it half raised a lot on their EVA's. As part of my research, I watched hours of their EVA's on DVD's from Spacecraft Films ... it still amazes what the USA did 50 years ago ... re-e-e-e-markable! Till next time! Thanx for stopping by! Pete
-
Thanx Mark! I love the way little pieces of styrene, placed in a specific spot is interpreted by out brains as a Widget or a significant 'thing' ... or Greeblies / Greebles. and when it works, O-o-o ... perfect! I saw your Atlas and Saturn V ... do you have a built thread on 'em ... I'd love to see your process and issues with the kits. Pete
-
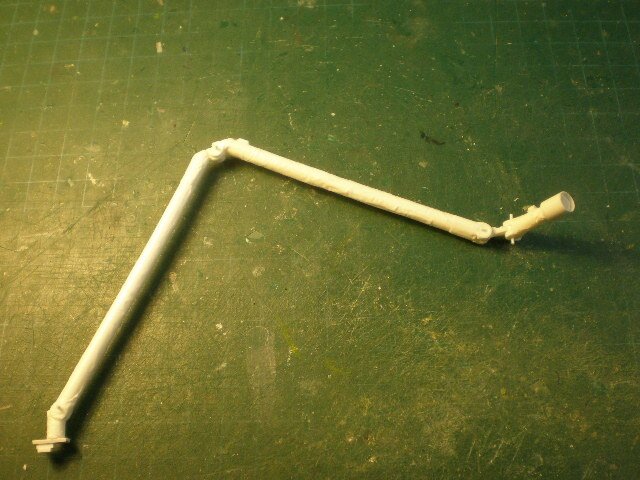
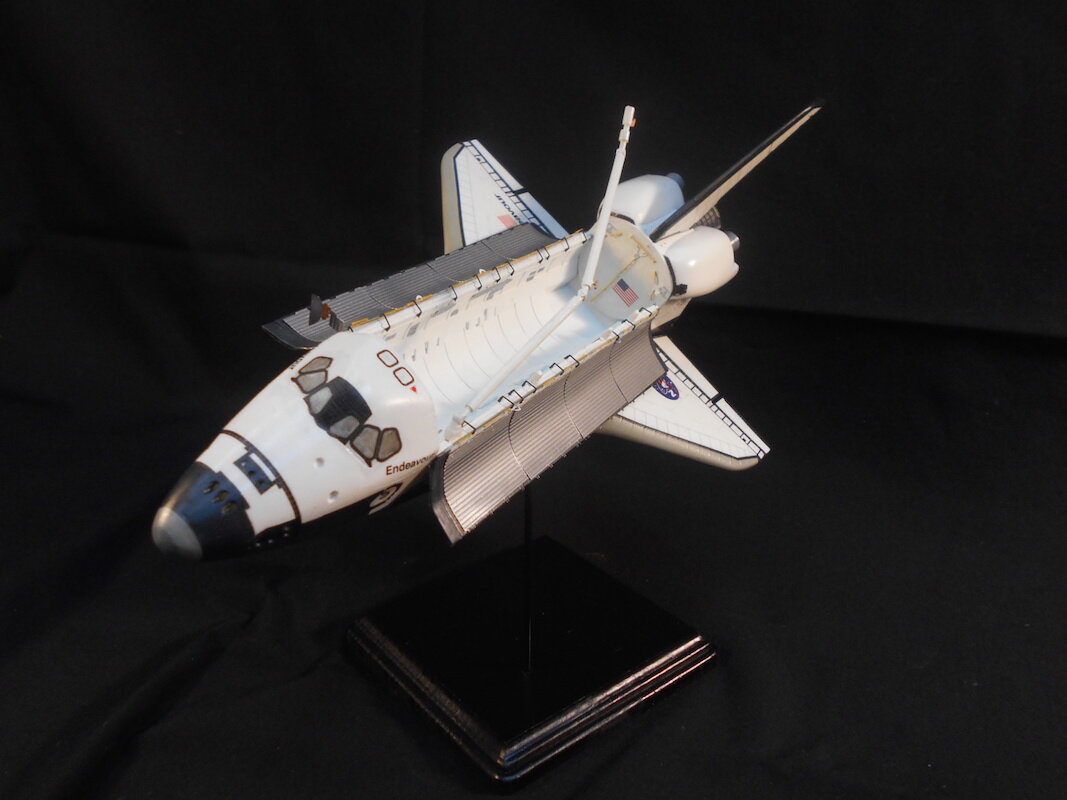
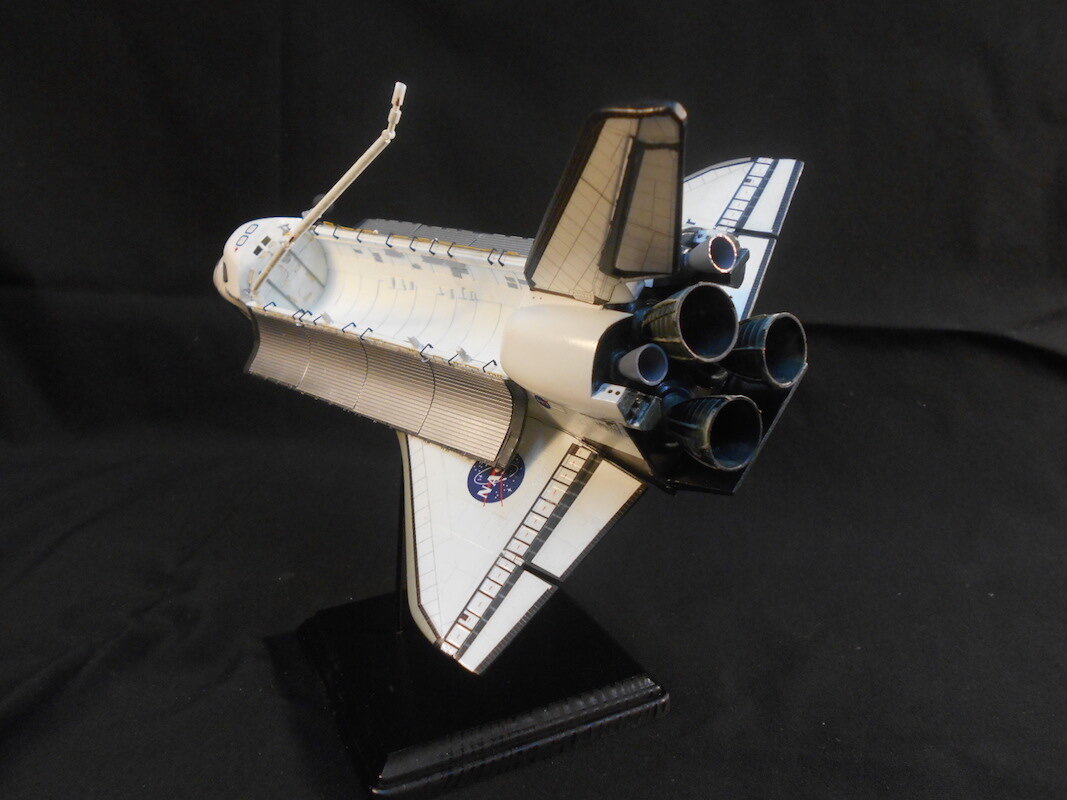
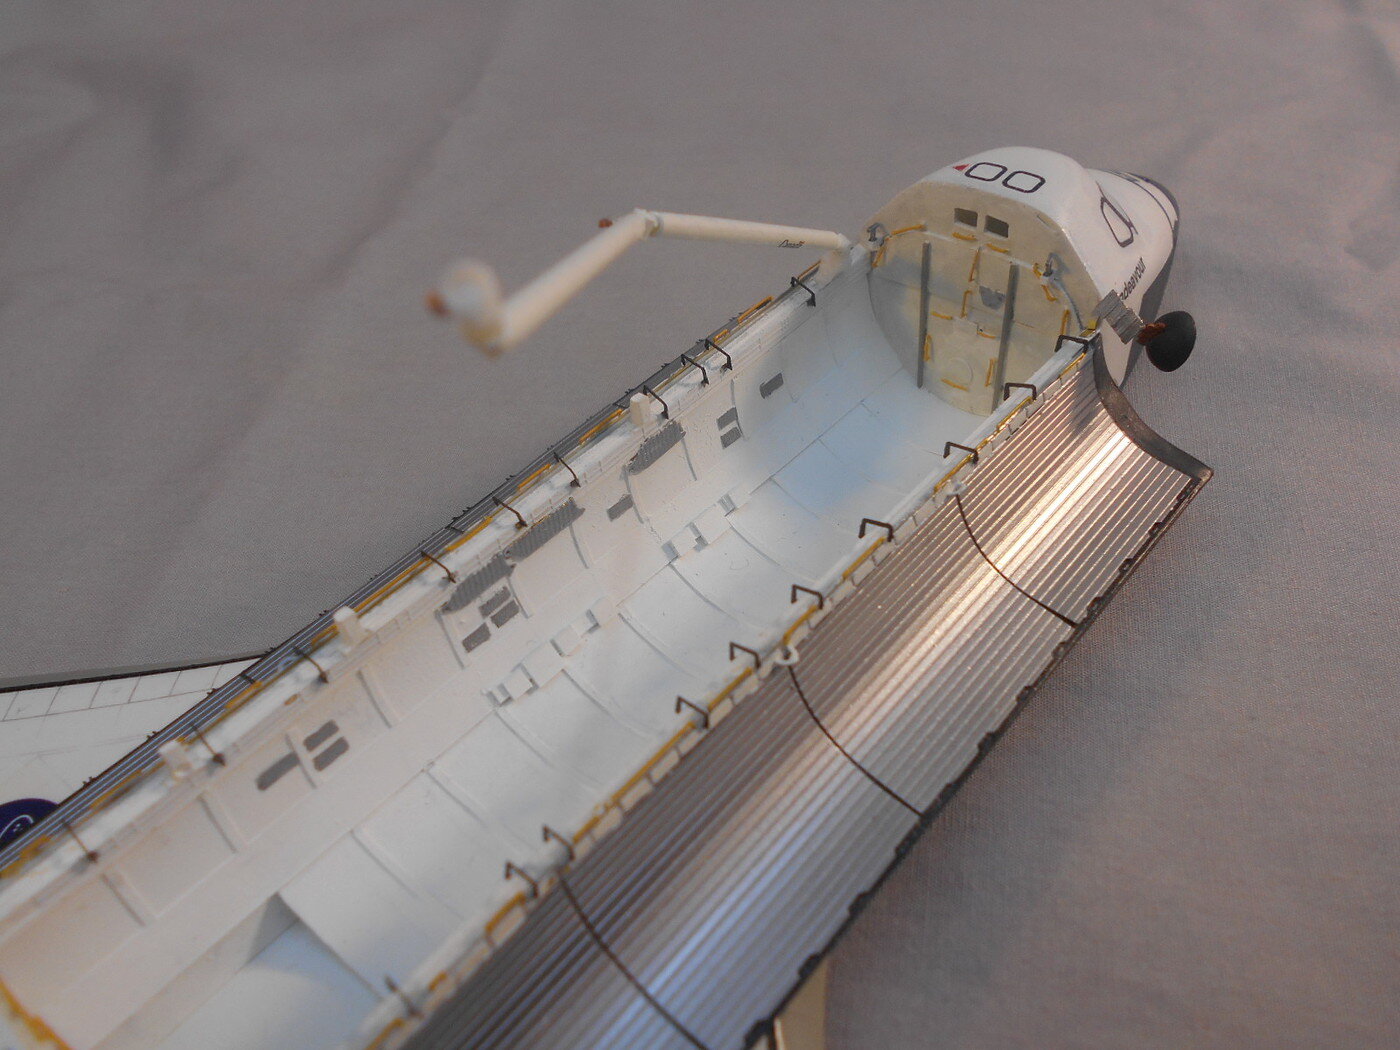
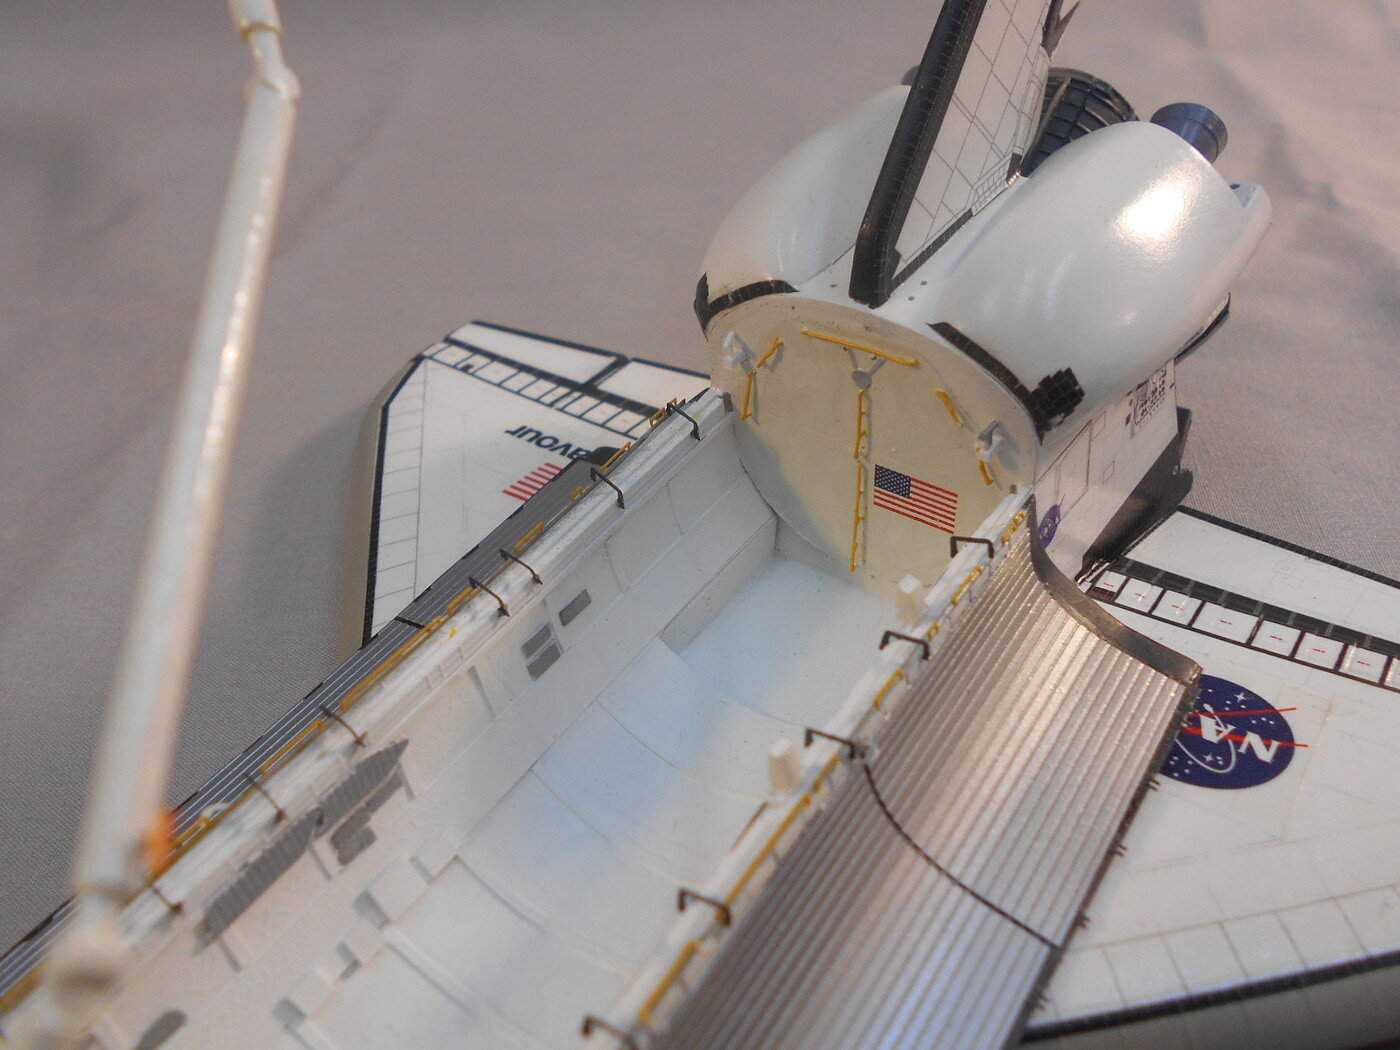
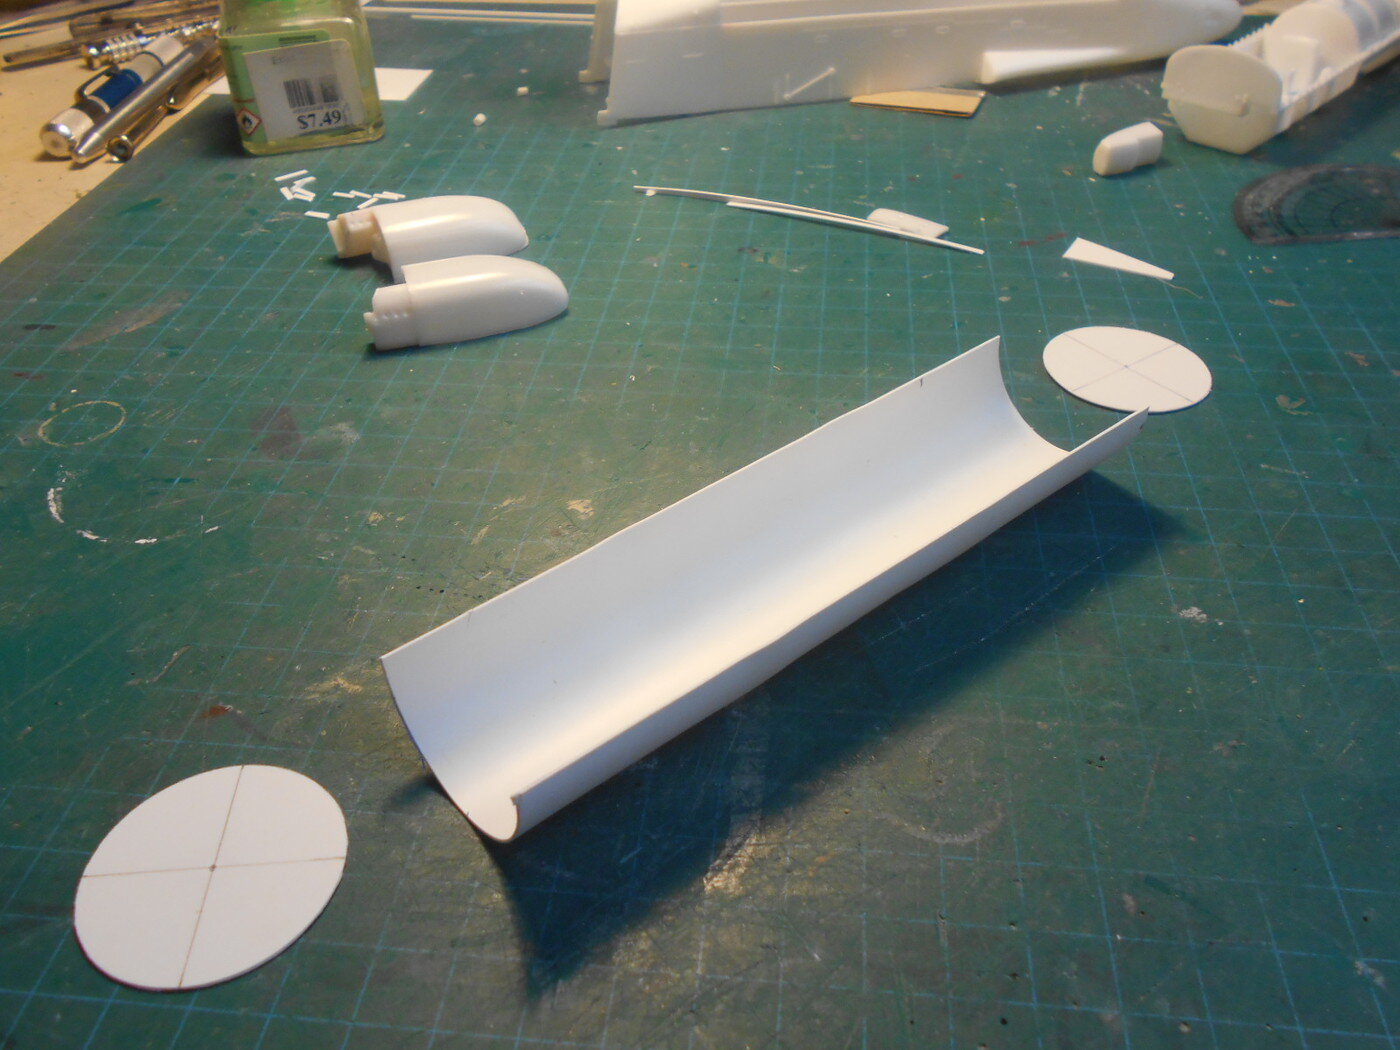
I've built a few Shuttles and as inaccurate as they all are, being based on prototypes, I like to modify 'em to make them look a little more accurate. With this little AIrfix, I've built up the Payload Bay, and opened up the Payload Bay Doors. Using New Ware PE for the REVELL Shuttle, the Radiators give it a nice look. All my Shuttles have the Bay doors open and the Payload Bay displayed. To me, this is how the Shuttle looks most of the time up there! The details were all built from scratch including the Ku Band antenna. The PE radiators and hinges were from New Ware. The FWD and Aft Bulkheads were built up too from scratch. The fit of these kits is really poor, but the molds are all 40 and 50 years old, so we have to expect this. Needless to say, sanding and filling are part and parcel to a nice build. Fitting the PB Doors ... lovely detail here, too bad they got covered up! Starting to built the new Payload Bay ... The kit's PB was replaced. The length of pipe was used to form my PB. The realistic Belly decals were made by a fellow modeler and really add to the accuracy of this little model. The RMS, Canadarm, was modified from the lit too ... Thanx for taking a peek gents! Pete
-
Yessir! The event is fictitious, but the hardware is actual ... that's how I measure my satisfaction, " ... does it look like the actual thing, YES? Then carry on mate!" Thanx Mark! ;- D Pete
-
Thanx a lot Mark! ... I really do appreciate your comments! ..... re the Models, I do try to get that realistic look to them. Little details that the viewer doesn't even notice, I enjoy placing, because, you know, I know it's there. Like putting all the details, switches, gauges, in a Plane's cockpit even though it's gonna be closed right up. And when someone like you 'notices', it makes it all worthwhile. So Thanx again! ..... just between you and me, are these boards usually this quiet? ... and as you're one of 2 who have responded, do you have a real interest in the Space program or are you a moderator and you're participating as part of your job? ;- D I wanna post just a couple more threads and these will be my favourites ... and up here, near Niagara Falls Canada, we're getting 2 feet of snow today, so I can spend some time building up my Apollo 10 LM. ;- D Pete
-
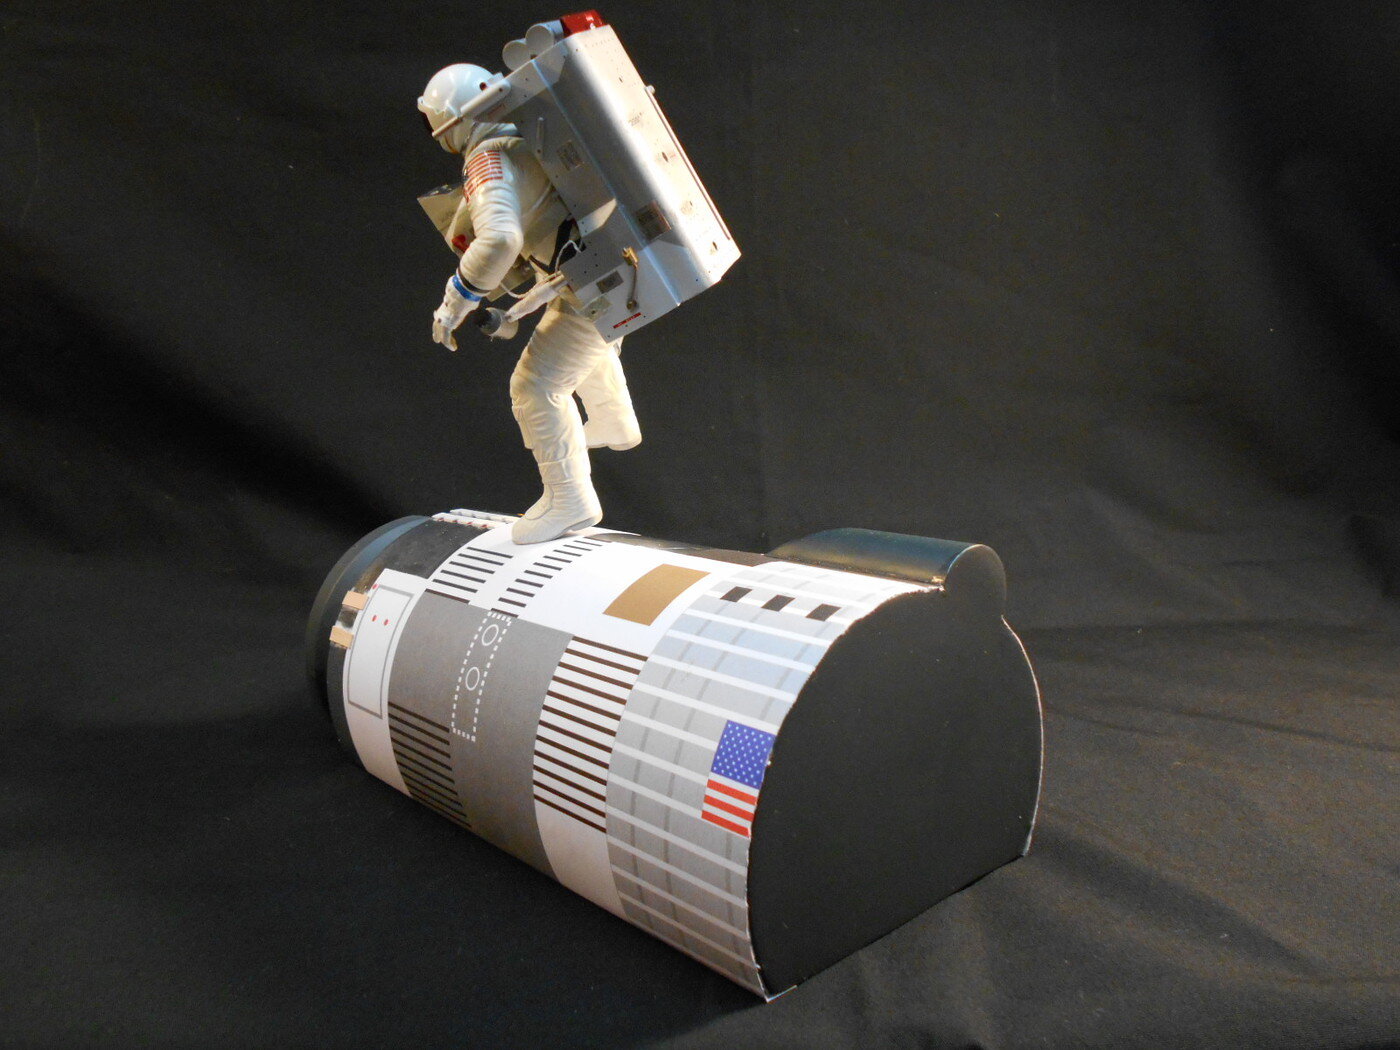
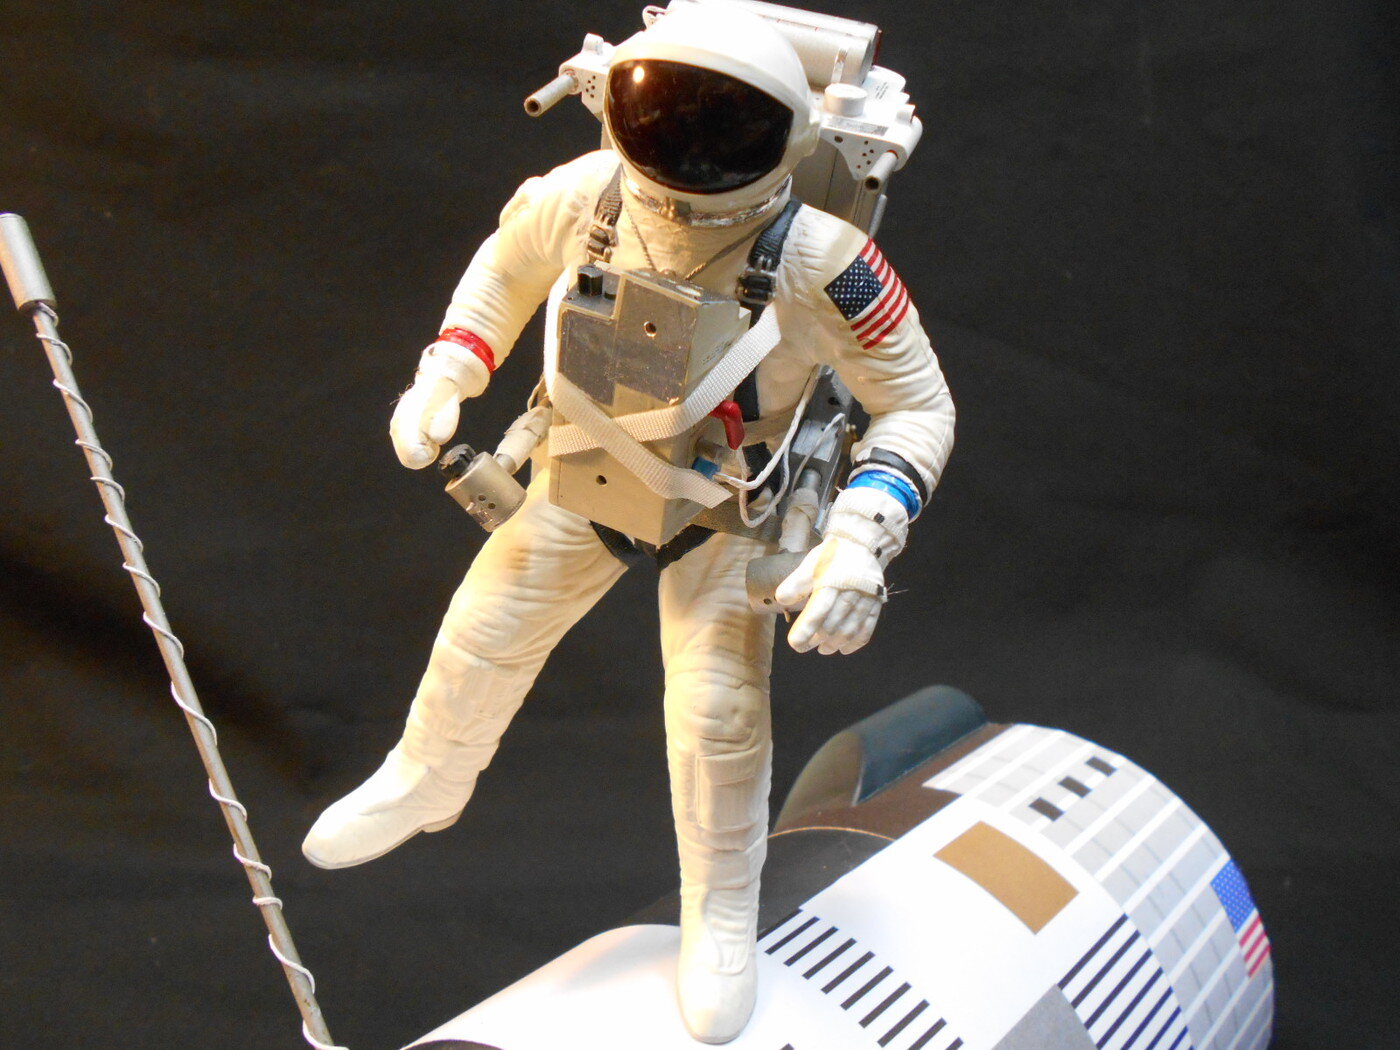
This was another fun model for me ... using the Revell Gemini 1/6 scale kit of Ed White on his EVA, I modified the figure and made an AMU ( Astronaut Maneuvering Unit ) as well as a partial Agena. The Decals were all homemade ... The AMU and ELSS ( Chest Pack ) The AMU ... Just using styrene ... I did a little surgery on the Astro's hands ... ... building up the partial Agena ... This event did not happen, but I had a kit and some plastic and thought ... oh ... what the heck! ;^ D Pete
-
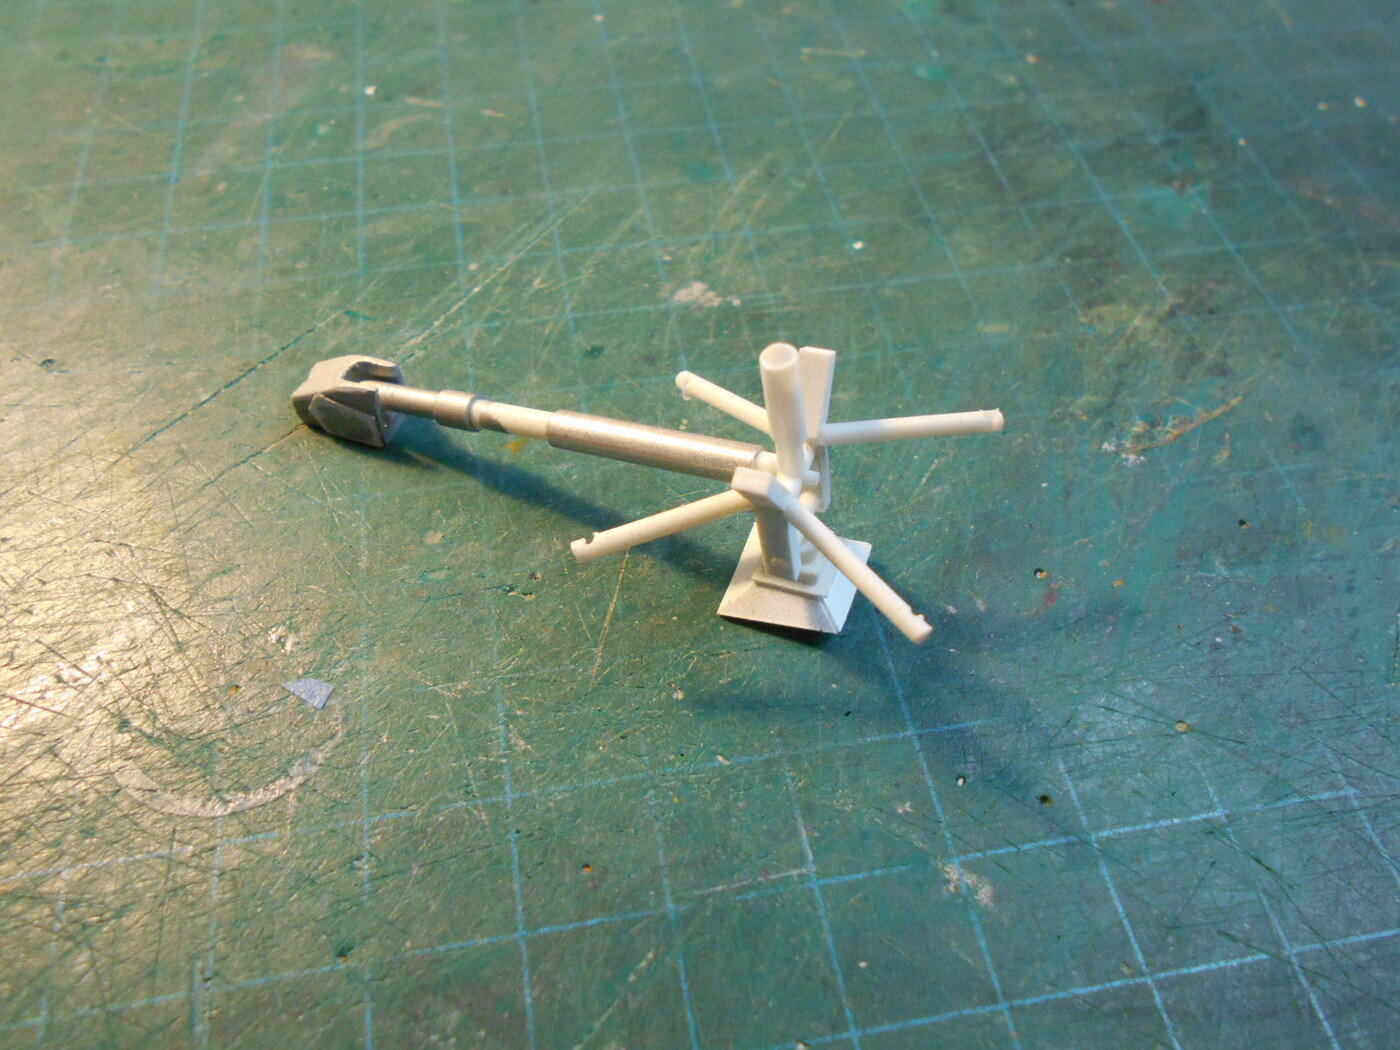
This is the Augmented Target Docking Adapter for the Gemini Program. It was built from scratch with homemade decals and is a companion to my 1/24 Gemini 9A on which they shared the mission. I used a short length of Plumbing pipe and bits of styrene. The Orange docking collar, which was under the shroud, is a funnel. The shroud was scratch built as well ... the Grey section to the far left is a spare part from a 1/24 Gemini kit which has the thrusters on it. I think Glenn at Real Space Models has a Resin kit of this ATDA but not in 1/24 ... ... and one more ... Thanx for taking a peek! Pete
-
Many Thanx Mark! I really appreciate your responses ... it's so-o-o nice to received positive feedback. Thanx! I did this for s Group Build, in 2019, to commemorate the 50th anniversary of the 1st Moon Landing. Here's the link to the build thread where it gives way-y-y more info ... take a peek if you wish. http://www.arcforums.com/forums/air/index.php?/topic/307093-apollo-16-csm-and-lm/ I have a few more of my builds I wanna post here, then, I'll give the forum back to you guys! ;- D Pete
-
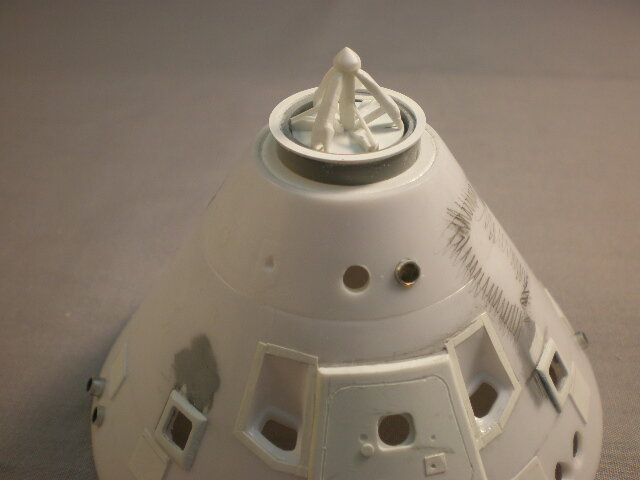
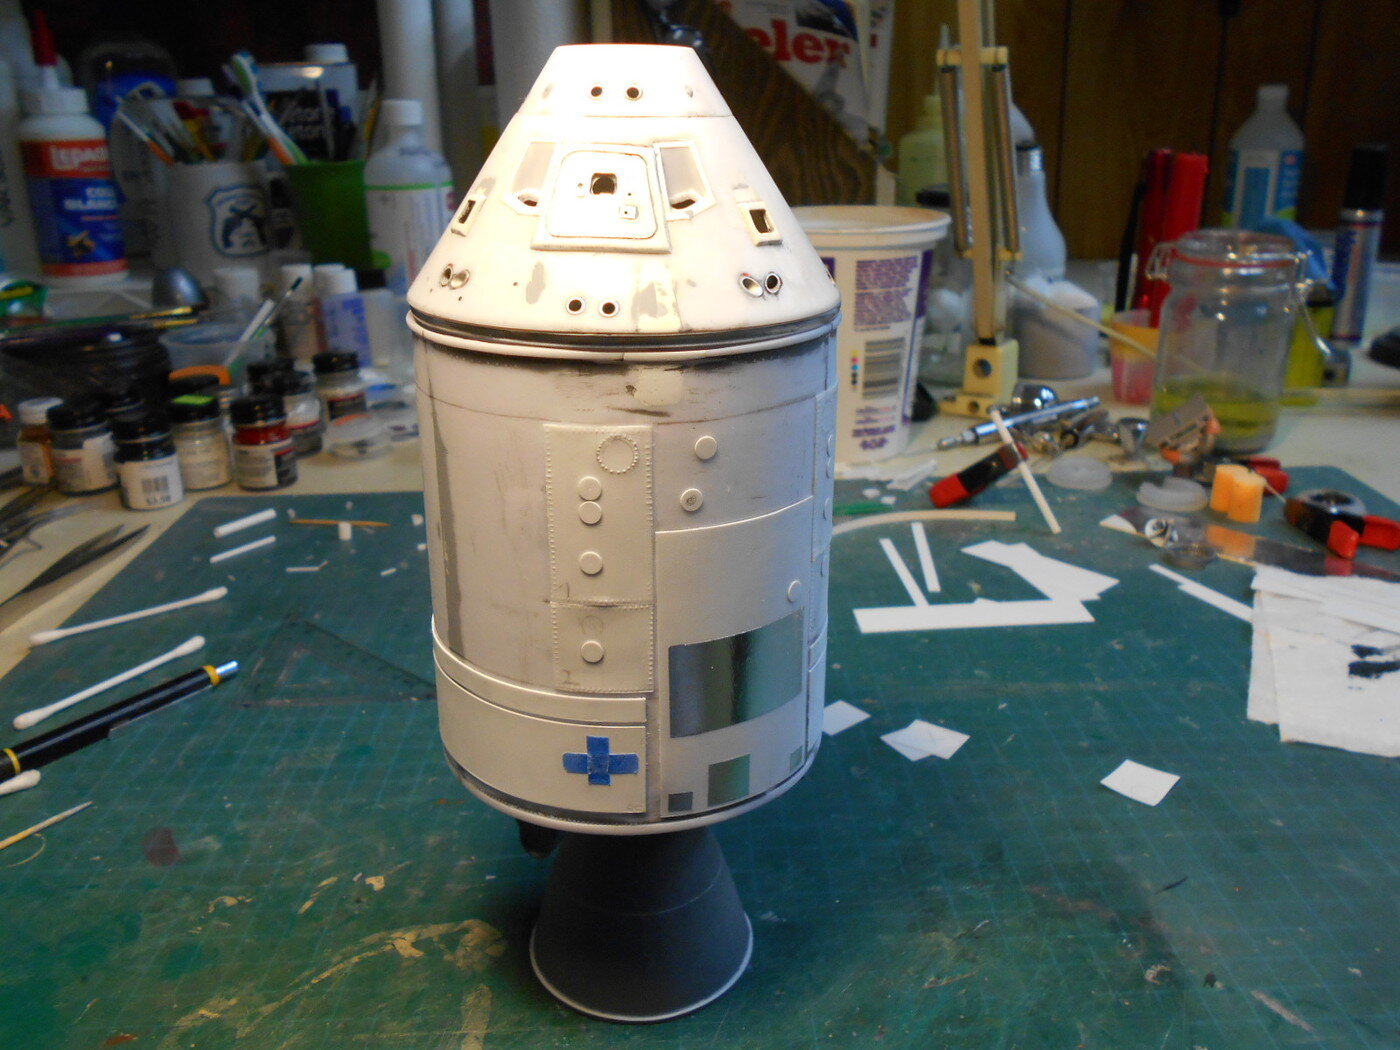
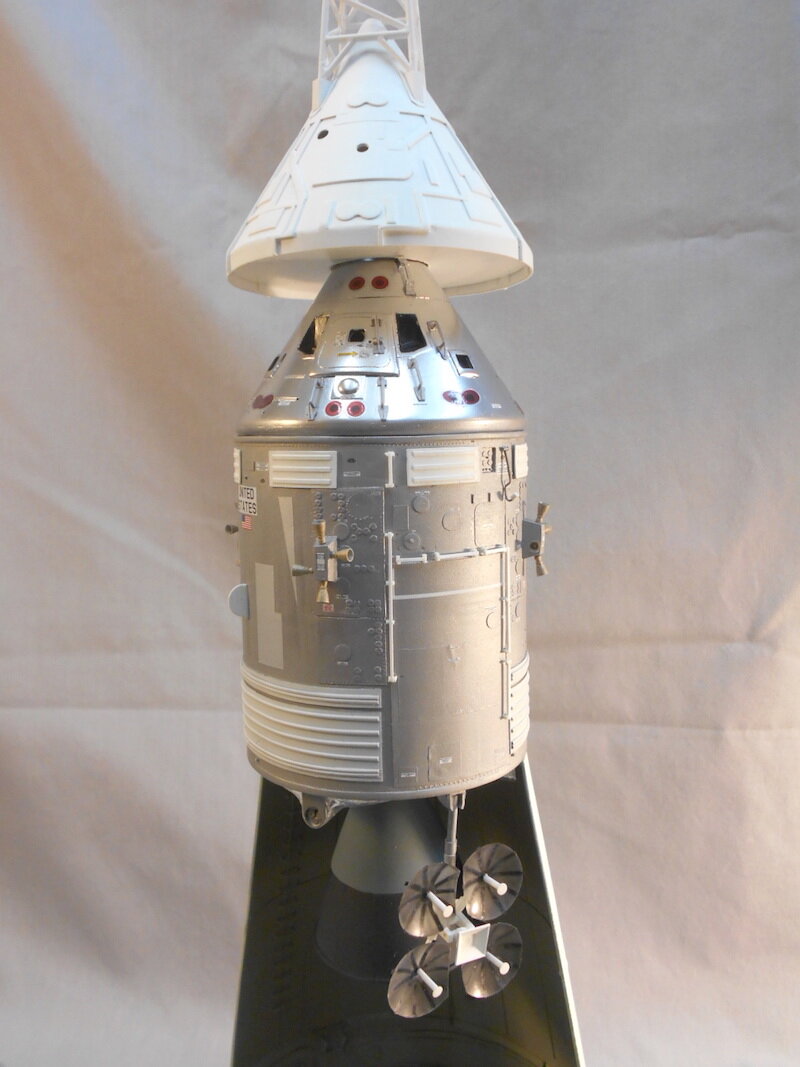
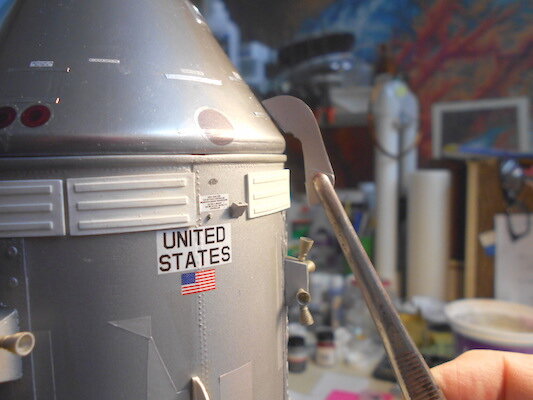
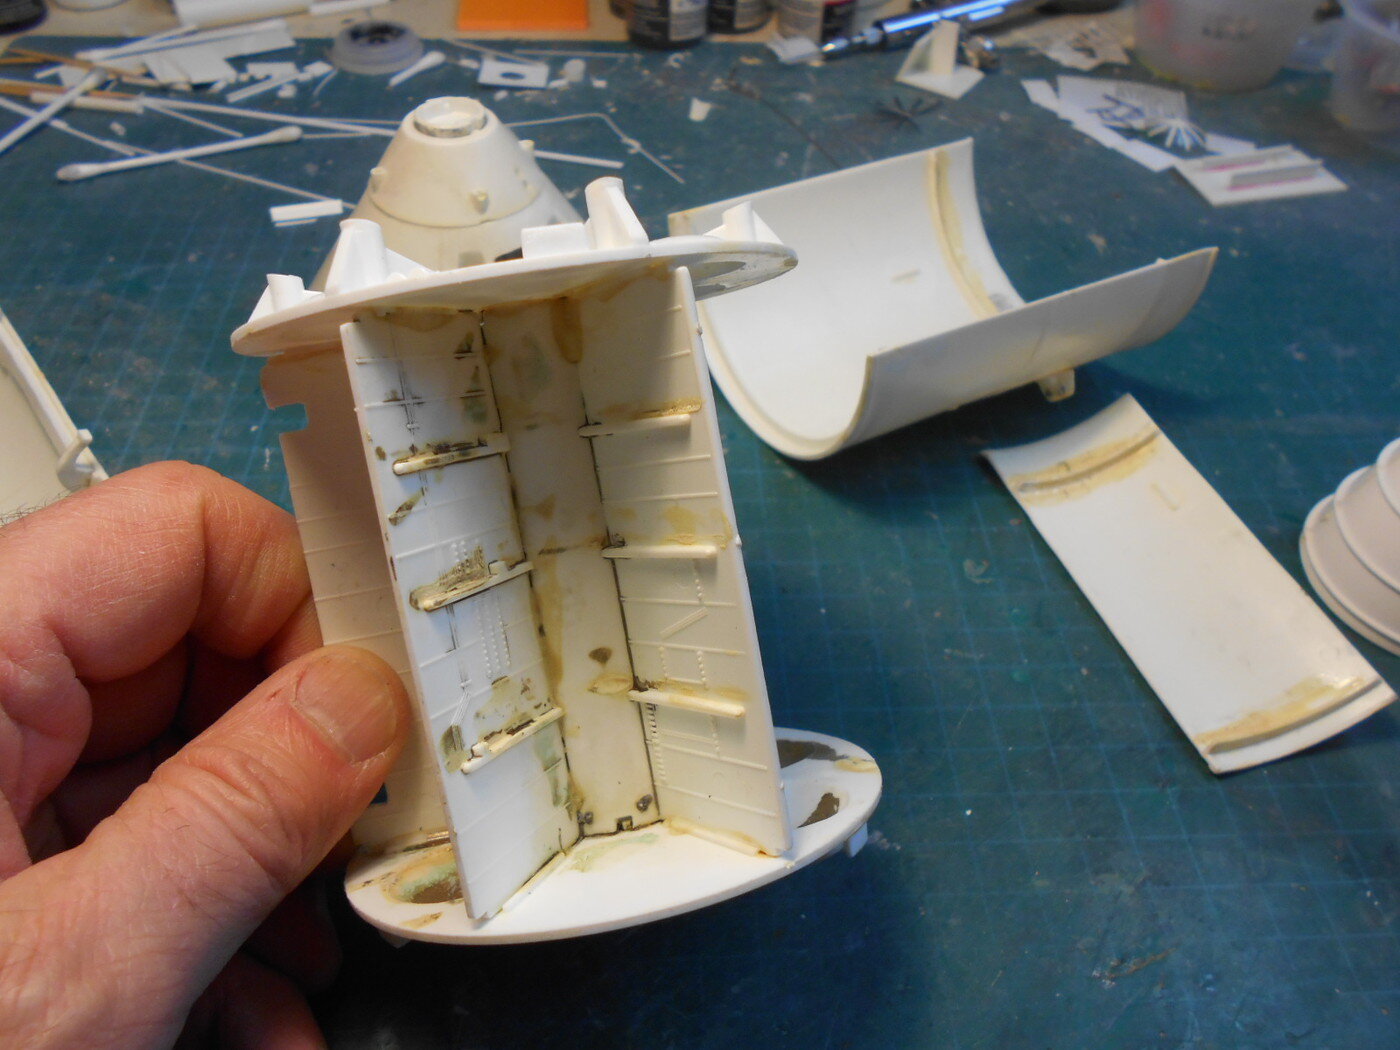
This is an eBay find and it was in pretty poor shape ... but it's just what I like! I took it apart and rebuilt it using a lot of scratch building ... I did the LM and the Rover ( a 3D print ) too, but I'll just show you the CSM. Lotsa seams, lotsa incorrect surface detail and loads of work to do, or should I say, Fun to have! Taking apart the Service Module and reworking it ... I trimmed the nose of the CM off and sanded and filed per usual. I had to move the windows and build a new hatch ... To include the SIM Bay (Scientific Instrument Module) I had to do a little modification! The different instruments were all built from scratch. this is a dry-fit. Another dry fit as I had to fill and sand some seams. Notice all the kit's surface details were sanded and filed off ... Starting to add some PE from New Ware The Command Module (CM) has some more PE attached and a new hatch too. The Docking probe was built too And how it looks just before priming and painting ... I love this stage! And Done That High Gain antenna had to be hand-built too as well as the SPS engine Bell and the Heat Shield and the Umbilical cover All in all another fun build! Thanx for popping in! Pete
-
Thanx Mark! I used to work as a Technical Illustrator creating exploded views and cutaway views for use in Technical Manuals and I love getting "into the weeds" when I'm researching a subject and to see my results in 3D, that I can hold in my hands is a bit of a thrill. To build it all up like a carpenter would build a lovely piece of furniture from a couple sheets of wood, just satisfies the heck outta me. It's not at all the same as building it up on a screen and sending it to Print ... ;- ( And this subject matter has been my main area of interest since the early 60's ... and it STILL fascinates me! Pete
-
Gee Mark ... Thank You! ... now, where can I send your check? ;^ D Pete
-
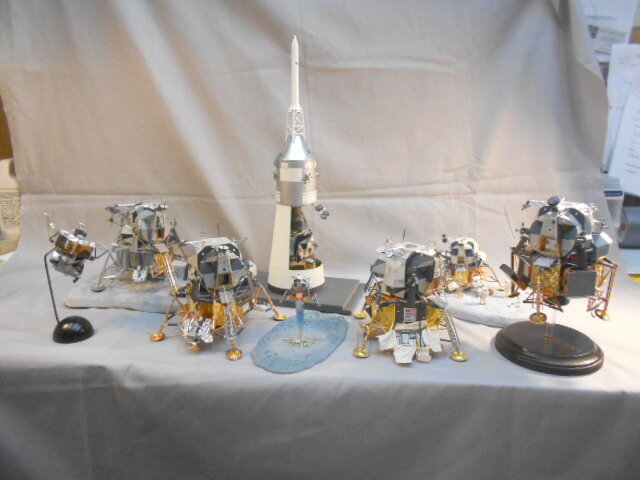
That's very interesting Mark about the activity level ... Let's see if this image gets published! These are my LM models in various scales ... Left to Right ... Apollos 9 (1/96), 11, 12, 13 (landing 1/144), 14 (1/70 in the stack), 15, 16 and 17.
-
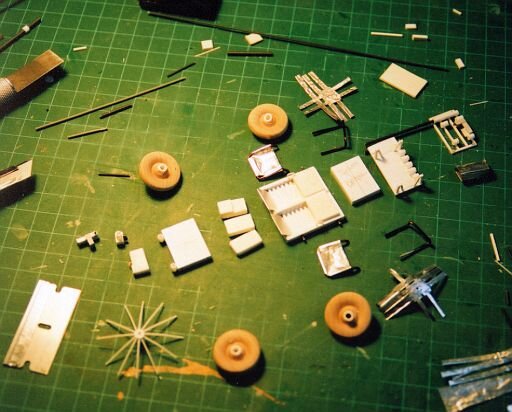
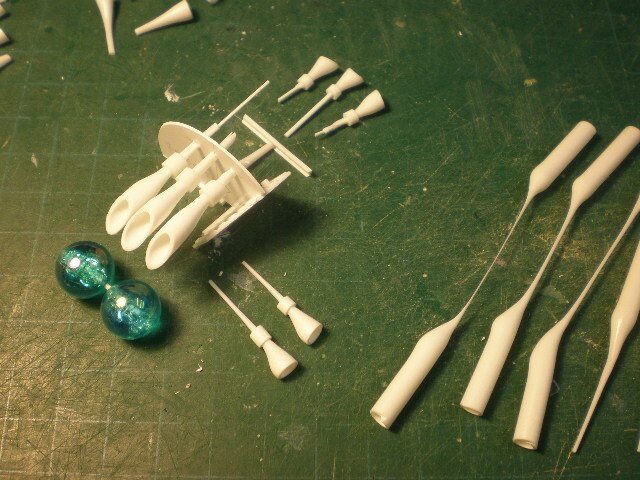
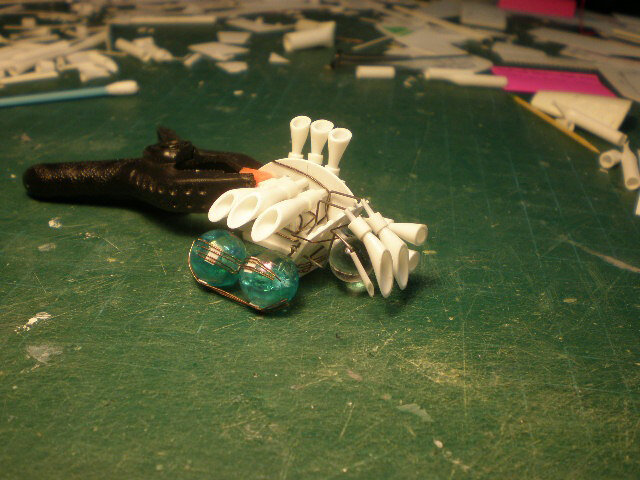
This is my very first model built a few years ago ... All the mods were made from scratch because I didn't know of any aftermarket items available. The Lunar Rover was completely built from scratch using a variety of materials. I had built the ALSEP door to open and close. The empty LRV bay ... The LRV was built from scratch too ... with homemade decals The parts ... One more view ... I've got a real affection for the Lunar Module and I've built them all, with Apollo 10's as a current build Thanx for popping in for a peek! Pete
-
This was done a few years ago and is one of my first models ... I've seen 3D prints offering this same sort of unique view. I used a lot of references for this kit and it's STILL one of my faves! This is Apollo 11 ( the cutaway ) and 12 together The Lunar Module has to be my favourite space vehicle. The design and engineering, the pure imagination and creativity used in building this is STILL remarkable after all these years! Pete
-
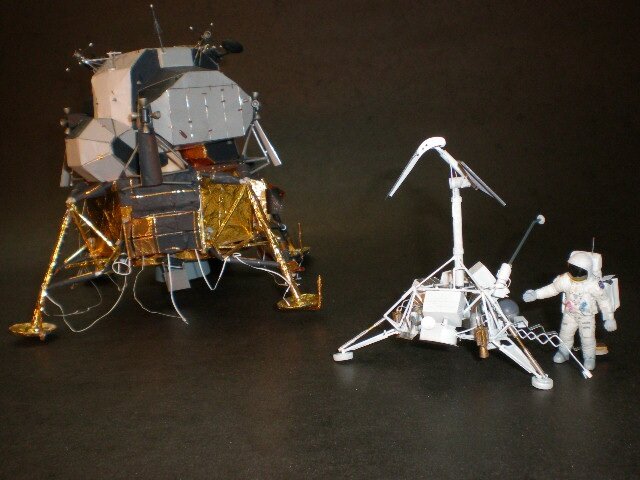
This is the Monogram 1/48 Lunar Module with my scratch built Surveyor ... in a diorama. I used the book Virtual LM and New Ware's update set to build out the LM ... The Surveyor with Pete Conrad ... This was the Diorama ... the base was 24" x 24" IIRC The Surveyor's parts ... ... and done. And a view from the back ... This was another fun model to build! Pete