bb62vet
-
Posts
25 -
Joined
-
Last visited
-
Re. the enamel paint issue: seems like there is an online scam re. Rustoleum discontinuing the Testors brand of paints (they are the parent co.) but apparently this only applies to overseas distribution/sales. US/Canada distribution/sales continuing...at least with their best sellers. One never knows these days with profits outweighing customer need/loyalty/etc. - you may want to stock up on your most used colors. Just an FYI....
-
Bob, First, thanks for the kind remarks - I do appreciate them! The paints I used on this build were all enamels - I do have acrylics, but I'm not too sure I'll stick with them on my PENNSY build in the future, although a few parts I've already created for that build are done with them. Most of the paints were Testor Model Master enamels and the "haze grey" I used was, in fact, Light Ghost Gray (FS36375) which is only available in bottle. On the deck/flat surfaces I used Gunship Gray (FS36118) which IS available in rattle can, as well. In addition, the hull was painted with a flat gray primer paint that was actually a lacquer - Mr. Color 601 - but the actual # of the bottle I don't have - all my modeling stuff is packed up and the paint with it. This paint went on well using vertical strokes with an artist's fan brush and was damn near identical (if not actually) to the Testor Lt. Ghost Gray. Good luck with your CONNY - I was aboard KITTY HAWK in 1966 taking air sea pilot rescue training prior to our destroyer's 66-67 Westpac cruise. Very similar to CONNY - esp. the paint scheme. Hank
-
Thanks Rob, I always appreciate comments from non-ship modelers! If you do get interested, try something a bit less daunting for a first time - work your way into the hobby with something that's pretty much all in one package. This build was extremely challenging and complex. Hank
-
Ralph, Thanks for the kind remarks re. the model. Your advice is well taken - esp. today when the OOB model building is simply for beginners or kids. Hank
-
EJ, In the case of the IOWAs, both NEW JERSEY and IOWA were under construction at the same time - NJ at PNSY and IOWA at NYSY. There was fierce competition for steel by both yards to the point of actually driving off with loads of freshly rolled hot steel from one yard to the other. I'm also convinced that this also resulted in why the superstructures of those ships varied in their "as built" appearances. Each yard, I think, had the prerogative as to what was needed to build that ship and whether the exact cosmetic appearance was as shown by the blueprints or locally modified I would tend to believe that the yard had final say based on available steel, labor, schedules, etc. I would imagine that the carrier construction was no different, or any of the many classes of ships under construction for the war effort. I have also built the 1:350 Tamiya kits, even their predecessor, the 1:350 Life-Like MISSOURI. I actually liked it better than the newer Tamiya kits. I've always found that research is your best option before construction and part of that is photographs, if available. Good luck with your model build; I'm sure you'll reach a successful conclusion. Hank
-
EJ, First - thanks for the compliment. Second - that's fine to use my build as a guide, but please keep in mind that all 4 IOWA class ships were NEVER identical at any time in their history. Each was built to a std. set of blueprints modified as needed by the shipyard doing the work. As a result, they all, even at their launchings, differed slightly in how they actually were built. One size does NOT fit all in this case. Similar - YES! but that's the extent of it. Hope this helps, Hank
-
Sprueguy & Mark - Thanks so much - I do appreciate your comments and so forth. Nice to know others share my desire for details! I'm guessing that you (Mark) mean the IPMS show in Chattanooga. At this point I'm a forum member and not much else. Having just retired, I'm still sorting out things I'd like to do, things I NEED to know, and of course the most important - things my wife thinks are most important to be done next. 😥
-
Ron, Thanks for the kind remark! Yes, a "small" bit of personal pride in the outcome.
-
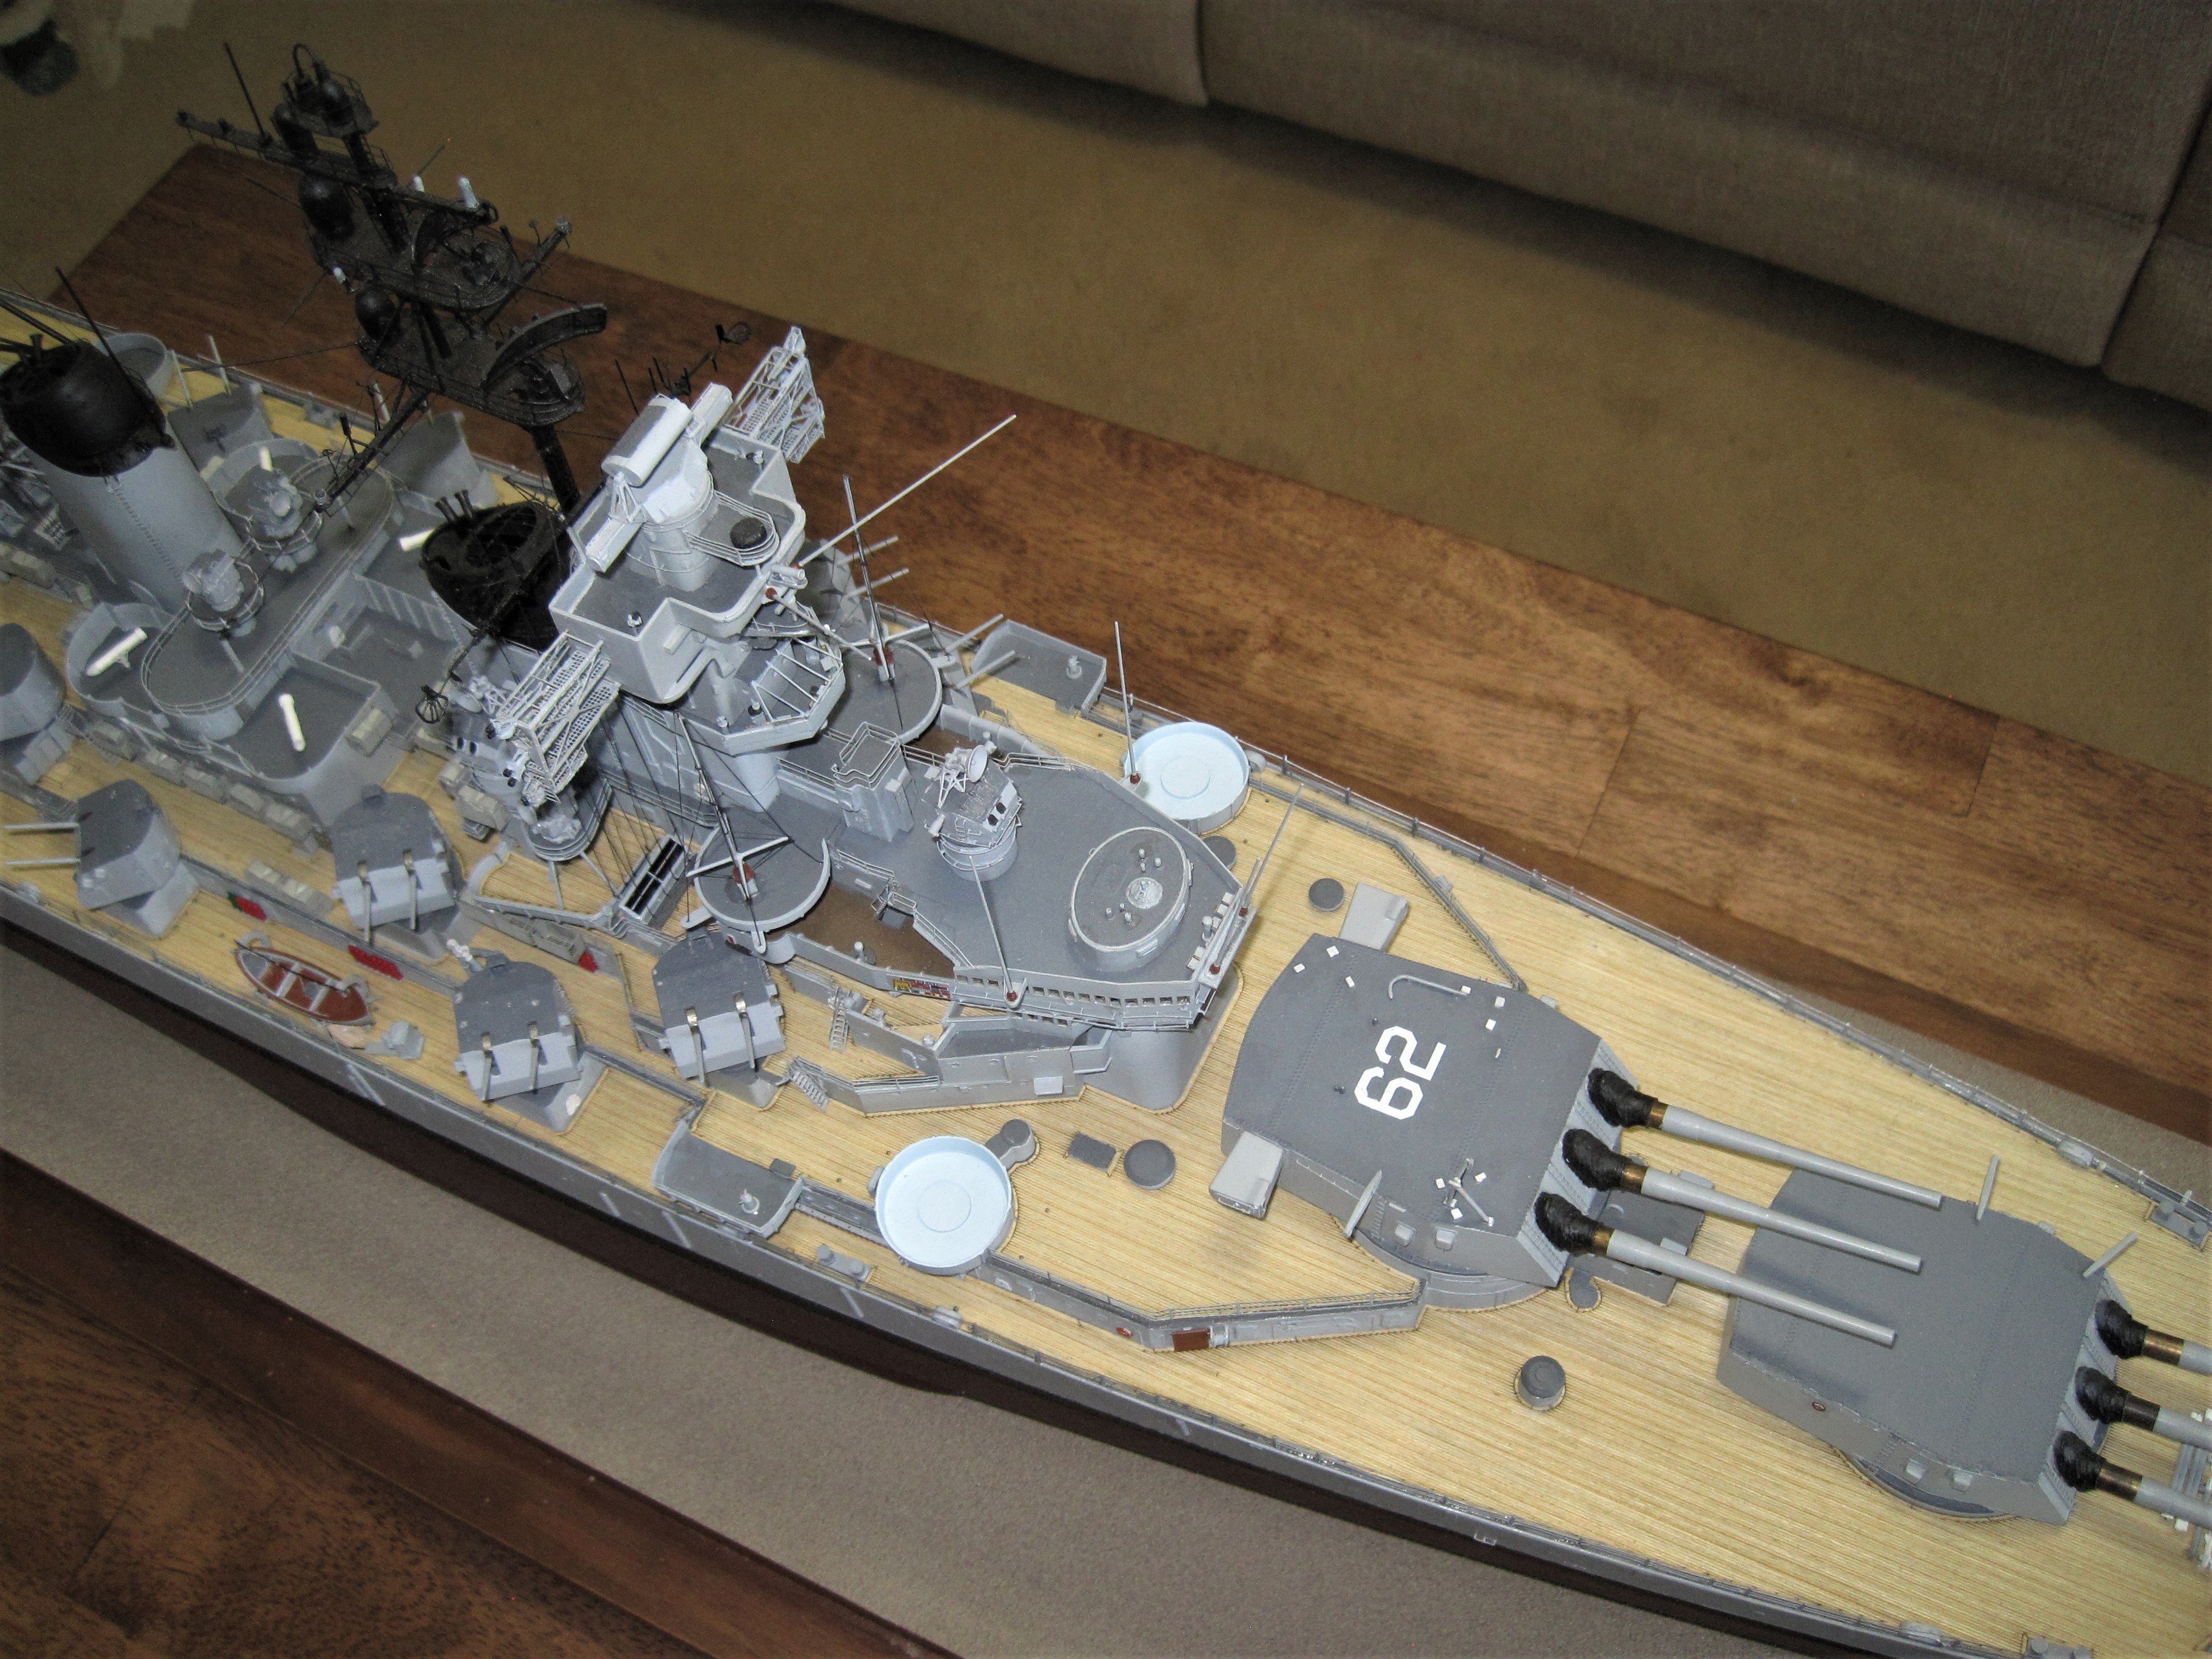
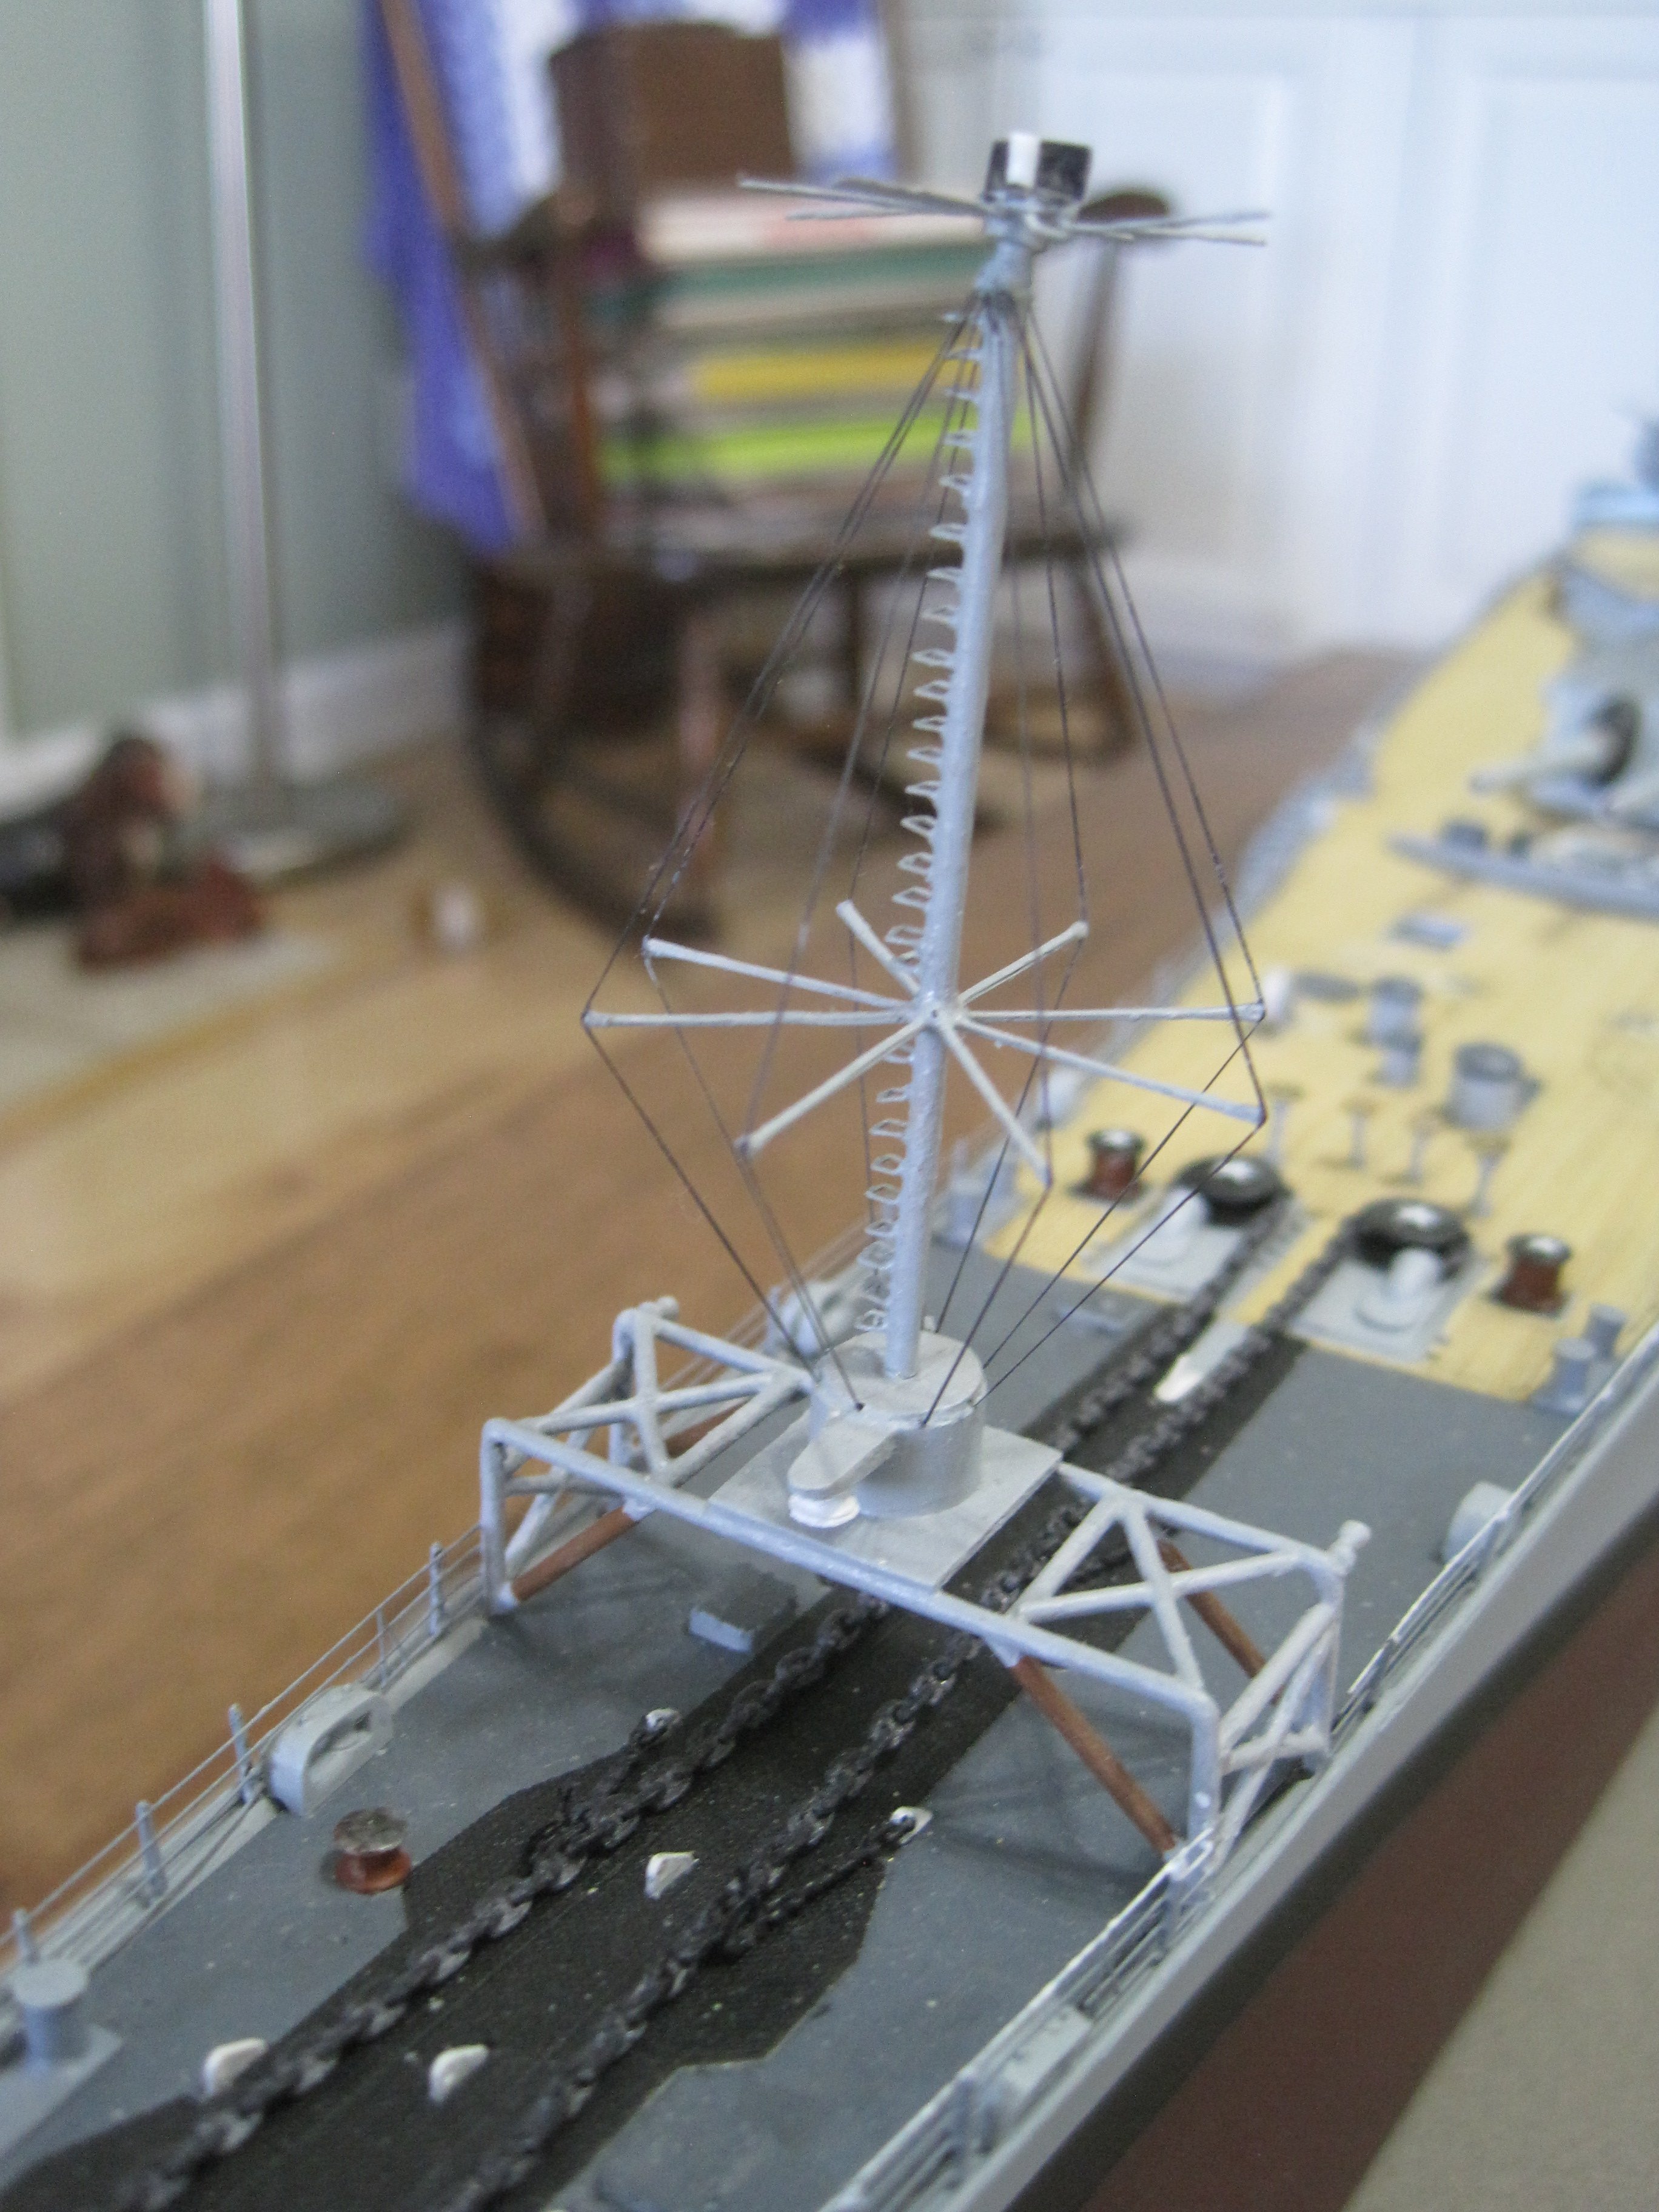
 As a former crewmember of USS NEW JERSEY (BB-62) - X Division, 1968-69, I Have wanted to build a larger model of her for a long time. The 1:200 scale Trumpeter MISSOURI kit provided the basic starting point for this project. I began in 2012 and finished in March 2019 - the complete build log is on The Ship Model Forum under Completed Models. I am posting photos only of the completed model here with a very brief assessment of the kit and overall project: The 1:200 Trumpeter kit for both MISSOURI/IOWA is, at best, a great idea with poor/fair outcome. The hull (common to both kits) is incorrectly molded and needed extensive rework to get the shape fairly close to what the actual ship was built. The 5"/38 dual gun mounts are incorrect for U.S. battleships (they would work for GEARING/SUMNER class DDs) so these were replaced by Model Monkey dual 5" mounts. All fire control directors/RADARs, etc. were replaced as they were incorrect or didn't exist in 1945. I created approx. 15-20 CAD drawings to fabricate equipment that was scratchbuilt for the model. The both masts and all RADARS/fwd. conning tower were all scratchbuilt or modified from the kit parts. I designed CAD drafted 3 sheets of PE parts which I had Starling Models (London, UK) print for me. Pontos provided a teak custom deck set that I gave them specifications as NEW JERSEY in 1967-69 had obvious changes made that I needed modified from their std. decking set. I also used the Pontos Detail Up kit for MISSOURI. Research included one week at NARA in College Park, MD in order to find additional information on NEW JERSEY as well as other ships. The display board and case I CAD designed/drafted and the case was trucked from Hamilton, OH to my home in North Carolina (what an ordeal!!). The model is 53" overall and the case 60" in length.
-
Question Re. Testors Decal Making Kit
bb62vet replied to bb62vet's topic in Tools, Tips & Techniques
Robert, Once again, Thanks! - I'll look into this (Openoffice) and their vector graphics Draw component. Quite professional the way that fellow had laid out his artwork and so forth on the Hampton Roads example. I do understand your comment re. the gray background - I had another modeler draw up some similar type graphics for me for a different ship model (can't recall the program he used but I think it was Illustrator) and he sent the .pdf to me with the objects placed on the sheet with various shades of gray as a "surround". These were not decals but printed on regular white paper. It worked great as the actual object was raised from the mounting surface and this gave that effect on the model. The gray I picked was almost invisible after placement. Looks like I've got some "schooling" to do and since this isn't a current on-going need, I should have time to research, download, study, etc. all the items that have been presented so far. Hank -
Question Re. Testors Decal Making Kit
bb62vet replied to bb62vet's topic in Tools, Tips & Techniques
Michael, I appreciate the link and info! I'll look into that avenue although I don't have Adobe Illustrator (just Acrobat Reader) at present. It's quite possible that one of these fonts can be imported into my CAD program and used like any of the included fonts. I use the same program at work and can stay late and experiment - esp. during these cold nights!!! Hank -
Question Re. Testors Decal Making Kit
bb62vet replied to bb62vet's topic in Tools, Tips & Techniques
Gentlemen, et al: Thanks so much for the advice, info, etc. First, almost all internet programs are going to the cloud (actually, IMHO they are going to Hell in a handbasket!) and it is for one reason only - $$$$$$!!! My CAD program is trying it's best to get everyone licensed on a cloud-based platform, which is why I don't have a current license. It's ridiculous! My only need at the moment is to create some 1/144 scale hull numbers for one of my ship models. These are black, military block numerals with a white shadow (you've seen them I'm pretty sure) - that's it! So, I'll take all the advice, info, instructions, etc. into account and go from there. I do have the official USN drawing that illustrates the proper size, styles, etc. so it's just a matter of creating a CAD file that I can print on decal paper and get it to come out correctly. FYI - this particular scale is an odd-ball in the hull no. decal world - none currently available that I know of. There are a few other items to be drawn up (also numerals and simple symbols, etc.) which I'll include on the sheet, but the hull numbers are the main attraction. Once again, thanks! Hank -
Question Re. Testors Decal Making Kit
bb62vet replied to bb62vet's topic in Tools, Tips & Techniques
Pete, Thanks for the reply! I am not at my workshop (where all my decal printing kit is located), but will check out the YouTube tutorials you suggested. I am familiar with the Win10 photo editor as it is a pretty good editor compared to earlier versions. When I get back to my shop next week, I'll look to see if the decal paper had any instructions with it. Perhaps by then I will have decided on a particular .jpg to use for the new decals and will have scaled it according to my needs. Hank -
Question Re. Testors Decal Making Kit
bb62vet replied to bb62vet's topic in Tools, Tips & Techniques
OK, I'm at a total loss as to how to even BEGIN to use this software. There are no instructions about anything - PERIOD!!! Help doesn't work on Windows 10 O.S. At this point, I would just as soon uninstall and figure the cost of this piece of S$#%%!!! program down the drain!! I've just spent 2 hours trying to figure out ANYTHING about how to import existing photos for making them into decals without any form of success. It went downhill from there!!!! If anyone has a CLUE about how to go about starting this thing, please let me know!! Thanks, Hank -
Question Re. Testors Decal Making Kit
bb62vet replied to bb62vet's topic in Tools, Tips & Techniques
Nick, I ordered it from Hobbylinc online - www.hobbylinc.com Hope this helps! Hank