JowesCrow
-
Posts
14 -
Joined
-
Last visited
-
Days Won
2
-
Thanks!
-
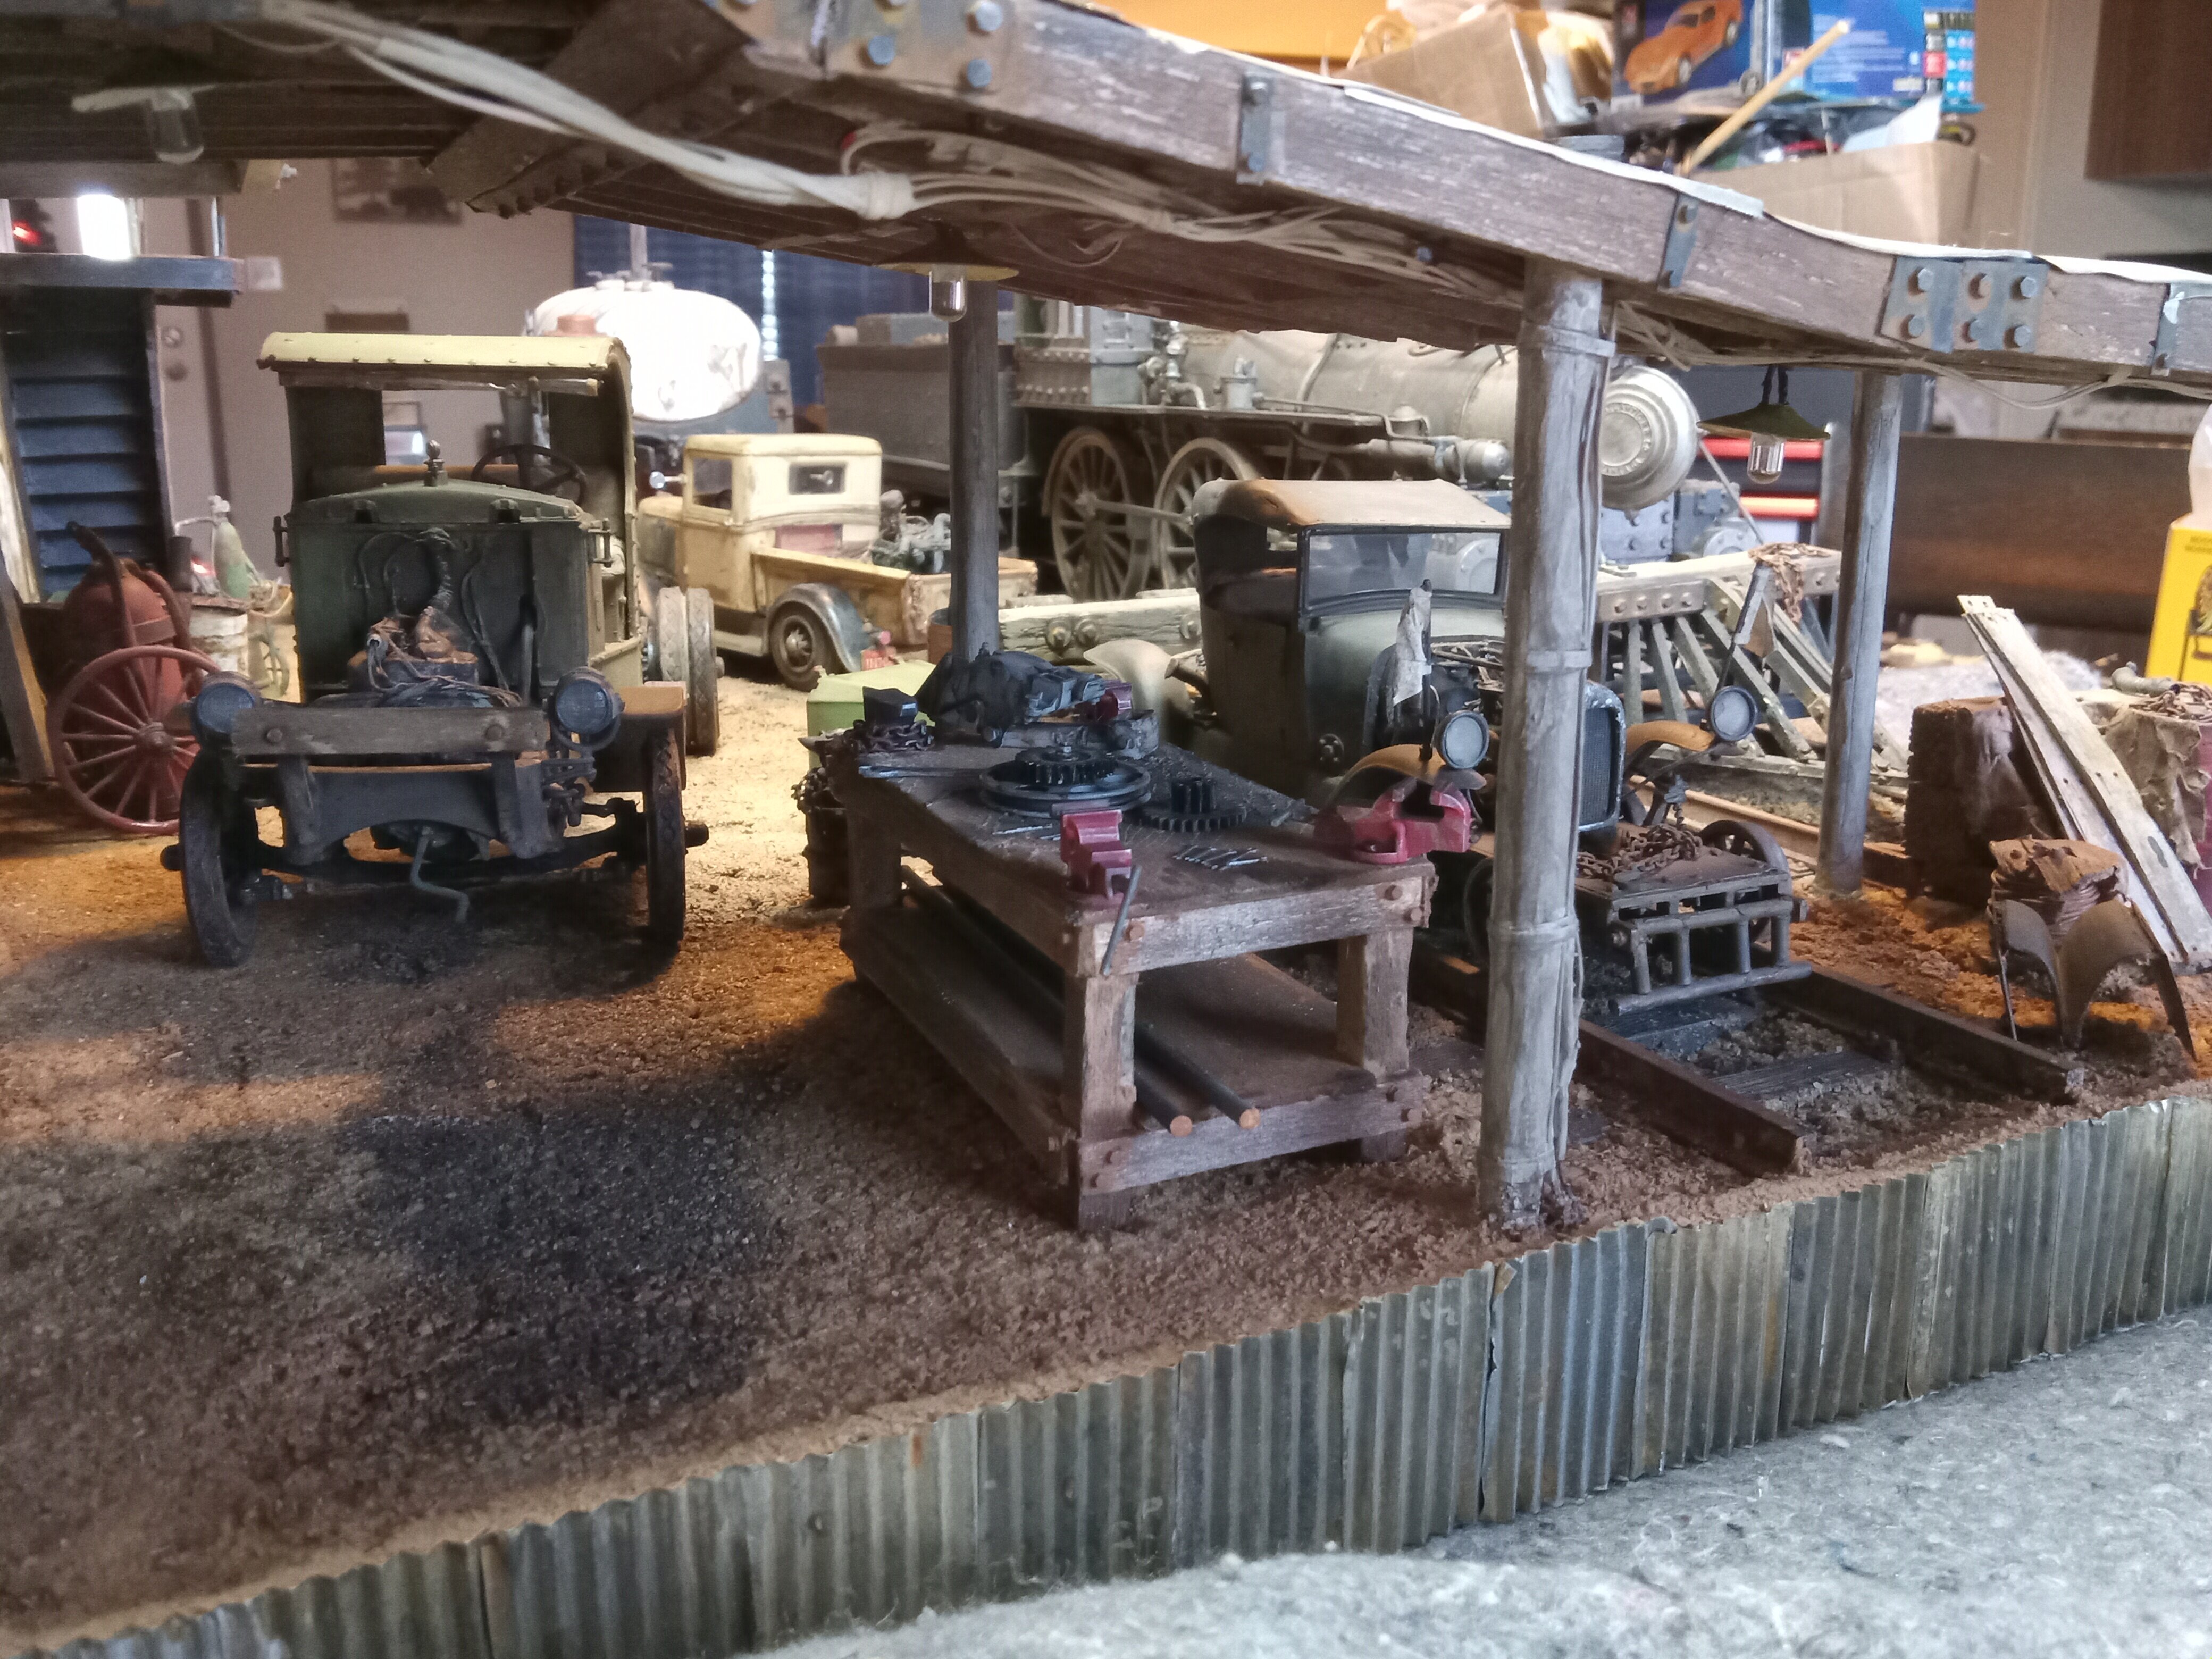
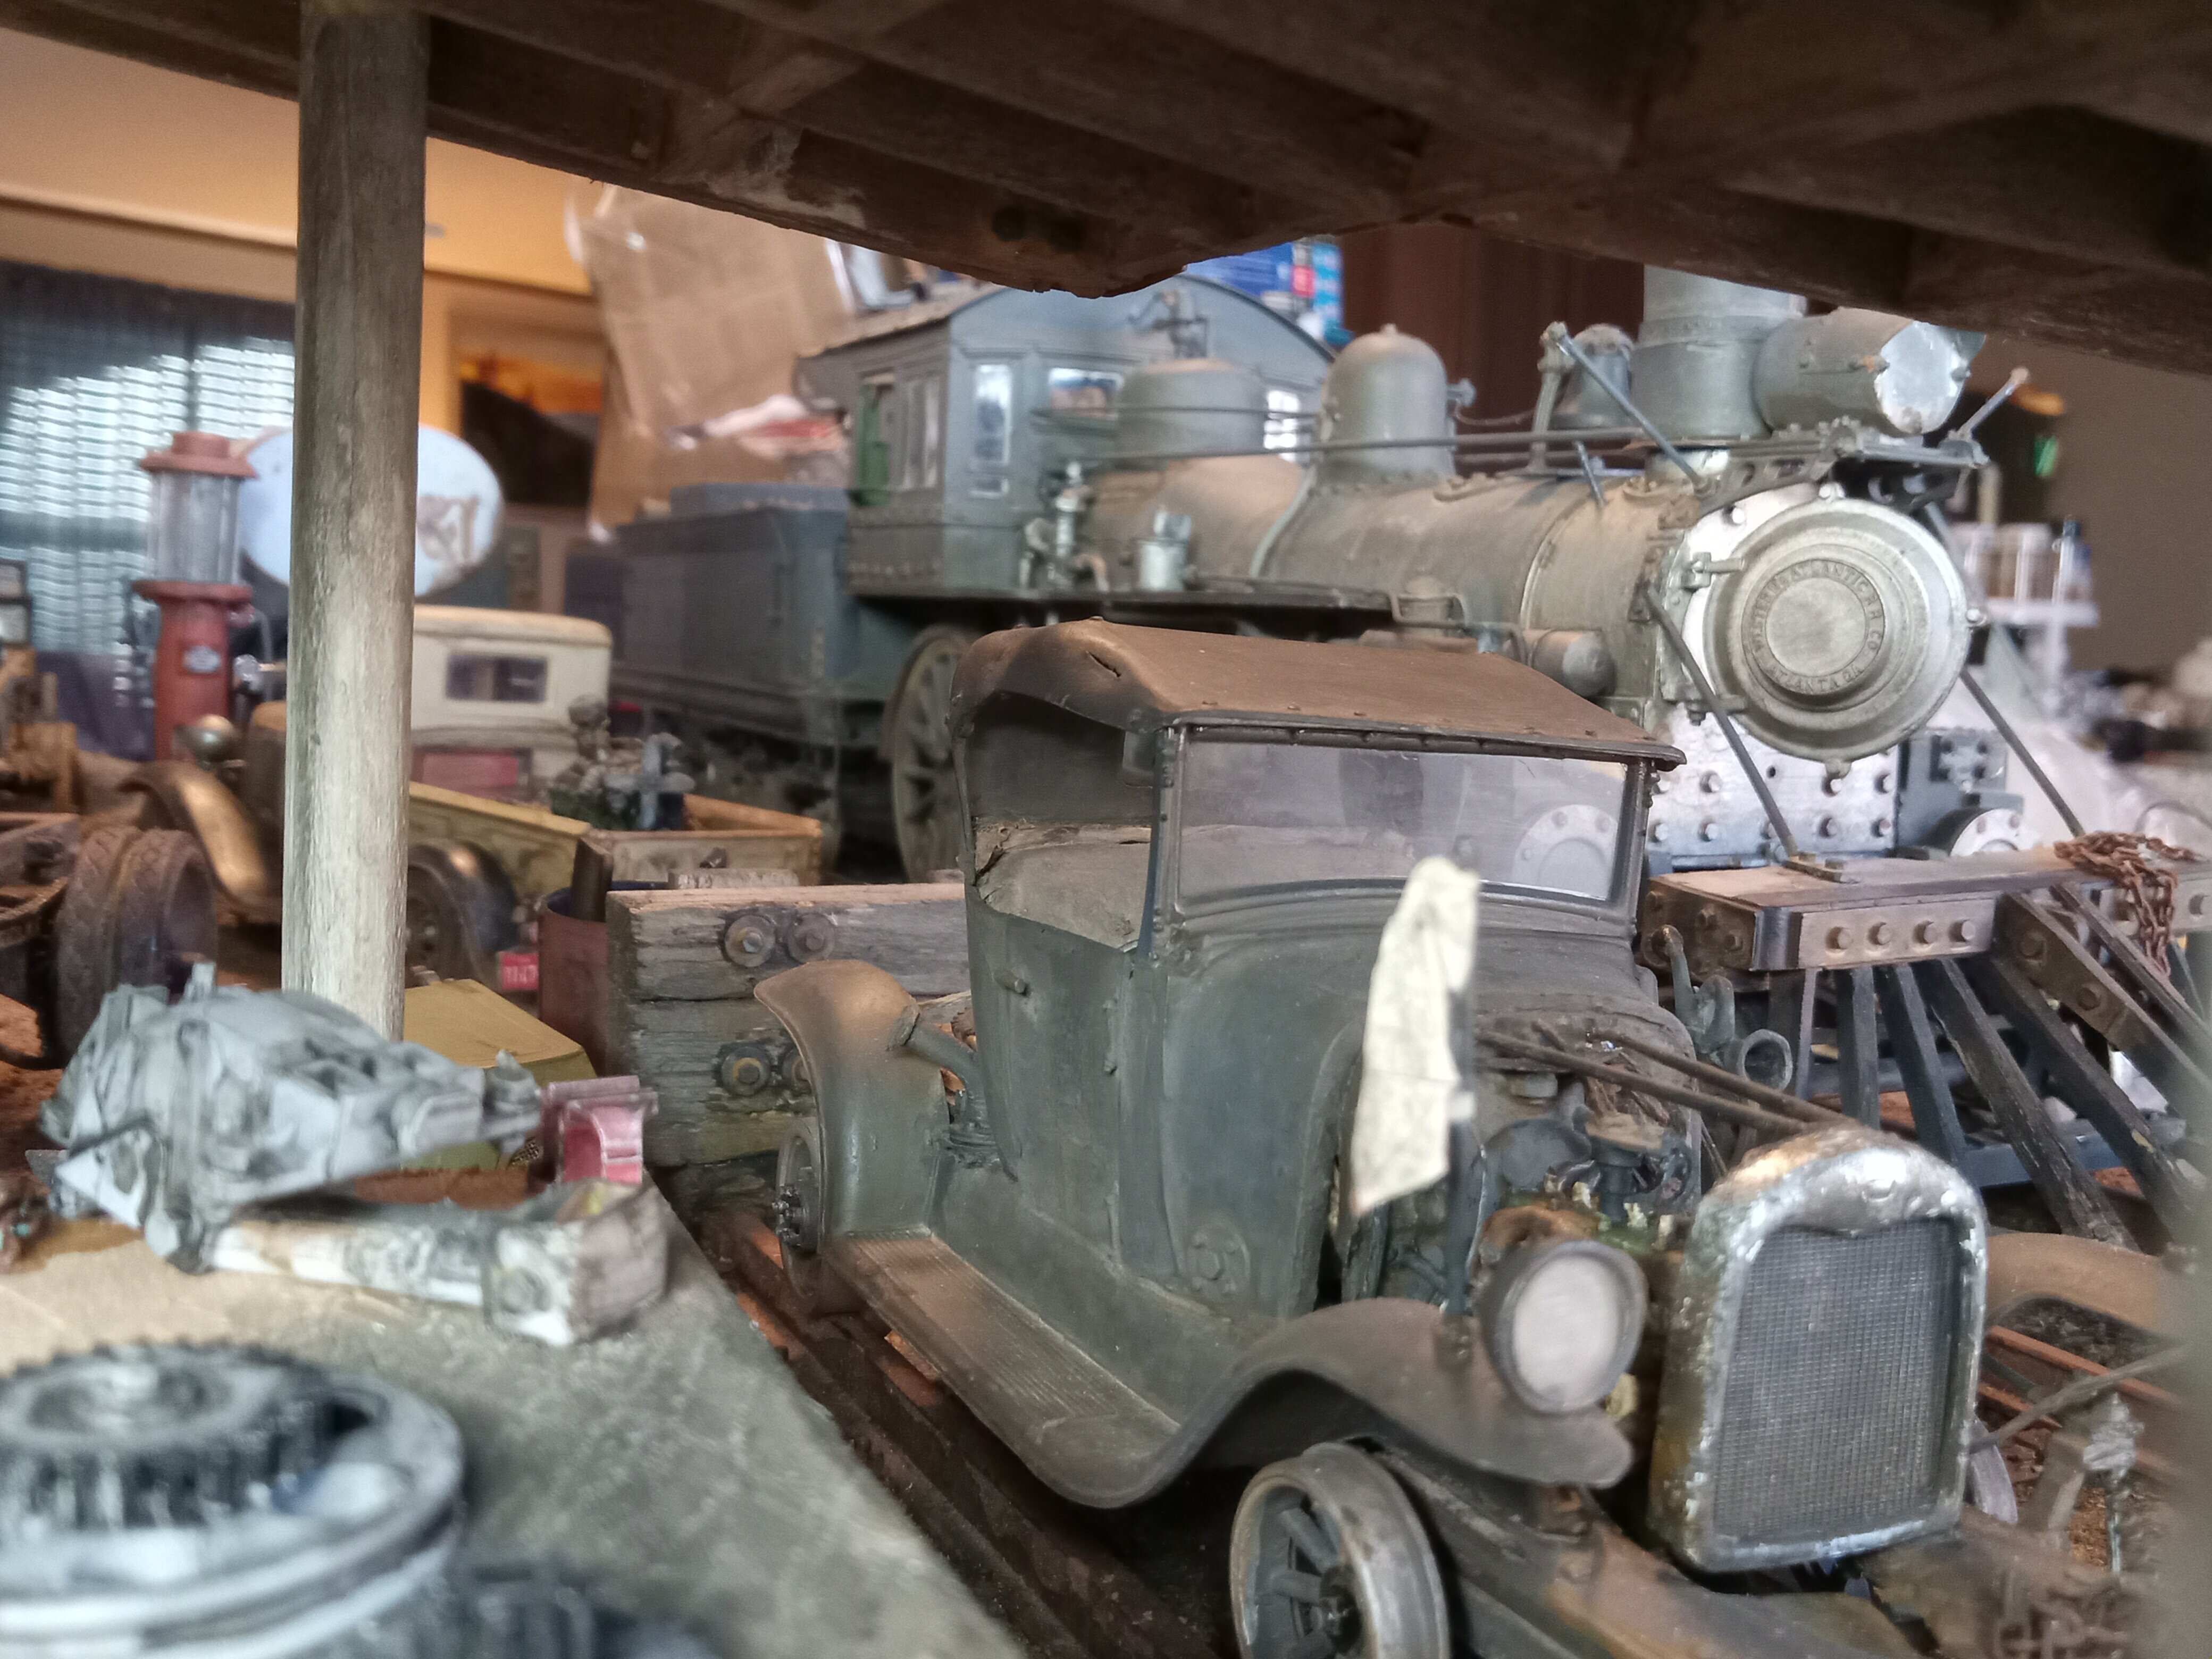
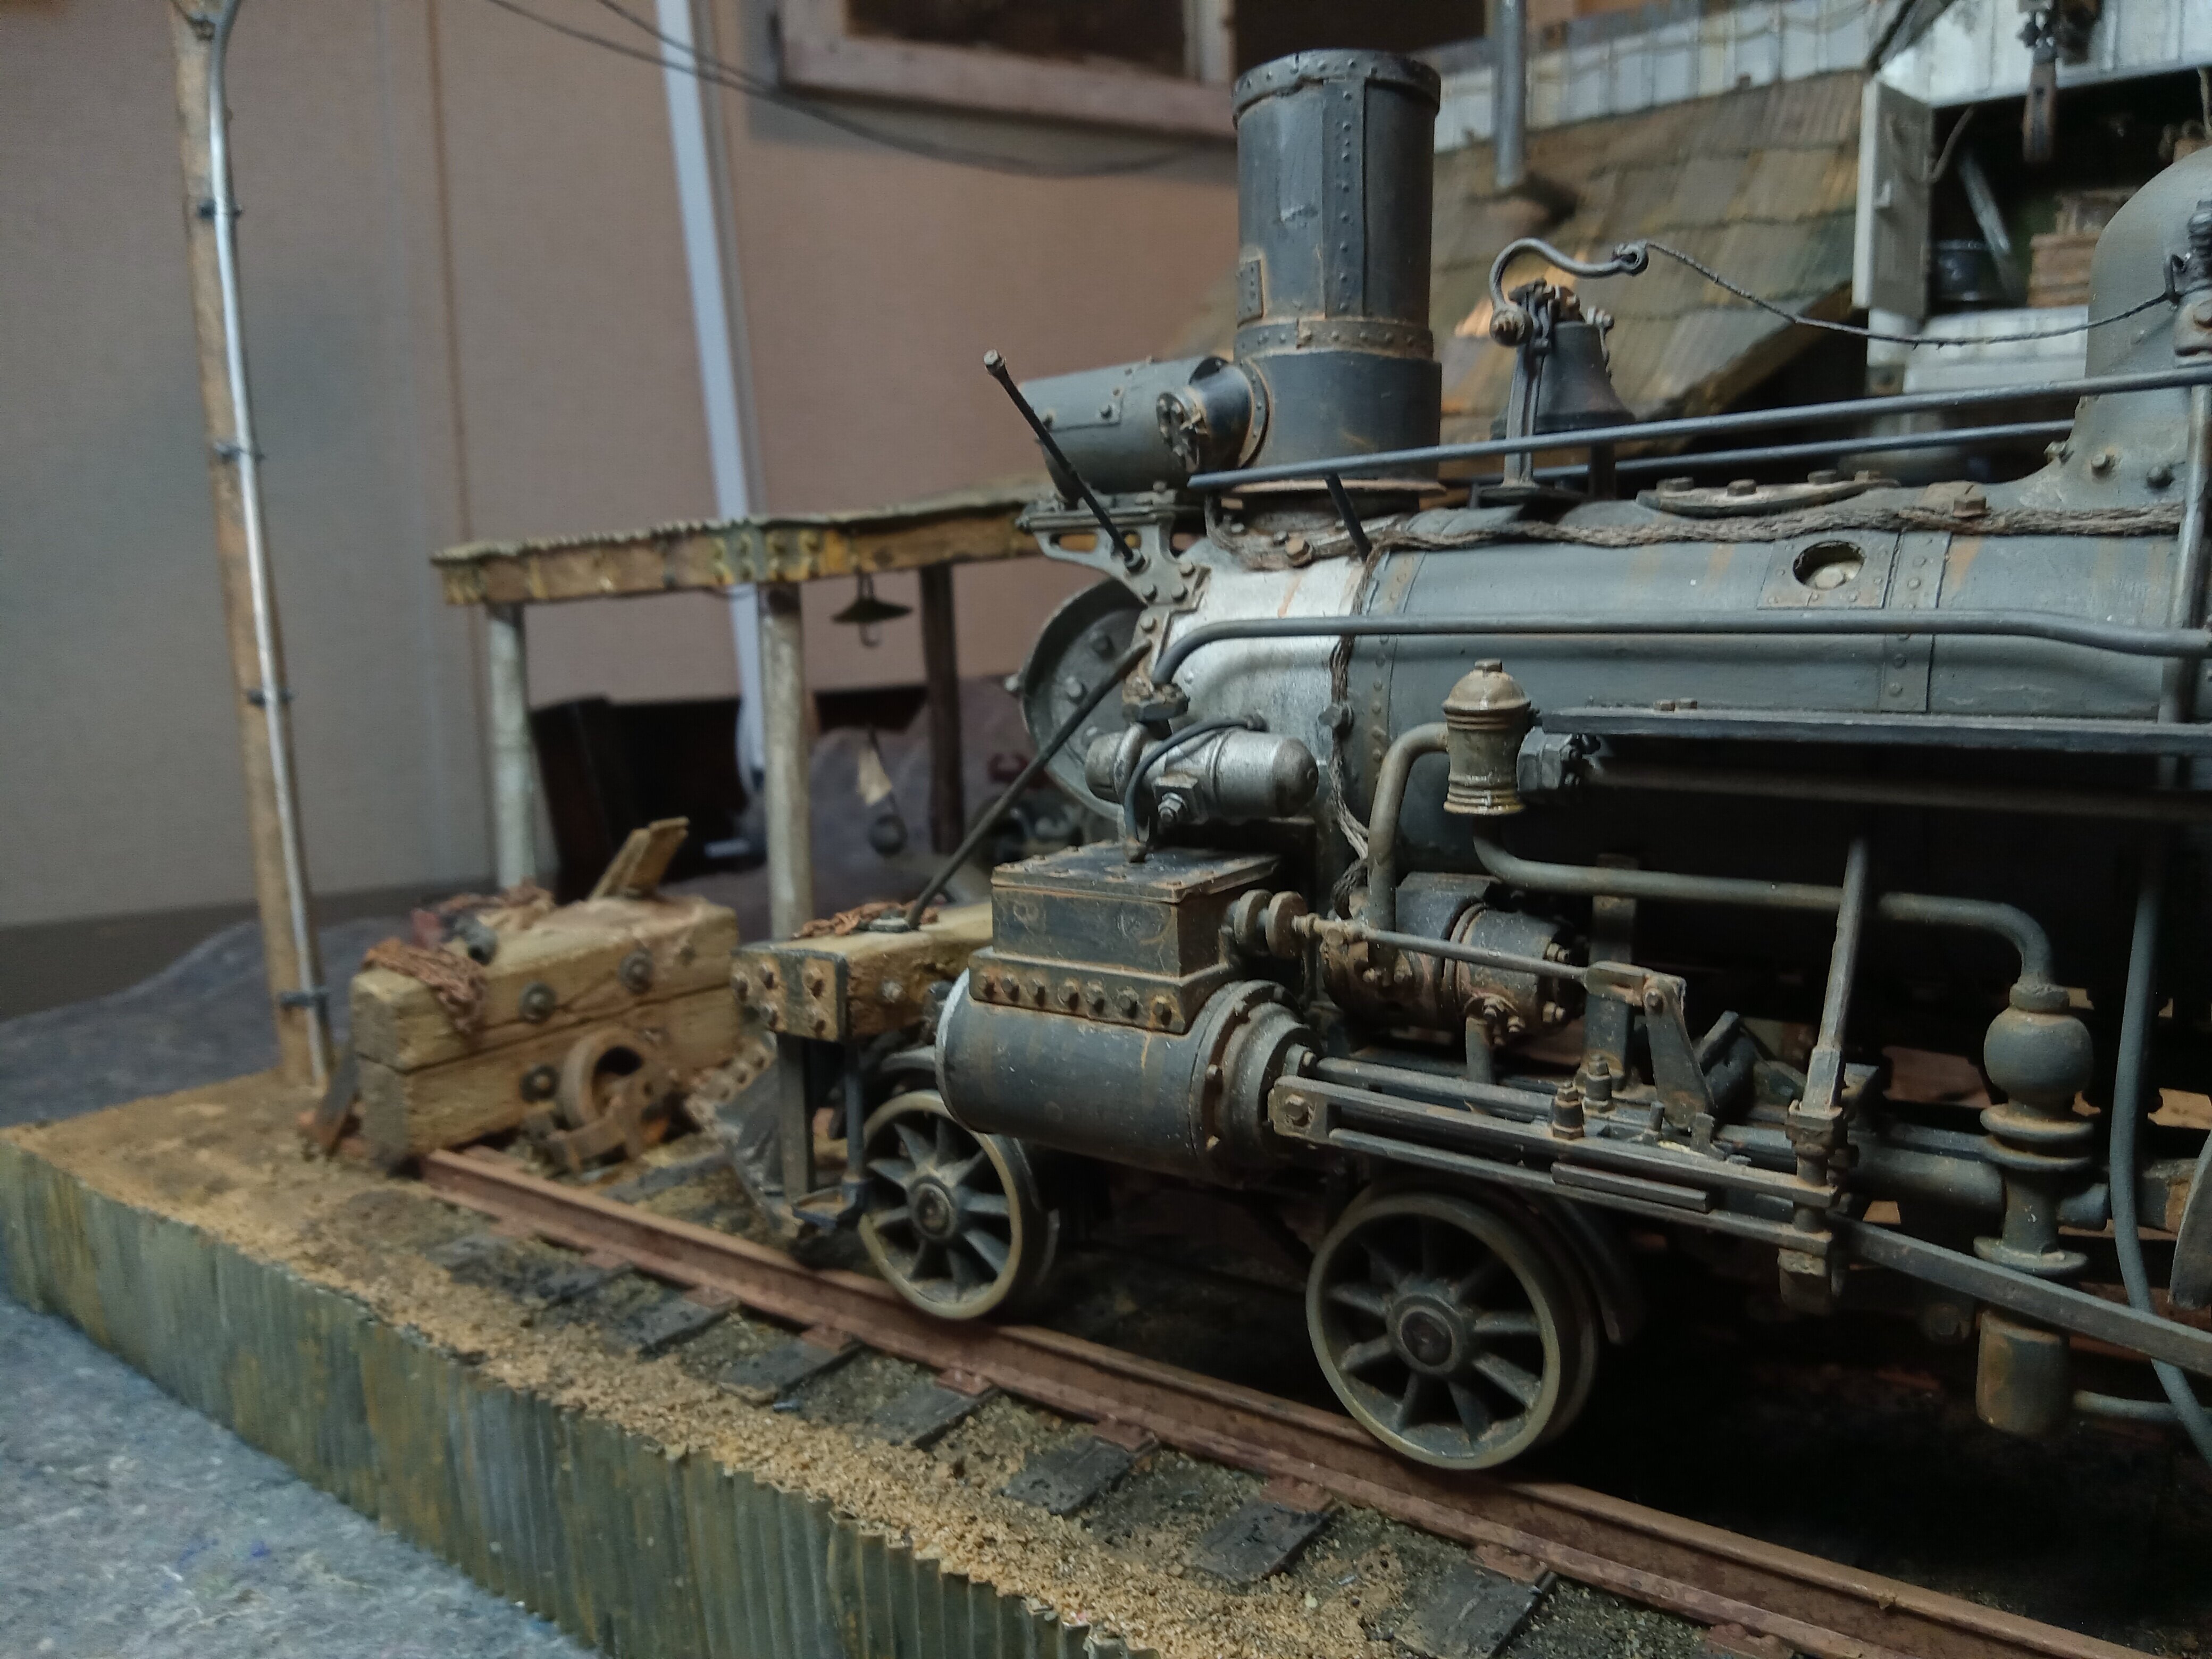
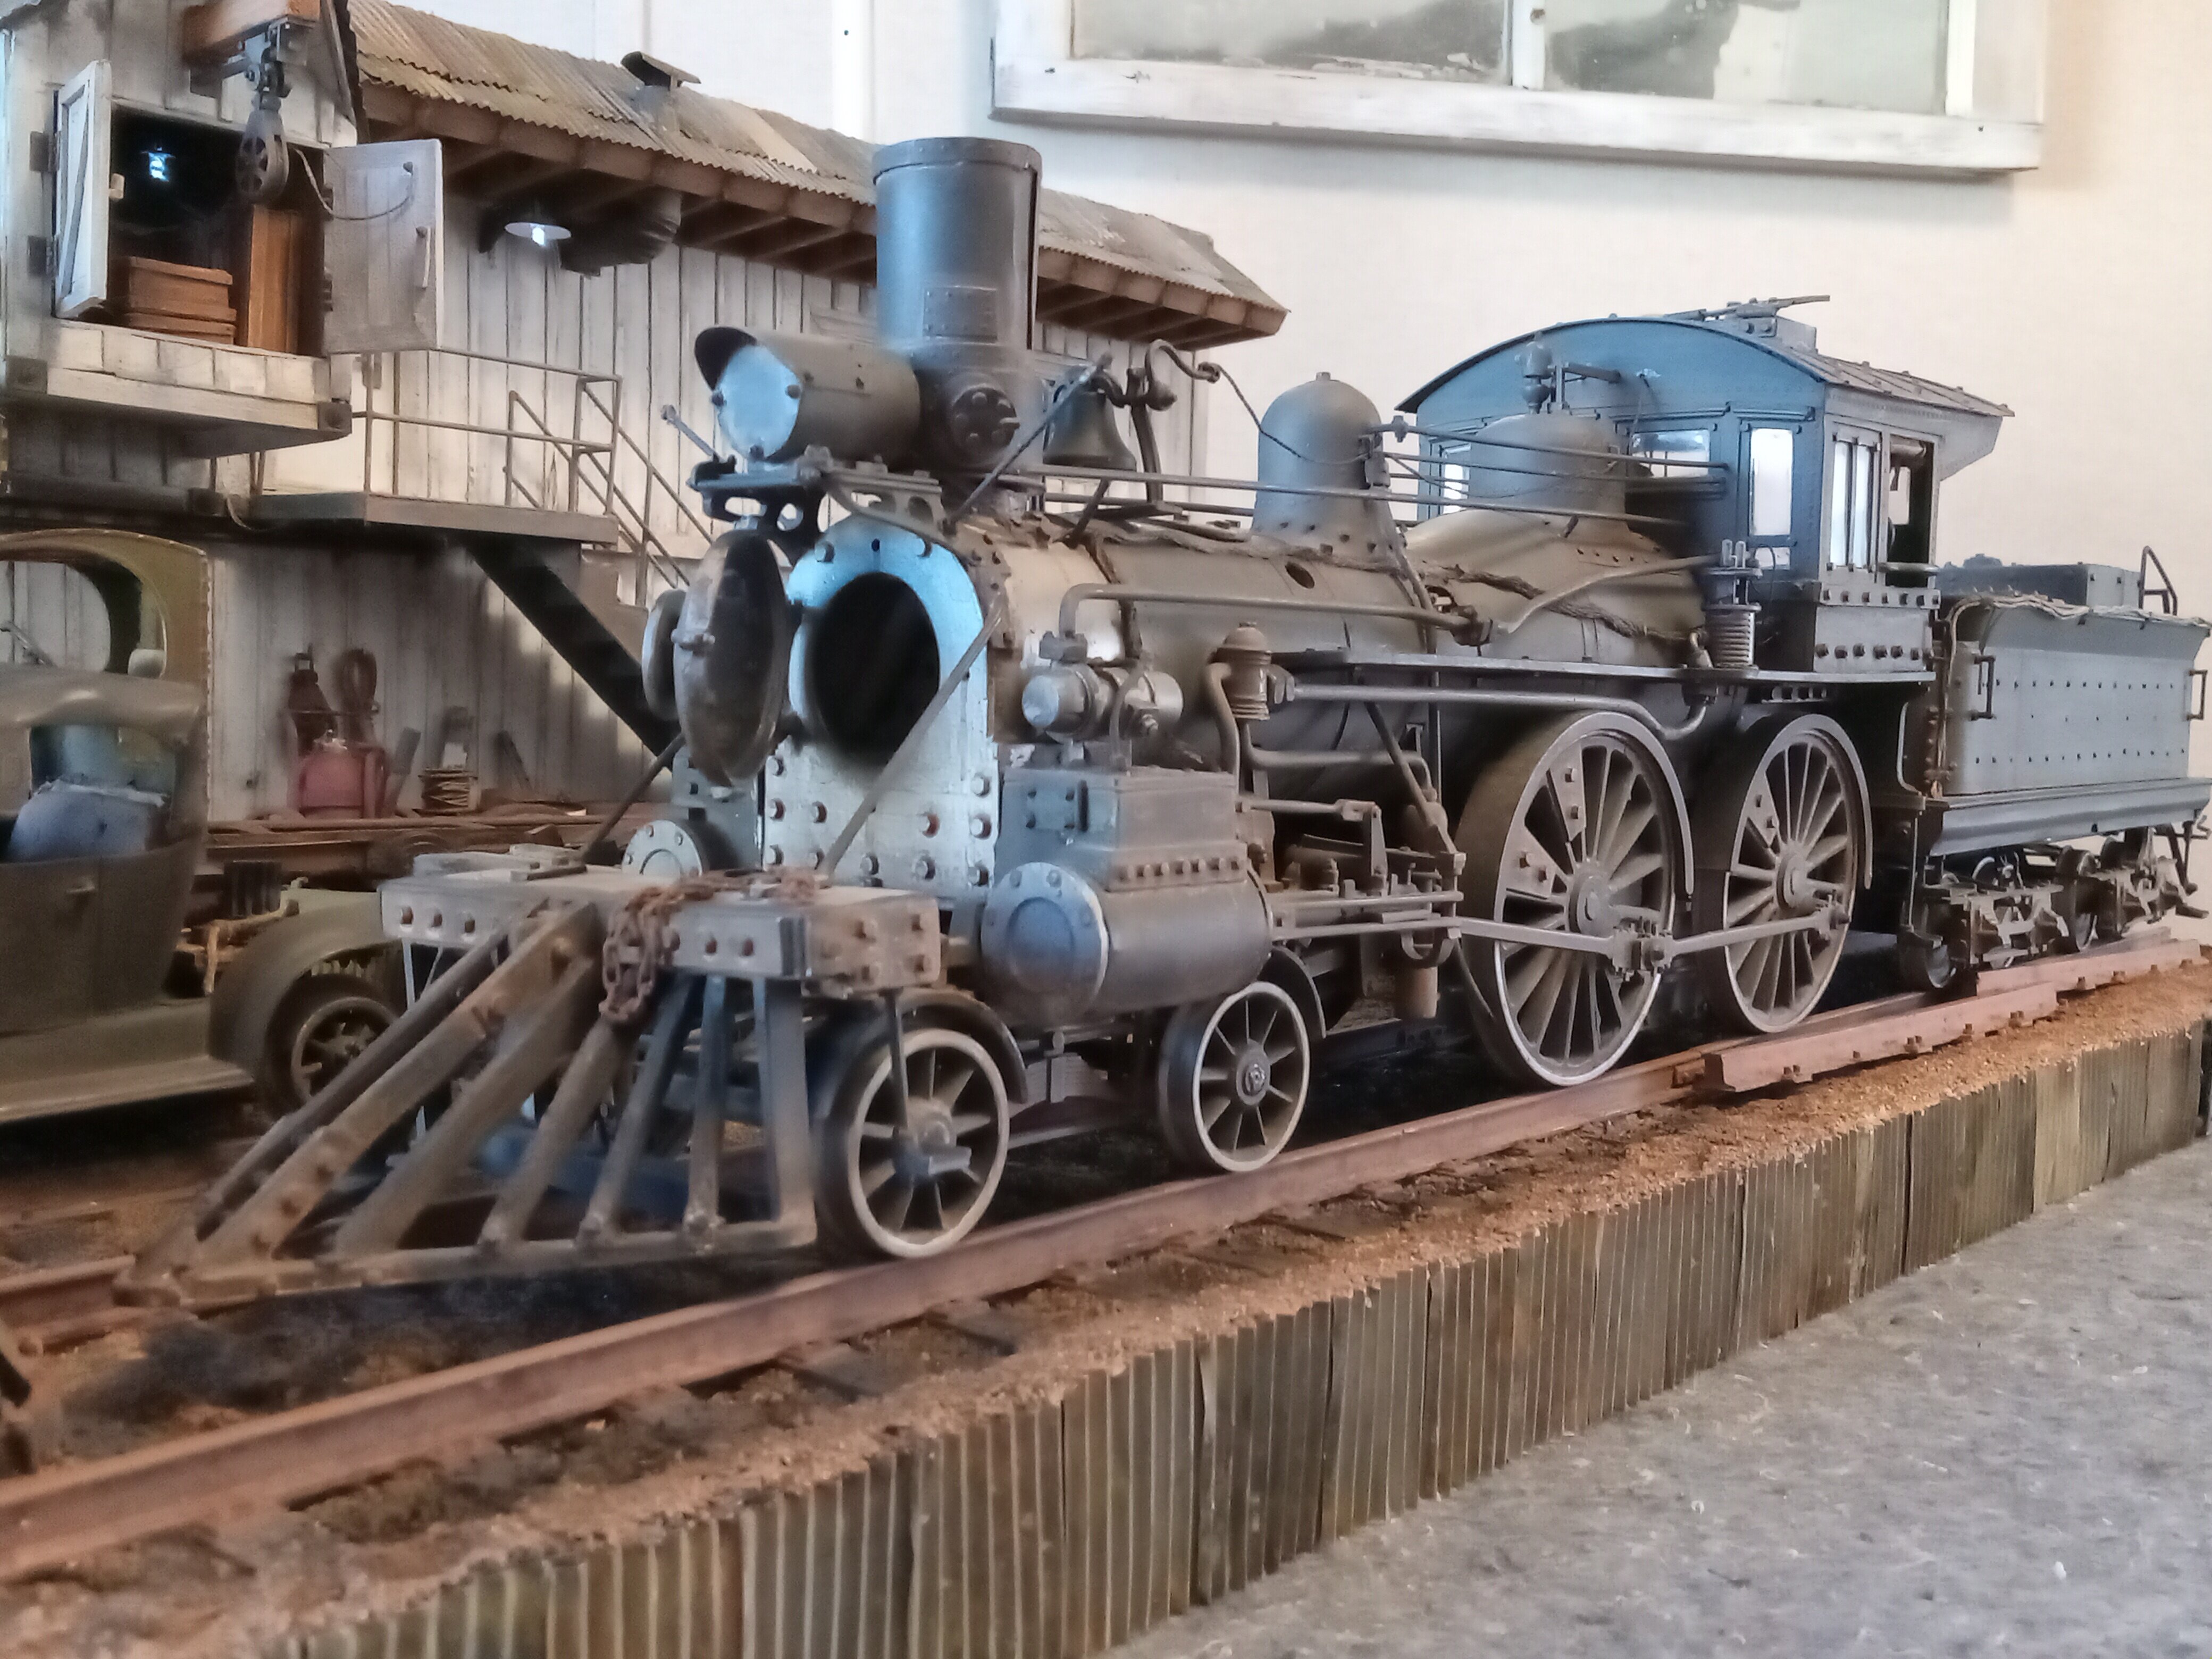
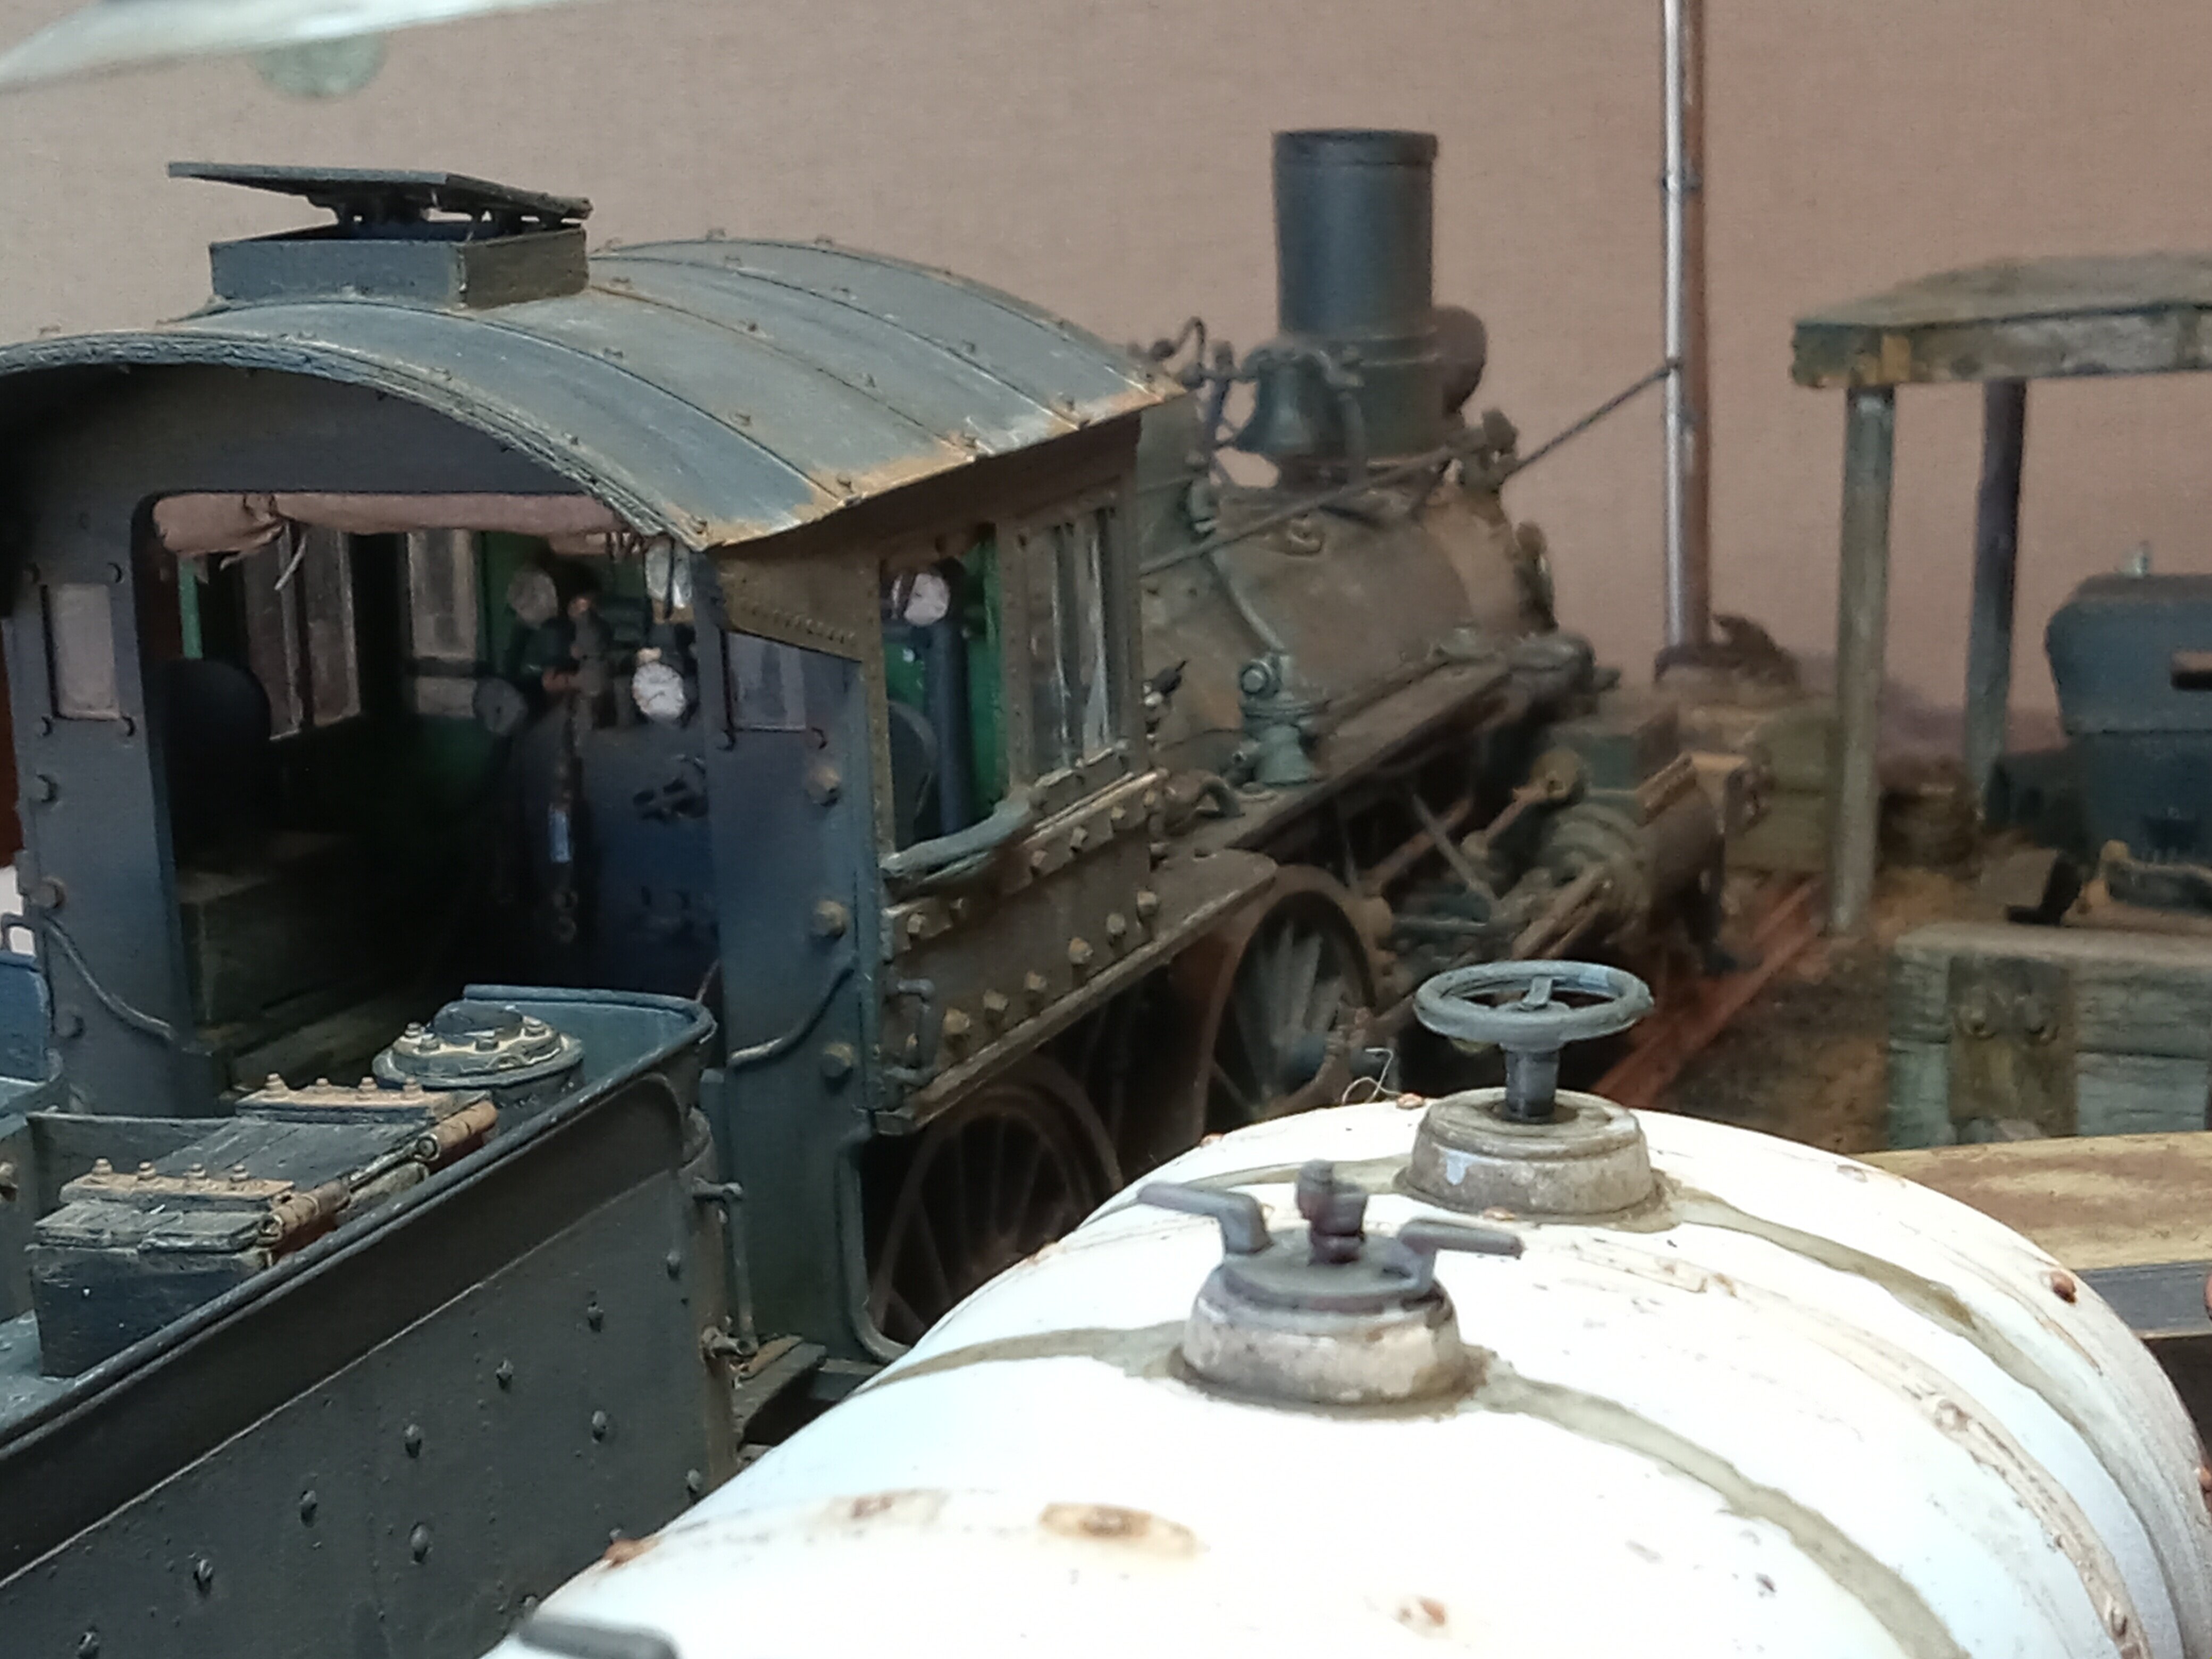
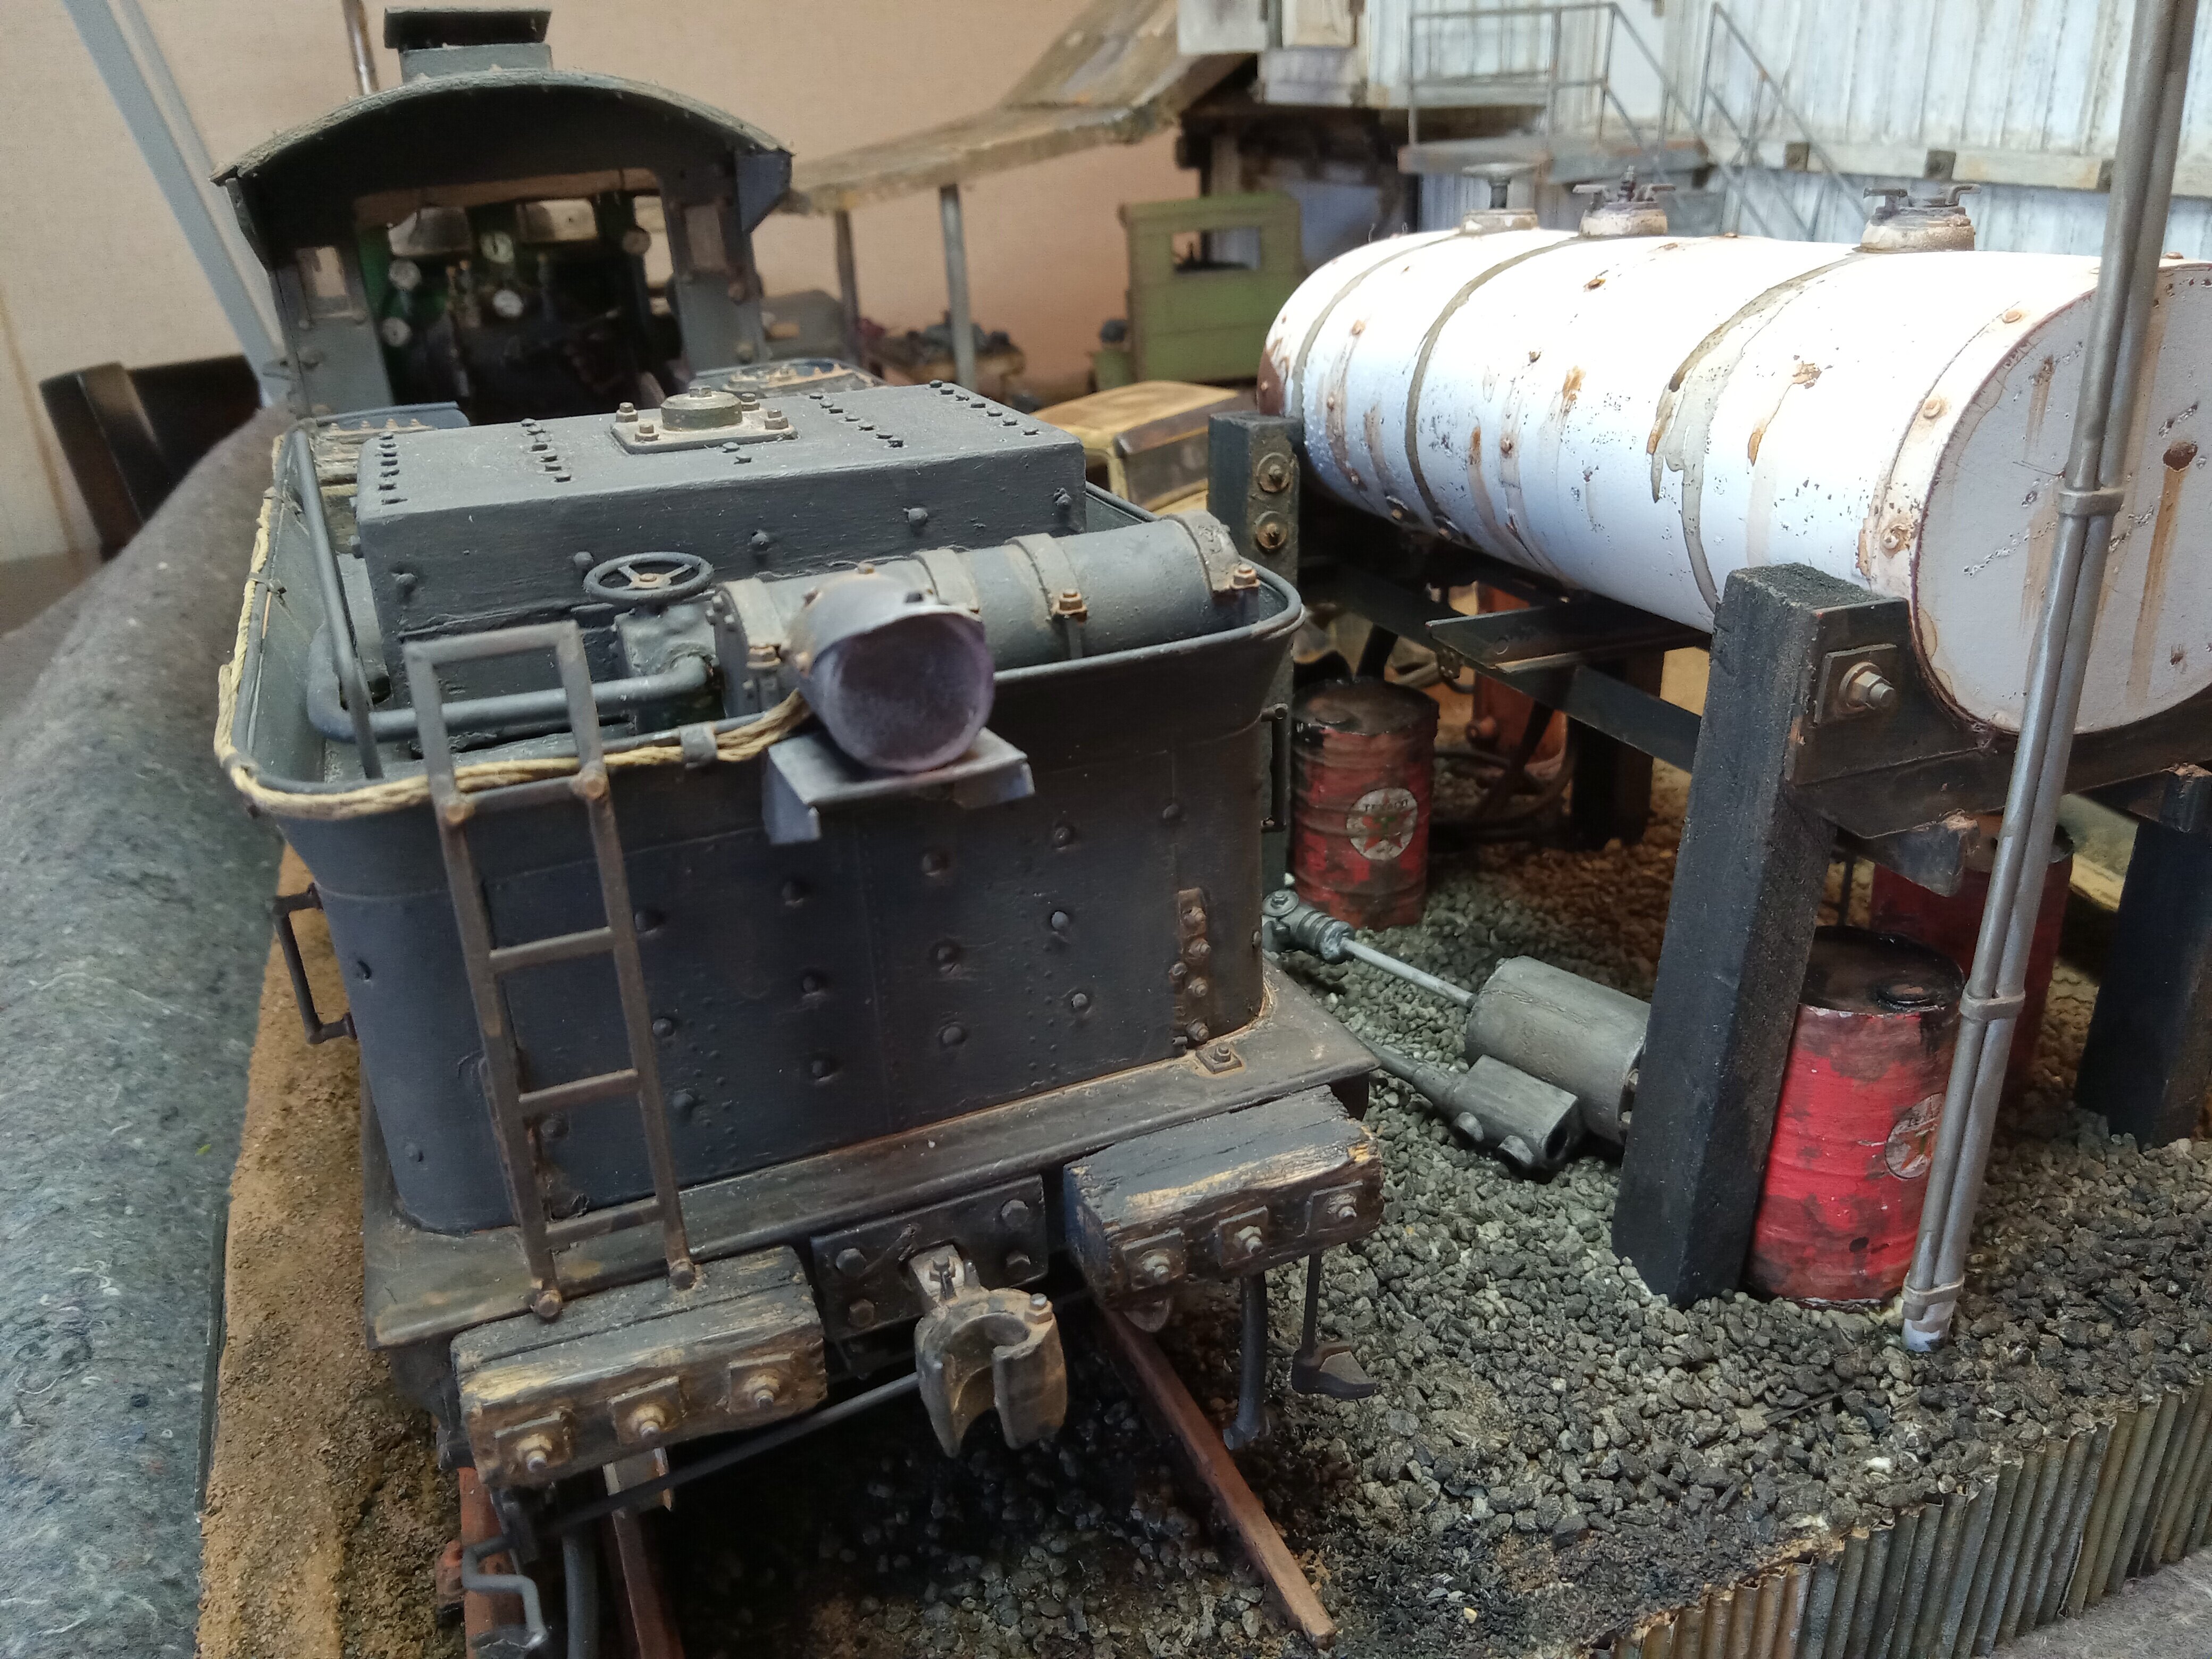
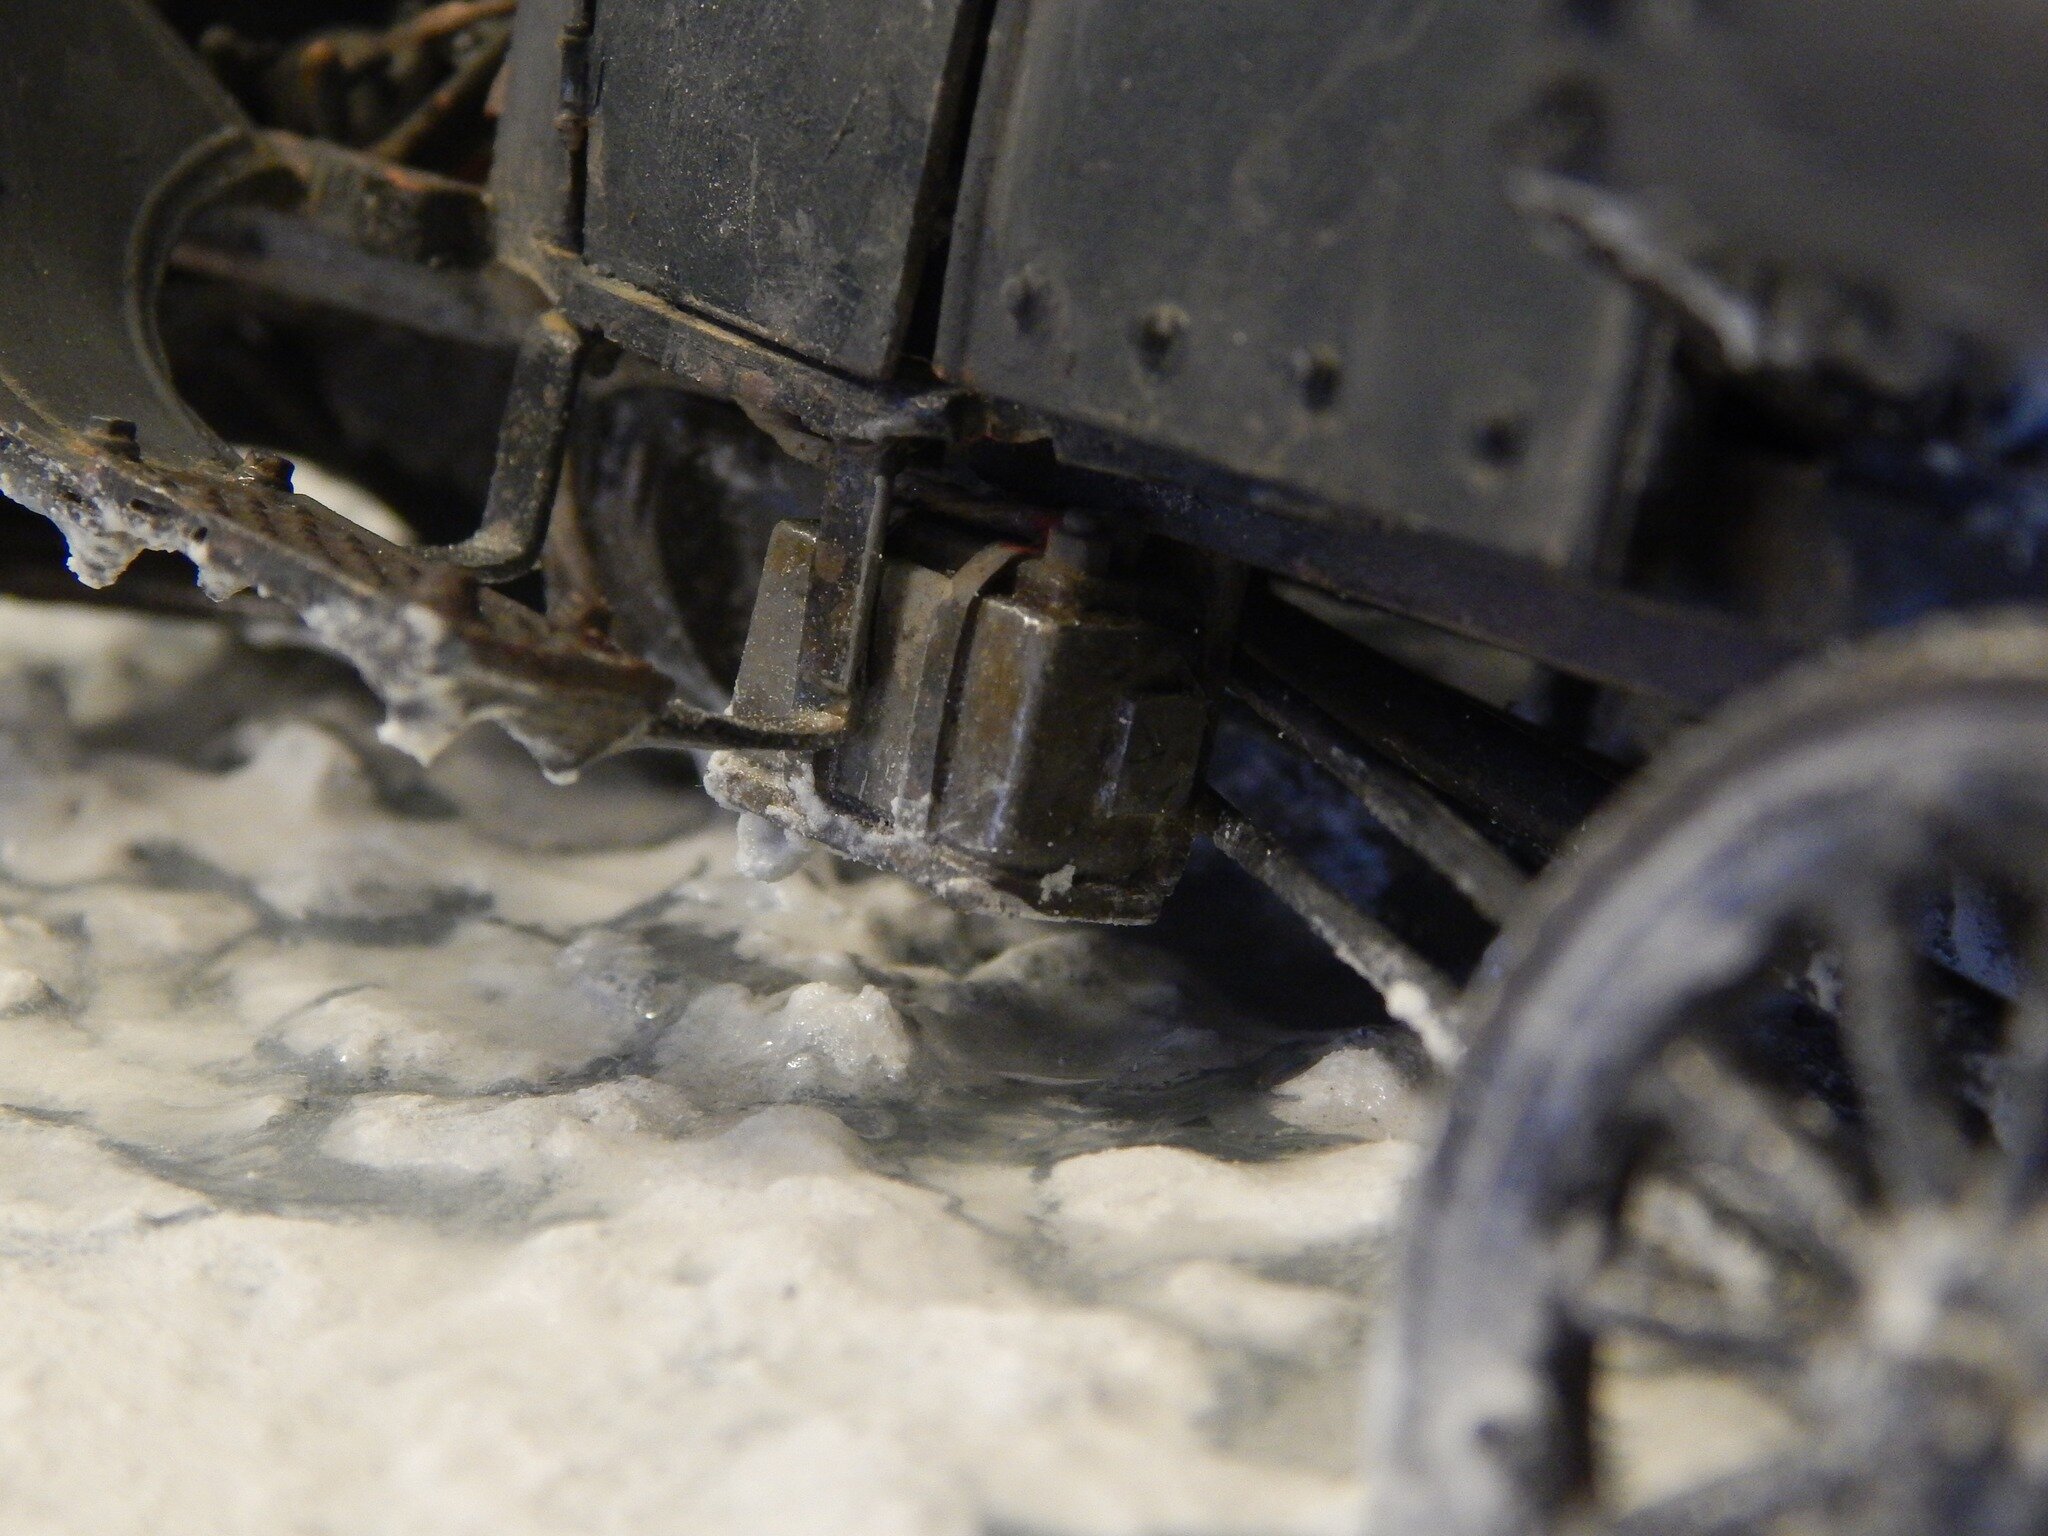
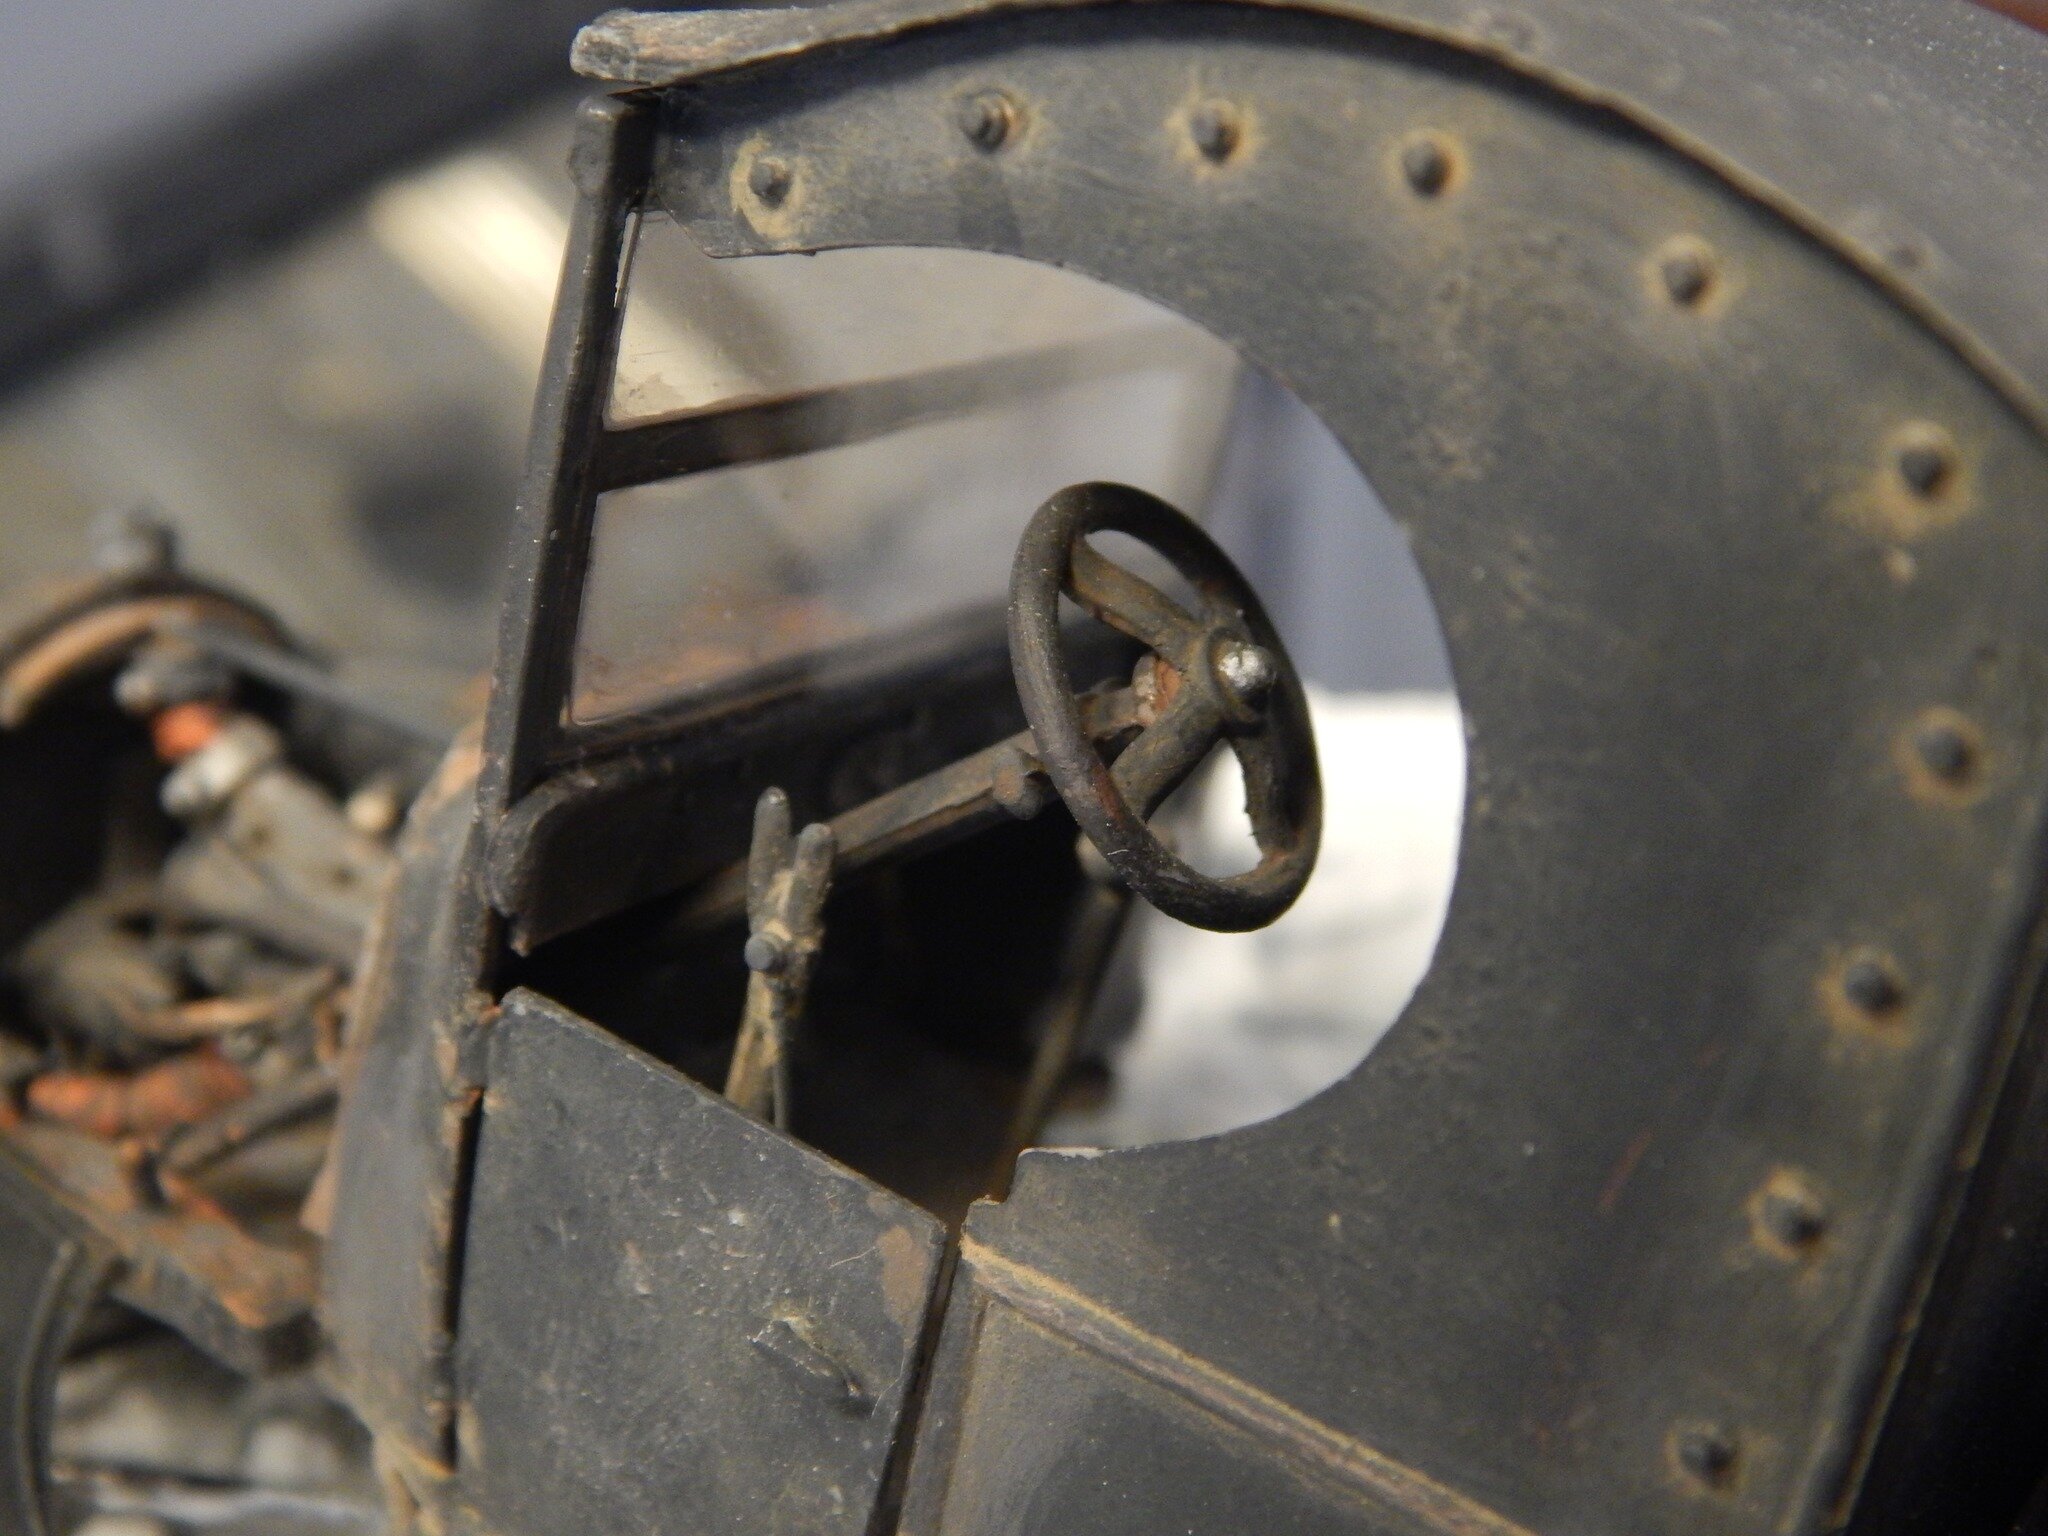
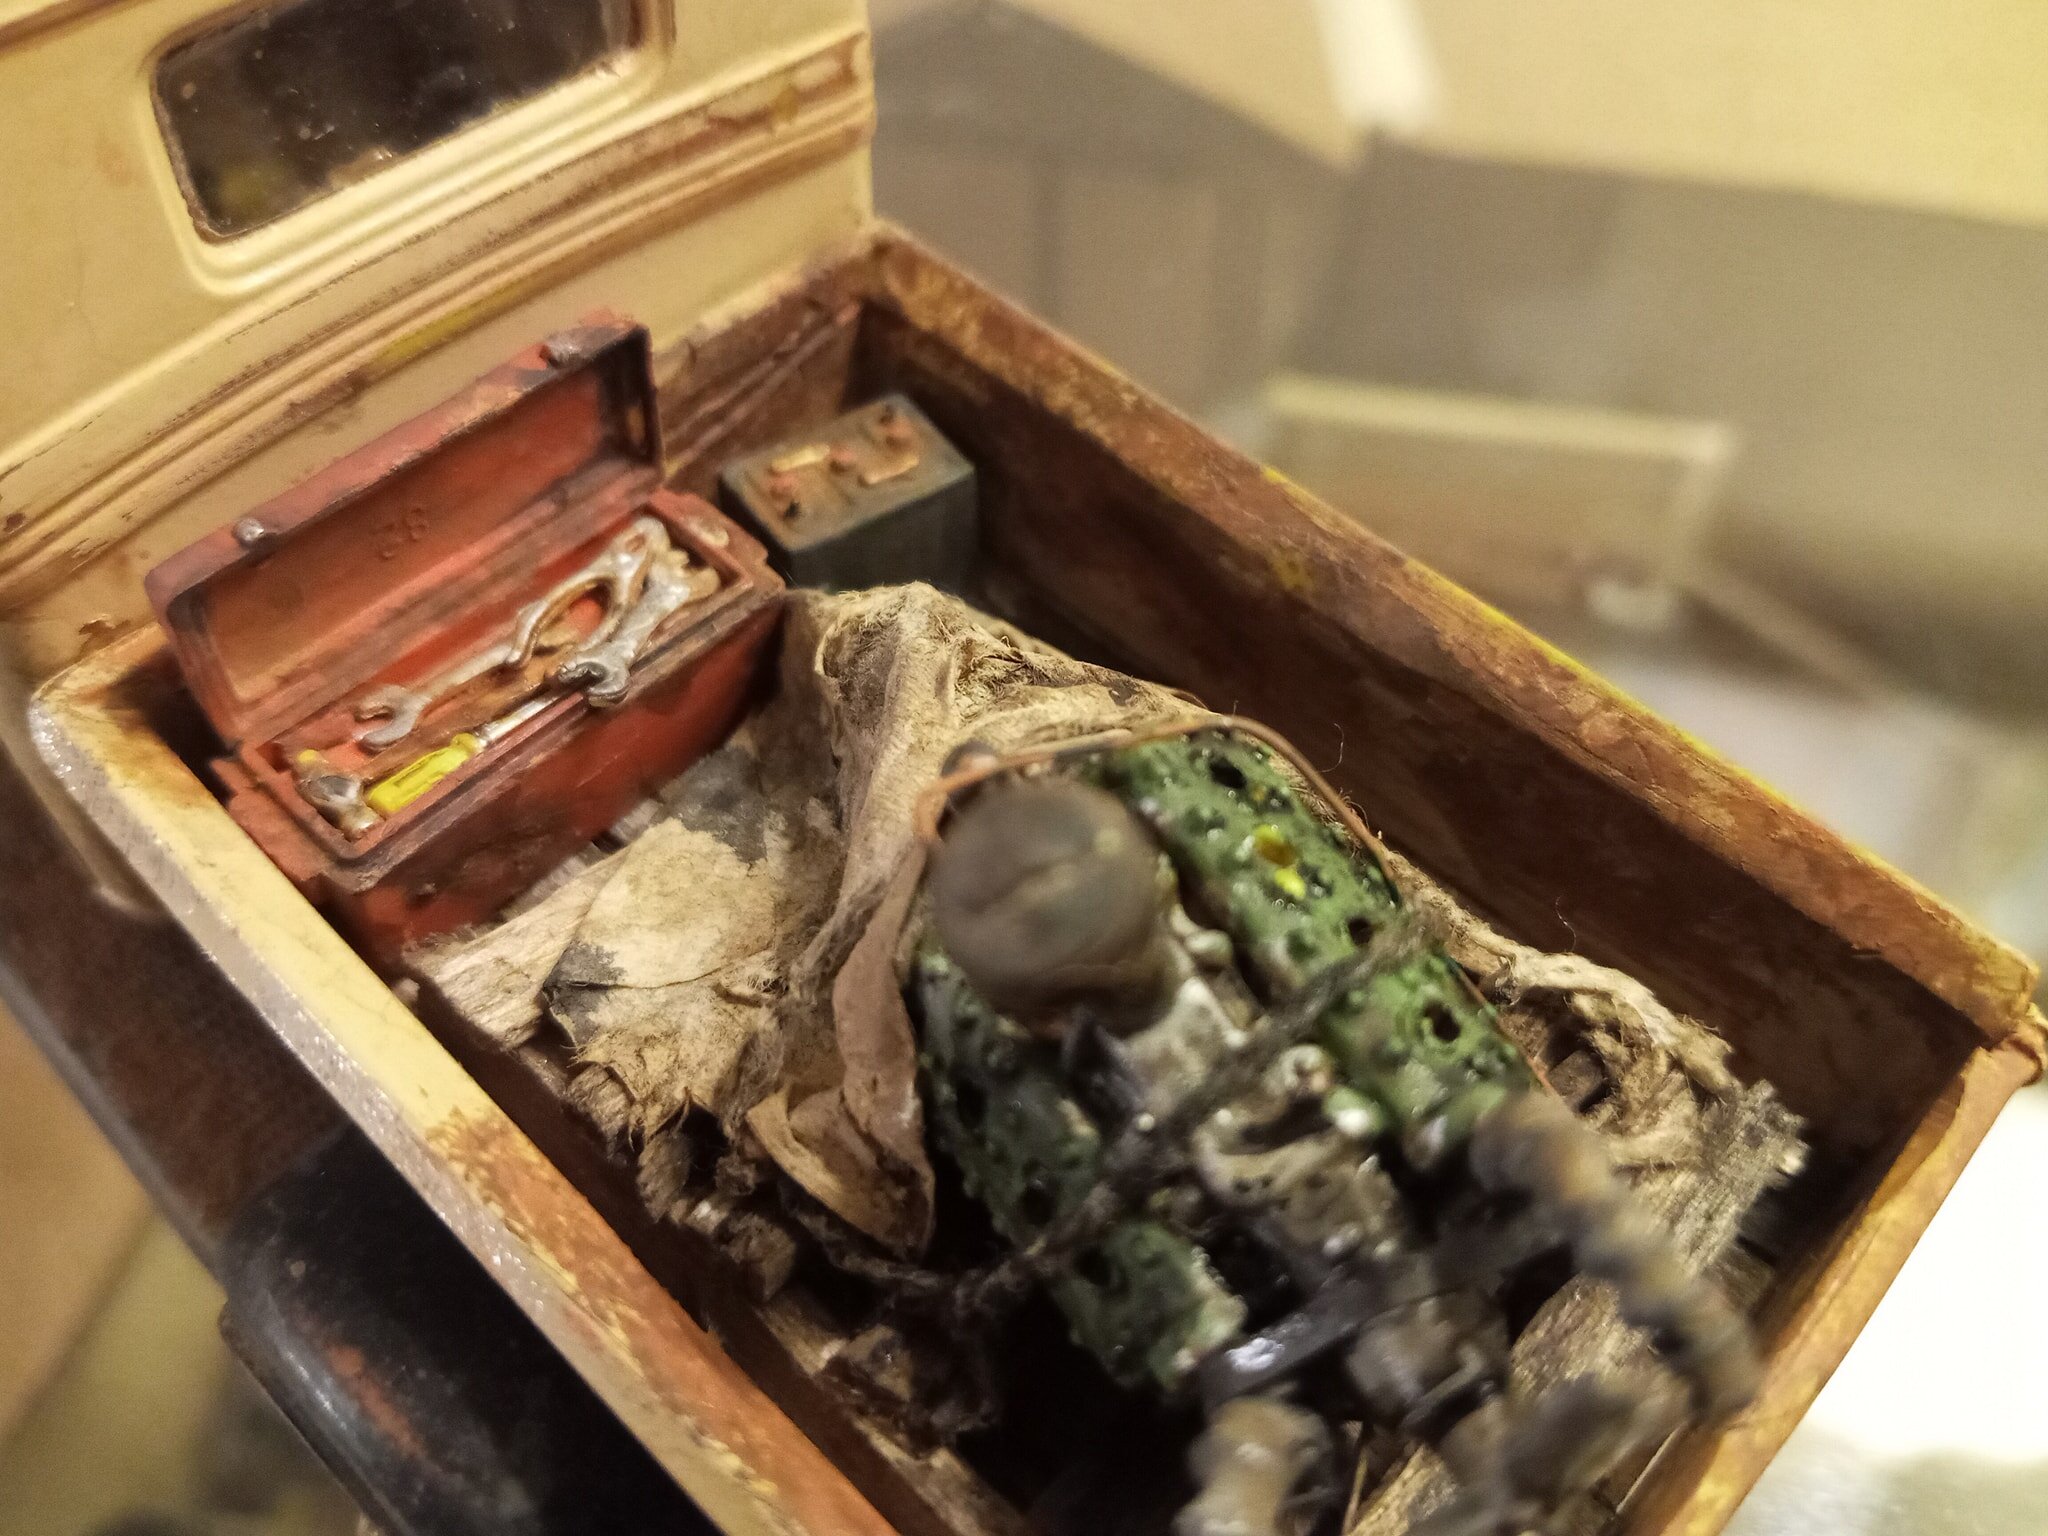
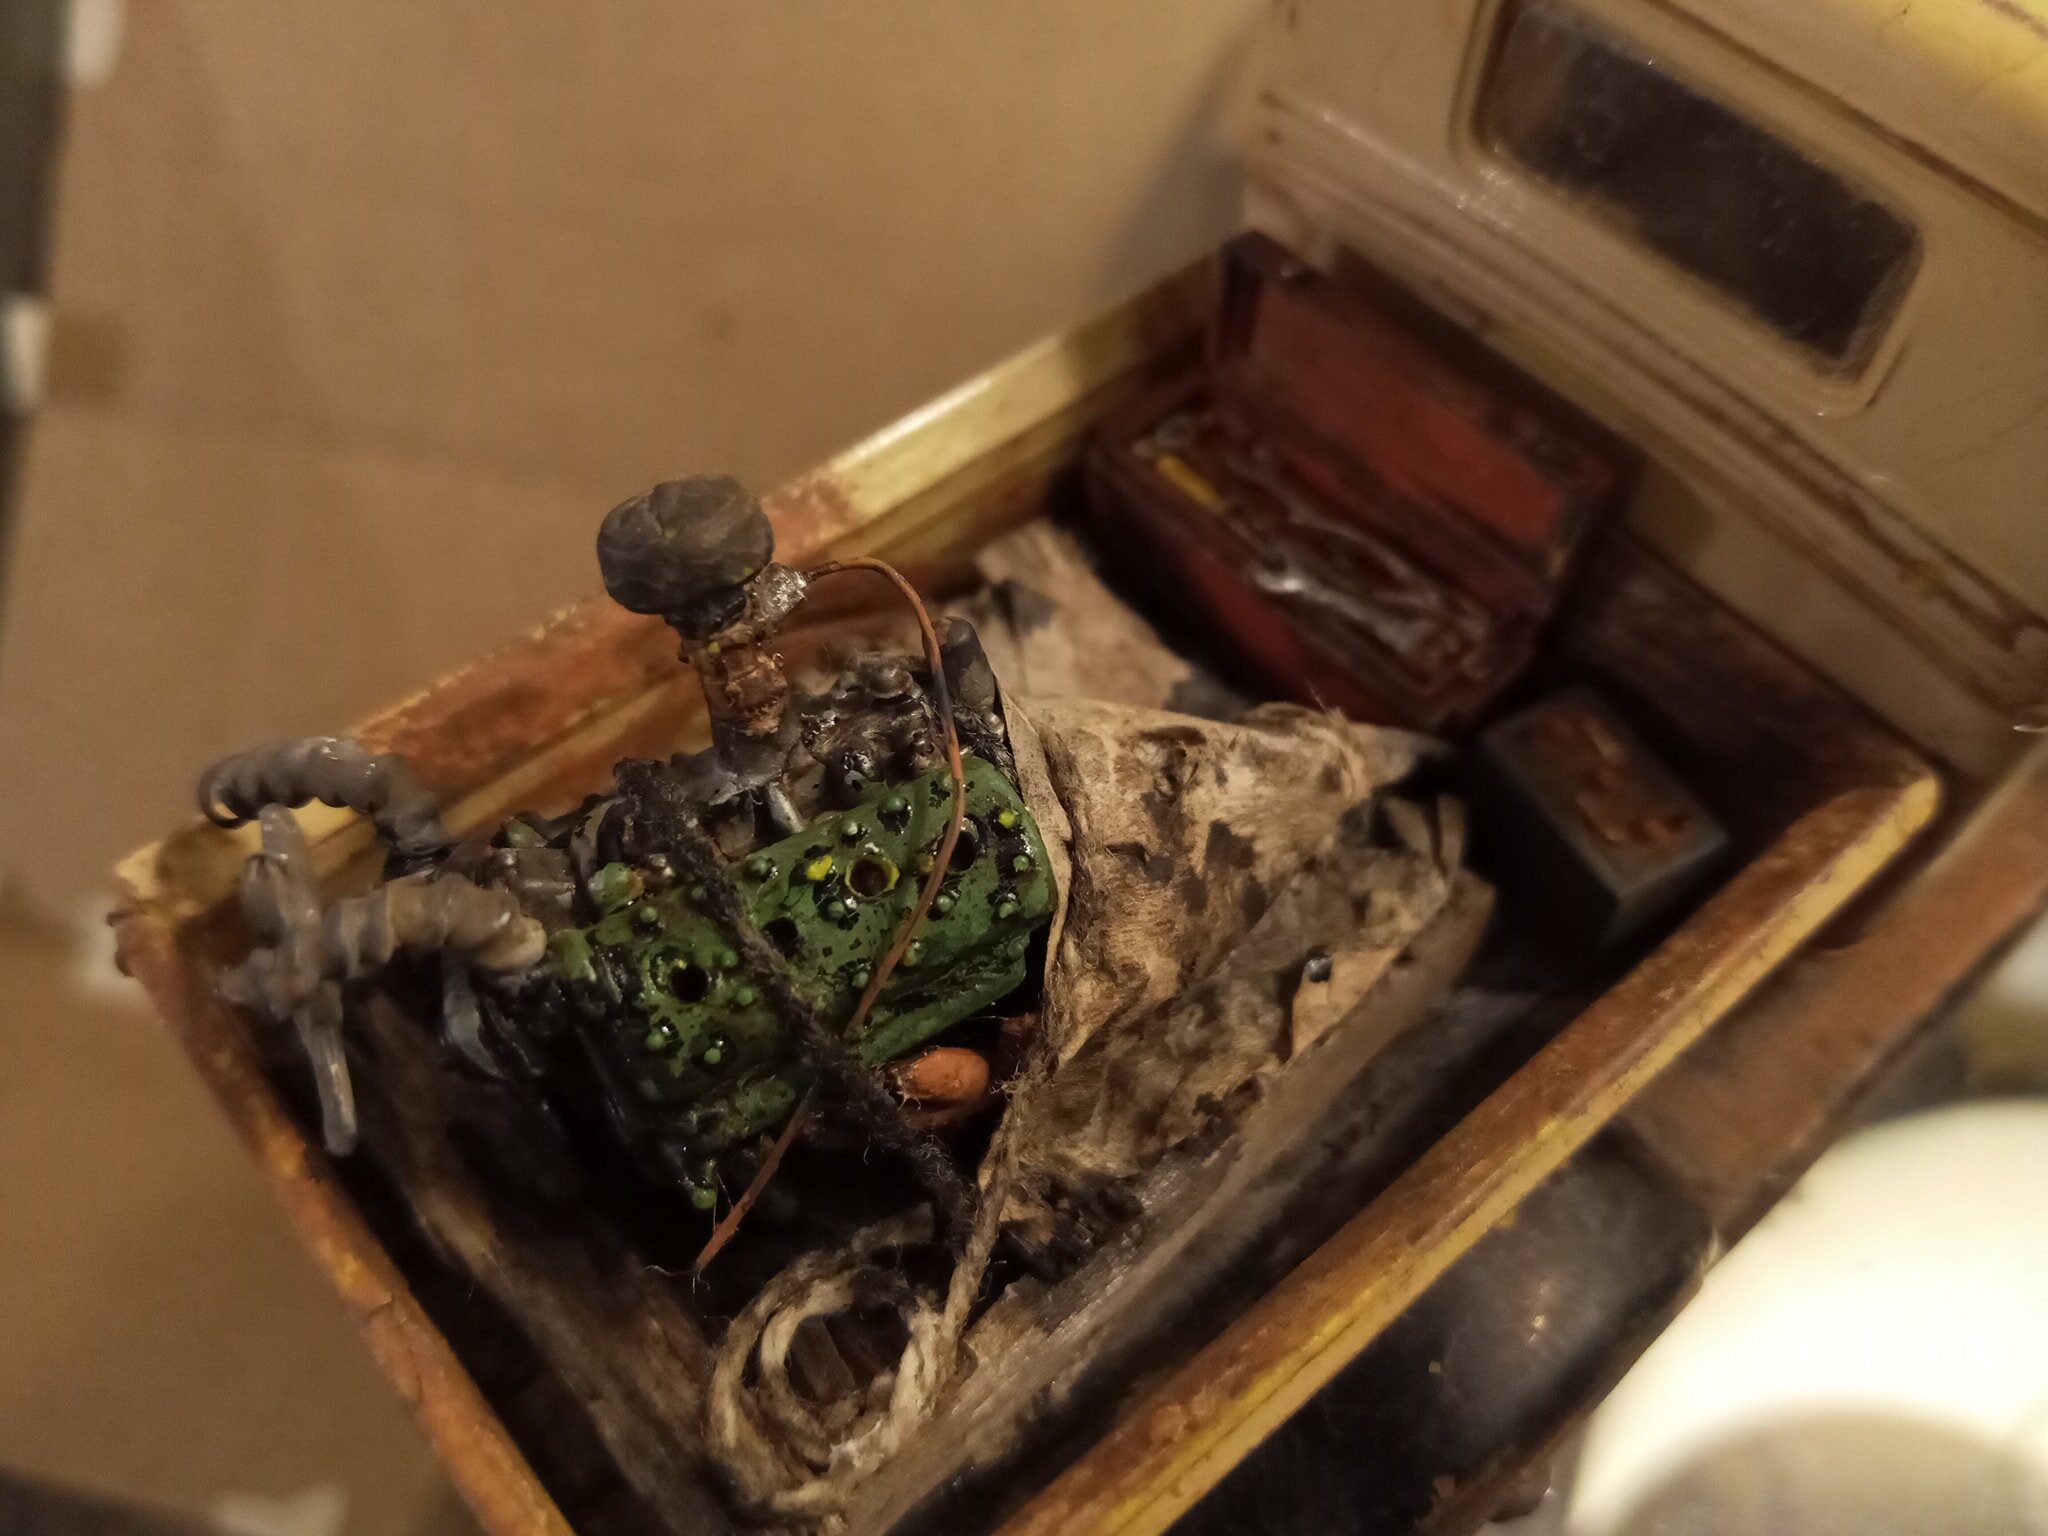
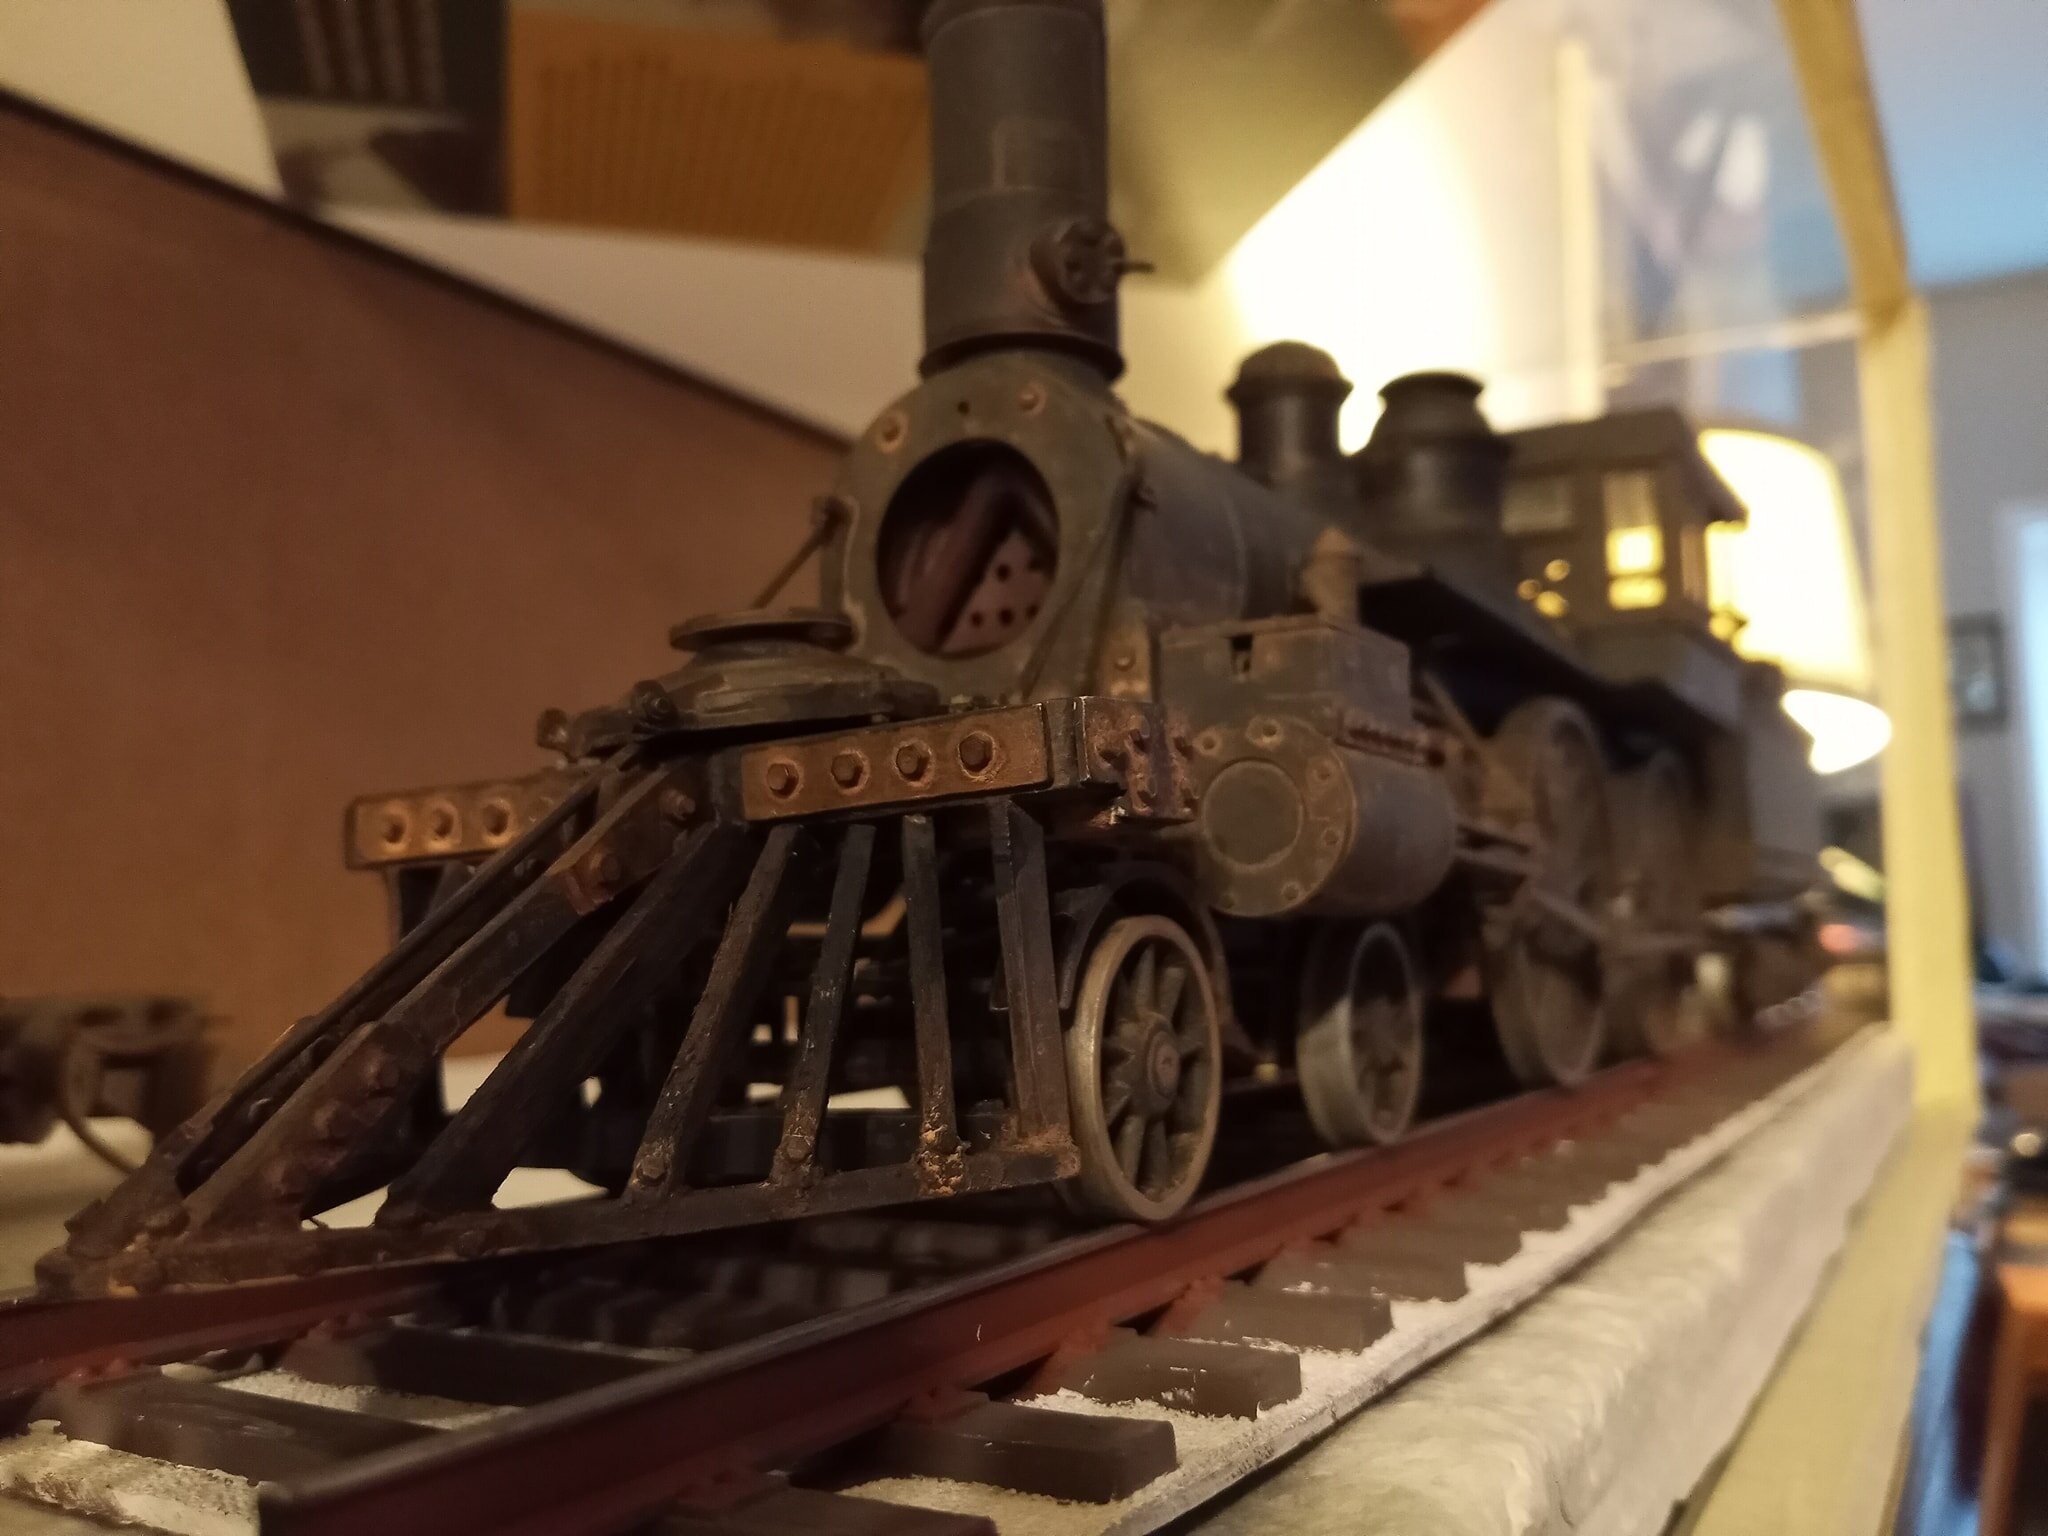
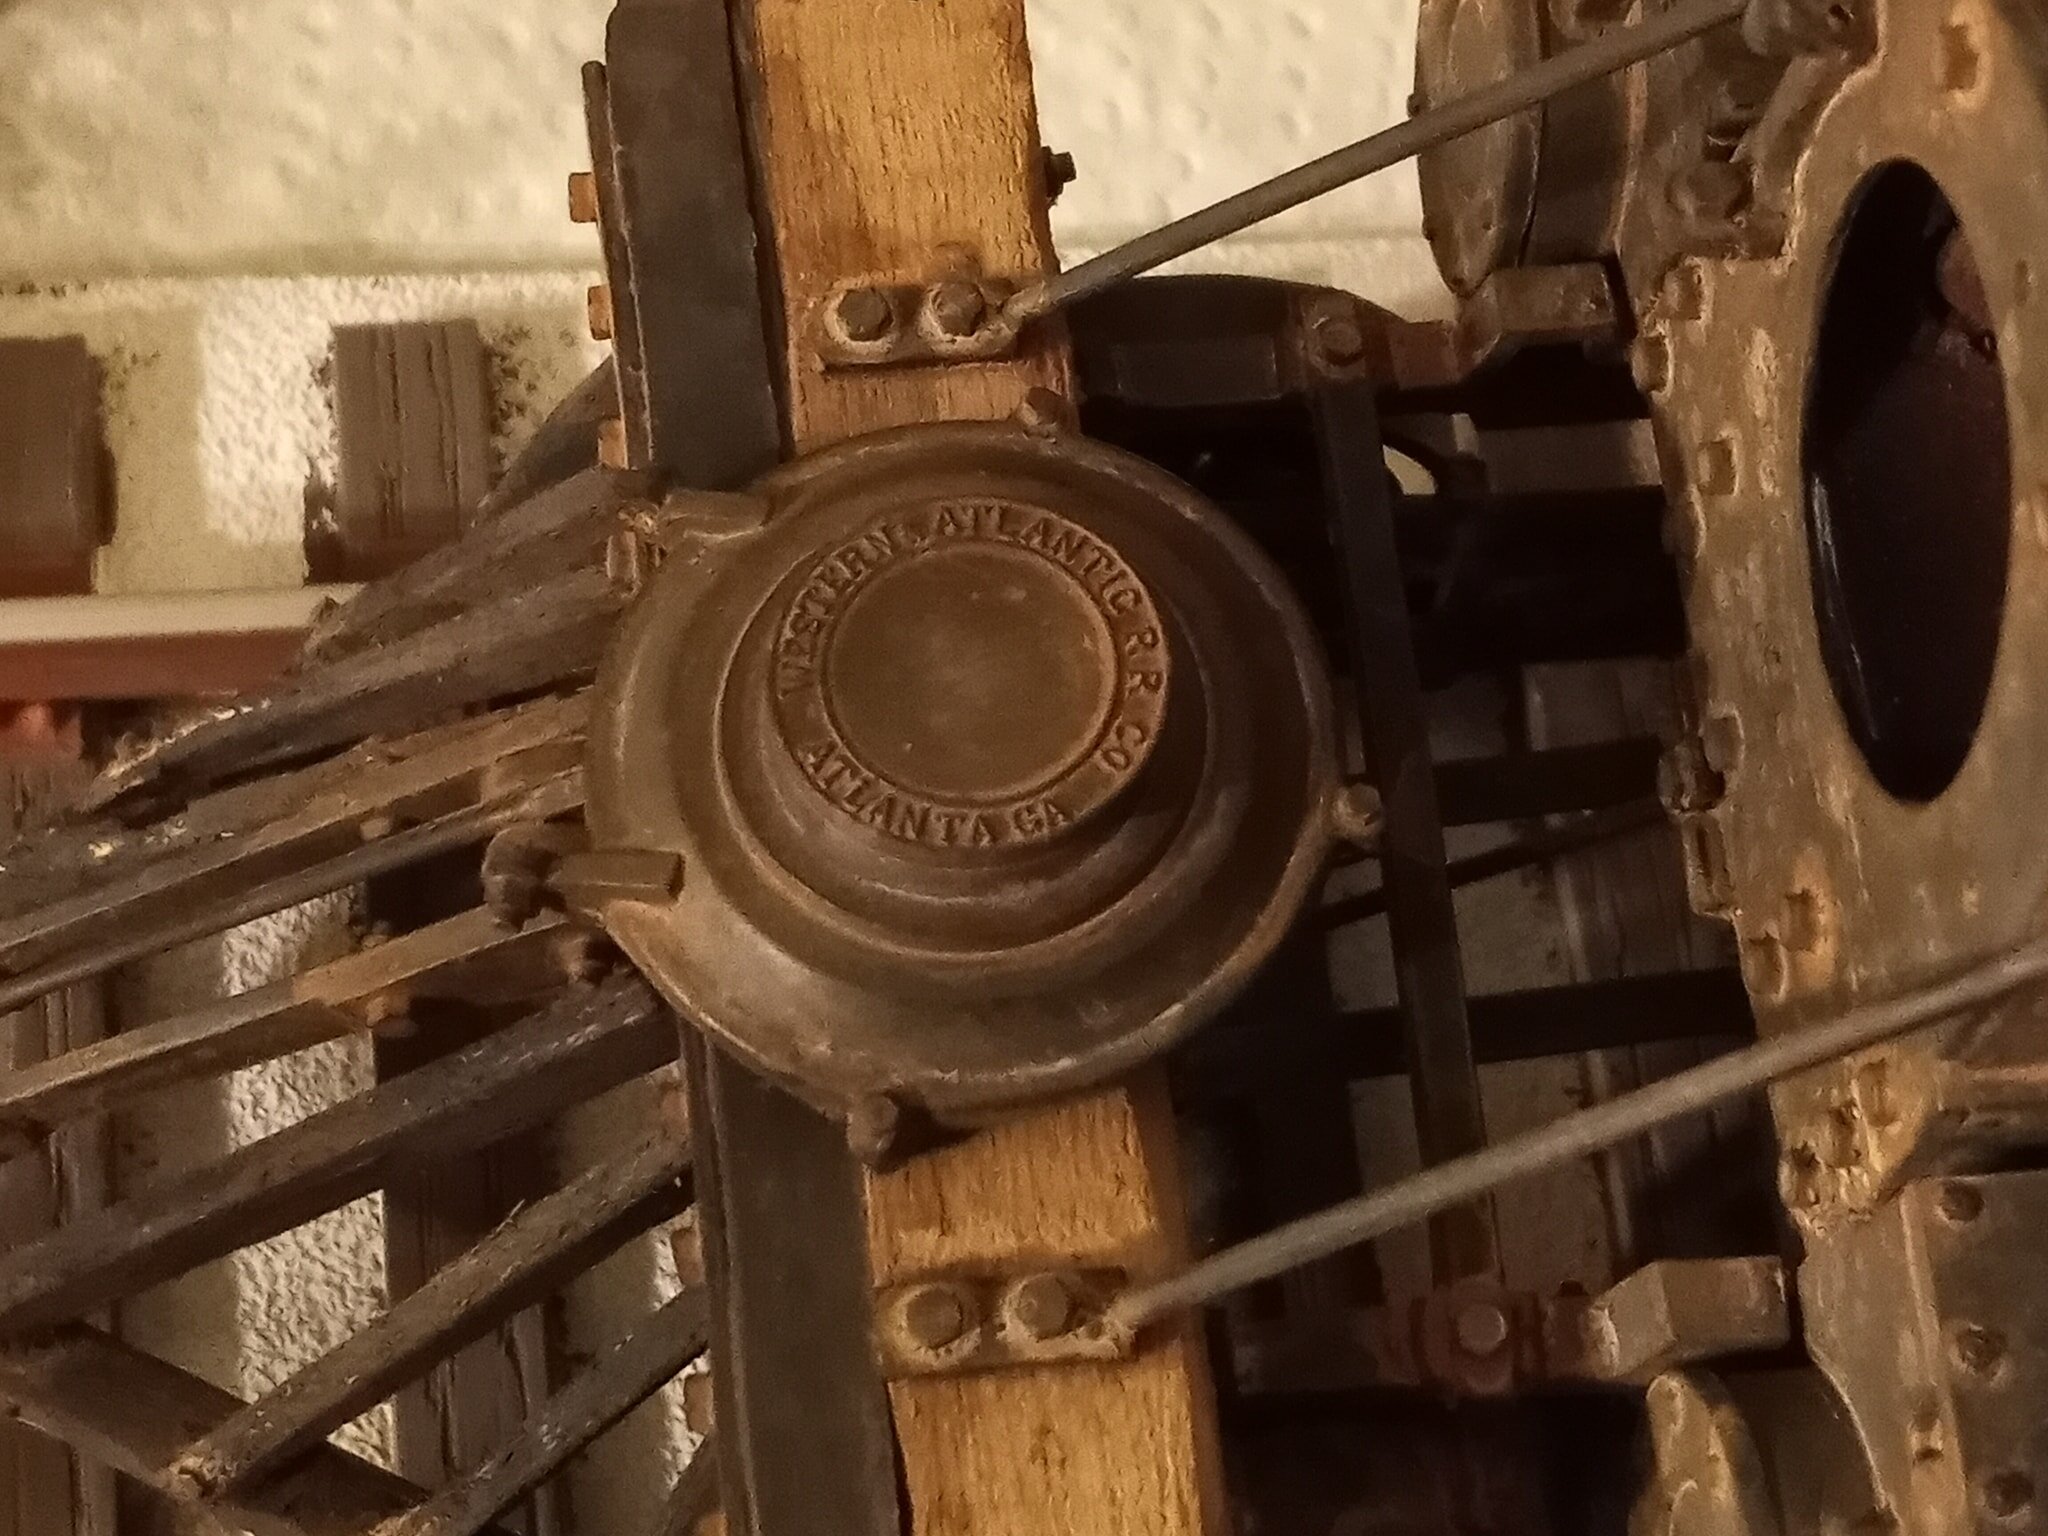
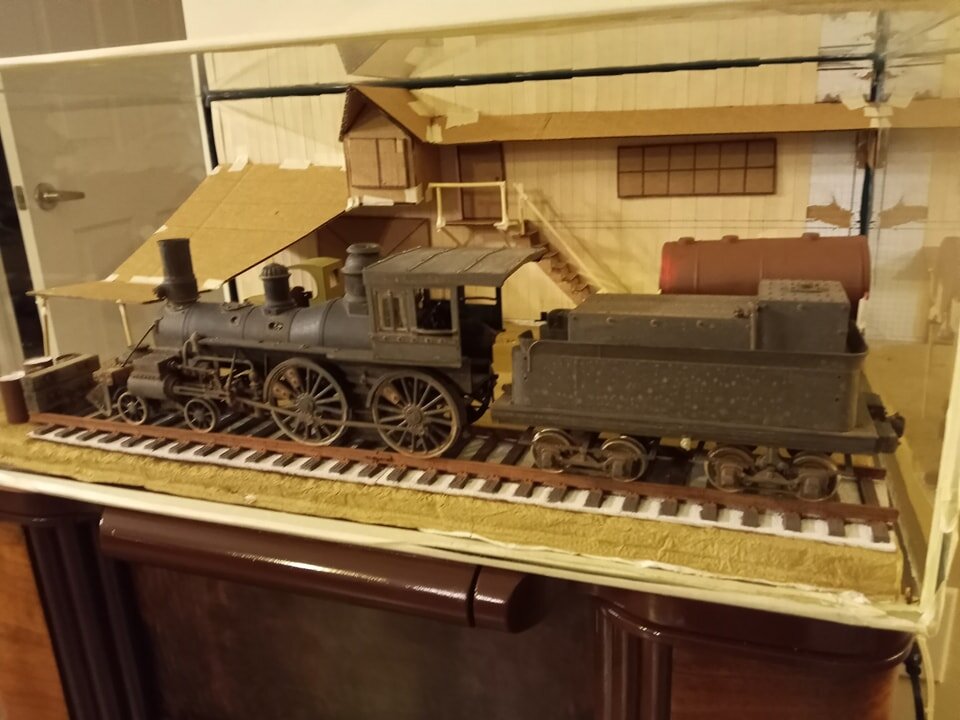
Finally done after 2 years. What you see here is: 21 feet of balsa on the roof structures and 4 feet of various other balsa; 10 feet of 36 gauge aluminum, 6 feet of electrical wire; 32 feet of 1" poplar strip wood *and* 32 feet of basswood balsa strip batten; a little over 13 feet of styrene rod; 1000 bolts of 3 different sizes; 1,146 structure rivets; 56 tubes of superglue, 13 superglue gel; 12 LEDs; over 64 oz of Titebond; 1/2 gallon of plain white Elmer's; 3 pounds of sand, J.B. Weld, epoxy, 3M adhesive, and no telling how much paint. All clocking in at 8 pounds. At *least* 1,000 hours. All questions, comments, critiques welcome! Thanks for looking. Jason This is a 1/25 scale, heavily modified AMT 'The General' kit made to look more like 1920s-30s stock. This is a fantasy build, not representing any particular locomotive or technology'; nothing is accurate anywhere. It's an amalgam of things I saw doing research that I really liked.

-
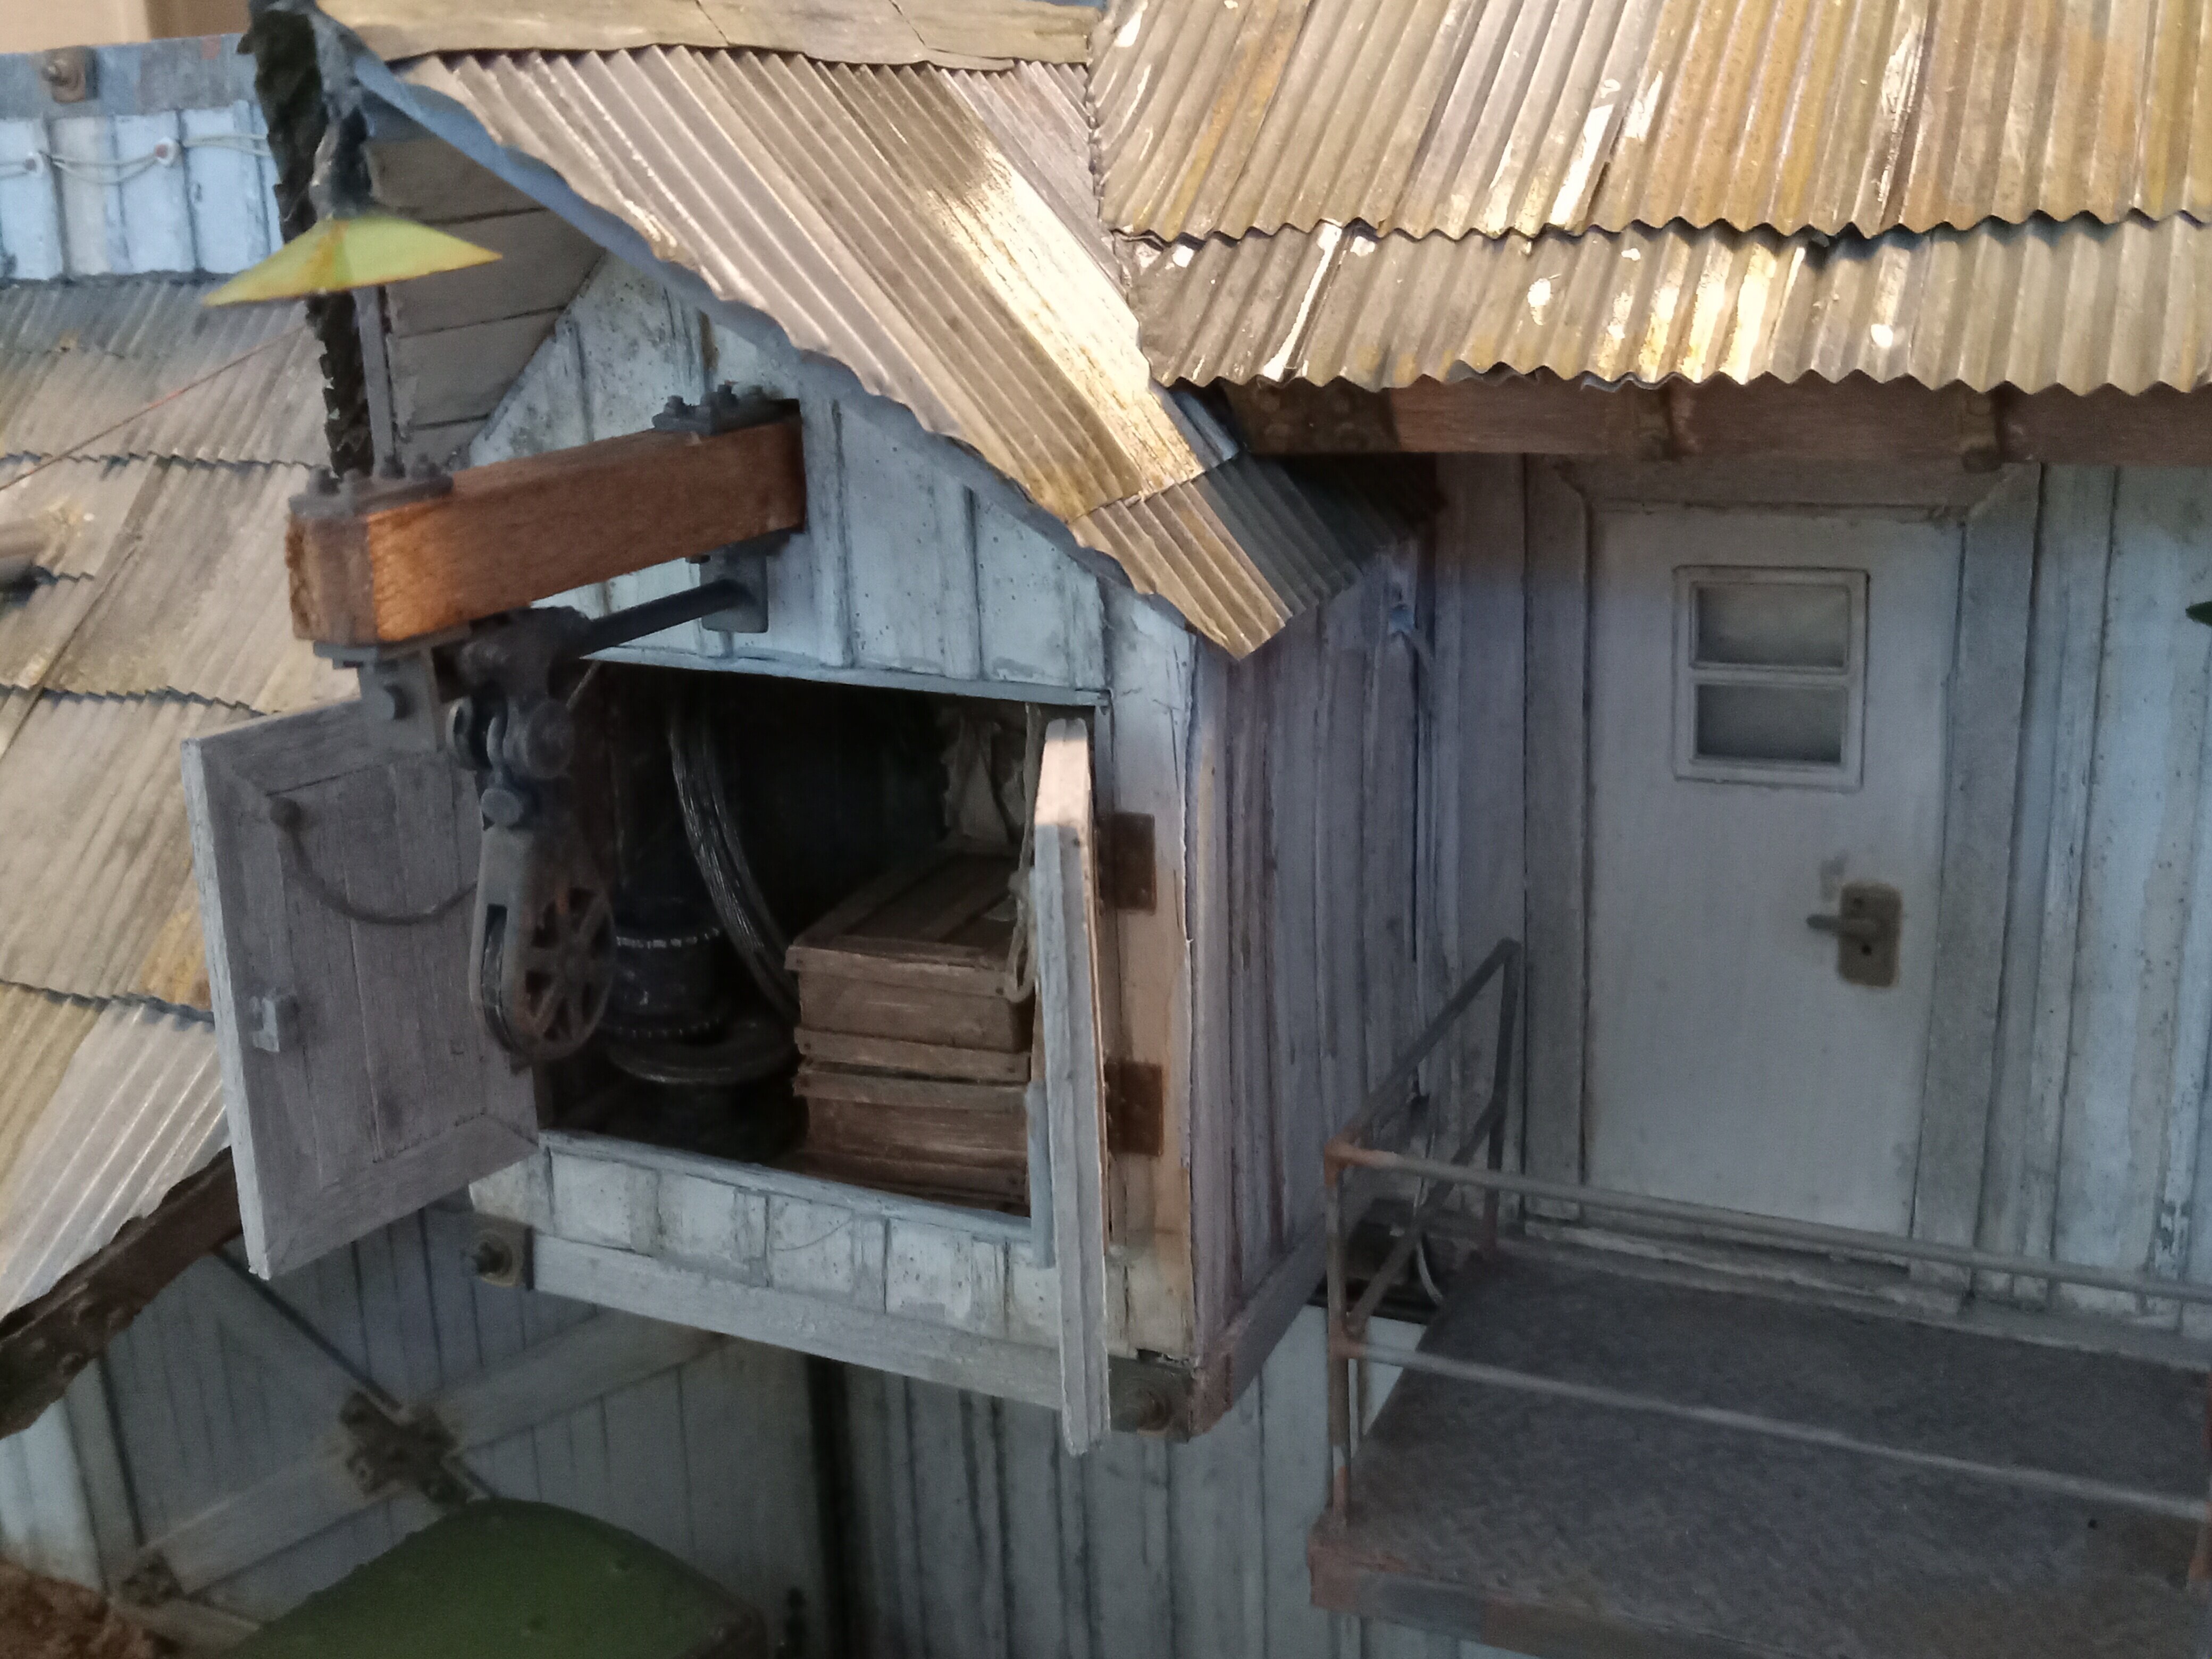
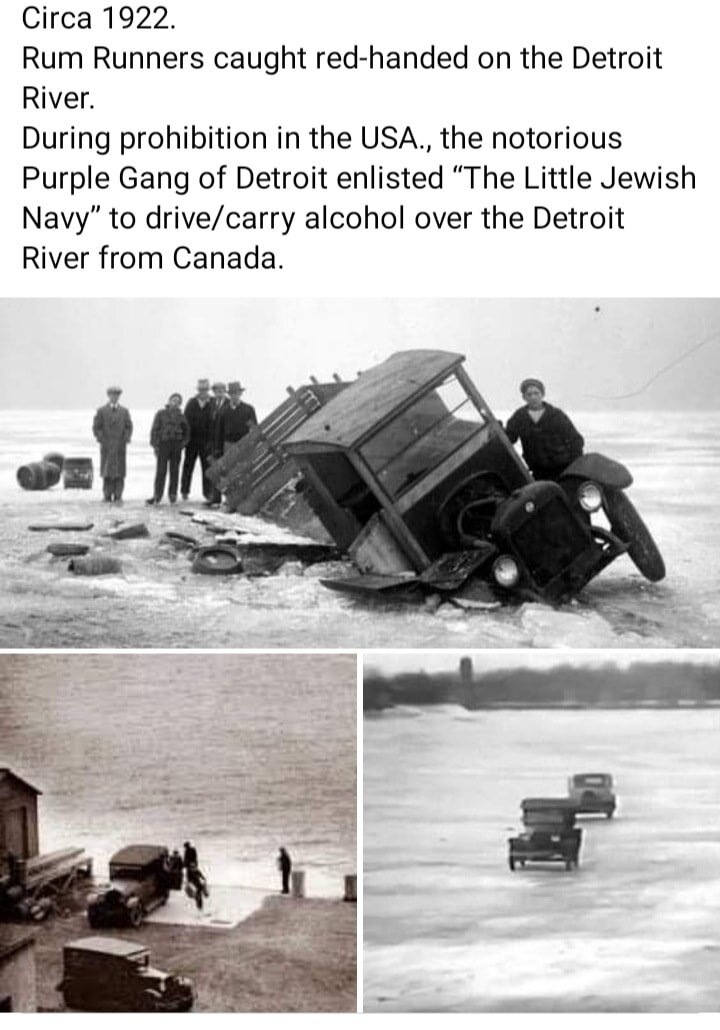
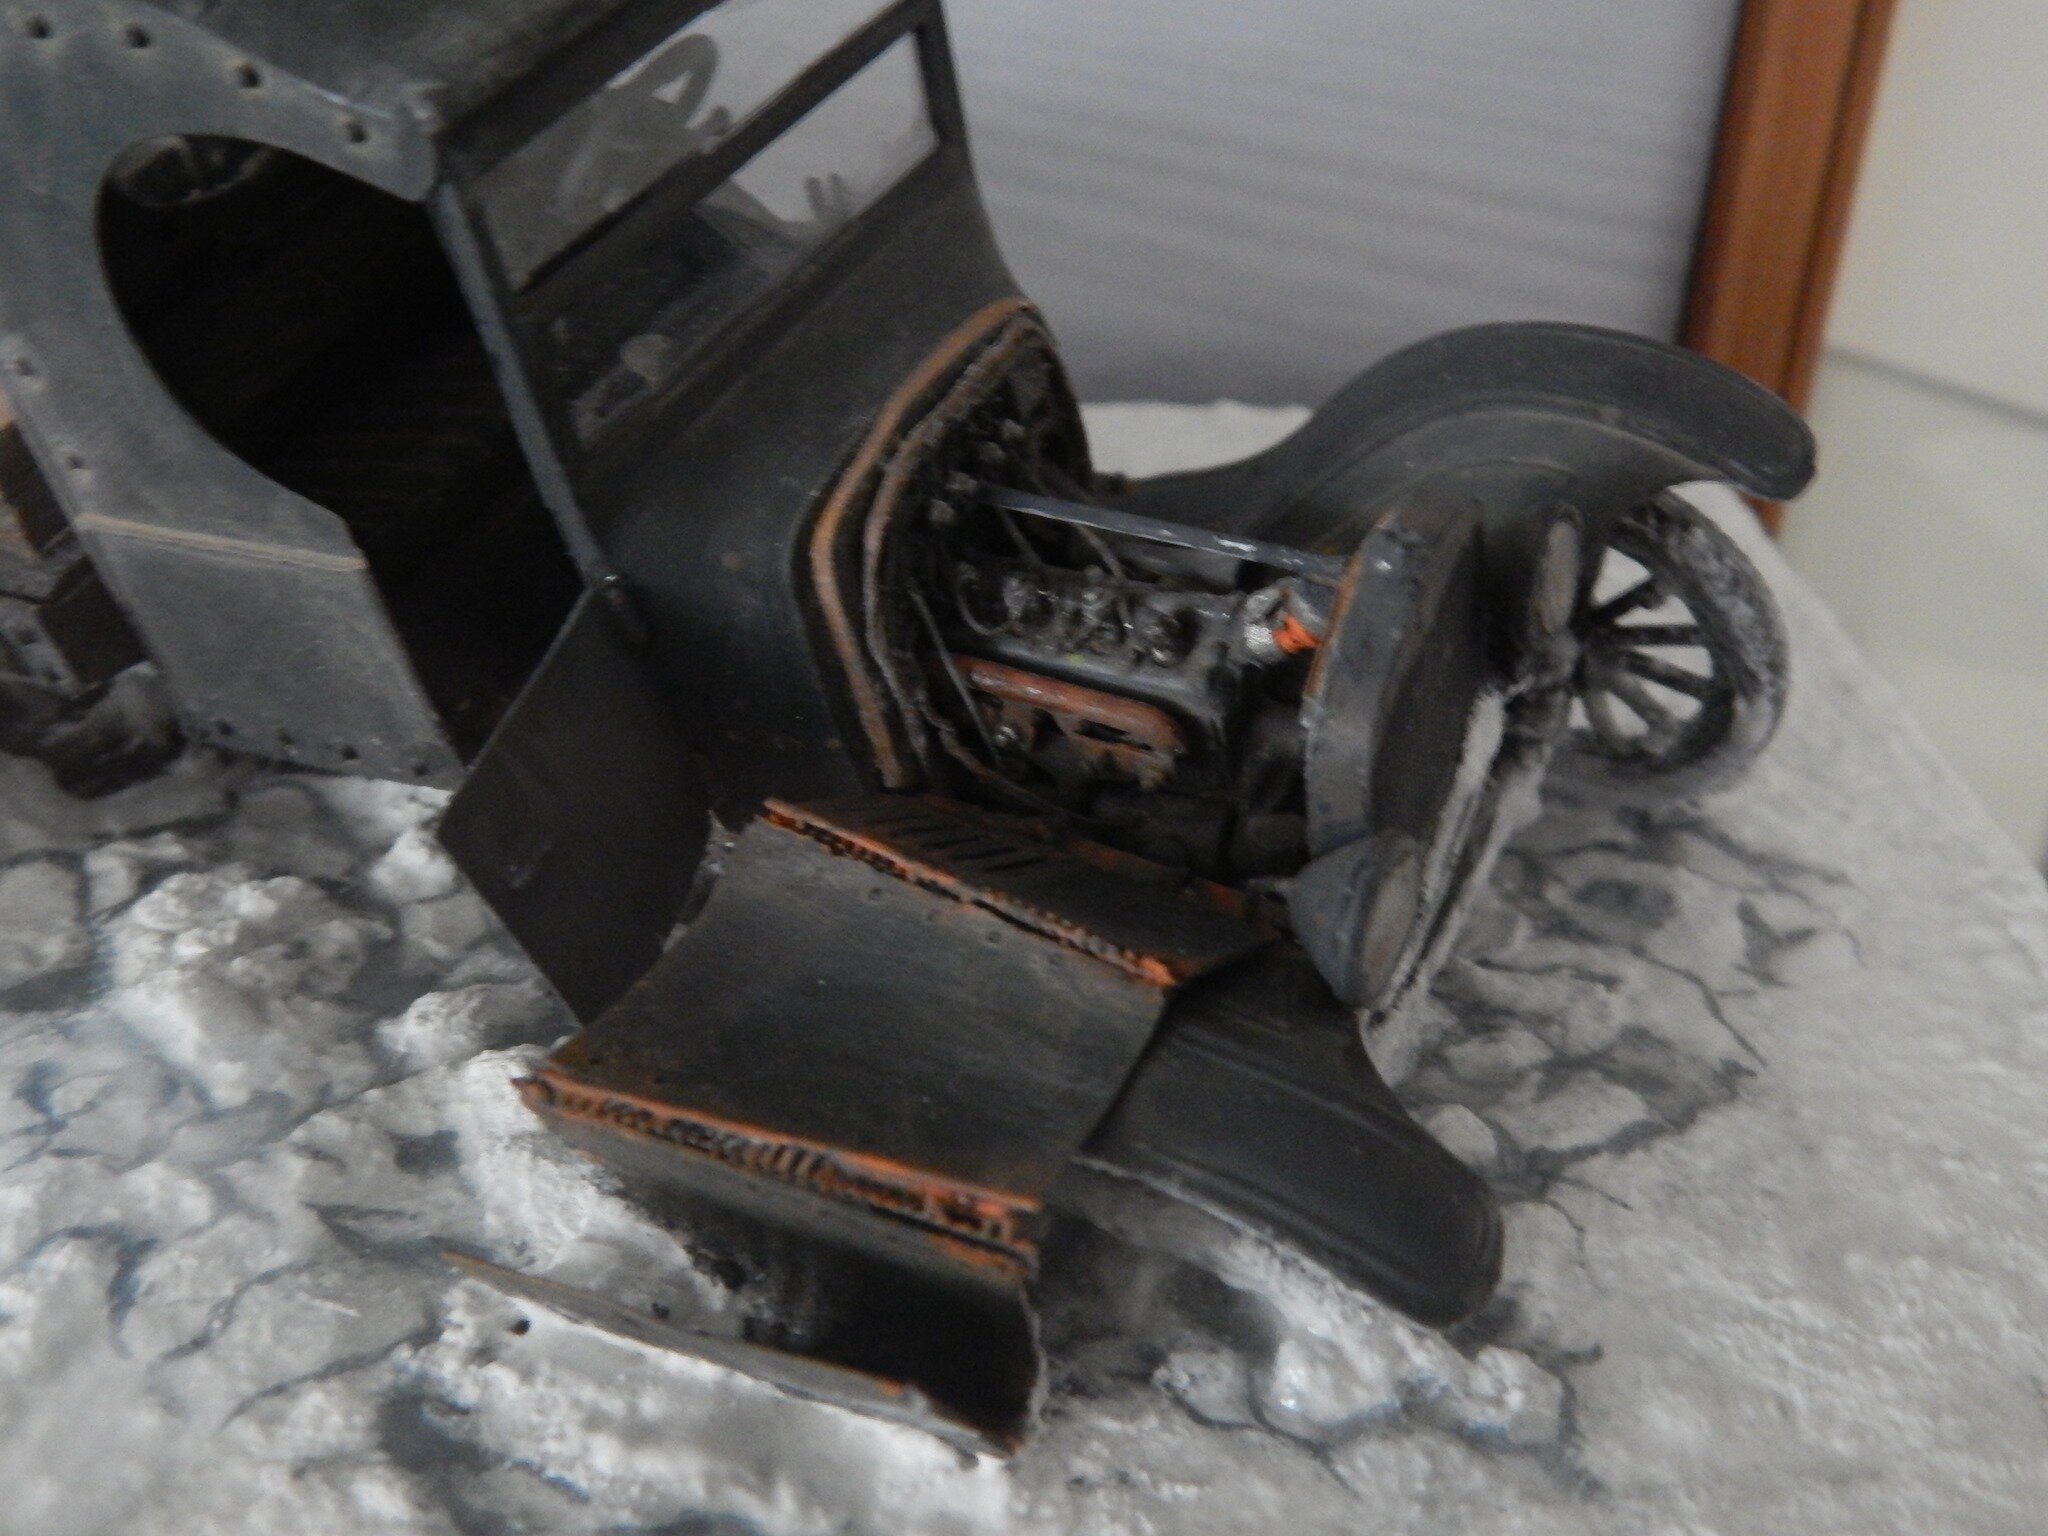
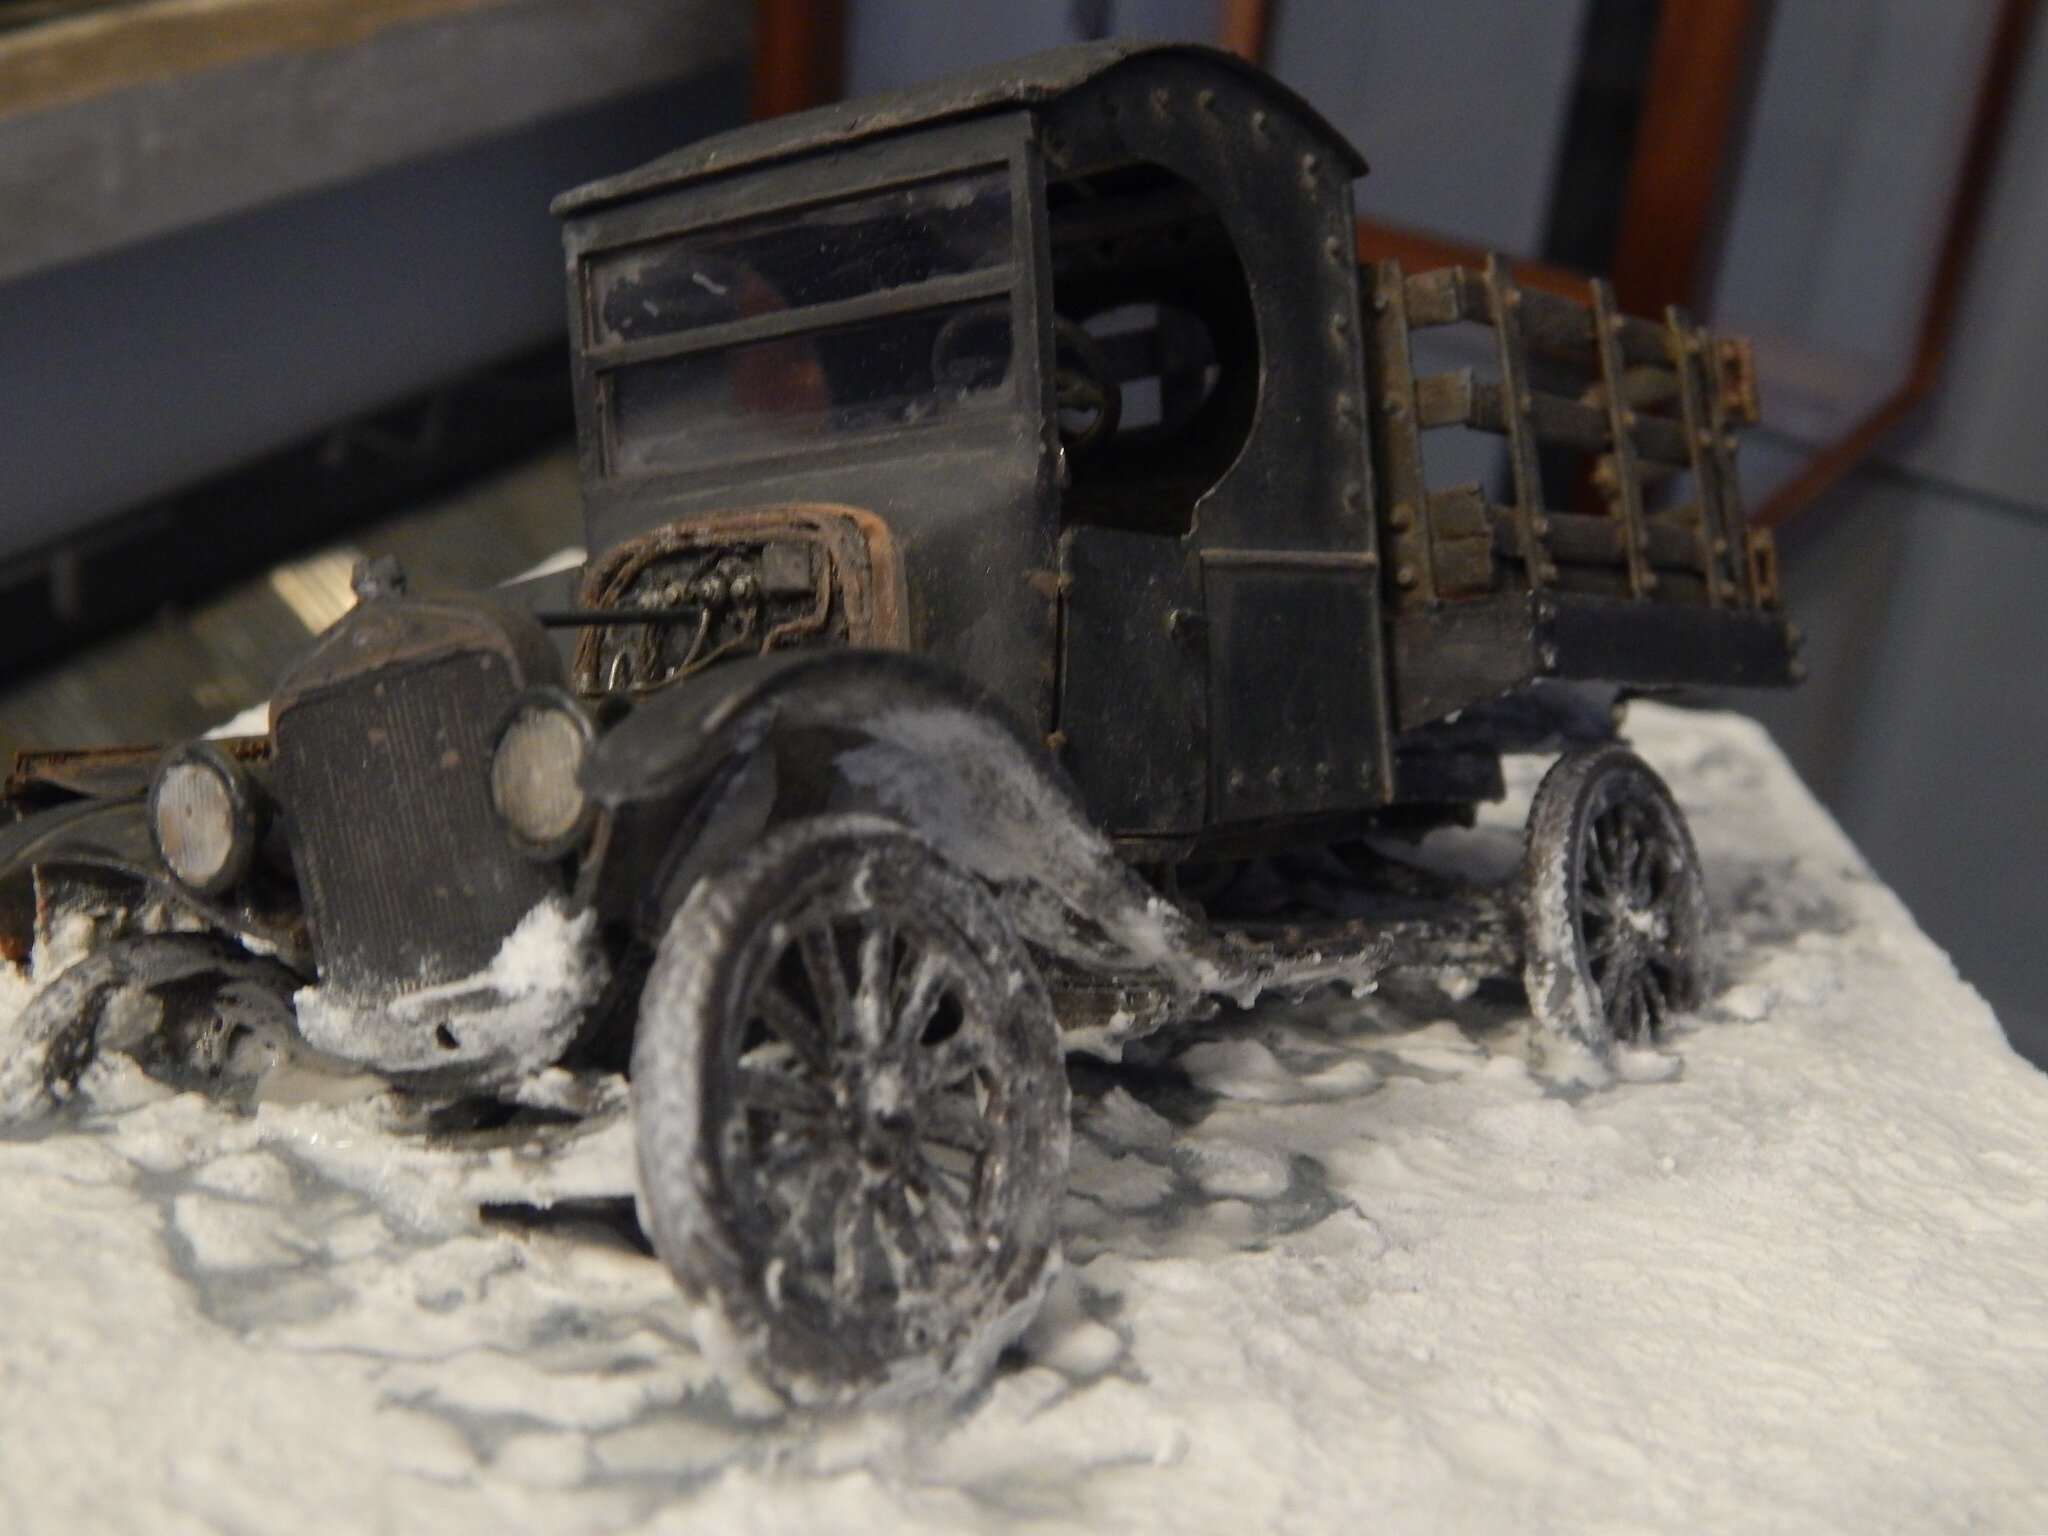
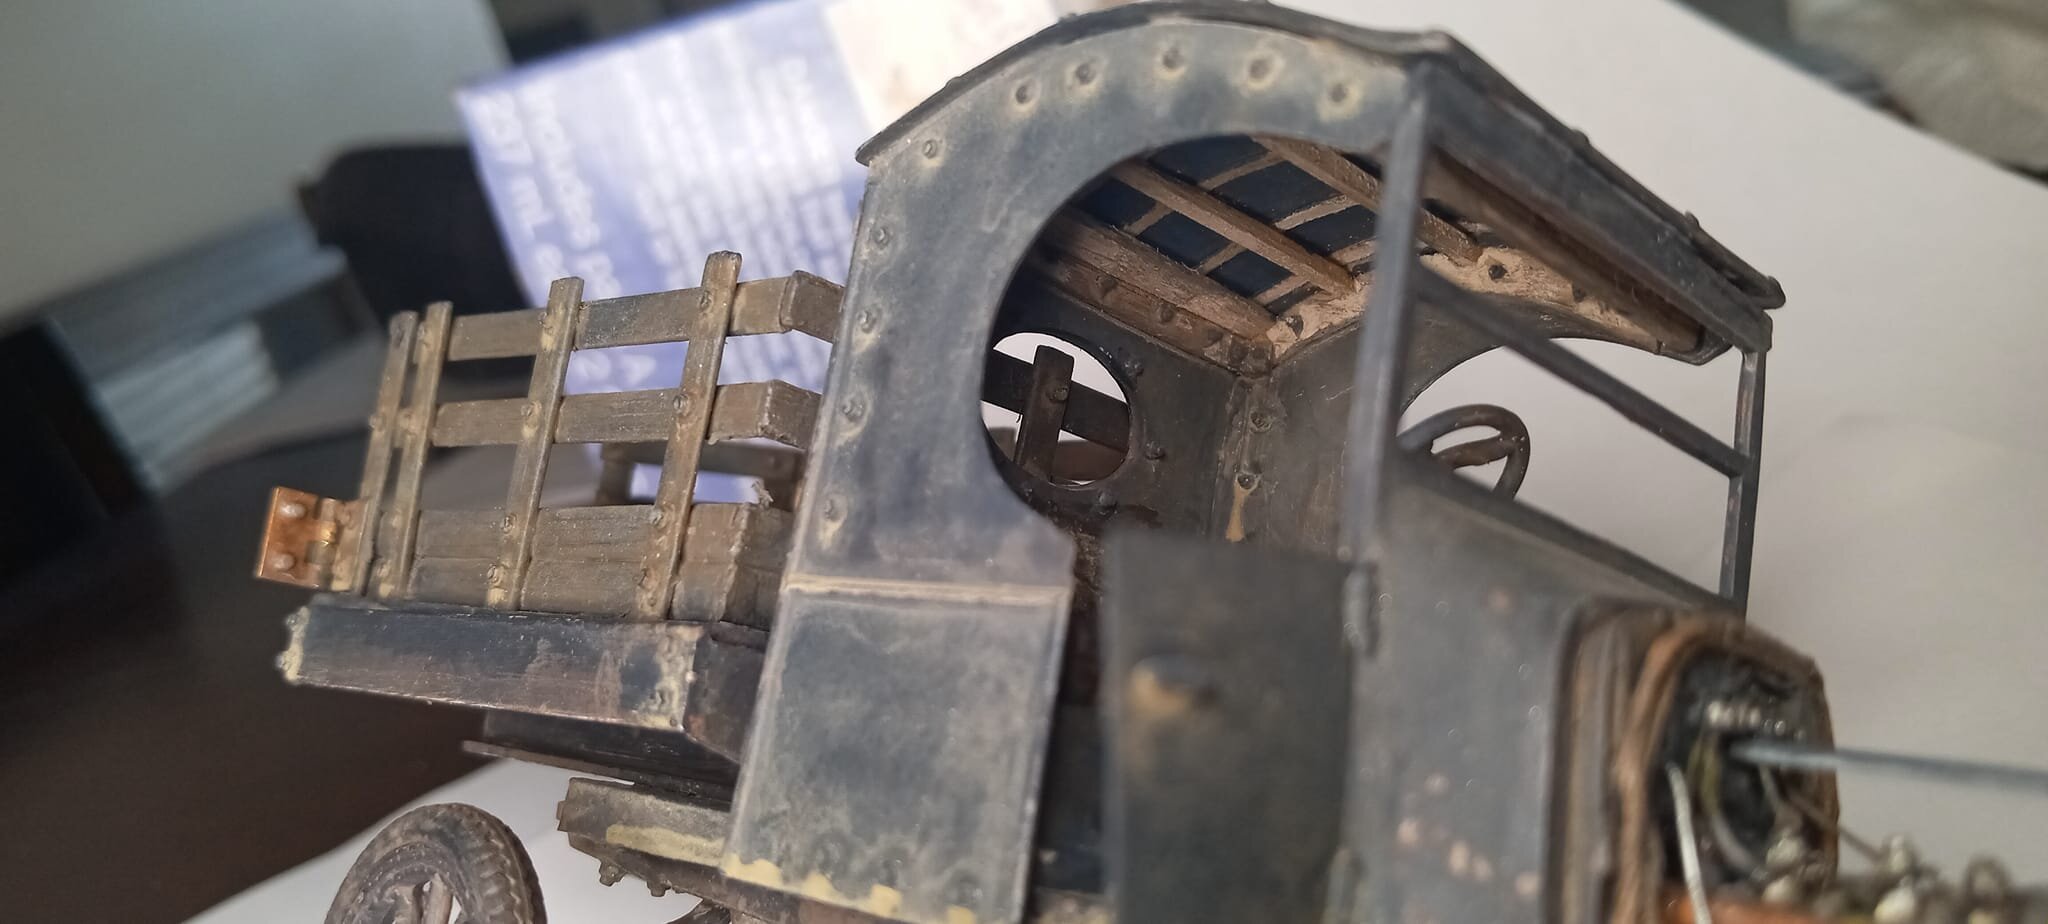
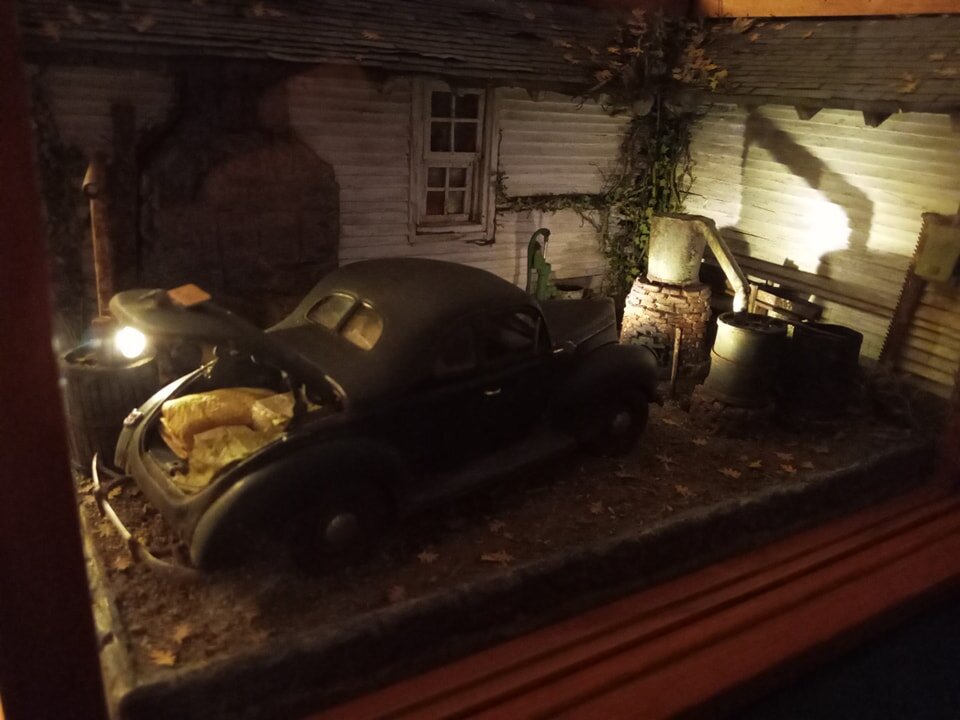
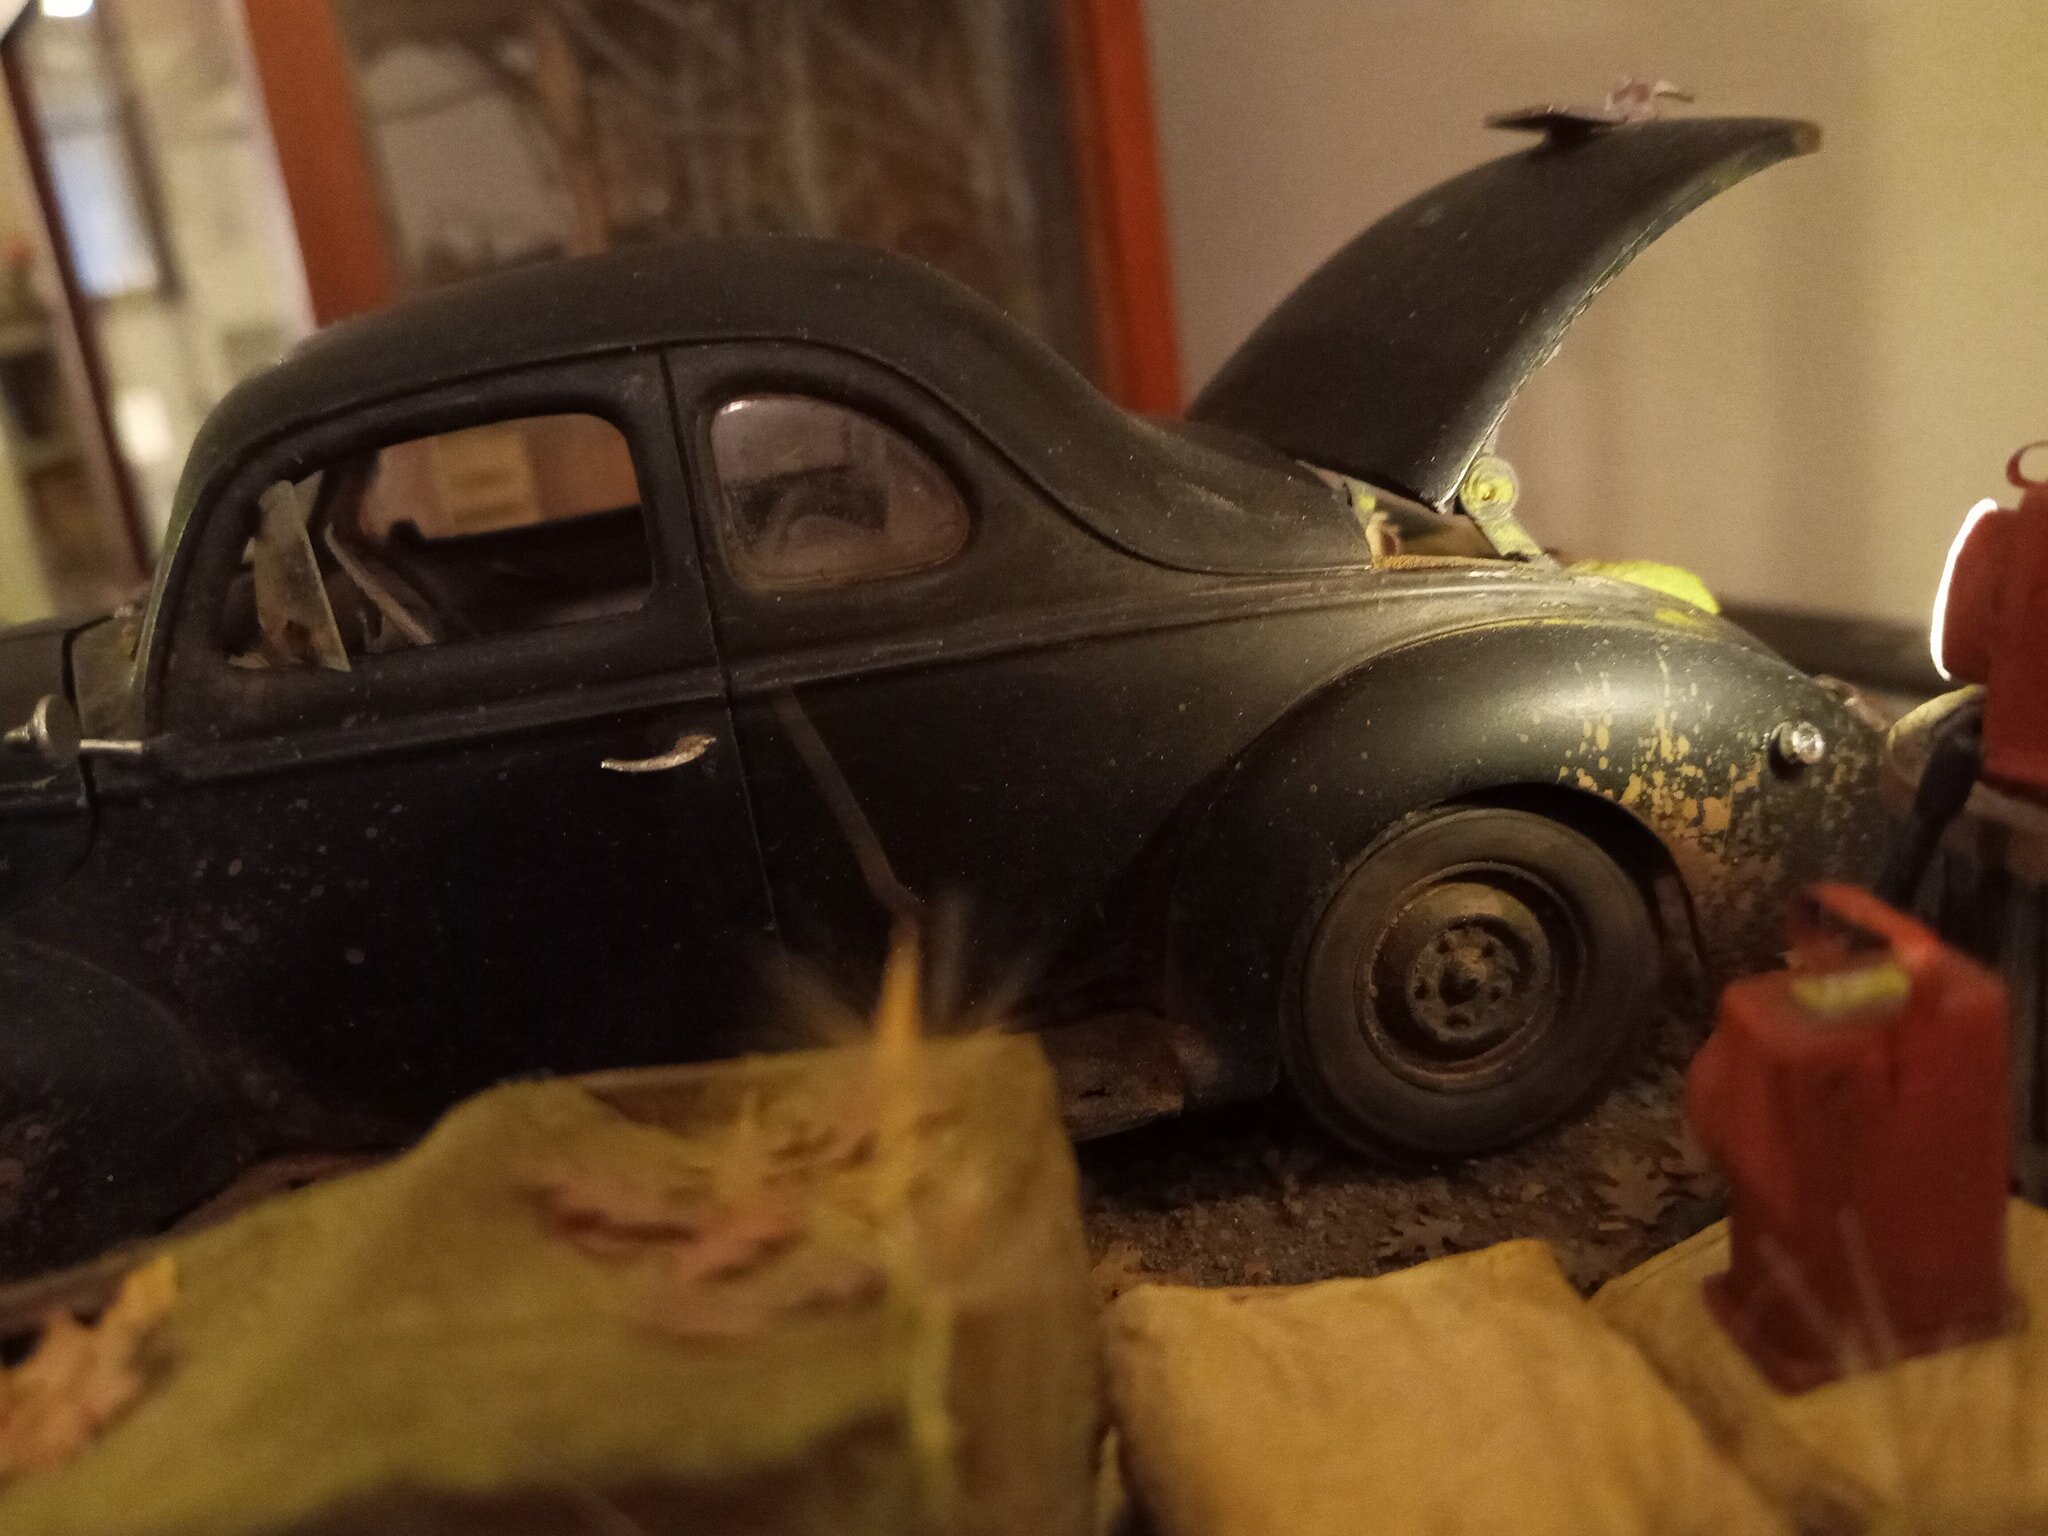
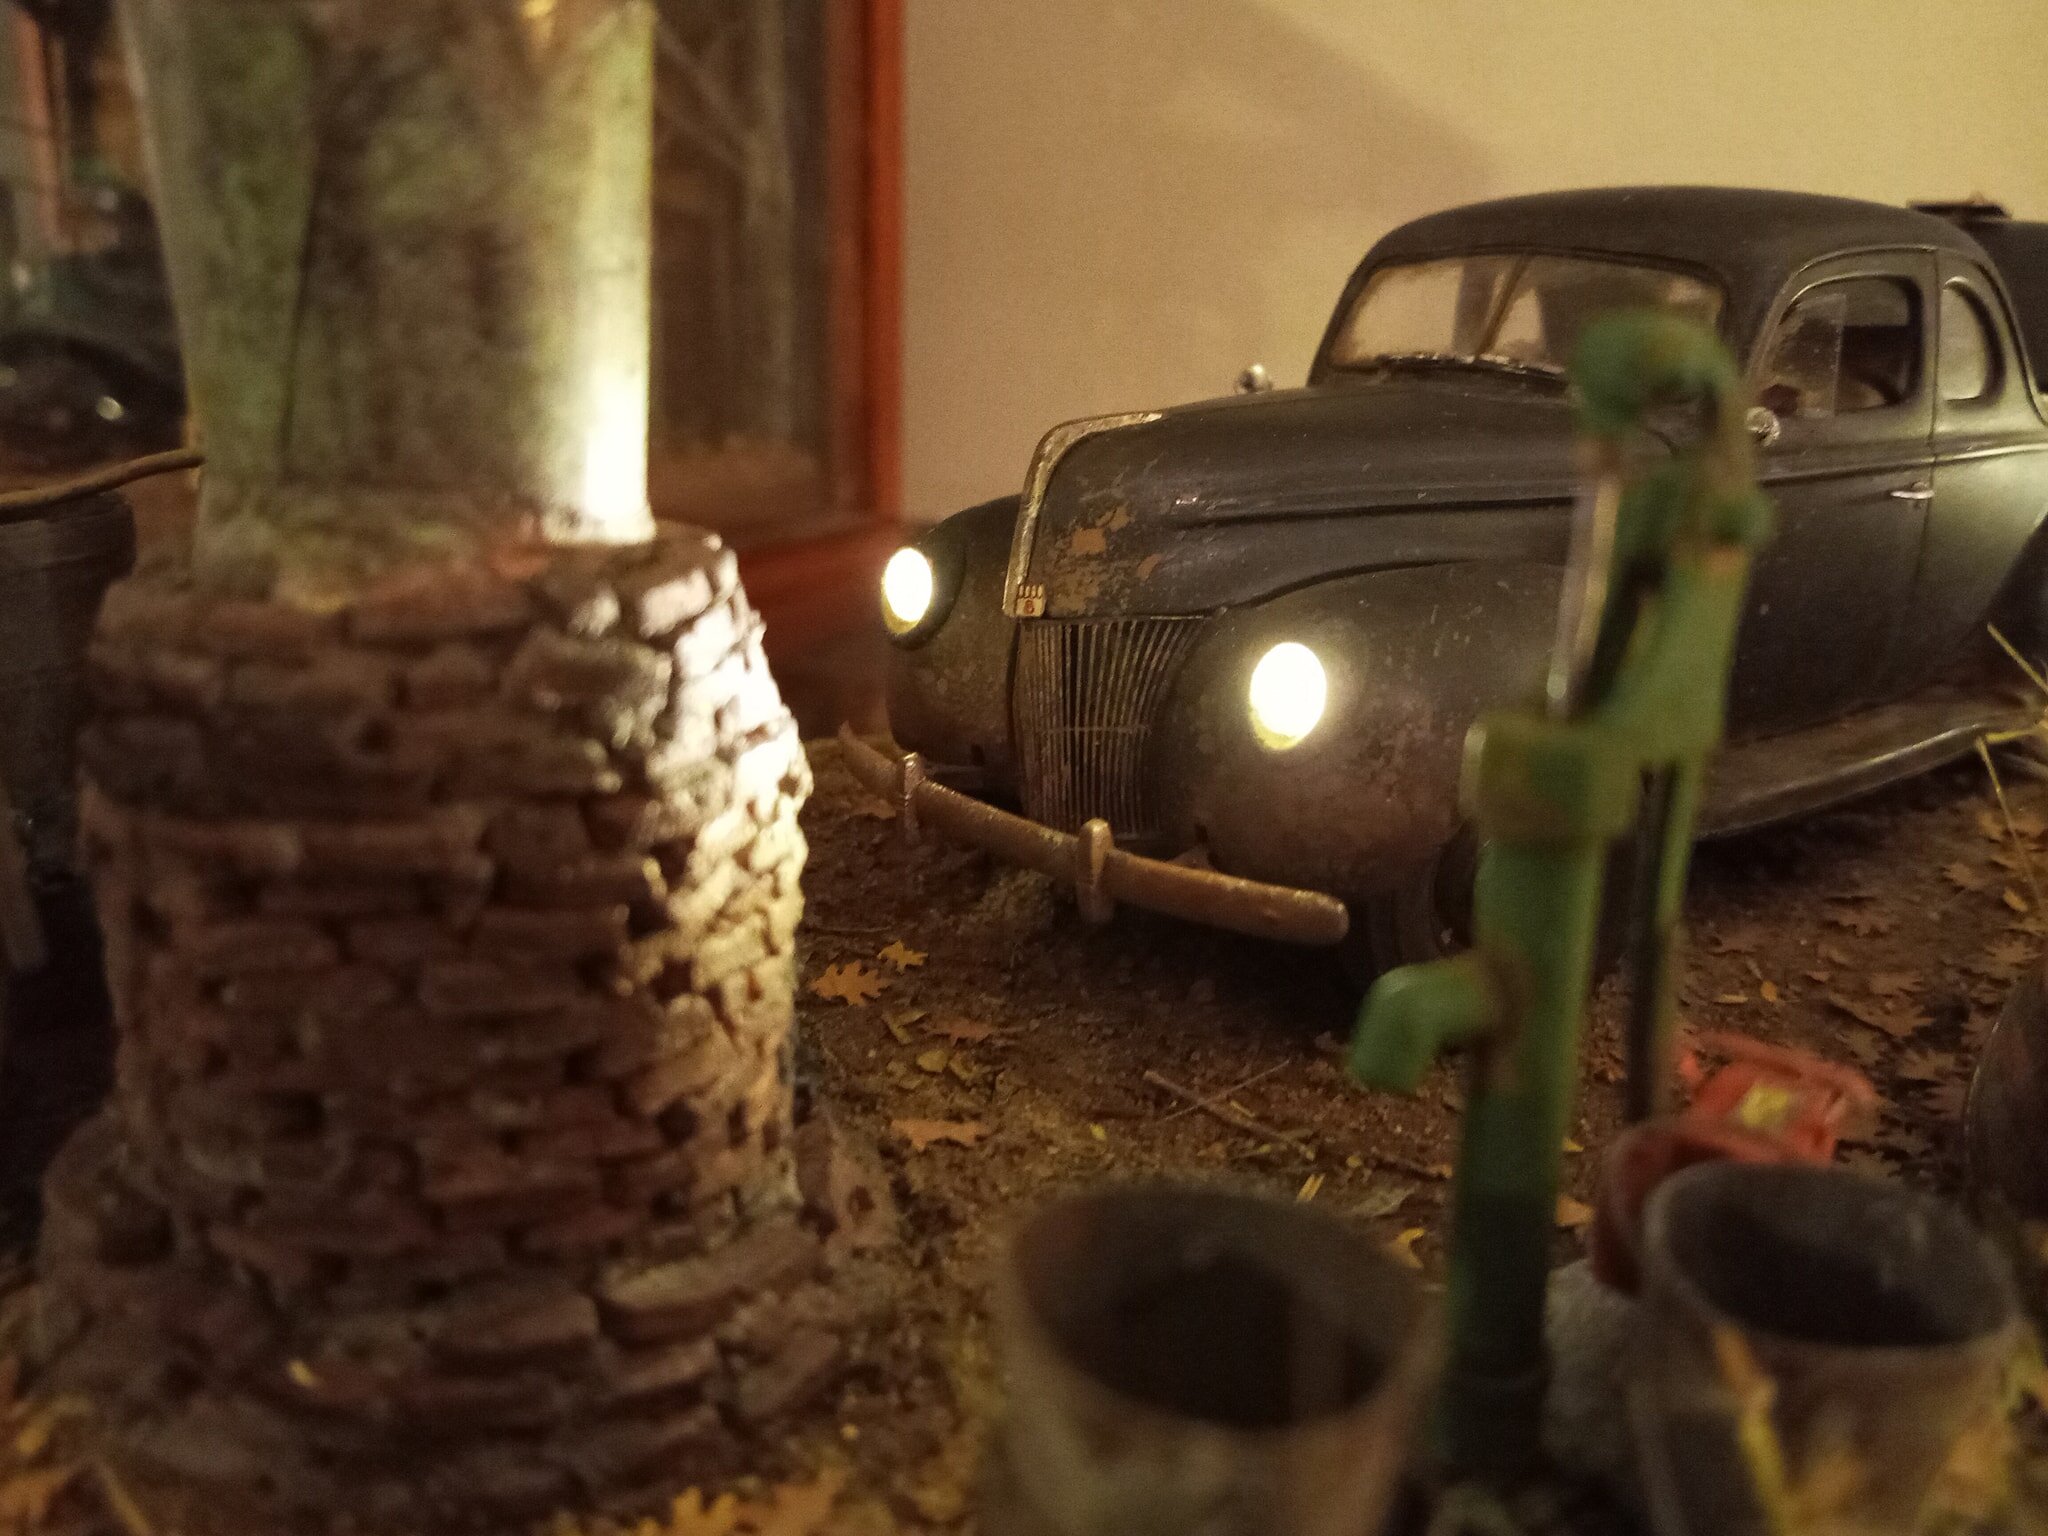
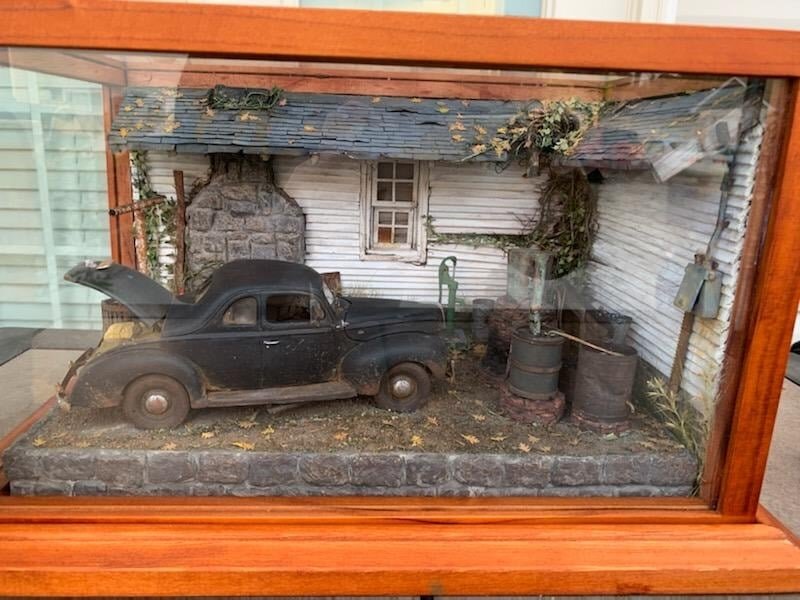
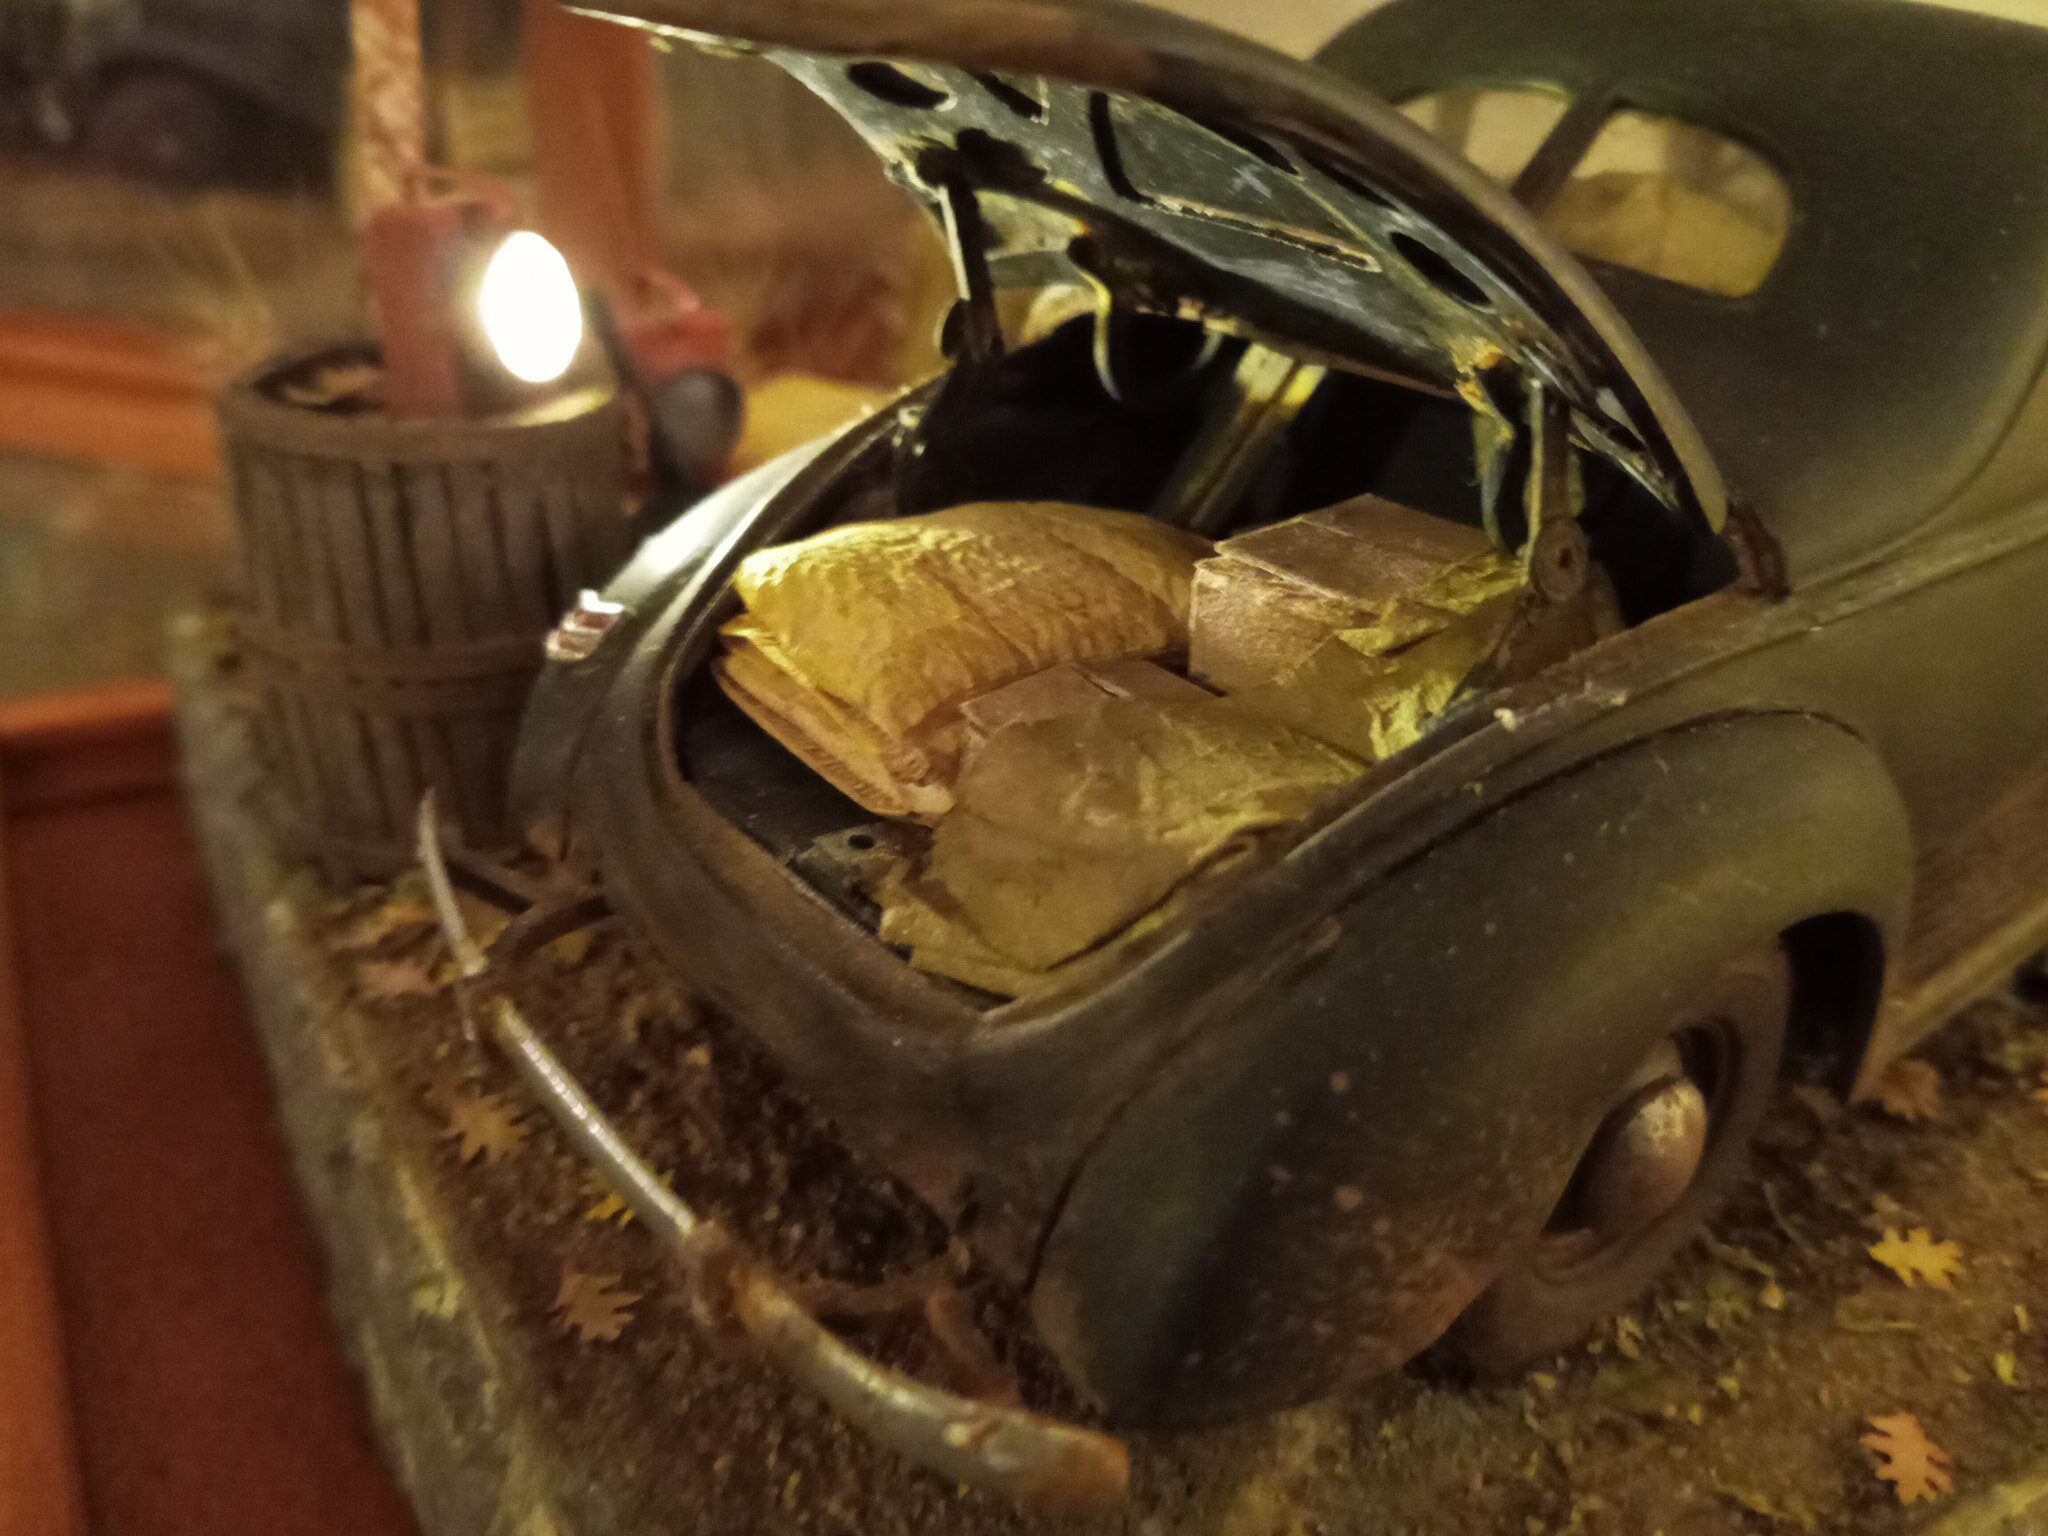
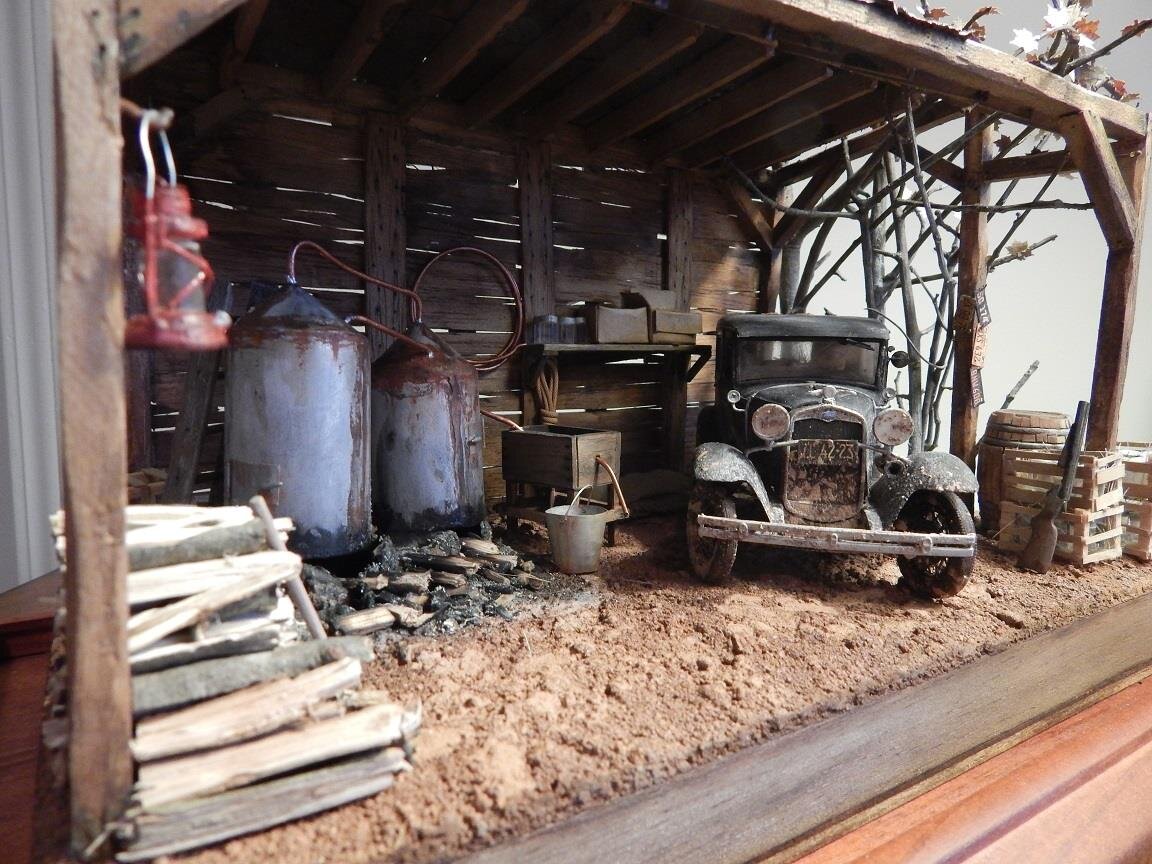
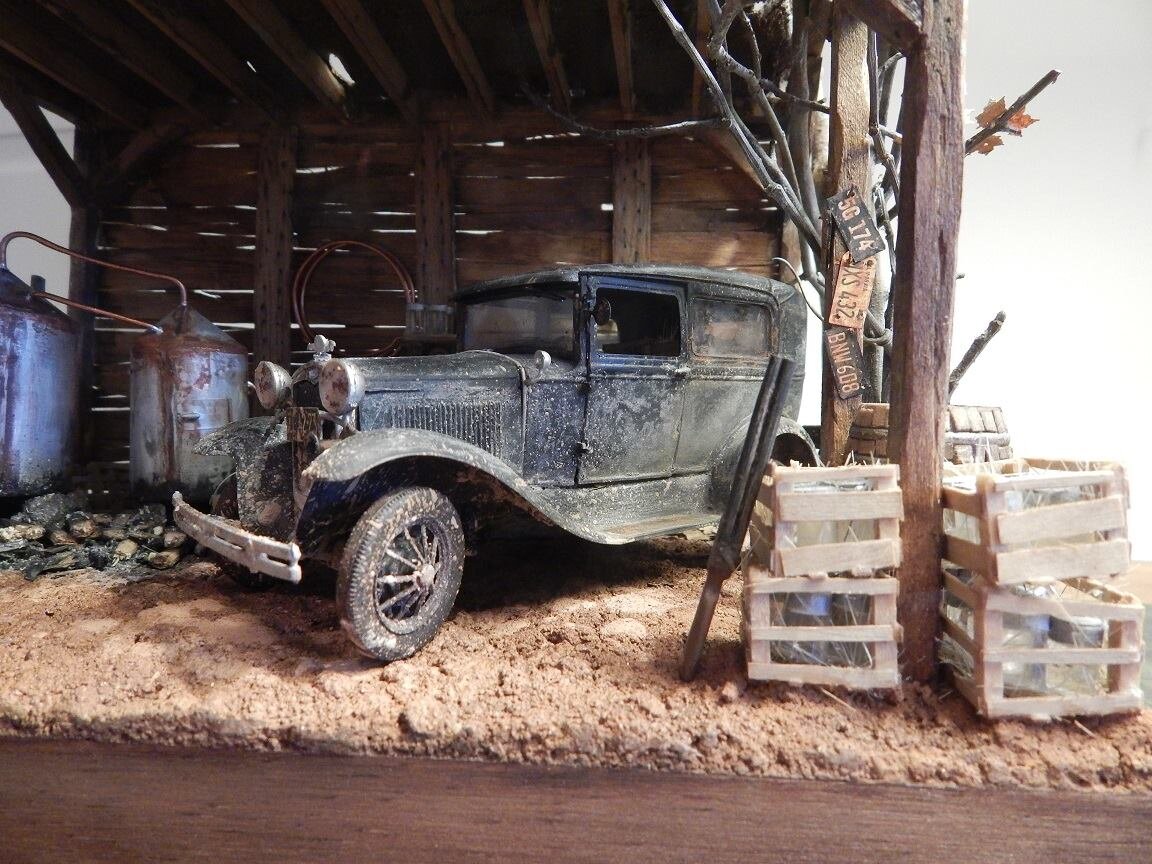
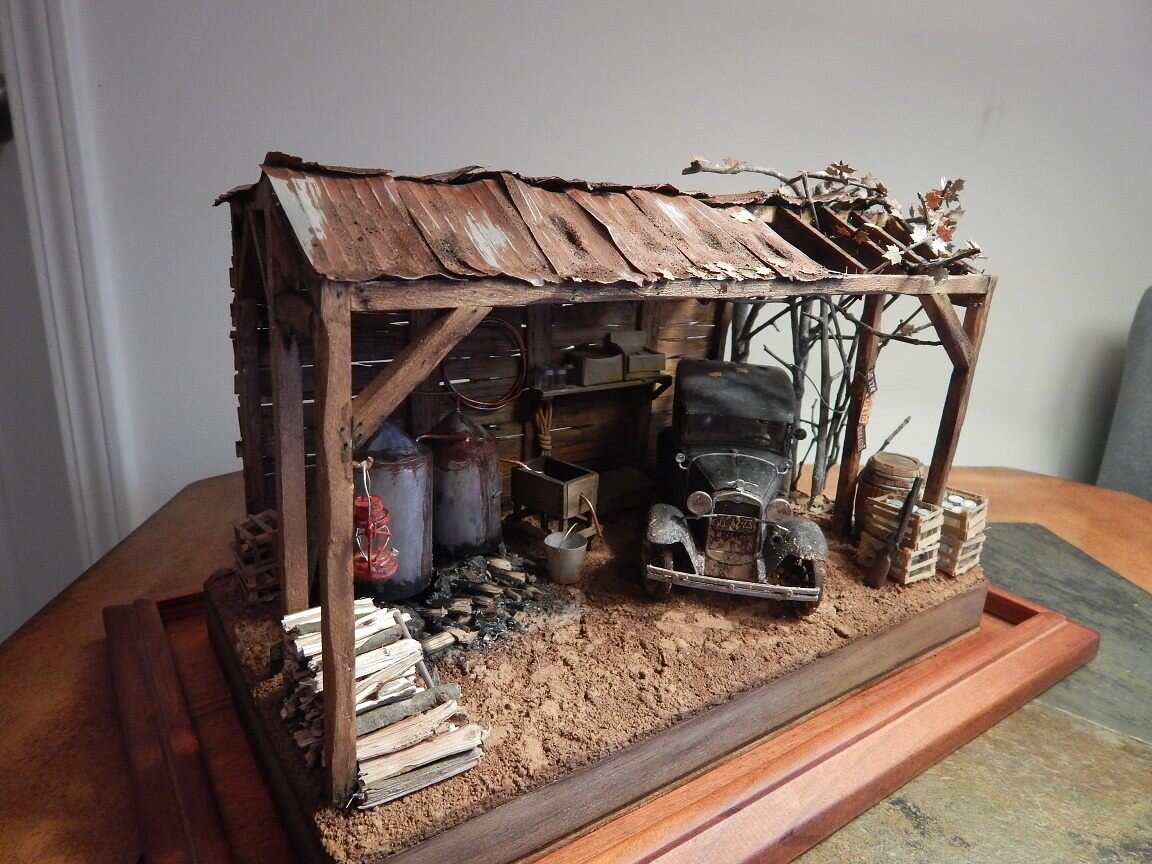
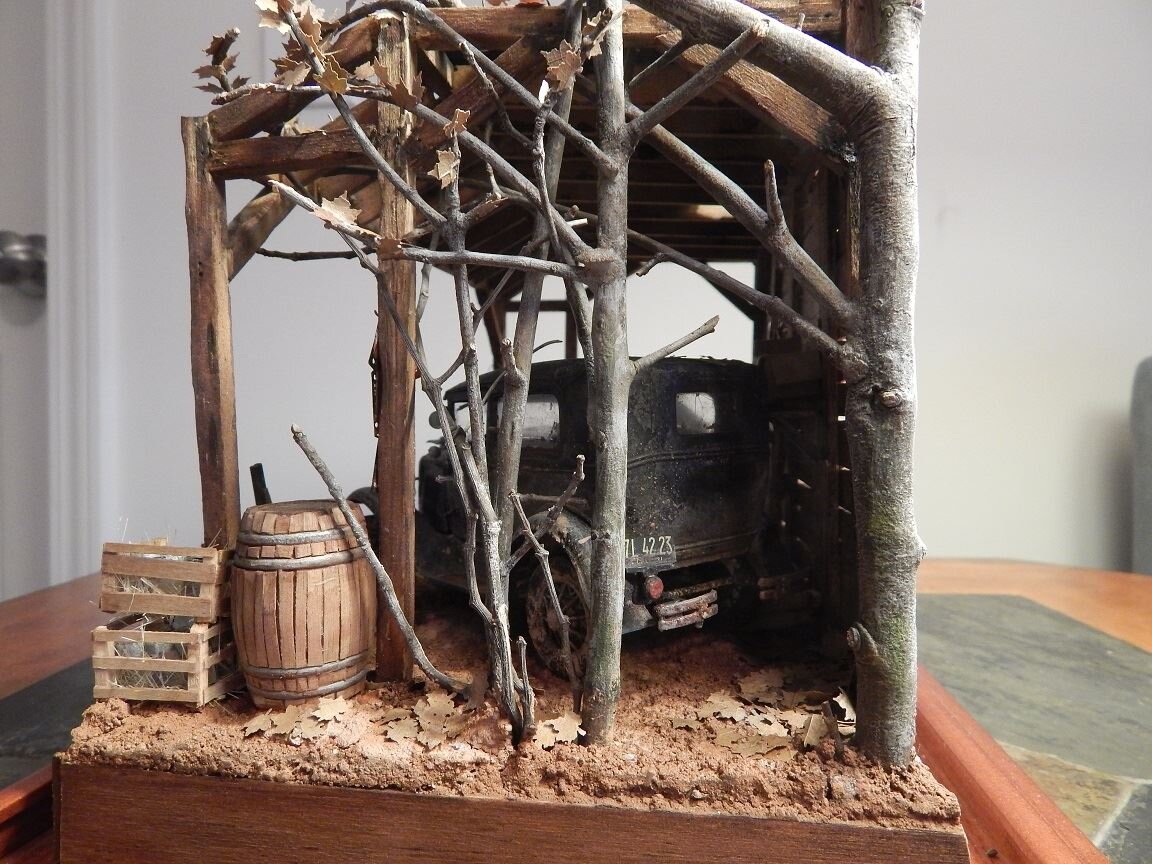
My 1/25 ice road moonshine diorama, based on the historical pic. Thanks for looking.
-
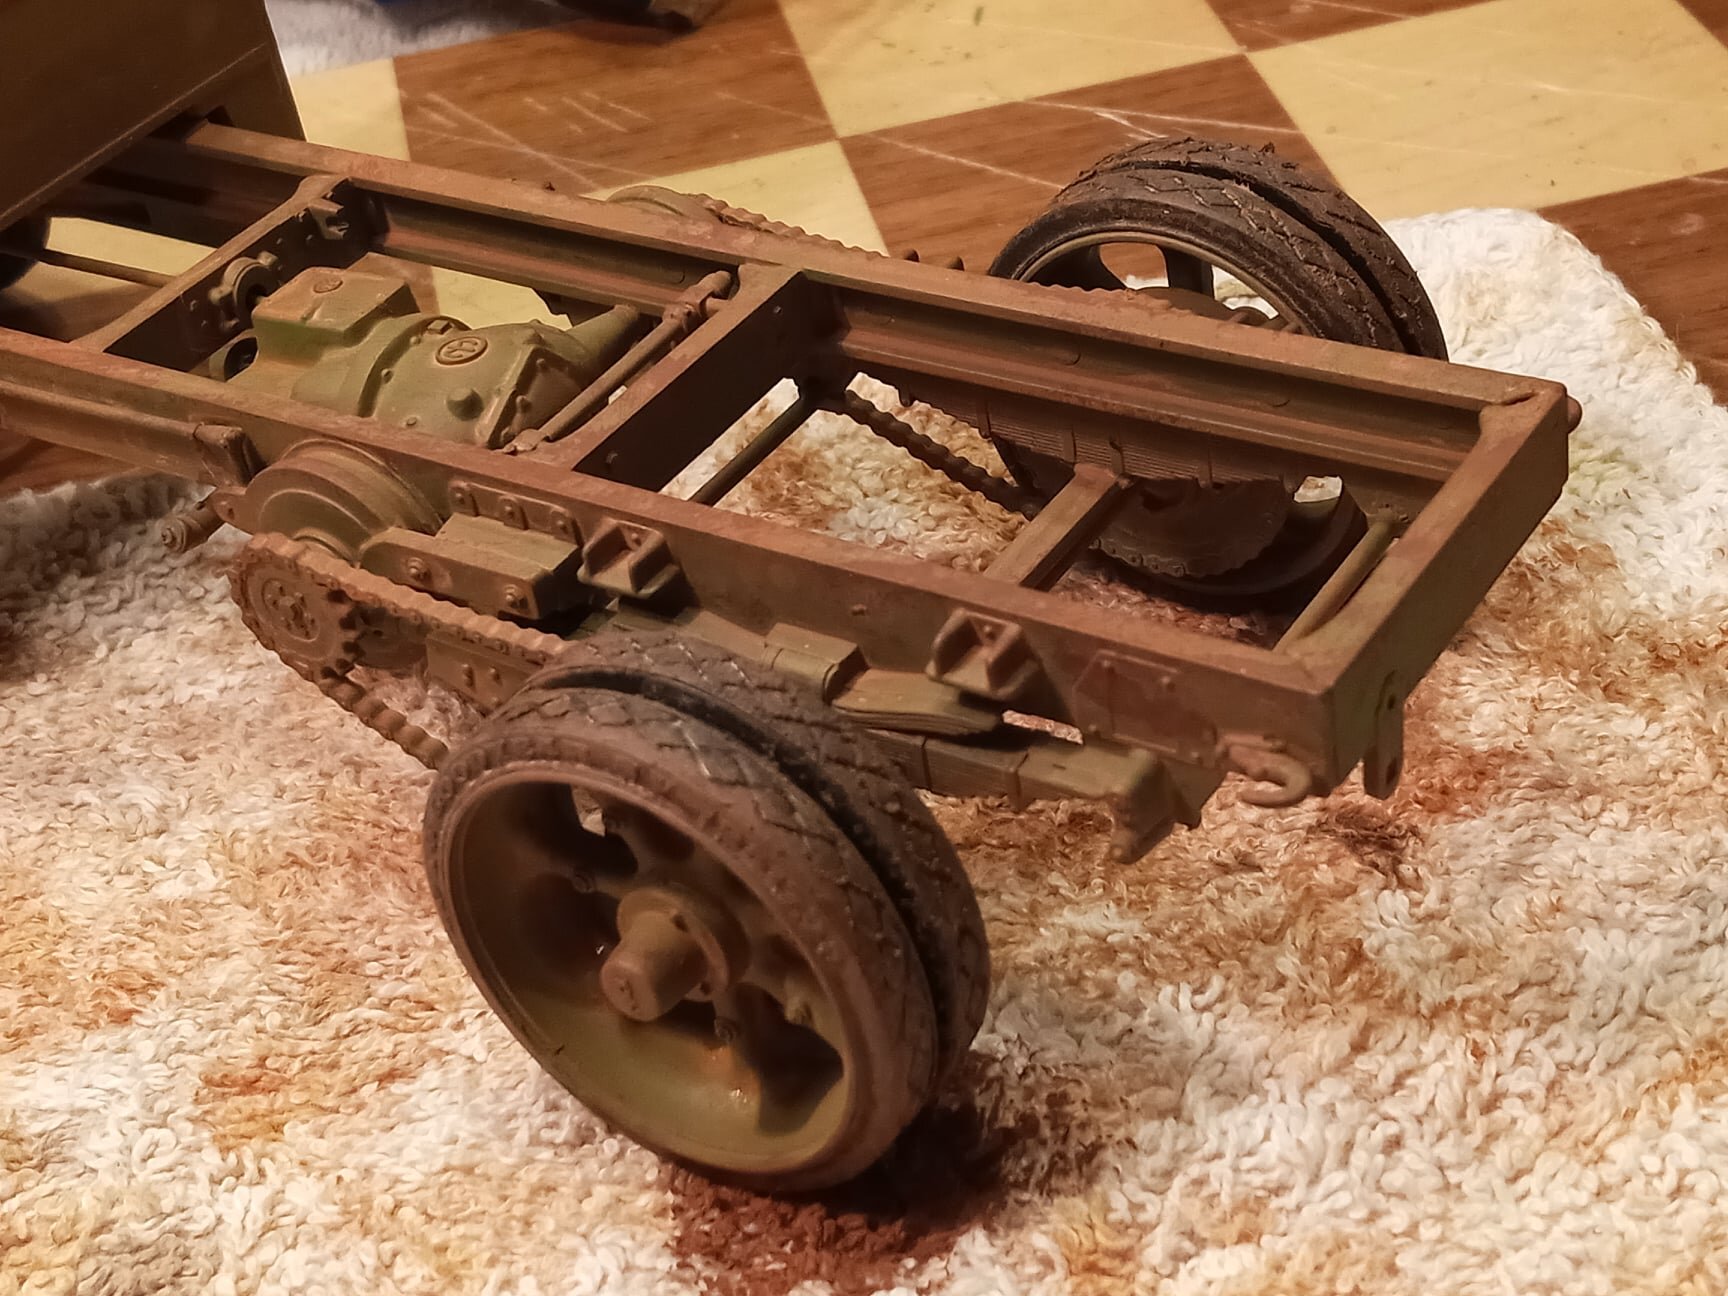
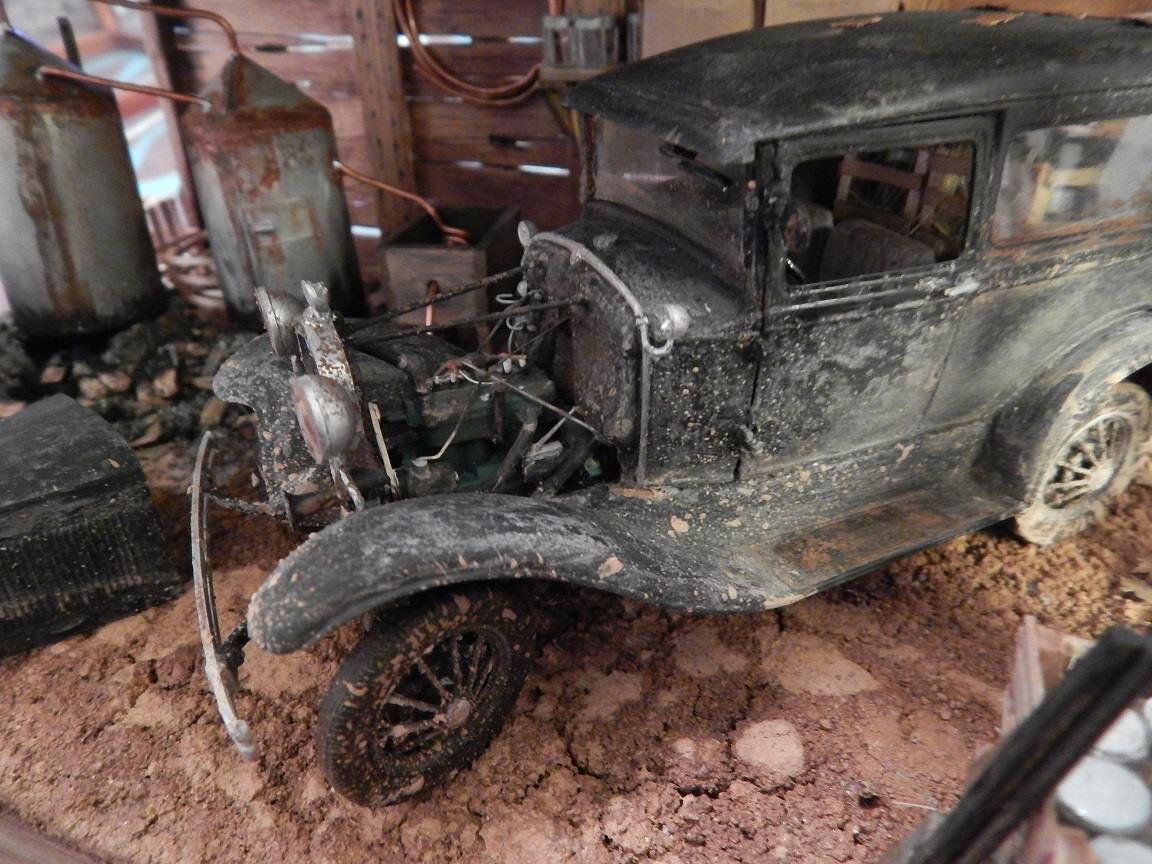
The '34 is almost done, just a few small chains to go. This will be on the train diorama. A really fun build. Once the gloss yellow plastic was tamed, the rest was excellent, especially the details (the hood's Ford logo, for example).
-
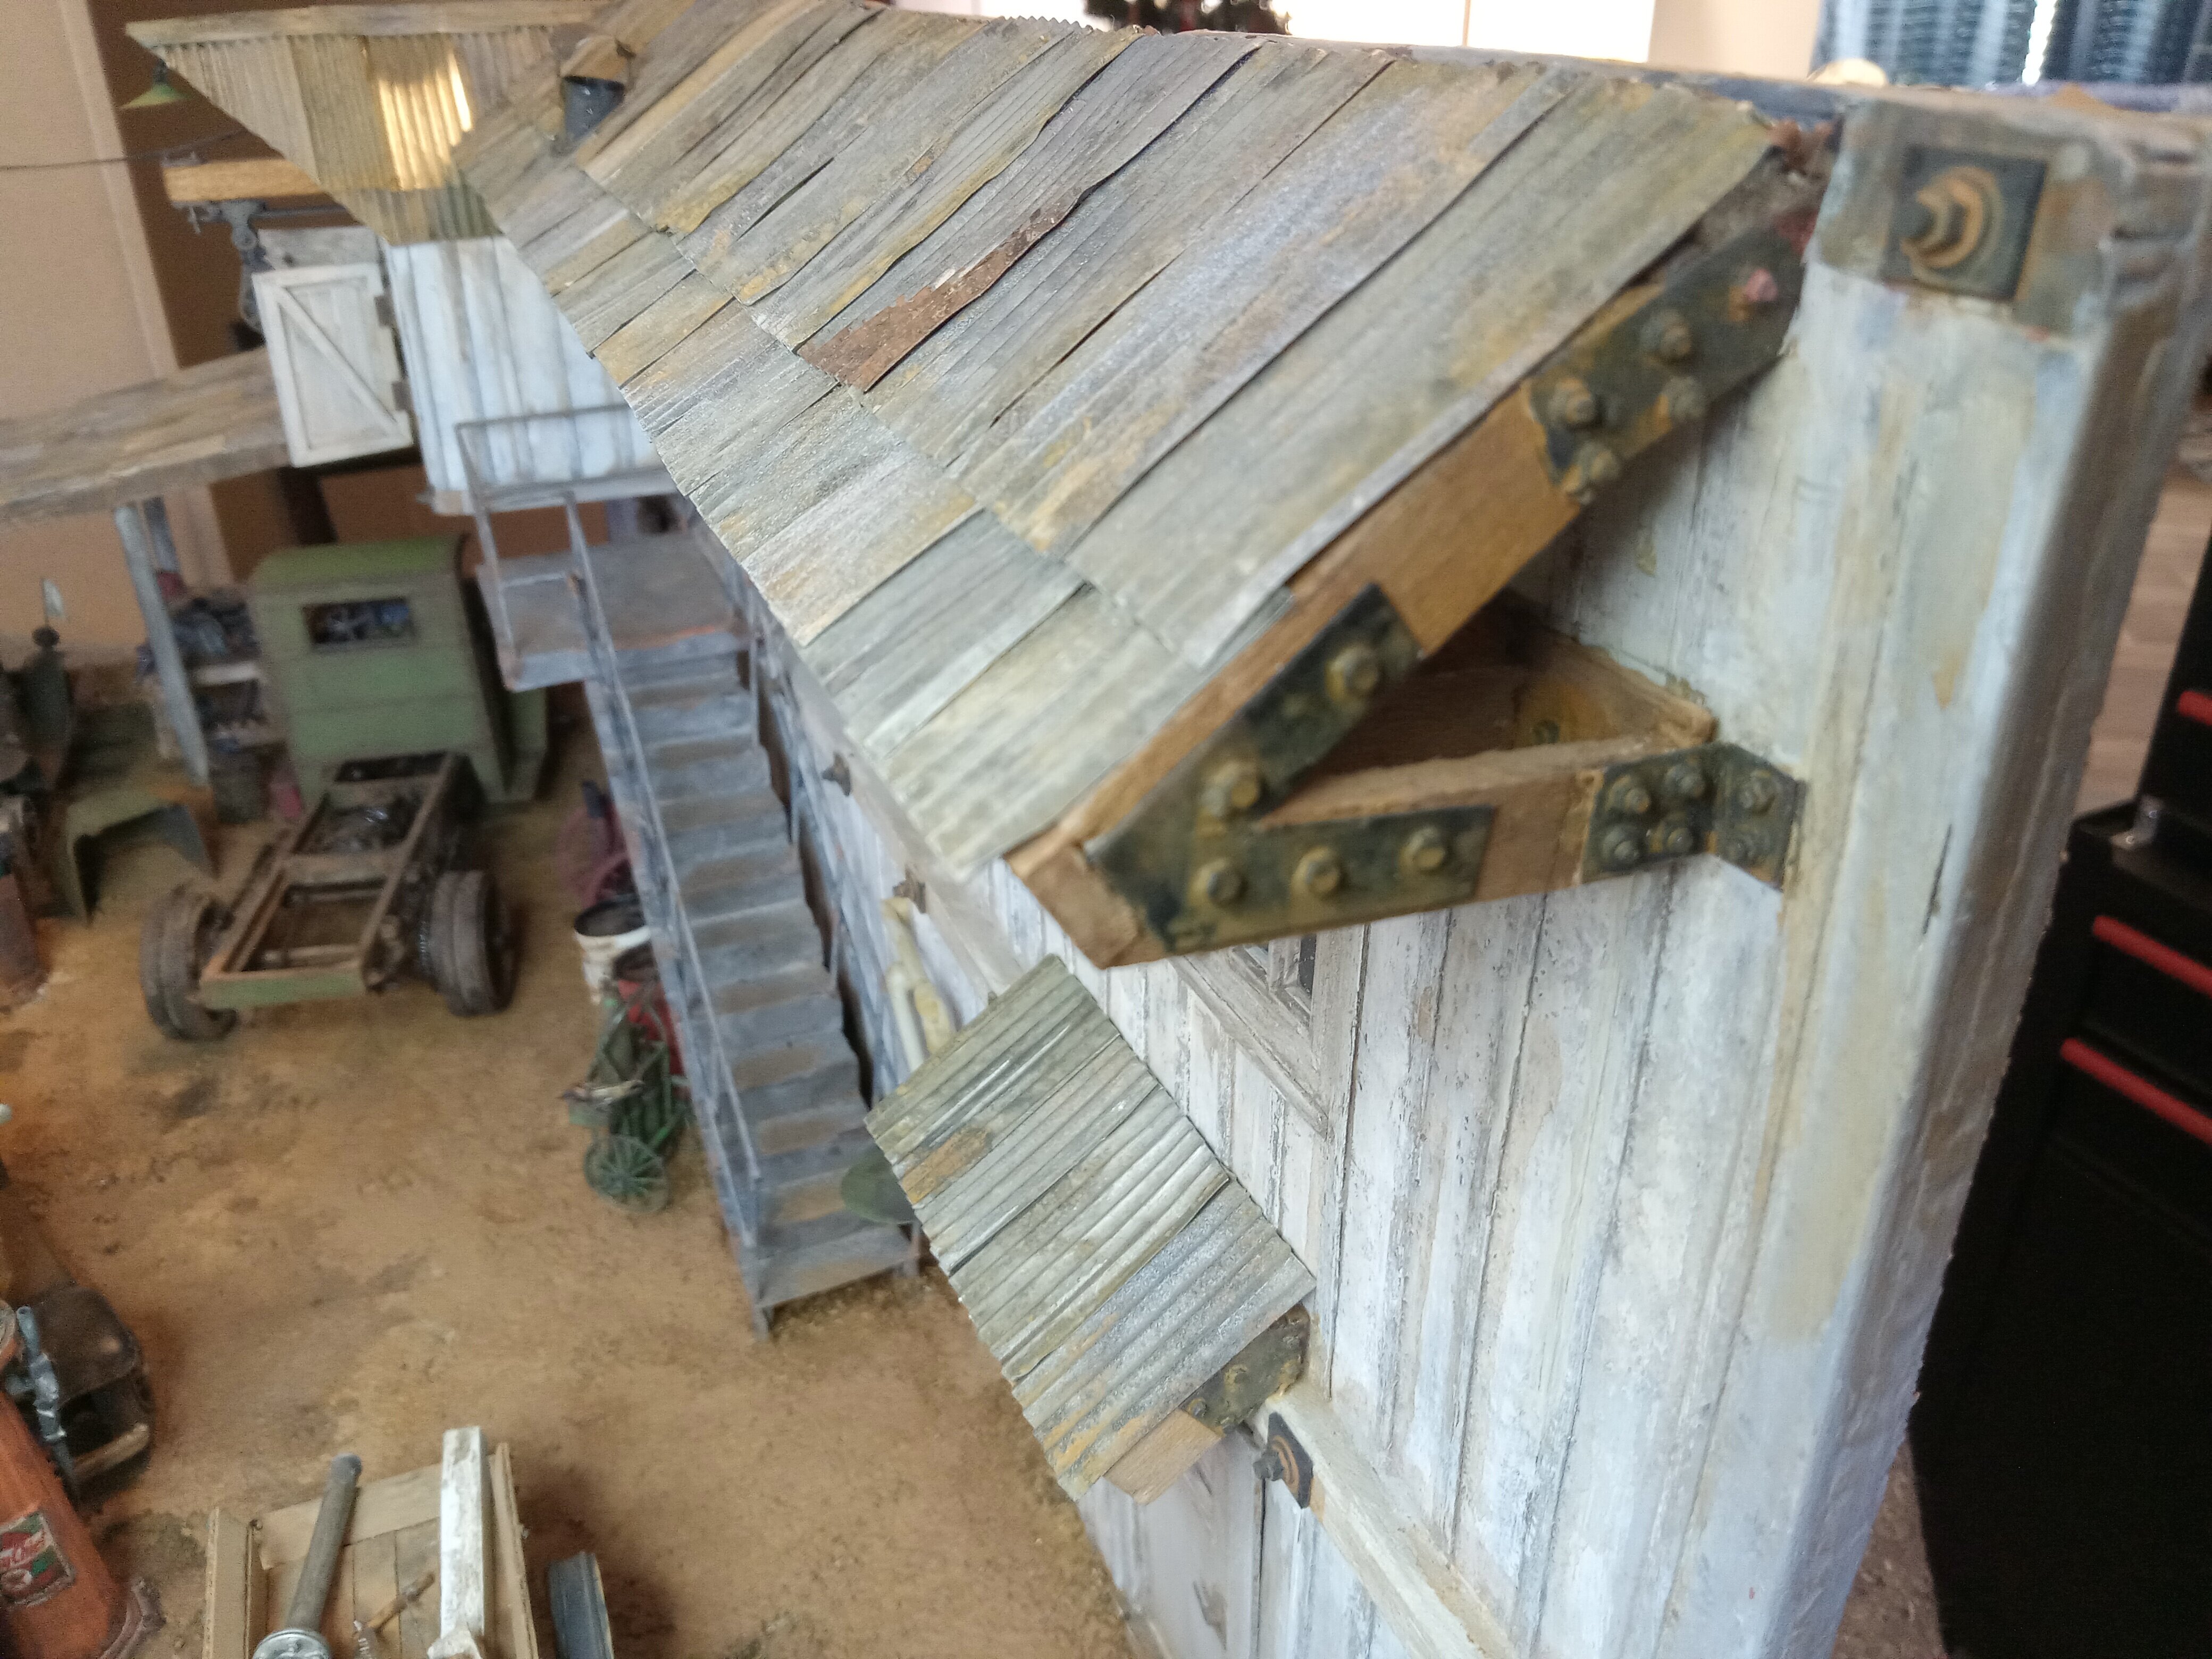
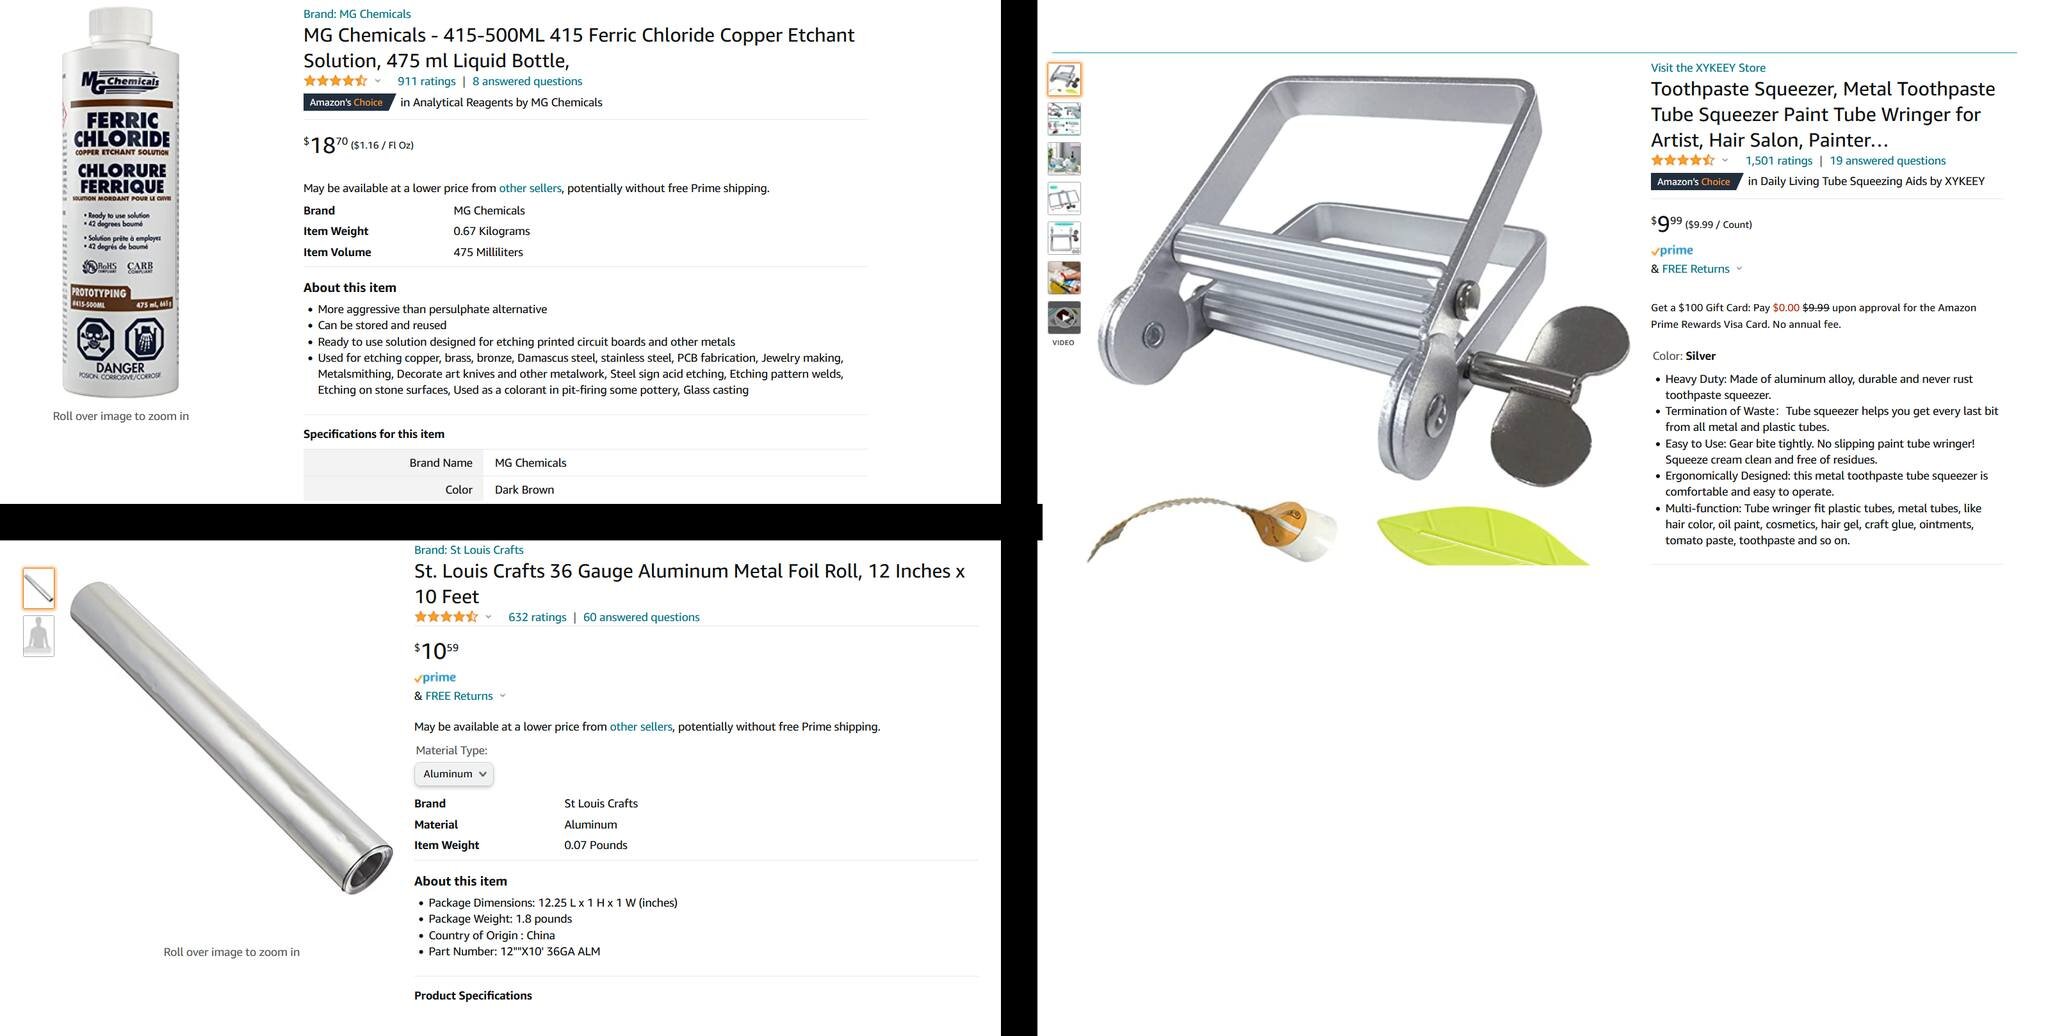
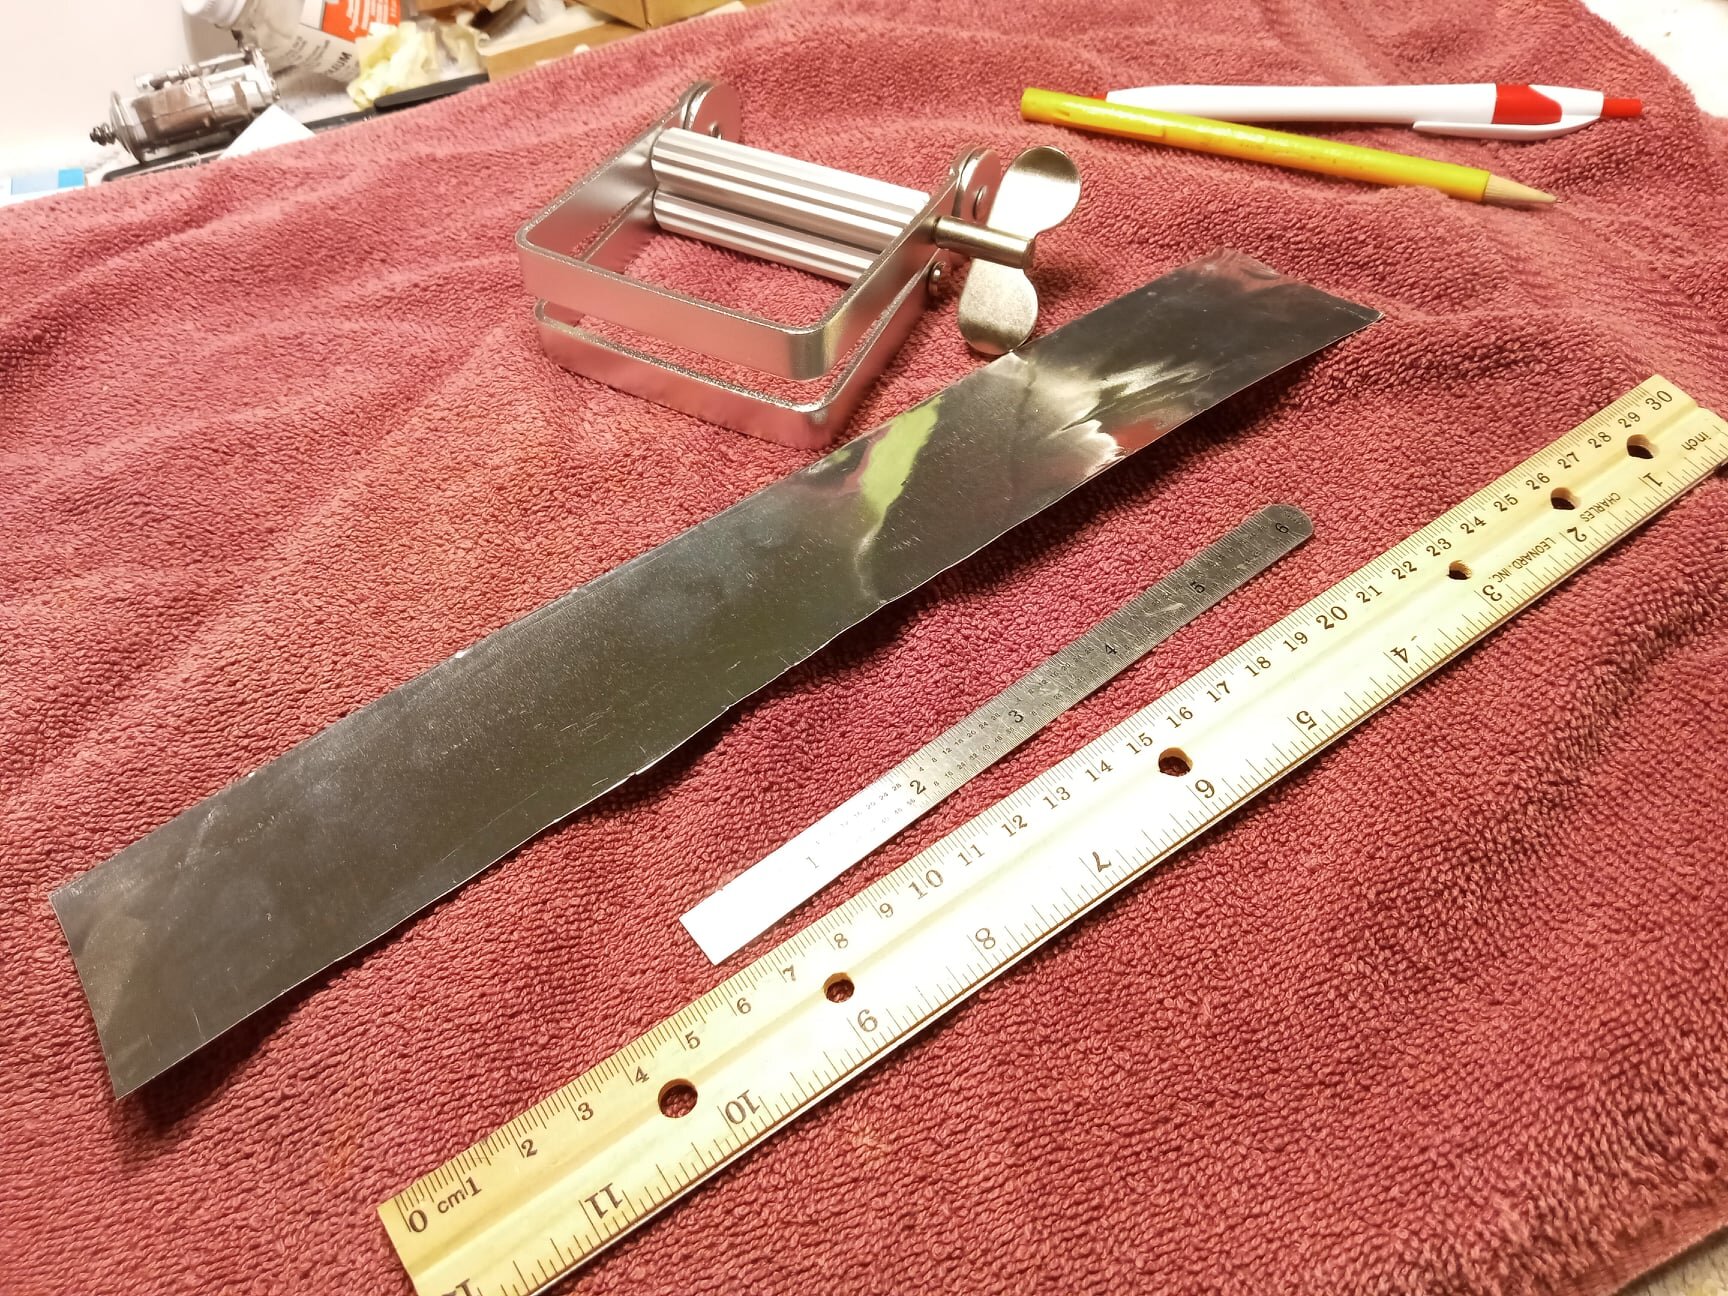
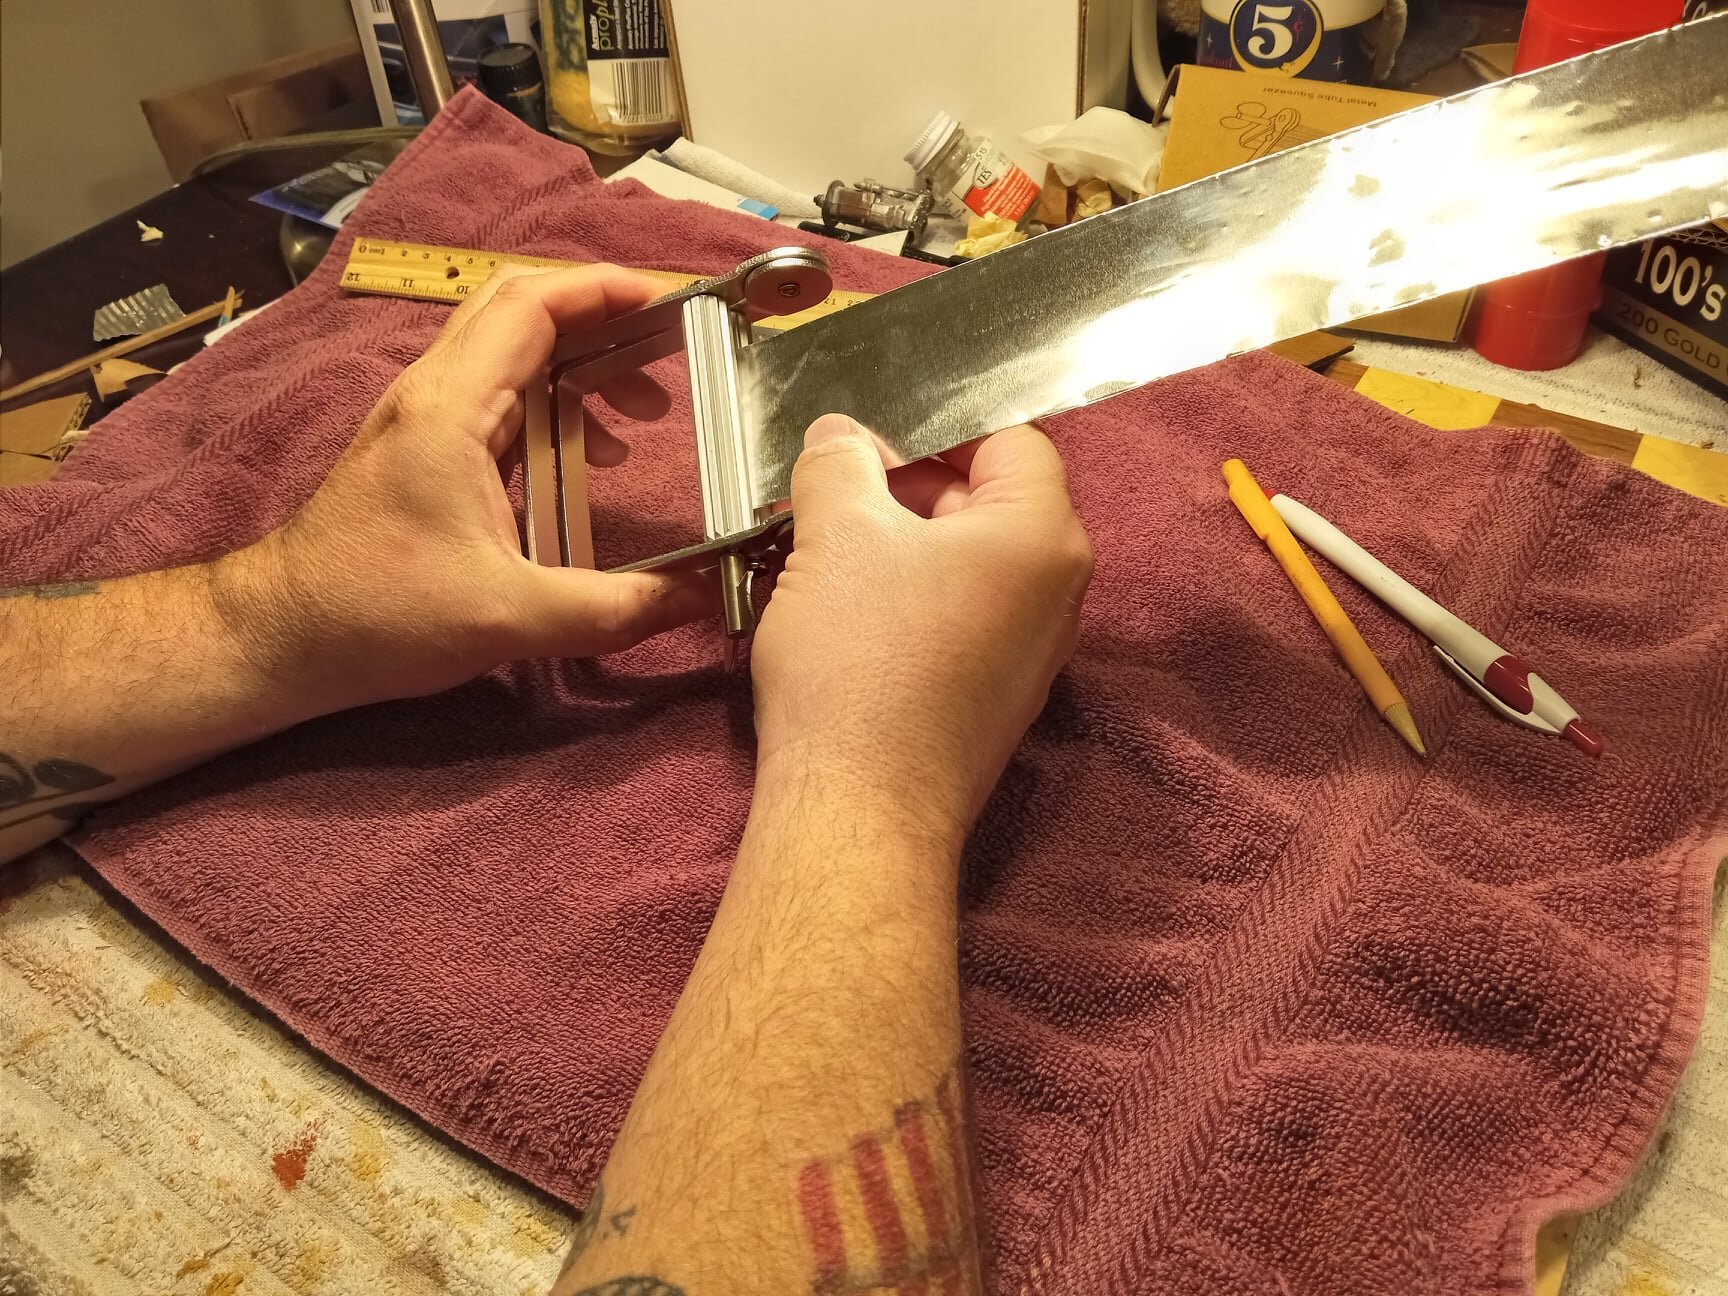
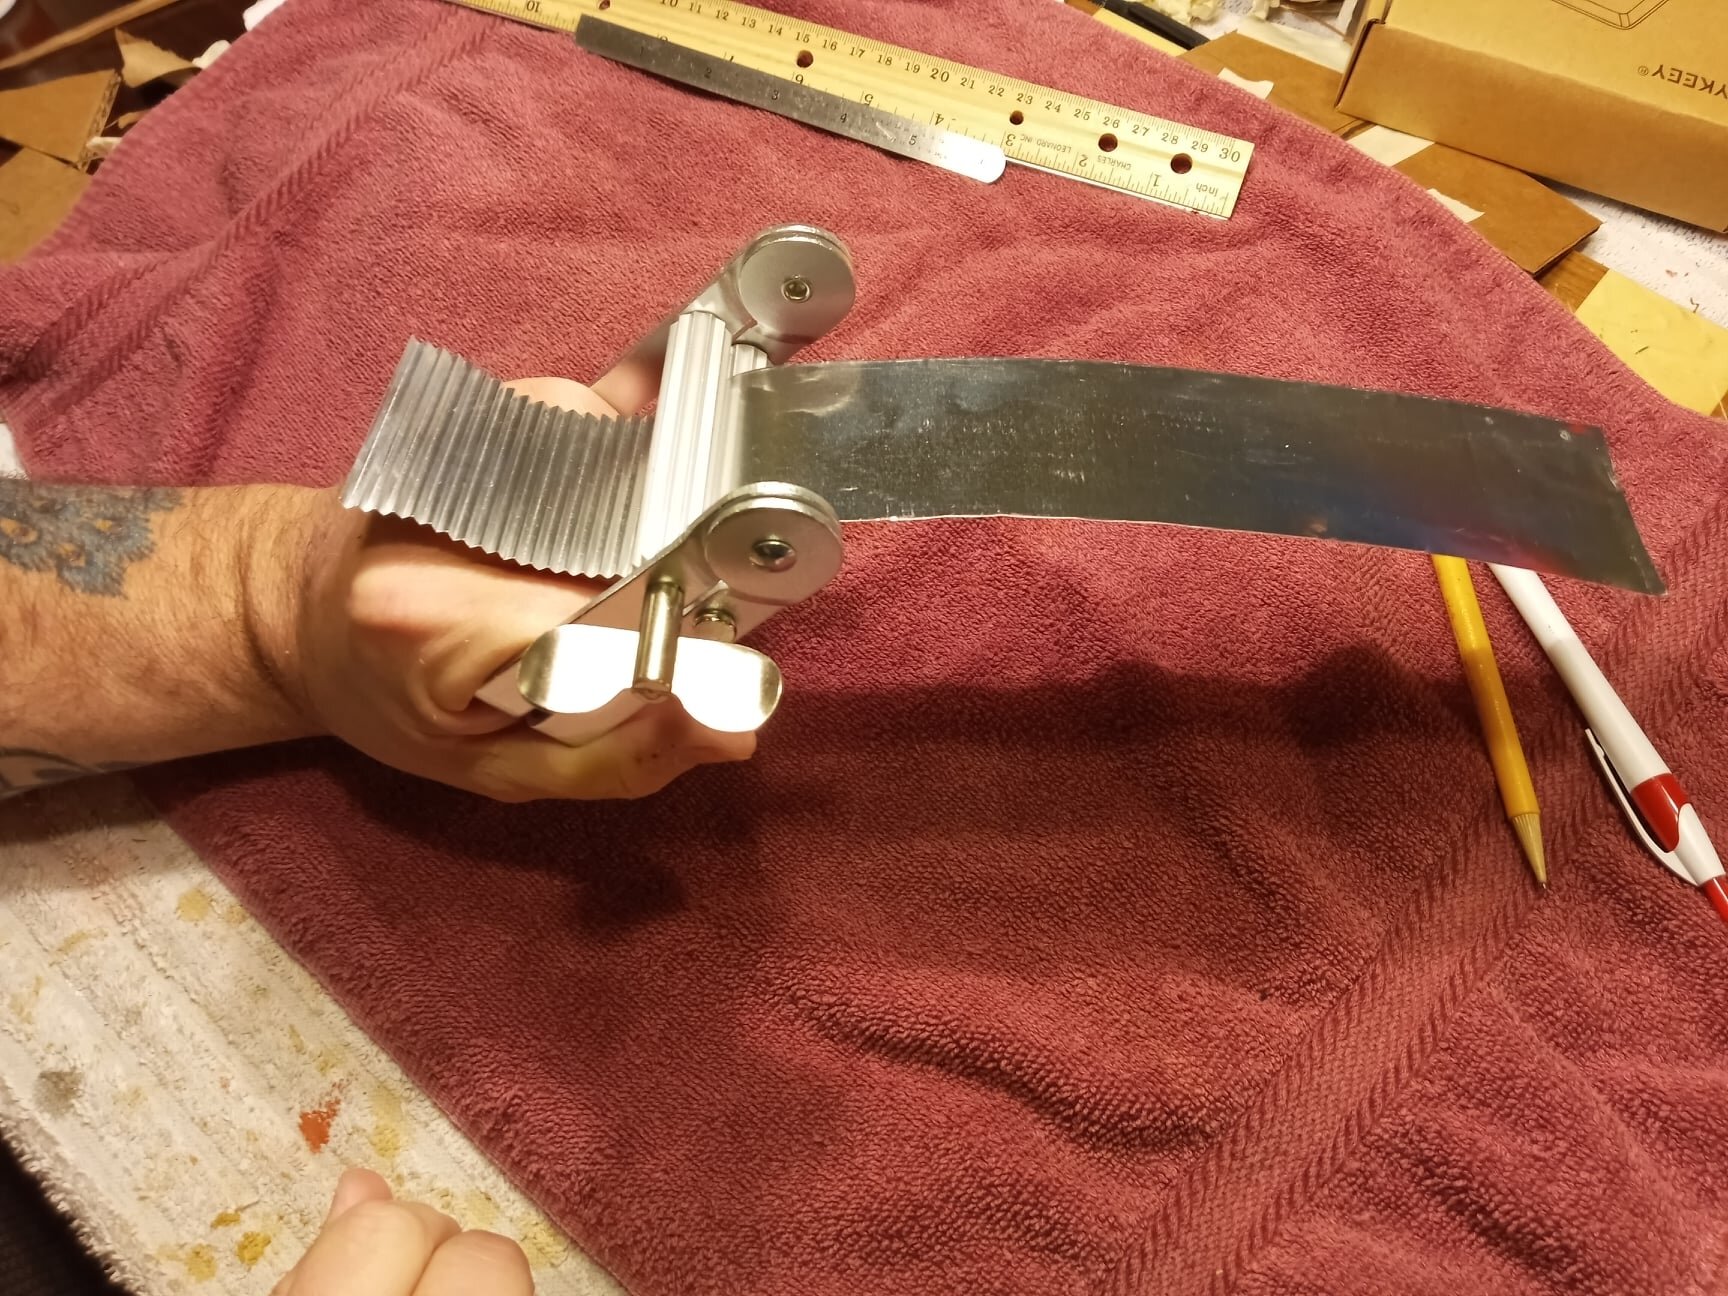
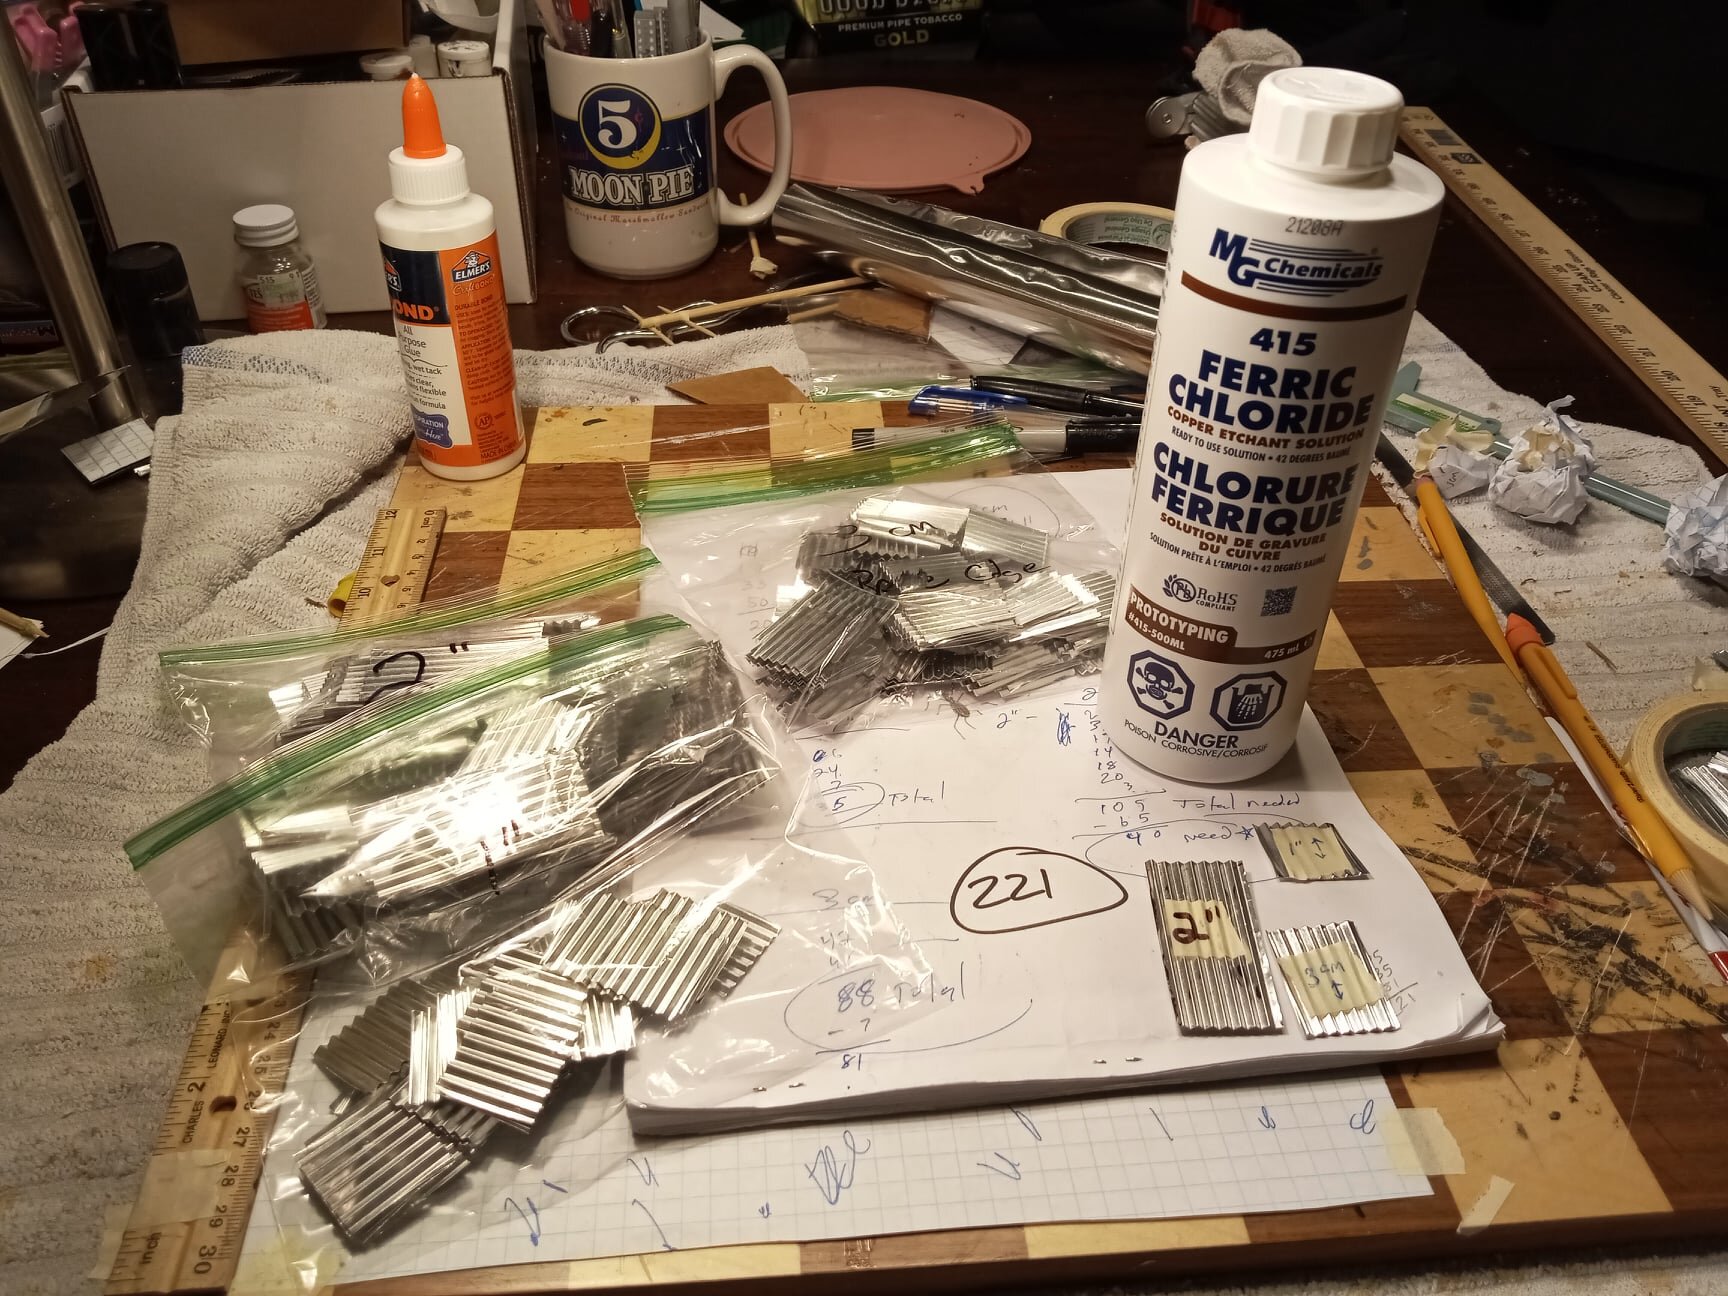
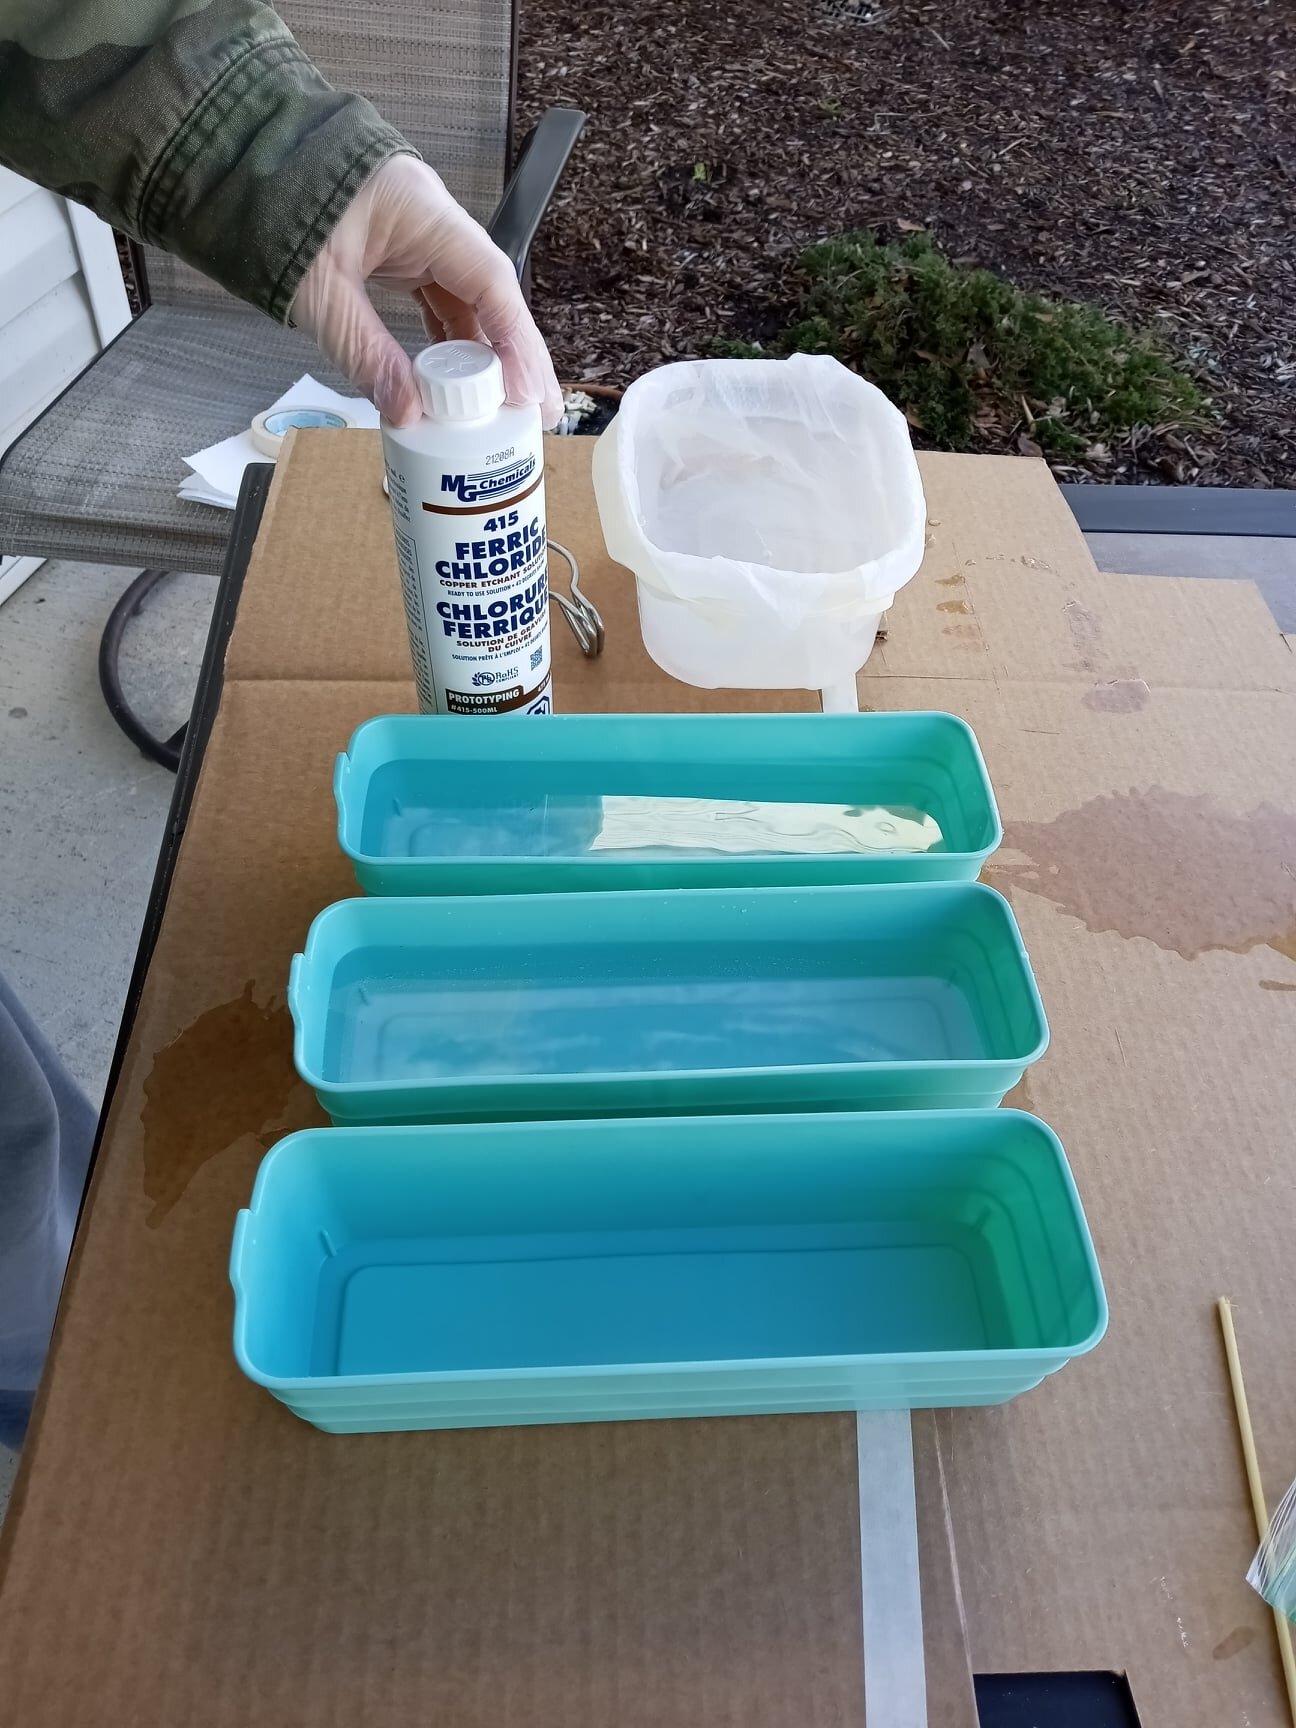
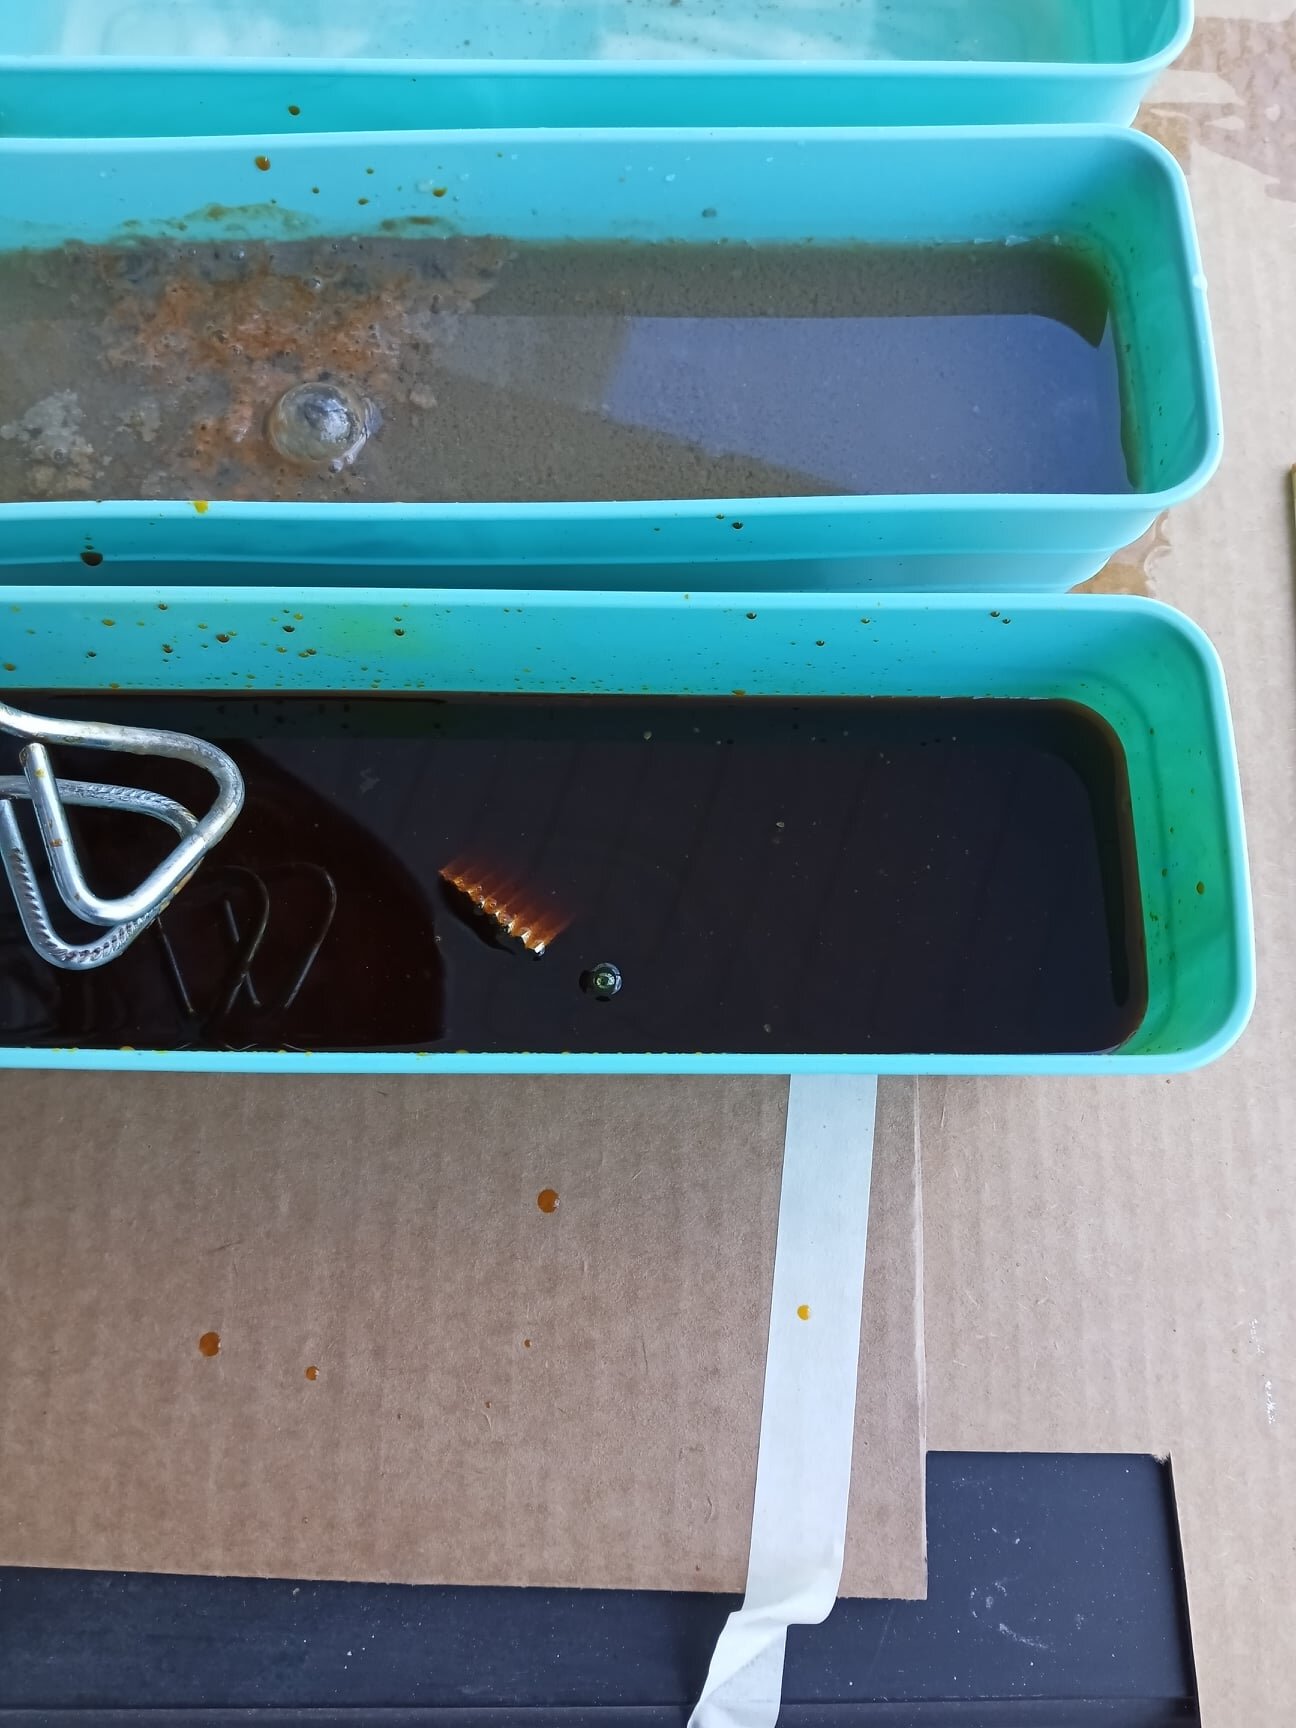
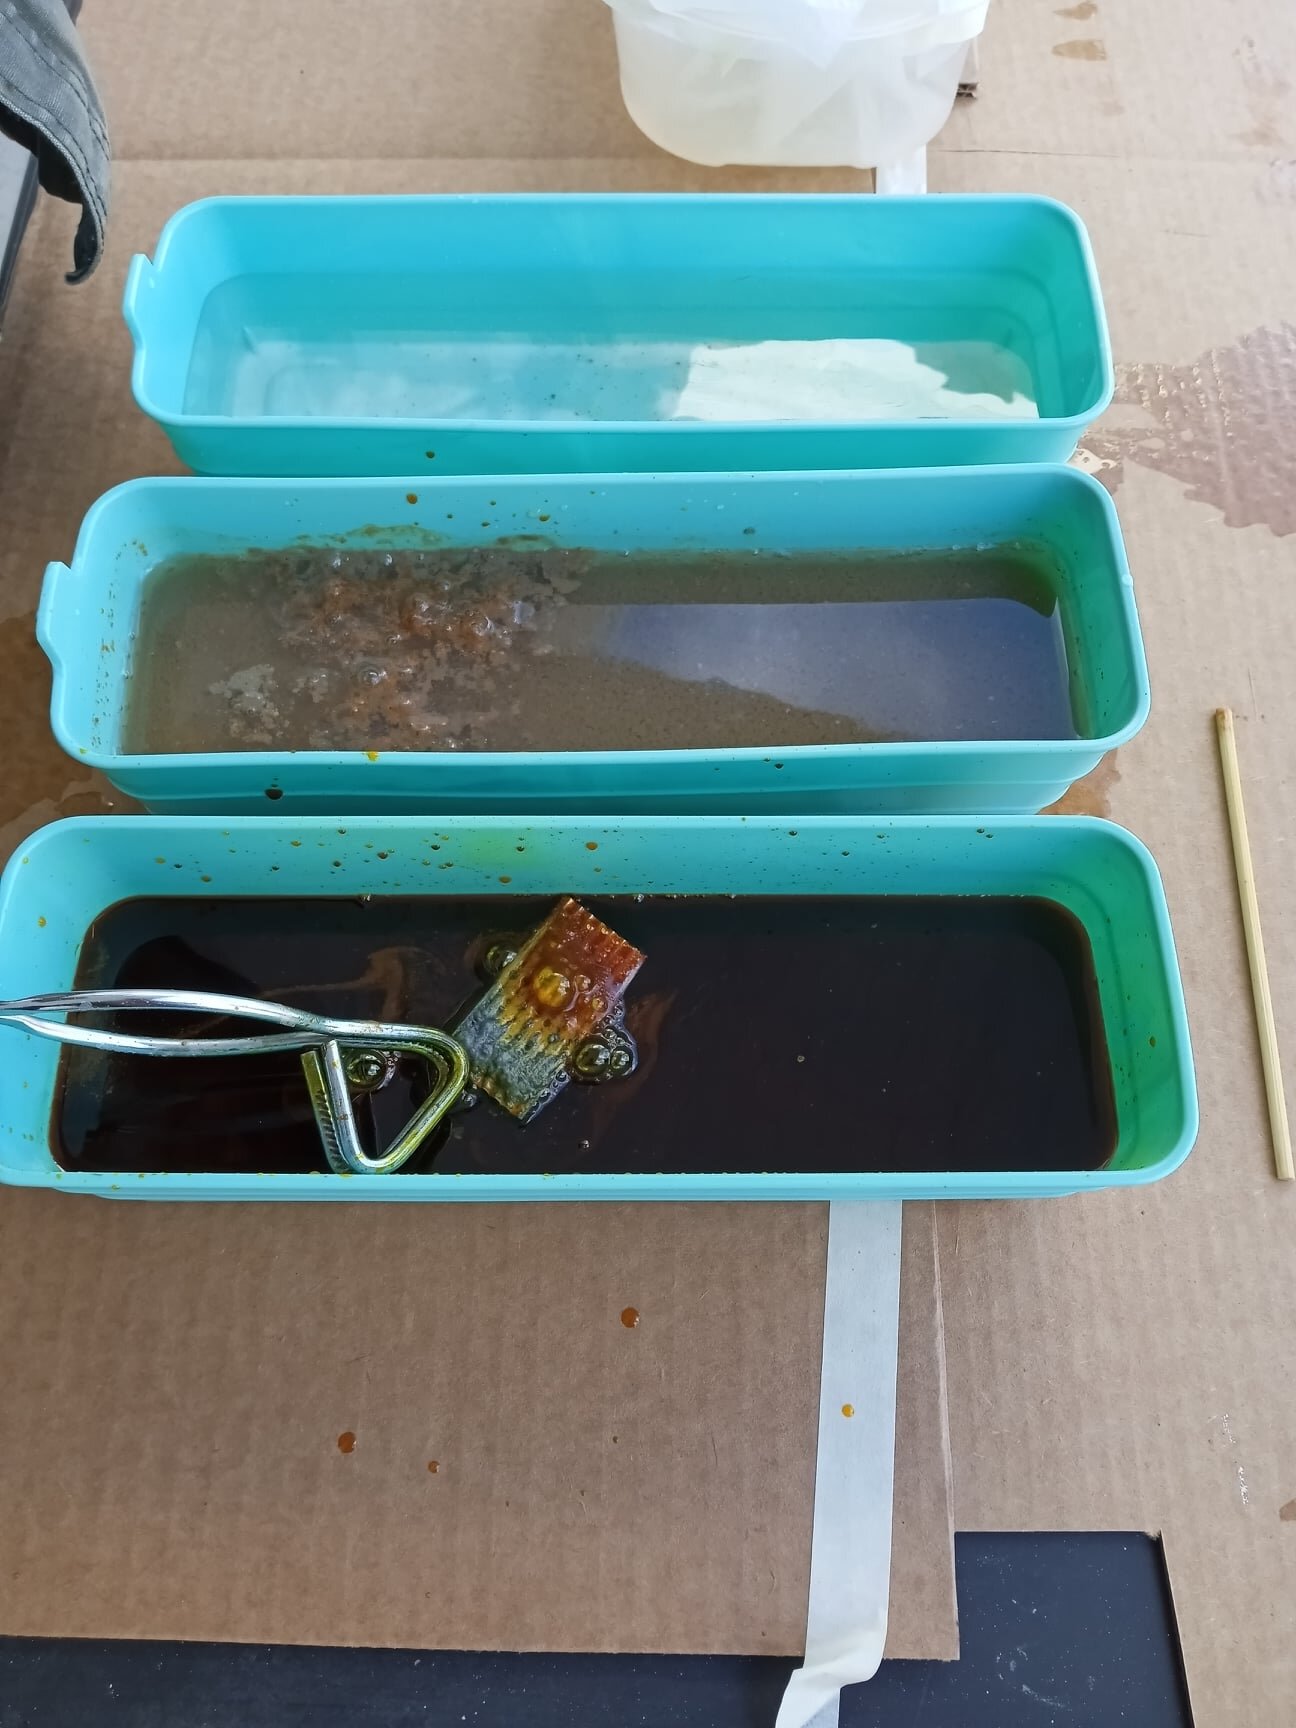
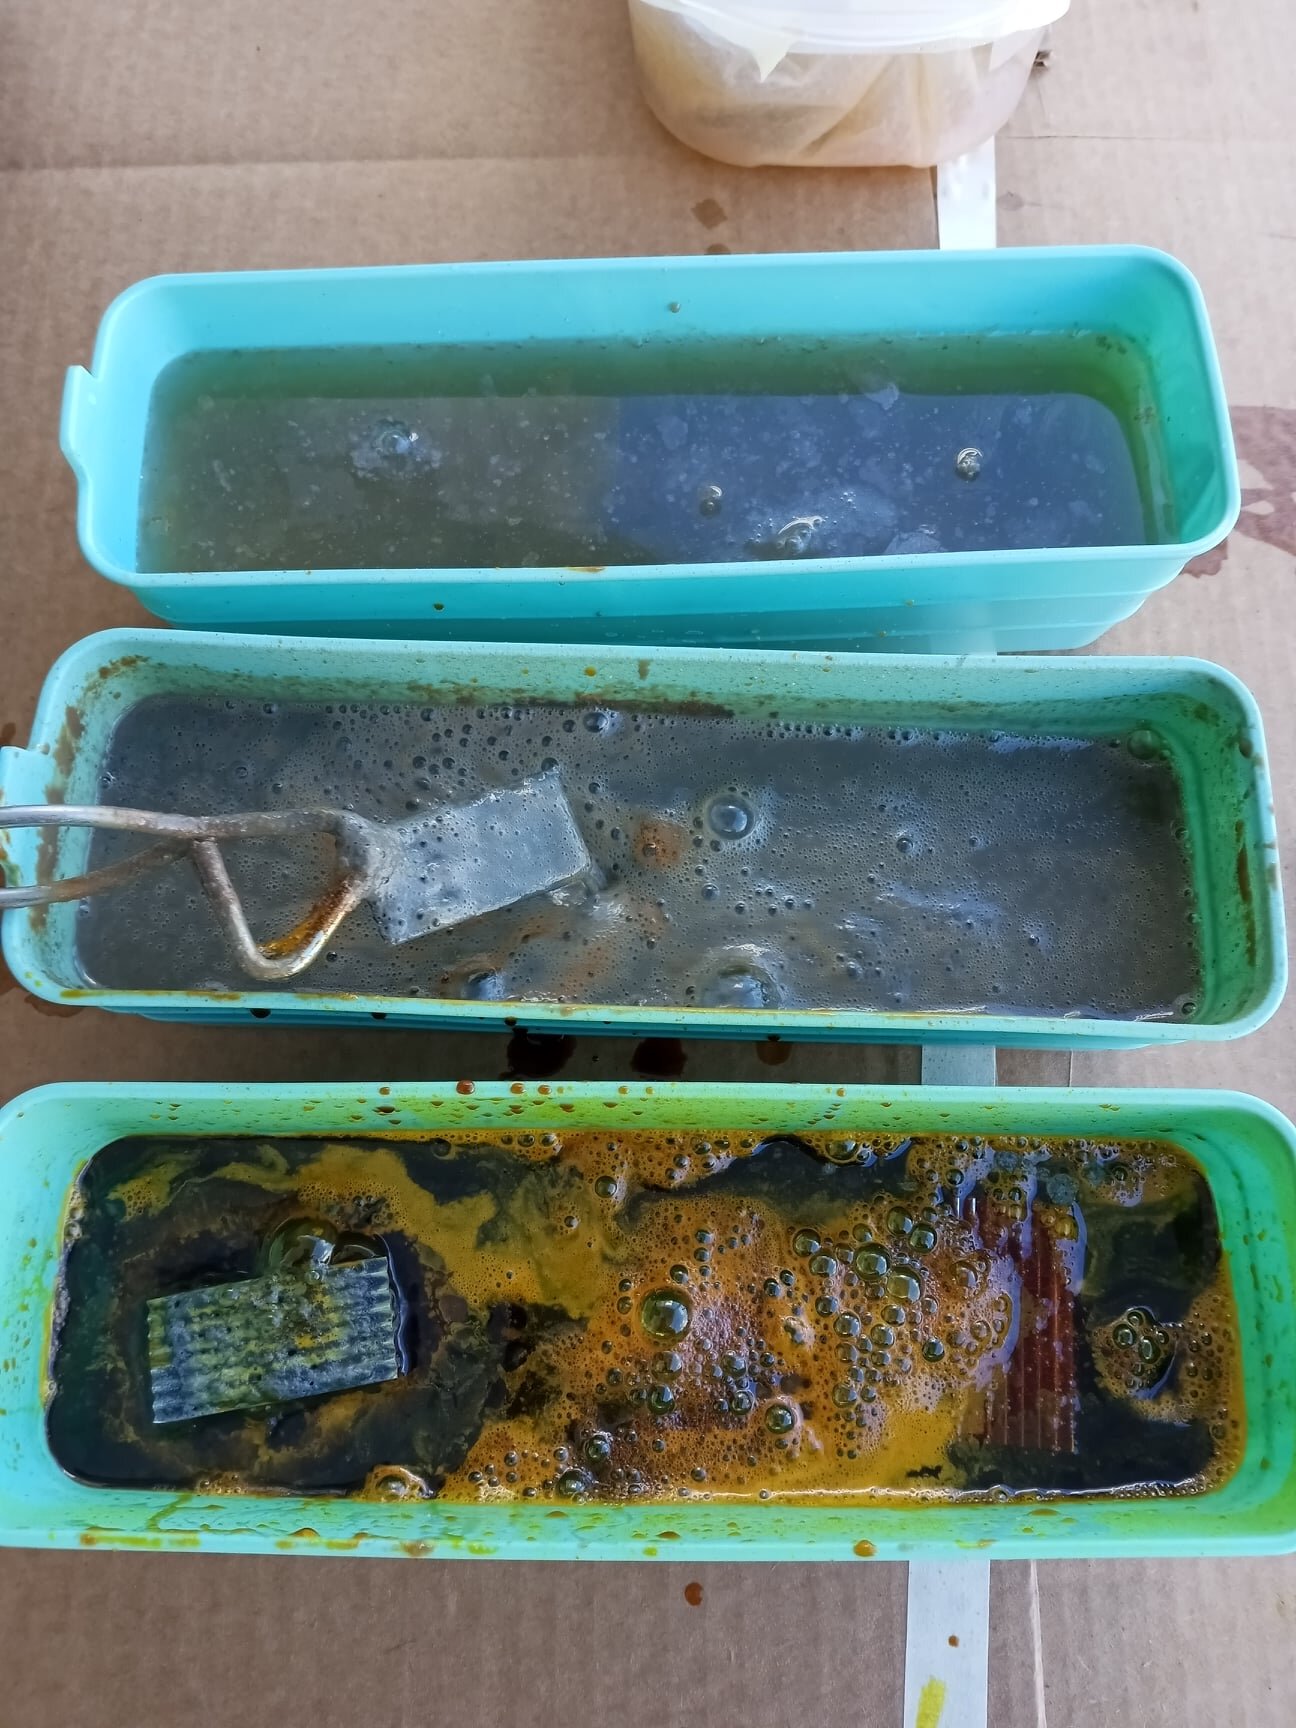
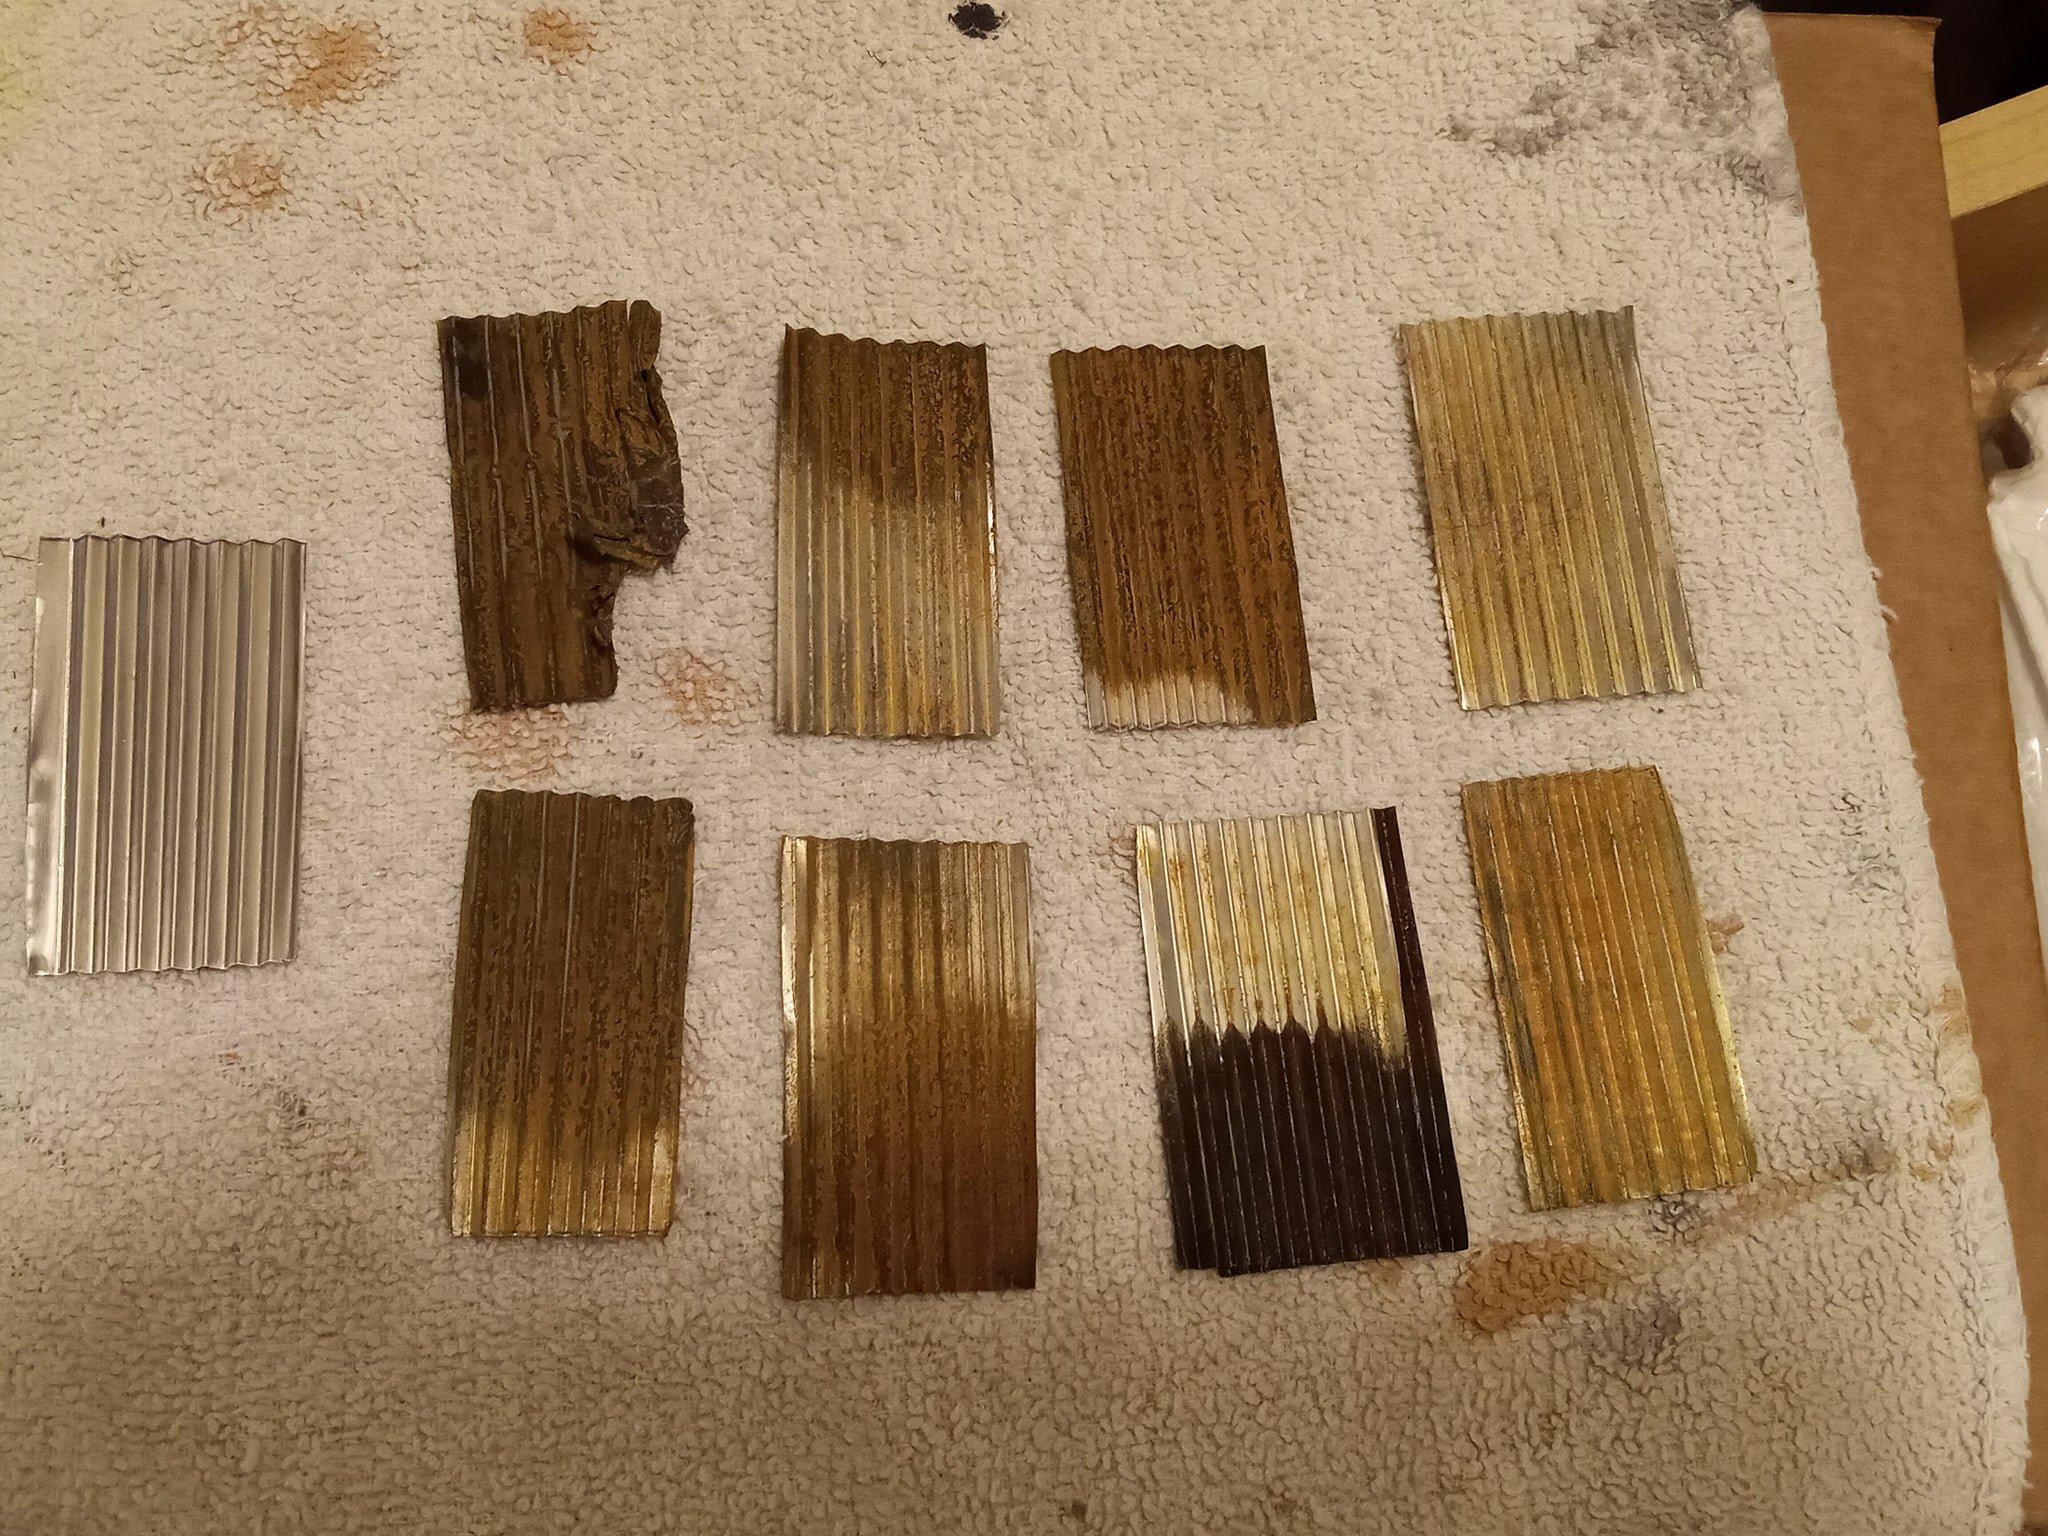
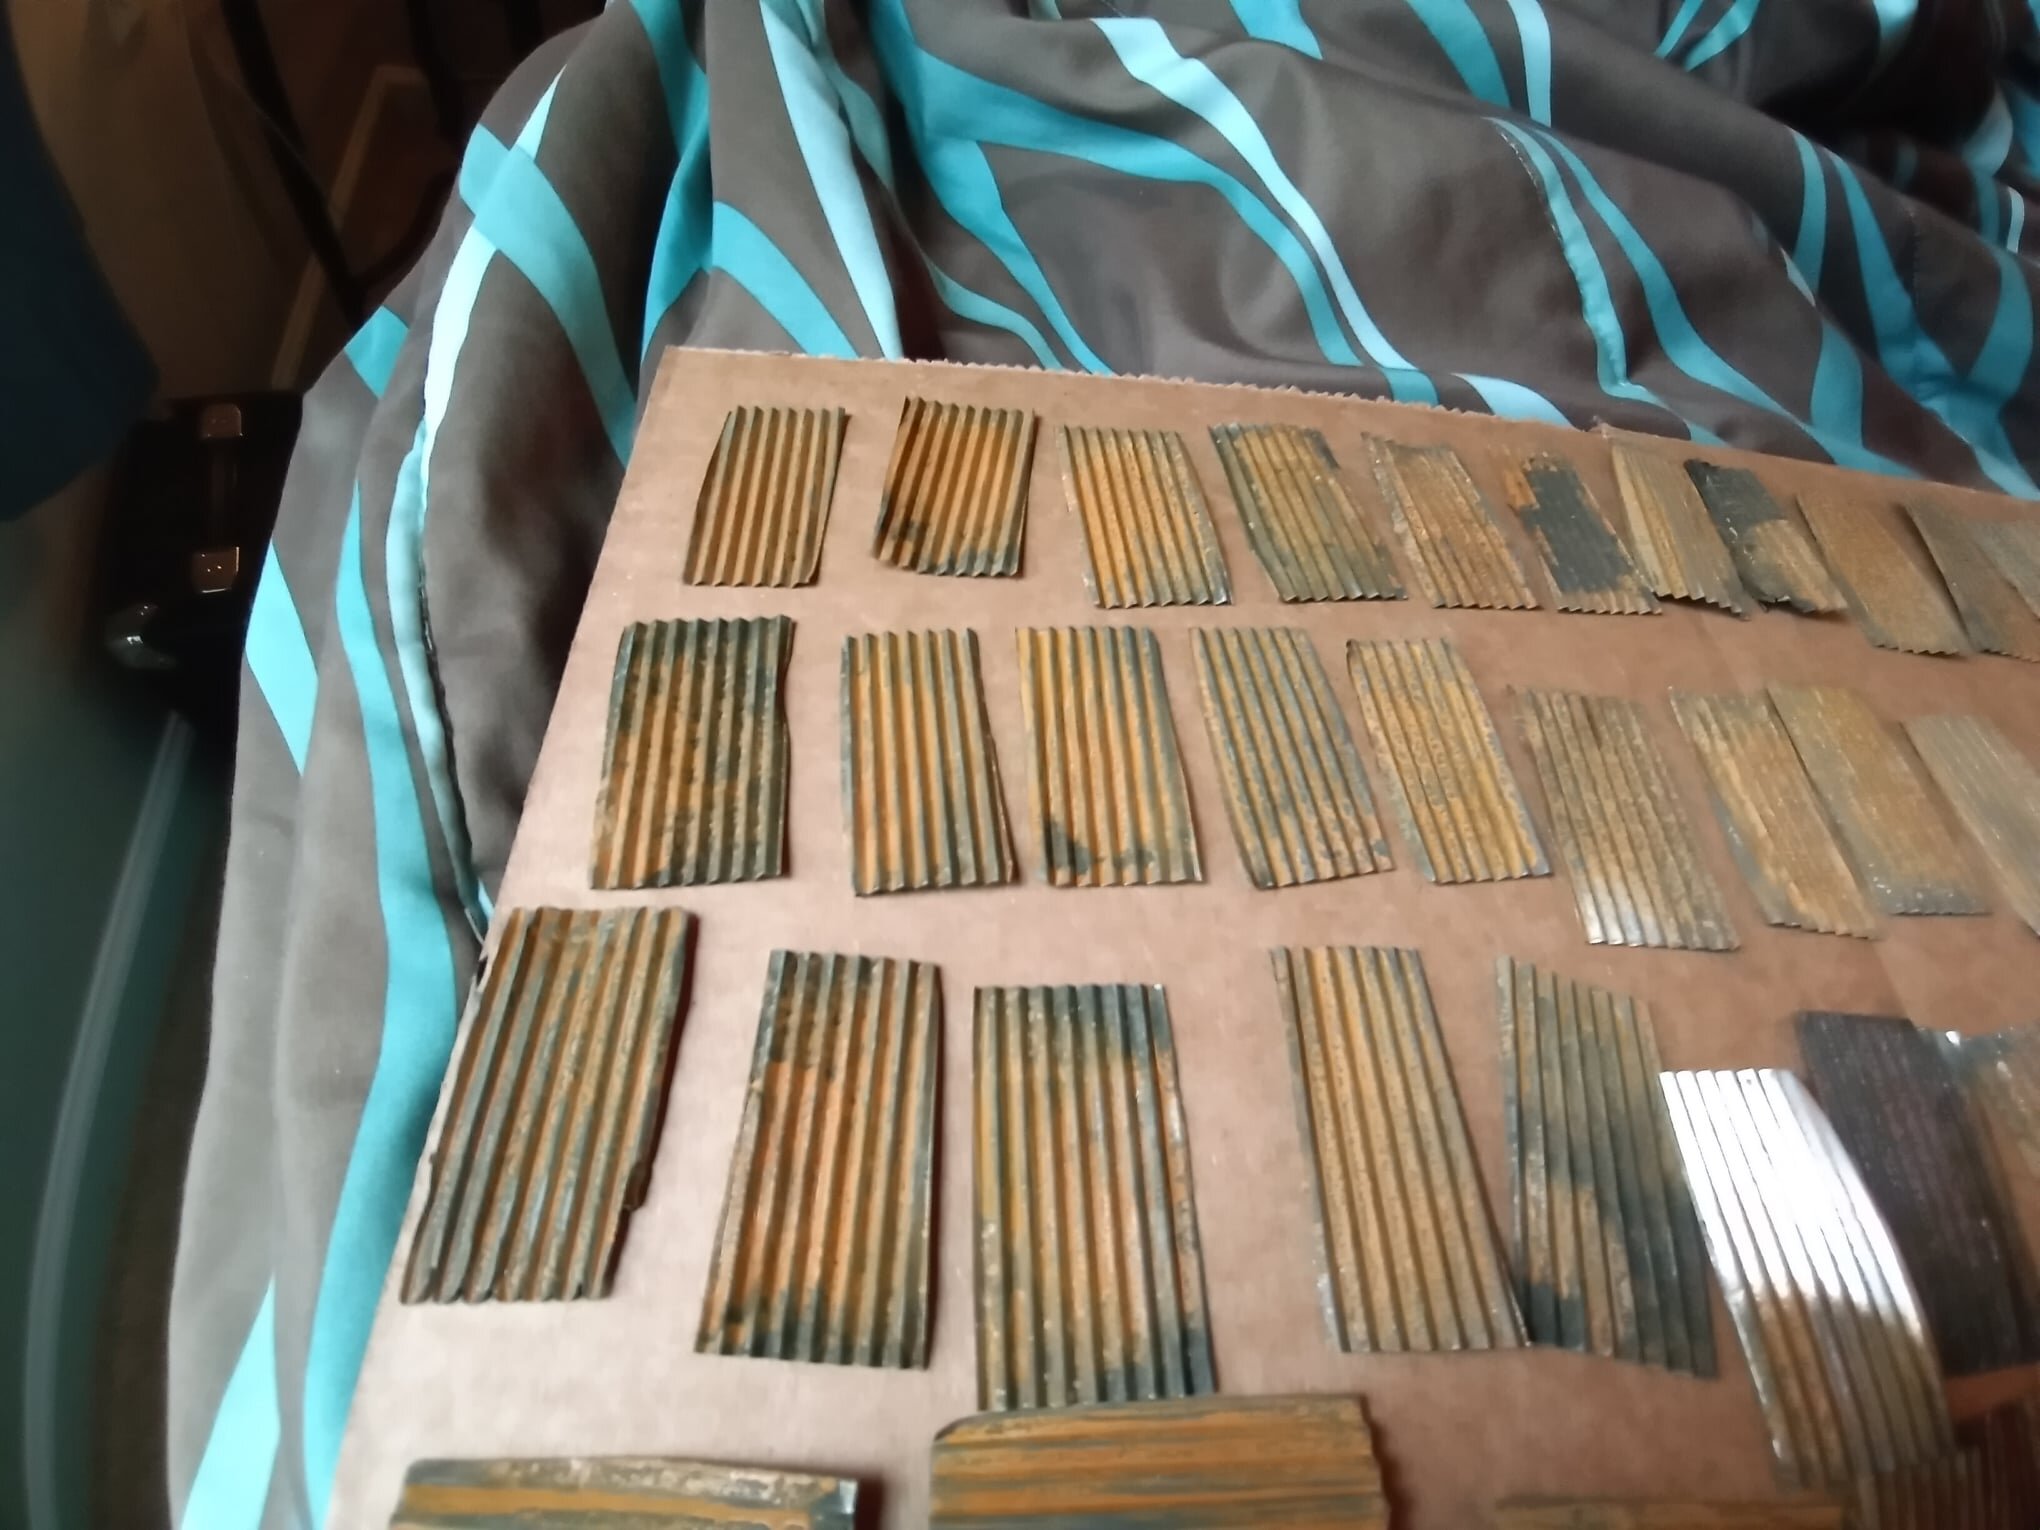
Hi friends! Here's how I make scale galvanized sheet metal roofing panels. This works great at the 1/25 scales I use (G scale on trains). Each one with a unique style, color, and pattern yet uniform at the same time. Materials I used are all from Amazon. An artist's oil paint tube crimper, 36 gauge aluminum foil, and the ferric chloride. Gloves, eye protection and ventilation; I cannot stress this enough. This is nasty stuff that gives of toxic fumes. Work outside! Carefully cut your strips to your desired width. Be careful here as well. These edges are sharp! Align your strip into the crimper. It's 3" wide, but I found that it's really hard to keep the aluminum foil straight. I used 2" for my panels and they fed in quite nicely. Turn the metal through the crimper. The strips can wander off course as you go, but corrections can be made as you go. Keep as straight as you can. This wore my wrist out. Take breaks! Nice. Cut your desired panel size. If you have multiple sizes to do, bag them in groups. This will save you some headaches and time re-sorting them after you're done. Make some extras, too. There's a learning curve so you'll want a few more. Ready? Time to acid. Top down: first container is just plain water, next two are baking soda/water (to stop the reaction), bottom one will be the acid. Pour very carefully. Wear gloves and eye protection. Do this outside. Dip the panel. Depending on the outside temp, the acid can attack quicker when warm. It's cold today so I've got some initial work time to test before it starts to get warm; the acid will put off it's own heat from the reaction. The pan above it is neutralizing a test piece. Acid 10 seconds, stop the reaction a couple times, put in the last water/soda pan. Wash thoroughly. They'll appear black, but really come to life as they dry. My test pieces. Here we are. Hope this helps someone. Feel free to ask any questions. If you try this, be safe. 🙂 Thanks for looking. J
- 1 reply
-
- 1
-

-
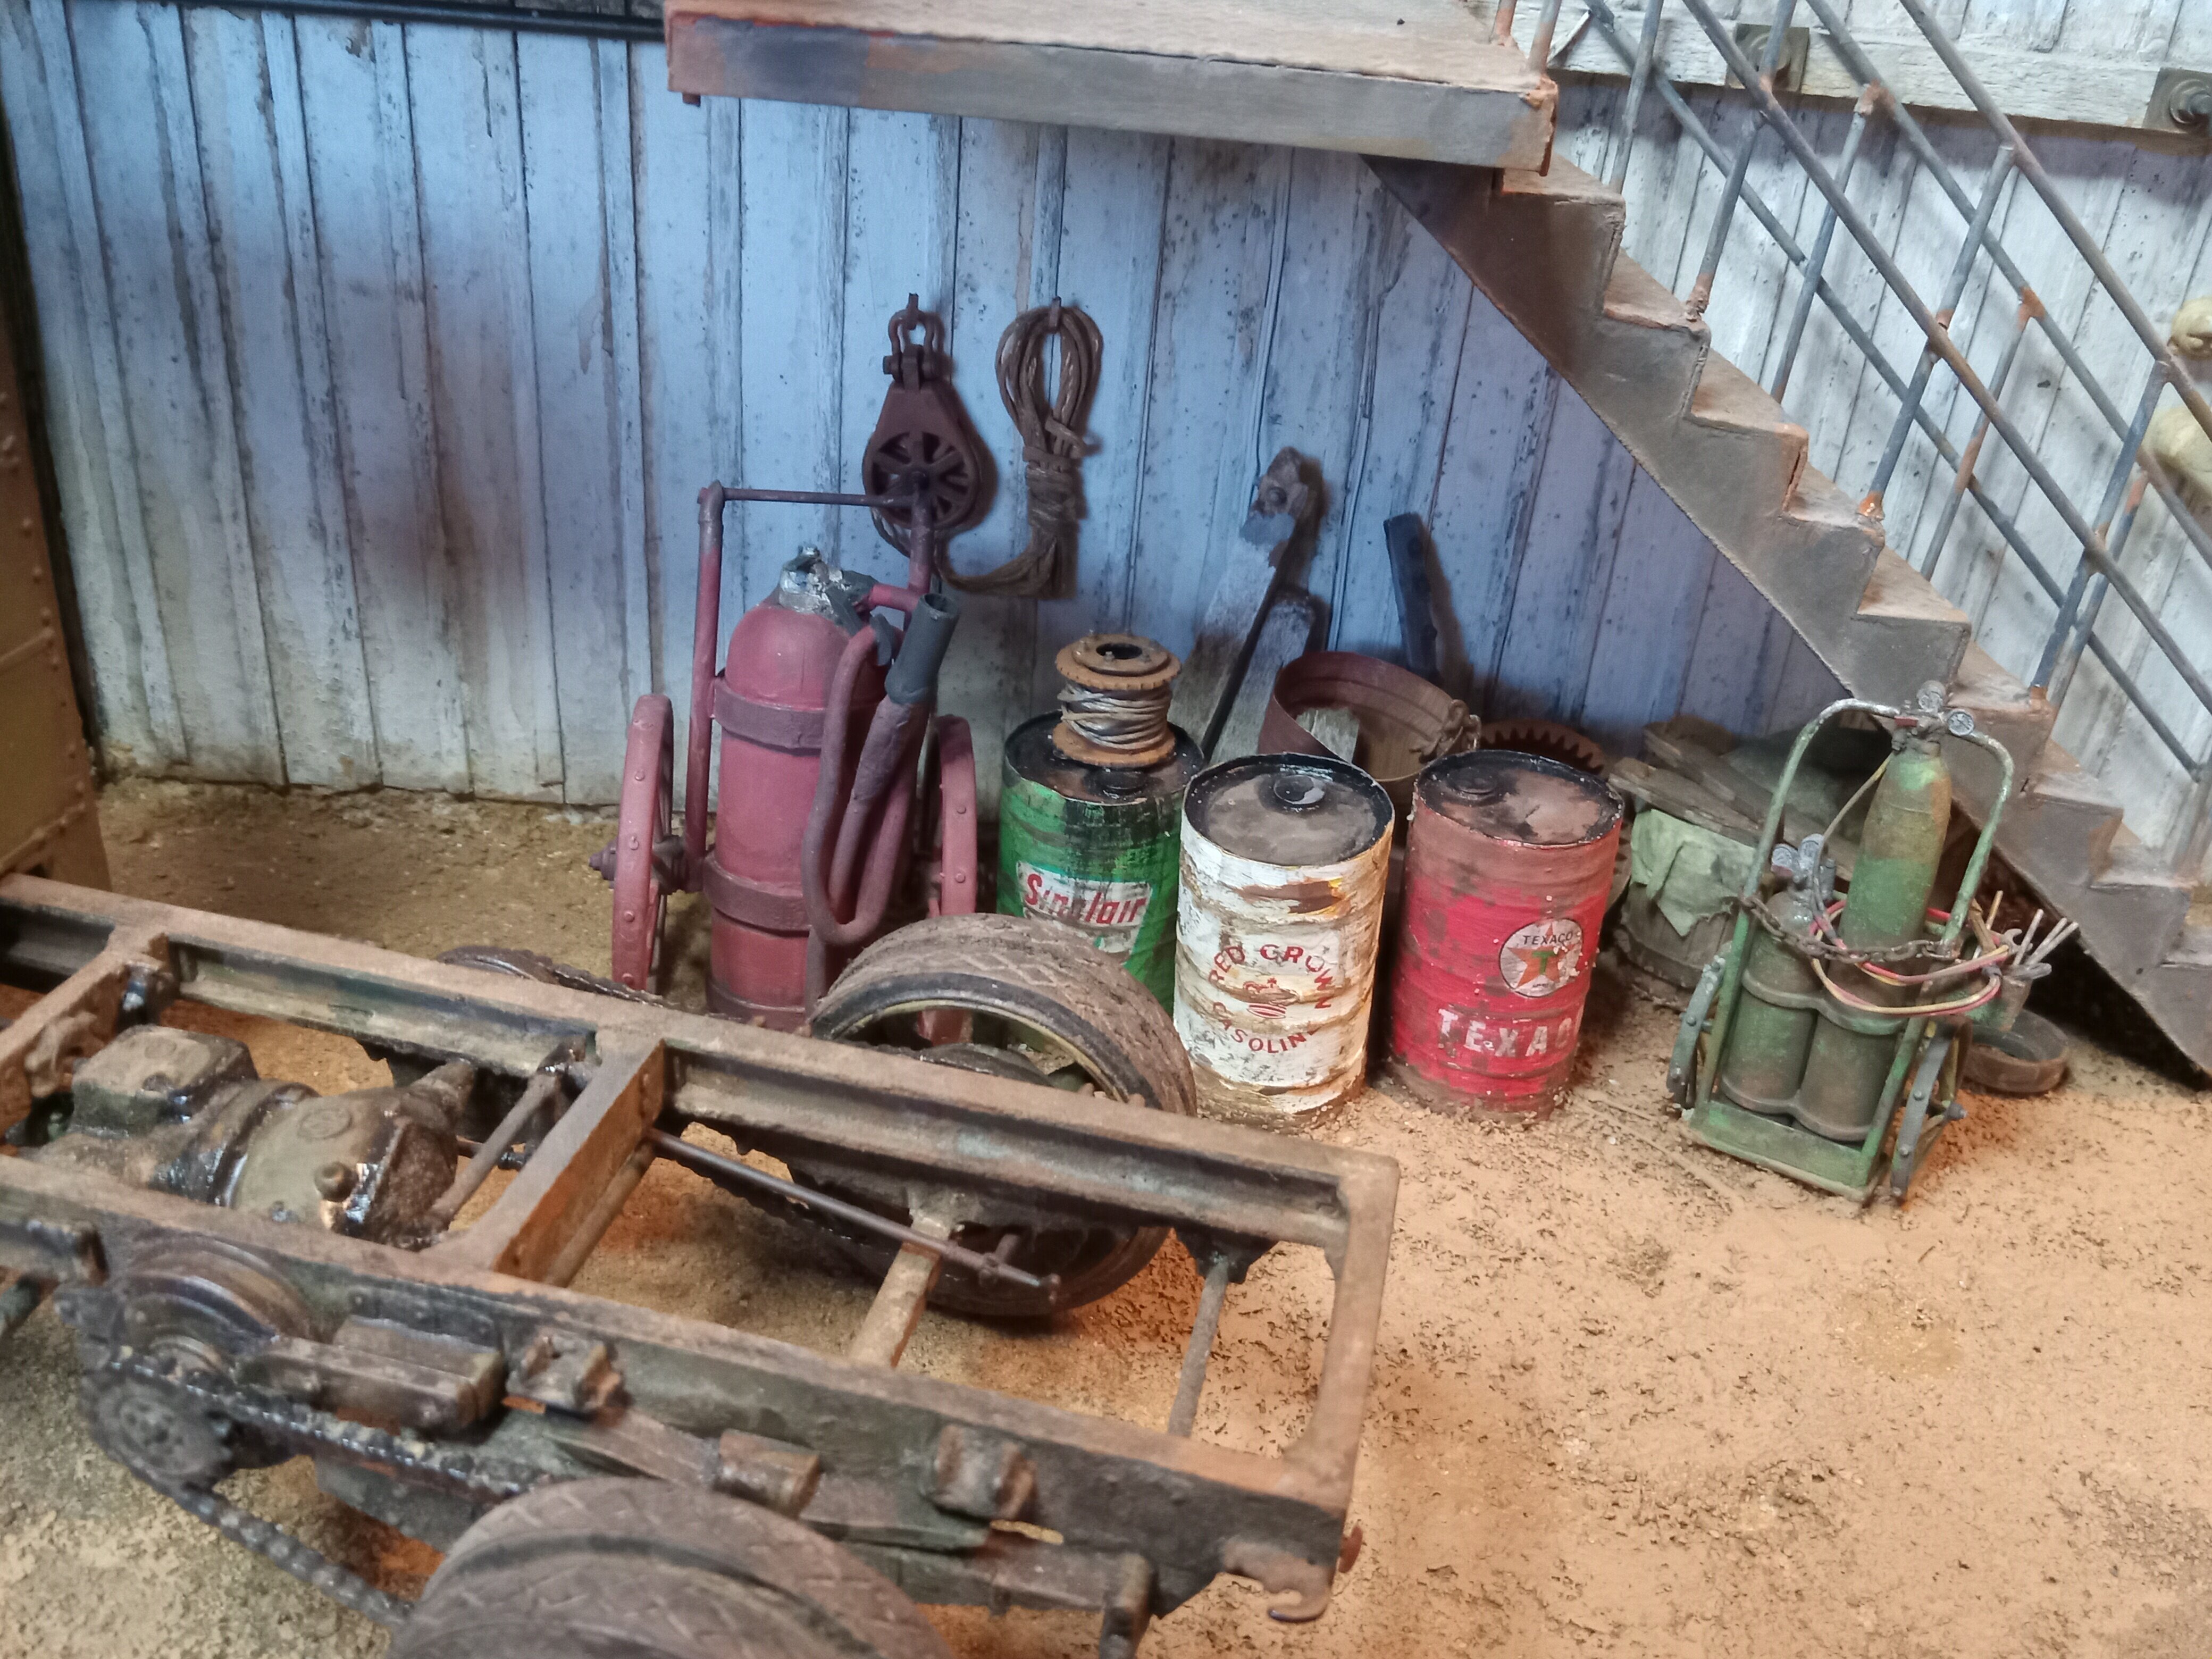
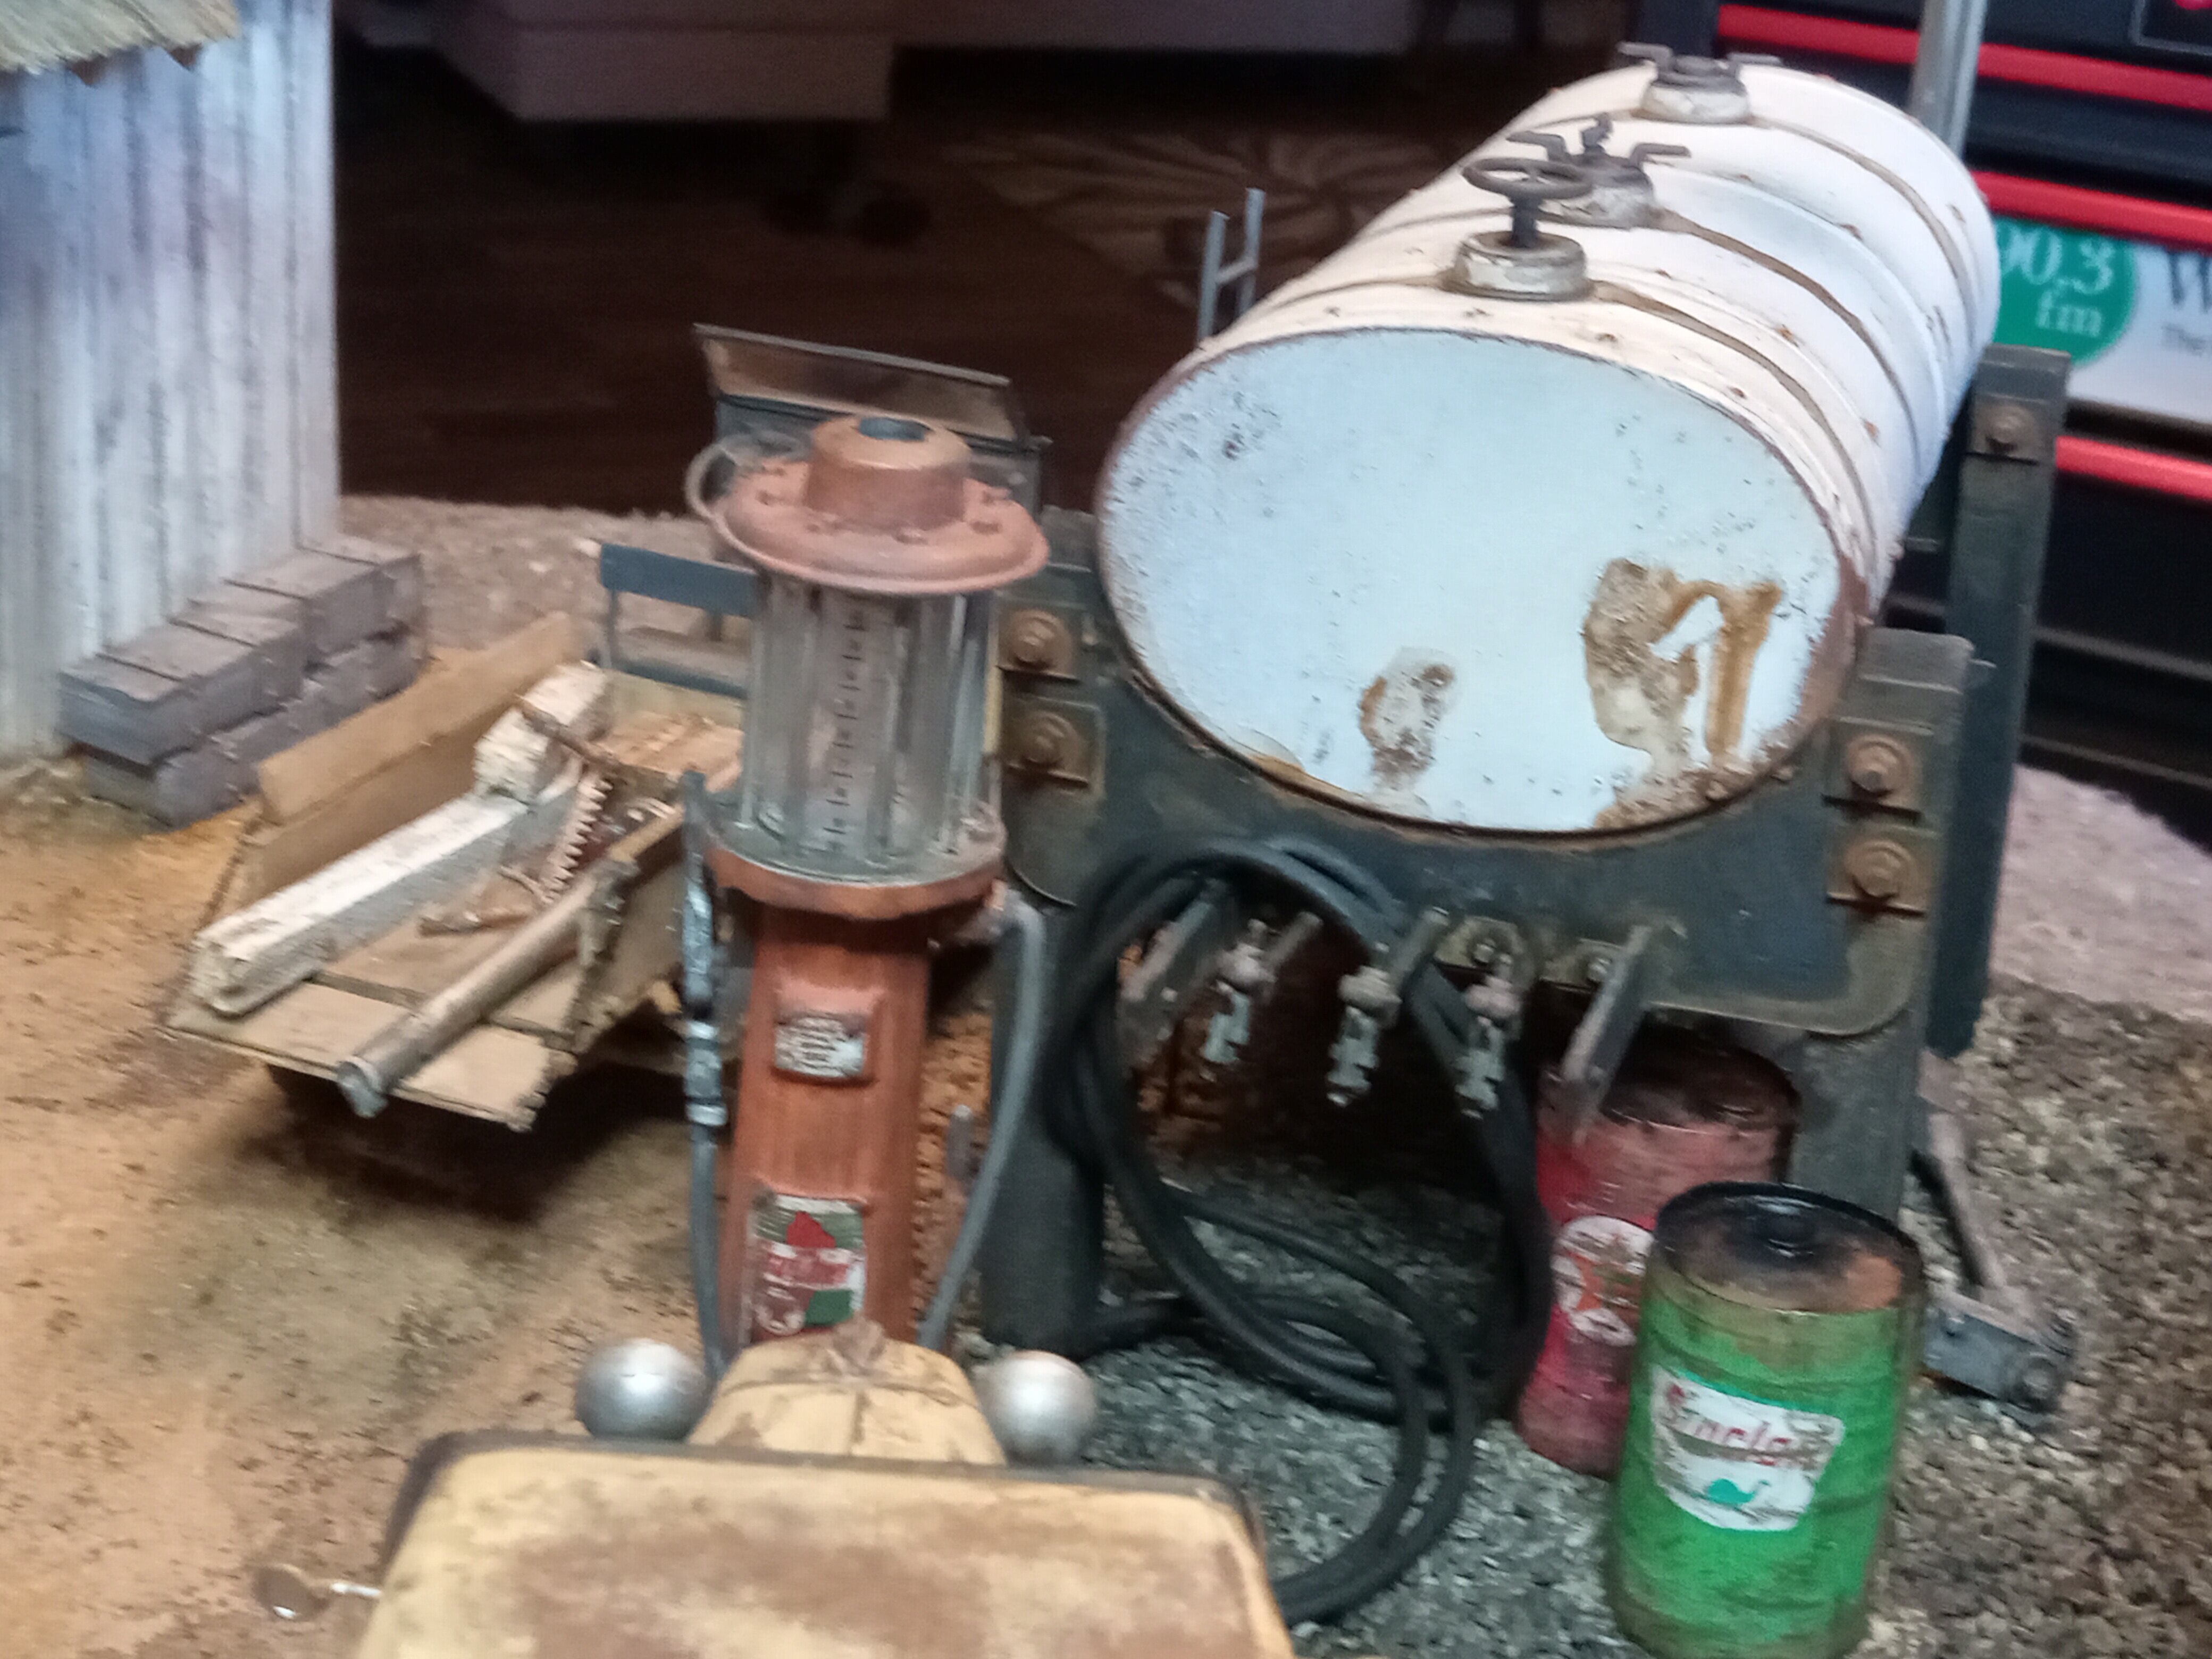
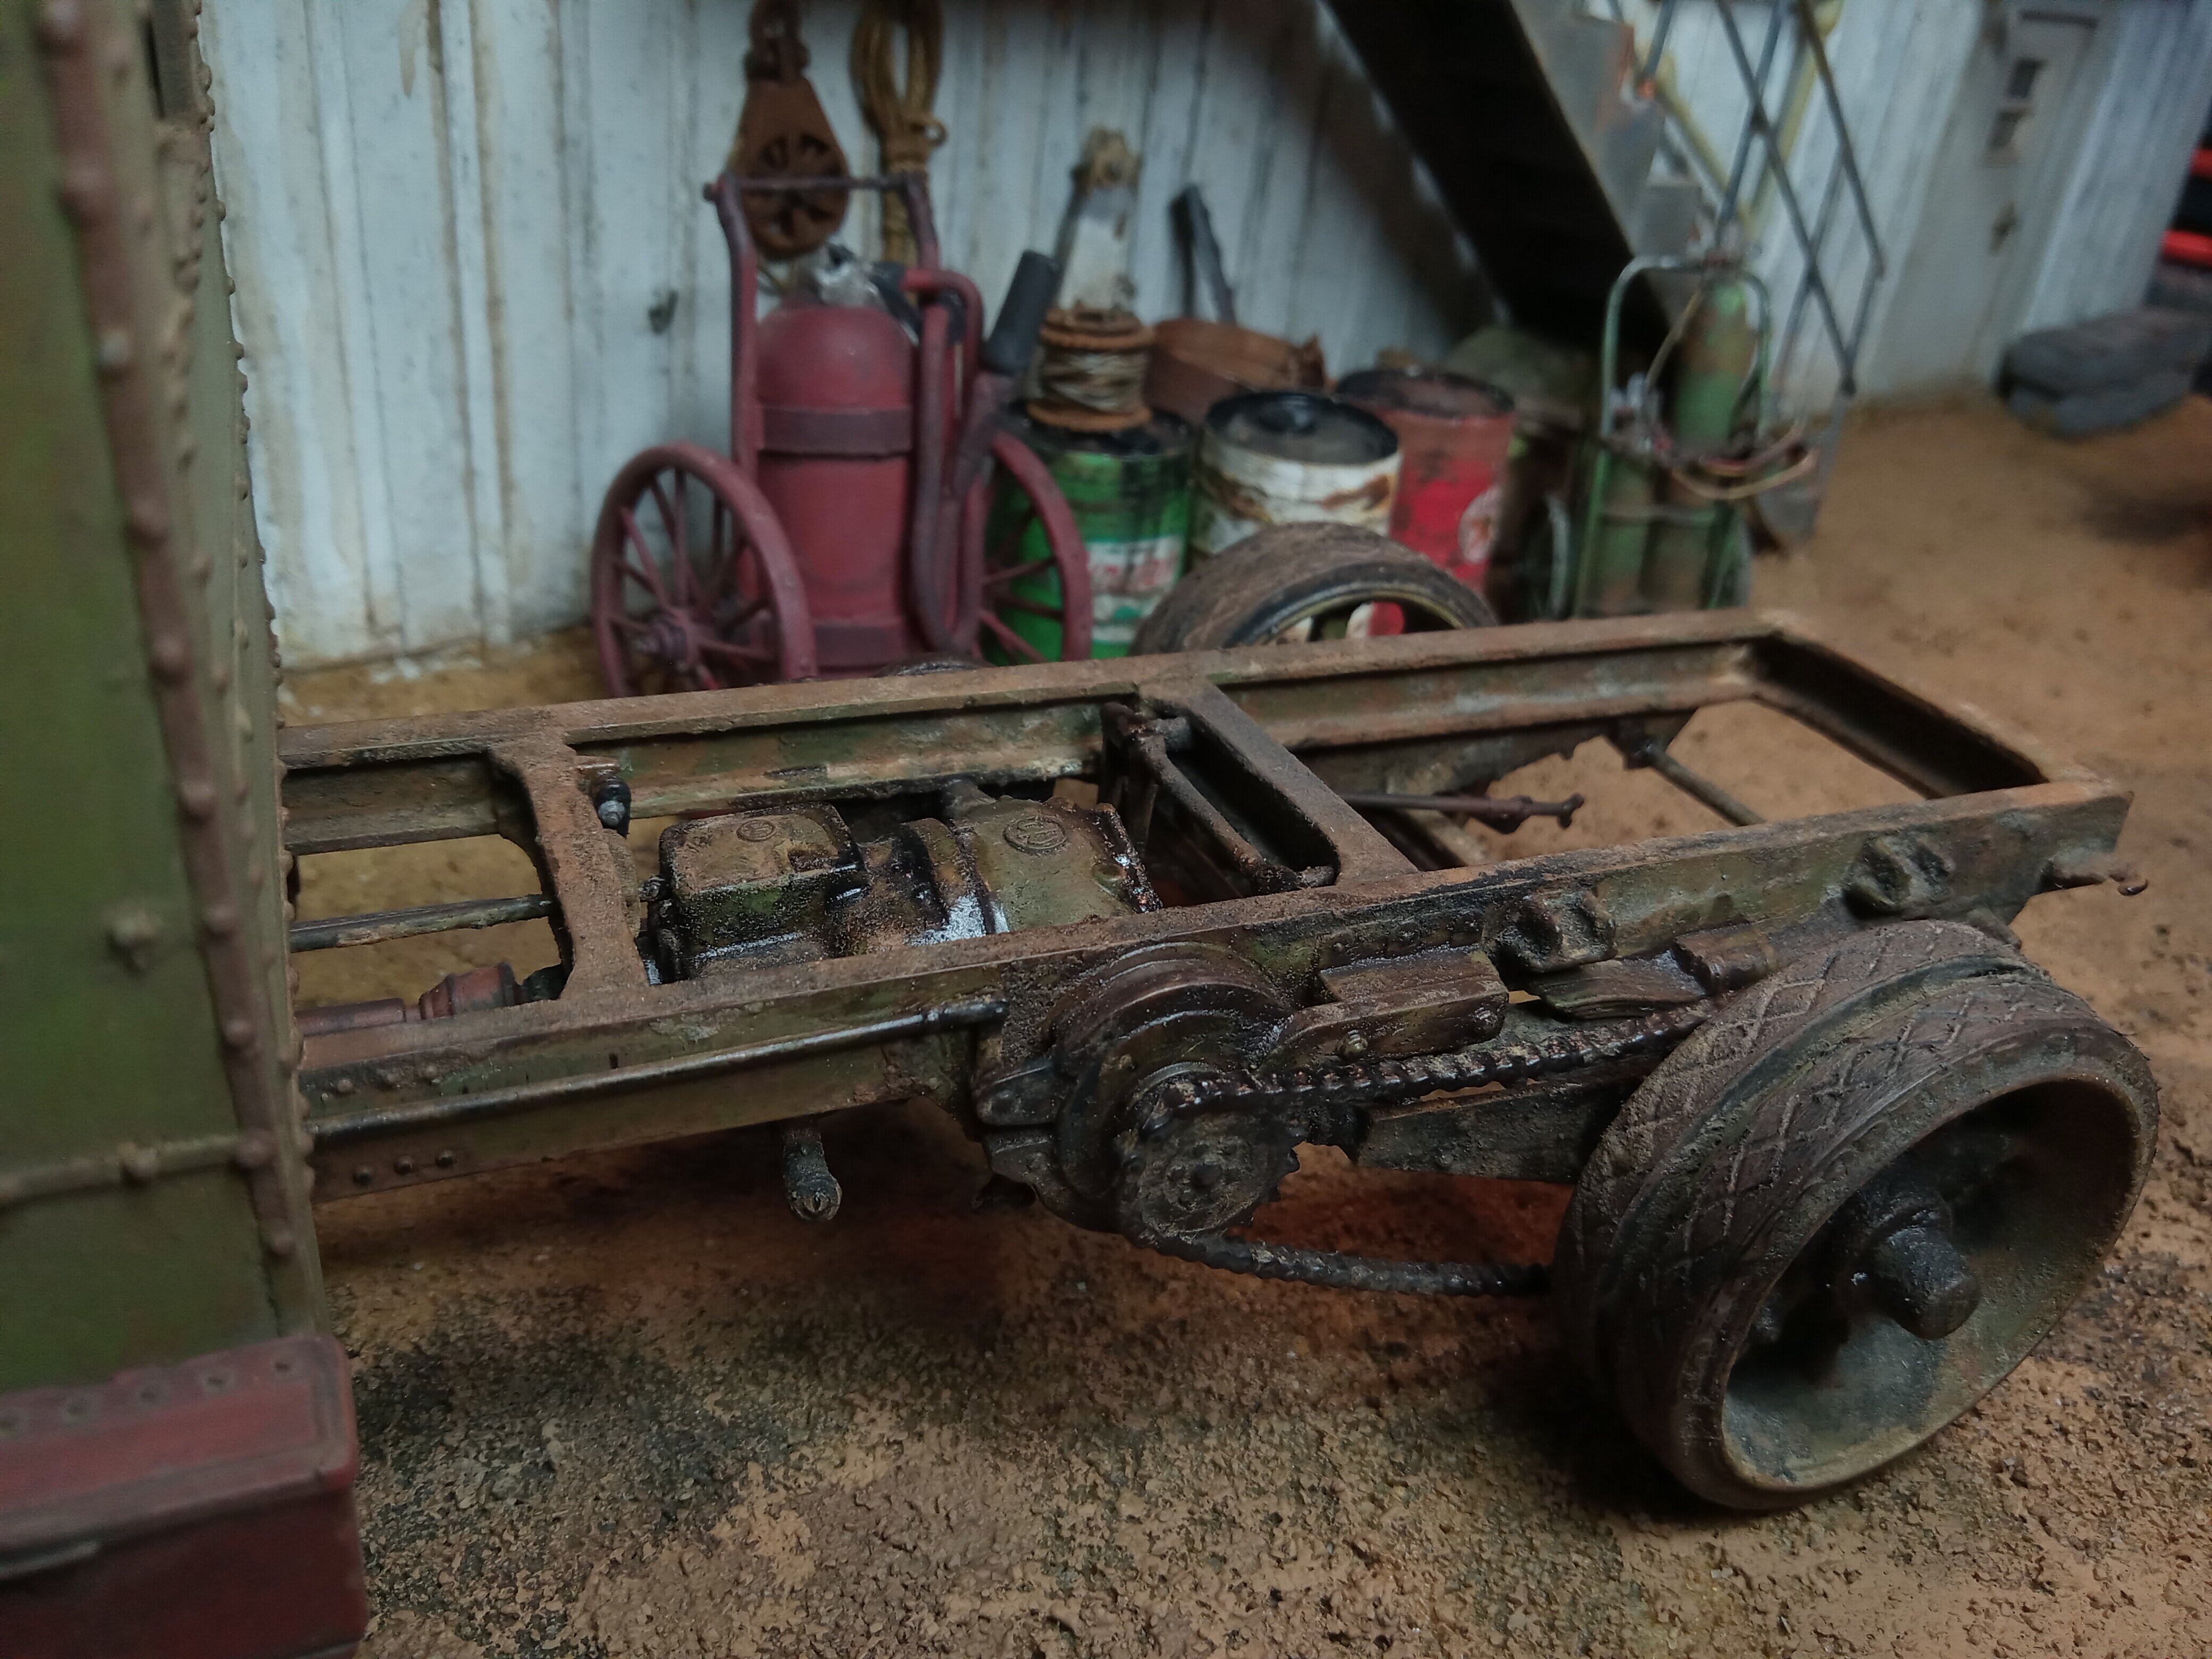
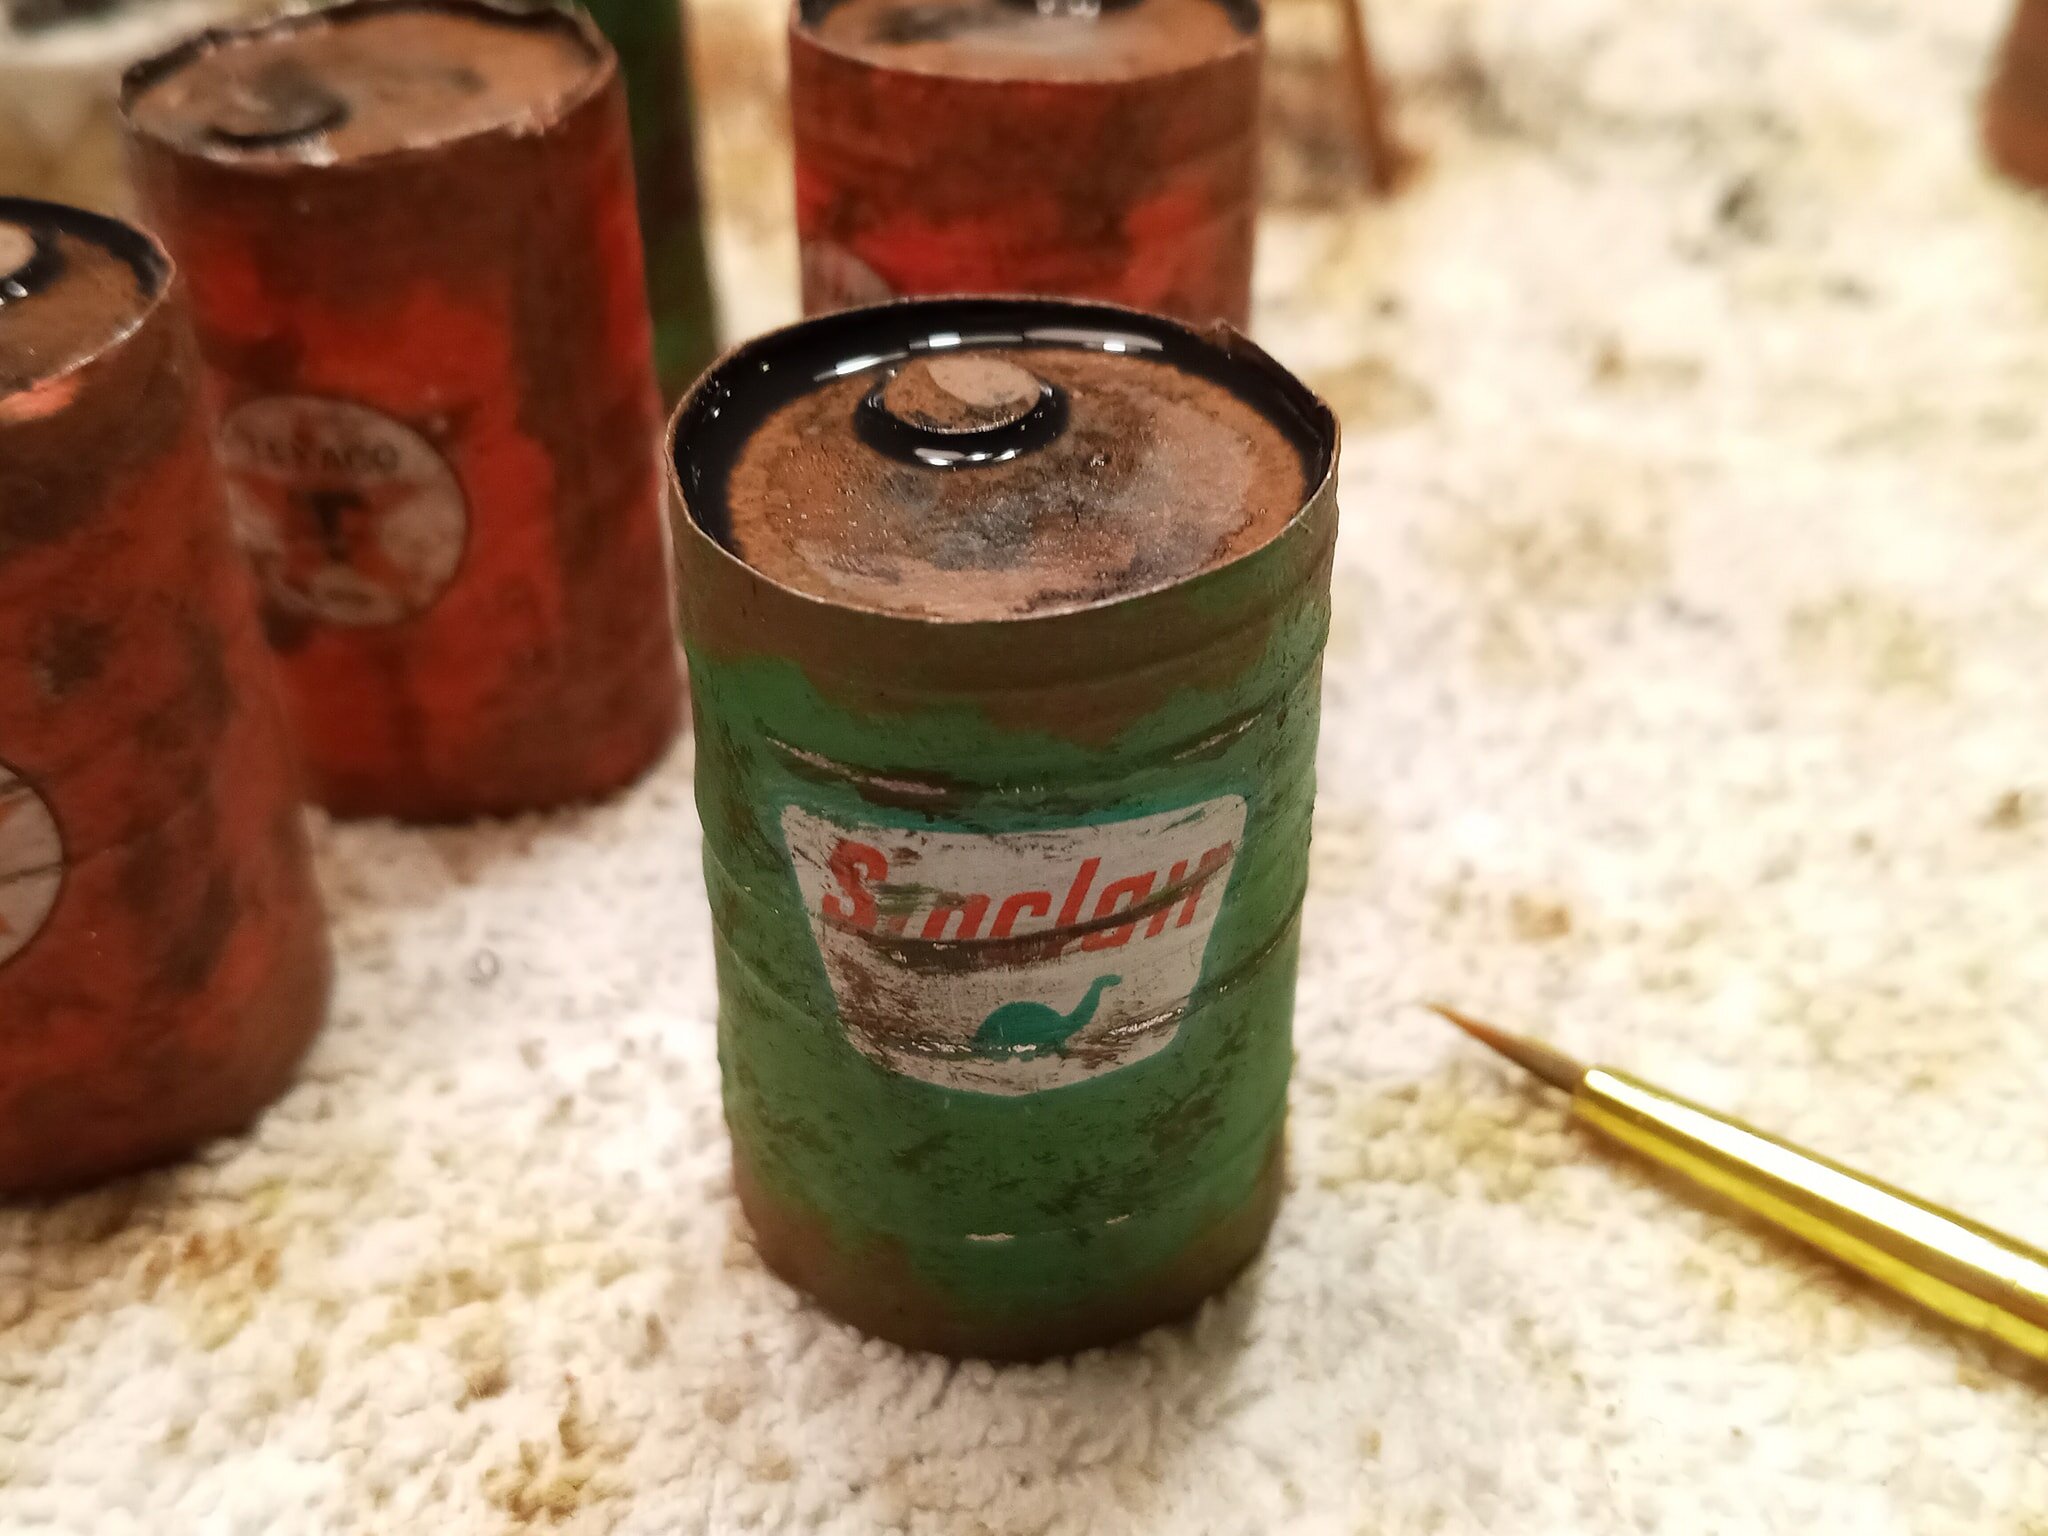
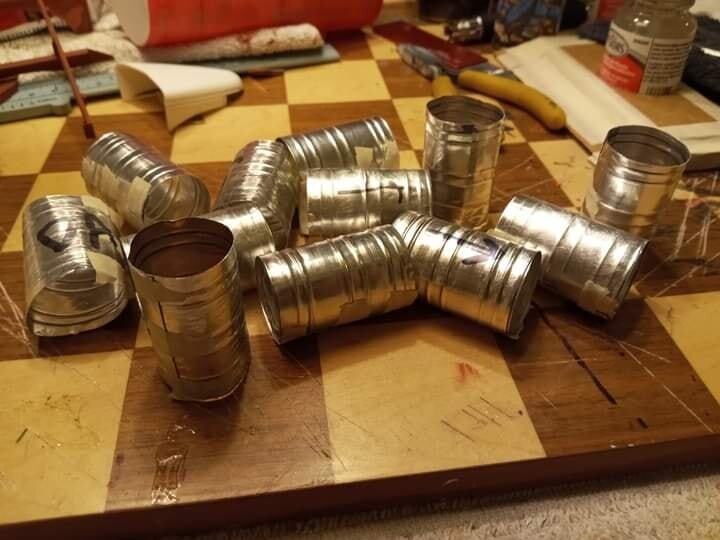
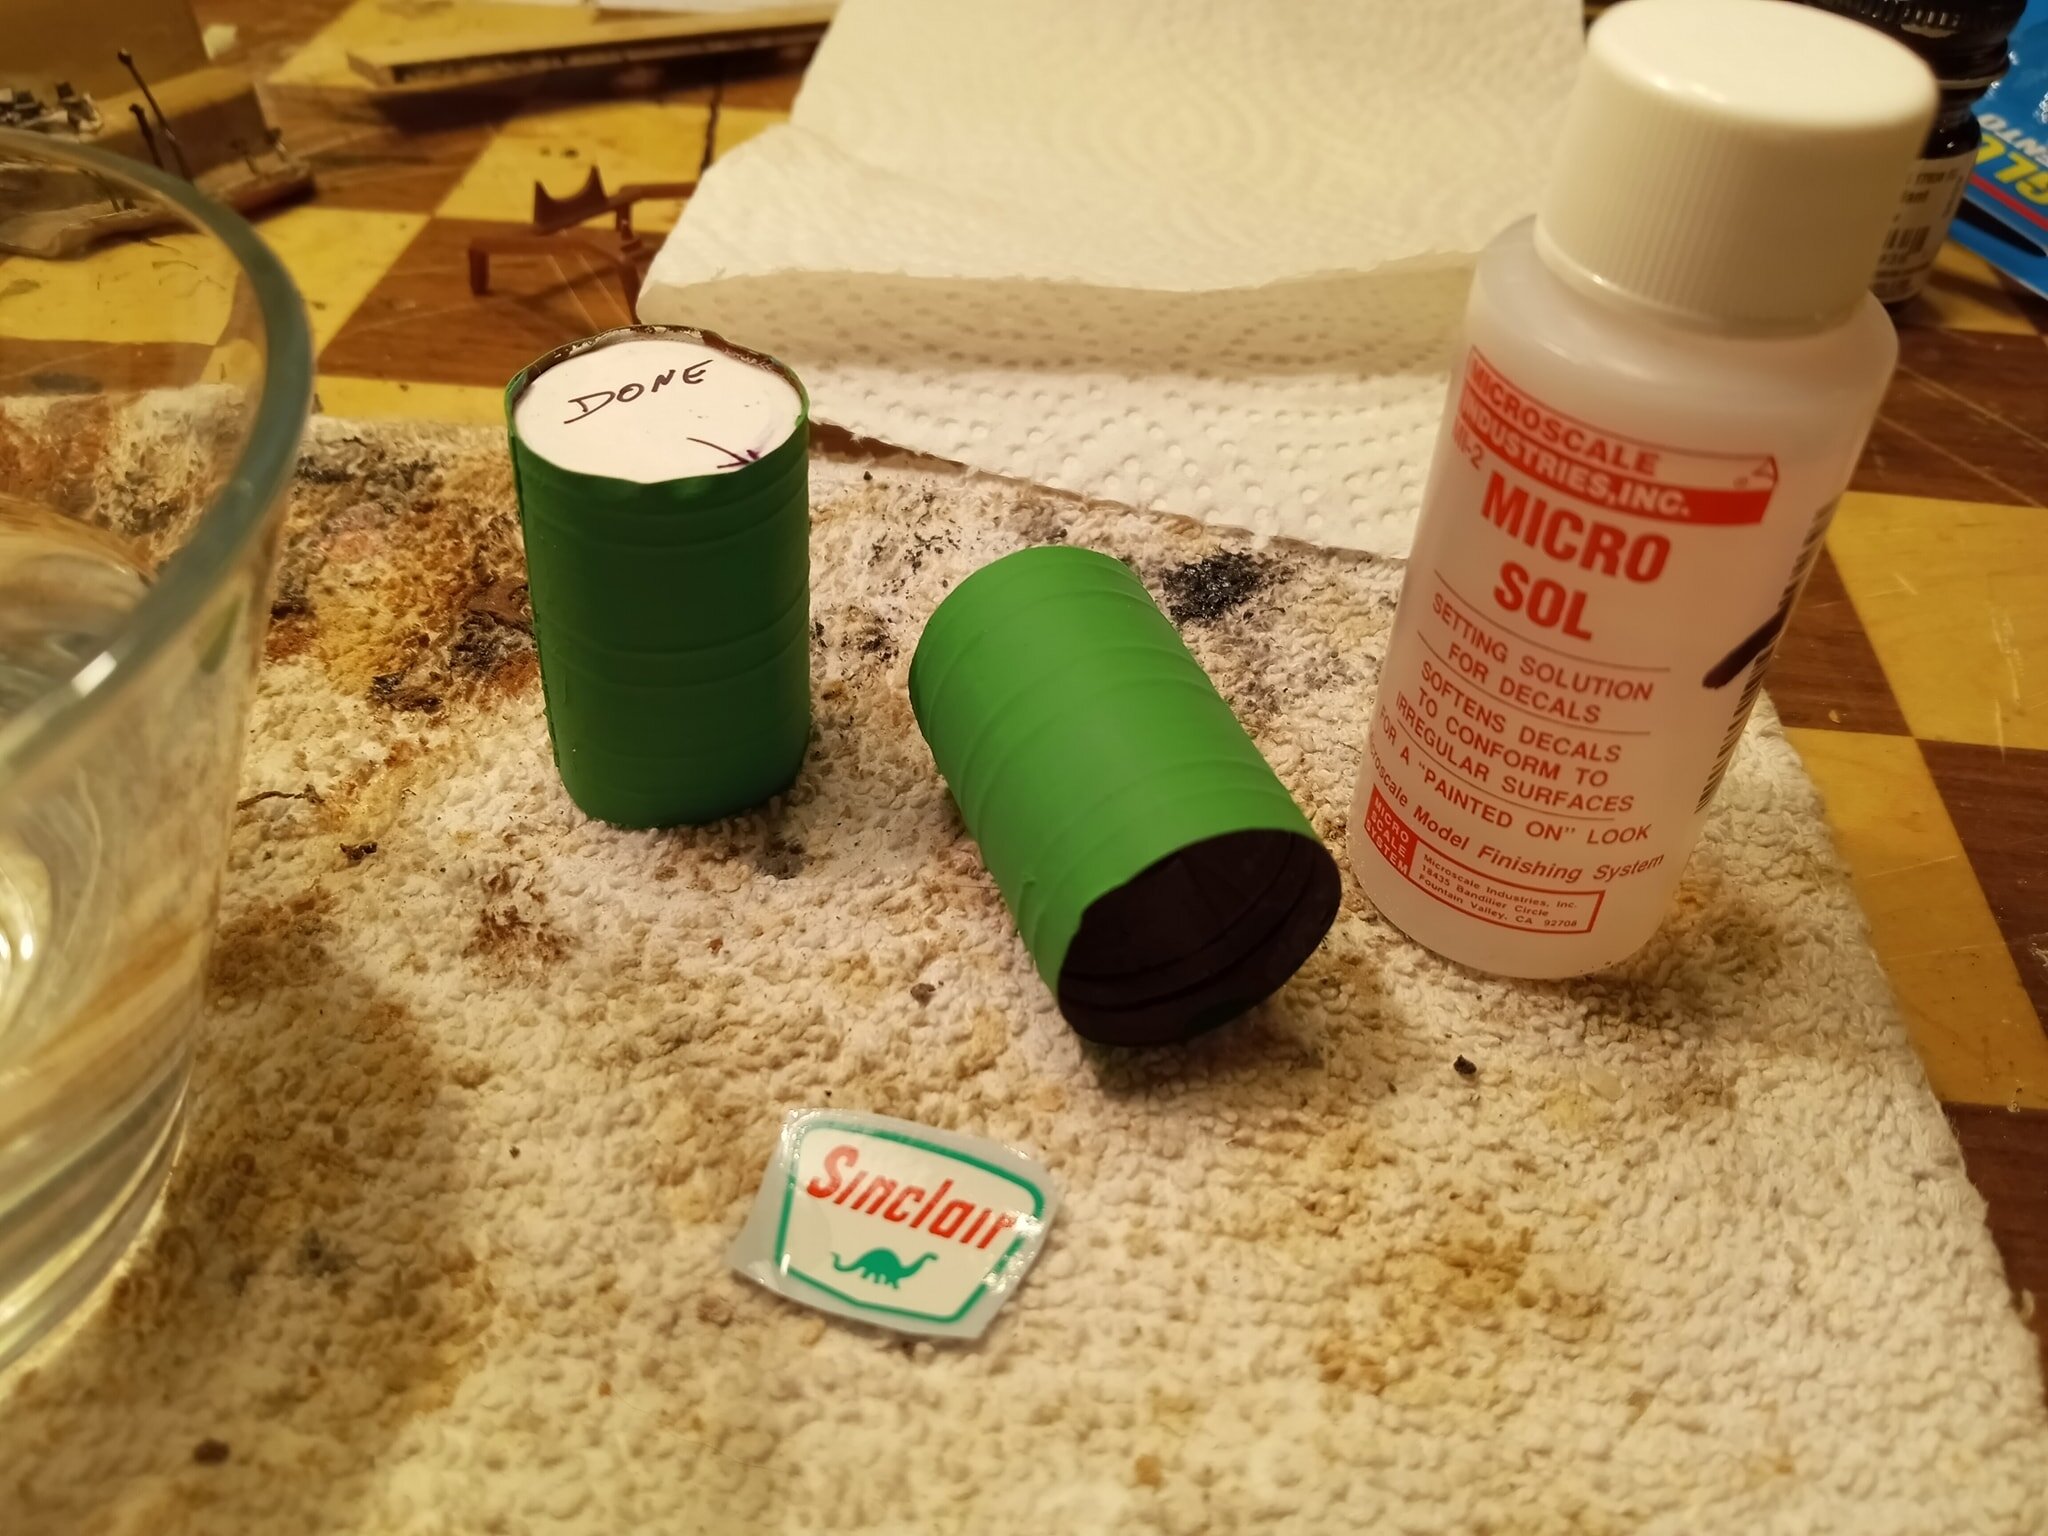
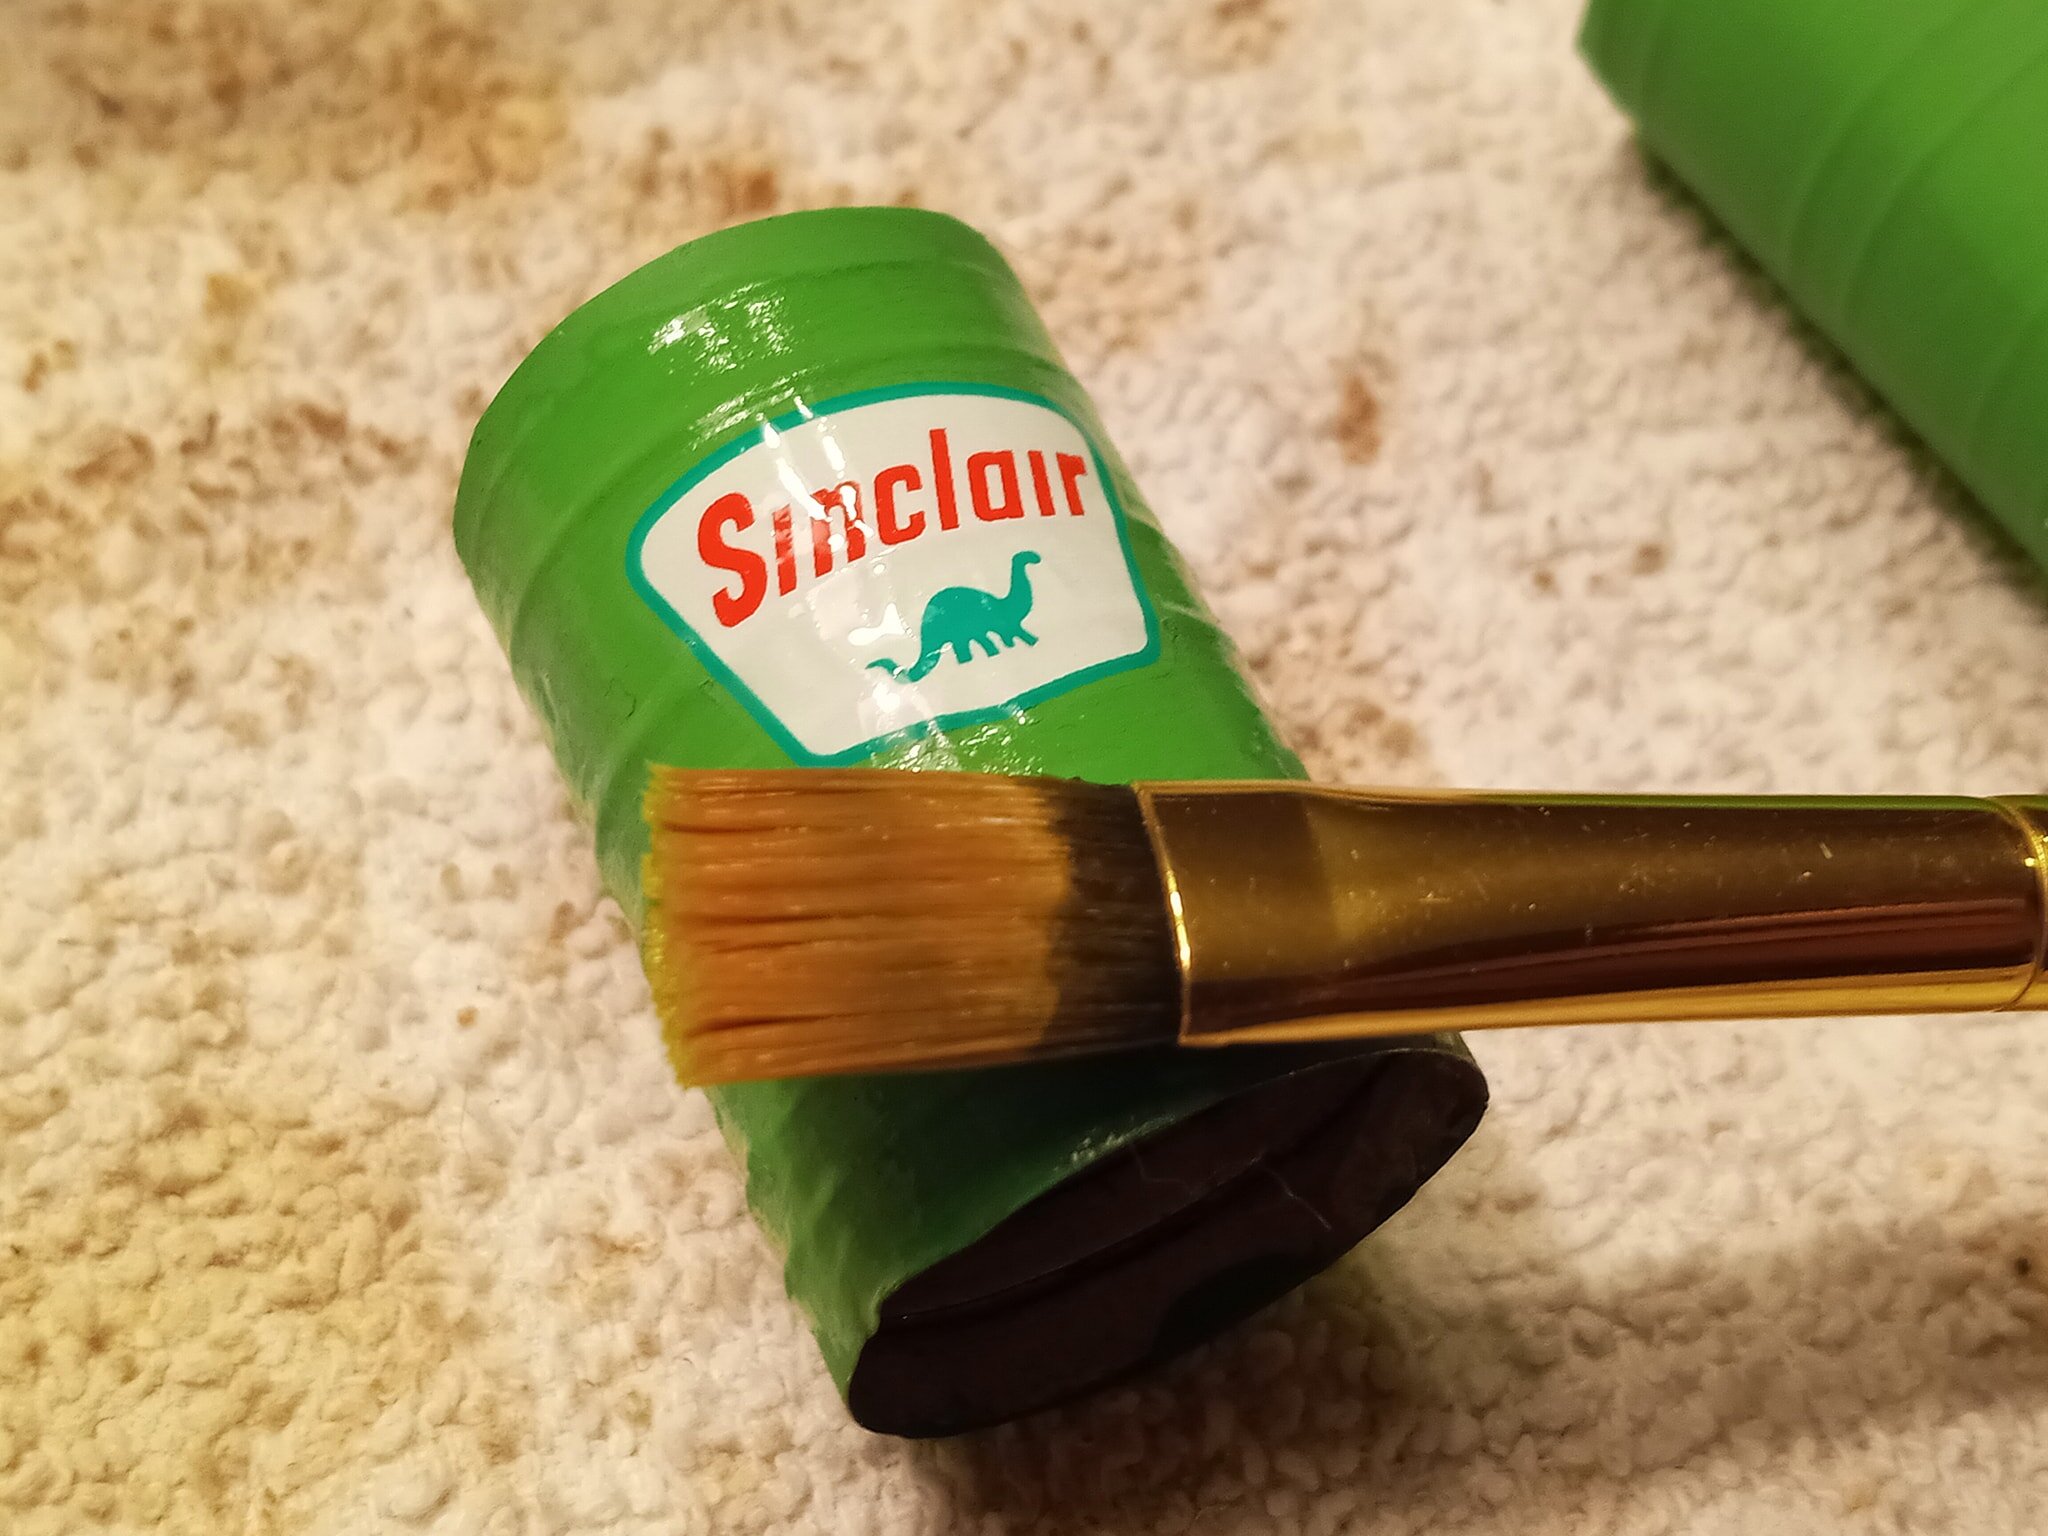
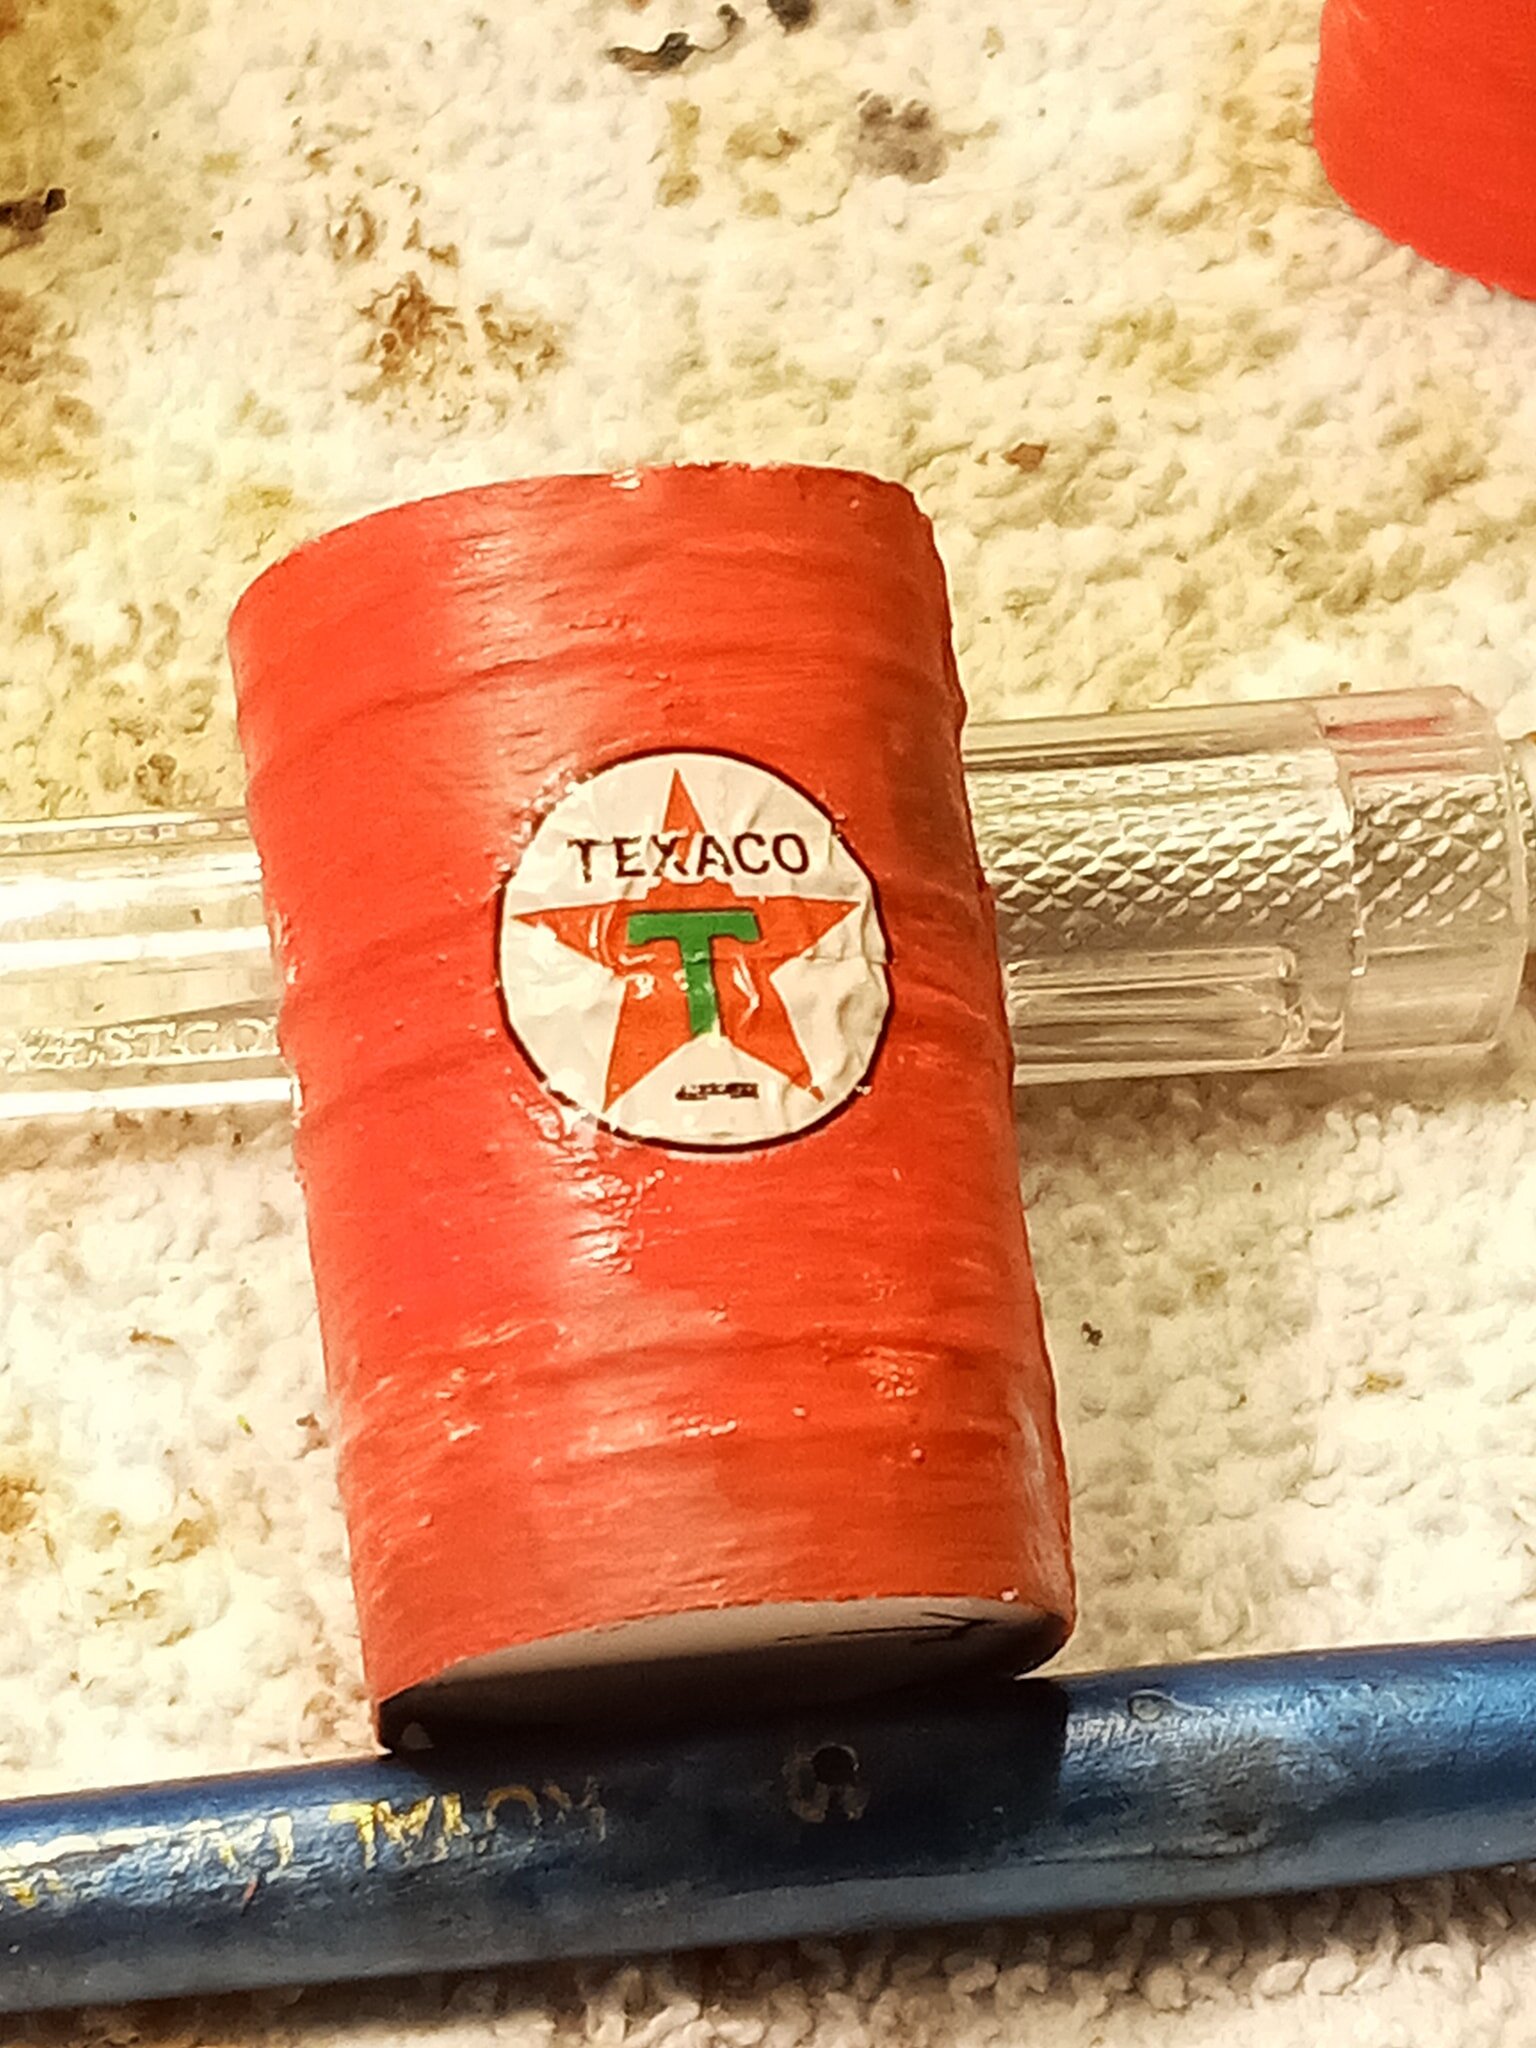
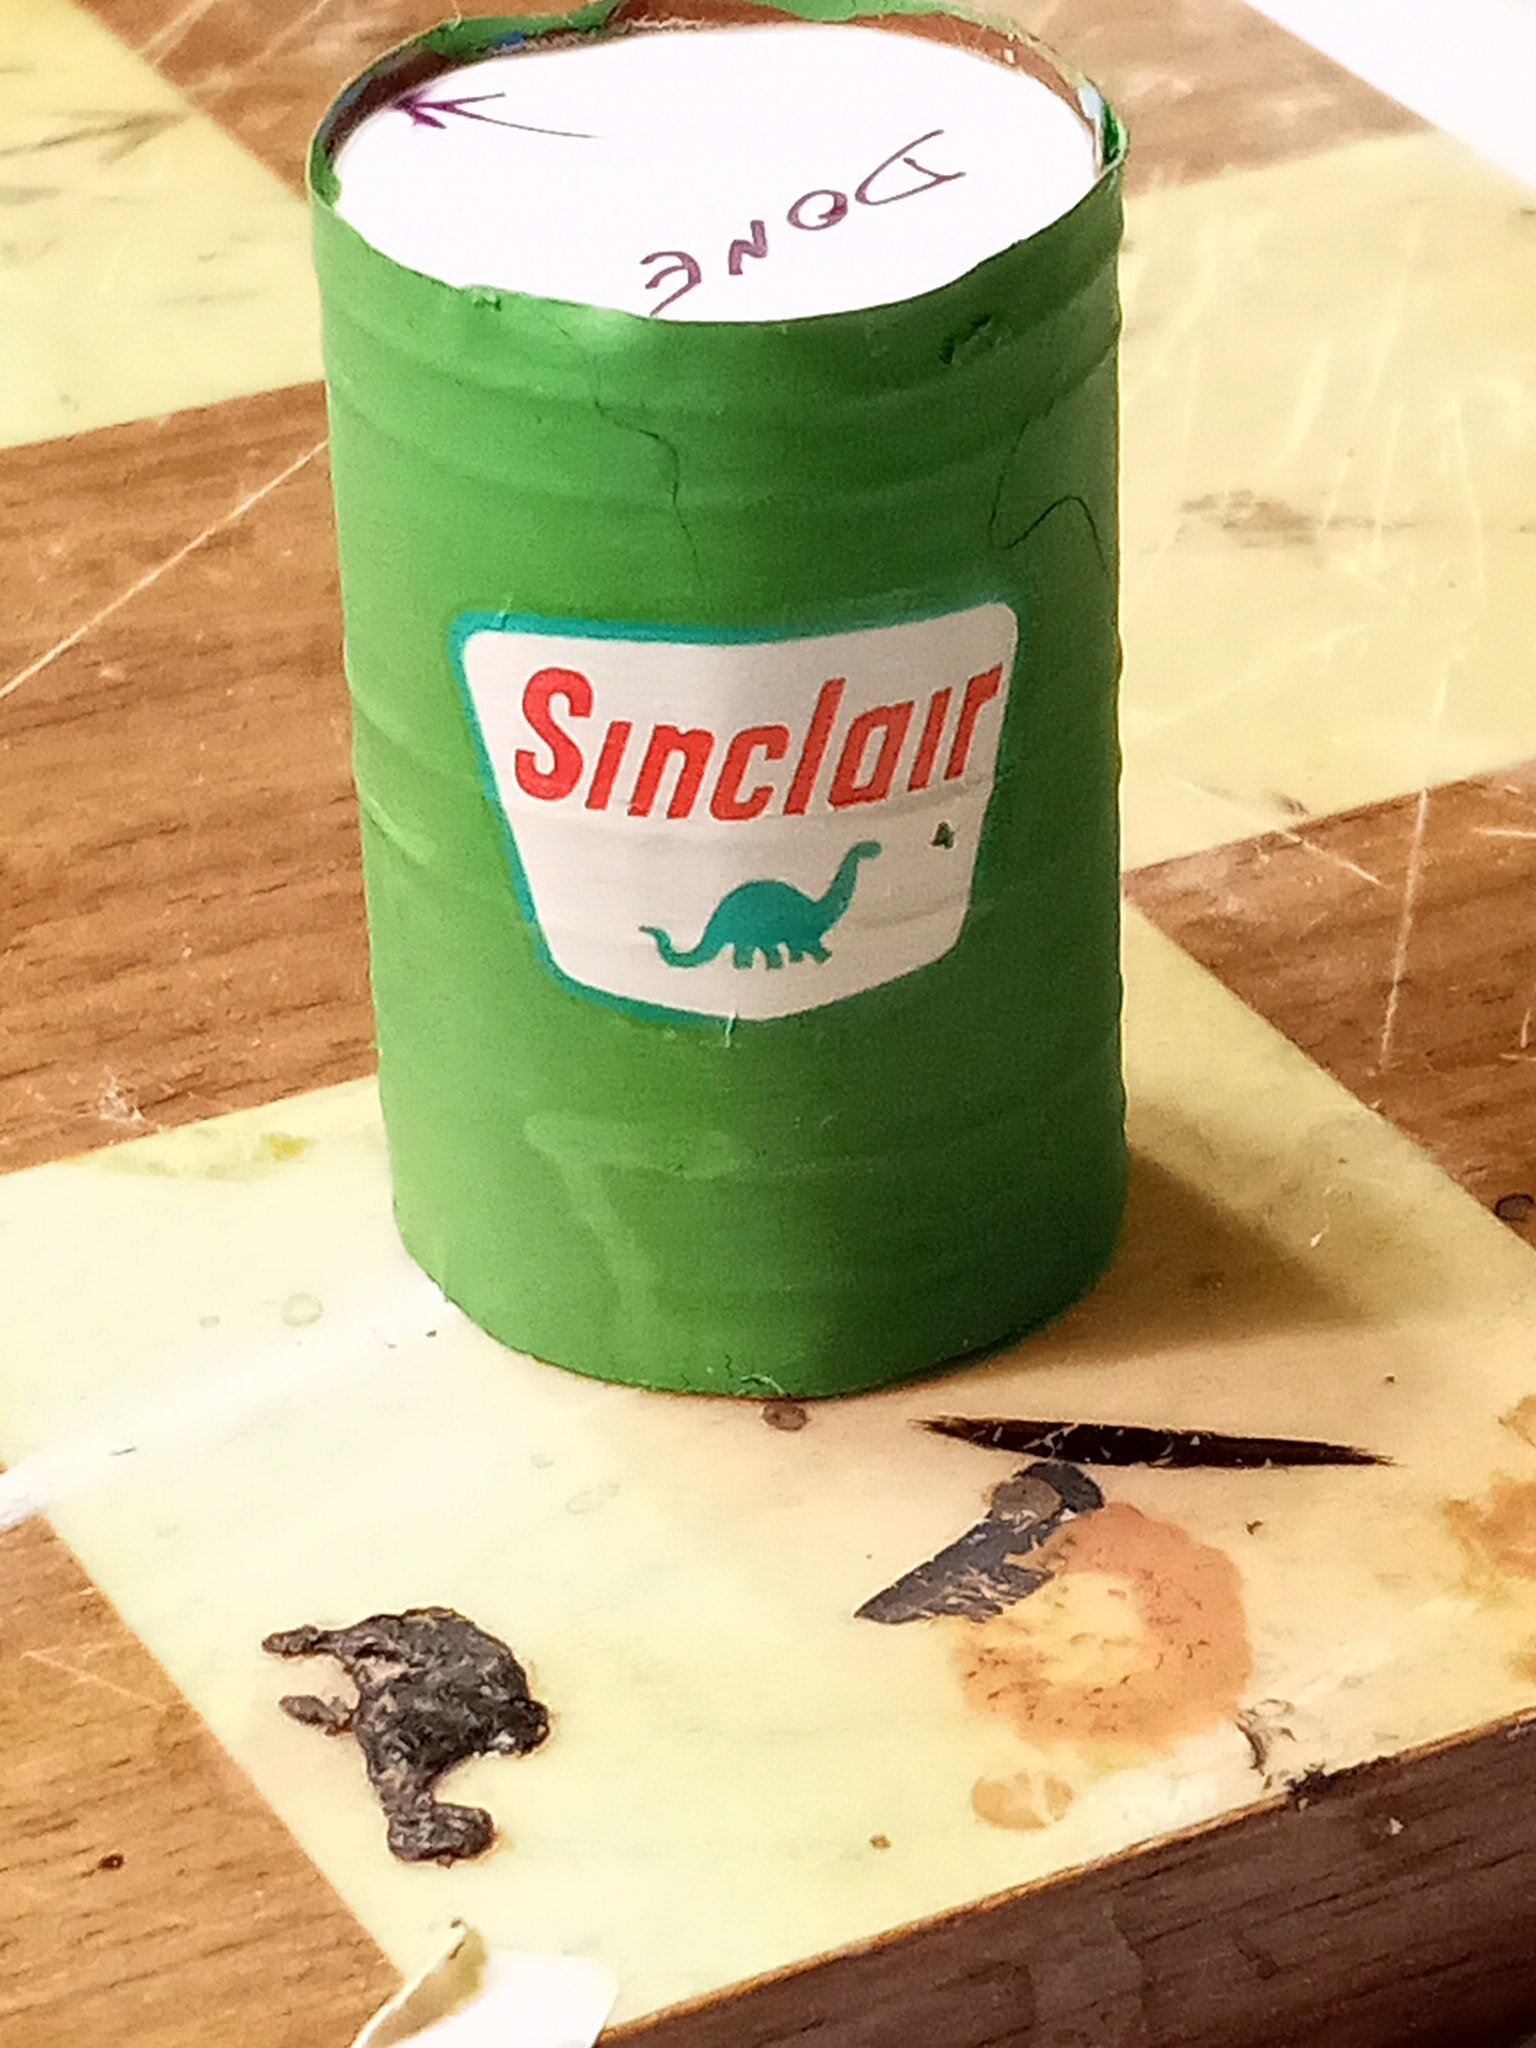
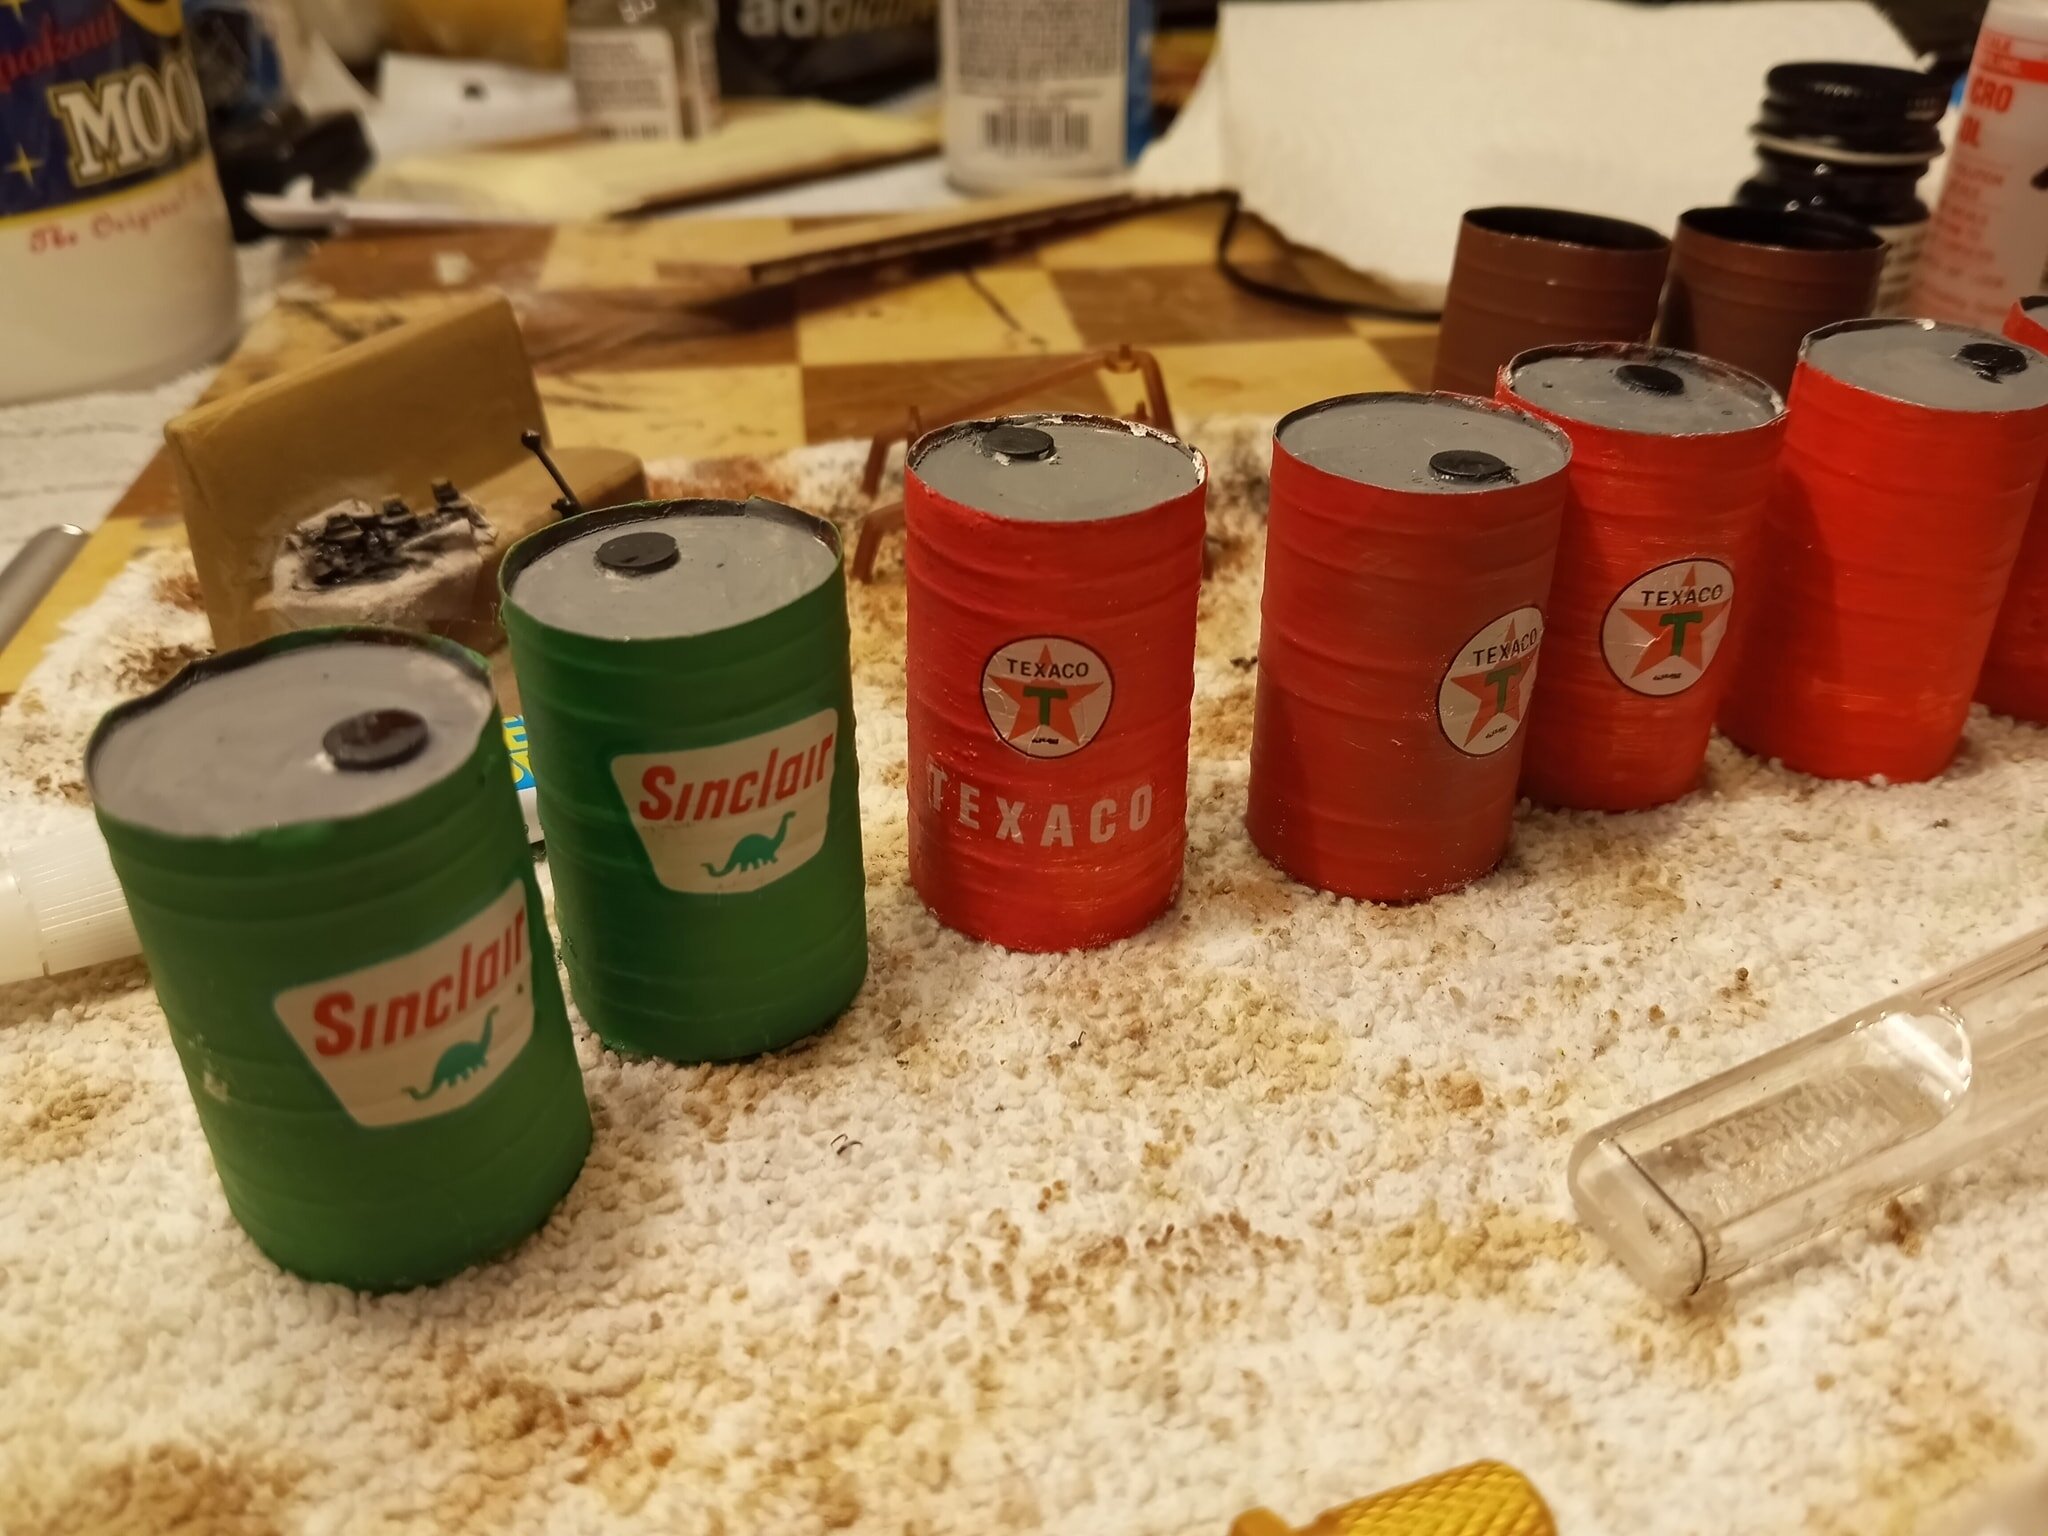
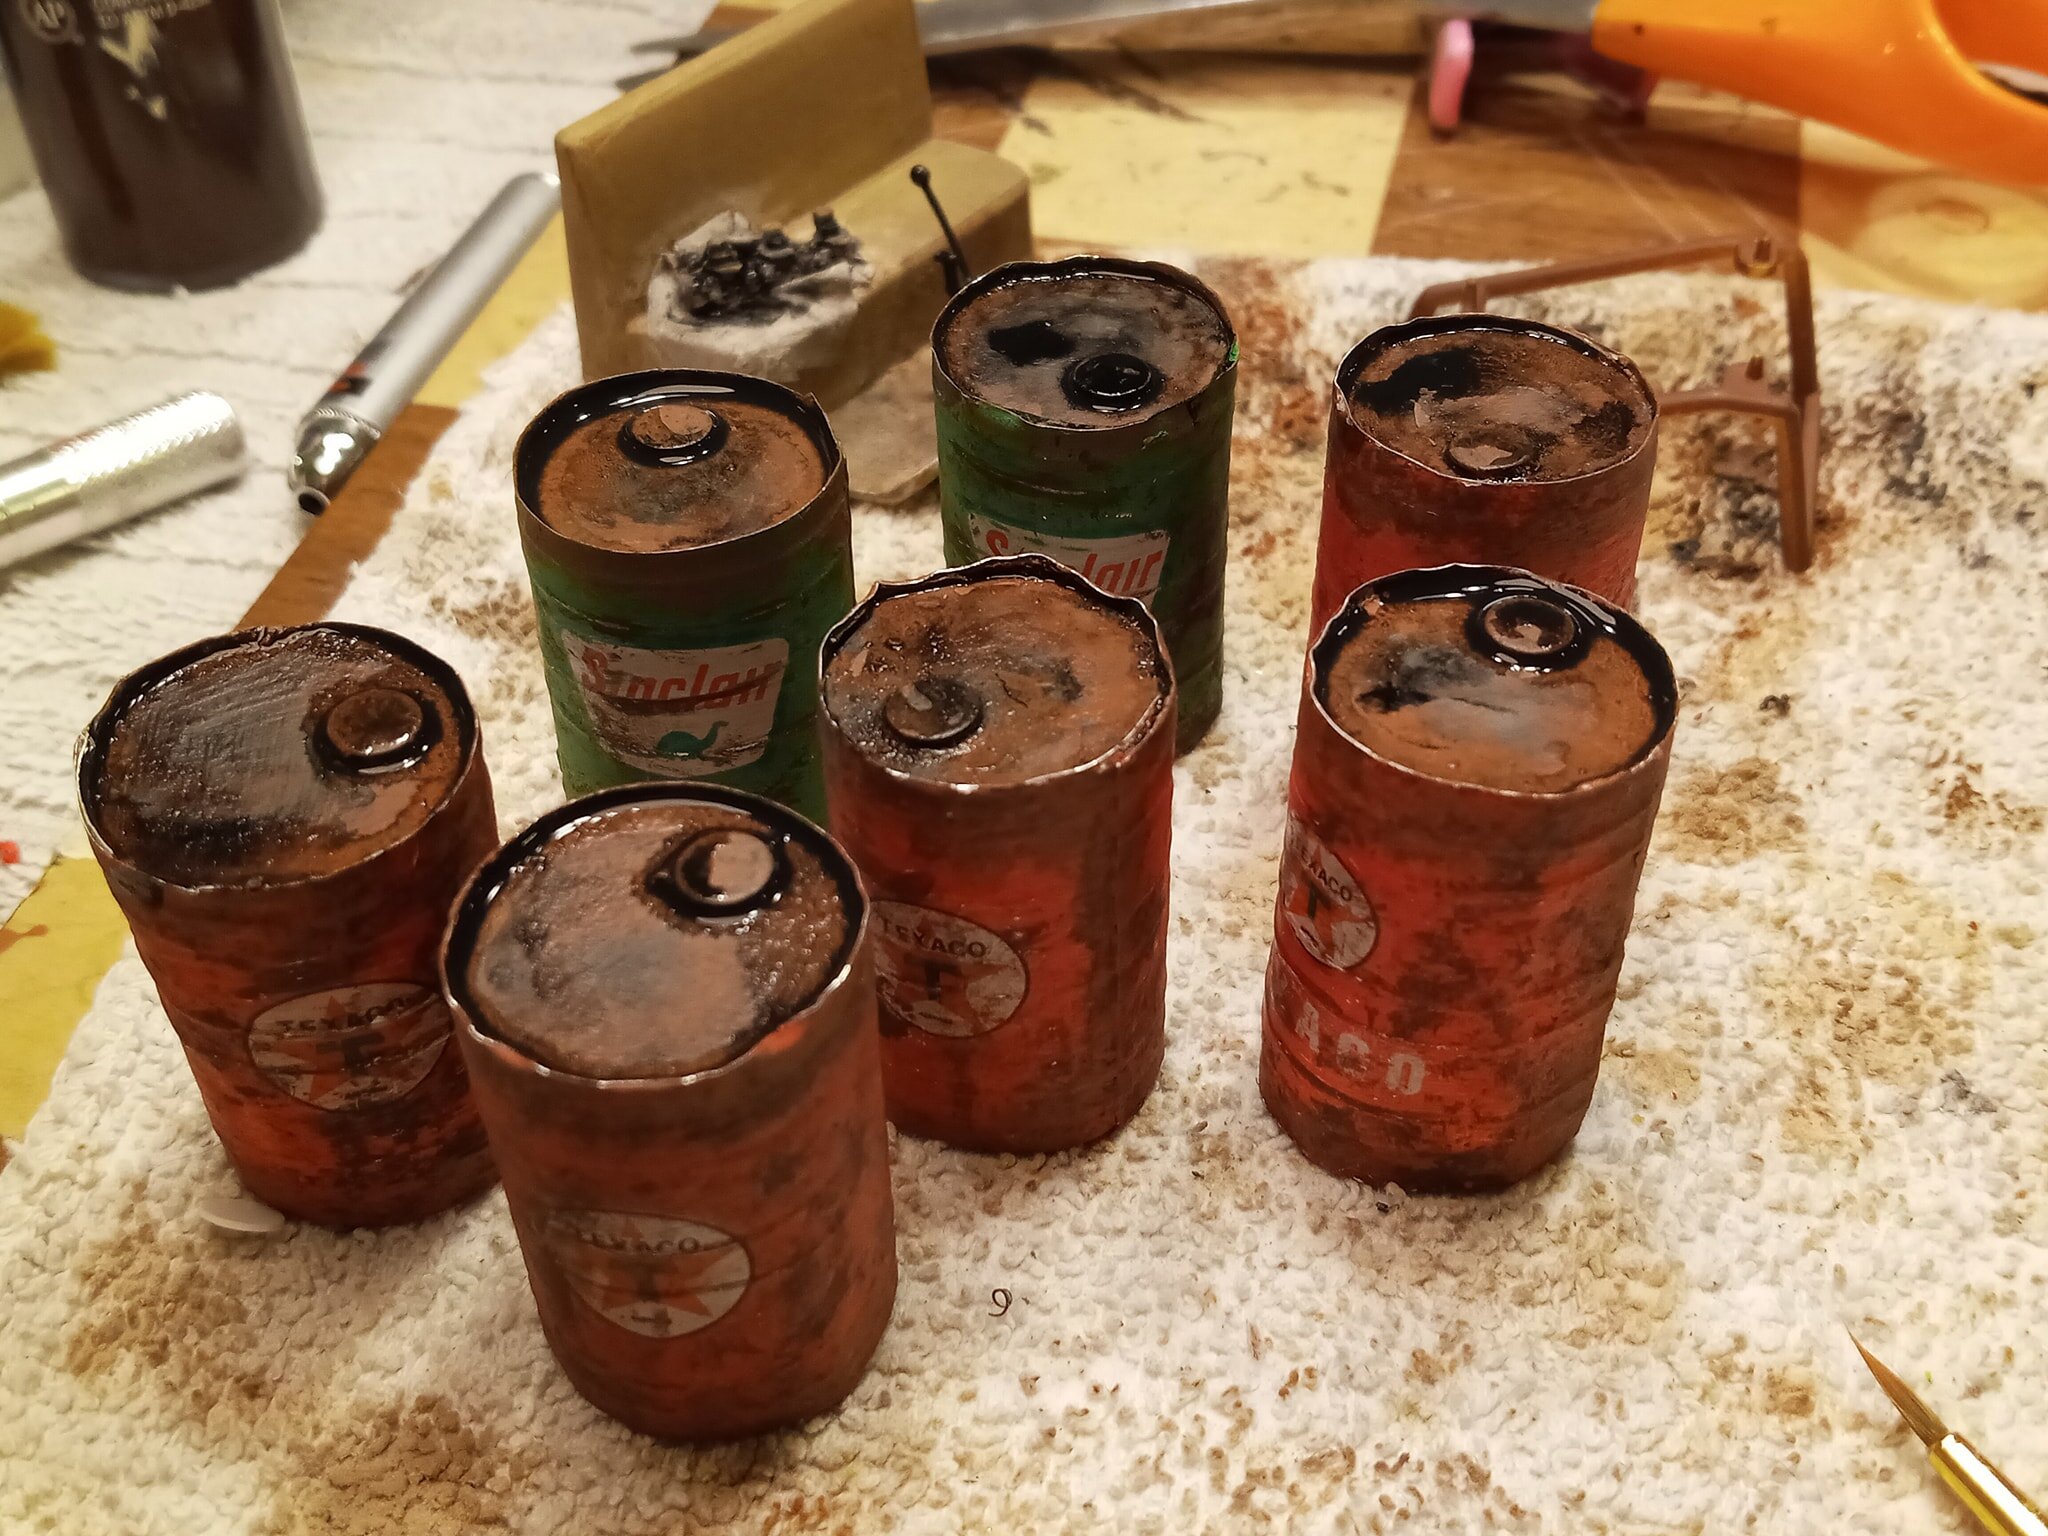
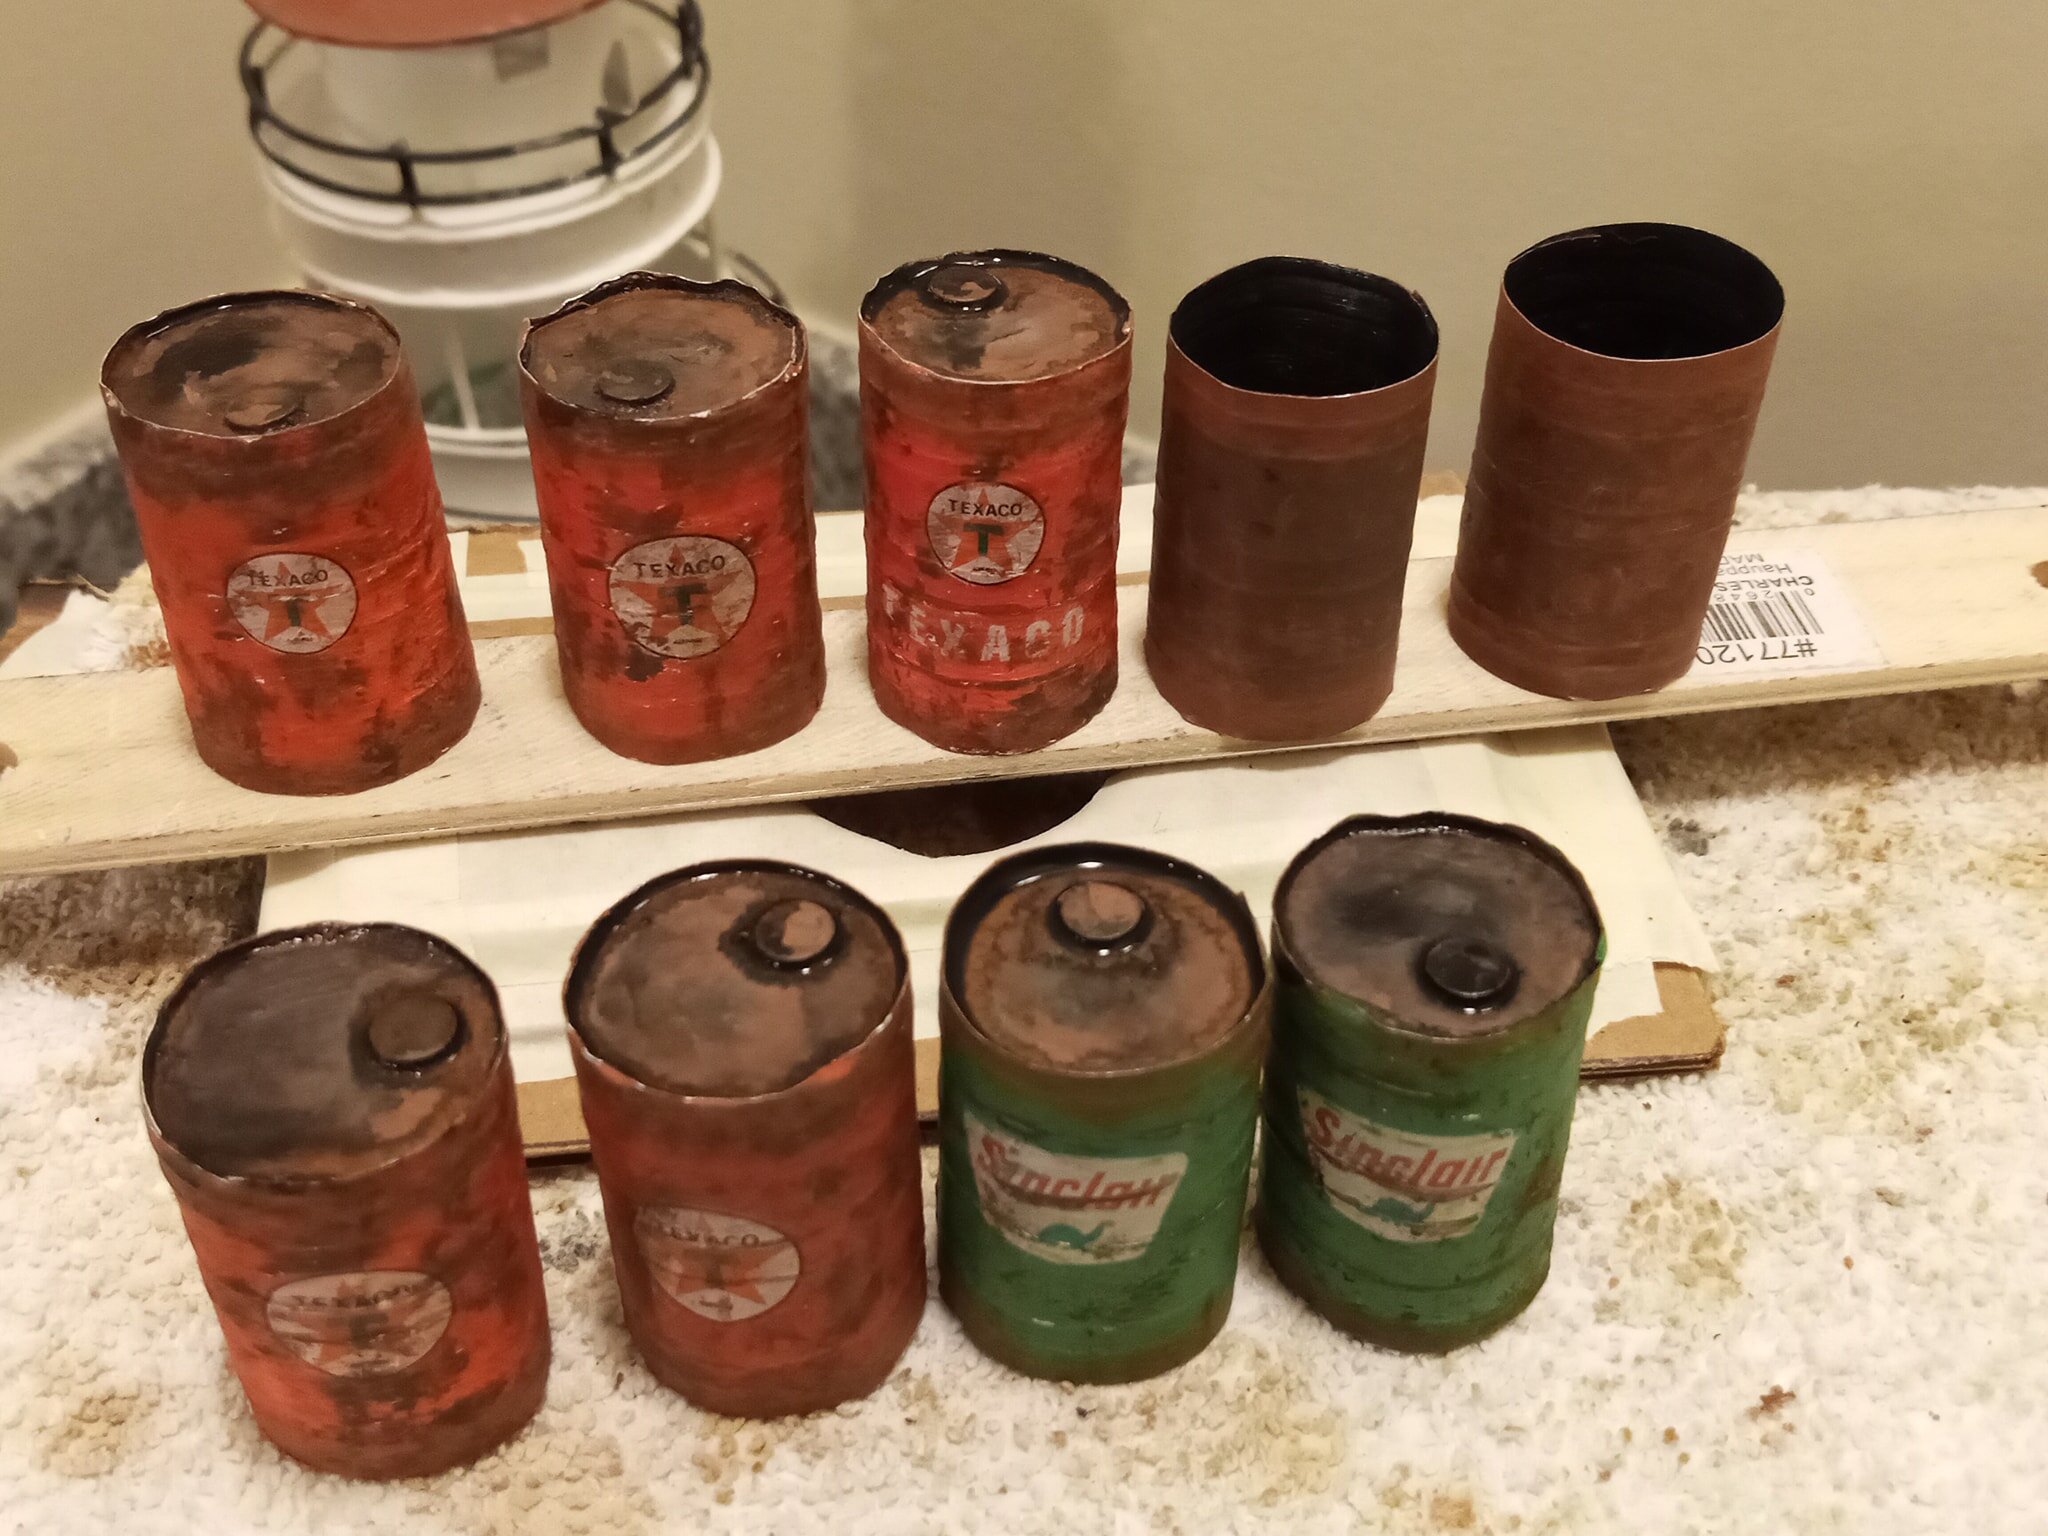
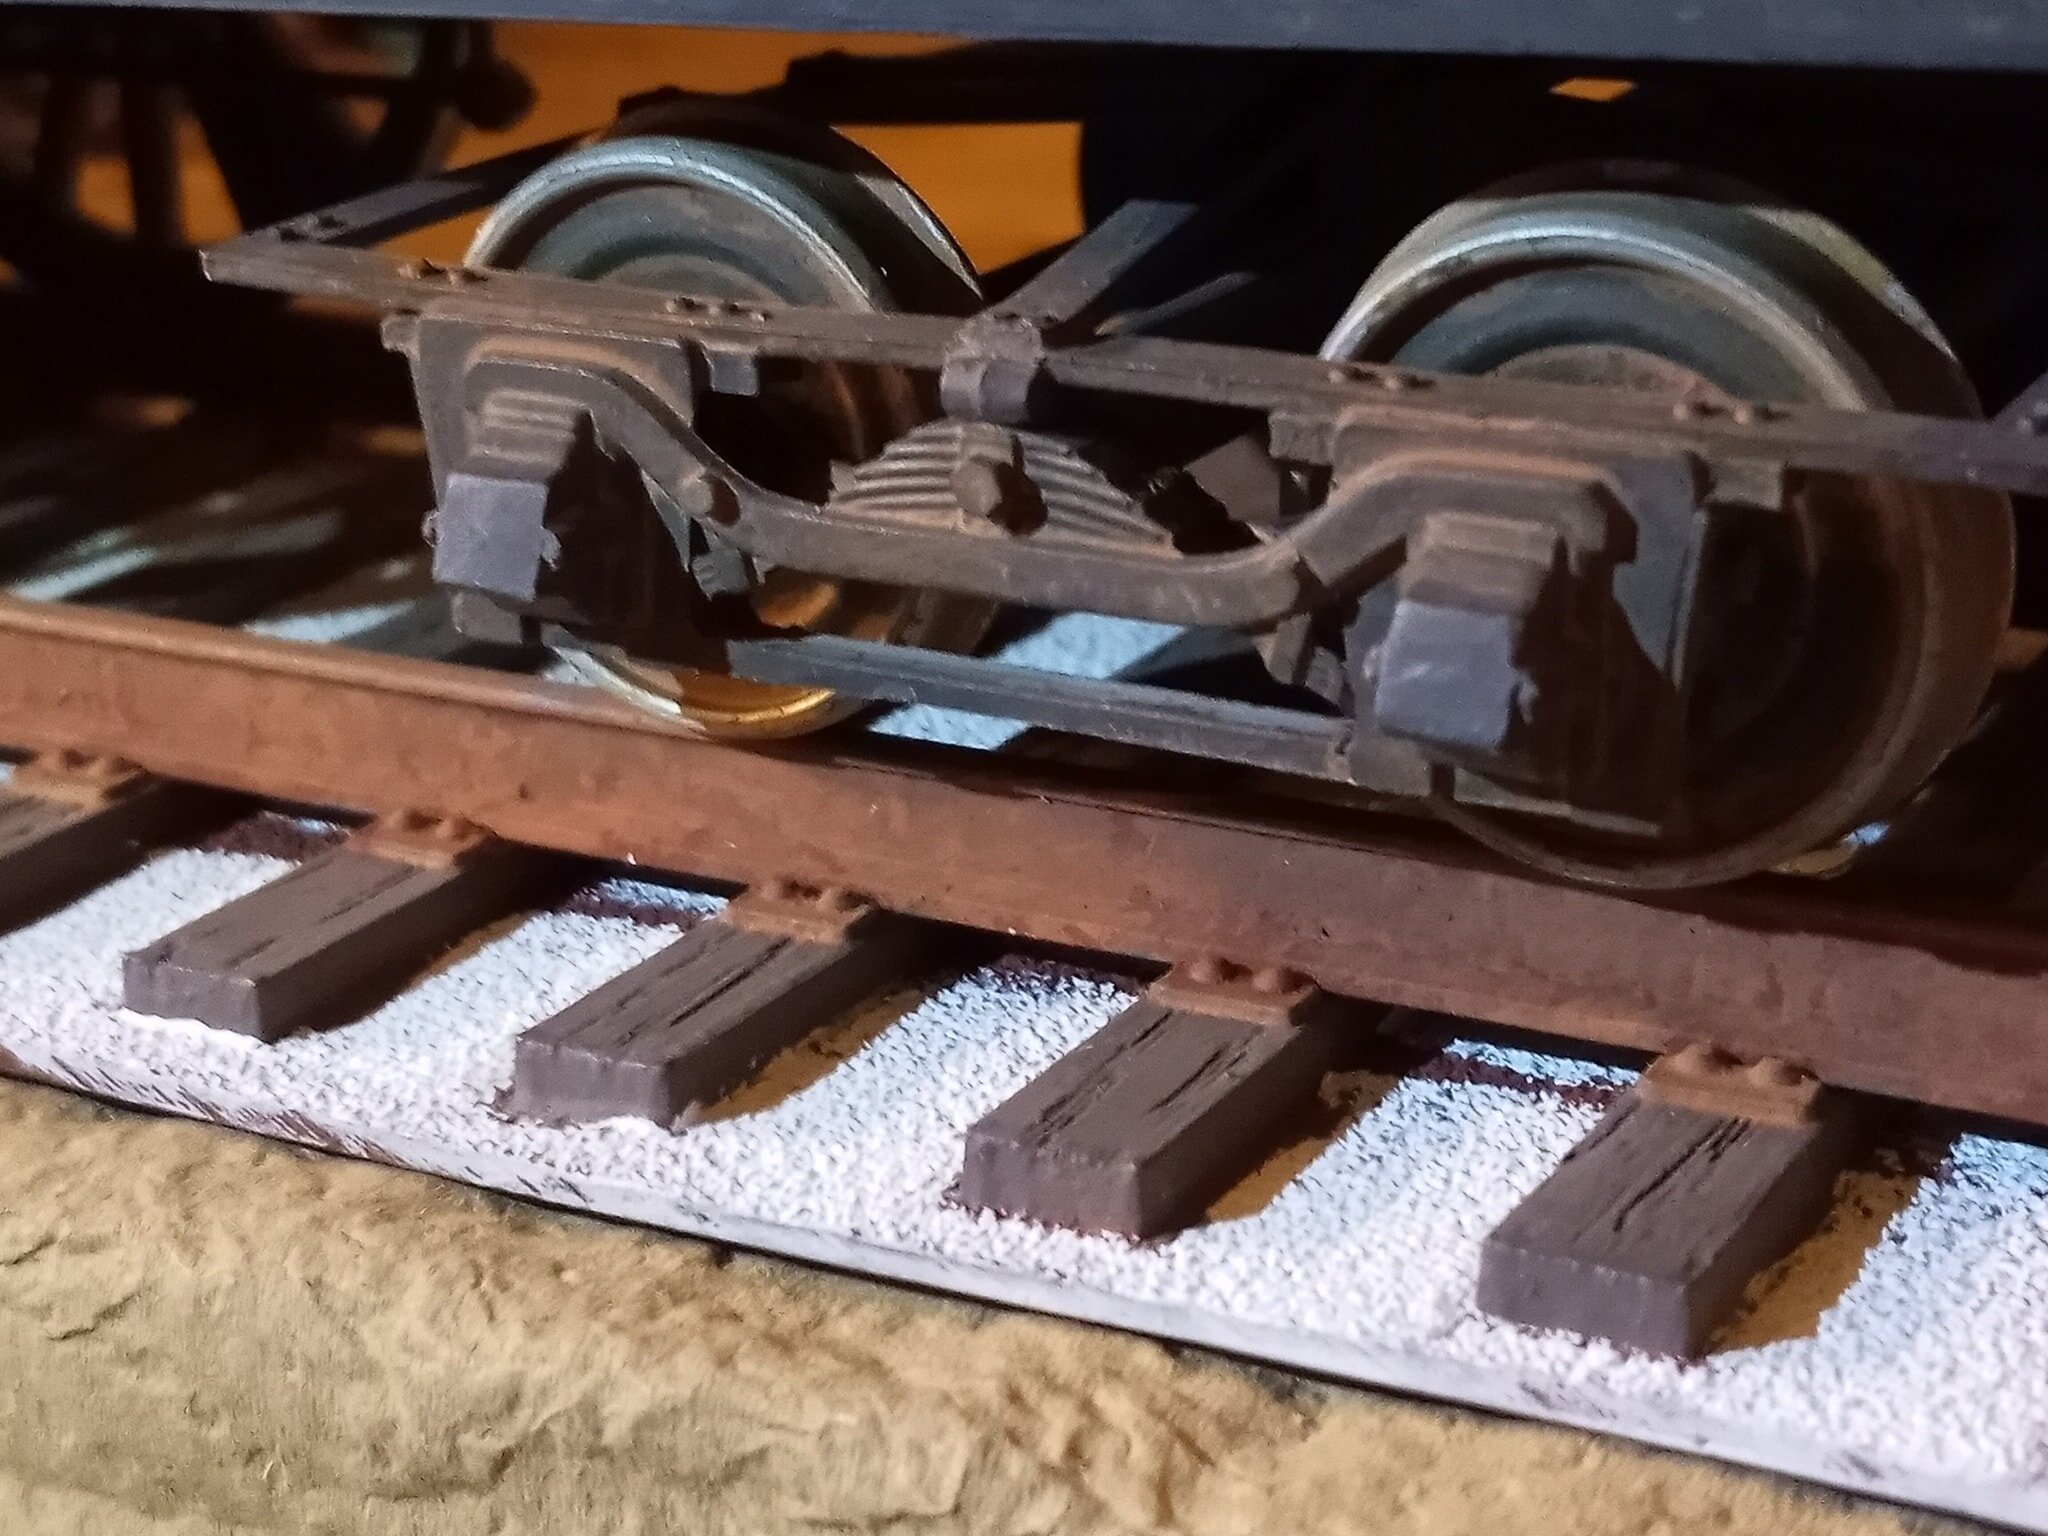
Hi friends. I thought I'd share how I make steel 55 gallon drums in 1/25 scale. This may be useful to someone. Edit: Not sure why some pics are posting twice. I'll figure it out. 😕 🙂 36 gauge aluminum foil from Amazon. I measured the real barrels and converted them to scale. Using these strips, I embossed my lines on the back with an old ball point pen. Made the lids out of heavy paper stock (cereal box cardboard here), no use wasting styrene here. I made a generic ribbed pattern, but you can use whatever patterns you need or want. Red oxide primer. The train yard's refuelling tank in the background. 🙂 Acrylic paint. Any decals are definitely gonna need some solution to help set. I made some tops from the cereal box cardboard and some punched styrene discs for the openings. S Some rust paint. 🙂 I rust the bottoms more; they take the brunt of the damage and wear. Some generic rust color acrylic on the lid tops, followed by some gloss oil wash and floor shine (Future, but I used another brand and it works fine). That's pretty much it. All of these materials and techniques can be done many other ways, but this is how I do it. Thanks for looking. J
- 1 reply
-
- 2
-
-
Thanks! Nah, just plastic. 🙂
-
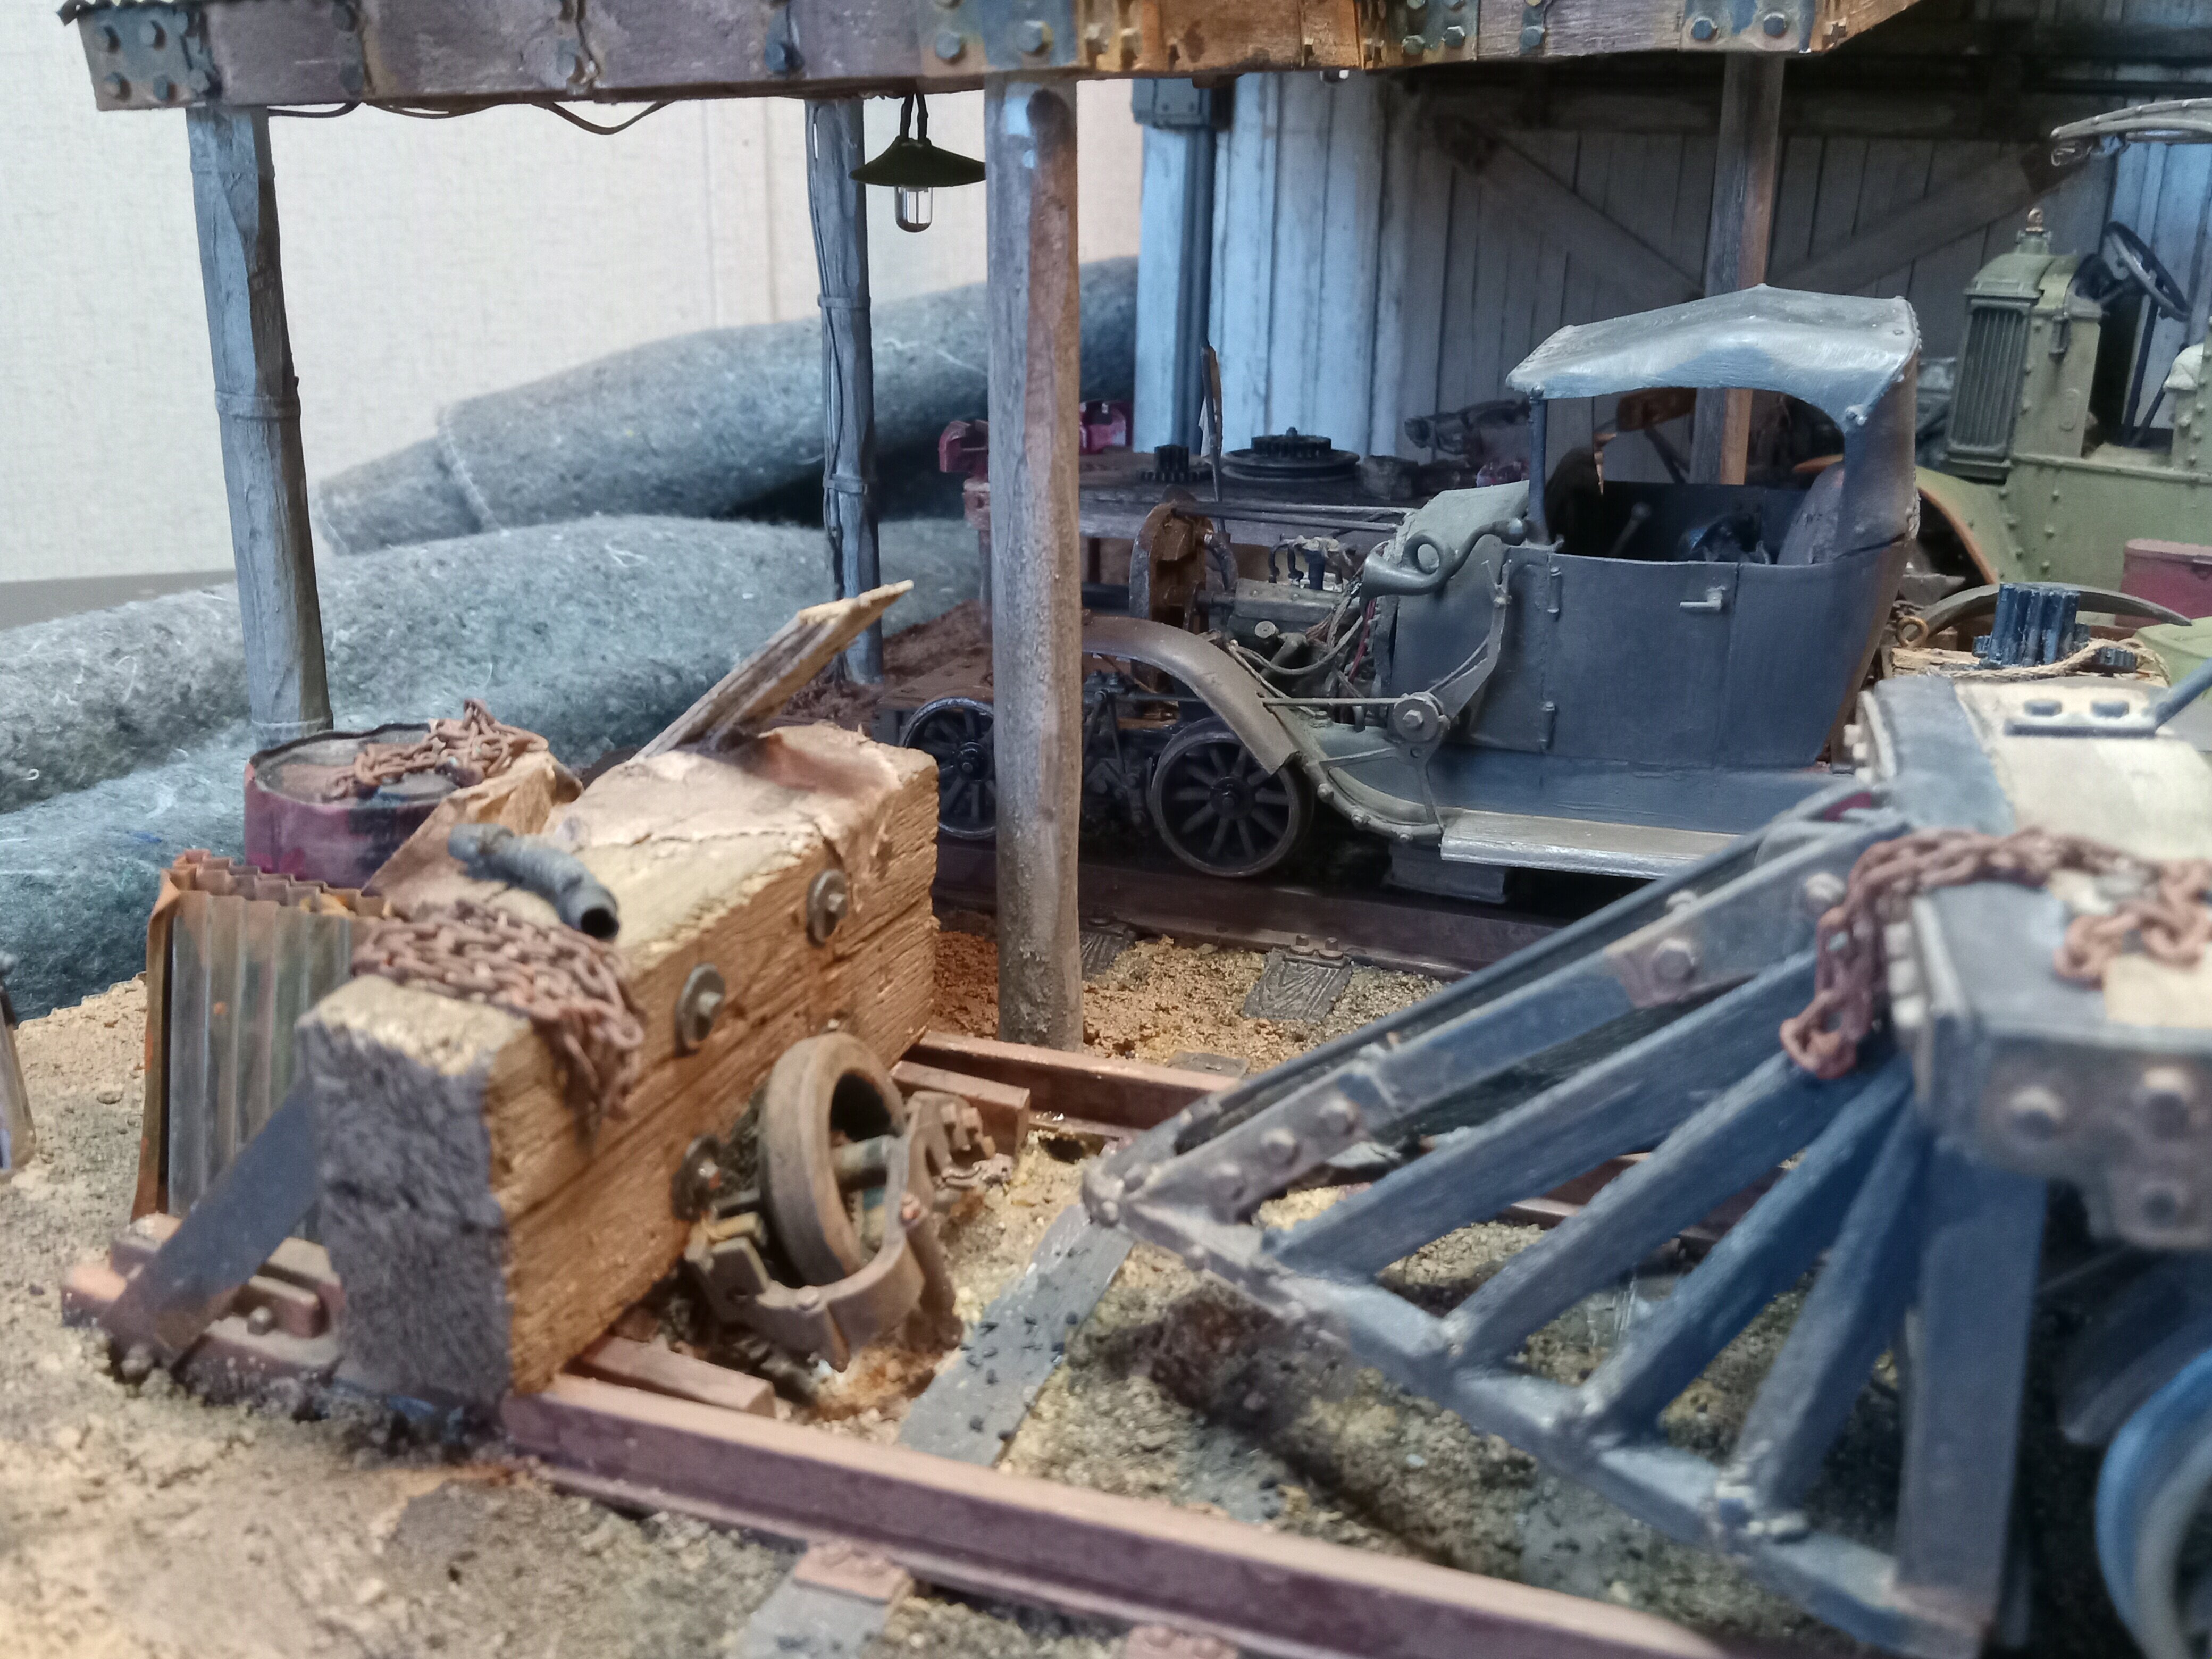
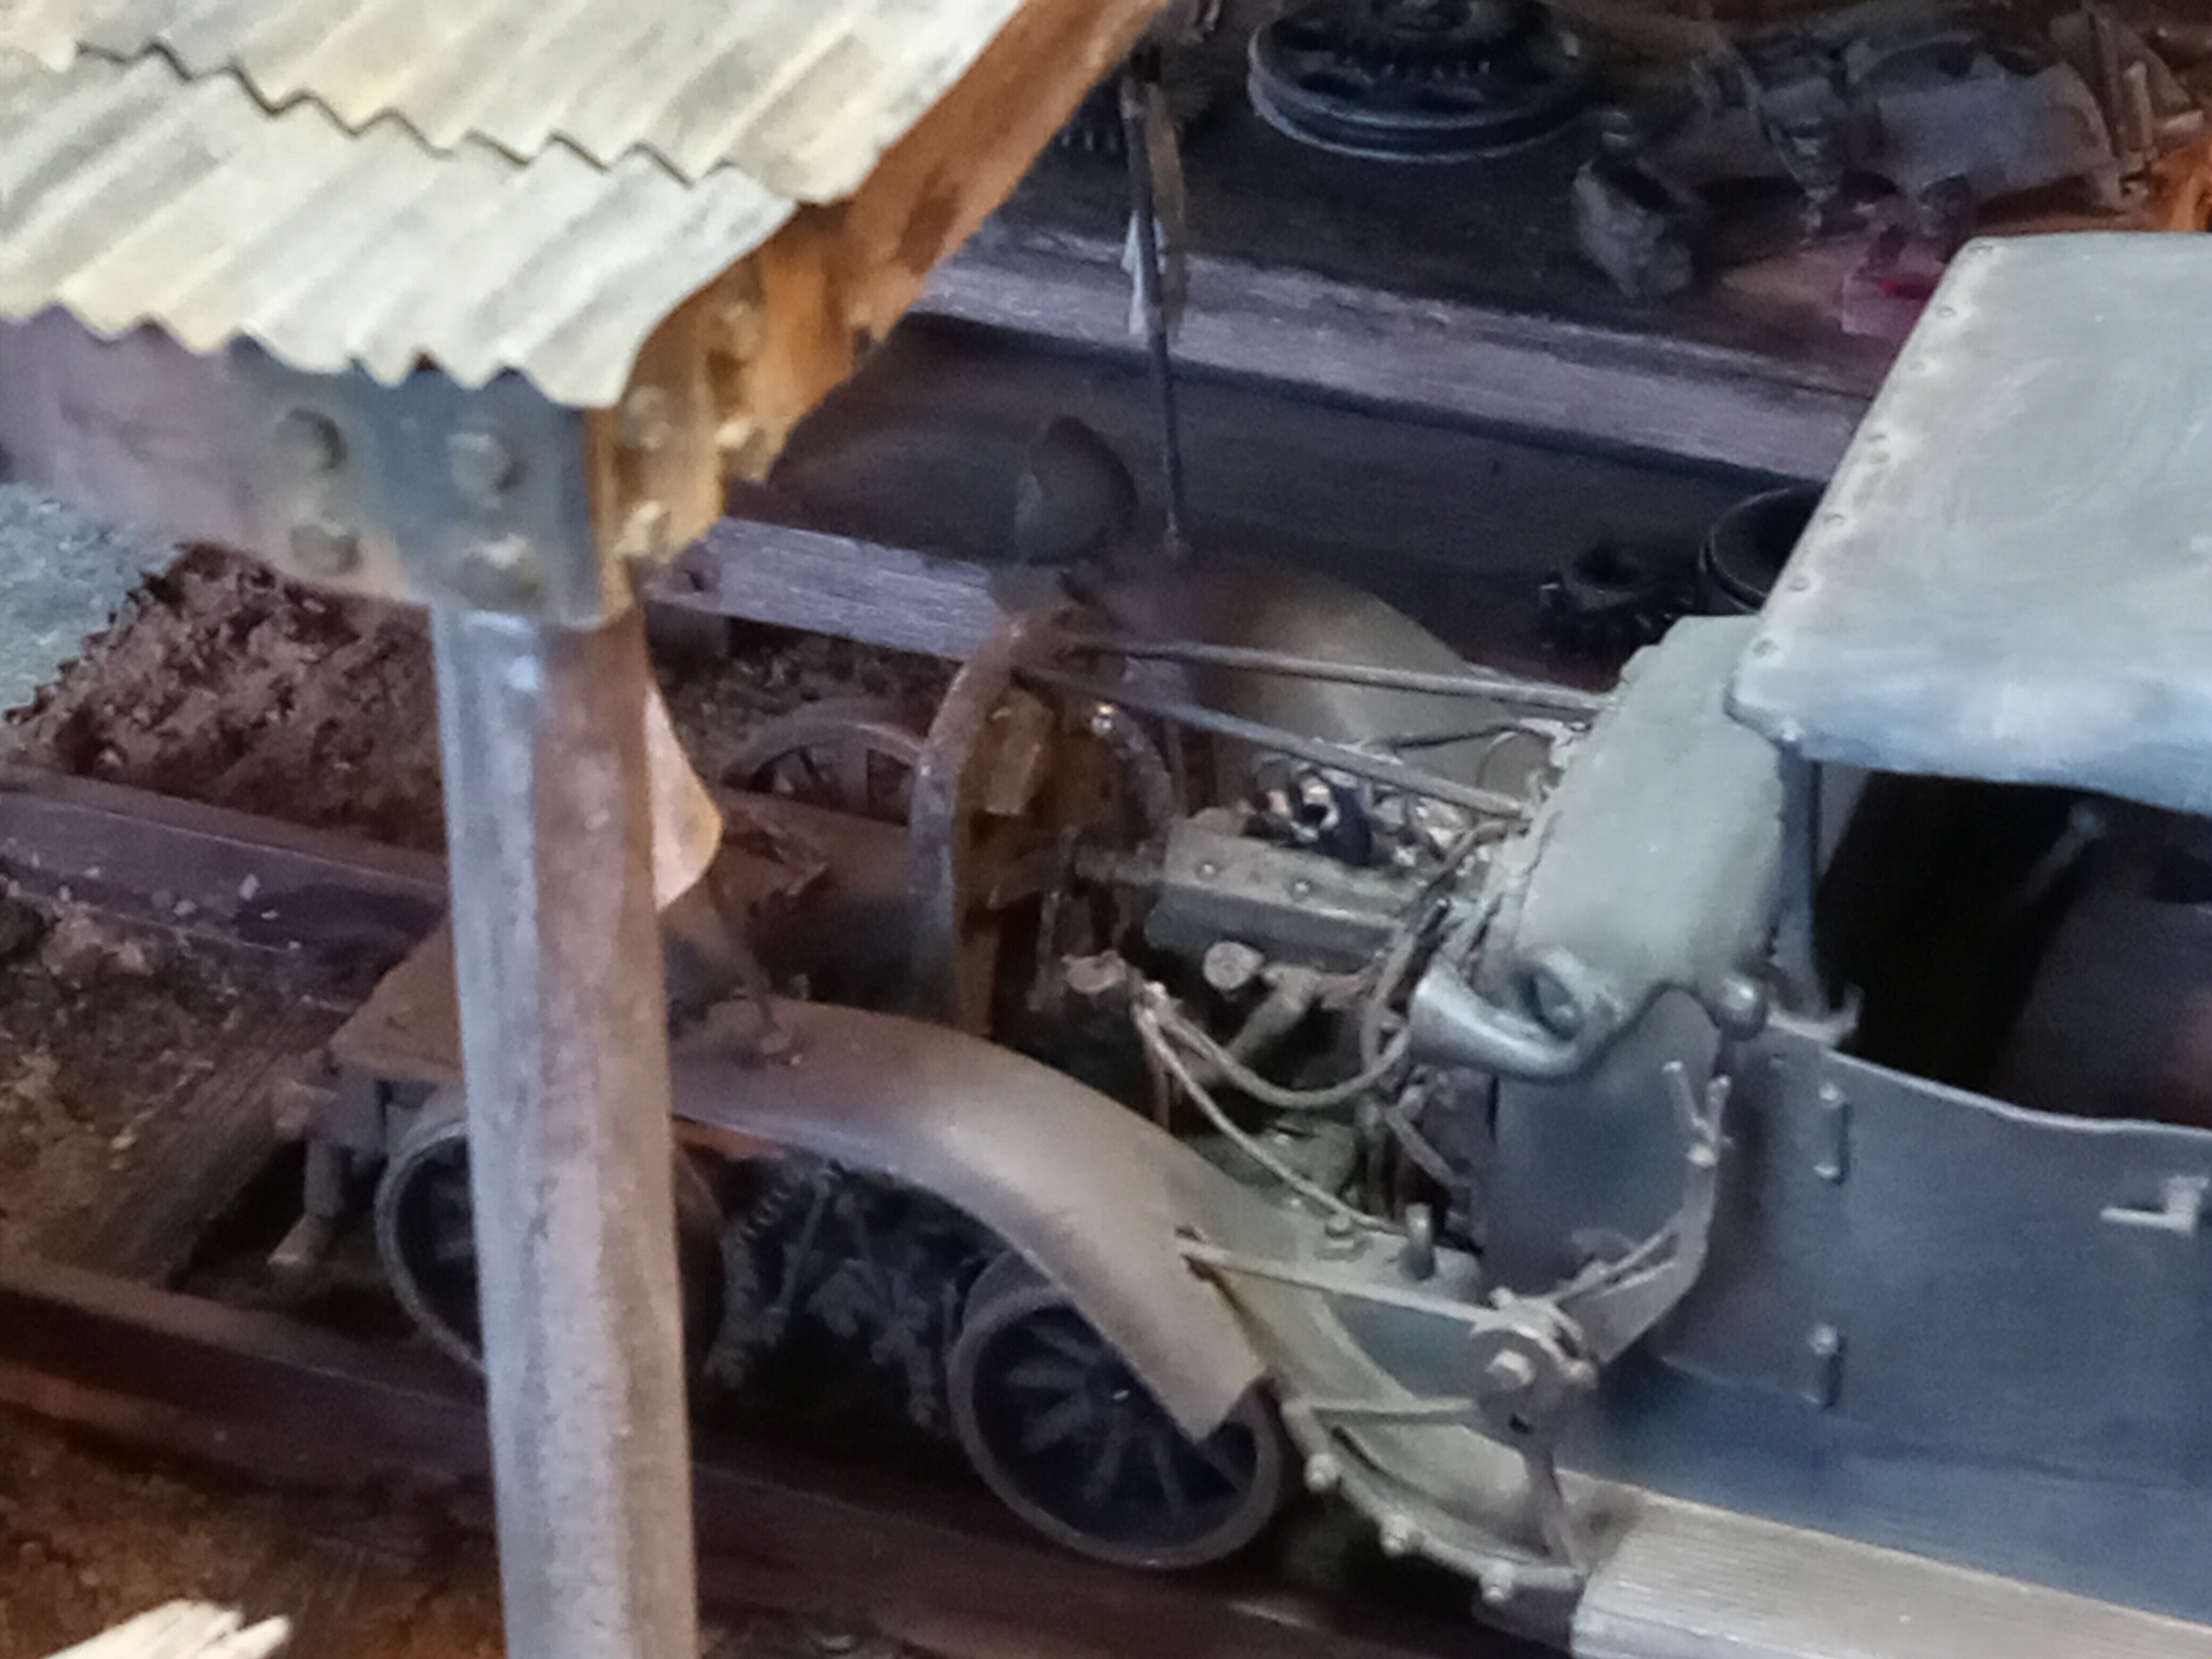
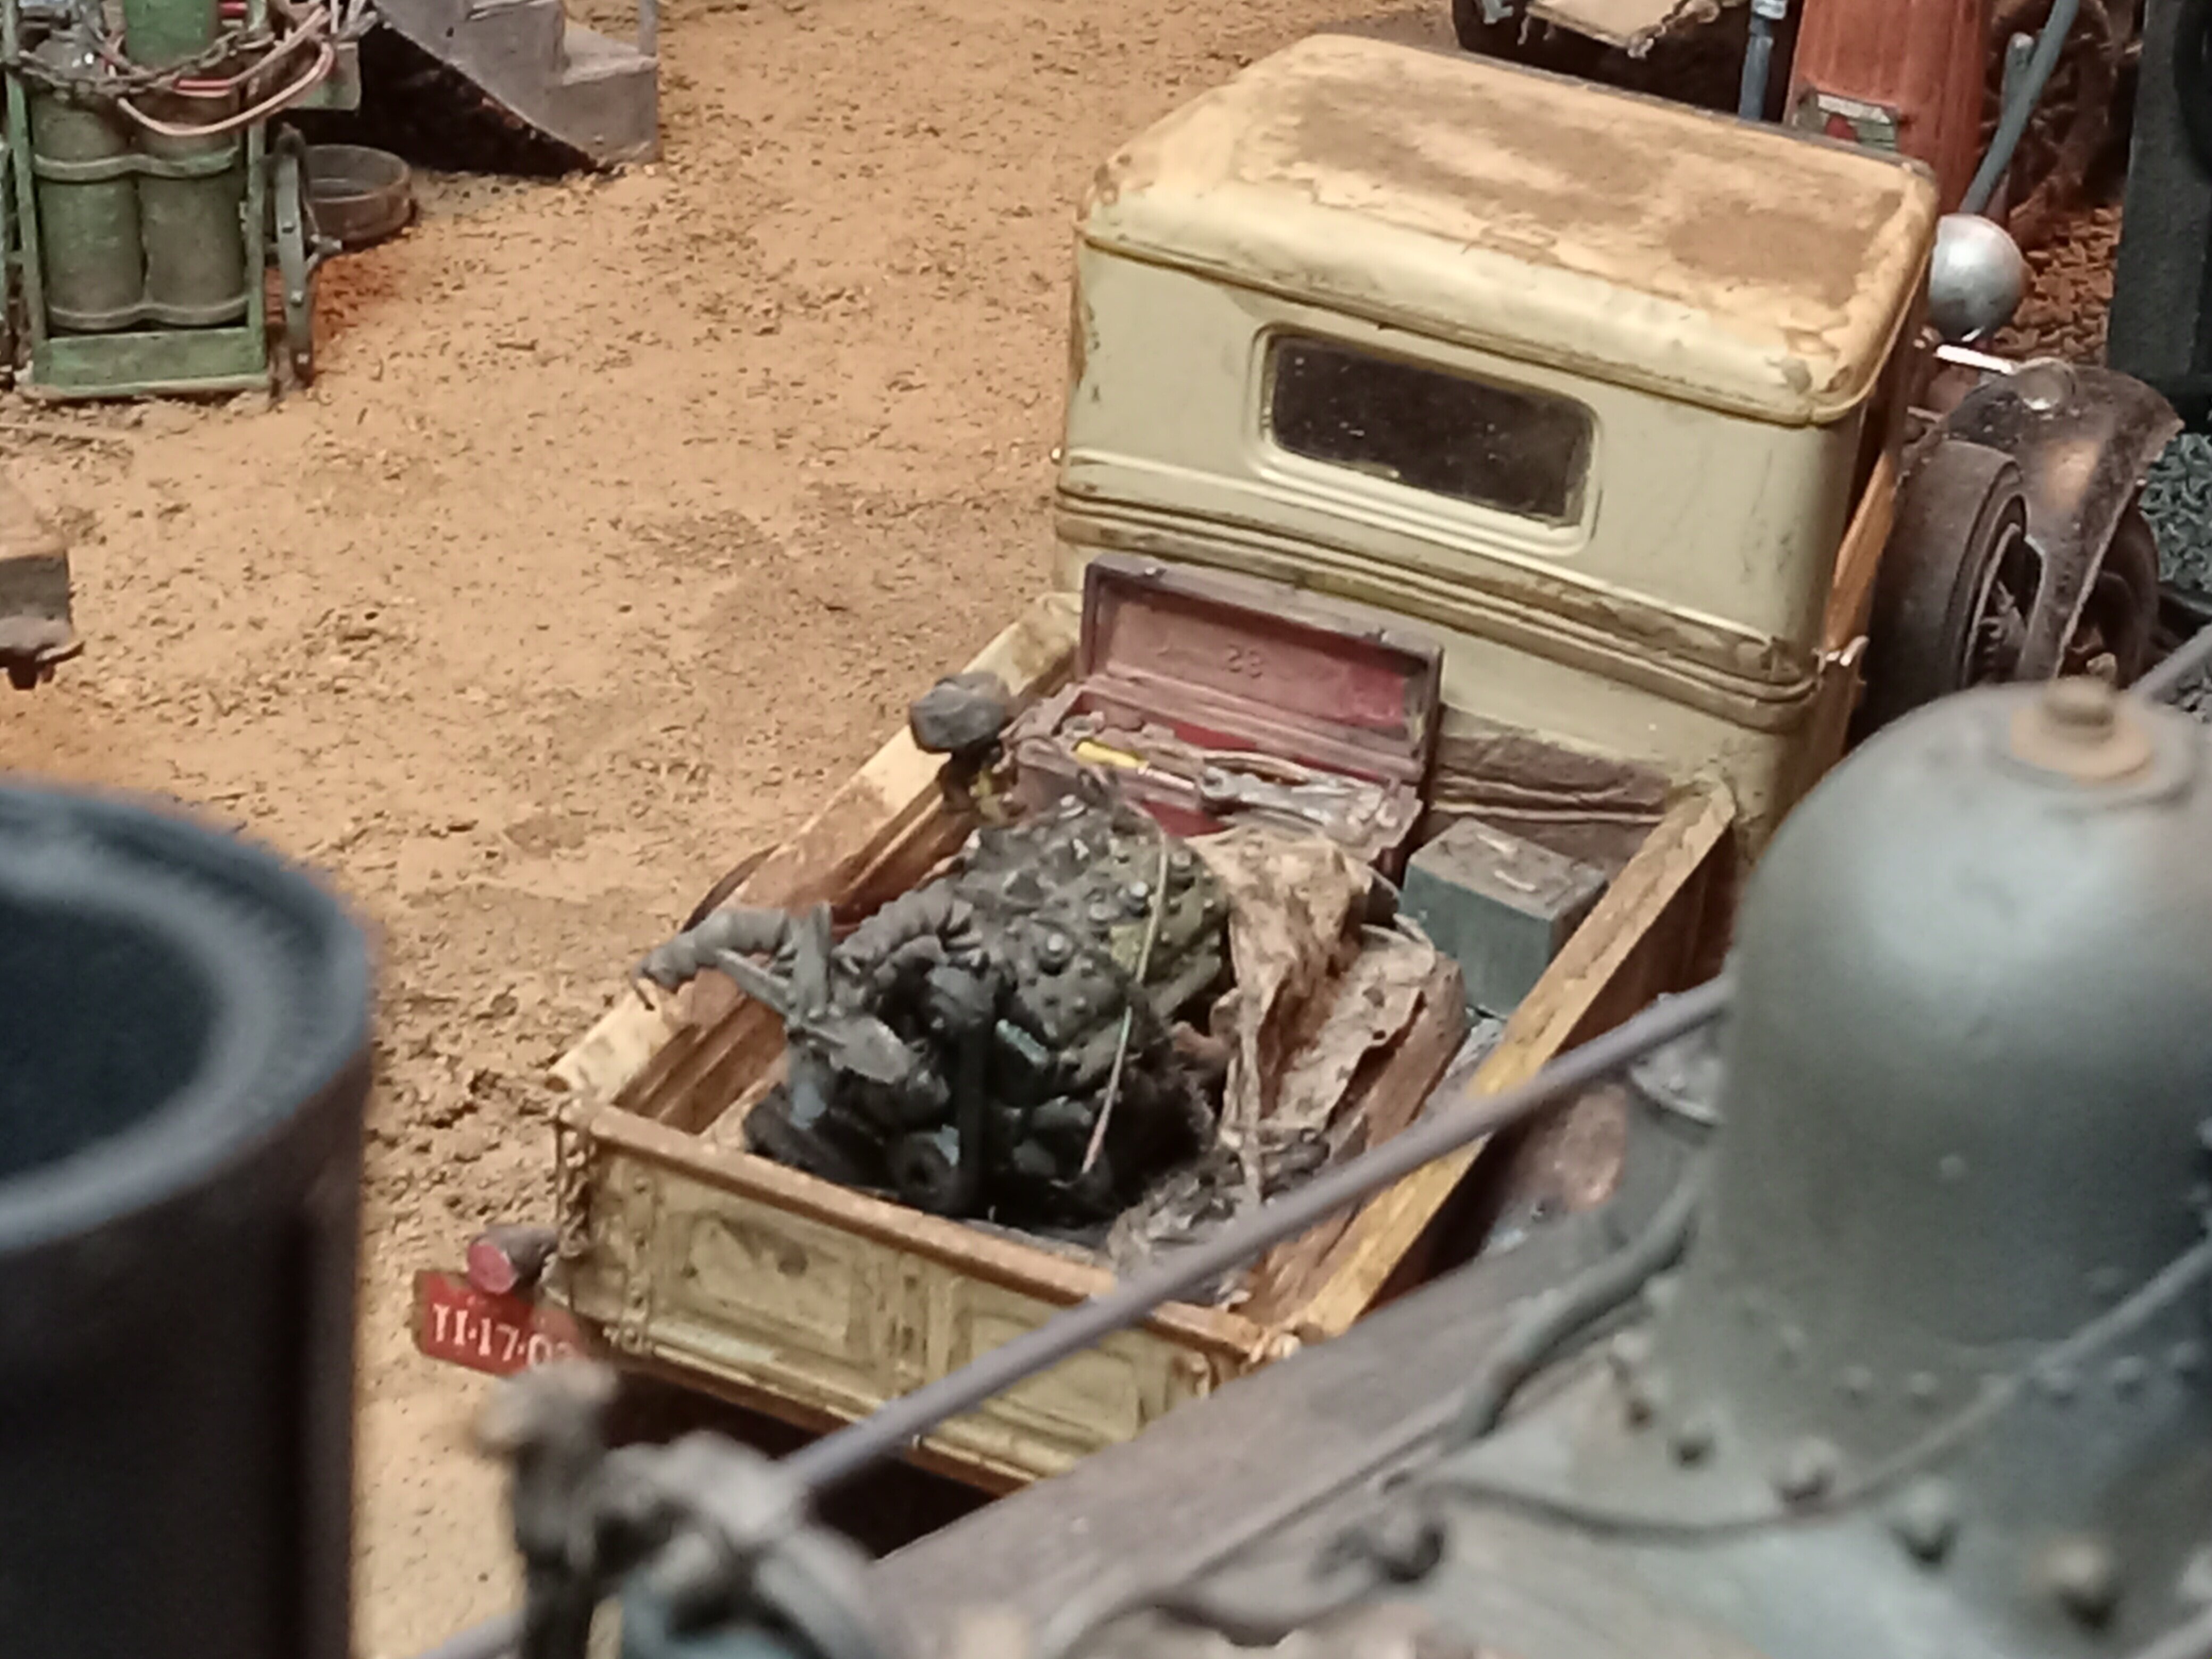
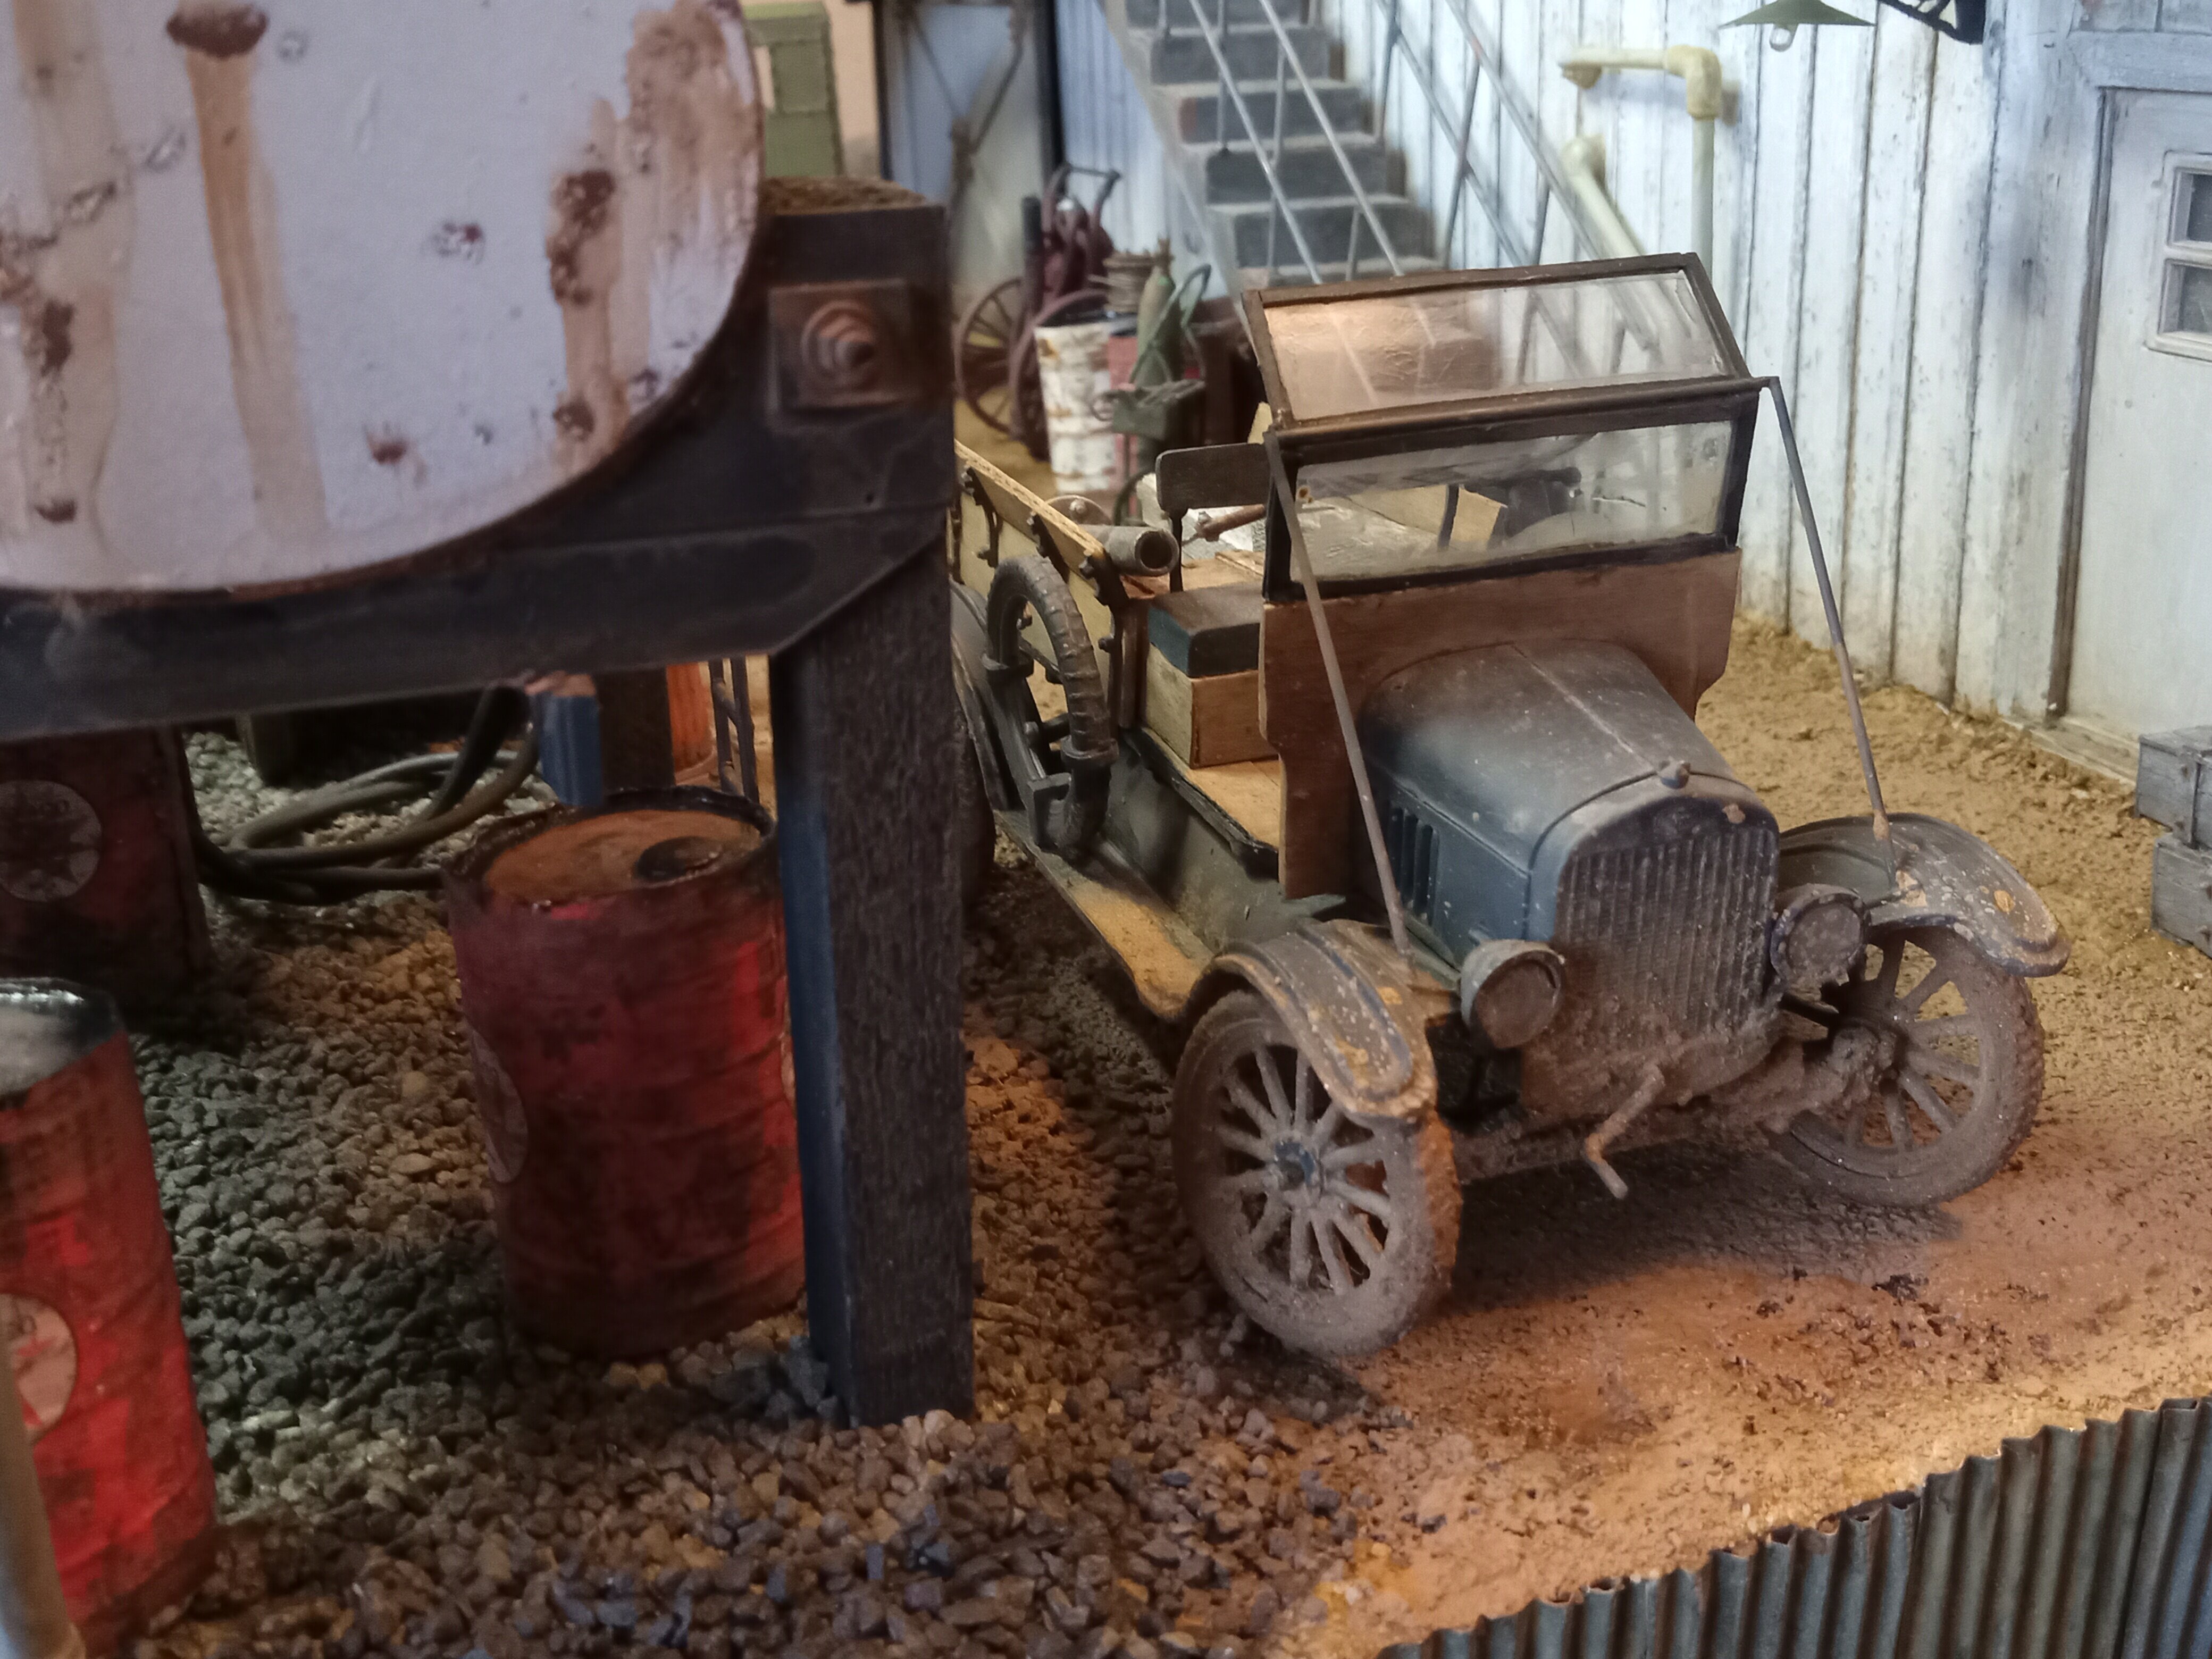
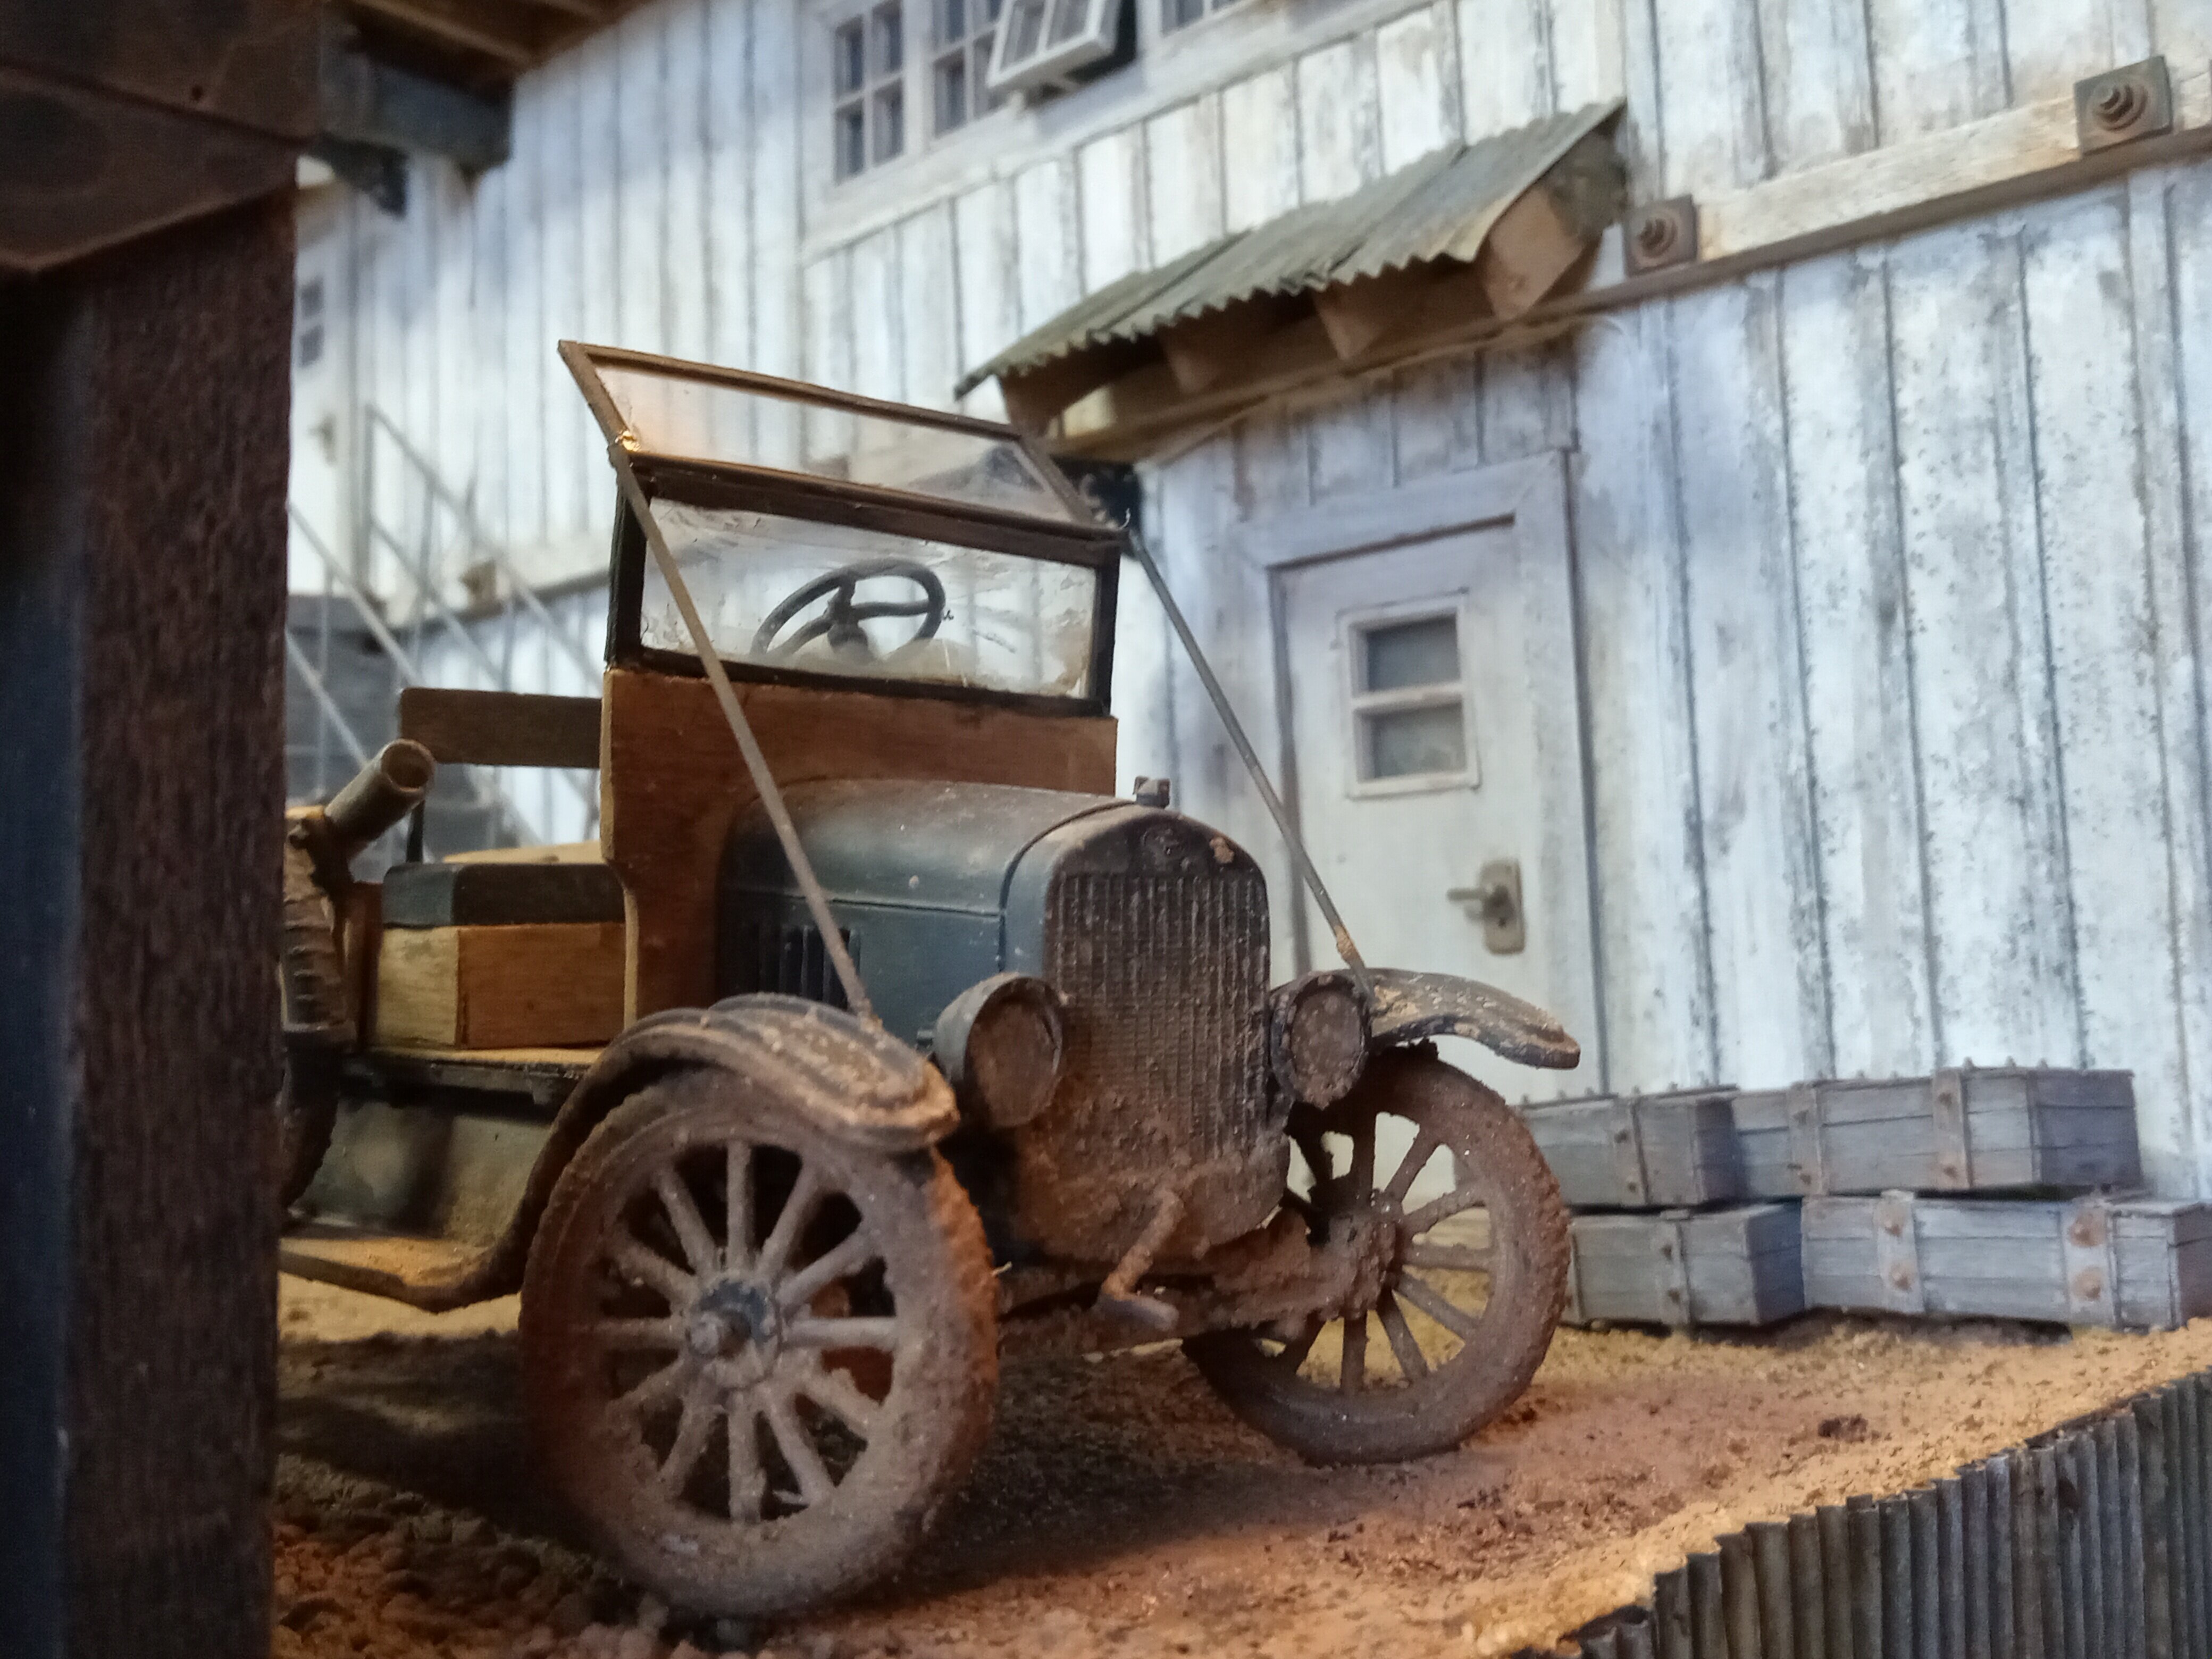
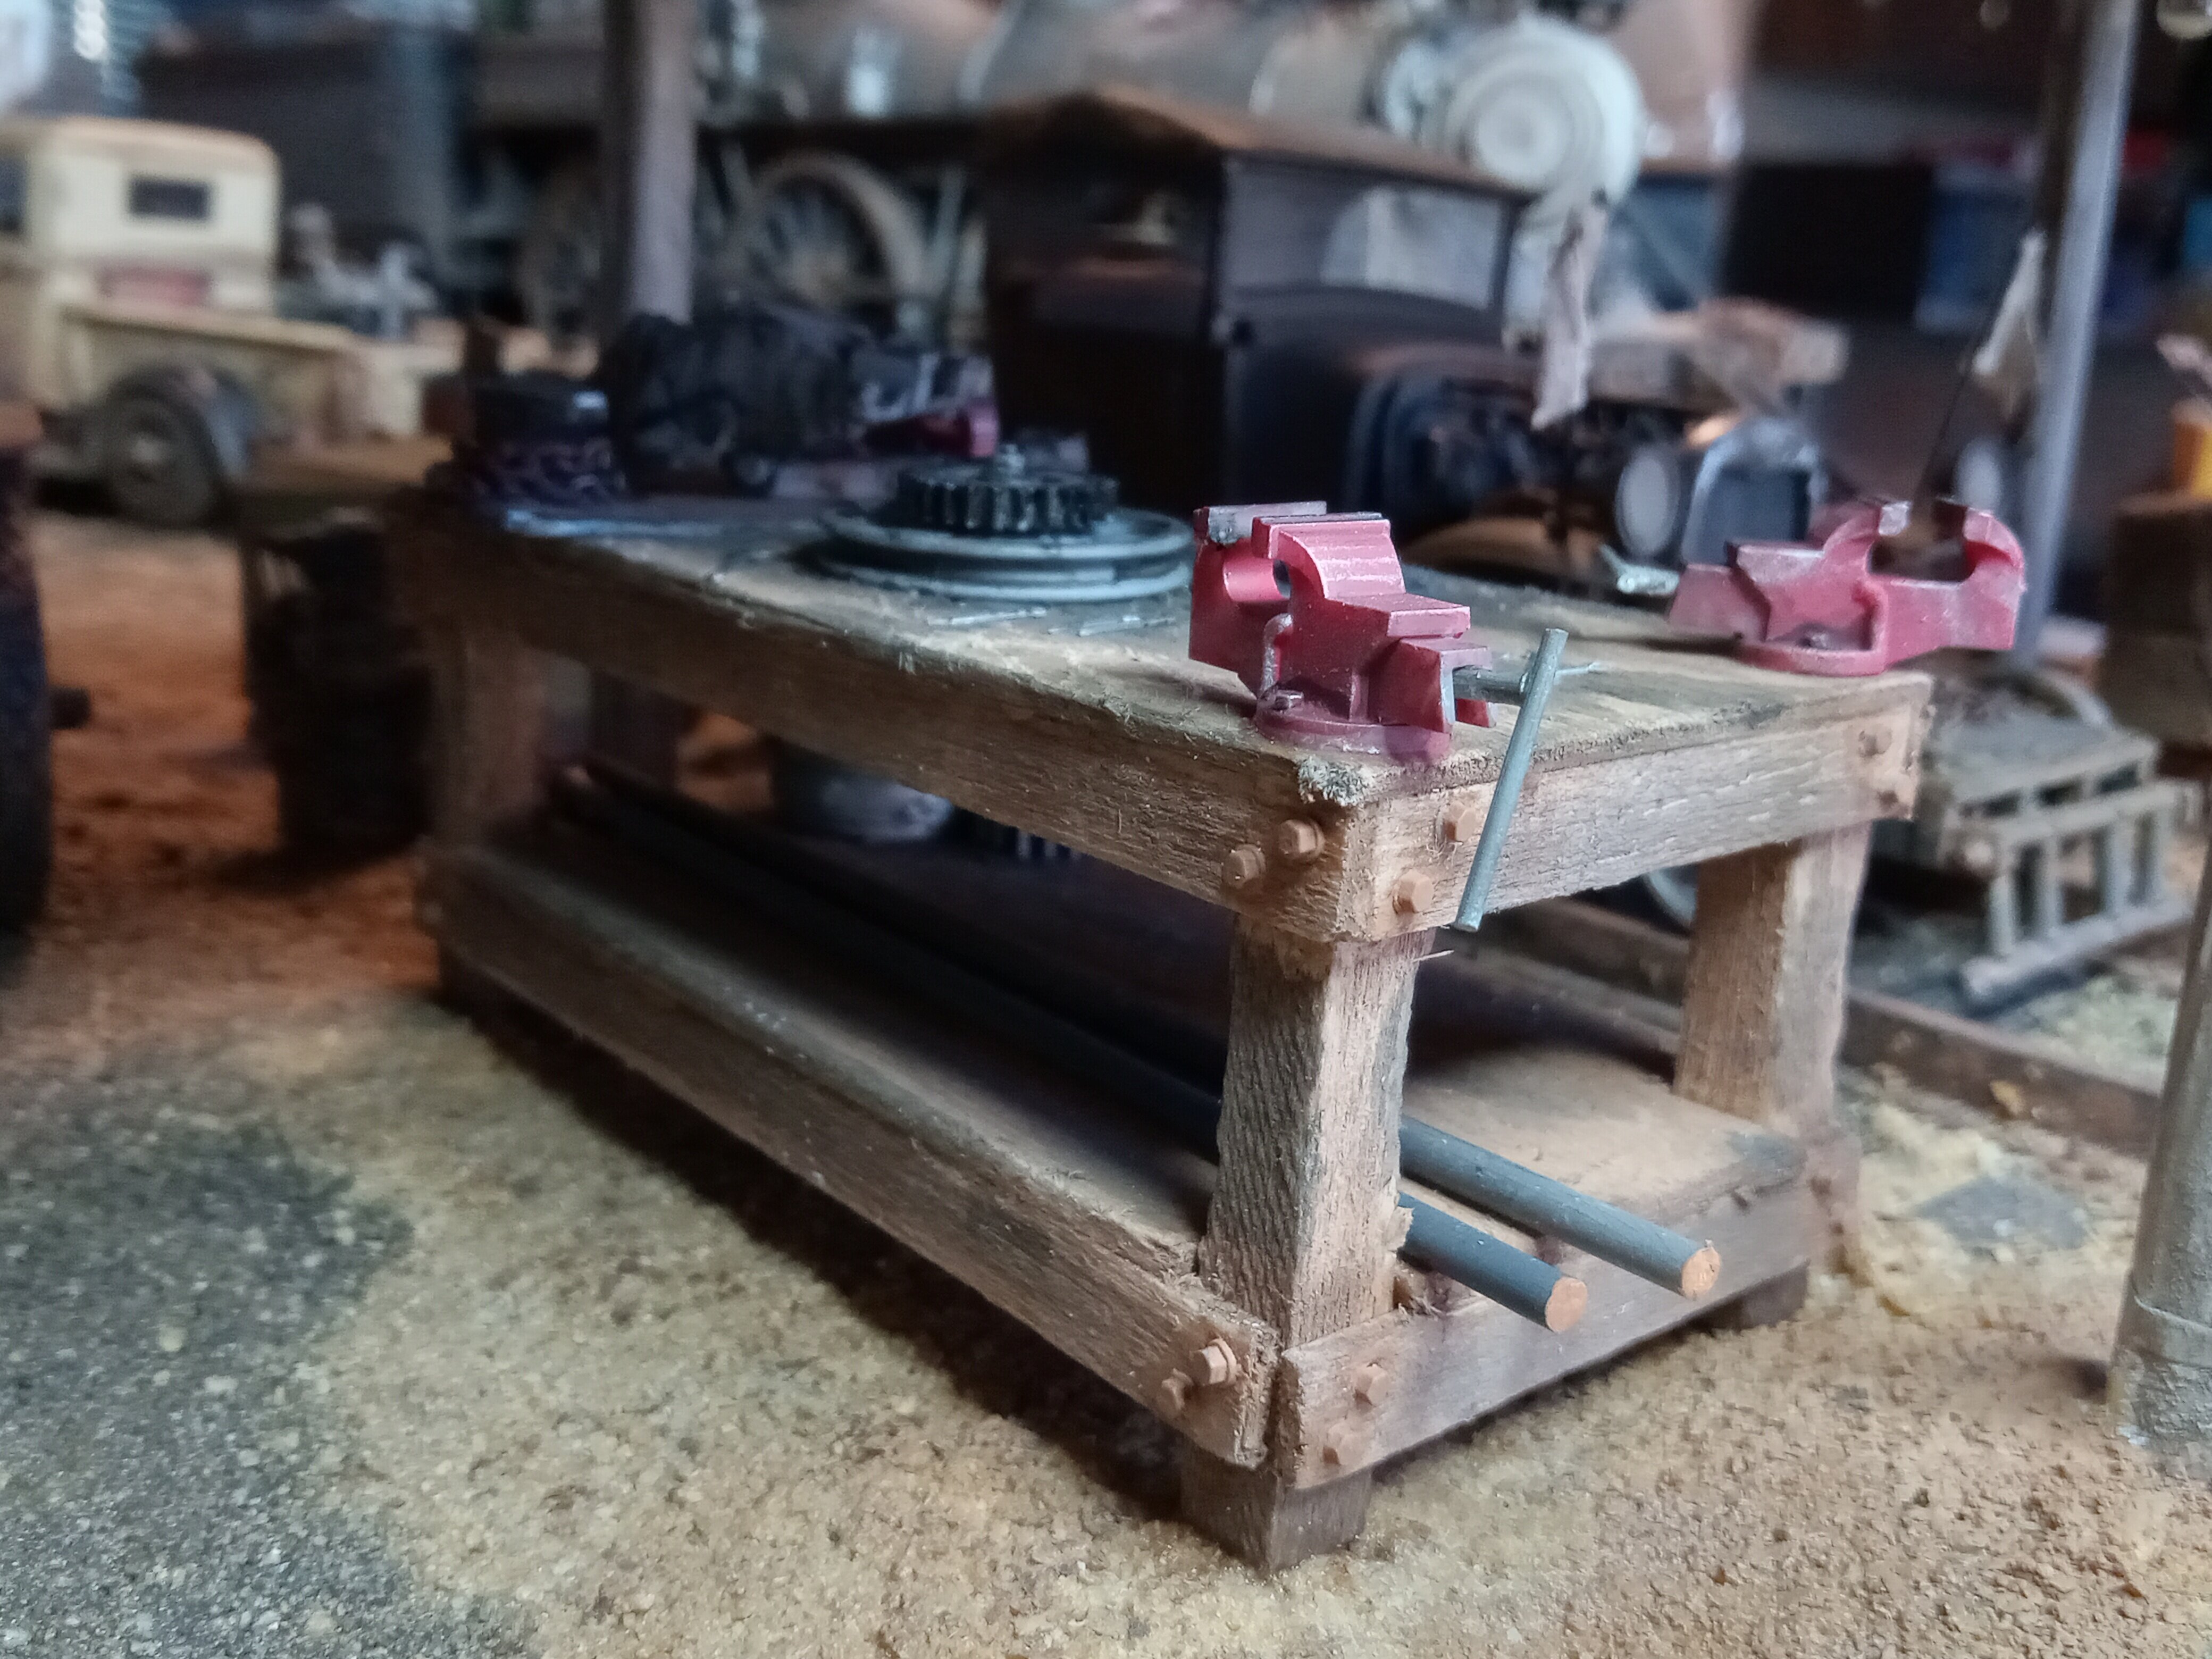
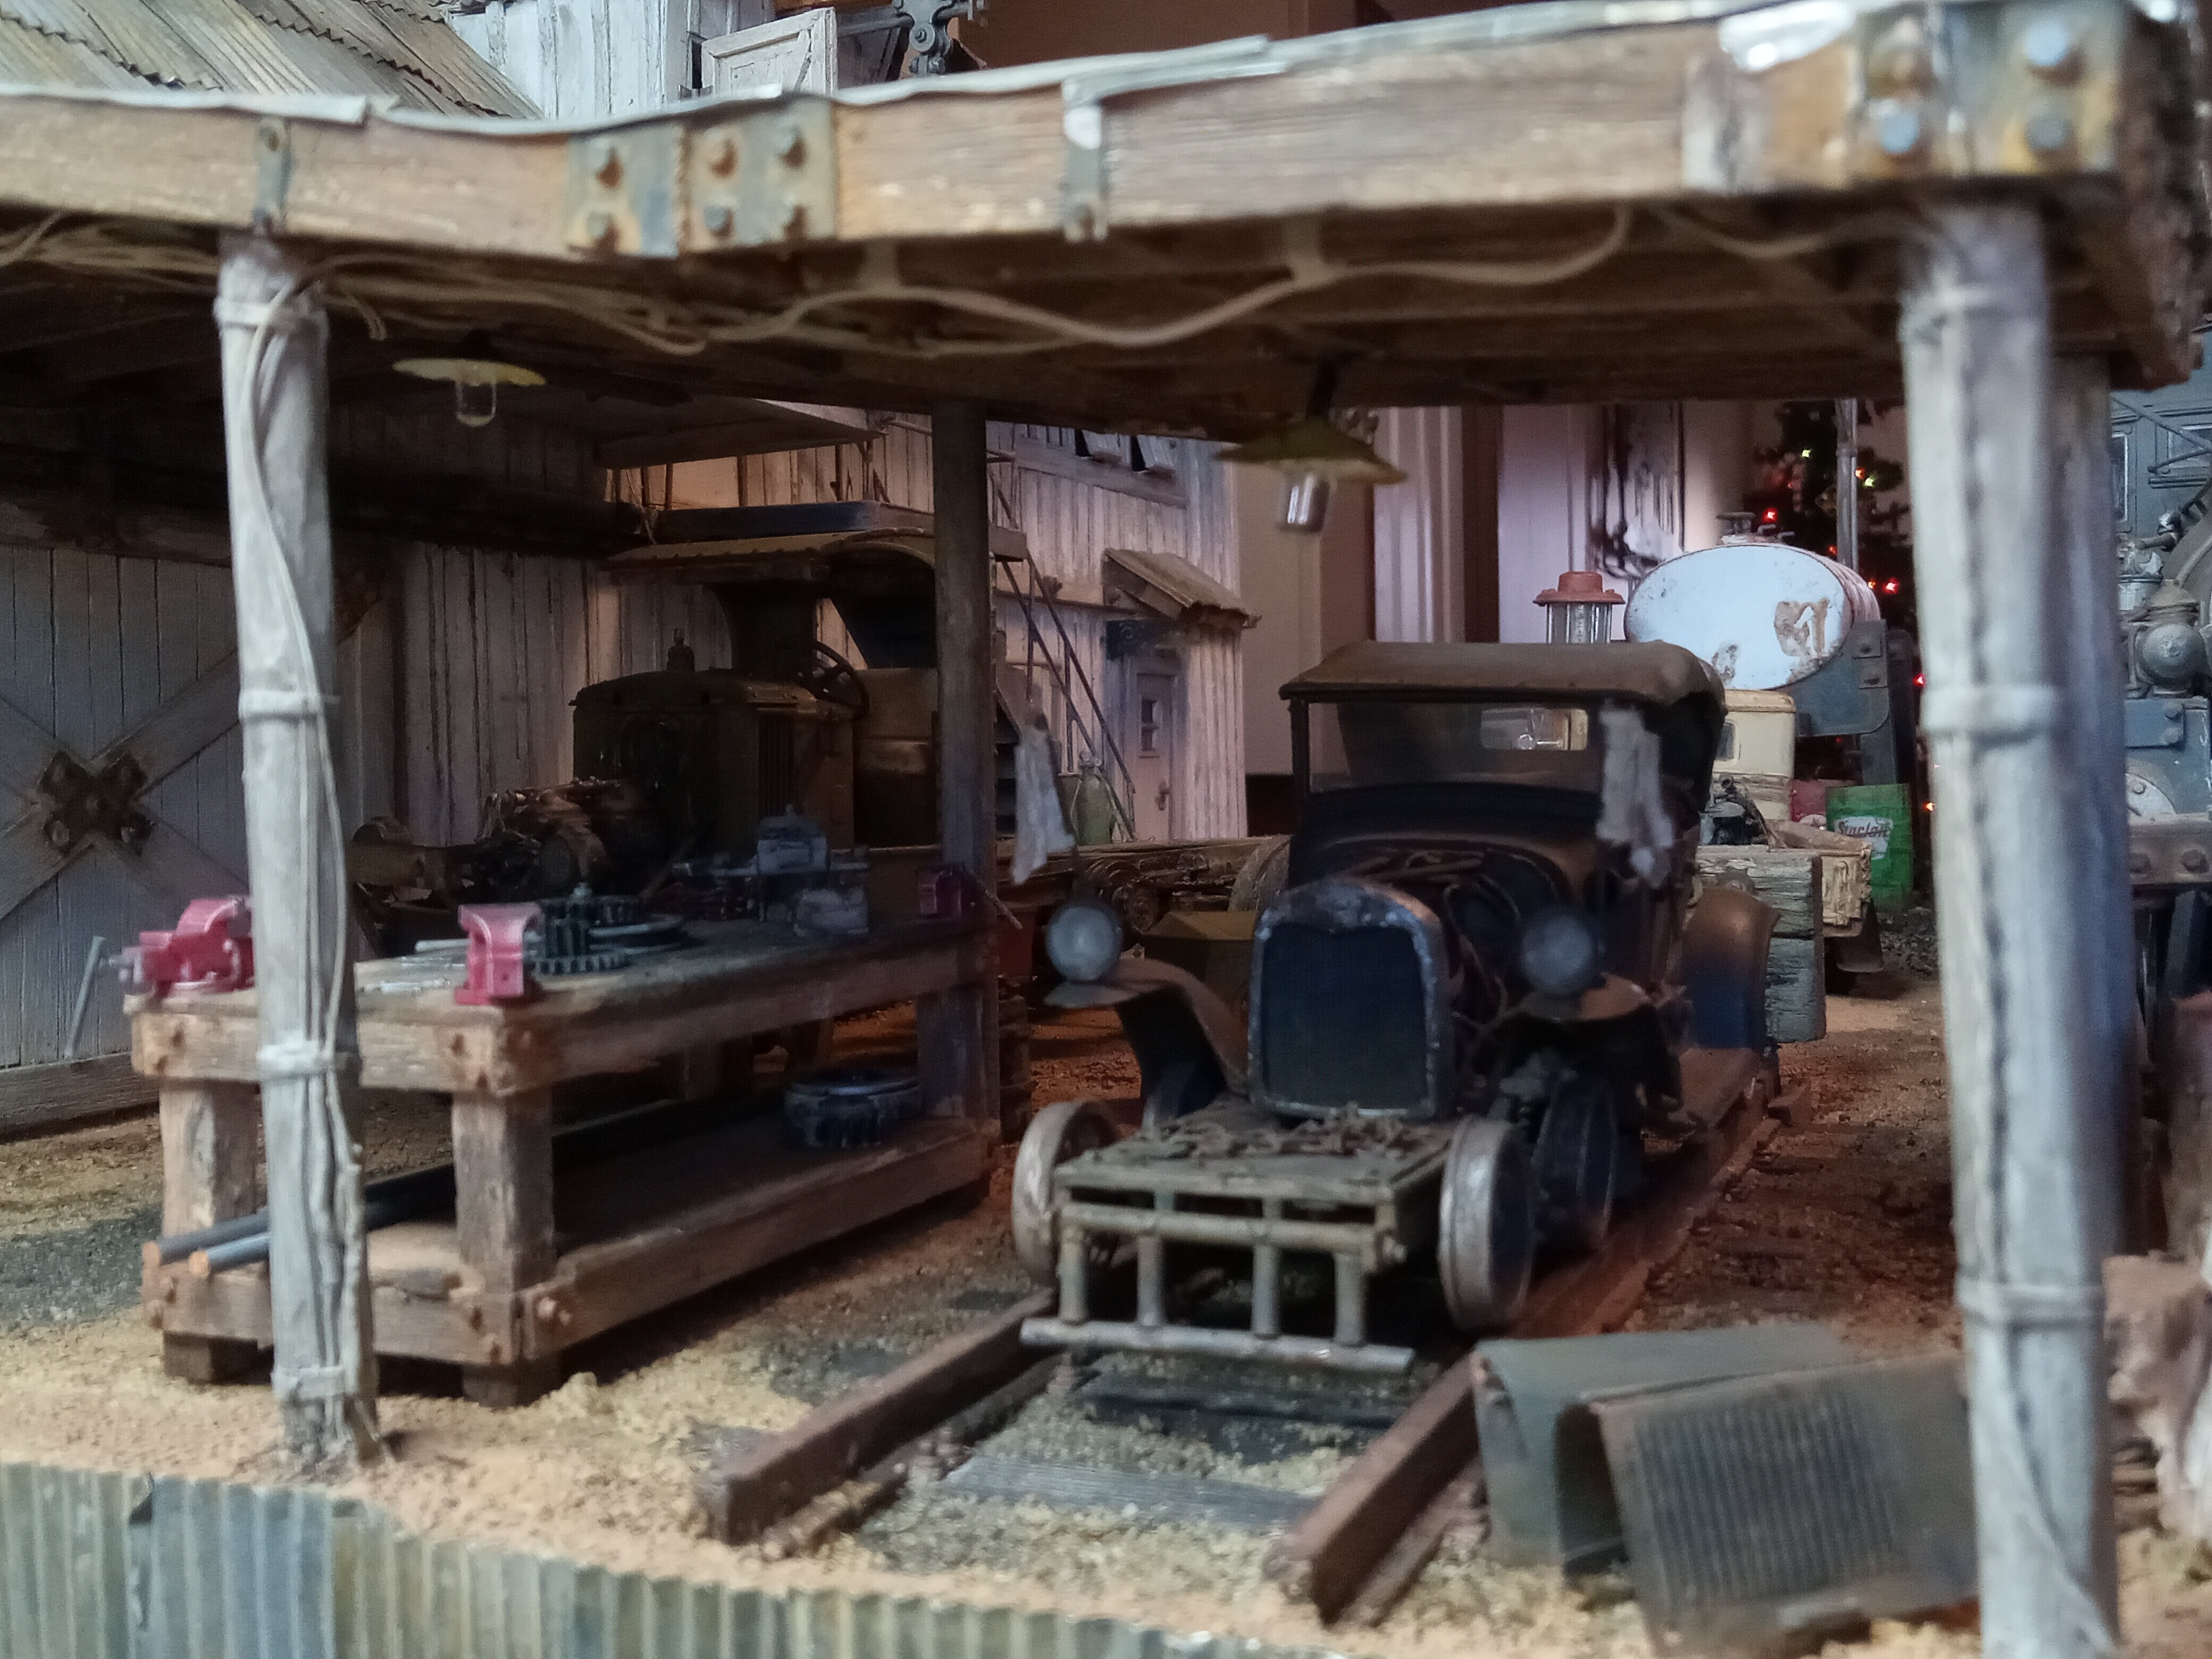
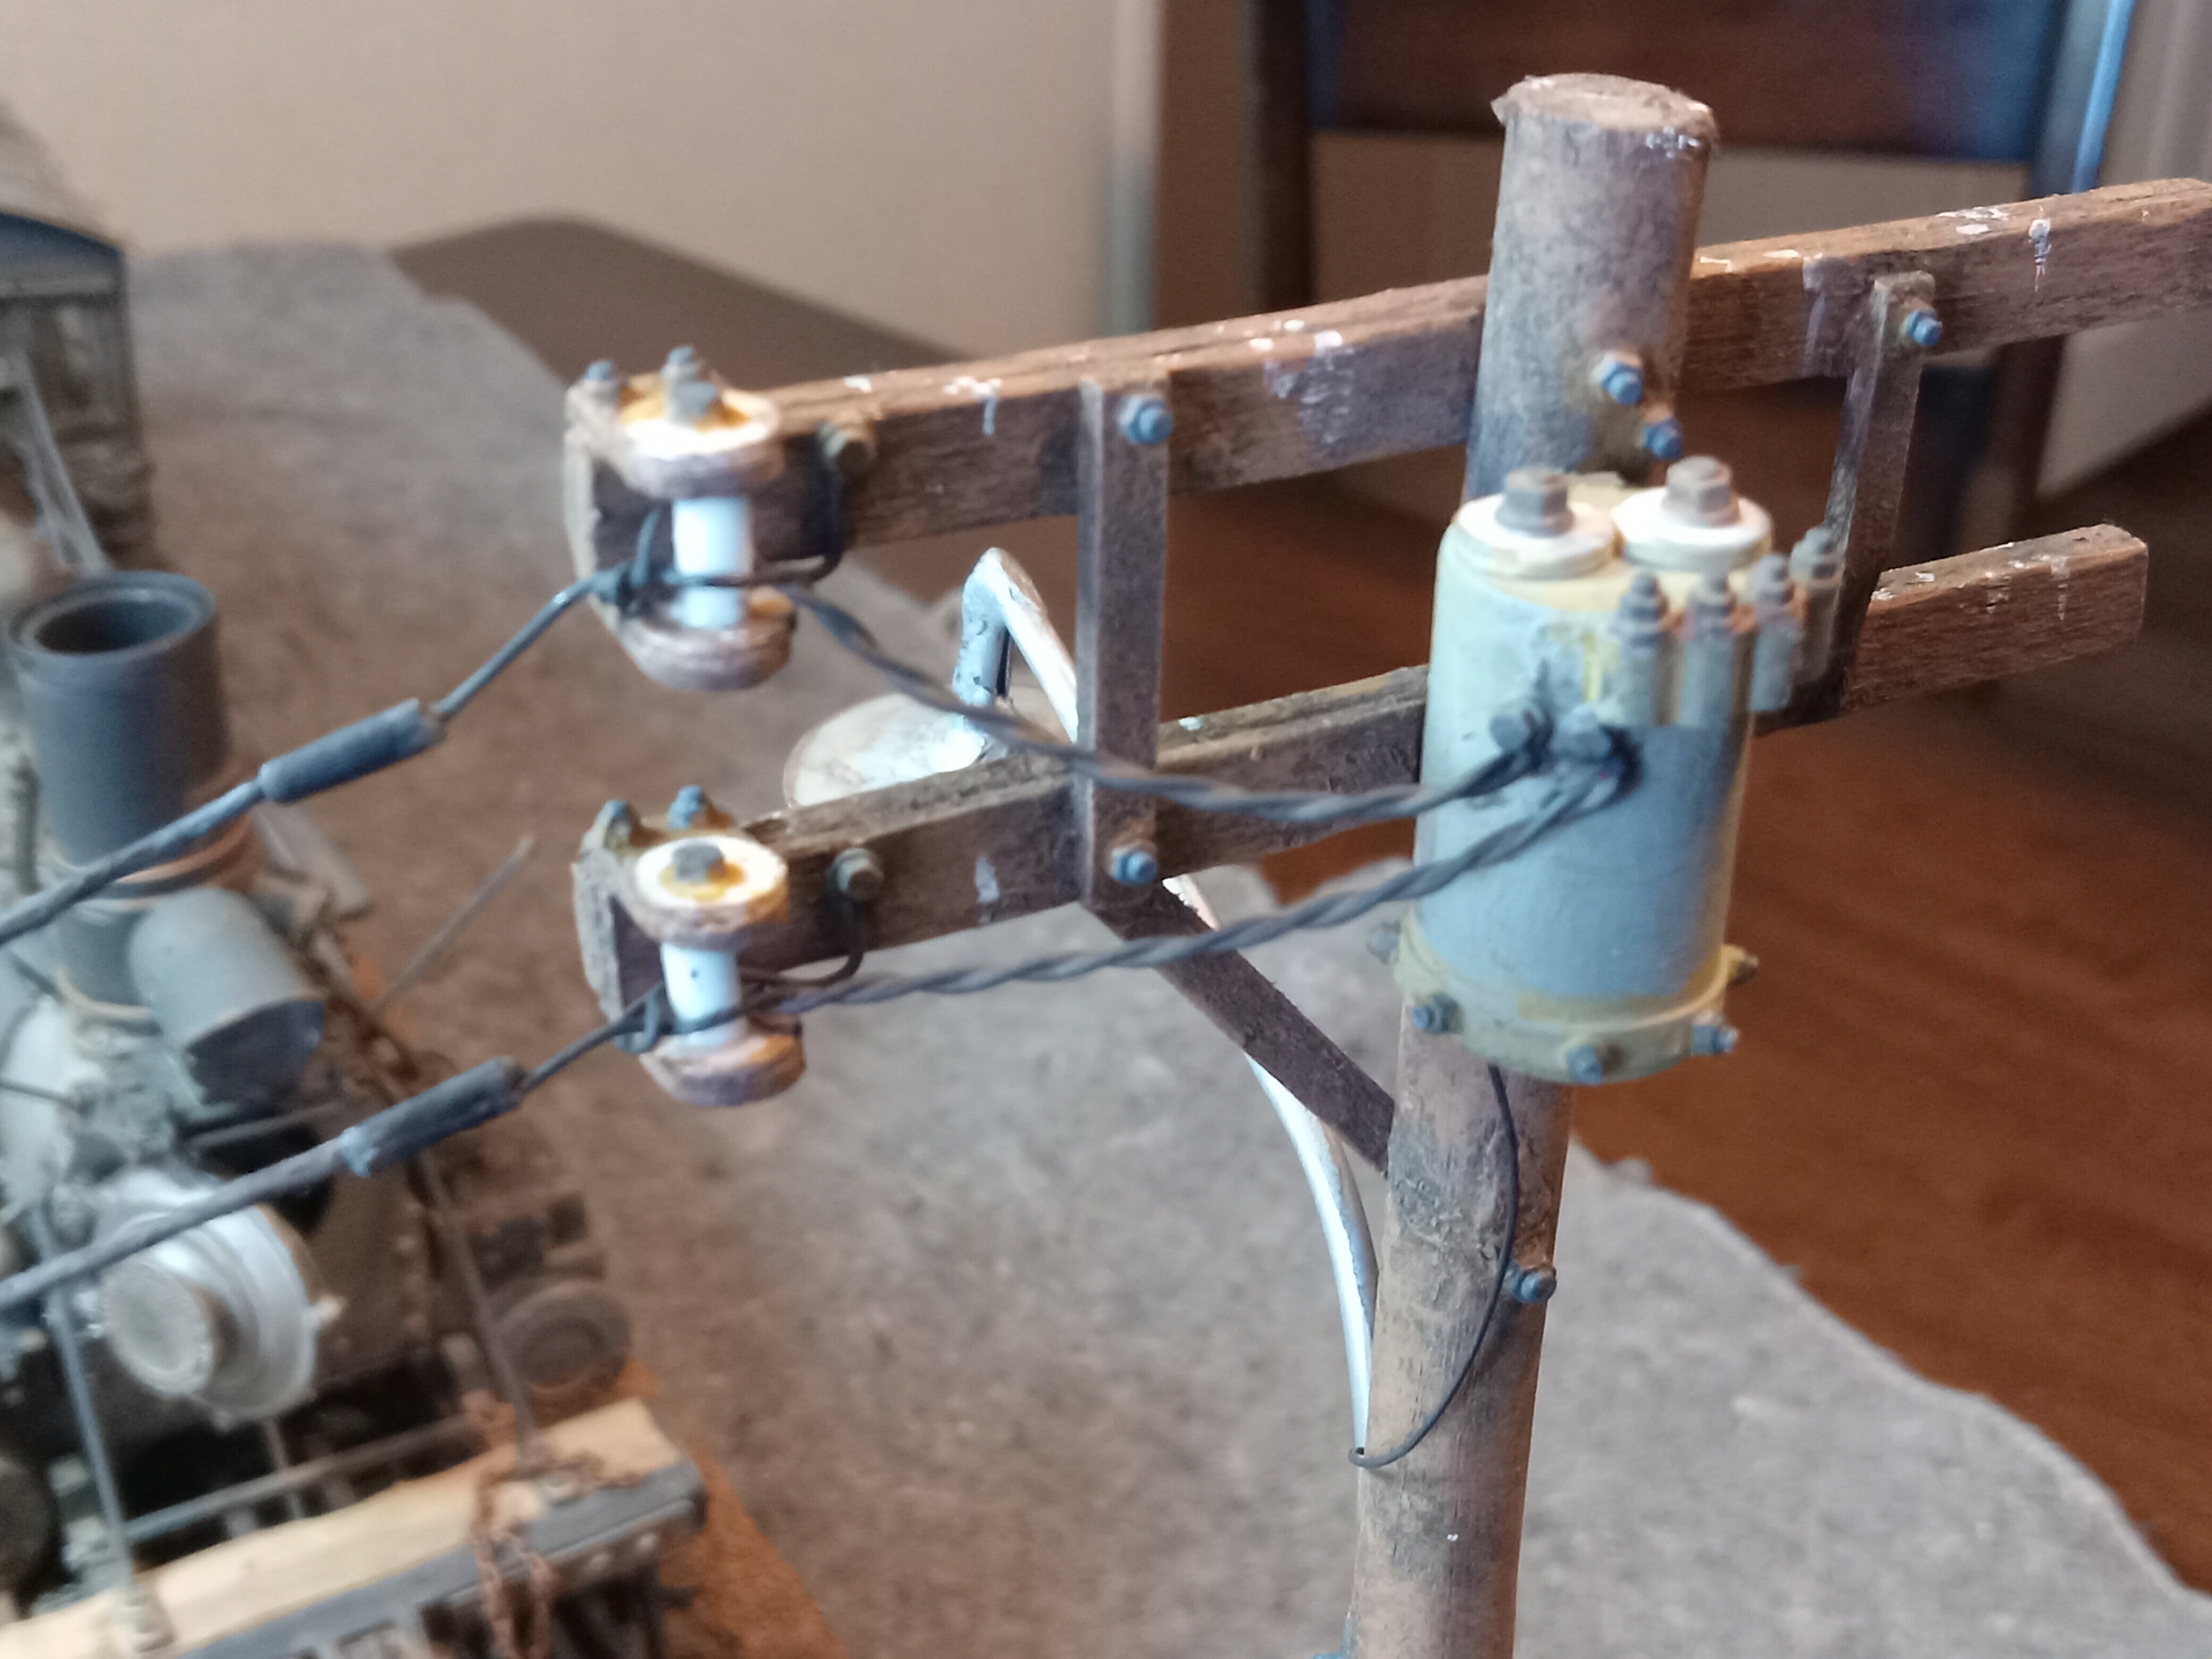
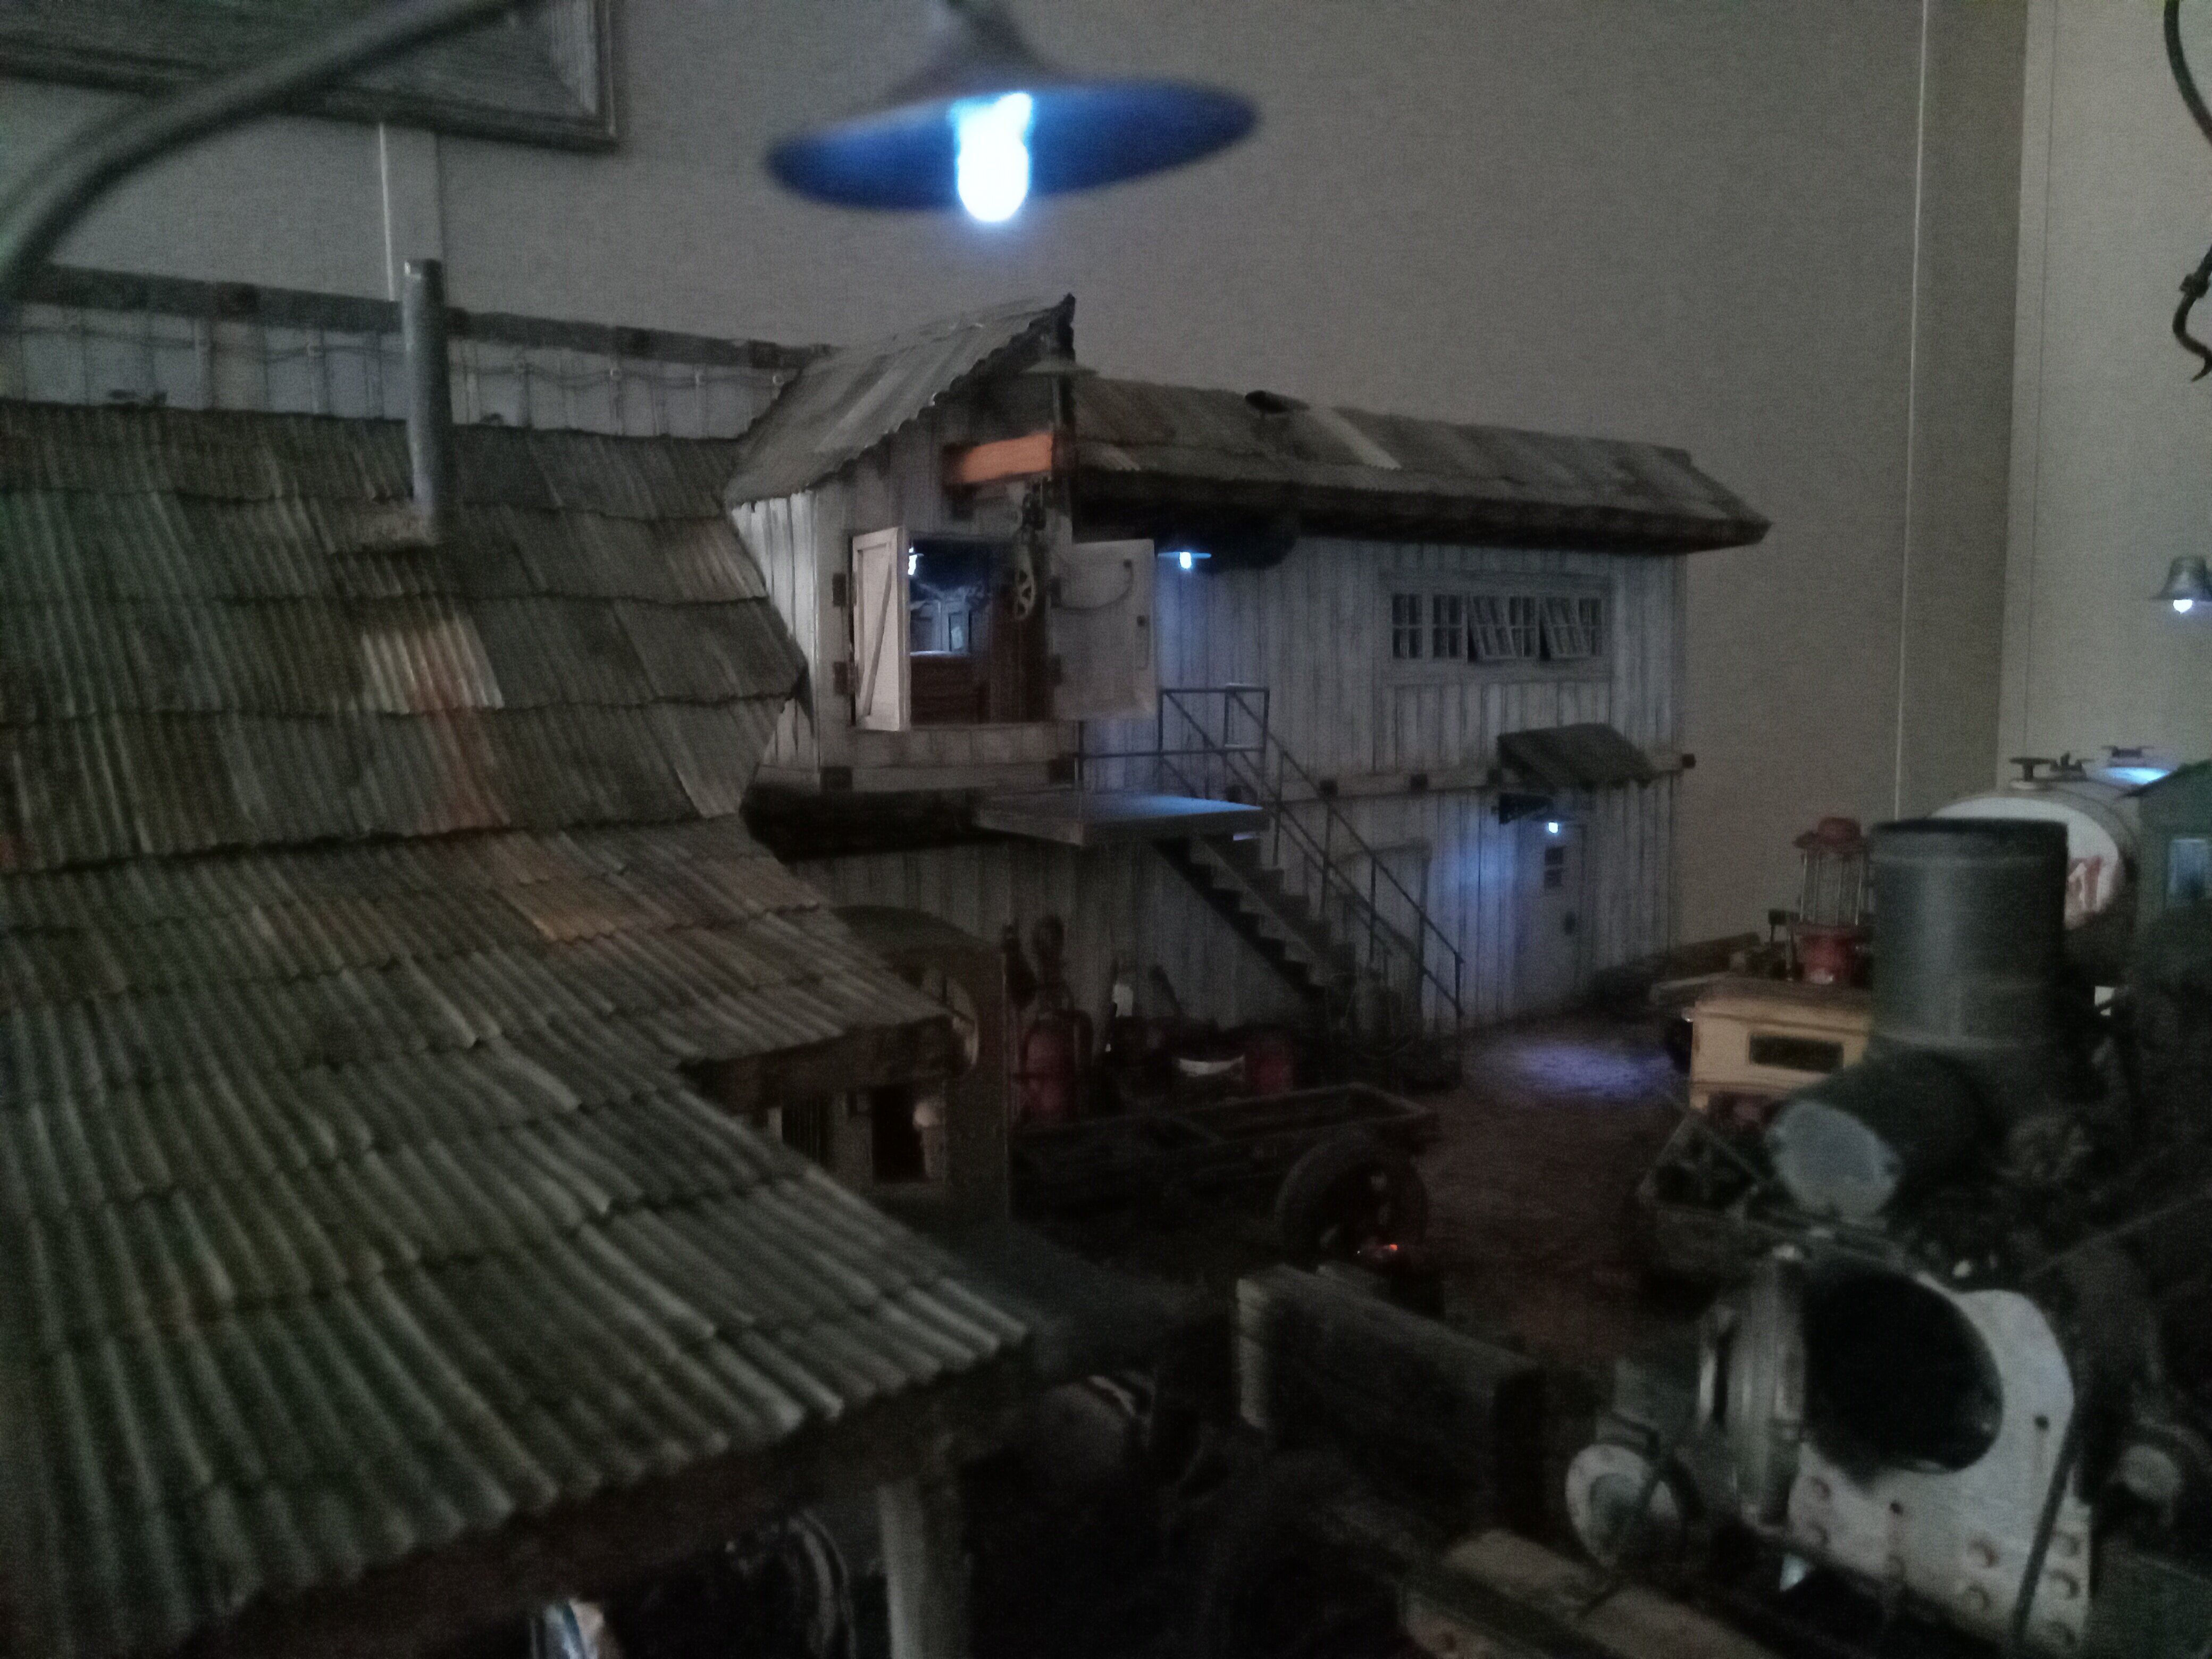
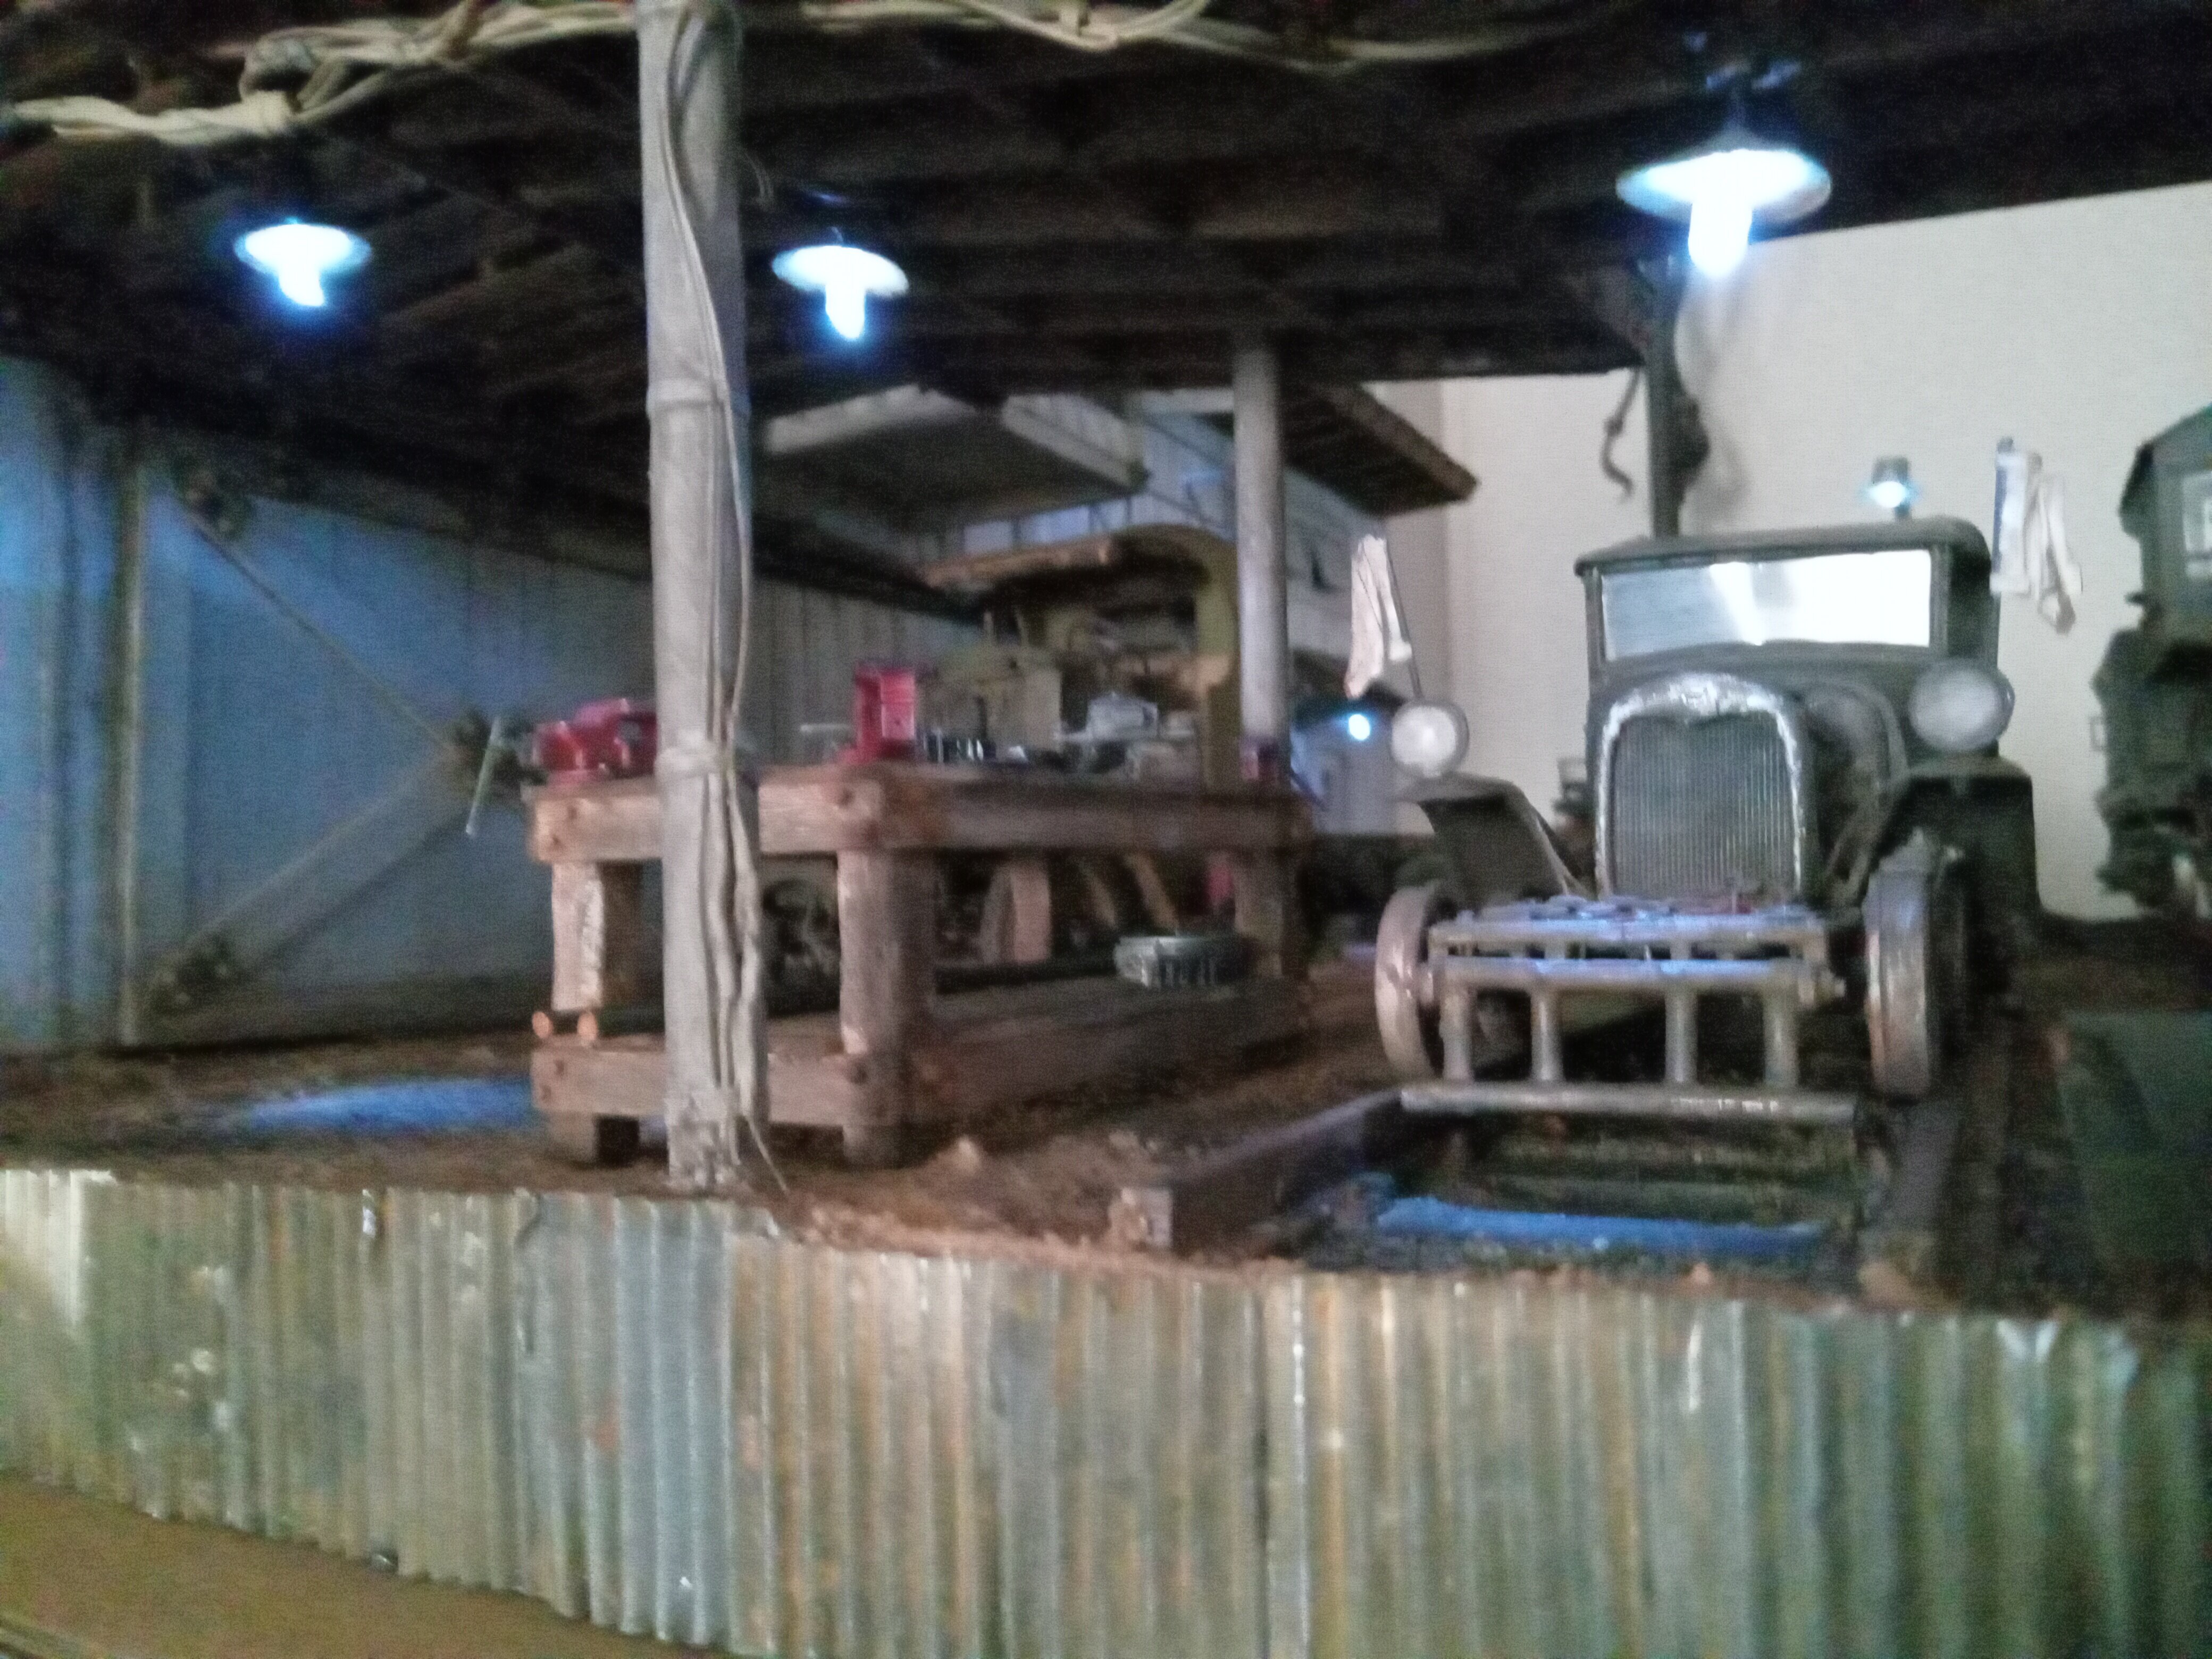
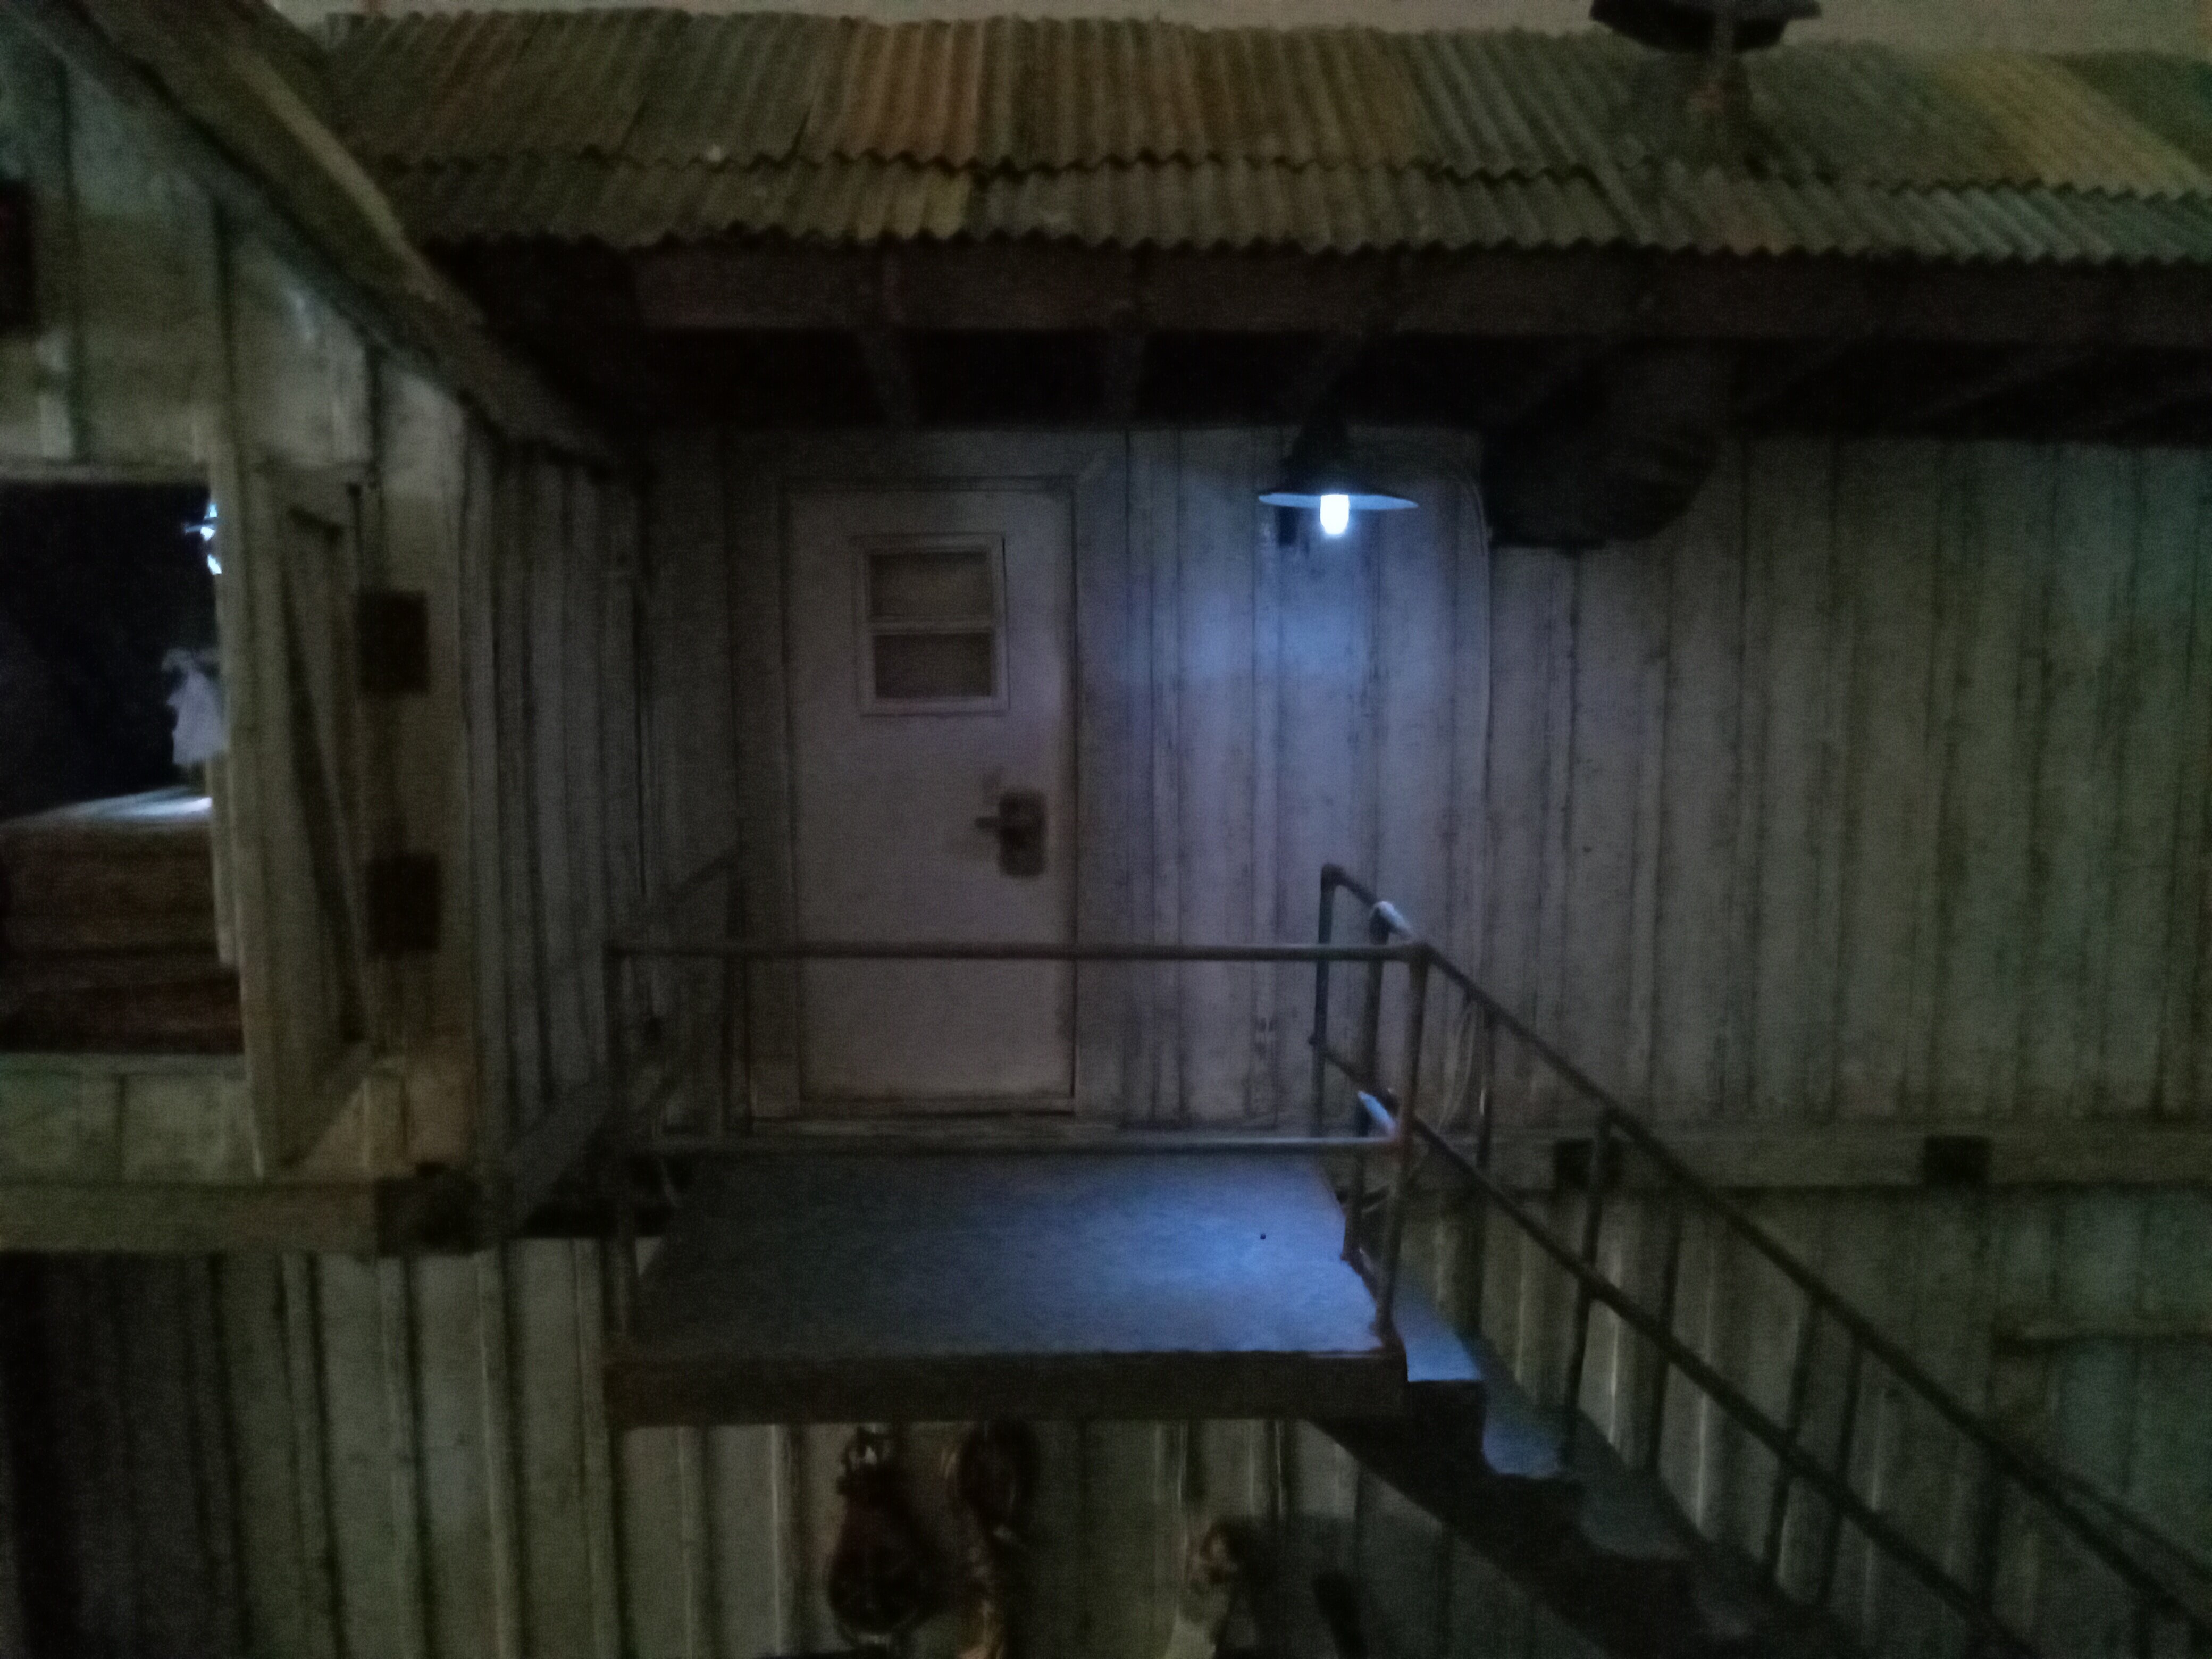
My current diorama. This is a monster; I'm looking at at least another year to completion. Thanks for looking. 🙂 JC
-
Thanks Highlander! 🙂
.jpg.fb3273d2f1fbd038573aa0006ccae74b.jpg)