Zglossip
-
Posts
207 -
Joined
-
Last visited
-
Days Won
3
-
Thanks rotkman for the advice i will look for the lead wire and the camera makes it look glossy i sprayed matt and it looks matt in real life gotta love cameras
-
Hey everybody here is somthing i have been wanting to try but always been to scared to do superdetailing i finally did it. This a cockpit of a p-38 lightning it wasnt very detailed and i wanted the canopy open so I decided to do it myself using epoxy putty, stretched sprue, and bailing wire. Lookin for some ideas and construtive critiscm thanks.

-
Simple, easy, realistic and cheap rust effect
Zglossip replied to Zglossip's topic in Tools, Tips & Techniques
Sorry about the spelling my phones auto spell keeps jacking with me. Here is a picture of what it looks like when dried
-
Here is a tip for you fellow modelers it is a rust effect I stumbled across three experimentation and accident. It is super easy and cheap all it takes is white vinegar a mason jar and lid and some rusty nails or steel wool. You take the vinegar put it in the mason hat put some rusty metal items in it the more the better and let it sit for a month the vinegar liqufies the rust off the nails. Here is how you use it when is good and steeped give a good stir and brush it on where you want it it clumps together like washes made washes made with water so add a healthy does of dish detergent to make it flow better if you want to broadcast it of not leave out the dish detergent and brush it on like paint the more you add the more rust will be there it may look weird at first but let it dry for a full 24 hours before you touch it. Also a near truck is to take a little put it in a separate glass and let the vinegar evaporate and it leaves you 18th a rust powder that acts like a mig pigment. A word of warning be sure you put it where you want it because it does NOT COME OFF and also do it afeter your final flat coat of you do it before and spray the flat coat in after it can make it look unrealistic. That is the top take it or leave it but it works well for me on acrylics I suggest you try it on a old model or scrap plastic before the real thing to make sure you like it . hope this helps
- 1 reply
-
- 2
-

-
Thanks
-
.
-
Thanks for the advice I will keep this in mind for my next project.
-
Hey there guys here is my latest project it is a figure diorama, the figure was completely cut apart and reposed using epoxy putty and seam filler the model was not easy to do it took a lot of time and patience but i found the end product to be very satisfying. The face ended up being very difficult to do from my hands being shaky but it ended up OK. This figure didn't start out being a project just something to do why my bf-109 dried but I just ended up getting caught up in it and adding more and more detail until it was finished it took me three months and i am happy with the product . this diorama depicts a German solider heading home on leave and he is waiting at a bus stop waiting to head home .
-
.
-
Gil it is a decal on the nose cone . I am not that good at hand painting stuff like that yet but I am hoping to get to the point where I can paint most of the markings on the model instead of using decals
-
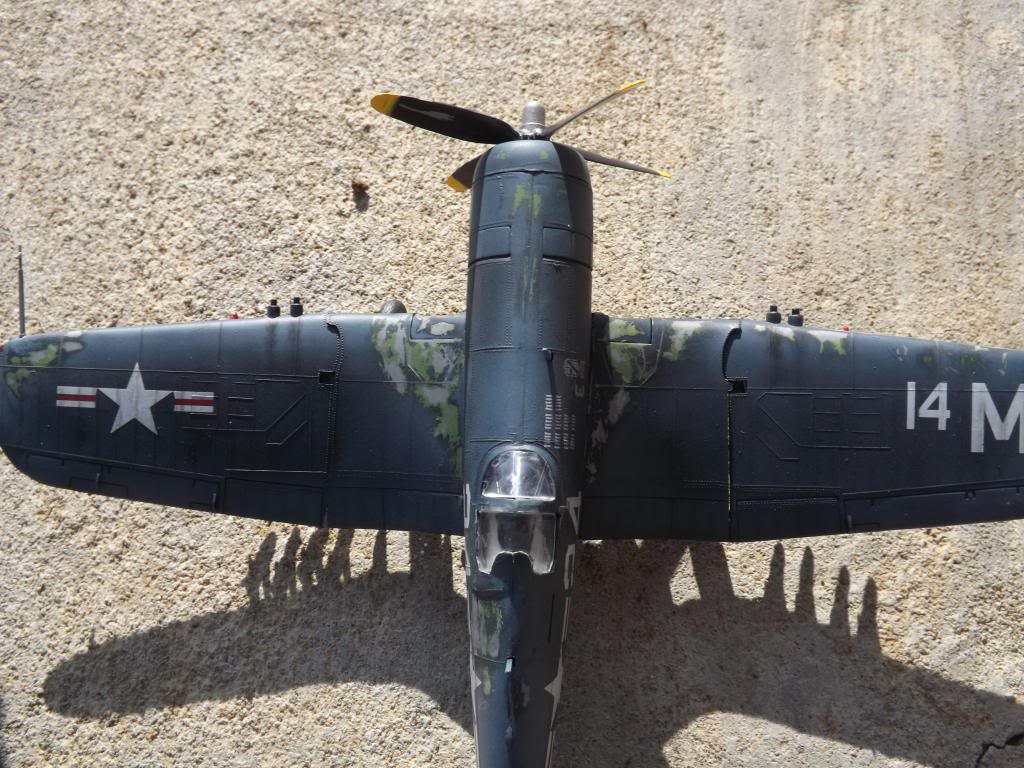
hey there fellas here is my newest build it is a 1:48 scale bf-109 from Revell . This model was a pretty easy build I made it a bit harder by repositioning all the control surfaces and doing alot of scratch building in the cockpit that to my dismay was hidden when the canopy was put on . Other than that it was a fun build and I welcome any criticism and comments .
-
Here is what I'm talking about zoom in the seam is clearly vissible.
-
Thanks guys again for answering my question I will deffinettly try these and hope it solves my problem . Mark sorry about the grammar I was using a phone and my big hands make it hard to type I will try to make it more leggible next post.
-
Hey there fellas i am back with probably another borring quistion how to make seam line dissapear i have forund the putty i like to use and it works well but no matter what technique i use you can still see them i am no novice to modeling i have been doing it for four years but i am also not a master every technique i have tried still shows a line or a ridge and it doesnt look like part of the model when painted the only technique i tried that hid them well was aplying a wide band of putty and sanding to the airvraft contour but it erased so much detail it didnt seem worth it any help would be appreciated .
-
Hairspray chipping or no hairspray chipping that is the qeustion
Zglossip replied to Zglossip's topic in General Modeling
Thanks for the tips guys I will deffinettly take these into consideration . Another thing is do you do chipping before or after the main weathering process.