


66Foxtrot
-
Posts
436 -
Joined
-
Last visited
-
Days Won
21
Content Type
Profiles
Forums
Events
Posts posted by 66Foxtrot
-
-
I actually started an Otaki Bf-109G 2 days before flying to Phoenix......
-
Well, it was waiting for me when I got home from Phoenix this afternoon, along with the two PE sets I ordered. All in all, roughly 2 weeks from order to delivery.
-
That is extremely cool...!
-
I ordered one a couple of days ago. From Japan. They're scheduled to ship July 31st,so, we"ll see. They haven't charged my card yet. There's a build up article in the current SAMI issue.
-
Ha ha, that's really cool!!!!!
-
WOW!!!! The Master strikes again!!!
-
Here's a link to Jim Rotramel's article on how he painted his 1/72 Raptor. I saw it at the VABCH NATS, and it's pretty spectacular.
-
Nice, Mike! I've had my eye on this kit.....
-
Thanks everybody!
I simply dipped the canopy in future, like always. I did use Eduard masks on it, which are the best thing, ever. I use them whenever I can, nowadays.
-
In typical Italeri fashion, this kit fought me every step of the way. Absolutely nothing fit, and molding flash abounded. A great deal of time was spent re-scribing and re-riveting the lost, raised details. There's more epoxy, superglue, and putty on this model than on my LHS's shelves. But, I like how it ended up. The decals were quite nice. Lifecolor acrylics....very nice paints! I liked the way they went down. I just noticed, looking at these pics...I forgot to add the windshield wipers!!!
JK

-
WOW! Very inspiring!
-
That's a lot of plastic but I am forced to wonder how good are they? I'll probably catch some flak but the amount of built models doesn't impress me as much a hand full of beautiful builds.
Mark's work is clean, and concise. And, most of all...consistent.
-
So..I'm doing a search on "Sherman Firefly" to help someone on Hyperscale, and I stumble across "classified" photo documentation of the world's largest manufacturing facility of military hardware...."Maddog Manufacturing". Look at how the shelves are actually bowing under the massive military might!!!
I am not worthy......
My apologies for "outing" you Duke....but your collection is TOO good not to share! :)
-
Thanks Don and John. The honeymoon is, apparently, over. I spent 2 days making the tailwheel assembly, and installing it. The left and right fuselage halves do NOT fit together well at ALL. The main wing spar causes about a 1/8" discrepency in nose-to-tail lengthwise fit. And, the 30 steps of lovely cockpit....causes the front end to not fit well (fuselage to inner port-side panel wall).
After much swearing, struggling, and super-glue, I managed to get it together fairly well. At the cost of the tailwheel assembly. Lots of filler putty going to be needed, which is fine....but, I think the issue is the way the openings for the mainspar are designed. I did test-fit the spar/fuselage halves together before assembly began on anything, and of course...it seemed to fit OK. I don't know what I did, but I have to accept that I did something! I'll try to take some photos later today.
JK
-
Thanks for the positive comments, gentlemen.
Ed, I am indeed following the instructions! The one criticism I have of ALL RoG kits is the instruction booklets. They're extremely "over-engineered", IMHO, and waaaay too "busy". The cockpit is a very detailed part of the build, and I needed to pay attention closely!
In fact, construction of the entire cockpit comprises the first 30 steps of the build!
-
I've spent a little bit every day, for maybe...the last 3 weeks on this kit, and the cockpit is nearly complete. The only aftermarket here are Mike Grant decal placards, and Eduard PE Seat Belts. (I know the interior was probably RLM66...I did mine in RLM02, because I wanted to pre-shade and use some dark washes, as the size is so conducive to these techniques.)The port-side wall panel still needs a satin varnish coating, and some dry-brushing. Sorry for some of the photos' lack of clarity, as well...I'm still learning my new Nikon D3000. :)
-
Built OOB. Tamiya acrylics.
-
I have this exact kit....I won it at a show(raffle). It's still in the box, where it will stay!
-
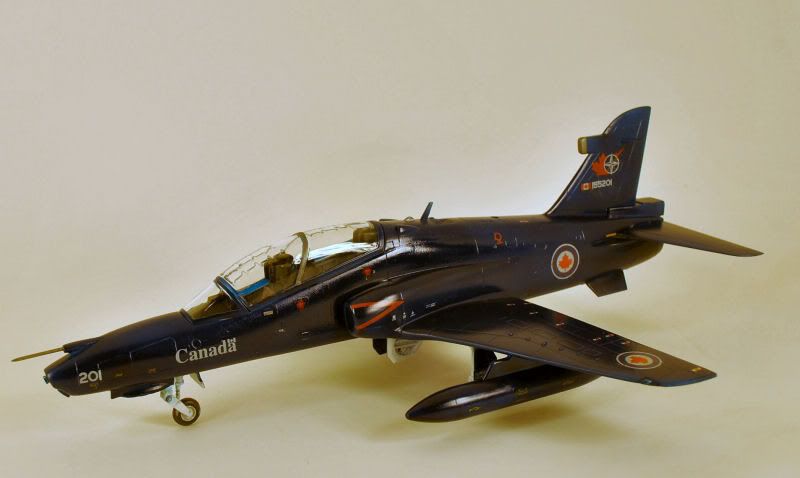
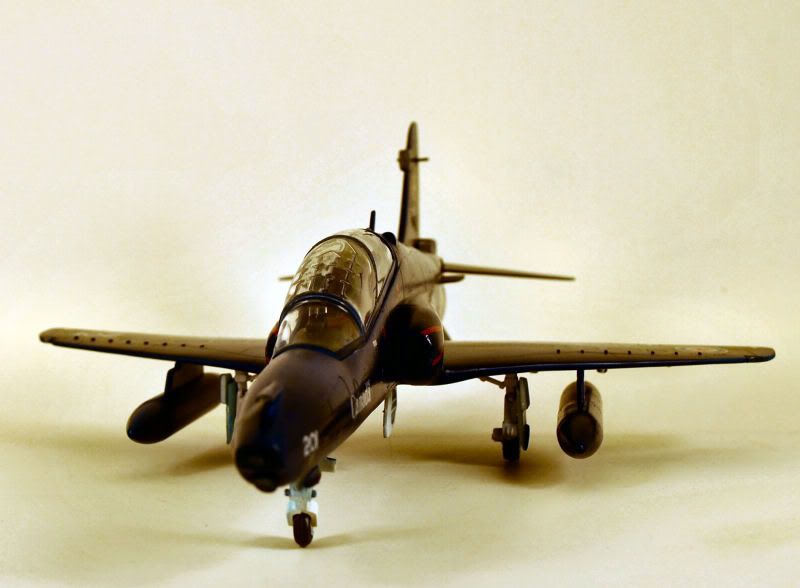
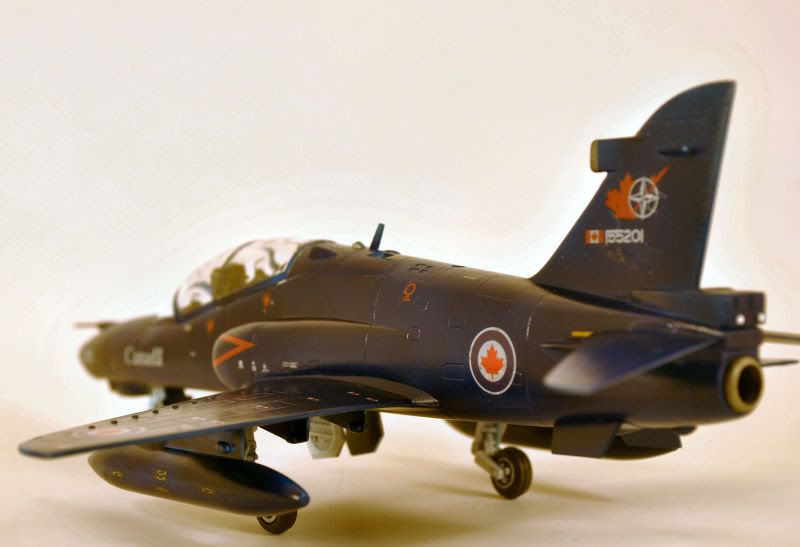
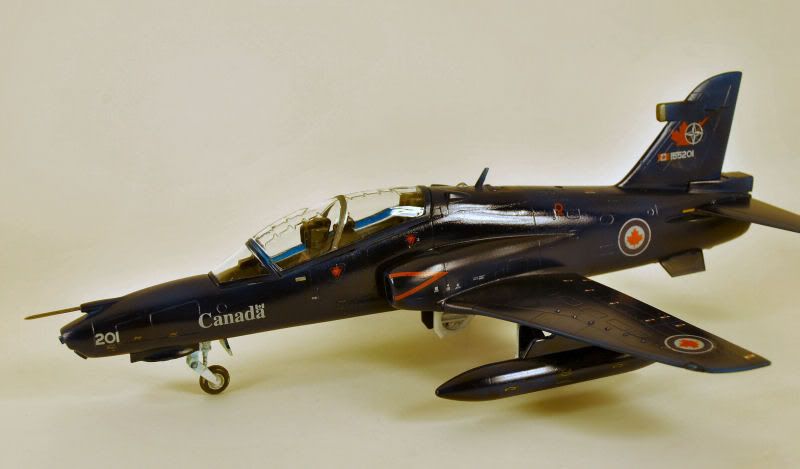
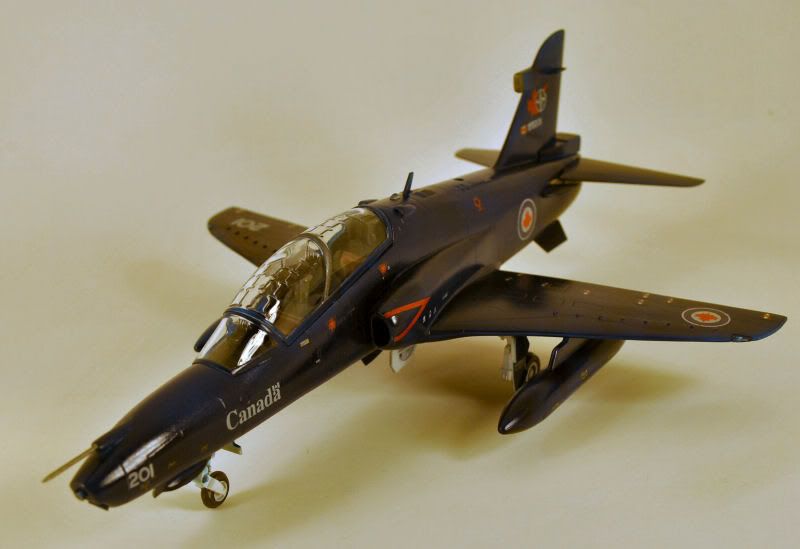
I just finished this up this afternoon...Airfix 1/48 BaE Systems Hawk 100, finished with Vallejo Model Air acrylics.. Not a bad kit, really. Typical Airfix fit issues in a few places, easily remedied. The decals were very poor. I wish Hornsby would contract with Cartograf, or someone...the quality of their recent releases is quite good, only to be seriously compromised by crappy decals.
JK
-
That's really, really nice Tim!! What decal sheet are those markings from?
-
Yep! It works on Firefox now. Make sure you "toss your cookies" and restart the browser.
Thank you Eric!
-
I'm curious..without naming names, was the vendor a guy in his 60's, with a walrus-like mustache and a khaki ballcap? Maybe wearing a sweater vest? If I WAS gonna suggest a name, which I am not, it would rhyme with "fuzz"?
-
Since moving to the new server, it seems that when you write in a text box (like I amn now) there is no cursor visible. Also, if you try to correct a mistake, or go back to delete, or copy a section of your text, you really can't. If you get to edit at all, the invisible cursor is most likely somewhere in the middle of what you were writing. This is REALLY annoying. Is there anyway we can have the cursor back?????
-
Pz.Kpfwgn = Panzerkampfwagen = Special Vehicle, Tank.


Academy 1/72 F/A-18C Swiss Tiger Meet
in Aircraft
Posted
Academy's scaled-down Hornet, built OOB. The Swiss Tiger Meet markings are from Zotz, while the fuel tank stripes and all stencils are from the kit (Cartograph!) I added Bare Metal Foil to the oleo struts. Finished in Life Color acrylics on the airframe, Tamiya acrylics on the undercarriage. Semi-gloss finish is custom-mixed, and Pro-Modeler wash in the panel lines. Tried to finish for Phoenix, to no avail.
Enjoy....