dmjung
-
Posts
125 -
Joined
-
Last visited
-
Days Won
5
Content Type
Profiles
Forums
Events
Everything posted by dmjung
-
Ditto hobbylinc.com. I use them for a lot of stuff. However, they can take awhile if its something not in stock--they're up front about that on the website. I don't use them for anything I need right now. Don't use Squadron much since I'm in Texas, but when I have used them its usually here in a day or so. Prices and shipping cost are better then they used to be, but sales are typically for stuff I don't care about or require buying more than I want to spend. I like Spruebrothers, but prices are sometimes not all that good for what I'm looking for. They are fairly fast delivery to me from Missouri. I use eBay a fair amount. Be sure to use ebates.com to get your 1% along with the ebay bucks. Heh. Direct from the manufacturers or suppliers in Europe/Russia/Ukraine once in awhile if the price/shipping is good or they're the only source. HLJ.com if the price is right (shipping usually kills the good price from what I've experienced.) The ability to assemble purchases for shipping at later dates is nice. Amazon once in awhile--Japanese hobby shops seem to list a fair amount of stuff--be prepared to wait. Lots-of-models lists there and also eBay...they're in Missouri and I've wondered if they're associated with Spruebrothers in some manner. Hannants - 10% backorder discount. The exchange rate right now appears to be favorable. I've had pleasant experiences with freetimehobbies and if you like ships, they seem to have a good selection. HobbySearch http://www.1999.co.jp/eng/ Prices/shipping is usually pretty decent. The main page is dolls--ignore and click on the categories to get to the good stuff. Or look at the almost-nekkid dolls if you want. I use dragonusaonline a lot...especially when they have sales or the daily special is in my area of interest. I like hobbyeasy.com but the website can be a bit awkward to use. Prices are often good for something weird I'm looking for. I believe its kind of a front order-taking site for multiple shops/suppliers in Hong Kong. I have actually had fairly good luck with sourcing books, kits, and detail parts from around the world. I'm sure I'll get burned sooner or later, but if you use Amazon or Ebay, then a refund is pretty much guaranteed. Even shipping time has been reasonably, even unexpectedly quick in many cases. And speaking of Amazon.com, even if you don't order much from them, the wish-list capability is very very nice. You can have multiple wish-lists to categorize stuff, make them private or public, and you can add items to it from other websites very easily. So if I see something on a manufacturer's website or one of the hobby vendors that I want/am-researching, it often ends up in one of my Amazon wishlists. --David
-
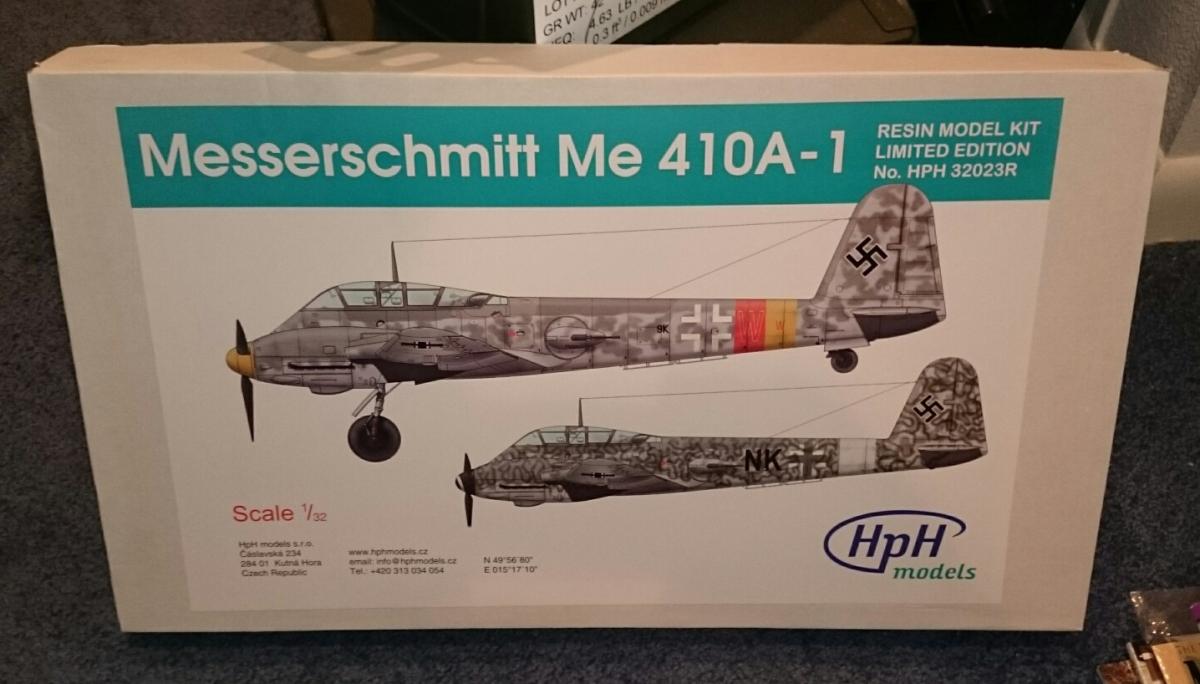
Once I finally get the huge TWA Moonliner wrestled into shape and finished, I want to build something simple and easy. This probably isn't it... Courtesy of the exchange rate and Hannant's back order discount, the HPH 1/32 Me-410. And this explains my other forum post looking for a good 1/32 DB603A engine. --David

-
Anyone know anything about any of the DB603A engines in 1/32? Have looked hard enough to tell if there's any visible external differences between the variants. So far I've found the following: Zoukei-Mura #SWS06-F03 Engine Maintenance Set (Resin Parts). DB603A and appears to include two figures. Grey Matter Figures #GMALB3201 DB603 Engine. Presumably an A. Any others? Anyone held either of these in their hand and have an opinion? Thanks... --David
-
I'm not aware of an injection/resin 1/48 C-119, so does this mean one will get released later this year? :) --David
-
Been working on the landing gear bay edges that are messed up. The real object is a corrugated section between the floor of the bay and the skin of the rocket. I'm trying the rebuild the edge and hope there's not too much cleanup for the corrugated part. Taped off the edge and gooped Tamiya filler onto the edge. If this doesn't work out I'm not sure what my reasonable options are...I'm really not wanting to have to skin this area as its mostly curved and a good part of it curved in multiple axis. --David
-
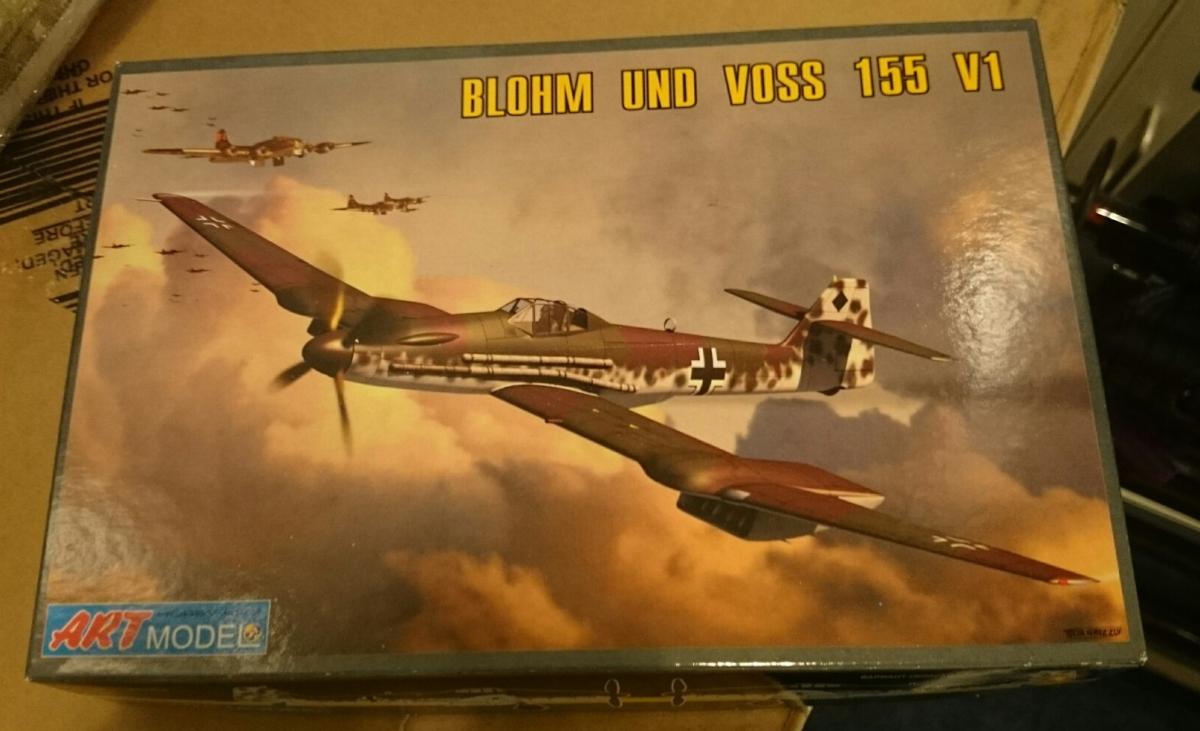
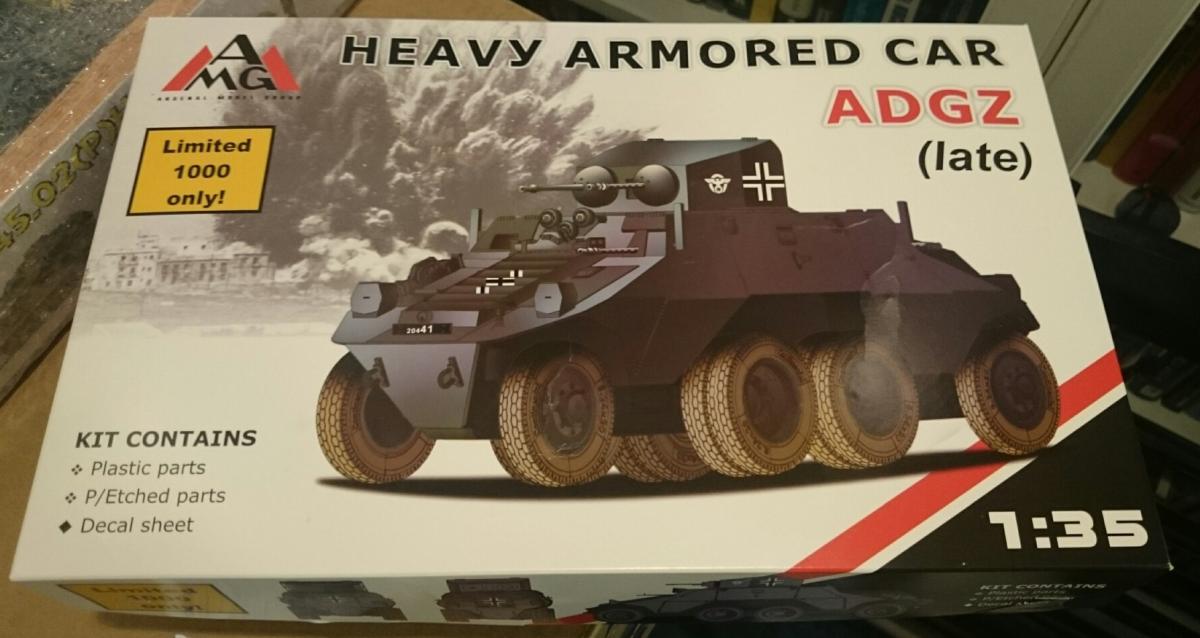
Because I'm a sucker for unusual subjects...via eBay foreign sellers. Artmodel BV 155 V1 in 1/72 (who am I kidding...I'm getting too old for 1/72 even with optivisors) AMG ADGZ Armored Car in 1/35 (I may actually build this one.) The (un)usual east bloc shipping method of flat boxes and bagged parts in a bubble shipping bag. I'm shocked that it actually made it without any damage. Curiously he sent the right kit with the wrong box...I have the Fu version with the radio antenna assembly over the top. All the parts and instructions are there so, eh, life's too short to get wound up about the inconsequential. :) --David
-
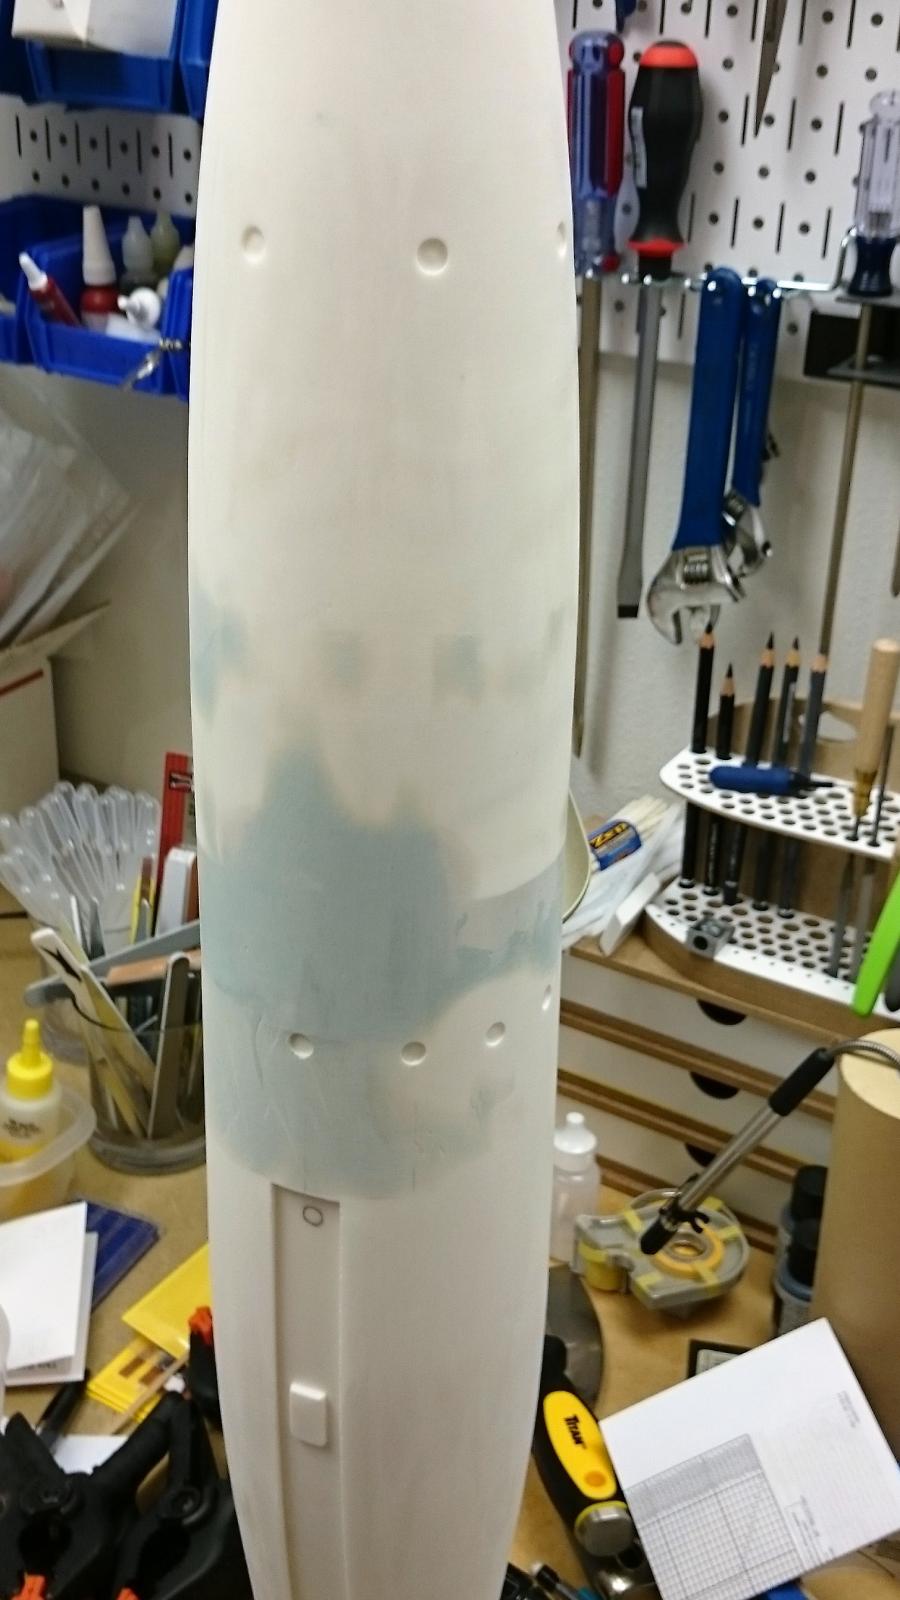
Thanks, Mark. Other than flying rockets this looks like it may end up being the largest model I've built. Pin holes...lots of them and they weren't all mine. The high-end body filler didn't have many and the few it did were kind of large...a shade smaller than 1/16". The Squadron putty had a bunch of smaller pin holes which was a little surprising since I used a proper putty blade and tried to lay it down without introducing any air. The resin...where I had to do some heavy sanding to get something approaching a circular shape exposed a lot of really fine pin holes. Just a bit too big for the primer/filler coat to handle. Used some Tamiya White putty and a soft rubber brush to attack the pin holes. The other side isn't any better. There's a problem along the edges of the landing gear bays which I've been trying to ignore, but they haven't gone away yet. Its supposed to be a corrugated pattern under the skin of the rocket, but its broken through and exposed in a number of places. (Came like that and sanding/shaping probably exposed some more.) All three bays have edge problems and I'm not sure how I'm going to fix this...all my thoughts so far are going to involve a lot of very tedious work. Any ideas? --David
-
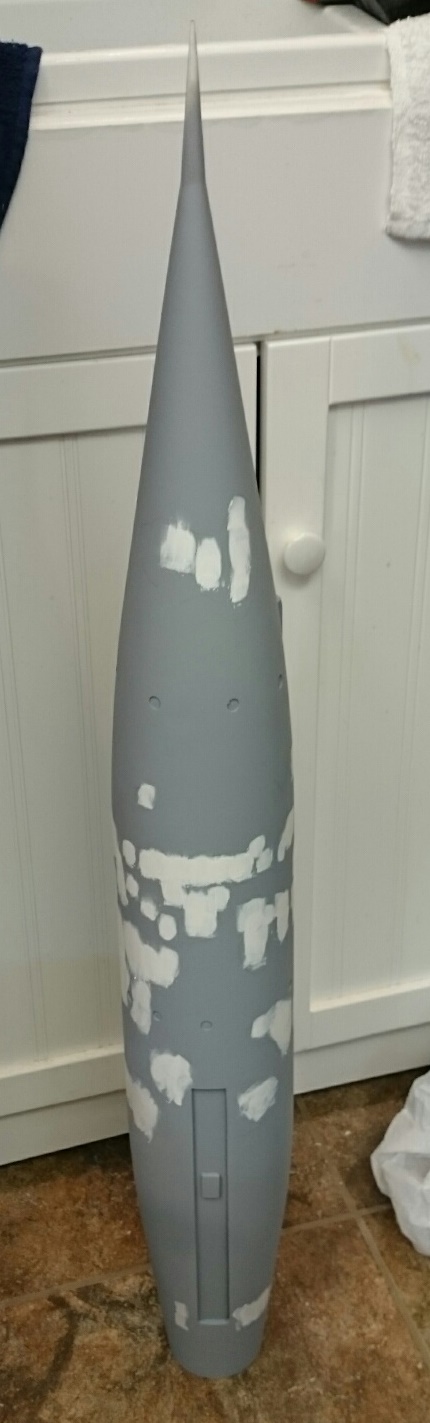
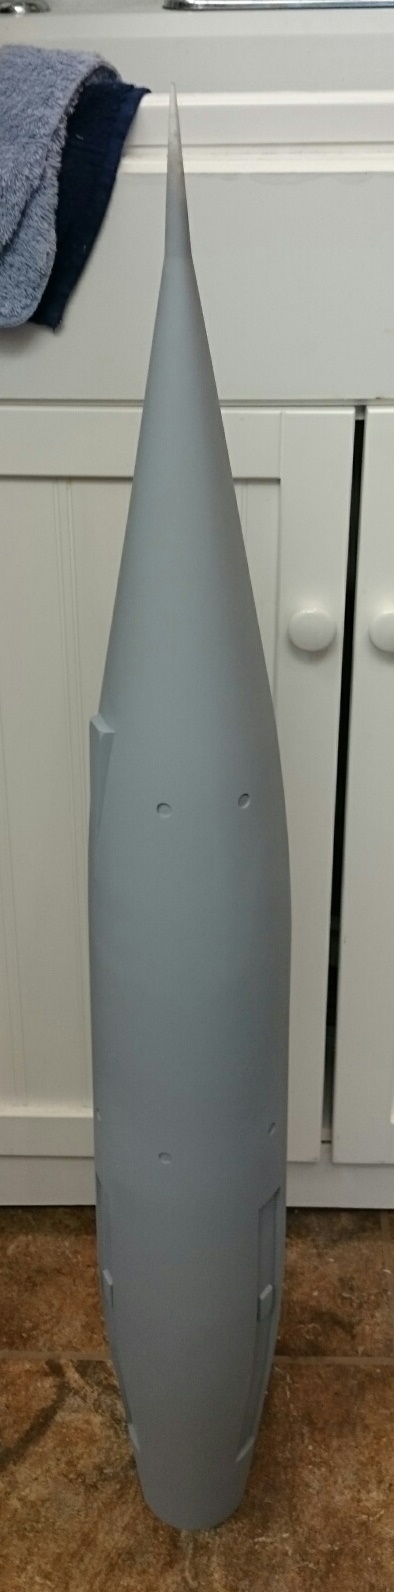
First Primer/Filler Coat. About as tall as the sink cabinet and that's without legs and the base. Pin holes...believe they're from the fillers and not the kit resin. A couple of minor sanding/filling imperfections also showed up that will need some attention. --David
-
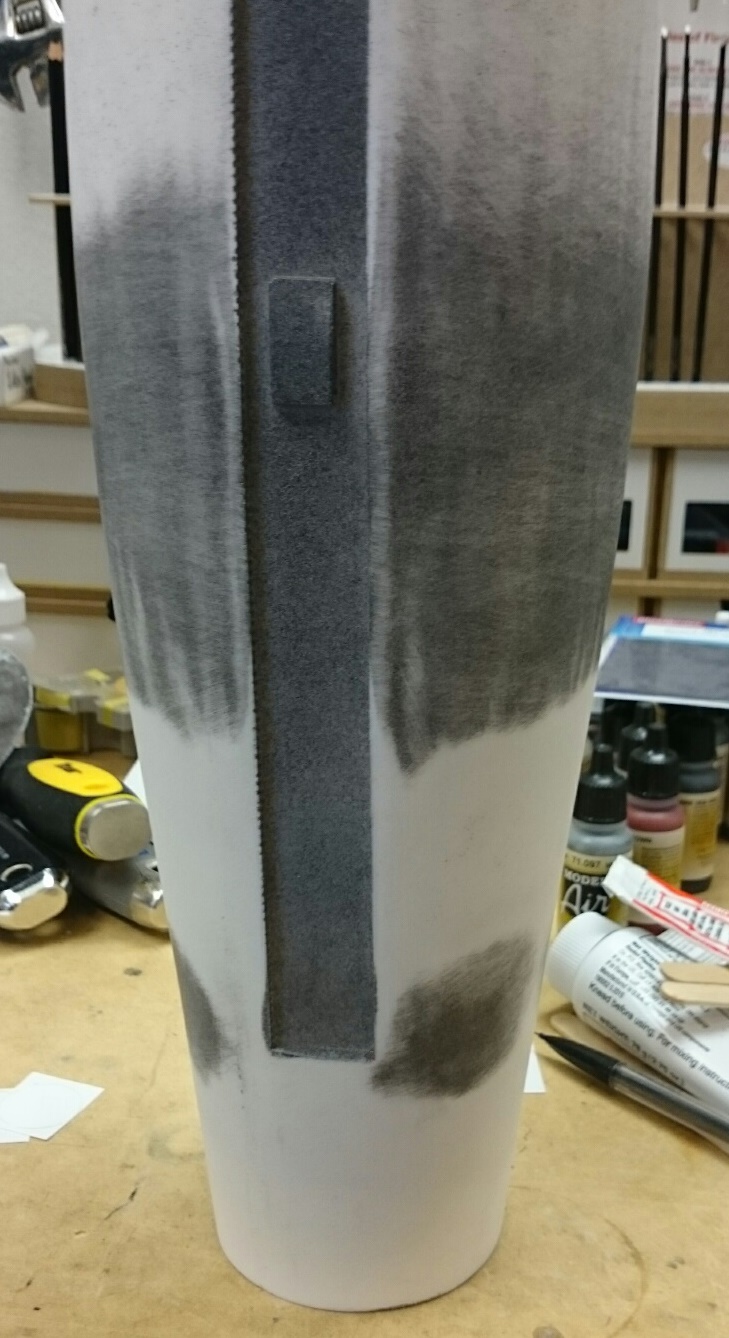
This particular spray-on guide coat was not significantly better than plain spray paint in terms of loading up the sand paper, esp the 220. The dab on carbon black powder would presumably be better. Experimenting with different techniques...another reason I never get a model finished. --David
-
Tail shows a weird patchy flair between the very bottom of the landing gear bays--not seeing a flair in pictures of the actual Moonliner. A little putty and fix some low spots on the gear bay edges and I say that end is shaped. No pix, but the nose actually looks a bit better than I thought. Curved transitions between the nose and tail to the main straight fuselage need a little love. The low patches in the tail appear to be the worst. Should I light this booger's port holes? Oooh, and strobe warning lights on the launch pad. (This is why I never finish a model....) --David
-
Tail shows a weird patchy flair between the landing gear bays--not seeing a flair in pictures of the actual Moonliner. A little putty and fix some low spots on the gear bay edges and I say that end is shaped. No pix, but the nose actually looks a bit better than I thought. Curved transitions between the nose and tail to the main straight fuselage need a little love. The low patches in the tail appear to be the worst. Should I light this booger's port holes? Oooh, and strobe warning lights on the launch pad. (This is why I never finish a model....) --David
-
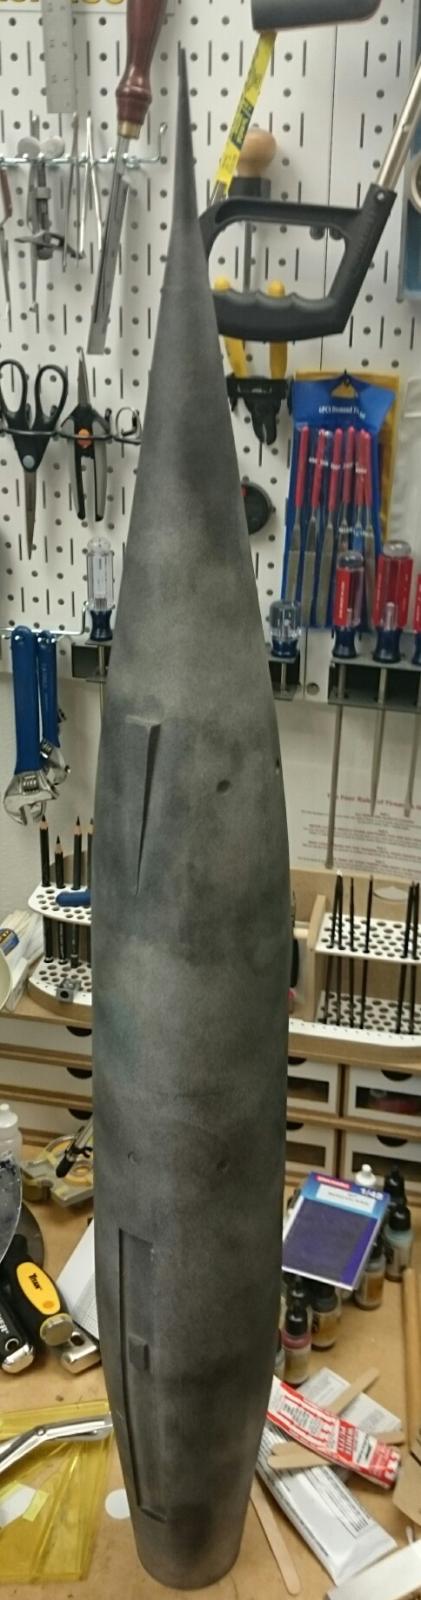
I think I'm almost there getting the main fuselage in shape. Nose is mounted...instructions said a spacer would be needed and I have about 1/8" of styrene in there. It's difficult to say if that was too much or too little since the nose seemed to not be completely symmetrical. Kind of like the fuselage. :( This is the first time I've use an actual guide coat product so we'll see how that turns out. It's just carbon black...sprayed in this case. The guide coat will get mostly sanded away to tell me if I have any low spots. And I have to decide if the pointed nose is really in the center line or not. If not, maybe some heat will coax it there. Turns out this kit design was originally an Atomic City kit and now Masterpiece Models has it. This could have been a fairly easy build if the molds were up to snuff. --David
-
You can also carve away the not-quite-cured filler with your hobby knife. Absolutely, but there's so much area in play here I needed the long shaper file to help keep the long lines somewhat straight as opposed to my ham-handed knife skills gouging great valleys in unwanted places. :) --David
-
A couple of body filler applications/sanding and almost there. The darker is the filler showing how far out the two halves were from each other. The other side isn't any better. I have a dusting of primer on it now and will block it tonight or tomorrow to see what's left. I know there are seams on the tail and nose that need some attention. A longer Dura-block sanding block has come in handy with this...anything shorter would have followed the hills and valleys. This is the first time I've used Evercoat filler...don't quite have the touch for how much hardener to add so was a bit too quick setting up on the first application. Fortunately I saw a youtube tip to use a shaper file to get the filler knocked down and shaped while not fully cured in order to cut down on the sanding. Sands really nice though. I can see why some of the auto body guys swear by it. --David
-
Picture doesn't really show the unevenness, but at least half a tube of Squadron putty and still not there. Its really too big an area for Squadron putty and that stuff started setting up before I really got a chance to get it smoothed out. But it gave me an excuse to try out the Evercoat. :) --David
-
I thought I would build the Masterpiece Models TWA Moonliner next as most of my building in the last twenty-something years has been in rocketry. How hard could it be? Well...the molds must be getting a little tired as the fuselage halves weren't quite circular and didn't match up well. And there's a bit of a wasp waist to boot. I had some Squadron putty on hand which I worked with a little, but decided to order in some Evercoat Rage Ultra body filler to test and finish it out. If it works out, I'll try it on some flying rockets. TWA Moonliner: What I've been building instead of plastic: Whatever I build after this needs to be something easy...I'm open to suggestions. --David
-
Actually this was a new build, but I had a number of do-overs. I did get a Bronze for it at Wonderfest a couple of weeks ago which was unexpected, but I guess not all of the defects I was aware of weren't readily visible. :) --David
-
Thanks, Mark. I believe almost every assembly has been stripped and repainted or reassembled at least once. Need to figure out what's next now...
-
Finally finished this old kit saved by Nick's suggestion to use more liquid cement to separate a badly attached wing. Because there weren't enough things to make this go wrong, I retrofitted an F-whatever aftermarket cockpit and sawed the canopy into two pieces. (Did you know that really old clear-tinted plastic likes to flake/shatter when you're sawing it?) There are things I would like to do over (yet again), but I've already invested too much time in this one and need to move on. :)
-
Nick, that did the trick! I clamped the wing so I could get some torque on the joint with one hand and started painting the joint with the Tamiya Extra Thin. Took a couple of seconds of sheer terror and then started to bend open. More Extra Thin and finally completely apart. Thanks! --David
-
It's the Testor's cement joint that I need to separate. There's two somewhat flat surfaces mated together so there's a fairly large area involved as opposed to, for example, the thin join of fuselage halves. I'll work up some courage tonight to take a crack at it with the Tamiya Extra Thin. Thanks... --David
-
While I'm debating whether this step in the aft part of a wing joint is my stupid mistake or just another issue with this 1984 Japanese Sci-Fi kit with too many moving parts...any thoughts on de-bonding this kind of glue? I have the usual assortment of hazardous fluids... :) The wing is attached to a currently free-standing "engine" nacelle which has its own set of parts which were joined using Tamiya Extra Thin. I'd rather not jack it up trying to get this apart. --David
-

Columbus 2015 model numbers
dmjung replied to LRandel's topic in About the IPMS/USA National Convention
Thanks! Never mind...I have a pdf to excel converter in front of me. --David -
Sea Plane Kit with Registration Packet
dmjung replied to lilgeneral's topic in About the IPMS/USA National Convention
I wonder what the story was behind the presumably abandoned storage unit full of model kits...? At least it wasn't my unit as I don't have that many bagged kits. :) -
Thank you for posting. Is it just me or does the Napoleon bust look a little like Elvis? :)