


SkyKing
-
Posts
506 -
Joined
-
Last visited
-
Days Won
30
Content Type
Profiles
Forums
Events
Posts posted by SkyKing
-
-
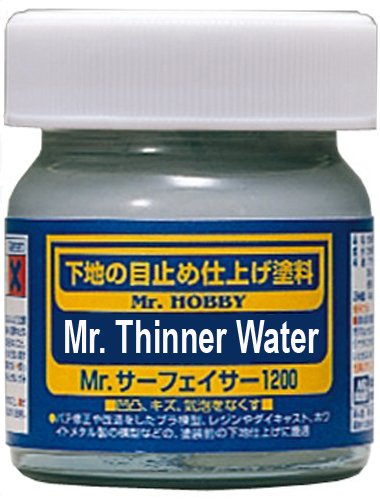
I've just learned that, in response to huge demand, GSI Creos will soon be releasing this new product, containing all necessary additives:

But Mr. Water Thinner will still be available for those who like to mix it themselves.
-
I seldom thin water, but when i do, I prefer …
-
When I was a kid, I received Revell's Space Station and not one, but two XSL-01 moon rockets the same Christmas!. Those were scrapped long ago, but I was able to acquire one each on ebay and have them set aside. I also have a Design-a-Plane set. Remember that?
-
Here's my standard response, which probably needs updating:
The best way to avoid large gaps is to carefully test fit parts before assembly. But if you have a very large gap in spite of your best efforts, it's best to try to fill it with styrene plastic rod/strip and liquid cement, allowing it to dry thoroughly before applying any putty. This technique is handy for wing-to-fuselage gaps.
For filling large gaps, I'd suggest Milliput, which is an epoxy filler that comes in two parts that have to be mixed thoroughly before applying, and can be smoothed with a wet finger/cotton swab/sculpting tool, or Aves Apoxie, a similar product which comes in a variety of colors. Some of the auto body glazing putties, such as 3M Acryl Spot Putty, make good model putties; these are lacquer based and can be applied (sparingly) with a brush dampened in lacquer thinner. Of the lacquer-based glazing putties, I'd recommend Spies Hecker Permacron Fine Putty.
Another useful filler from the auto body repair sector is Evercoat/Eurosoft, also a two-part putty which requires the addition of a catalyst to harden it. A nice thing about it is that before it sets, it gets rubbery, which makes it easy to carve away any excess with your modeling knife, but once cured, it sands and takes paint like styrene plastic. It's available at auto body repair supply outlets.
Tamiya makes some body putties which are said to be quite good as well, although I've not tried them. Squadron's white putty is said to be good, but I've not tried it either. A relatively new product is Perfect Plastic Putty, a one-part putty which can be smoothed with water, but it is water soluble after it dries so cannot be wet sanded. However, it can be smoothed after application with a damp cotton swab or fingertip. Many modelers like to use CA glue as a gap-filler and have had success. But it must be sanded immediately after it initially sets up. I've never had much success with it myself.
You can also make your own putty by dissolving sprue in liquid cement or MEK. What's nice about this is that you can control how thin or thick you want your "plastic plastic" to be, you have a variety of colors of sprue to choose from, and once it's set and sanded it takes paint just like styrene plastic, because it is styrene plastic!
Mr. Surfacer comes in three "flavors": 500, 1000, and 1200, in order from coarse to fine. They are intended more as primers/surfacers for filling small imperfections prior to painting, not as a general gap filler. See here for a good primer (pun intended) on Mr. Surfacer:
http://www.swannysmodels.com/Surfacer.htmlThere's also Mr. Dissolved Putty, which is an even thicker liquid putty, but again, it's not intended for filling large gaps. It can be brushed on, however, which makes it really useful.
Typewriter correction fluid ("white-out") can also be used to fill fine cracks. Brush it on, let it dry, sand, and paint.
Putty, regardless of type or brand, should be used sparingly. The lacquer-based putties can melt through plastic components if applied too generously. You can place masking tape on either side of a gap before applying putty. Once the putty is cured, sand it until you can remove the tape, then sand it flush with the surface. Lacquer-based putties should also be given plenty of time to allow the solvents to evaporate. My rule of thumb is: If I can no longer smell the putty, then it's safe to begin sanding.
I'd suggest getting an old kit and a supply of different model putties and body fillers and experiment. Keep notes. You'll soon find a combination of putty and technique that works well for you. Good luck!
-
13 hours ago, Nick Filippone said:
Thanks for posting this. Do you have any idea when they might have interviewed me for this article? I confess I have no recollection of it. Maybe this modeling thing isn’t preserving my brain like it’s supposed to. Regards, Nick Filippone
🤣Well, it was originally published in 2009, so I'd say about 10 years ago!
-
-
On 1/4/2019 at 4:36 PM, tgidcumb said:
Looks like the question was answered with the map, put it in the general location of where the United Kingdom is on the map and it will be centrally located. 😂
Looks like Omaha to me!!! 😀
Great steaks and the SAC Museum! What more could we want? 😀
-
-
9 hours ago, ghodges said:
Ain't technology great? And as rough as parts of that look, it'll only get better as time passes!
GIL
As pointed out on another forum, the resolution of the kit could be much better if it were printed in something other than ABS plastic on a different printer and/or used as a master to cast resin copies, but in either case, the price would be prohibitive.
-
 1
1
-
-
https://www.ebay.com/itm/113408761674
Note: I have no connection to the ebay seller. Just passing along the intel. -
Haters gonna hate. Hyperscale is a prime example. Most of the anti-IPMS comments come from non-members.
-
Is glorious model of heroic space traveler of Soviet workers' paradise!
-
1
-
-
Nice work!
-
I like it as well. Your wife is from Tahoka? I actually know where it is! My parents were from O'Donnell, and I started grade school in Lubbock.
-
Beautiful model! Next time you're in Big D, be sure to visit the Frontiers of Flight at Love Field. The real thing, lovingly restored by Vought employees, is on display there.
-
Just Google Sandle Hobbies. You will find many horror stories.
-
-
Go to "IPMS USA Home/About/Officer Directory and Email" for contact information for officers and office staff.
-
Why shouldn't junior entries be judged by the same criteria as adult entries (with due allowance for the age and relative inexperience of the junior entrants, of course)? I thought the judge's knowledge of the subject was supposed to be irrelevant, because "we don't judge for accuracy." Speaking of which, I've been to plenty of contests where the adult judges didn't know much about the adult entries, either.
-
-
I'm more concerned about the contents of the box than the box itself. In ordering from such varied vendors over the years as Hannant's, Hobby Terra, and Dauntless Hobbies, as well as many ebay sellers, I've yet to receive a badly damaged item.
-
This is how it was done prior to the introduction of after-market decals, home computers and graphics software, ALPS printers, and blank decal paper.. From the "Model Talk" column by Geoffrey Norris, RAF Flying Review (International Edition), May 1960, p. 45.
"You need: a sticky label like those used for re-addressing envelopes*, some clear varnish (I used Humbrol), and ordinary plastic enamels. Working on the sticky side of the label, coat the approximate area of the transfer with clear varnish and allow to dry. Then trace the design onto the varnish. paint it in, and allow to dry again. Another coat of clear or matt varnish on top of this will help strengthen the transfer, but it is not strictly necessary. Once this is dry you can proceed as with an ordinary transfer. One last word of advice: these transfers need a lot of soaking and do not slide so easily as those bought in kits. But they certainly stick on the model very well indeed."
Having done this many tines after discovering this process, I can testify that it does work quite well. My "clear varnish" of choice in those days was Pactra Clear Gloss enamel, Humbrol being somewhat hard to find in the US in the early 1960s.
*Note: this is a gummed label with "lickable" or water-activated glue, NOT the pressure-sensitive adhesive variety. -
Who remembers this brand of paint? It was manufactured by Frontier HQ, Lancaster, New York. Photos of bottles, if you still have any, and scans of ads appreciated.
-


Shapeways 3D Products Now Easier to Find
in General Modeling
Posted
It appears that Shapeways has reorganized its website to make items easier to find. Here is a link to the "Aircraft" index page, where you can filter by scale, type, era, and country. Accessories such as engines are also included. There's even a Norden bombsight!
https://www.shapeways.com/marketplace/miniatures/aircraft/
There are also index pages for sci-fi, ships, vehicles, trains, and other items.
Note: I have no connection to Shapeways or any of the designers whose work is sold there.