


ghodges
-
Posts
7,570 -
Joined
-
Last visited
-
Days Won
298
Content Type
Profiles
Forums
Events
Posts posted by ghodges
-
-
It'll be intersting to see how this new 1/48 kit stacks up against the newer Trumpy kit and the older Monogram kit. I know it'll be lacking in the detail department, but if it's an accurate airframe it'll make a lot of "purists" happy!
GIL

-
Excellent model from one of my favorite eras of aircraft! Great job on the NMF variations too! Congrats on a beautiful build! By the way, what about the kit (besides its title) makes it an "easy build"? Cheers!
GIL
-
And people think I'm crazy for building vacuforms..........
There are more parts, more cutting, and more shaping in those paper models than in building anything in plastic! Impressive work, both in scope and technique!
GIL
-
I've found beer to be a great aid in my vac motivations.....
Got the wings on, so it's starting to look like a Havoc!
Windshield is also on so I could get most of the heavy filling/sanding done. I used superglue/babypowder for that. Making some sure (but stubborn) progress! I'll definitely be in the mood for a Tamiya kit by the time this one's done! Cheers!
GIL
-
Ooooo...a "flamin'" F-8C! I have those markings for 1/48. Thanks for the inspiring work!
GIL
-
More progress on the CA 1/48 MkI Hurricane.....
She's together and I've added some Mr. Surfacer to the seams (ALL of them!). Should make some rapid progress over the next week or so. Cheers!
GIL
-
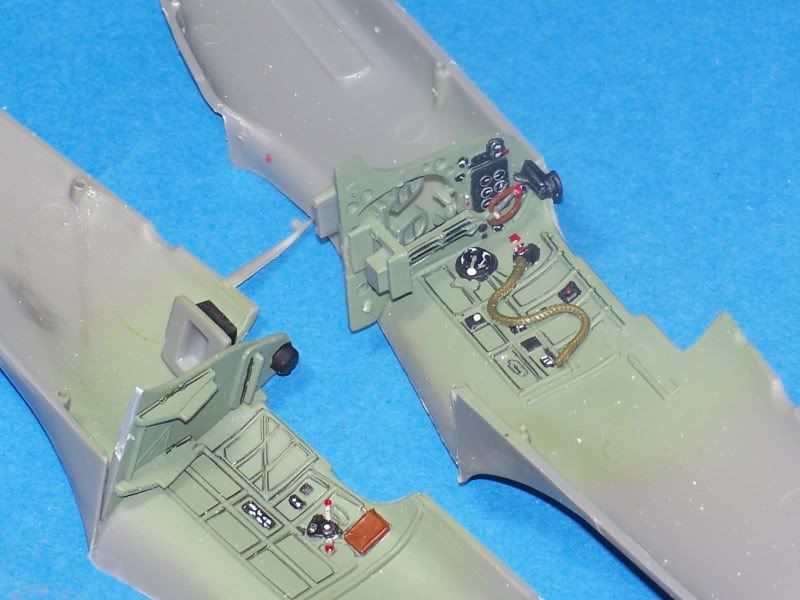
Made some progress on the old Revell 1/48 MkI Spitfire...
The seat is painted, but I need to add the harness yet. After that I'll be ready to close up the fuselage and make some rapid progress. This is mostly OOTB except for the added O2 hose. Cheers!
GIL
-
Got the fuselage together.....
The bright silver object is part of a Terry Dean nose weight. I'll have to blow all that sanding dust out before adding the canopy! Slowly making progress!
GIL
-
Welcome!
GIL
-
Brubaker? Brubaker?
Nice Panther!
GIL
-
SWEET winter camo James! That's just what I'd like to learn how to do. Congrats on a great build!
GIL
-
That is COOL on so many levels! Although I like "nekked plastic", I look forward to it getting somehting on it!
GIL
-
I think the key to any painting of any kind over another is to let the first coat completely dry.
The top layer will gas out and be dry to the touch in hours or a day, but it will still be curing. Also, when you use the SAME paint type your solvent in the overcoat has the potential to soften the bottom coat again. The heavier the paint coats, the more likely an interaction due to more solvent being present.
As for the cracking, that is usually caused by the bottom layer drying at a slower rate than your top coat. The top coat dries, THEN the bottom coat finishes drying (and shrinks a bit) cracking the top coat in the process. The variables here can be paint thickness, allowed drying time between coats, paint brand drying time (different lengths needed for different manufacturers), or all of the above.
What I said above is a simplification of how paint dries, but it does apply to most cracking problems. The real key is patience and controlled application. Hope this helps!
GIL
-
May have been a tough masking job, but looks like you won that fight!
GIL
-
The short answer is: whatever works!
Soft sponge (think the make-up type) is very good. Tissue is also good, and usually easy to come by in the house. Facial tissue is better than toilet tissue as it leaves less paper fibers when you pull it out. Care must be exercised when "stuffing" those items into openings. You need to make sure they're tight, but also avoid breaking off anything down in the openings. Toothpicks and exacto blades are good items to use when stuffing it in to make sure every corner has been "filled".
Sometimes tape is the simplest and easiest method. Just place a large piece over the opening and use a new SHARP blade to trim the excess away flush with the edges of the opening.
If you have items that are going to stick out, like machine gun barels, you have 2 choices. 1) Be VERY careful when masking around them, or 2) Cut them off and glue them back in place towards the end of the project. You can drill a tiny hole in the barrel and the receiver and add a thin wire to act as a locator when you glue the barrel back on later.
Your question is a common theme for almost every build, and there's no one "right" answer. I've even seen people cut out paper masks and attach them with rubber cement or liquid masking material that can be easily peeled away later. Experiment a bit and see what workd best for you. Don't be afraid to alter the contruction sequences to make YOUR painting and masking easier. Following the instructions to the letter is optional! Hope this helps!
GIL
-
Update (no pics): I have put the interior green on, and plan to do the interior detail painting over the next few days. I got sidetracked by starting a Hurricane and a Spitfire for the BoB and Steeds of the Aces builds!
GIL
-
Got a Revell 1/48 MkII Spit in the works. Pics of it are with pics of my Huricane build over on the BoB thread. The "ace" markings will be Bader's!
GIL
-
I've got two 1/48 qualifiers in the works:
The main entry is the Classic Airframes MkI "ragwing" Hurricane. The second entry, which will also qualify for the "Ace's Steeds" build is the Revell MkII Spitfire, which will be done in Douglas Bader's markings. Building both primarily OOTB, though I am doing a quick and dirty rescribe job on the old Revell Spit! By the way, that's Floquil Soviet Gray-Green for the British interior color. More pics in a few days when the interior painting is done!
GIL
-
Looks totally different without the tip tanks! Looking forward to the pics of the finished model.
GIL
-
The word that comes to mind is GORGEOUS! Love the finish! Congrats on a very pretty build, and thanks for sharing!
GIL
-
Glad you're here Peter!
GIL
-
Hmmm........I'll have to ponder this. I was looking for an EASY build while working on my A-20G. And, I DO need to replace a couple of Bf-109E's that got pancaked in my "shelving accident" last year. I also have an older Revell MkII Spit that would be an easy OOTB qualifyer. Another I have is the CA MkI Huricane and the BP Defiant. I think I'll poke around the stash a bit....Is there a time limit for the BoB build?
GIL
-
And thus the sub-title to the thread!
I did have some serious second thoughts while building the gear and the gear wells......... !GIL
-
Lookin' good Duke! What scale is that Aurora Skymaster?
GIL


 I did have some serious second thoughts while building the gear and the gear wells.........
  !
!
Battle of Britain
in Group builds
Posted
No pics as both this Hurricane and the MkI Spit I'm building for the "Steeds" build are now primed in overall Floquil SP Lettering Gray. Dull, boring, not worth a picture.....BUT it's the result of about 3hrs of filling and sanding on each of the kits! The CA MkI Hurricane and the old Revell MkI spit aren't known for their fit! should be able to make some faster progress now....Cheers!
GIL