


ghodges
-
Posts
7,570 -
Joined
-
Last visited
-
Days Won
298
Content Type
Profiles
Forums
Events
Posts posted by ghodges
-
-
Richard: The only thing I can think of is to ask: did you cut the decal out as close to the outline as possible? If so, THAT may be the problem.
Most aftermarket decals are designed with either minimal clear around the decal (Invisaclear); or the clear actually thins out and tapers down as it goes out from the edges of the printed colors. If you look at Microscale, Superscale, and other decals they tell you to cut out the ENTIRE decal, including its surrounding clear carrier. This allows the last gloss coats to cover the thinnest outer edges easier. If you cut right up to the color printing, you're actually applying a decal with a thicker edge, and the gloss will have a harder time covering it and blending it in.
Of course, the quality of your decals will make a difference! That's why you see frequent complaints about thick kit decals that are next to impossible to make disappear. Hope this helps!
GIL

-
Very nice! The 262 is one of the few planes that looks menacing even while sitting on the ground, and your model captures that !
GIL
-
The "humor in modeling" category would be the closest thing in IPMSUSA to what you're talking about. But, I know of no dedicated group for that.
GIL
-
Yea, but then I'd have to alter my spelling for tyre and colour, among other things.
Thanks for the heads up!
GIL
-
About 20-25yrs ago (or so) IPMS Eddie Rickenbacker in Columbus OH compiled a lot of "tips" from their "Flyby" newsletter and put it into a 30pg pamphlet called "Basically Speaking". It was given to members and sold at the local hobby shops. The rear of the booklet has:
"Murphy's Laws as Applied to Modeling"
1) The most important part is always the one missing
2) A seam is never on any known panel line.
3) Within a year of your major conversion or scratchbuild project, it will be released as an injection molded kit (in your scale).
4) The part with the most mold flash will be the most delicate.
5) The odds of finding the part you just dropped under your bench are directly proportional to how important the part is to finishing the kit.
6) A decal will only silver where it is most visible.
7) Gloss paint will always run.
8) The latest kit of a model in your stash will always be better than the one you own.
9) Tank treads are always too long, or too short, but never just right.
10) A seam will always be in the worst location to fill and sand.
11) The worst fitting joint will always be where the most surface detail can be destroyed by sanding.
12a) If a manufacturer should mold a part in one piece, they'll mold in six pieces.
B) If they should mold it in several pieces, they'll mold it as one piece.
13) An out-of-production kit will always be re-released, but only AFTER you've paid a collector 3 times its worth for one.
14) A model build that you like will always do worse in a contest than your builds that you don't like as well.
15) There will always be decals on a Microscale decal sheet with no reference drawings as to their location. (This one shows how old this is!)
16) The markings you hand painted will be released on a decal sheet the following month.
17) The decal that shatters into a thousand pieces is the one you need most.
18) Kit decals are always off register.
19) The guy who writes the article always makes it sound so easy.
20) There's no such thing as an easy vacuform kit.
21) Matchbox kit plastic colors will never match any known FS color spec.
22) Paint or glue will only spill where it can do the most damage.
23a) When you need a lot of glue, you'll get a little.
B) When you need a little glue, you'll get a lot.
24) Anything advertised as "fast drying", won't.
25) You'll only find out about the new kit at the local hobby shop after it's sold out.
26) The kit you saw somewhere last week will never be there when you return to purchase it the next week.
27) The kid eating the greasy french fries will always choose YOUR model to pick up.
28) You will not see the flaw in your model until you have published some close-up photos of it on the web.
and remember, Murphy was an optimist!!
All of the above courtesy of the great guys in IPMS Columbus, of whom I'm proud to still call myself a member!
GIL
-
No.....You can improve the kit gun barrels by drilling them out, removing seam lines, etc; but you cannot replace them. As for seat belts, simple tape belts are allowed, but not aftermarket pe stuff.
GIL
-
That's taking shape nicely. Are you doing a OD/gray bird, or will you dare to bare the metal?
GIL
-
I'll be watching this one closely too Richard, as I often have the same problem. You'd think after 40 years I'd get some part of this hobby down to a "science"....
GIL
-
Glad to have you here with us William. I'd love to see some pics of that Nascar collection, sounds colorful! We'll try to help with any questions you post.
GIL
-
Very cool! I can almost imagine little Sparrowhawks fluttering around it!
GIL
-
Squadron mail order has vacuform canopies in 1/32 for the late "erla" blown hood and for the earlier 109E model. Oddly, there's not one listed for the F or G variants. The "E" variant center section might be close enough to consider. A better idea might be to hit the modeling selling/trading sites and beg for someone's spare kit part. Best of luck!
GIL
-
The mix ratio for superglue/baby powder:
Dump a small pile of powder onto a butter tub lid (about 1" dia.). Level it out a little with a toothpick. Place a drop (or 3-4) on the powder. Mix the glue into the powder with a toothpick until it thickens to your liking. Apply to your gap!
You'll have a working time of 30secs to a minute once you get it mixed. After that, it'll start to harden. When that happens, move to another section of the powder and repeat the process as needed. The advantage to the butter tub lid is it will allow you to save unused powder (or at least some of it) if you want. Also, you can flex it to remove the dried stuff when you're done and want more working room on the lid.
GIL
-
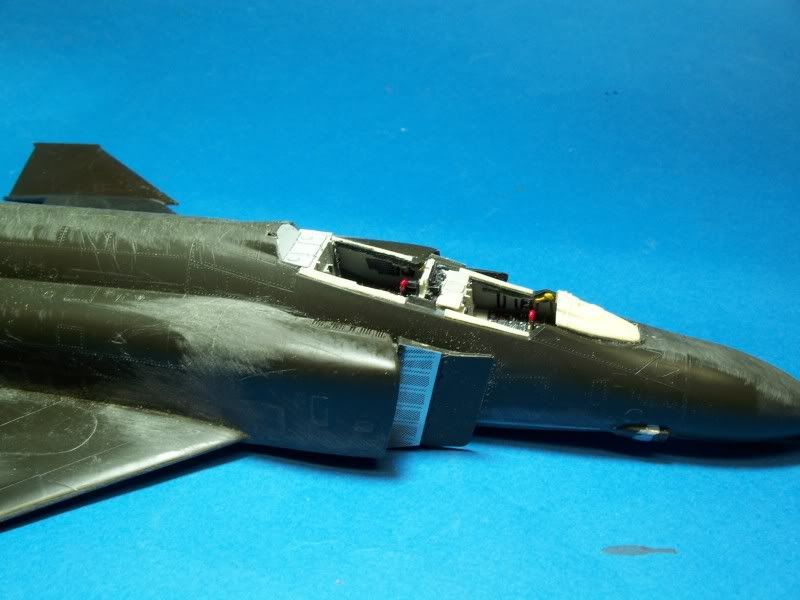
Significant progress has been made...
Typical Monogram 80's kit fit....needs some heavy sanding!
Replaced the kit fin pitots with steel tubing, which will hold the smaller diameter tubing to finish them up. I also added the fin light from clear red plastic.
Adding the resin cockpit tub caused significant fit problems on the bottom, even after sanding the top of the nose gear well paper thin. I had to use a Dremel to eliminate a step at the front of the gear bay, and used superglue/baby powder to fill the huge gap down the side.
The worst fitting parts of wing in the rear are the flaps. I used some Mr. Surfacer and some superglue on them.
Well, the main airframe is now complete. I now need to get some new sanding sticks to get her ready for priming! Cheers!
GIL
-
If you do go the superglue/baby powder route, buy the CHEAPEST superglue you can find (4 tubes for $1 pack is perfect). The very thin, expensive, name brand hobby shop type superglues actually react too quickly with the powder. The cheap stuff allows enough working time to apply the "paste" before it sets.
GIL
-
Obviously the paper mill smell in Jax has gotten to you!
Ah yes!
"Eau de Jaxonville" ........not too bad here in Orange Park, unless the wind shifts the wrong way! GIL
-
Ron is right! That's not a gap, that's a chasm! Filling it with strip plastic will greatly minimize the amount of filler you need, as well as the related shrinkage IF you use putty. I also recommend using super-glue mixed with baby powder as a filler. It'll dry faster abd doesn't shrink; allowing you to glue the strip wedge AND fill the surface at the same time! Hit it all with some accelerator an you can start sanding it smooth right away!
GIL
-
As expected, the vendors area is all but "officially" sold out! If you still want a table or two, I can find somewhere to squeeze you in, but you better act fast! Regular space is gone and I expect to sell the alcoves out within a week! It's gonna be another great Jaxcon, I hope you can join us for the fun!
GIL
-
Pretty P-3, or at least as pretty as that tub of a plane gets! If I ever build my 1/48 one, I hope to do the scheme you did. Thanks for the reference!
GIL
-
Another nice one Ying! Congrats!
GIL
-
Looks great Ying! I think you nailed the weathering on the bottom. Russian stuff was heavily used on grass fields, and your Yak looks the part! Congrats!
GIL
-
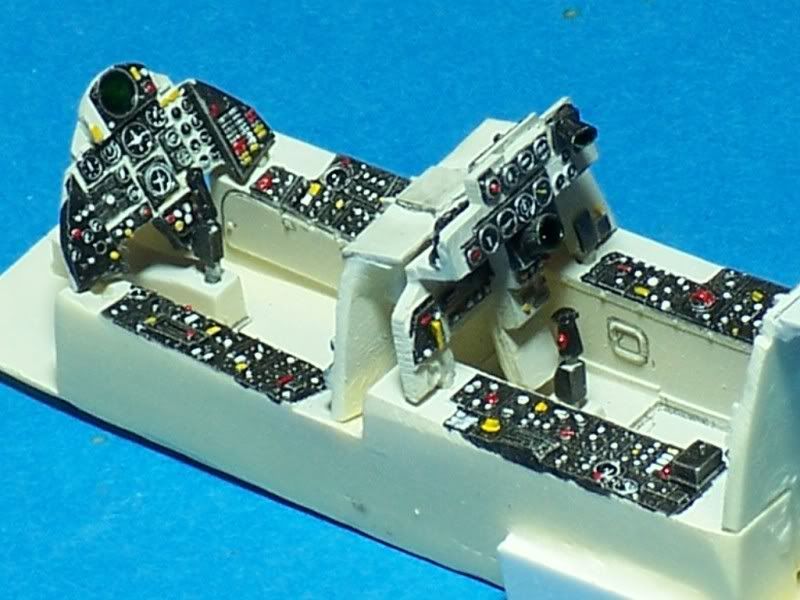
Got the interior painted...
Now to get it into the fuselage and I can start making some faster progress! Cheers!
GIL
-
No, the books I'm referring to have a lot of detailed scale drawings, just some plans are more detailed than some others. The plans were designed for people to be able to scratch-build scale models and flying models long before the days of plastic modeling. As with all plans, you either trust them or you don't.
Gil
-
You might check libraries and book shops for the old Wylam Plans books. These were soft cover books and carried scale drawings of various types, usually grouped by time period. I believe the drawings date from the '30s, '40, and '50s; and cover a LOT of the inter-war civilian and military types.. I have 2 or 3 of the books, and the plans range from simple 4 views to 3-4 pages of detail drawings including fittings and cockpit layouts, depending on the type. The largest plans in the book seem to be 1/48, with larger planes having smaller scales to fit on the pages. It would be a simple matter to copy and enlarge the plans once you found them.
One last thought....I believe Guillows made a stick/balsa PT-17 Stearman kit in a large scale. It might be worth tracking down IF it includes scale drawings in the kit (many of those old flying kits did). Hope this helps. Best of luck!
GIL
-
The Testors Liquid Cement can be used to thin Squadron Green Stuff, White Stuff, and Dr. Micro-tools red putty (which are all basically auto-body putties in other tubes and varying grains of fineness). I actually make a bottle of "thinned" putty by using an extra paint jar, filled half/half with putty and cement, or thinned until it's got the consistency of paste (thinner than toothpaste though). I apply it with a toothpick or thin brush (which must IMMEDIATELY be cleaned with lacquer thinner). The advantage is that it's easier to apply in small doses, dries faster, and the glue actually gives the putty more "bite". The one caution here is that you do NOT want to apply it in thick layers; use the sutff straight from the tube for that! The glue-thinned putty IS more aggressive on plastic, and may tend to deform thin areas (like vac plastic) if used to excess. Cheers!
GIL


 "Eau de Jaxonville"
  ........not too bad here in Orange Park, unless the wind shifts the wrong way!
Humor in modeling,
in General Modeling
Posted
Good one Clare! Done!
GIL