ghodges
-
Posts
7,568 -
Joined
-
Last visited
-
Days Won
298
Content Type
Profiles
Forums
Events
Everything posted by ghodges
-
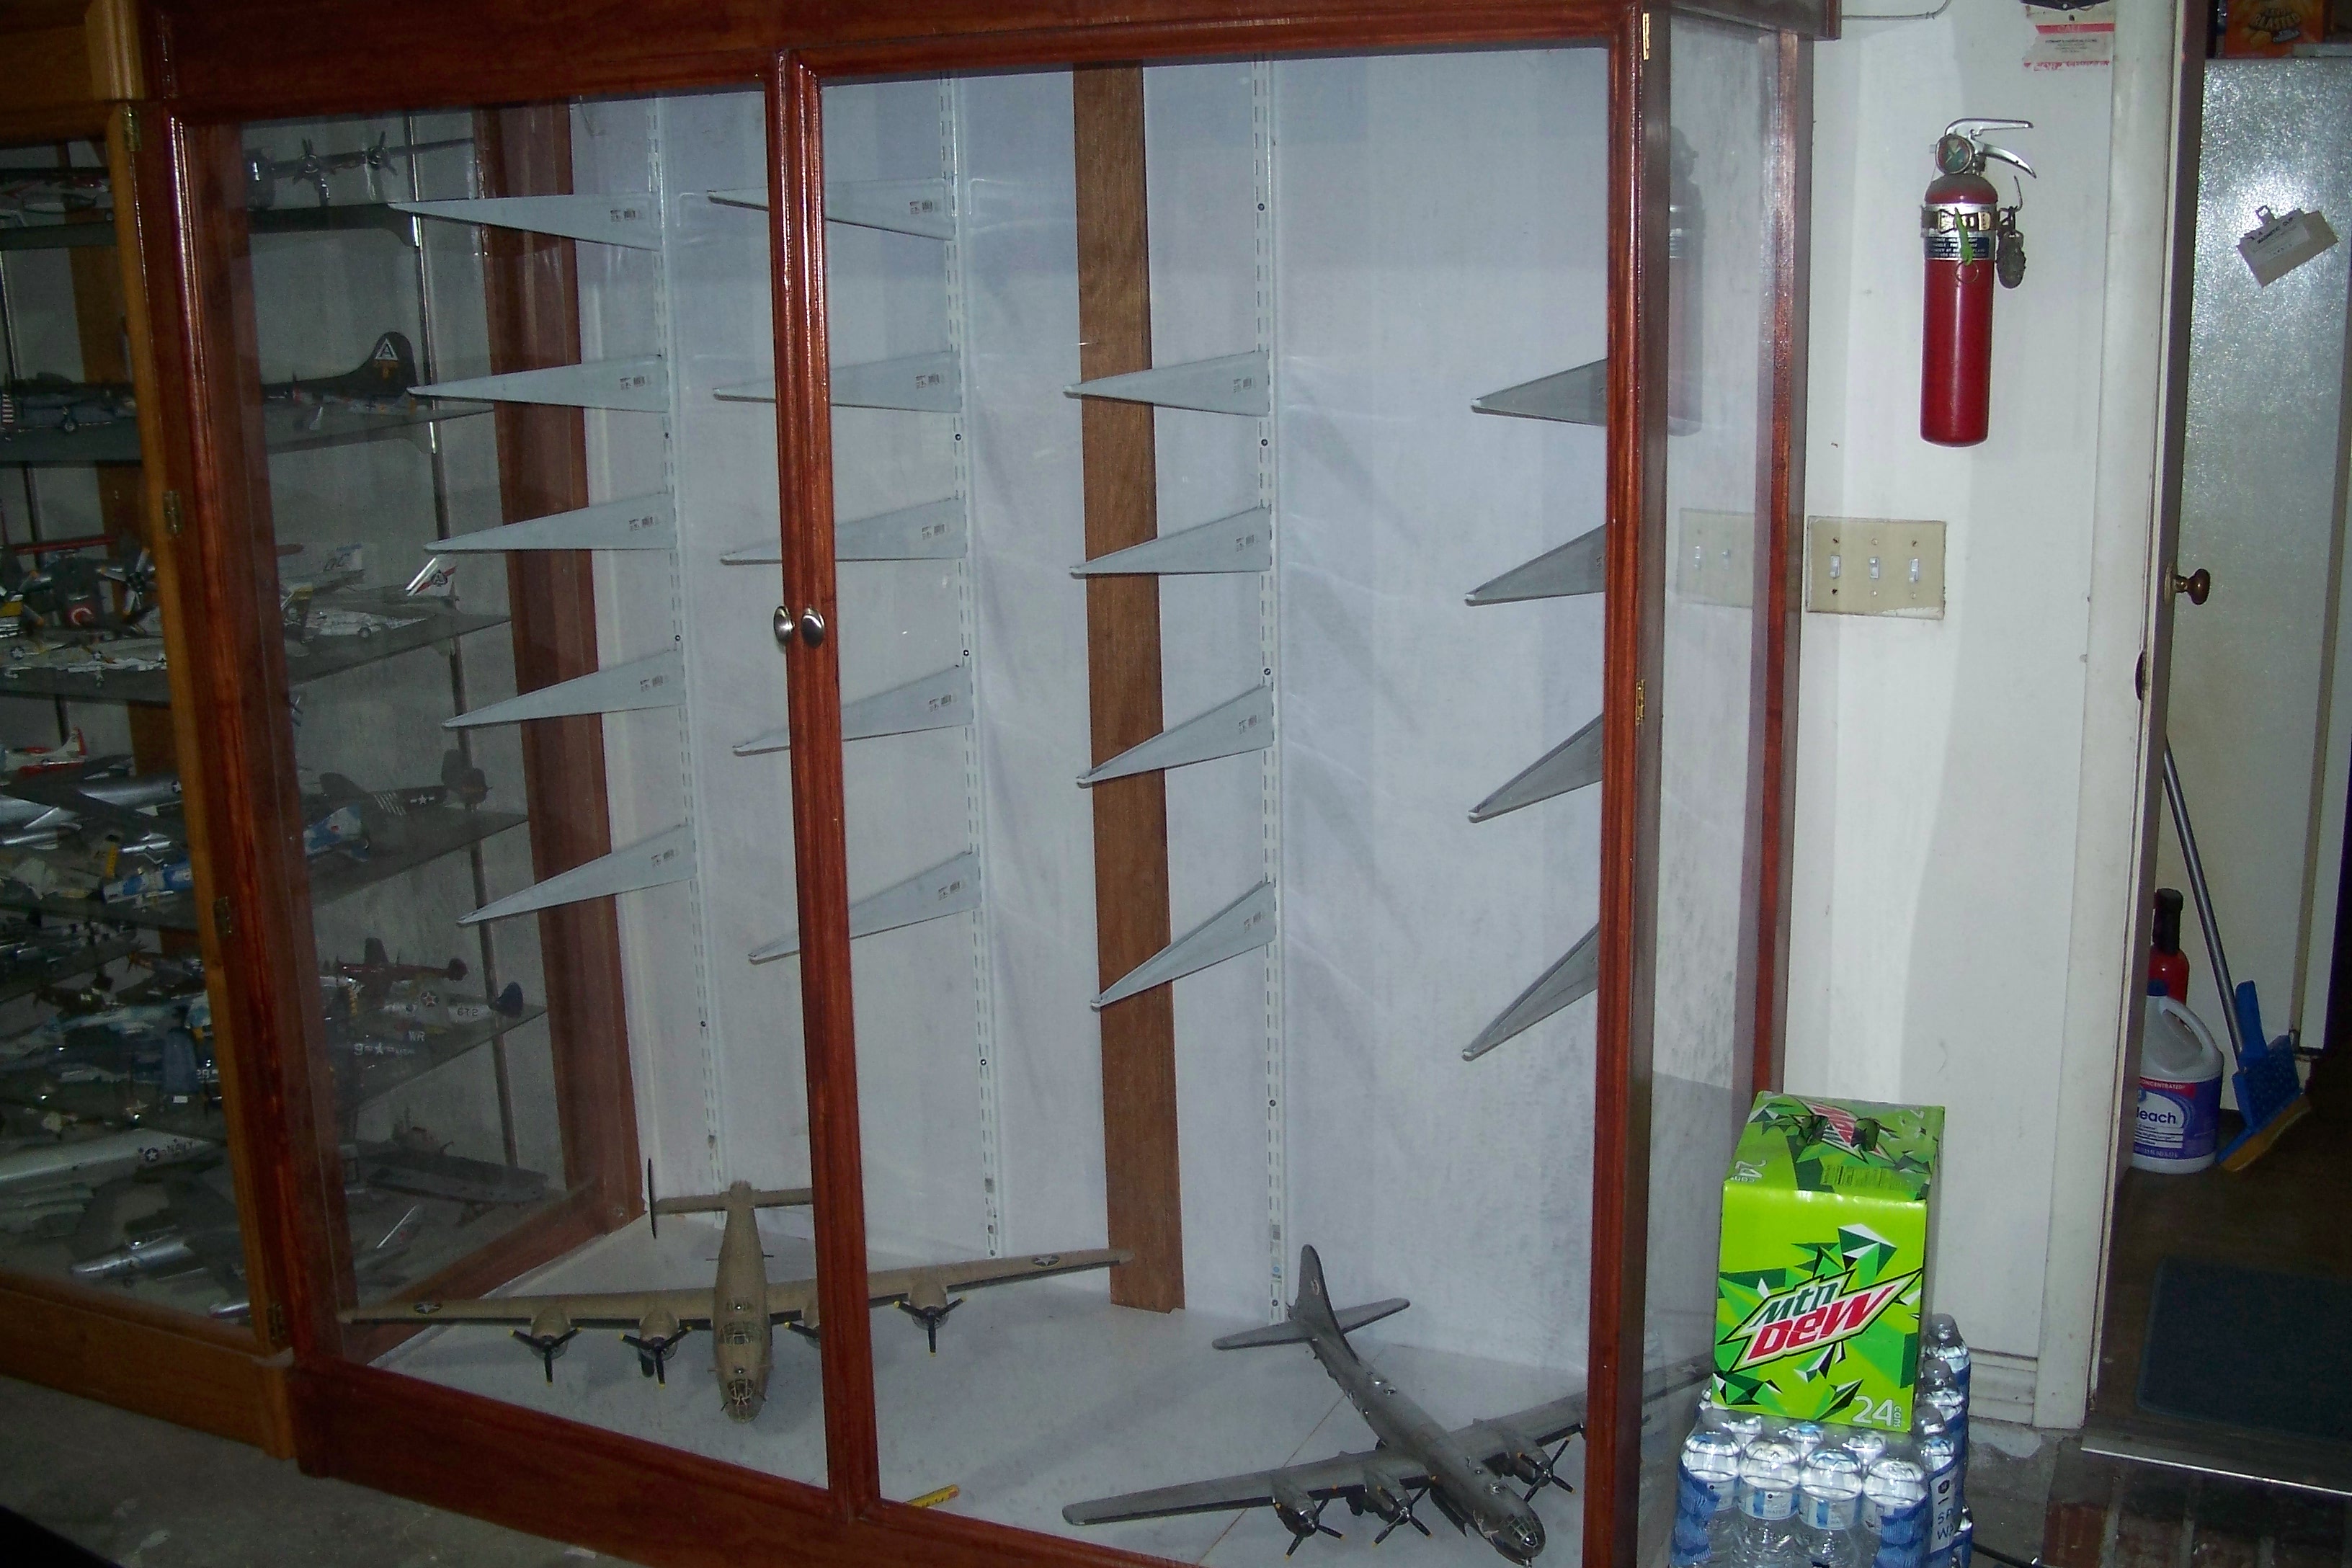
It actually fits in my newest display case! Gil

-
Gotta agree with Mark, your fledgling museum is off to a fine start! That PT-17 is especially eye catching! I haven't been able to find the ceramic wire in anything larger than what is sold by Wonder Wire. My 2 choices for 1/32 rigging are either stretched sprue, or thin floral wire. You can usually get a handful of the wire at your local florist, and they may or may not charge you. The thinnest works well, but is also easy to kink, and thus has to be handled carefully. Videos on stretching sprue can be found on line. It takes practice to do it and also to get it taut once in place, but is also readily available in your kits. Hope this helps! Gil
-
No.... not much room to spare at all, but there IS a modicum of "air" on all sides! And, there's room to add a couple of smaller 1/48 models in the space between the tail and the wings if and when that becomes needed as the case fills up. My real hope is that the local military museum will have space for it there eventually, and I'll give it to them. If not, it still has a home with me! Gil
-
Display only for 2023 Nats?
ghodges replied to DavidBridges's topic in About the IPMS/USA National Convention
I've made good use of display only space in the past and hope they'll have some in Texas. That said, though it does limit the number of models you may want to bring, you can simply bring your models and "display" them in the regular categories. If you're registered for the convention it doesn't cost you anything buy the time to fill out the forms. The only real down side is it makes more work for the judges...... though most of my entries, whether for real or display, don't take long to judge and move on past! Gil -
Brilliant work! Ok, I'll leave now..... Gil
-
Very nice! Completing 4 is a great way to wind up the year, though knowing you, you could have a few more up your sleeve in the next week! Too bad about that canopy.... I gave up on liquid masks years ago as being unreliable at the best and a gooey mess like yours at the worst. Hope you can replace the clear parts as that Harrier deserves it. Gil
-
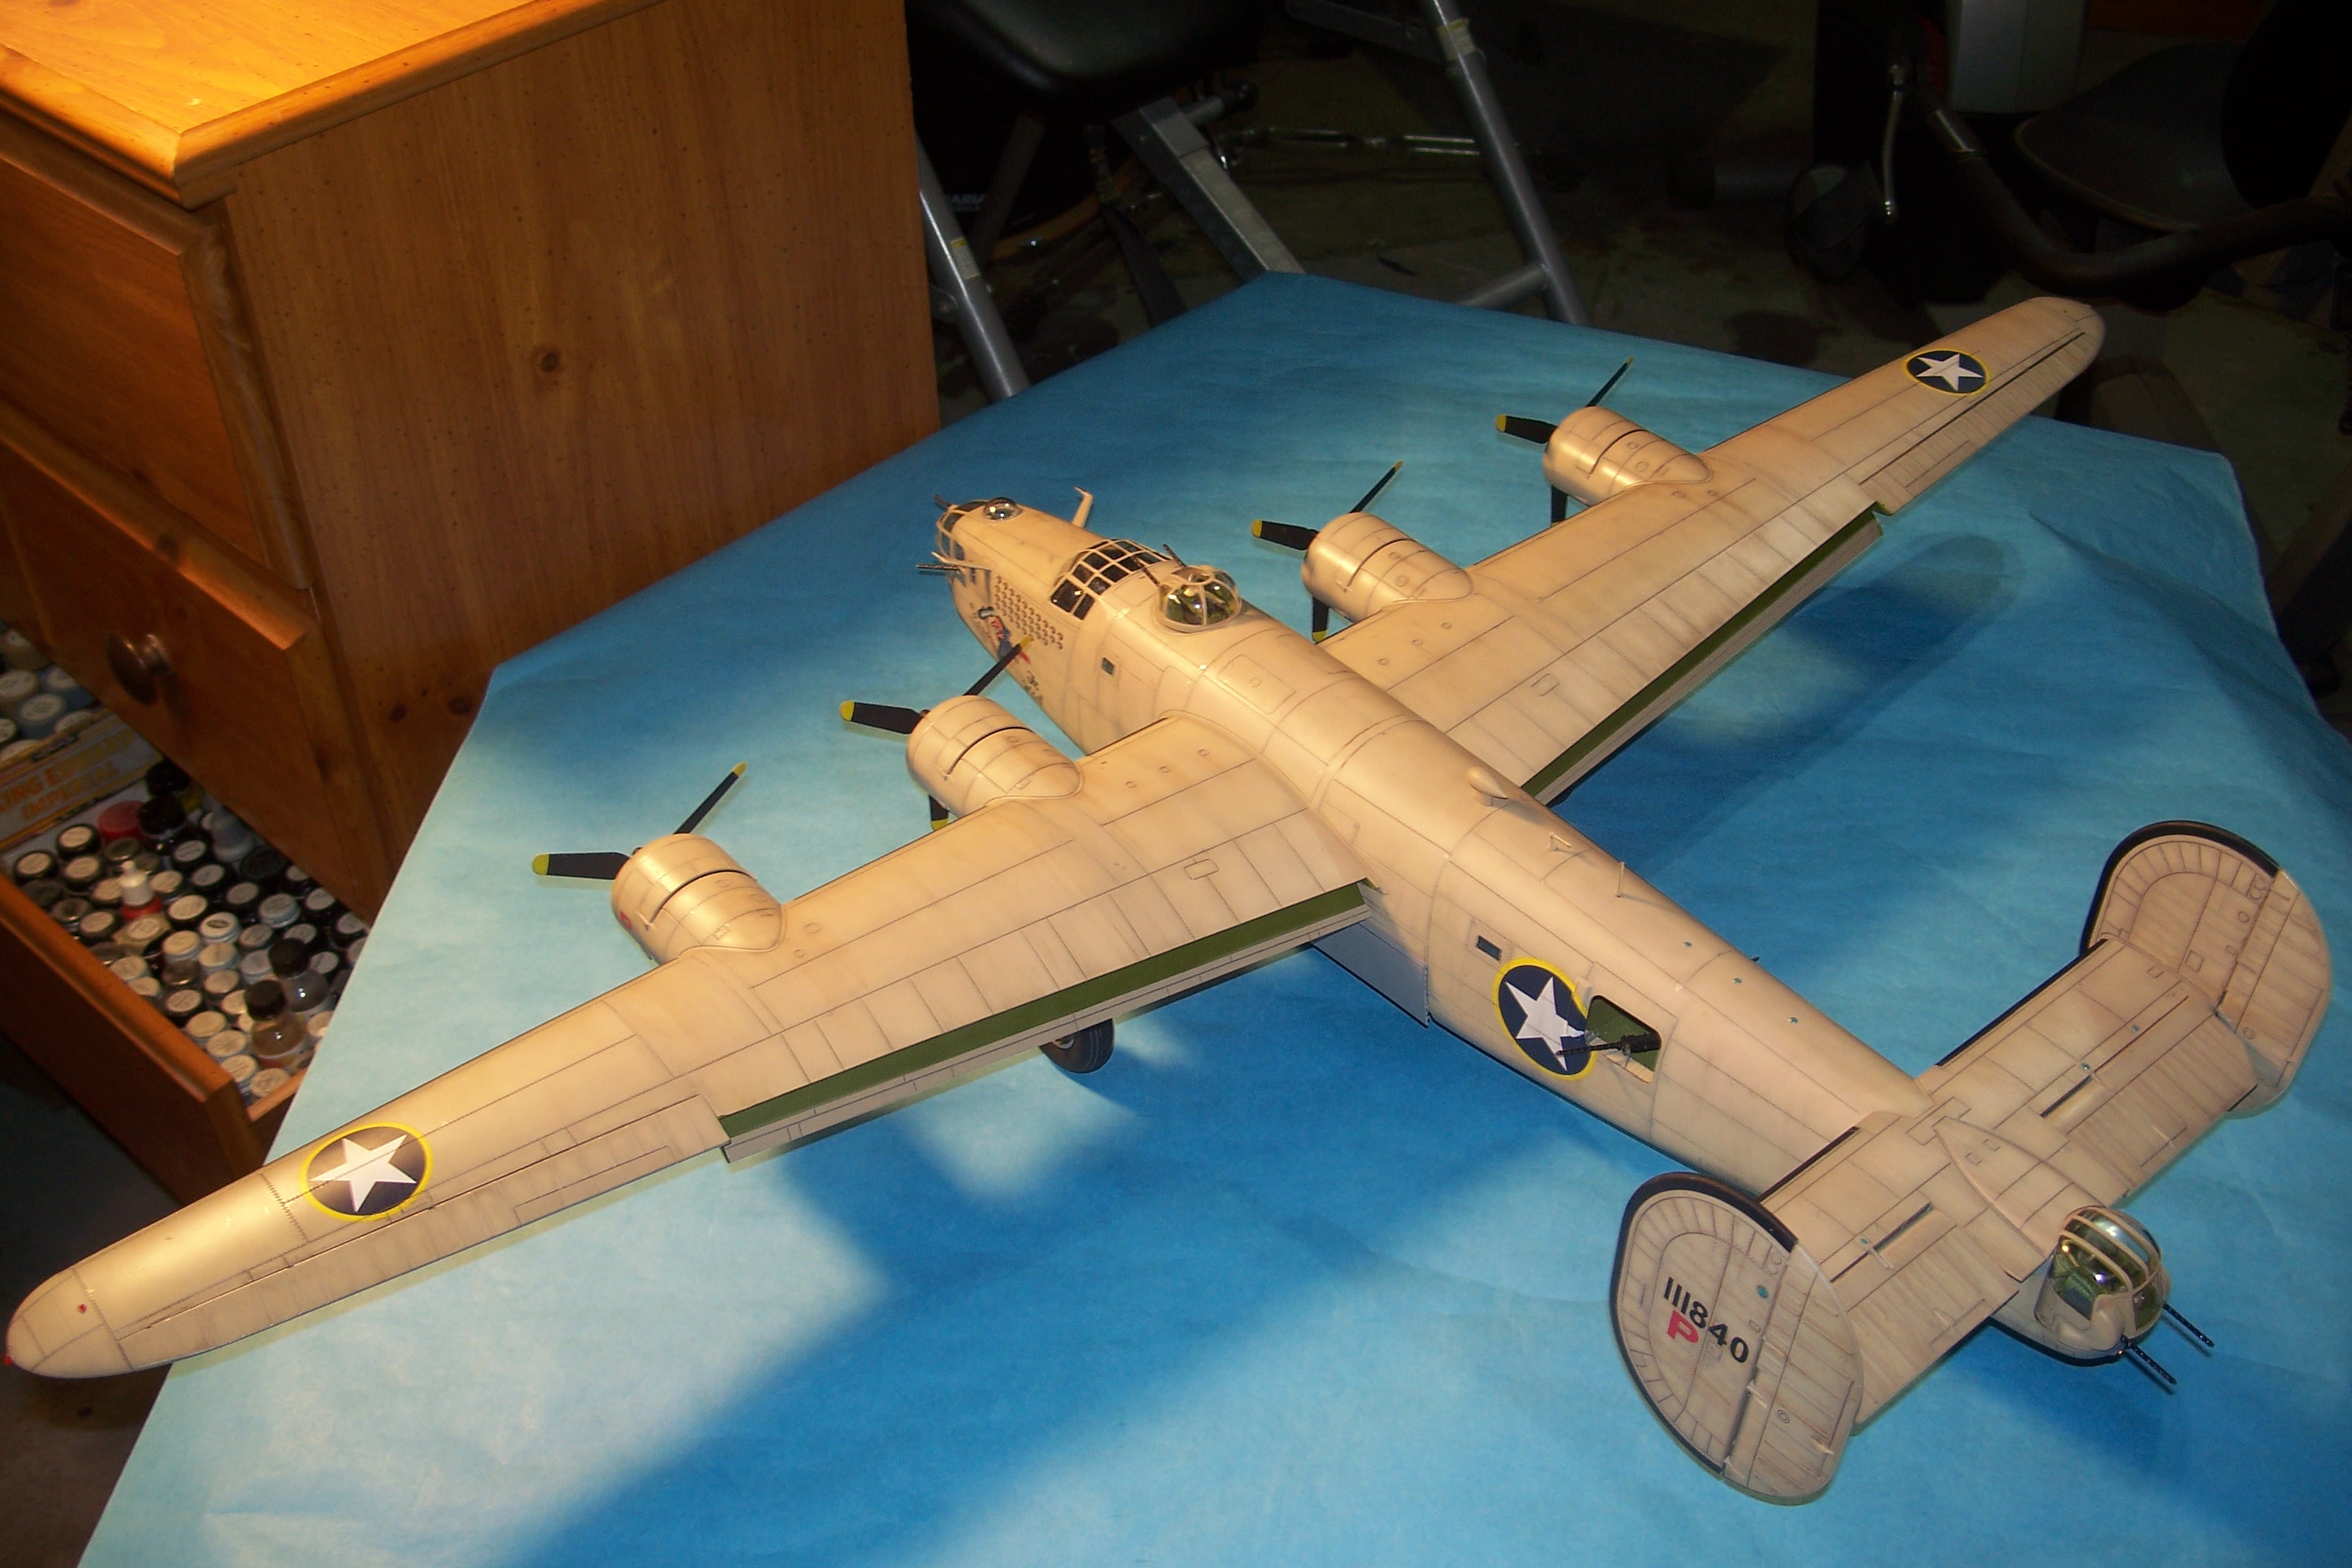
I considered installing a mirrored back, but since it cost me twice what the last one did, decided to cut costs. My smallest case in the office does have a mirrored back. Here's the latest pic of the new case with that 1/48 B-29 I "christened" the case with and the 1/32 B-24D I just finished in it.... Gil
-
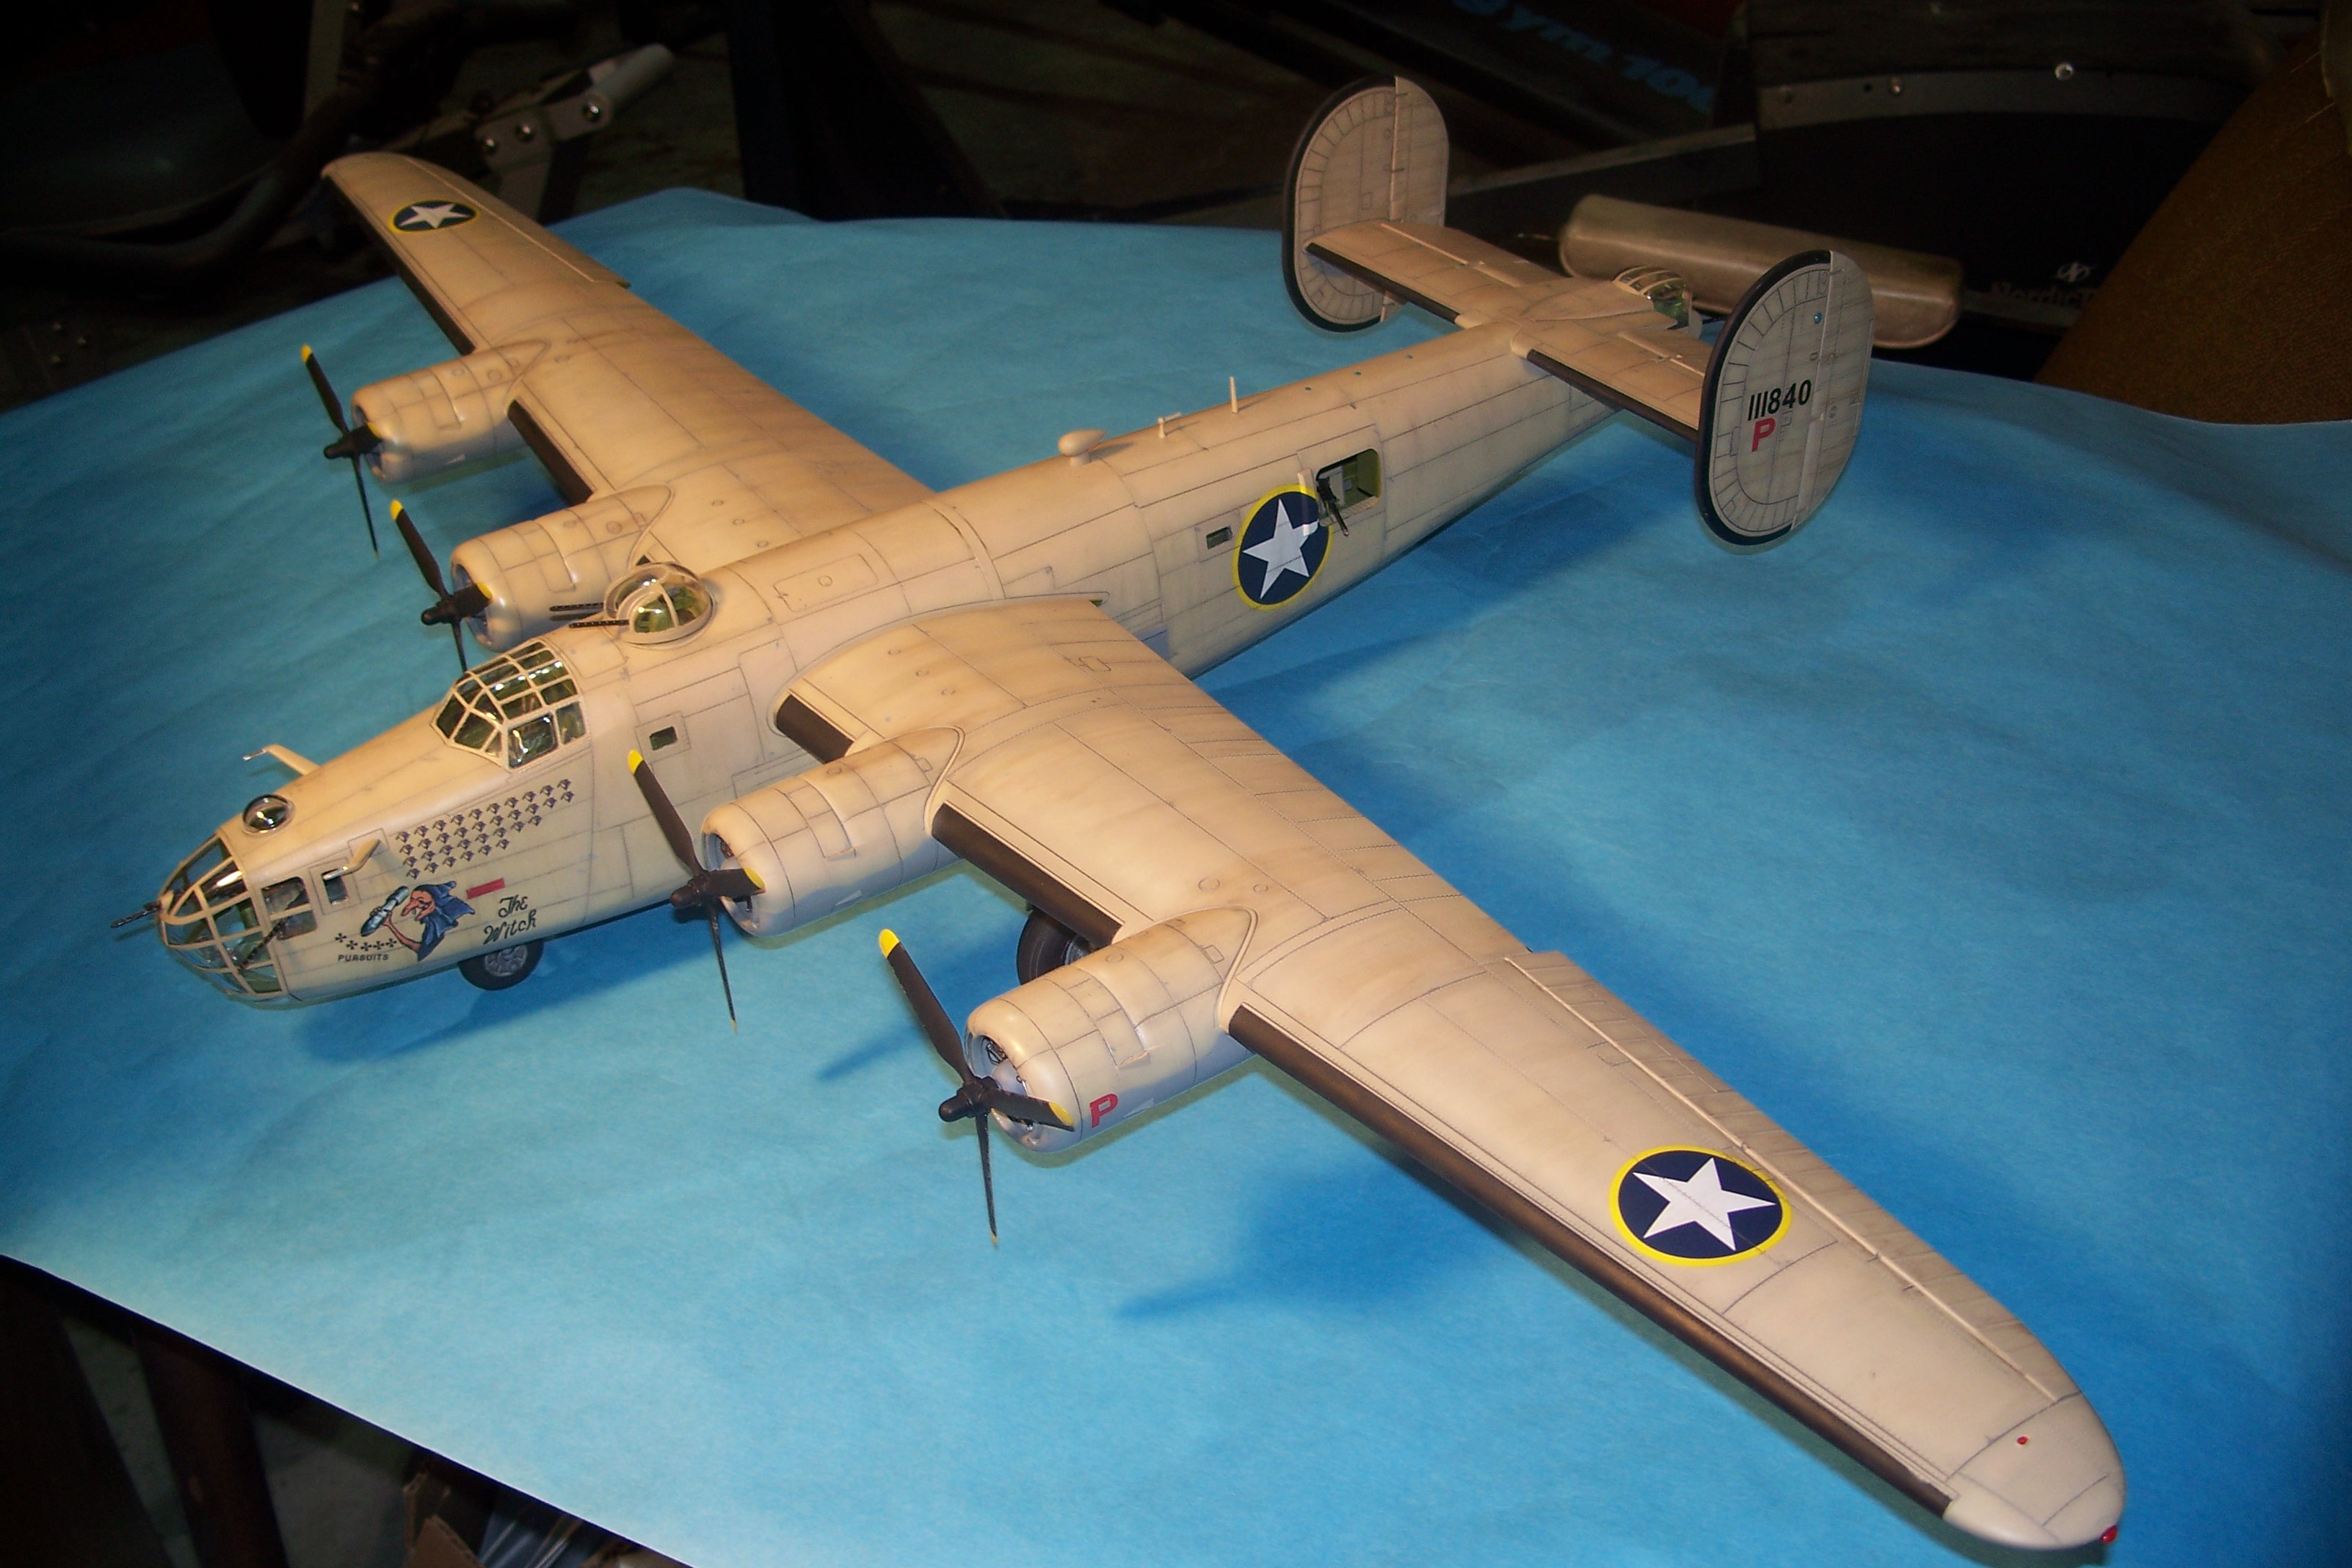
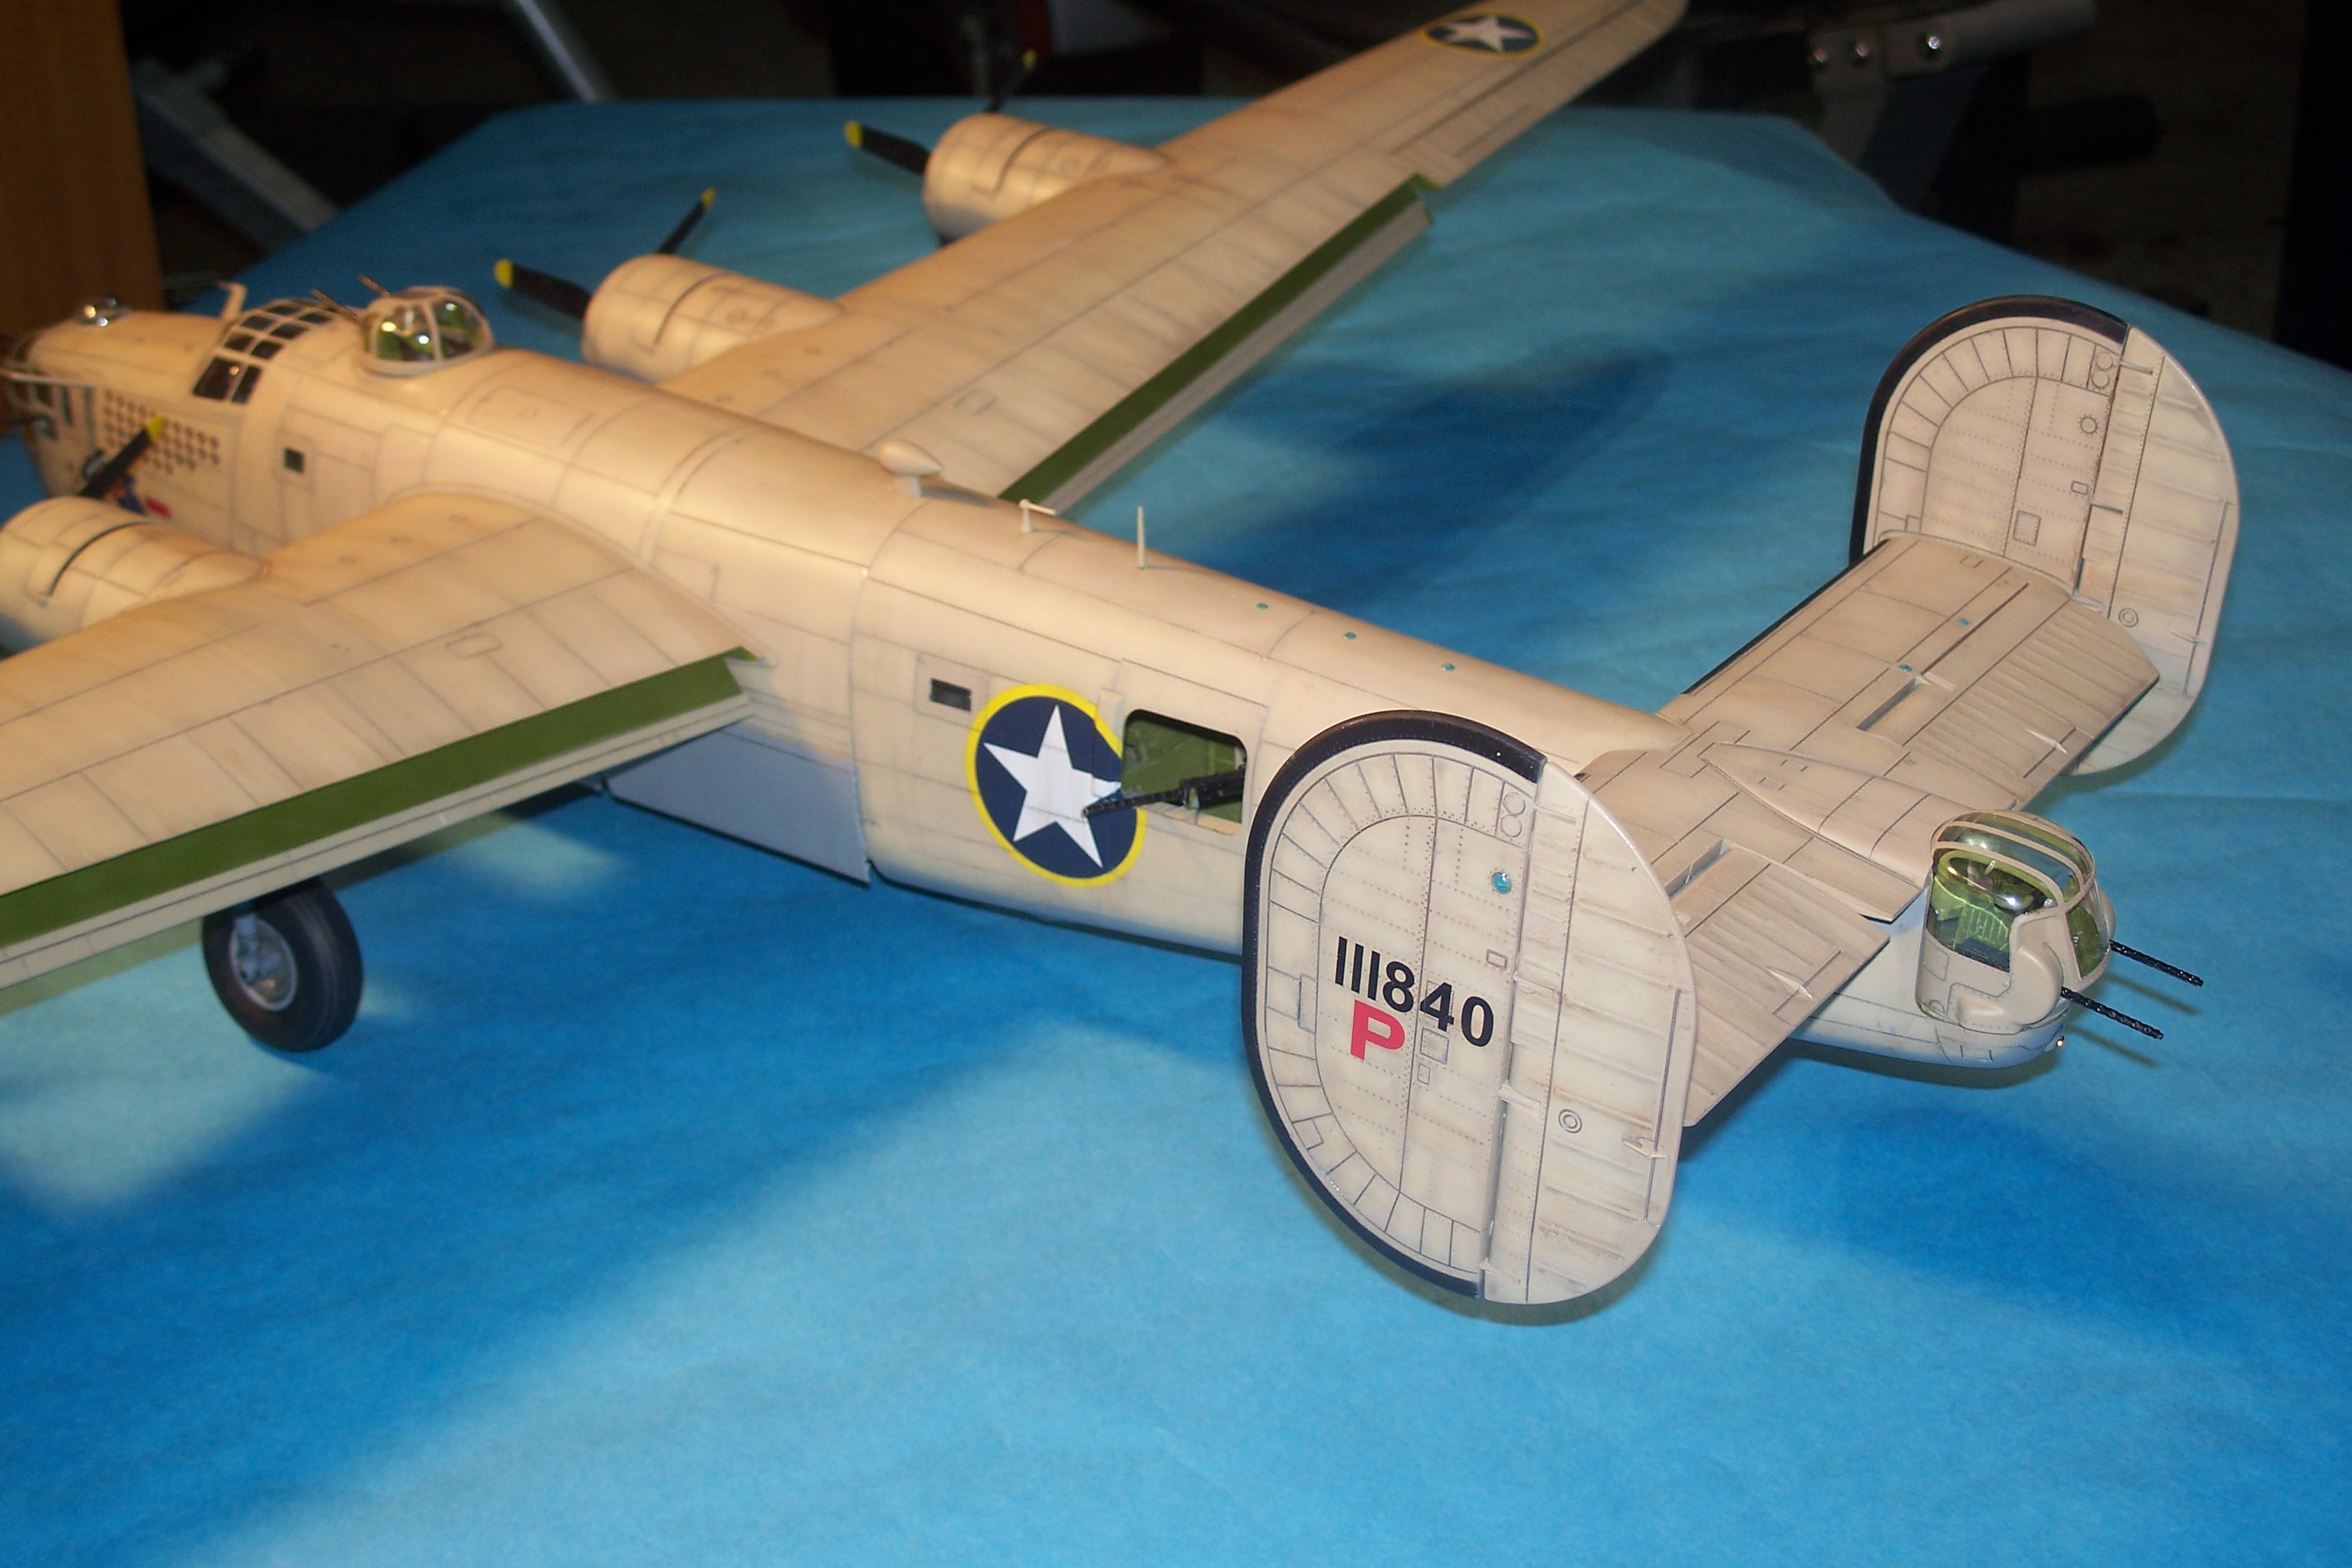
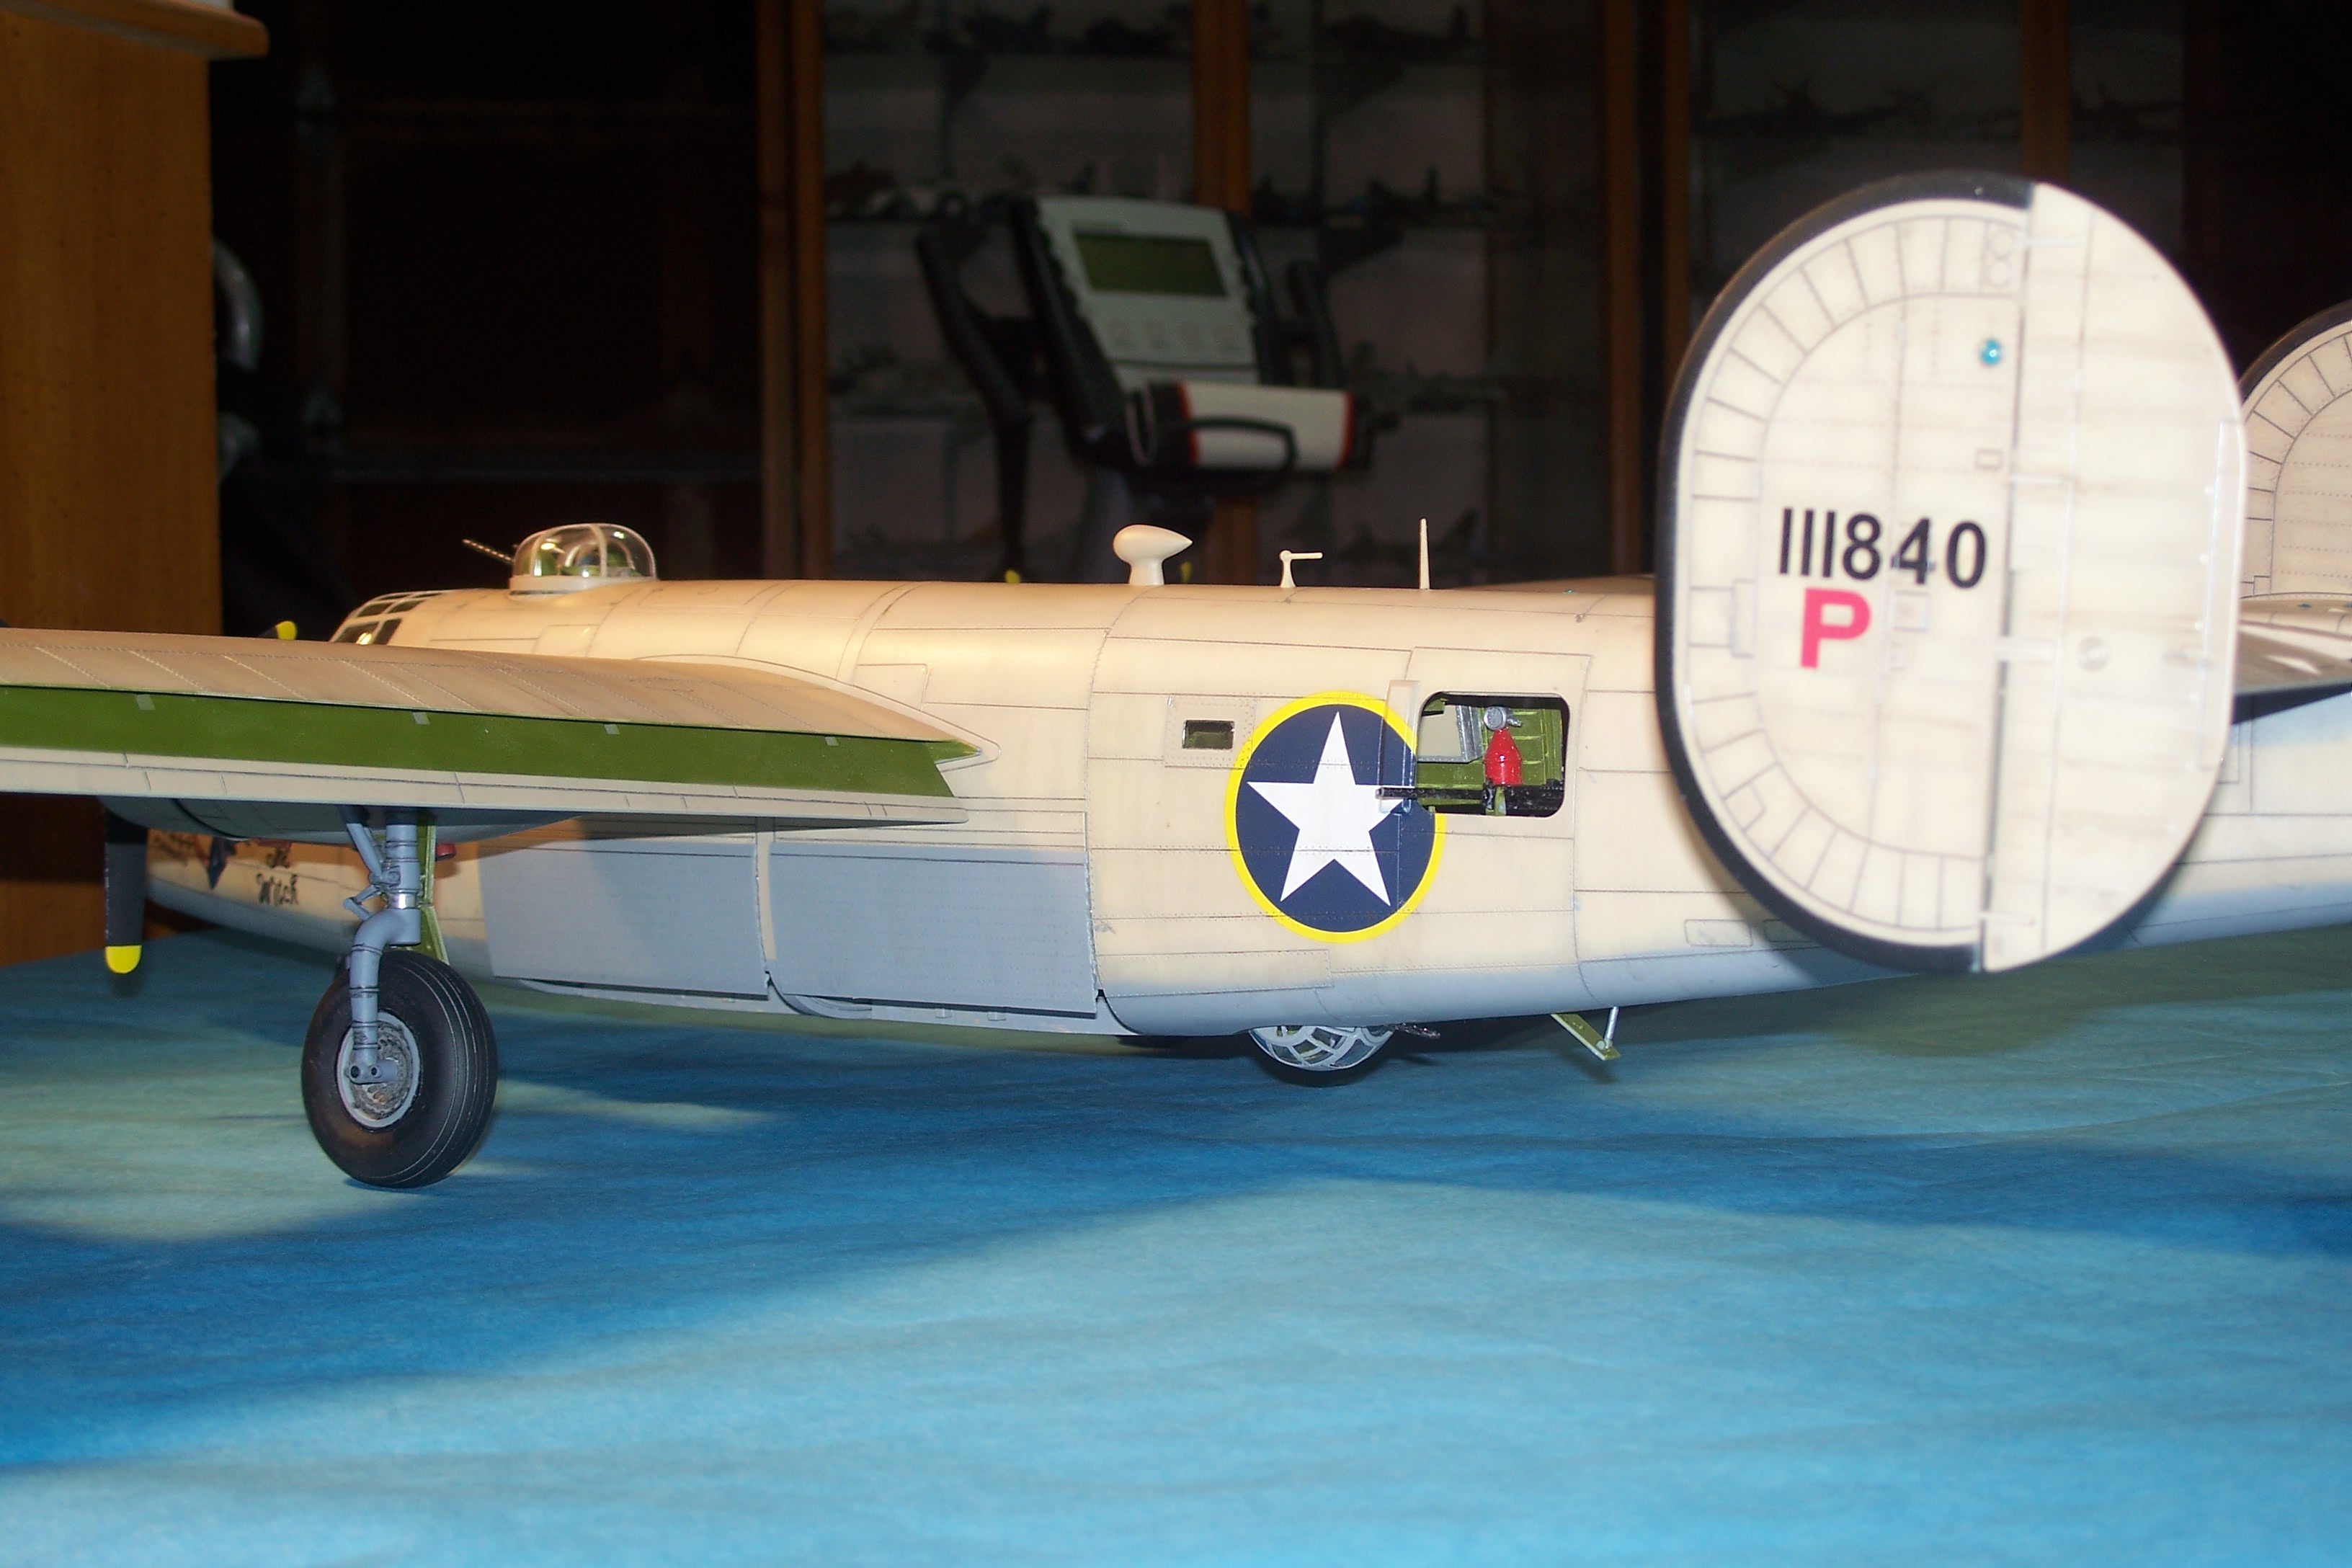
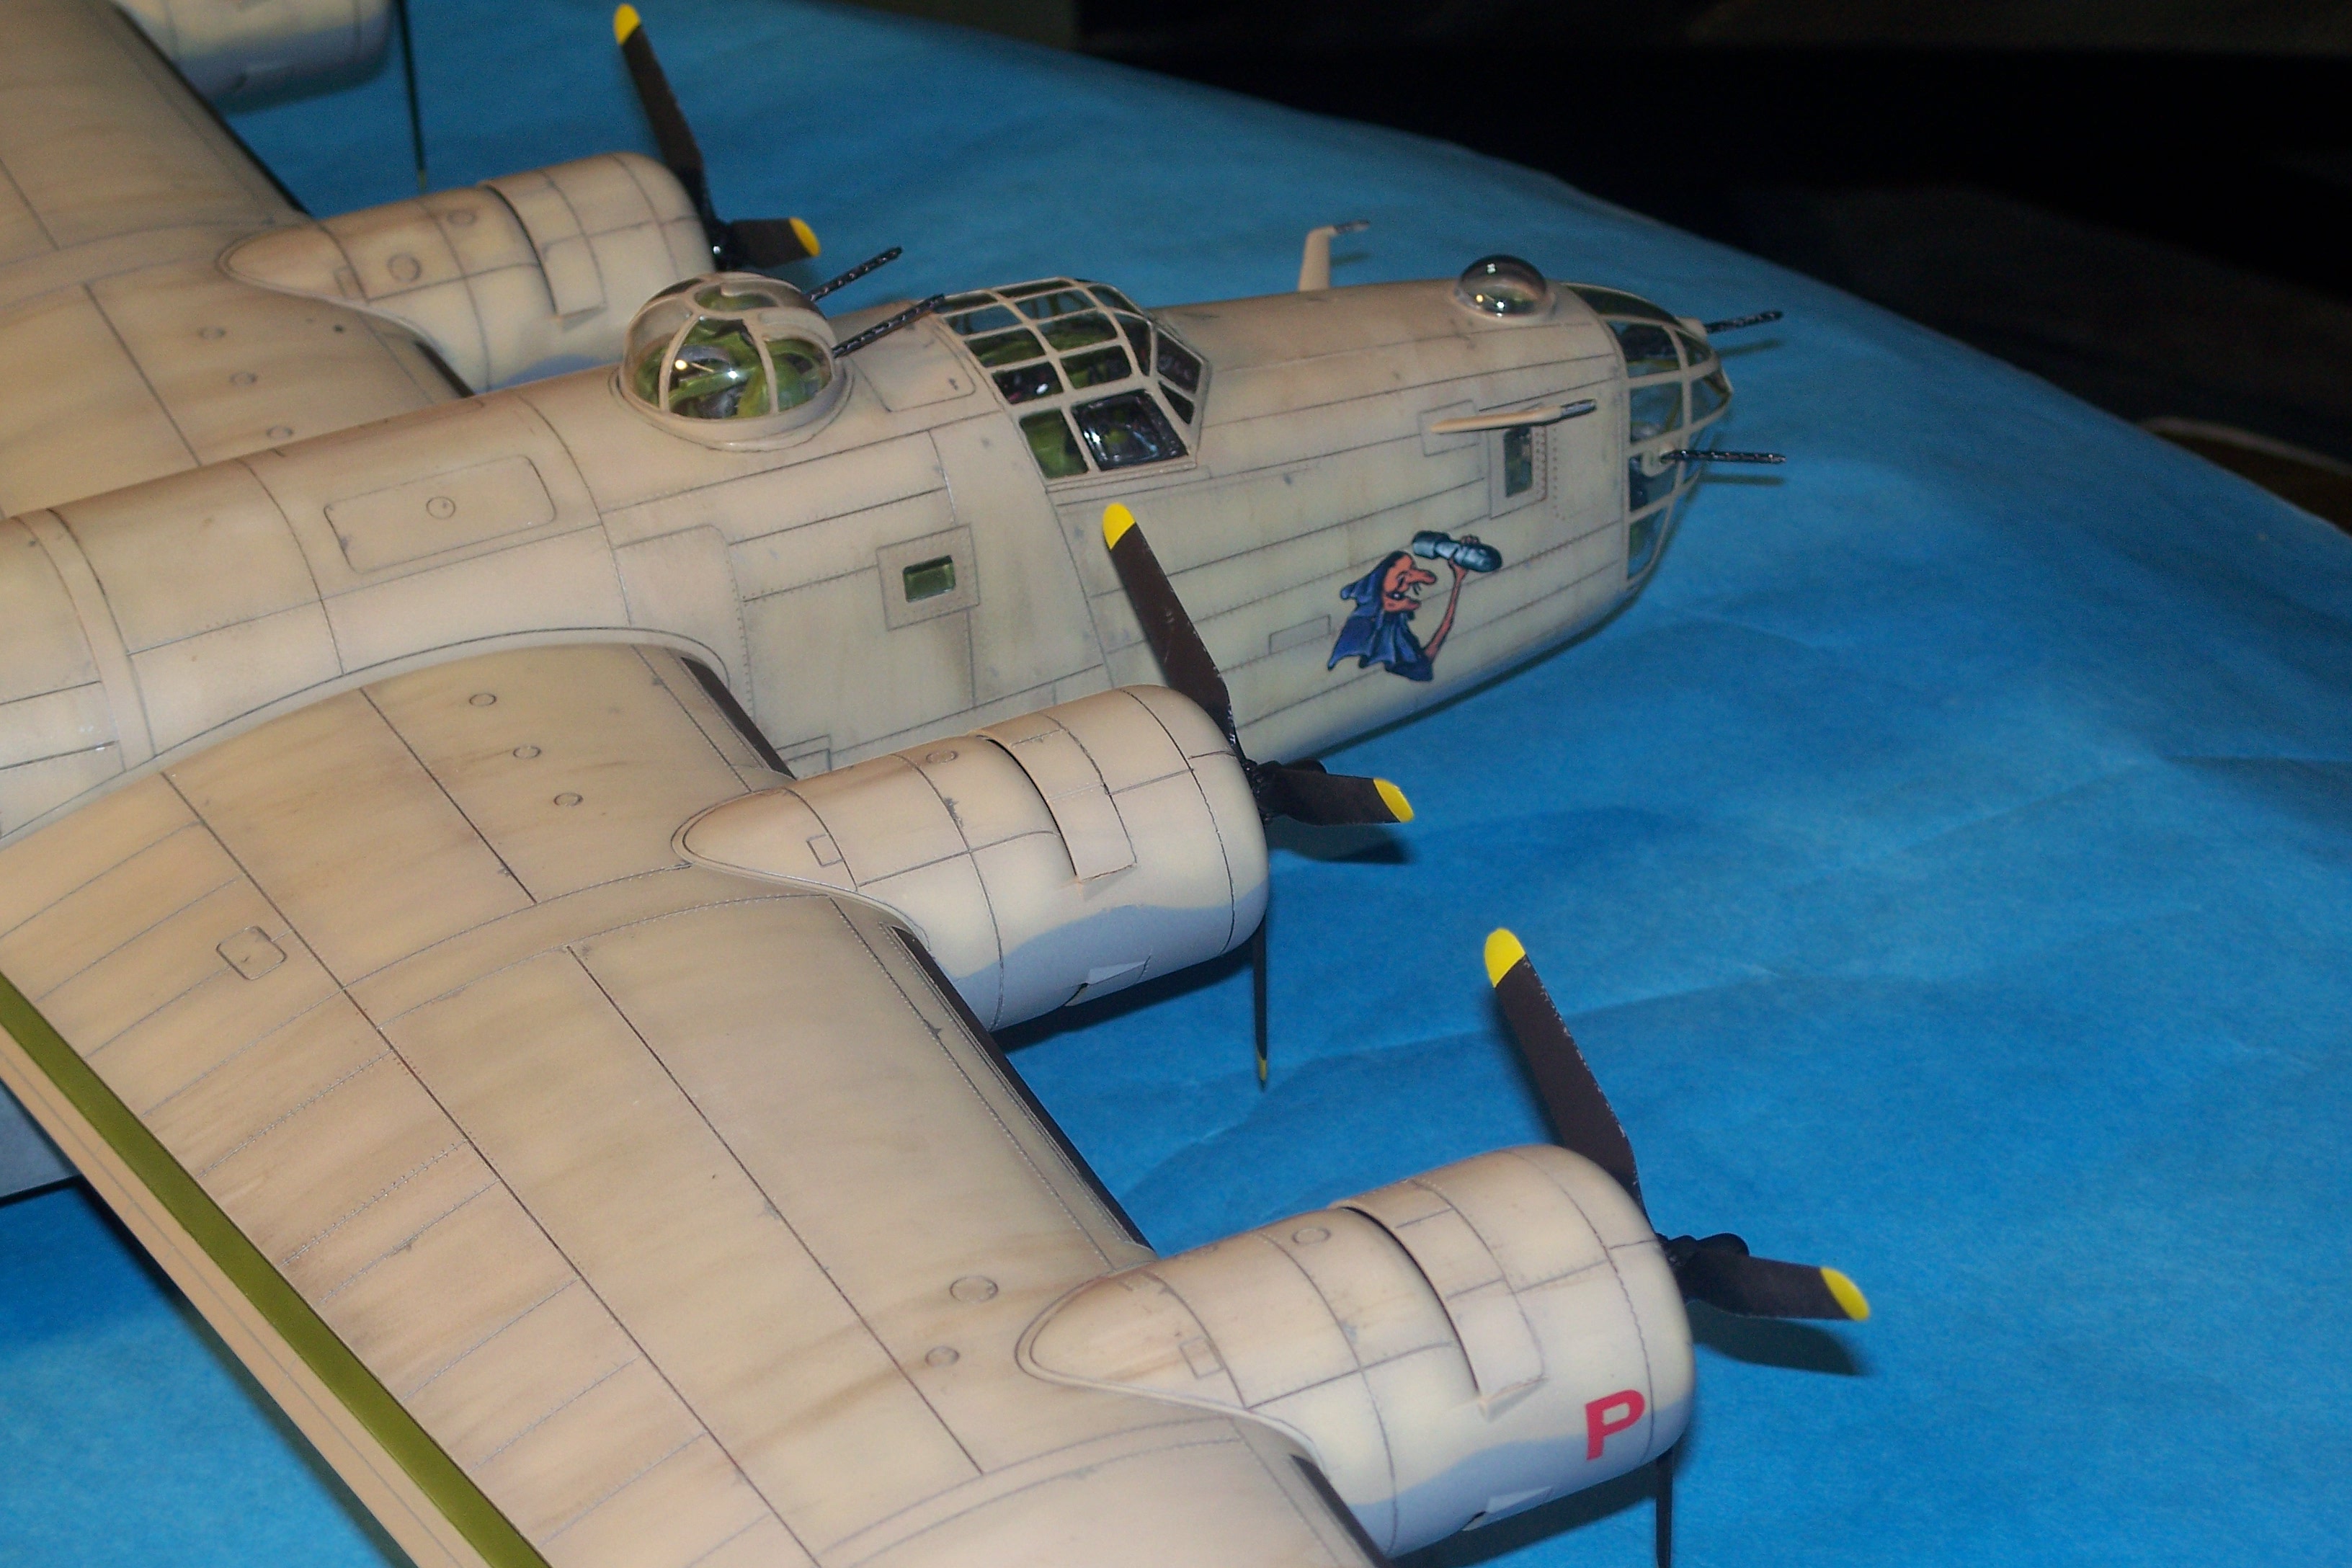
The model was painted with Tamiya rattle can Deck Tan topside and Neutral Gray underneath. The top side was then heavily post shaded with Tamiya lacquer Light Sand, and a "mist" coat of Tamiya lacquer Deck Tan was applied to tone it back down. Tamiya rattle can Gloss was used before applying the kit decals, which are quite good. That said, it did take a new bottle of Solvaset and some patience to get the fuselage roundels to suck down over the waist window wind guards. I panel lines were done with pencil, which was then smeared with a wet finger for weathering. MIG brown pigments were applied in the same way for more weathering, along with some selected silver chipping. Tamiya rattle can Flat sealed everything. This thing is HUGE.... tough to get good pics of it overall, so please excuse the background stuff! Comments, critiques, and questions welcome! Gil
-
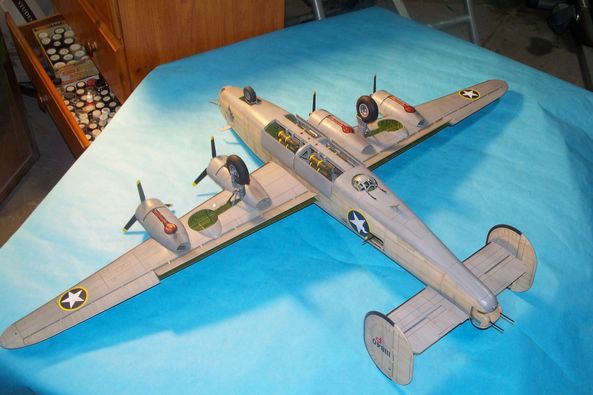
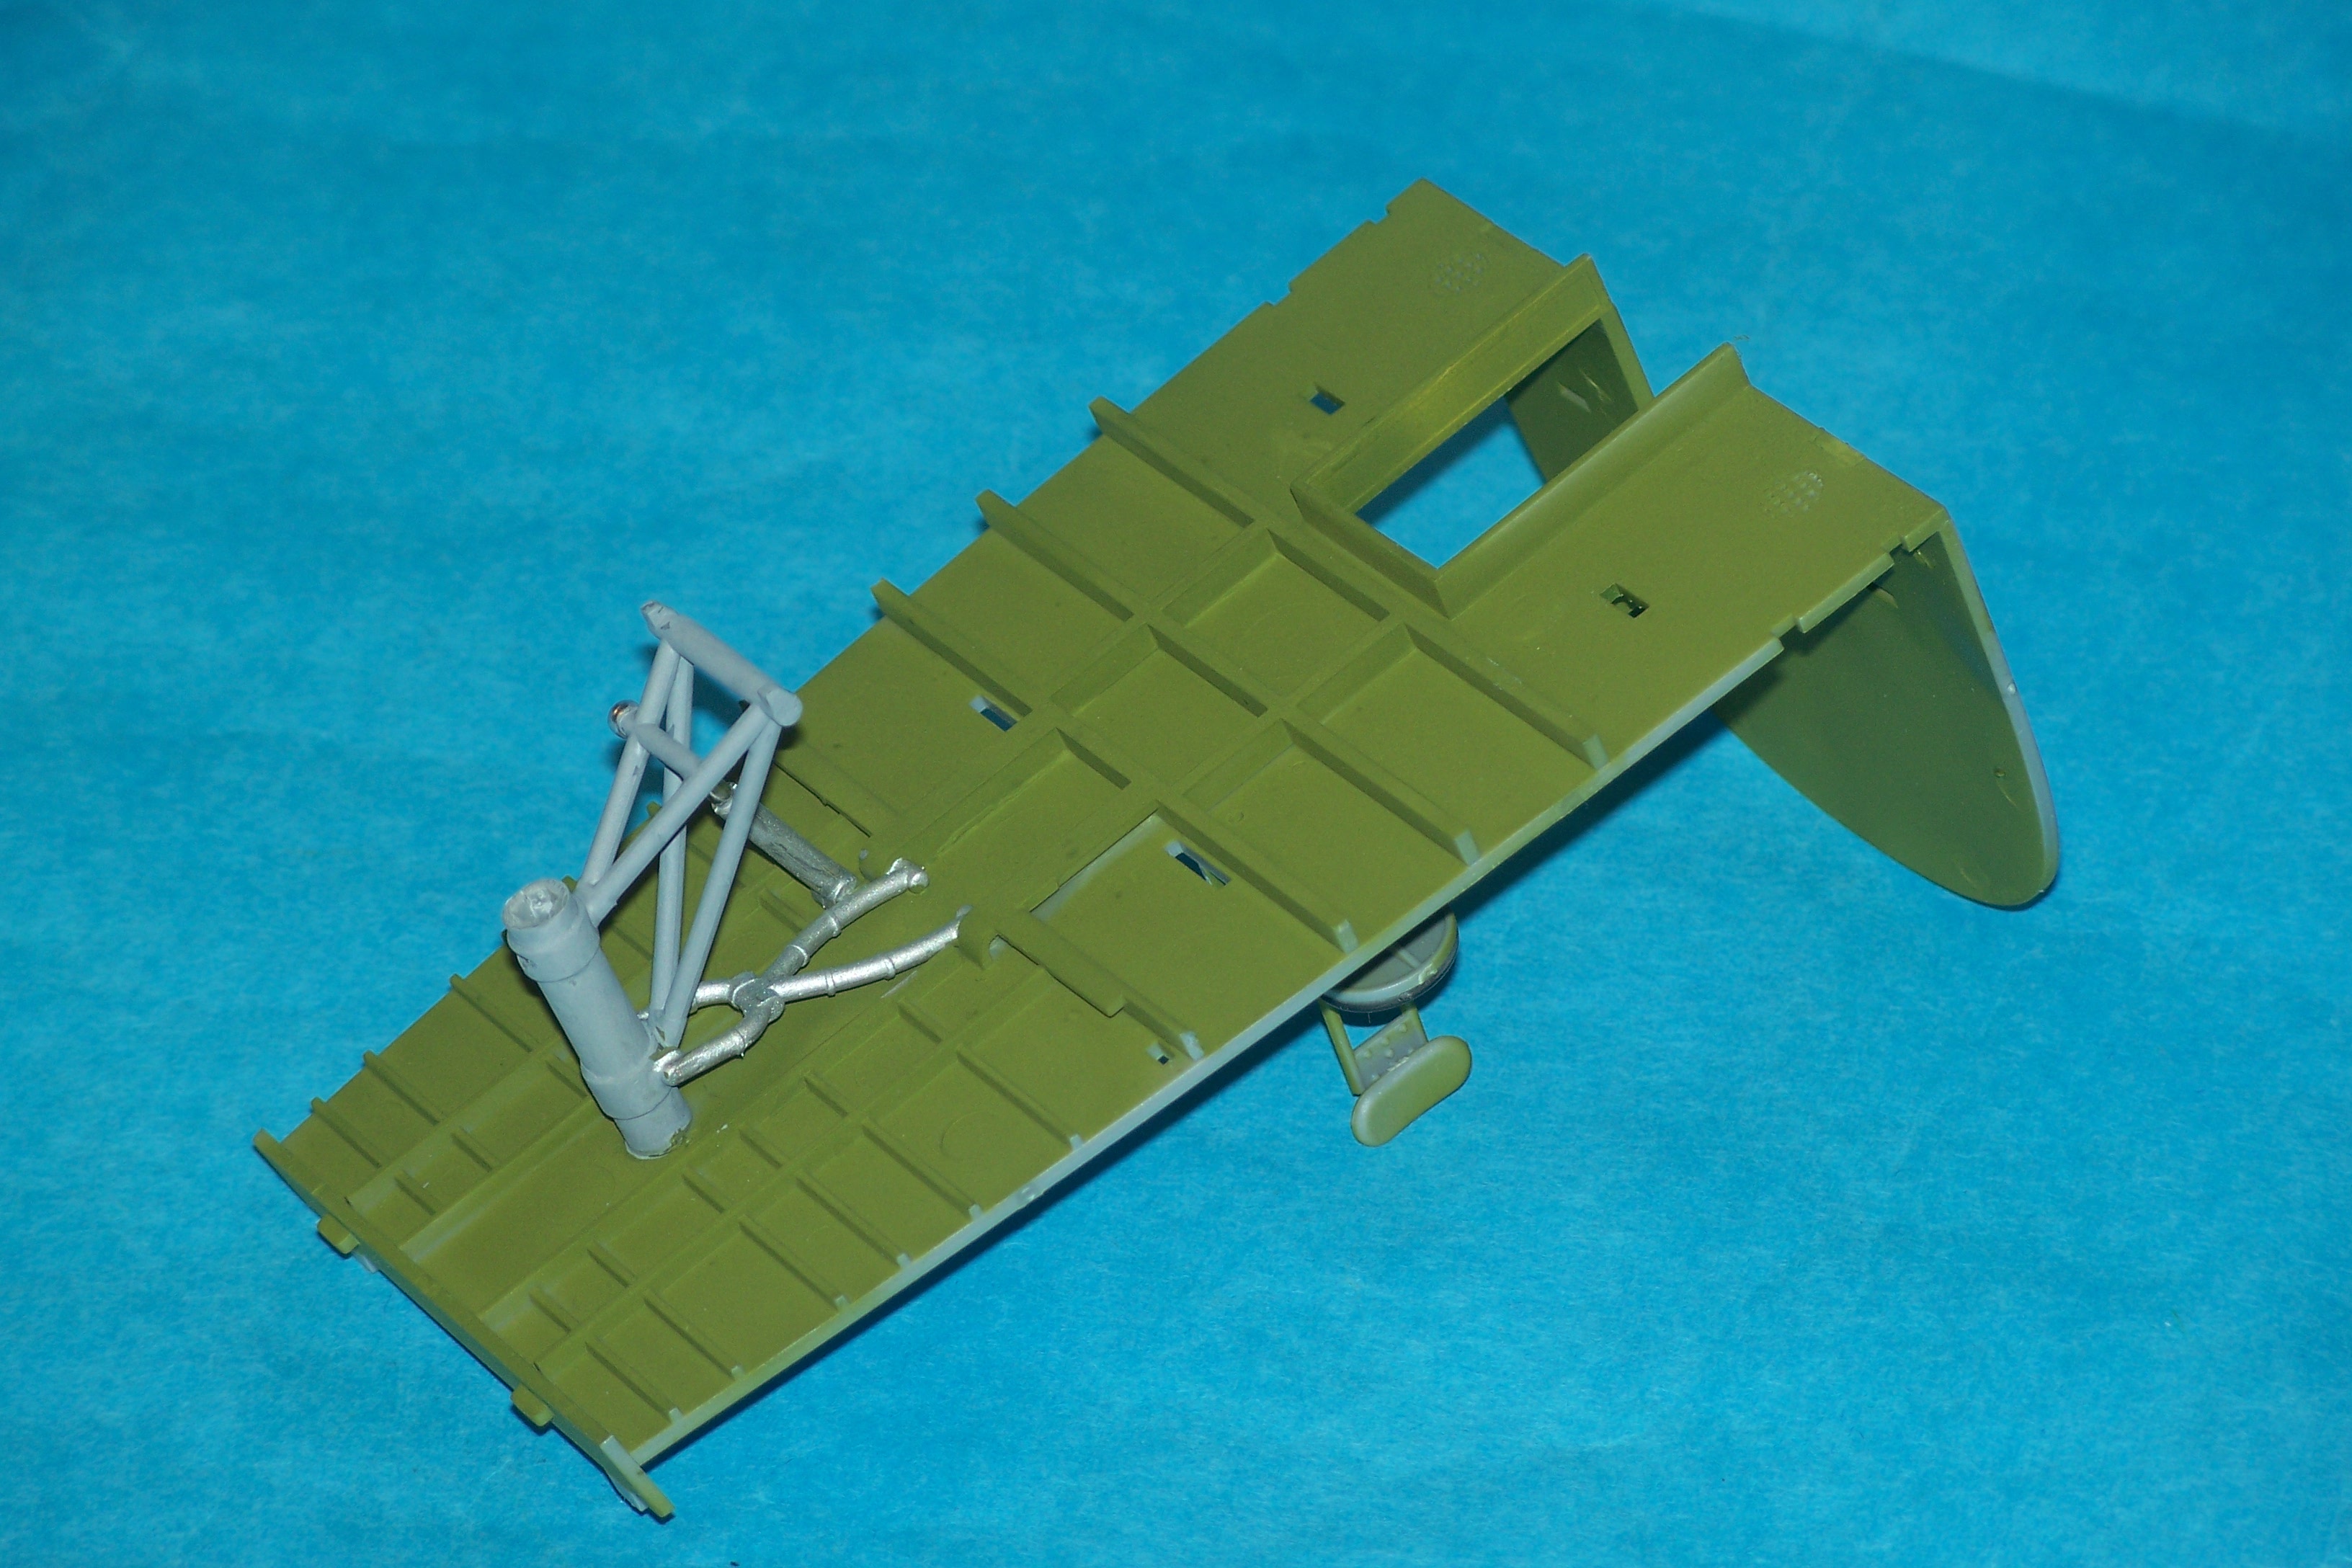
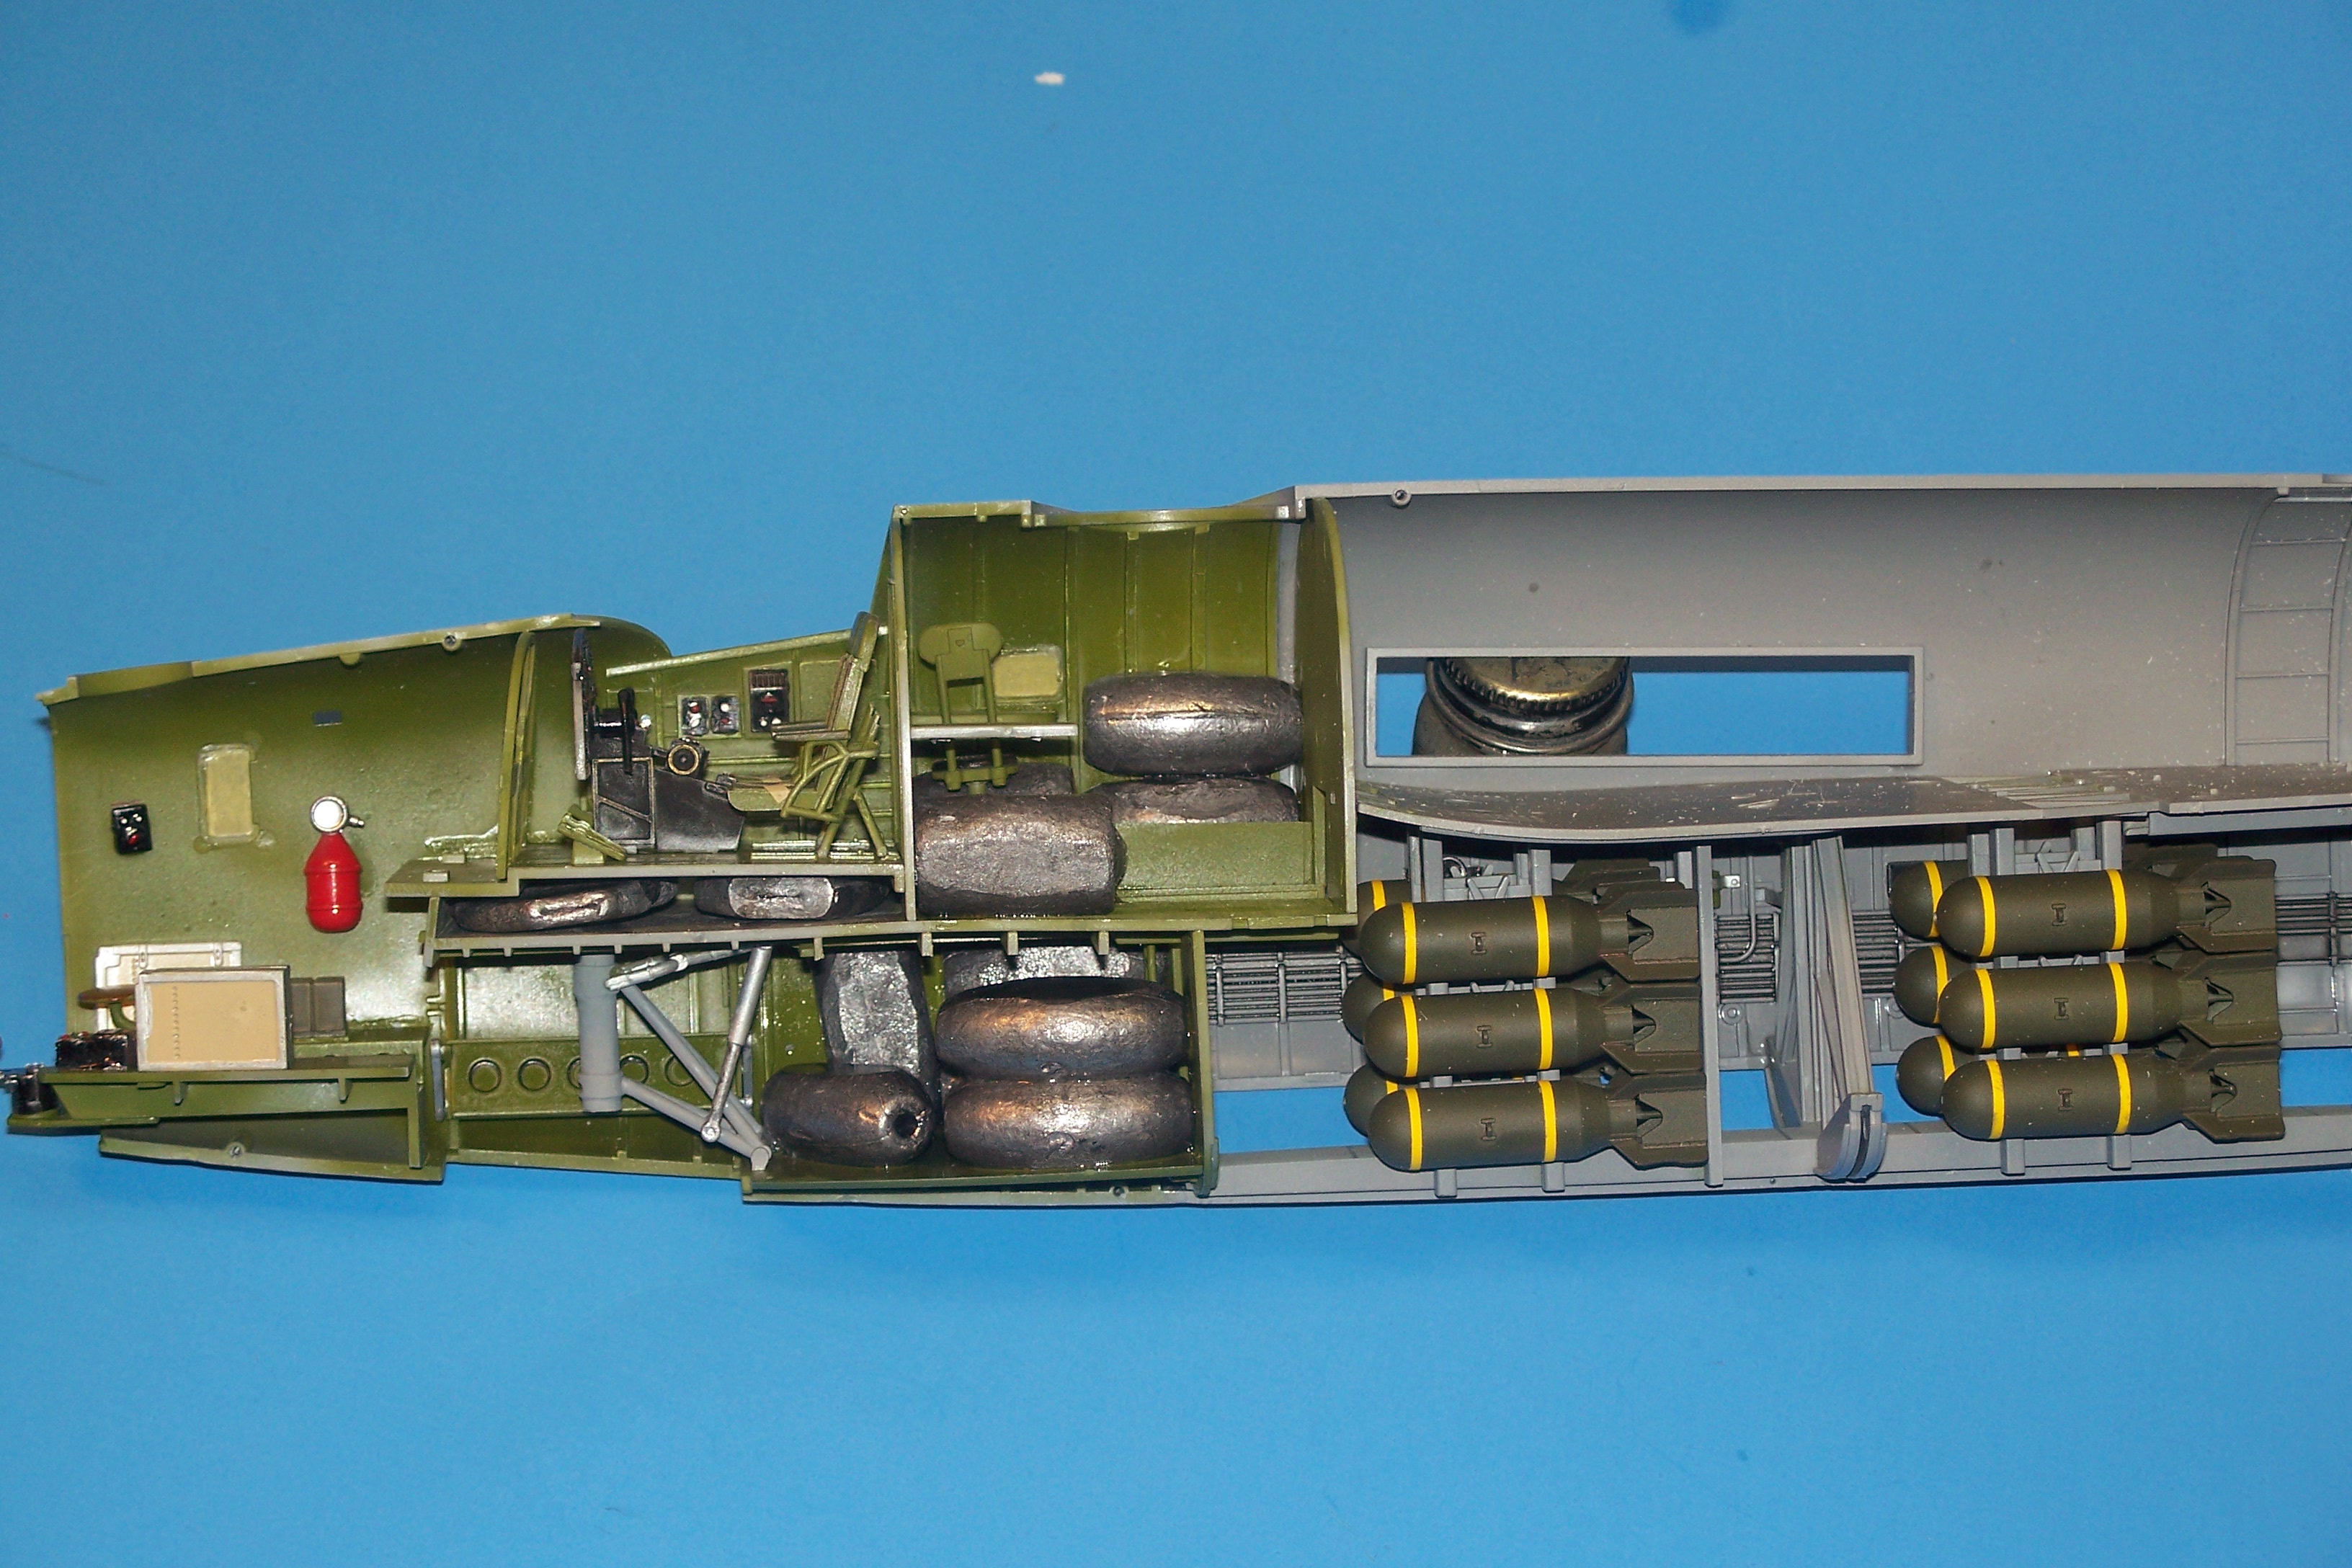
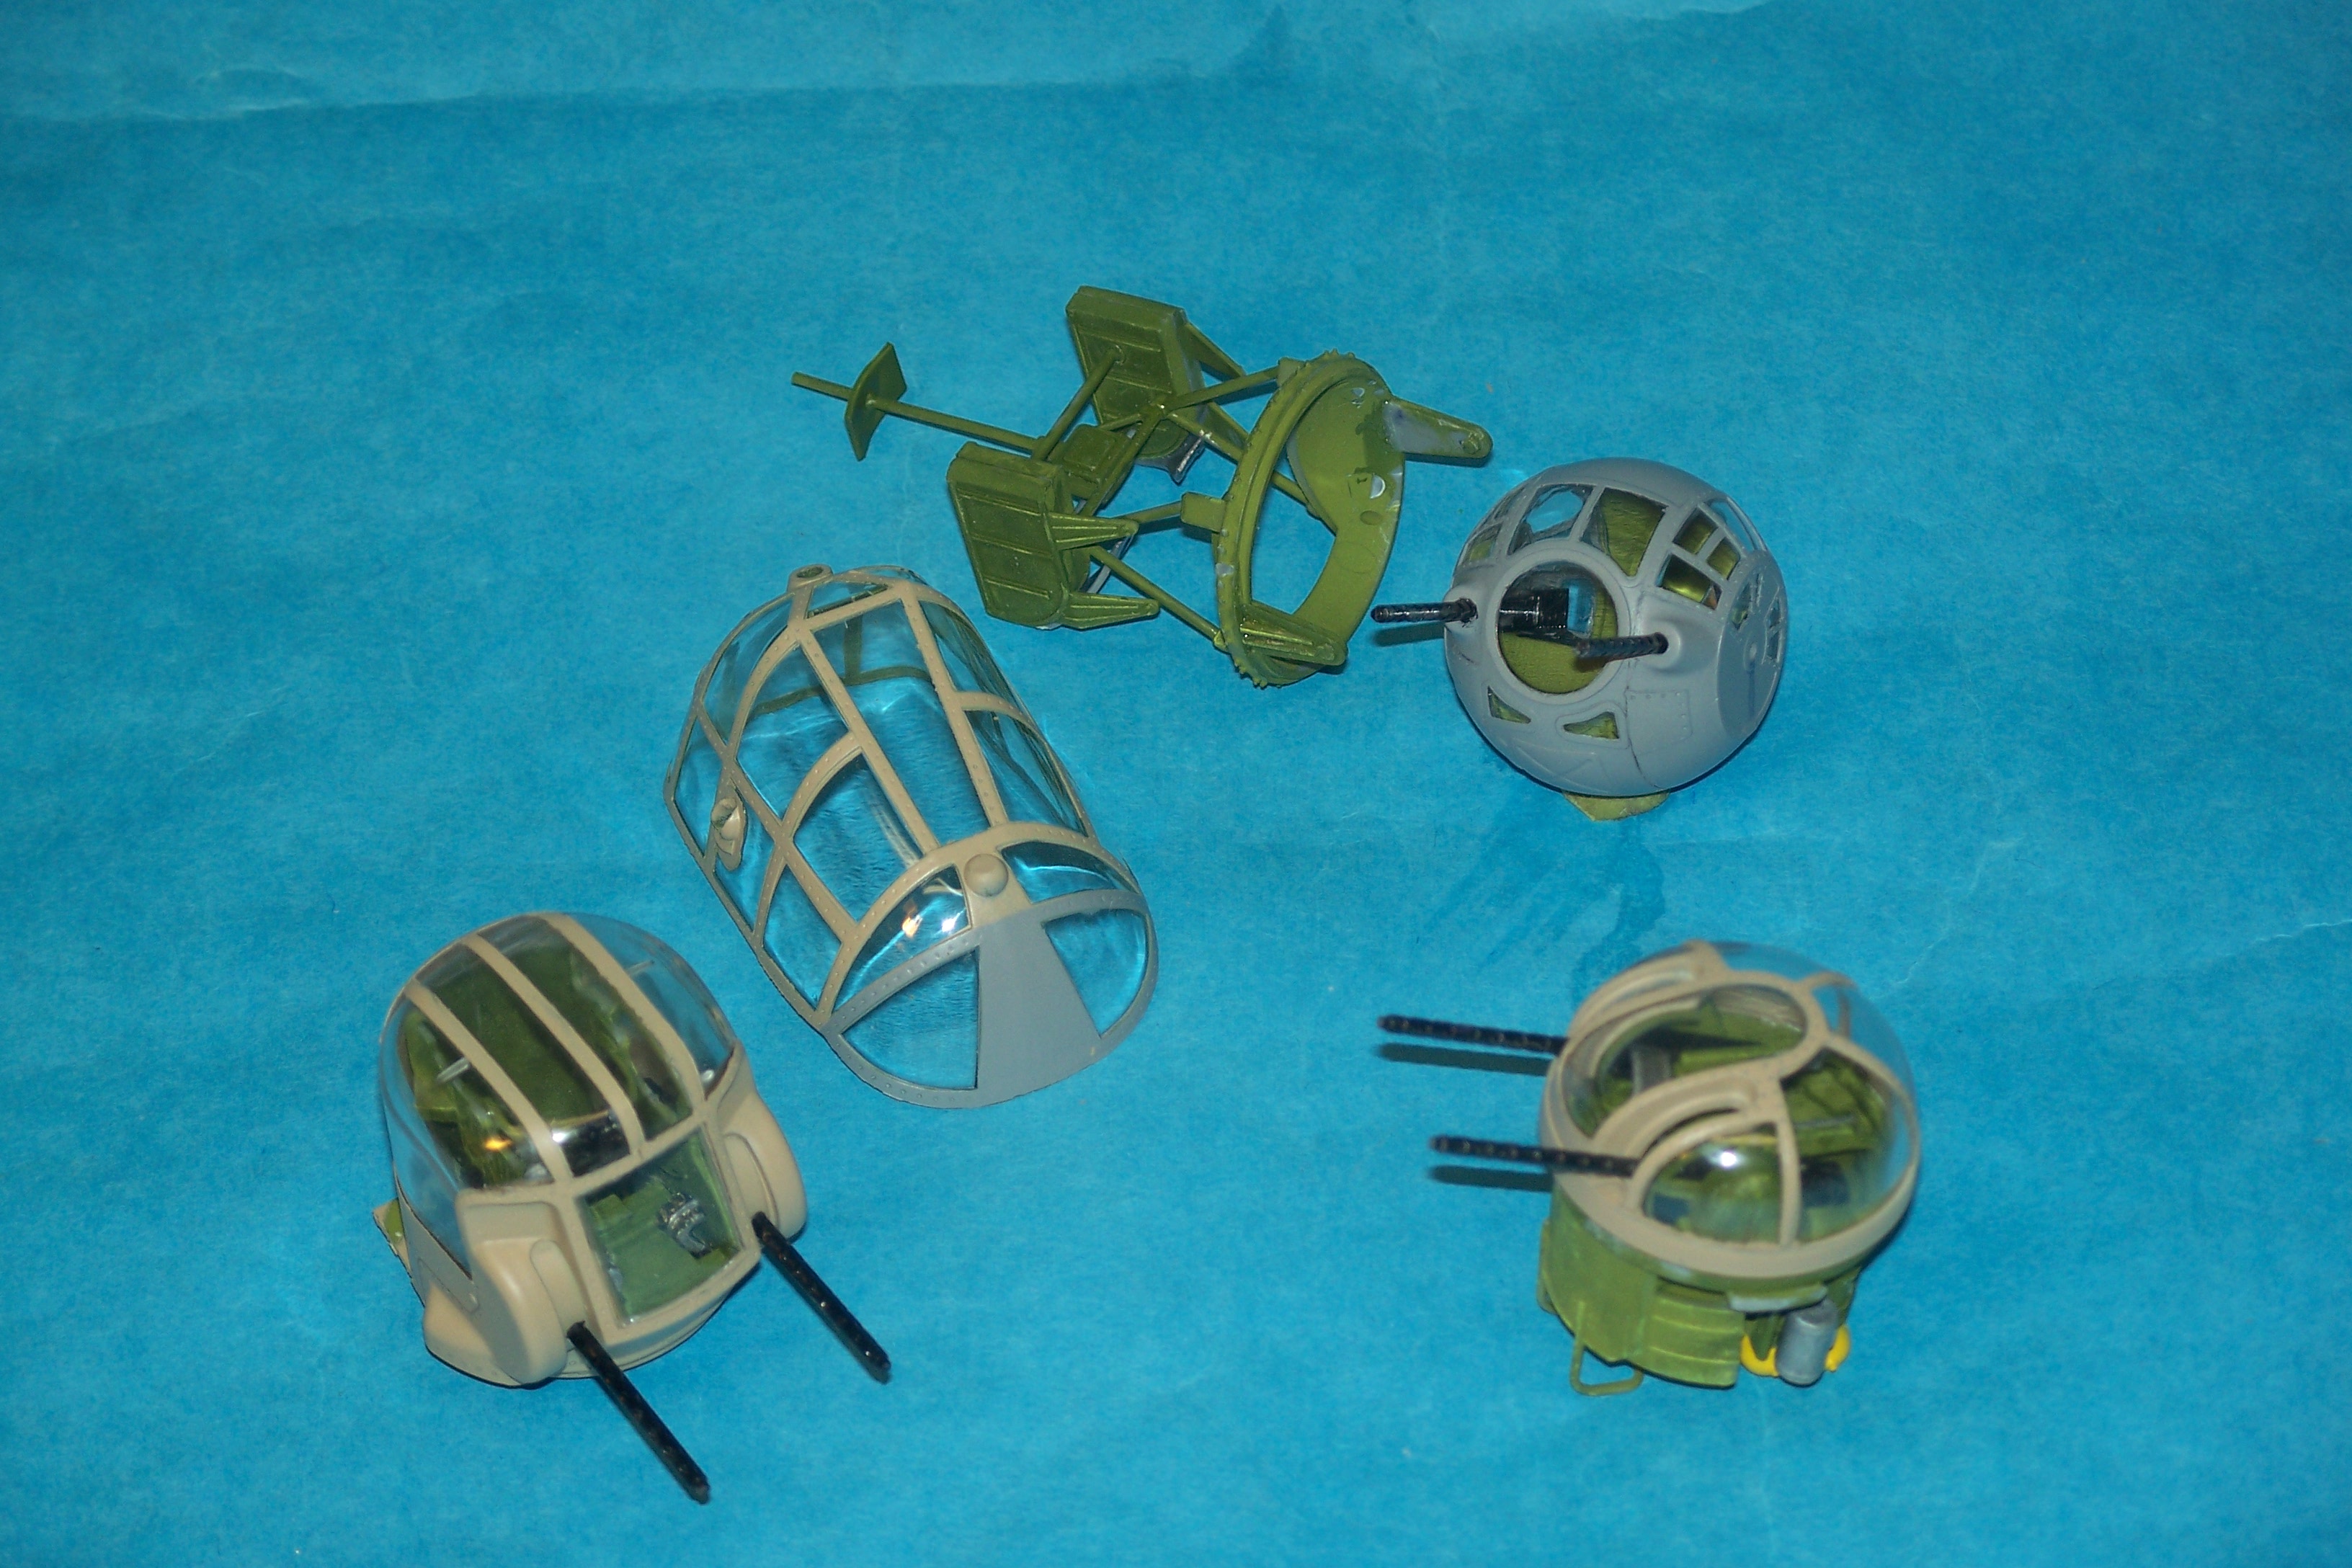
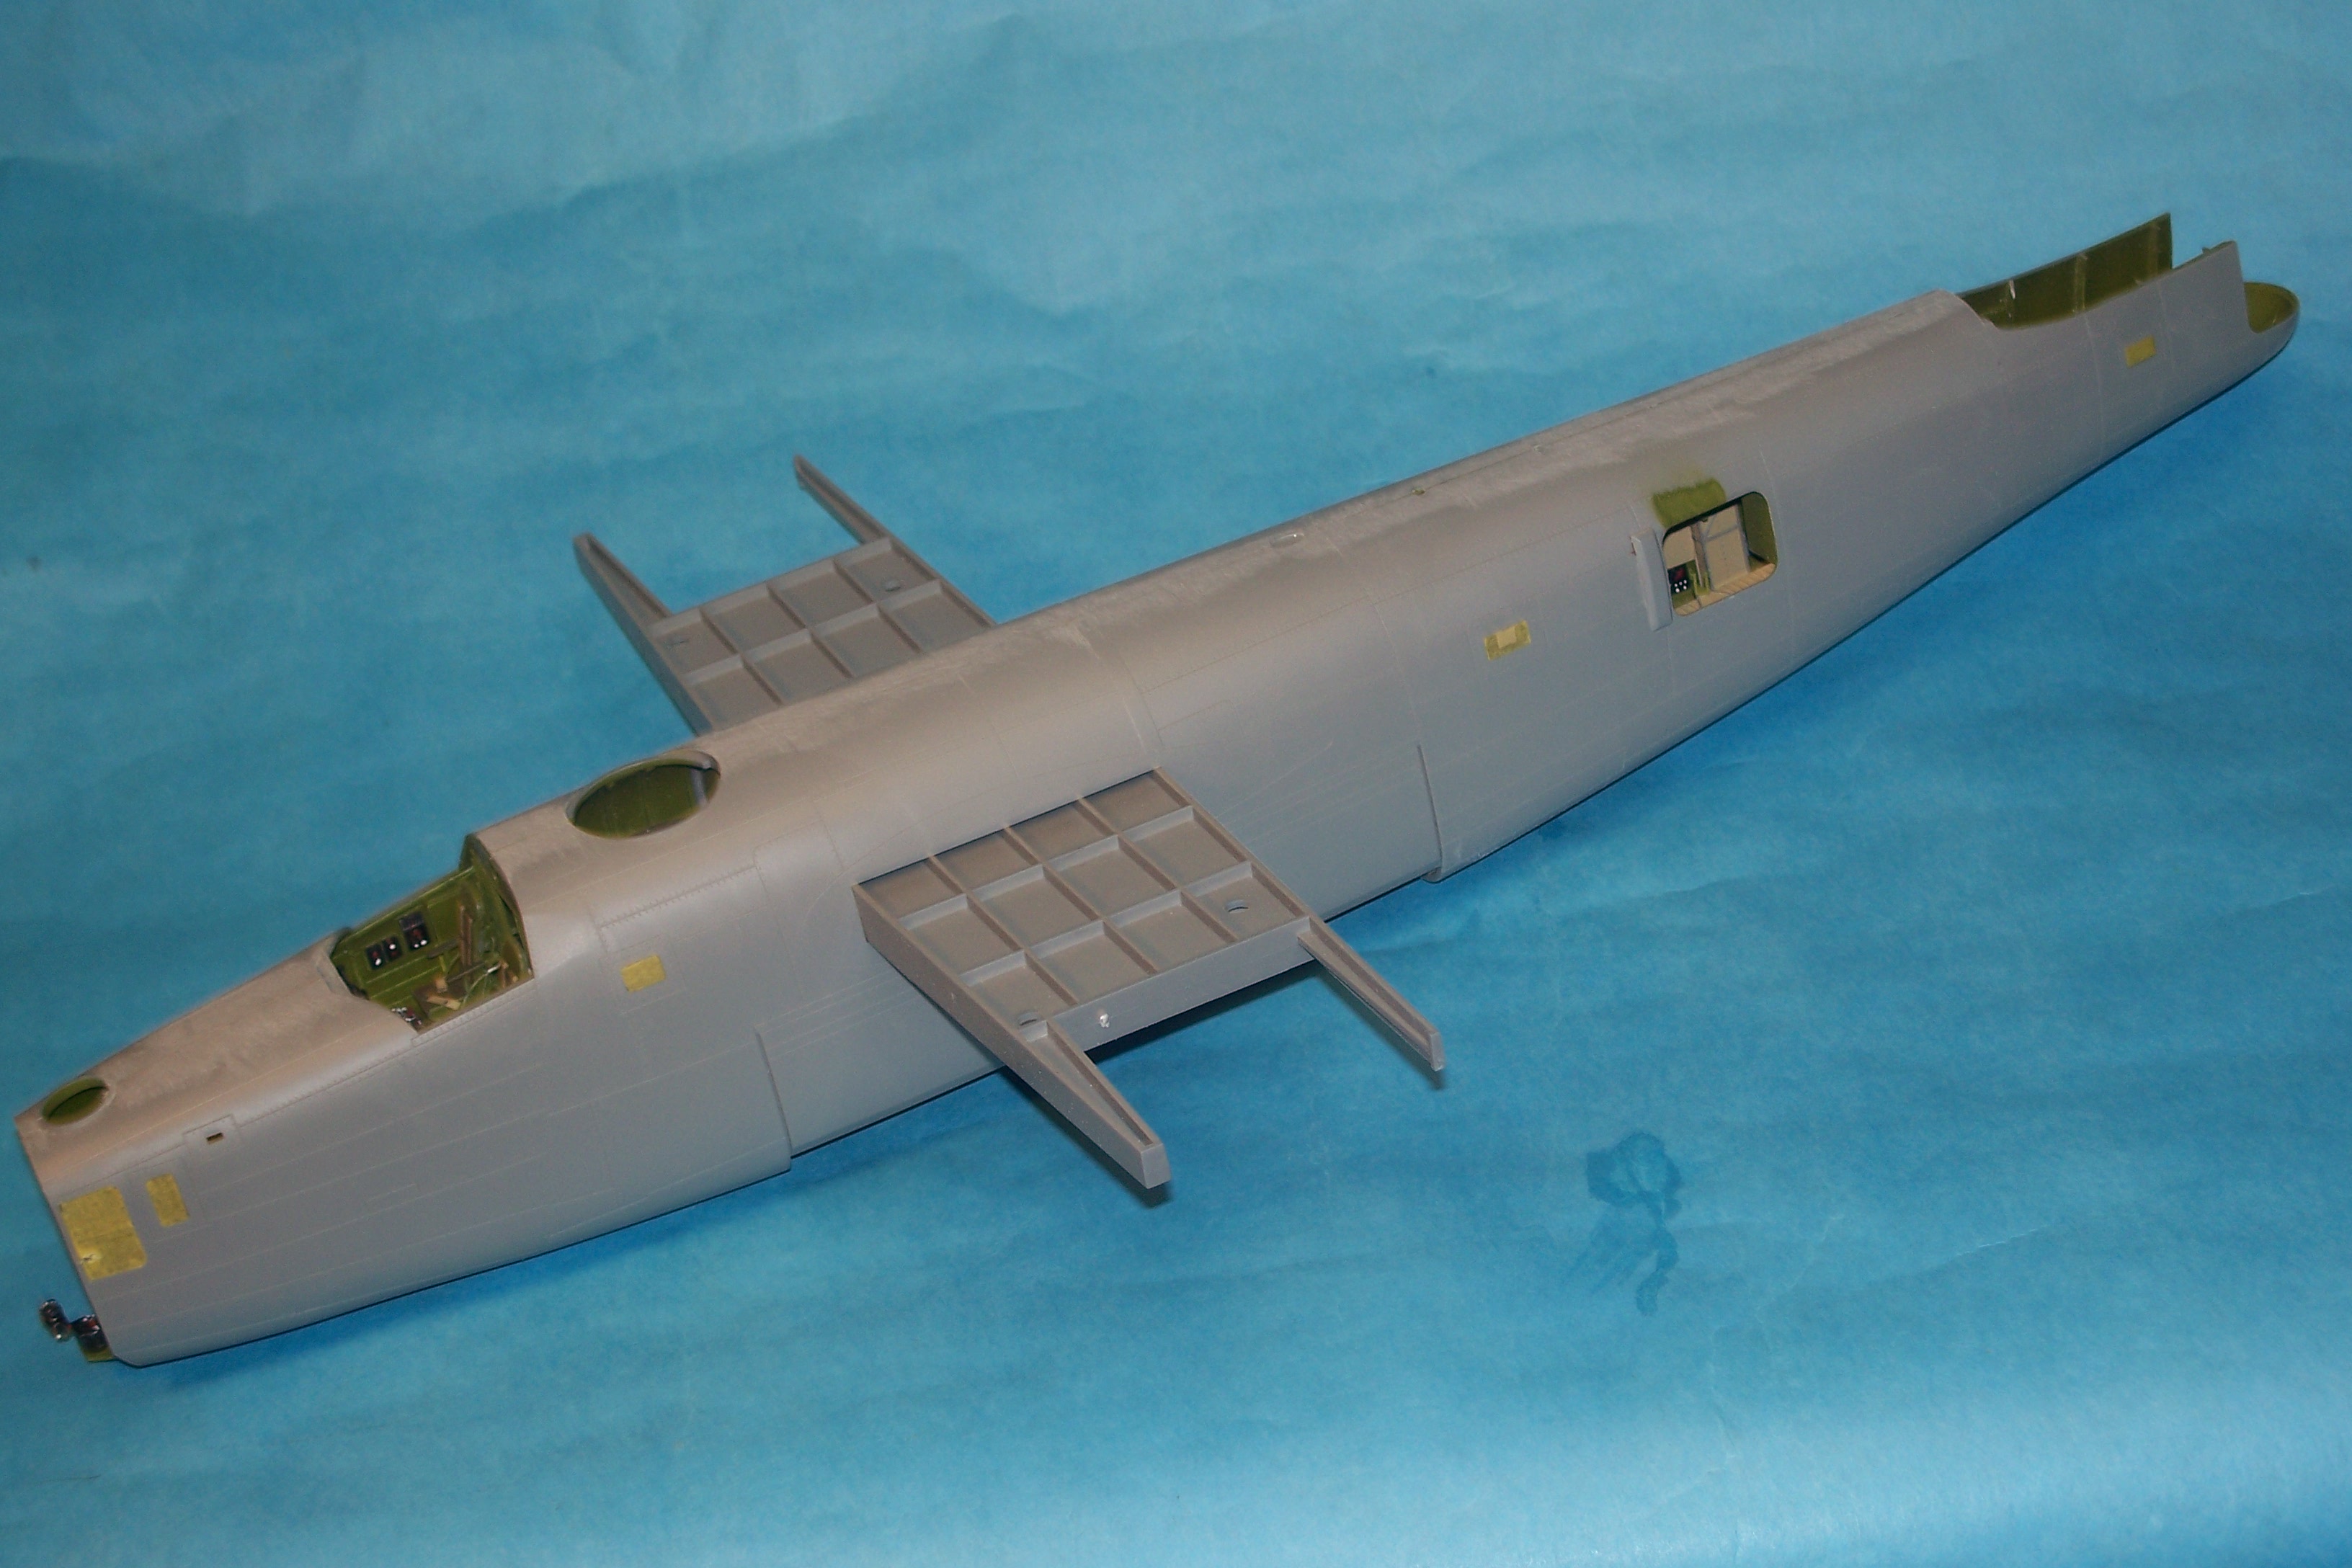
Finished this one up today. This is a pretty good kit, that certainly looks like a Liberator when done. The Davis Wing contour on the top of the wings at the root is missing; which is odd because they got the offset leading edges of elevators and rudders correct! The fit over all is good, except for the fit of the gear bays in the wings, which are too thick and require significant thinning to close the wings up. The ailerons and flaps are designed to be trapped when building the wings, but the hinges can be clipped so they can be added later. The kit has over 20 sprues and LOTS of heavy sprue connections and nubs on the parts. You'll need a very good set of nippers and #11 blades to trim all of the parts. Also, many of the connectors run OVER onto the gluing surfaces, making for extra trimming to make parts fit properly. There two other significant engineering anomalies to work around. The first is to clip the top off of the stem from the nose gear fork so it can be added later in the build. The other is the need to clip two big pins inside the wings (top and bottom) so that the wings can be built and then slid OVER the wing spar. The instructions would have you build the wings around the spar making for a massive assembly to handle for much of the build. Doing this mod allows the fuselage and wings to be assembled and painted separately, which eases things greatly. The fit of the wings to the fuselage is very good, by the way! The kit has plastic landing gear, which appear to be robust enough to support the model. However, Aercraft Models makes brass replacement gear and would be a better idea over time. The weakest area of the kit is the rubber tires, which fit their hubs horribly. I heartily recommend the Eduard resin tires if you build this kit! The detailing is good throughout, except for the radio room and the nose. The radio room only has 2 small windows, and the details aren't missed there. The lack of detailing in the nose is baffling. The instructions only show a seat and an ammo box, even though a Norden bomb sight IS in the kit (along with some other "J" parts); and do NOT tell you to add it. I built up a structure for the sight and added extra kit parts to at least detail the nose area. Here are some in progress pics with comments to better illustrate.... I used tape tabs to mark the numerous sprues, making it much easier to find them during the build... The kit cockpit deck is good. I cut the kit decal and used it on the main instrument panel. The blue throttle handles are PE parts, which are easier to apply if they're cut apart. This shows the upper nose gear installed on the nose gear floor. Cutting off the very top of the stem to the nose gear fork/mud guard allows it to be slid in later. Typical waist area detailing... This shows how much grinding/trimming I had to do to make the gear bays fit. You can also see the 2 large pins/sockets that need to be removed to allow the assembled wings to fit over the wing spar. This shows how I first installed the bomb sight (rebuilt a higher support structure later) and the kit parts I added to detail out the nose. I weighted the model with lead fishing sinkers that could be smashed flat/shaped to fit. You can also see the full bomb load added into the well detailed bomb bay. The kit glass is very clear with sharp framing that allows masks to be cut on them using Tamiya tape and a NEW #11 blade (wore out 5!). The turrets are well detailed, though the interior parts for the rear turret need some trimming to get it to close. It also has an unsightly seam on the top center that I hid with a bogus center line frame. Enough in progress pics.... on to the completed model Gil !
-
Love it! It harkens back to the day when this was the only way to get such a subject. Though it's a bare bones build, it certainly smartly represents that mark of the Meteor in your collection. Glad to see I'm not the only vac madman here! Gil
-
The older I get, the more attraction I have for "nostalgia" modeling and emphasizing FUN! Love the Airacobra! Gil
-
Wow! Gil
-
Good looking camo from what I'm seeing, but you have to paint it to make yourself happy! Love the progress you're making! Gil
-
Love the burnt colors on that tail pipe! Gil
-
Dunno....can't see the problems and I like the oddball scheme with the painted out red surround. Bet it looks great on your shelf! Thanks for sharing! Gil
-
Glad to have you here with us Jeff! I build mostly 1/48 a/c, but occasionally dabble in 1/32. I built the HK 1/32 B-17F last year and now I'm in the middle of the HobbyBoss 1/32 B-24D.... Make yourself at home and let us know how we can help you have more FUN! Gil
-
That has to be tedious to add all of that wiring, but you can't argue with the results! Gil
-
To my knowledge, you cannot bleach out the yellow in a vac canopy as it's a chemical reaction in the plastic as opposed to a yellowed clear coat over a decal. I've never had any luck making a yellowed canopy any clearer, nor have I ever seen anyone else show a way to successfully do it. My solution has always been to fill the old canopy with Plaster of Paris to make a new mold to vac over. You could simply back it with hard clay and vac over it directly, but then your copy will be slightly larger than the original. Hope this helps! Gil
-
Good looking camo scheme! Gil
-
If you're set on using EZ Line, neither color will be correct, since flying wires were generally metal. However, they were also not "shiny", so generally a flat aluminum or black color is what you want. The easiest way to get that is to use black Sharpie pen, or a silver colored ink pen to color the EZ Line. I'd buy the white, as it'll take either ink color the best. Personally, I also recommend (and use) Wonder Wire (ceramic wire) for rigging. Gil
-
Outstanding! Popping some popcorn to go with you further updates! Gil
-
That is a very crisp, sharp looking Israeli Eagle! It comes across as larger than 1/72 with the attention to the details you gave it. Thanks for sharing! Gil
-
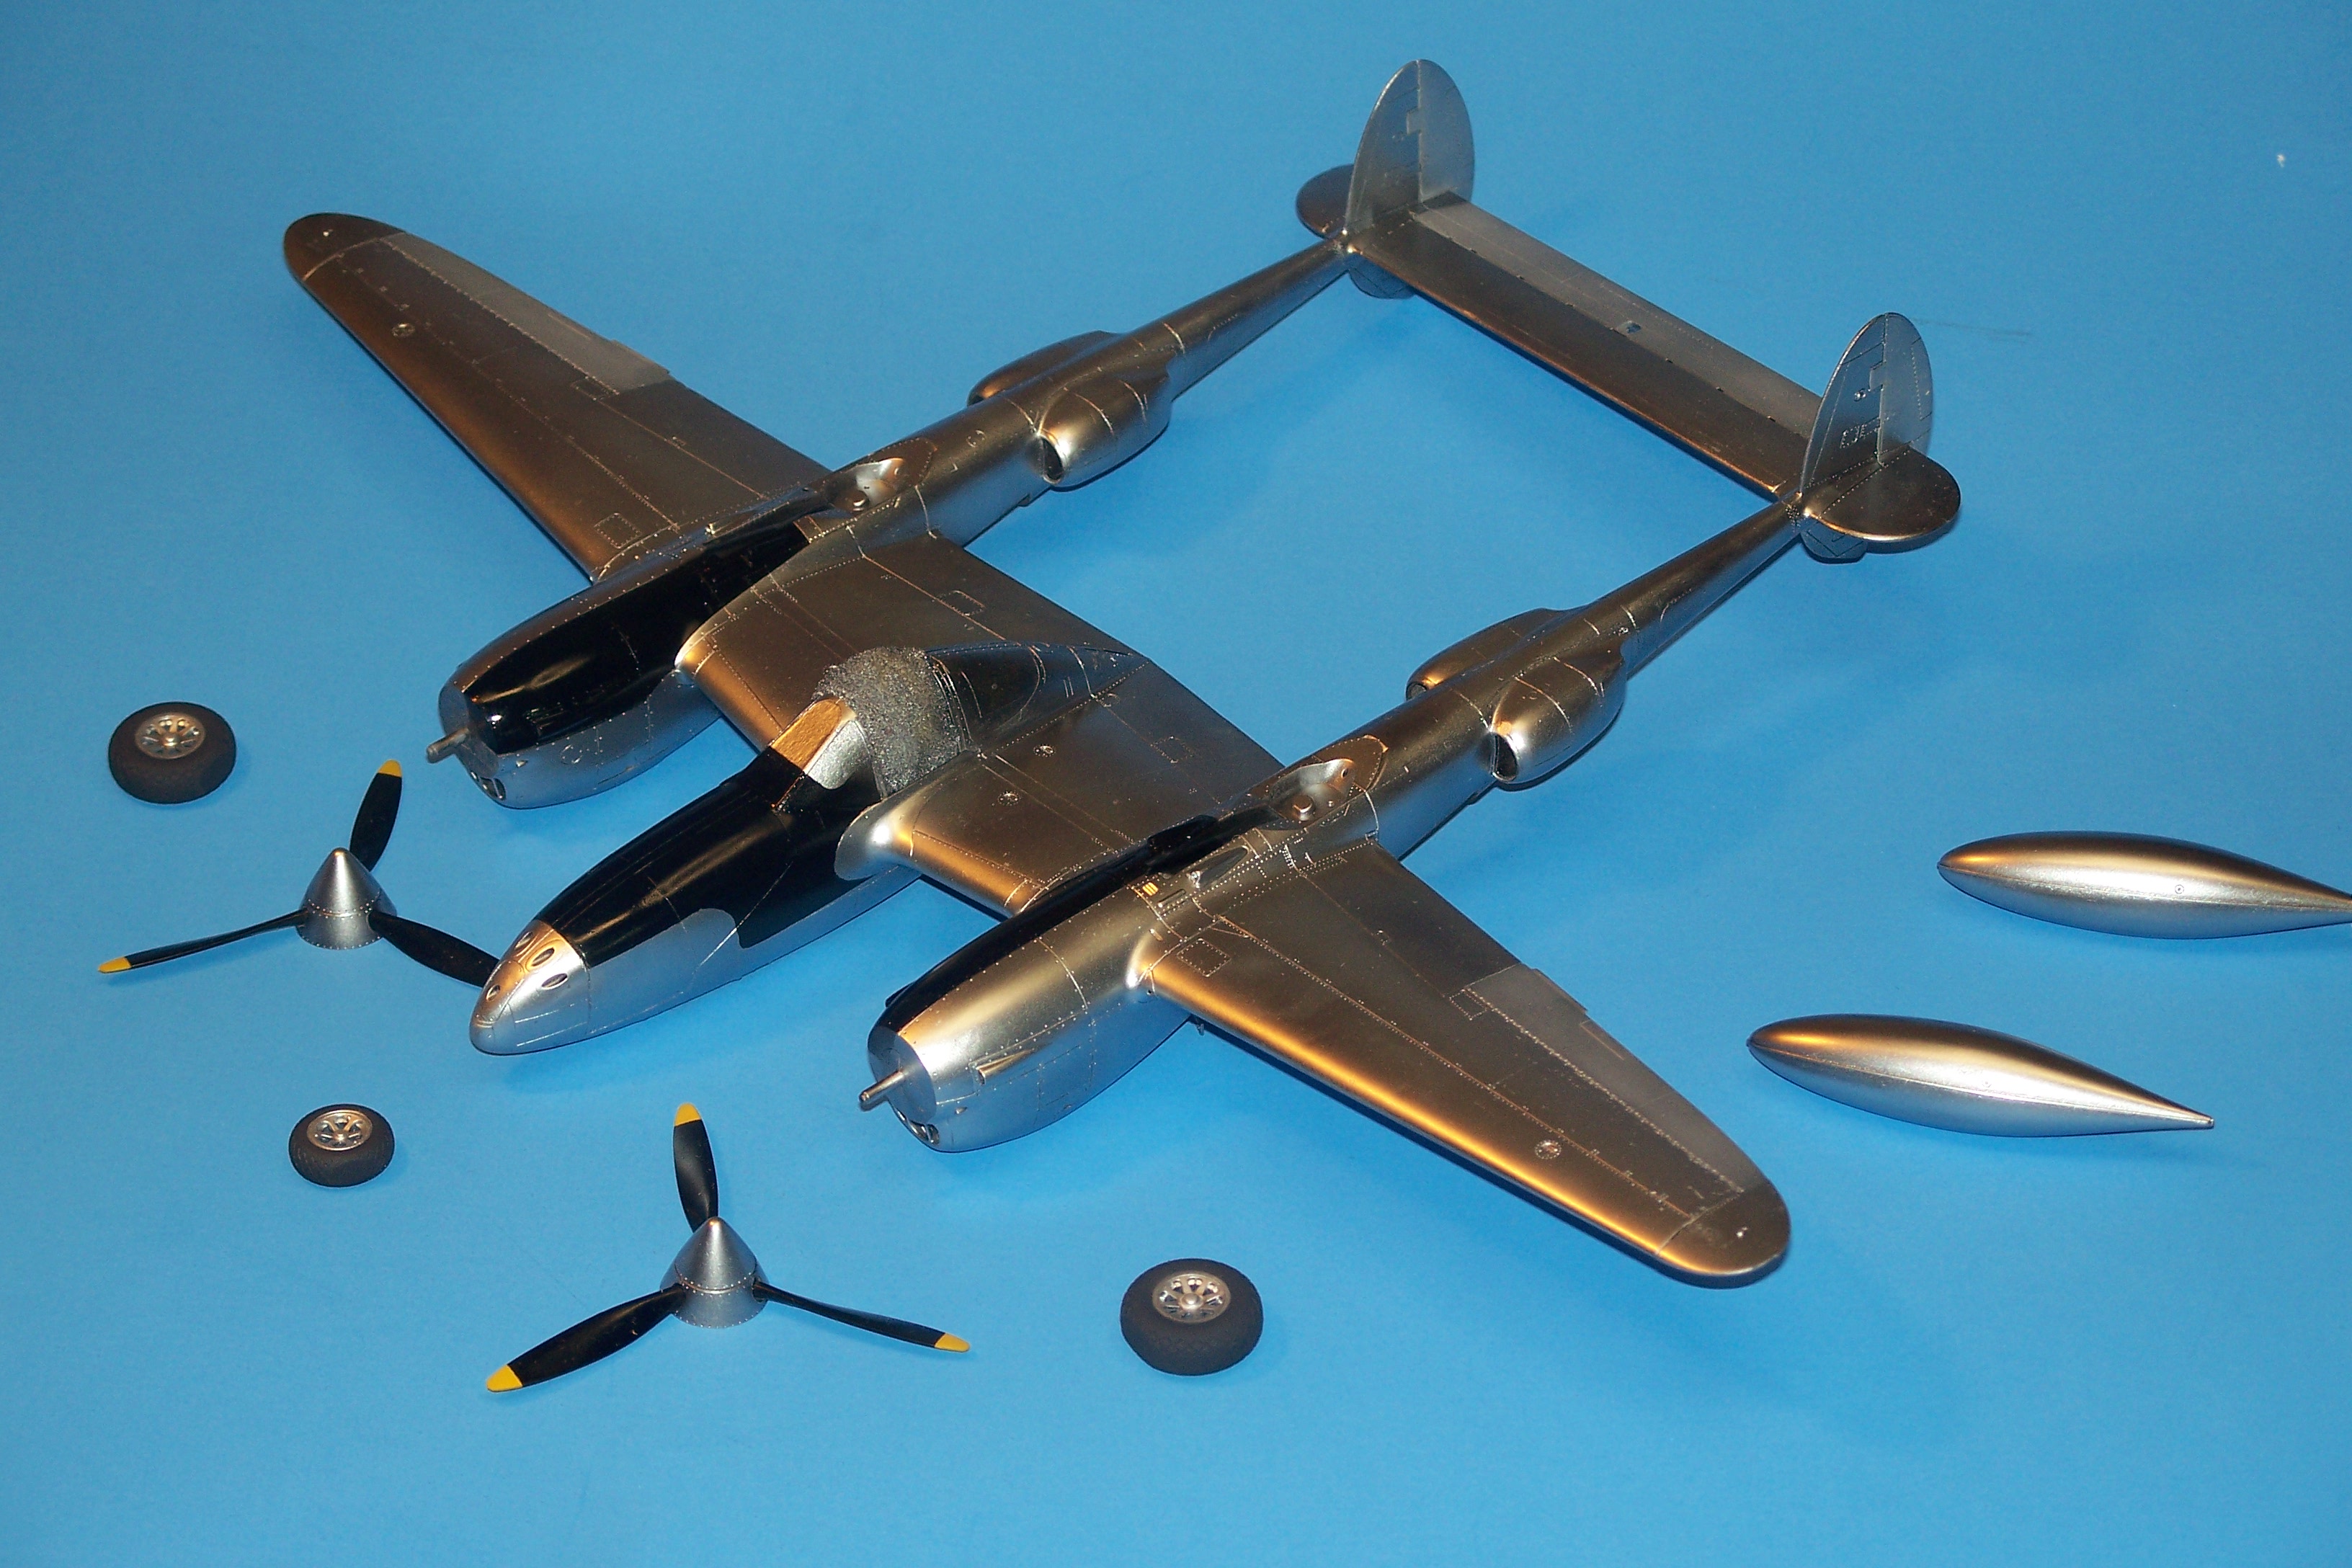
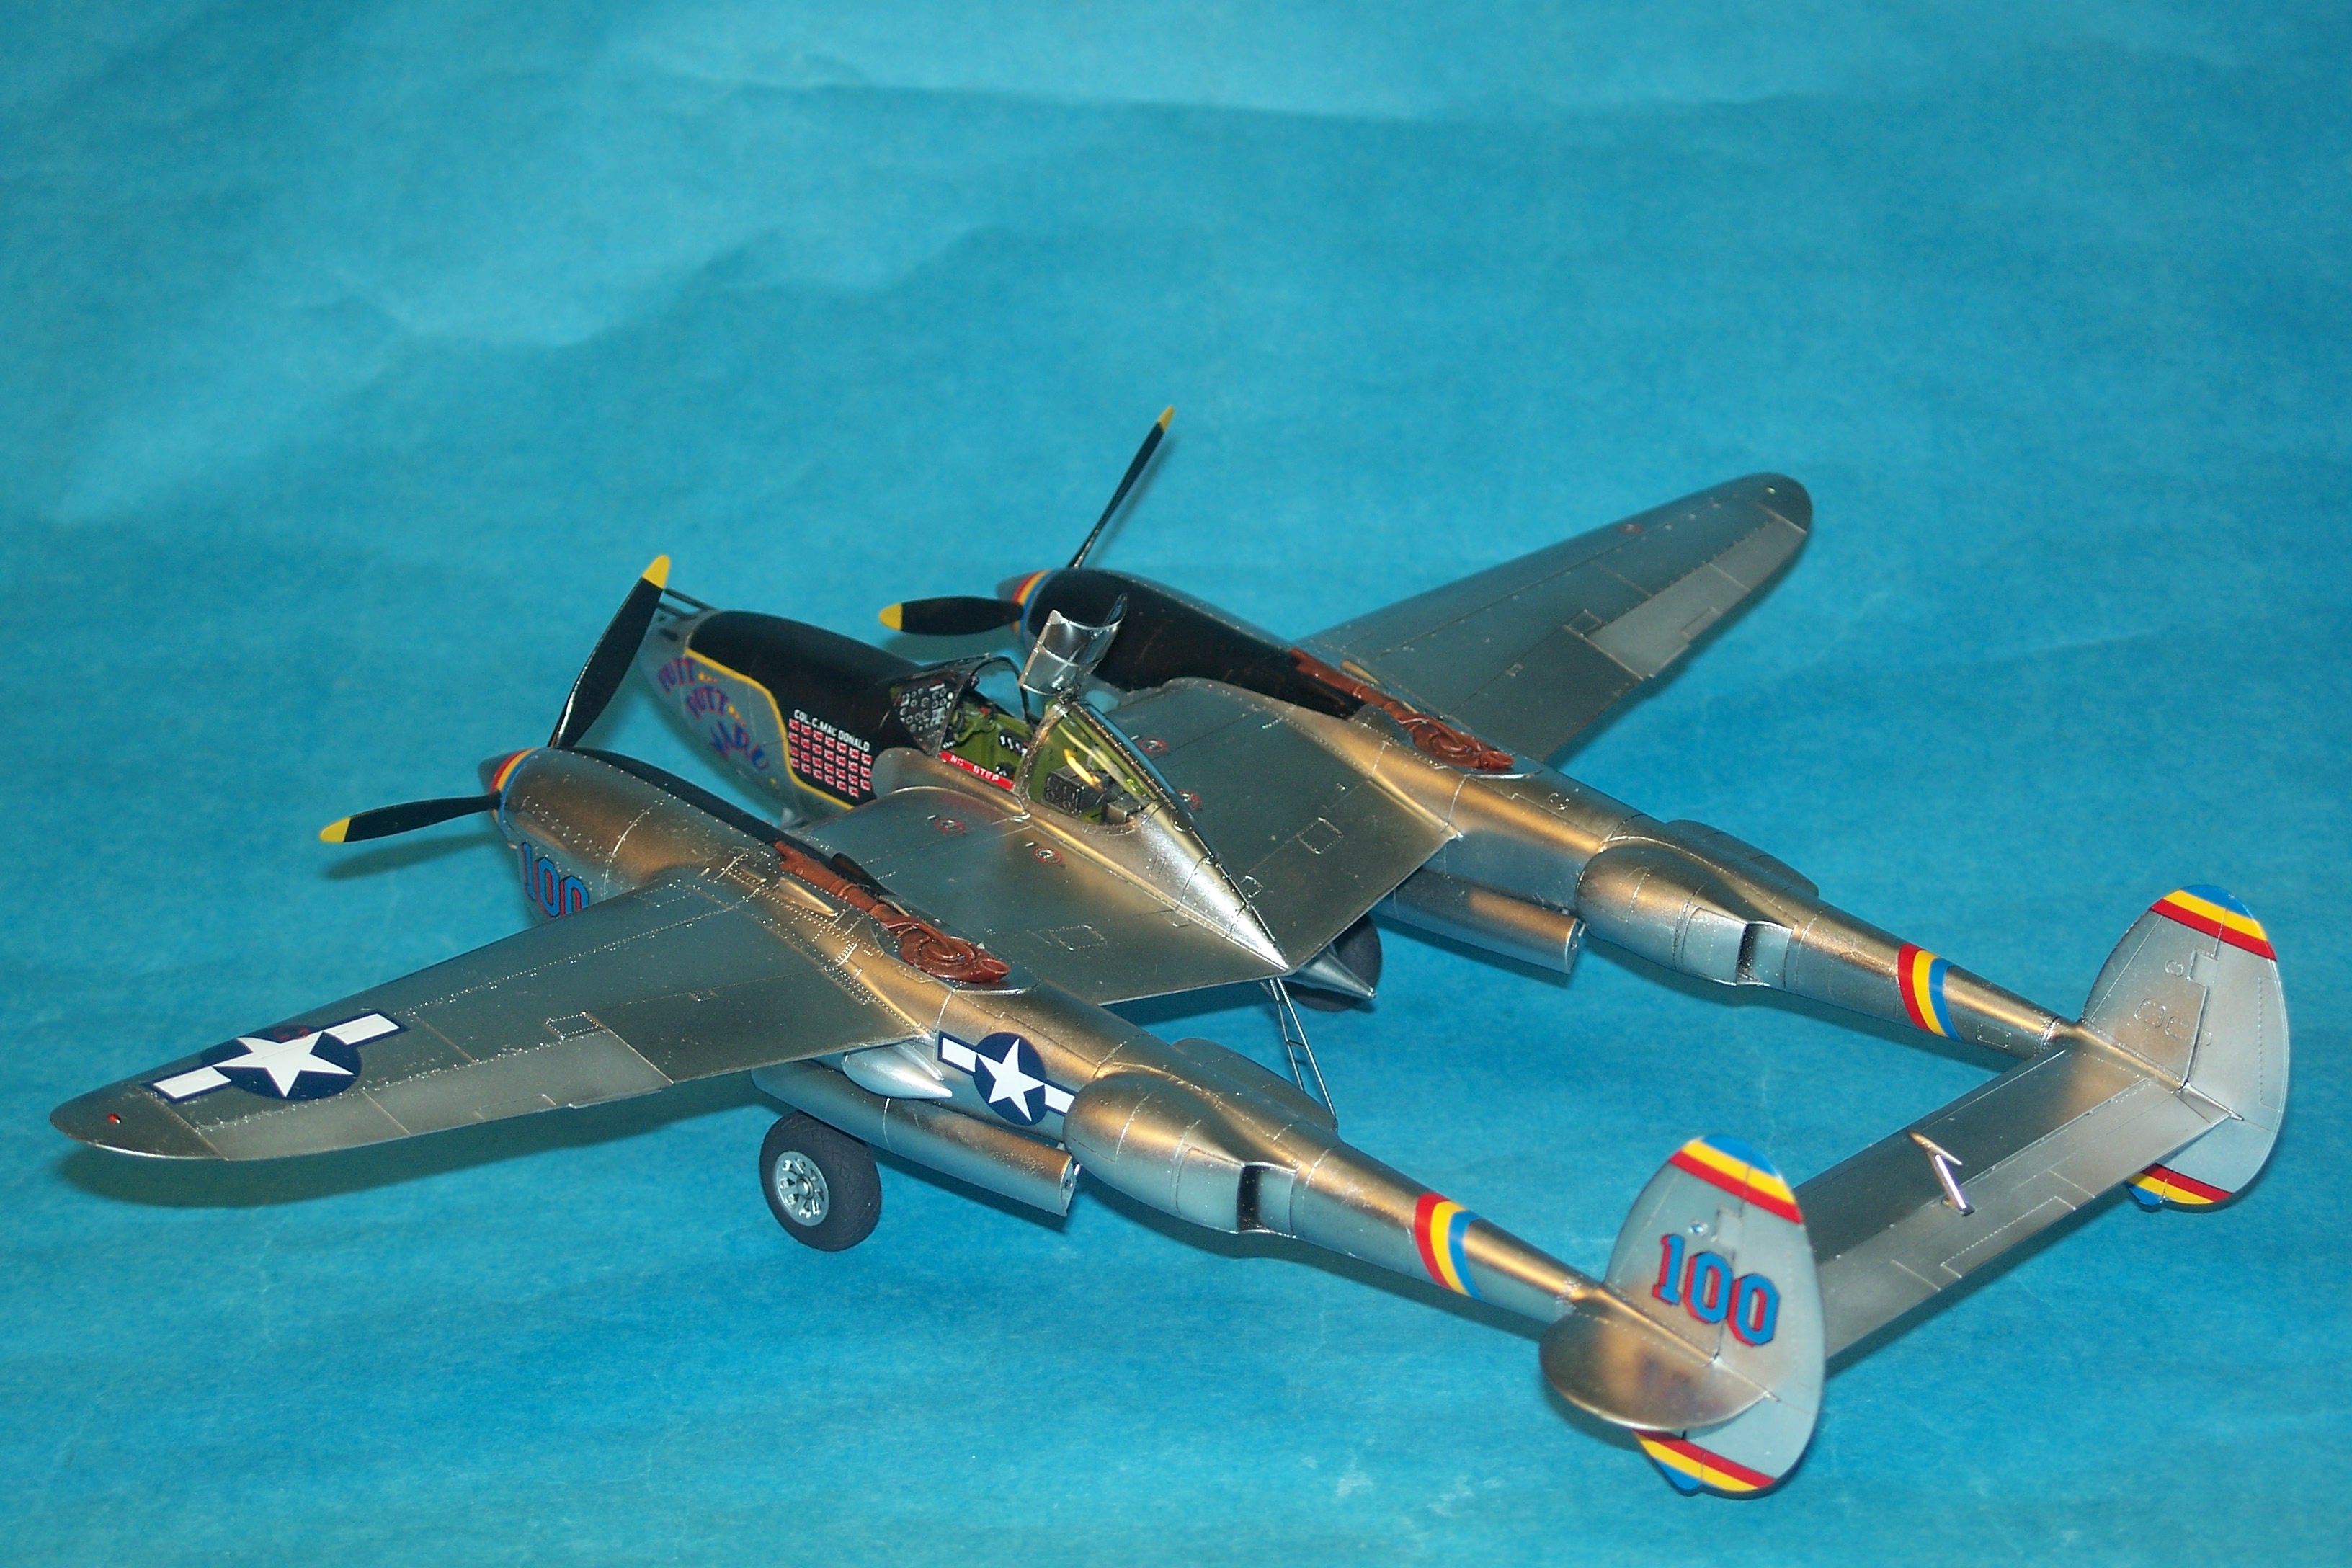
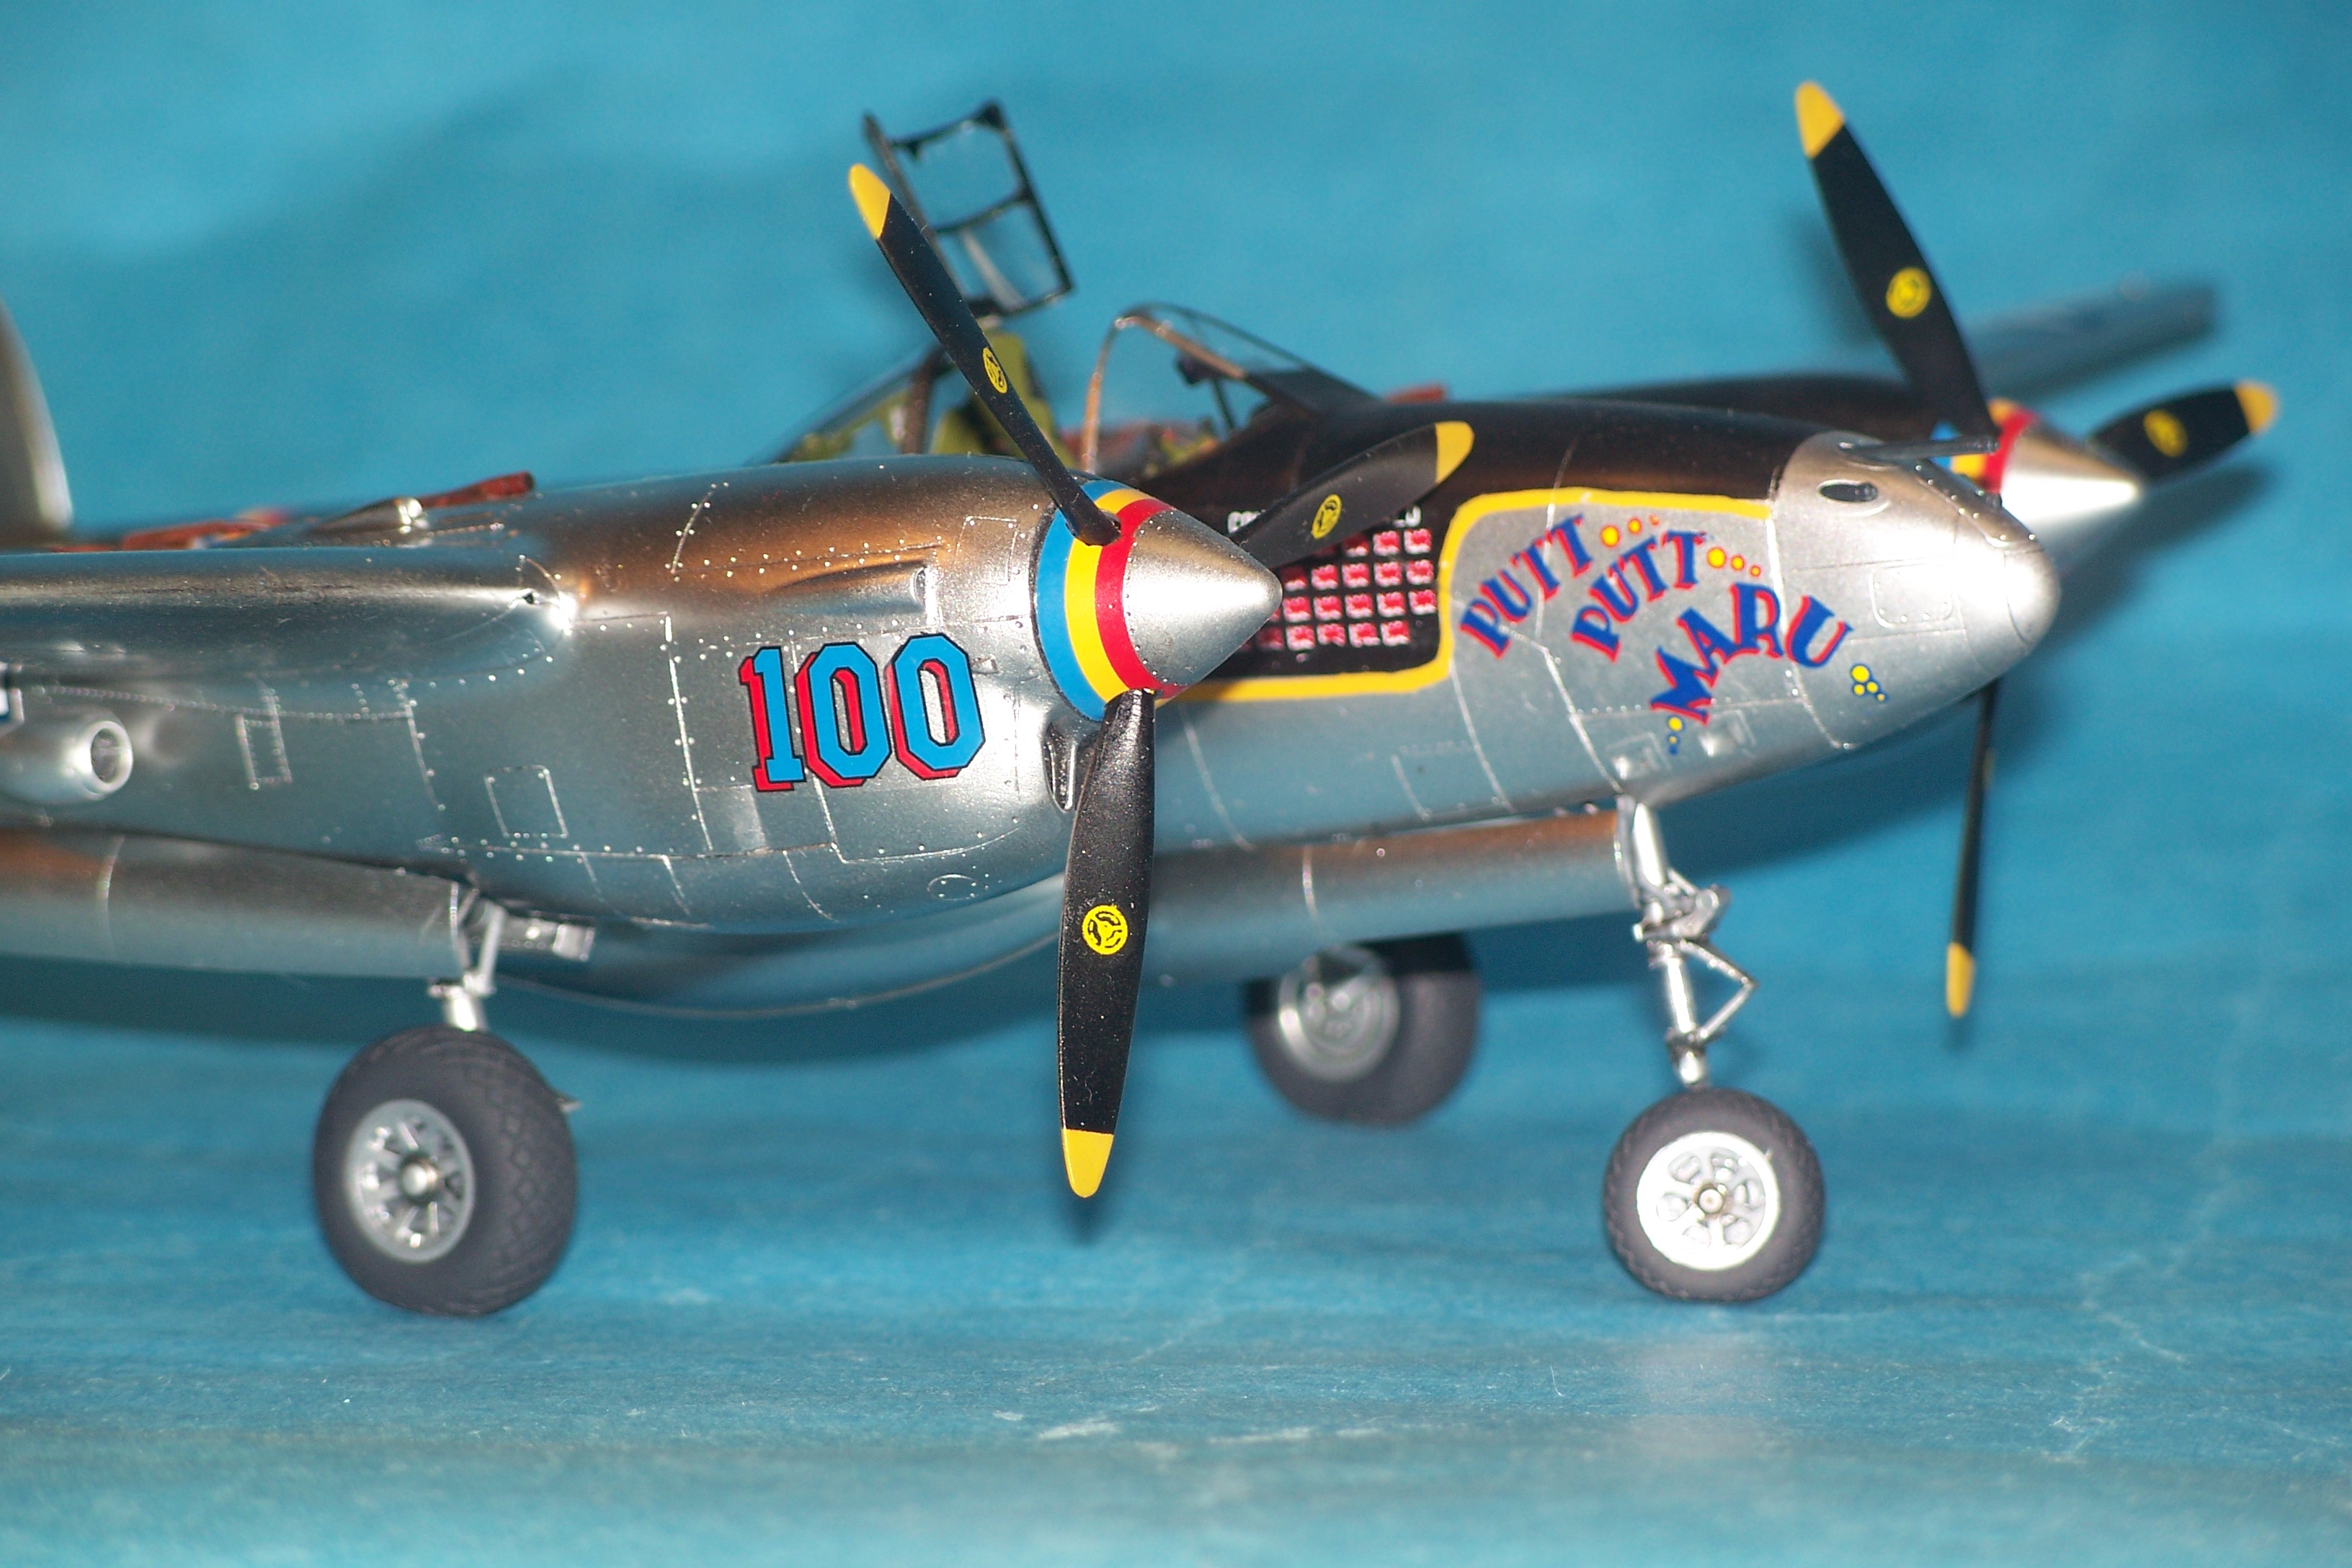
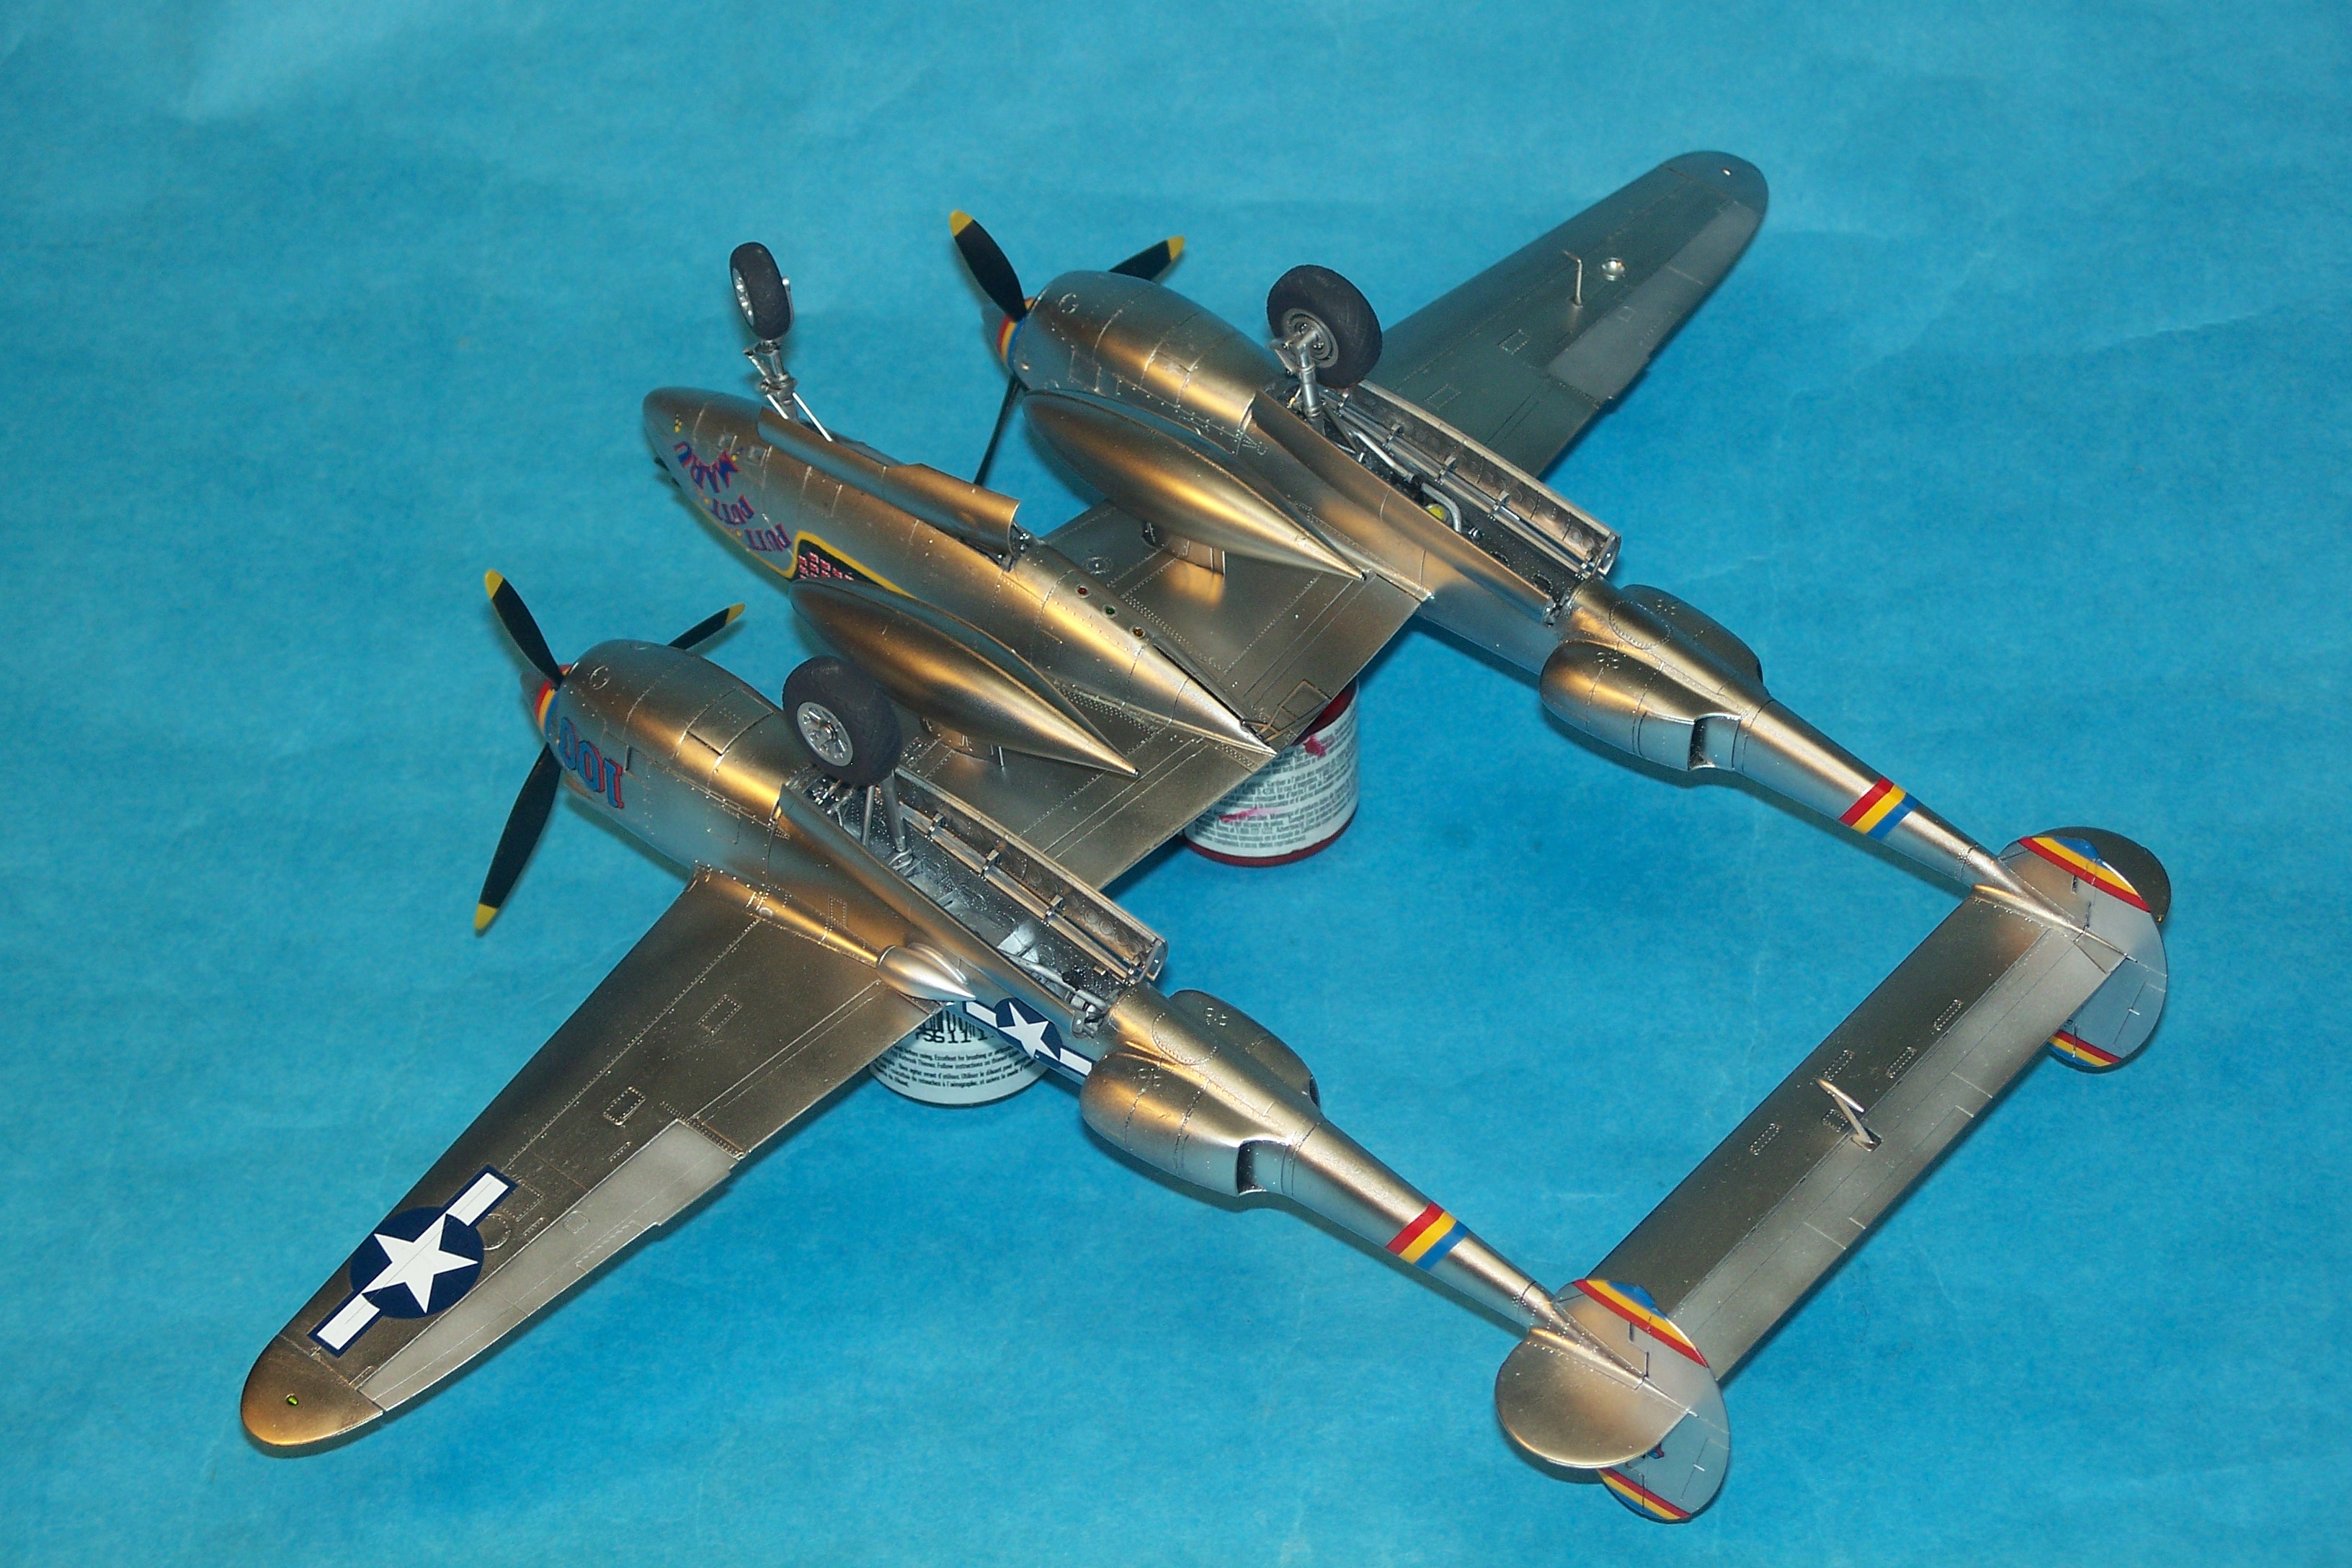
Finished the newest Tamiya Lightning this afternoon. It was built OOTB except for lengthening and turning the nose gear leg. It's the most complex P-38 kit in 1/48, but also the best detailed. It fits together beautifully. I used no filler anywhere and only medium and fine sanding sticks. The only negative thing I can say is that there are some actuators in the main gear bays that have to be installed and then hang down in the way for the rest of the build. The kit includes kabuki masks that you have to cut out yourself, but fit perfectly when done. I used AK Extreme Metal Aluminum over Alclad Gloss Black for the overall NMF, along with some other Alclad metallics for varying NMF colors. I was going to do another scheme at first, but those decals were too old and brittle, so I defaulted to "Put Putt Maru". I used a combination of the kit decals and an old MicroScale sheet to do a later version with more kill markings than the kit decals offer. If you're going to build a 1/48 P-38J for competition, THIS is the Lightning you want! It takes longer to build, especially the wheel wells, but everything pretty much locks into place. The Alclad Gloss Black primer.... there were some bad batches of this, but mine worked perfectly and dried hard in 24hrs. The painted model and accessories. The 4-part prop hubs fit so well you can paint them first and then assemble them. And the finished model.... Critiques, comments, and questions welcome! Gil
-
Wonderful looking 109! I'd have guessed at least 1/48 if you hadn't put 1/72. Congrats, and thanks for sharing! Gil


.JPG.62ce6064805b5be31d6af64c30b7cacc.JPG)