ghodges
-
Posts
7,570 -
Joined
-
Last visited
-
Days Won
298
Content Type
Profiles
Forums
Events
Everything posted by ghodges
-
Stellar looking builds and a great year! Thanks for sharing and more for '24! Gil
-
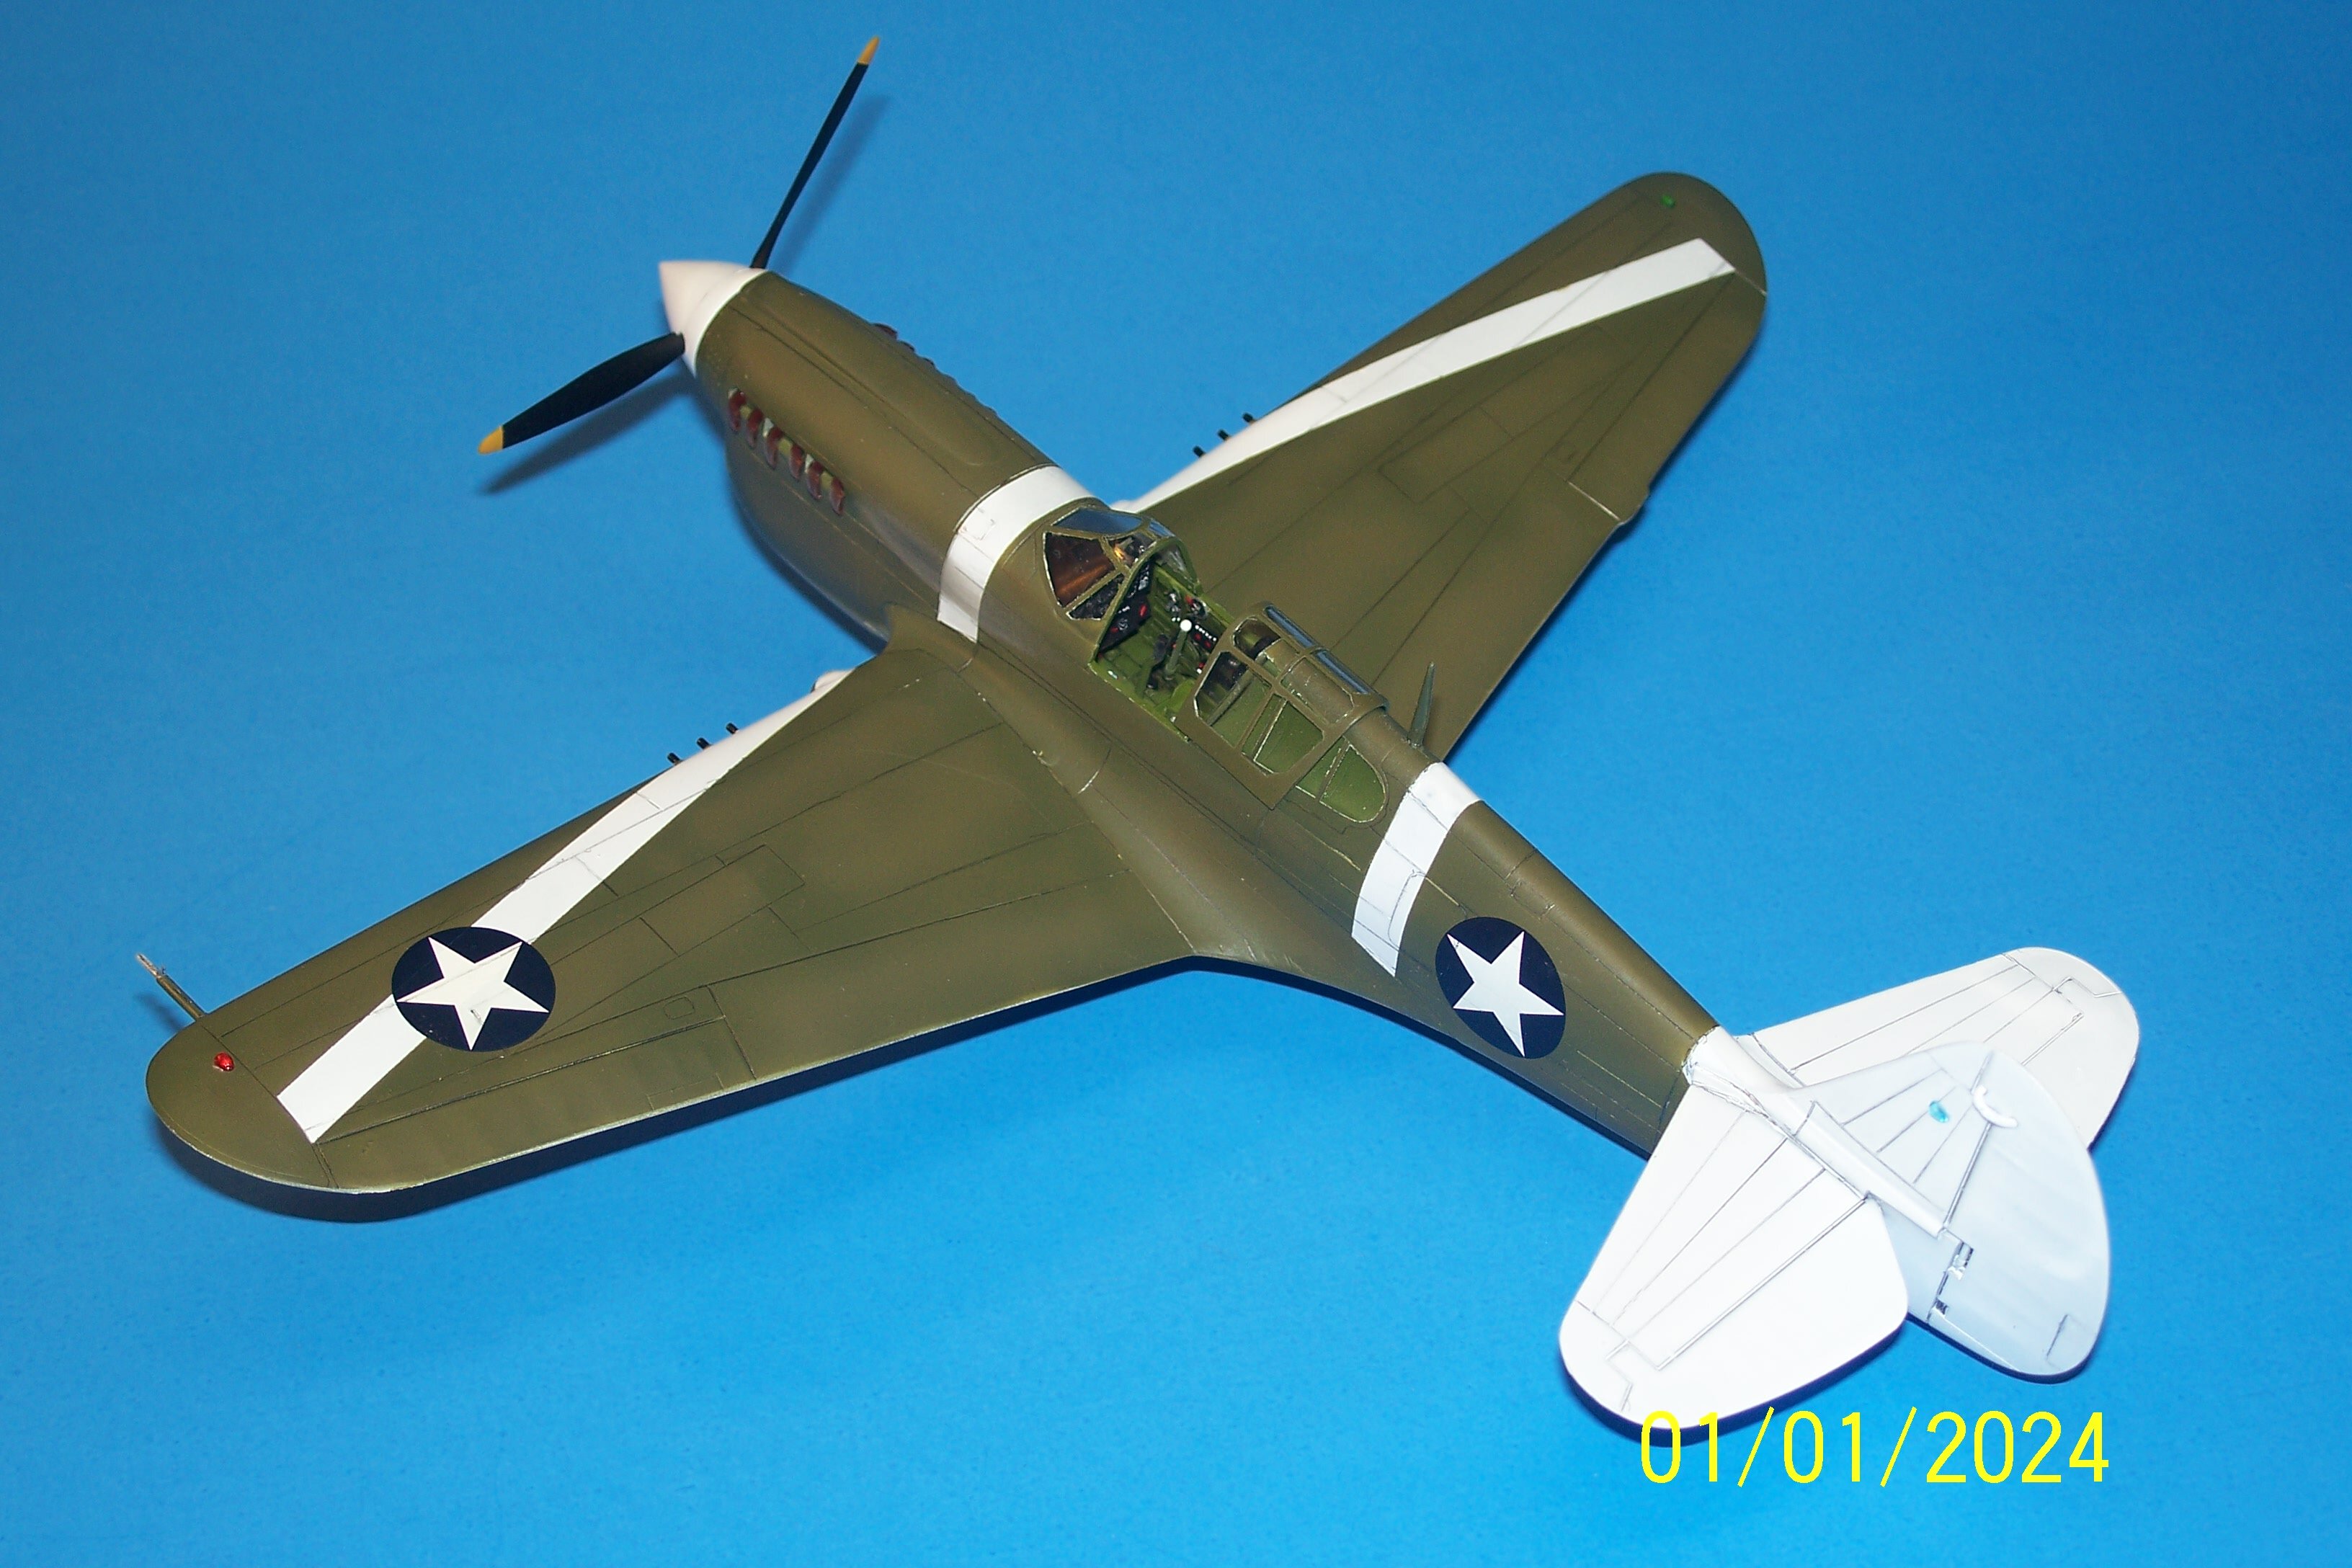
Someone posted a "24hr build challenge" for New Years eve/day, and I opted in. Proud to say I was able to "get 'er done" in just over 24hrs, starting at 2pm yesterday and finishing at 3pm today. This is the Mauve 1/48 P-40M with a True Details resin interior, but otherwise OOTB. The white in the scheme is actually the white primer used in the build, helping speed things along. I also used dry transfer stars, which eliminated the need to gloss and flat coat the model. Overall it took just over 10hrs of actual work, 7 of them yesterday (with final paint going on at 3am!), and 3hrs today to finish painting and assembling all of the details. All in all, it was pretty good fun to get one done in a day! The starting point at 2pm.... I spent the 1rst hour just masking off all of the clear parts! This pic is at 7pm. You can see all of the parts that have been glued and assembled, as well as all of the interior painting done. A close up to show the resin floor and side panels. as well as the kit main IP panel. This pic was as of 8pm, with all basic assembly done and the wing roots filled with Perfect Plastic putty. Took a break to let the glue dry a bit and came back out about 10pm to sand seams and apply the Tamiya Fine White primer. After allowing the primer to dry for a few hours, got back to masking and painting about 2am, applying the bottom gray using Alclad Gray primer. This was it's condition as of 2:30 am... The OD has been applied, along with some lighter faded OD to finish the painting process at 3am. And on to the rest of the finished model pics! Comments, critiques, and questions welcome as always! Gil

-
Very interesting.... is this a kit or scratchbuilt? I like the way your bleached linen looks along with the ribbing looking visible. Is it plastic or tissue or something else? Gil
-
Got this one in just under the wire for 2023! This is the 1/48 Monogram F-80C Shooting Star converted back to a P-80A and painted in my interpretation of the colors from the only b/w pic of Robin Olds "Scat-X" @1946/47. The conversion is extremely easy... you just have to add a landing light in the nose, move the pitot to the tail fin, add a radio mast to the bottom behind the nose wheel well, leave out the ejection seat (I used a P-38 seat), and reshape the rear of the canopy to eliminate the "tear-drop" (I vacked a new canopy to do this and also get around using the kit's separate canopy glass and frame). I did use a Black Box cockpit, though I installed the Monogram main IP in it. In hind sight, and if I ever do a gray P-80 again, I will not add the wash as it's too stark looking. But, what's done is done and finishing it did allow me to get my 21rst build in for this year! This shows the BB resin tub and the P-38 seat I used in place of an ejection seat. The resin IP is on the left and the Monogram IP I ended up using is on the right. I used sheet plastic strips to fortify the interior seams between the front and rear fuselage halves, and scracthbuilt the upper flap well structure using strip plastic. The rectangular piece is to fill the gap betwen the flaps across the fuselage bottom. This shows how it all fits together... The landing light was a piece of clear sprue with a hole drilled into its rear for the light. It was super glued in place and the sanded and polished to shape. I long ago glued together an F-80 canopy frame and the kit glass together to make a vacuform mold. This gives me a clear canopy I can slide the kit canopy frame under to detail it. For this P-80A I also sanded the rear of the mold to a point. And here's the rest of the finished pics.... This is the only known pic of the aircraft. The nose and tail fin color looks to be lighter than the insignia blue star/bar, yet they do not match the black code letters, so I went with red. The center of the nose lettering appears somewhat close to those trim colors, so I elected to go with red there also. The lettering outline is clearly a lighter color, but not as bright as the white on the insignia so I went with yellow. However, these are just my guesses based on my interpretation as well as a little common sense as to what colors were commonly used for such nose art. Comments, critiques, and questions welcome as always! Gil
-
David’s Scale Models 2023 – The Year in Review!
ghodges replied to Wolfman63's topic in General Modeling
Excellent year and I've enjoyed following your builds through the year. Looking forward to more in '24! Gil -
Gotta say that the glass looks pretty good, and helicopter glass of ANY kind is usually tough to get right! Congrats, and welcome to your first steps to the DARK SIDE.... 😁 Gil
-
Once more, thanks for the very kind remarks! Gil
-
Good looking progress and that's one properly busy looking front office! Gil
-
A very good and well rewarded year! Thanks for sharing! Gil
-
Love it! I always thought those Batman markings were very cool and the F-94B looks like a T-33 on steroids and muscled up. Thank for sharing Duke! Gil
-
Tis the season for modeling and nostalgia. Great verses! Gil
-
Maddog Manufacturing 2023 Grand Reopening
ghodges replied to Mark Deliduka's topic in Photos: On the Bench
Lots of nice progress! If I might suggest trying for the RE Lee lettering... I've found a Sharpie to be useful on raised lettering. You just have to be careful to keep it above the sides so it only touches the raised lettering; but there's also no danger of it "running" like paint can. And, a finer tipped red Sharpie might do the job neatly on the inside of the lettering too. Gil -
Got my 20th for the year done... this is the Otaki 1/48 FW-190F-8 in desert camo; OOTB except for a replacement vac canopy (the kit one was buggered up), a 10 day build just to get another done by the end of the year. I've got one more I should get done by next weekend to finish out the year at 21. More pics then! Gil
-
You may be thinking of the old Monogram/Mattel 1/72 Snap Together kits from back in the 80s.... they were good kits designed to be put together with no glue, but they were also relatively "accurate" so that the more serious builders had a stating point to build something that hadn't been available before; like their short winged B-26B Marauder. You may be able to find some of them individually here and there, but they're long out of production to get in bulk. Gil
-
Nice! Is the unpainted scheme a real thing, or did you just portray it before getting its paint job? Gil
-
Airfix has a series of easy build "press-fit" kits that are relatively cheap and need no gluing as they go together like Lego kits do. I know we're planning to buy some for the junior modelers at Jaxcon next February. Gil
-
Nice start on that German flea! Gil
-
Wow! Those colored cockpit parts really deck the interior out very brightly! Great beginning! Gil
-
I found this email address, though it looks like your parts would have to come from Trumpeter out of China.... http://part.trumpeterkit.com/ Hope this helps. Gil
-
WOW! That is SO cool! Wish I'd thought of that..... I think if they had existed that Goshawk would have been a great choice for them as one of the best looking biplanes the Navy ever had and from everything I've read it was a dream to fly. Congrats on both a great looking build and a rocking modeling idea! Gil
-
Very nice pair of Avengers the hard way! Gil
-
Nice Spit! While the WWII versions are the "classics", the later Griffon engine ones like yours look a little meaner in my opinion! Congrats, and if you have 2 weeks left that has to be at least 2 more models you can finish! 🙂 Gil
-
Thanks for the very kind words! The time on the finish had more to do with overcoming painting problems than anything else. If you go to the "Build" topic area and scroll to the bottom there's a complete explanation of the problems. It took about 7-10 days to paint including the various primer stages, but generally about 5 days when it was in the final painting stages for the yellow and blue and final gloss coats, and that was due to time needed for paint to dry and then the time needed to mask off all of the yellow areas. In the end, it looks good on my shelf and in the pics, but wouldn't survive 30secs in a contest setting due to the various rough patches here and there. As mentioned above, no one makes decals for the 1/48 Connie (but they do in 1/72 if you want to build one). I found a set of 1/32 DRAW decals for the BA Cutlass that had the number 8s for the tails that I needed. However, when I got the sheet, the numbers looked "less yellow" than the CAM Blue Angel decals I had and planned to use so I wasn't sure if I wanted to use them. Therefore I used the 8s on the Draw decal sheet to trace out stencils and paint them along with all of the other yellow trim. By the way.... those 8s aren't really "accurate" either..... if you look at pics of the real plane they were much larger on the fins! But, I also think they looked ugly and out of balance so I scaled them back on my model to a size that I thought looked good and how I think they should have applied them on the real one! It turned out my qualms about the Draw decals were for nothing.... I had to use their block US NAVY on the bottom of each wing, and when I applied them they were plenty yellow enough, though they looked less so on the sheet. The decal 8s would have been just fine! If nothing else this model taught me a few things, but I'm glad I've no need to build another one! Cheers! Gil
-
Very cool idea and a scene that conveys a lot in a simple setting. I built 2 Texans and a BT-14 earlier this year using both of those kits, and I have to say I really preferred the Monogram kits over the Occidental, though get the job done. Looking forward to more! Gil
-
A very good start indeed! I plan on doing a recce Mosquito too whenever I finally get around to it and look forward to taking notes from yours! Gil