Stikpusher
-
Posts
914 -
Joined
-
Last visited
-
Days Won
66
Content Type
Profiles
Forums
Events
Everything posted by Stikpusher
-
After a few months of sitting on the sidelines, I pulled this one back out and resumed construction. During the So.Cal. AMPS monthly Zoom meeting I was able to get a LOT more built on this track. I’m going to build this with the hammerhead in the stowed position. I was able to get most of the basic construction completed, although the engine deck is not glued down, only fitted in p,ace for the moment. I want to build some sort of support base for a driver’s bust/torso since that’s the easiest way to place one in there. I have trimmed down the forward hammerhead support pads a bit too much since I took the photo, so I’ll need to go back and adjust those to get the proper stowed angle. Before I trimmed them, the front sat way too high. More to come soon…
-
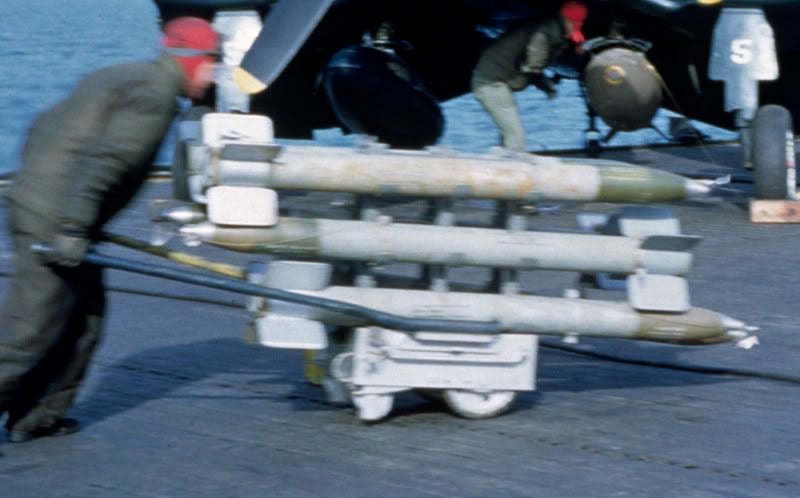
No. Actual military inert ordnance is painted blue. An inert, blue, warhead can be fitted onto a live, NMF or Gray, rocket motor for practice firing. Or if the rocket motor and warhead are both inert, they will both be painted blue. Blue has been the standard color for inert US ordnance since before WWII. here is an inert warhead rocket at Smithsonian that came from the USMC.

-
In 1/48 yes, in 1/32 no. But… ProModeler made a 1/48 decal set of markings for US WWII/Korean War ordnance, including 5” HVARs. Now if you were to get that sheet, scan it, then enlarge the appropriate percentage up to 1/32 and then print those decals for yourself…
-
That’s a very nice years worth of work. Looking forward to see what you build this year.
-
You’re quite welcome. That photo is quite real, but it most likely came from either somebody’s restored warbird, or a museum aircraft with somebody’s artistic impression of how they thought the rockets might look. I did a bit of read up on the 5” HVAR, and it turns out that the Army and Navy rockets had different electrical firing connections, so that would be another reason to have the motor casings in different colors for the ordnance armorers. Apparently there was also an adaptor kit available for the firing connections to make the Navy rockets compatible with the AAF connector wiring. I imagine that in some theaters of war, such a thing would come in useful.
-
I don’t know where they came up with that red and white scheme for the 5” HVARs. The rockets came out of the ordnance factories in standard colors with OD warheads and depending upon Navy or Army use, light gray or bare metal rocket bodies. Presumably the gray paint on Navy rockets was for corrosion prevention at sea in the damp salt air environment. Yellow stenciling is seen on the warheads, and the fuse is in bare metal. USN USAAF/USAF
-
A few new acquisitions over the past 48 hours... first up, the railroad flatcar for the Jagdpanther that I bought last month turned up in another box of the late owner's collection... mostly built... the executors brought it in to IPMS last night for me they also threw in the Panzer III M that was mostly built and just needs some little bits added then move on to painting... no charge to what I had paid for the three previous purchases and then a guy brought in this Flak 18 that Ive been wanting since it was first released. I couldn't haggle him down from his asking price, but it was still a good chunk off retail, so I'm happy and then the postman brought in these two online purchases for a couple projects that I have in planning... good stuff ahead...
-
Thank you Jim! I’m with you on appreciation of Dassault designs. Now if I can find an affordable 1/48 Super Mystere 😉
-
Great looking trio of 109s! They look great, and you completed all three so rapidly! Very impressive on all accounts.
-
Keith, Gil, Chris, and Mark, thank you one and all guys. I do appreciate your kind comments!
-

Trumpeter 1/24th scale Ju-87-D Stuka completed
Stikpusher replied to Bradley25mm's topic in Aircraft
That’s a mighty fine looking build! I can only imagine how much display space it takes up between the aircraft and the beautiful scenic base. Just curious, but which colors did you use for the topside camo? -
So here we have my latest completion- Heller’s Etendard IV M in 1/48. Let’s just say that this kit was challenging. The front of the fuselage was warped around the intake areas, the plastic quite brittle, and the fit in some other areas less than ideal. She fought me more and more as I neared the finish line, but in the end I did complete this bird. Using the kit decals, and some scavenged from an Etendard IV P in my stash I was able to finish this in the scheme worn in the mid 80’s, using some Xtracolor enamel on the topside and Tamiya acrylics on the undersides. It has lots of little flaws due to various things that happened along the way, but I am quite happy to get this one finished and onto my display shelf. Thanks for looking, comments and critiques are welcomed 😉
-
Thank you Freddie!
-
A few new purchases came in this past week. These decal sets for 1/35 armor and this 1/48 aircraft kit
-
Mark, those are some mighty fine additions to your stash. And I have no doubt that you will build them all! I’ve had a few new acquisitions come in since my last update. For my 1/48 RAF & Fleet Air Arm, I picked up these both well discounted off of their list price on the evilBay and then these two items… scrambling for replacement decals on my recent Mig-3, I realized that I needed Red Stars in my decal stash… and the Tempest PE set will dress up the old Eduard kit in my stash For my 1/35 motor pool, I picked up these kits… last weekend at AMPS, some guys came in with partially built and unbuilt kits from a friend of theirs who had died recently. I picked up these two very well along and very well started kits.. and this un started early Jagdpanther… it is missing the rail flat car, but I’m not complaining. All three cost me $20!!!
-
Gil, all three are coming along quite well. The camo schemes turned out great!
-
Great finish on this! You can practically hear his whooping as he rides the bomb down.
-
Yesterday I went with a friend out to Luke AFB and during our visit, took him by the Air Park display of aircraft types that have been flown at the base. They could use a few more types from the early years at Luke, but it is still a very nice collection.
-
Time saved on painting is time that can be applied to another project. 😏
-
Beautiful collection! I remember seeing a few of those kits on store shelves long ago. Nice to see what can be done with those kits! 👍🏼👍🏼
-
That’s a good trio of armor builds Mark. I didn’t realize that the Japanese got into the AMTRAC users club. Now you know that saying you’ve built all 1/72 Leopard kits available means that somebody will come out with a new one. That’s just how the universe works. 😉
-
Thanks Mark. A simple technique that gave quick nice results.
-
Not bold in tackling a vacuform kit on its’ own, but bold in tackling one as part of a batch build. They just need more effort compared to a current standard injection molded kit.
-
You’re too funny Gil 😉 Those particular tanks are just packing some serious heat… 😏 Thanks for the kind words on this past year’s work. To be honest, I’m a little discouraged about posting WIPs on here with the lack of feedback or comments compared to other sites that I’m on. I’ll just keep posting finished work.
-
I’m with Gil and missed it too until today. Truly an excellent year of building for you! Bravo! 👍🏼