


StuartMont
-
Posts
233 -
Joined
-
Last visited
-
Days Won
10
Content Type
Profiles
Forums
Events
Posts posted by StuartMont
-
-
No zooming in please 😀😀.
These are my last two 1/32 scale airplanes, no more room so it’s on to 1/48 scale.
The Trumpeter P-38J was a bear (for me) and it’s hanging because I accidentally reversed the landing gear wells and could not remove them without destruction🥴. So I switched gears and built it as a flying model. Based on the fit I don’t think it was supposed to be. I tried to scale up (I think) the weapons decals for 1/48 scale to 1/32 scale but that did not work. The colors are accurate based on help from you guys. Getting fishing wire to make it look better hanging.
The Tamiya F-15 went together very nicely and was a joy to build. Finally purchased an airbrush but too late for this one and the finish is C- at best. All of the detail colors are accurate I hope. This is the first time I applied every single decal called for and they went down fine. I took liberties with the ordinance, picking what looked coolest to me and learned a hard lesson about the order of things in terms of assembly. The instructions weren’t much help and thus the two missiles sitting next to the plane.
So my modeling experience now consists of twelve 1/32 scale models. The 1/48 Tamiya Swordfish is next. This will be also be my first build using an airbrush so wish me luck.

-
 1
1
-
-
I did try to search for one online but to no avail. Does anyone know where I might be able to buy a 1/16 scale WWI British pilot figure?
Thanks,
Stuart
-
Thanks for the link! Here’s my workspace, plastic airplane models and Ancient Egypt.

-
Wonderful trip full of incredible sites you’ll never forget I’m sure. I’ve been studying ancient Egypt since 1977 when I took a class during my freshman year and immediately became addicted. My plan is to visit sometime in the next 5 years 🤞
BTW - already ordered the stripes, thanks again.
-
Awesome! Thanks so much for the reply.
-
Good morning. I was hoping someone might provide some advice on how to paint these very thin lines on the Mk. 20 Rockeyes. I practiced with a short liner brush and made a real mess of it. Masking the lines is difficult due to space and obstructions. Any thoughts would be appreciated.
-
Will do, thanks for posting!!! Waiting for the decals.
-
15 hours ago, Stikpusher said:
ProModeler made a 1/48 decal set of markings for US WWII/Korean War ordnance, including 5” HVARs.
I found these on Ebay and also bought a pack of decal paper for inkjet printers. Seems like a straightforward procedure but if there are any “warnings” please feel free to post.
Thanks again,
Stuart
-
2
-
-
Great, thanks for the tip, I’ll start looking.
-
I still have to ask if anyone knows where I might find appropriate decals for the 5 inch HVAR. I thought I had a set of yellow stencils for weapons, but they are just for bombs. It looks as if the motors/bodies also had stencils applied. I have searched quite a bit and can only find modern weapon sets. Any ideas would be greatly appreciated.
-
Well I’m not sure. They did look cool so the photo op worked for me 😀
I went with colors similar to the USAAF photo that was posted here with the tail fins the same color as the warhead.
thanks for weighing in.
-
Thanks for the additional information, cool stuff. I did some more digging also and found this . . . Yikes! Not sure what game they are referring to but perhaps that was the genesis for the incorrect red/white color scheme. Based on your AAF photo I will be painting the tail fins the same color as the warhead.
-
Well thanks very much for your reply. Happily no red has been laid down and I have yellow decals from a separate weapons set. I’ll use the army scheme for the P-38. The photo looked real and I did not delve any further into it’s origins. I appreciate your pointing me in the right direction.
-
I am currently building the Trumpeter 1/32 P-38L. There are no indications of the color scheme for the HVARs and there are no decals for the rockets and bombs. I found the attached photo on the web and it is captioned as pertinent to later versions of the P-38. I really like this look and plan to proceed forward. My question is whether anyone knows where I might find decals appropriate for the HVARs. Any suggestions would be appreciated.
As always, thanks for the help for a very needy modeler. 😀
-
Thanks very much John. The DH-9A looks fantastic, much more complicated rigging. Since this is the first time rigging for me I choose a method that seemed easier based on what I read and watched. I’ve learned they all have their issues 😀
It sounds like I should paint the wires when I’m done.
-
Chris, thanks for the kind words. I’ve gotten lots of help from these forums. Not show ready but I’ll keep building them.
-
Ron, thanks so much for taking the time to describe your method. I have read posts about stretched sprue. I’m not going to lie, I’m a little intimidated by it but will definitely take time to fully digest your recommendation. Can you explain what you mean by “PM you”?
-
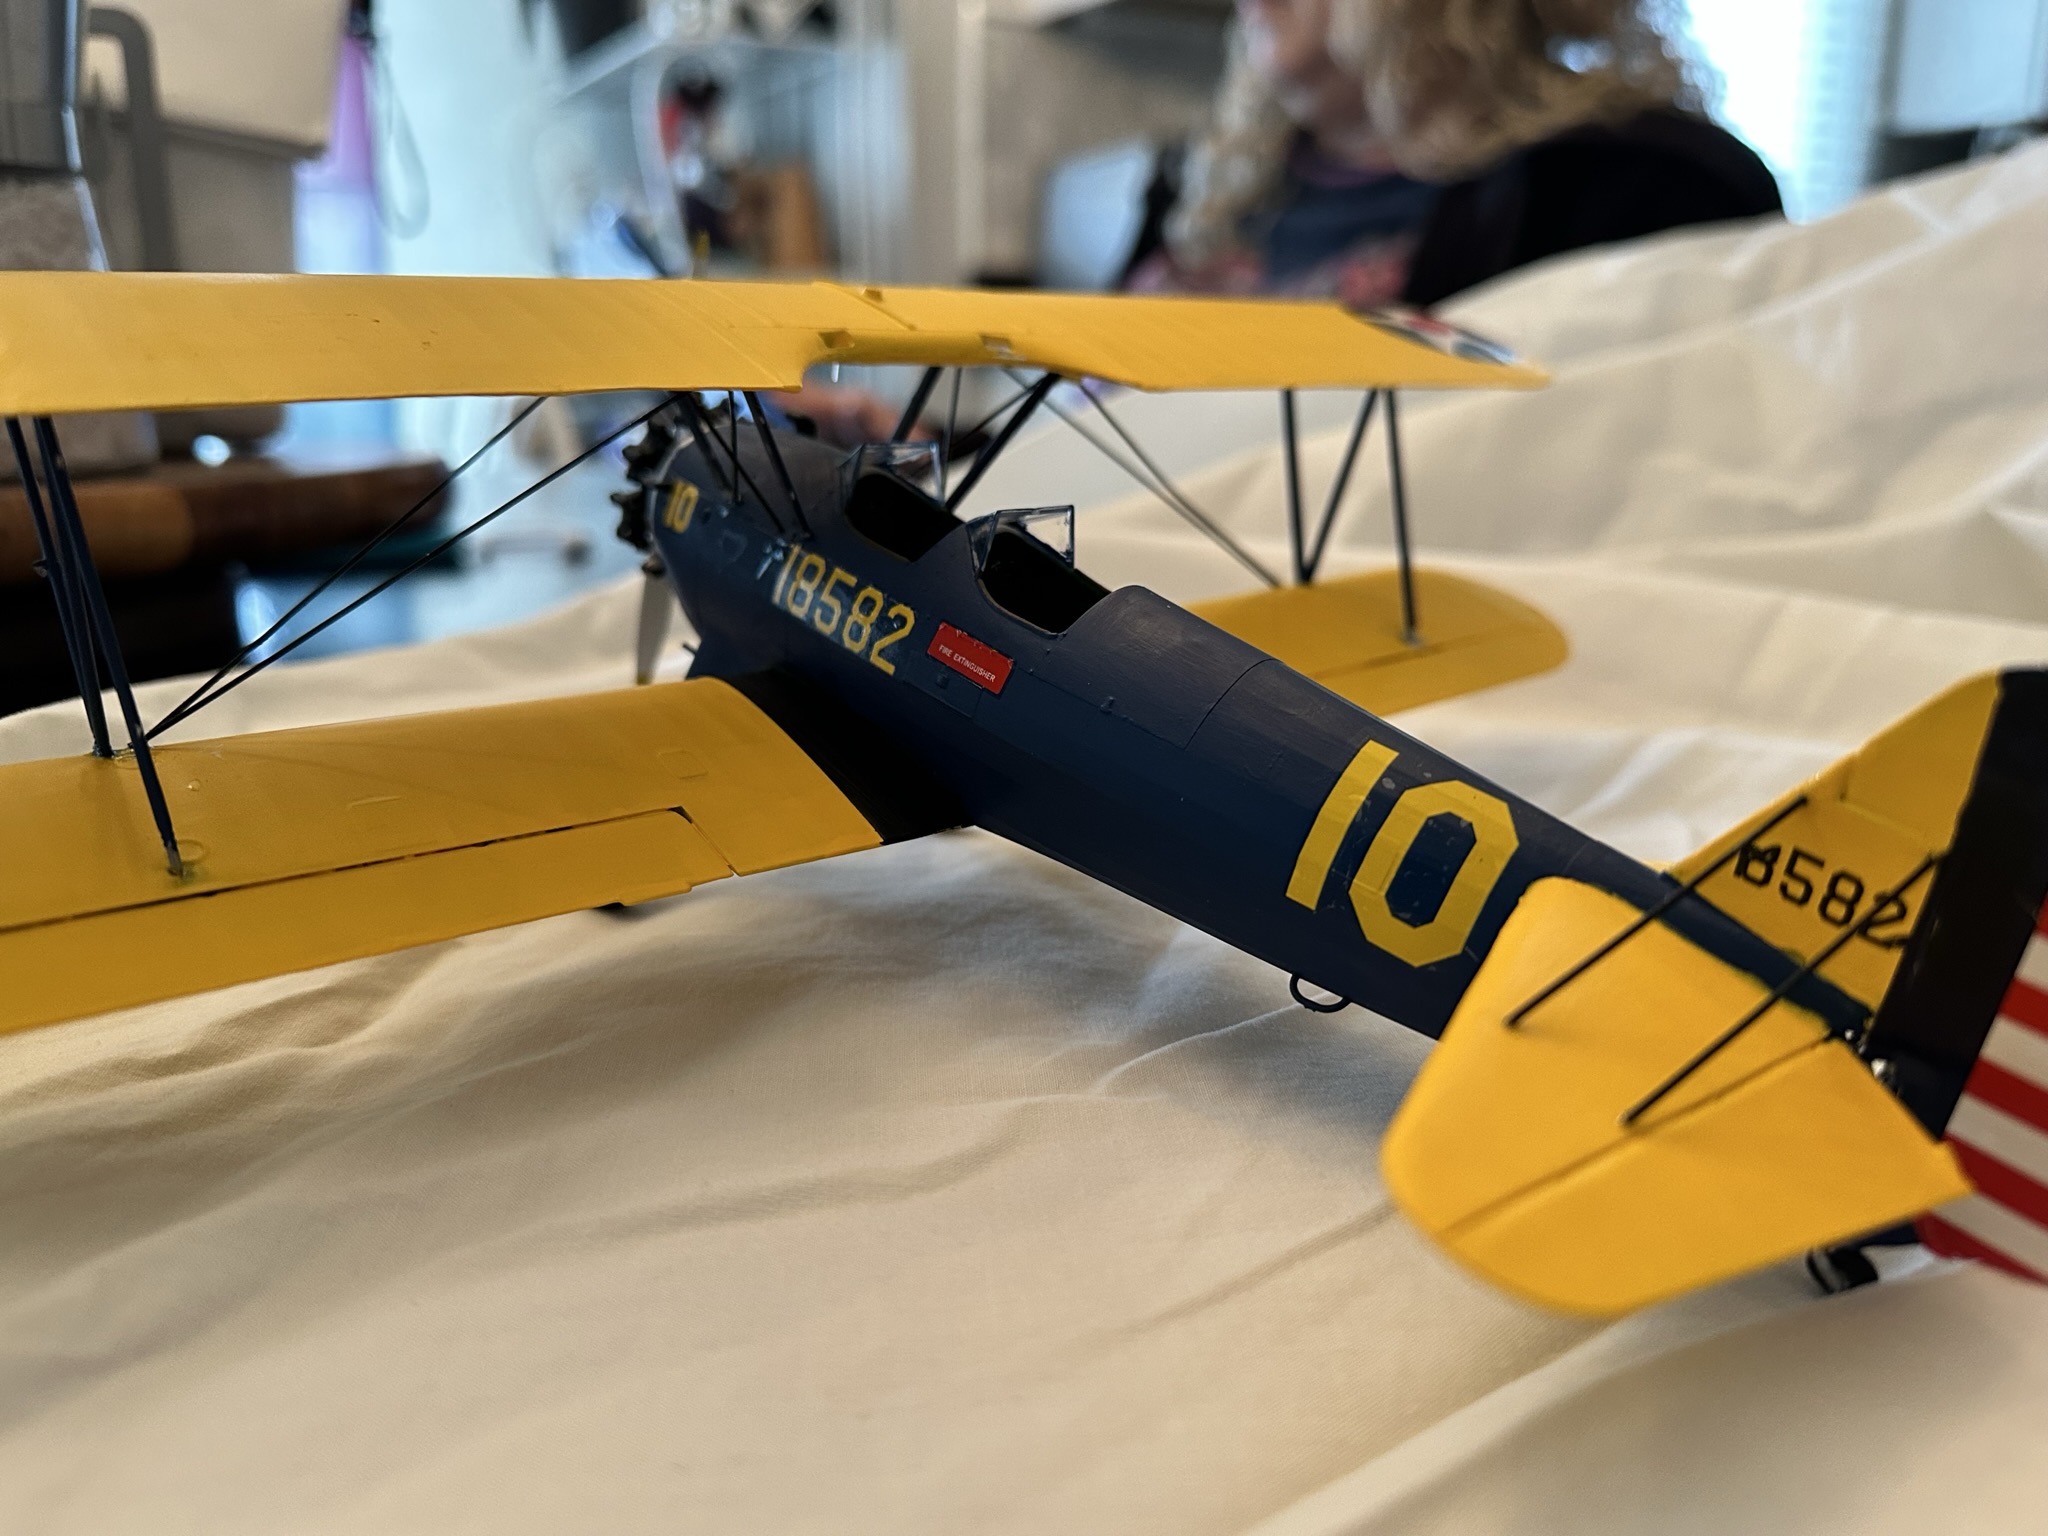
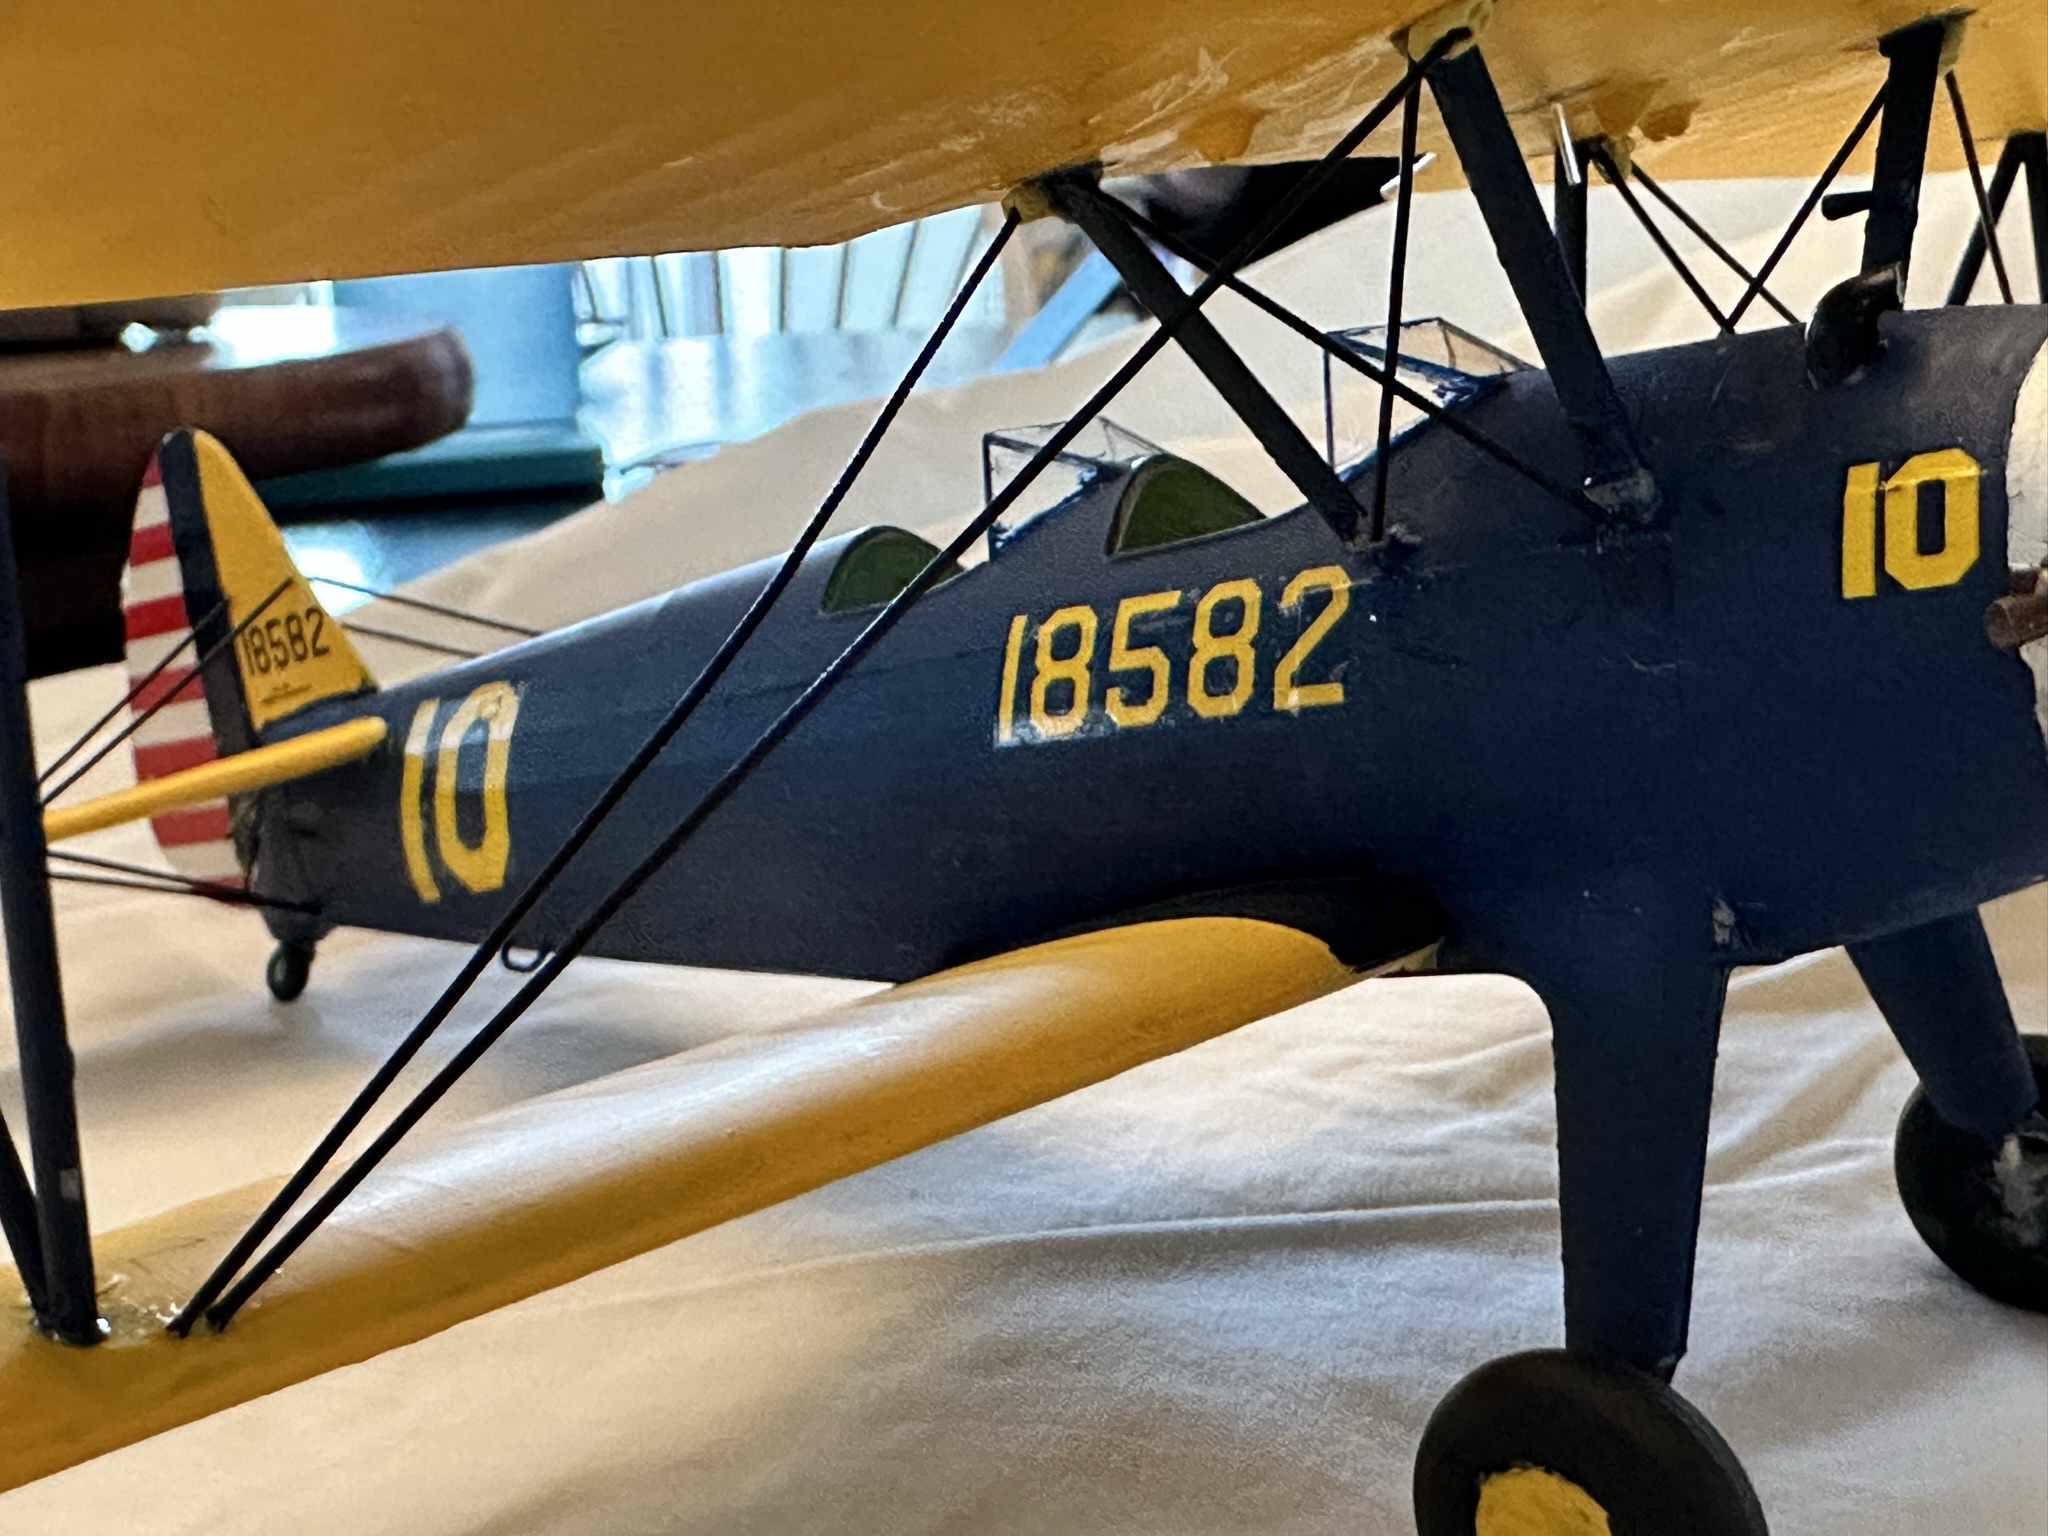
I wanted to post some very messy progress photos of my first attempt at rigging a biplane. I decided to start with the Kaydet. I used 0.4 mm floral wire. This converts to 0.015" at 1/32 scale equivalent to 0.48" (12.8 mm). How does this look from a scale perspective only.
As you can see I've made a real mess of the job and am going to have to do a lot of cleanup at the locations of the wire ends. One piece bowed. Markings on the model where wire ends need to go have been few and far between. Perhaps I covered them up when I painted. Therefore this was done by sight from the plans and when I looked at it the second time I found several mishaps.
I must ask if you use some kind of "jig" to hold the pieces in place while the glue cures. That is the cause of the mess, constantly reapplying CA to the ends of the wires and holding them in place long enough to "stick". I finally tried small pieces of putty to hold the top end of a wire and fix the bottom end with CA where required. This was a mistake since removing the putty in order to apply CA takes more than enough effort to pull the pieces off.
I may actually just pull off the wires I have attached, cleanup the model, and start over. they come off very easily.
Any and all thoughts would be most welcomed.
-
1
-
-
You’re too kind Mark. It wasn’t all sunshine and roses, especially when we inspected wastewater treatment plants 🤢
-
I do have some Tamiya spray paint and primer that I bought for the P-38. I’ll do that one next.
One more question - how deep is your display case to fit that bomber?
Stuart
-
18 hours ago, Mark Deliduka said:
That story is so cool. I think I'd feel like a groupie too! I already feel like I am, having followed the Thunderbirds for most of my life (father was Air Force)
We had an open-end contract with the Navy at PNAS. I think we made 10 trips there from Baltimore and every time saw something very cool. We designed the V-22 Ground Run Stand to facilitate testing the Osprey and watching them do that sent shivers down my spine. We also climbed all over the trusses in one of the hangars and got to watch them testing prop engines. Unfortunately I also got a speeding ticket on the base but that's okay since that was the day we saw the Osprey. Just as cool, while we were designing a bridge replacement at Quantico we saw them practicing with the Osprey during our inspection of the existing bridge.
-
Hopefully an irrelevant question once I finally get an airbrush.
Thanks Gil.
-
1
-
-
Thanks for the detail Gil. I assume this won’t work well when applying coats with a brush?
Stuart
-
That looks incredible Gil. I can’t tell, did you drill holes or make depressions to accept the wires?
Stuart


Finished 1/32 F-15E and P-38J
in Aircraft
Posted · Edited by StuartMont
Pushed send too quick. Added a few more photos of the F-15 and apologies for two of the same photo in the first post. Not sure how that happened.