


Bradley25mm
-
Posts
469 -
Joined
-
Last visited
-
Days Won
30
Content Type
Profiles
Forums
Events
Posts posted by Bradley25mm
-
-
Getting ready to paint. The vertical stabilizer and beaver tail have been permanently attached. Currently working on the payload bay doors. Thanks for having a look

-
You sir, have some impeccable scratch building skills. Thanks for sharing.
Chris
-
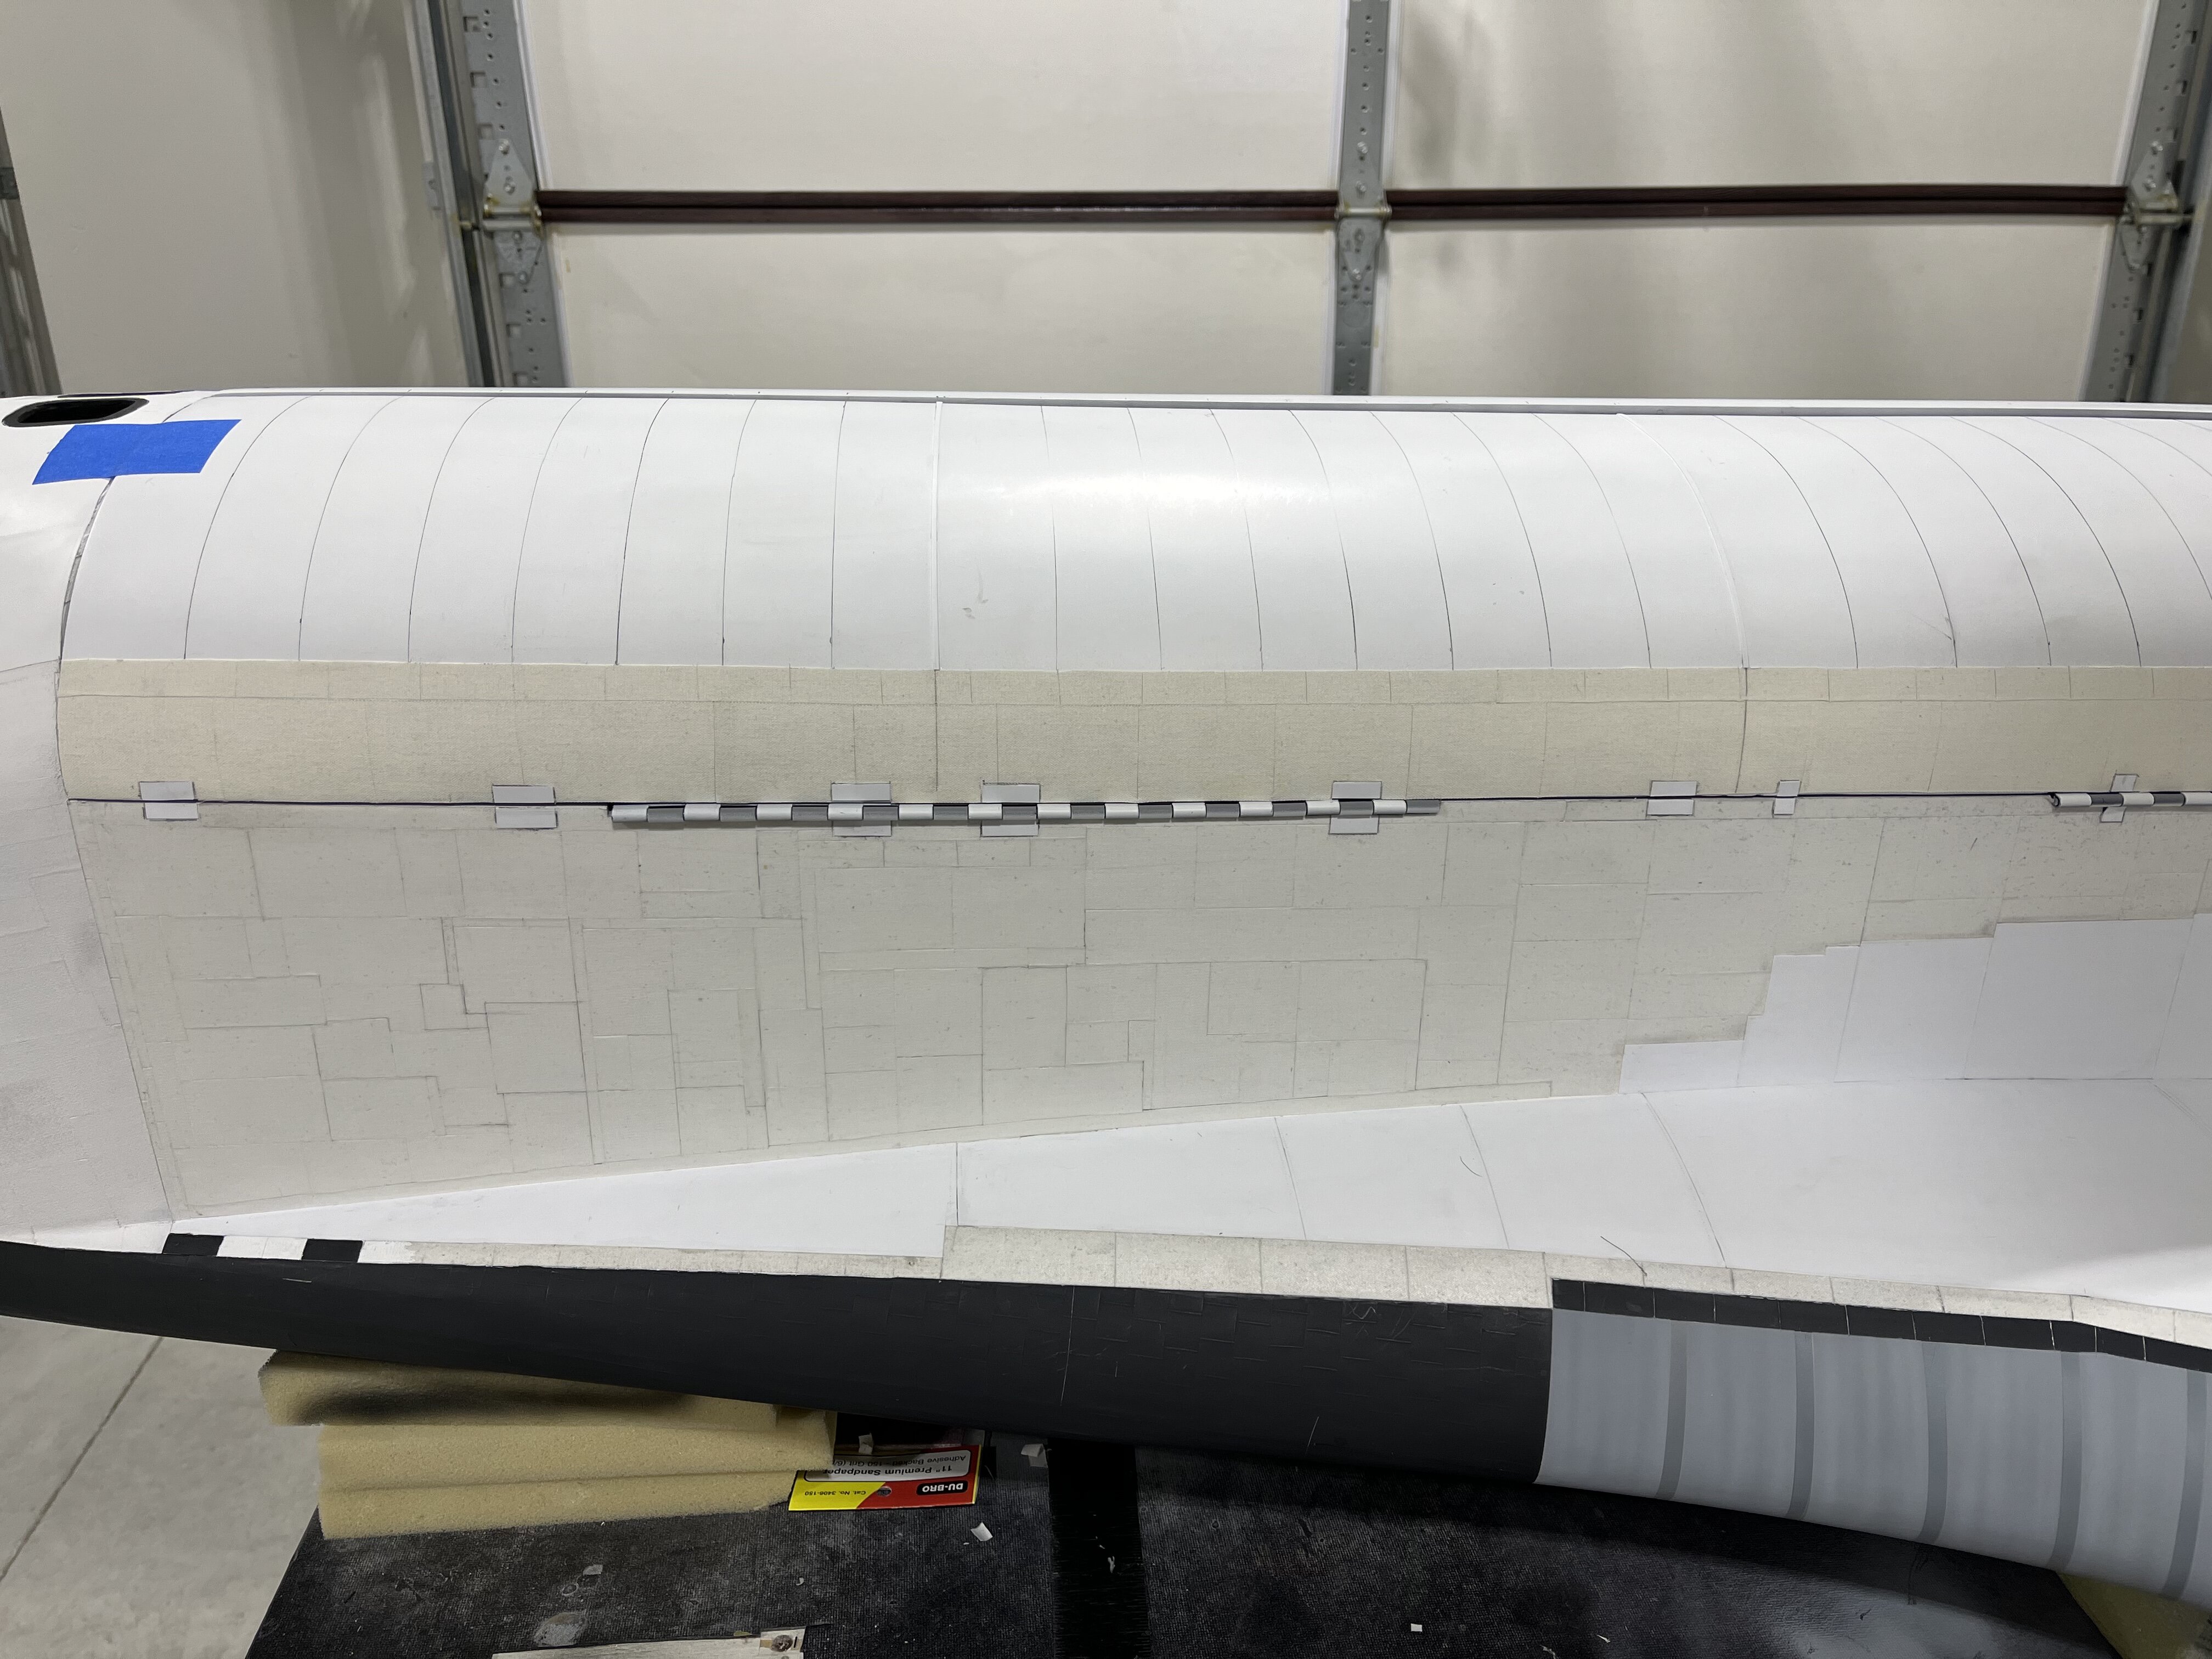
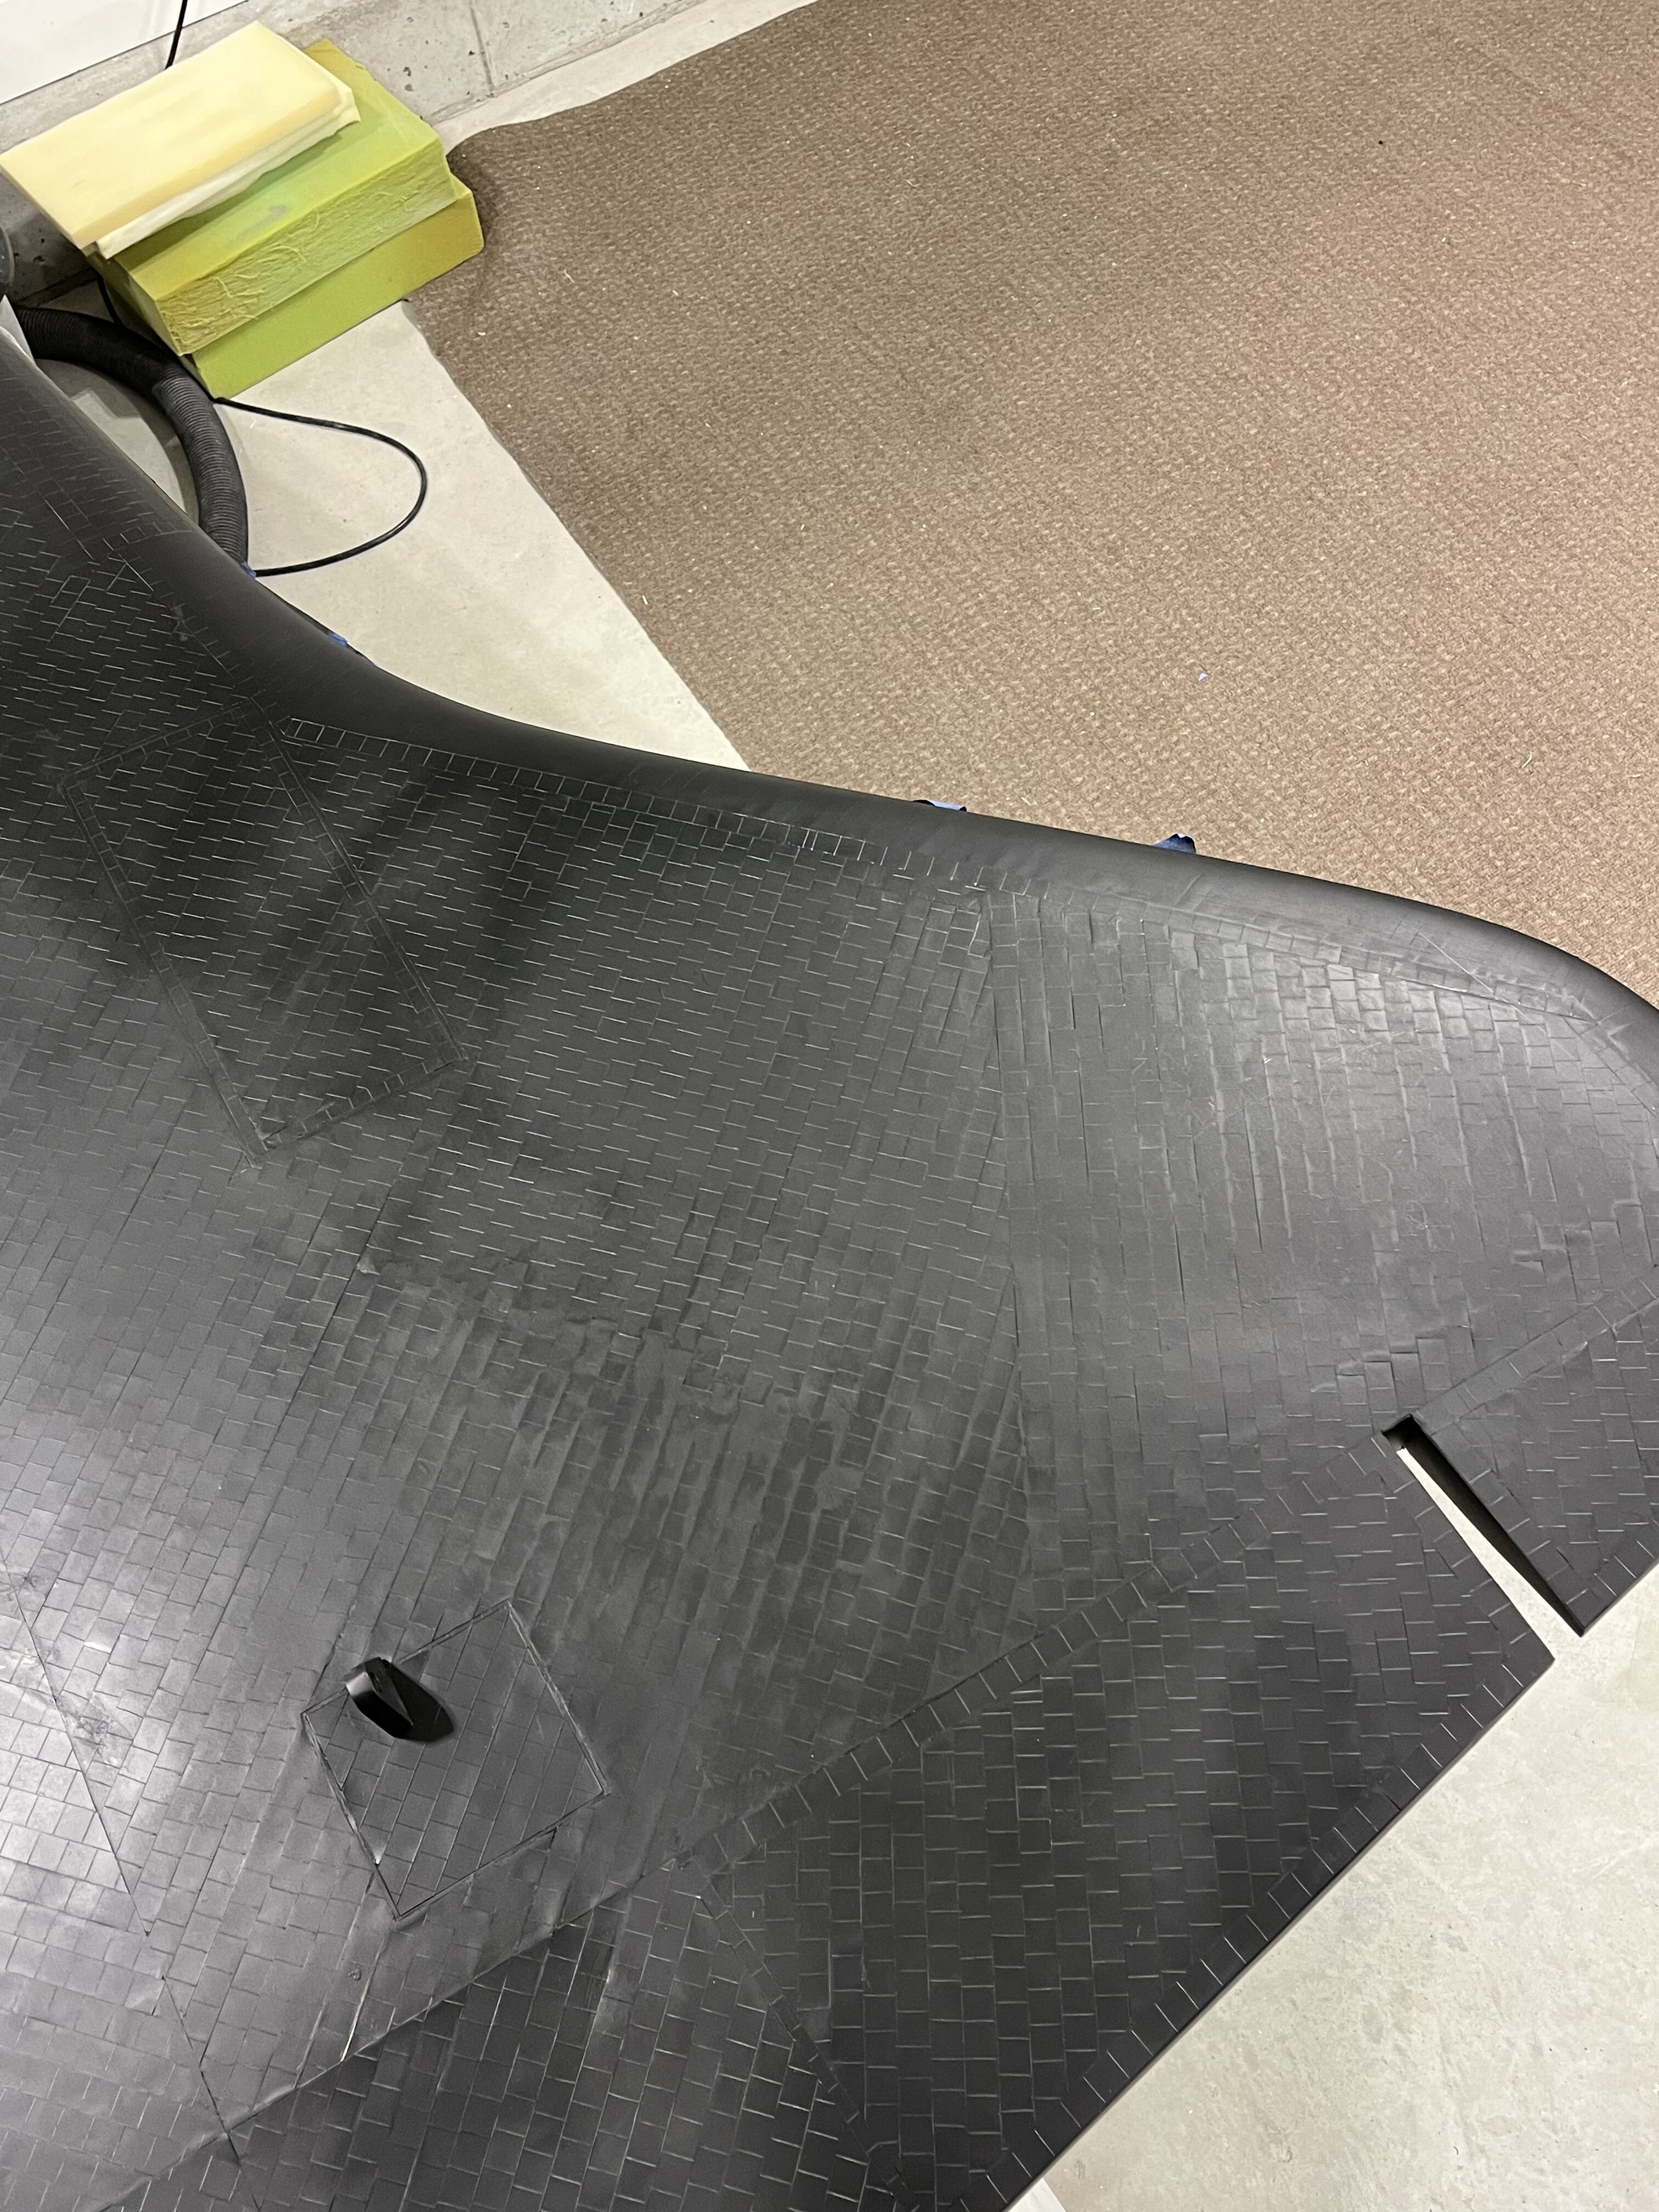
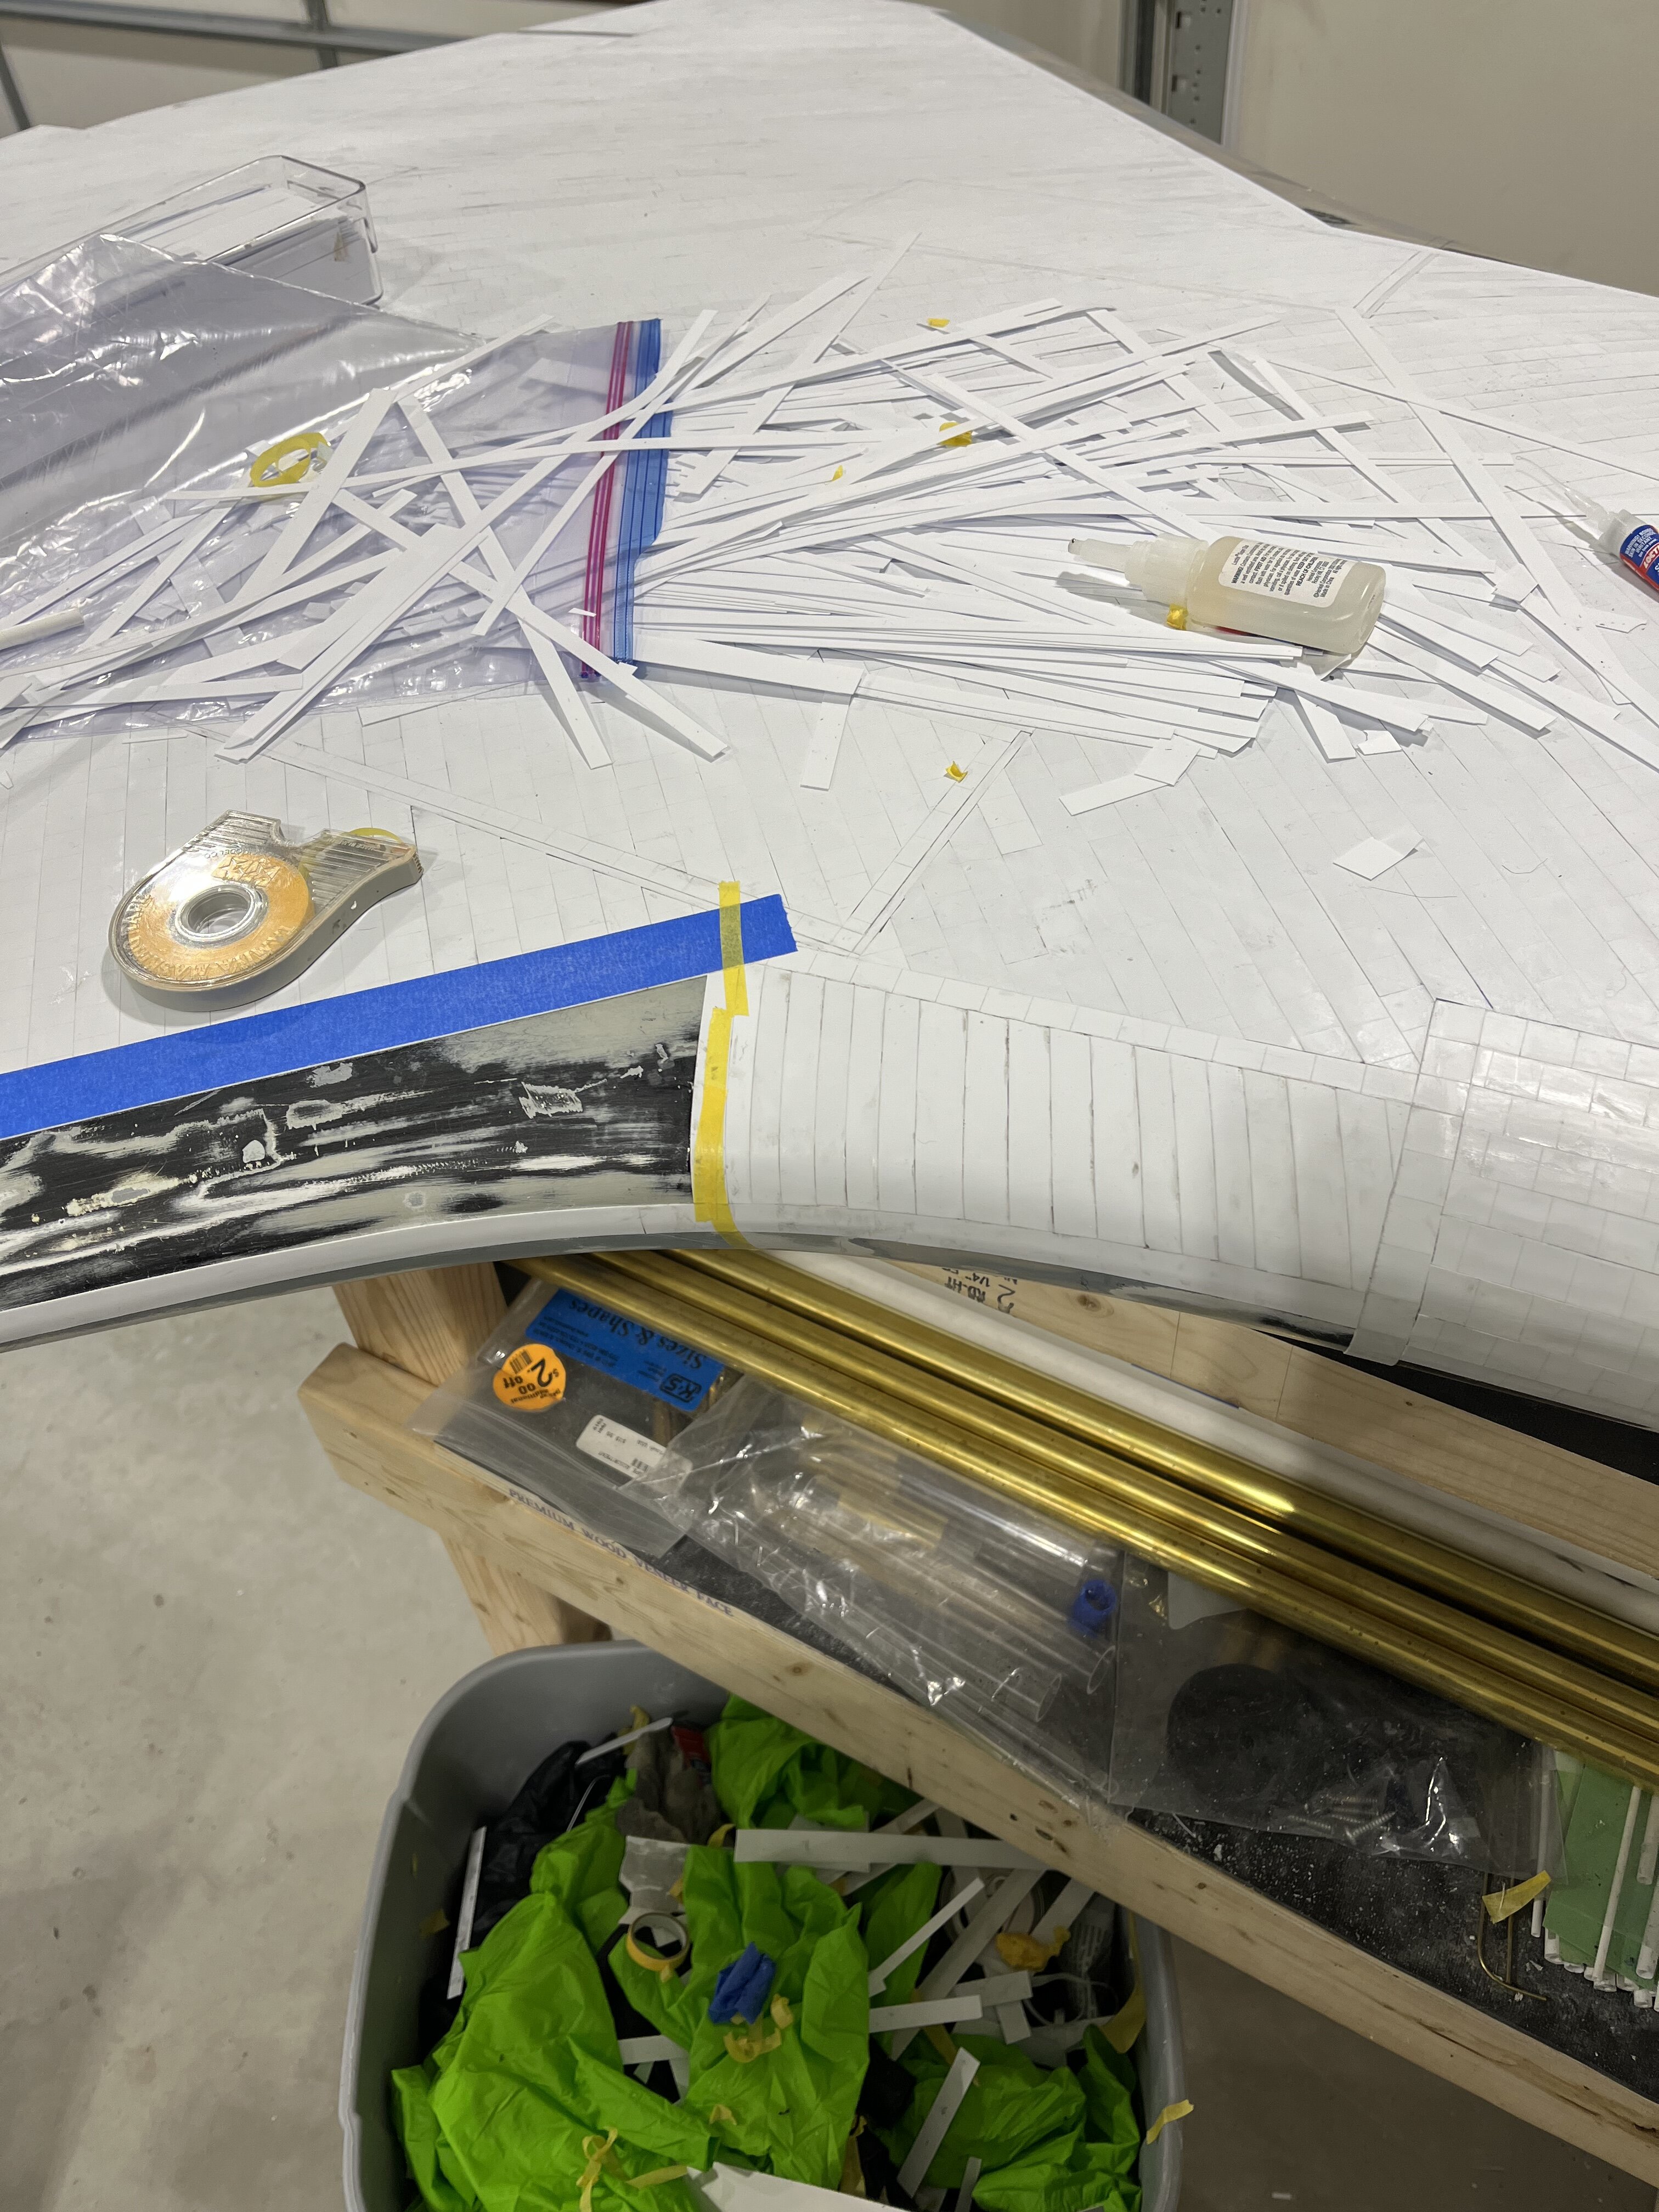
Made a lot of progress the past two weeks. Working myself around the shuttle to the other side. Everything on one side of the shuttle is either covered with plastic, sheeting or athletic tape. To knock down the fuzz on the athletic tape, it was coded with Woodland scenic spray on glue. After this dries , it can be sanded the 400 grit sandpaper. It easily knocks off any roof stuff, or standing fibers. After that, it will get one more coat of straight, seen it glue not cup with water. Thanks so much for having a look.
Chris
-
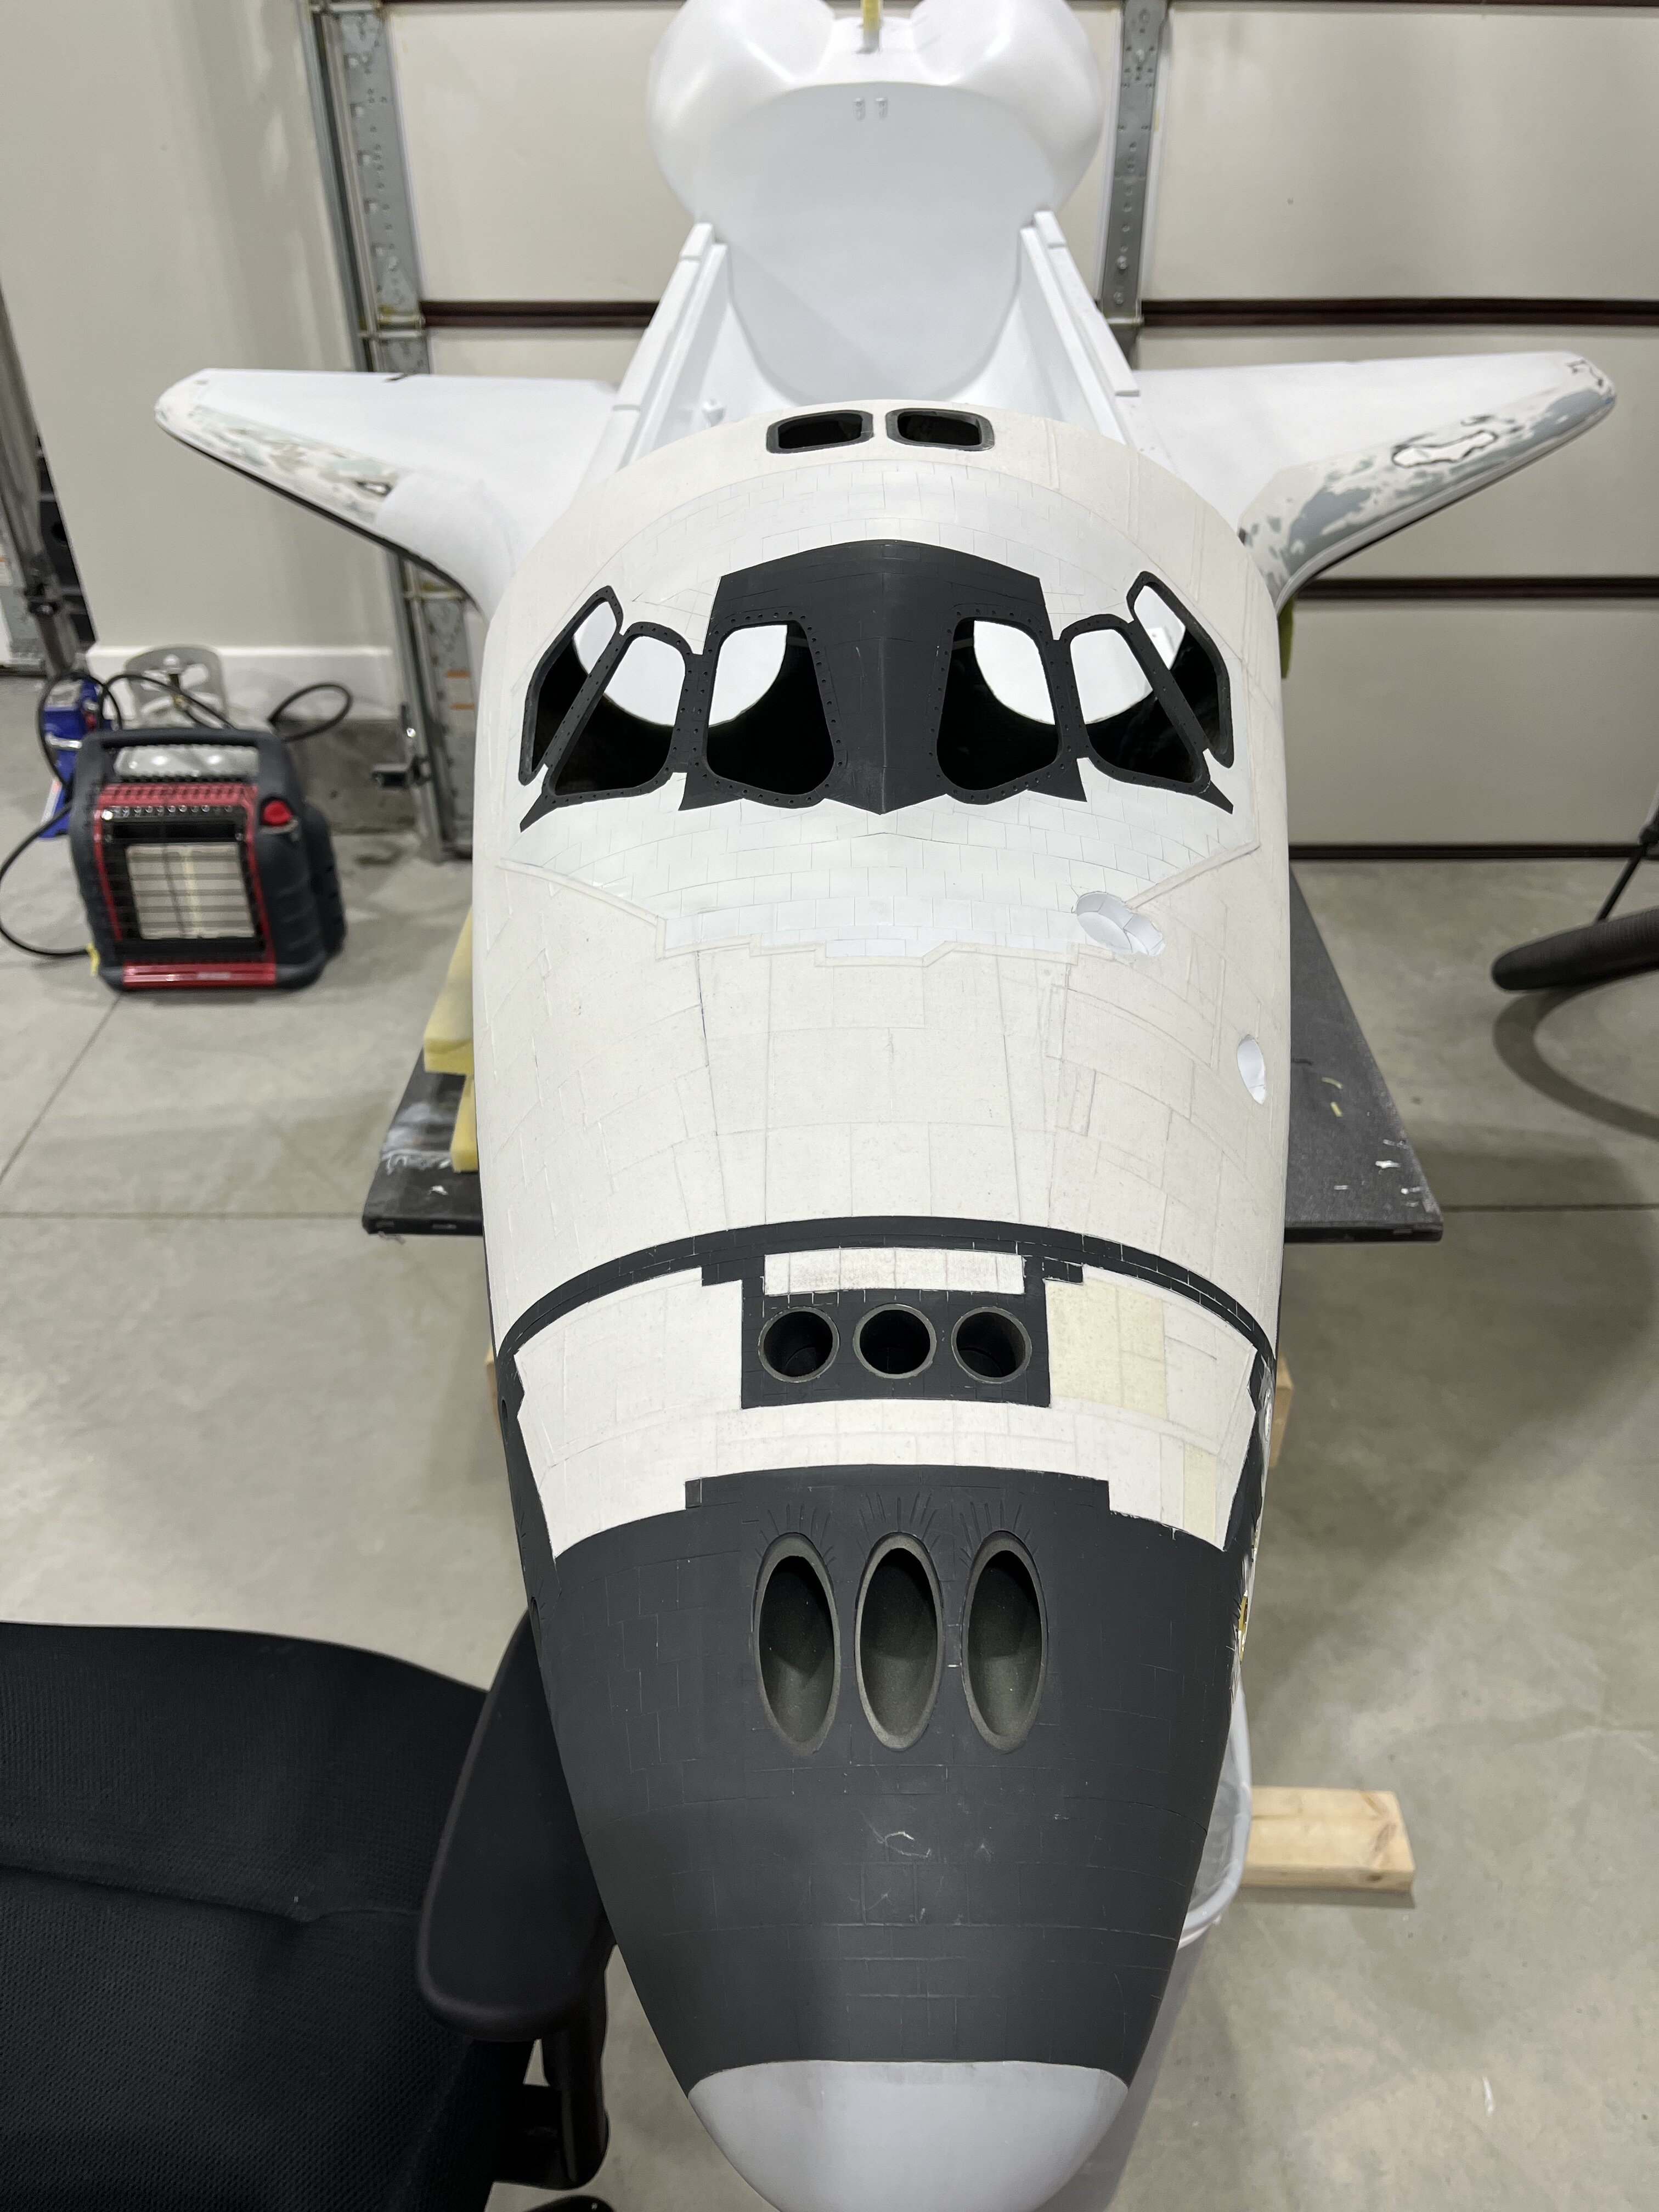
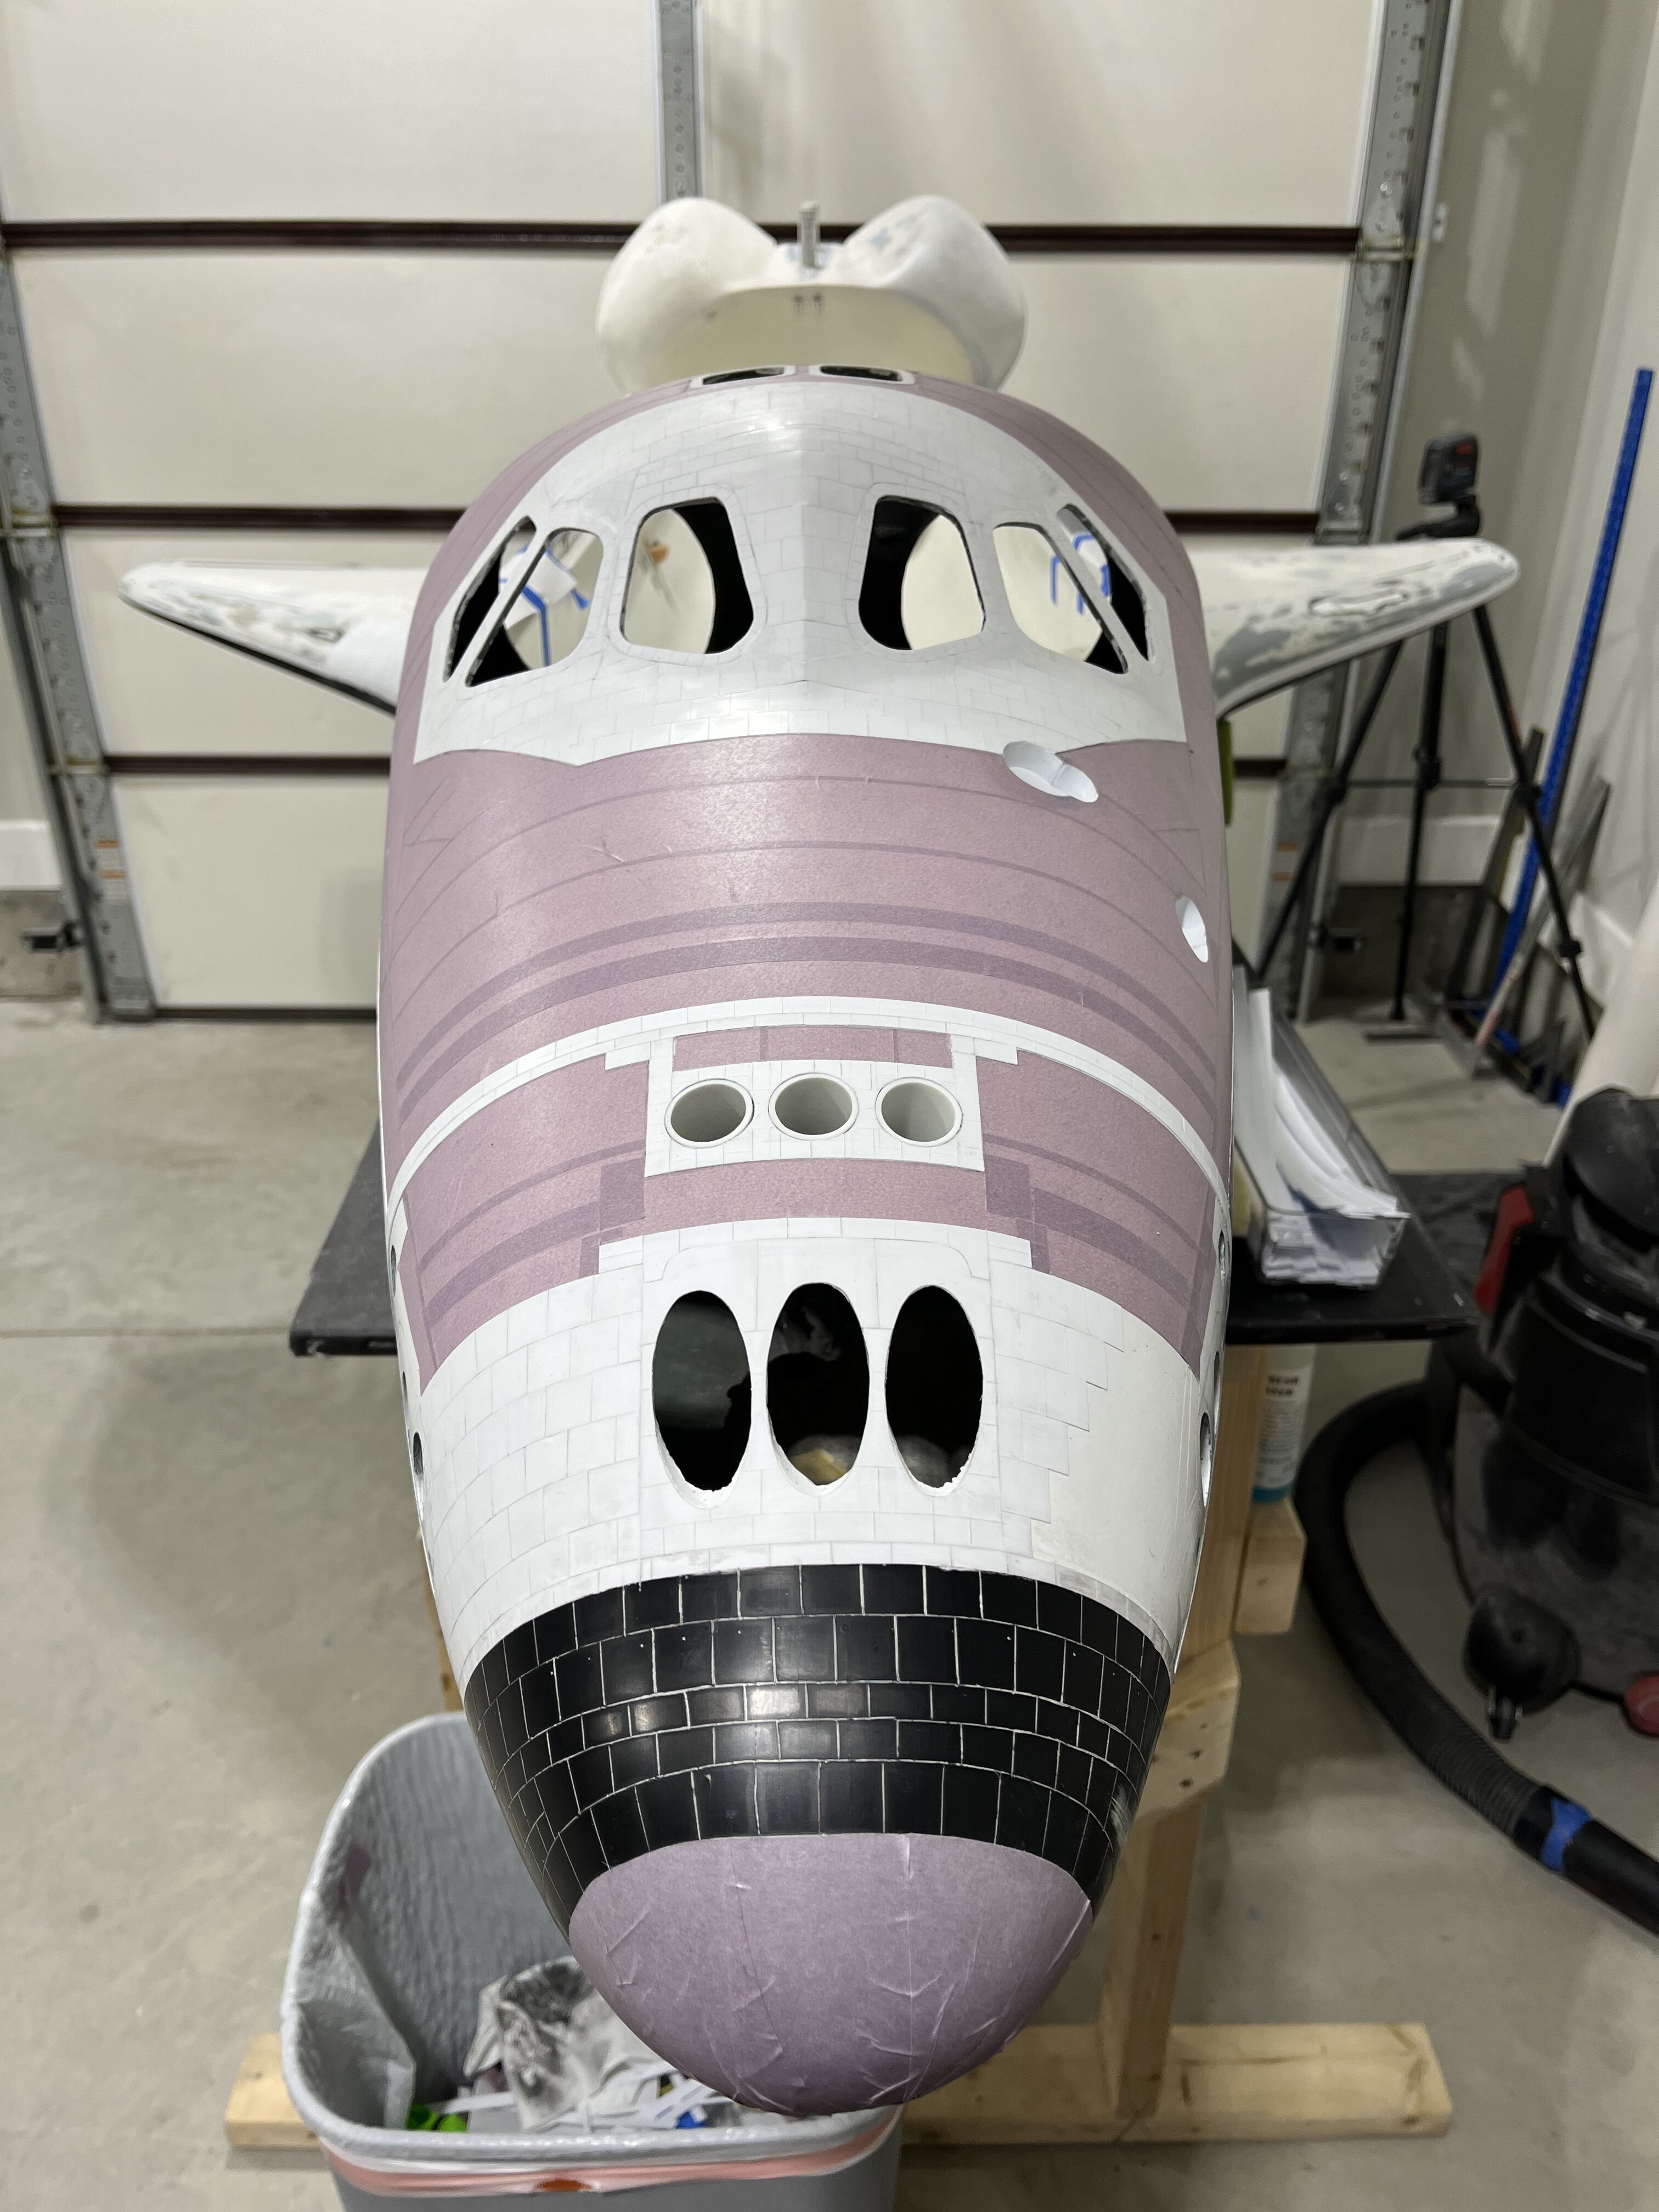
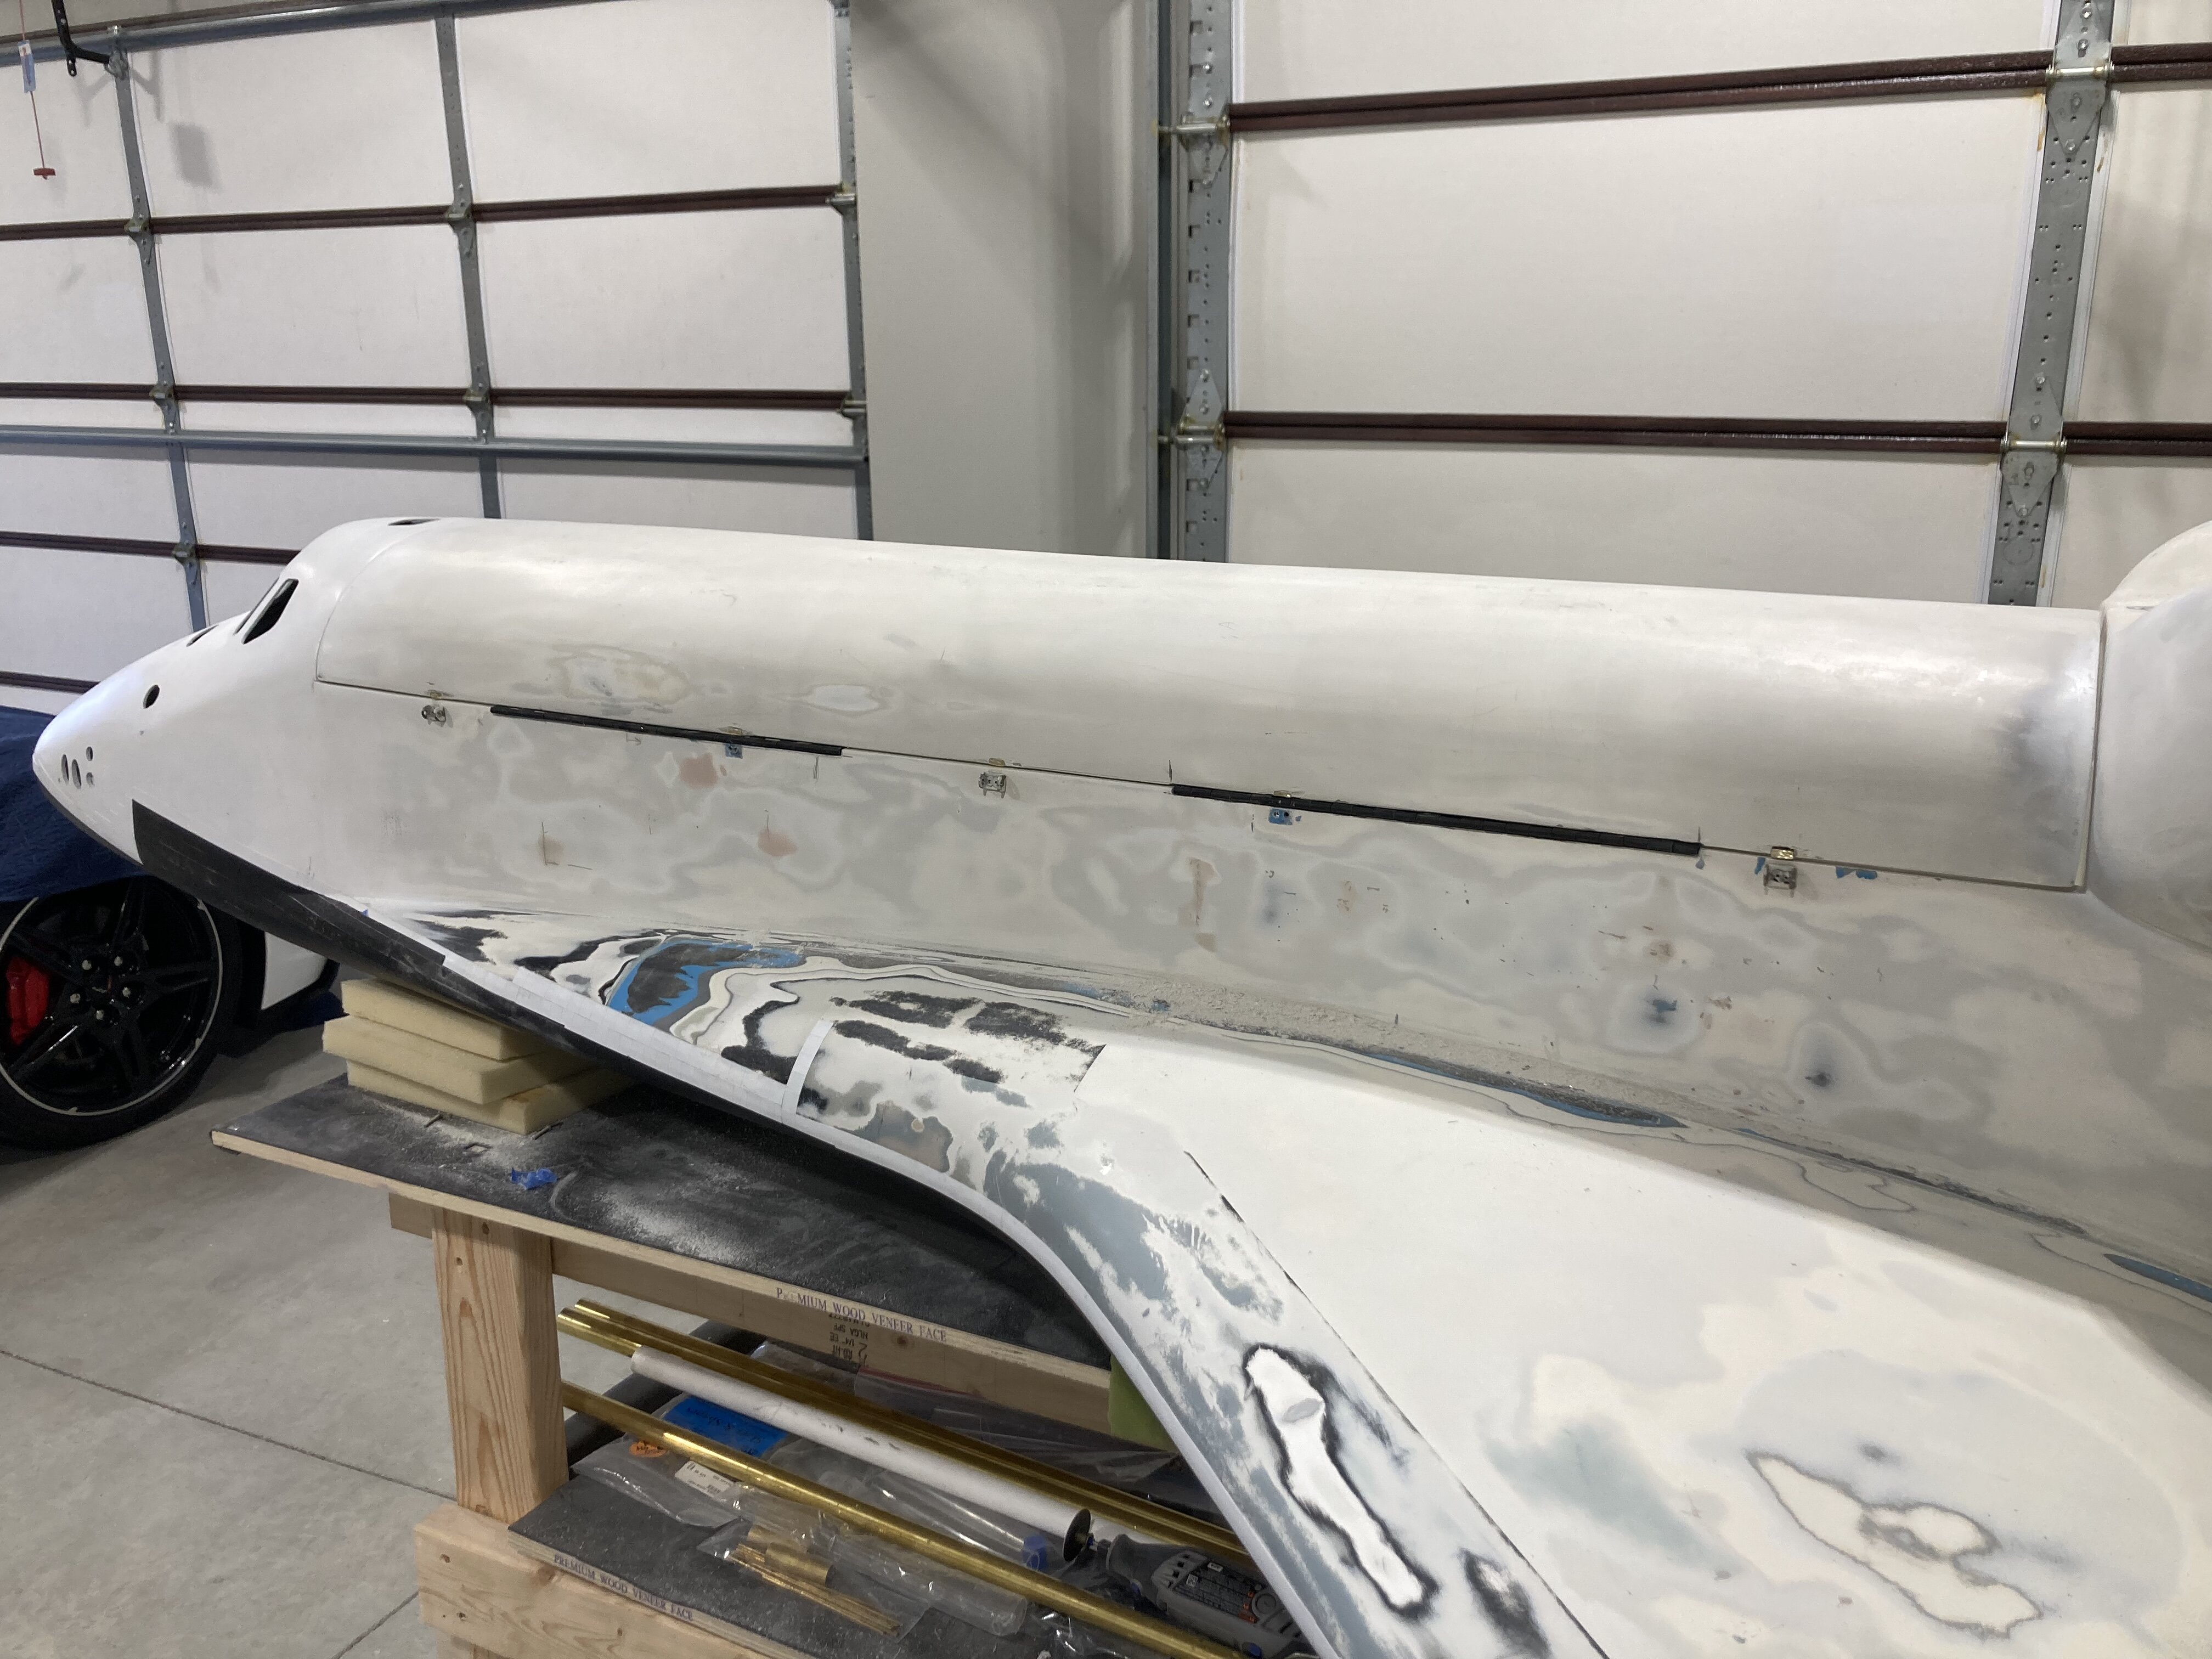
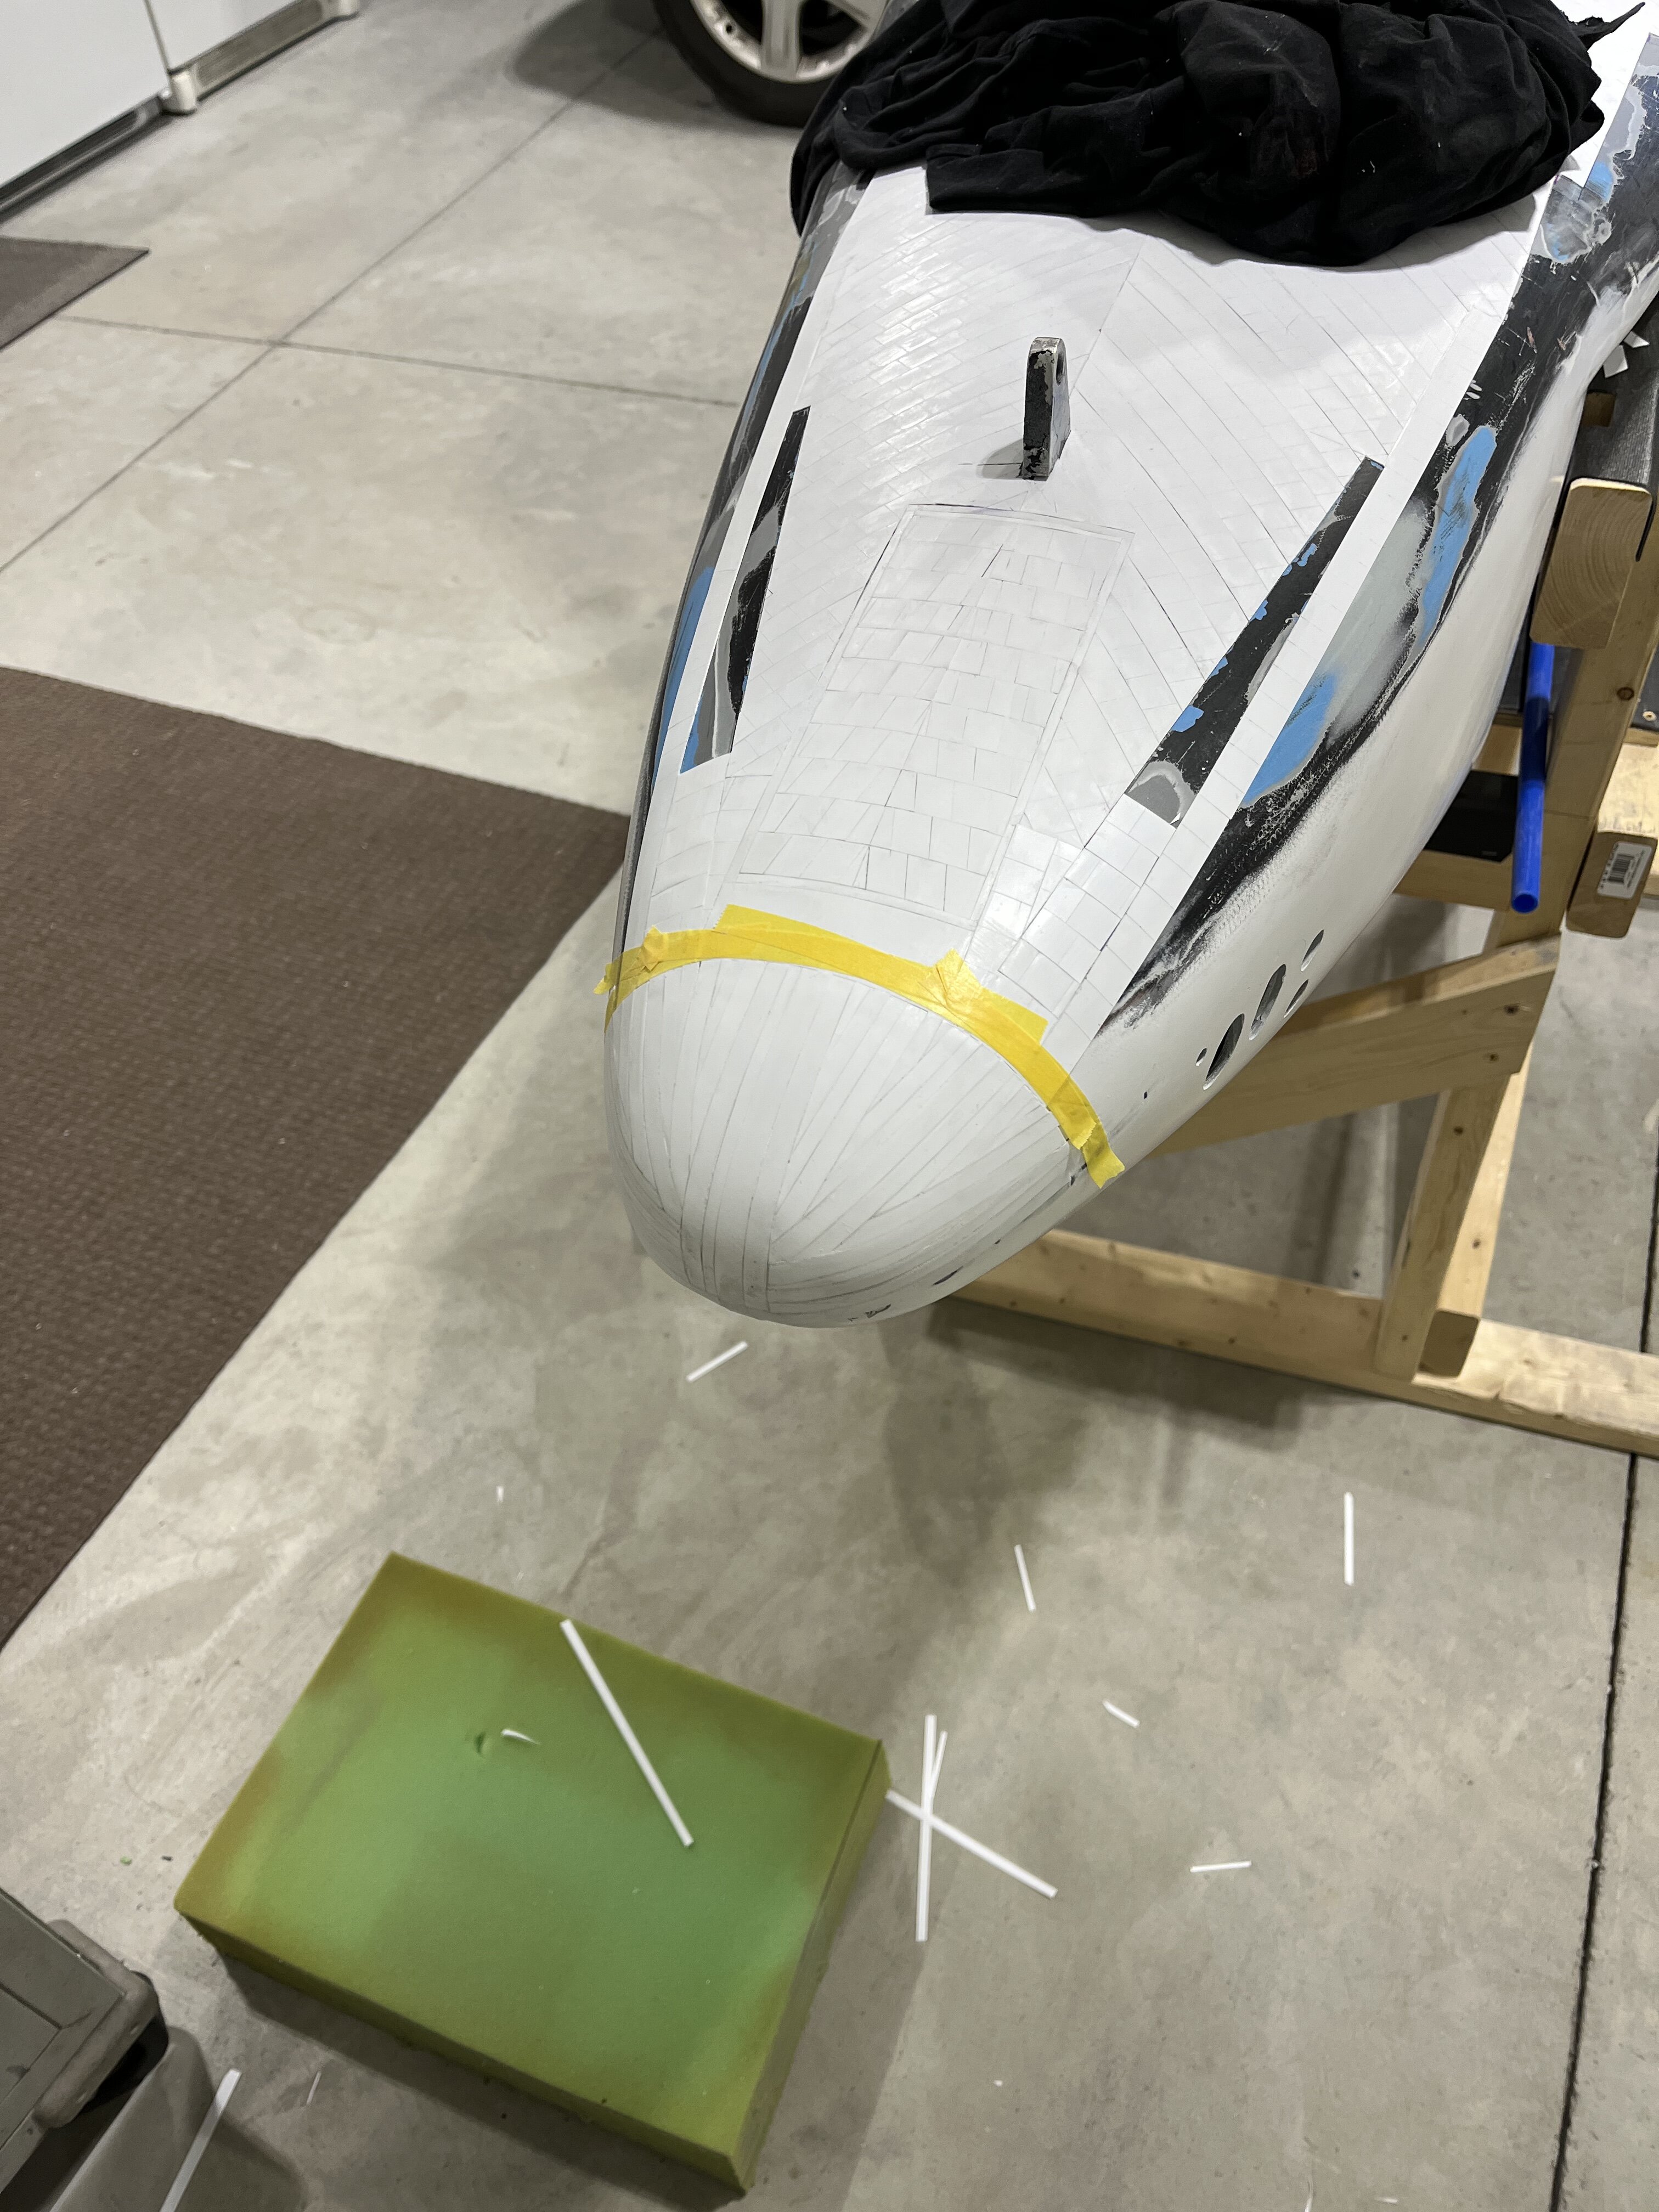
I’ve been fortunate enough to make some pretty decent progress the past few days. Everything from the nose of the shuttle to the beginning of the payload bay has been covered with either plastic squares, or athletic tape that will simulate the thermal blanket shields.
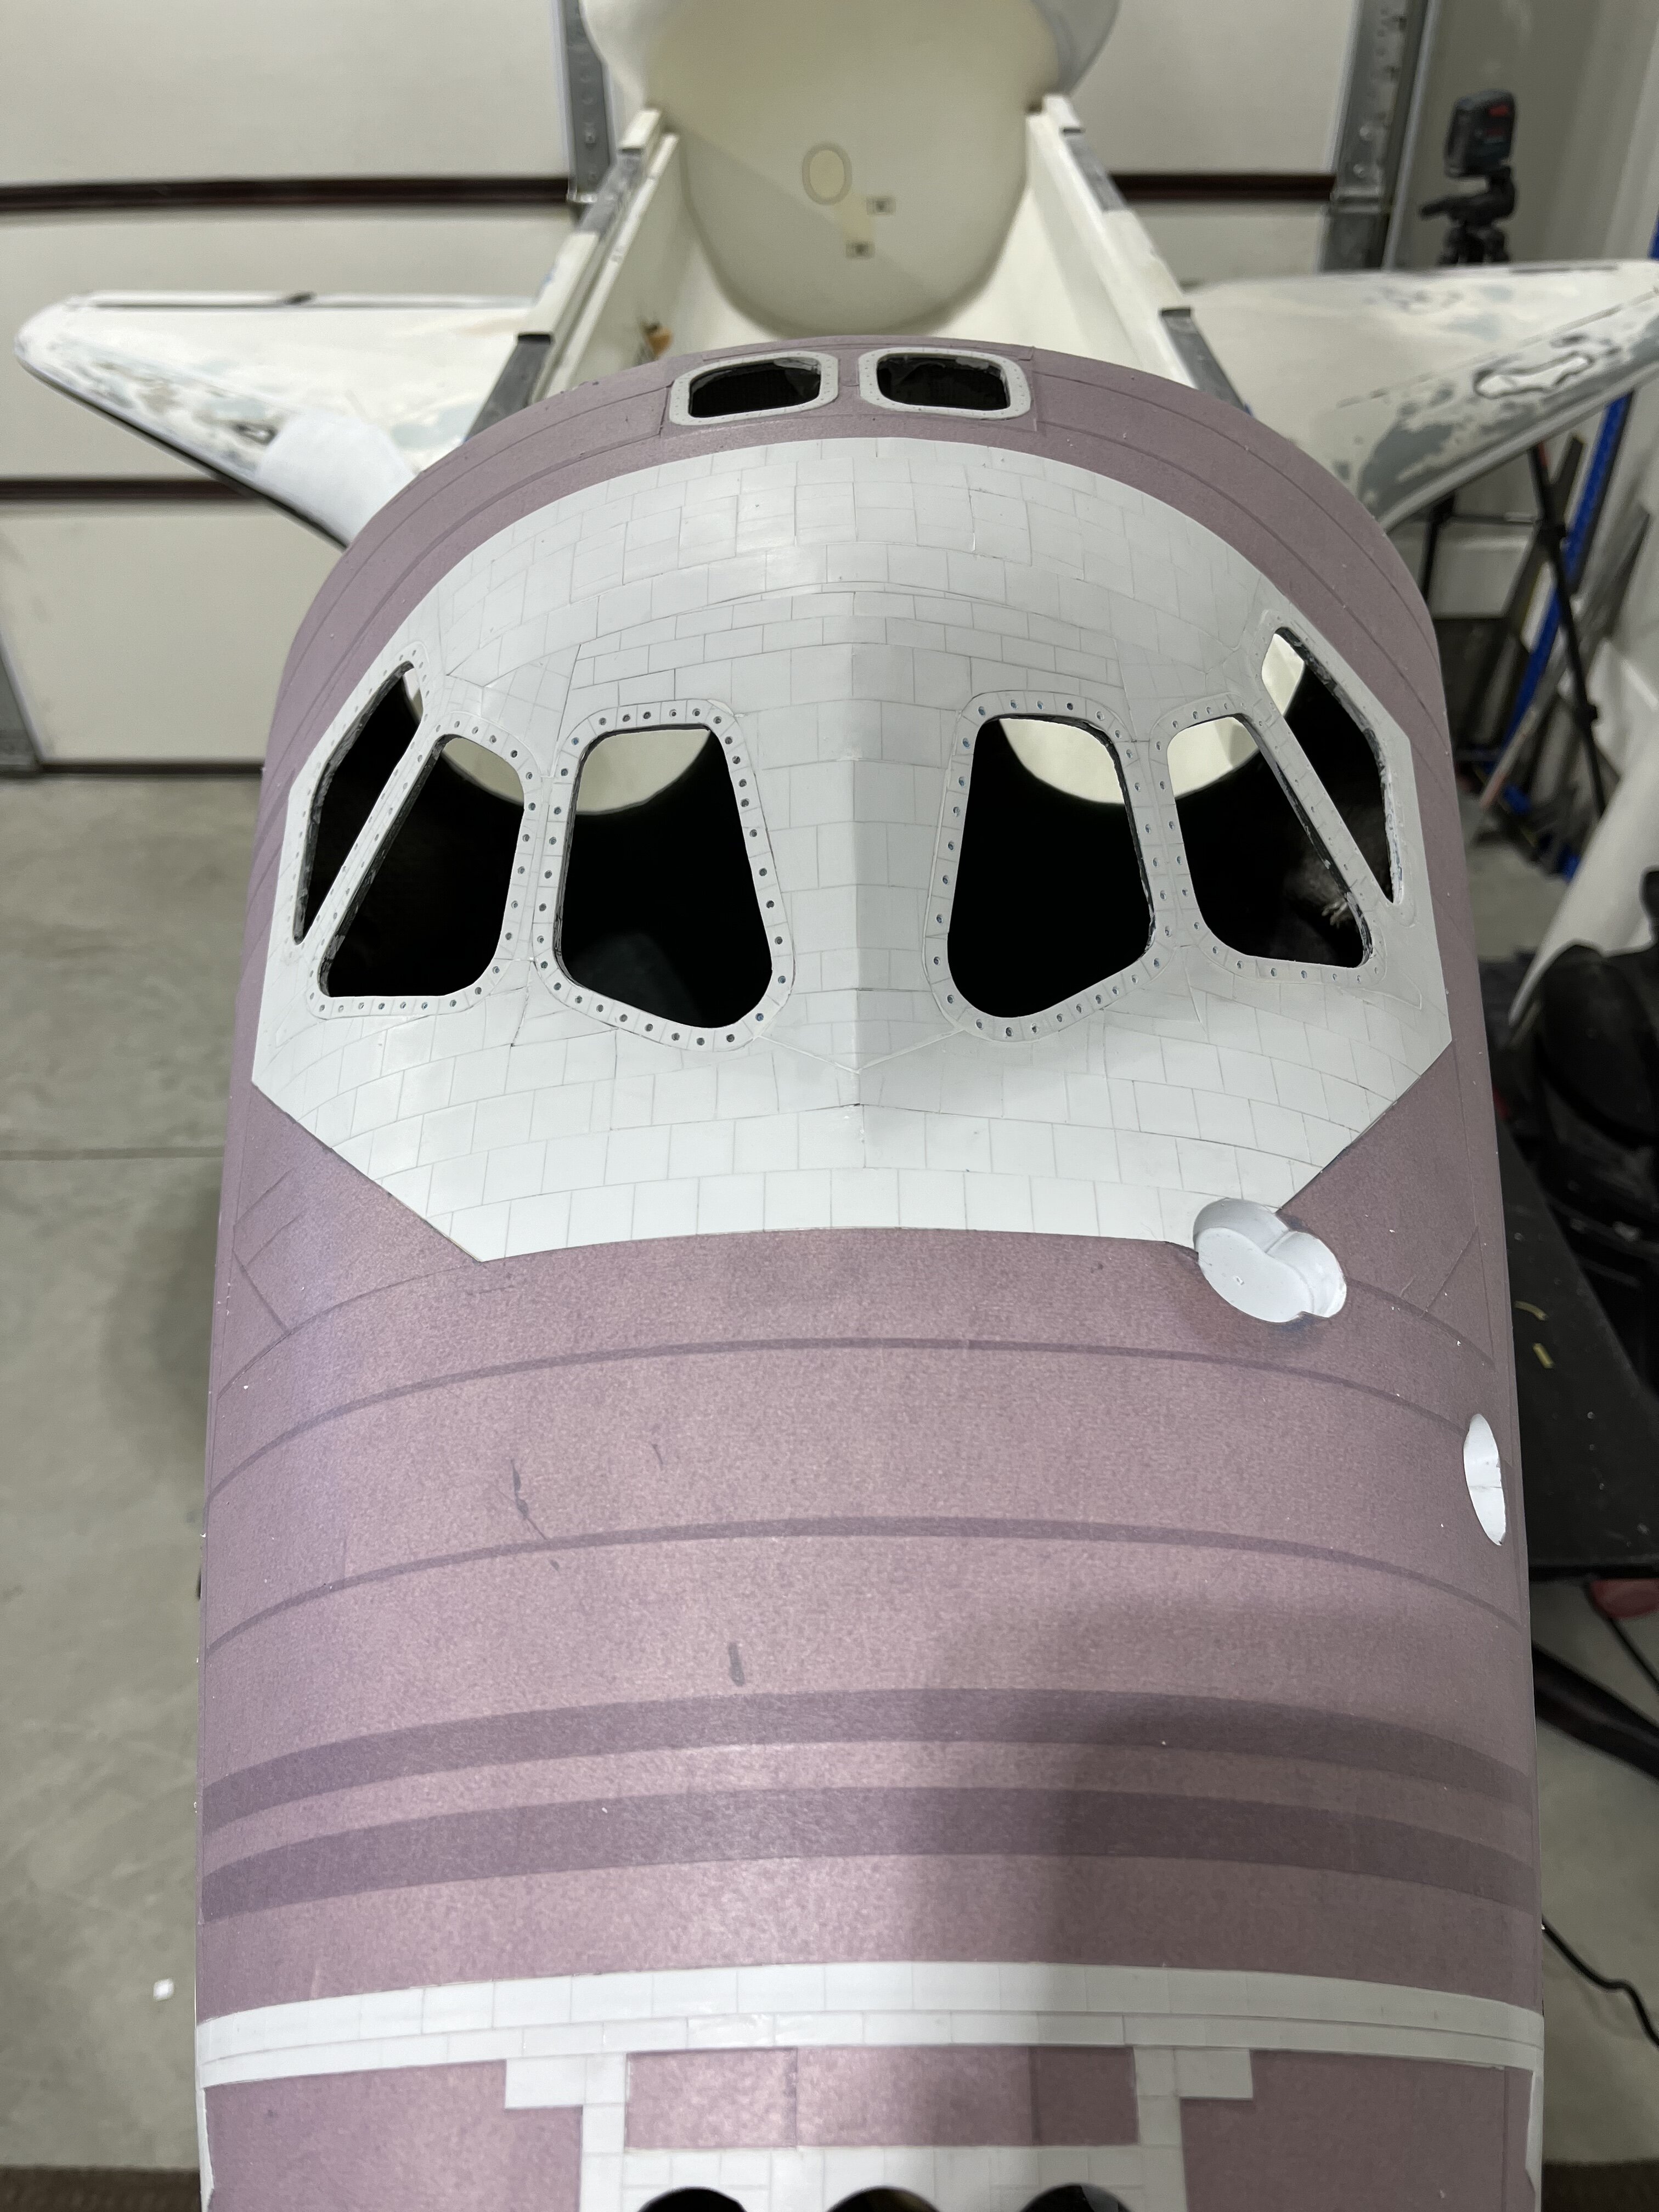
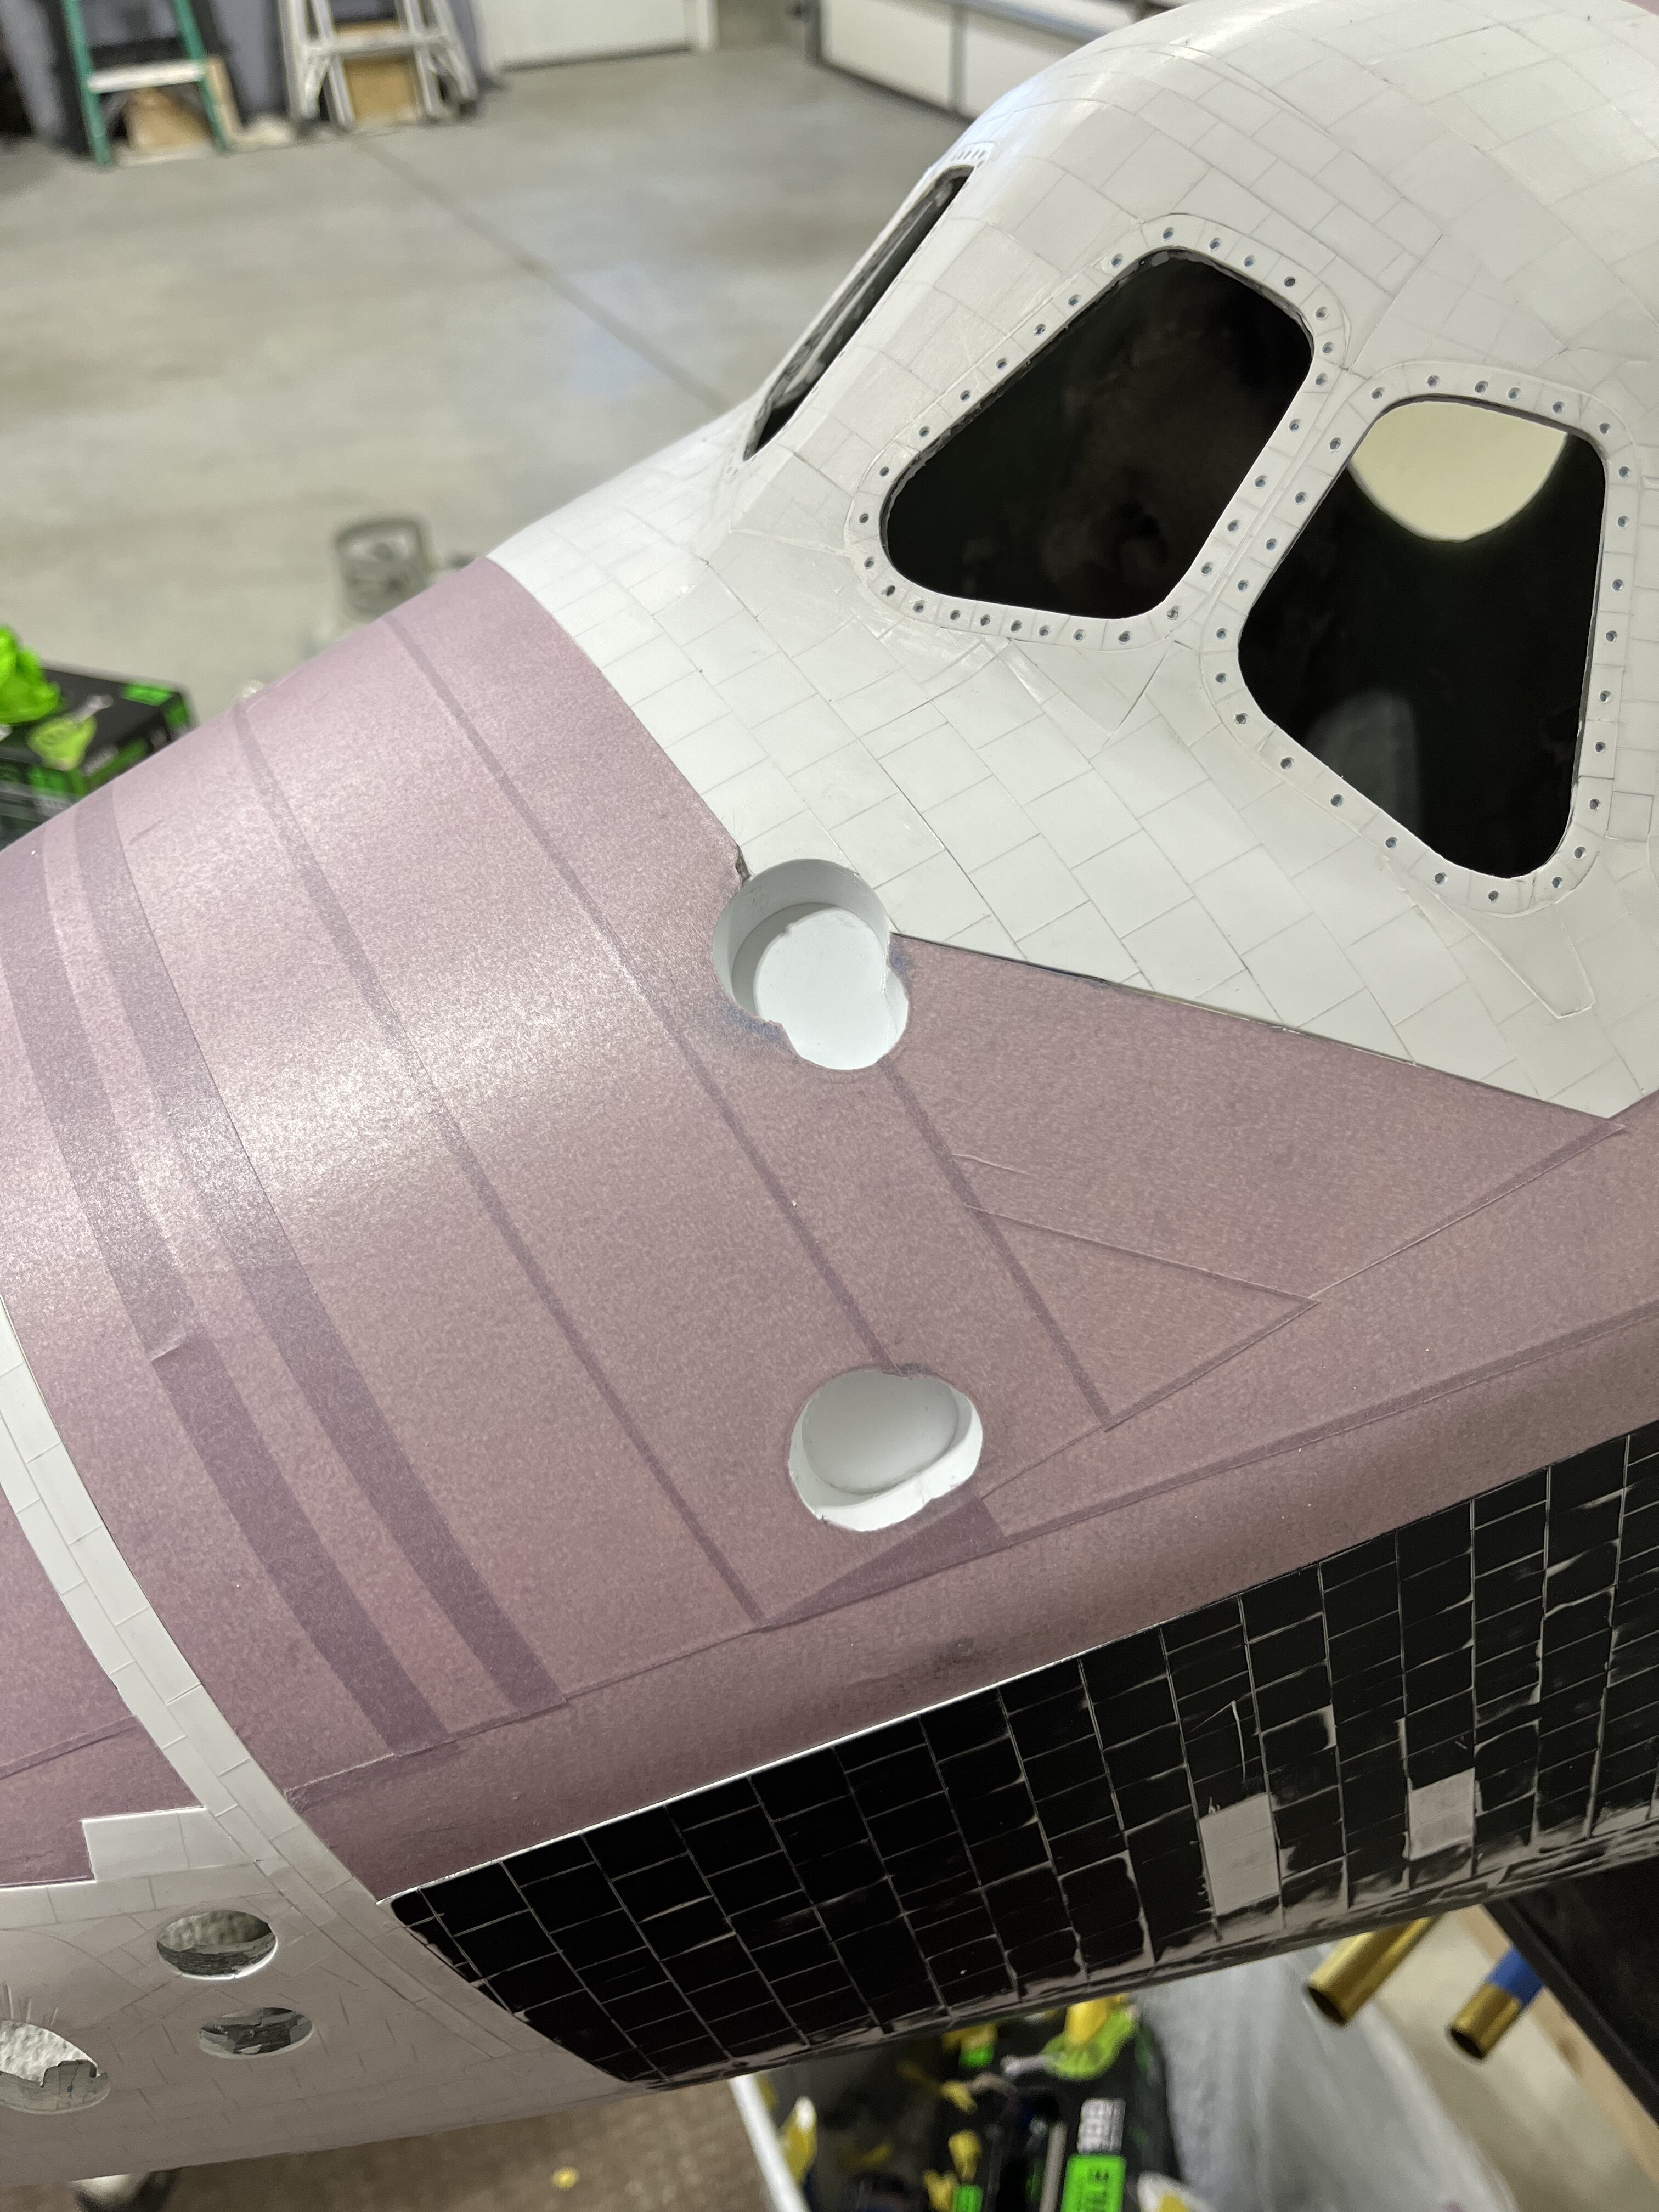
I drilled shallow holes around each window frame. Painted all the holes white this morning. When they dry, I will take the bolt heads and glue them in the center of each one. Thanks for having a look.Christopher
-
I’ve been blessed with a wife that is extremely supportive of my hobby. A lot of late nights spent on this one.
Thanks
Christopher
-
 1
1
-
-
Really interesting build Ron. The paint job is awesome.
Christopher.
-
That is some amazing work. I don’t think I would have the patience to do something like that. Thanks for sharing.
Christopher
-
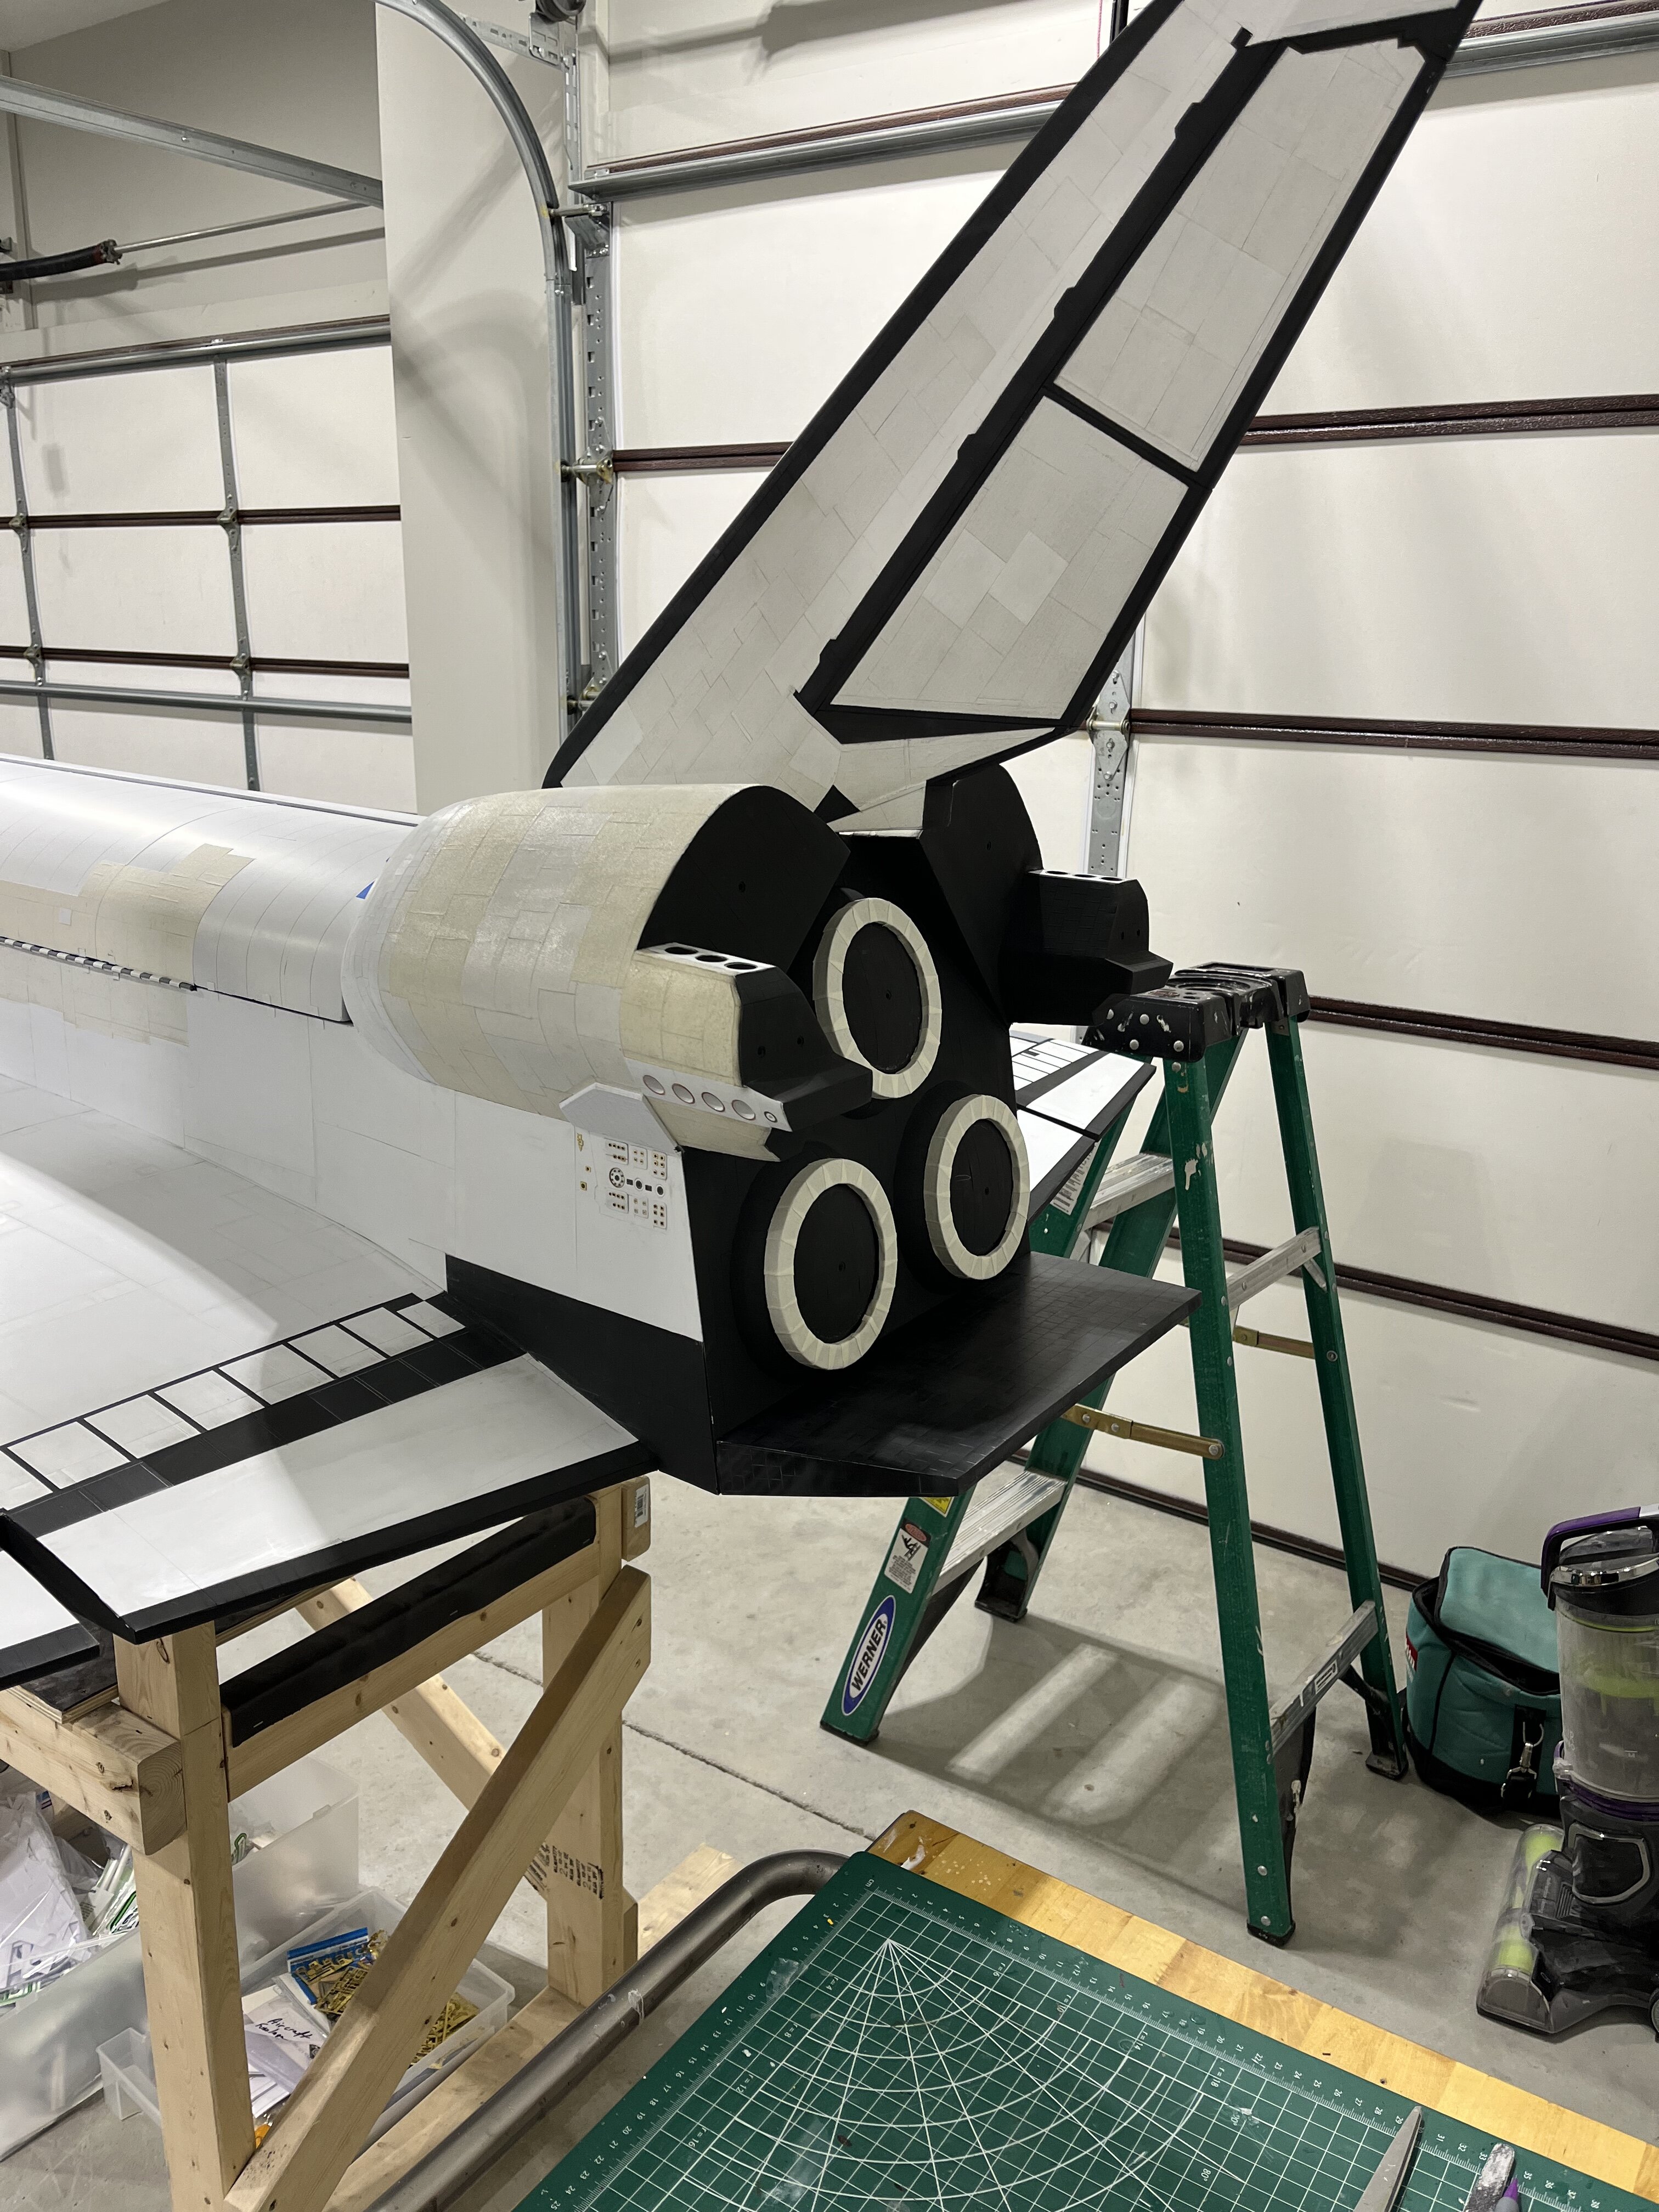
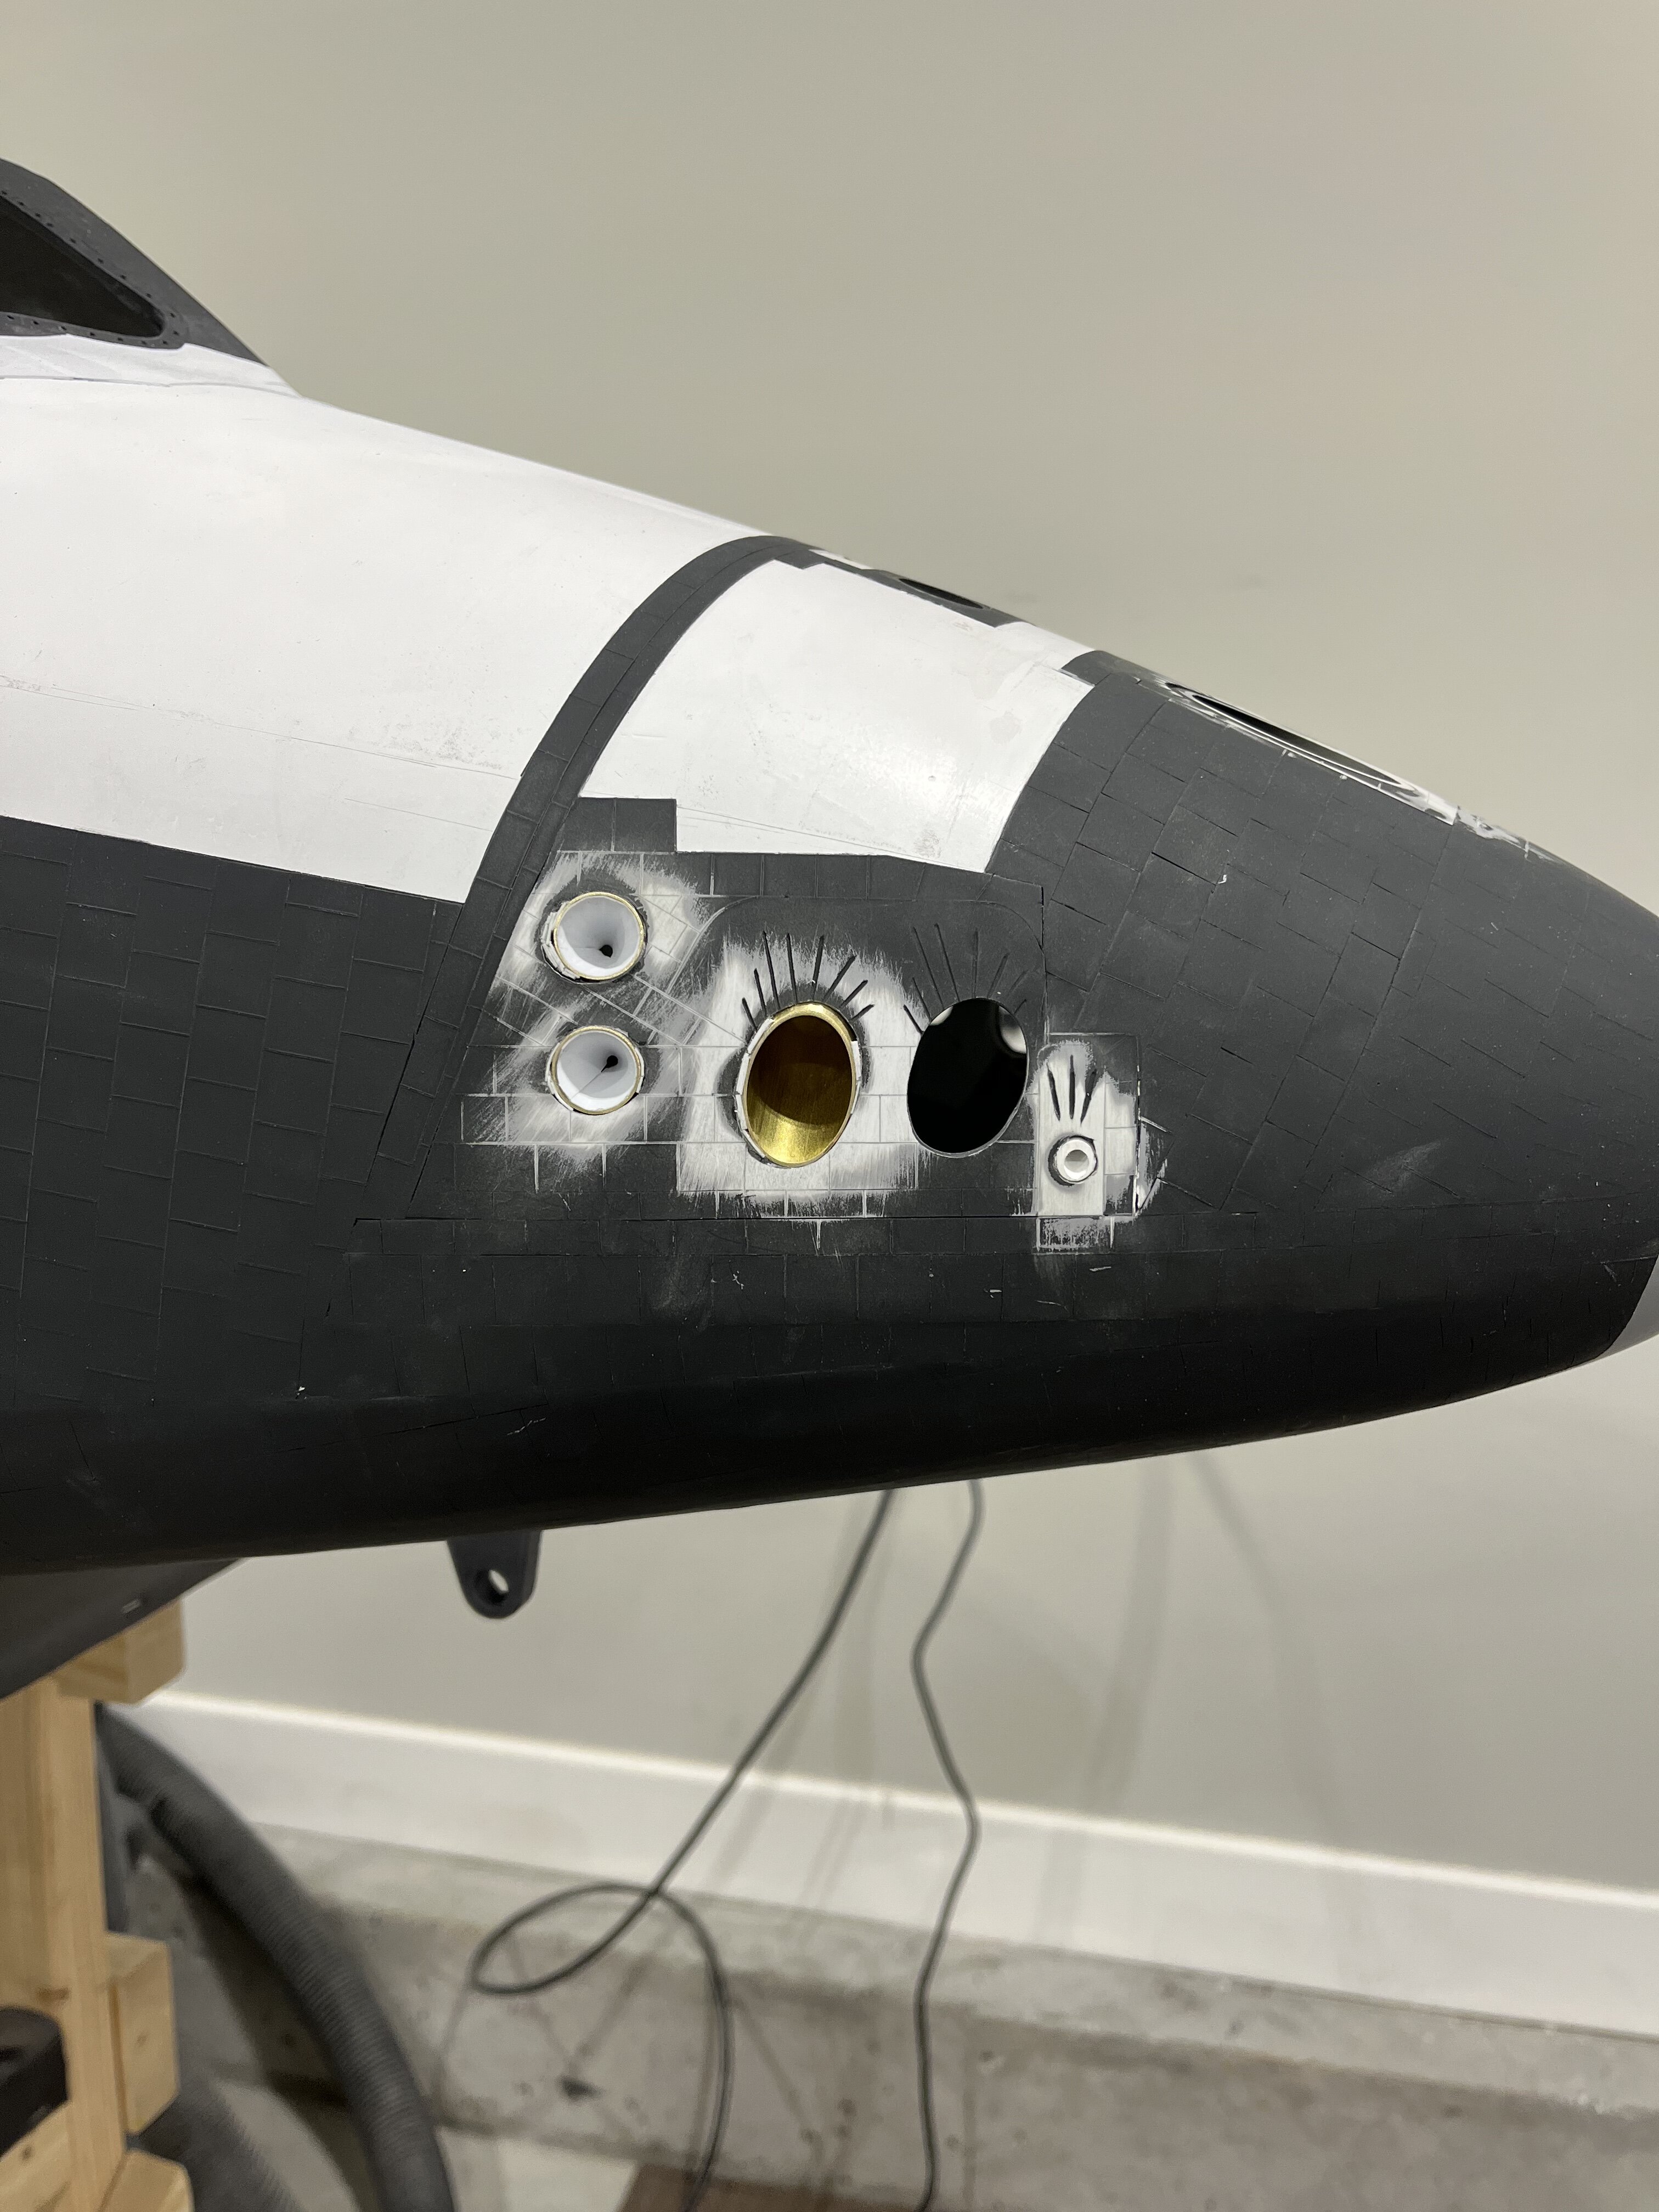
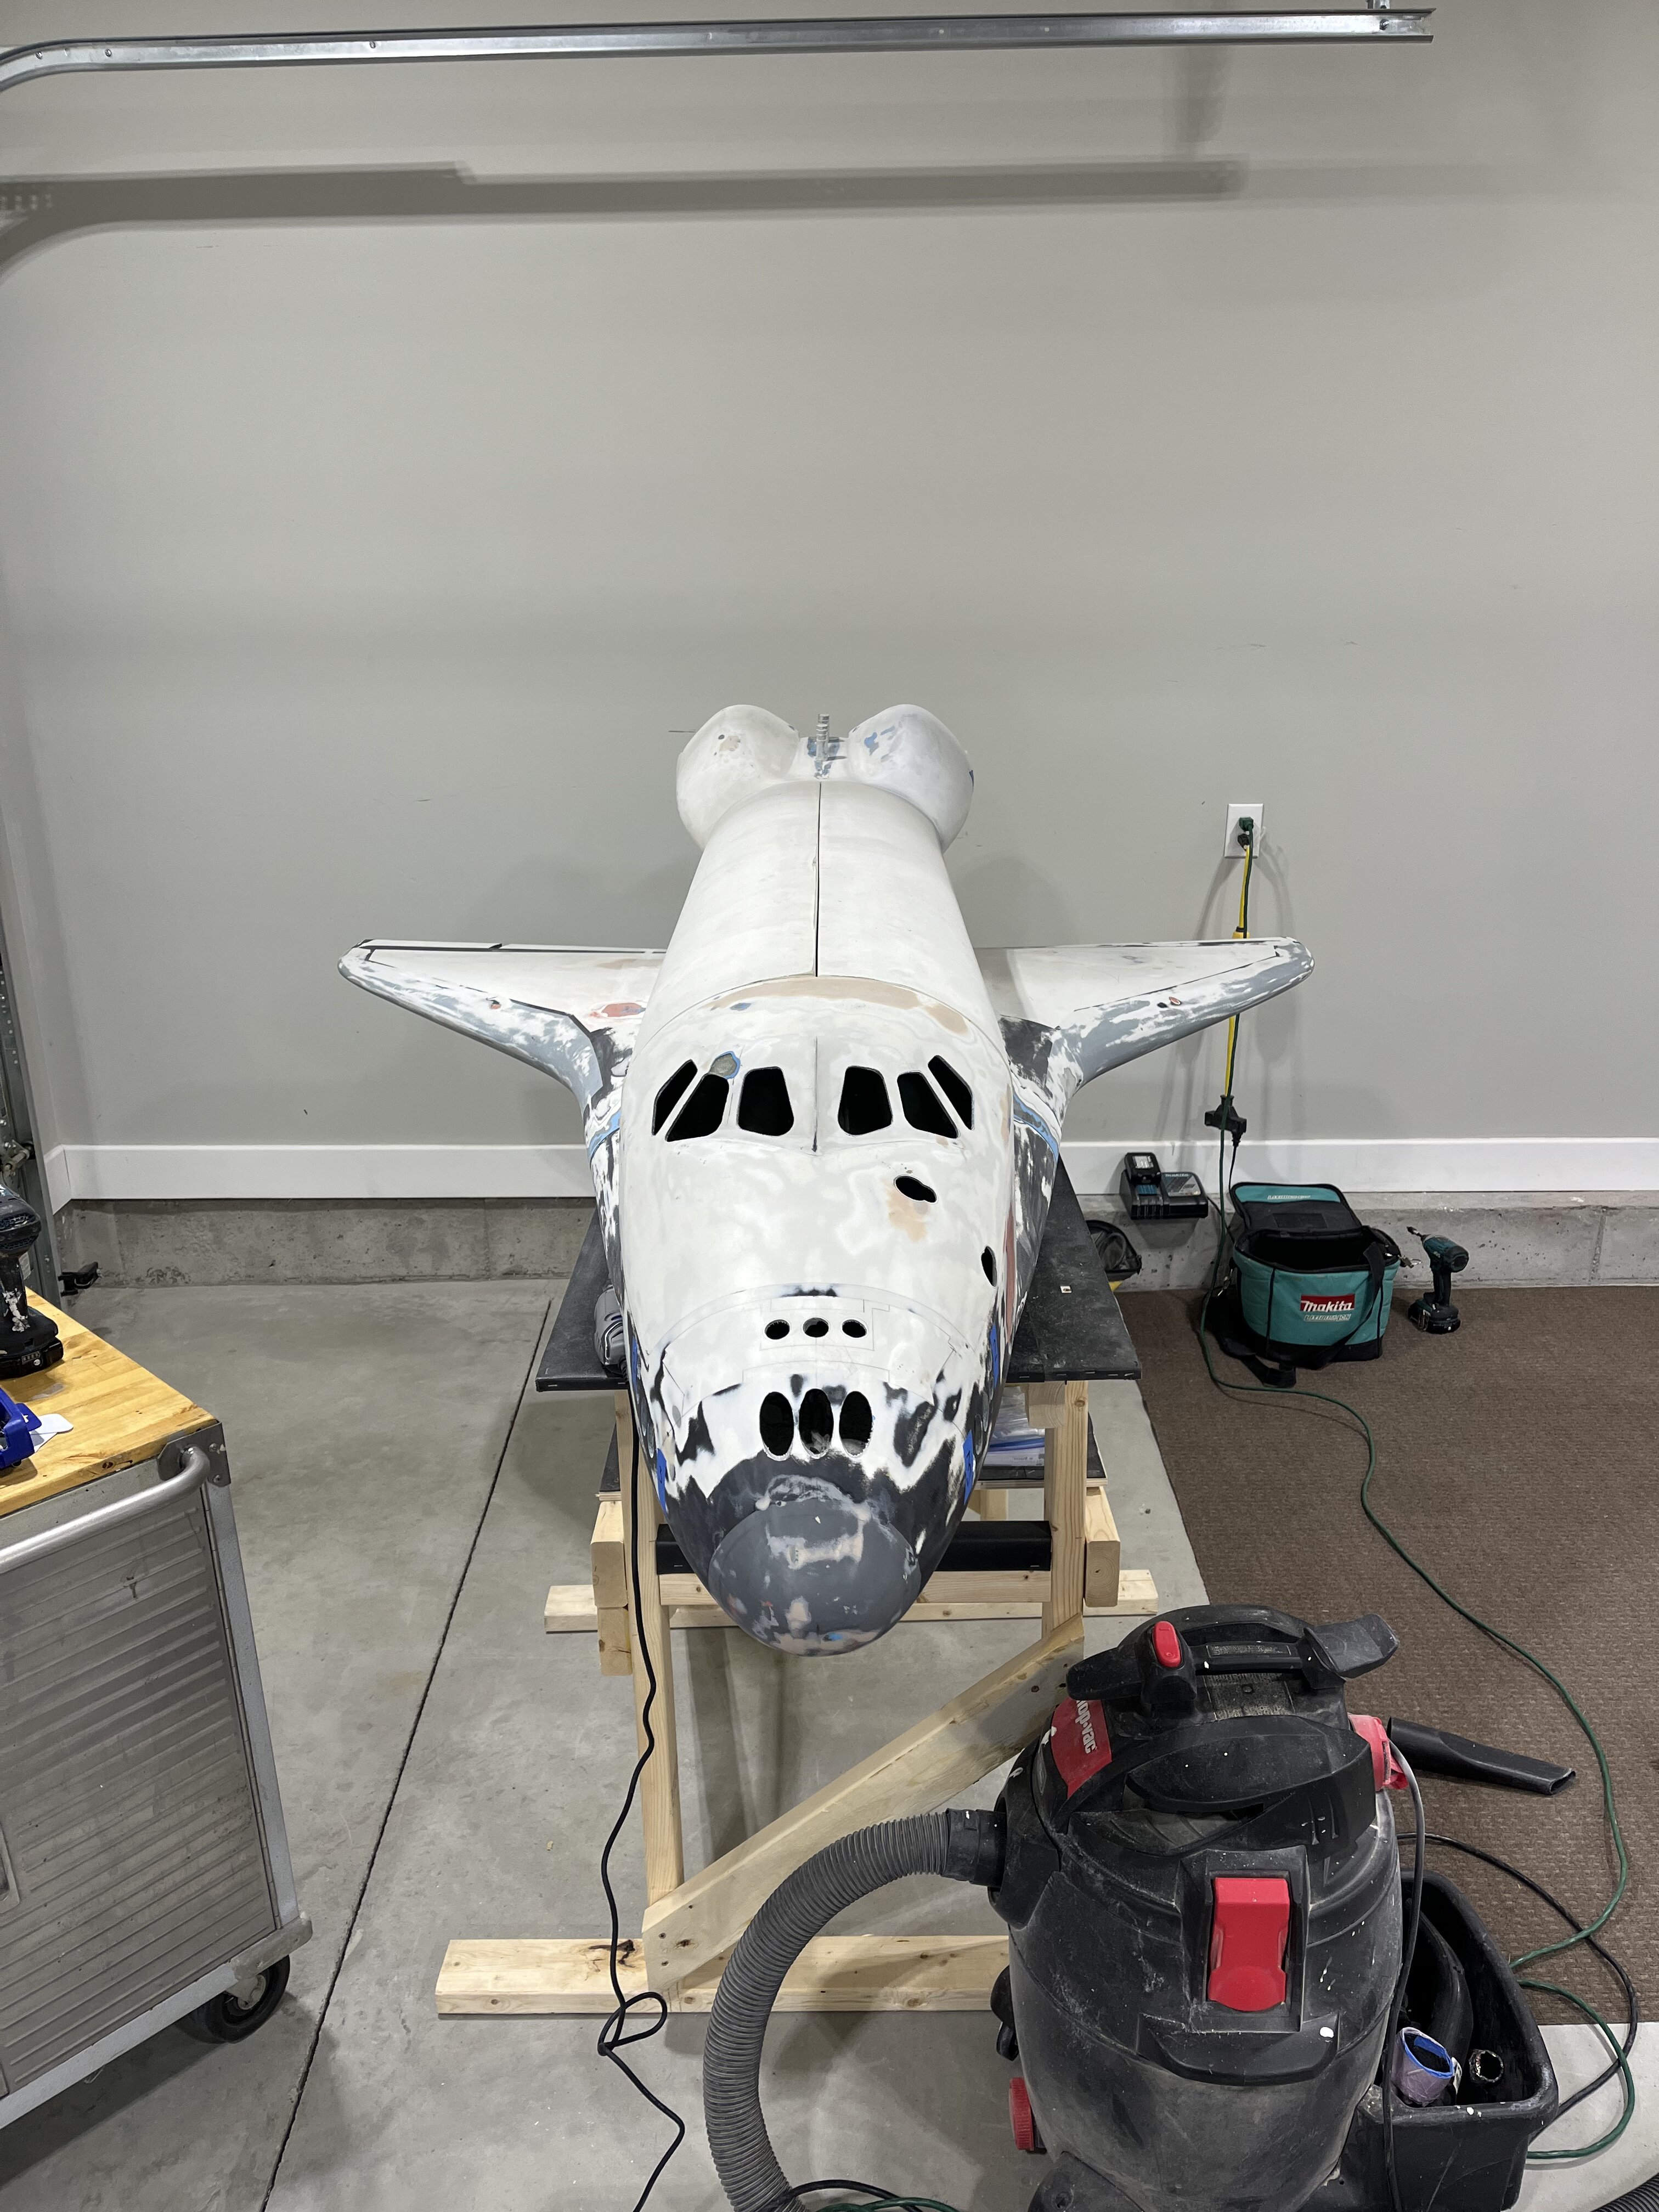
The thrusters have been mounted on the top and sides of the nose. The interior cargo bay doors originally had some type of heavy foil glued on each one. Today, I stripped it off, sanded everything smooth, and glued .015 sheet styrene in its place.
Next I move on to applying the athletic tape to the white sections of the nose. Thanks for having a look. -
Thanks so much for the compliment. I began the project on 4/25. The final corrections were made on 7/15. The Fire Tank took the most time.( I had to rebuild it after not being happy with the first attempt.) I ran into an issue with the paint reaction to the clearcoat. I used to paint stripper to start over.
Thanks again
Christopher
-
1
-
-
This is a link to the build. https://erickson.mediavalet.com/portals/model-resources
Thanks for having a look.
Chris
-
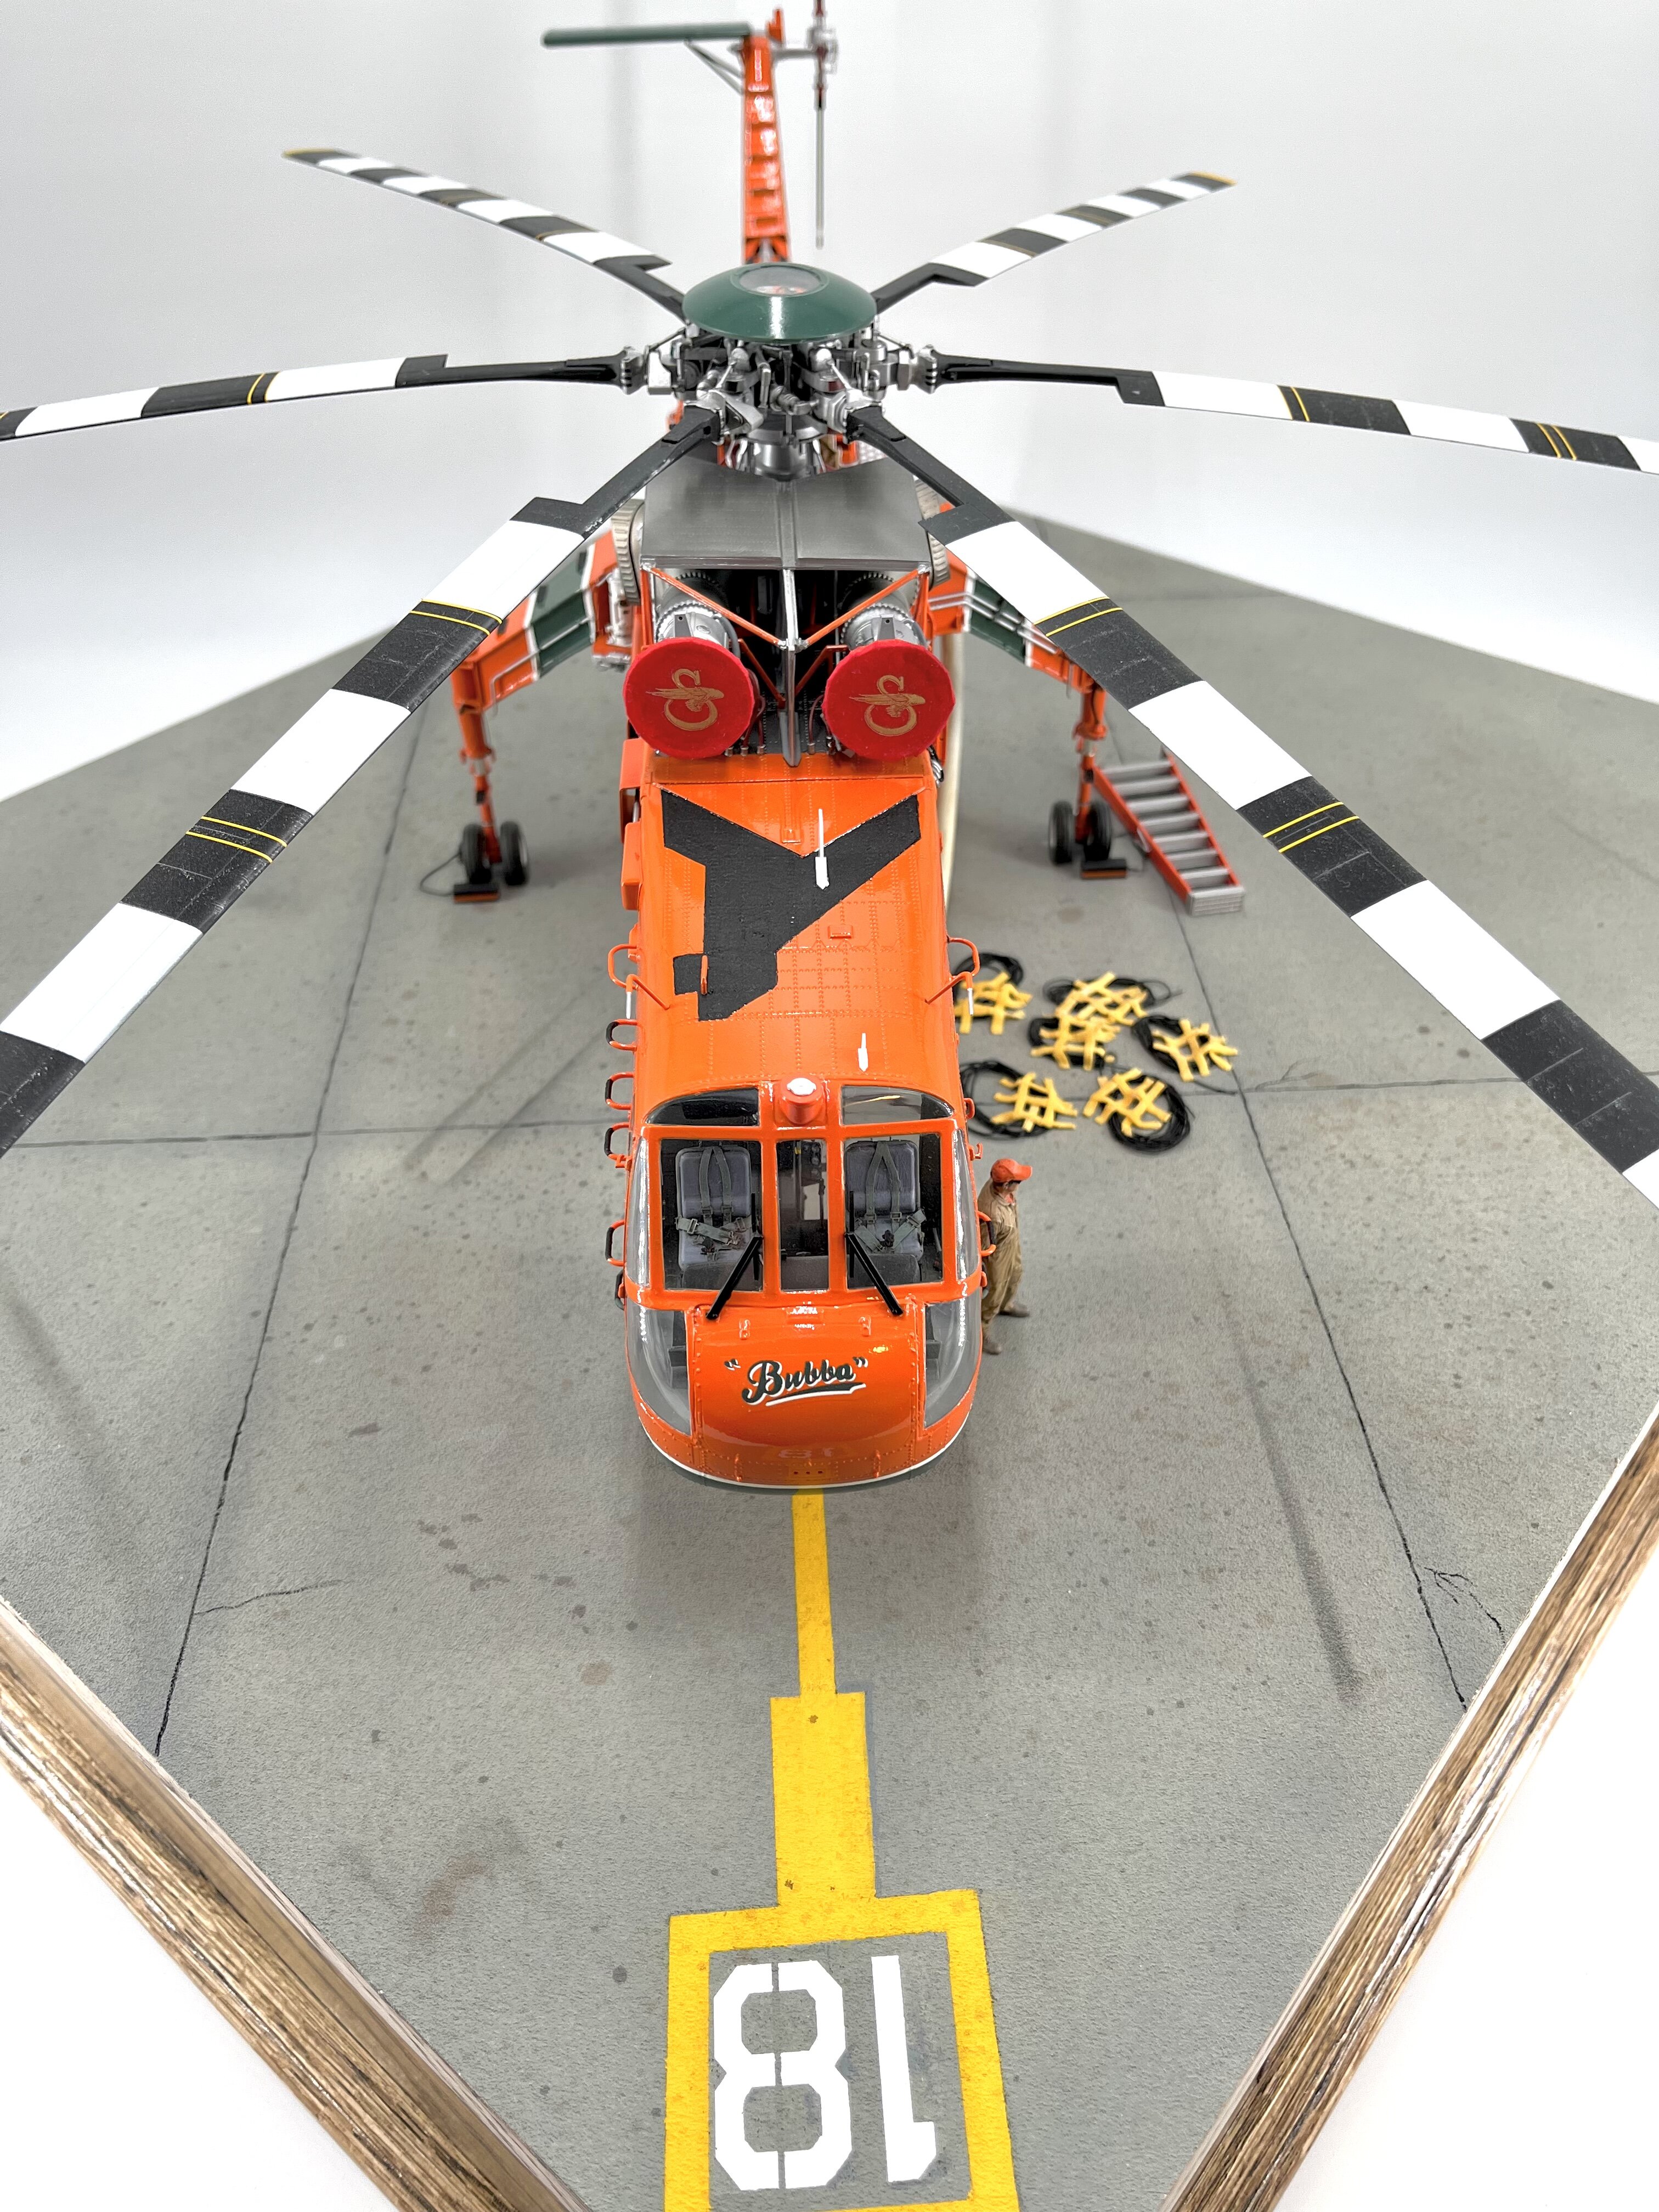
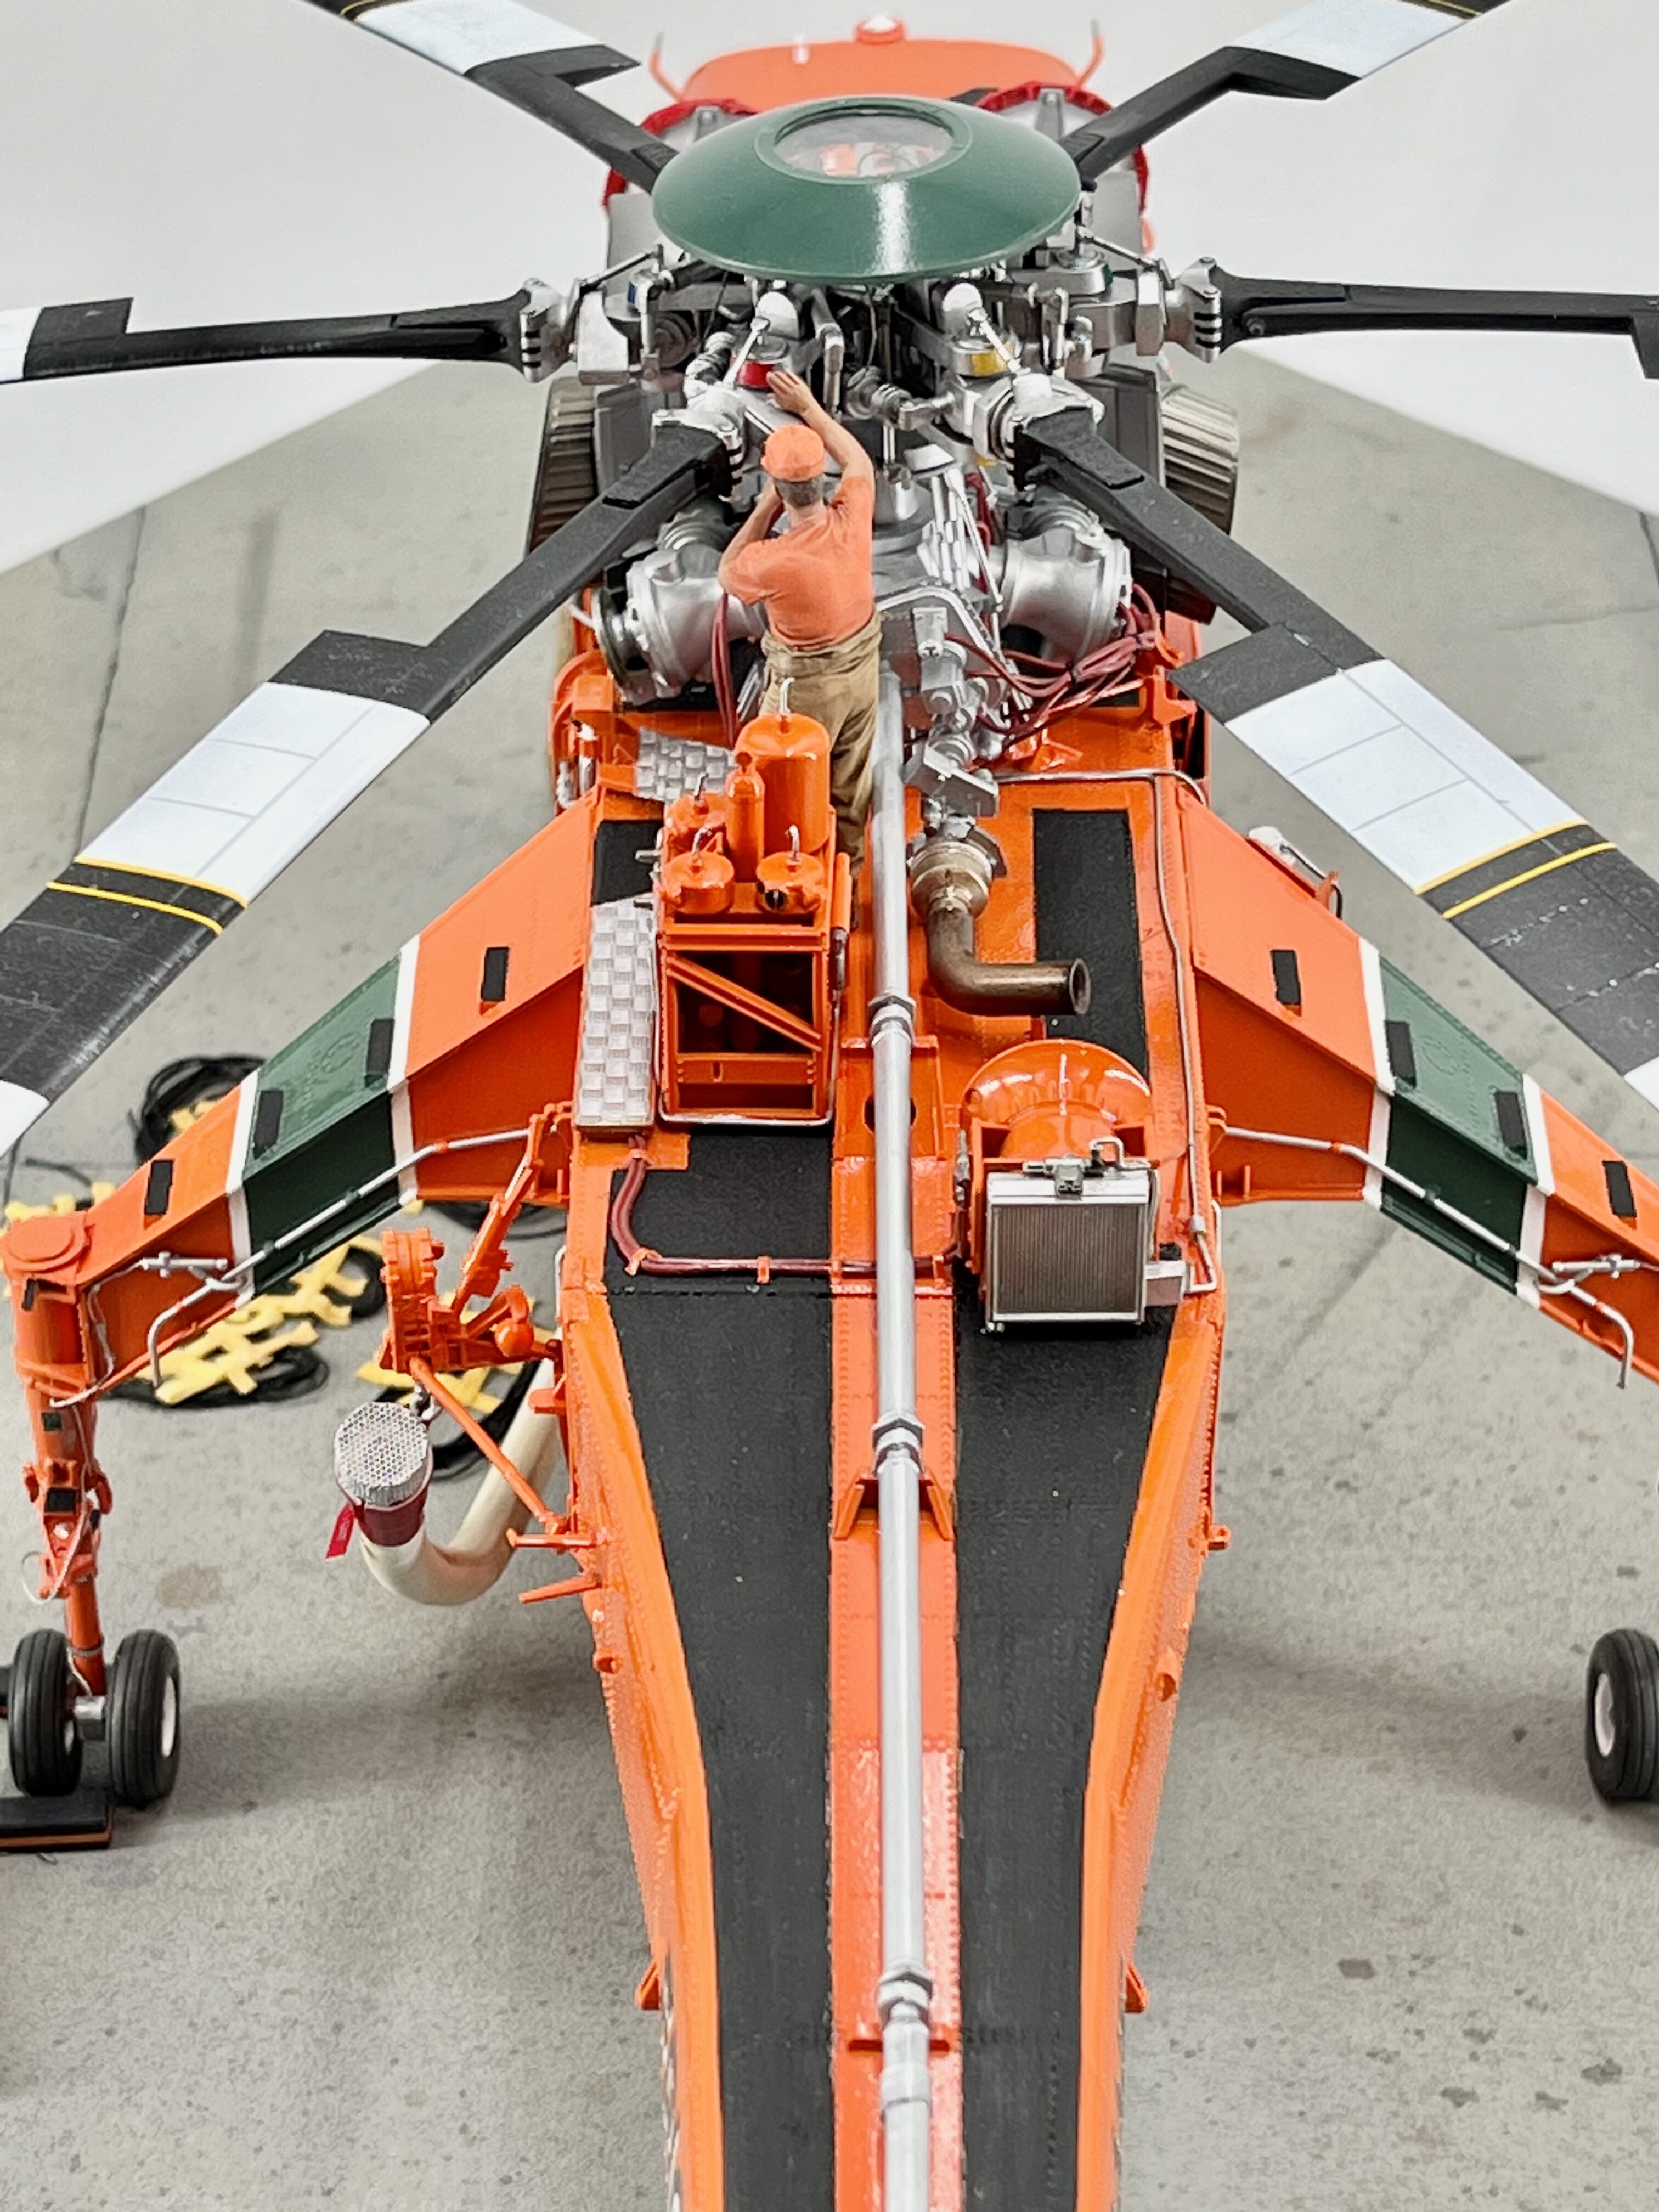
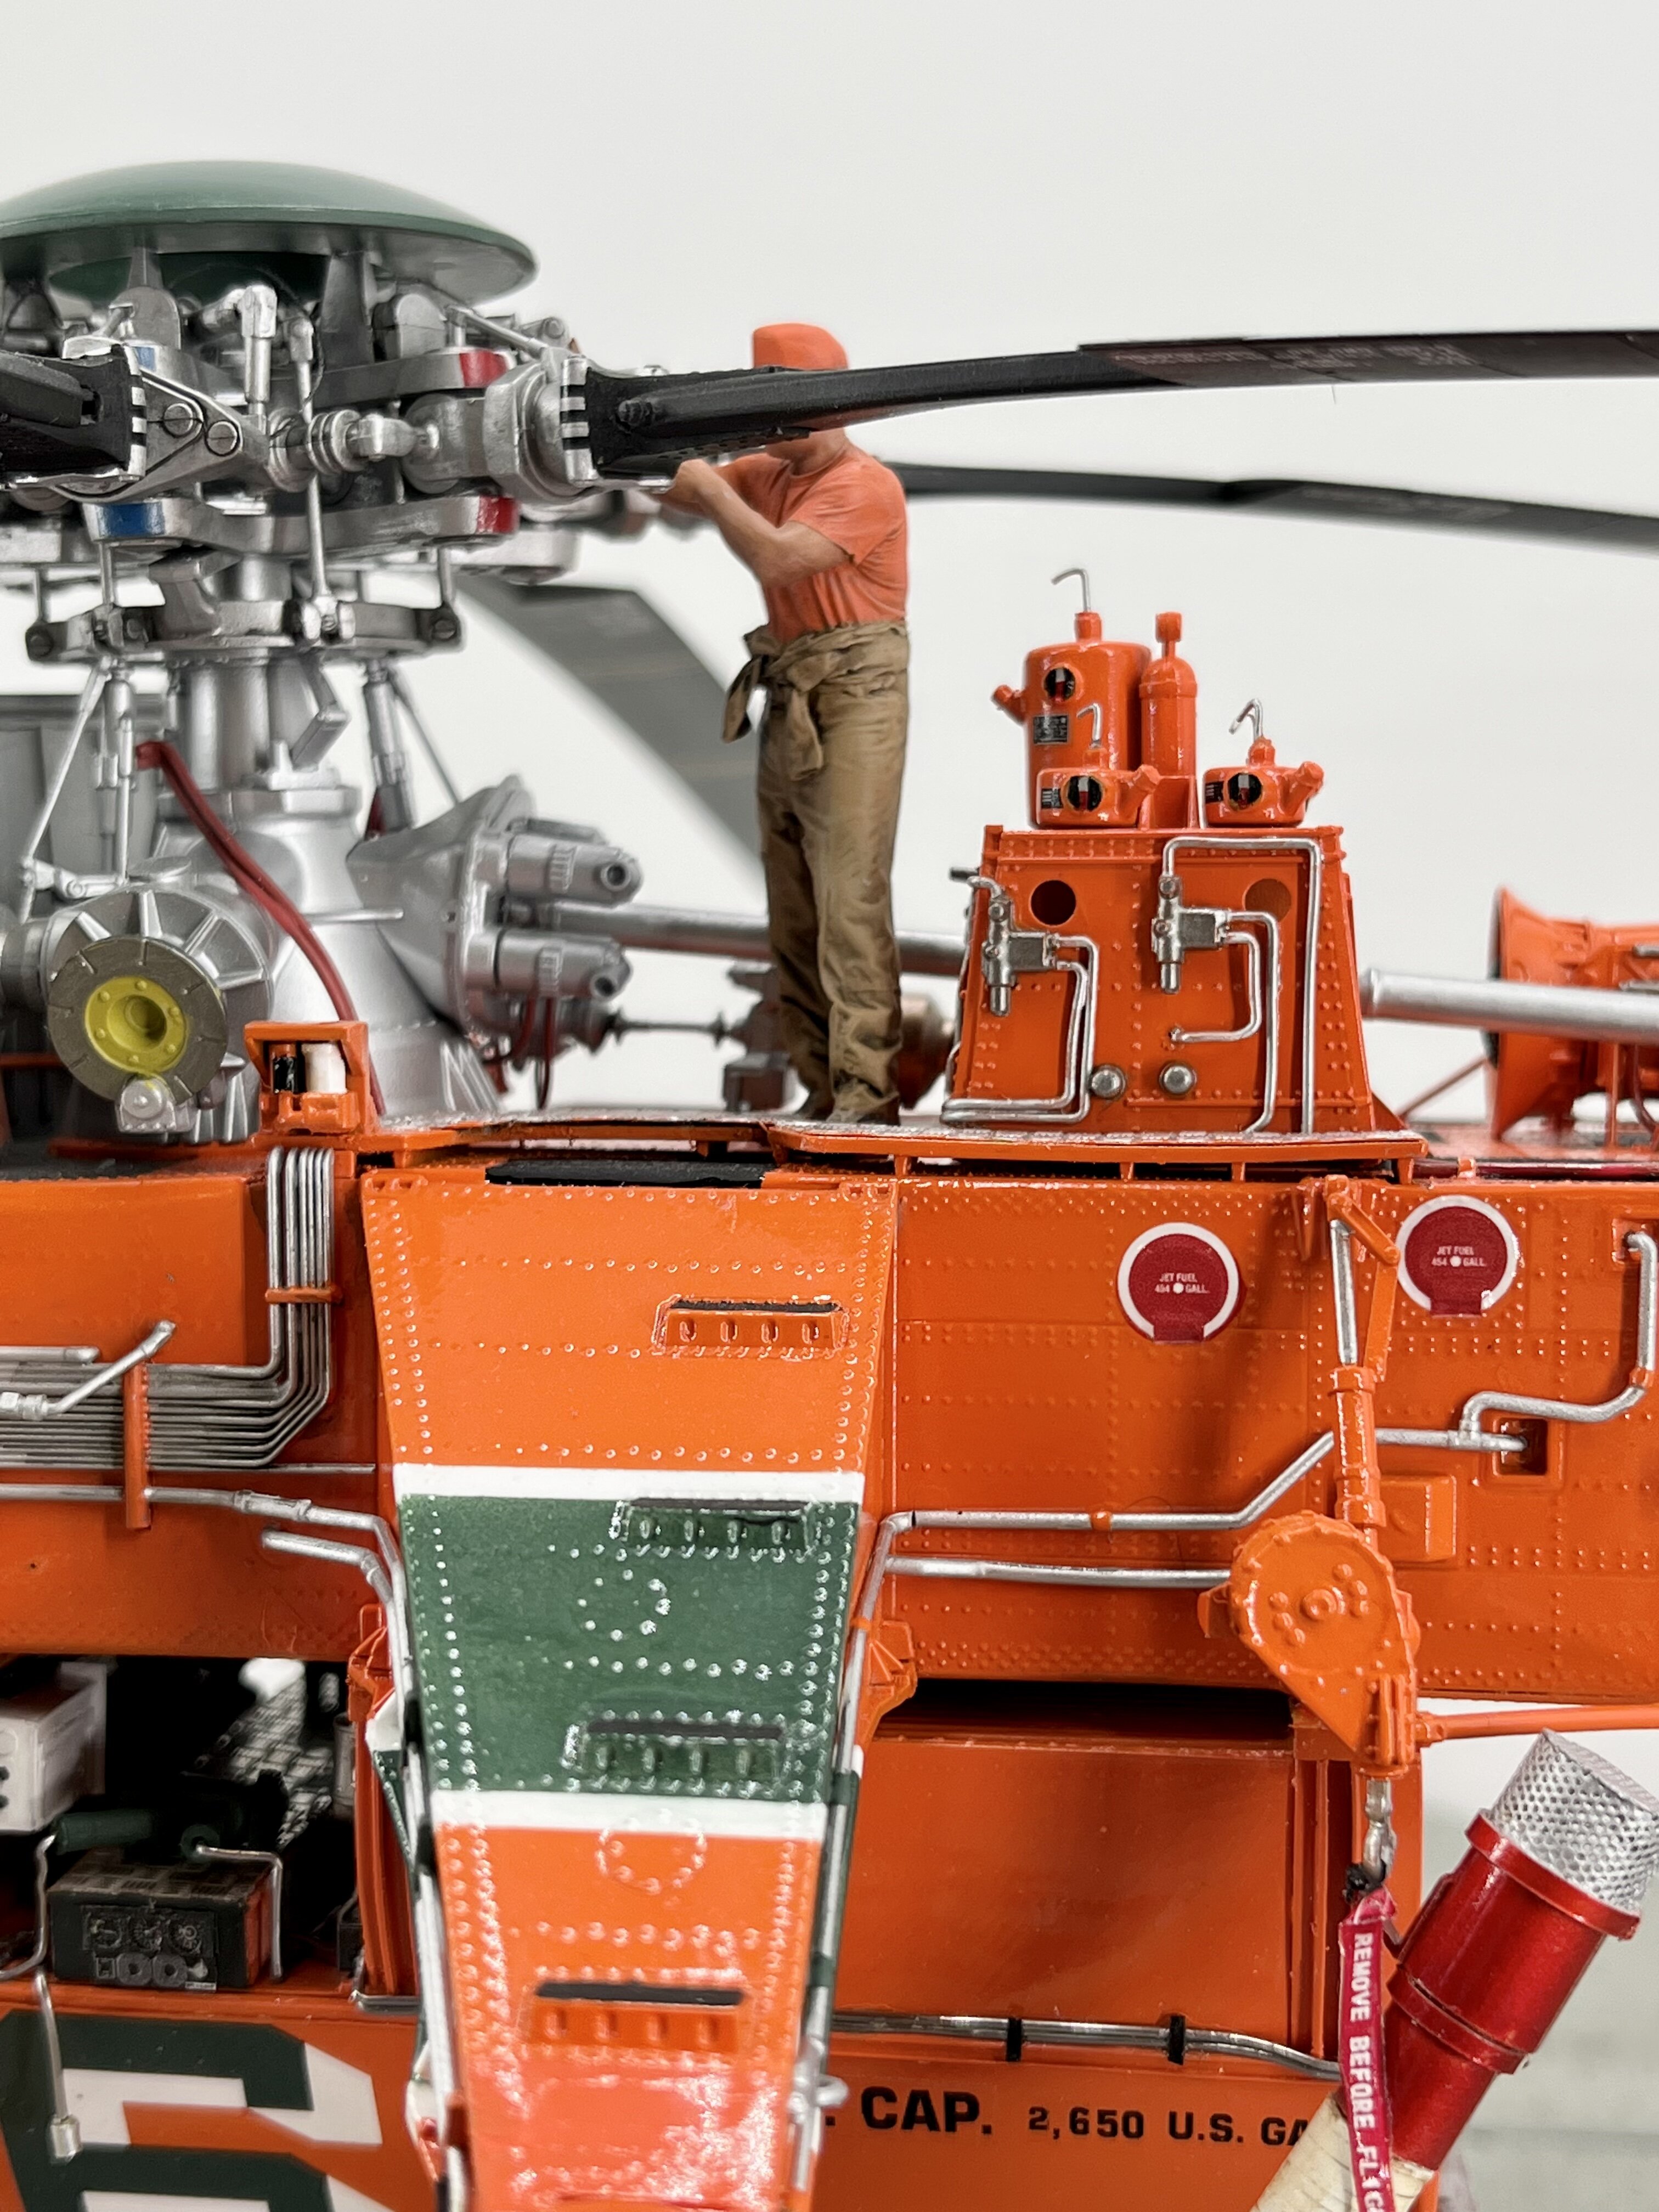
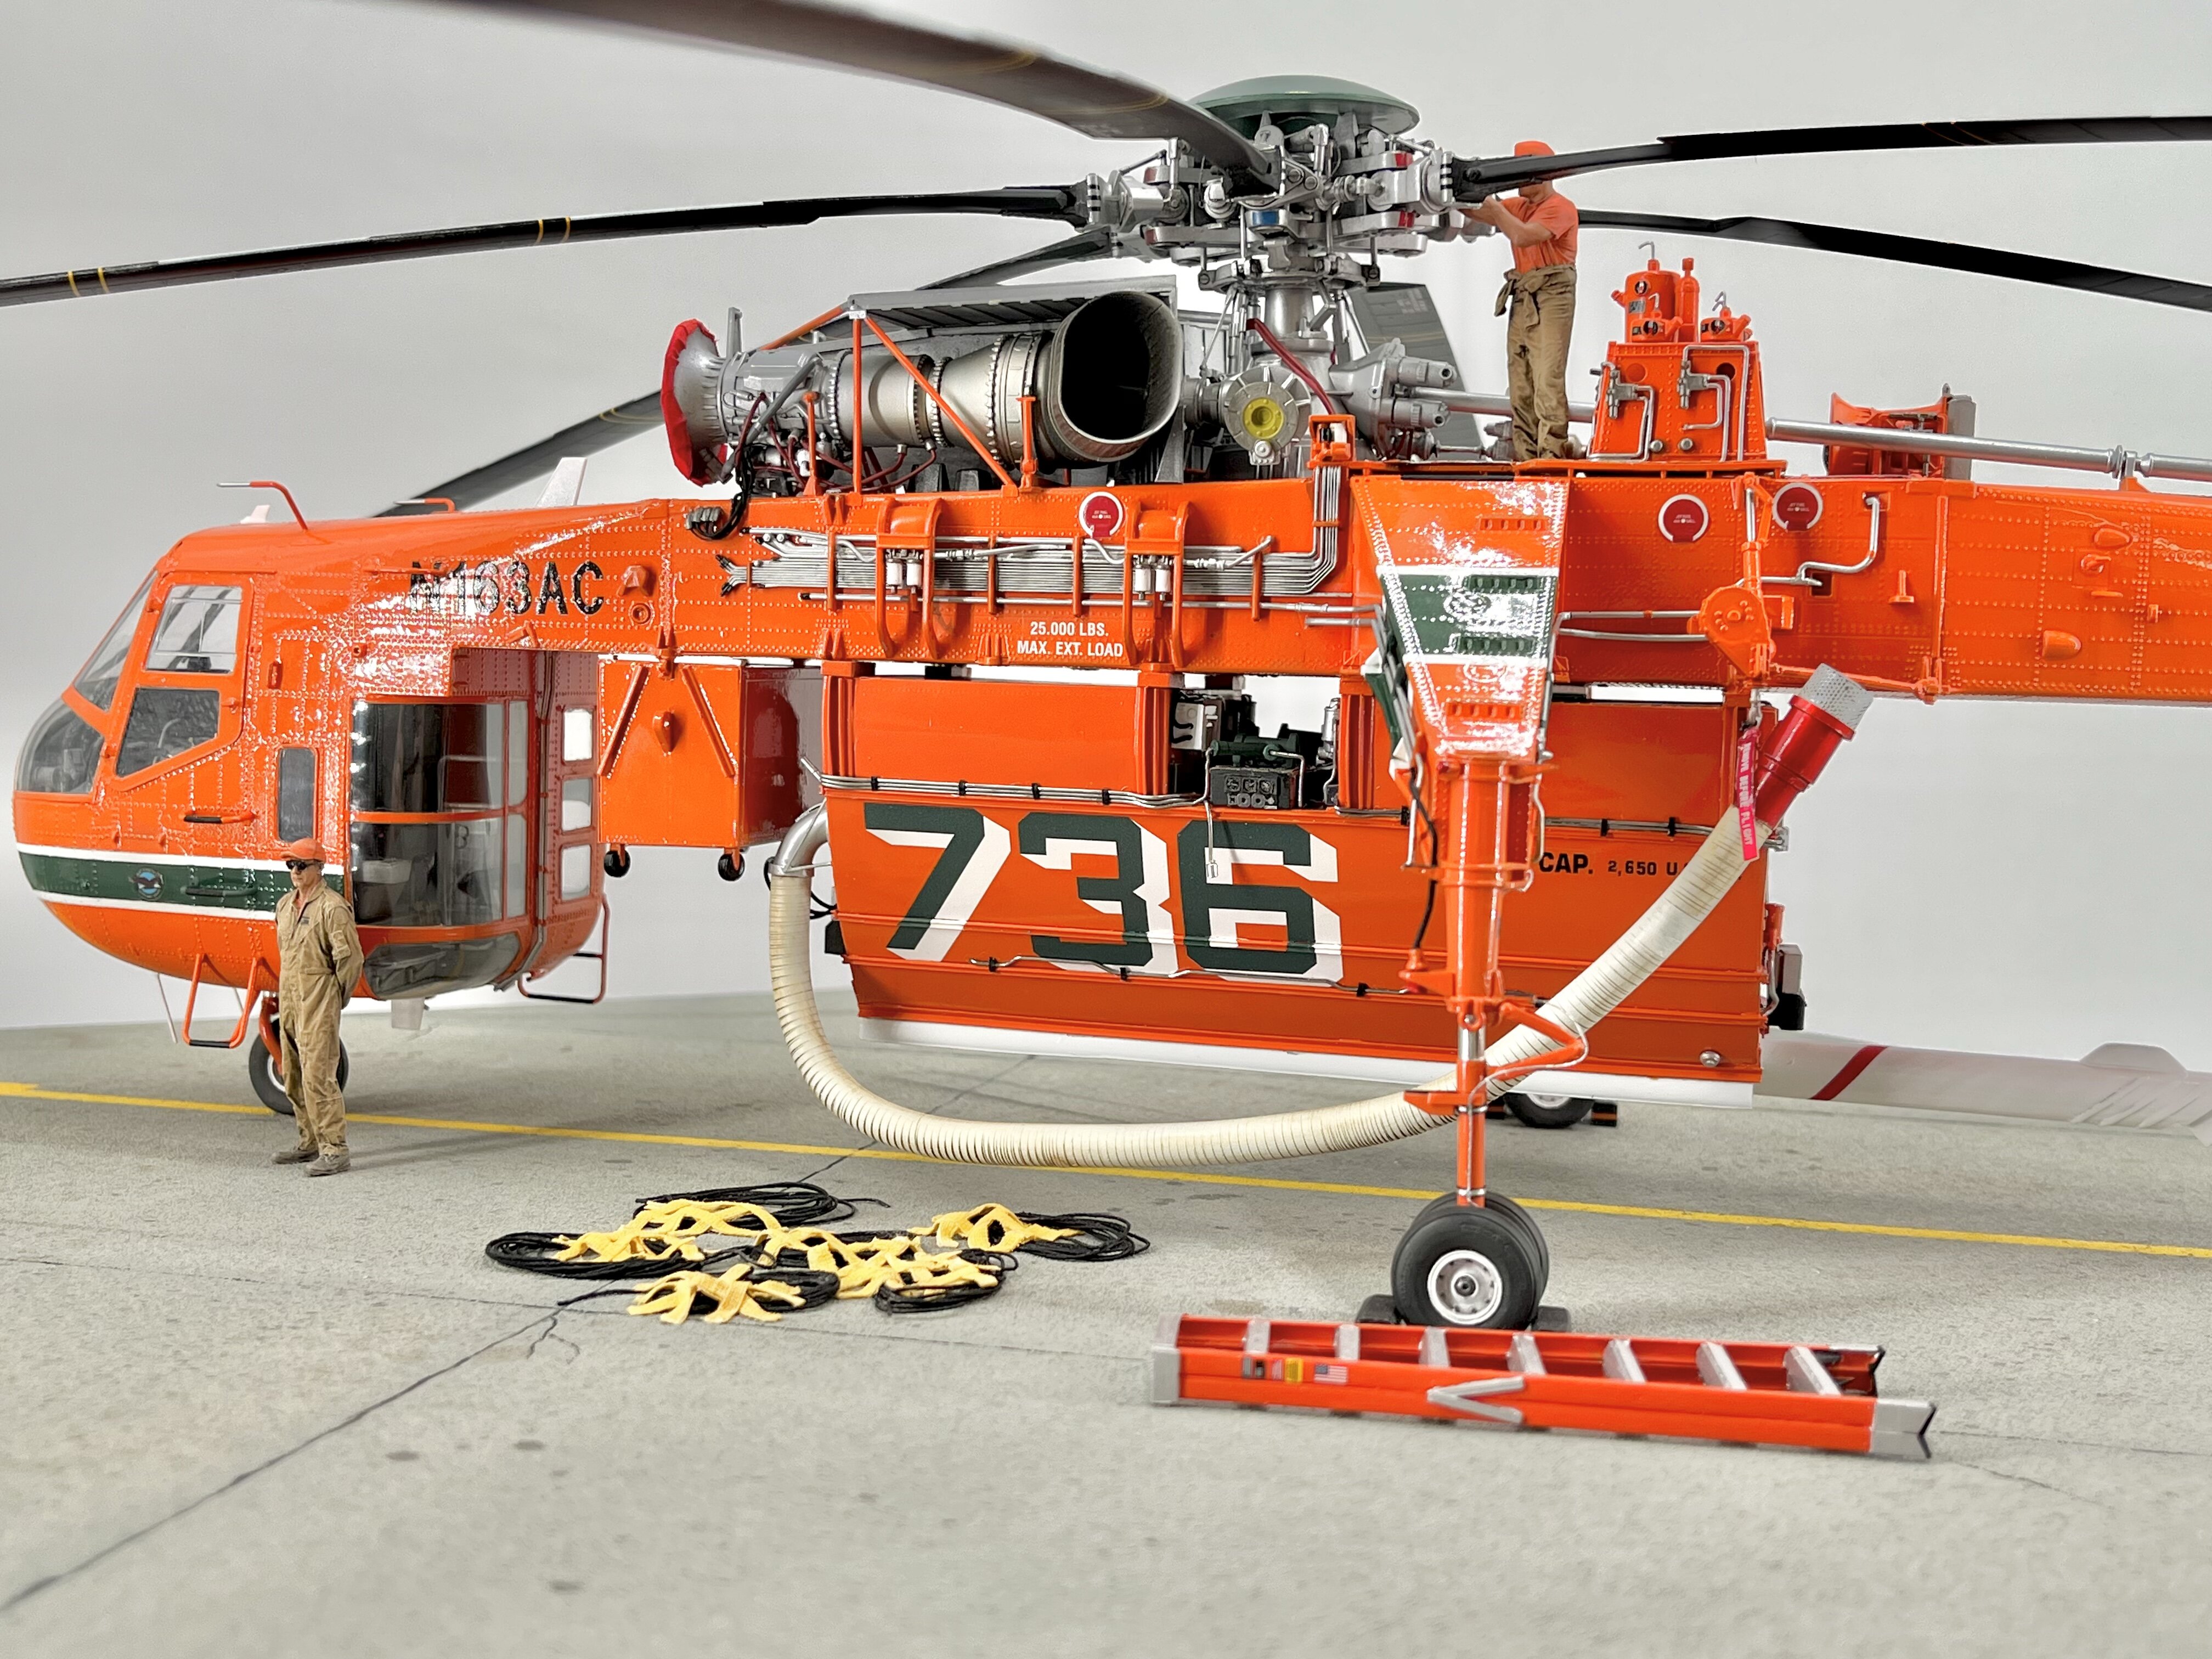
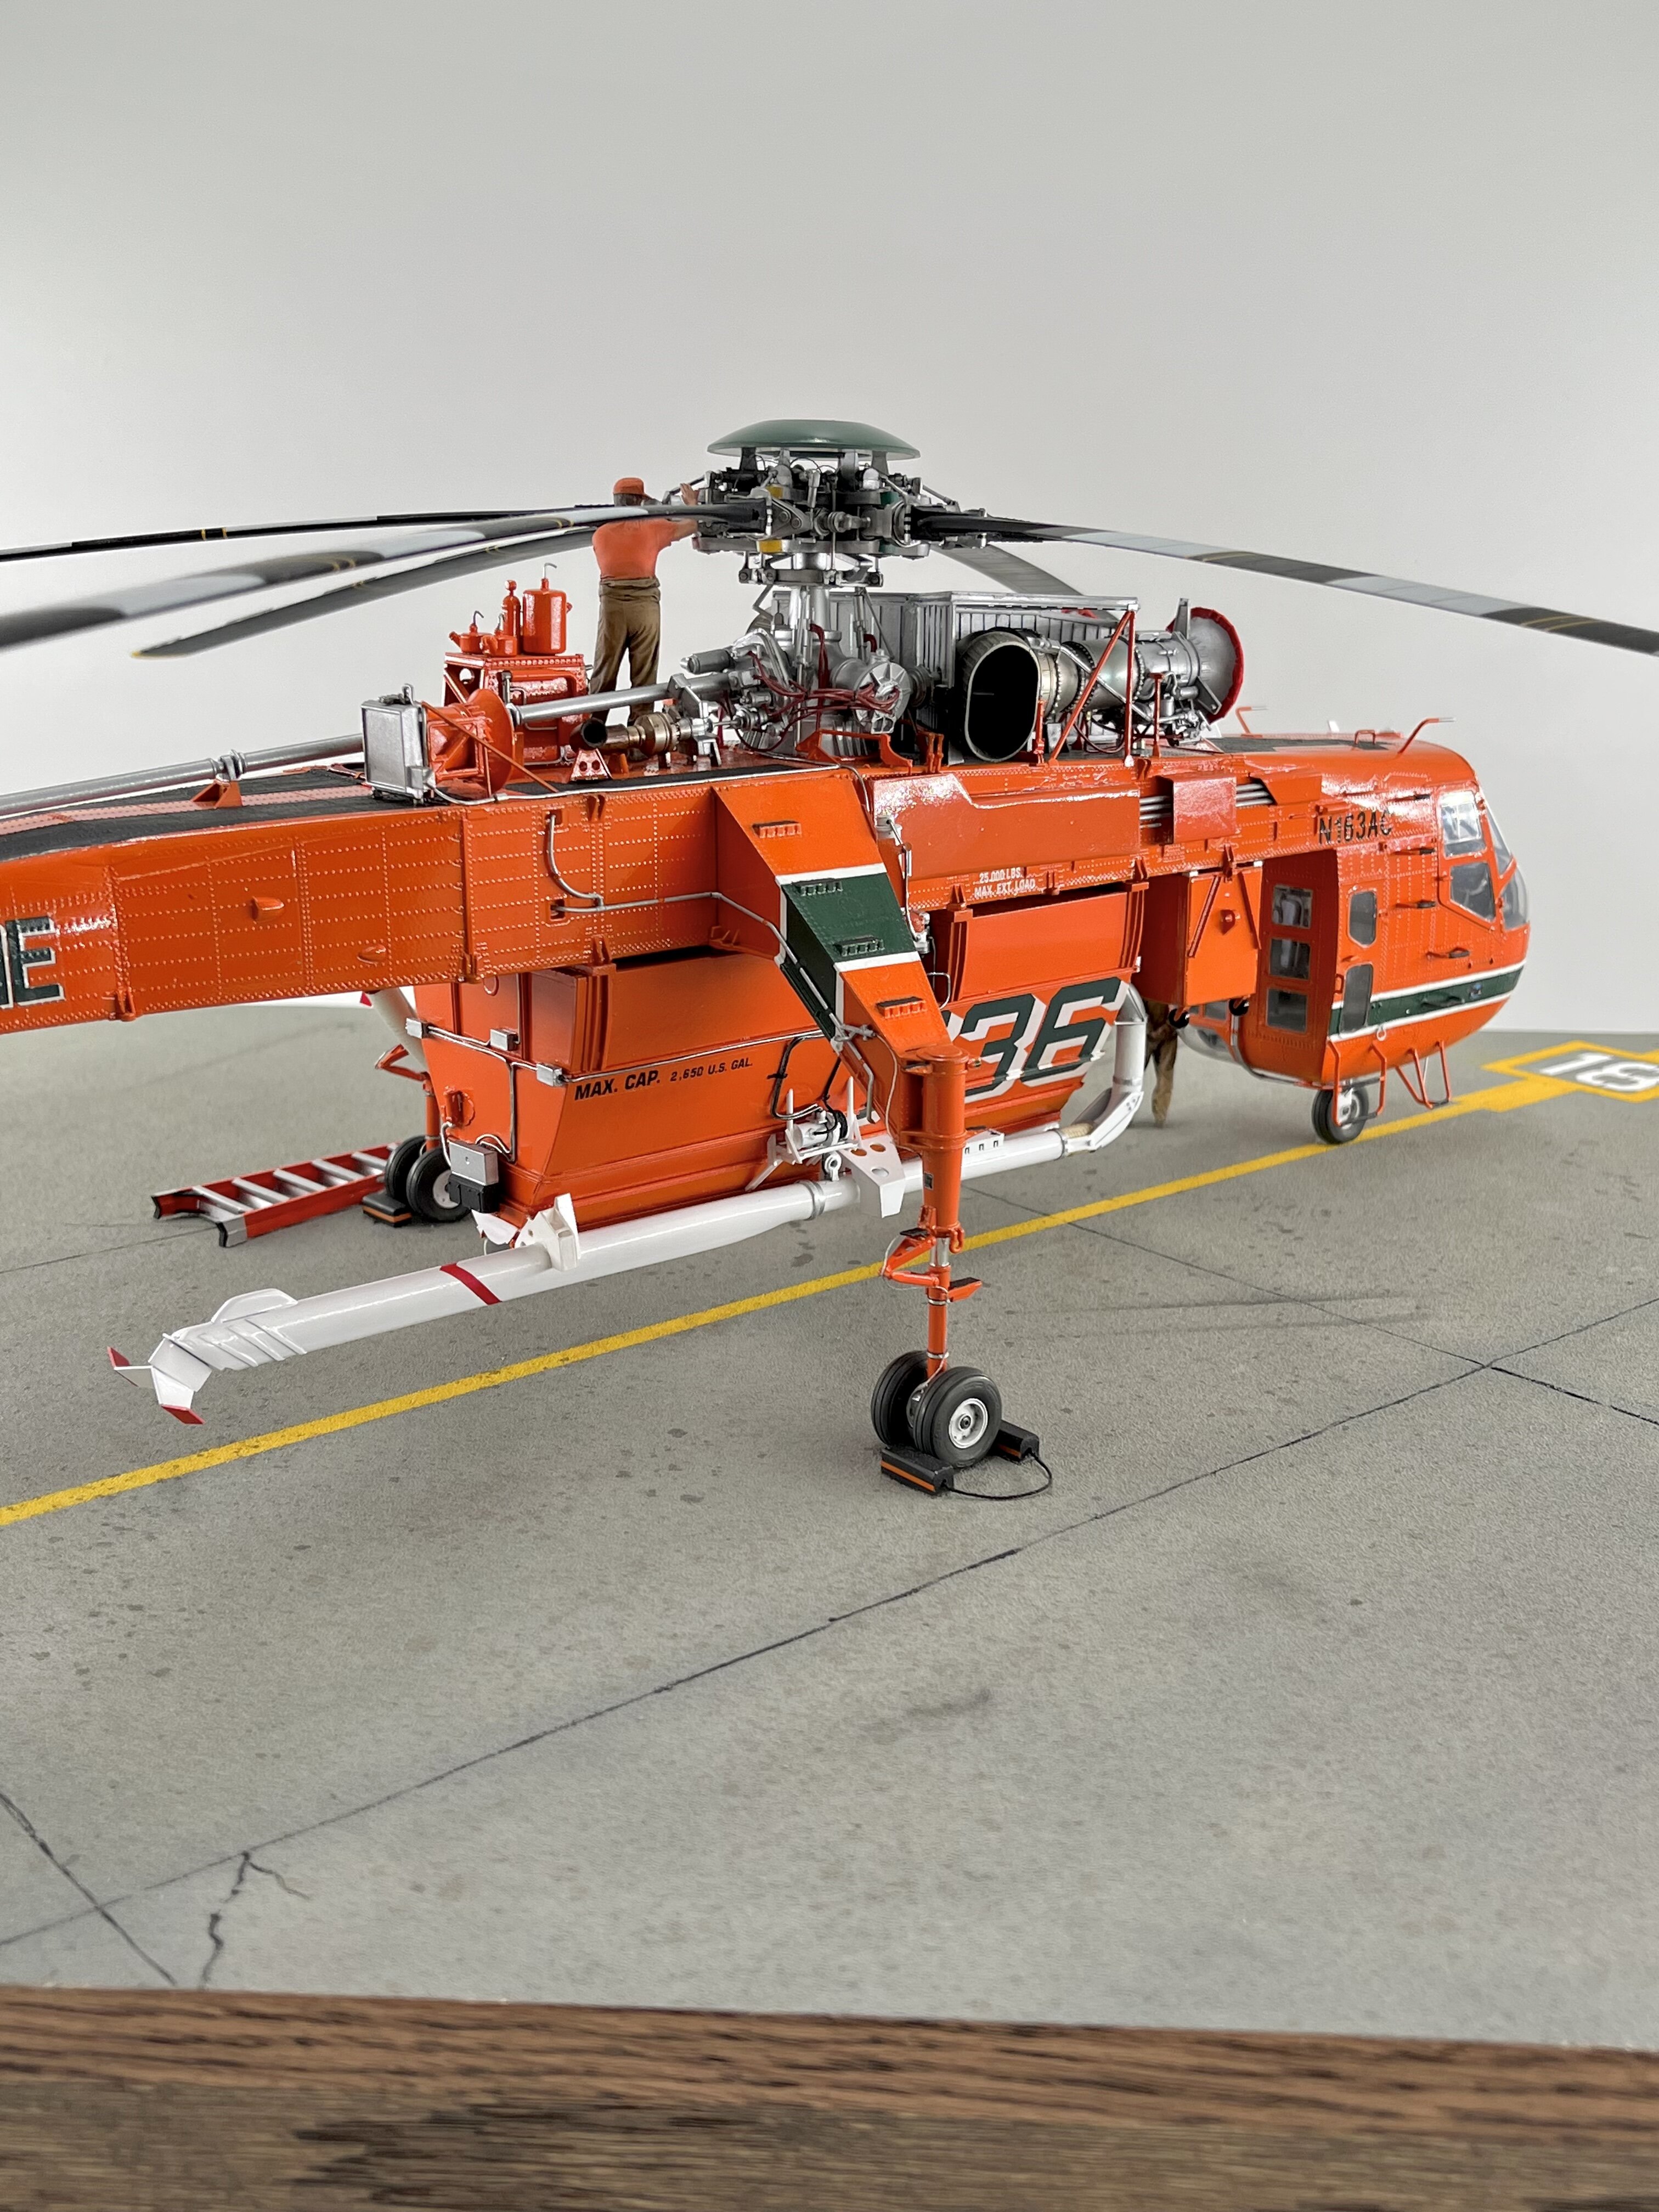
Erickson Air Crane was extremely helpful in making this project possible. Areas that had to be altered/scratch built. 1. Rear landing gear struts. (Bubba has duel wheels) Made from brass tubing, plastic tubing and sewing thread. 2. Cooling unit. The kit instructions has it attached to the transmission housing. Moved it to the correct location. Scratch built the mounting bracket, and air intake screen.
3. Tool box on wheels. Scratch built with resin casters and evergreen plastic styrene. (Needs to be altered, it’s too high). 4. The entire water drop tank. (Erickson provided detail photos to help). 5. The steps leading up to the tail rotor gear box. Evergreen polystyrene and sand paper for non-slip surface. 6. The rotor blade tie down straps. 7. The ladder. 8. Wheel chocks.
The figures are from Reedoak. There are some things that need to be replaced when, and if they come available. I’m hoping that a company will come out with these items in the near future.
The entire rotor head assembly w/ composite blades. Bulging windows for both doors. It’s been a lot of work, but well worth it. Comments/critiques always welcome. Thanks for having a look.-
2
-
-
That’s one awesome build!
-
Another masterpiece!!
Christopher
-
That is one interesting diorama. All of your builds are very unique, and well executed. Thanks for posting.
Christopher
-
Good afternoon fellow modeler’s
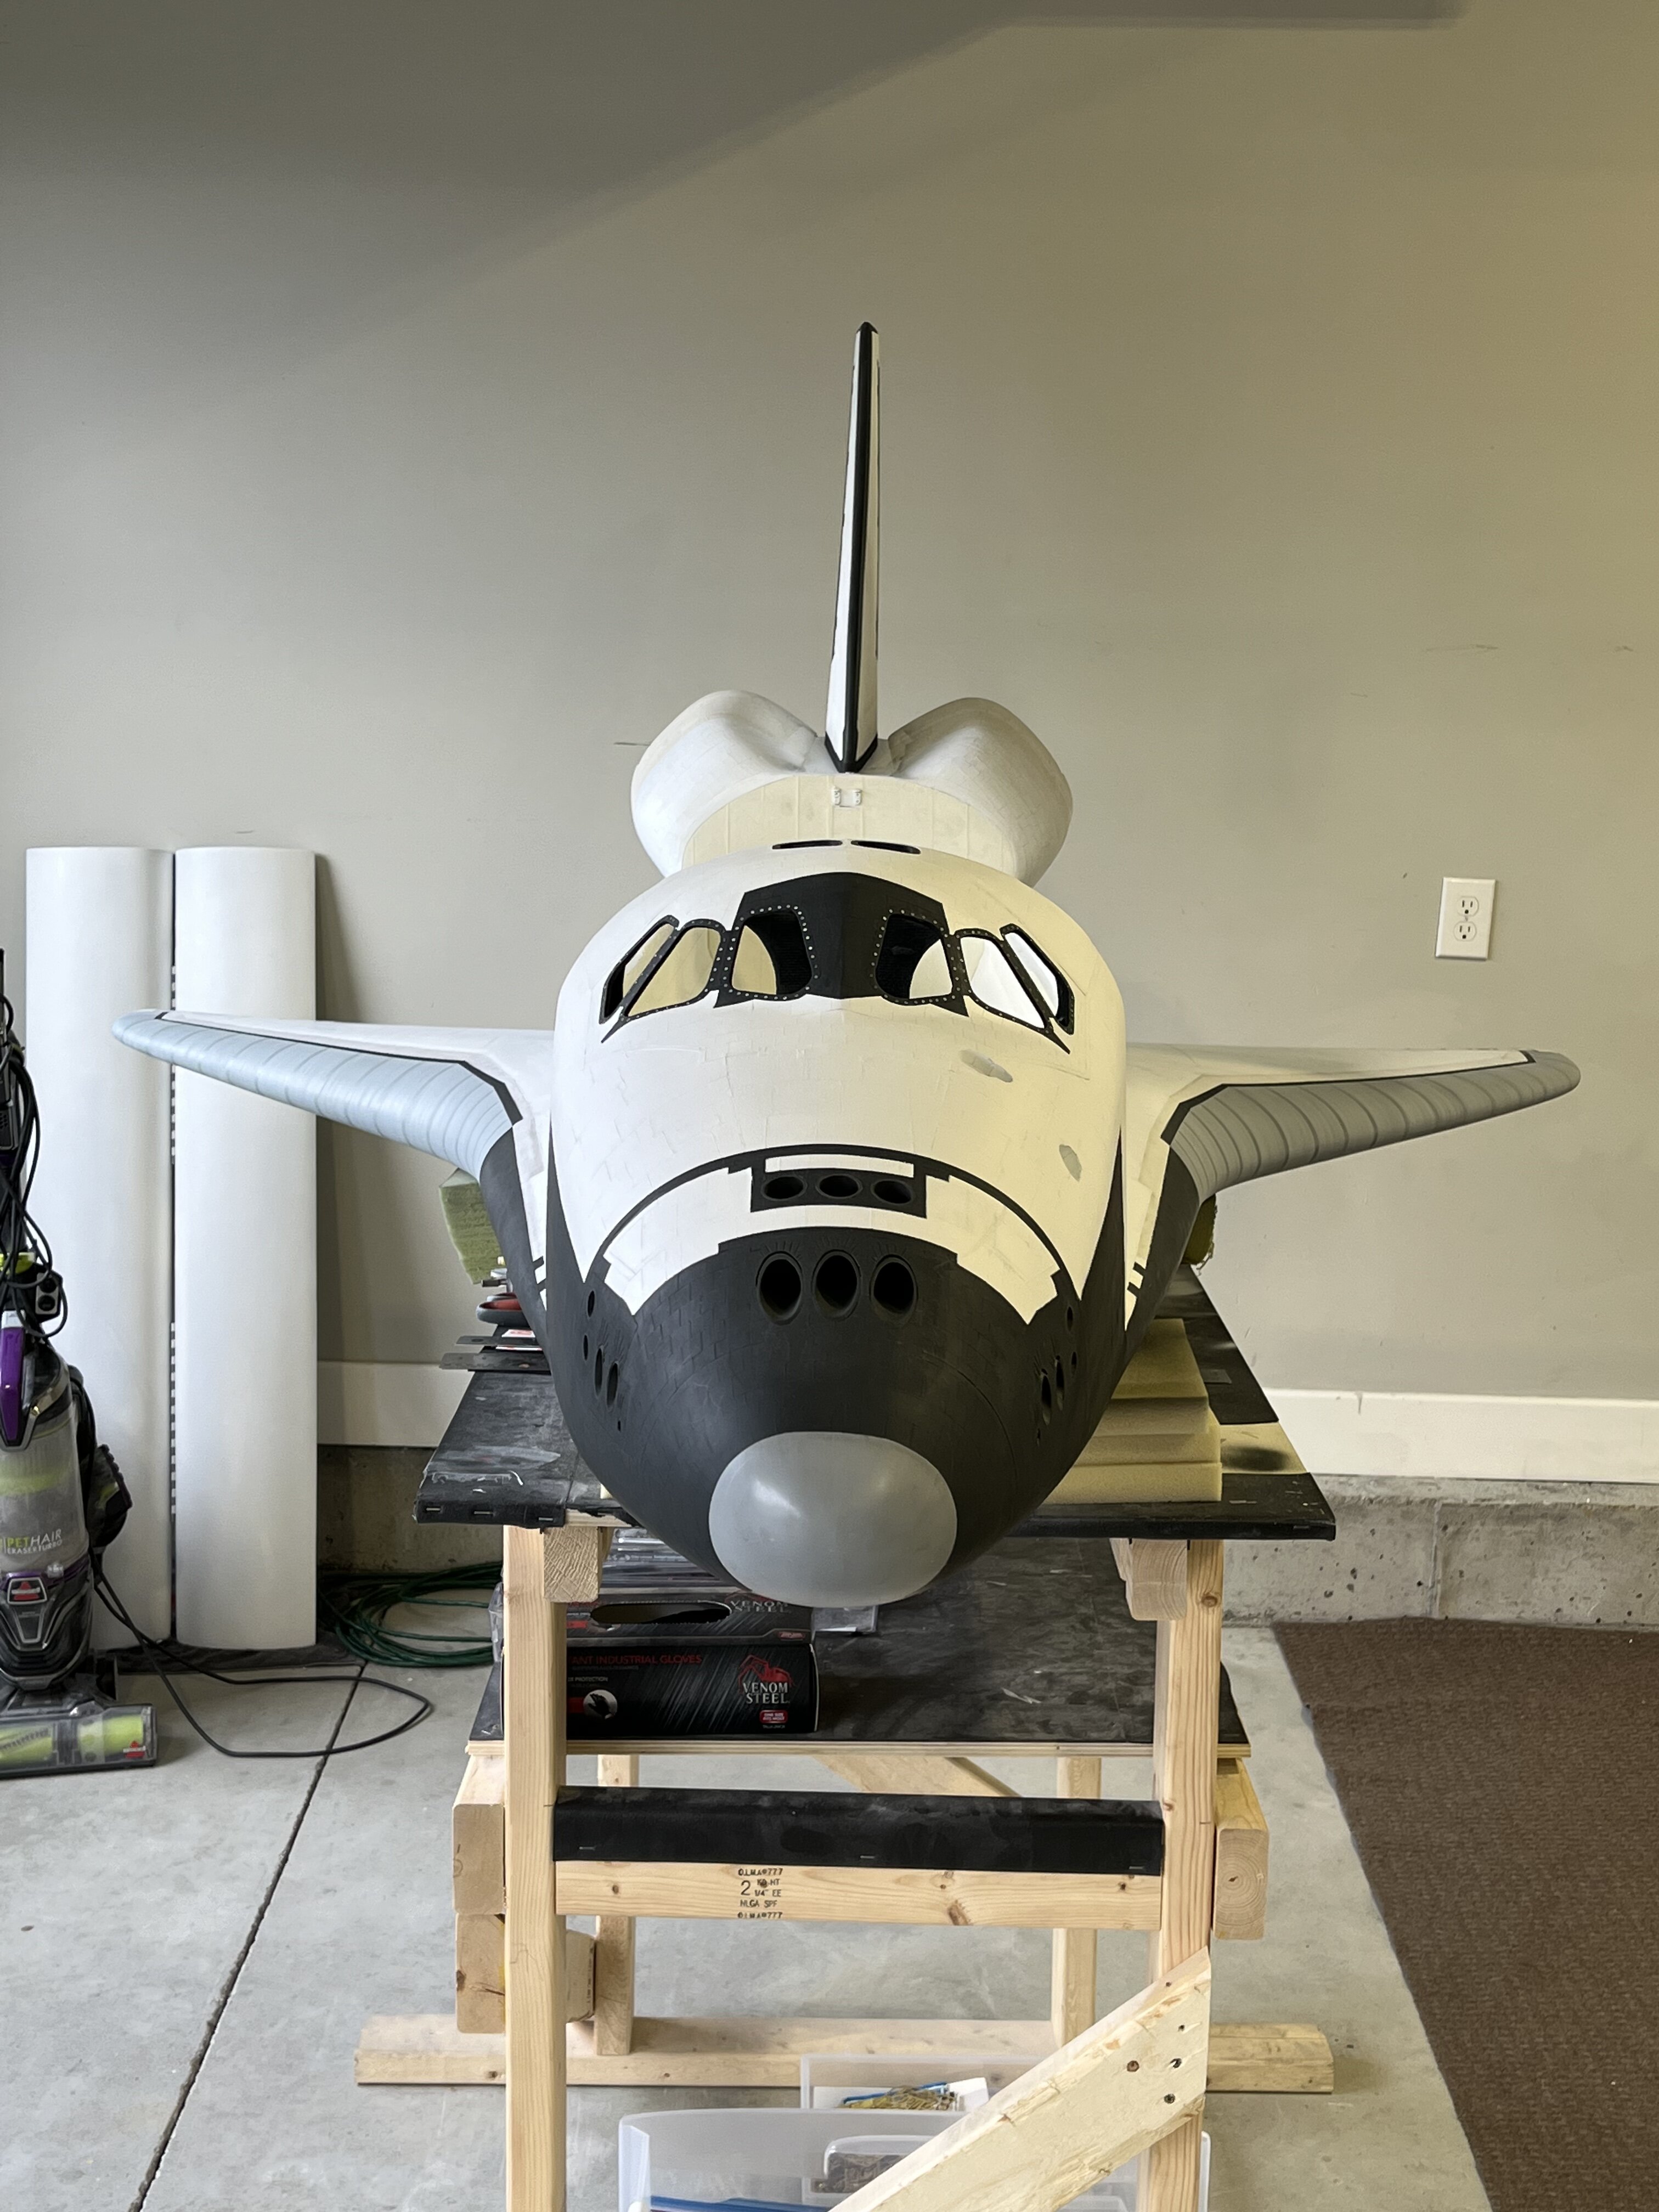
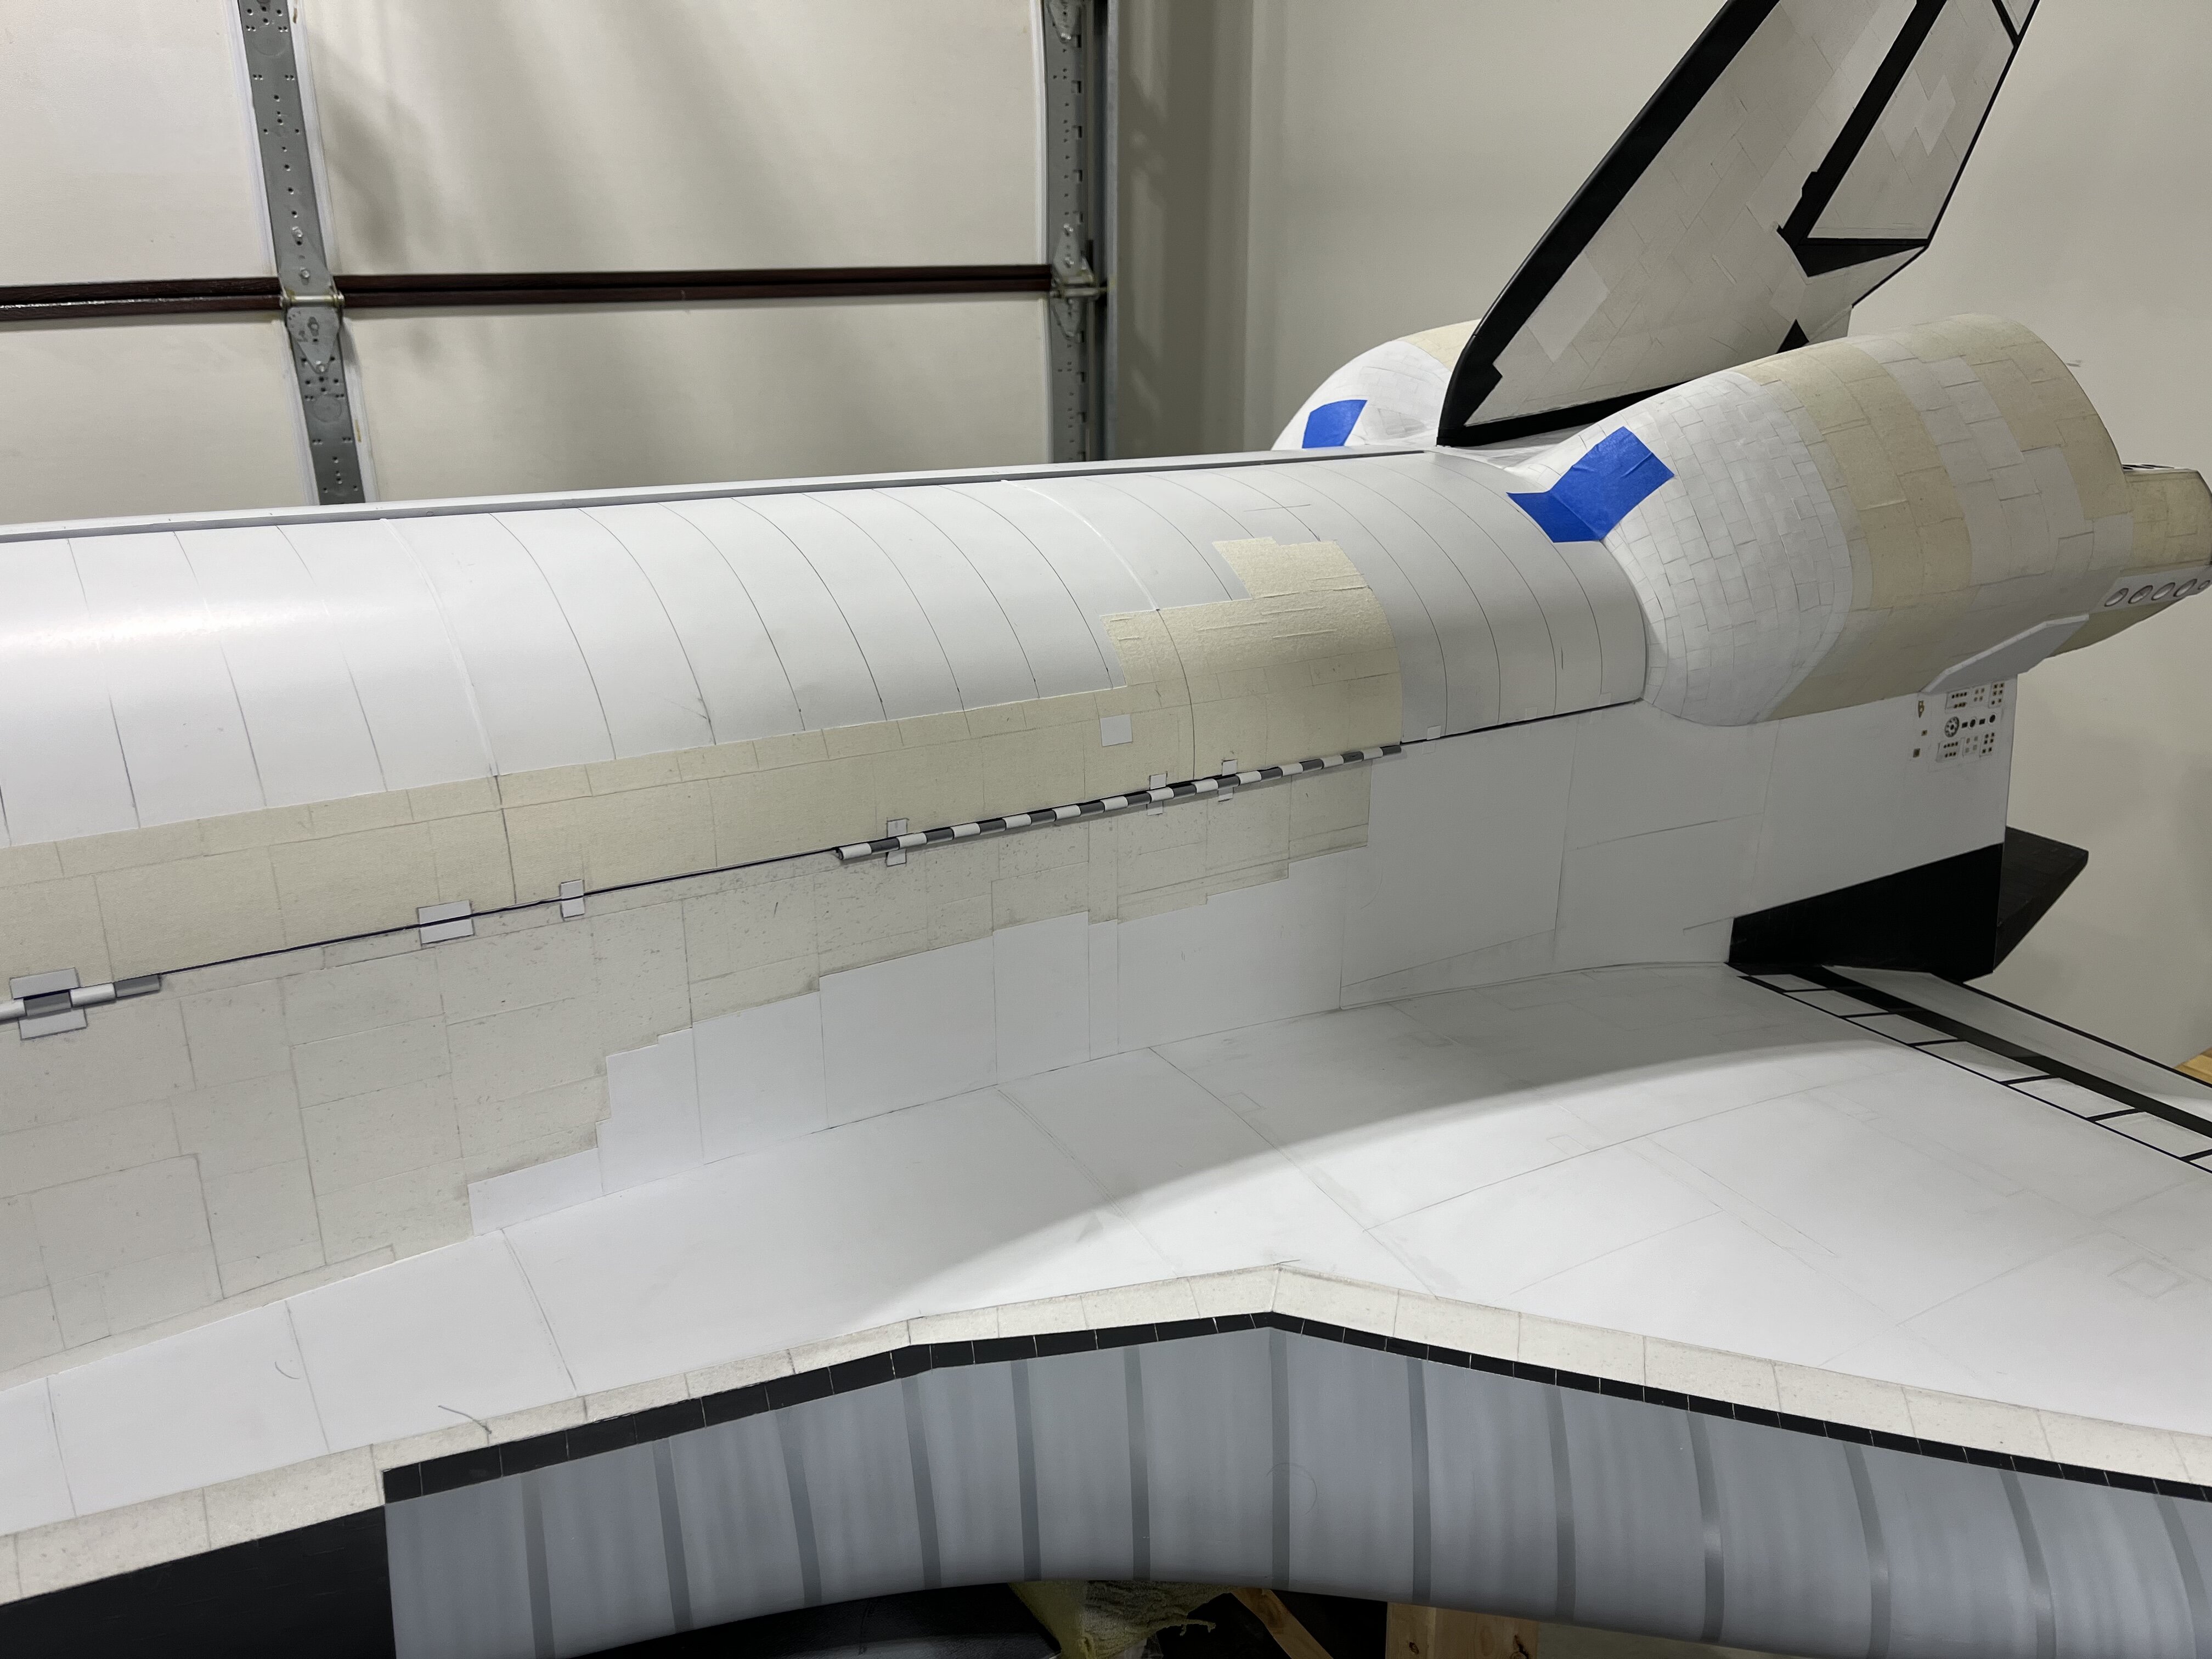
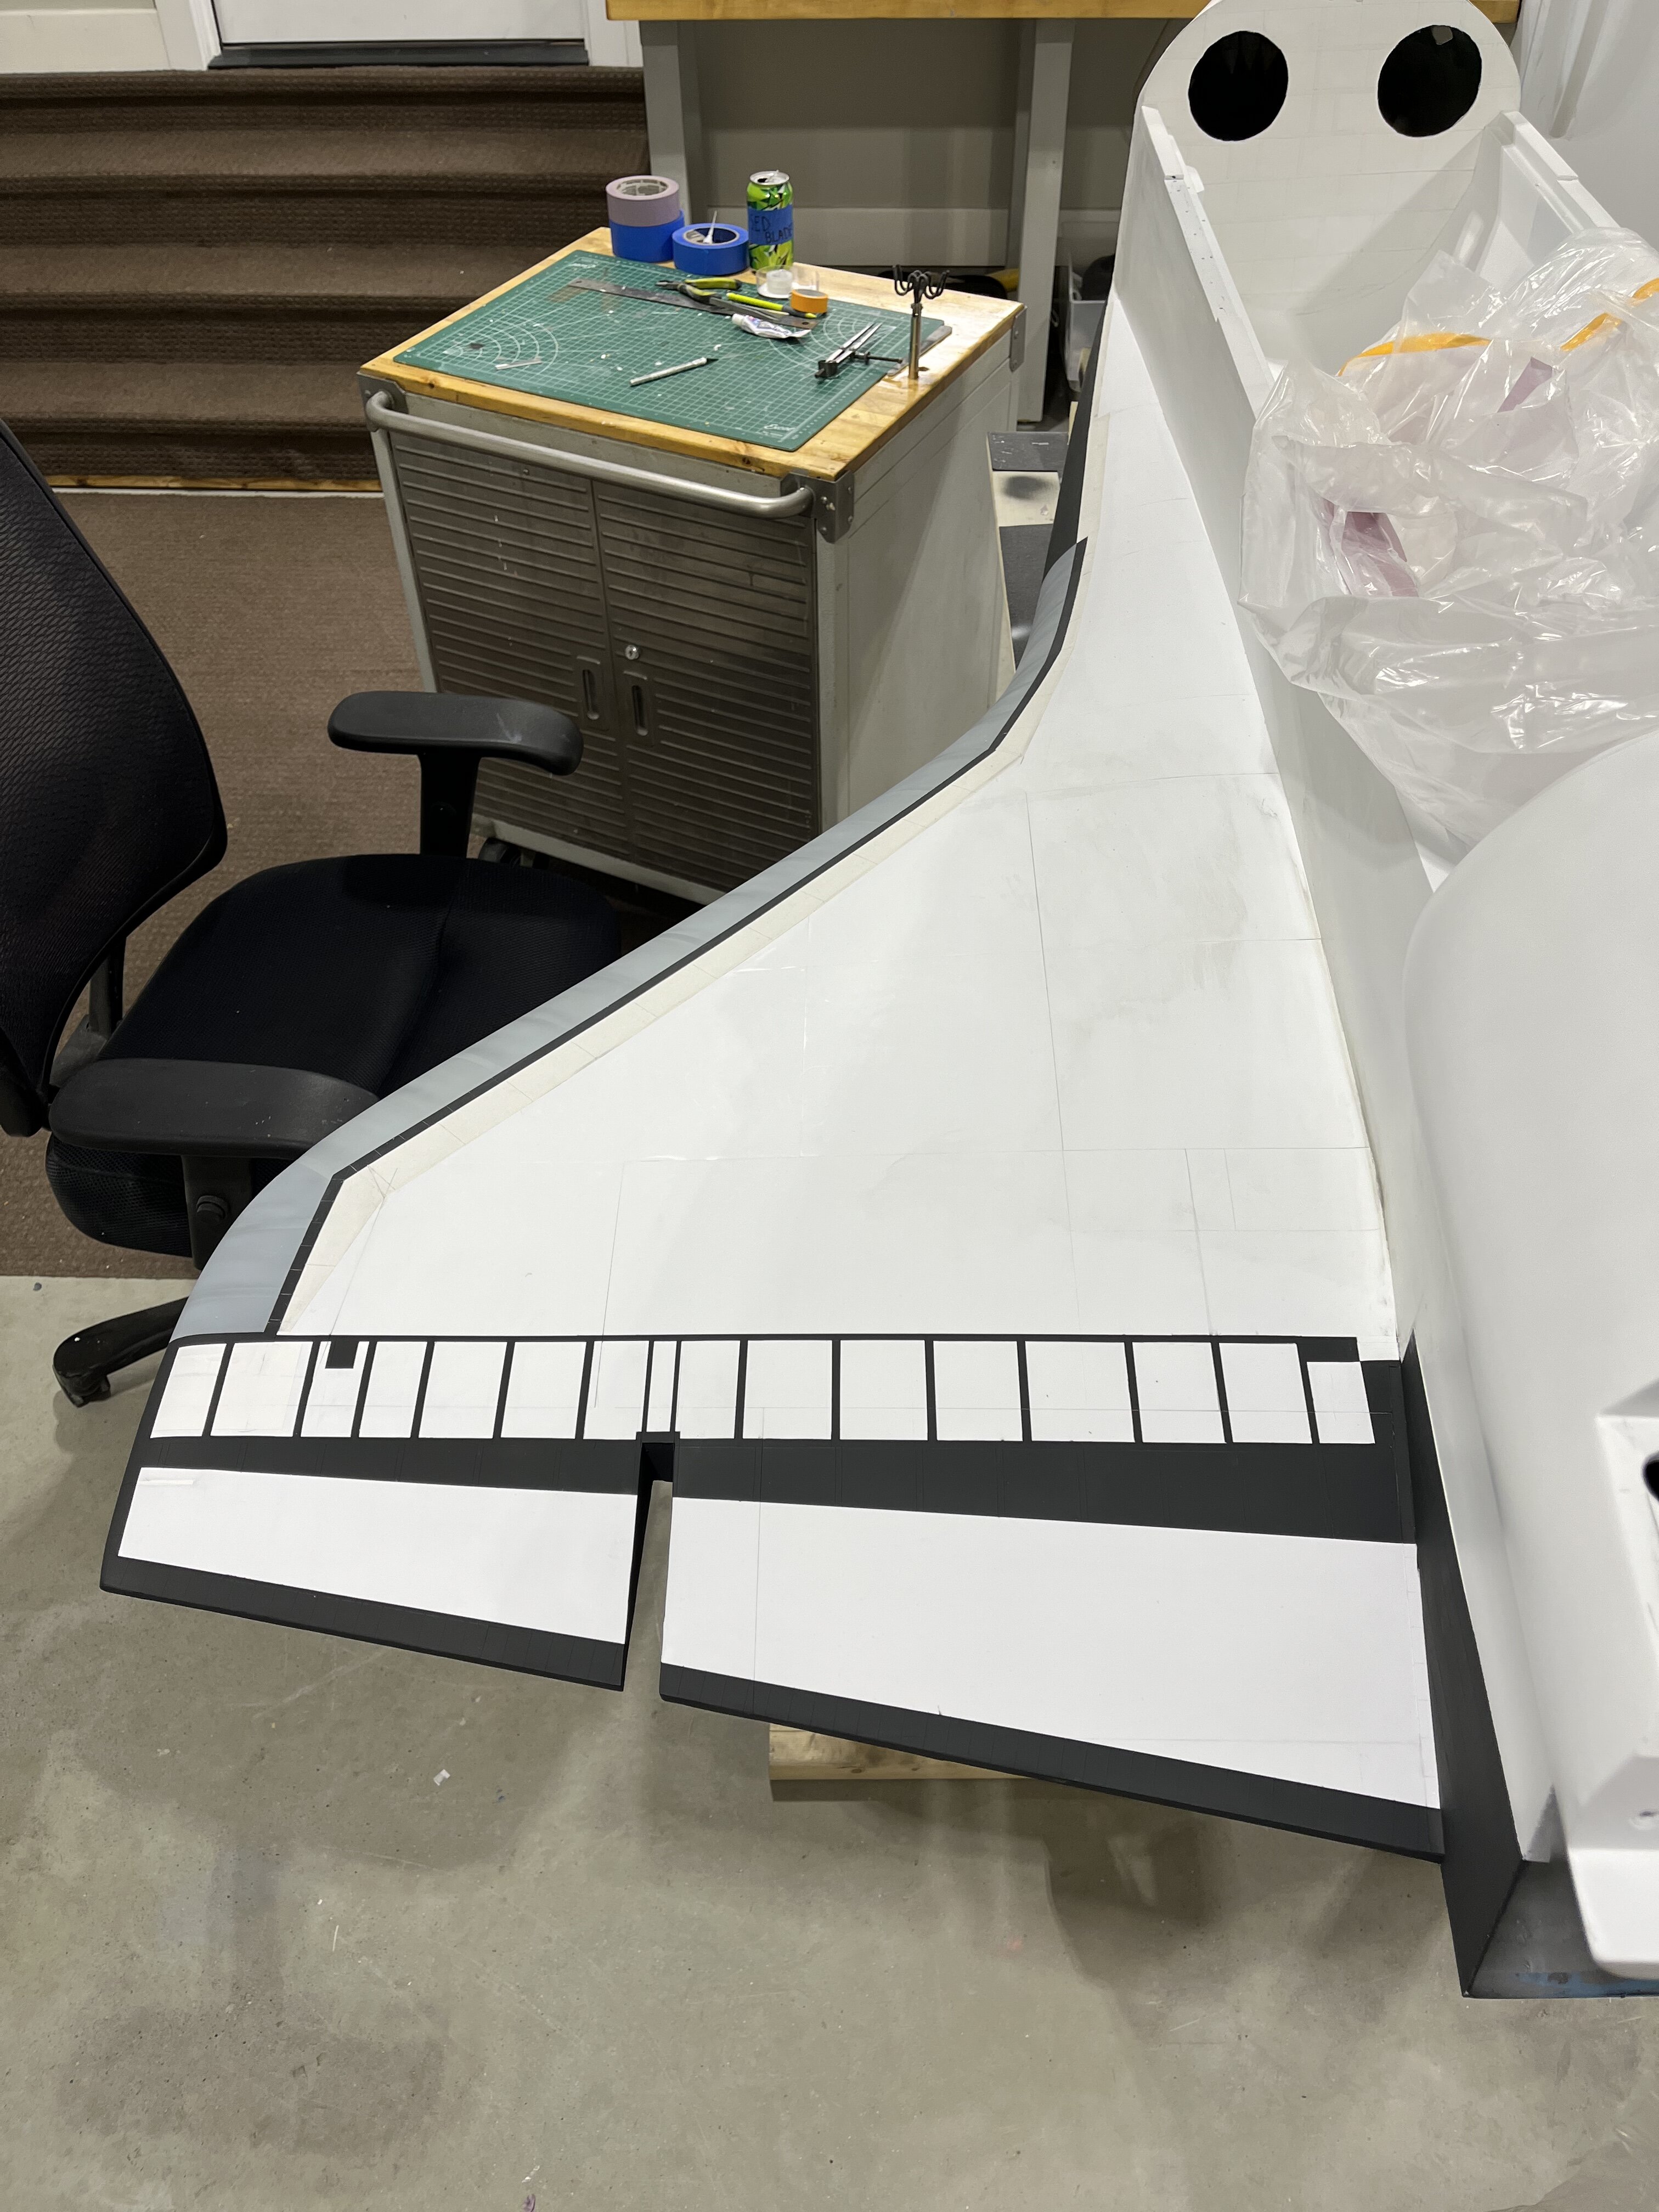
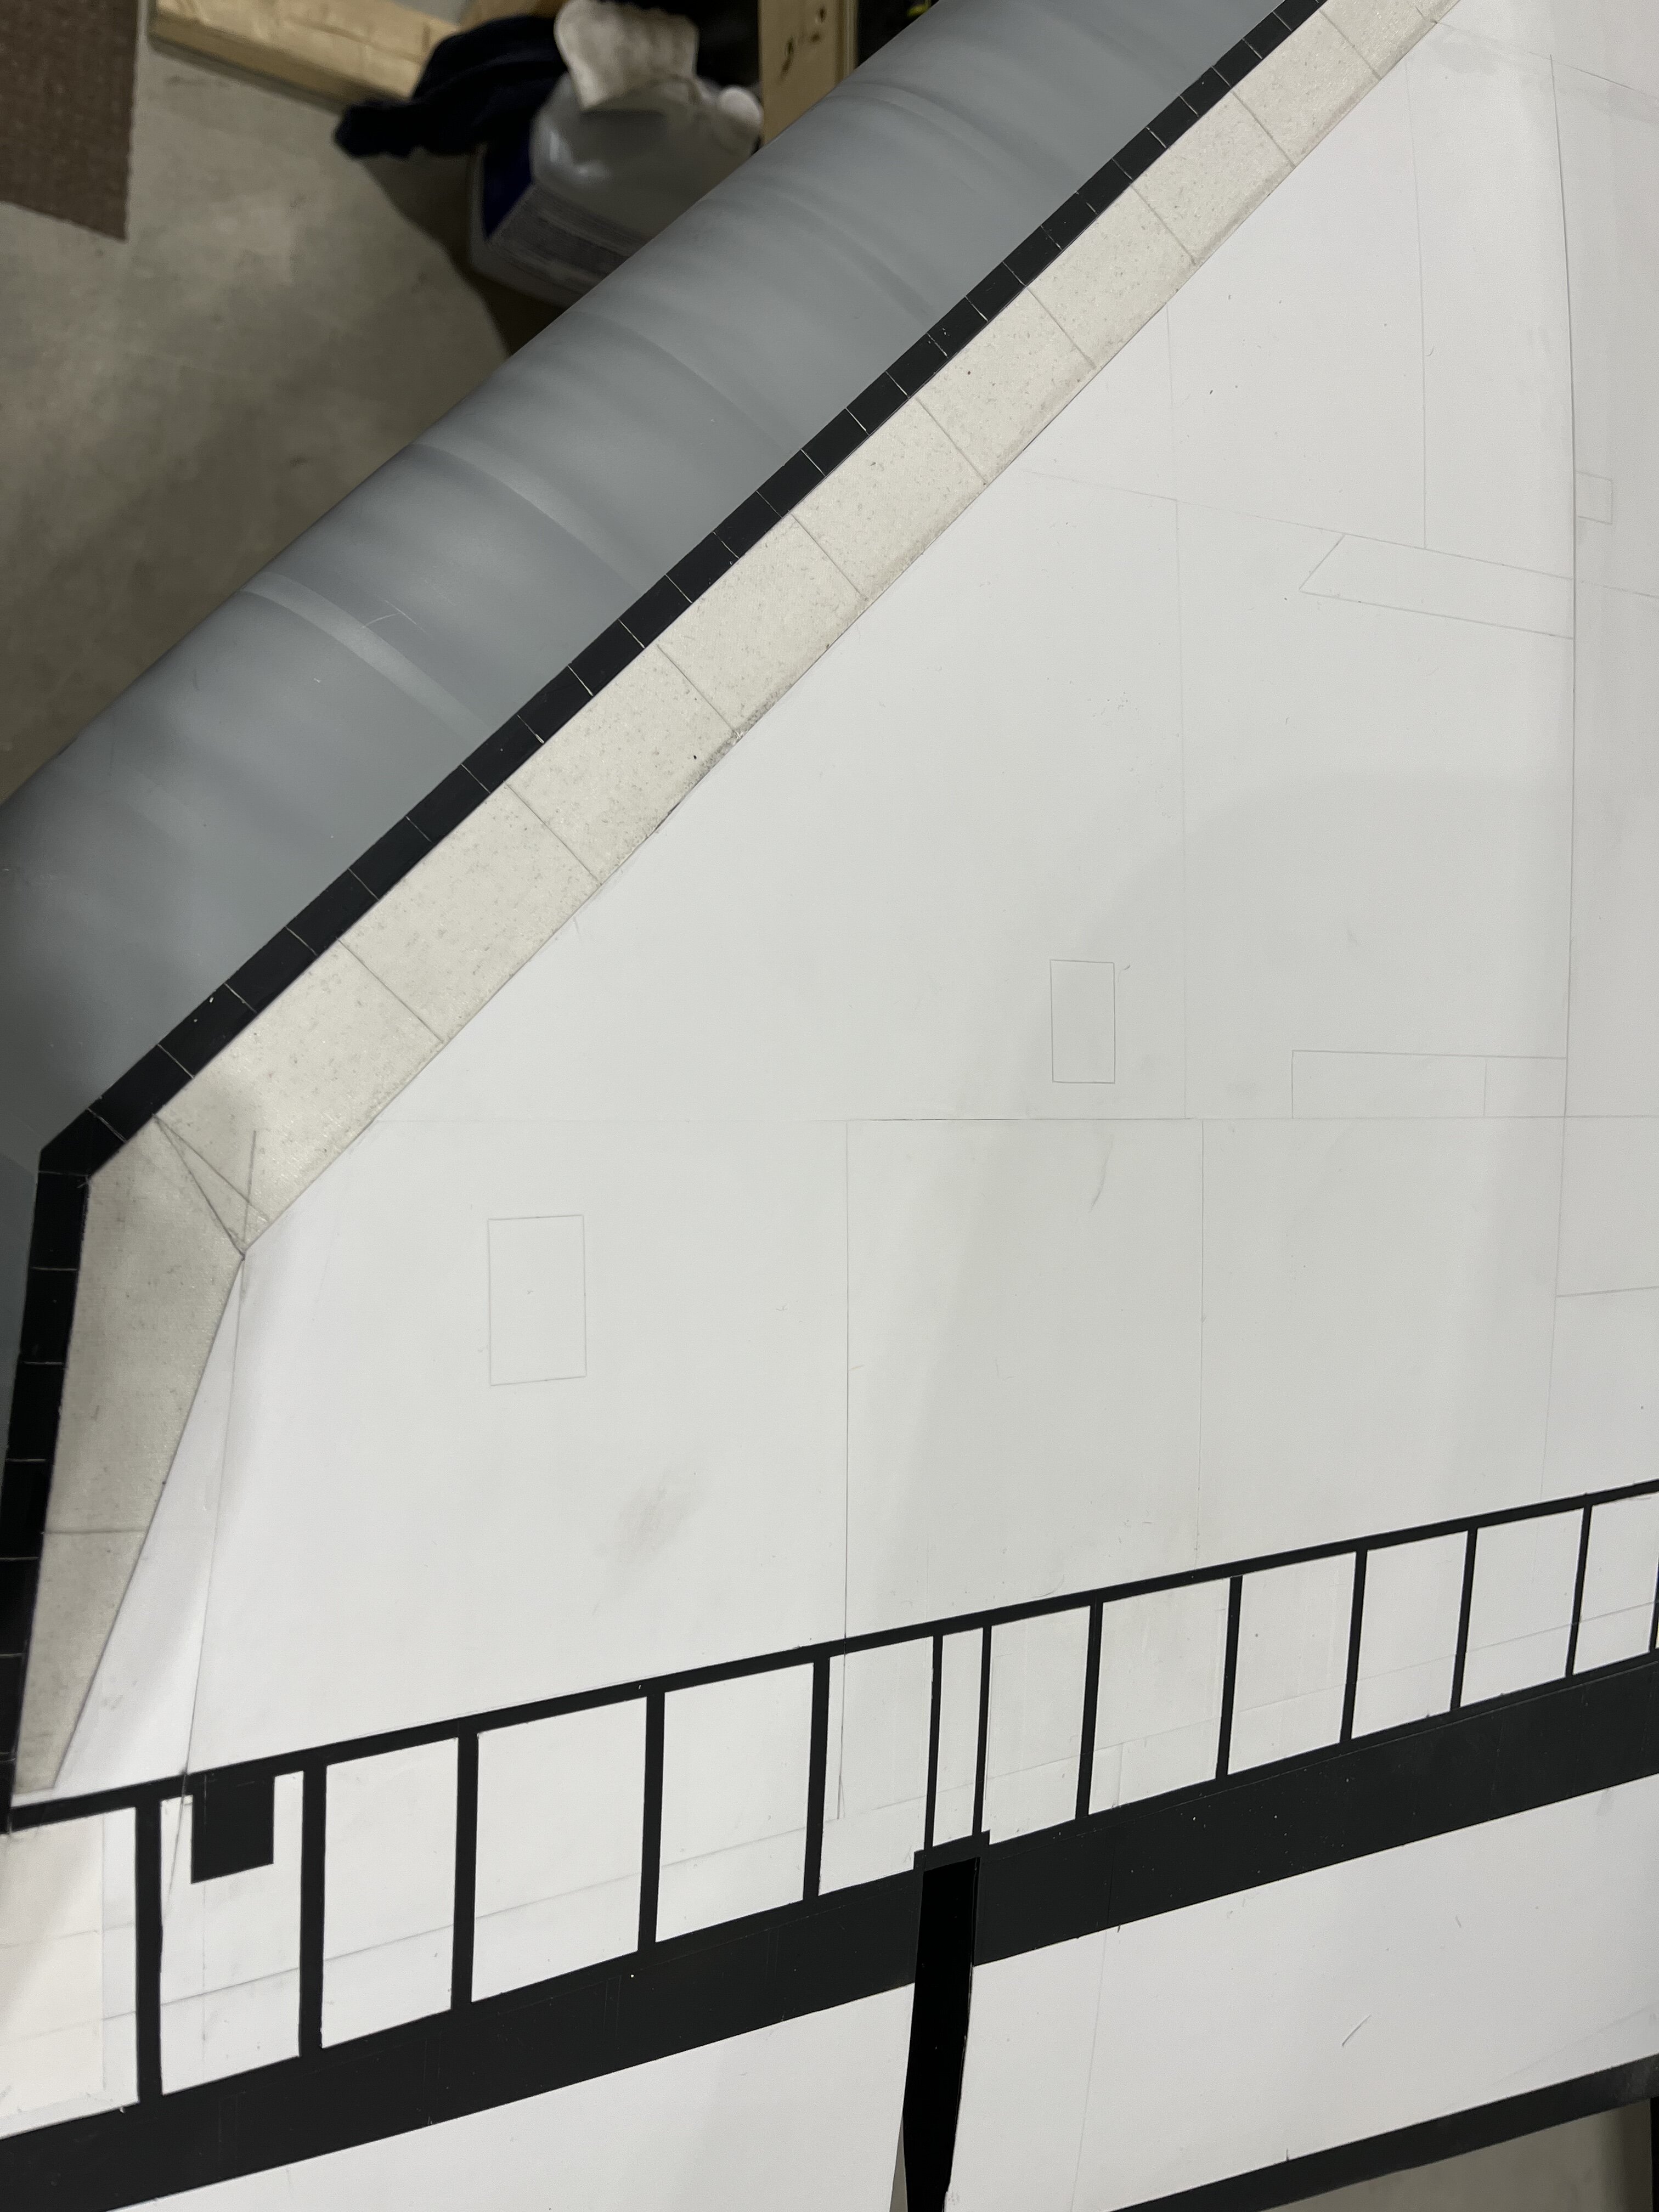
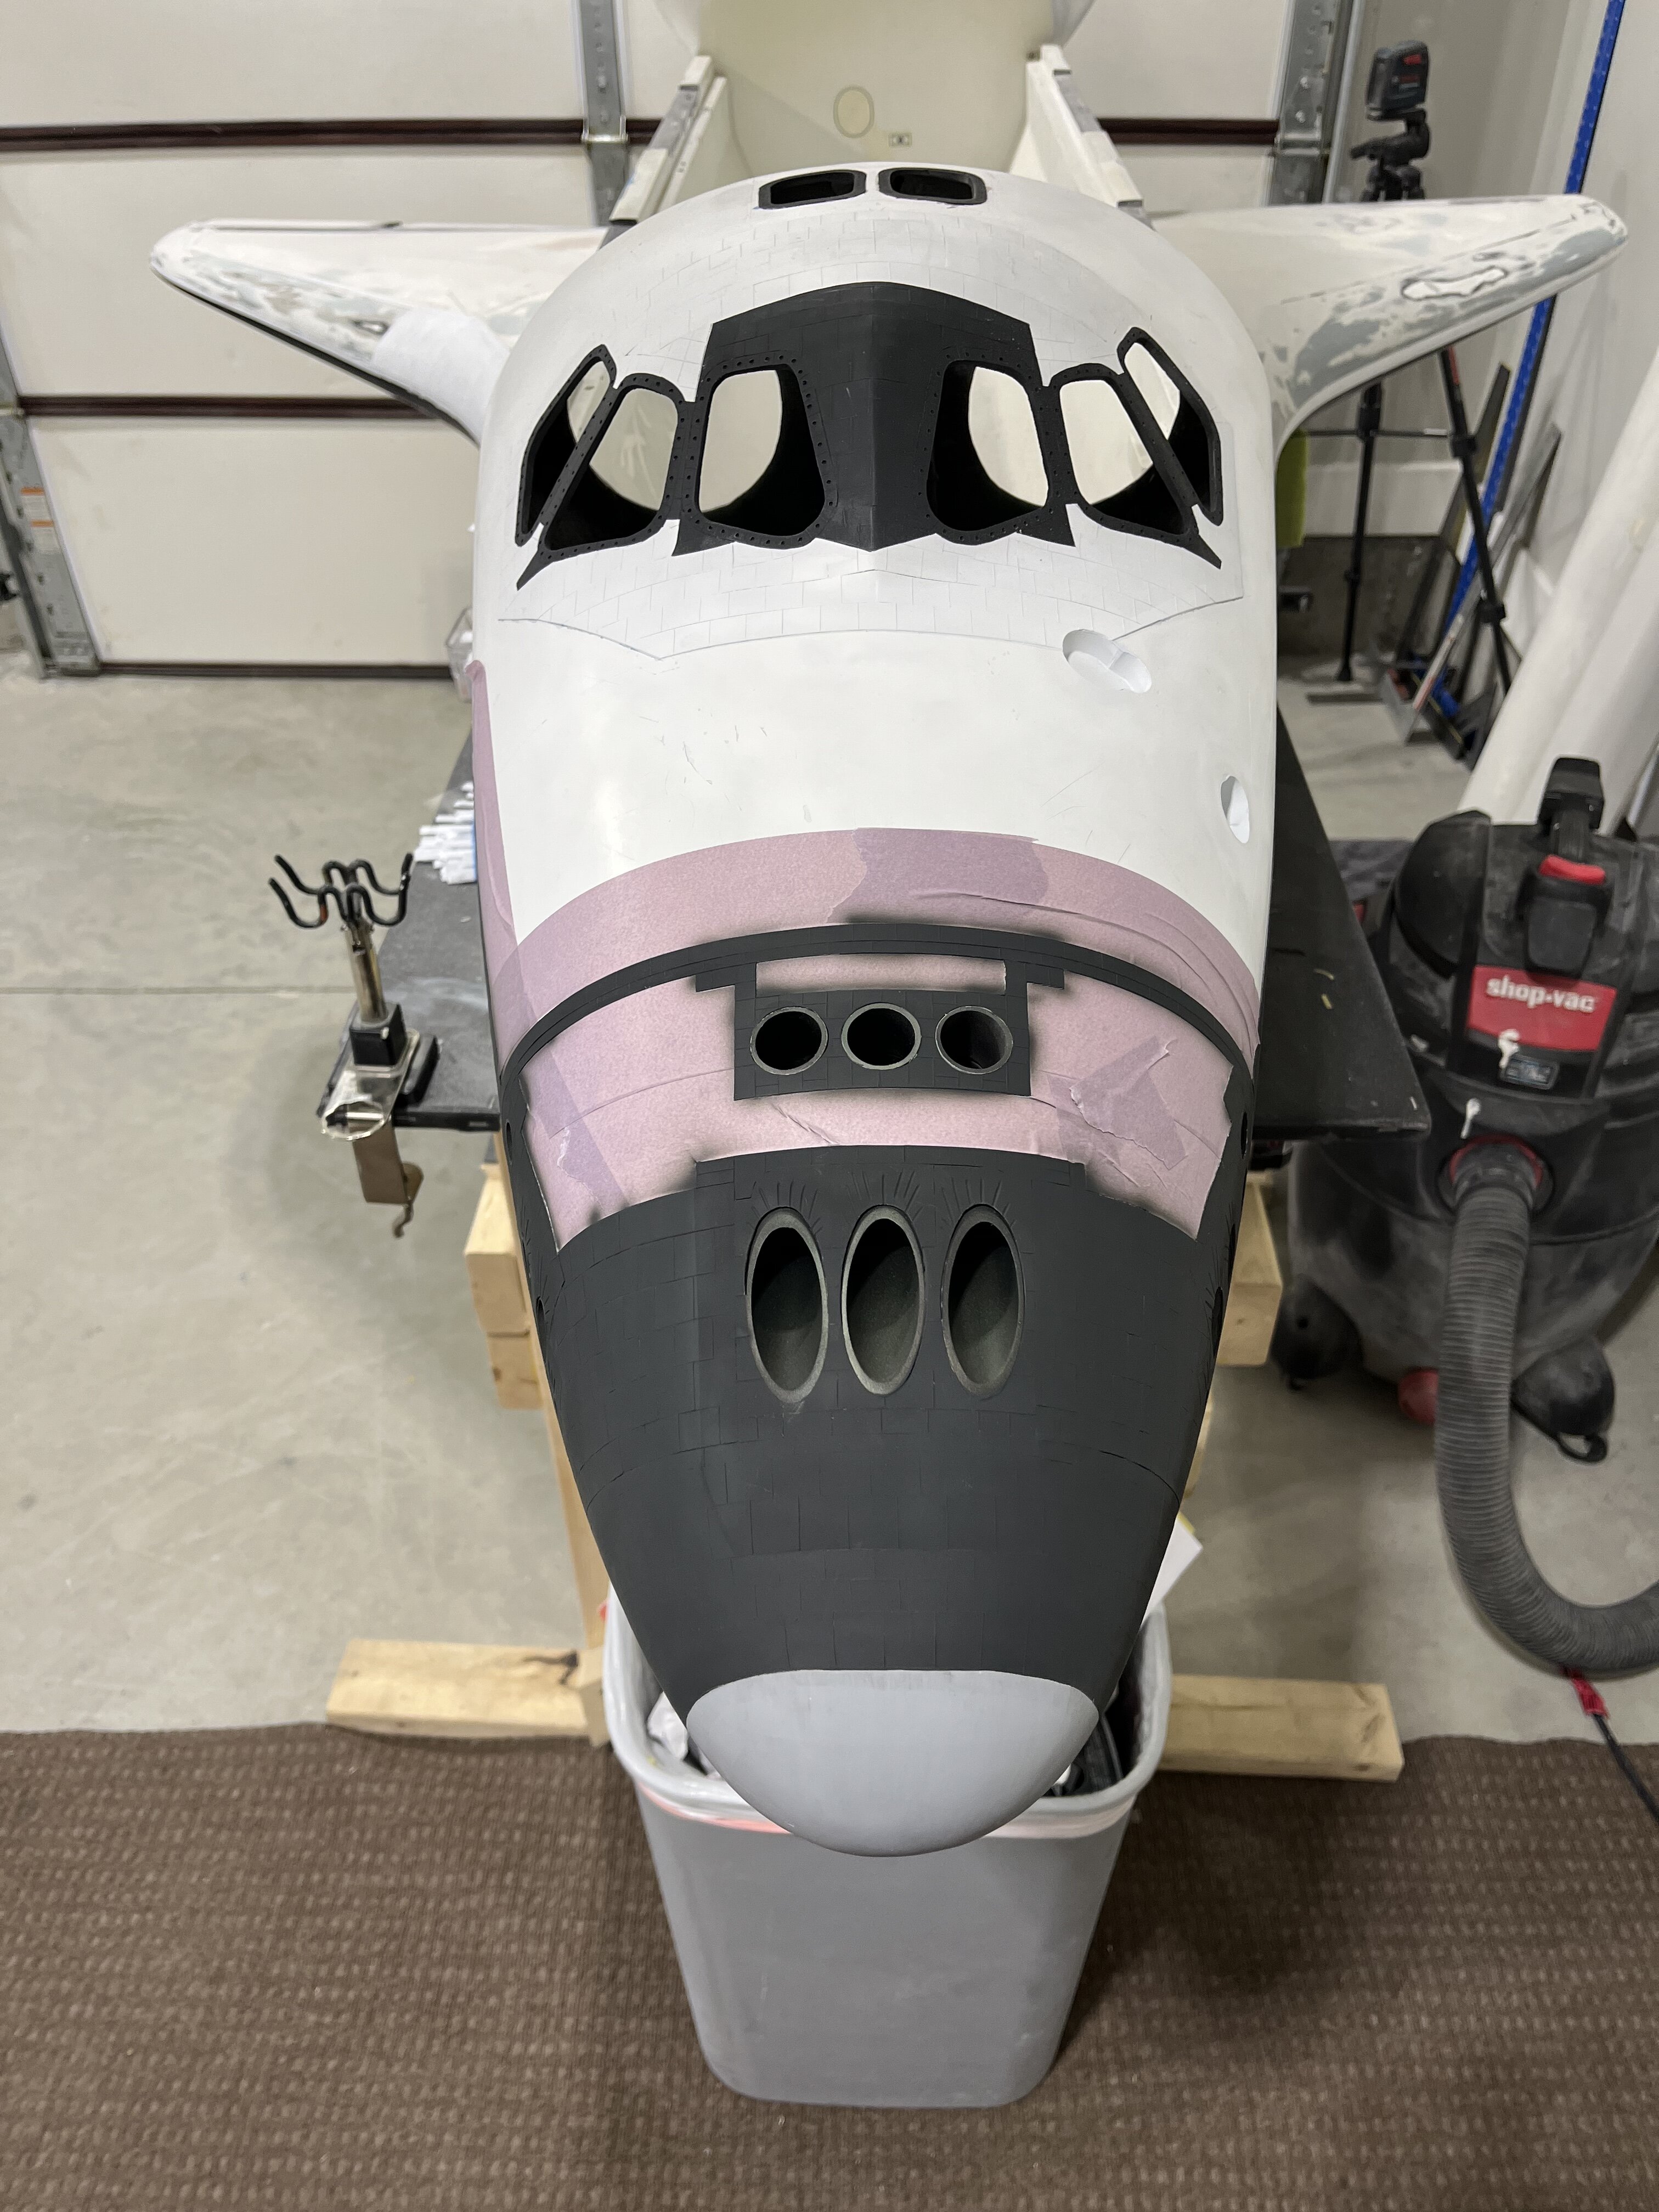
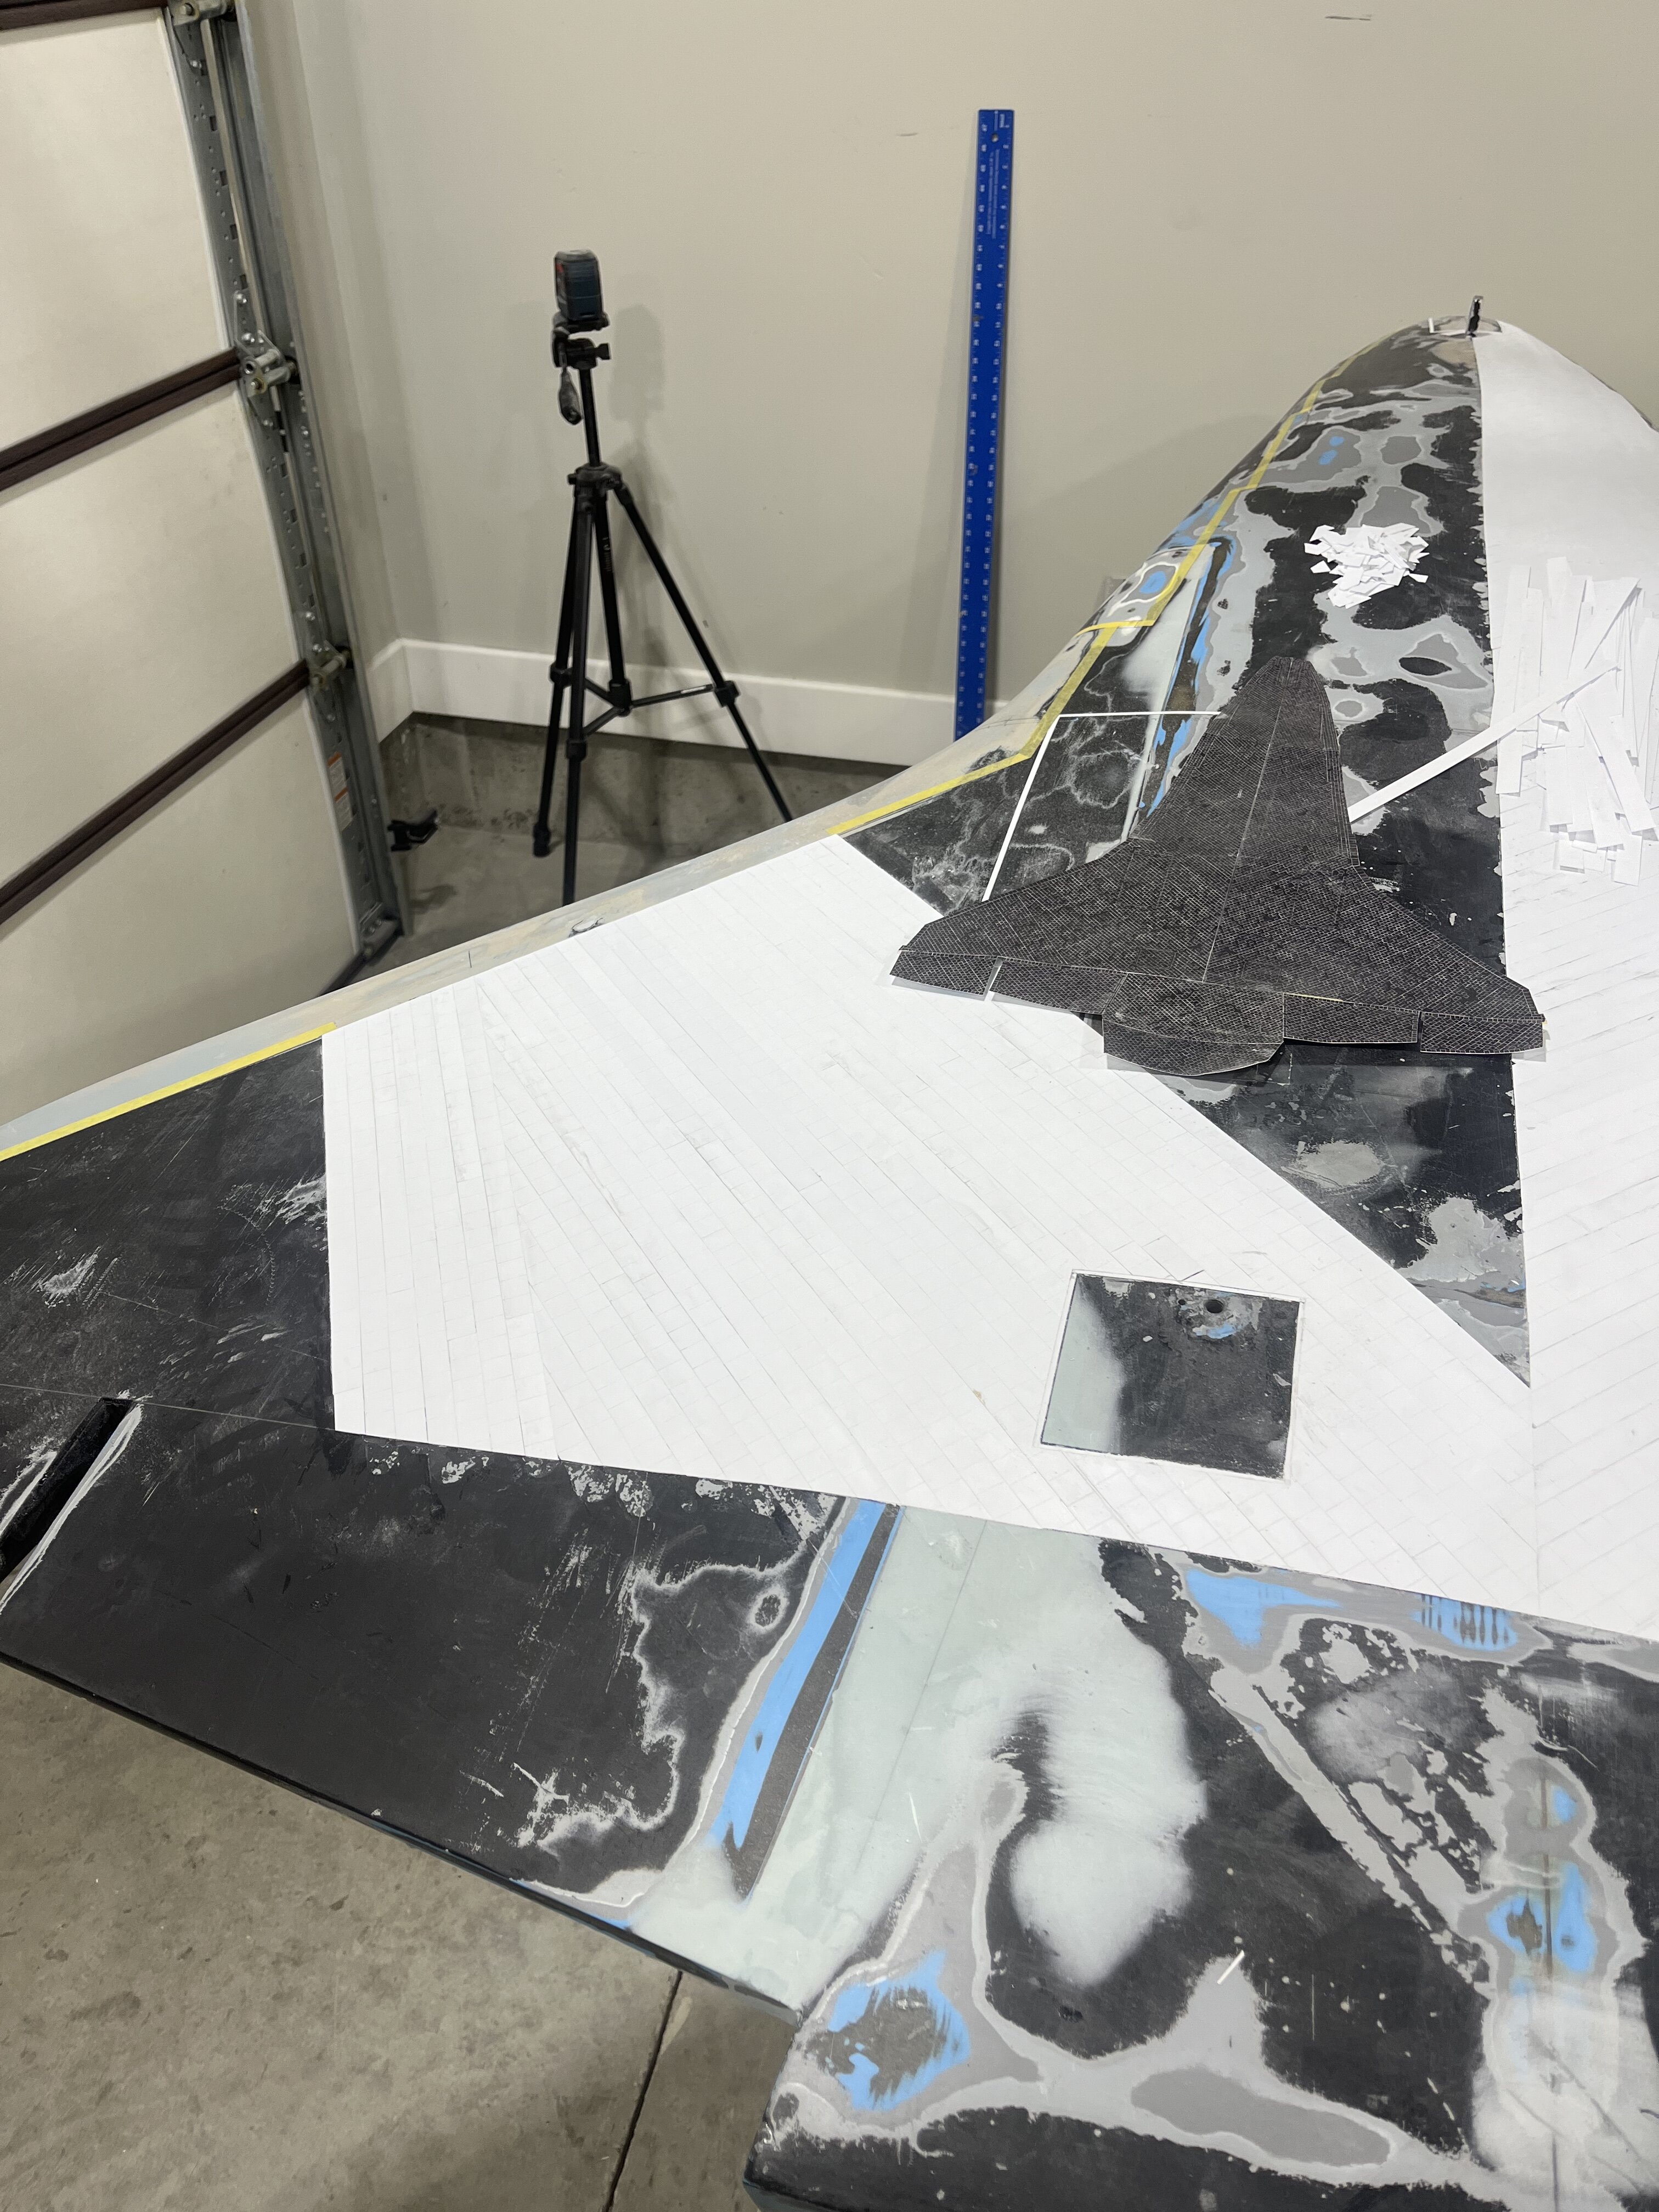
I’ve finally made some much needed progress. All of the tiling from the nose of the orbiter to the beginning of the cargo bay is complete. I’ve got a few small areas that need to be puttied prior to primer. Every place that you see purple tape is where the thermal blanket material will go. (athletic tape.)
All of the thruster nozzles have been cut. The next step is to make a cone out of very thin plastic and put it in the end of each thruster. The company that is making all the graphics for this project has come up with a very good idea. For the windows, an image of the inside of the shuttle (Crew members, and cockpit), will be laminated on the back piece of plexiglass. This plexiglass will then be installed on the inside of the shuttle.
Thanks very much for having a look.
Christopher
-
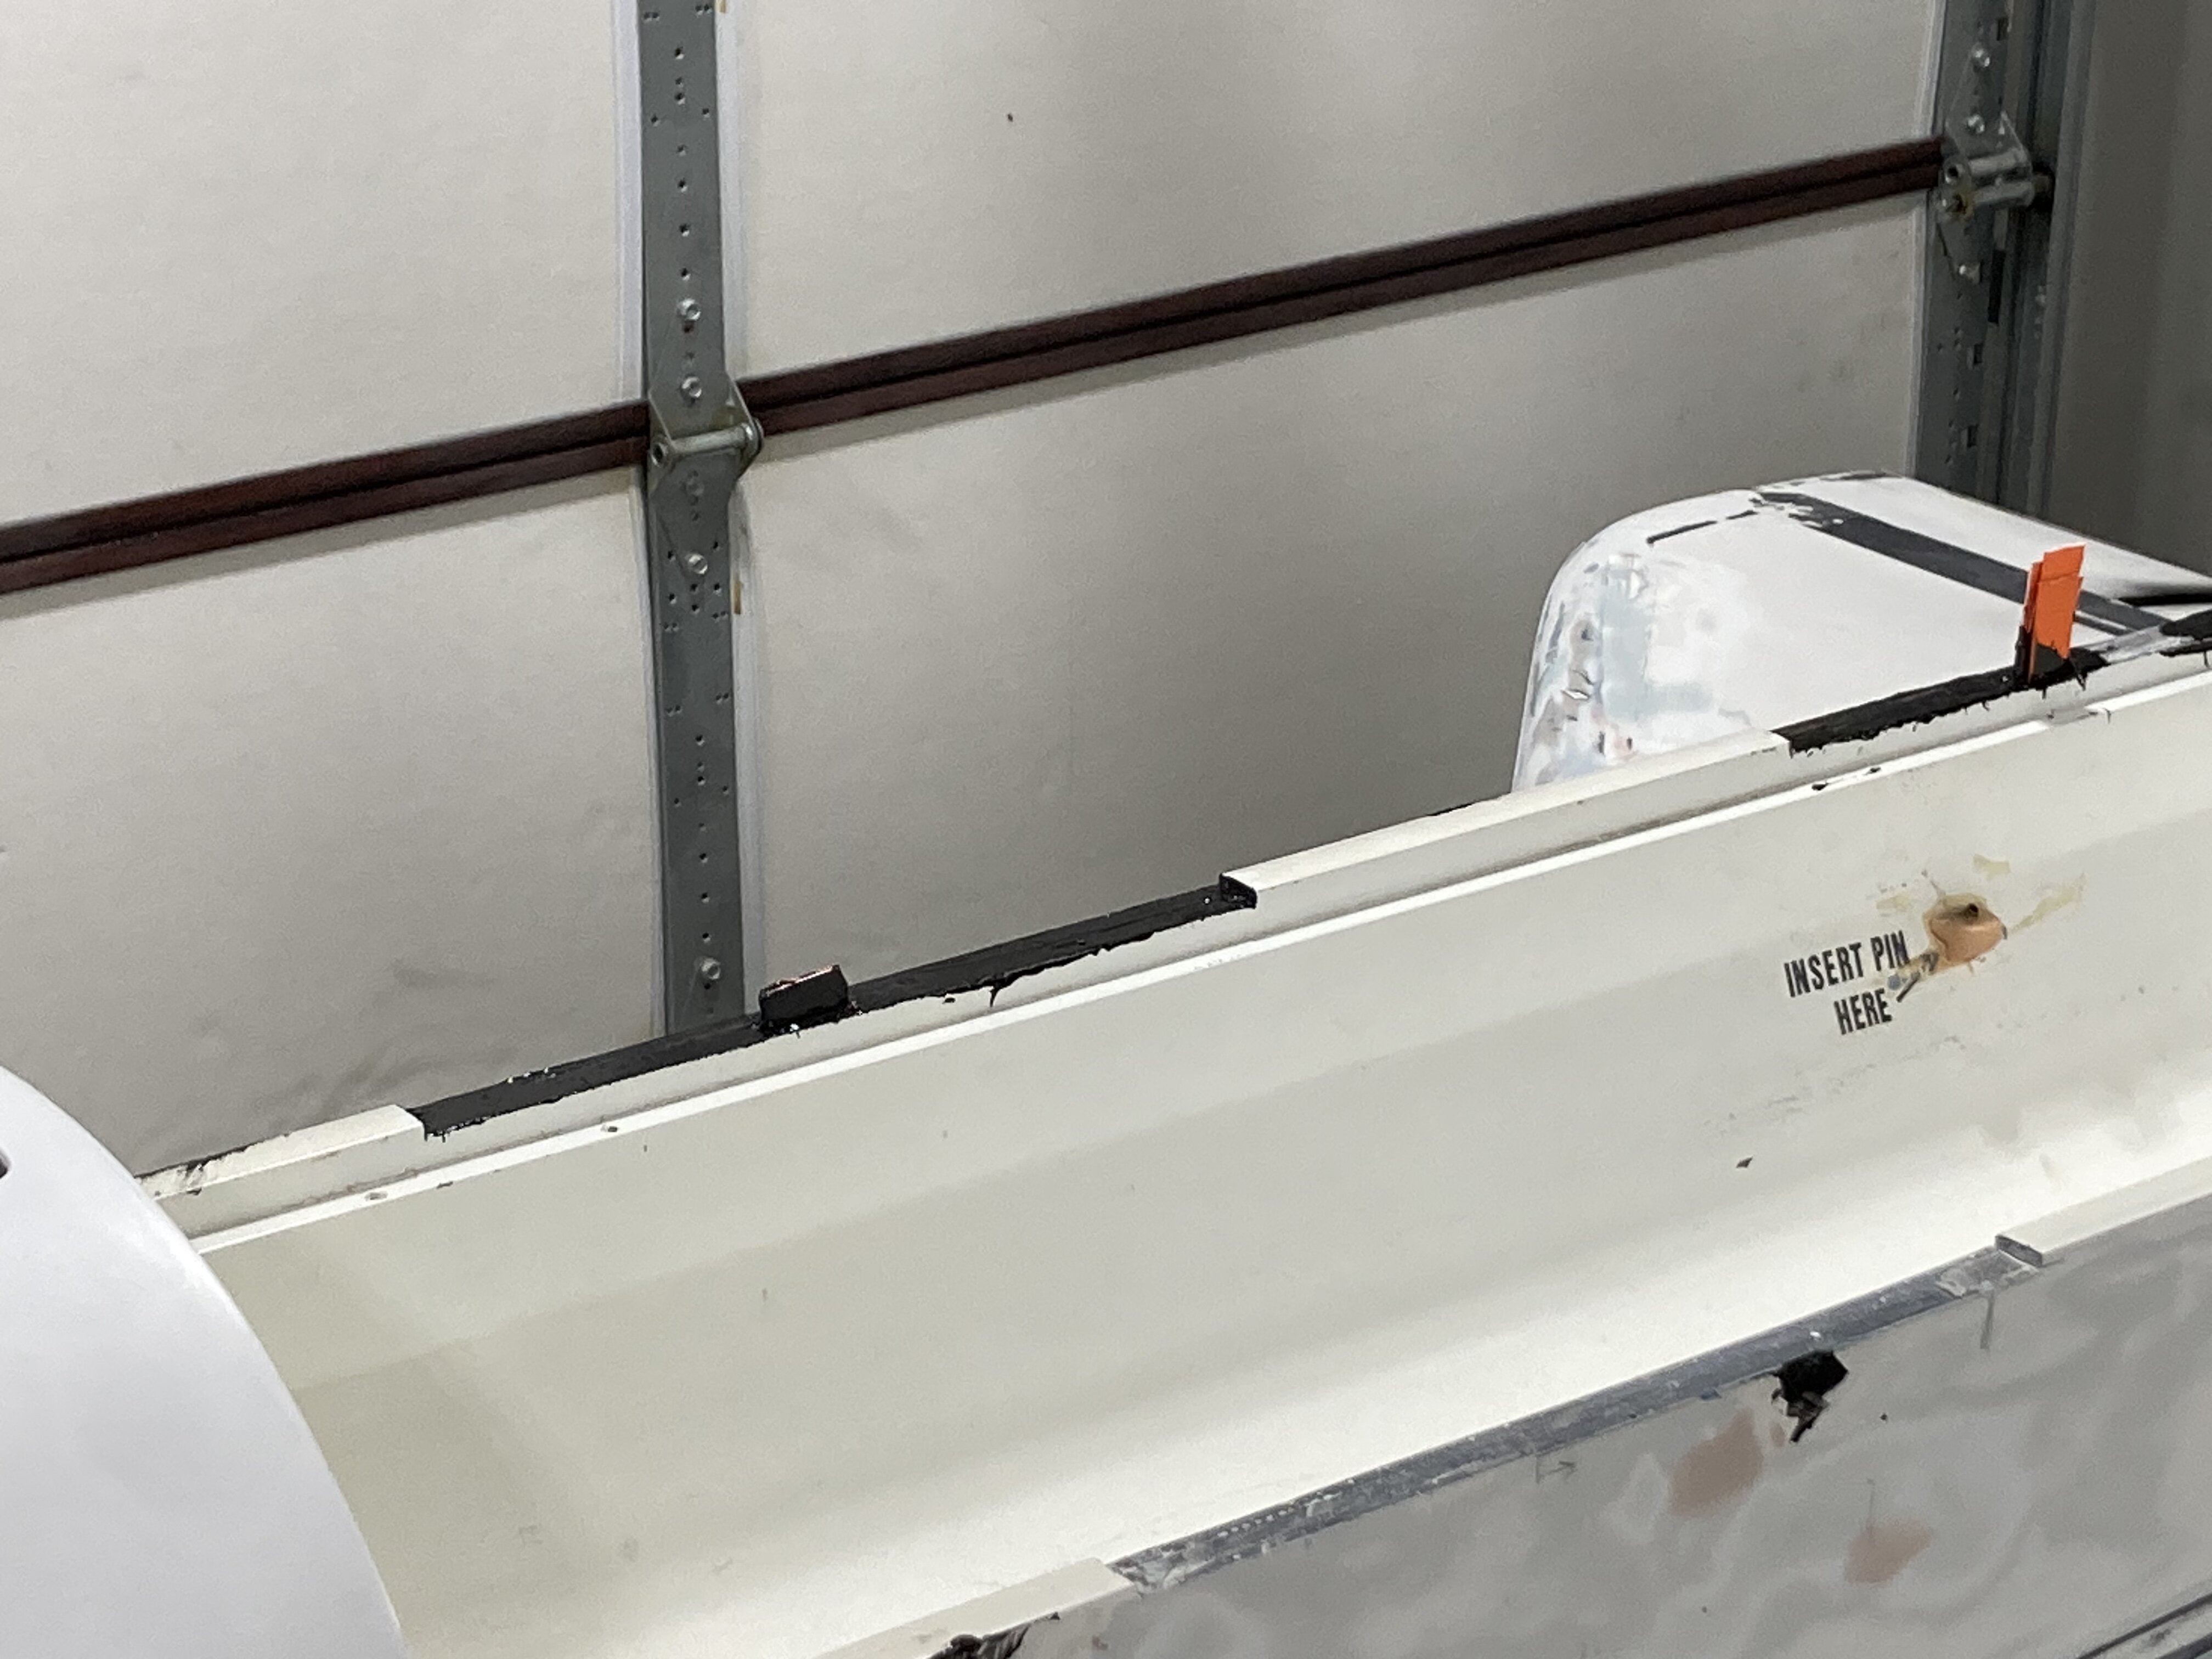
So today, we tackled replacing the original hinges. They were large and very bulky. Chris wanted to make sure that this one glaring eyesore was fixed.
Piano hinges were the best option. We move on to getting ready for thruster installation. Thanks for having a look.Christopher
-
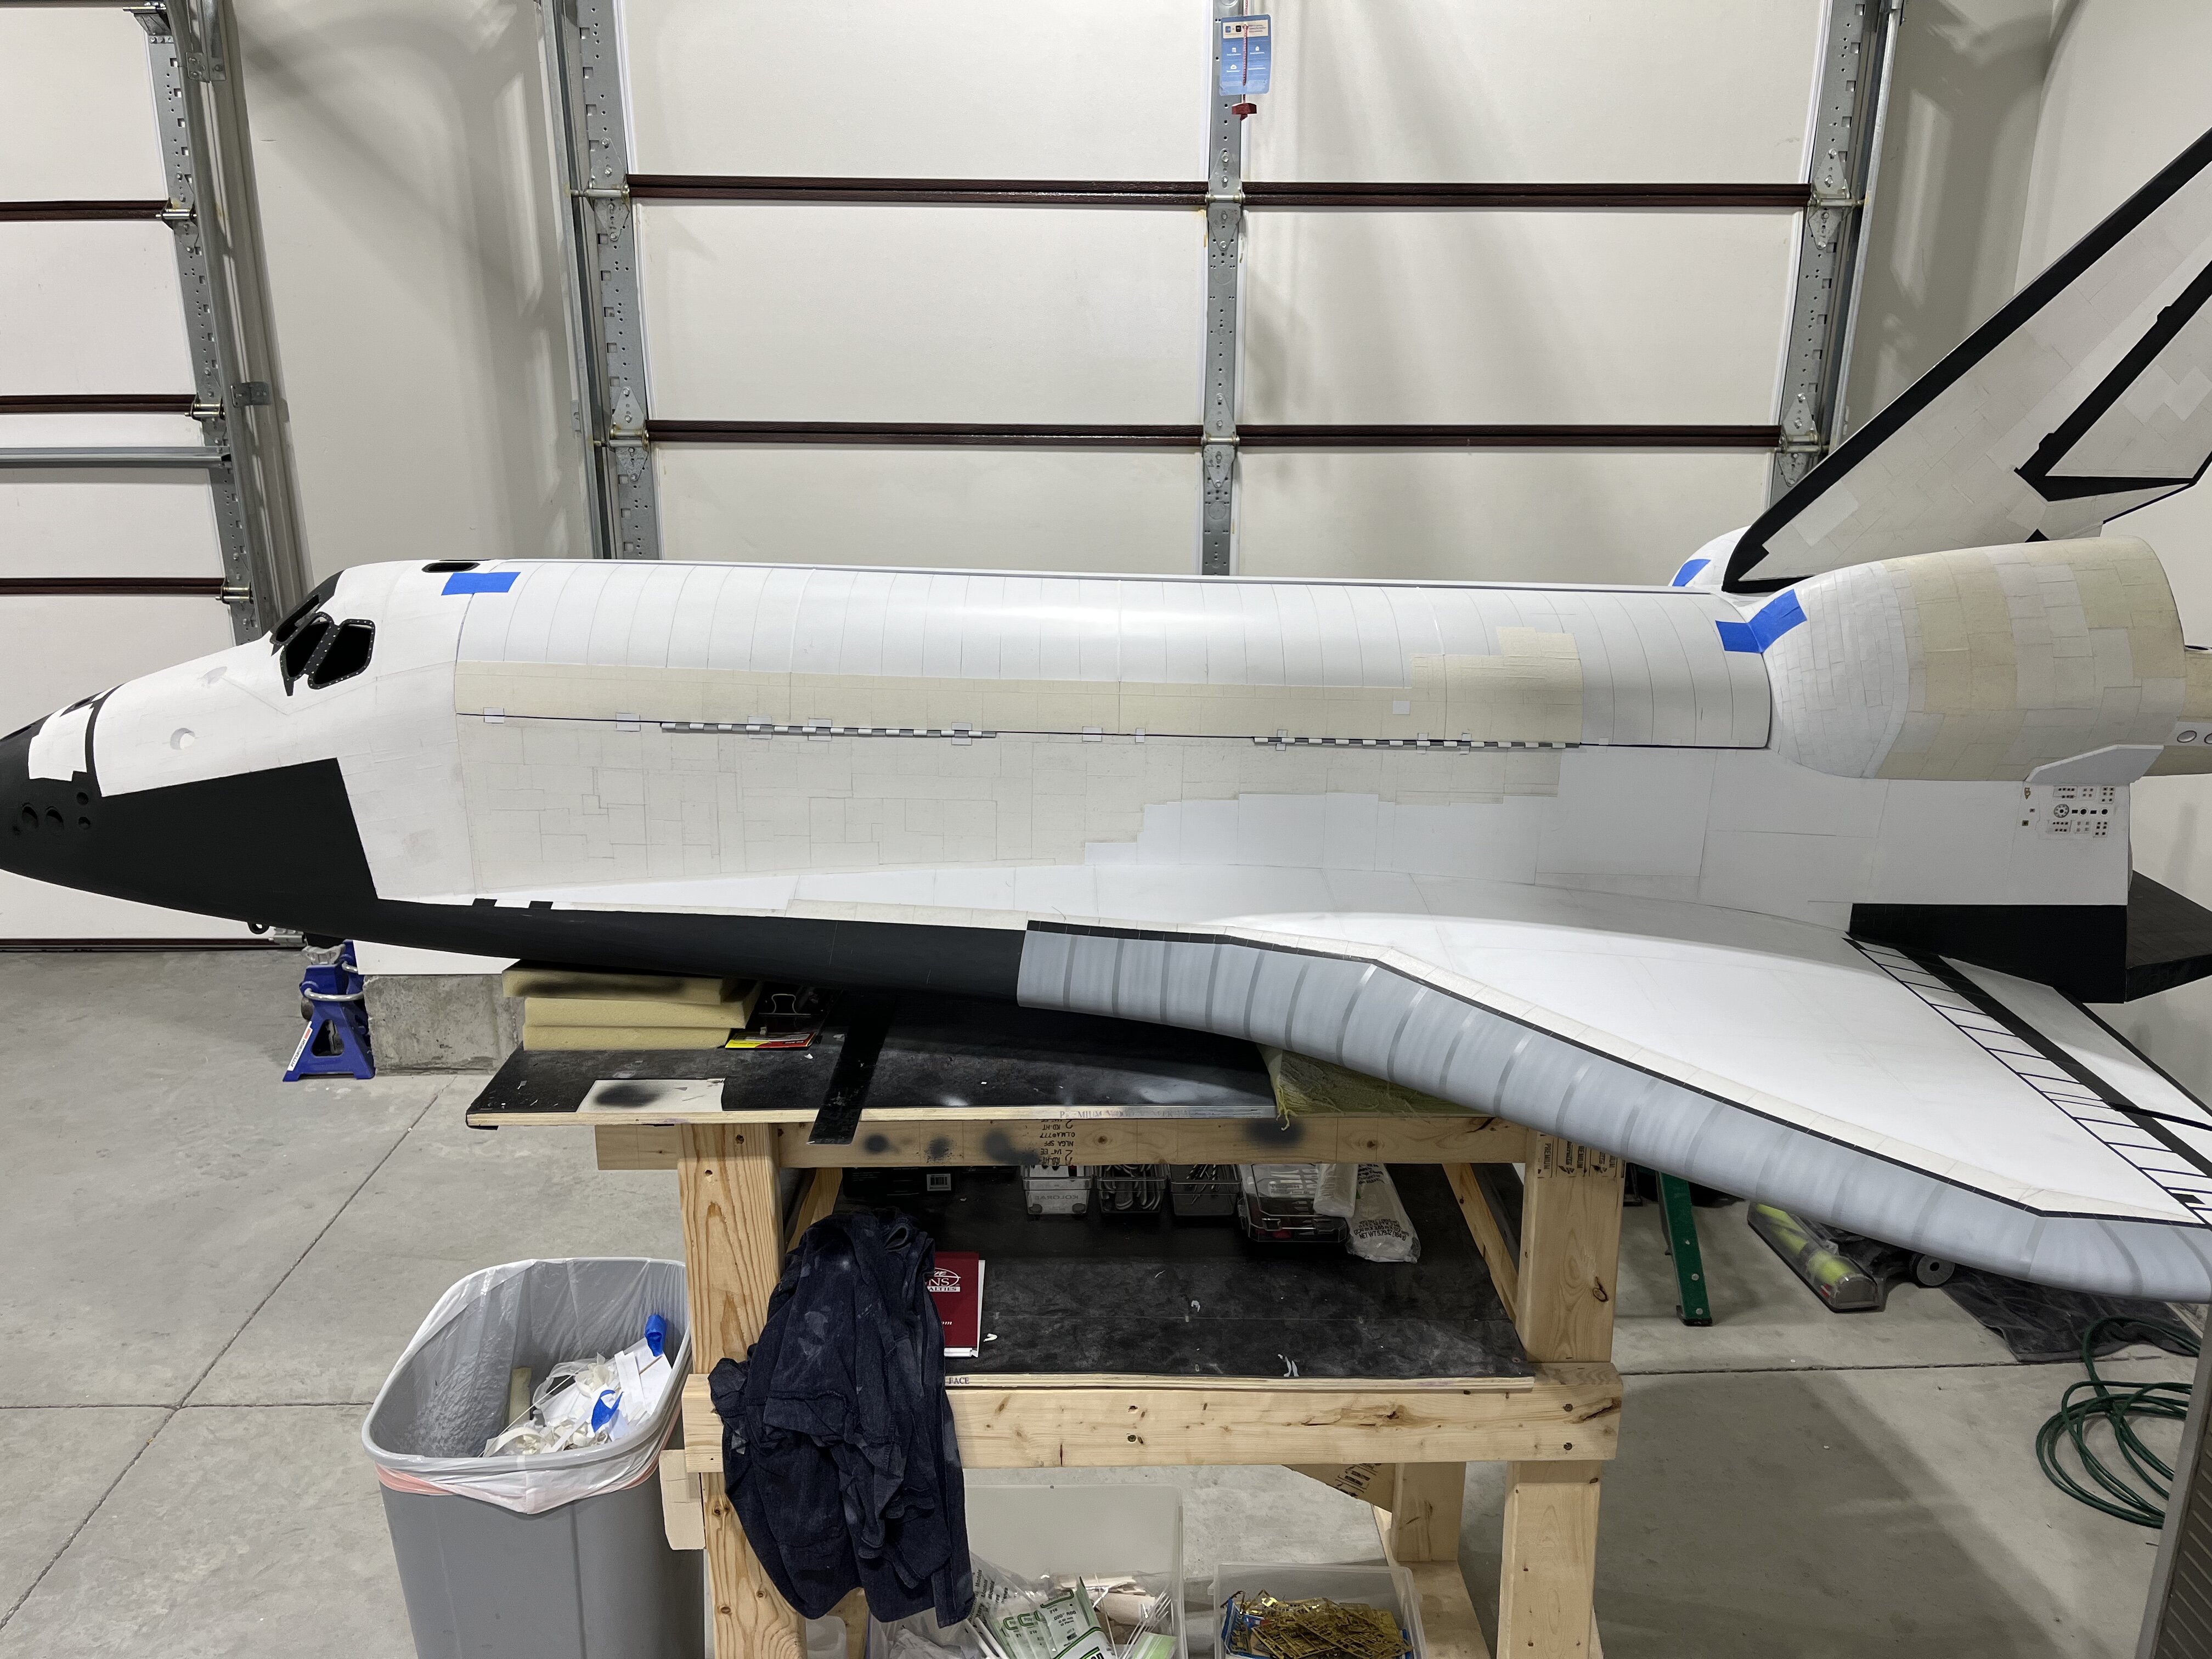
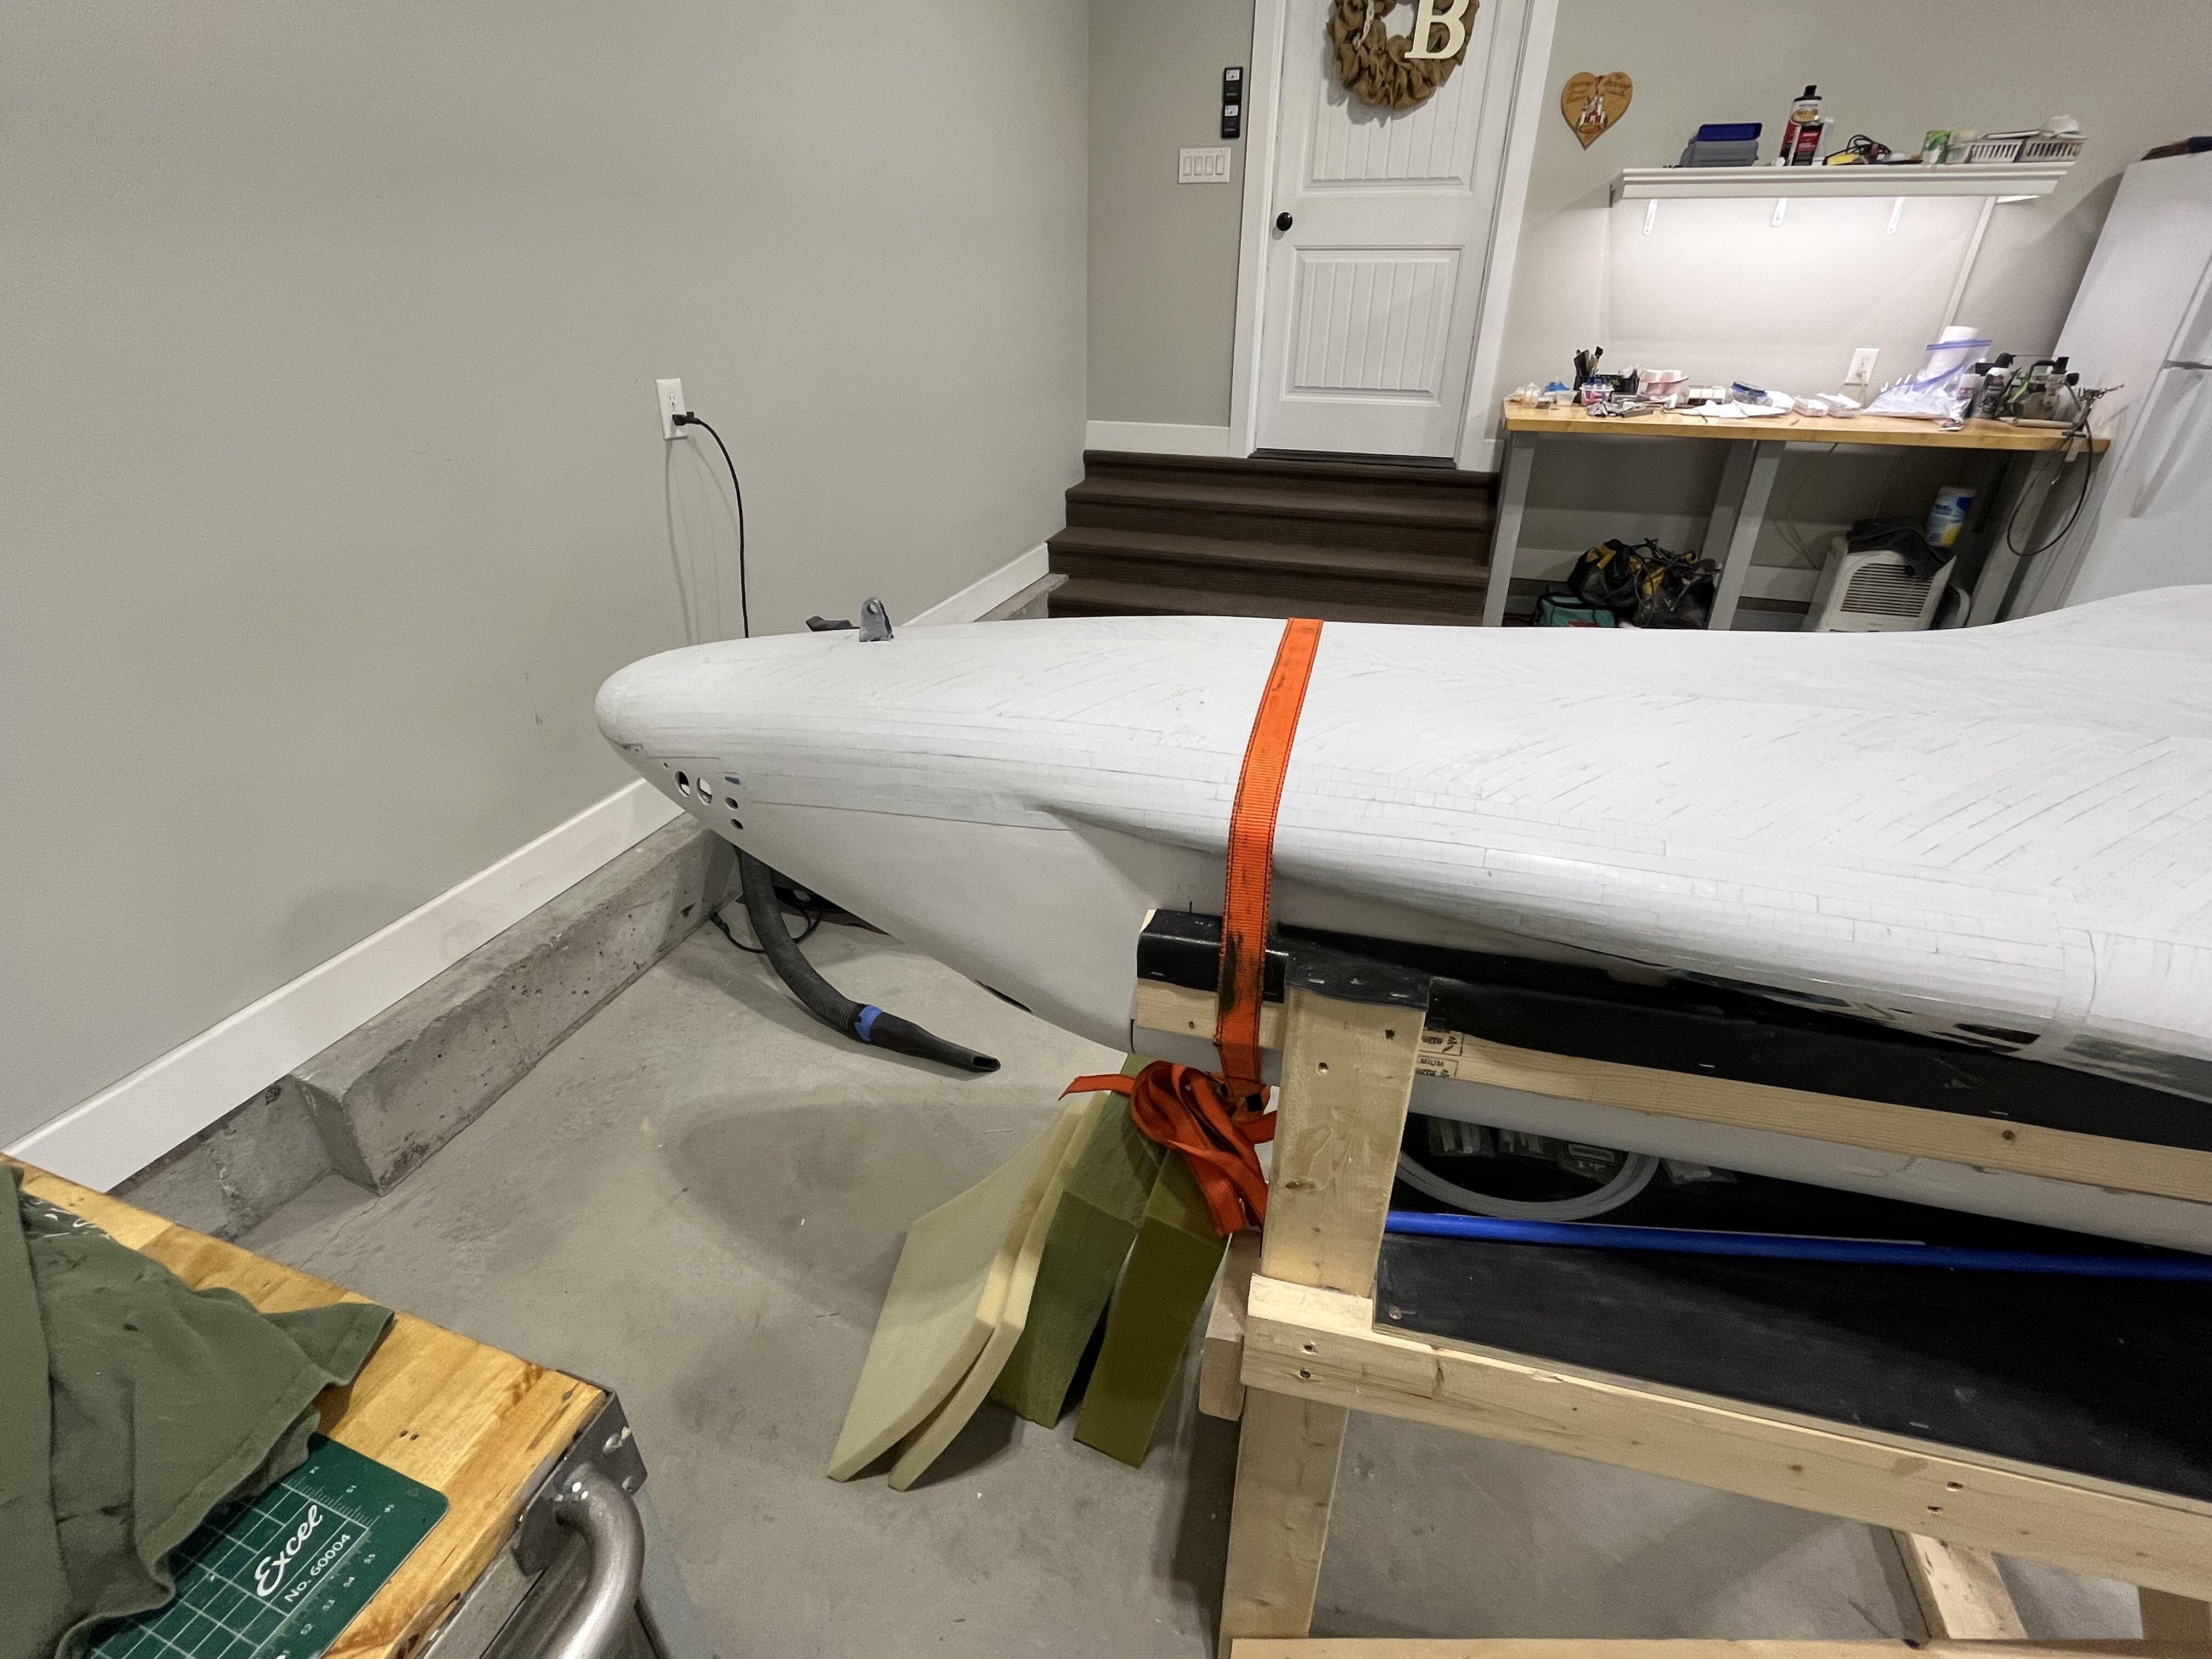
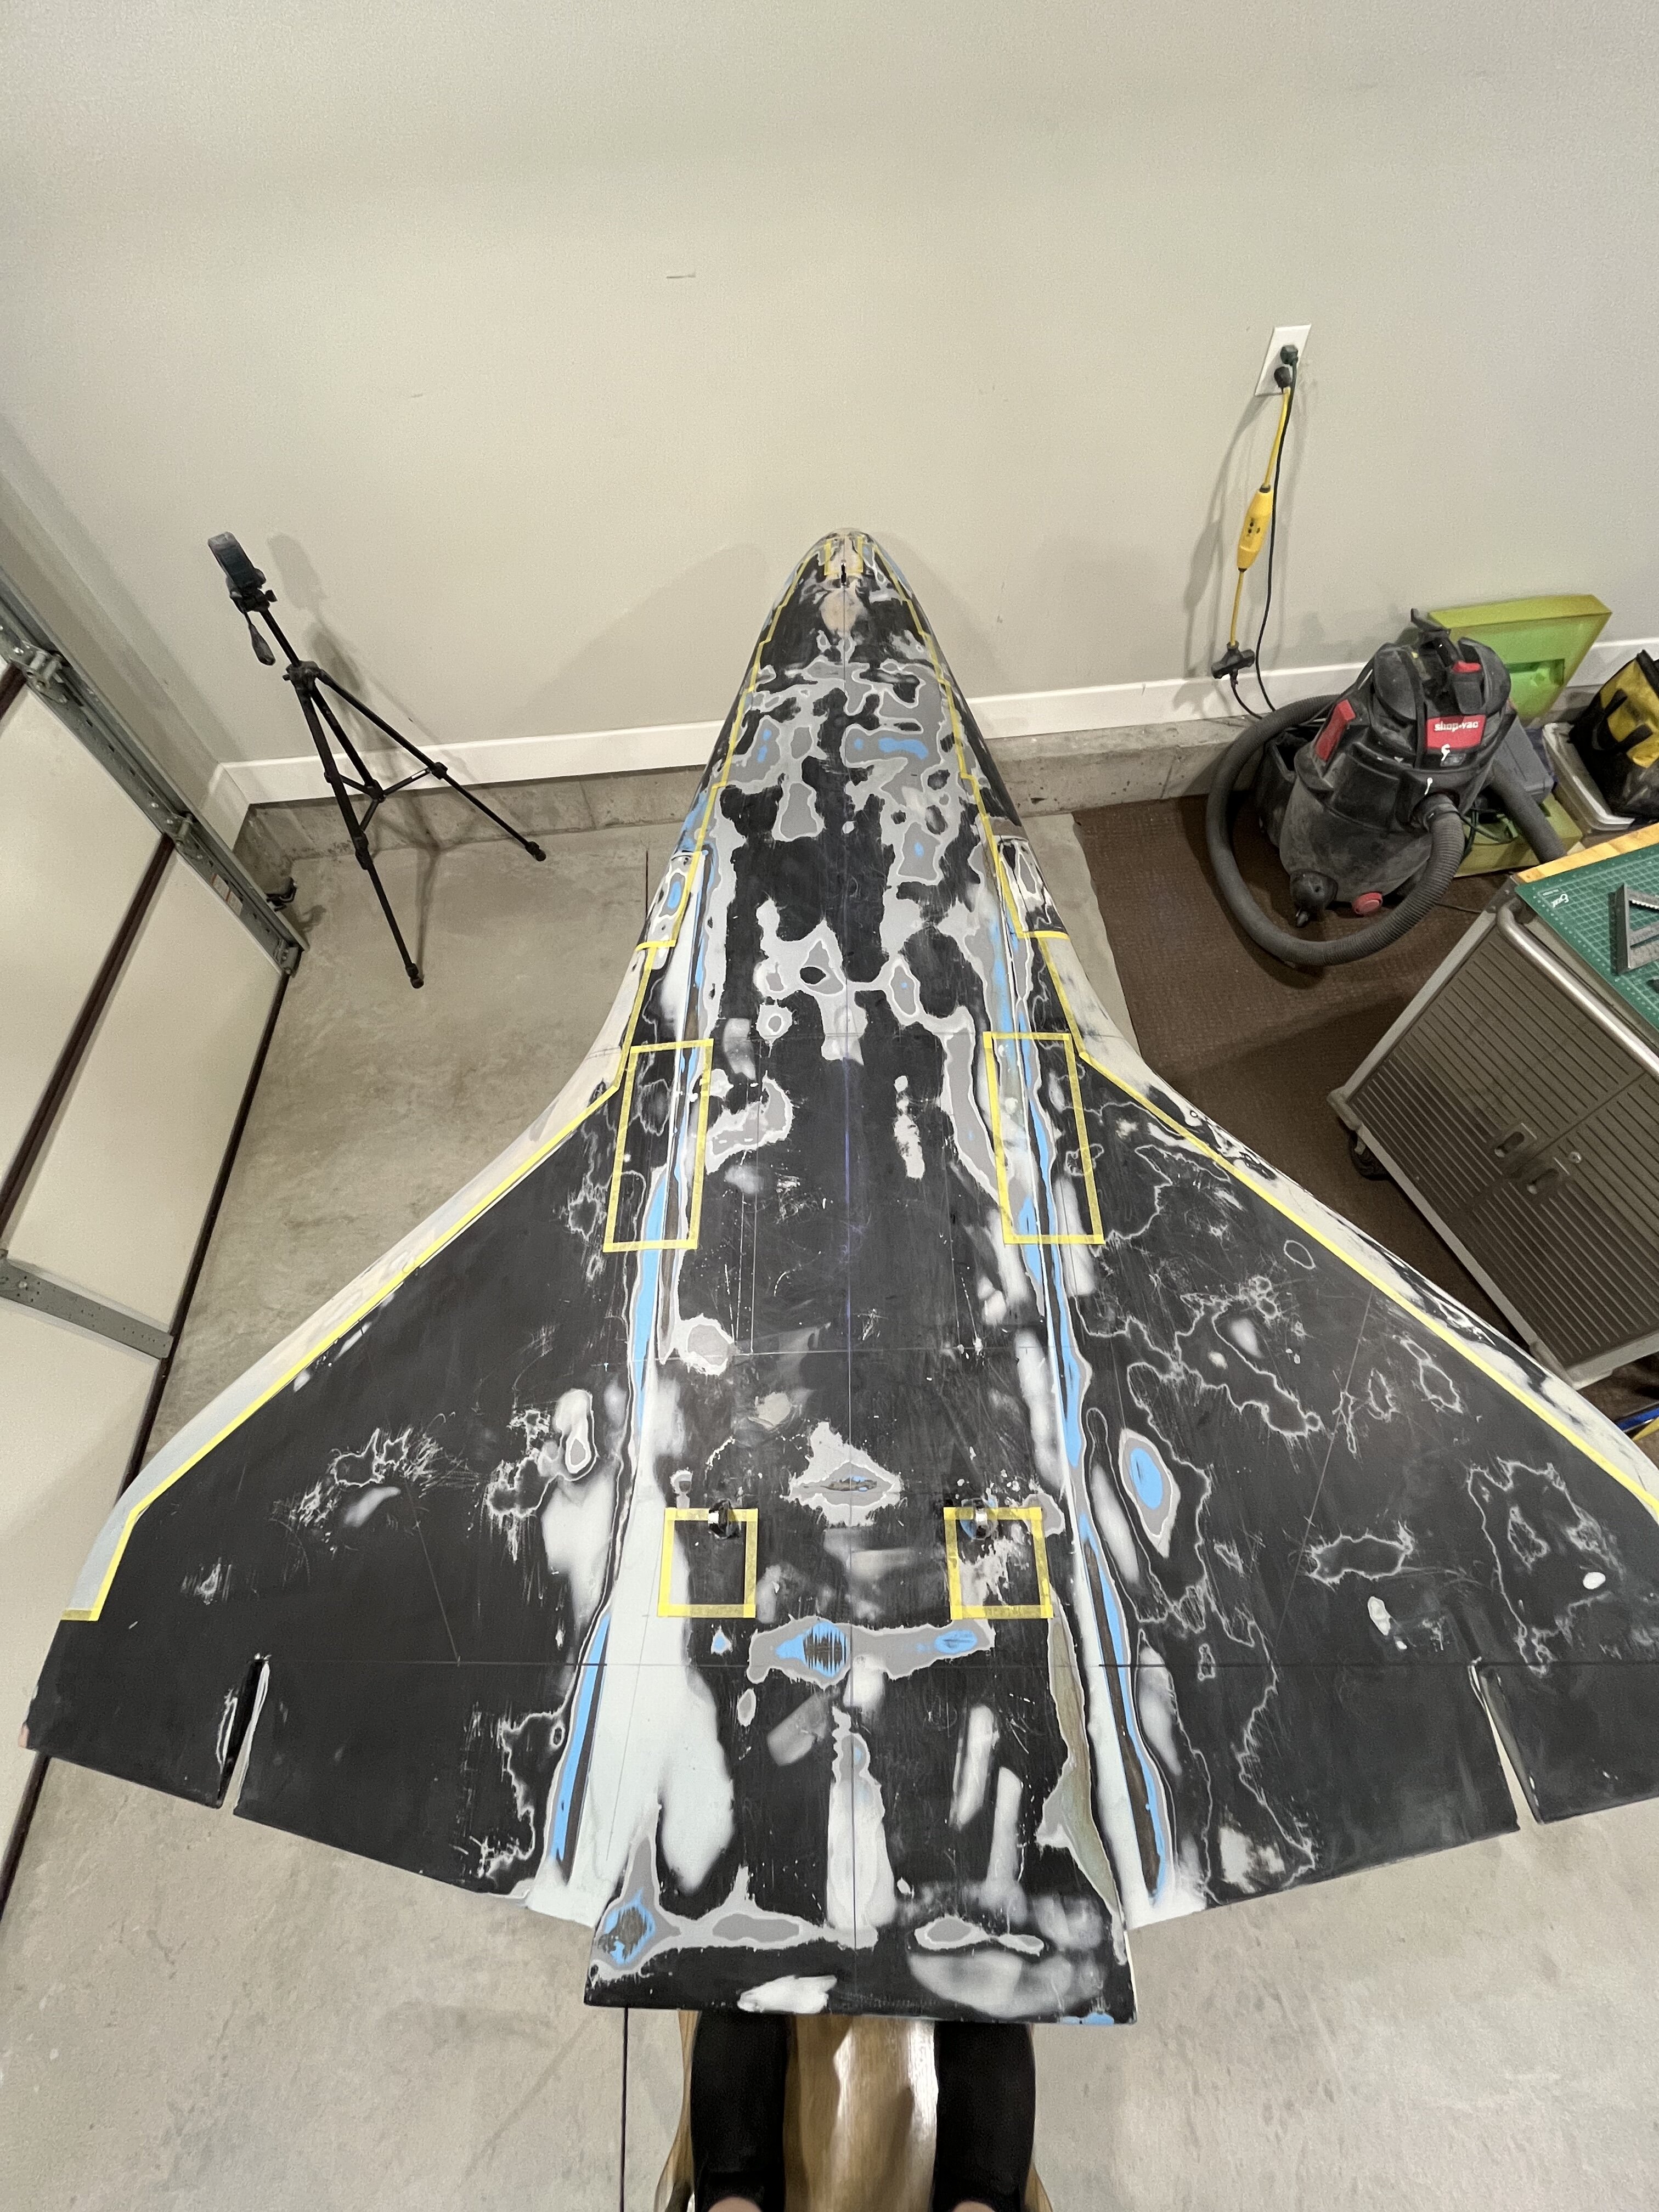
The bottom is now complete. I wrapped the tiles around as much as I could. Tomorrow, I will clean up the glue spots, then blow the entire bottom of the shuttle off to get any dust out of the cracks before it’s primered.
It will then be flipped over in the cradle so that we can start tiling the top. My buddy Chris, from Ohio, is driving down for the day to give me a hand. Thanks for having a look.
Chris.
-
Of the few time I interacted with Dave on the forum, one thing was for sure, he was a straight shooter, and always voiced his opinion. I found that quite refreshing . He will be missed for sure. His contributions to IPMS will forever live on. Prayers to his family and friends.
I wish I would have had the opportunity to meet him in person.
Chris.
-
1
-
-
She’s beautiful!!. And what an awesome paint scheme. Congratulations.
Chris
-
Chris and I have made some progress on the shuttle
-
Love these builds Jmarc. Thanks for sharing.
Chris
-
Fantastic build Carlos. Love the paint job!!!
Chris
-
Another amazing build David. Your attention to detail is off the charts.
Chris
-
Thanks a lot guys for the comments. One of the most important tools that the Mongoose and I have been using, is my laser level. Once we were able to level the shuttle up, we were able to plot where things needed to go. My friend, Myles Marcovitch, was a huge help in up scaling the decals to 1/15th scale. He would print the upscaled images on paper. We then cut those images out and tape them on the shuttle where they need to be located.
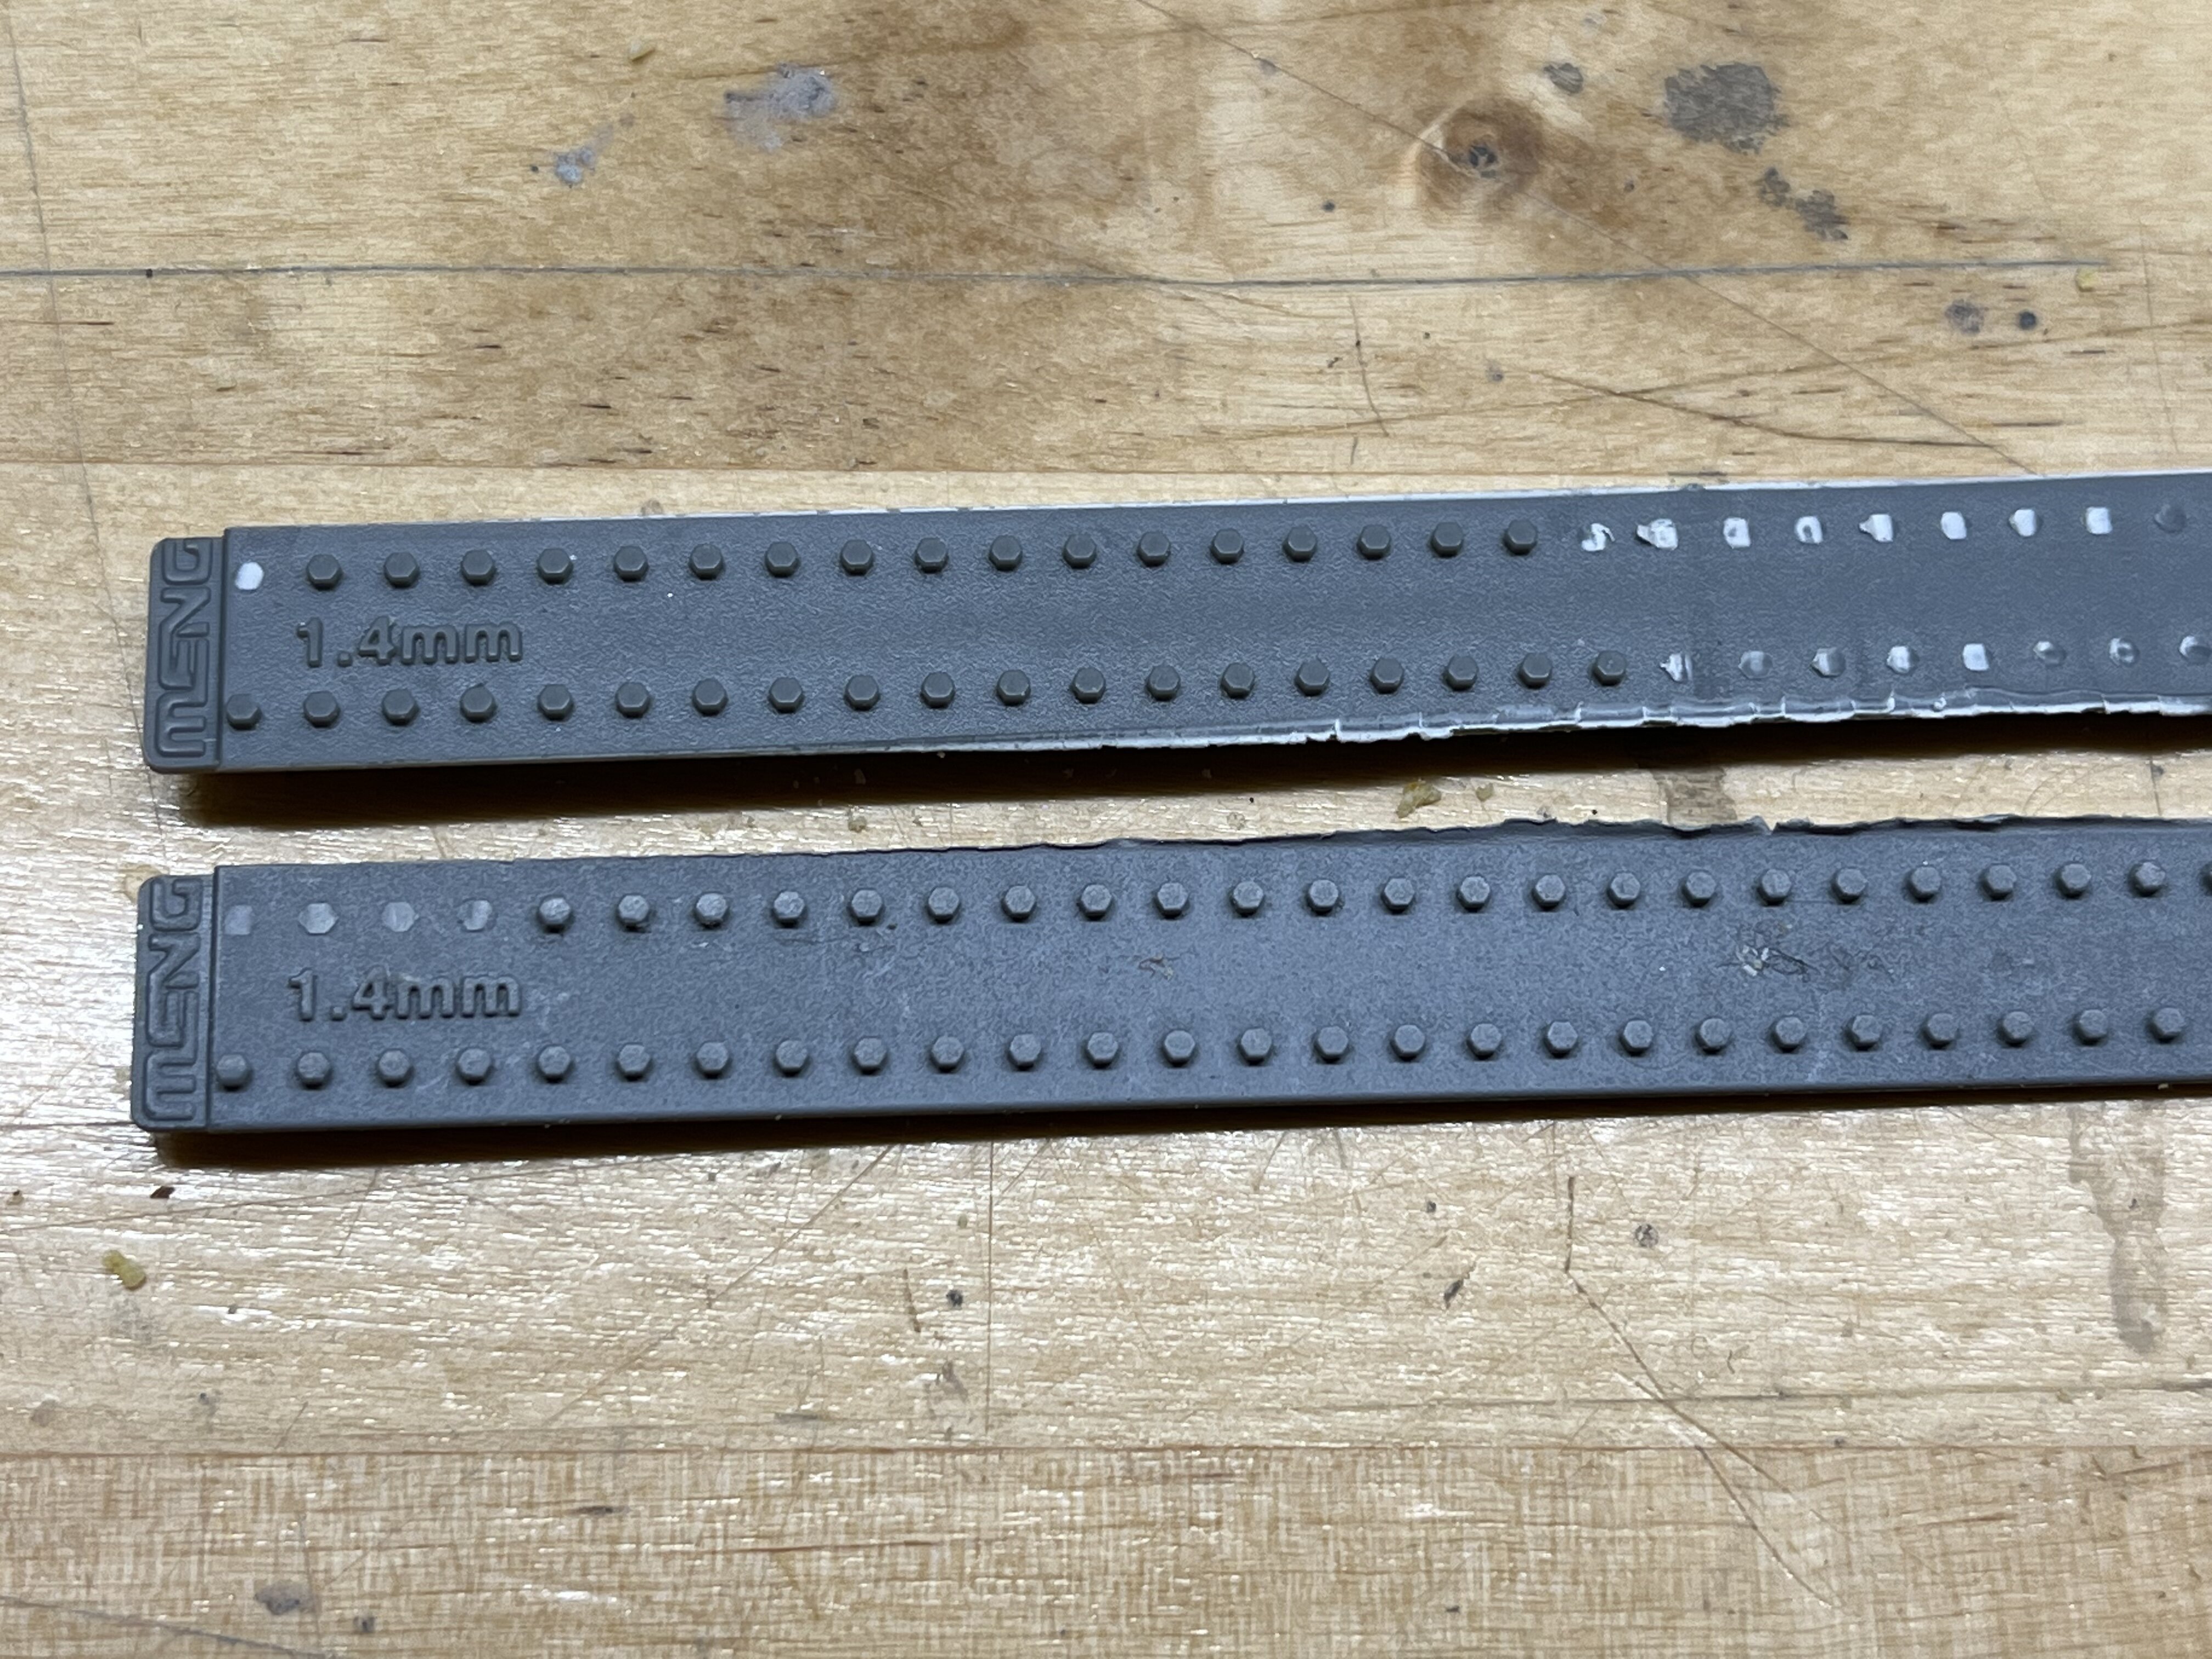
My other friend, Harry Fogerty, pre-scored all the Evergreen sheets to replicate all the tiles. He used his cricket cutter. This was also a huge help as we do not have to individually cut each tile. We have several different sizes that we are using. Around curves, we modify tiles that we already have cut. Lucky for us, the top and sides of the Atlantis are about 90% thermal heat blankets. I was able to replicate those using athletic tape, coatex with woodland, scenics, white glue, and then painted.
It’s been a tremendous amount of fun to be able to work with these guys. It’s definitely been a collective effort from the get go. The mongoose is going to travel down here from Cincinnati next Saturday so we can put in all the thrusters. (Brass and plastic tubing).
Thanks for having a look.


Hasegawa 1/16 Sopwith Camel
in Aircraft
Posted
That is gorgeous.