


ju52junk
-
Posts
144 -
Joined
-
Last visited
-
Days Won
2
Content Type
Profiles
Forums
Events
Posts posted by ju52junk
-
-
1 hour ago, Wolfman63 said:
EZ Line is a great product for doing aircraft (and ship) rigging. Here is a link to the Wingnuts website that has a very good tutorial on rigging a biplane with EZ-Line.
http://www.wingnutwings.com/ww/productdetail?productid=3046&cat=6
Dave,
Thanks for pointing me to this website. It all seems so simple now to do rigging.
-
I will just paint over the nudity.

-
1 hour ago, ghodges said:
Terrific looking Tiffie...but isn't that the car door version? Thanks for sharing!
GIL
Gil,
You are correct. I was thinking this was the Monogram model(I grabbed the wrong model for the pics).
-
44 minutes ago, ghodges said:
I too build almost exclusively 1/48, and occasionally 1/32. I've been building my own display cases for decades, and I'm no wood worker. The plan that I'll post is "expandable", meaning you can adjust the lengths and widths to make a case bigger or smaller as you need to fit what you build AND where you'll place it in your home. The last case I built was nearly twice as big, and was sized expressly to be able to build my 1/48 bombers. You can control costs by using cheaper wood and also by buying shelves as you need them, as opposed to buying enough to fill the case immediately. It's a basic wood/acrylic display case with 1/8th in. glass shelving. It uses readily available adjustable shelving brackets you can get at any good Home Depot/Lowes/Ace; though the longest shelf brackets need to have their end lips sawn off to allow for a larger shelf. The cost of the average size one is probably $200-$300, and the largest is probably closer to $400. The most expensive item is the acrylic sheet, which is no longer cheap. But, once you learn to cut and drill it yourself (easy, actually), you can save money there by buying larger sheets instead of ordering it cut to size. And, the only tools you need are a saw (electric one helps, but a hand saw will do the job too), a drill, a box cutter tool (to scribe and snap the acrylic), and screwdrivers (powered ones save time and effort too); or you can simply use a hammer and nails. Extras that help, but aren't necessary include corner clamps, and adjustable clamps.
Here's some pics of the cases themselves...none of them are lit, though you could do that too if you wanted...
The last pic is the BIG case...note that the C-119, B-47, B-45, and the P-3 are all 1/48. You can see the unused shelf brackets lying in the bottom. When I need more shelves, I'll buy 1 or 2 at a time and add them at that time. Each of those large shelves costs about $30.
Let me know if you have any questions. Hope this helps!
GIL
Thanks Gil for the blueprint and pics. I will try to build one.
-
2 minutes ago, Rusty White said:
Watch your newspapers for stores going bankrupt or closing. I picked a beauty of lighted display case from a bankrupt jeweler. Used furniture stores and your local Craigslist have them as well, but you'll need to keep an eye out.
Rusty,
Thanks for the info. I will keep an eye out.
-
I need some suggestions please. I only build aircraft in 1/48 scale. The planes are displayed in my basement on wooden shelves mounted on the walls of the basement. My collection of built aircraft is exceeding 200+. I used to be able to keep up dusting off the planes. But my collection is growing so large so that I cannot keep up with the dusting off. I need to display my models better than having them on wooden shelves exposed to getting dusty. I looked on line and I cannot find any good clear acrylic floor model display cases. I do not want to spend a arm and a leg(no more that $500/case). I also cannot find any large enough for 1/48 scale bombers(these plane can take up a lot of space). I now I could scale down to 1/72nd. I prefer 1/48th scale. Any ideas?
-
Hasegawa's Hawker Typhoon Ib bubble top. Eduard's PE cockpit, Resin wheels, Resin Bombs, Eduard's Canopy mask. AK paint, AK wash.
-
Hasegawa's Grace. Eduard PE cockpit, Resin Wheels, Eduard Canopy mask AK paint, AK panel line wash.. Japanese canopies would be would be tedious "greenhouse canopy" without Eduard's canopy mask, saves a lot of time.
-
Hi Gil,
The F-105 you mention must be P**** G*****. Over the years the Air force has really changed to allow what might politically incorrect nose art from being allowed in WW2 with no censorship and not allowed(except for the gulf war) today. I guess the same could could be for allowing pin ups in the barracks. I still have a WW2 pin up(Betty Grable) my father had from WW2. Too bad I will not have the tail art showing, this is why I got the aftermarket decals.
Rusty,
I am not experienced enough with photo shop to put clothes on the naked lady. I do have something called snap and paint on my laptop and i can erase the picture on the model like I did to the picture above.
-
Thank you for the info. When the P-40 is finished I will post the pictures of the model, but not include the naked lady on the tail.
-
I am almost ready to put some decals on a P-40 tail that has some naked ladies for tail art(change of pace for naked ladies nose art). A squadron of P-40s operating in the MTO had some interesting tail art. My question is if I post in the forum the finished P-40 with the naked lady(or naked lady nose art) will I be breaking a Forum rule of posting a plane with a naked lady decal? I do not wish to offend anyone.
-
Nice job! Out of the box? Matchbox kits are known to have "trenches" for engraved panel lines. The engraved panel lines ok in this kit?
-
I agree with everything Gil has to say on this subject. Let me add,
I am a dinosaur, one of those "graying modelers", 55 years of building models and going. I feel that kids of today build what they build is a generational thing. When I was growing up mostly every ones father was a WW2 vet (including mine). In general, planes, tanks and ships of WW2 are not familiar with todays younger generation. Hence, todays youth build something more familar to them(Gundam and SiFi). Also there was not much to do for a kid growing up in the 60s and early 70s. You could play outside, play sports or build models.
-
Sorry for asking. I see you metioned using PE.
-
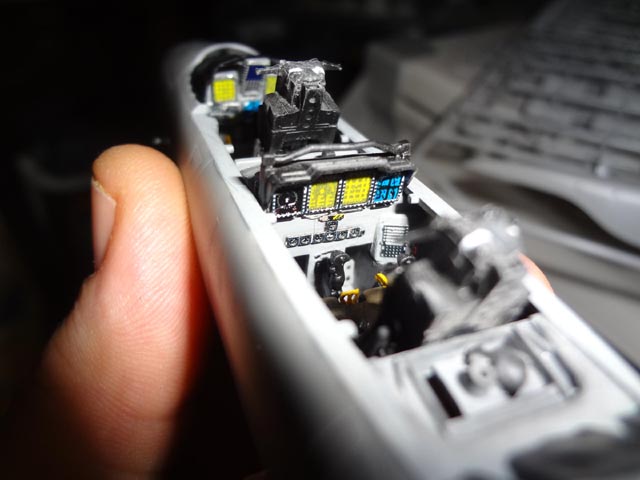
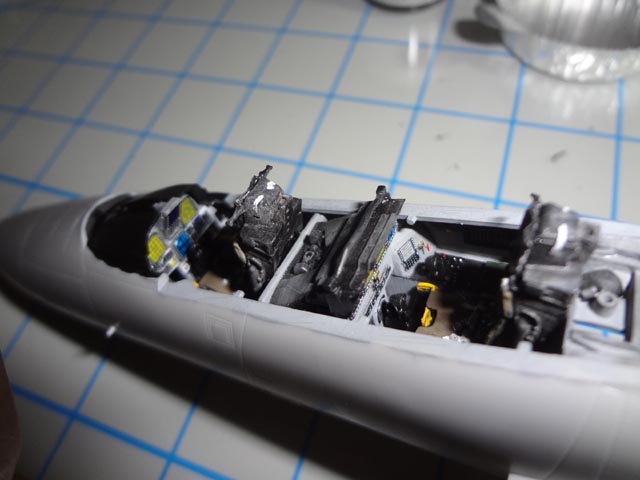
1 hour ago, Wolfman63 said:
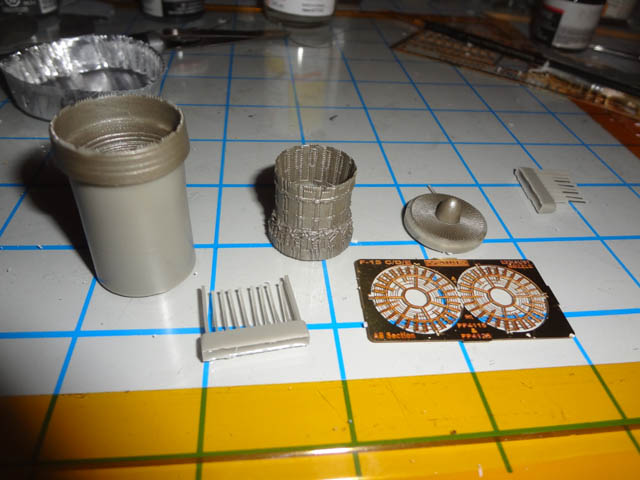
Working on the Revell F-15E Strike Eagle kit. This is my first build for my new website ( https://davidsscalemodels.com/ ). Using the Eduard cockpit detail kit, Quick Boost ejection seats, and the Ares resin Turkey Feather exhaust.
The cockpit is looking good. I had to add a spacer under the resin seats to raise them to the proper height.
The Ares resin exhaust cans are built and detailed.
Nice job on the cockpit and exhausts. PE or decals for the instrument panel displays?
-
Thanks Gil, I will be using wire . Awhile back I bought some wire in different diameters. I will post pictures when the Walrus is done Wish me luck.
-
 1
1
-
-
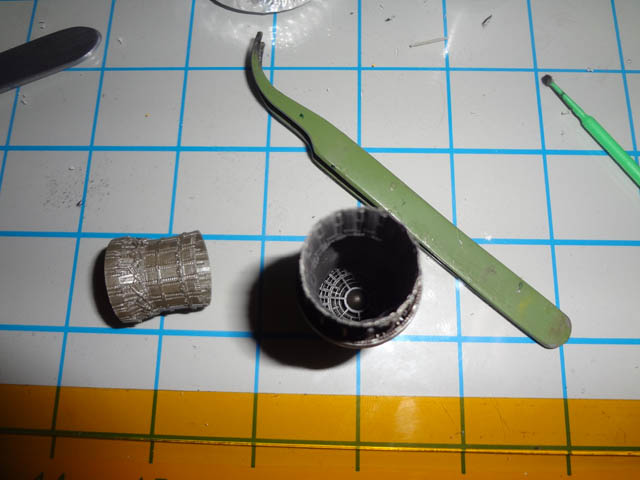
I have been putting off building the new 1/48 scale Airfix Walrus. Rigging a biplane scares me to death! I sure this question has been asked many times? I searched the Web for the best/easiest way to rig a biplane in 1/48 scale. I could try drilling a hole putting the rigging wire through(EZ line) and using Superglue to hold the line in the hole. Drilling a dimple on the bottom wing and then Superglueing the EZ line (pulling it taunt) in the dimple. Is this best/easiest way to rig? Should the rigging be done after painting and decals are put on? If so, how are the dimples handled? I do not want to ruin the paint work by filling and sanding the dimple. Anyone have any ideas on how I should go about this? Thanks.
-
19 hours ago, ju52junk said:
Starting to build the T-33A from Academy with aftermarket decals of a VTANG bird. The kit is originally a Hobbycraft kit. Should be a simple build. One of Hobbycrafts better kit.
Changed my mind about using the old Hobbycraft kit. I just ordered the Great Wall Hobby T-33 (better detail).
The bottom of is the VTANG aircraft. I remember seeing this plane flying overhead win I was a kid. Grew up in Winooski in the 60s and early 70s so I was right under the flight path on final approach.
.
-
On 3/25/2018 at 11:37 PM, RGronovius said:
My time in the Guard was just a stepping stone, a way to get more military training than ROTC offered. I spent the next 25 years on active duty after I was discharged from the Guard.
Starting to build the T-33A from Academy with aftermarket decals of a VTANG bird. The kit is originally a Hobbycraft kit. Should be a simple build. One of Hobbycrafts better kit.
-
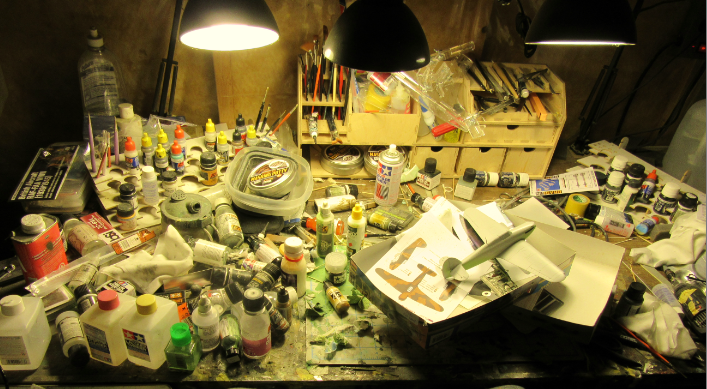
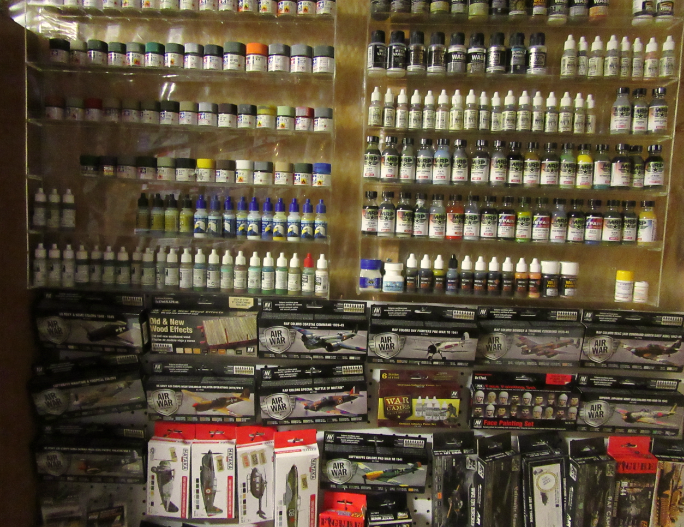
This may be a duplicate post. Paint is neat and work bench is utter chaos.
-
7 hours ago, ghodges said:
You'll need to experiment a bit, but in general the ratio's I've seen start at 80% water to 20% "paint", and then no more than 1-3 drops of liquid dish washing detergent. Start there, try it on some scrap model parts and see how it works. If it's seems too sludgy, add more water. If it seems too thin and doesn't leave enough color, squeeze a little more paint into the mixture. The soap is supposed to help break surface tension and help it flow easier, as well as allow it to wipe off easier.
GIL
Thanks for the ratios.
-
5 hours ago, Ralph Nardone said:
As with most ANG units, finding decals for everything is usually a treasure hunt. In a lot of cases, you'll have to cobble together what you need from insignia, letter, and number decal sheets. If you wait for a sheet dedicated to a particular airplane, you may be waiting.
That being said, Caracal Models has been doing a lot of neat subjects lately. You may want to check them out...
Ralph
You are correct, it has been a treasure hunt. So far I have found 1/48 scale decals for VTANG planes of the F-102 and T-33A. The rest I have cobbled together.
-
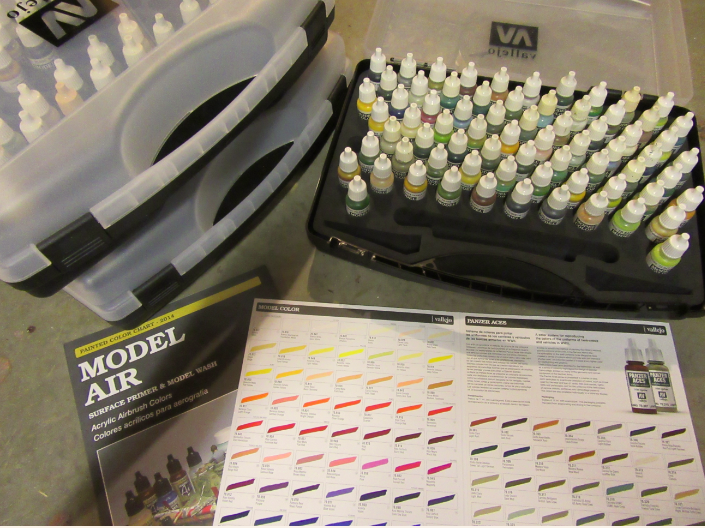
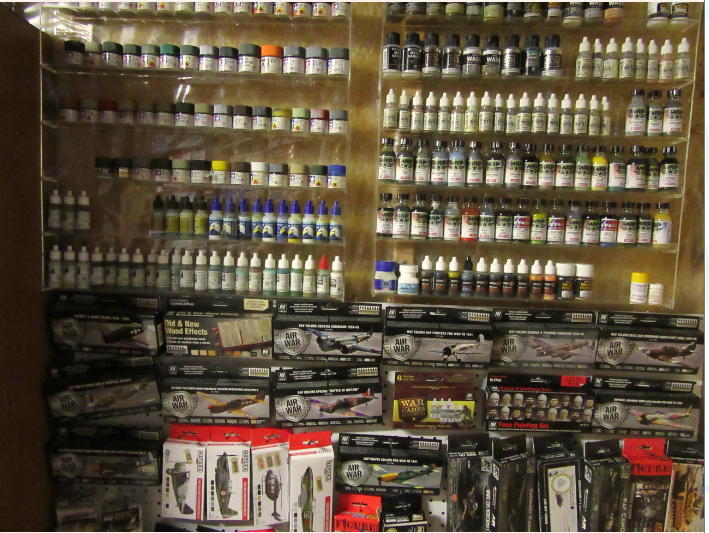
My pains are nice and organized My workbench is another story!
.
-
IRecently got some tubes of water paint. I am going to use the water paint to make a wash for NMF. What is the ratio of water paint/water/detergent to make the wash? Thanks.


Naked Ladies
in General Modeling
Posted · Edited by ju52junk
Let me clarify. Not actually paint over the decal. But use paint before I submit the photo to the forum.