


Wolfman63
-
Posts
514 -
Joined
-
Last visited
-
Days Won
88
Content Type
Profiles
Forums
Events
Posts posted by Wolfman63
-
-
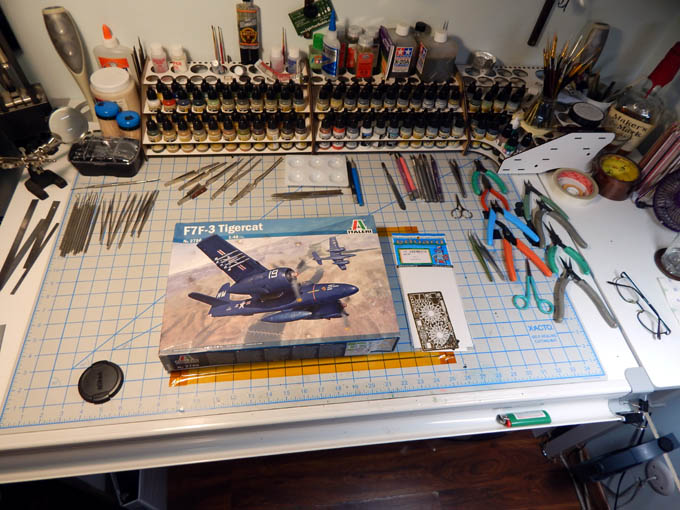
Next up is the Italeri 1/48 F7F-3 Tigercat with Eduard photo etch details. The F7F-3 aircraft entered service late in the war in 1944. They were produced in day fighter, night fighter and photo-reconnaissance versions. They were originally designed to be carrier based but there were some issues that caused them to fail carrier qualification. They ended up being used by the Marines and did most of their service later during the Korean War.
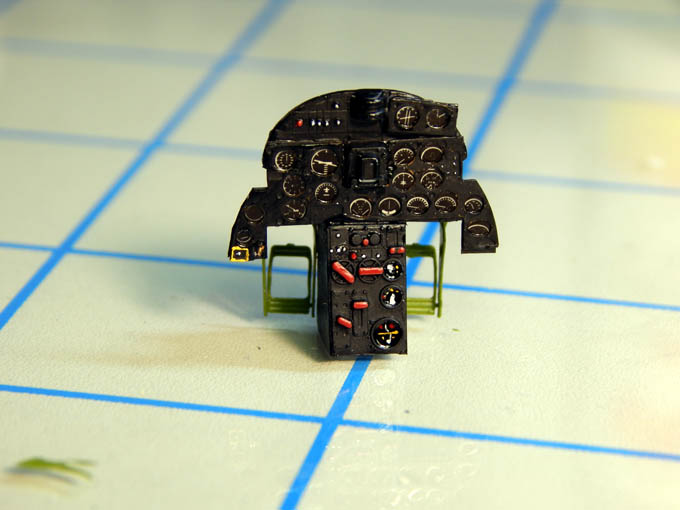
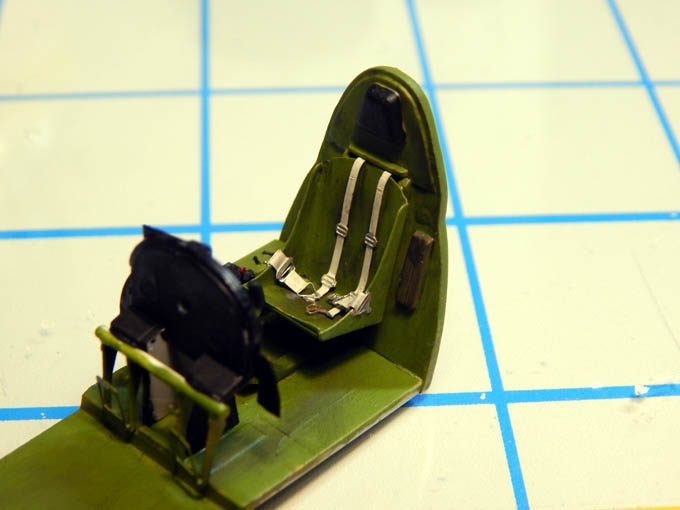
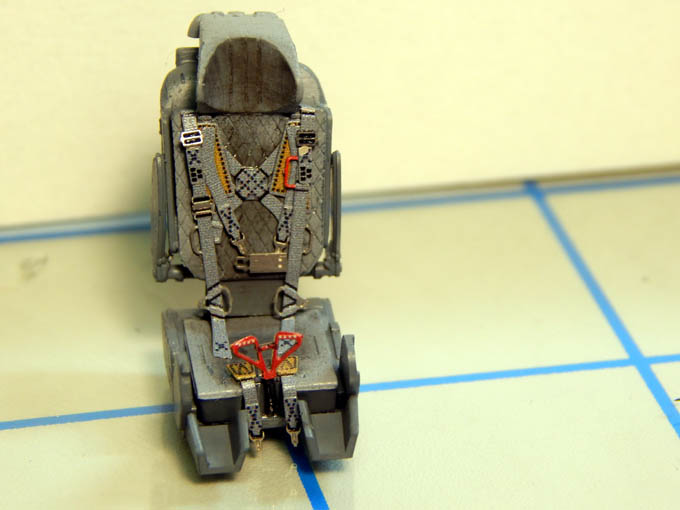
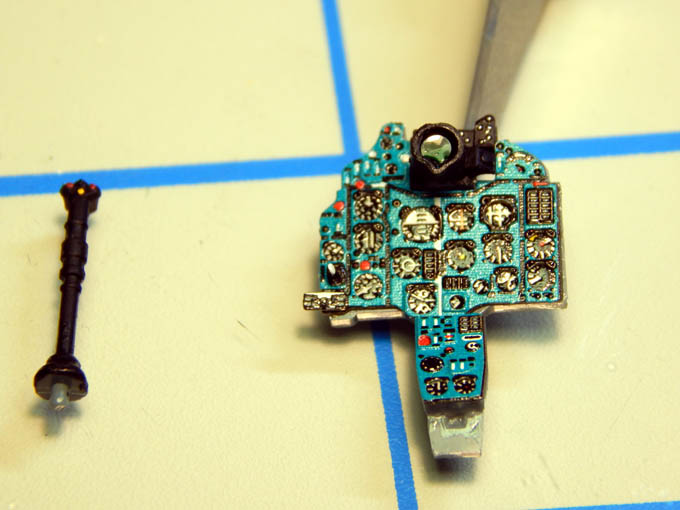
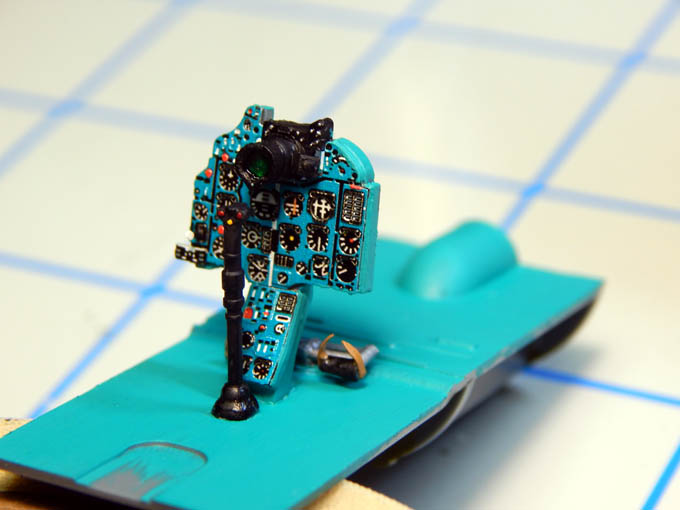
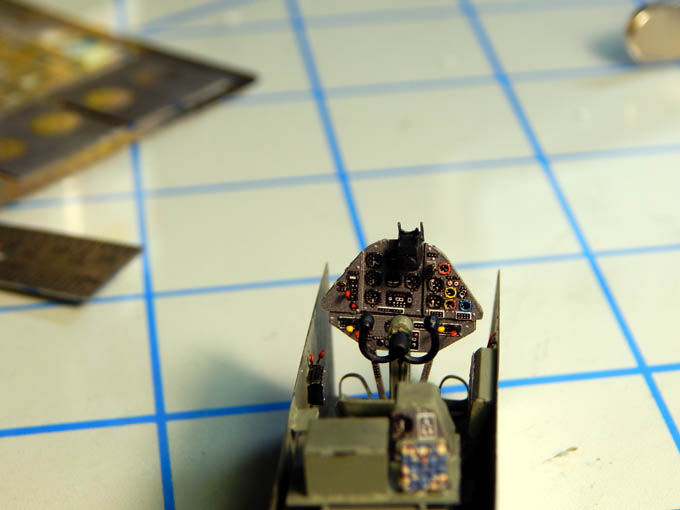
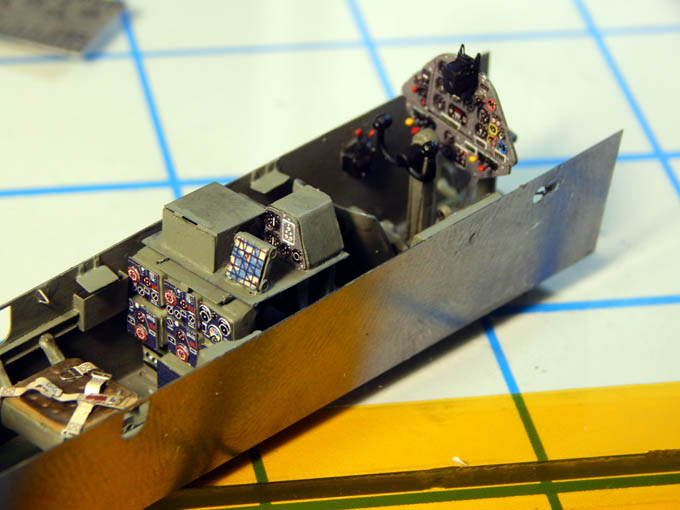
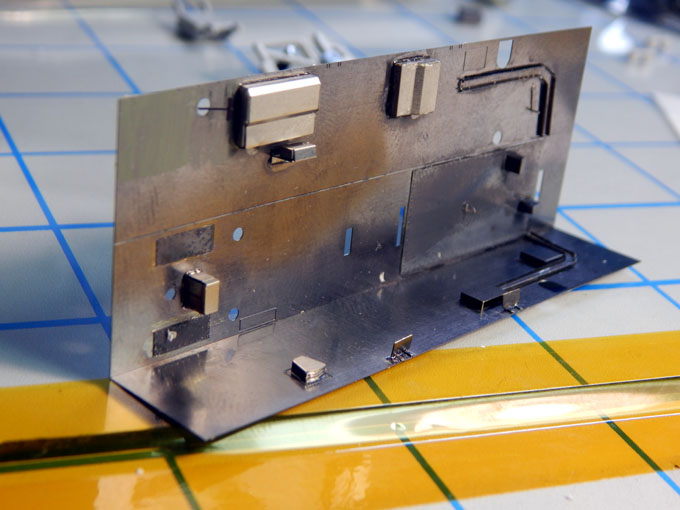
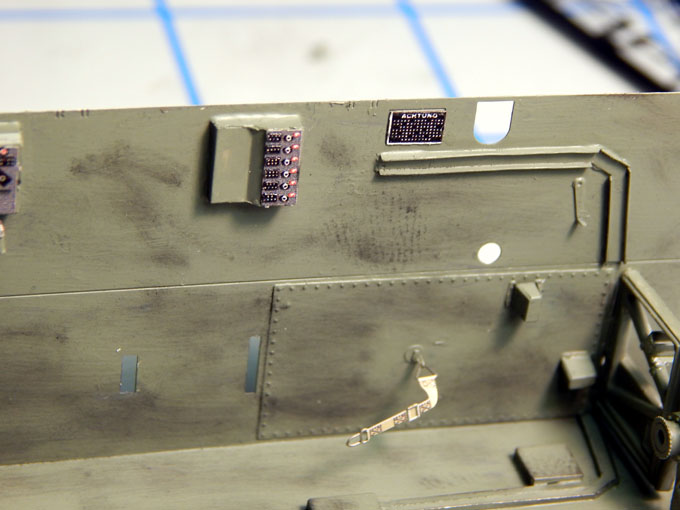
Starting off with the cockpit, the dashboard was detailed with photo etch parts. The photo etch seat was adorned with the seatbelts then mounted to the cockpit. While assembling the cockpit to the fuselage I noticed the kit did not have parts for the front a rear bulkheads of the nose gear bay.
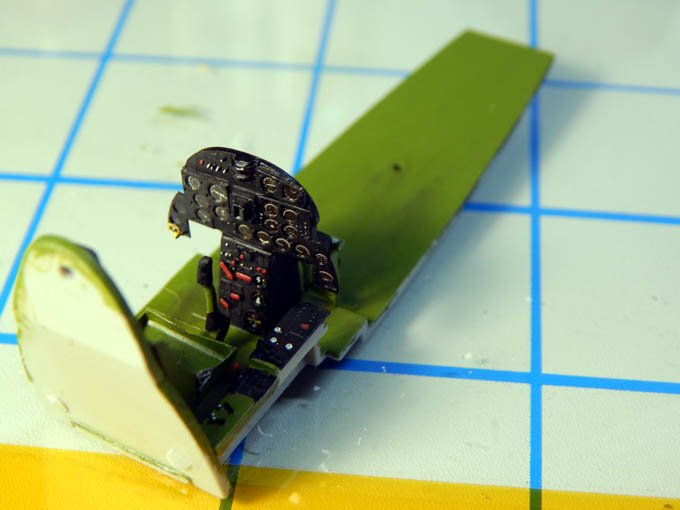
I used a contour gauge to measure the fuselage and cut out the bulkheads from sheet styrene. They grabbing so extra photo etch parts from my spares drawer I detailed the bulkheads . with a little minor shaping they fit right in. Another detail I did was to drill out the gun barrels of the nose guns for a more realistic appearance.
See my build log for more detailed photos. https://davidsscalemodels.com/build-log/1-48-f7f-3-tigercat/

-
 1
1
-
-
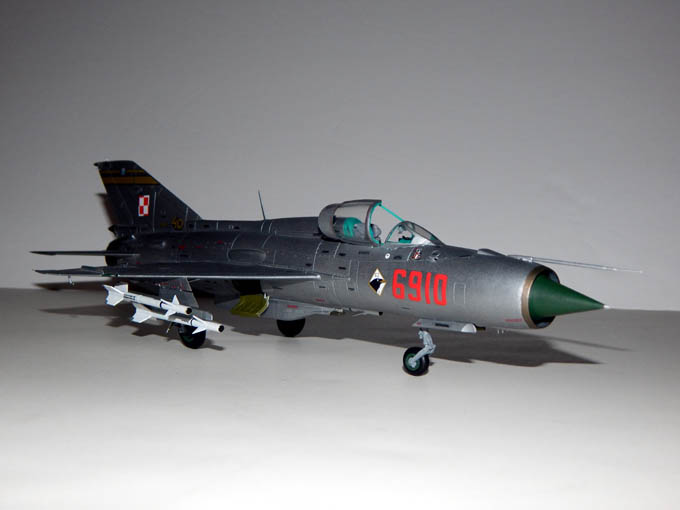
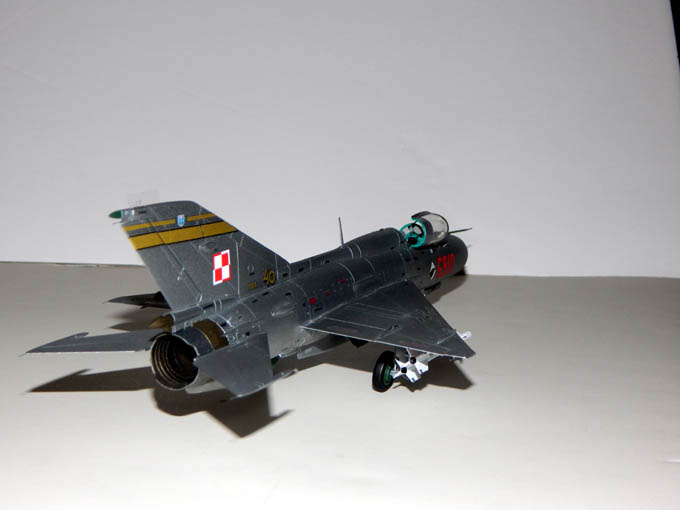
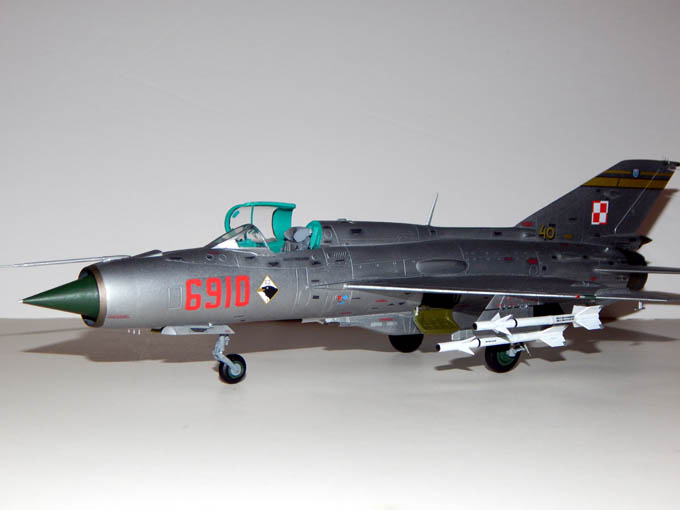
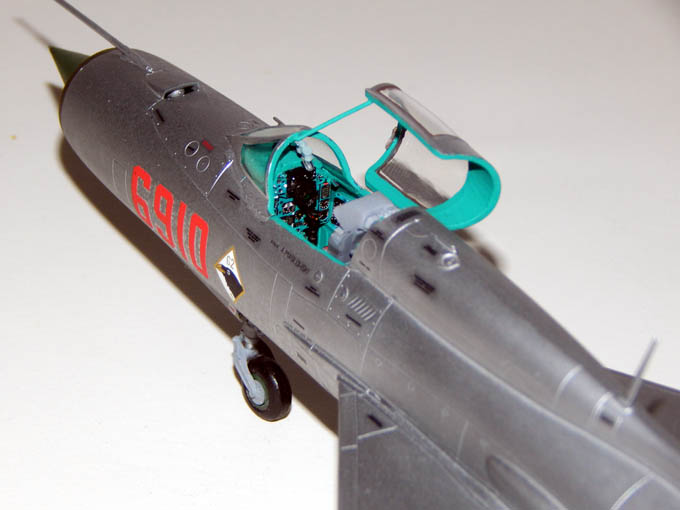
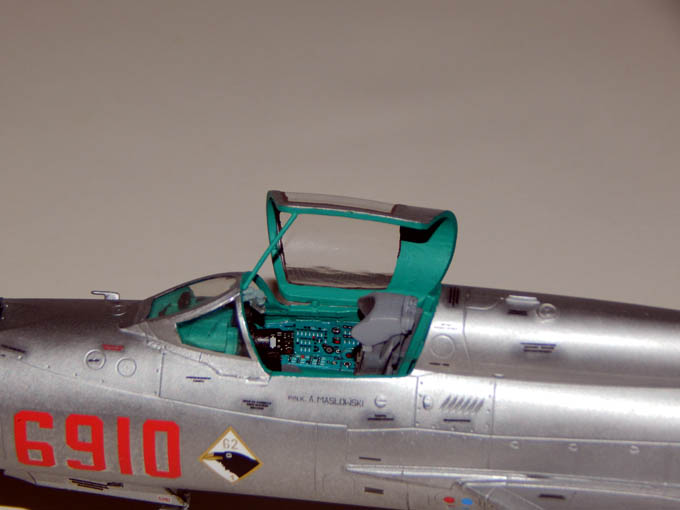
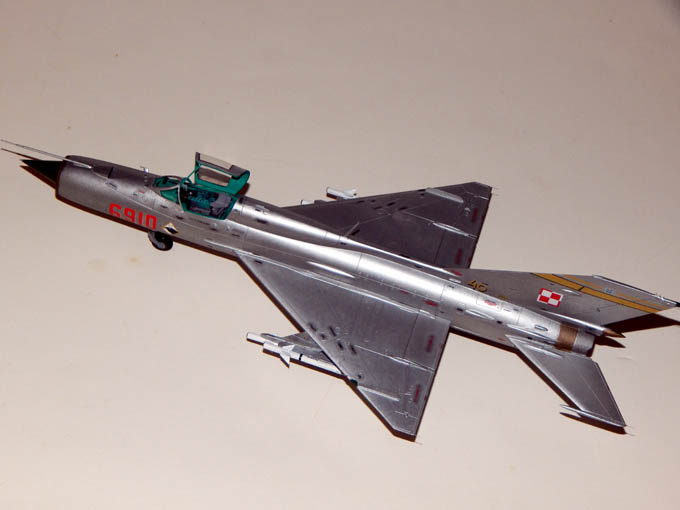
The MIG-21 PFM is now complete. I detailed the canopy and opted to leave it open to show the details of the cockpit. After reviewing some photos on line I dulled the finish a little. I then detailed the R-3S missiles by making the sensors look realistic. The method used is in my Tips and Tricks section.
https://davidsscalemodels.com/tips-and-tricks/how-to-make-laser-and-ir-sensor-heads/
The missiles were then mounted as the final step. This was a very nice model to build. The fit was very good with very minor work required to line up the parts. Aside from the numerous decals they all went on nicely. Thanks for following along. Here are the final photos.
To see all the photos from start to finish check out my build log.
https://davidsscalemodels.com/build-log/1-48-mig-21-pfm/
-
1
-
-
Corrected link.
-
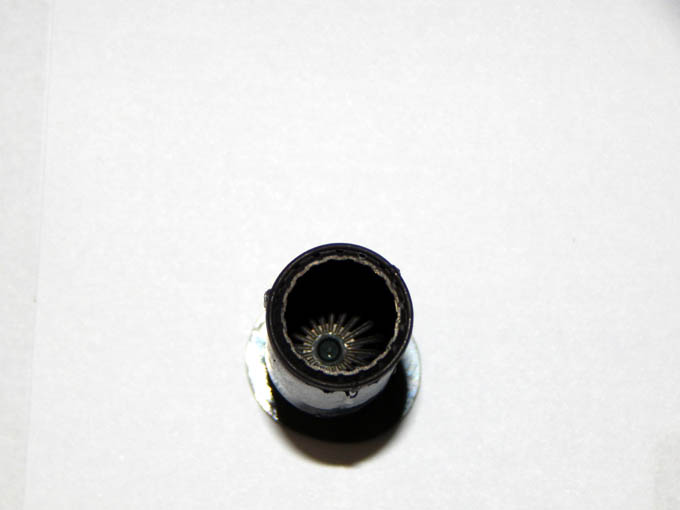
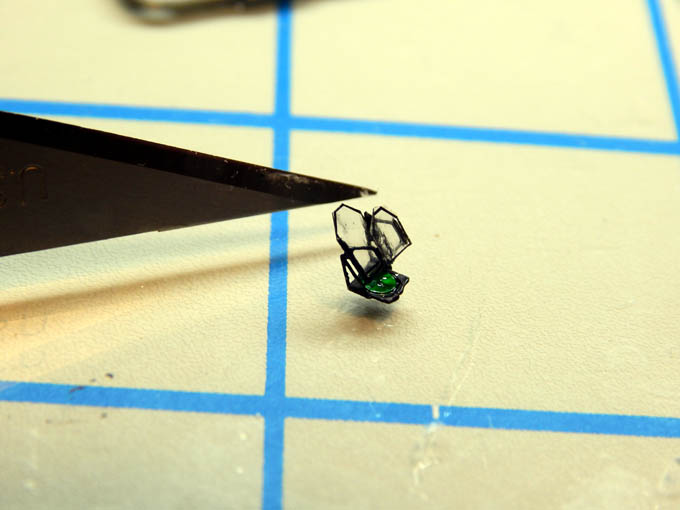
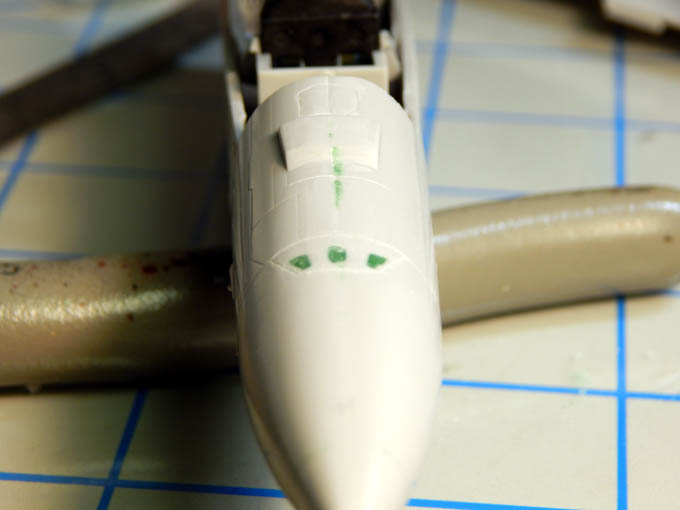
Many modern weapons like missiles and bombs have a sensor on the nose for Infra Red (IR), Laser, or GPS guidance. Typically the sensor is mounted behind a coated lens to protect the sensor and allow it to have a wide field of view. Many times modelers paint them using gloss paint. The tutorial on my blog will show you how to replicate the coated lens appearance.
https://davidsscalemodels.com/tips-and-tricks/how-to-make-laser-and-ir-sensor-heads/
-
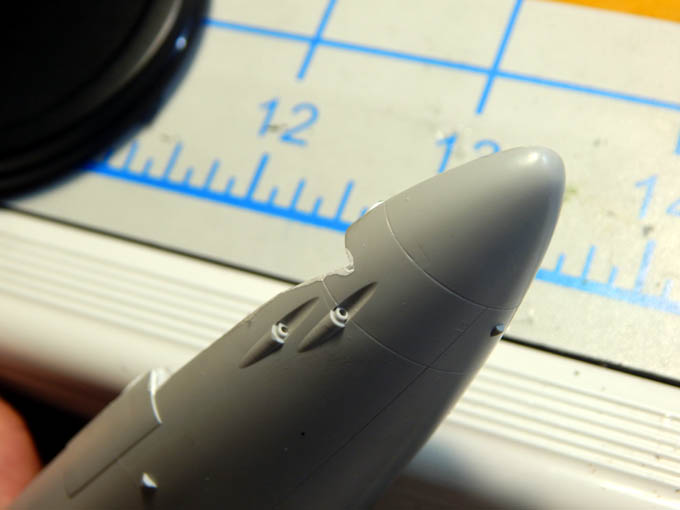
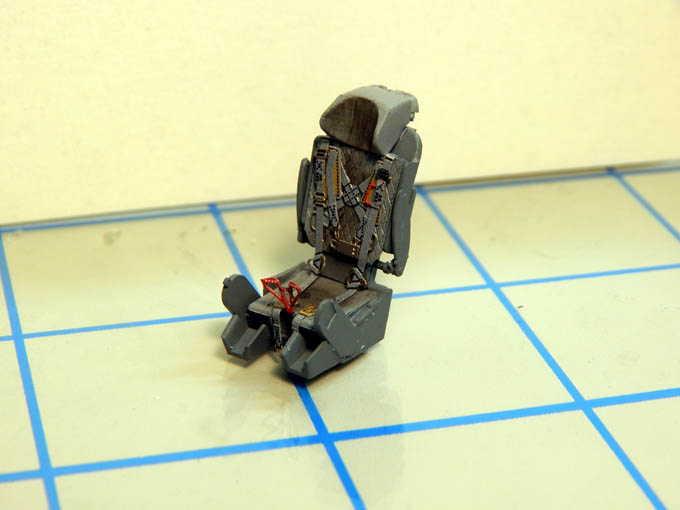
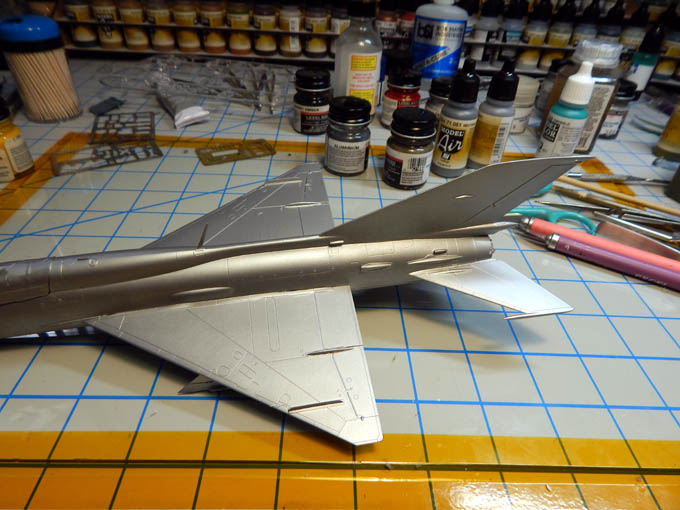
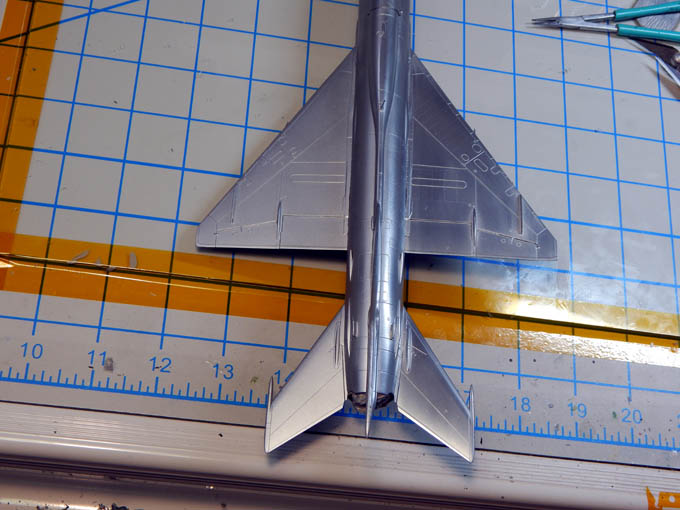
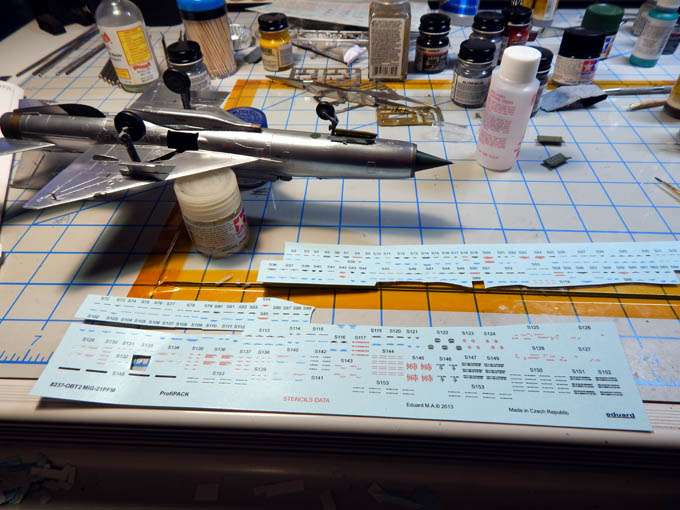
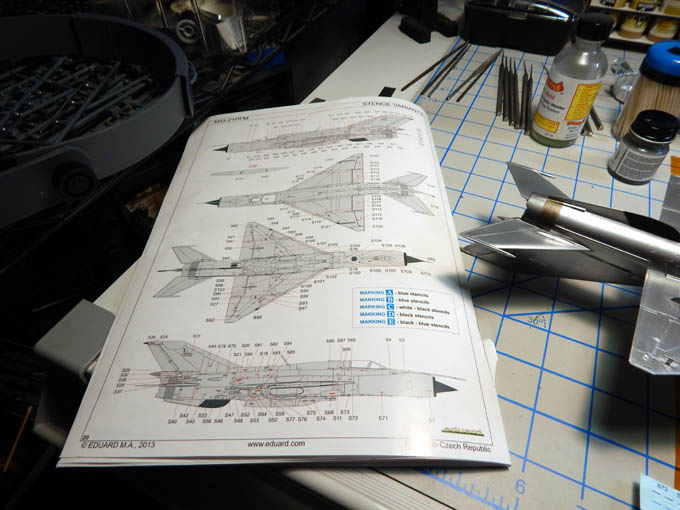
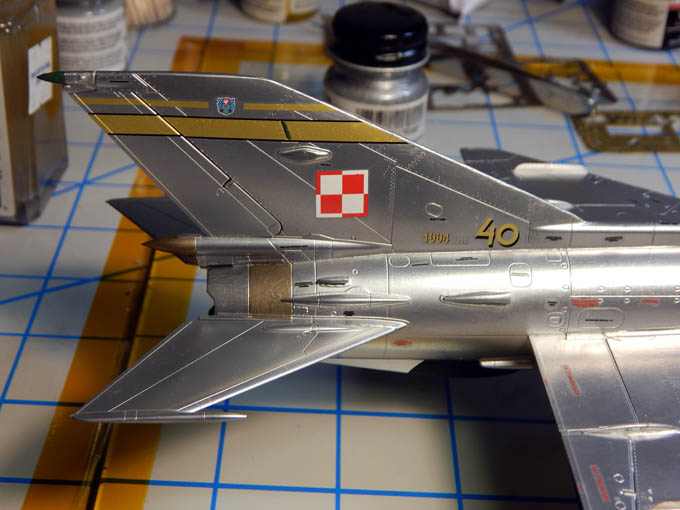
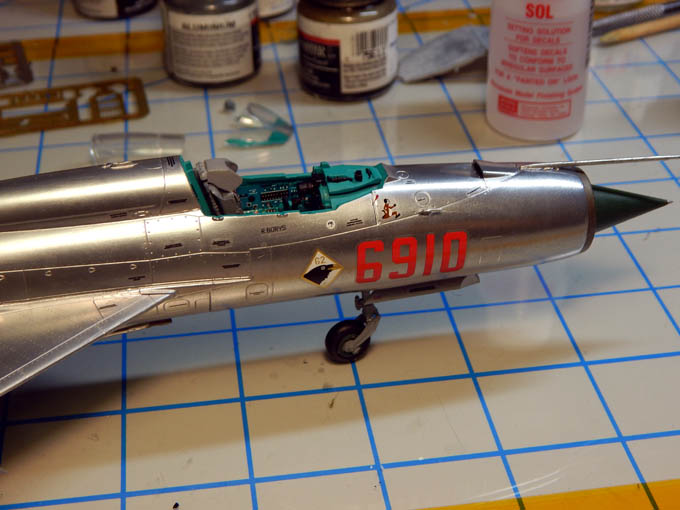
Progress on the MIG-21 is coming along nicely. Detailed the wings and fuselage with photo etch details they moved to the ejection seat. The photo etch details really highlight the seat. I then started to paint the aircraft. I used Model Master Aluminum buffing metalizer. The process is you spray the model and let it dry. It looks like a very dull and grainy appearance. Using an old cotton T-shirt I then buffed the paint to a shiny aluminum finish. You will need gloves as while buffing you can inadvertently leave fingerprints in the surface. I then painted the highlight areas like the engine exhaust cone, intake trim and the ventral fin on the bottom.
Next I went to apply the decals. There are over 155 tine stencil decals that needed to be placed. While tedious (took two evenings to do just them), they went on nicely. I then added the Polish Air Force decals. They went on very well and with a little Microsol came out great! Starting work on the R-3S missiles and then the canopy needs to be polished, detailed and painted. Should be completely done in a few days.
You can see all the build photos from the start at https://davidsscalemodels.com/build-log/1-48-mig-21-pfm/
-
Thank you all, I have a set that are on their way to me.
-
I am looking for a set of decals for a 1/48 AH-64D that were available from IPMS at the 2010 convention.
Or if you have one of the Two Bob's 1/48 decal sets for AH-64D Helicopter.
Please contact me.
Thanks for looking.
-
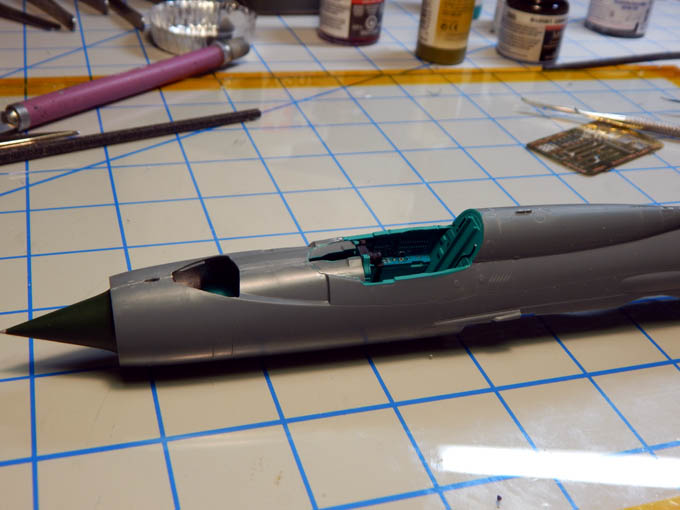
Starting the Eduard 1/48 MIG-21 PFM. I will be using the decal scheme for the Polish Air Force. The scheme represents the aircraft as it appeared in 1996. The kit includes photo etch details so no extra accessories were added.
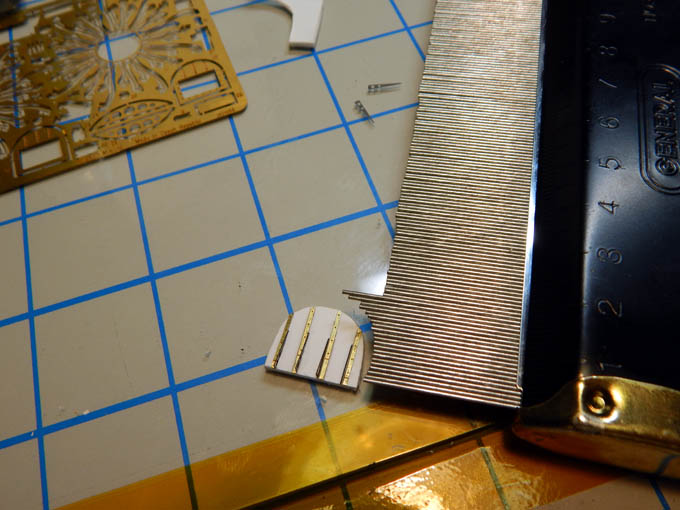
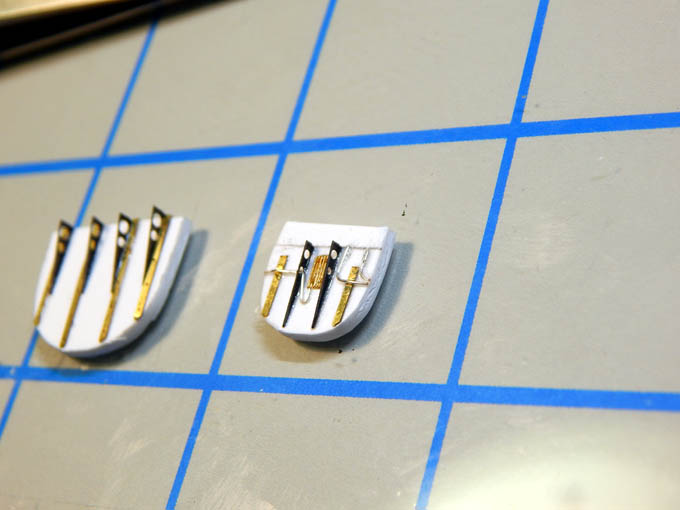
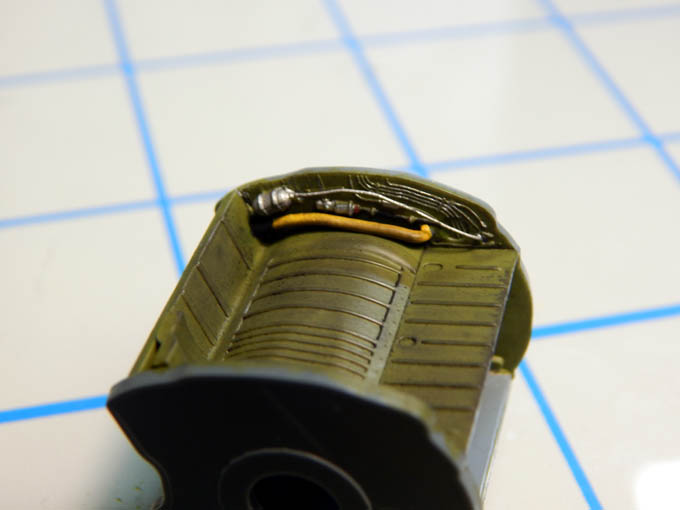
To begin I started with the cockpit and the engine exhaust. For the interior color, Vallejo makes a Model Color (70.838) which is a match to the interior color used on the actual aircraft. The cockpit section also has the nose gear bay attached. I detailed the bay walls and assembled them. The dash was multiple layers of photo etch and looks great. The exhaust was detailed with photo etch and then weathered with pastel chalk to add a level of realism. The main landing gear bay was assembled and detailed. I added some 32 awg wire for details. I added some weight to the nose cone so the aircraft would not drag the tail once fully assembled. All of these sections needed to be built so that the fuselage can be built up. Assembling the fuselage was a little tricky for the area around the cockpit. I had to trim the sides of the cockpit floor by removing about 1mm from each side to get the fuselage to meet together.
You can see all the build photos in my build log https://davidsscalemodels.com/build-log/1-48-mig-21-pfm/

-
1
-
-
4 hours ago, ghodges said:
That came out super David! If I may ask, exactly how and what did you use to polish that canopy? Looks very sharp!
GIL
I use Meguires PlastX, Q-tips and a microfiber cloth. See my tip here: https://davidsscalemodels.com/tips-and-tricks/how-to-repair-clean-and-polish-clear-parts/
-
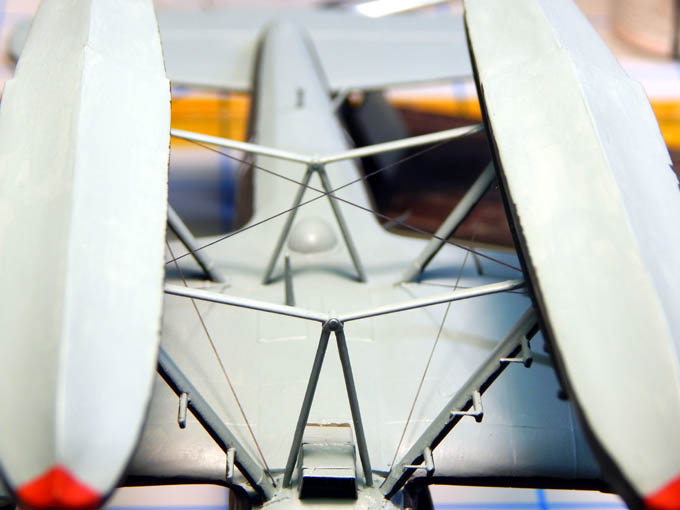
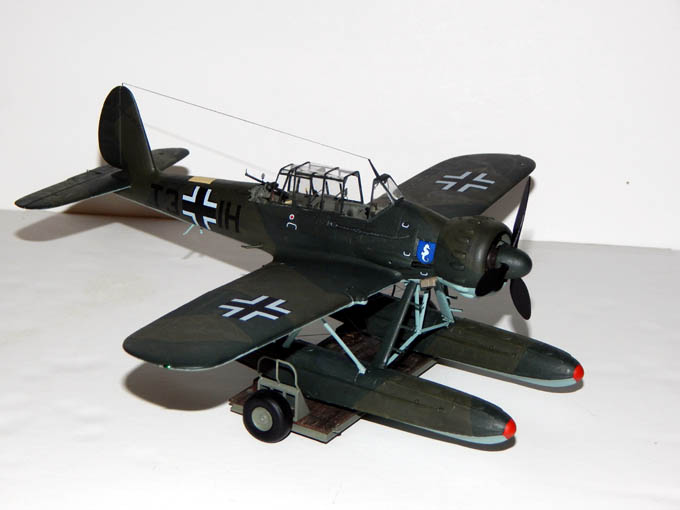
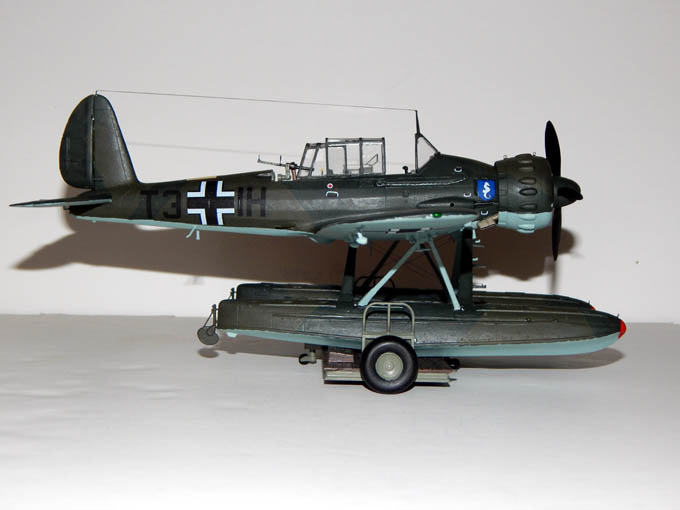
The 1/48 Tamiya/Italeri AR-196A German float plane is now complete. I added the rigging for the floats and the antenna using EZ-Line. I added the sight glass by using a small piece of acetate. The decals are for the aircraft used on the Bismarck Battleship. The decals were really nice. Thin but not too thin. Slid right into place and laid down nicely. The canopy sections were polished, detailed with photo etch and painted. Aside from a few gaps this went together well and came out looking good.
You can see all the photos from start to finish in the build log https://davidsscalemodels.com/build-log/1-48-arado-ar-196a/
-
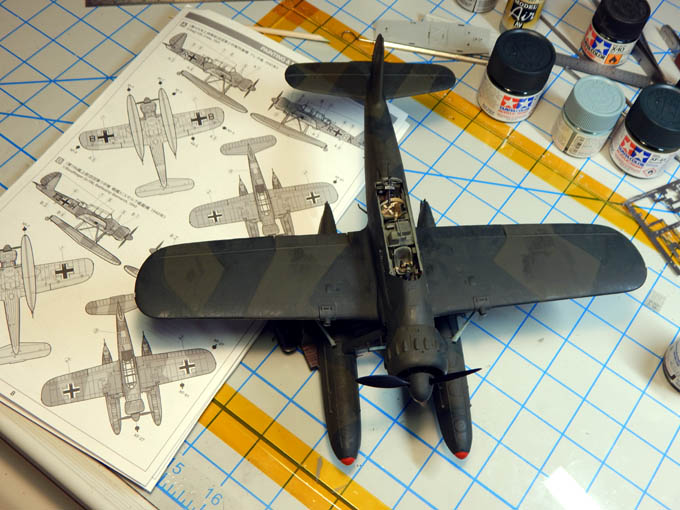
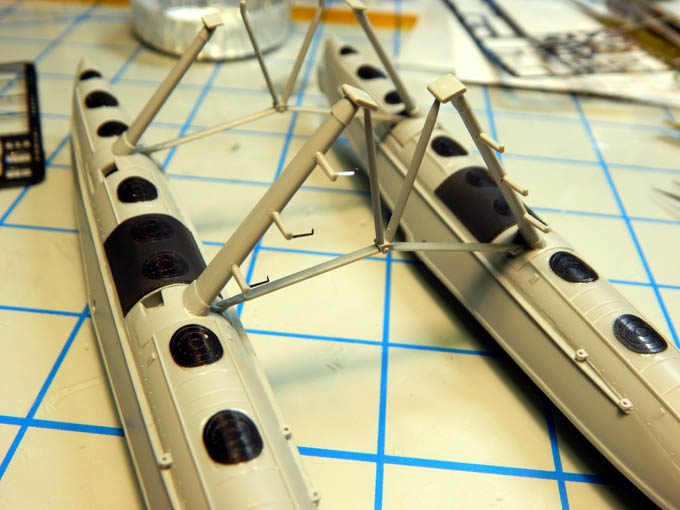
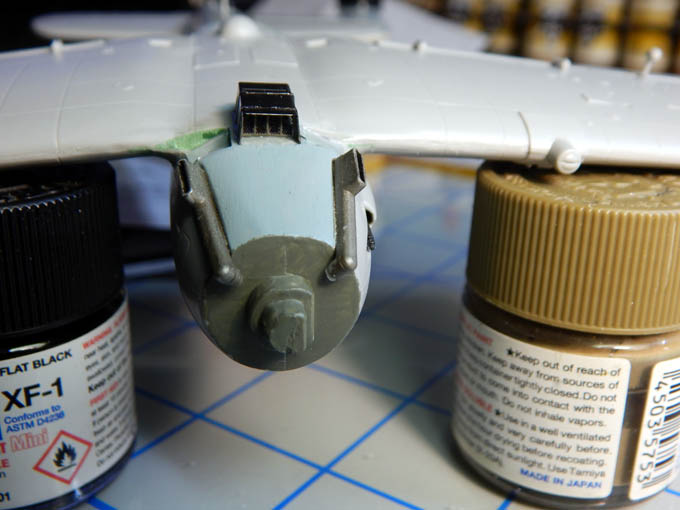
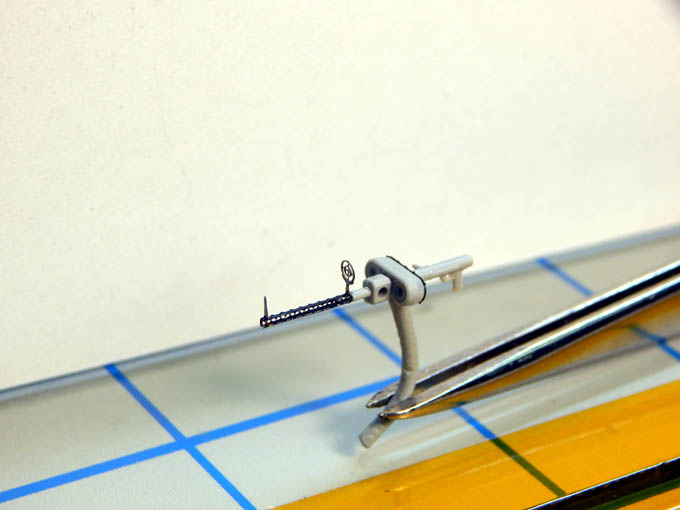
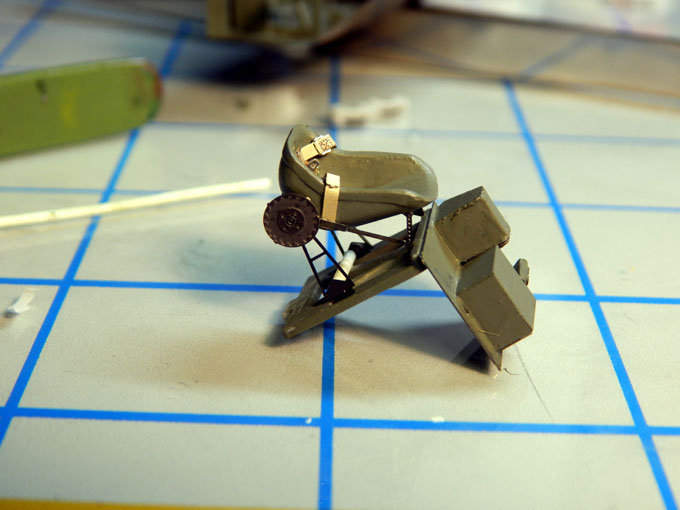
Lots of work completed on the AR-196A. First, assembled wings and found that the fit to the fuselage has an issue. There is a large gap on the port side. The other side and bottom also have small gaps. These were all filled, filed and sanded. Then the floats were assembled and detailed with photo etch parts. The oil cooler was replaced with photo etch parts and added some more photo etch details to the fuselage.
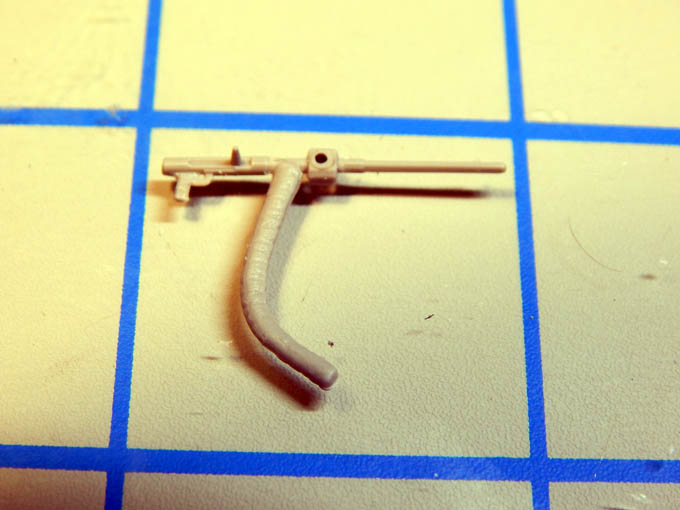
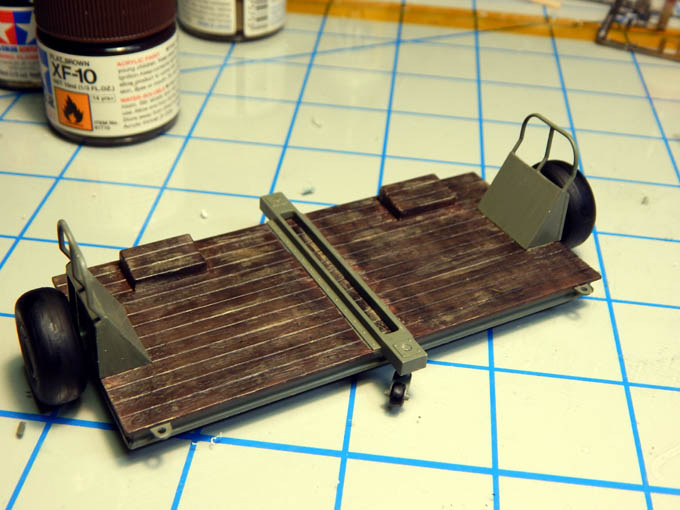
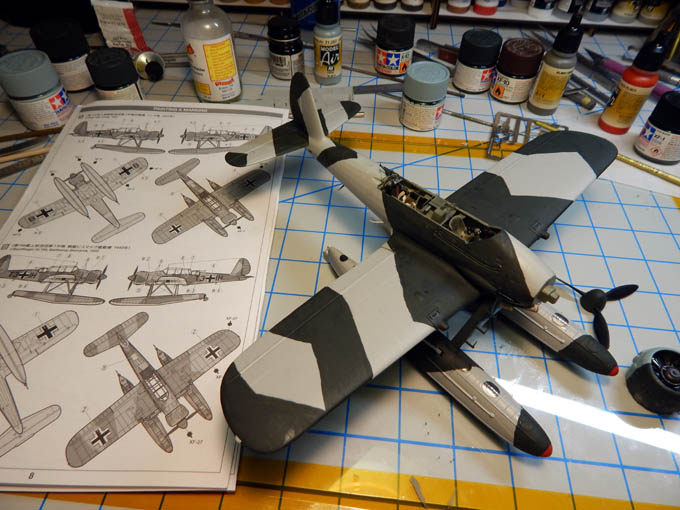
The rear machine gun was then detailed, painted, and mounted. The dolly was then assembled and painted. I painted the “wood” to look weathered and aged. Painted a brown base, then dry brushed tan and finally lightly dry brushed light gray. Once the paint was dry I used dark brown and black pastels to add weathered and dirt to the surface. Now working on painting the base coat on the aircraft. The first color of the scheme is done. Letting it dry overnight before I mask and paint the other color.
Many more photos can be viewed on my blog at https://davidsscalemodels.com/build-log/1-48-arado-ar-196a/
-
1
-
-
More work done on the Tamiya 1/48 AR-196A float plane.
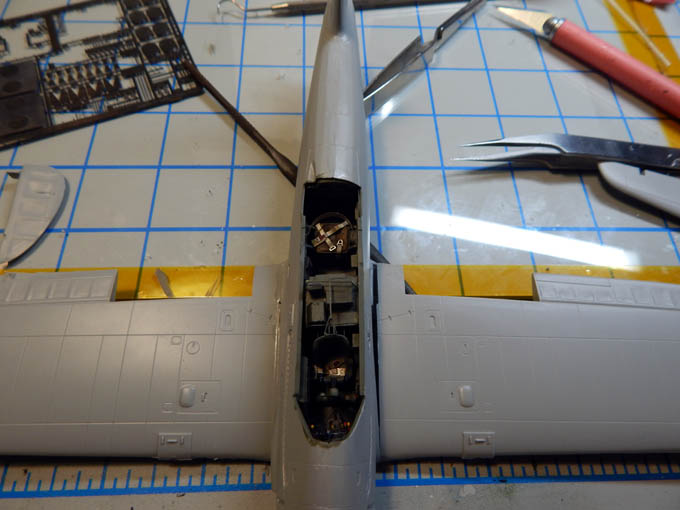
I have completed most of the cockpit and installed it in the fuselage. The fit was a little difficult. The top of the cockpit walls fit fine but I had to twist it a bit to align it. If you ever go this route don’t install the cockpit to one side then join the fuselage. Put the fuselage together then install cockpit from bottom. I made a couple of shims to keep the cockpit floor square to the top.
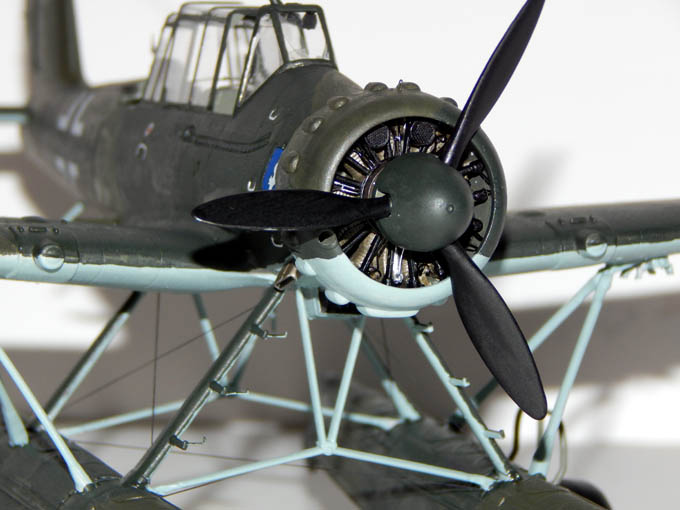
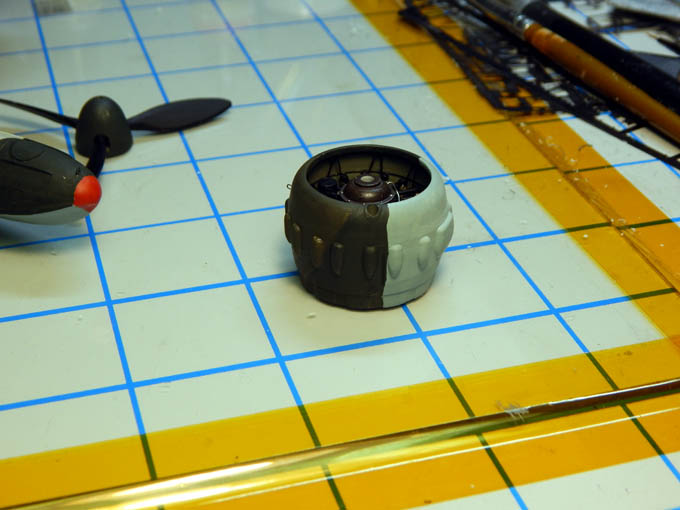
I then started on the engine. The part with the pushrod’s had one pushrod that was “short shot” in the mold. I trimmed the nub and scratch built a new one using some stock styrene rods. The photo etch details and wiring were added and painted. After reviewing some photos of the real engine I used 32 gauge wire to make the oil return line. I cleaned up the cowl parts (the seams and a little flash) then installed the engine. The photo etch set also comes with the front cowl mounts. It was tricky getting them mounted the correct height so they would meet the cowl edge correctly. Once I finish cleaning the outside of the cowl and the assembly mounted to the fuselage I will be starting on the wings.
You can see all the build photos from the start at https://davidsscalemodels.com/build-log/1-48-arado-ar-196a/
-
1
-
-
On 2/10/2019 at 11:22 AM, ghodges said:
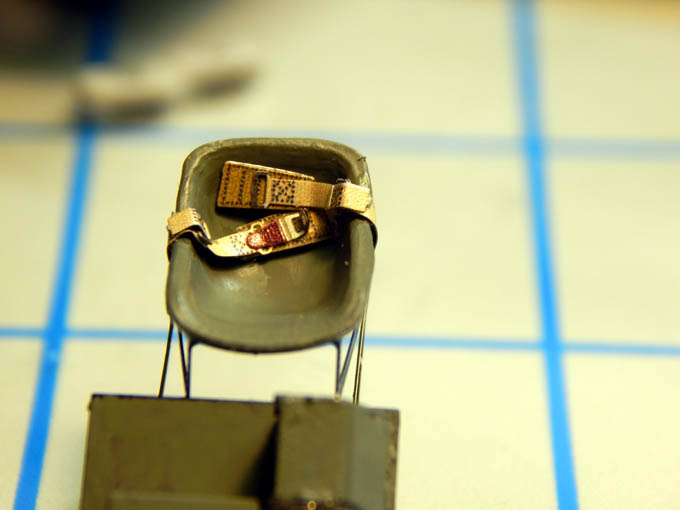
Great looking start, though those pe belts sticking up and out into thin air look odd!
GIL
It is the safety belt for the rear seat. It attaches to the seat which looks like the seat can move forward and backwards on the track. When I first installed it, it took a while to figure what it was for.
-
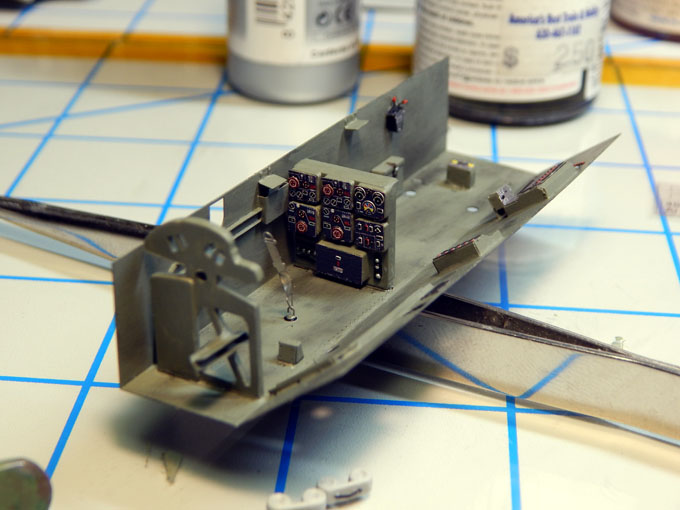
Next up is the Tamiya 1/48 Arado AR-196A German seaplane. I will be doing the scheme as one of the aircraft that were used on the Bismarck battleship. The Arado Ar 196 was a shipboard reconnaissance low-wing monoplane aircraft built by the German firm of Arado starting in 1936. To add details I am using the Eduard detail set. The first thing I noticed was aside from a few of the kit parts like the seats and some bulkheads the cockpit is 80% photo etch! There are 3 sheets of photo etch and most are the cockpit. It is taking a lot of time to cut, bend, and place the many parts but it is looking great.
You can see all the build photos and follow along in my build log at https://davidsscalemodels.com/build-log/1-48-arado-ar-196a/
-
6 hours ago, ewahl said:
Hi, David,
Gasp! 16 days from start to finish on this incredible build. I'd still be reading all the instructions, cleaning parts, test fitting, agonizing over proper paint colors, and which glue to use on which parts. You, sir, are an expert builder!
Ed 🙇♂️
LOL, The polar vortex this past week helped a lot, Off of work a day and a half due to -20* temps.
-
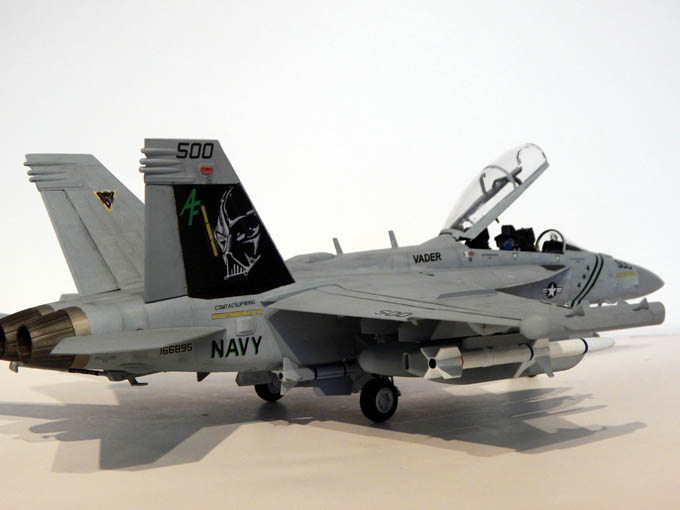
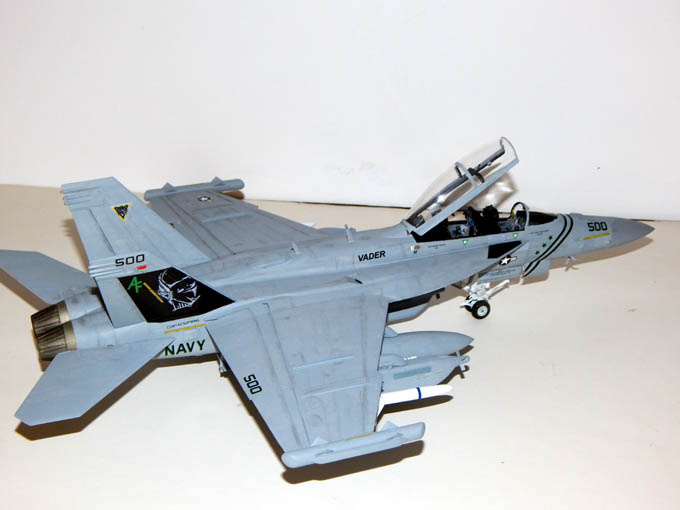
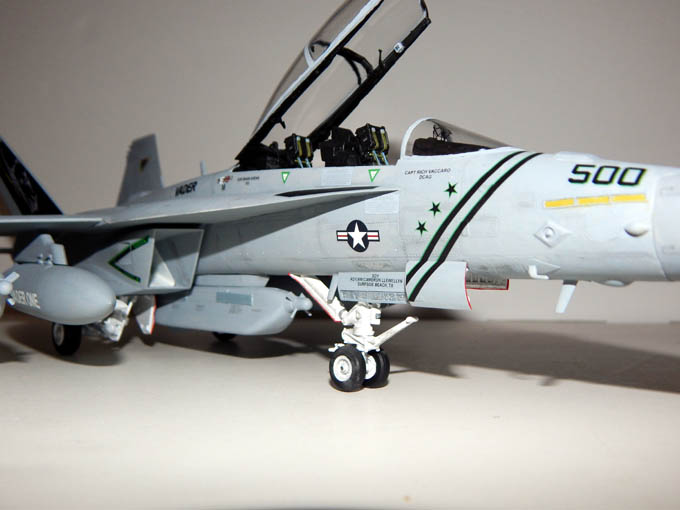
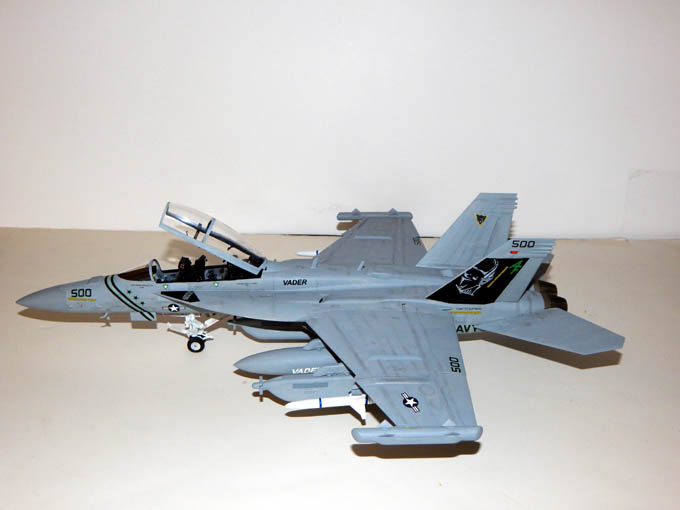
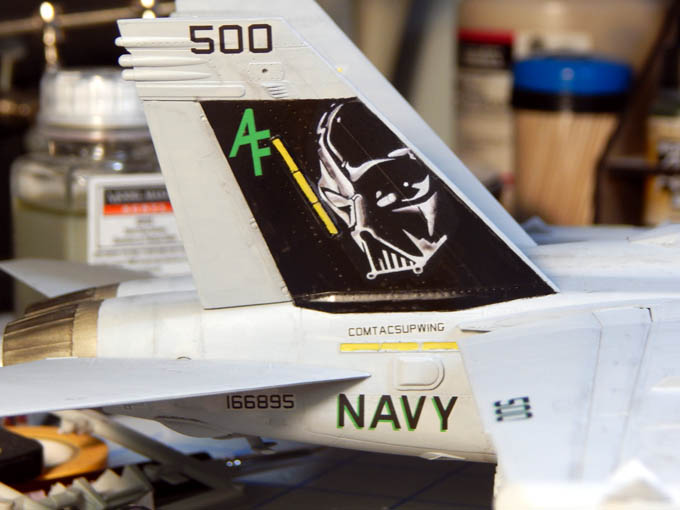
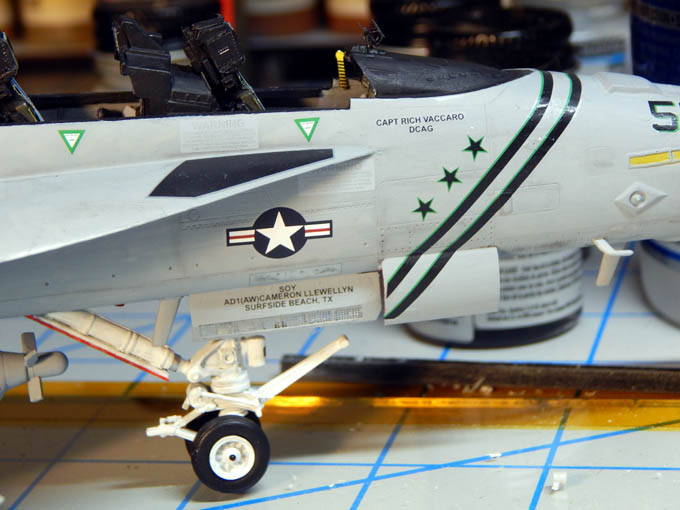
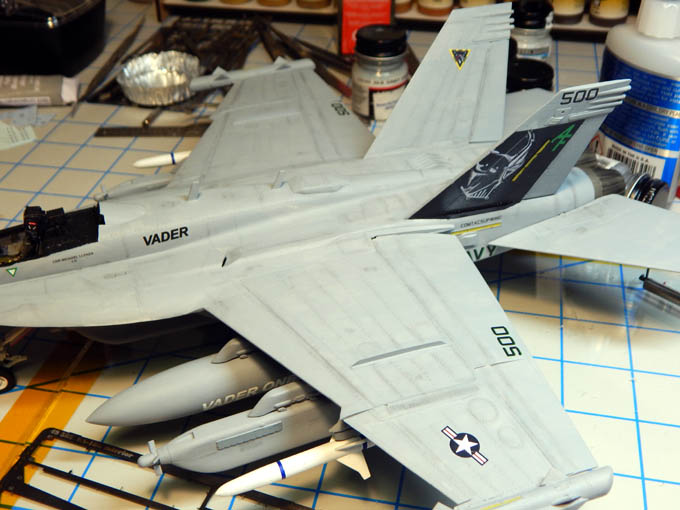
The EA-18G Growler representing VAQ-209 is now complete. This build was very nice to build. The fit was great and the instructions were well done. The Two Bob’s decals are nice and thin. They went on well (aside from the Vader face being on a single film) and they look great! The Eduard photo etch set is great as well. Thanks for following along!
All the build photos from start to finish are on my blog at https://davidsscalemodels.com/build-log/1-48-ea-18g-growler-vaq-209/
-
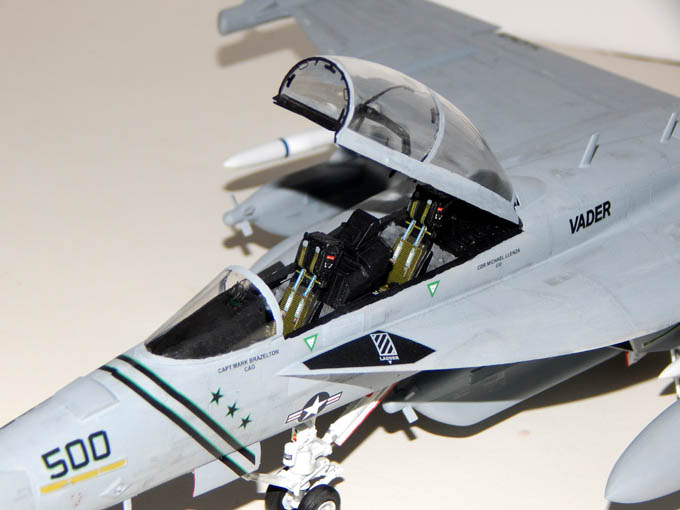
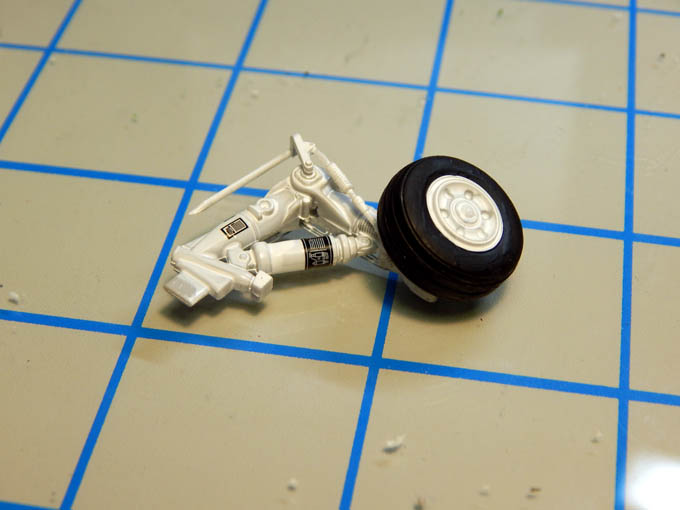
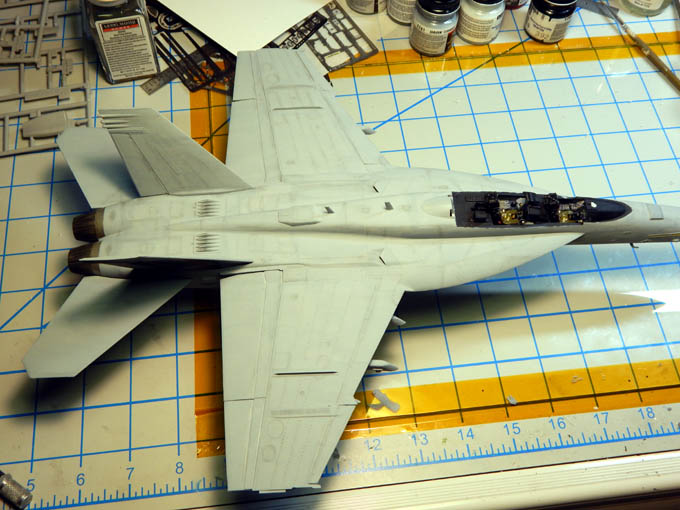
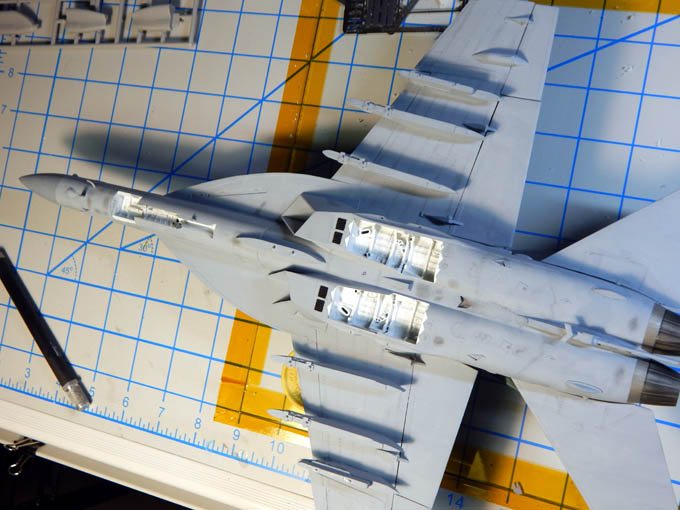
The 1/48 scale Hasegawa EA-18G Growler is getting closer to the finish line. The landing gear has been detailed and installed. The nose gear door was completely replaced by photo etch. Hoses and cables added to the struts. Installed all the under wing missiles and jammers. The decals were then put on and the top coat applied. The decal set is very nice. Just a word of caution, the decal sheet with Vader’s face and the CAG logo is a single film sheet. It must be trimmed before placing in water.
I they switched over to the canopy. The first thing I needed to do was to remove the seam down the middle. I have a tips and tricks section on how to remove the seam at https://davidsscalemodels.com/tips-and-tricks/how-to-repair-clean-and-polish-clear-parts/
The HUD wad assembled using photo etch for frame and clear acetate for the glass. The canopy frame has lots of photo etch details for hooks, levers, and panels. Once the canopy has been fully detailed and painted it will be installed open then I can finish the external details.
You can see the numerous photos of the build from the start at https://davidsscalemodels.com/build-log/1-48-ea-18g-growler-vaq-209/
-
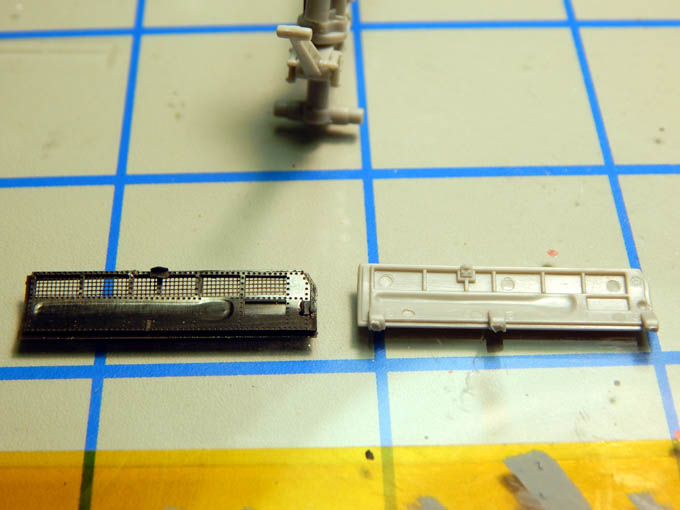
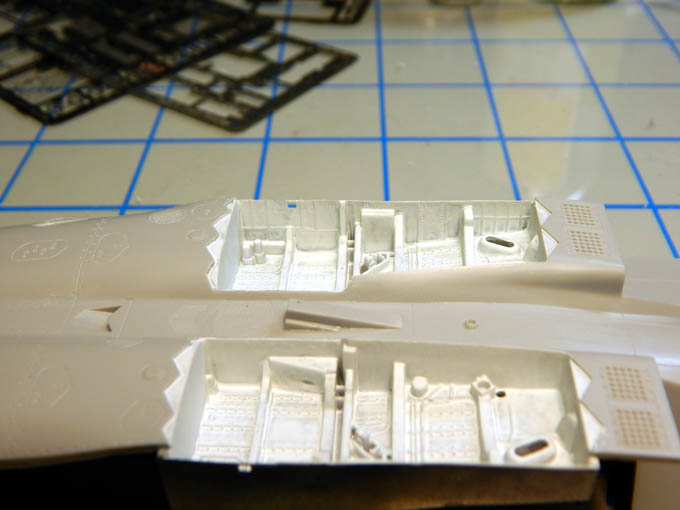
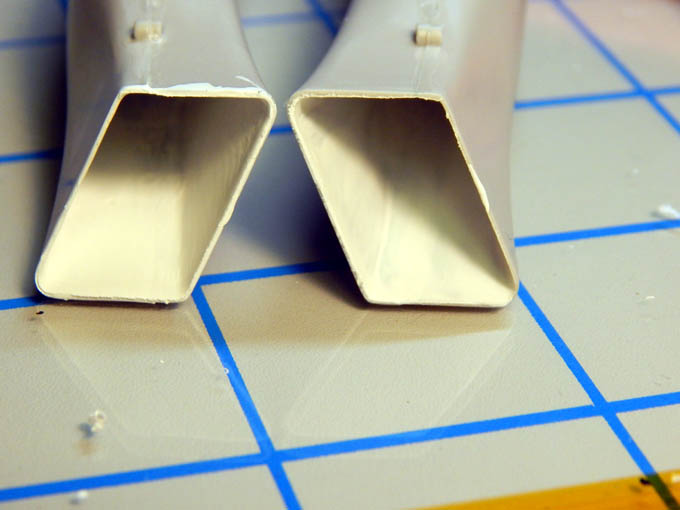
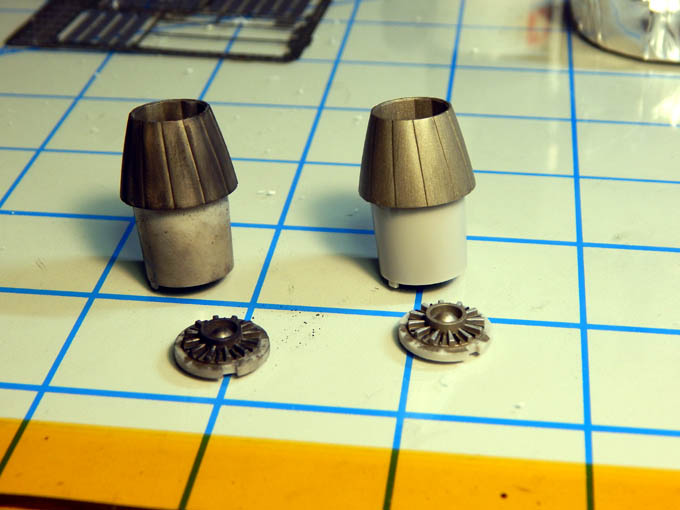
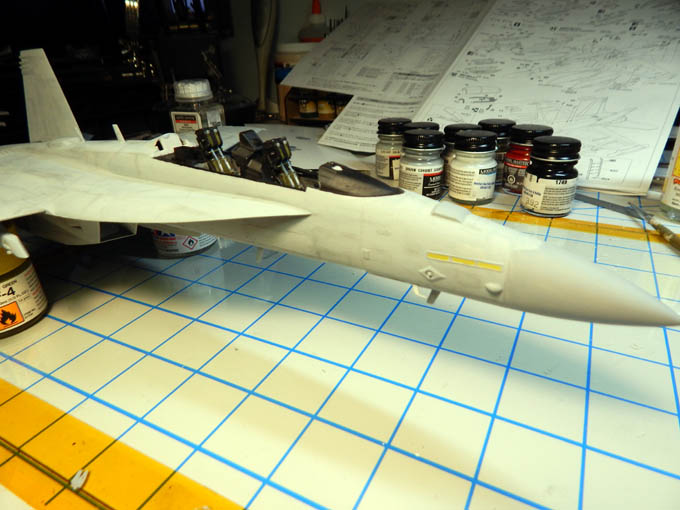
As work continues on the EA-18G, the landing gear bays have been detailed with the photo etch parts. The main gear bays required the entire outside wall to be removed and a photo etch panel attached. I used 400 grit sand paper to remove the kit wall. I then assembled the intake ducts. Using dental spade I filled the seam with putty and sanded it down with a sanding stick. The fuselage was assembled and the front landing gear bay was detailed with photo etch parts. Added some more photo etch details to the fuselage like wind splints, chaff buckets, and formation light frames. The exhaust cones were assembled, painted and weathered with blue, brown and black pastel chalk. The fuselage was base coat painted and weathered with dark gray pastel chalk to highlight panels and other details. Currently working on the under wing stores and the landing gear details.
You can see the numerous photos on my blog at https://davidsscalemodels.com/build-log/1-48-ea-18g-growler-vaq-209/
-
16 hours ago, dmorrissette said:
Agree. Not too bad but if I can get some time savings, worth it to me
Dave
If I had seen it earlier I would have definitely bought a set. If I ever do the E/F I will get a set.
-
16 hours ago, dmorrissette said:
David:
Great start. I have built a couple and they are nice. I would suggest one thing I don't see. Mike Reeves and his company Phase Hanger make a beautiful white resin intake set that saves lots of sanding. I have used three of them so far and they are wonderful and save time. I think they are $17
Dave
Wish I would have seen this earlier. I just finished building and installing the intakes last night. The seams were really not too bad. The flexible sanding sticks I use were worked very well.
-
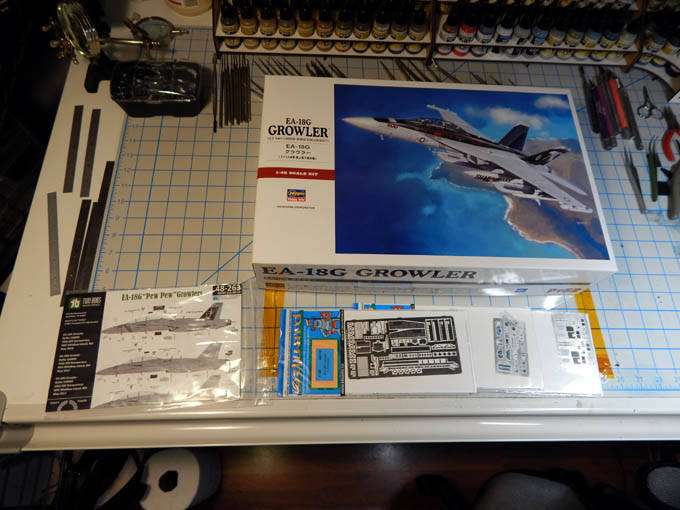
Next up is the Hasegawa 1/48 U.S. Navy EA-18G Growler. The EA-18G Growler is an airborne electronic attack (AEA) aircraft which operates from either an aircraft carrier or from land-bases. The Growler is the replacement for the United States Navy EA-6B Prowler aircraft which entered service in 1971 and was retired in 2015.
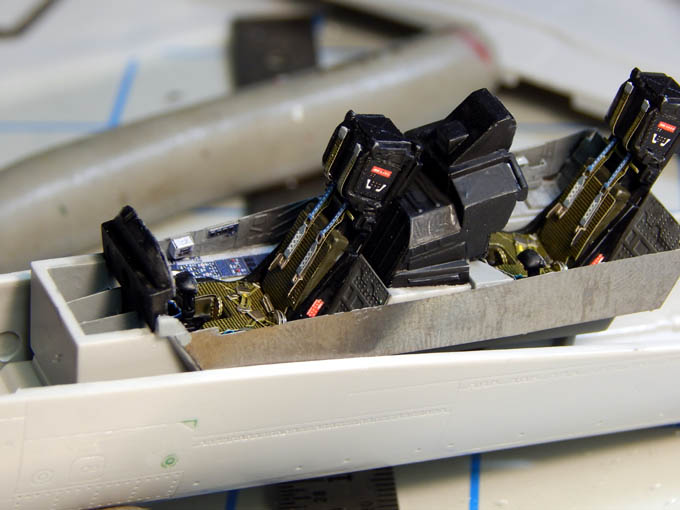
For this kit I will be using the Eduard photo etch sets for the seats, cockpit and exterior of the kit. I also will be using decals from Two Bob’s Decals that represent “Star Warriors” of VAQ-209. I chose these because I like the star wars theme with Darth Vader on the tails.
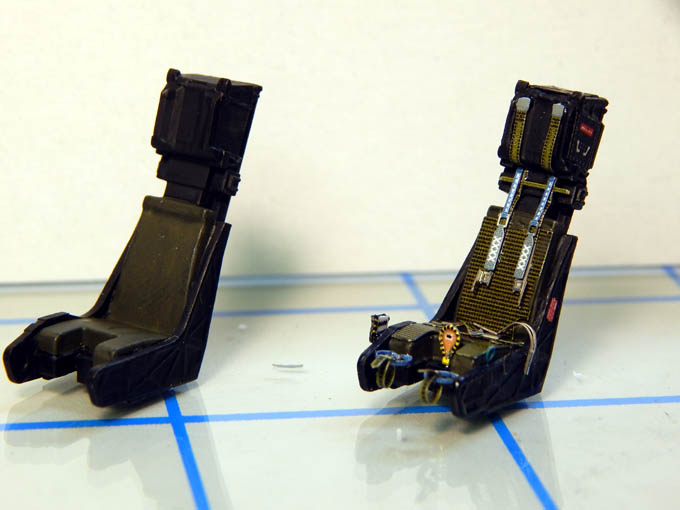
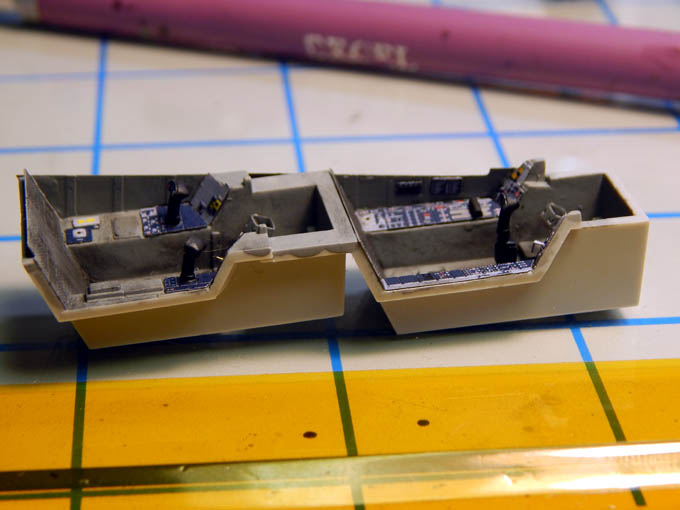
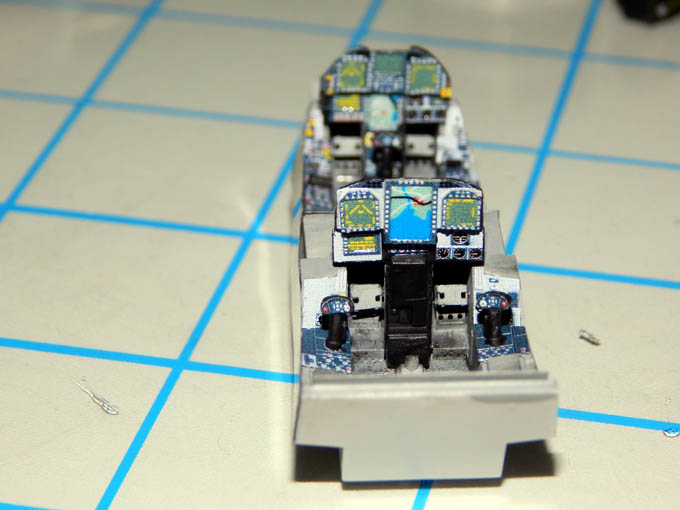
Starting with the cockpit, I built and detailed the seats first. The photo etch set includes the seat belts, seat pads, handles, and warning signs for each seat. Once the seats were done I moved on to the cockpit tub. The details added were the pedals, walls and dashboards. I weathered the interior with some dark gray pastel chalk the mounted the cockpit in to the lower fuselage. The kit shares the same mold as the Hasegawa F/A-18E/F so some of the details on the nose needed to be modified. The instructions show you which panel lines need to be removed and which ones to add. Since the EA-18 version does not have the guns, the gun bulge and ports are removed. It is nice that the instructions include the corrections.
Check out the many other photos in the build log on my blog at https://davidsscalemodels.com/build-log/1-48-ea-18g-growler-vaq-209/
-
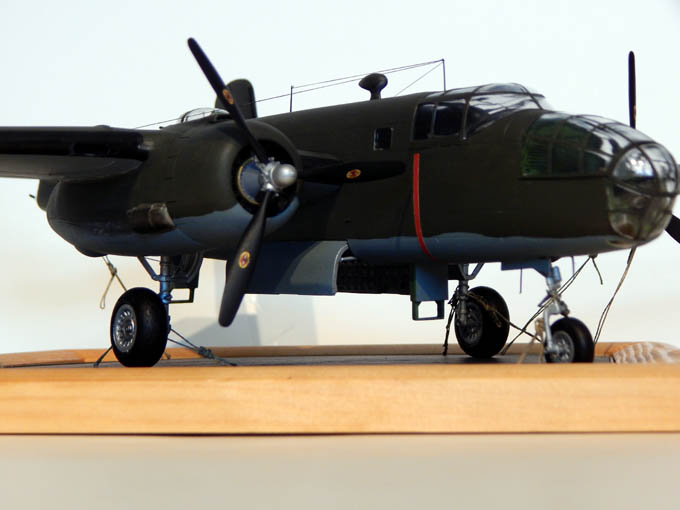
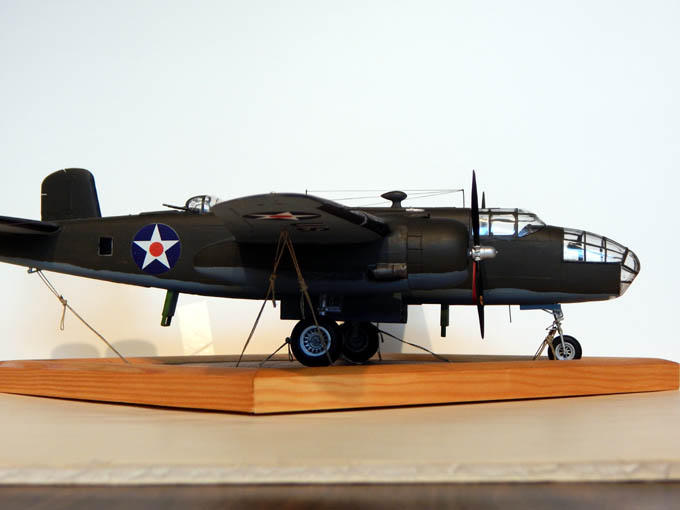
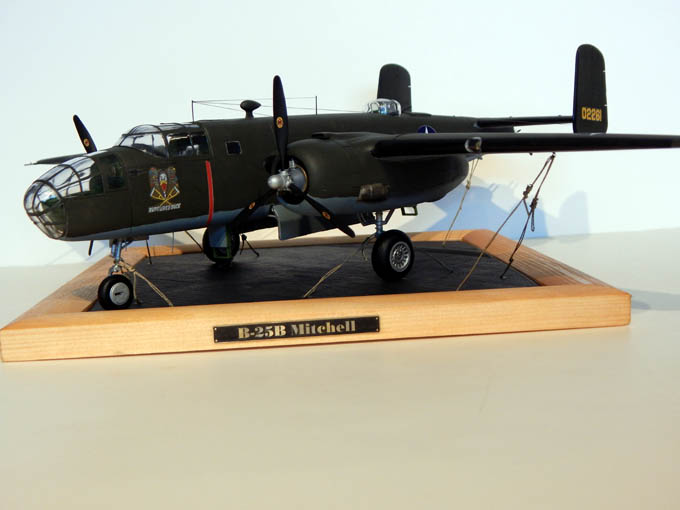
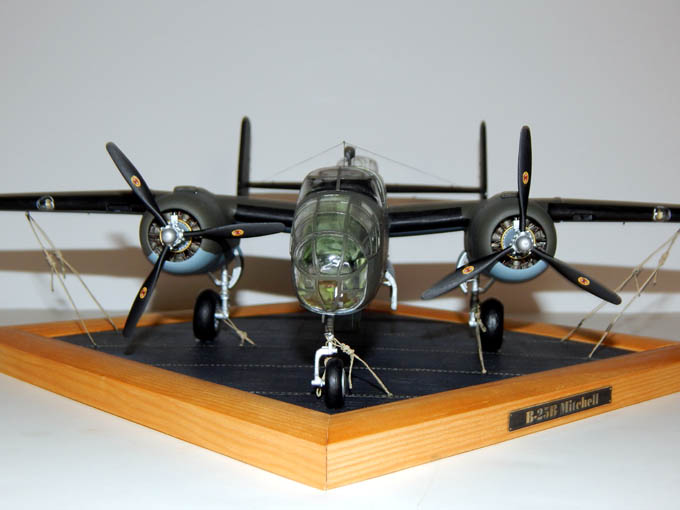
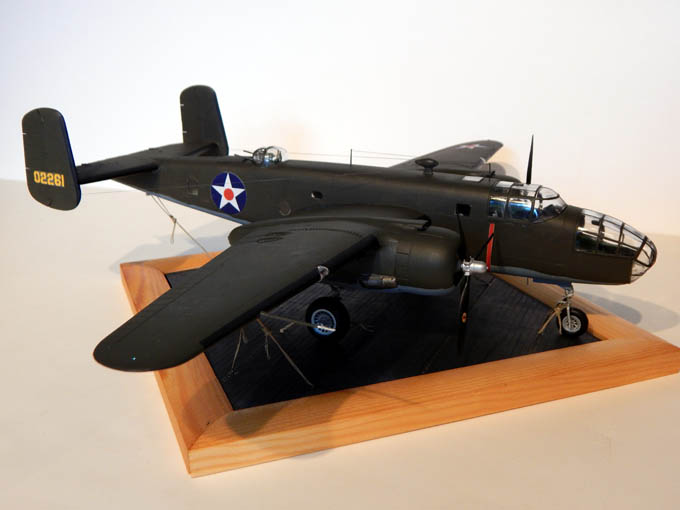
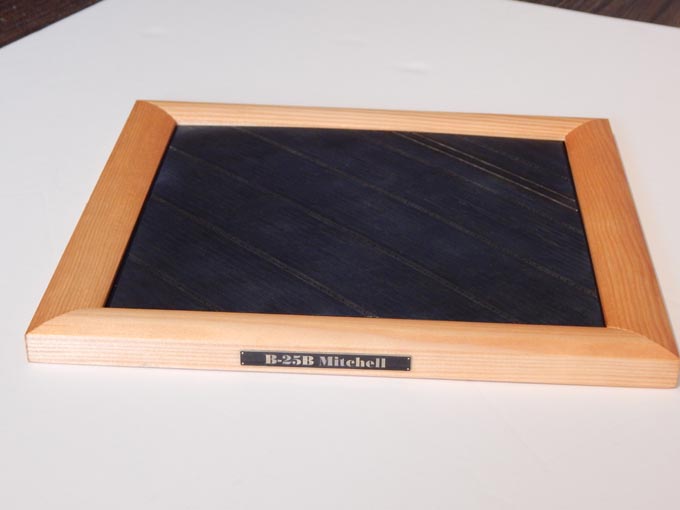
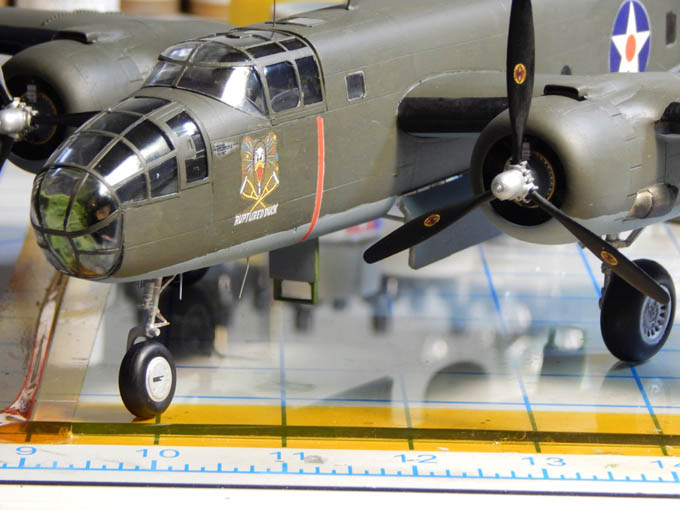
The Accurate Miniatures 1/48 B-25B representing the “Ruptured Duck” is now complete! It has been mounted to the deck and tied down. I used Berkley 50lbs test braided fishing line to simulate the ropes. Then I used two tweezers to make the knots. Finally they were then painted with Tamiya Buff (XF57). Once it was mounted I used EZ-Line to rig the antenna lines. Aside from the issue with the decals I really liked this build. The kit is well detailed and the fit was very good. It now sits on the display shelf while I decide what the next build will be.
Build log with all the photos from start to finish; https://davidsscalemodels.com/build-log/1-48-b-25b-doolittle-raider/
-
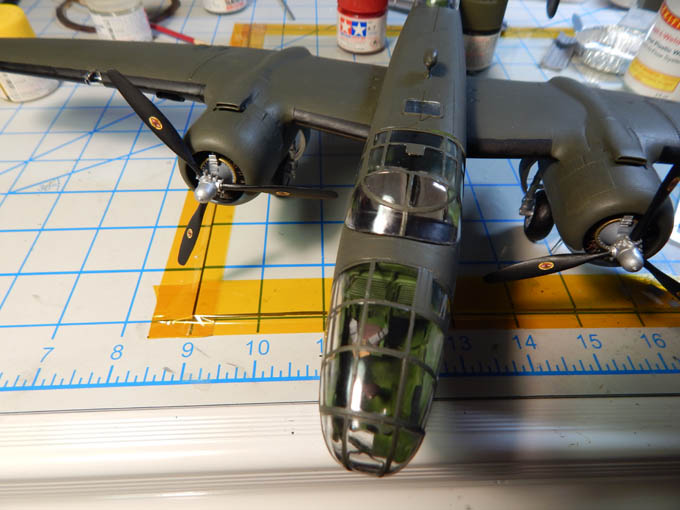
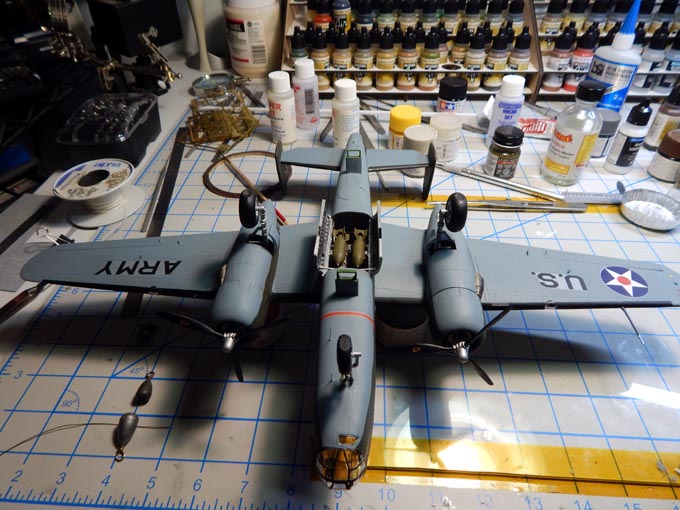
This has been a difficult week on the B-25B. Calling this the good, the bad , and the ugly week. The good is paint and decals done. The aircraft is nearly done with the exception of some minor details. I will be mounting it onto a resin base that looks like the deck of the USS Hornet. It will be tied down just like it was on its journey across the Pacific. The base is the Eureka XXL USN Aircraft Carrier Wooden Deck Base. It comes with a resin insert, wooden frame, and steel arresting cables. It is very nice and very detailed. I used a teak colored primer then top coated it with deck blue. I weathered it using some sandpaper and pastel chalk. The fit of the kit has been very good with minimal gaps.
The bad is the decals. The kit decals are poor. They are slightly off register and very thick. I had a rough time getting them to adhere to the model.
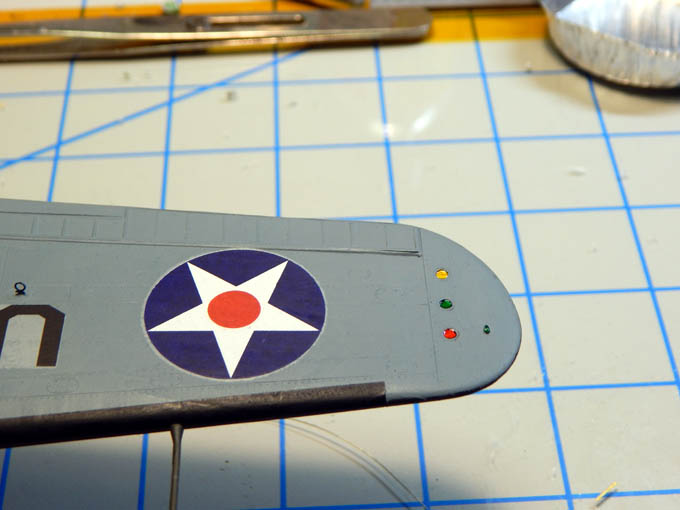
And finally for the ugly part. The Ruptured Duck logo aside from being difficult to adhere also was not very accurate and the coloring is wrong. It actually came off while I was painting the recognition and formation lights. After some internet searching I found the logo that closely resembles the original (as described in the book “Thirty Seconds Over Tokyo”) and was used on the aircraft from the movie. I had to make my own decal for this. It looks a lot better than the kit decal.
Stay tuned as I near completion of this kit representing a historic aircraft.
You can see all the build photos at https://davidsscalemodels.com/build-log/1-48-b-25b-doolittle-raider/
-
I use Kapton tape to tape off areas and do not have any problems around curves and angles. Have done boots on other models without issues.


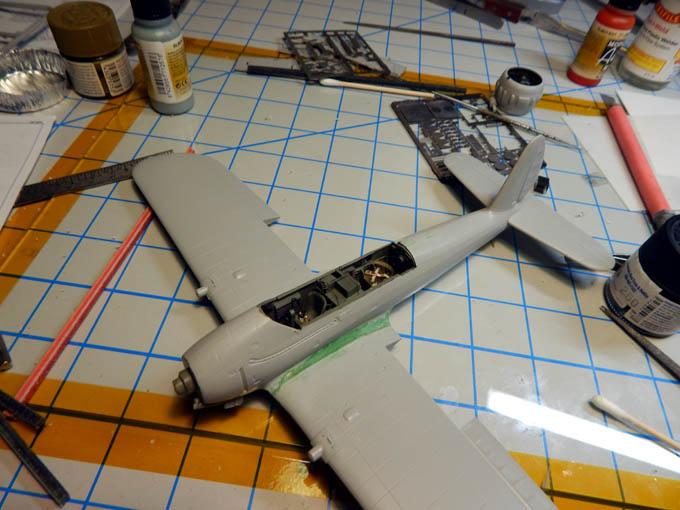


Italeri 1/48 F7F-3 Tigercat
in Builds
Posted
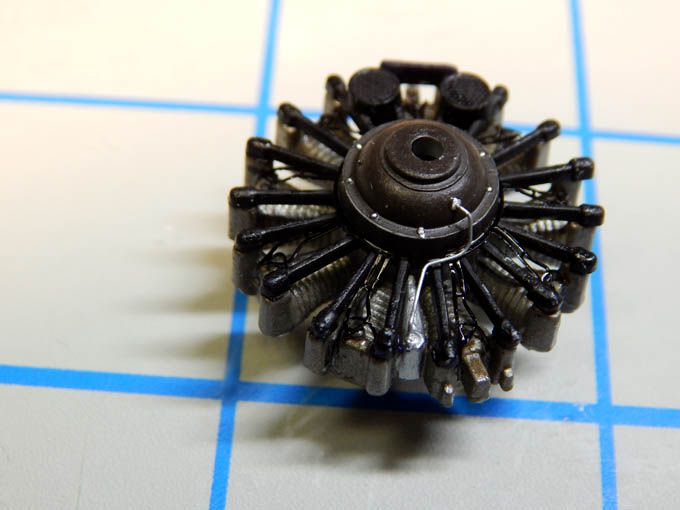
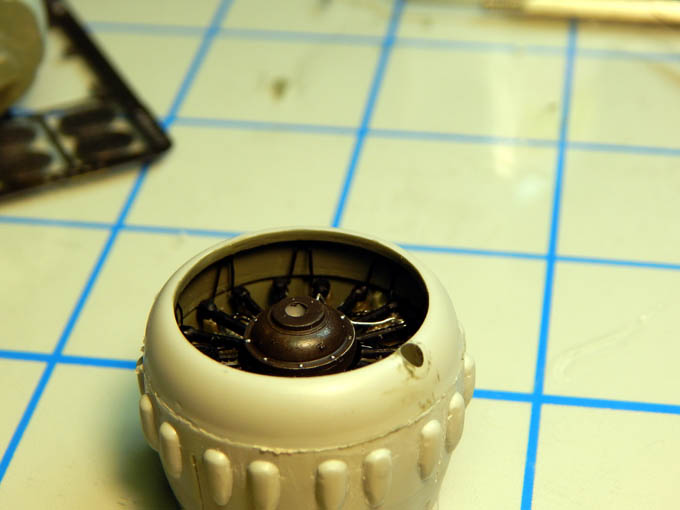
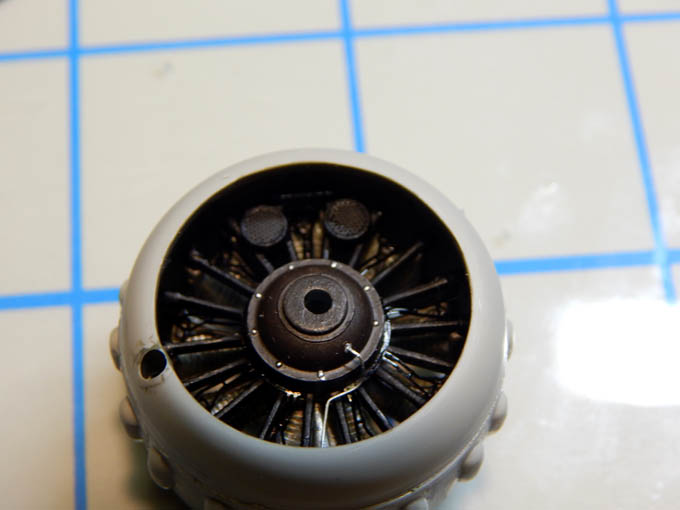
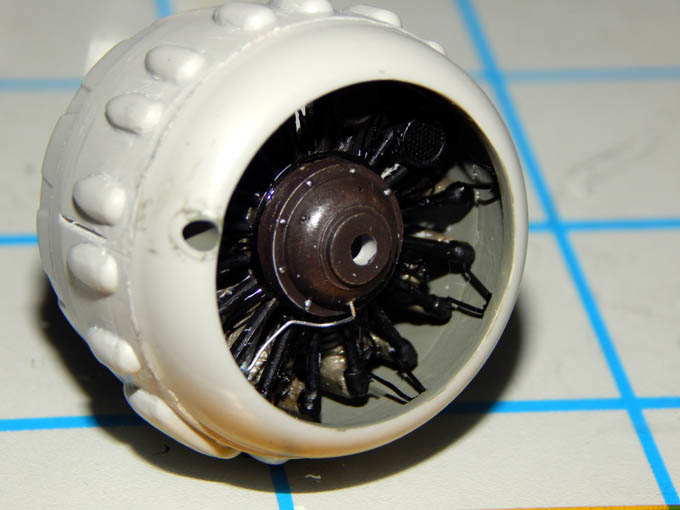
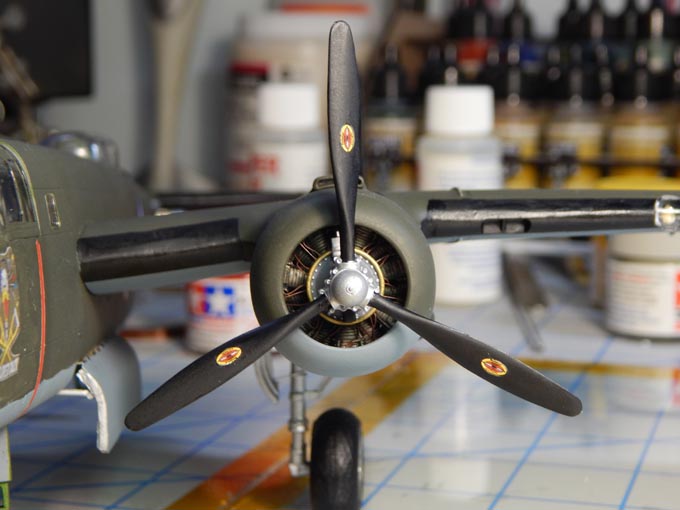
More progress on the Tigercat. I first cut out the molded wing tip lights. Later I will add clear parts to make the lens. Next I assembled and detailed the main gear bays with some photo etch and detail painting. Moving onto the engines I used the photo etch wiring harness. The engines were painted with aluminum for the cylinders and black for the pushrod covers. The wiring was painted burnt umber and the front cover was painted light gray with chrome bolts. The landing gear was then detailed. The main struts had the hydraulic lines molded on. I cut them off and replaced them with black sleeved 32 awg wire. I drilled a small hole at each end then stripped the sleeving off to the bare wire and CA glued the wire into the hole. I added the one for the nose gear as well.
When assembling the fuselage I filled everything forward of the cockpit to the nose with lead weights. Alas even with all the weights the aircraft still wants to sit on its tail. There just isn’t enough room to add more weight due to the sleek fuselage. I am most likely going to make a display base for the aircraft to sit on so that it displays correctly. The fuselage has been base coated and the decals will be the next step.
You can see all the build photos from the start on my blog at https://davidsscalemodels.com/build-log/1-48-f7f-3-tigercat/