johneaton
-
Posts
106 -
Joined
-
Last visited
-
Days Won
7
Content Type
Profiles
Forums
Events
Everything posted by johneaton
-

Dragon M48A1 Elvis Tank, Patton Project Pt.III ***FINISHED***
johneaton replied to Stikpusher's topic in Armor
If I built a tank I'd like it to look like this one💪 -
Thanks, Jim and Rick. Nah, Rick, I'm about two pockets short of the patience a real modeler has🥴
-
Getting closer. If I was a real modeler I would spend a few more hours on the propellers. The resin parts were pretty rough, by modern standards.

-
I could spend another day on this one but as usual it's at the point where I have to give up because my shaky fingers keep breaking bits off. Oh, well, it's been that way since I was 8 or 9. Looks good lined up on the shelf with a yellow wing F4F-3, an FM-2, and an F6F. I didn't paint the back of the props flat black because pictures seemed to indicate that they weren't, but looking at the pictures and seeing how far ahead of the cockpit the props are I'm wondering about that. The props are removable so I can fix that if I choose to. I probably should put an antiskid patch on for the wing walk too.
-
Thanks, Carlos and Mark. I am well pleased with it at this point and hope I can get it to the finish line without messing it up.
-
Looks great to me, a lot of nice work here. I like the carrier deck!
-
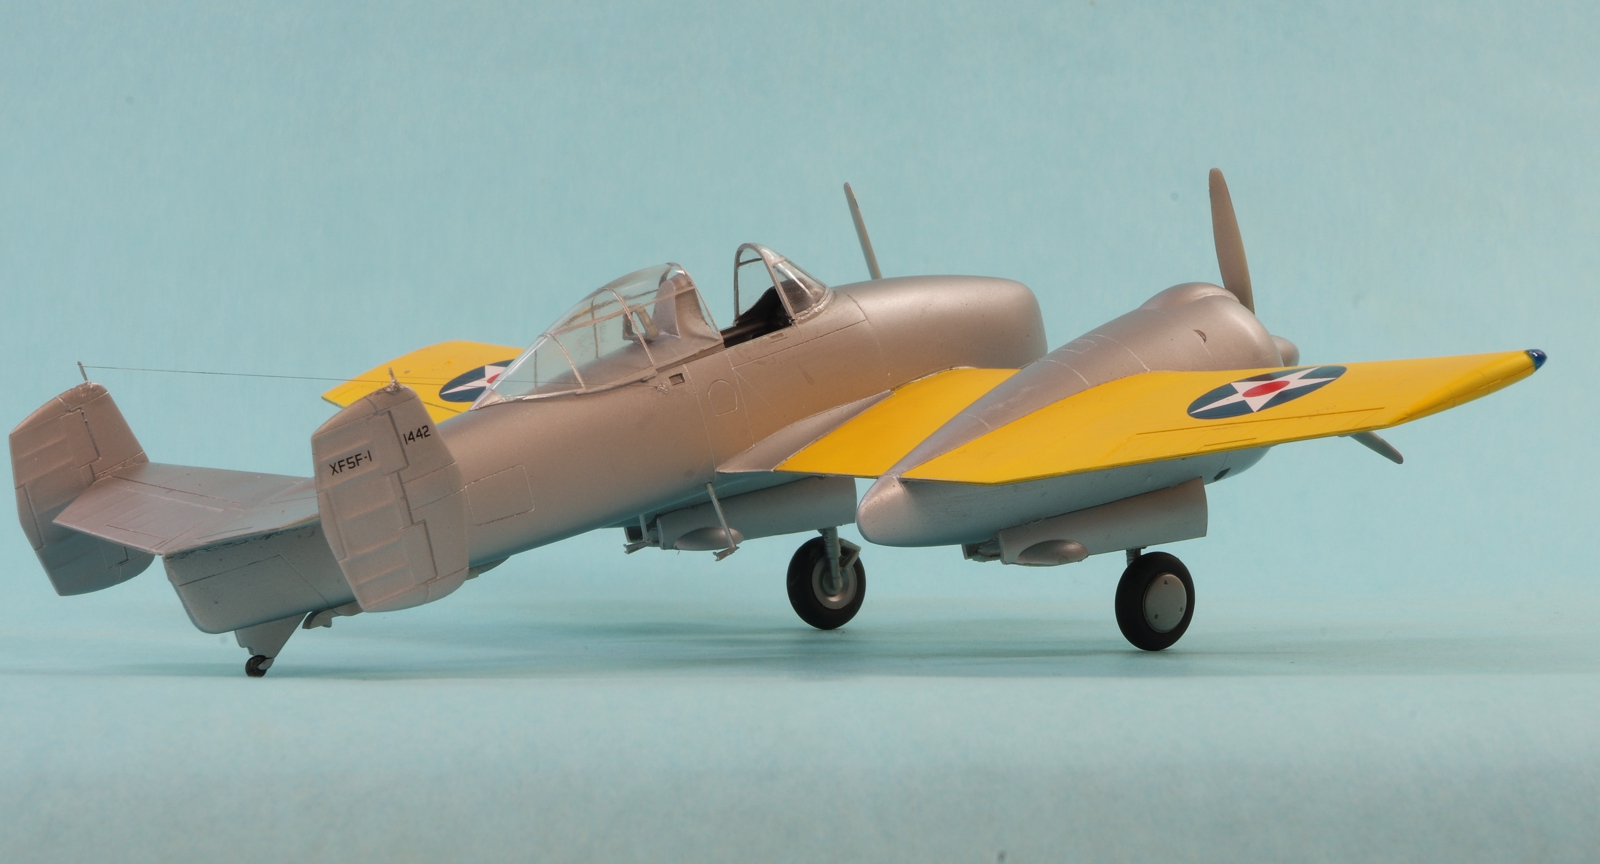
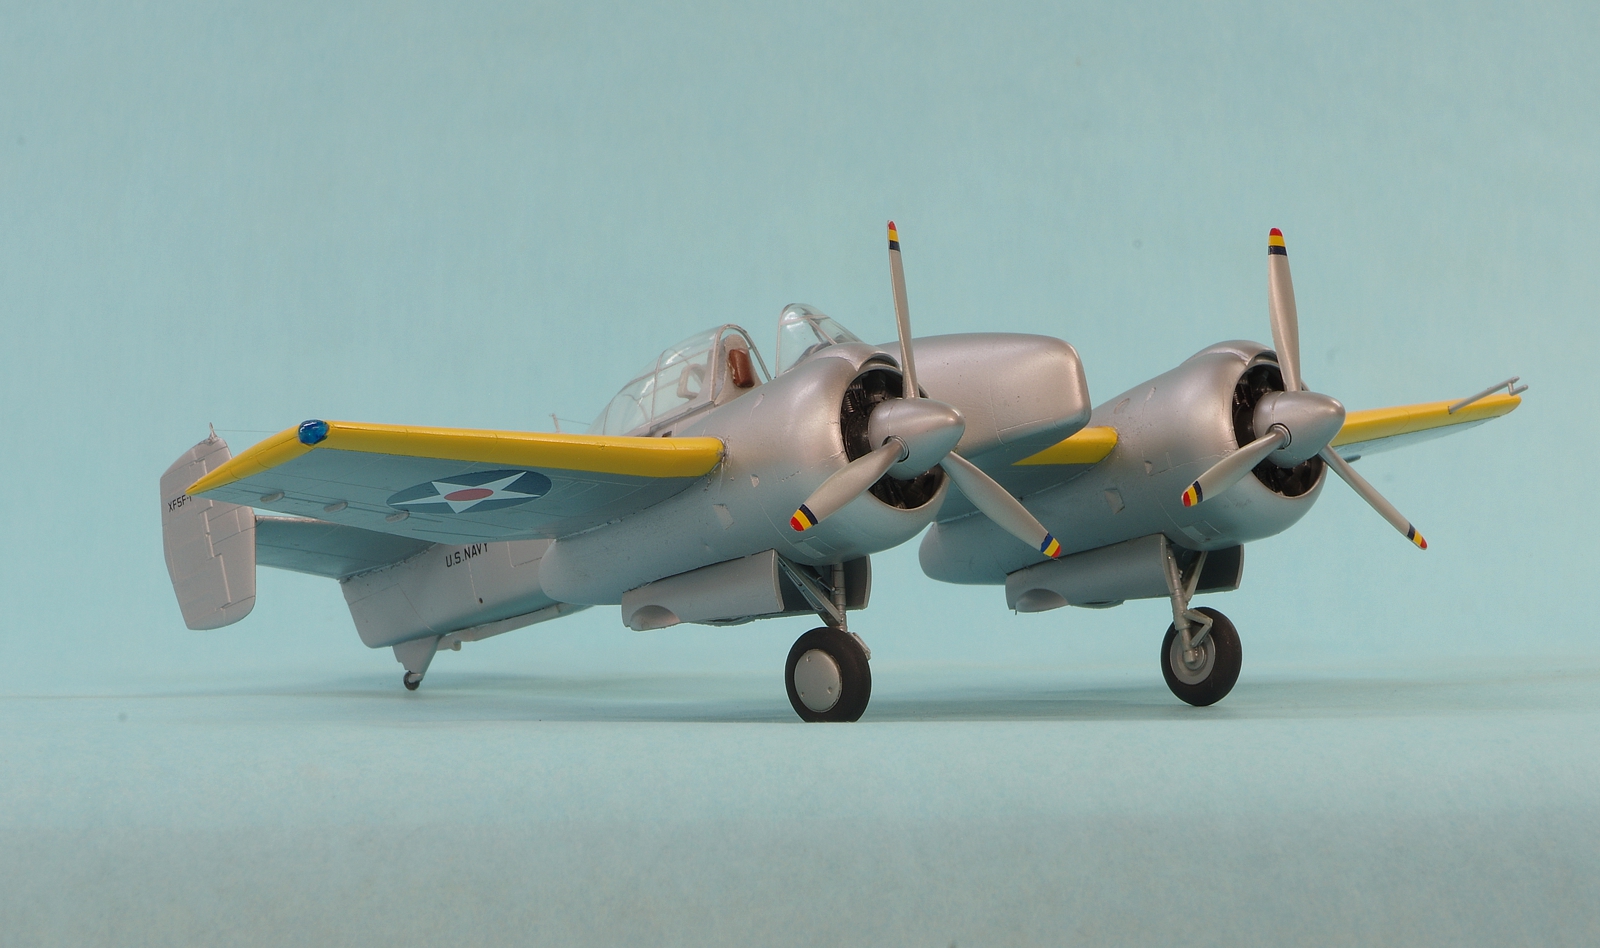
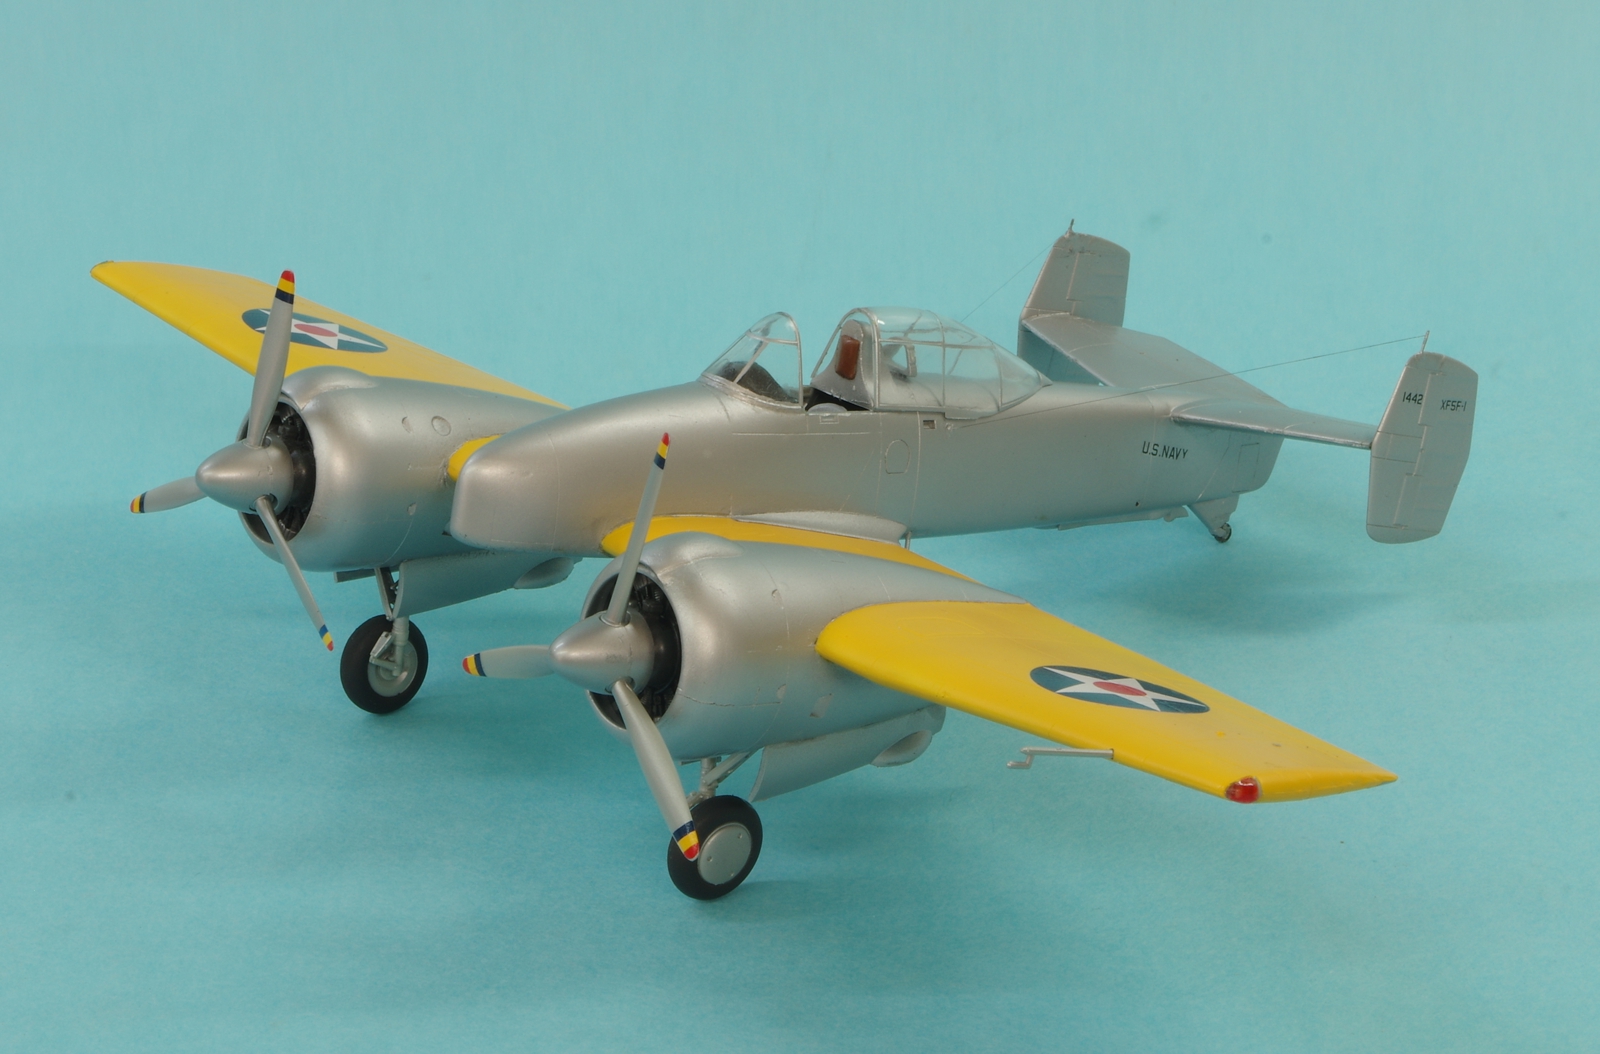
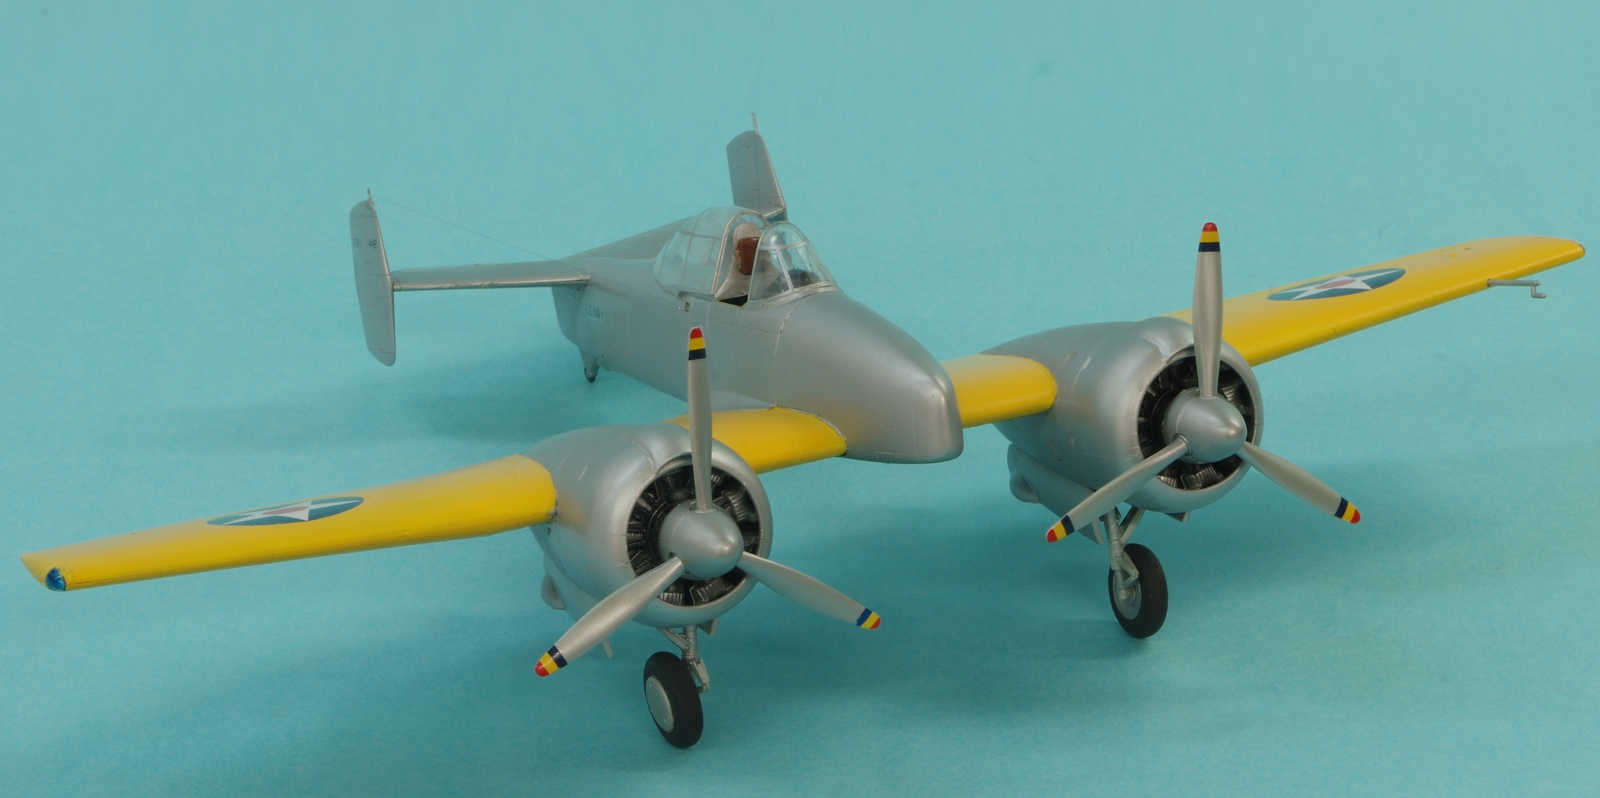
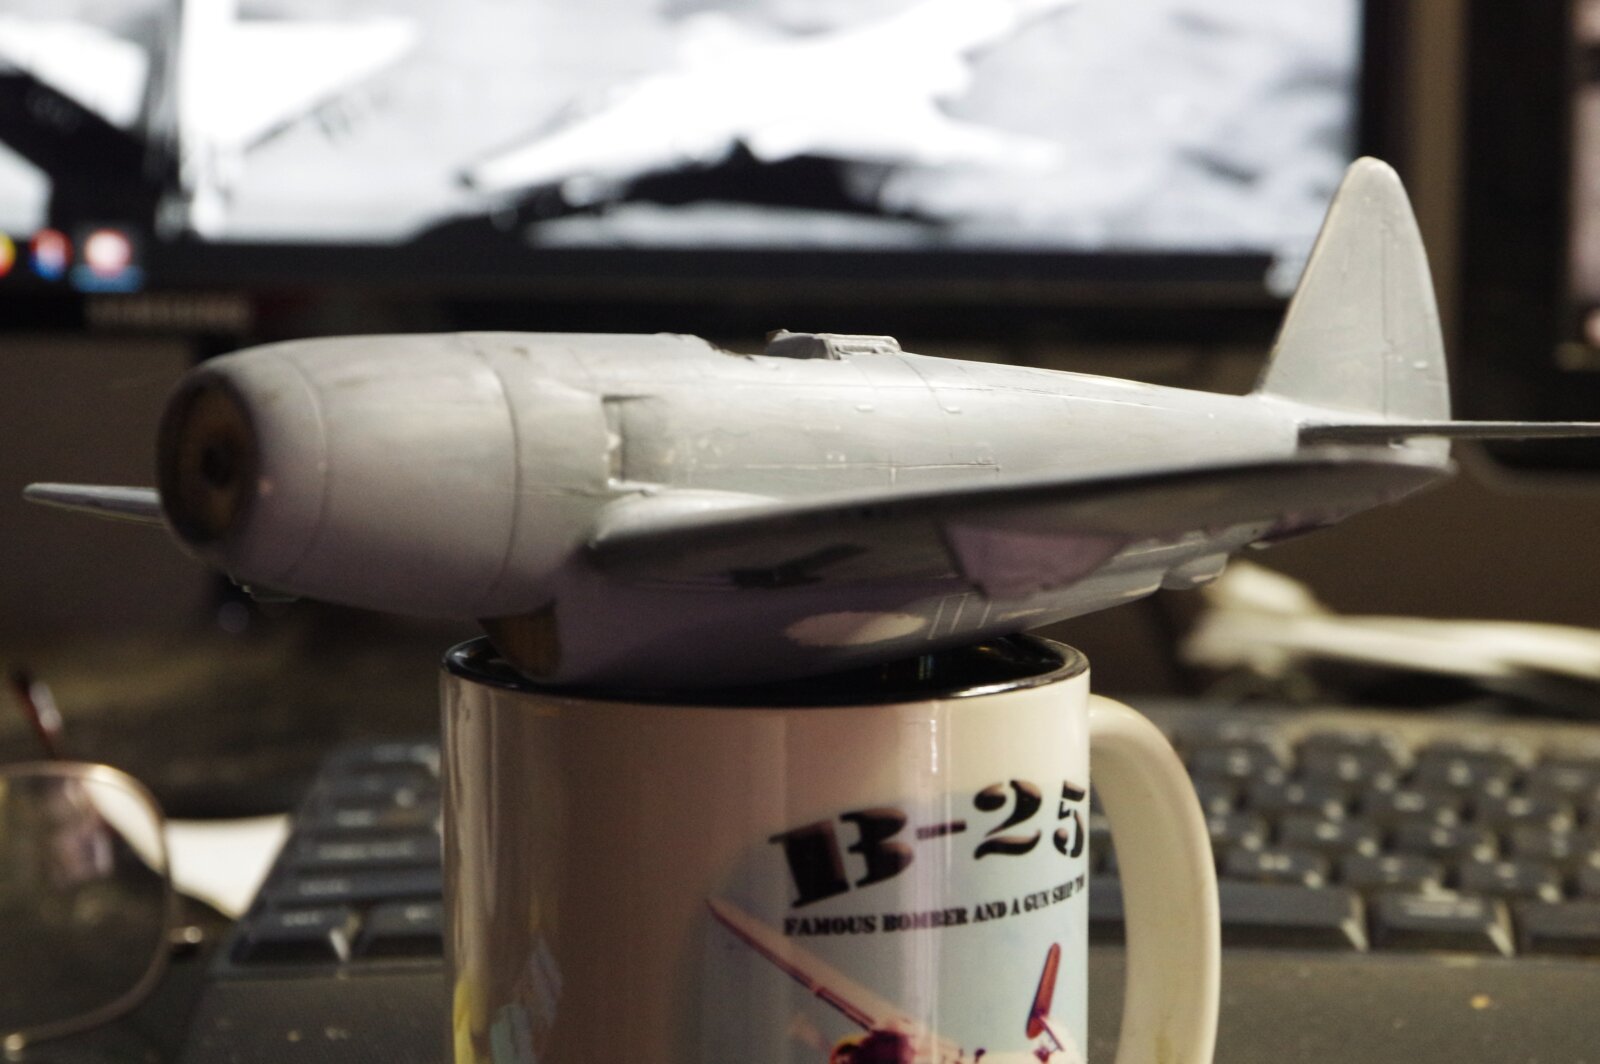
I've been working on this one for a week or two, letting an Airfix Victor K.2 rest a bit before I start painting the camouflage. It has a few indefinite fits, especially if you build the long nose version, but everything does finally fit without much seam work so long as you don't hurry. The F8F in the second image is a Hawk kit I built in 1967 and has lasted all these years just as it was built. I used Tamiya AS-12 Silver decanted and Hataka Yellow Orange C006.
-
Great post, thanks, Rick. Where do you hang out now, forumwise?
-
Here's the current progress, lots of time fixing seams, rescribing and fixing goofs on scribing, and other various don't want them theres:
-
Well done, David!
-
Nice work, David. That's a lot of what, bracing? in the cowl fronts.
-
I'm always surprised at how large the Buffalo and Wildcat were, compared to a P-36, Zero, or Spitfire. Barrel shaped fuselages that had to be mostly empty.
-
Very nice, Bill. I recently got in contact with the granddaughter of a friend of mine. He was a Polish pilot in the RAF in Spitfires. She recently sent me a group photo of a flight instructor class he was in, and I hope to see some photos of some of the airplanes he flew. I towed gliders for him way back when in Truckee.
-
Nicely done, David.
-
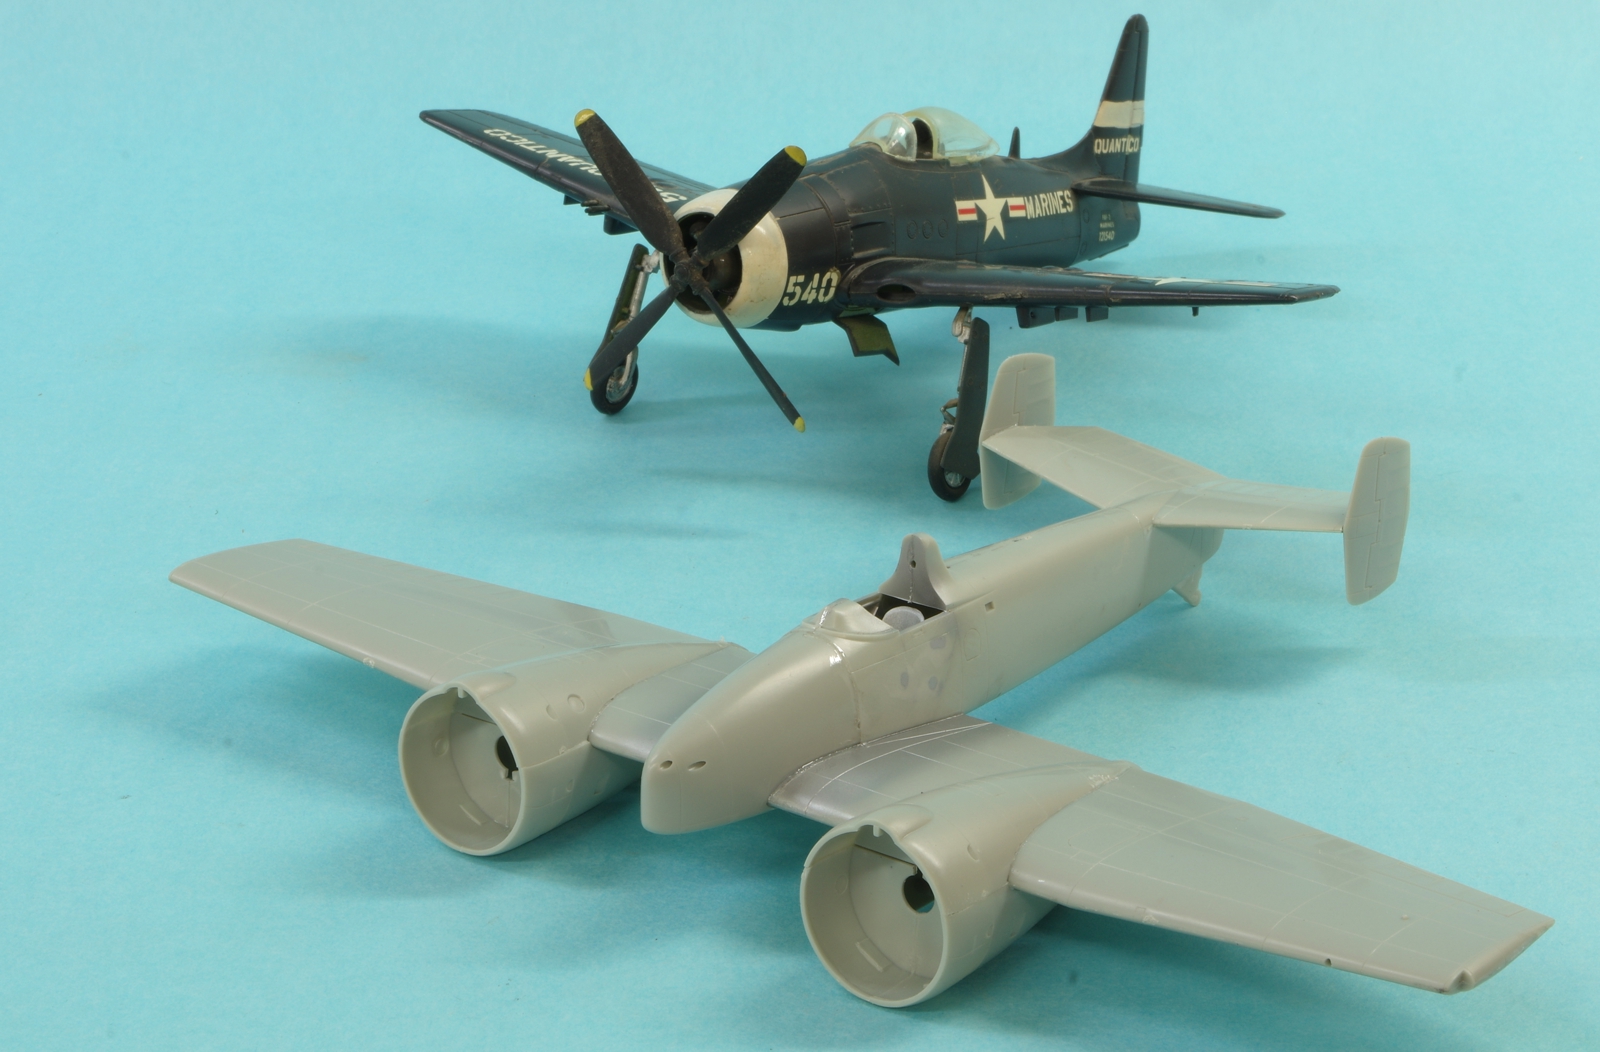
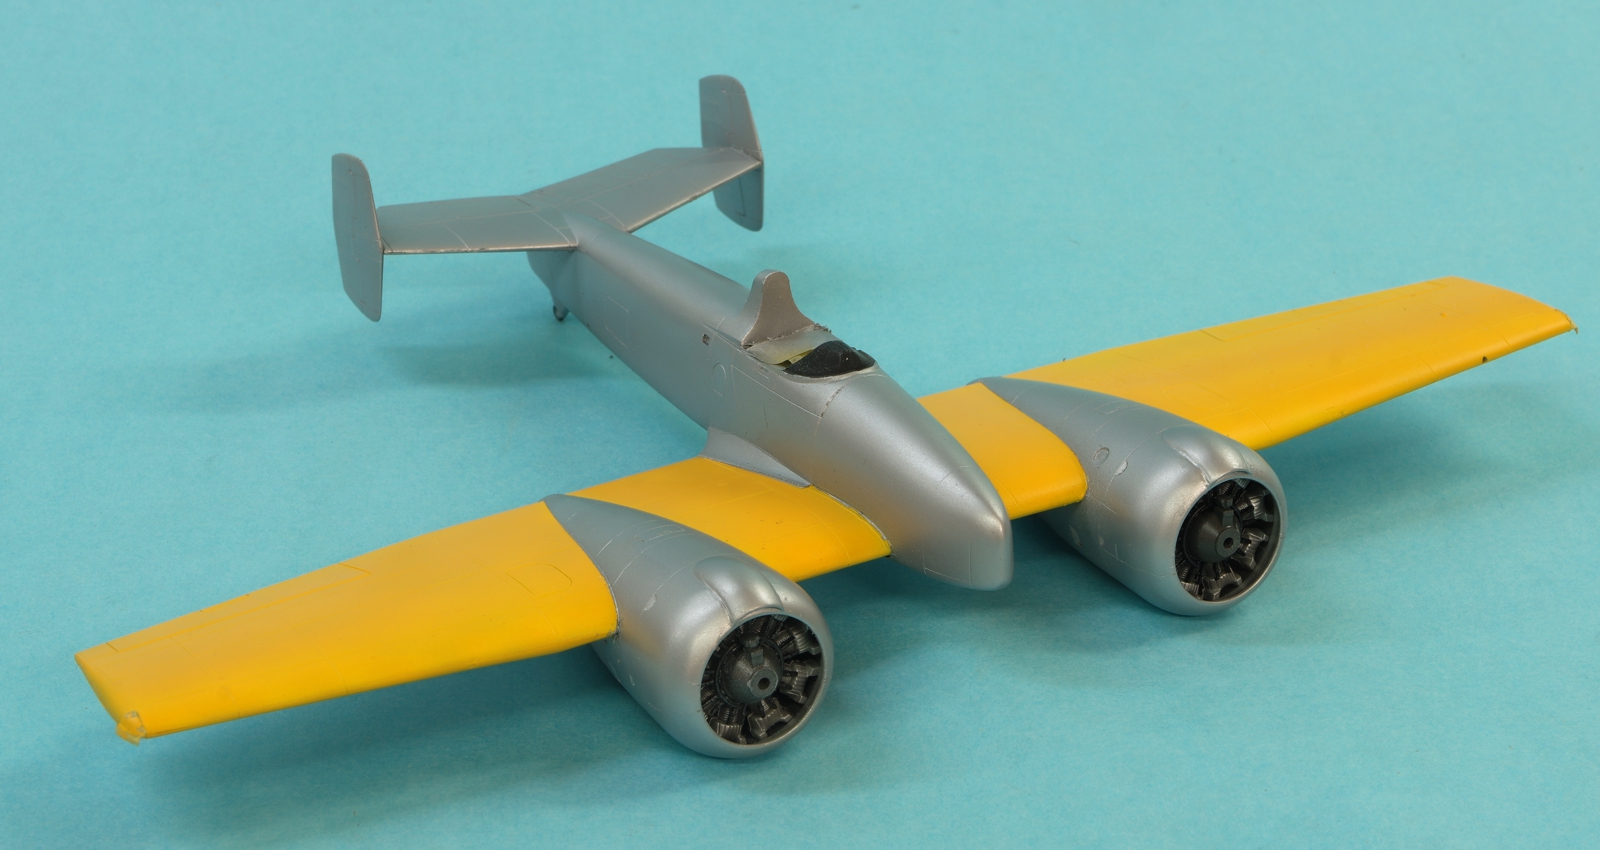
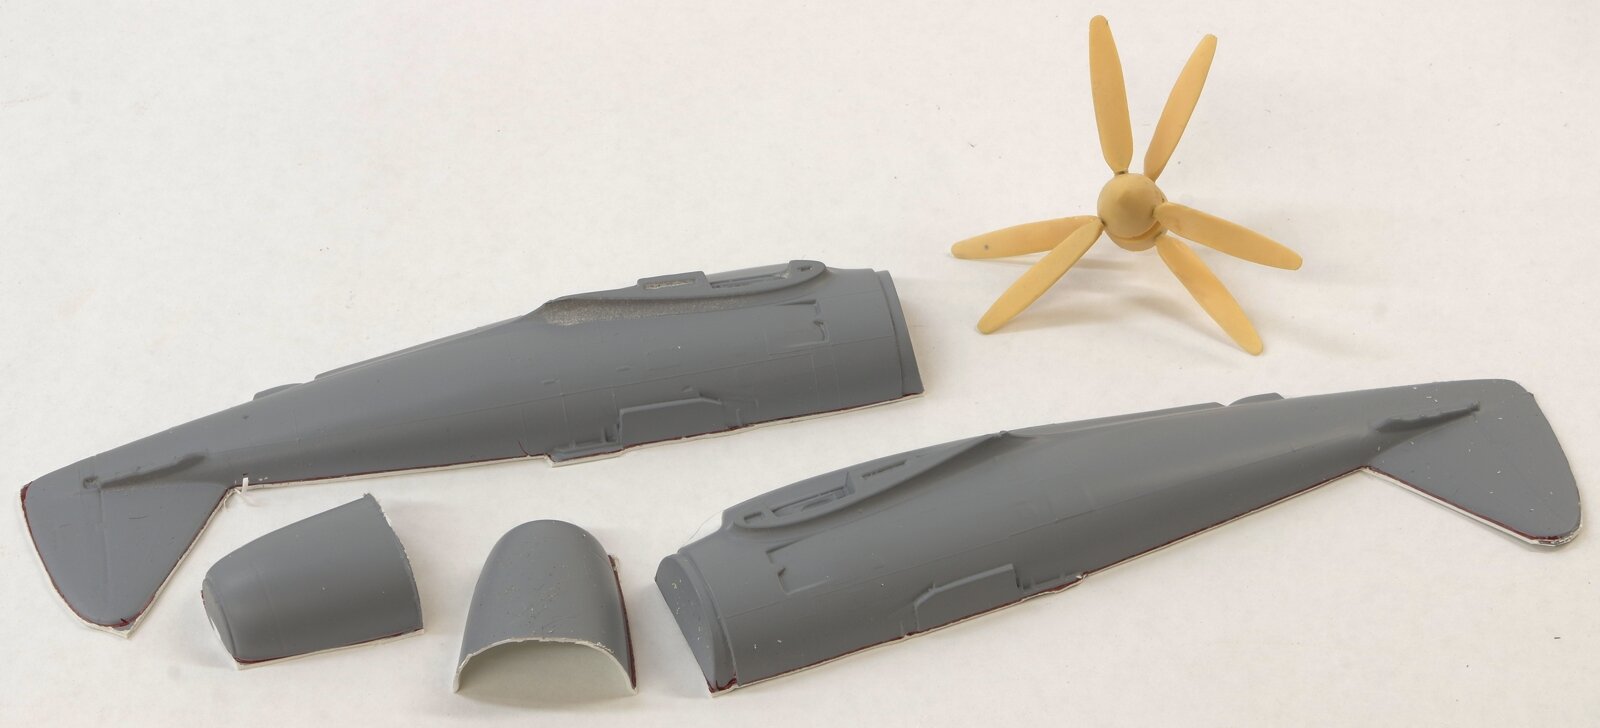
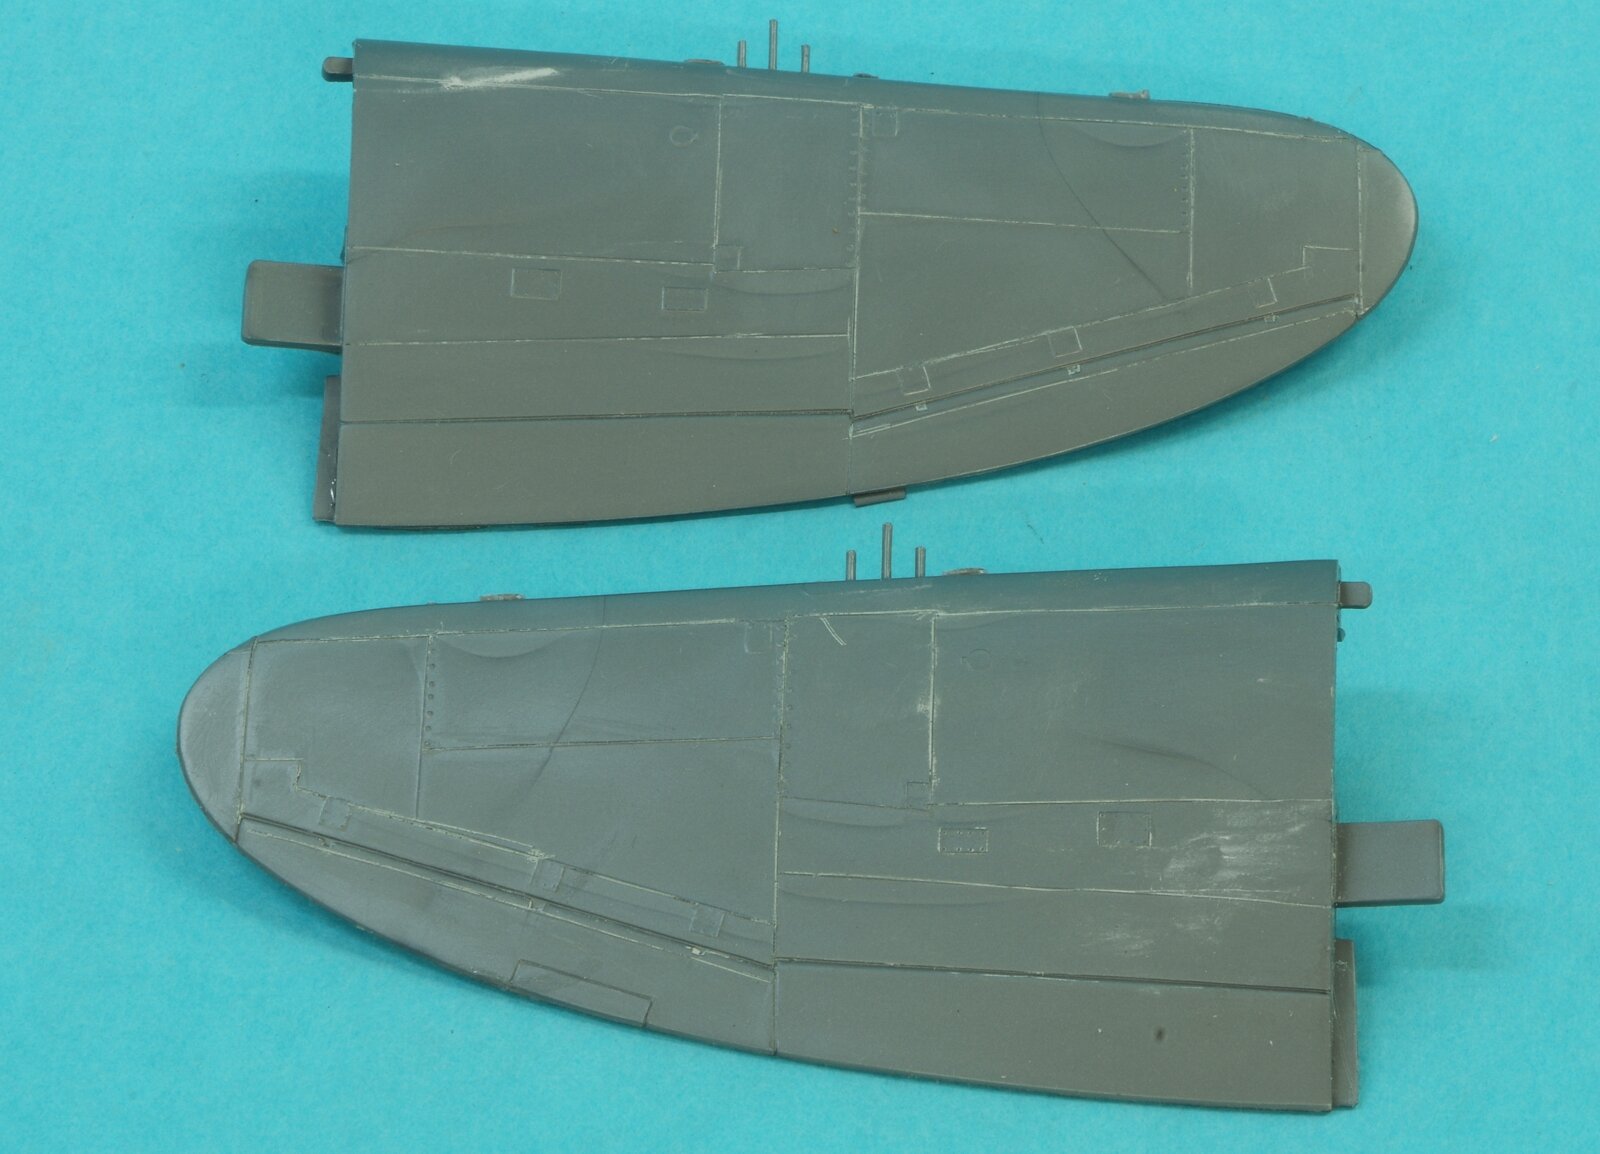
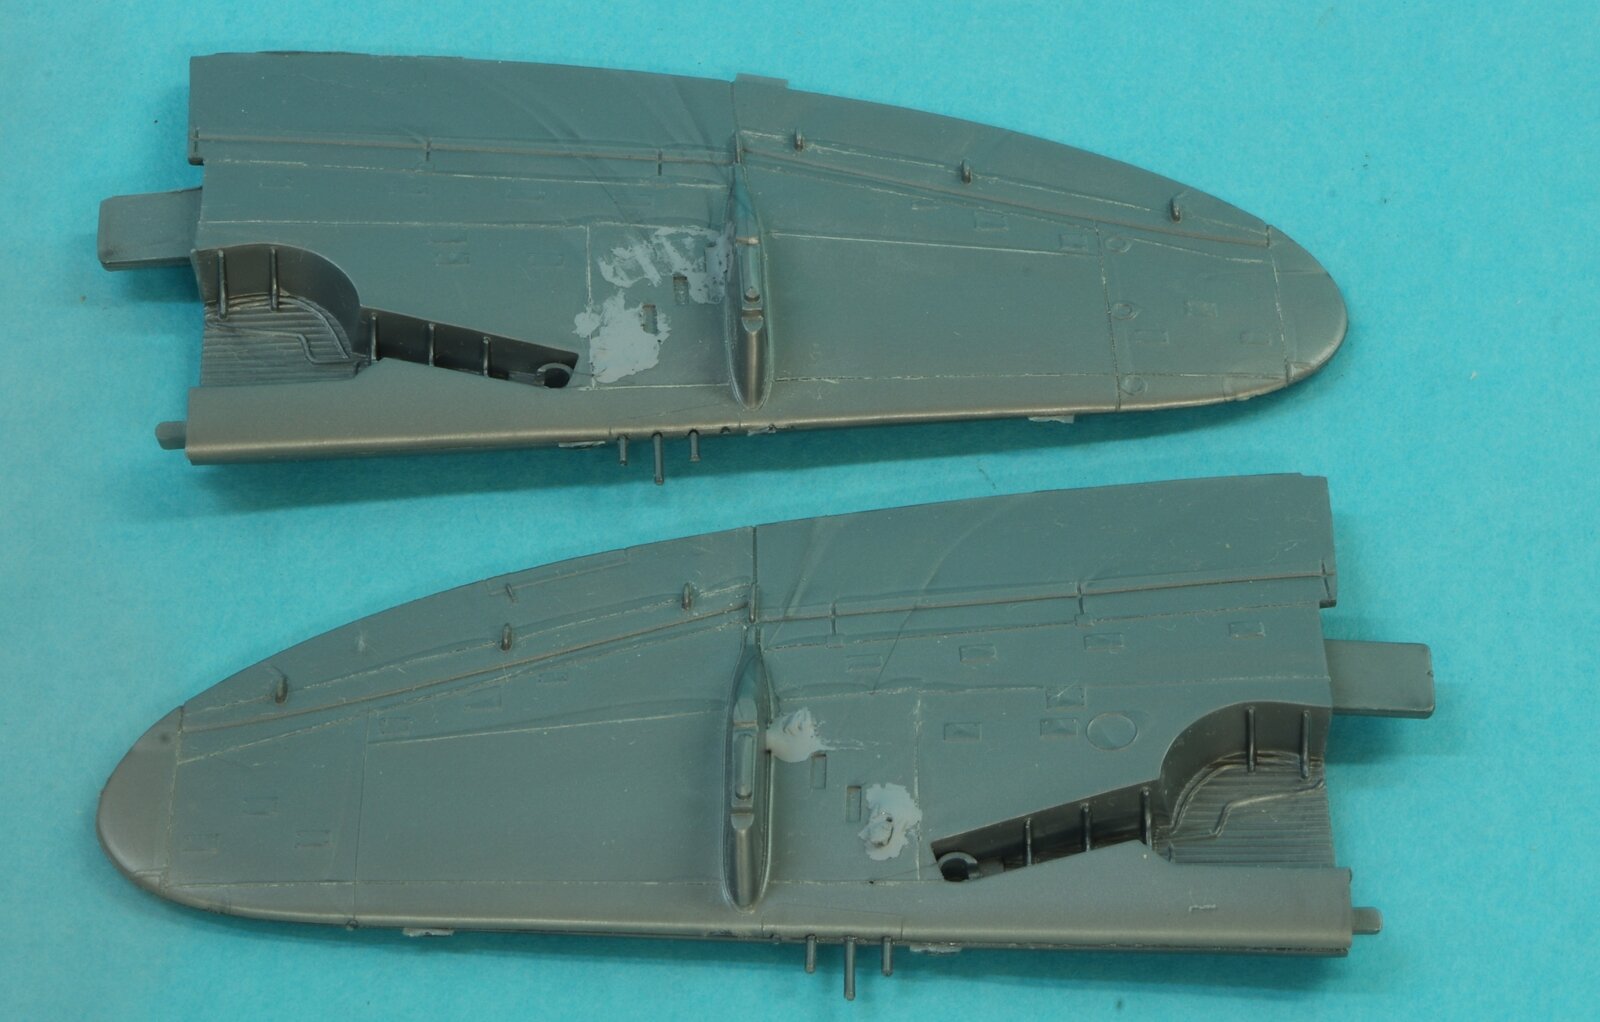
Started on this as a fill in model while others have waiting time. The Koster parts are very good to work with. I followed Bill's directions and sprayed the vac sheets with a good grey primer, then went around the edges with a narrow felt pen. I scored around on the middle of the black line and then put a piece of 220 wet or dry on a glass surface and sanded until things looked right. Since it has been a fill in project I wasn't as good as I should have been about wip photos, but what's not shown is the process of putting together and installing a Black Box/True Details P-47M resin cockpit and Eduard seat belts/instrument panel. I put strips of plastic card in alternating spots on the fuselage halves and glued them together using the Tamiya resin glue in the hexagonal bottle. I am starting to like that glue, though the brush is a bit bigger than I like. There were resin parts for the contra rotating propeller, engine fan, and intercooler below the chin. This airplane was powered with the Pratt and Whitney R-4360 and unlike earlier Thunderbolts it did not have a GE turbocharger. Instead it had a second stage compressor mounted in the back where the turbo was earlier. The compressor was shaft driven from the engine. It had good altitude performance and reached 490mph during the test program. Only two were built, it was too late in the war to be needed. I reinforced the cowl seams with .6 ounce fiberglass adhered with thin CA. The wing panel lines were scribed. The XP-72 had 6 guns arranged differently so gun ports were filled and the barrels modified. The inner gun port will be re-cut to match the location of the third. I backed up the cooling fan with Aves Epoxysculpt, that gave me a lot more time to position the fan correctly. I tried it with gel super glue the first time, but somehow once it was cured I saw that it had deformed the opening of the cowl and I had to take it back out. Some careful Dremel work was successful but I hope I don't ever have to do that again. I put a brass tube in to hold the prop assembly. The basic assembly is done and most of the filling and sanding, though there are a few remaining spots to deal with.
-
Sweet!
-
Oh, crap. Another one that must be added to the stash.
-
Looks real nice, congrats!
-
Nice clean work. Certainly 3 cuts above the Hobbycraft kit.
-
Well, shoot, it looks good here too.
-
Dragon M48A1 Elvis Tank, Patton Project Pt.III ***FINISHED***
johneaton replied to Stikpusher's topic in Armor
Looking good, Carlos. -
Thanks, Keith and Gil.
-
I strayed a bit from simple on this one, inspired by a really nice build of the Lindberg XFY-1 given to me by a friend who has Gone West. I built up a cockpit using some Monogram F-80 parts and a PE instrument panel for which I can't remember the source. The intakes were given some internal trunking and the belly was extensively reshaped as Aurora got that pretty wrong and it is an interesting part of the airplane. A new canopy was made so I could pose it open. Some of the casters were missing so I made some resin replacements and posed them in a more realistic fashion. Work was complicated by the fact that the kit came to me as a glue bomb and the first step was to get it apart without destroying it. Later I found an unstarted kit but what would be the fun in that? It rests in the stash.
-
Thanks, Ed, and I'm sorry I'm so late replying as well. Still working on the new workshop but I'm far enough along to do some modeling now. I have been to Oshkosh but it was way back in 78. It's a great place to take pictures.
-
That's the way to build these old kits. Looks good and was fun too, I'll bet.