


mustang1989
-
Posts
551 -
Joined
-
Last visited
-
Days Won
25
Content Type
Profiles
Forums
Events
Posts posted by mustang1989
-
-
33 minutes ago, ewahl said:
Hi, Joseph,
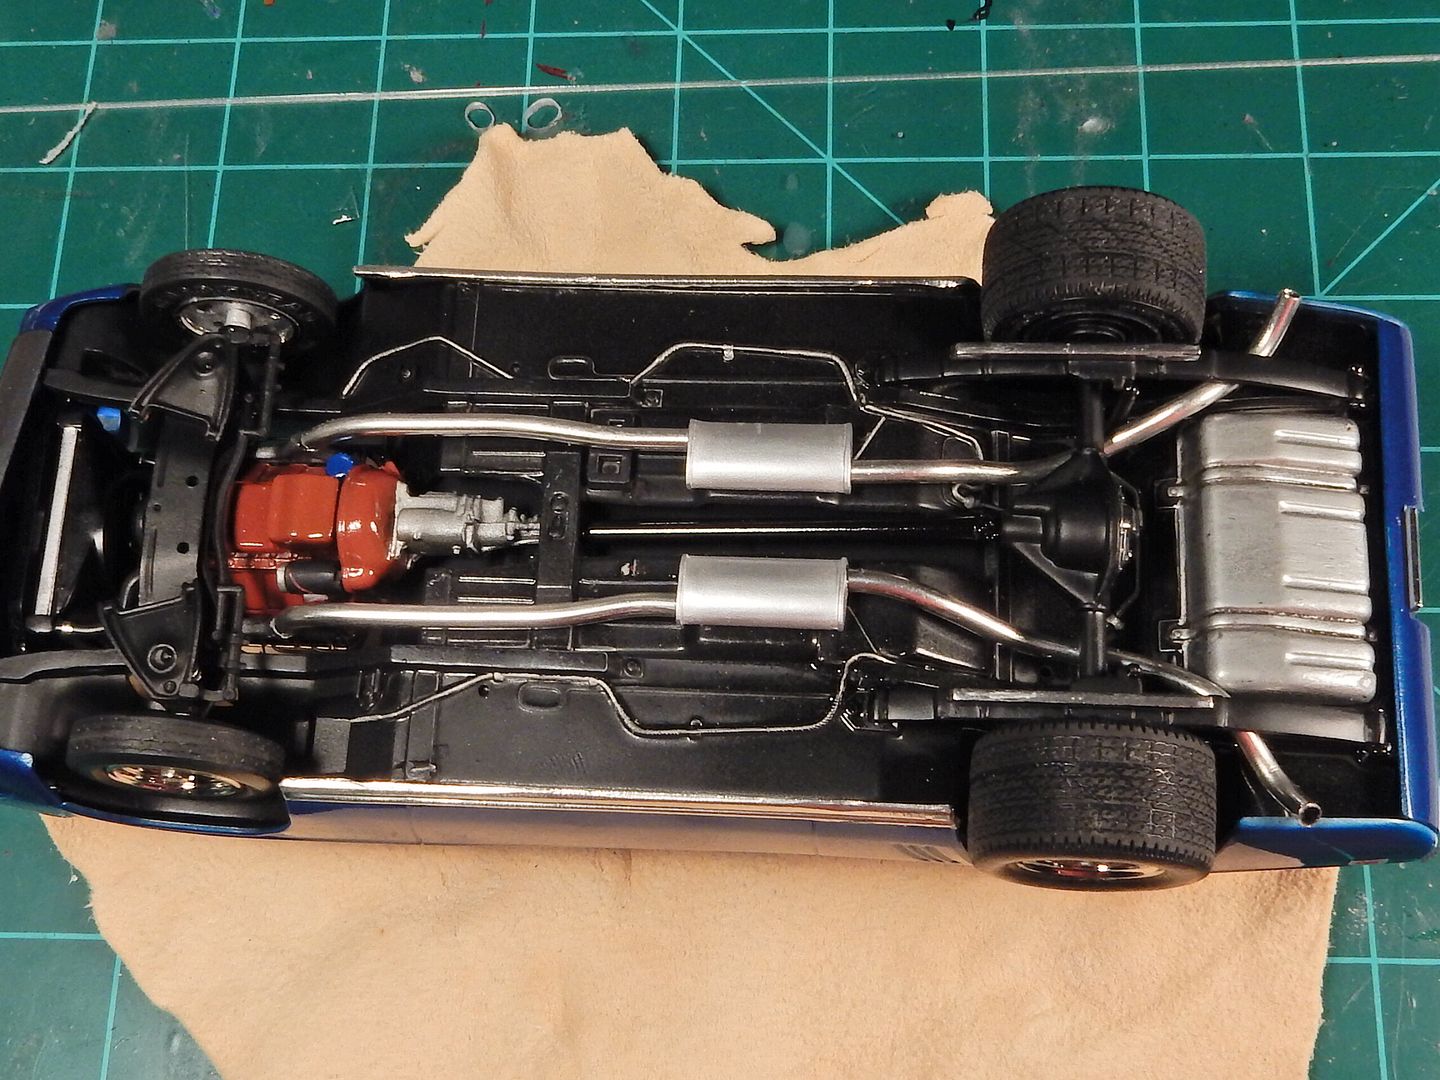
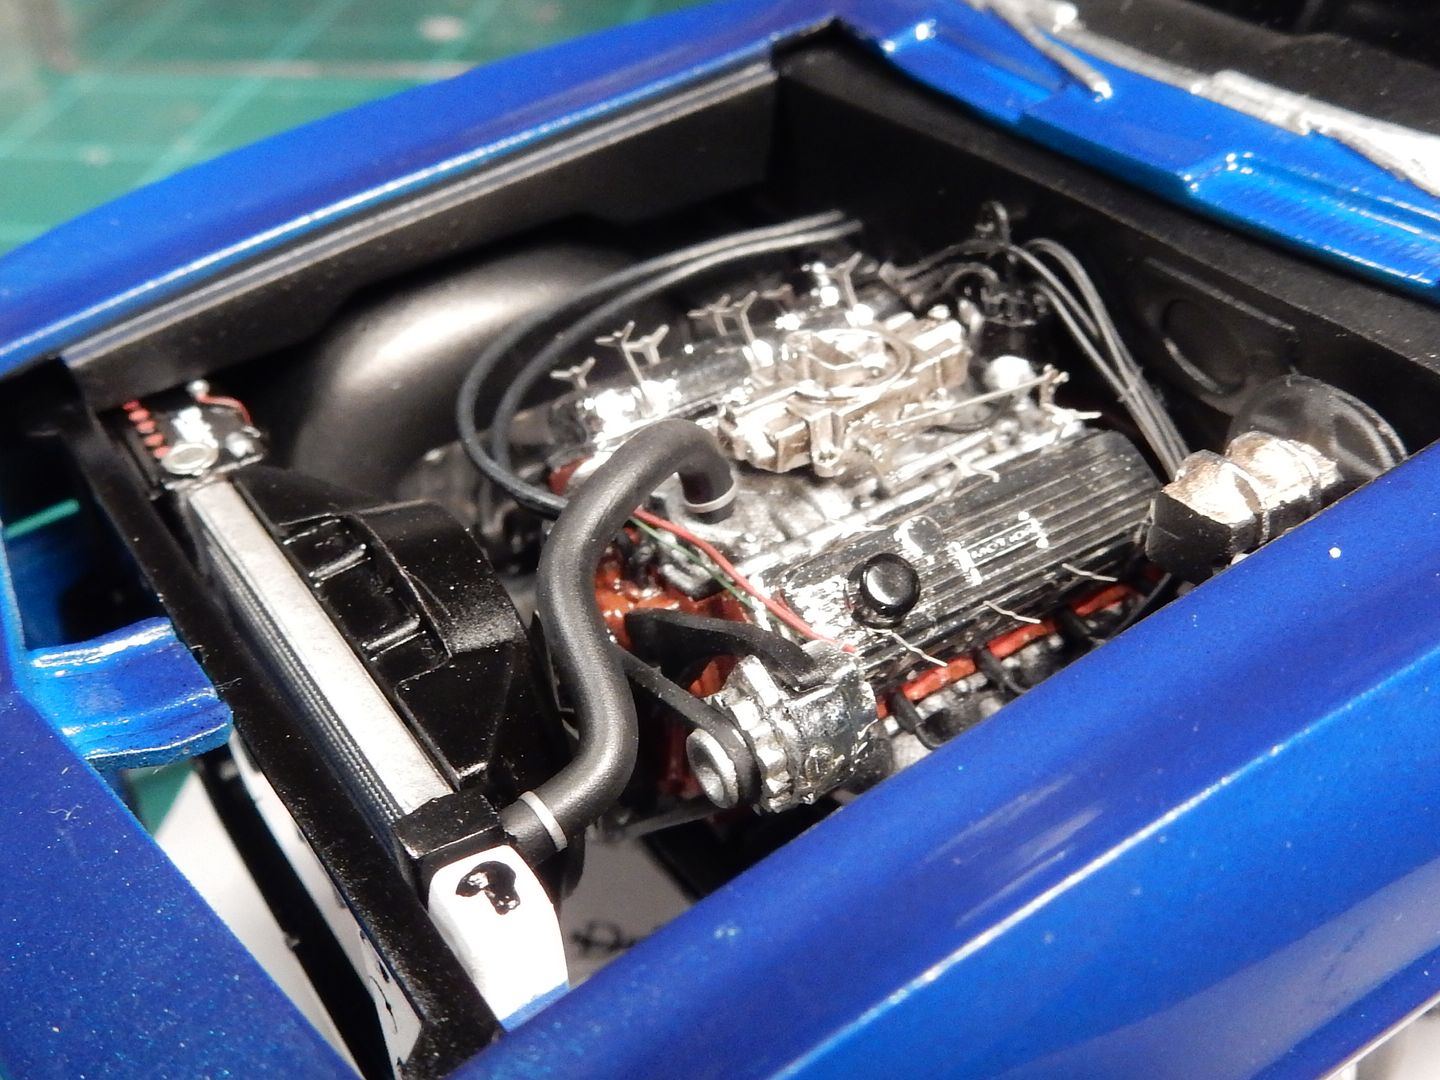
This is beautiful. I'm jealous of the finishes you put on plastic. The engine compartment and the undersides show everything that needs to be shown.
Ed
Thanks Ed!
-
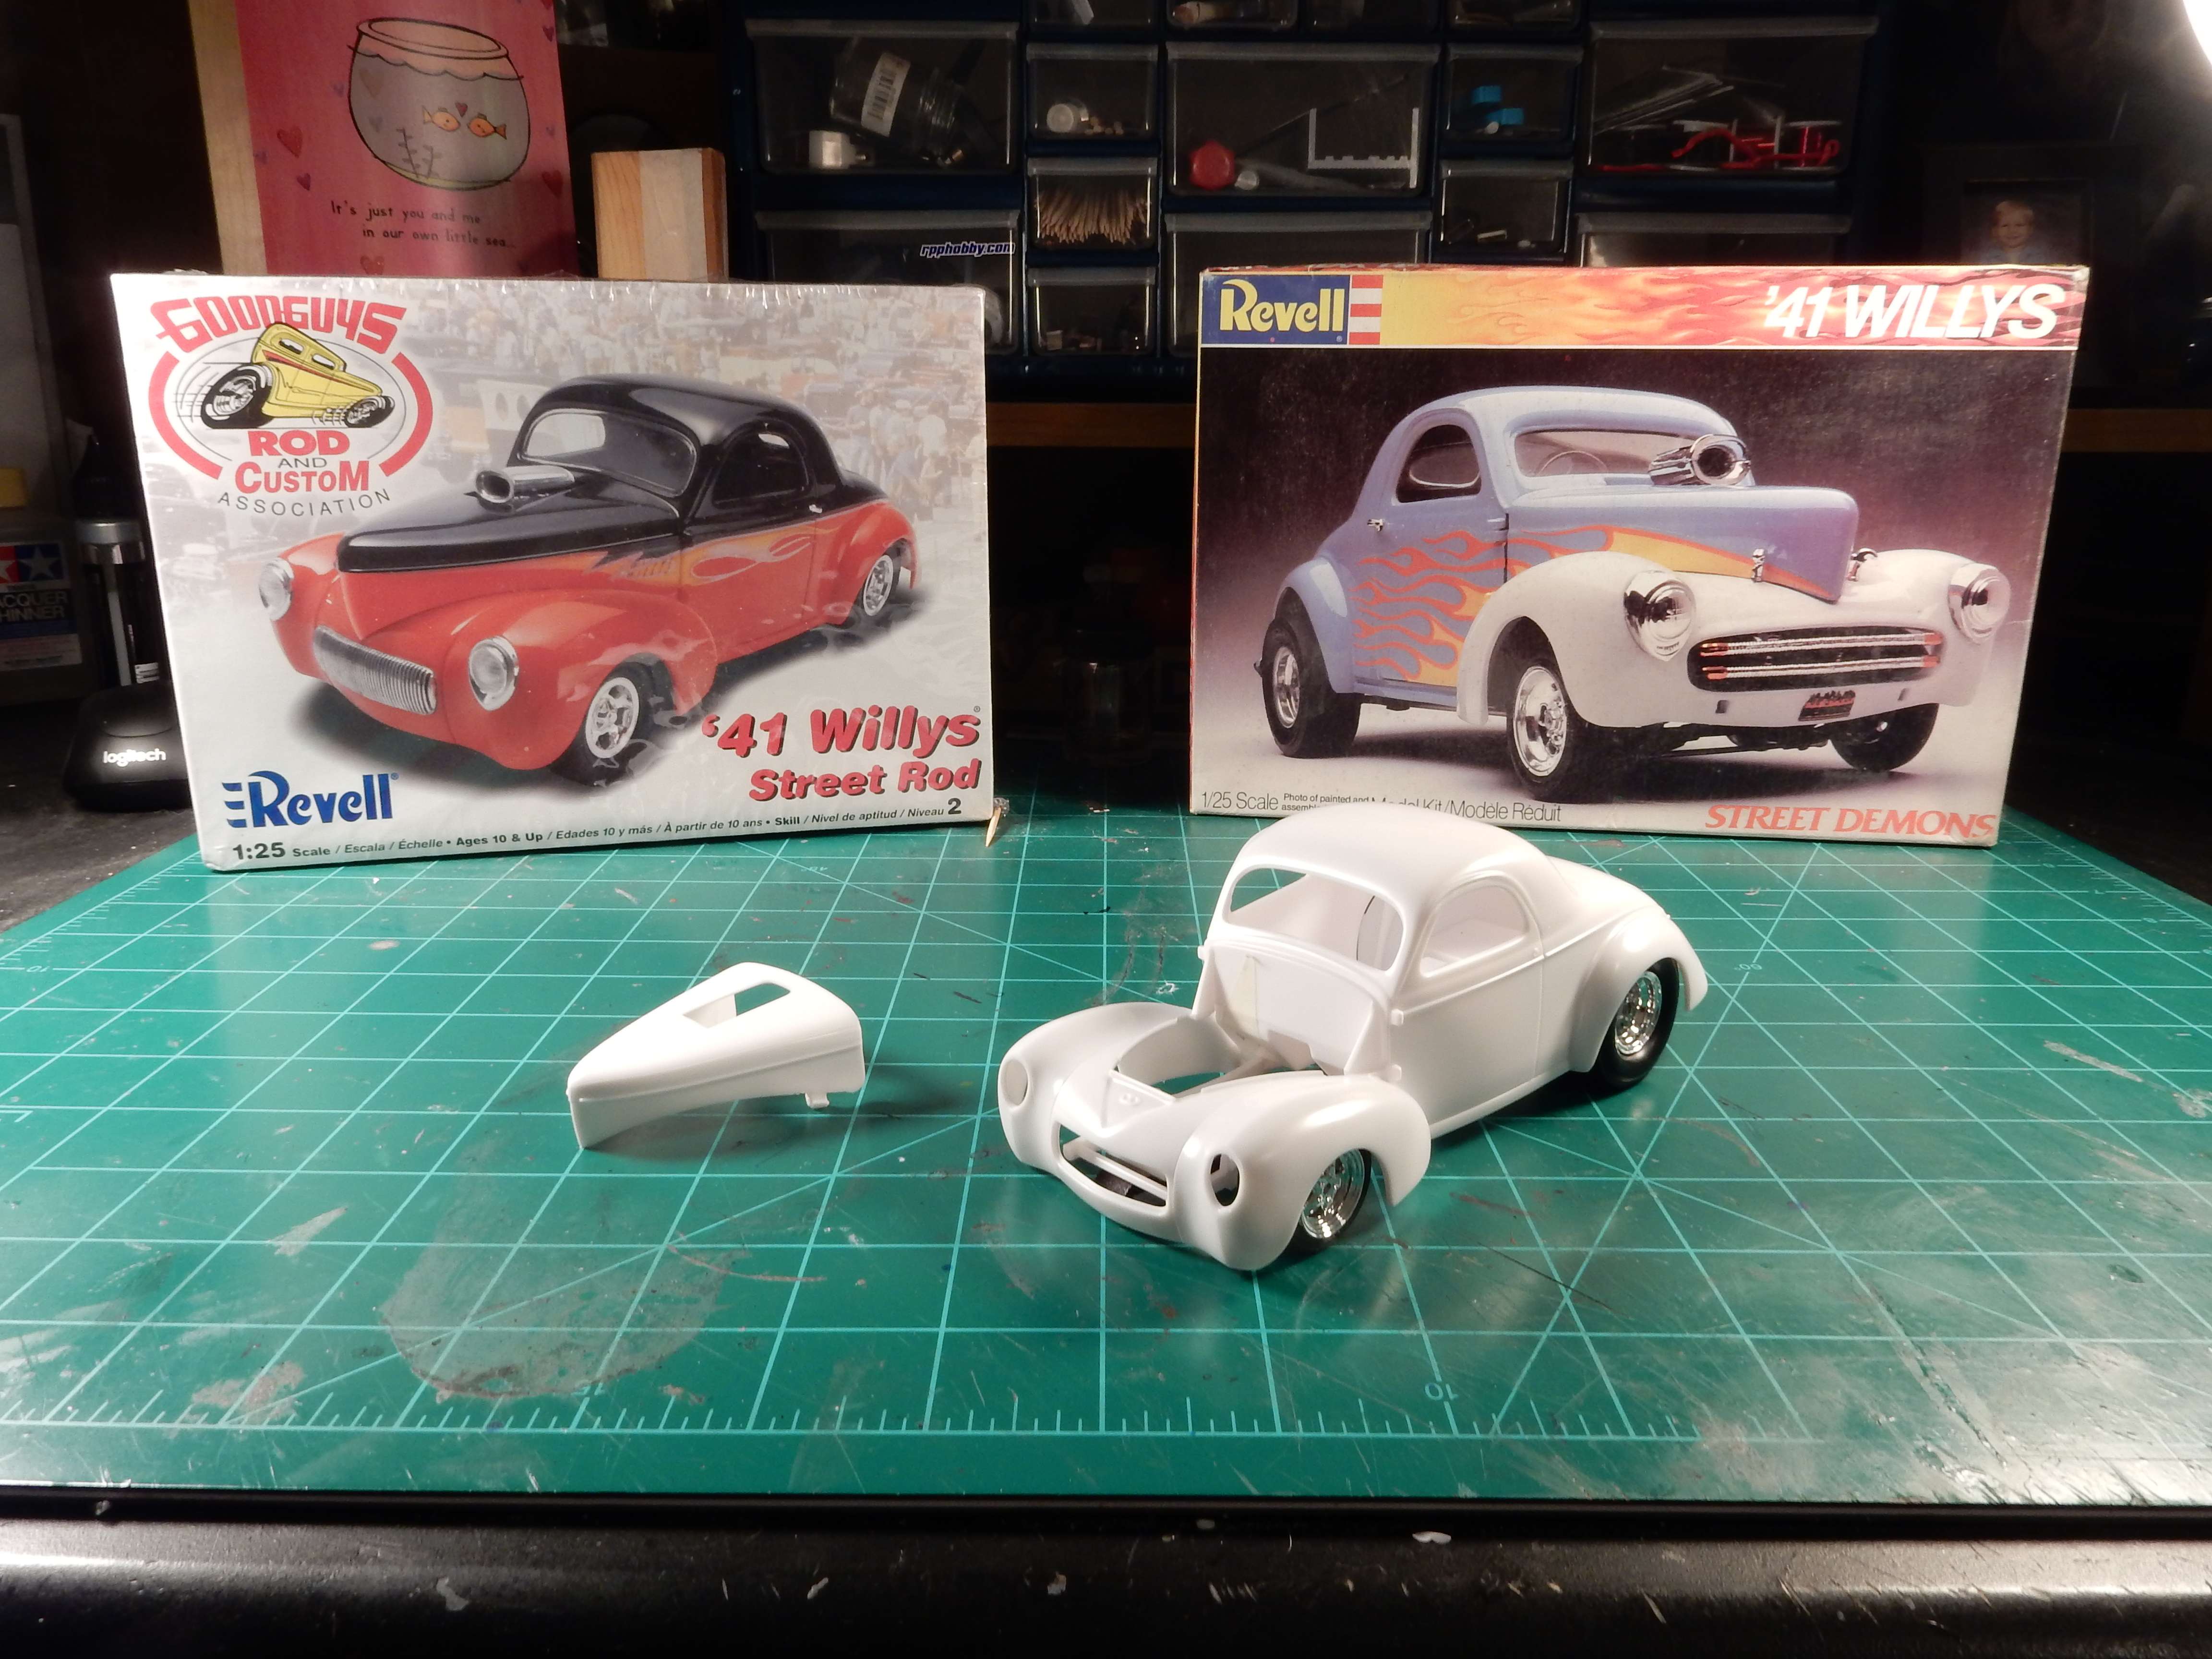
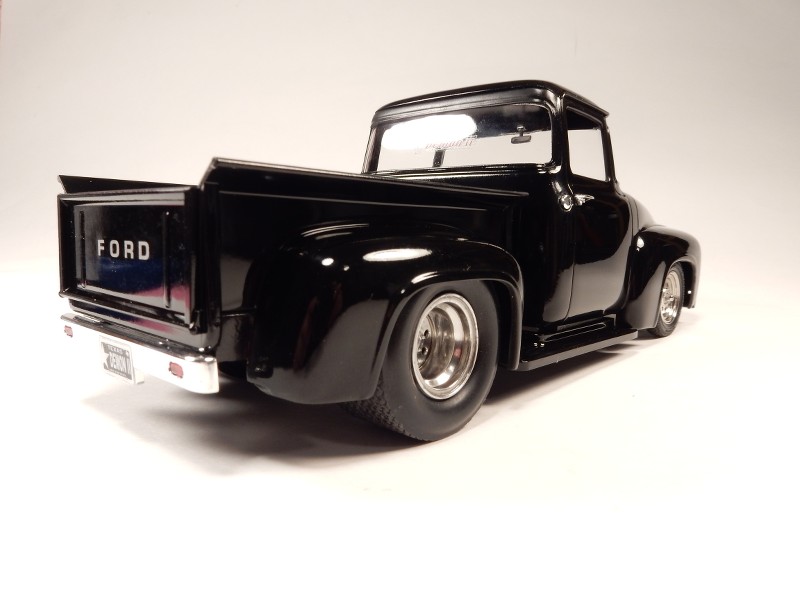
I needed something that's going to go a little smooth for me so I've decided to take on another "Demon II" project. I'll be taking the original gasser idea and slamming it to the ground for more of a Pro Street look. Paint scheme will be the original Street Demons theme with the flames on the sides.
Here we go:
-
A couple of years ago I decided to re-visit an old childhood fave of mine. I was drawn to the Street Demons series and even more drawn to the 56 Ford F-100 offering in that series. I ended up doing a total revamp of that kit when I did sit down to have a "second go" at that kit. Little did I remember just how awful that kit really was (or was it that it didn't really matter at such a young age----I just built it) but I did end up finding out that kit really had its challenges. After completing the revamp kit in 2015 I found out that I'd learned a valuable lesson in my adult modeling in regards to just how far I'm going to go with detailing a kit and more importantly how much money NOT to throw at a build. I detailed it to the point that I dread handling it every time I pick it up to take it to shows or if I have to do a photo shoot like you'll see below.
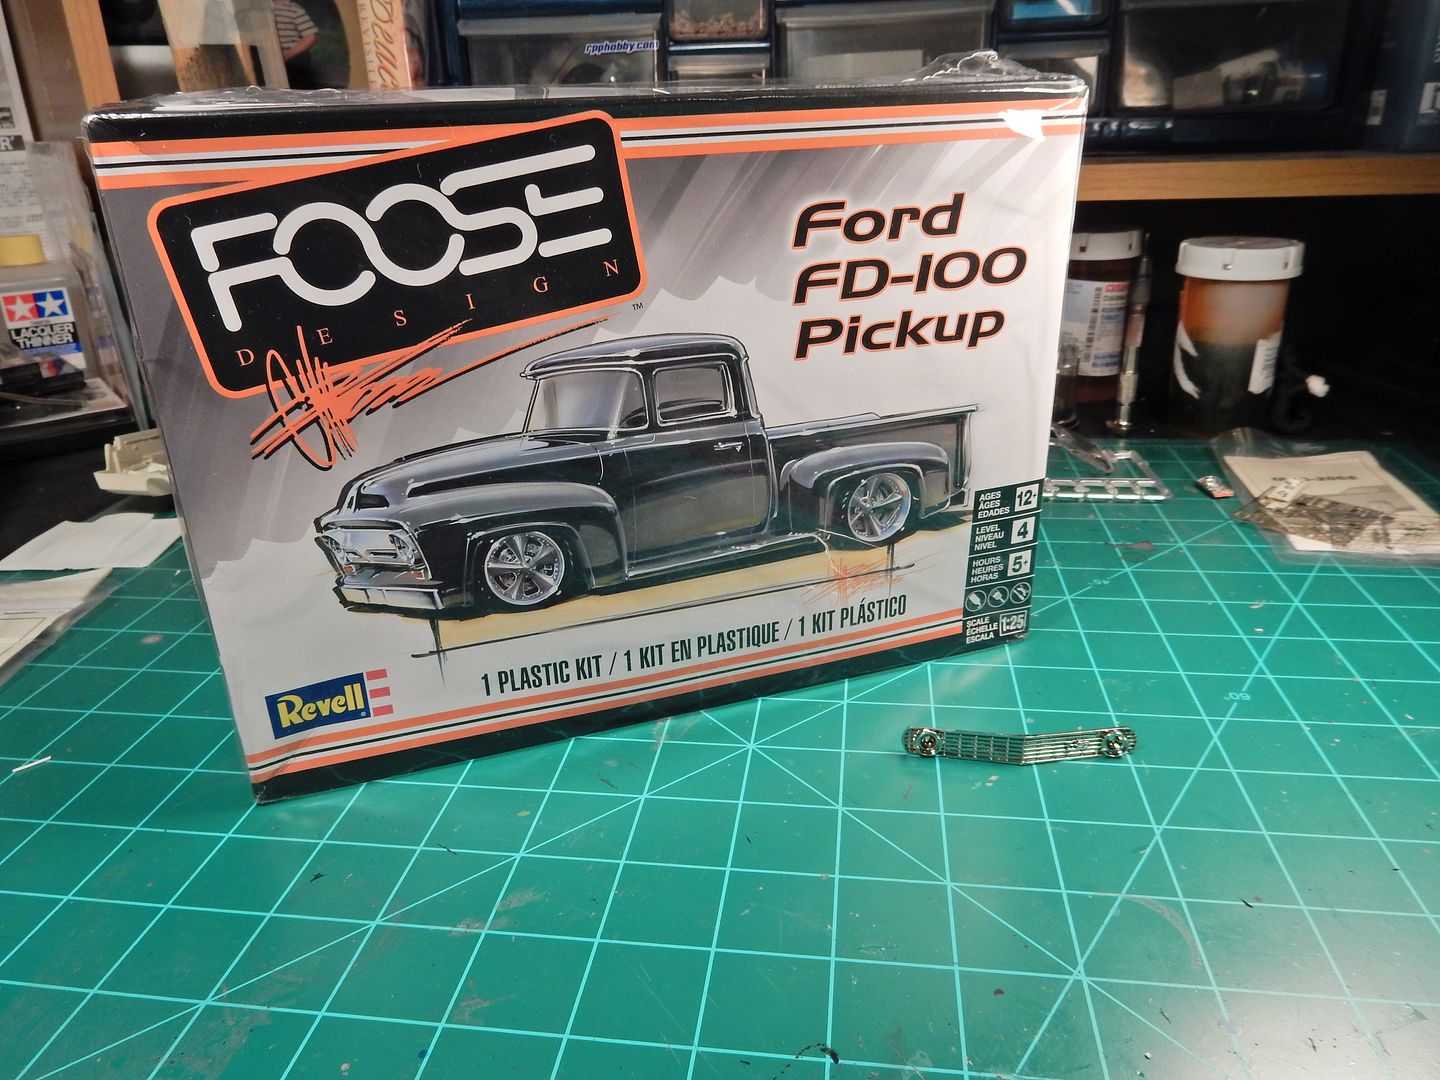
To flash forward to around August of last year, I'd been wanting to build another 56 for a while and then along came the Foose 56 F-100. Man............the body was totally tweaked and the appearance of this truck was so much sleeker than the original F-100's were. So with that I purchased a Revell Foose FD-100 kit.
My imagination went into overdrive at the possibilities. I had Thomas over at Speedway Decals go to work on fabricating the slides I'd need to pull this, more refined Demon version, off.
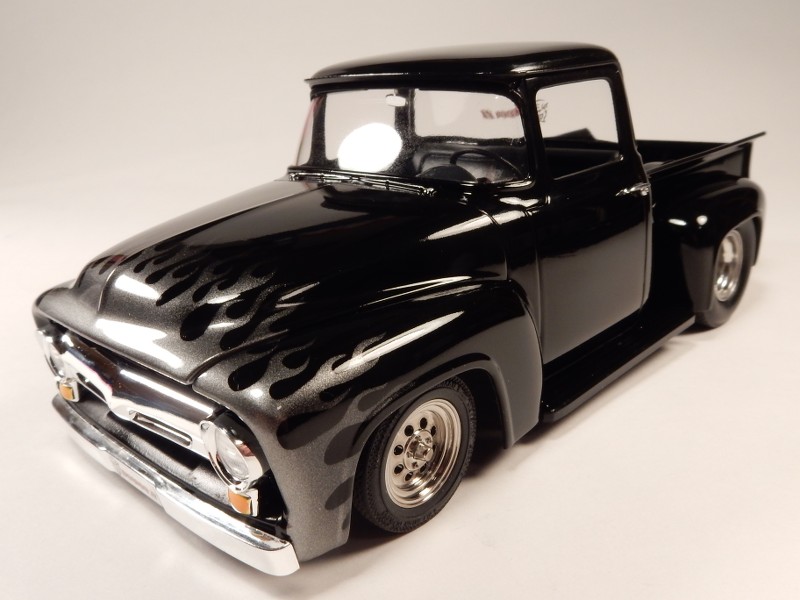
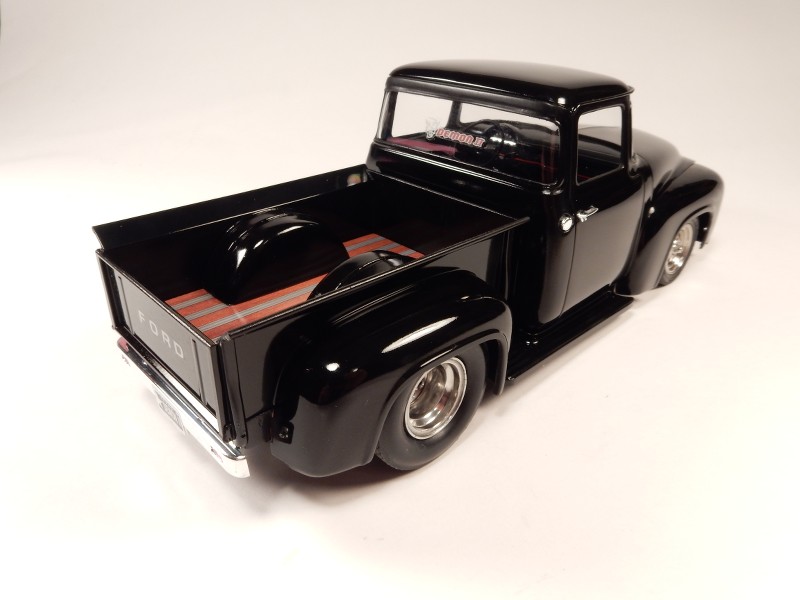
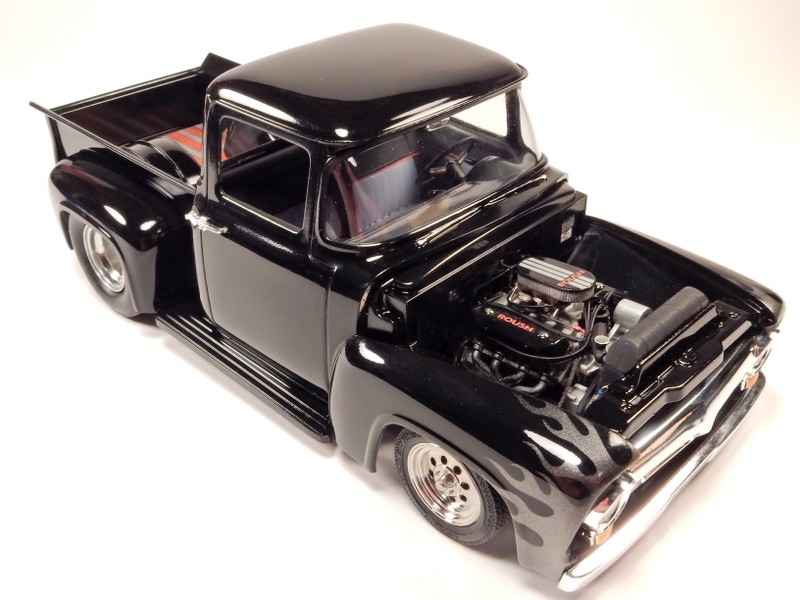
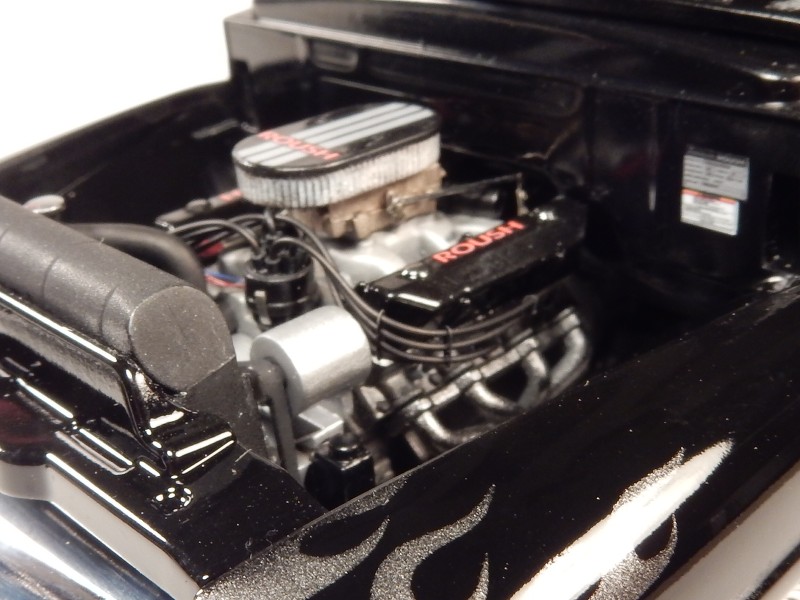
I kept the power and drive train and made some modifications to the rear suspension to narrow the rear end and lower it even more while retaining all of the original four link suspension parts. I had to cut the bed and make fender wells for the much wider tires that were to go in the rear. I tried to detail the engine up as much as I could using all of the OOB parts for the engine. I didn't want to have to modify this and modify that to retain the original look of the Roush engine (which is one of the best engines I've built modeling wise-save for that stupid hole in the oil pan for the metal axle to pass throughfacepalm_zpsgaclnqrj.gif ) I turned to Weld Draglites once again for this this newer version. The front wheels are from a Revell Pro Stock Camaro kit and the rears are from Competition Resins with a coat of Molotow Chrome shot through an airbrush and cleared with Spaz Stix Ultimate Clear. After that a coat of Tamiya Smoke was airbrushed onto all wheels to tone down the "toy chrome" look.
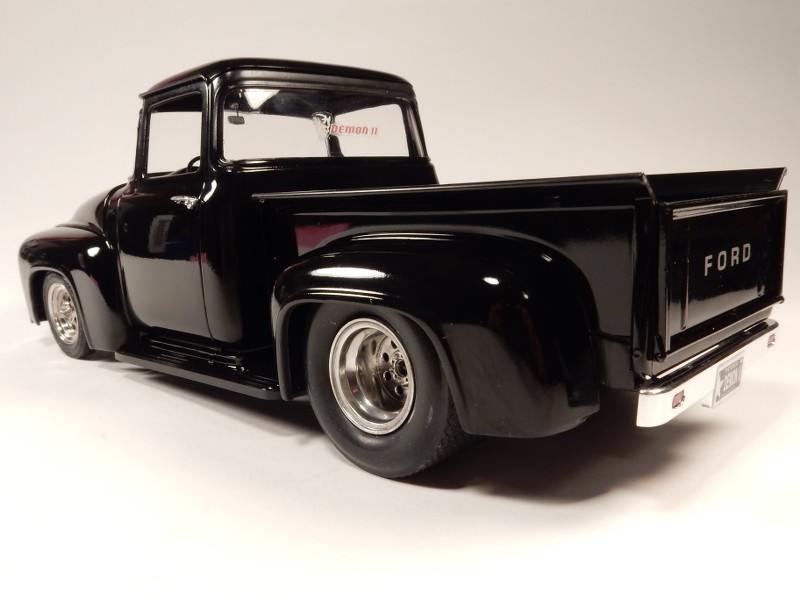
Paint is Testors Semi Gloss Black as a base color with Testors "Wet Look" clear bringin' up the shine. Both were decanted and shot through an airbrush to get the smoothest results possible. Flame masks from Anarchy Models and Alclad II Polished Aluminum ensured a nice smooth flame job. The "Foose" lettering was removed from the tail gate and F-O-R-D lettering was applied in its place.
If I had any words of caution about this kit I would say that the interior tub needs to be installed BEFORE setting the cab down onto the truck frame and to make sure to test fit the hood AFTER installing the radiator core support brace. I test fitted it before installing it and it fit perfect ...........only to find out that it didn't afterwards. Some gentle sanding cleaned it up enough to fit in the end. Also............make SURE then engine is all the way down in the mount slots provided. I had to risk and "all or nothing" attempt at forcing it straight and luckily I got by with it. facepalm_zpsgaclnqrj.gif Overall I was very happy with this kit as it's a solid build that takes to handling well and it just felt like everything "clicked" together unlike a lot of the older kits that I tend to build...........especially with any mods.
With all that being said, here's the finishing shots:
-
That Molotow chrome is the "bees knees" if you're going to keep the kit chrome and touch up the areas where the parts were cut from the sprue.
-
On 6/7/2018 at 11:55 PM, 1320Wayne said:
The decals came from Slotfabrik, out of Germany. They are expensive and for this particular build, very difficult to work with. This was probably the most laborious decaling job that I've ever had to do, and I've done some insane full wrap decals before.
Your efforts most assuredly paid off Wayne! Spectacular model building and beautiful car.
-
On 10/9/2017 at 11:44 AM, RGronovius said:
The head light blisters are chrome, but the headlights themselves are clear plastic on the same sprue as the windshield. There is also a duplicate clear sprue with a slight yellow tint to them that includes the headlights and windshield. The two tail light lenses are red clear but the fixtures they go into are chrome. Tail lights are optional.
Edit, the next time I build a car kit, it will be a more modern kit, not a nostalgia build. This car kit is primitive, but okay for the $8 I paid.
Any progress on this one Rob?
-
Nice ride Mark!! What was the parts count on this one?
-
Glad to see you here as well Mike.
-
Whoa Ho Ho!!!!!! Wowzers Gary!!! That is a friggin modern art masterpiece bud!!!
-
Man!!! I'd love to have that kit!! Any progress on this bad boy???
-
Oh my gosh man!!! The color and cals really set this thing off right along with the details and the realism. Good grief.....way to go!!
-
Sweet ride buddy. Wow!!
-
Sweet build Dick!! Have always liked this aircraft.
-
Sorry for the late reply fellas. Dodging hurricanes and busy cleaning up after the mess it left. Thank you all for the very kind responses/ comments.
-
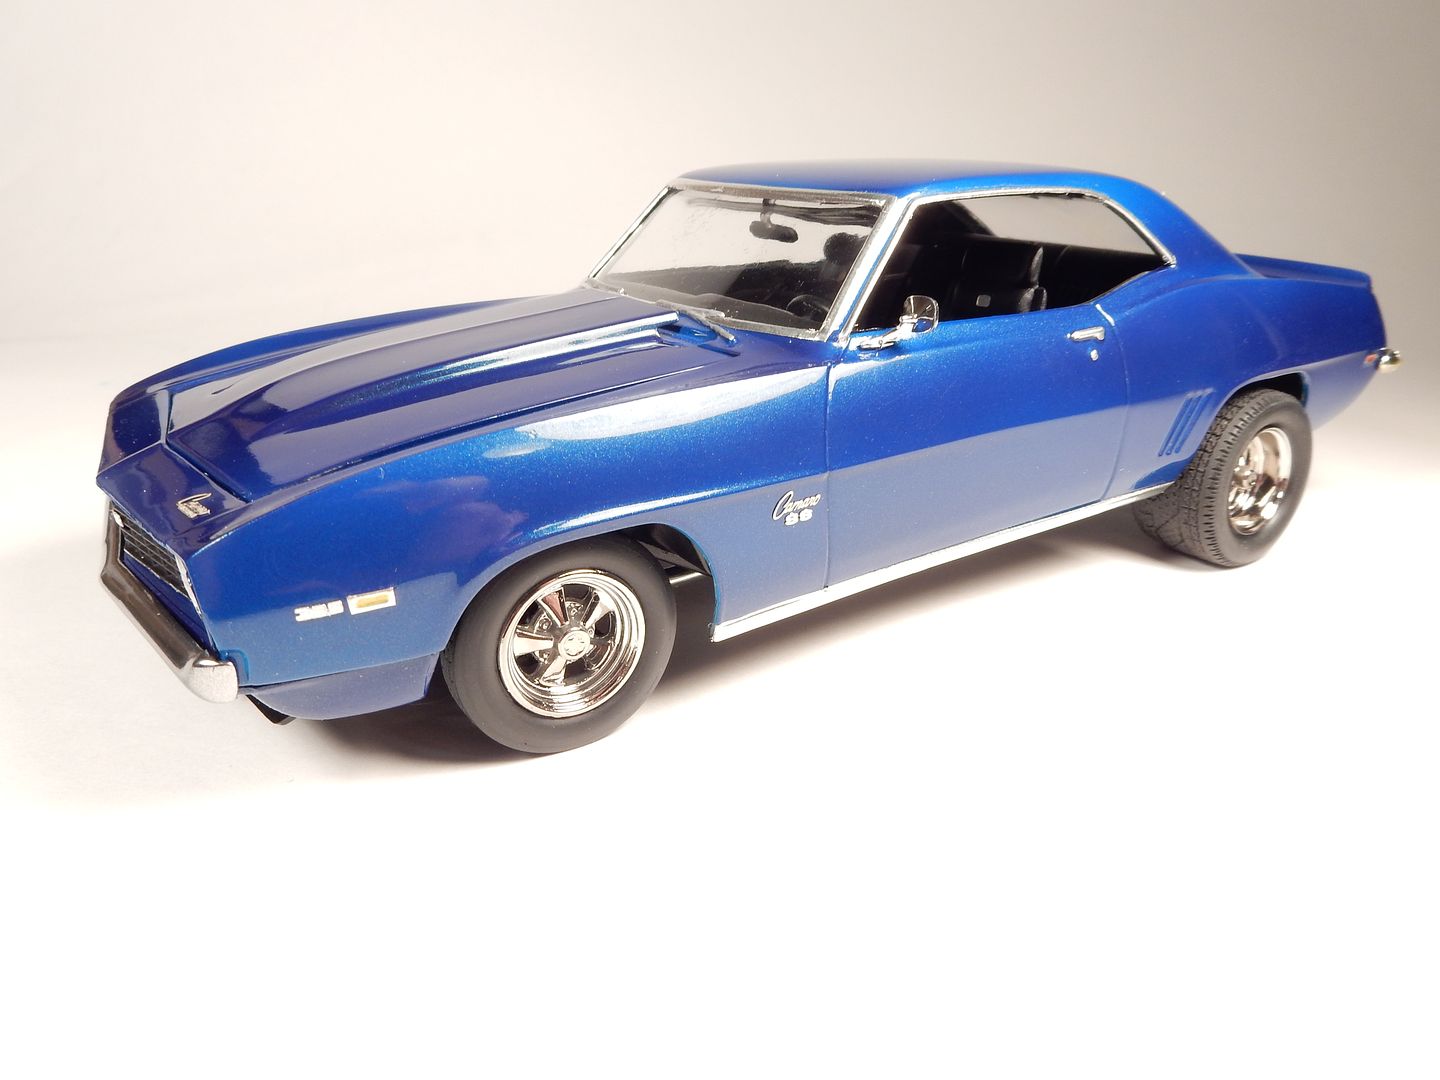
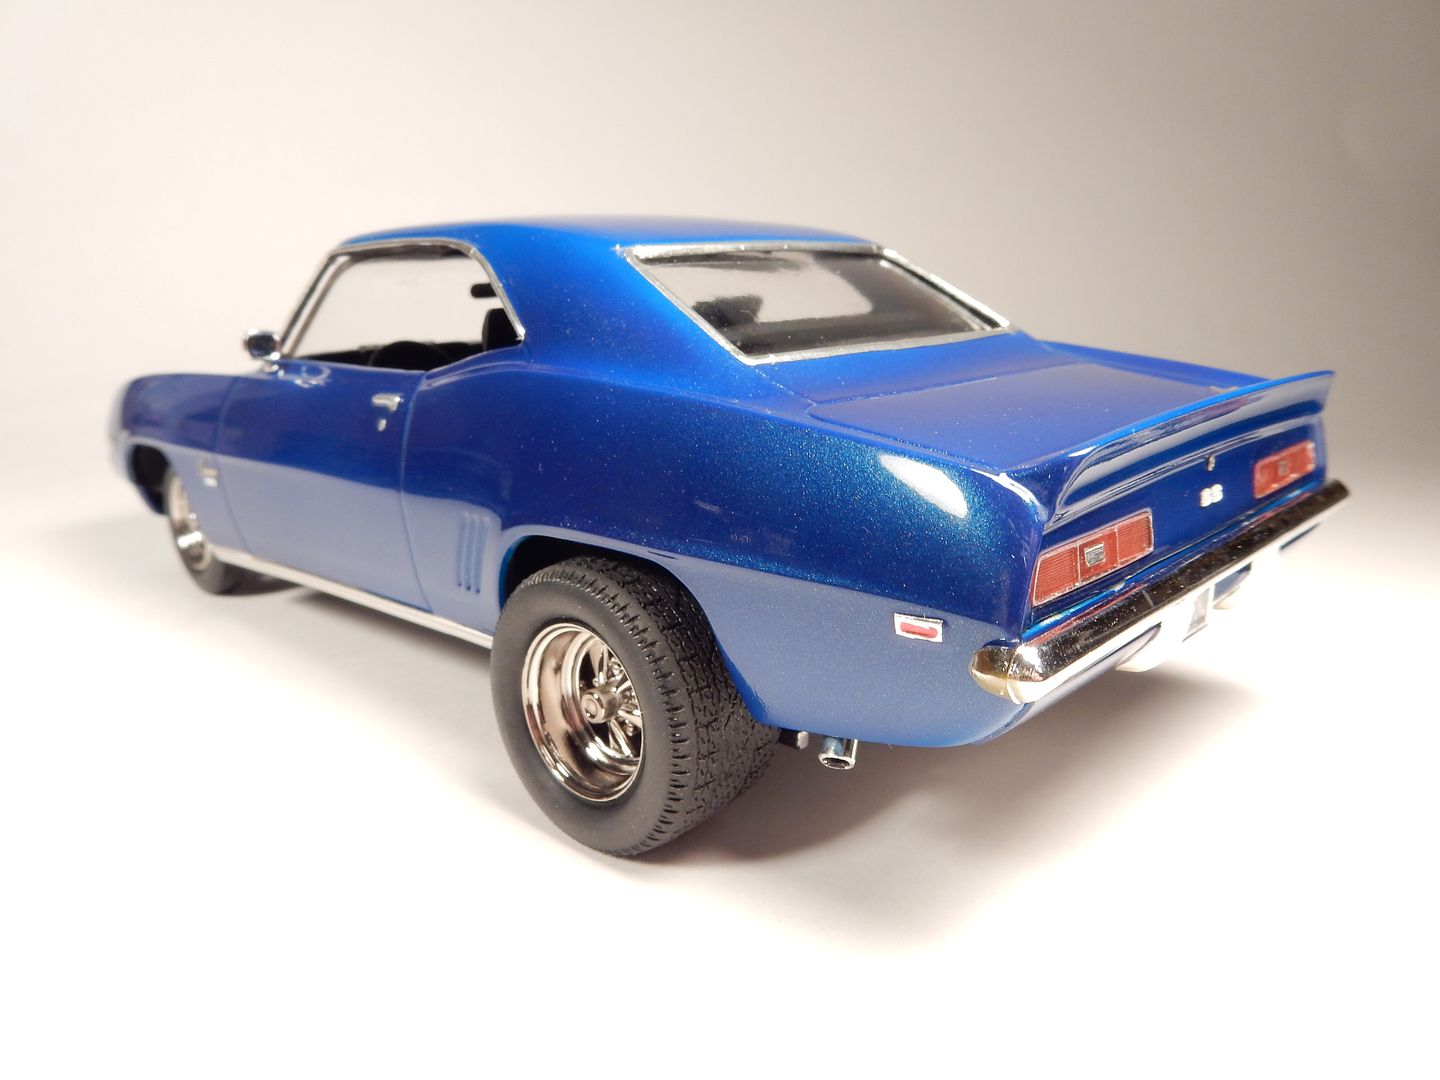
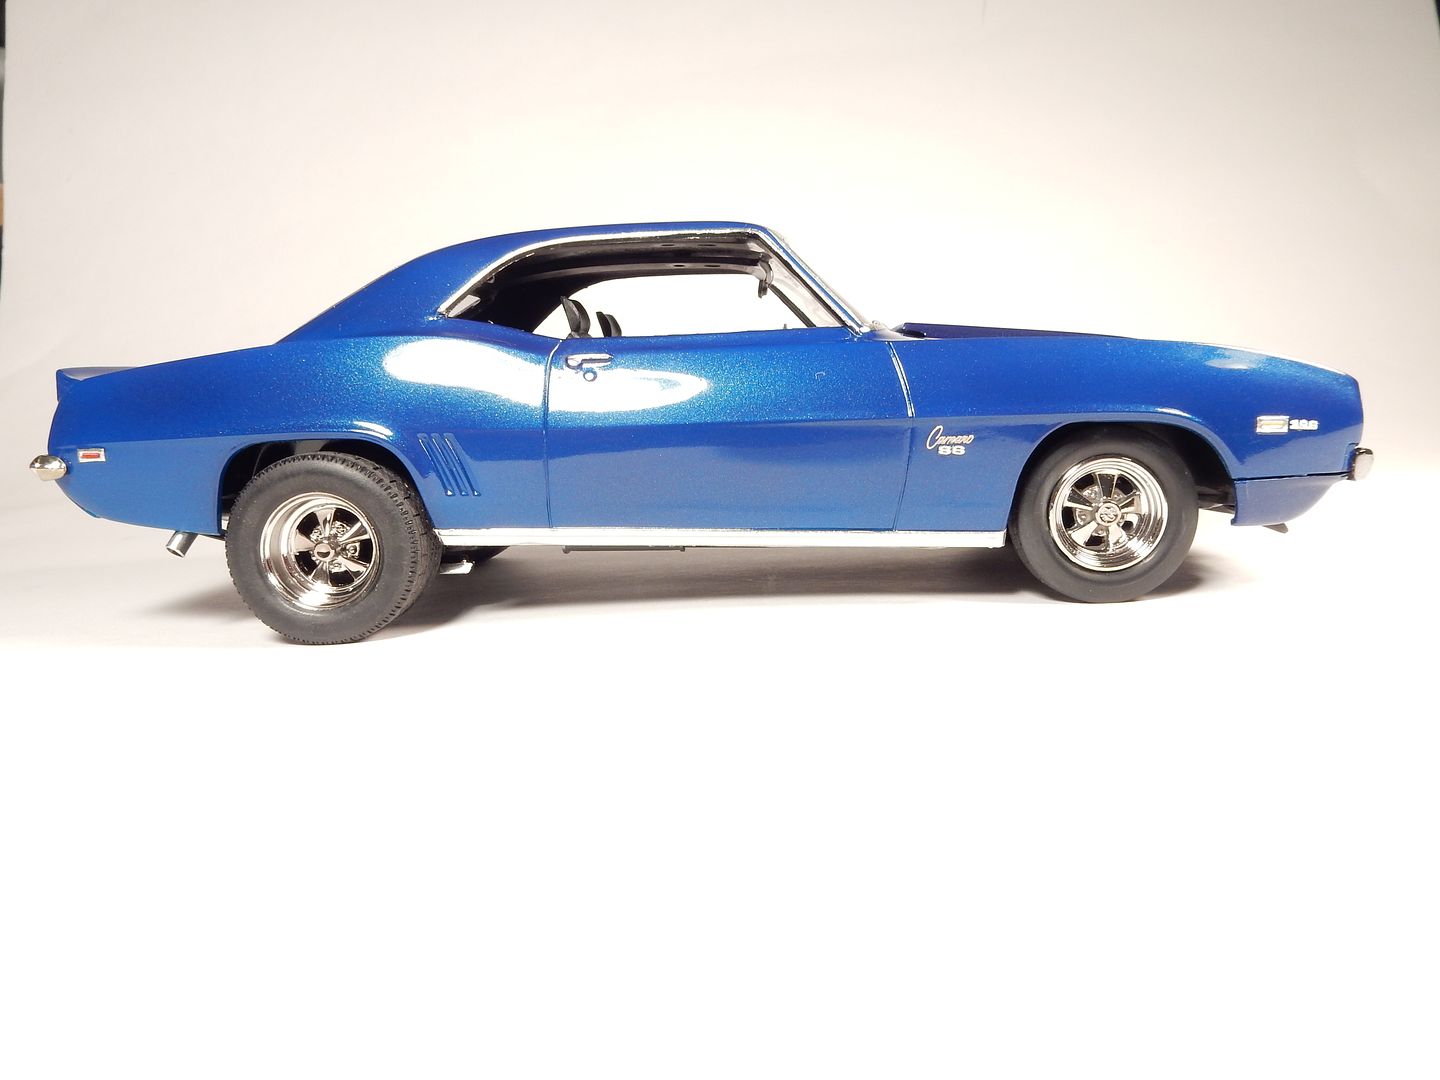
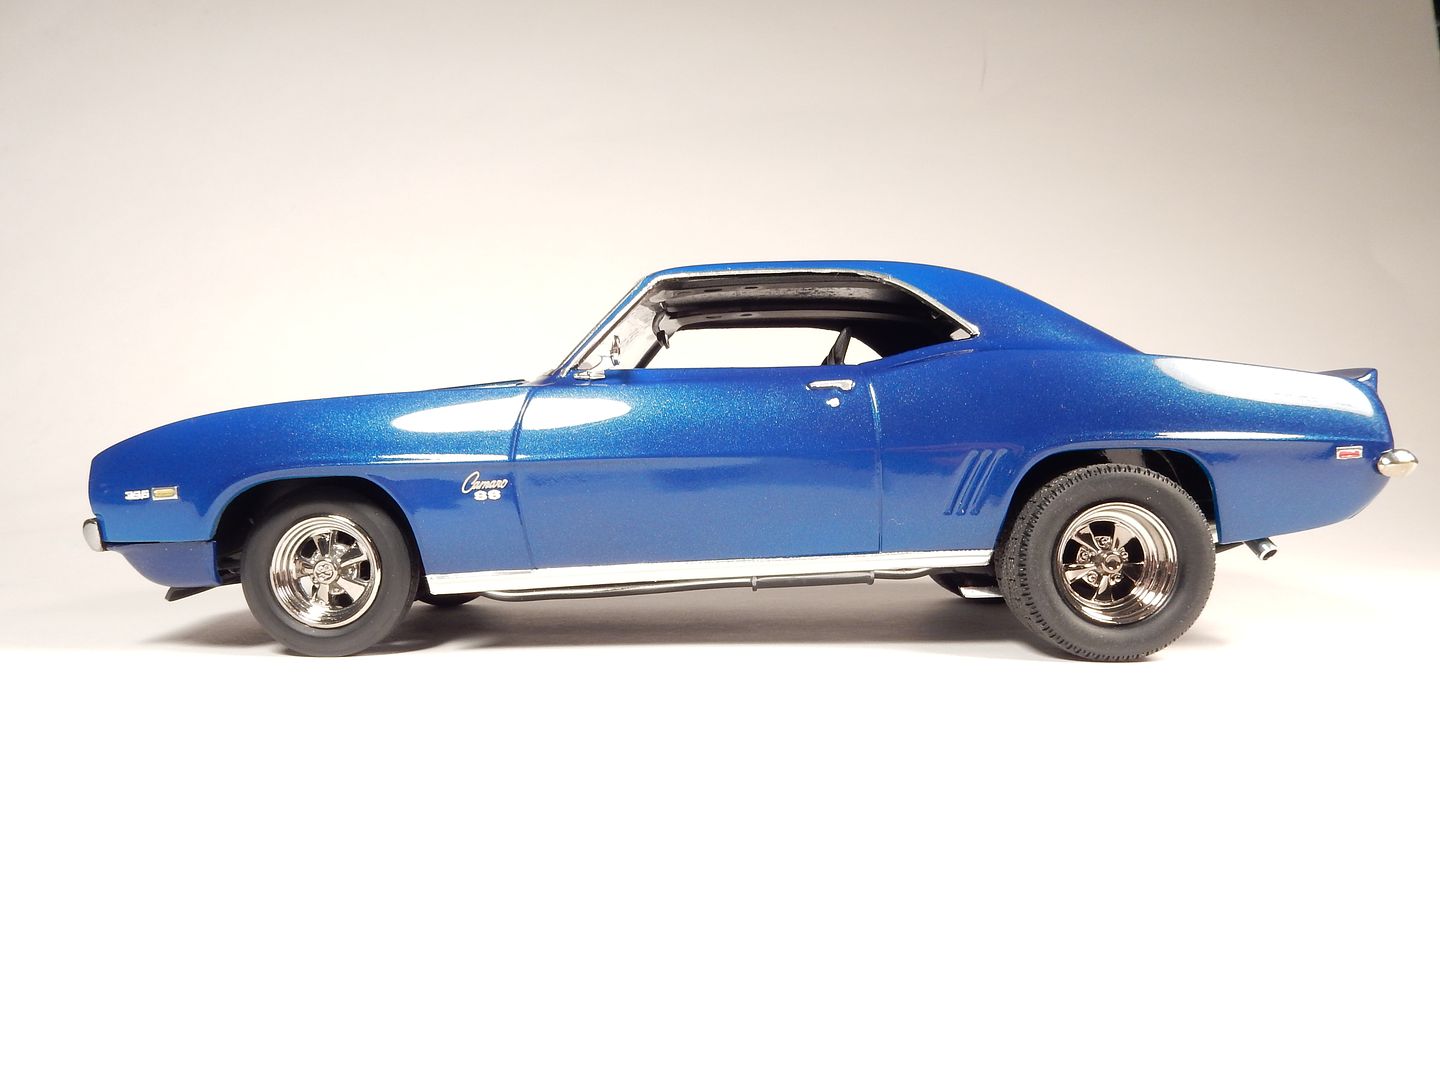
Dang guys! It's been a while since I've been on here! Busy summer around the house and got the chance to actually finish this one up over the course of it all.
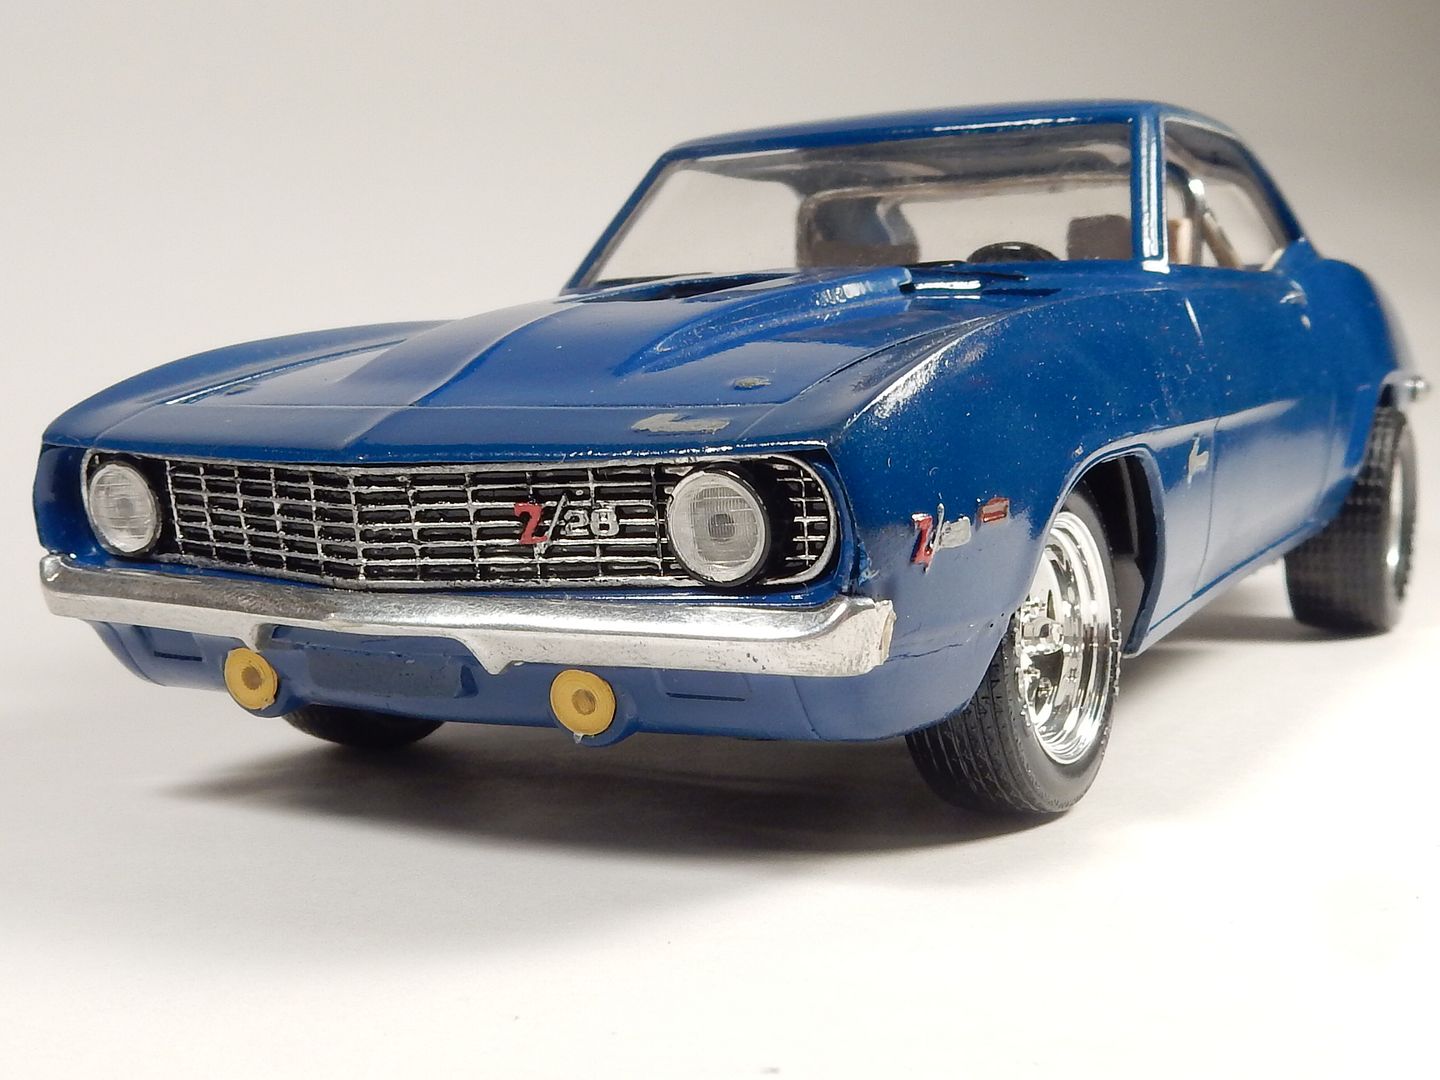
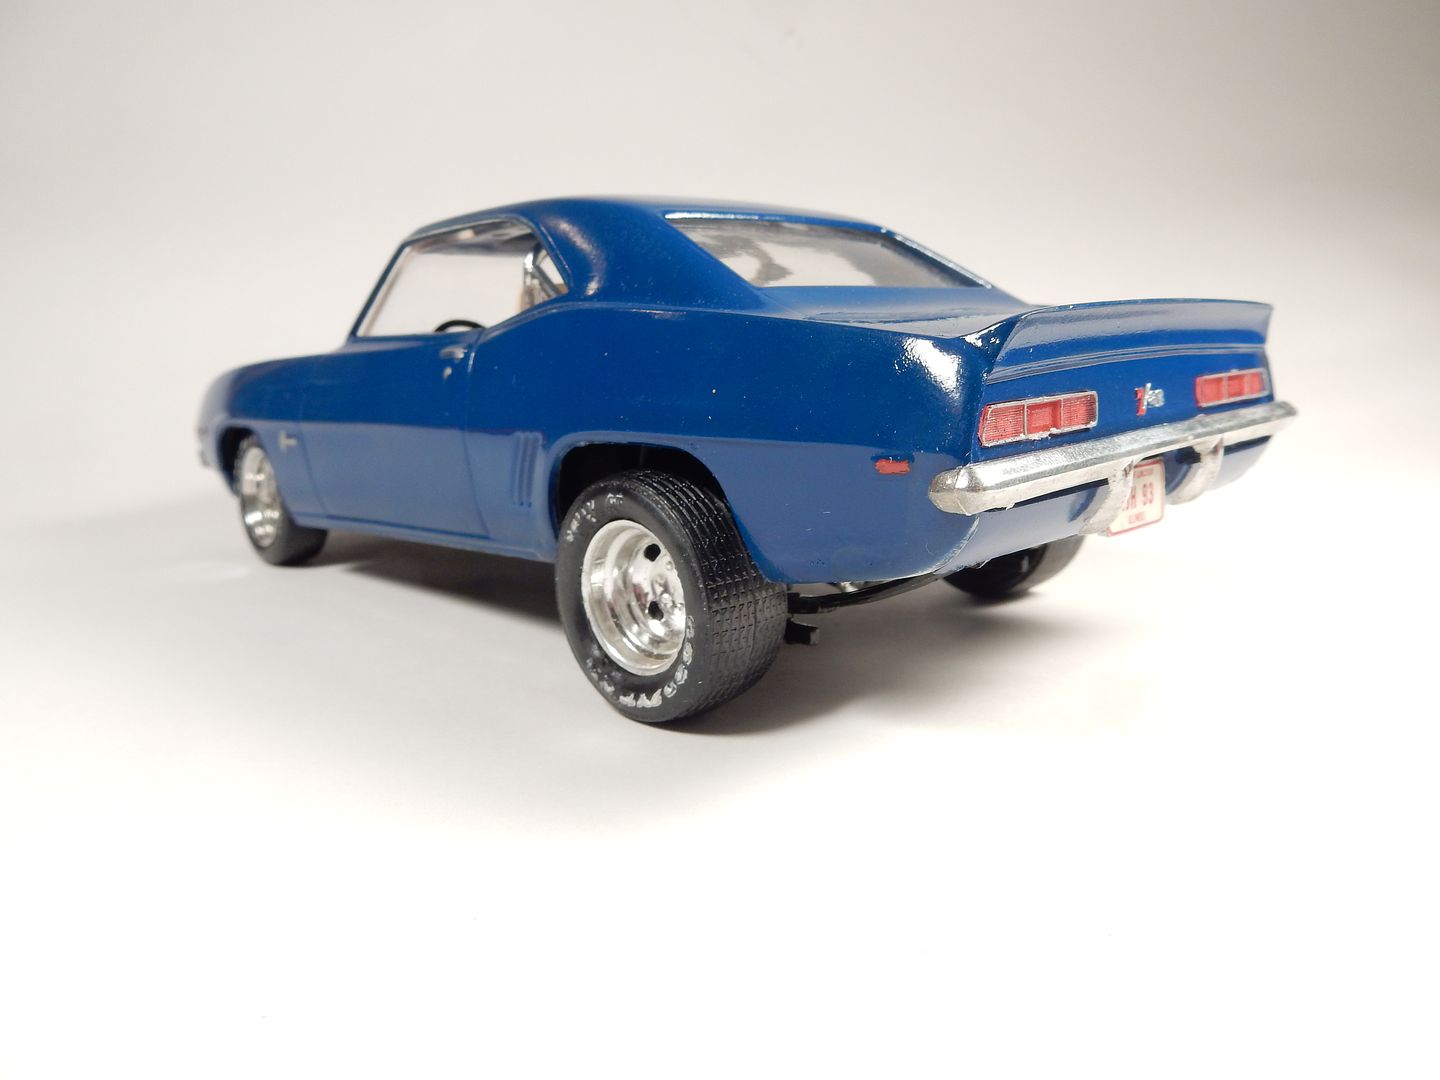
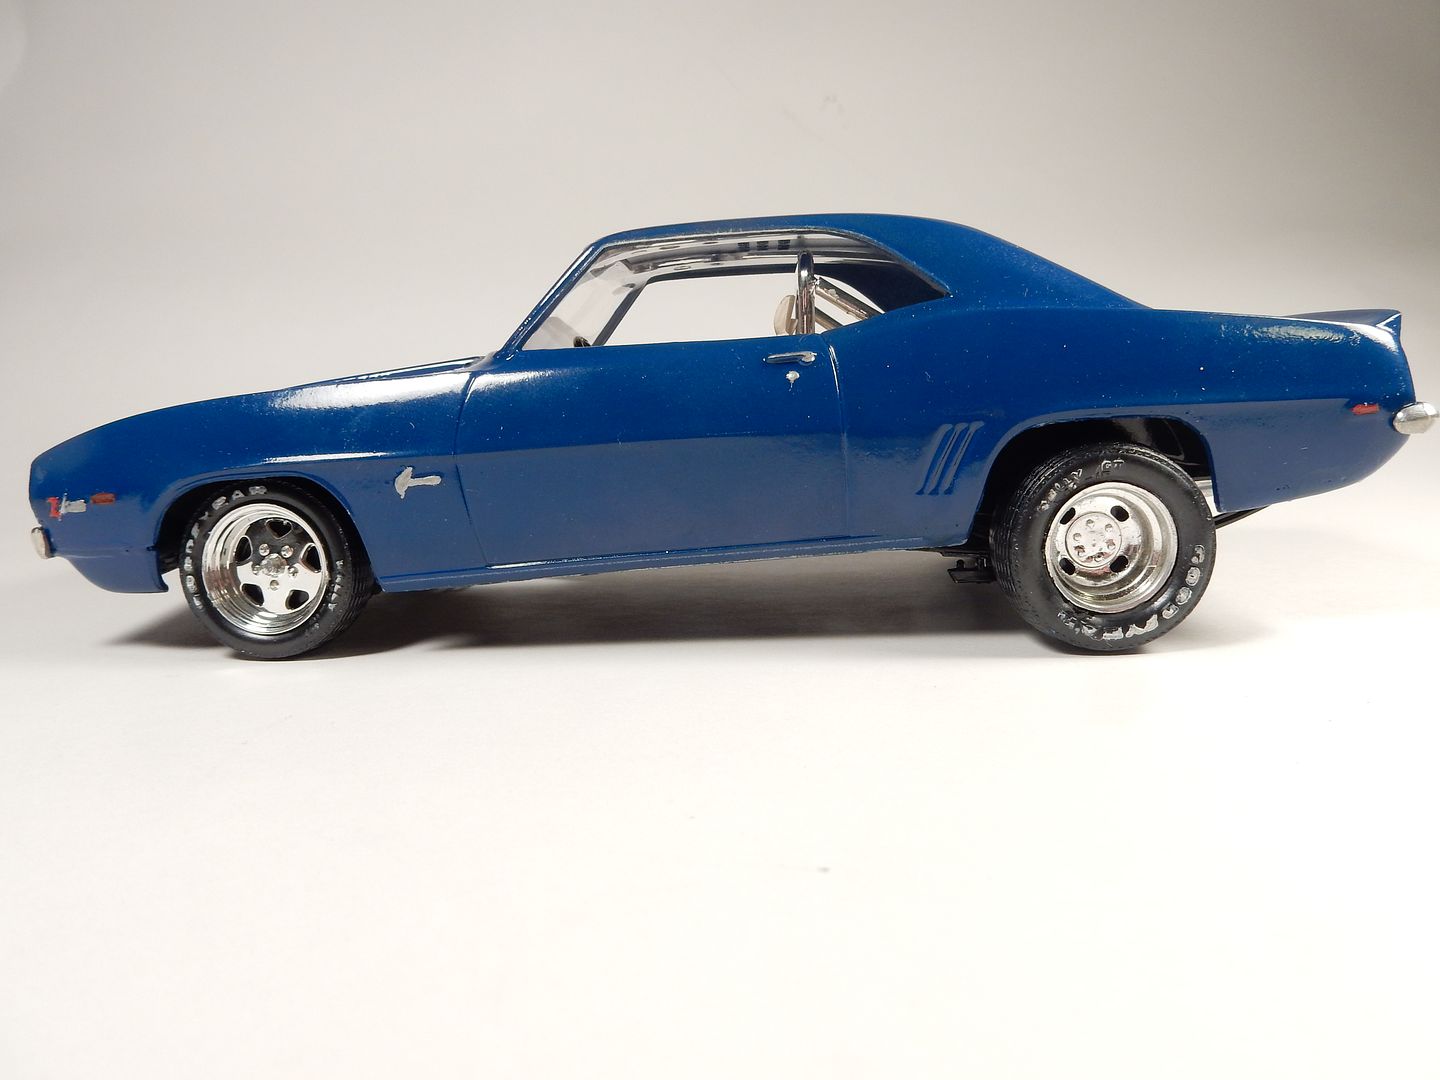
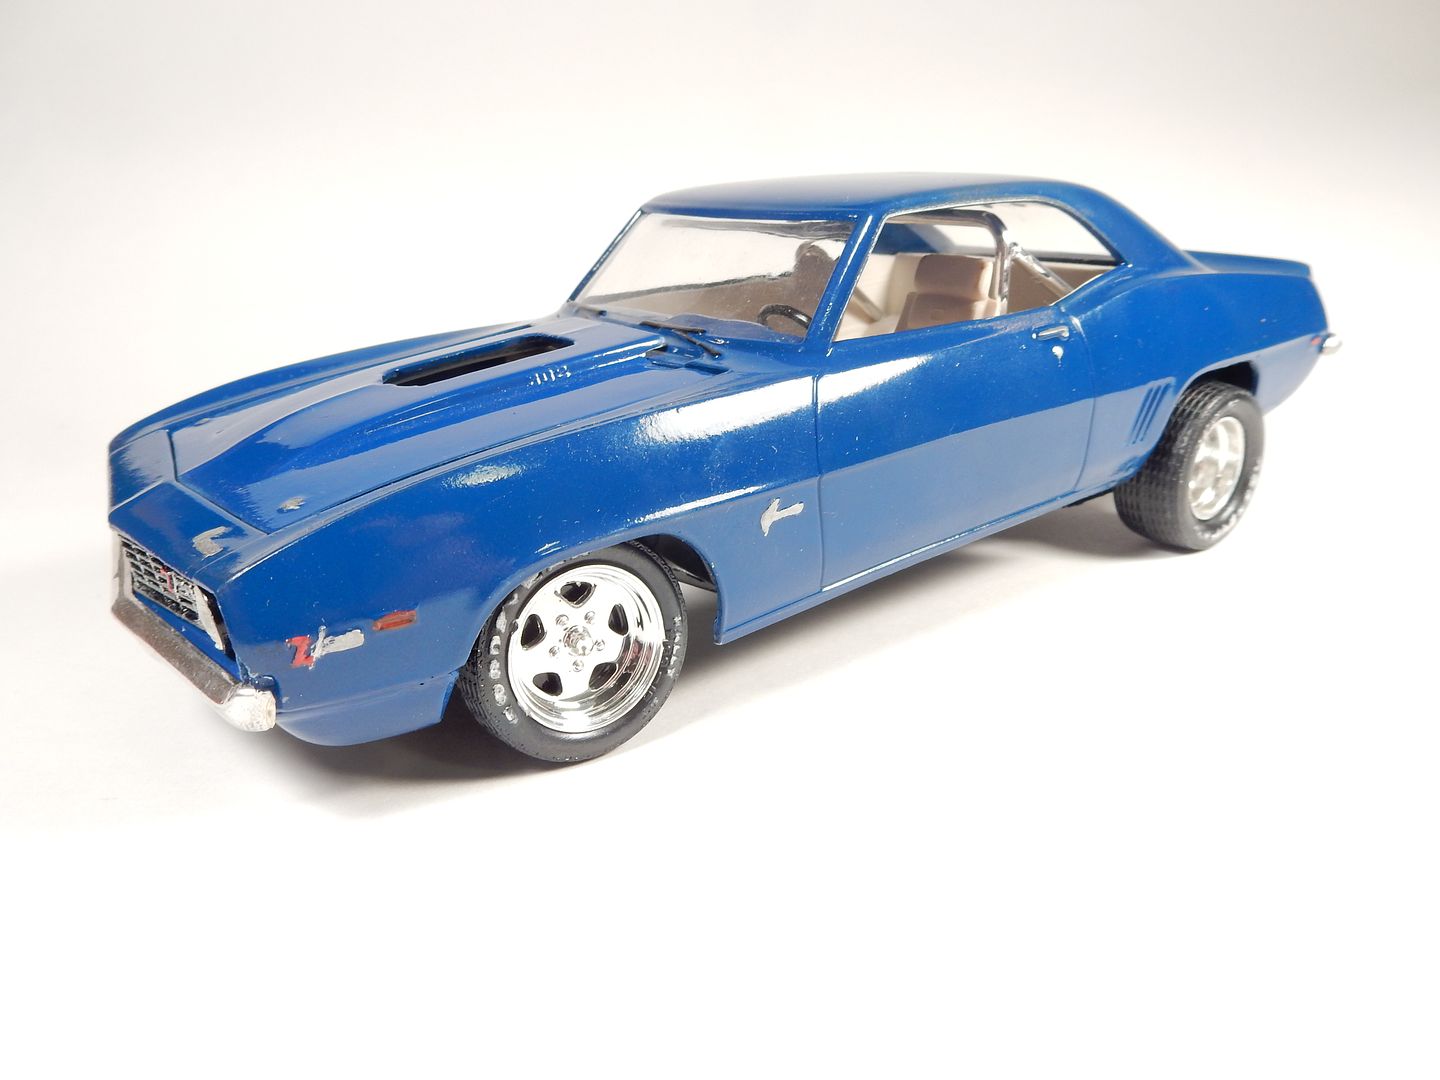
When I started this project in January I thought I was looking at a 3 month project. What followed was a seven month venture to pump some life into my first ever auto build which dates back 35 years. All in all the old build was in decent shape as I'd managed to keep it encased since first building it at age 13. When I left home at age 19 for the Army I left this build and several others behind where it stayed all this time until I finally picked it up from my parents house and put it in my display case here at home where it's spent the last 5 years. When I started on it 7 months ago there was no engine and the interior was.......well ........you know ...........very "Monogram" basic. I had alot of work ahead of me which I found out throughout the course of the re-build. I ended up using a total of five other kits to piece some of the missing pieces together (one of which was a newer Revell Camaro release kit to "update" this old dog of a kit with some of the parts that Monogram had failed to put in their kit) , hood and wheels were donations from good friends here on the forums (thanks be to Dee Cee and Paul). Powertrain/ drive train was from the AMT Chevelle SS396 kit. I ended up spending ALOT of time in the interior as well as the engine compartment. All badging is from PE fret for the Revell Camaro kits and the paint is GM paint code 79U--Mystic Teal Metallic, a paint that was used in the late 90's/ early 2000's on GM vehicles (Camaro's / Firebirds being in that line up). I also opted to transform this into an SS which took a little fancy foot work with the grille but I managed to pull it all off okay. I'm pretty happy with the results although the kit (as well as me) had it's limitations. lol.
With that.......here's the shots.
Before:
After shots:
-
Gorgeous!
:Smile_sceptic:
That's just a word!!!!!!!!!!!!!!!! Wow!
-
I ended up buying the '97 Ford XLT for $9.99 minus a 20% discount Squadron was running during Memorial Day weekend. Basically, $8 for the truck kit plus some other kits. My total 20% off discount for this order was more than I paid for the truck kit.
Did you post a thread on this one? I missed it so I was curious how it all turned out there Rob.
-
:lol: :lol: Welll...let me see.... I can't remember Joe.... :lol: It sure don't get much attention here on this forum...that's for sure. And I wonder why the heads of state can't figure out why more automotive builders don't come to the I.P.M.S sites and shows.
Keep posting away Gary. You're doin' great. I thought I might've saw this one over at MCM and possibly Scale Auto
-
Where else have I seen this one Gary? I absolutely love this kind of stuff!!!!!!
-
My son would go off the charts if he saw that Y - Wing. Nice score Kevin.
-
 1
1
-
-
Thanks Gil.
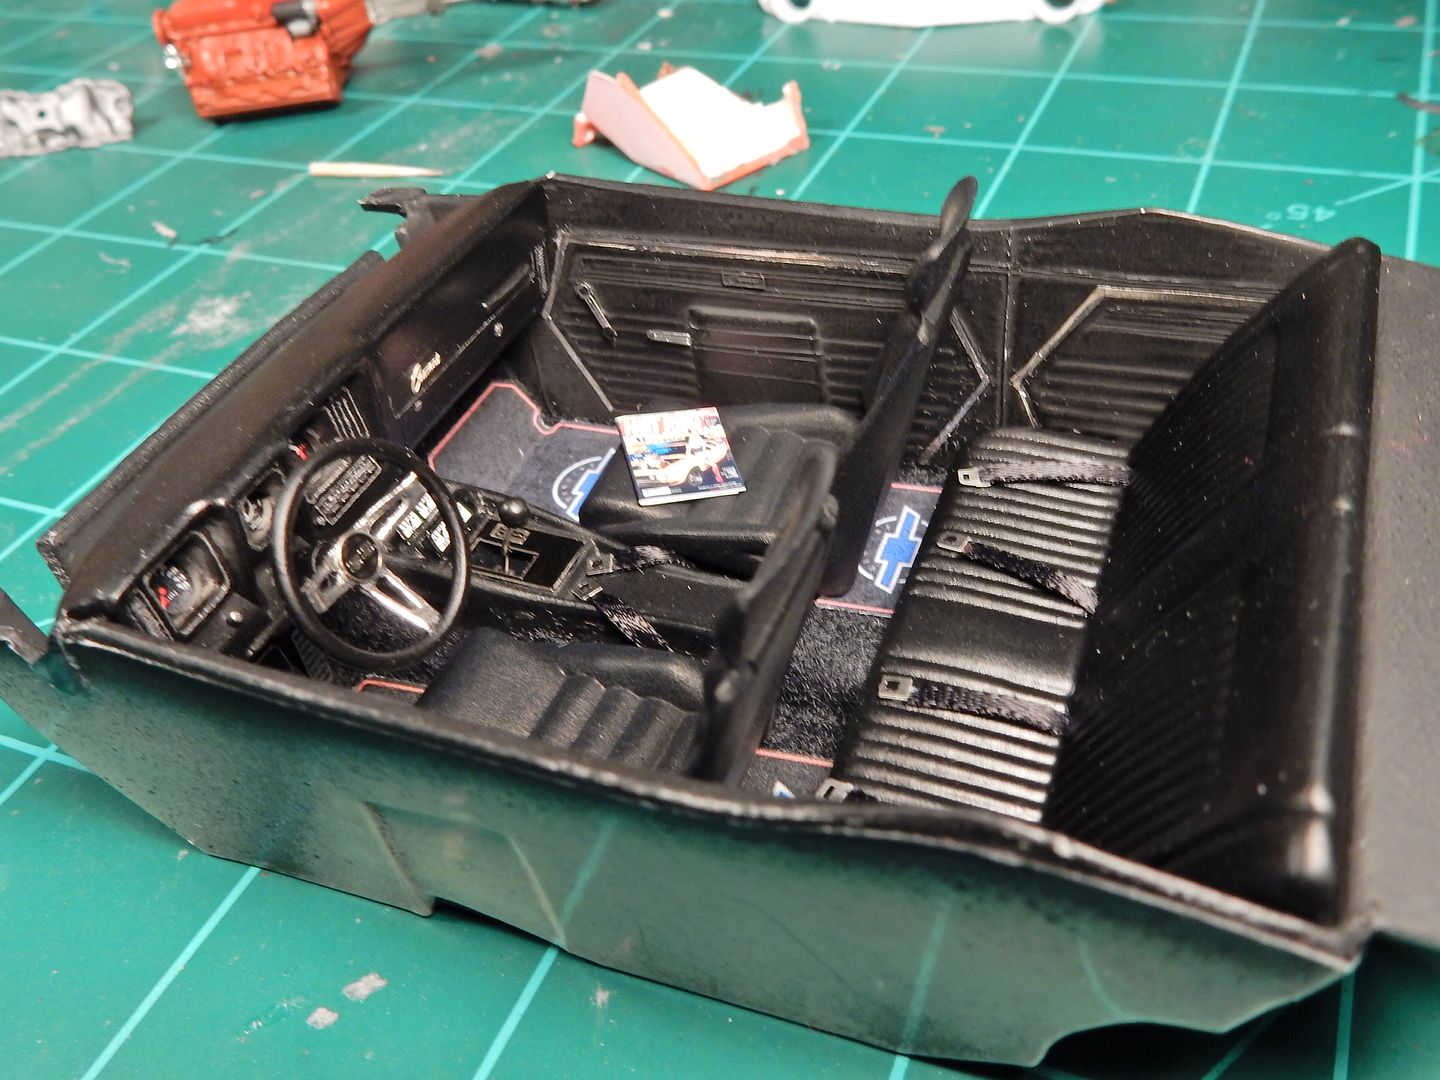
Well guys, the floor mats came in the mail yesterday and I went right to work finishing the interior. All I have left at this point are the door lock rods/ knobs at each door but that'll be one of the last things to take care of with this model. I will, however, go ahead and drill the holes in the door panel. Here it is with floor mats at all four seating positions , the front seat belts installed and a Hot Rod magazine to round it all out.
-
Here's the motorized Hellcat.......Considerably more from Ebay on this one. It' more like $45-50.
-
If I recall correctly Joe, that Stuka and Hellcat with the motors were probably Lindberg kits, as I remember building them too!
Models where everywhere back then....my dad got started (and then me too) when he bought his first model at an Eckerd's drug store while waiting on a prescription. There was also a place called the Bargain House down the street from my granny's house where I can recall buying and building the 1/48 Aurora A-7 Corsair II model. I can still visualize the camo of tan plastic and gloss green Testors paint! :D
GIL :smiley16:
Right you are. Did a little research and this is the one here, EBay's got it for 22 bucks/ free shipping. lololol
-
Models @ 7-11. Man do I remember when you could buy models at places like that. We had a local True Value Hardware Store named Heard's Hardware there in my home town of Bowie, Tx and they would have models on the shelf. I remember buying a Stuka kit with an electric motor for the prop and I think a Hellcat. I can't remember the model manufacturer but those were cool kits when I was a lot younger and from a hardware store at that!!


The Duke's Latest Automobile.
in Cars, Trucks, & Motorcycles
Posted
I hear ya. That's a pretty big parts count for such a small scale. I built a 1/72 scale Willy's Jeep when I was a kid and couldn't believe the parts count on that thing. I can't remember exactly how many parts there were but it was crazy.