


mustang1989
-
Posts
551 -
Joined
-
Last visited
-
Days Won
25
Content Type
Profiles
Forums
Events
Posts posted by mustang1989
-
-
This has really taken on a great appearance with all the detailing and decals Carlos!! Wow man!!
-
On 12/18/2020 at 10:12 AM, Stikpusher said:
I know that engine... 😉
Wheres the rest of it Joe?
LOL!! Thanks Carlos!!
-
On 12/6/2020 at 1:42 PM, cheveuxroux said:
I really like the engine and especially the frame modifications !🤩
Thank you for posting the supply sources.
Aftermarket for aircraft is something I've know about for decades but not car model aftermarket; some very nice items available from Future Attractions .
I am guessing that cutting the rims in half was accomplished by making and using spacers for gripping the rims in a lathe collet chuck.
Thanks Bob! There's a whole different WORLD of AM items available for scale autos. One can have LOTS of fun building them now with all that's available. I'm guessing yes on the collet chuck. We have a machine shop on the plant that helps me out with this kind of stuff.
-
Oh HELL yeah!! Looking forward to more Carlos!!
-
On 2/5/2020 at 9:50 AM, WildBill50 said:
Boss, man!
Love the color scheme. The attention to detail is really superb.
This looks well worth the effort and time put in.
Bill
So sorry for the terribly late reply Bill. Thanks bud.
-
On 11/1/2020 at 12:40 PM, RGronovius said:
No one forced them. They just as easily could have settled here. That forum is rather sleepy, they could take over the auto forum in a short while and the general modeling forum just as quick. The only forum at FSM that has decent movement is the armor forum, and even that is slow compared to forums that specialize in armor modeling.
The auto side seems to be picking up speed now. Aircraft section is all but dead for all practical purposes. Hope things are going alright with you Rob in your "at home" deal as of late.
-
I dunno about their magazine and whether it's been cancelled or not but I do like the forum. There's a lot of very talented builders over there and I learn all sorts of stuff. That's pretty much my "go-to" site for learning on auto models.
-
Wow!! Very unique build and well played out.
-
Nicely done David.
-
 1
1
-
-
Man you got ALL the good out of that kit!! VERY nicely done Gil.
-
On 11/12/2016 at 11:34 AM, ghodges said:
Good to see it again. I get a much bigger kick out builds that "shine up" an older kit, as opposed to those that simply take advantage of the state of the art we have these days. I also find myself building more often for nostalgia purposes the older I get. Thanks for reposting!
GIL

Took almost 3-1/2 years to get back to you Gil but hey.....I made it. Thanks.
-
HOLEEE SCHMOKES!!!! That thing rocks the friggin' house!!!
-
I've heard nothing but good stuff about these kits from numerous builders as well as reviewers. You've done one bang up job on this one GIL! Thumbs up all the way!!
-
Cleanly built F-84 Ron.
-
Beautiful build Mark!! Despite your troubles it looks like you came out top for the win.
-
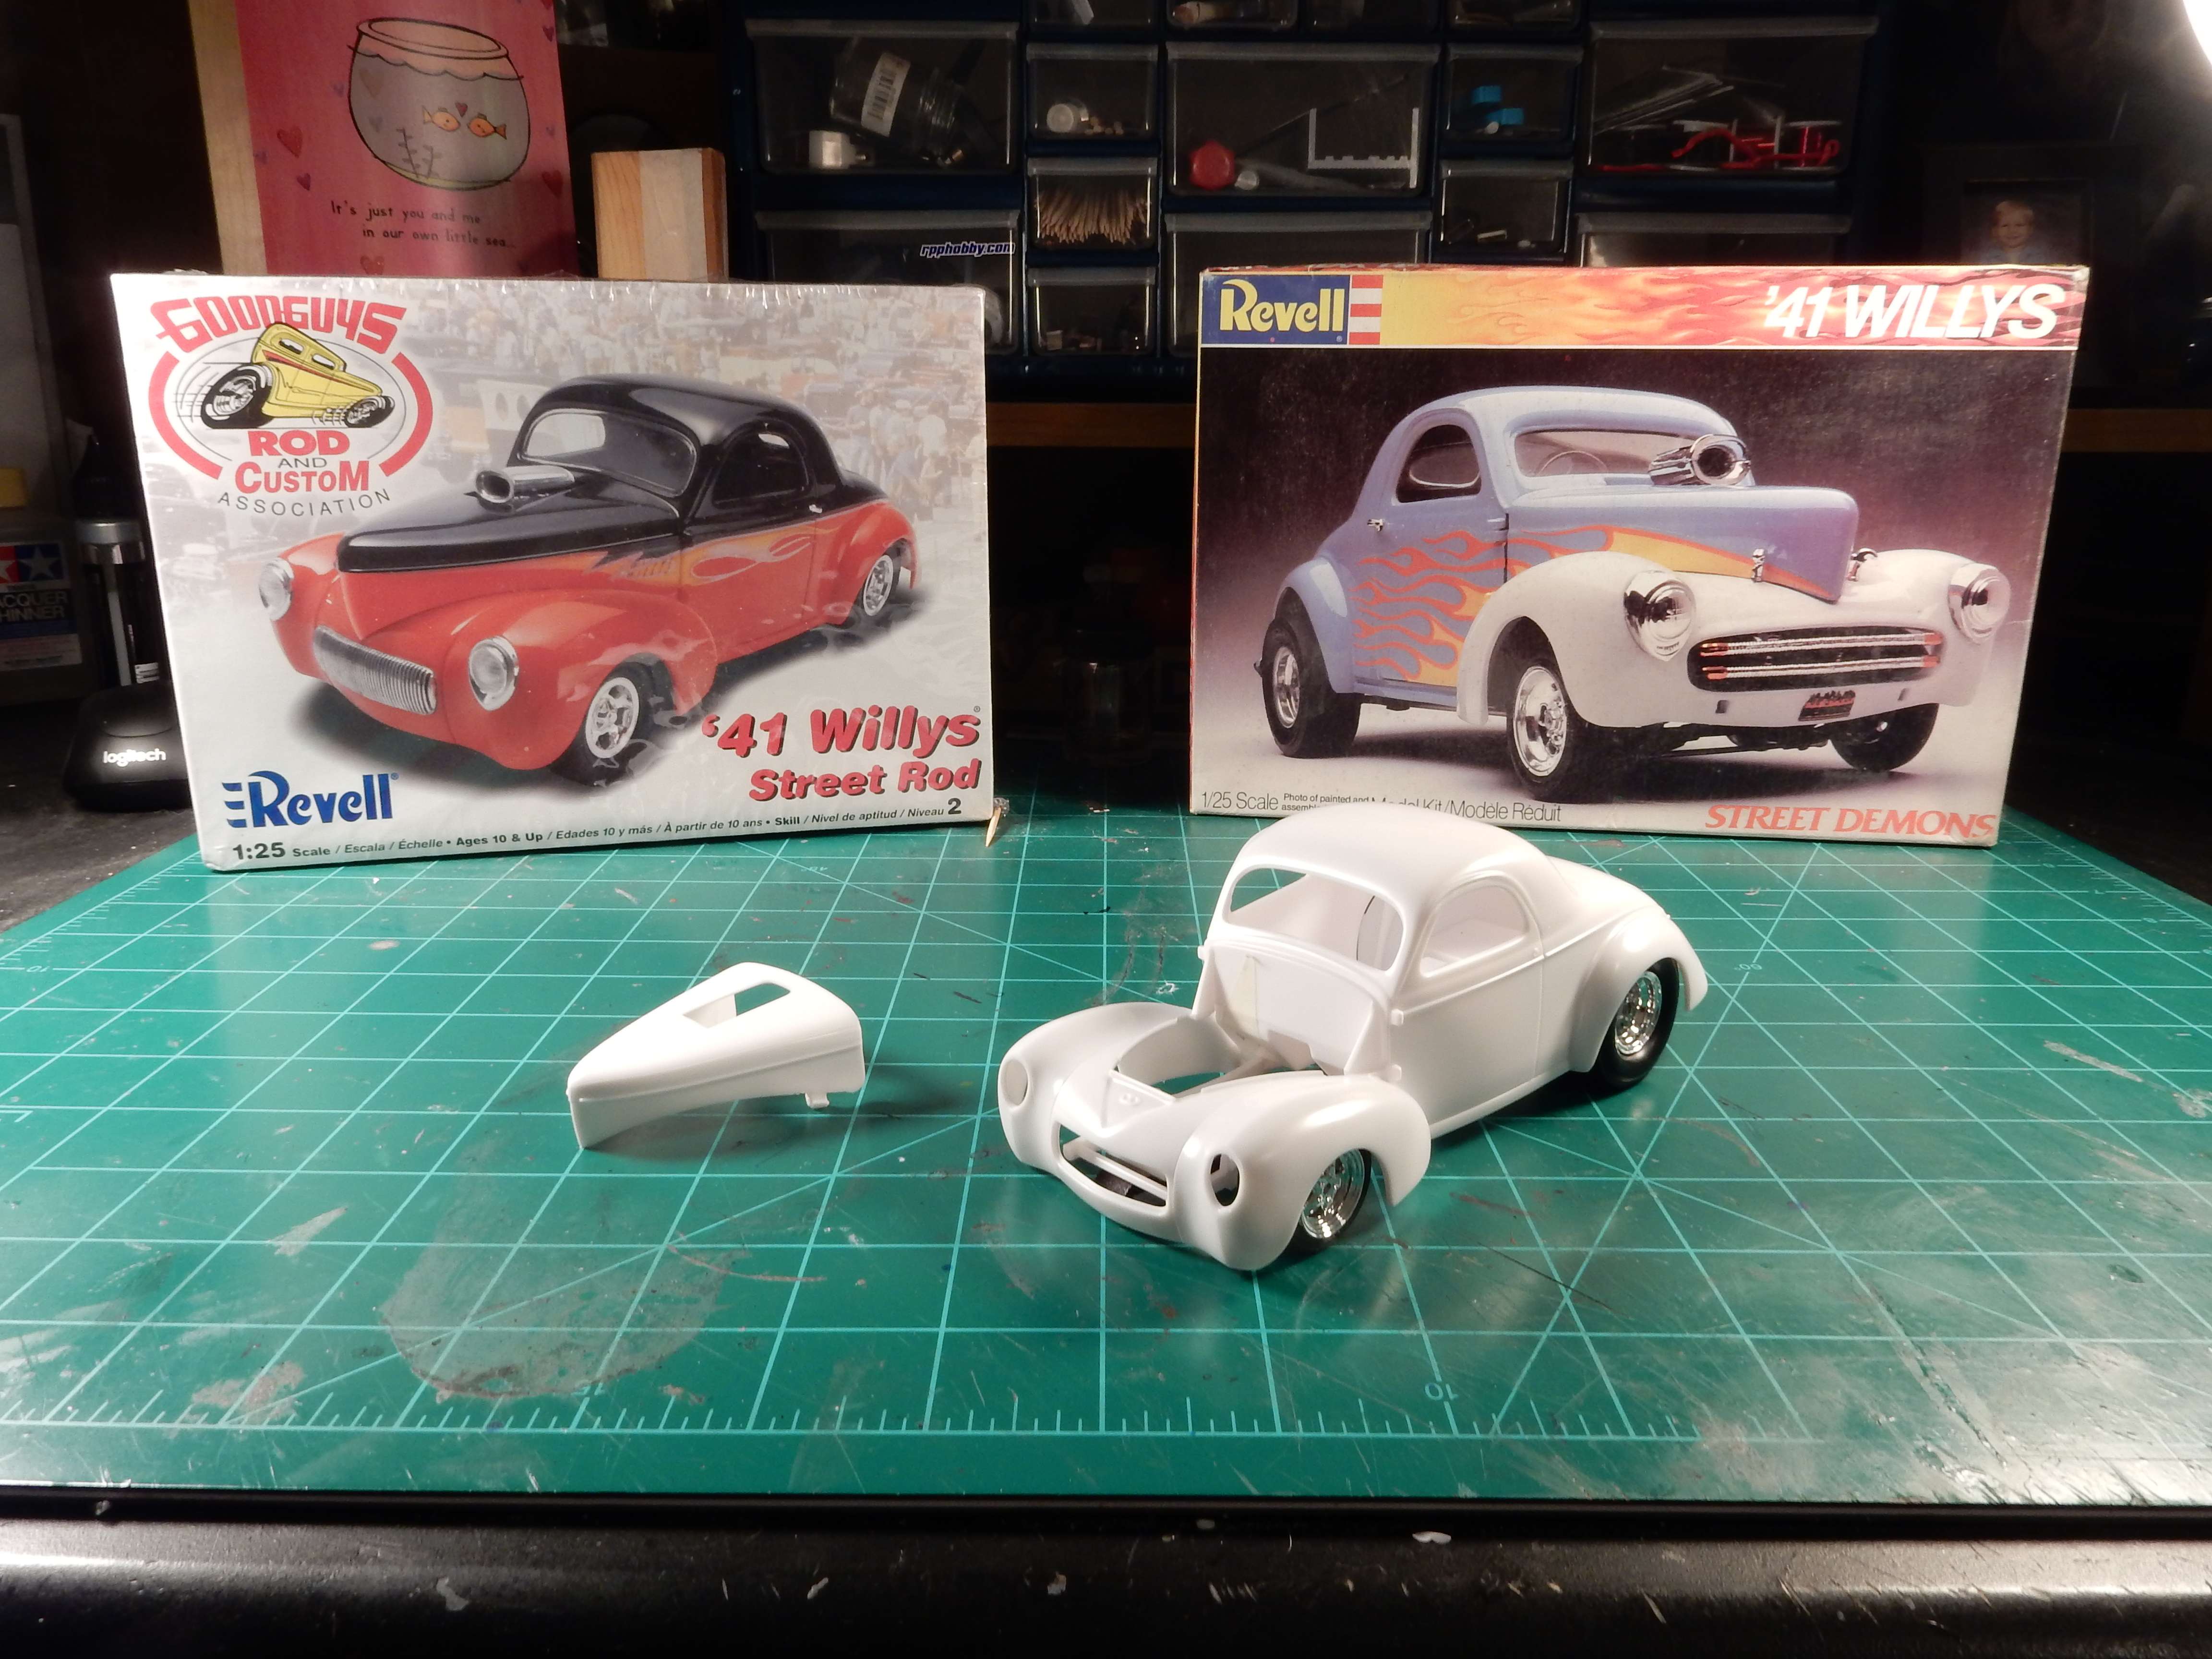
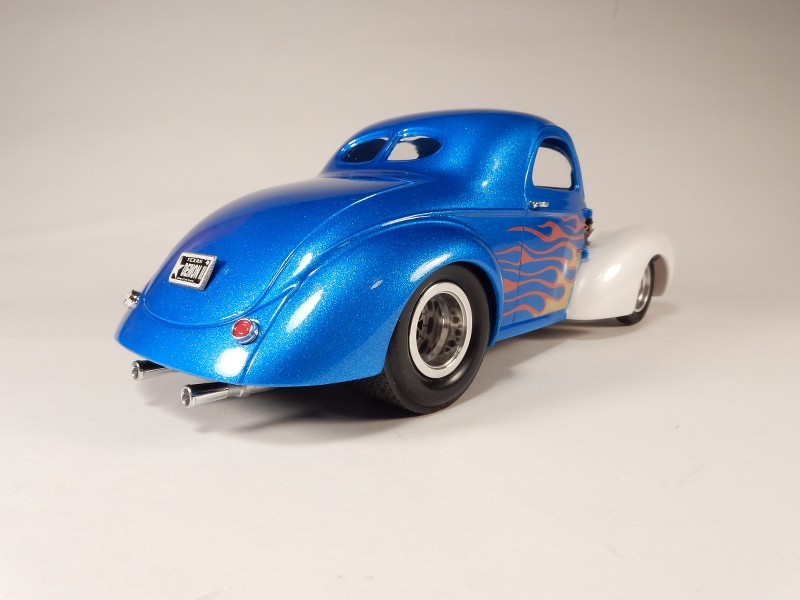
It has been forever and a day since I've last posted on here. I apologize for the long absence. I have since finished this build but wanted to post the completion of it here. I will be posting some more as there are some good folks here.
I started out with these two kits and a Pro Street vision between the two.

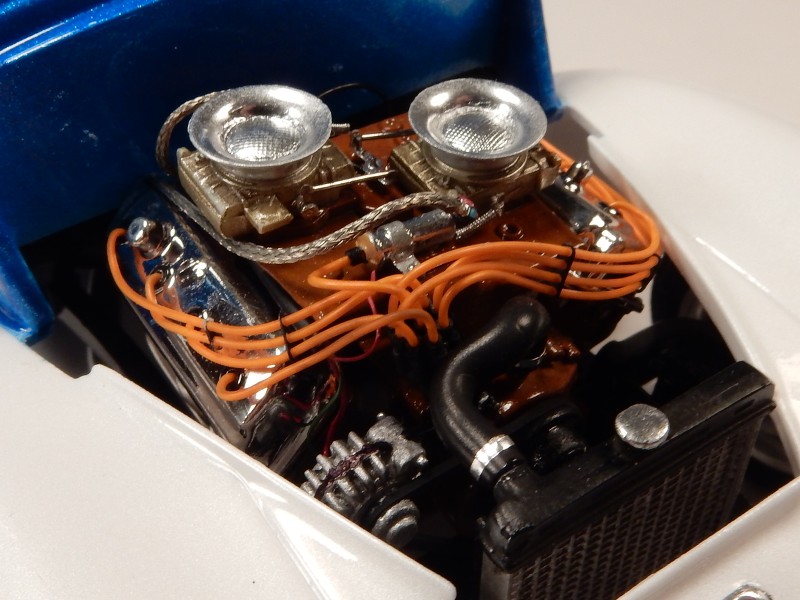
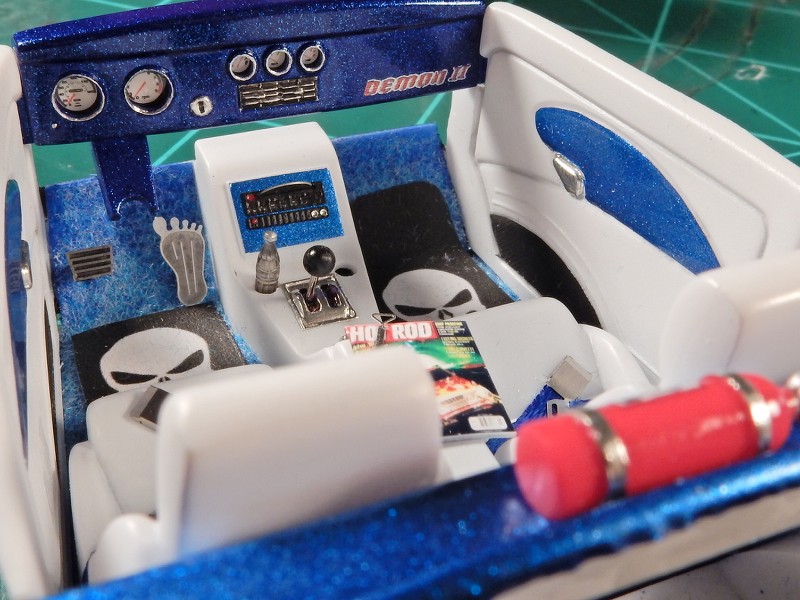
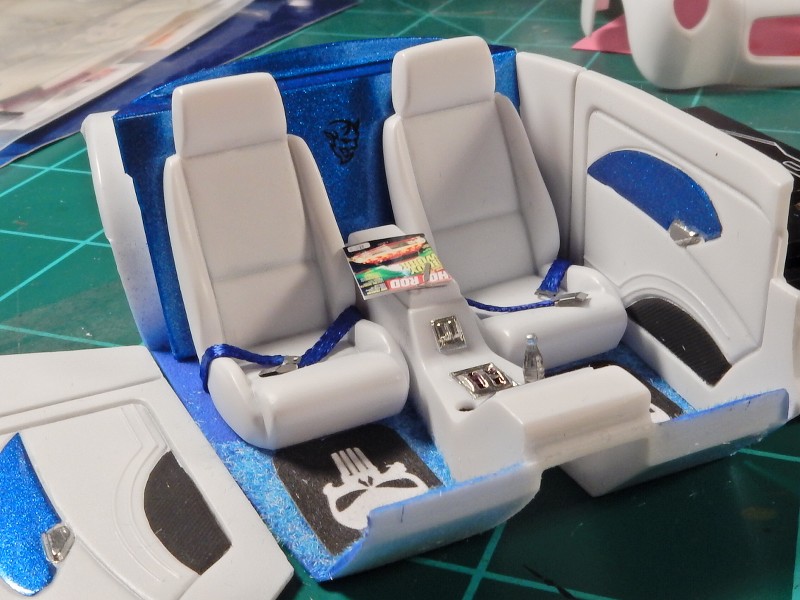
I've always had an eye for Revell's "Street Demons" series back in 1983 but I don't really care for the gasser look that a few of 'em had...……..this one in particular. In staying with the theme I set out to change things up a little bit in the way of a slight color change up, stance, powertrain and interior.
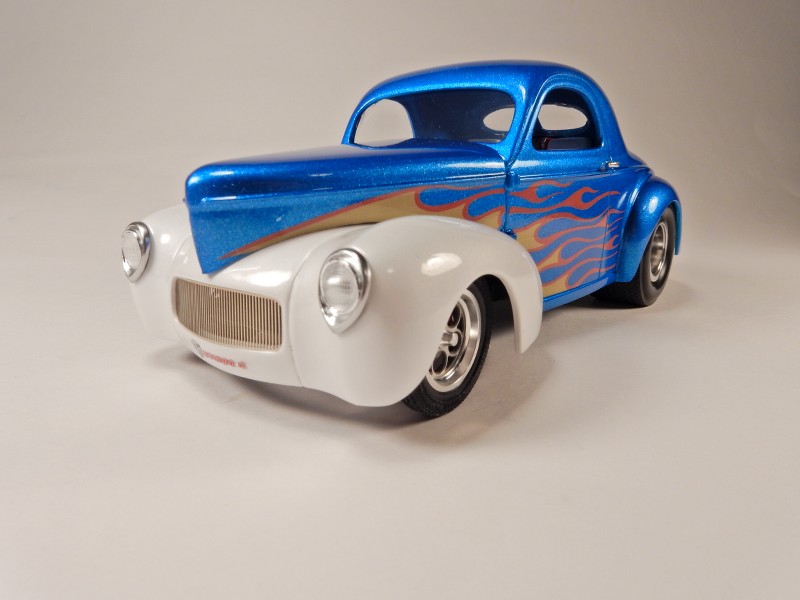
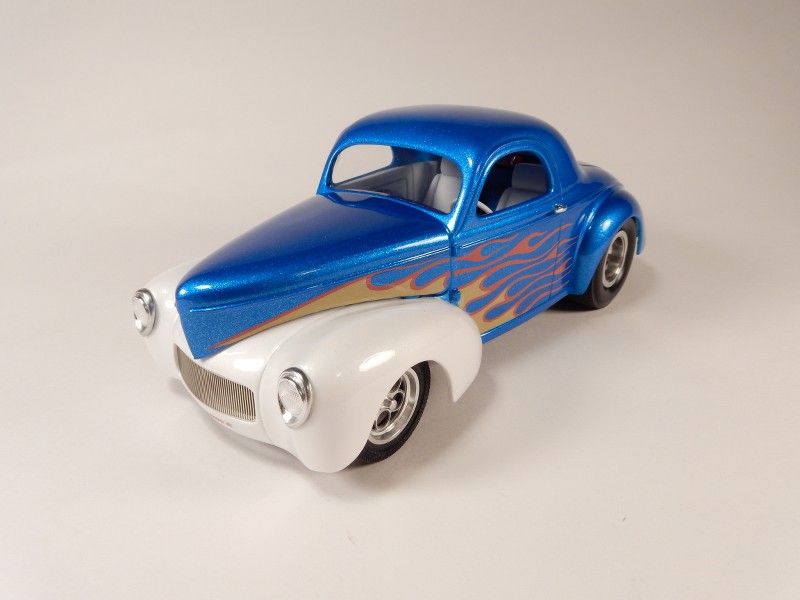
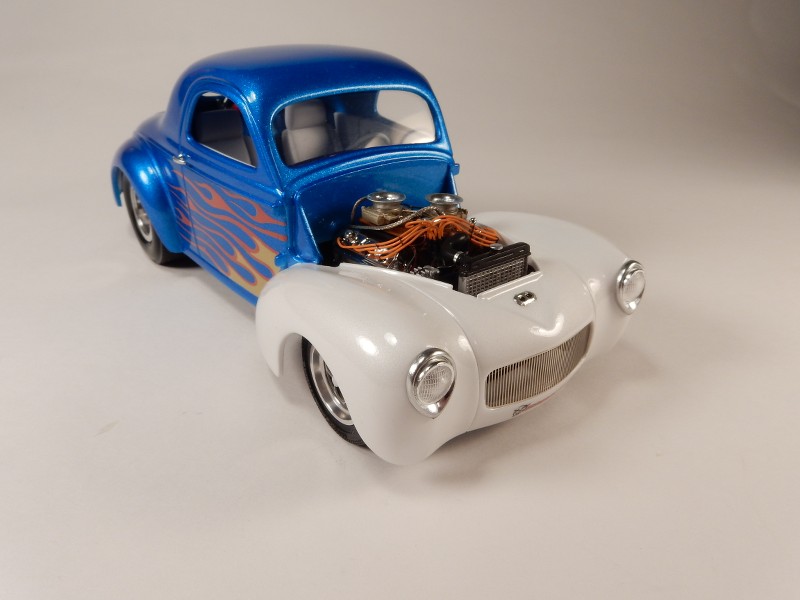
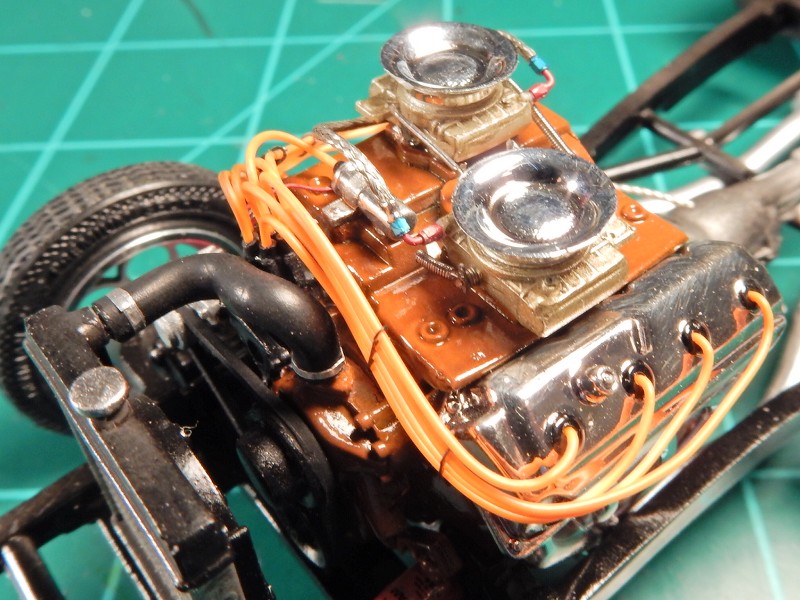
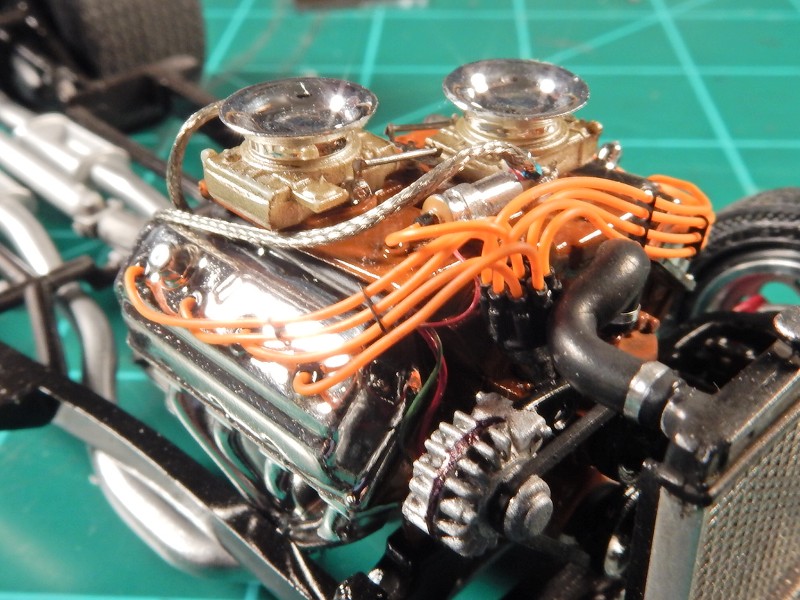
Powertrain : Came from the Revell 1968 Hemi Dart kit with upgrades to the ignition, fuel and throttle linkage systems.
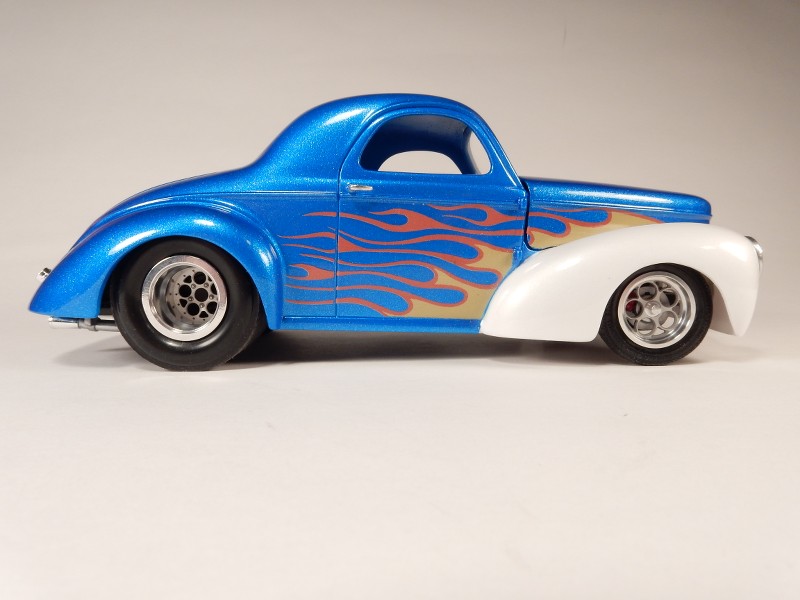
Wheels: From Future Attractions. I had my machine shop at work cut the rear wheels in half due to the fact that they were just too dang wide to use with the tires I had.
Paint: Testors Icy Blue Lacquer, Testors White Lightning Lacquer and Testors Wet Look Clear all decanted and shot through an airbrush.
Decals: Speedway Decals
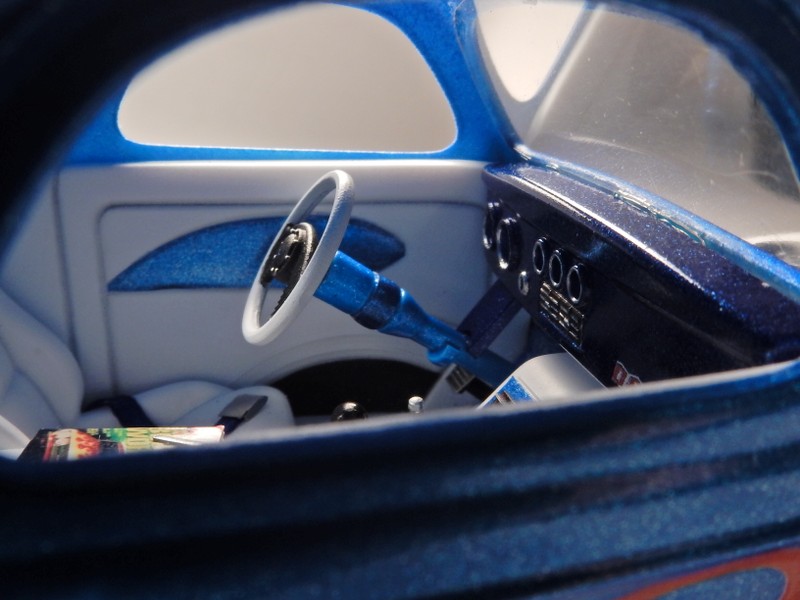
Interior Shots:
Additional engine shots:
-
That.............is a really good looking Chevy!!
-
Gotta love the General Lee! Good show Mike!
-
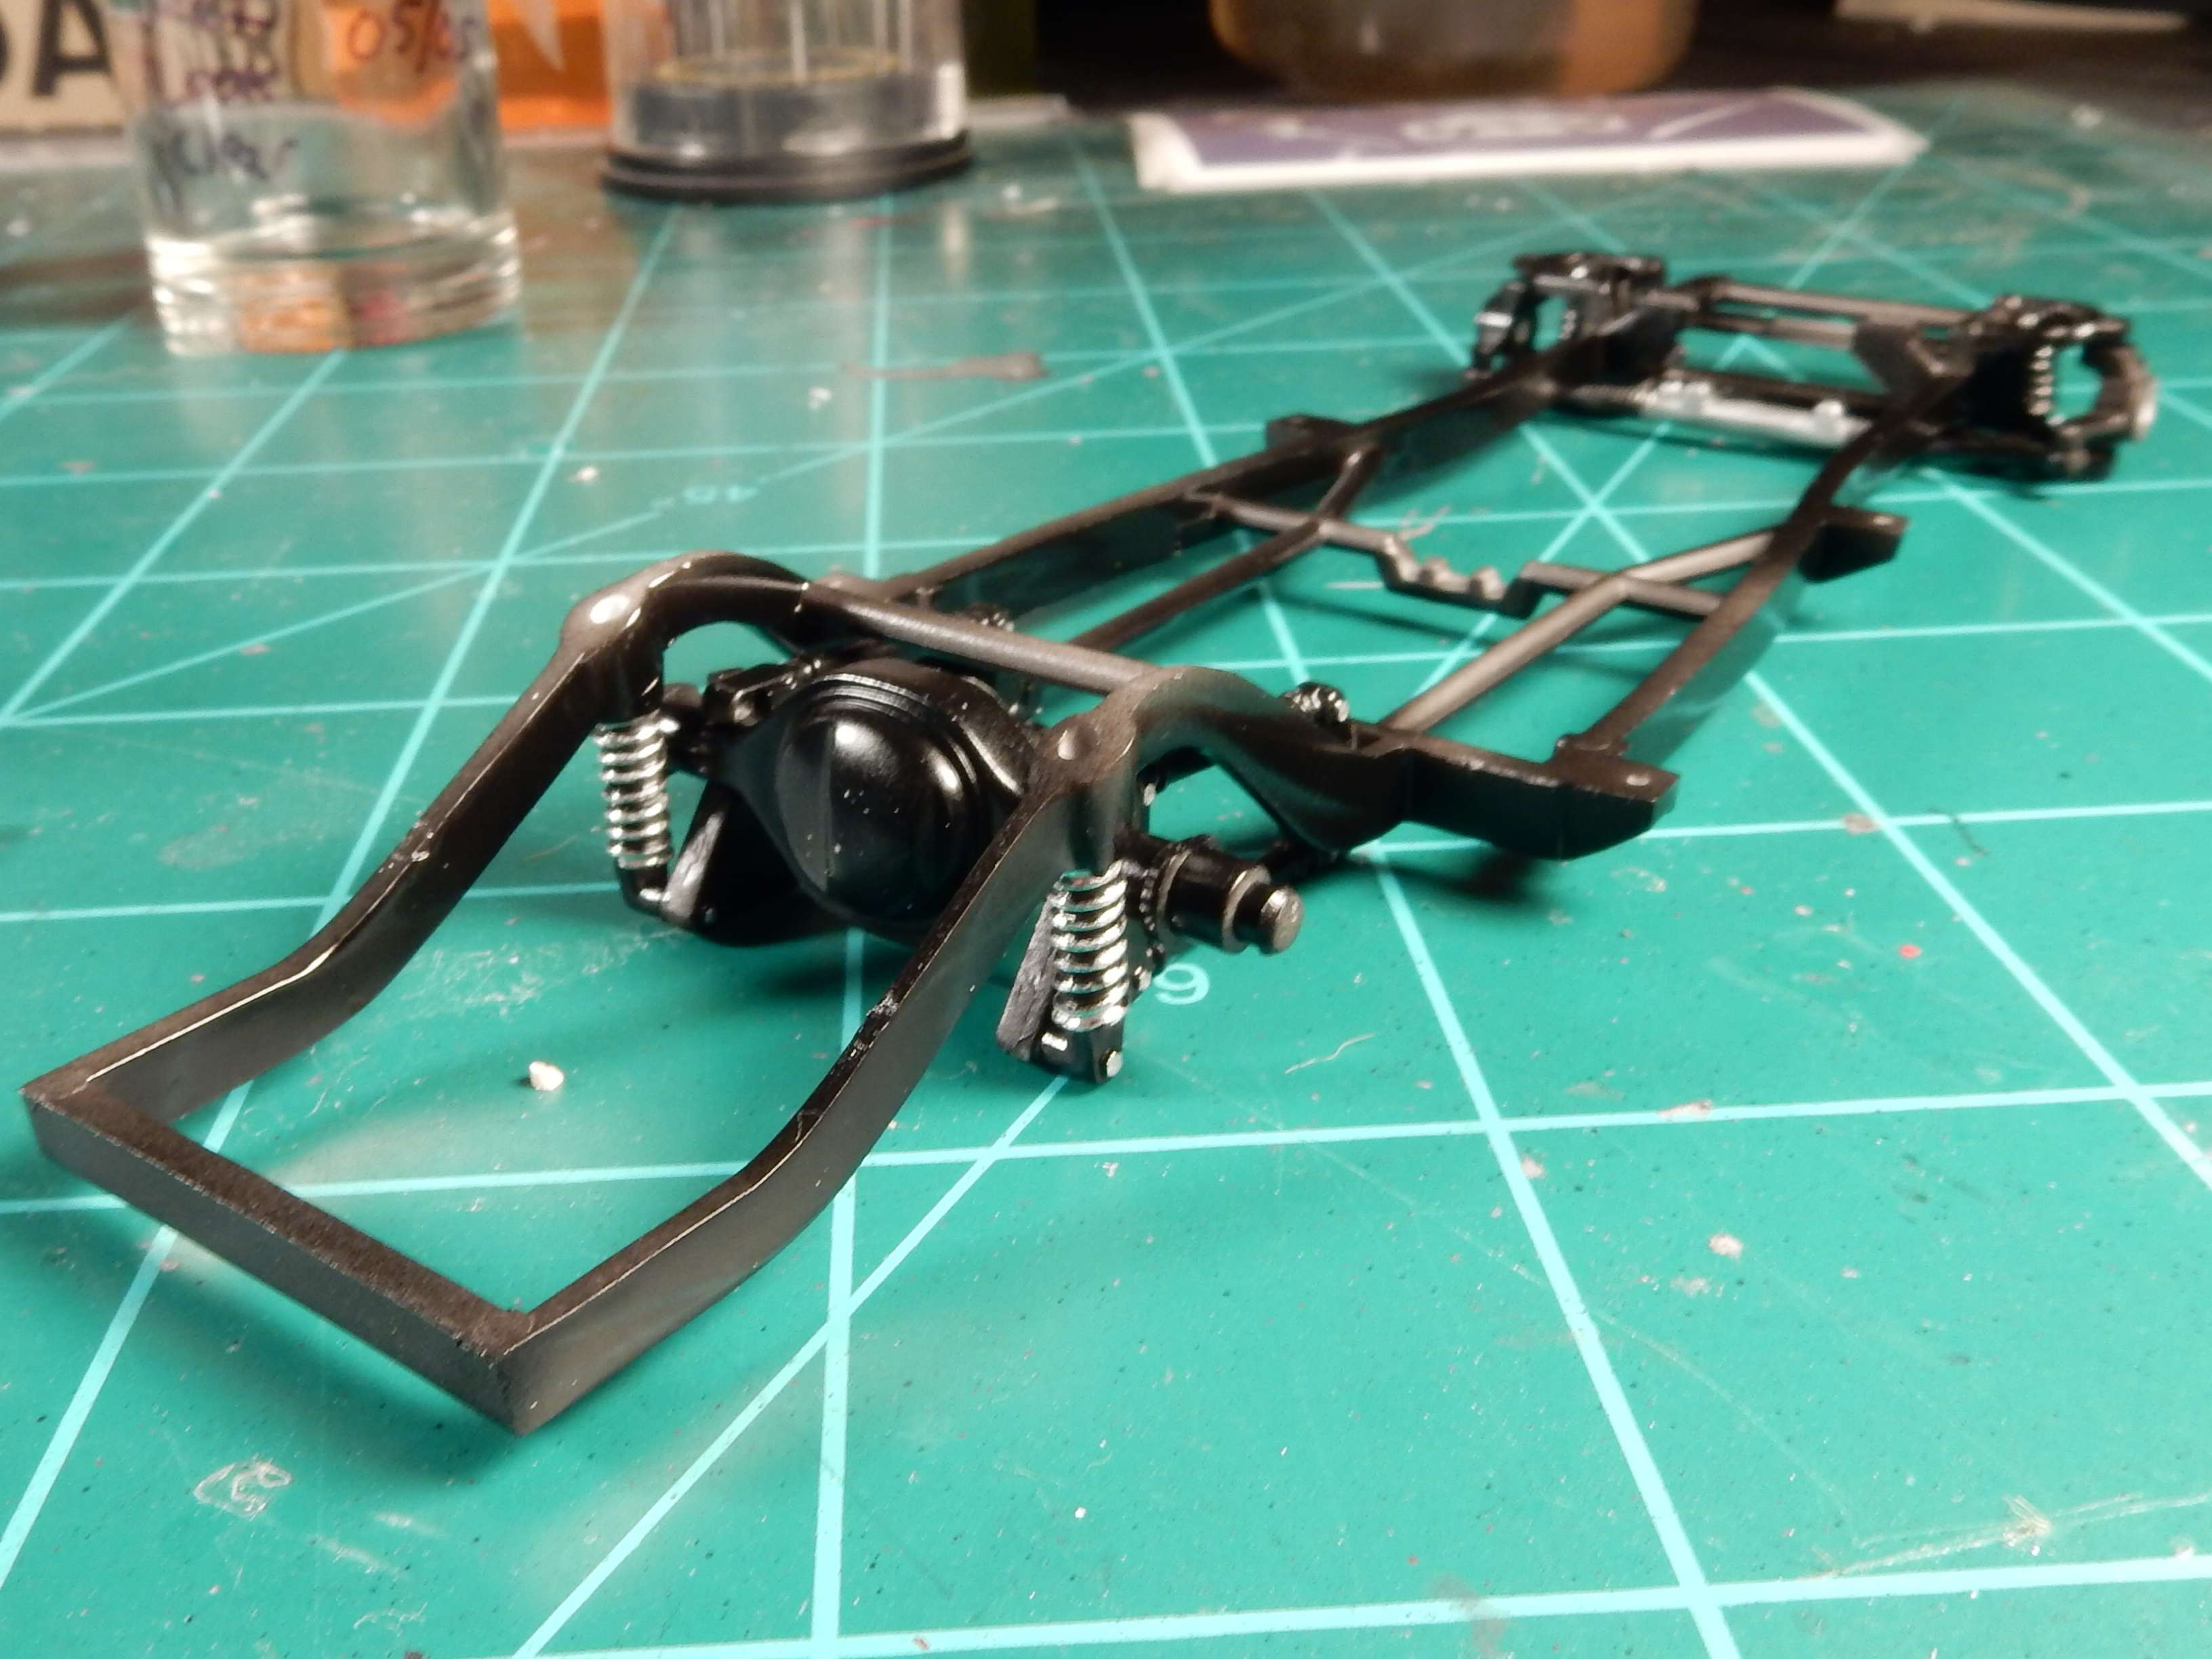
Just to let everybody know.............I am still working on this one. I've got the chassis mostly finished up except for the brake rotors up front and the exhaust system. I've also gotta tweak the toe in setting on the front end to keep the excessive toe in look from happening on the front wheels when fully assembled.
I narrowed the rear axle to get the wider tires underneath the rear fenders and lowered the front suspension a good 1/8" to make it an even drop all the way around.
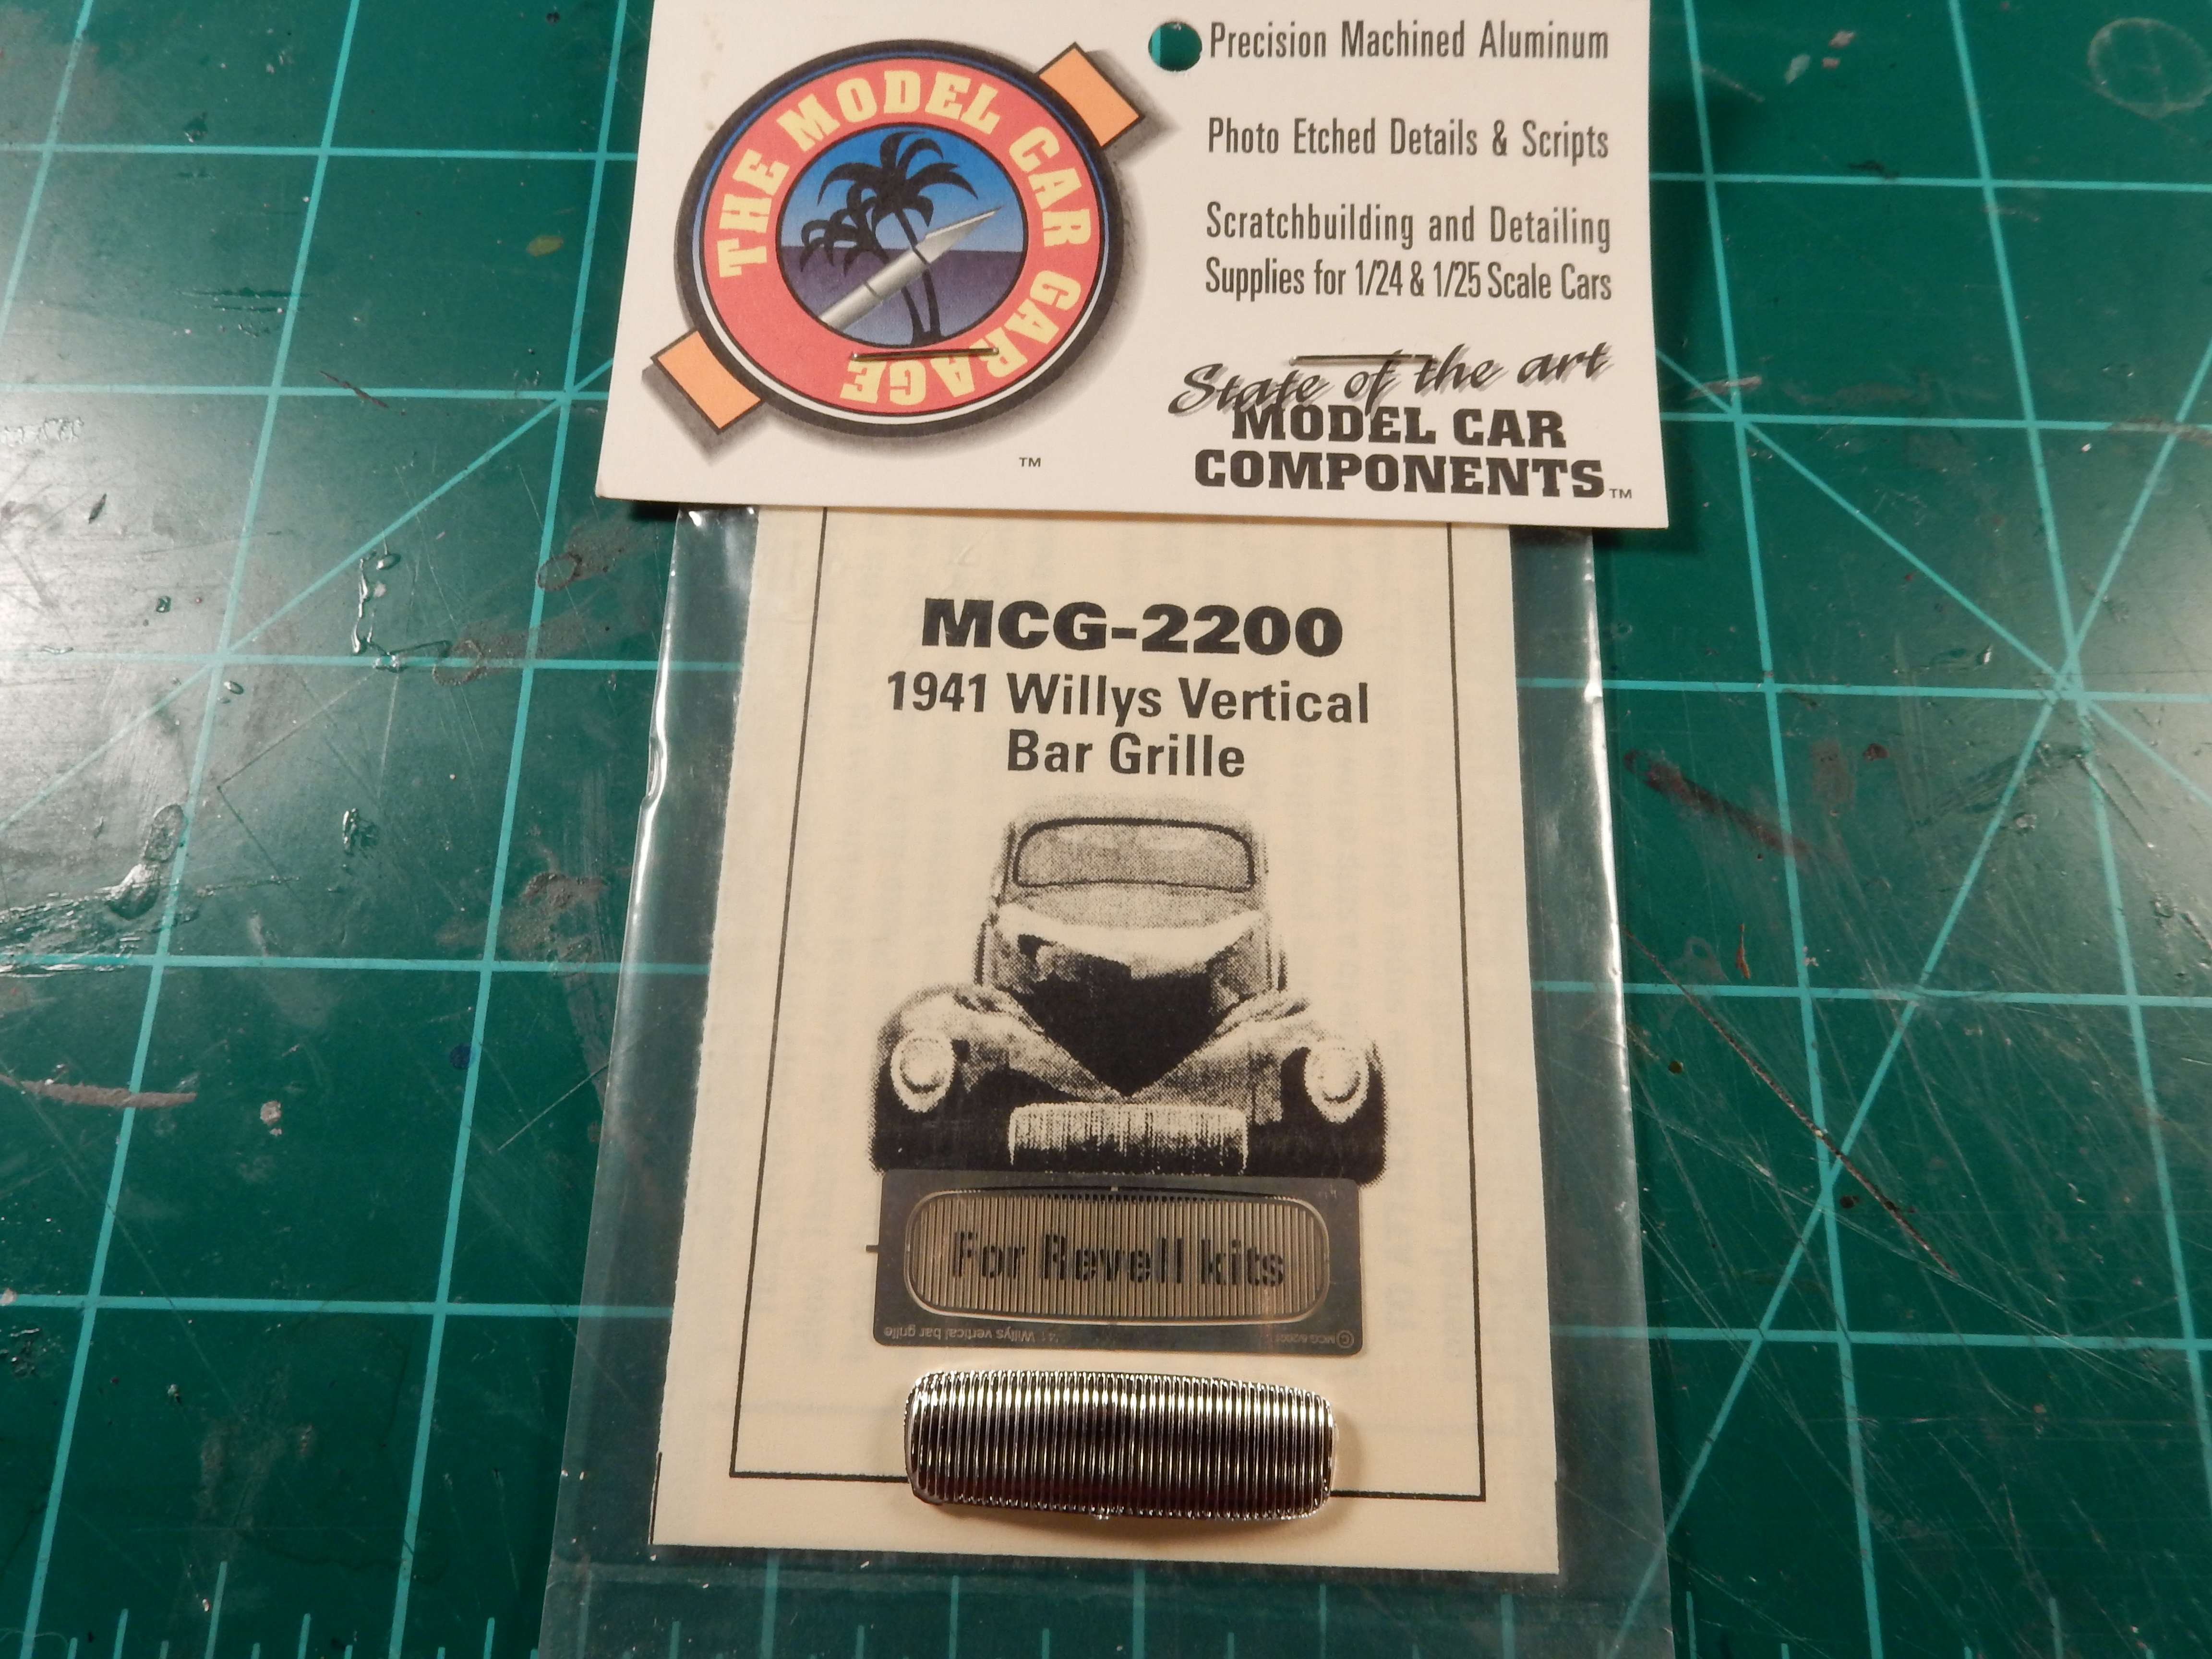
I did acquire the only PE piece made for this kit which will help the front end out ALOT. Sorry Revell..................that's good for OOB but it aint gonna cut it on this build.
I'm currently working on the engine which will take me a bit because of the detail I want to throw at this beast. I'll be robbing a lot of the parts except for the base engine block and transmission (which I'll leave OOB) from the Revell Hemi Dart kit. I was going to post some engine progress pics as well but the Spaz Stix clear doesn't work well with Model Master acrylic paint. Turned it white in the crevices so I'll be shooting another thin coat of orange on the block and re-coating the clear with Tamiya clear like I usually do the next time around. Learning curve complete.
-
On 7/18/2018 at 9:26 PM, 1320Wayne said:
Very nice indeed. Superb finish and added detail. Love the flames.
Thanks Wayne
-
This kit comes with a blown 426 Hemi but I don't like that nasty scoop coming up out of the hood. My aim is to fill in the hole in the hood and to change the induction up on the engine a bit. Gonna go with a Ramcharger 426 instead:
-
On 7/14/2018 at 10:37 AM, TimDarrah said:
Man, I just dropped 300 Euros with them. Way too much kool stuff on their web site.
I ended up visiting that site and you're right. Lotsa goodies on there. I do have a Porsche in my stash so I may re-visit it at "decal time".
-
19 minutes ago, Mark Deliduka said:
Yeah, I'd heard about that. I did build a 1/72 scale BMW with sidecar. It also had a fairly high parts count; around 20-25. Can't say the spokes were scale, but they do look good; and the steering column turns!
I'm almost finished with the Vauxhall ambulance that has the same chassis and front end as this car.
That's the one that you're building over at SPAM right? A 1/72nd scale BMW R75????? Wow!!
-
4 minutes ago, Mark Deliduka said:
I agree. It was surprising to me as well. What bothered me more was that so many parts were so delicate that they broke apart when I tried removing them from the sprue. A lot of those parts could have benefited from being molded onto other, stronger parts. Roden is famous for that kind of thing. Still, they do build into lovely models and Roden does do models that most other companies don't go near. Can anyone say German WWII Buses? LOL!😉
LOL!!! You should try building Tamiya's 1/48 scale BMW R75 w/ sidecar model. Man that thing looks solid and the wheel spokes are more to scale on it. Beautiful kit. I built the Bandai version of the R75 before the Tamiya version came out and it's nowhere NEAR the quality of the Tamiya kit.


Dyno Don Maverick-1 Year Project-Finished!!
in Cars, Trucks, & Motorcycles
Posted
First....let me go into the actual car. I've been wanting to build a Maverick for a VERY long time but there aren't many kits to choose from. The best offering (and this isn't saying much) is the Jo-Han kit. I was fortunate to get mine from someone on another forum for the mere price of $50. These kits are running around 300+ bucks nowadays so 50 bones is a friggin' steal. Then there came the matter of subject. I was looking for a car to build....you know....a pattern. Nothing struck my fancy for the longest time until I found Dyno Don's car. Man....I was smitten! Just an evil lookin' car! So .....I set out to build it.


The real deal:
When I started this project one year ago almost to the day I just didn't realize what ride I was in for. This started life as a Jo-Han kit and I quickly found out that it would become much more on down the line. The only things used out of this kit were the body, base interior tub (which got modified at that) and the engine. The rest....went in the trash. The chassis is from AMT's 67 Mustang Fastback, interior is almost all aftermarket stuff to include the 27 piece shifter and the 25 piece seat belt harness. In fact so much scratch and up level detailing was done in the interior that I don't even know where to start. Total parts count for the interior alone is 125 pieces in all. Extensive mods were done to the chassis to get everything to "work" and although not accurate it allowed me to achieve the stance and overall look that I was after. Probably the BIGGEST hang up I had with this car was trying to figure out how to fabricate the shock tower/ inner fenderwells for it because I just couldn't get anything to work. After MANY hours in thought and experimentation I ended up fabbing them up from soda can aluminum.
Paint....I used Tamiya's Pure Red with a Testors Wet Look clear. Car decals were from a supplier on Ebay....forgot the vendor. Wheels and tires are from the parts bin except for the rear wheels which I used from Revells 41 Willy's gasser kit. All lettering on the sidewalls of the tires are from Slixx decals. The engine has details from so many different suppliers that I forgot half of where I got everything from. LOTS of scratch work though. Cooling fans are from the Revell Rick Dobbertin Pontiac J2000 kit and again....were heavily modified to fit into this car. This was definitely a test of my abilities as a modeler to say the least but I learned ALOT from this build (as well as learned a few new curse words). There are inaccuracies that'll be noticed by anyone who knows anything about this car and a few liberties taken here and there in the name of adding interest to the car but I feel like it came out alright. I also left off the wheelie bars. I was going to scratchbuild a set but the longer I looked at it the more I thought that they would detract from the overall looks of the car. Any how.....I present here...the finished product.
and like all my latest builds she finds herself in my garage for a while now....