cruz
-
Posts
28 -
Joined
-
Last visited
Content Type
Profiles
Forums
Events
Everything posted by cruz
-
Hosted on Fotki Hosted on Fotki Hosted on Fotki Hosted on Fotki Hosted on Fotki Hosted on Fotki Hosted on Fotki
-
https://www.youtube.com/watch?v=cfvu6CvqRyo
-
https://www.youtube.com/watch?v=cfvu6CvqRyo
-
https://www.youtube.com/watch?v=So6lq4l5Vt8
-
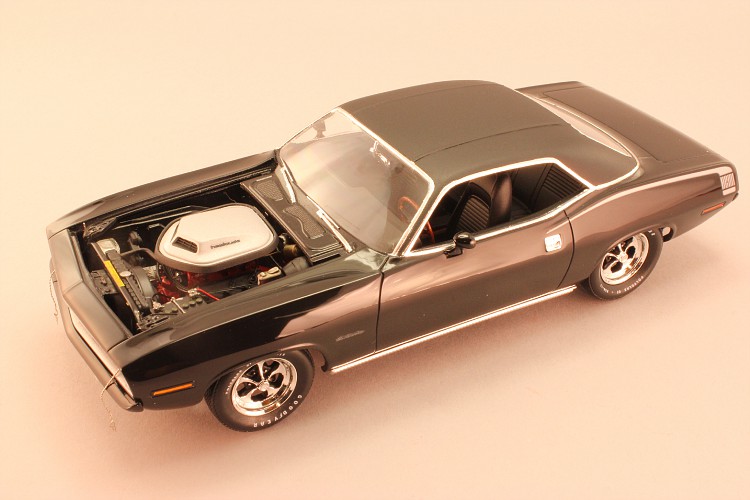
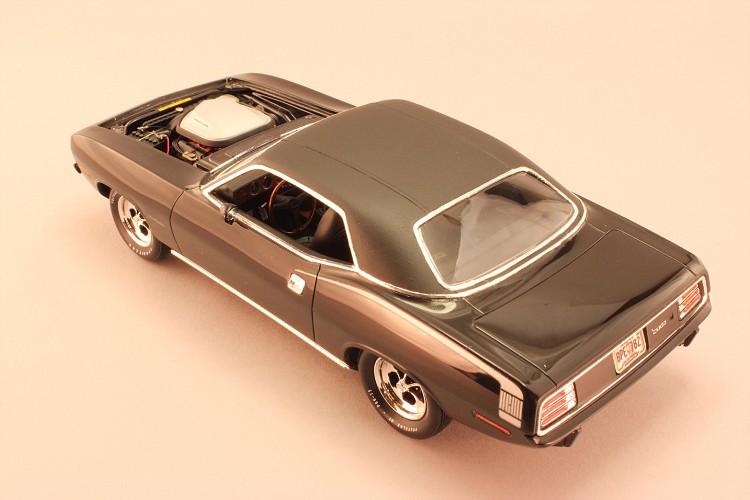
I was finally able to go outside and shoot much nicer pictures under natural light. Hosted on Fotki Hosted on Fotki Hosted on Fotki Hosted on Fotki Hosted on Fotki Hosted on Fotki Hosted on Fotki
-
Thanks guys. The interior colors are from flat Tamiya Acrylics, they were airbrushed.
-
The seats were painted flat red at the start and before applying the piping of course. I grabbed a toothpick and applied very small amounts of crazy glue on the wire first and then went ahead and started pressing it in place slowly and in sections while following the contours of the seats. Make sure the wire is stretched firmly first before applying it. You will surely notice small patches of super glue once done, it's inevitable being that the seat was flat and the glue dries glossy. No need to worry, just lightly add some clear to the seats from a distance. This will give it a slight vinylish look as seen in the pictures. It will tone everything up but make sure you don't go overboard with the clear, you want to achieve a satiny look.....
-
Thanks guys. The color is black, it was photographed in my light booth but I will have to work with the lighting to see if I can get the right colors. I usually take pictures outside in natural lighting but it's been nasty outside the last couple of days. The texture of the roof was simulated simply by shooting the color far away from the subject; this creates heavy orange peel which is what you should go for when simulating vinyl tops.....
-
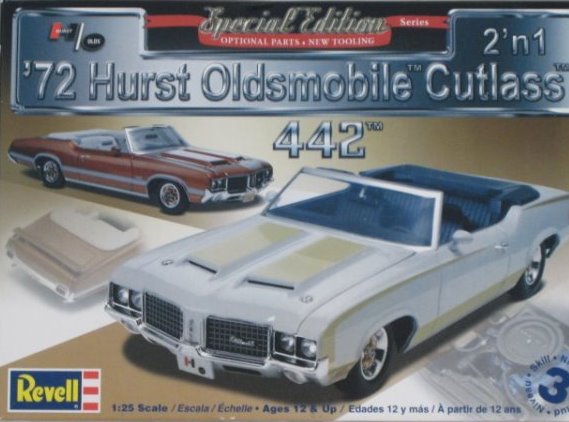
Based on the newly released kit.

-
Built this one for a club member. Color is Testor's Nassau Blue Metallic with Testor's Wet Look Clear. Didn't like the chrome on the wheels in the kit and decided to Alclad them instead for a more realistic look. I also dropped it down slightly, thought it was a little too high out of the box. Hosted on Fotki Hosted on Fotki Hosted on Fotki Hosted on Fotki Hosted on Fotki Hosted on Fotki Hosted on Fotki
-
Thanks Gary. I like using flat colors for my base whenever possible. They lay down much thinner and with much less orange peel so the wetsanding process is facilitated. They also preserve the small and subtle details of the body making it even easier when the time comes to add bare metal foil.
-
All the chrome is Bare Metal Foil. Check out the link for the paint tutorial done for Scale Auto Mag, keeps me from writing too much.... http://public.fotki.com/MCRUZ1/scale-auto-mag-pain/
-
This model was built for a review in Scale Auto Magazine a few Month's back. Nothing was added, basically an out of box build. Paint is simply Testor's enamel flat yellow as the basecoat and Testor's Wet Look Lacquer clear over it, wet sanded, polished and waxed. Hosted on Fotki Hosted on Fotki Hosted on Fotki Hosted on Fotki Hosted on Fotki Hosted on Fotki Hosted on Fotki
-
 Not joking around, want to see the biggest show in the nation? Come join us for the NNL East in Wayne NJ. Lots of models and vendors on site. My advice? Bring lots of dough!!!
-
For those of you that are into Automotive Modeling, this is the show for you! Come and join us, guaranteed to have a great time!!!
-
The Hurst Hairy Olds was a drag racing car, different year also.....
-
Thanks guys, the interior wood paneling comes with the decals in the kit.....
-
Don't know the model or stock number, I don't have the box either. This however is the actual kit....
-
Based on the Revell kit. Paint is Tamiya Pure White, no clear. Engine fully plumbed and wired. Used different set of tires, didn't like the ones in the kit. Hosted on Fotki Hosted on Fotki Hosted on Fotki Hosted on Fotki Hosted on Fotki Hosted on Fotki Hosted on Fotki Hosted on Fotki
-
WWII HEAVY PANZER WALKER from Dust Tactics
cruz replied to catdude01's topic in Space, Sci-Fi & Fantasy
Very cool Pedro, as you well know, I am more of a car guy but there are a lot of things you guys do which I always learn and try to incorporate on my builds. Thanks for sharing! -
Awesome work my brother!!!
-
Hola hermanito!!!
-
Here to help in any way I can!!
-
This is based on the new Revell kit. Paint is Testor's enamel Flat Red with Testor's Lacquer Wet Look Clear, wetsanded, polished and waxed to perfection. I used Model Car Garage's '62 Corvette Detail Set for the various P/E items around the build. Tires are from the AMT Custom and Competition tires, I was not too crazy about the ones in the kit. Engine is plumbed and wired for extra details. I also Alcladed the bumpers. Hosted on Fotki Hosted on Fotki Hosted on Fotki Hosted on Fotki Hosted on Fotki Hosted on Fotki Hosted on Fotki Hosted on Fotki
-
Hosted on Fotki Hosted on Fotki Hosted on Fotki Though the kit's seats have molded in piping, I knew it would be a challenge painting them so I decided to sand them off and use wire. I had to paint the bulge of the hood and match the paint to the rest of the decals because the hood decal would not conform to it. White has no clear.