Ron Bell
-
Posts
1,882 -
Joined
-
Last visited
-
Days Won
179
Content Type
Profiles
Forums
Events
Everything posted by Ron Bell
-

Phase 1 room reservation FAILURE
Ron Bell replied to ghodges's topic in 2024 IPMS/USA National Convention
Two things. CannonCocker, Part of the problem may lie with the hotels' systems. Many cannot accommodate reservations too far in advance of an event. Thus, when you do get to the point where they will take reservations, you get your Oklahoma Land Rush for rooms. Our problem is not the system, its the fact that we take up too much exhibition space for the number of room nights we guarantee so the number of rooms a hotel is willing to commit to us is limited creating the crush for rooms. And while our room blocks have steadily increased, it's a crap shoot as to who will actually show up and the hotels will not gamble on that. Never mind we have no control over the hotels reservations systems and web sites. And please, please, please, keep in mind that the people running these shows are not professionals. They are amateurs doing their best to give you the best convention they can. There are always glitches and some people may be inconvenienced but let's not crucify those that have stepped up to give us the best model show in the Western Hemisphere. As long as you mix hotels, venues and humans together you will have confusion and conflict. I did this for 18 years for IPMS/USA and not one of the conventions I worked with did not have some sort of problem with one or more of them. If you adapt to accommodate problem "A" in 20XX, believe me you'll have problem "B' in 20X1 that you didn't expect and the membership will vilify you for it. I wrote and rewrote the convention operating parameters for many years until they were eight pages long and took a Philadelphia lawyer to understand. (Ok, that reference may be a bit dated.) You just can't cover it all. The best I can say is take a deep breath, relax, remember that this is just a hobby and that some people that share your interest are trying to put on a show that you can enjoy and give them a break. -
Phase 1 room reservation FAILURE
Ron Bell replied to ghodges's topic in 2024 IPMS/USA National Convention
I used the link from the con site within a minute or two of noon cst and it worked fine for me. Arriv on 18(Thur) out on 21(Sun). Double room, one king bed. The Hilton web site is a bit clumsy/clunky, but it did work. Oh, I also got the No Rooms Available message at first, but then I clicked on "special rates" and got through. Like I said, the Hilton site is clumsy to use. -
Ha! Gotcha! Bet you were expecting an F-11F Tiger in Blue Angels markings but what you have is a Curtis F11-C Goshawk in Blue Angels markings. I know, I know, the Angels didn't even exist back then, but I had this old Lindberg kit on the shelf doing nothing and the F11 part struck me, so here you have what it might have looked like. Its the number "7" aircraft as I would suppose the other six would be of another type. It would have been like the Cutlass during it's brief time with the team. The lettering is just generic yellow letters and all other markings are painted Tamiya Royal Blue and Yellow. It's an old kit so has no interior so I added some basic stuff to busy it up. Mine did not have a pilot figure so it looks like this one is remote controlled and the windscreen was missing so I cobbled one together from the spares box. The prop disc is clear acetate. Actually, the kit went together well with little call for putty or any serious surgery. It was done for a laugh, so I hope it makes your holiday season a bit jollier.

-
Airfix 1/32 1930 Bentely Blower I picked this out of a vendor's box of bagged Airfix kits at Scale Model World along with several other ancient gems. The original kit dates back to the 50's and this release is an early/mid sixties version. I don't 'do' cars that often so this was just to be lark. Turns out it was no lark but more like a bedraggled old buzzard. There was extensive clean up, few parts fit together well which was complicated by very vague instructions of the "put this on that" type with an exploded kit view that showed all the parts but not really how they fit together. I struggled on and built it straight out of the bag, the only modifications being I added the fishtail exhaust end and modified the windscreen part which portrayed the folded down part as a solid block. Photos showed me that this part was either a screen like material that was suppose to be a guard against flying stones or was a more typical fold down windscreen. I chose to depict the latter. Another thing photos revealed was that the coachwork/passenger compartment was covered in some sort of material as it had a textured surface and it was not a gloss finish as were all the other metal parts. I have no idea what the deal is with this, but I depicted it with a flat finish to distinguish it from the glossy metal. Finished, nothing is in alignment and it would probably go down the road crab-like, if at all, but it makes a decent display and was a break from my usual braille scale AFVs.
-
Magnificent, as usual. You need to have a national con close enough to Jacksonville so you can drive and bring some of these larger masterpieces for all to see in person. And by the by, what Blue Angels Blue did you use? I have a little project of my own and I'm almost ready for paint.
-
Mark, there are no kits of the Bren Gun Carrier out there. The IBG, Airfix and other's kits are of the Universal Carrier, a development of the Scout and Bren Gun Carriers. It was much more common and was used throughout the war in all theaters.
-
Stikpusher, Yup.
-
I found a conversion kit to change the Airfix Universal Carrier to a Bren Gun and/or Scout Carrier from Matador. I've done several Matador kits and conversions and their parts fit...sort of and anyone who has built the Airfix kit knows that the fit is very "iffy". In this case it was easier to discard the lower hull Matador gave you and just modify the Airfix parts so that all the other pieces would fit better. In the photos, the green is Airfix, the tan is Matador, grey is from the spares box and white is sheet/rod plastic. To remove the large center mold seam from the tracks involves also removing the track detail. I replaced this by using strips of 3D printed bars that came on a sheet of 3D printed rivets/grids/etc. from MicroMark applied around the track. I used J&J Kleer, or whatever it's called now, to make sure they didn't flake off. I know it's not perfect, but I think given that the original kit is neigh on to 60-70 years old and is only 2 inches long, its not bad. The figures are typical Airfix of the time, in other words not very good, but they add a little life to it. Its marked as a vehicle of the recce element of the 2nd Infantry Division in 1939.
-
This is the old Revell kit of a Wickes/Clemson class destroyer released as the USS Buchanan and HMS Campbelltown. For a kit of it's age, it's actually pretty good. The 4" guns are pretty nondescript as are the torpedo tubes, but the single greatest flaw is that the decks have simulated wood planking and these ships did not have wooden decks. Due to its age there is a lot of parts clean up/seam and injection pin marks filling involved, especially the searchlight tower. It comes with molded on stanchions to make railings out of thread, but this is difficult to get right and looks too out of scale. Work that I did: deepened all the port holes, drilled out and busied up the guns and torpedo tubes, removed all the molded on stanchions and replaced with PE railing, sanded/filed/scraped all the molded in wood deck planking off. In the end it builds up into a nice display model. There were many Wickes/Clemson class built and they all had minor differences here and there but were basically similar in outline and armament. I marked mine as the USS Reuben James, a Clemson class ship that was the first US ship sunk in the European Theater in WWII and is the subject of the song "The Sinking of the Reuben James" by Woodie Guthrie.
-
Are you thinning paint with that Maker's Mark?
-
If I keep the plating on and fill, file or sand the seam and/or sprue attachment points smooth, the plating gets damaged and cannot be matched for a repair. If I remove all the plating I can treat these things normally. I primer it to blend the fix in with the plastic and then use a metalizing system like Alclad or the old Testers Metalizers. (There are almost too many to name nowadays.) This way the seam is hidden and all the metal finish matches. Usually the plating on kit parts will come off with just a soaking in household ammonia. Some parts take a day or so, but a quick scrub with an old toothbrush does the trick. Under that plating there could be a coat of clear lacquer. It's put on by the manufacturer to ensure a completely smooth surface for the plating. Don't worry about removing that. You're going to prime over it and then probably have to add some sort of base coat for the new metalizer anyway.
-
i usually strip the plating off the parts then treat the seams normally. Then I re-coat the parts with a suitable metalizer.
-
Any chance of getting the 1/48 decals and then scanning them and scaling them down to 1/72 and printing them? I couldn't do it as I am a computer Luddite, but I'm pretty sure it can be done.
-
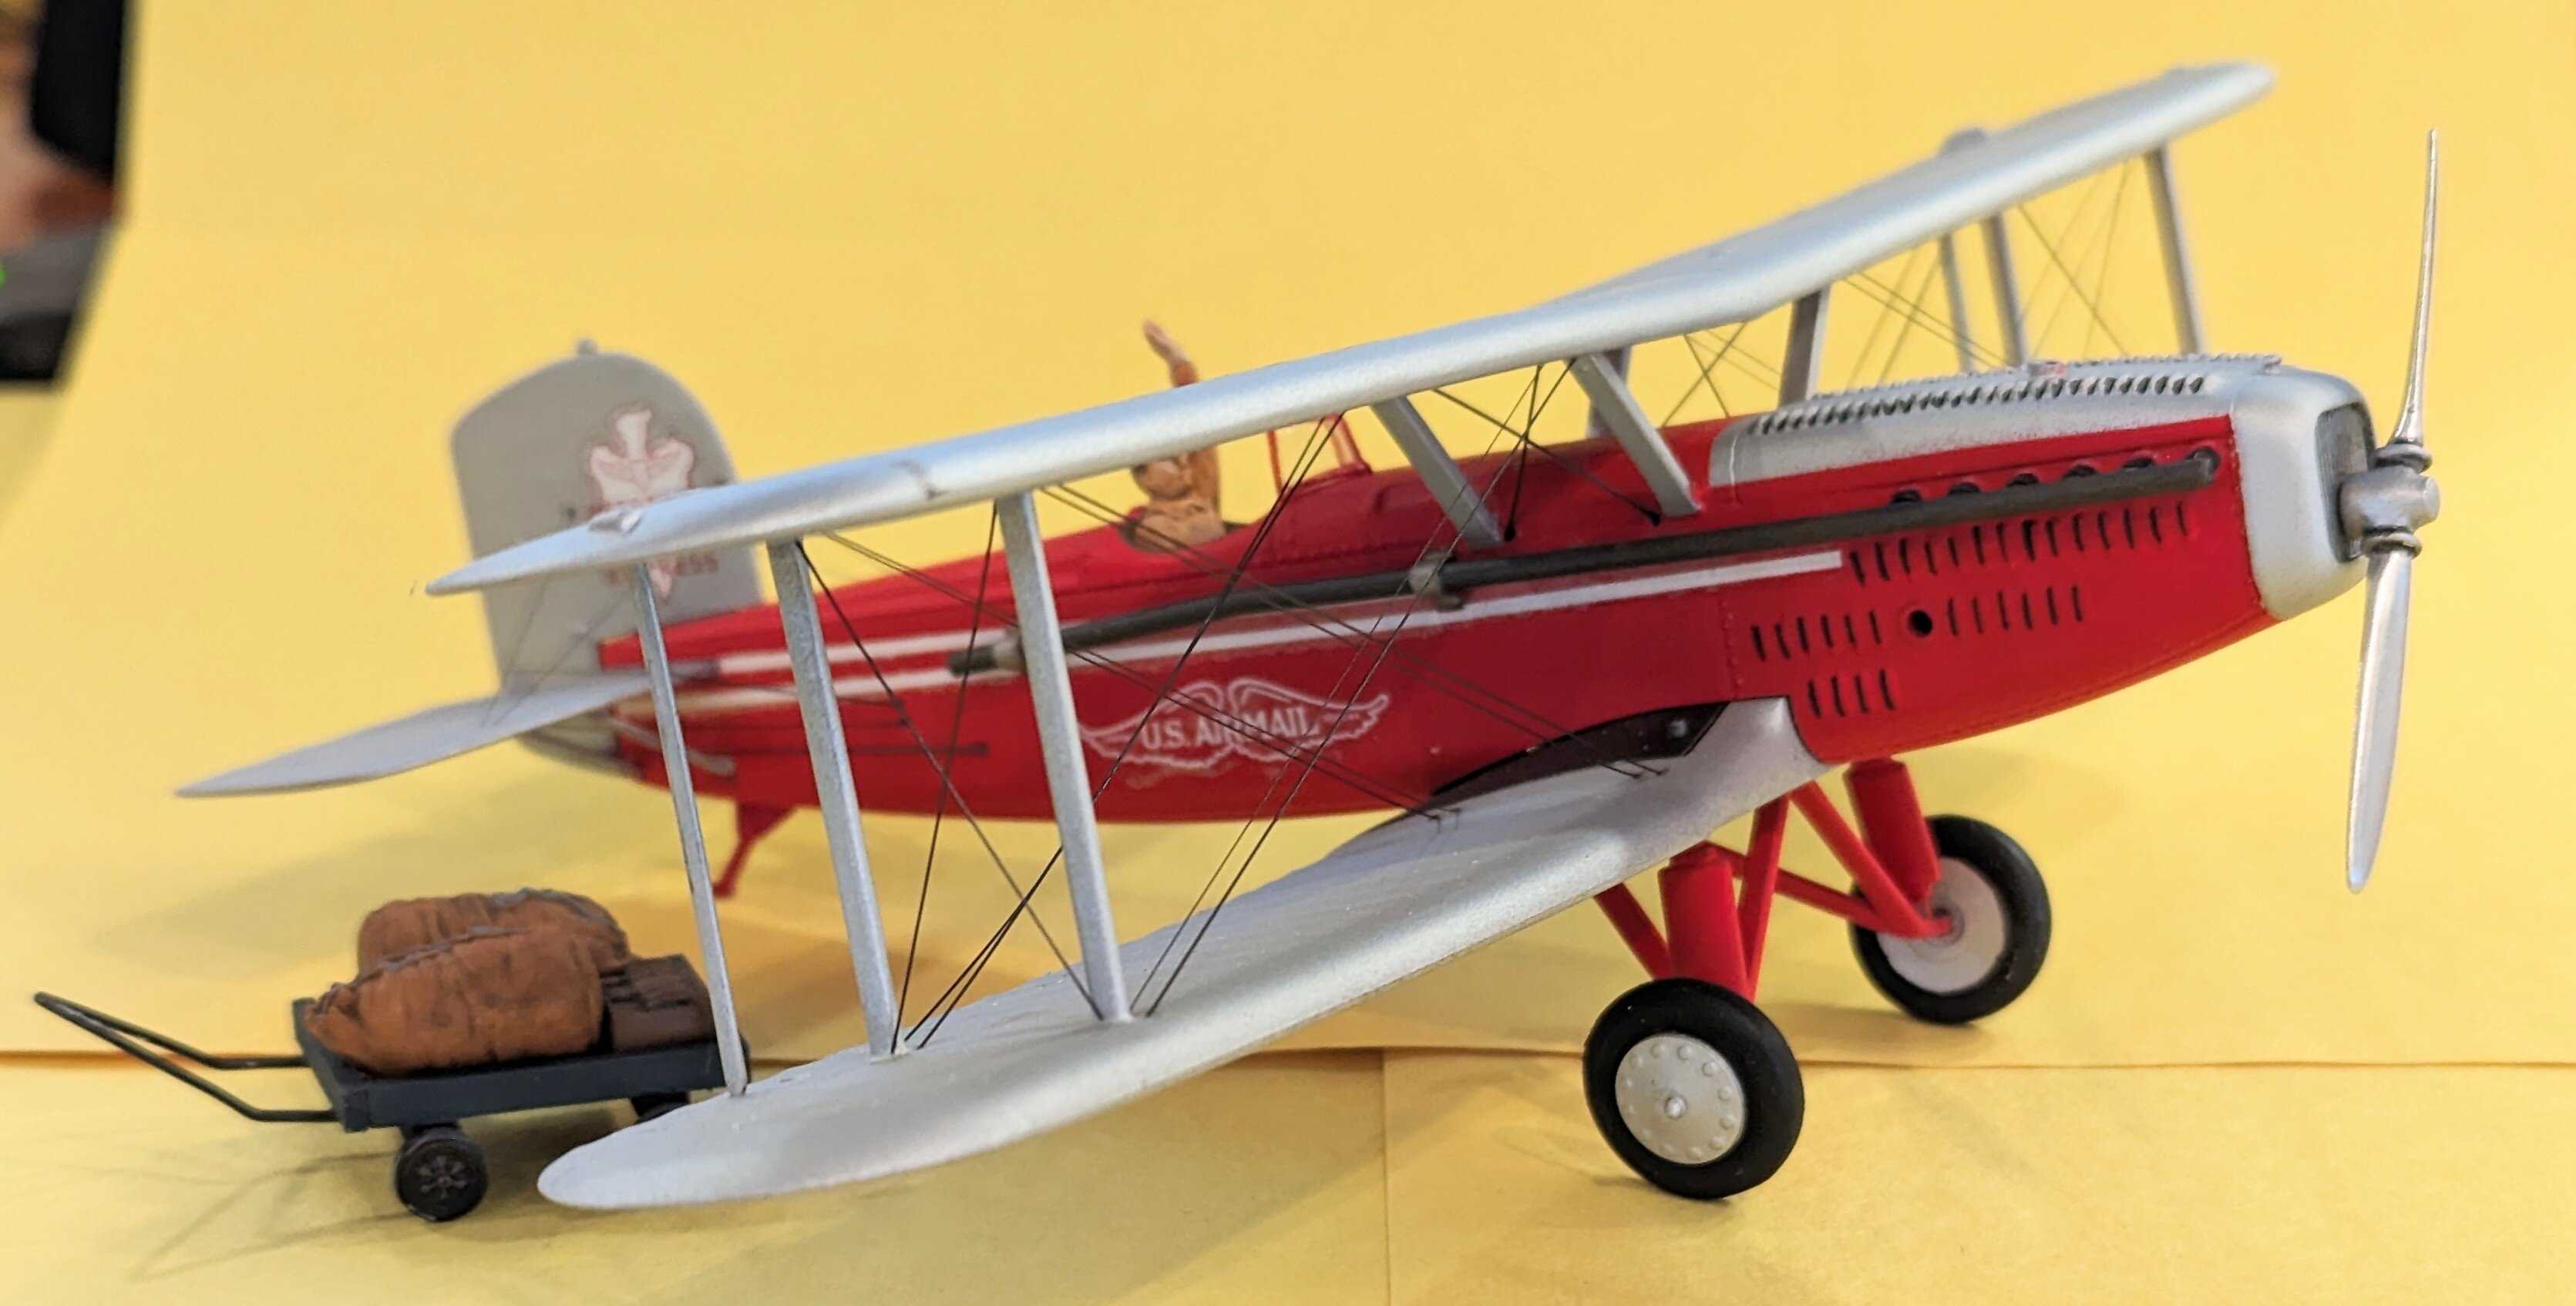
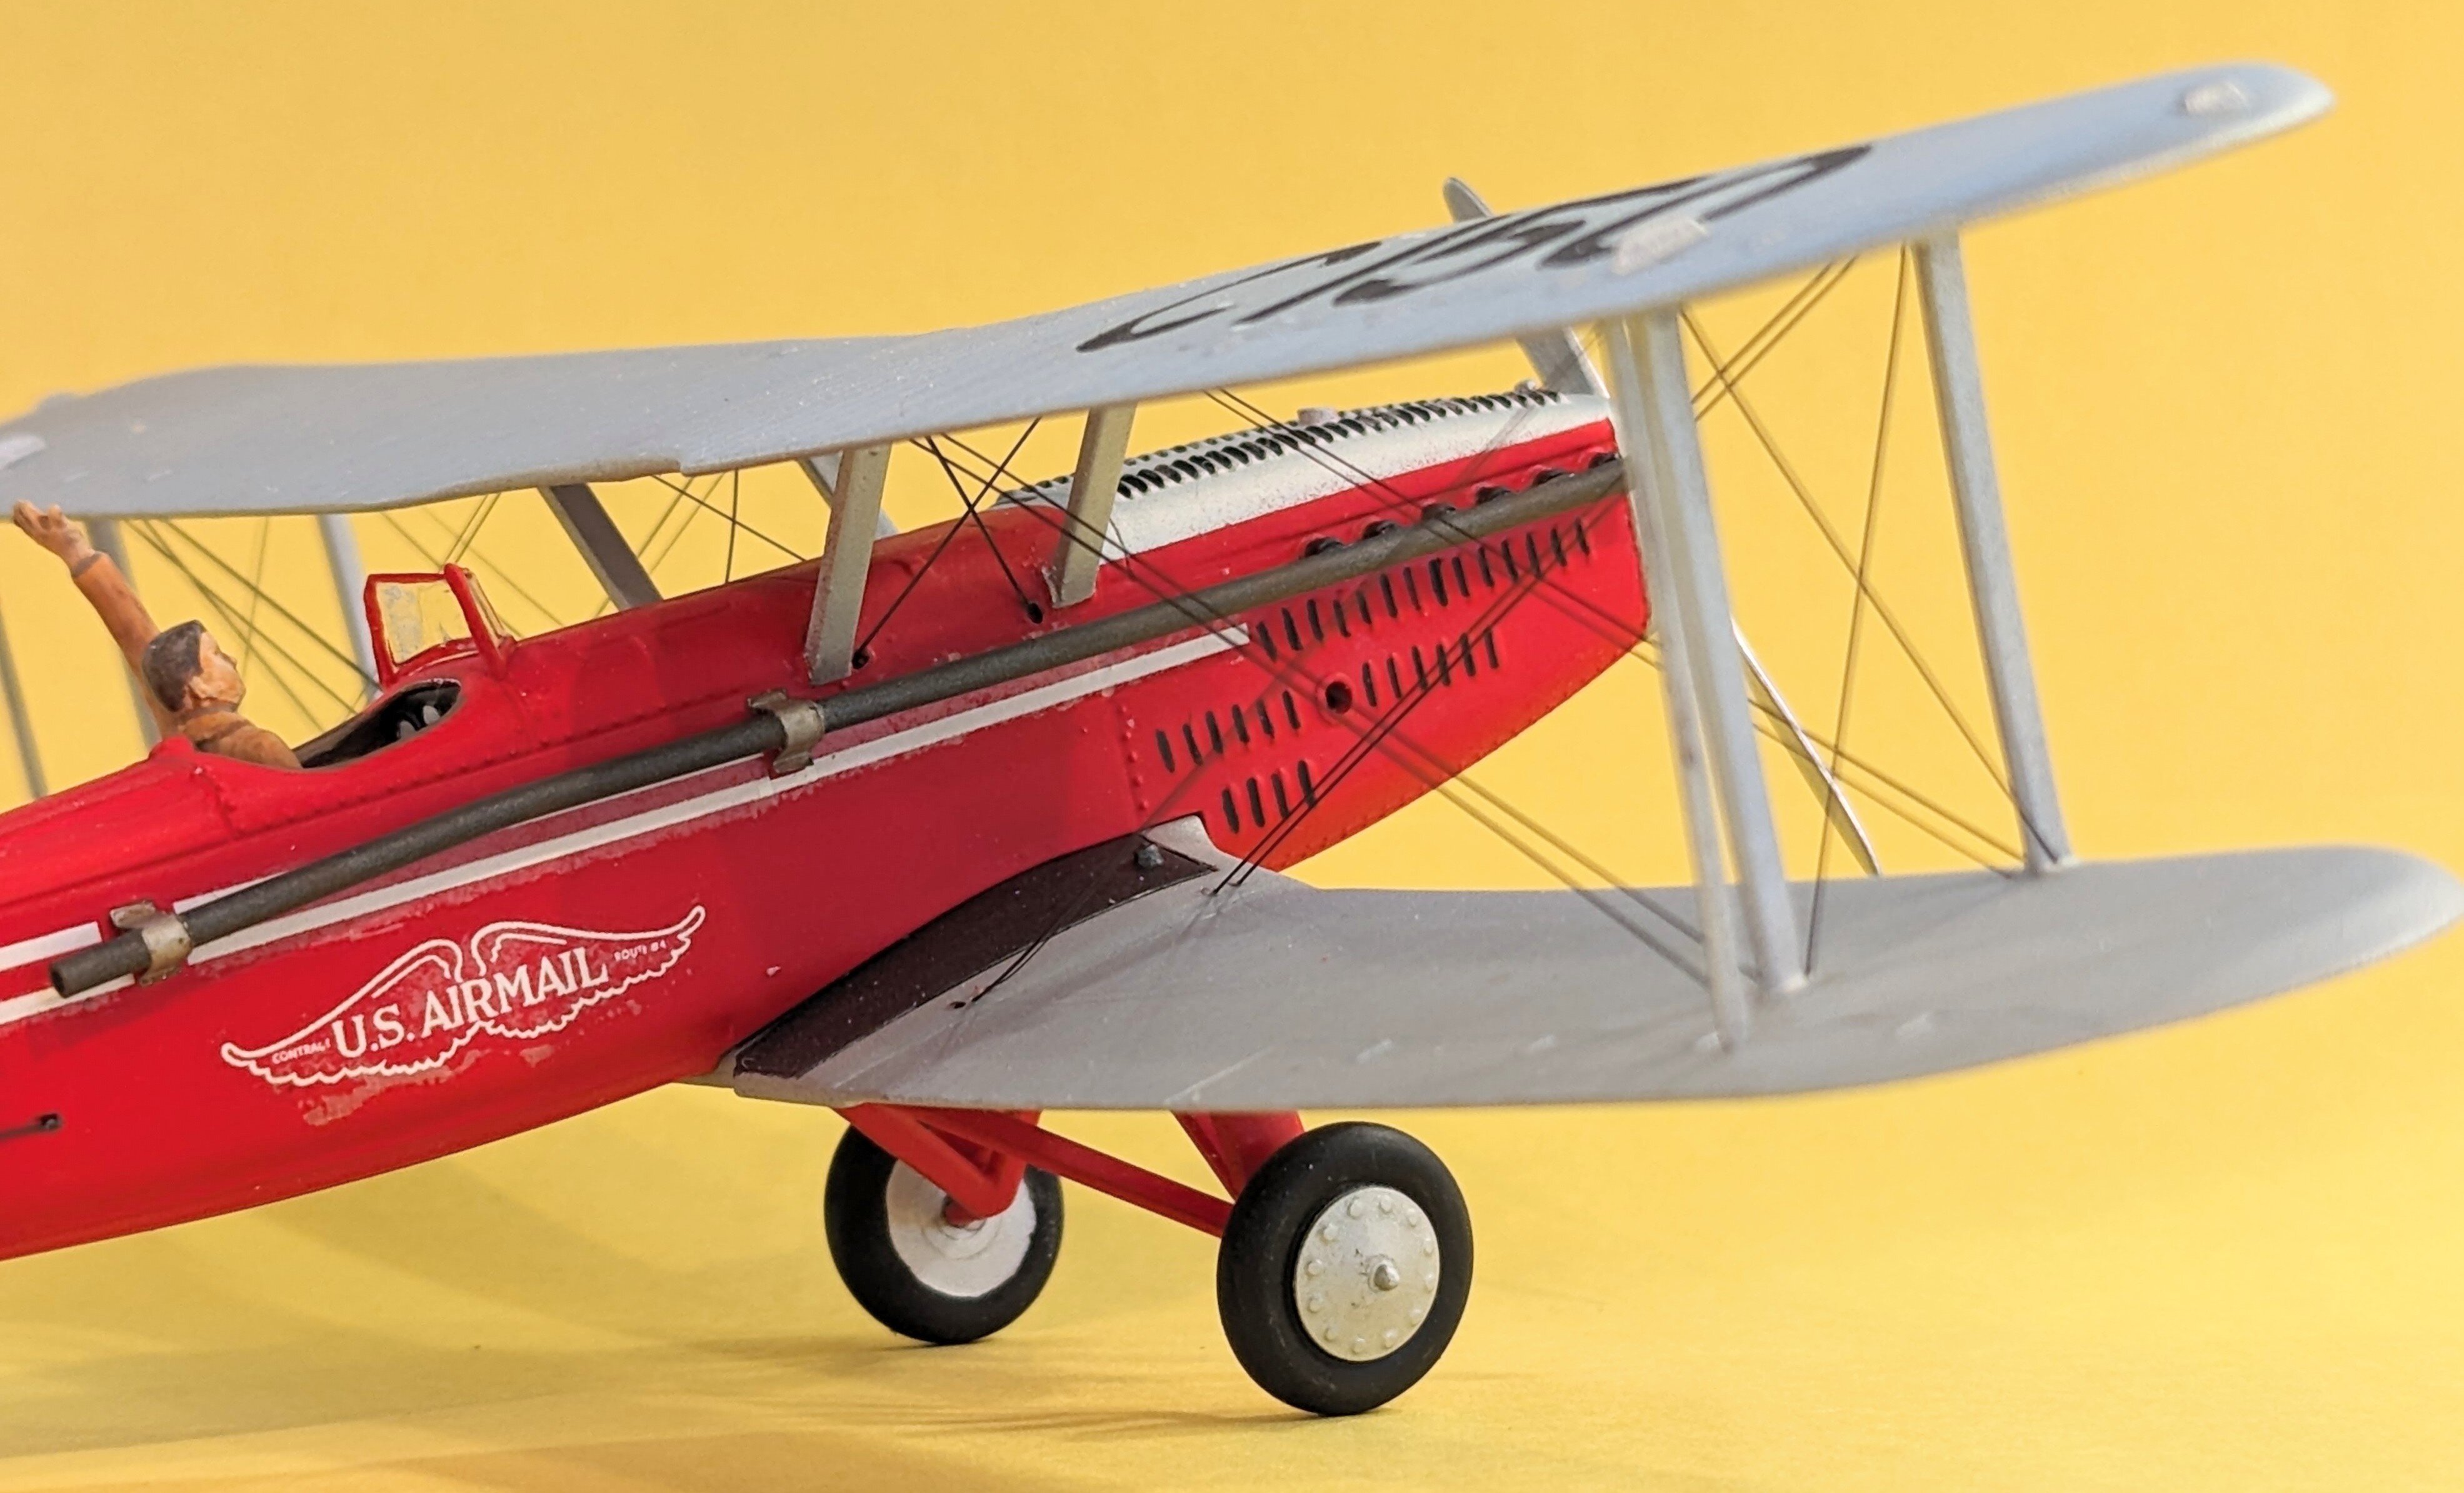
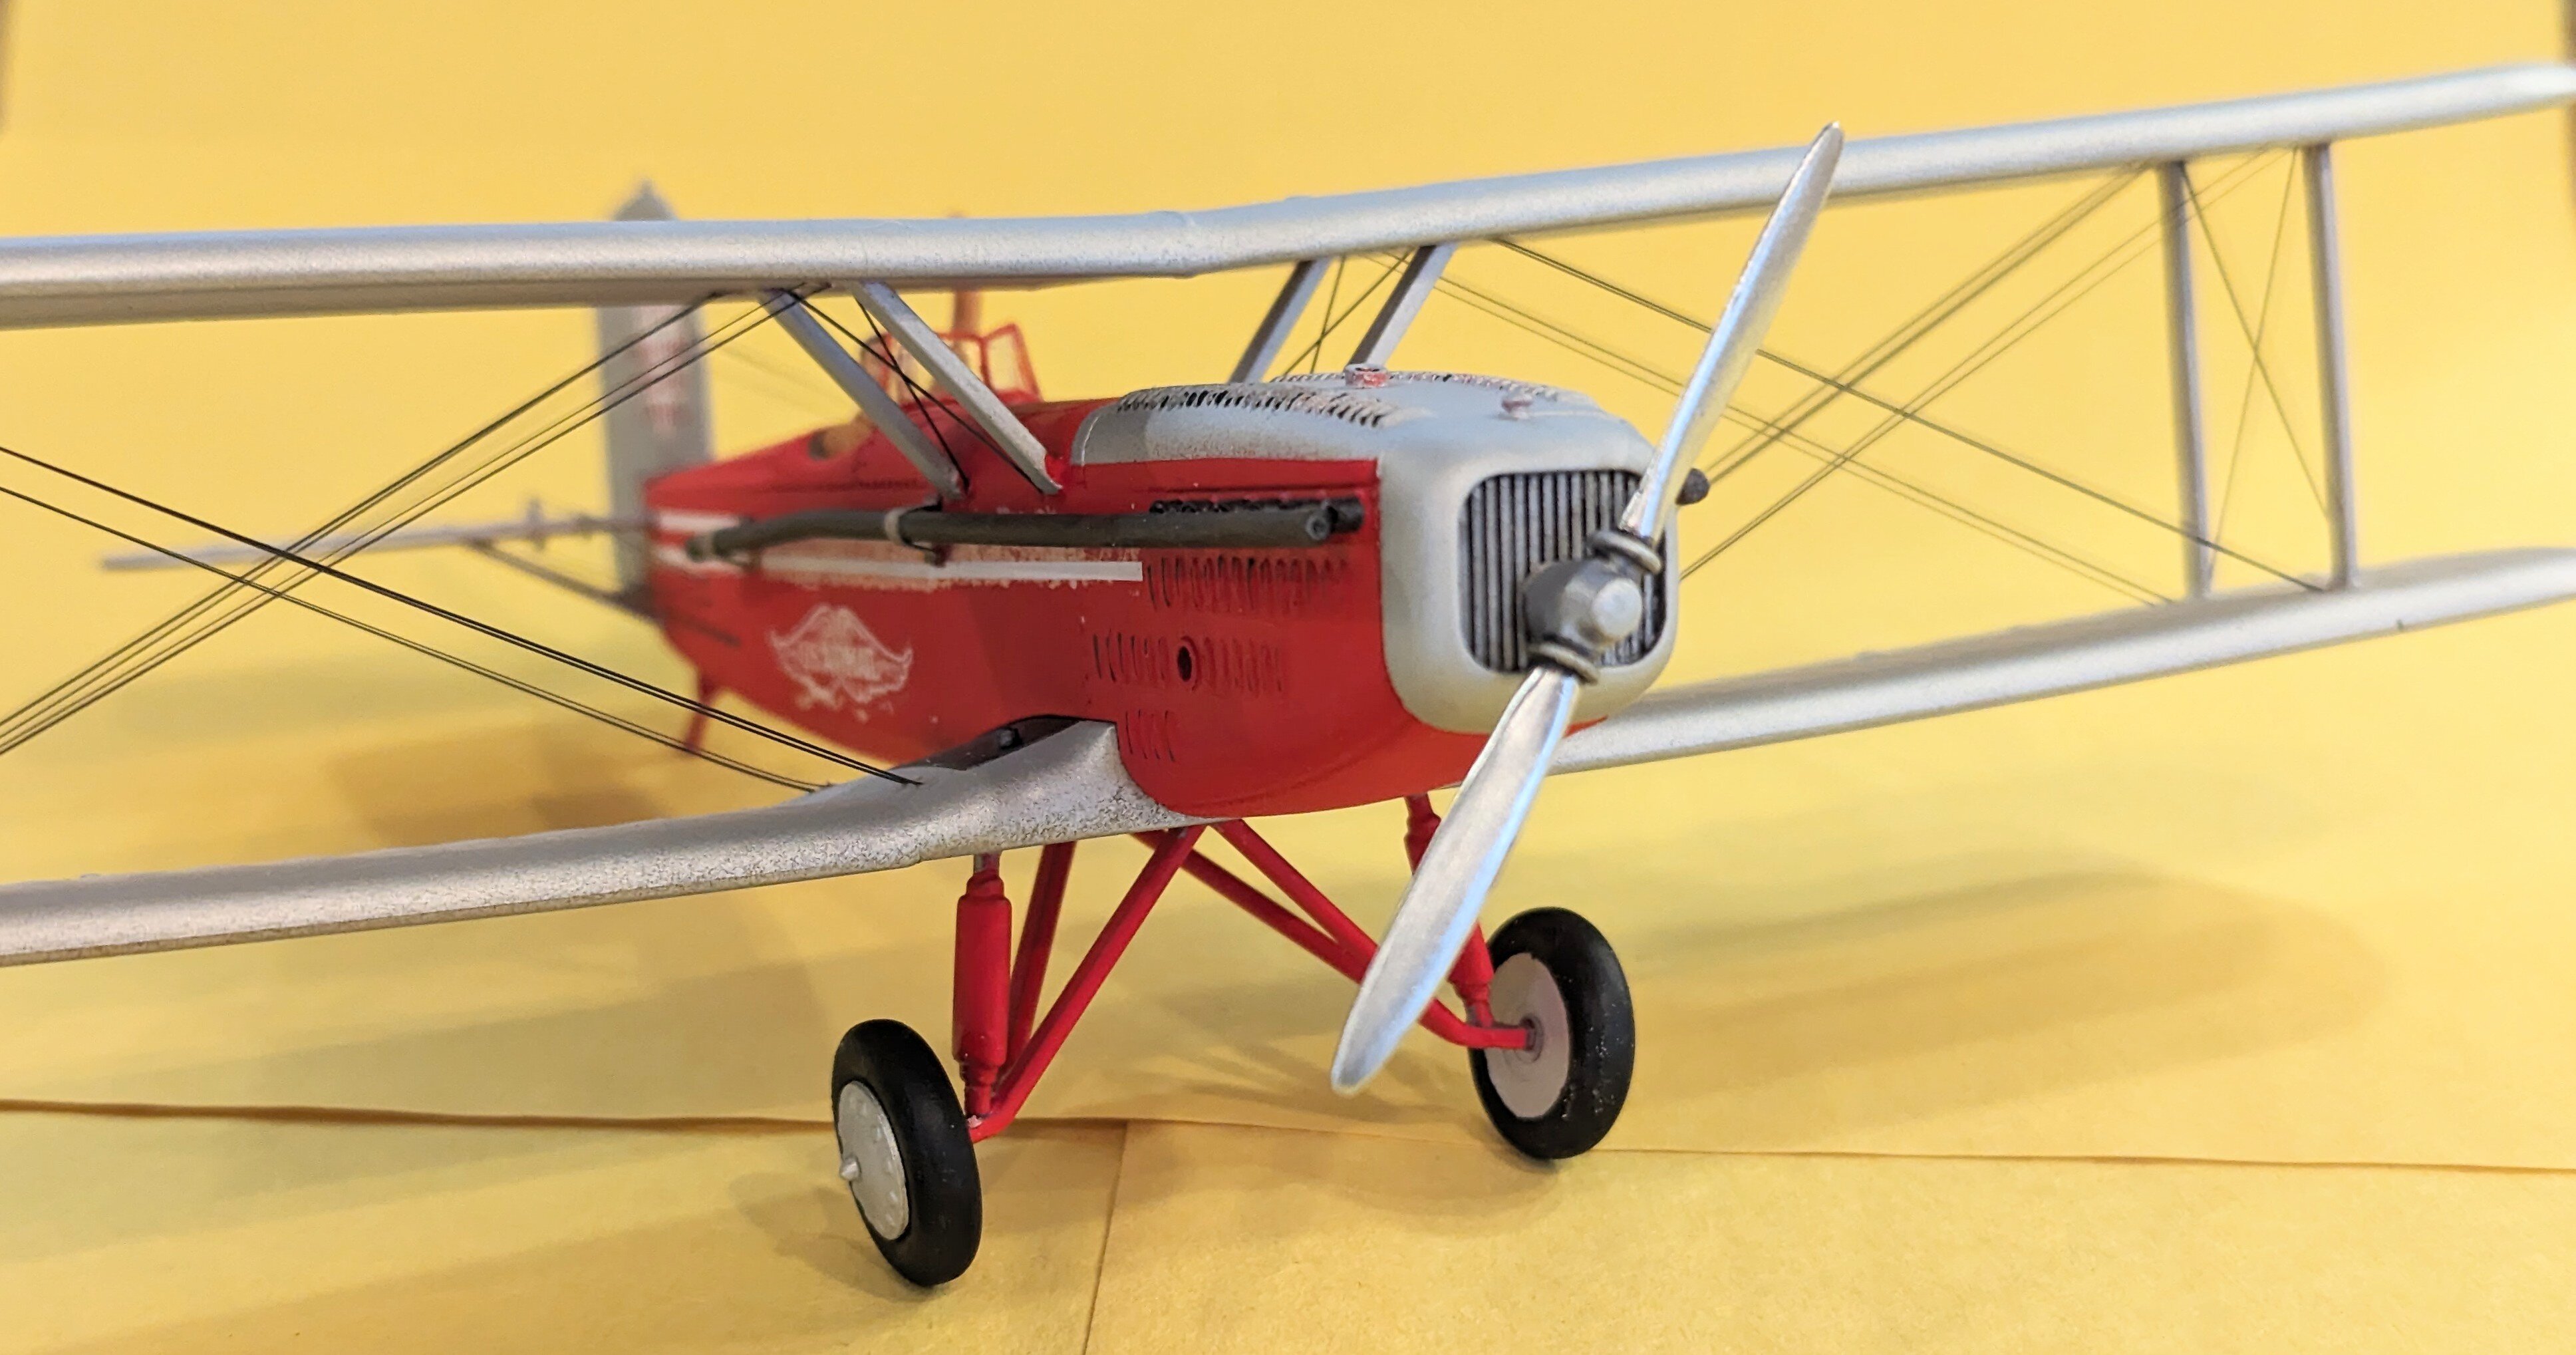
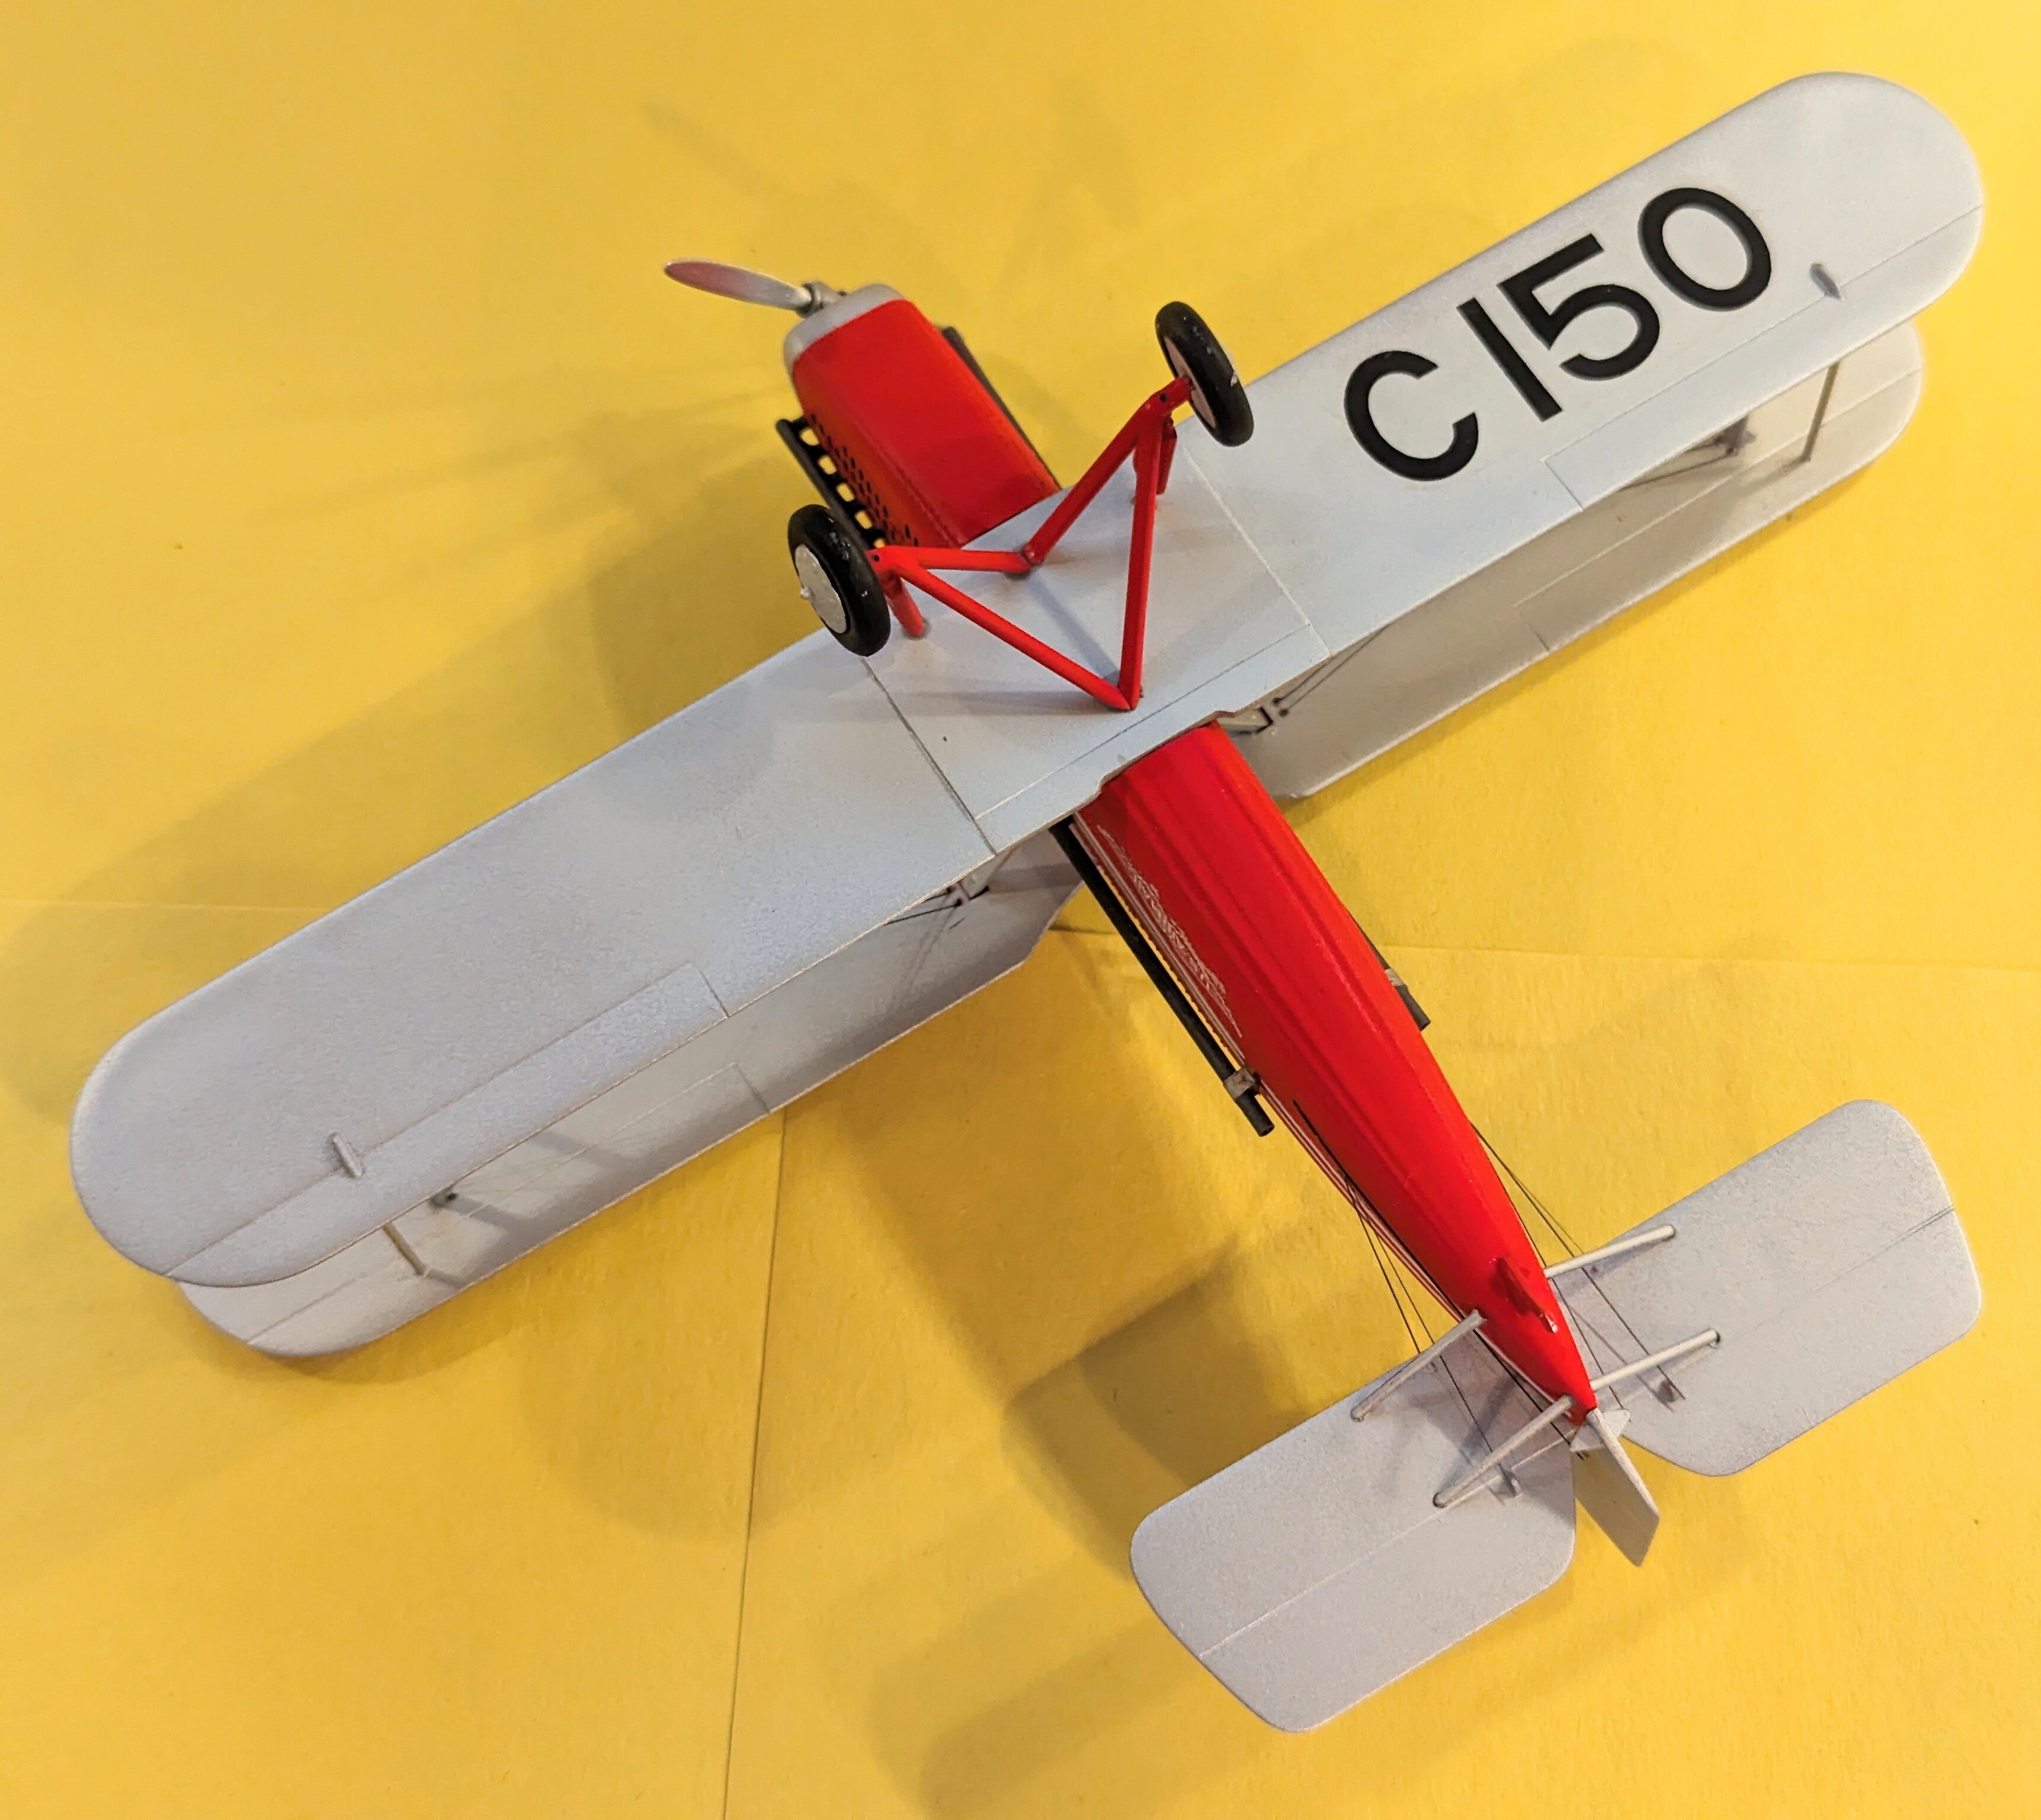
This is one of the later (1957) entries into the Aurora 1/48 biplane series and is actually a pretty nice kit. This is a later release that supposedly has some "new parts" which I suspect are the cabane and interplane struts in the common "U" configuration as the box top says there is "new easier wing assembly" so maybe the original had individual struts which are fiddly to get in place in correct alignment. If you were a super-detailer it is a pretty good starting point. The kit freaked me out while I was building/painting it as nothing went wrong and everything fit. The guy in the pilot seat is an enigma. He's not really in flying gear as he has no helmet nor googles and I have no idea what he's waving at. Like all these kits, there was almost no interior so I "imagineered" some stuff just to fill the space. No windscreen is provided oddly, so I made one out of my spares box. Also, the real aircraft had thos long exhaust extensions and they are not provided in the kit, so I made them out of plastic tubing. Even the decals went on like a treat. However, after dull coating I noticed there was was some silvering which was not there beforehand. But, it's only bound for my shelf so that's ok. Normally these kits came with a little base and one or two figures as a sort of ground crew, but not in this case but I wanted something to set it off a bit so I scratched up a little cart with some mail bags and a satchel in it However, so some reason, even though it's not all that complicated, the rigging on this stressed me out a bit. But, it's done now and I'm moving on.
-
After getting the replacement parts I needed, I whipped this little gem together as it only has 19 parts and seven of those are the MGs. it's a very nice detailed printing, but like most 3D models I have encountered, has some fit problems. I put this down to very close tolerances that are possible by using computer renderings but limitations of the materials that may either very slightly expand and/or contract. The side track units did not fit over the raised locator rib on the center hull for one area and I had to "modify" the ribs accordingly, In addition, the gun shields did not fit in the sponson openings and needed to be filed down to fit and the 6pdr guns did not fit through the slots in the gun shields so those needed widening. None of this was major surgery, but when working on such kits make sure you test fit everything. As far as the subject itself, Its was a joint Allied effort with production to take place in both Britain and the US and was intended to be used in what was going to be the "last great offensive" of WWI in 1919, but the war ended before they could be used. In the end, very few were actually built. The British only built 31 total, 5 of which were sent to Bovington for testing and the rest were sent directly to the knackers yard. In the US they equipped the 67th Infantry Regiment (Tank). (A quirk in the law at that time said that all tanks had to be part of the infantry.) They were seen as unreliable and prejudiced a whole generation of US Army Officers against the use of heavy tanks. All were phased out by 1934 with some being sold to Canada at scrap value for training vehicles. Perhaps it's greatest success was as the inspiration for the tank in "Indiana Jones and the Last Crusade", although that vehicle was actually a replica built from a modified excavator with a turret added on top. I have added a photo of the MkVIII next to the much used MkIV tank to illustrate the size of this beast.
-
When my Testers liquid cement is almost gone, I use the last bit, like a quarter inch or so, to really clean paint brushes. Even gets out dried acrylic paint. You can use it over and over.
-
Or, as a variant of the above if you don't want to risk damaging the surface of your model, spread a thin coat over a piece of scrap plastic and "float" your decal on it. Then remove the deal with tweezers, touch the end of it to a paper towel to whisk off the excess adhesive and then apply to the model. I use the same method with whatever J&J's Klear Liquid Wax is now called to prevent silvering in some instances. It provides an instant smooth surface under the decal and it acts as adhesive. Don't use too much, however, or it will build up on the edges of the decal when it dries and form a ridge.
-
The single tank is a US M-10 Tank Destroyer. In the first diorama, the tank in the back is a US M-5 Stuart and the one with the open top is an M-8 Gun Motor Carriage. The wheeled vehicle is a German Schwimmwagon amphibious jeep. The last diorama has a Russian T-34 tank, and a German 105mm gun being towed by what is known as a Ostschlepper.
-
I believe those are: A German Gepard Anti-Aircraft tank (modern) A Soviet IS-2 Stalin tank (WW II) A Soviet SU-100 self propelled anti-tank gun. Although without being able to accurately gauge the length of the gun barrel, it may be a SU-85 (WW II) A German Marder armored personnel carrier (Modern)
-
This is the other half of the Revell Tactical Missile set, the Dart anti-tank missile. In the early 50's a replacement was sought for the aging WW II era Bazzooka. The French had developed the SS 10 wire guided missile and, of course, since it was not invented here (NIH in military parlance), we had to spend lots of money to try to reinvent the wheel so to speak. Enter the SSM-A-23 Dart. It had a troubled development and as can be seen in the photos, was not exactly easy to deploy due to its bulk. After much wrangling, adjustments and expenditure, the Army cancelled the project and adopted the French SS-10 and 11 missiles, which were smaller, easier to deploy, more accurate and more dependable. Your tax dollars at work once again. The Revell kit gives you four missiles, probably because they are so small in this scale, three on maintenance racks and one on a static launcher. There are three Frankensteinian figures provided (and poorly painted I might add by me), one seated at what is probably a part of the guidance system. Two of the figures have smooth bases as does the launcher, indicating they were on a paved surface while the guidance guy's base simulated undulating ground for some reason. Since the missile was never operational, it appeared in a whole host of color schemes depending on which round of testing it was being used for. I selected several from photos on the internet just to make it more interesting. It's a primitive kit with lots of flash, mold seams and iffy fit, but then it does date from 1958. Any decals used were from my spares as the kit ones were long gone.
-
The first one is a hybrid built in France for Egypt. It's an AMX-13 turret mounted on an Sherman M4A2 hull. It was used in the Arab-Israeli wars. The next one is a Japanese Type 97, or Chi Ha. The last one is a US M-24 Chaffee. It was in use at the end of WW II, in Korea, was used by many smaller armies around the world and perhaps most notably against Godzilla and a whole host of other monsters that attacked Japan. And by the way, they are all very well done.
-
This is the Little John missile and launcher from the 1958 Revell Tactical Missile set. Also included were four Dart wire guided anti-tank missiles. The Little John launcher depicted must be from a test site as the ones actually deployed had two wheels at the rear and that thing hanging down from the front of the launch ramp also had one. The Little John could carry both conventional and nuclear warheads and was inertially guided. It was deployed to Europe and the last ones were only phased out in the 70's. The kit is very basic and full of mold seams and ejection pin marks, but cleaned up and with careful assembly is a good representation of this weapon. The decals were completely gone, so I cobbled together some markings from my spares.
-
Excellent workmanship and imagination. However, you might want to edit the title to "lawnmower" not "lawnmore"
-
And I think it is very good of them to do that. Good customer relations. Like this...