


1320Wayne
-
Posts
49 -
Joined
-
Last visited
-
Days Won
4
Content Type
Profiles
Forums
Events
Posts posted by 1320Wayne
-
-
I'm sure that you've all heard the phrase "my eyes are bigger than my stomach"? Meaning don't bite off more than you can chew.
I've always been intrigued by dioramas. The stories that they tell can be awesome. I've always felt that the best aspect of a good diorama is one that each new time that you look at it you find some new hidden detail that you missed the previous time.
I finally decided, a few years back, that I was going to build my first diorama. Being a car guy it almost made sense that I would do a garage with vehicles, tools, supplies, etc. I also like nature so I wanted to incorporate some added outdoors scene as well. So, one thing led to another and the next thing you know my design is way out of control and taking up a tremendous amount of space. It was fun but finding somewhere to store it/display it when it was done was no easy task. I also only took this to one contest after it was done because of the size and weight.
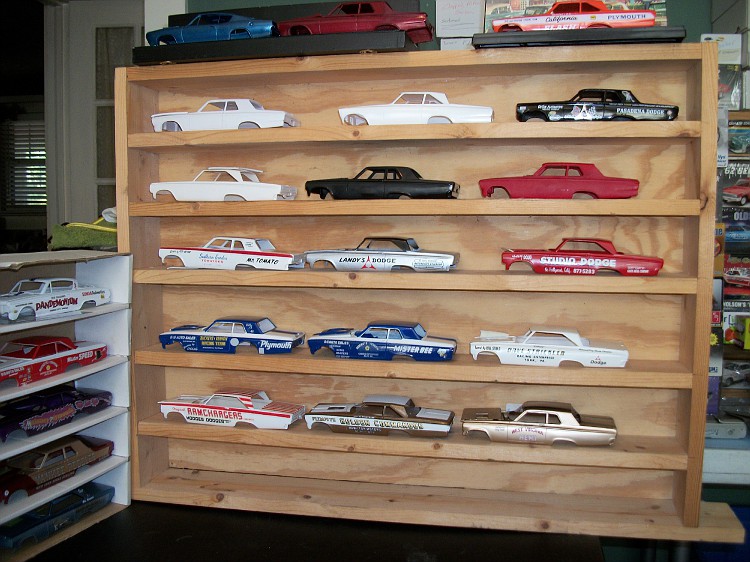
Here it is. I framed the garage completely out of wood. Removable roof, real shingles, opening garage door and as much detail as I could throw at it without it becoming too busy. It was great learning experience that mainly taught me that if I ever did any more dioramas, (which I have) to keep the size in check.

-
 4
4
-
-
Oops, this is the second time I've posted a completed build in the wrong area.
-
Yeah, another completed aircraft build. I've said this before but I'll say it again so that everyone knows my abilities. I'm primarily a car builder. Been around cars/race cars my entire life so I know where everything goes. So, when it comes to building and detailing it pretty much comes natural.
Aircraft, however, a whole different scenario. I have to do research for every build and hope that I get it right, or relatively close to right. The technical aspects of building aircraft are totally different than car/truck subjects. I am in total awe of so many aircraft builders and their abilities to get the finishes/weathering just right.
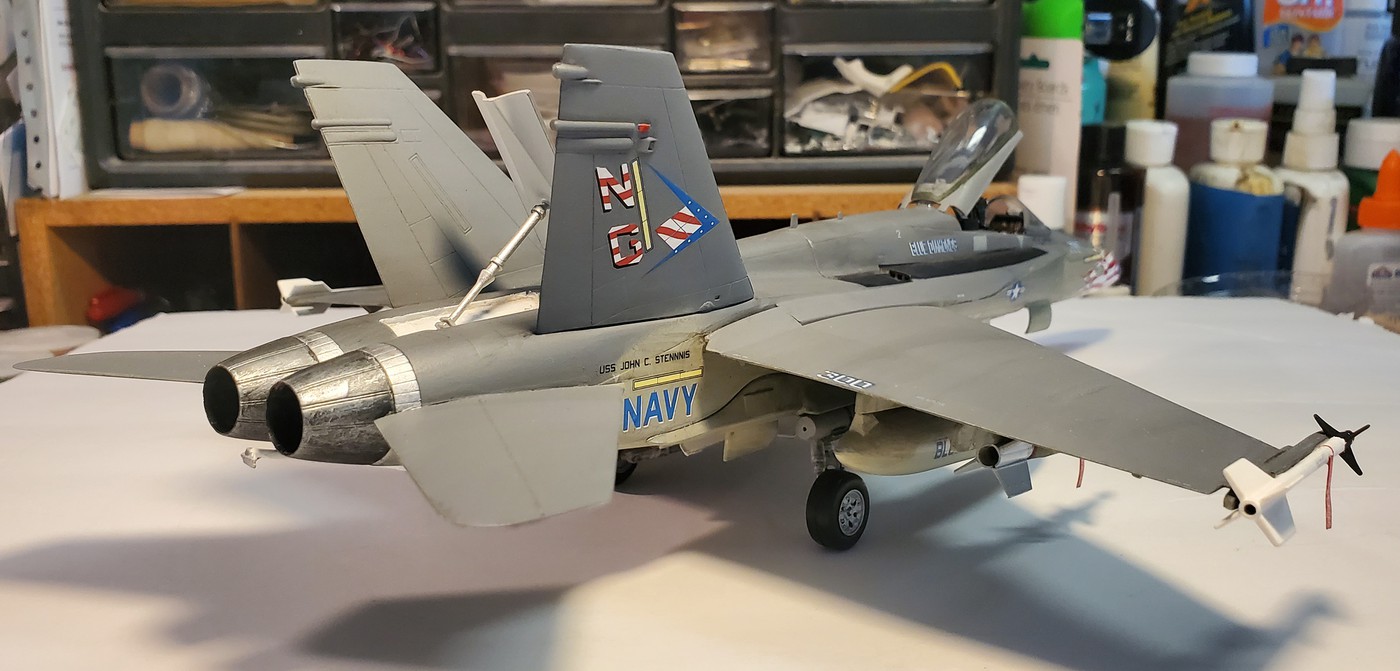
So, with the disclaimer out of the way here is my latest build.
F-18 VFA-146 Blue Diamonds using a Revell kit along with Twobobs decals. I'm trying to add the appropriate paint details and still trying to get the whole weathering techniques down. Still a ways off on that. All that aside I am happy with the results and think it looks good on the shelf.
-
2
-
-
6 minutes ago, ghodges said:
Great pics Wayne! By the way, could you post a pic of your '70 Pro-Mod 'Cuda that won Best Detailed Model; and do you mind if I share your link elsewhere?
Gil

Here is the pic.
By all means share the link to where ever you wish.
-
Gil, here is a link to my Fotki album. Just finished downlaoding the pics.
https://public.fotki.com/1320wayne/model_shows/2020-shows/jaxcon-2020/
-
Looking forward to the show Gil.
-
1
-
-
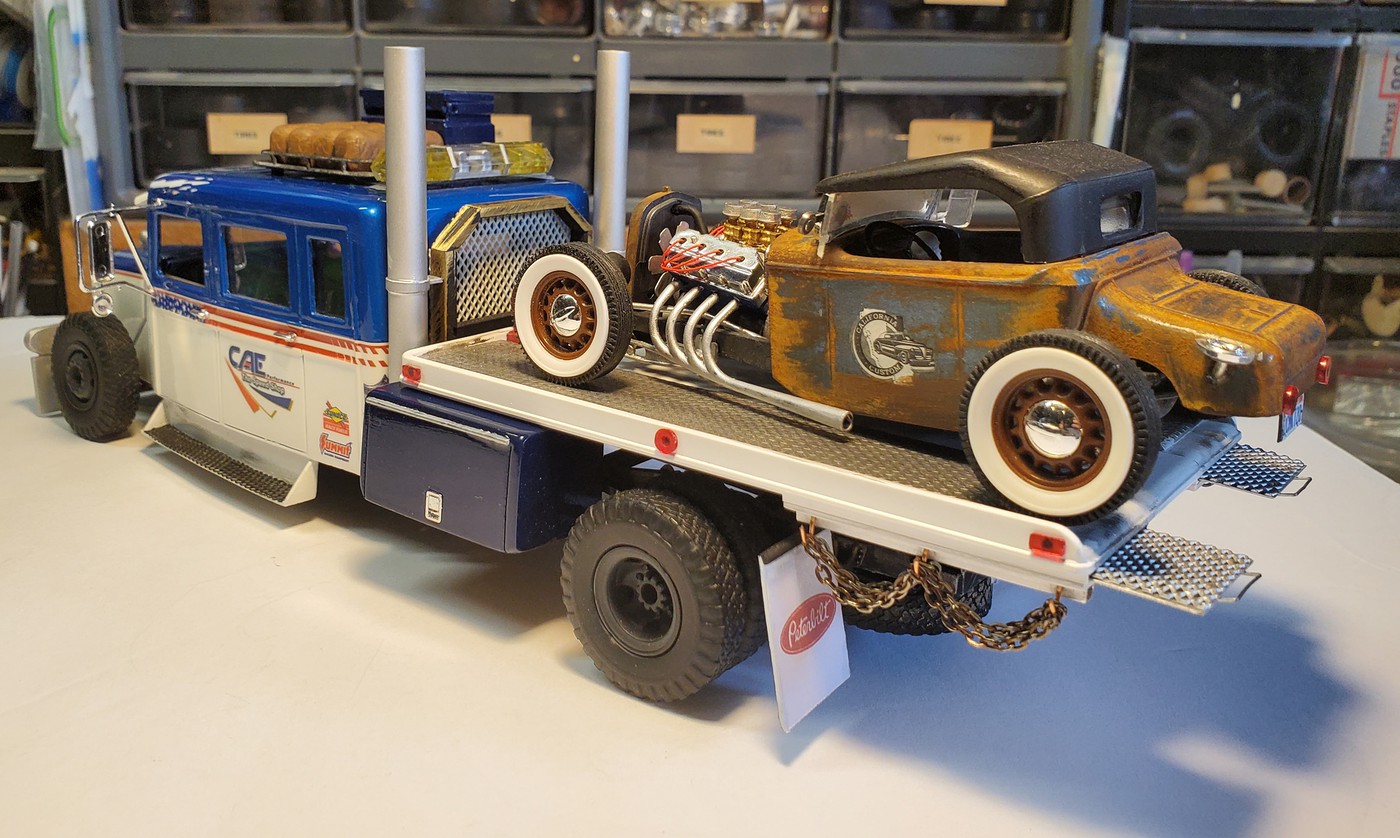
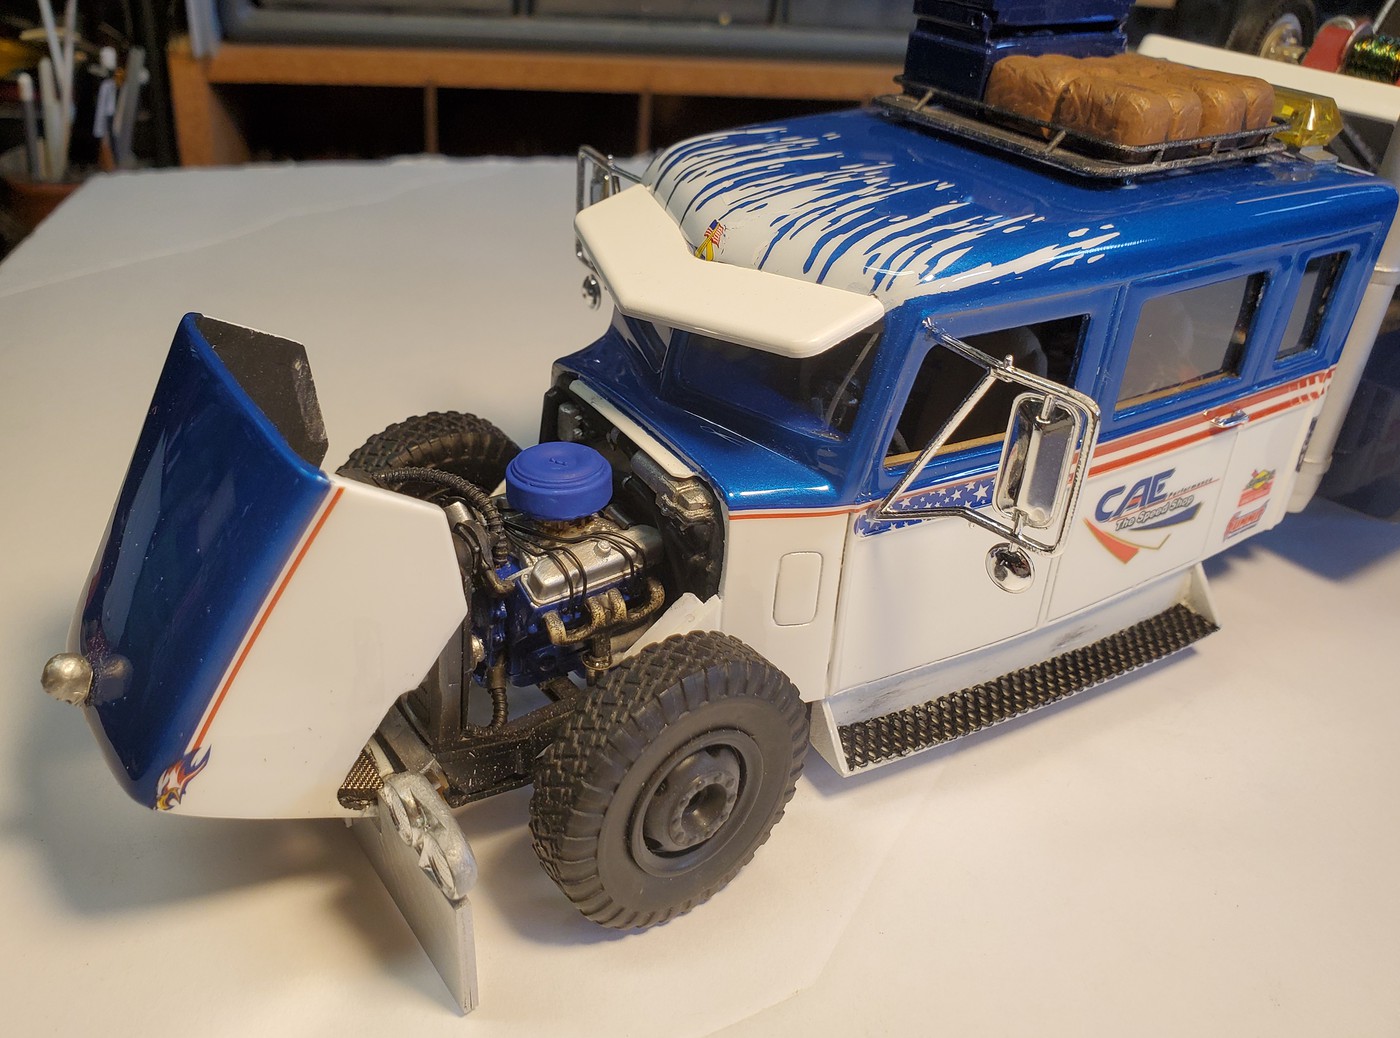
Here is another 2020 completed build.
This build started life as a Jimmy Flintstone resin body and interior and morphed into what you see here by utilizing a lot of scratchbuilding and kitbashing. I used more different materials on this from brass, resin, styrene sheet, old necklaces for chain, Bic pens for exhaust stacks and a little bit of 3D printed parts.
-
2
-
-
That's awesome.
-
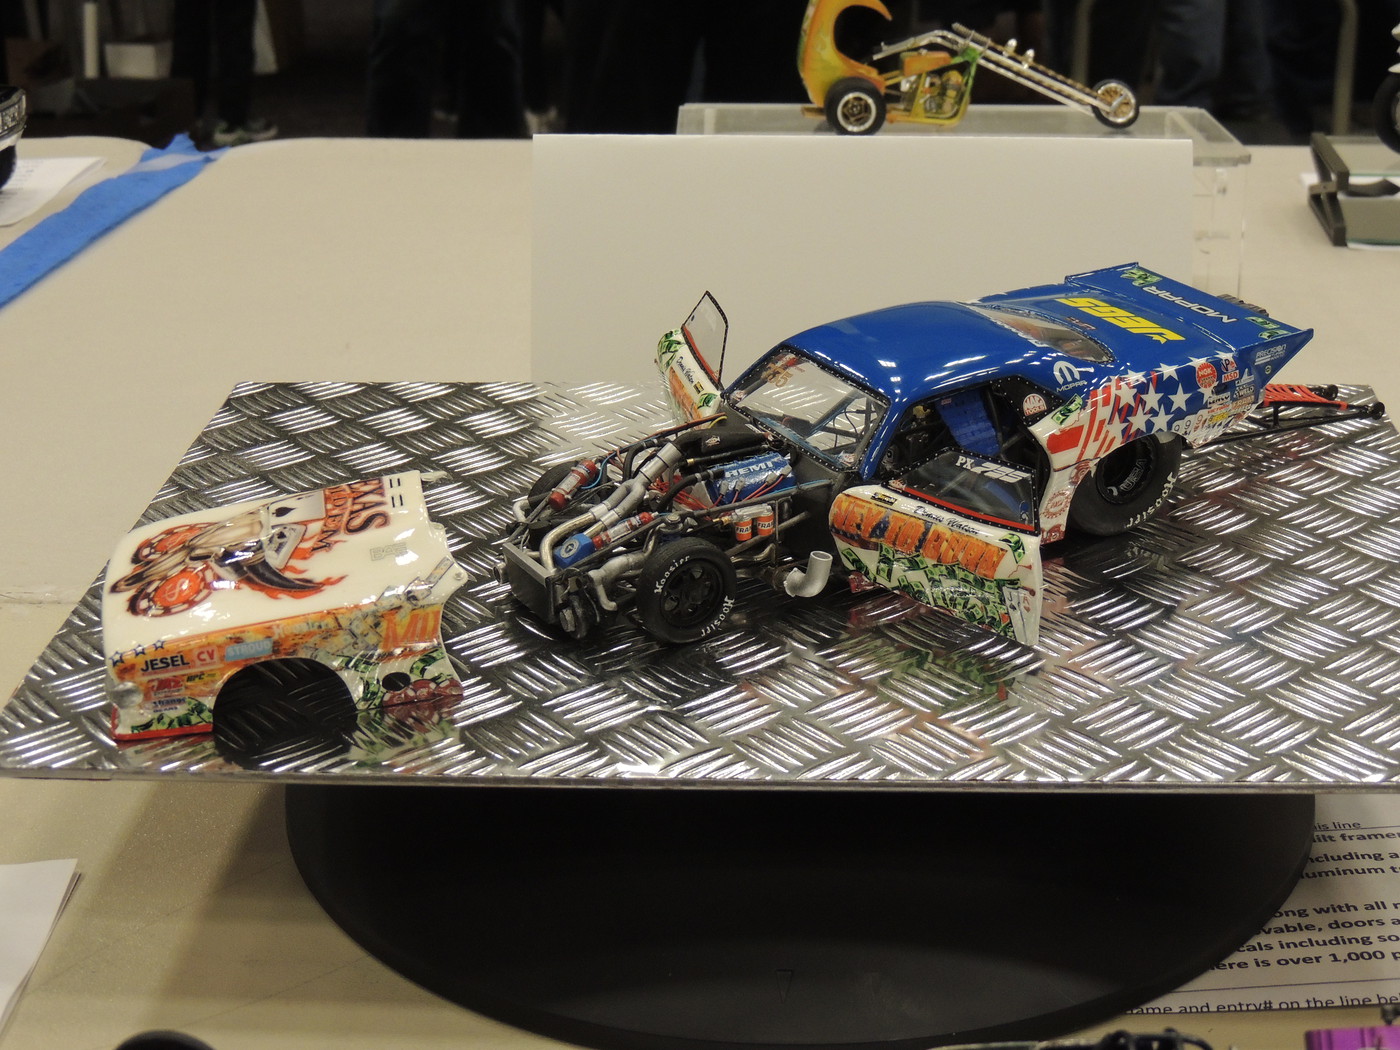
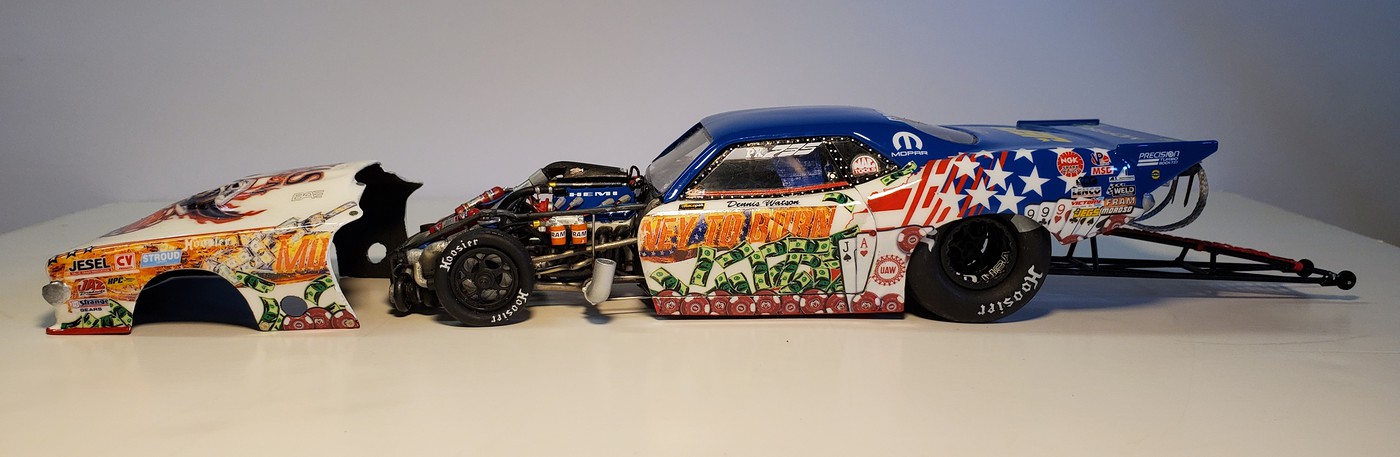
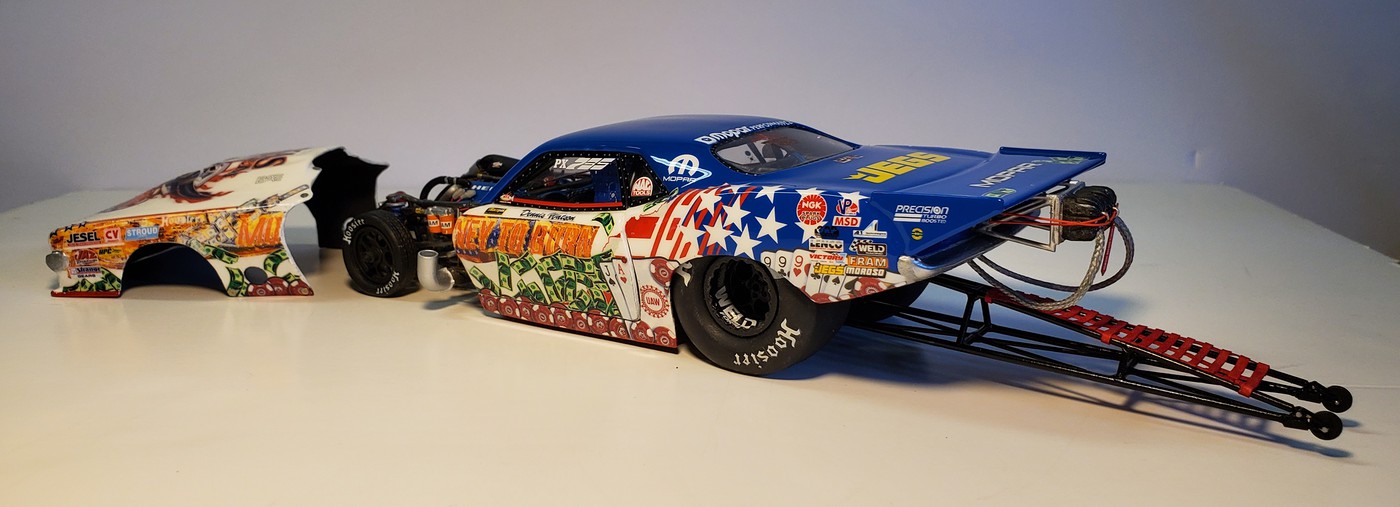
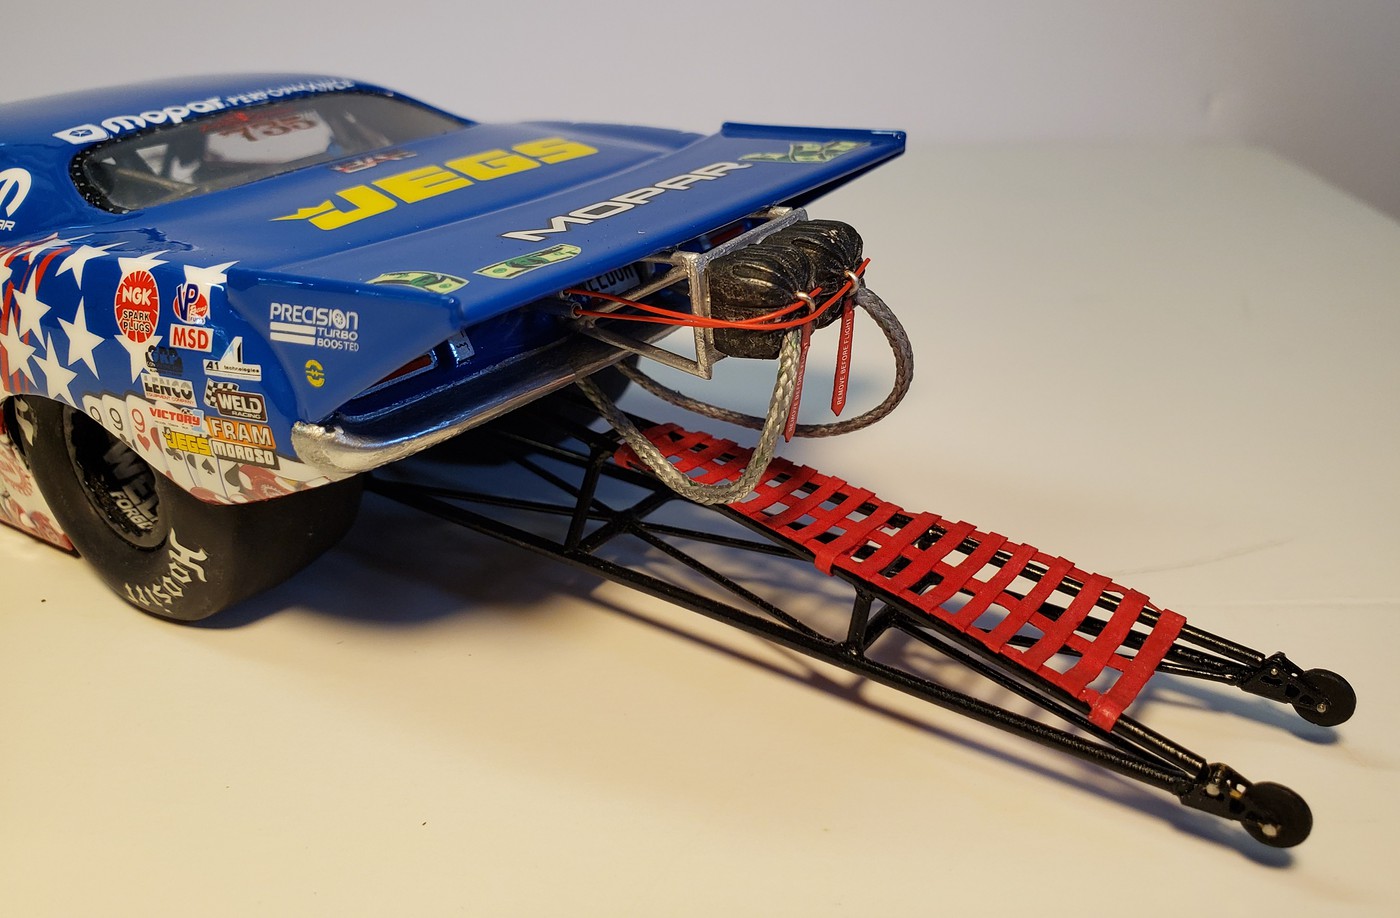
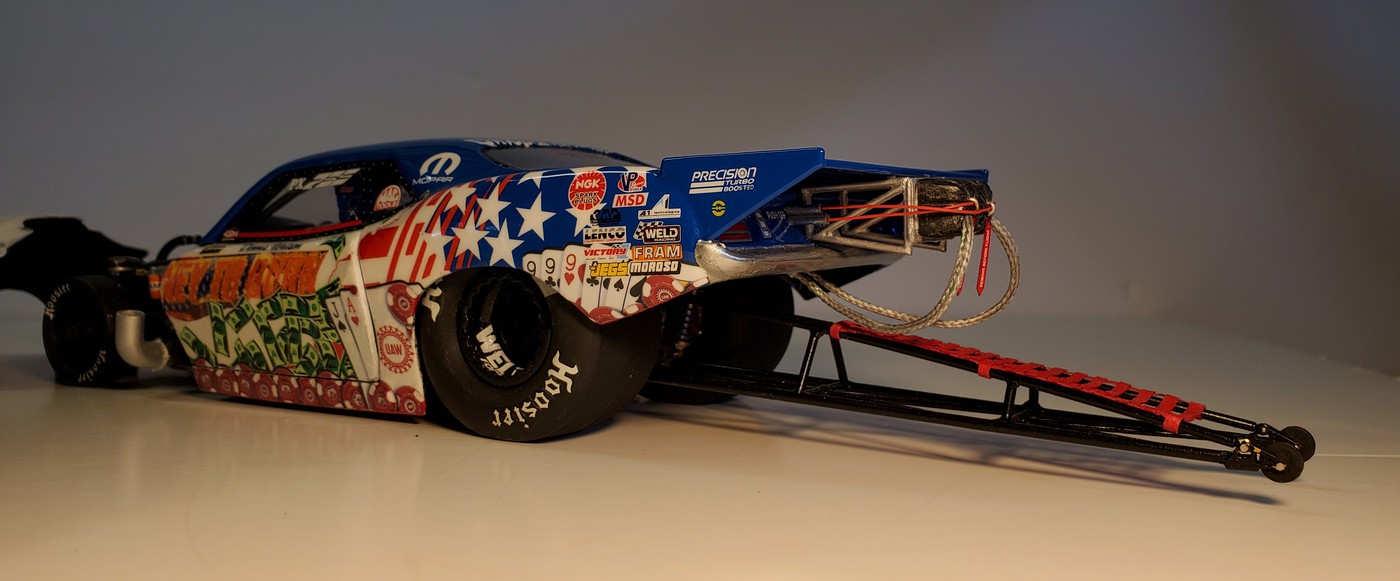
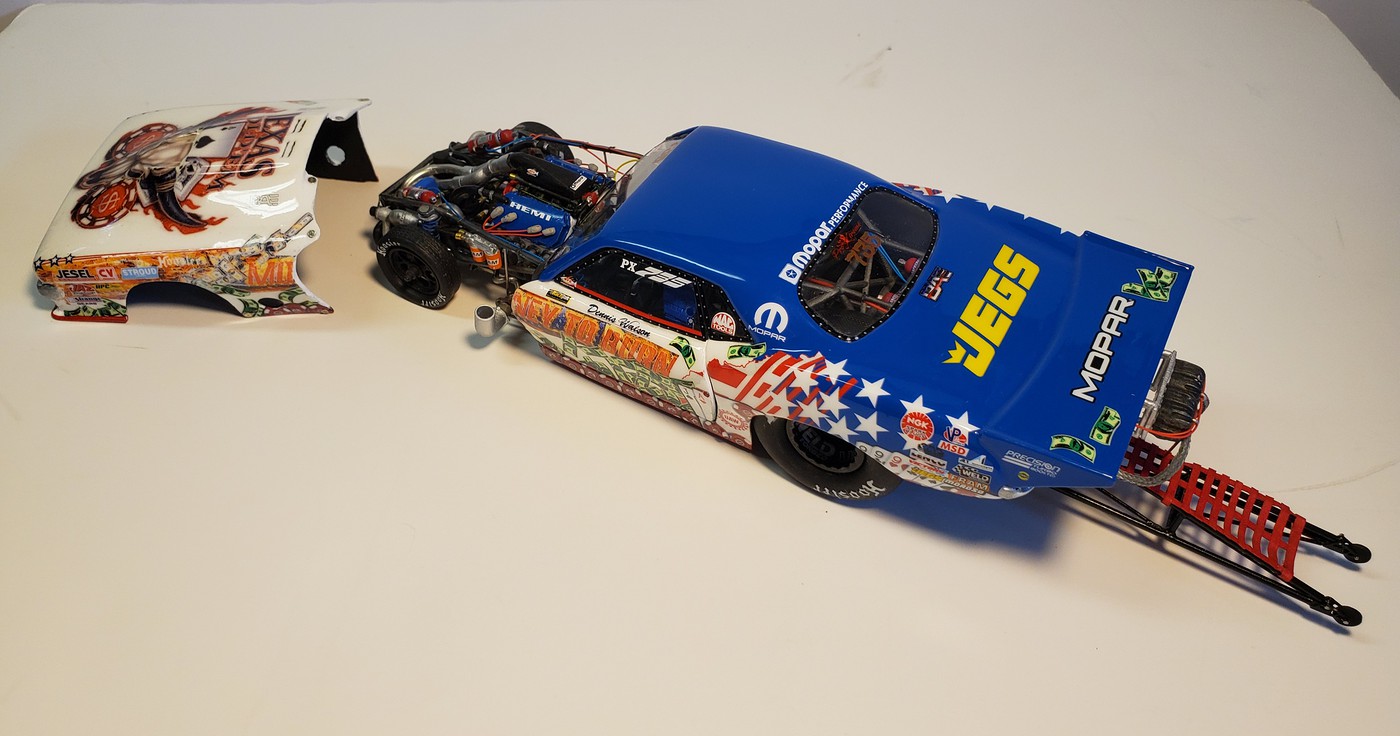
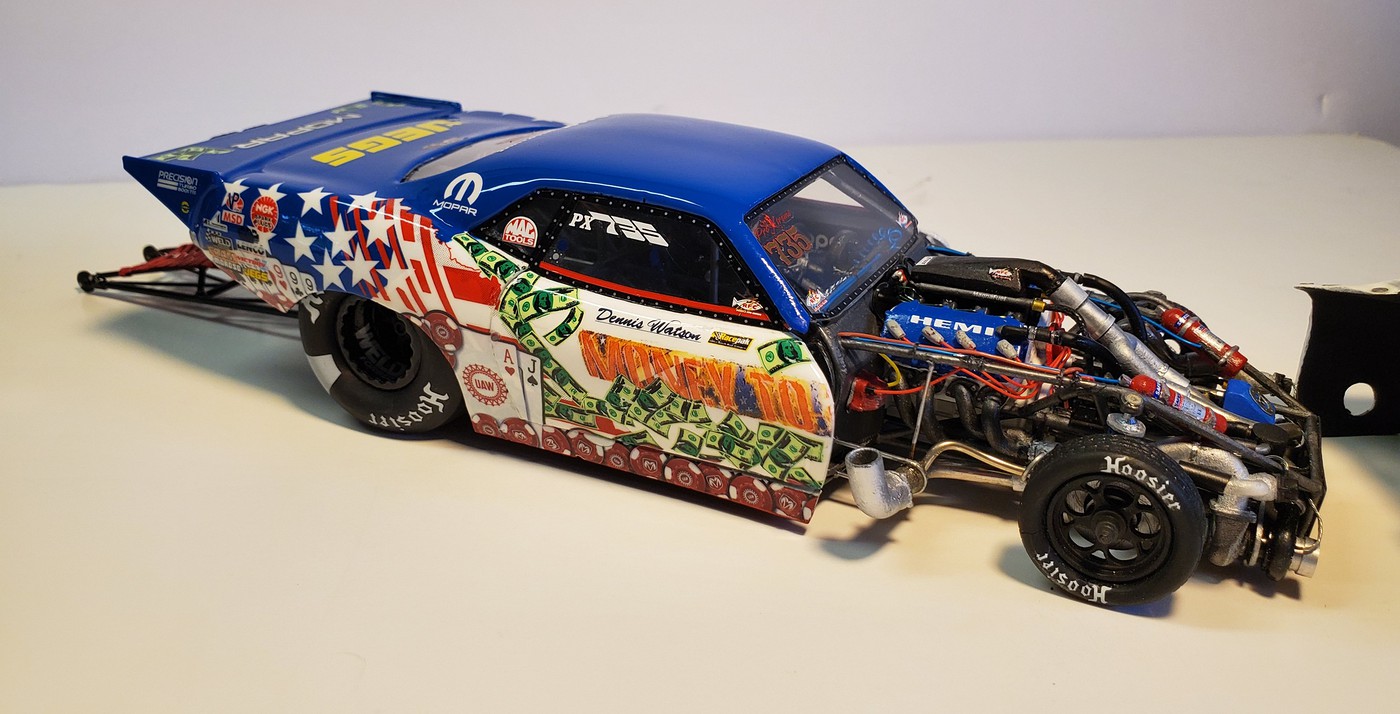
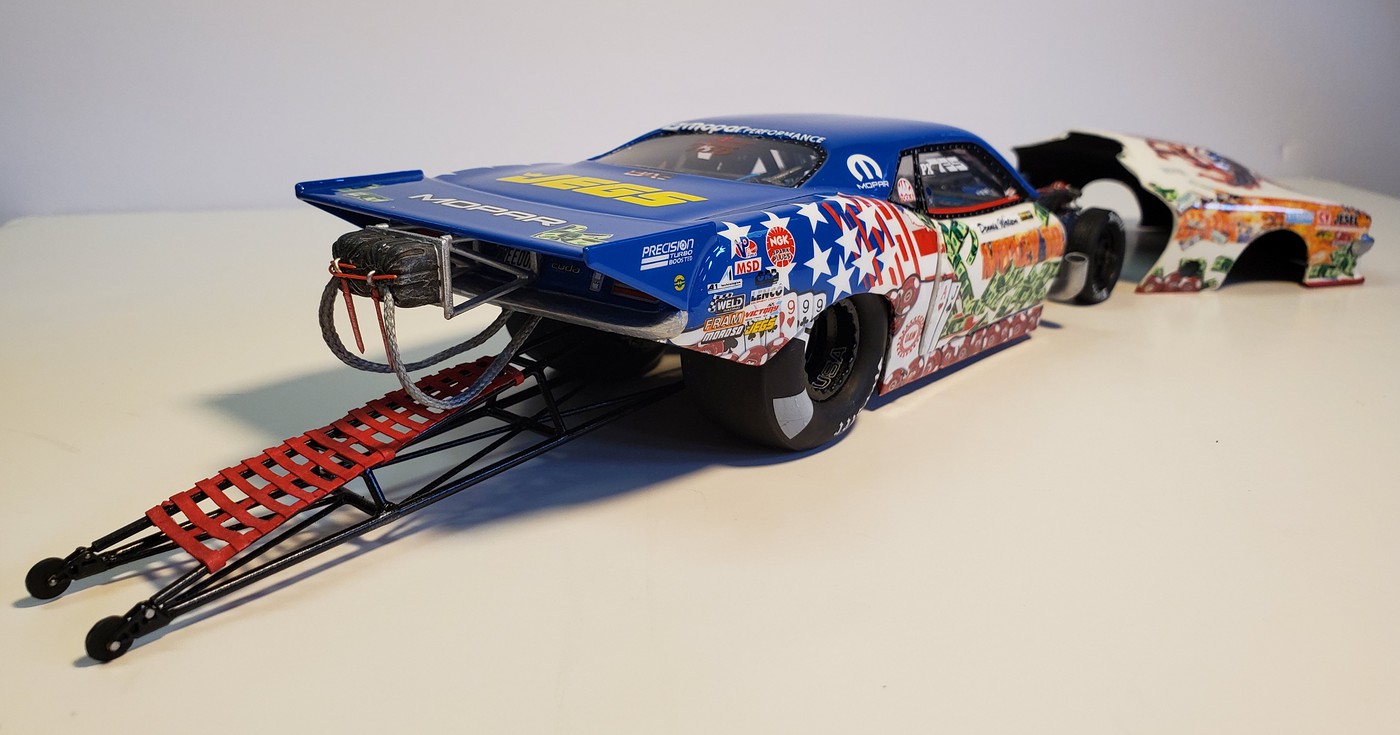
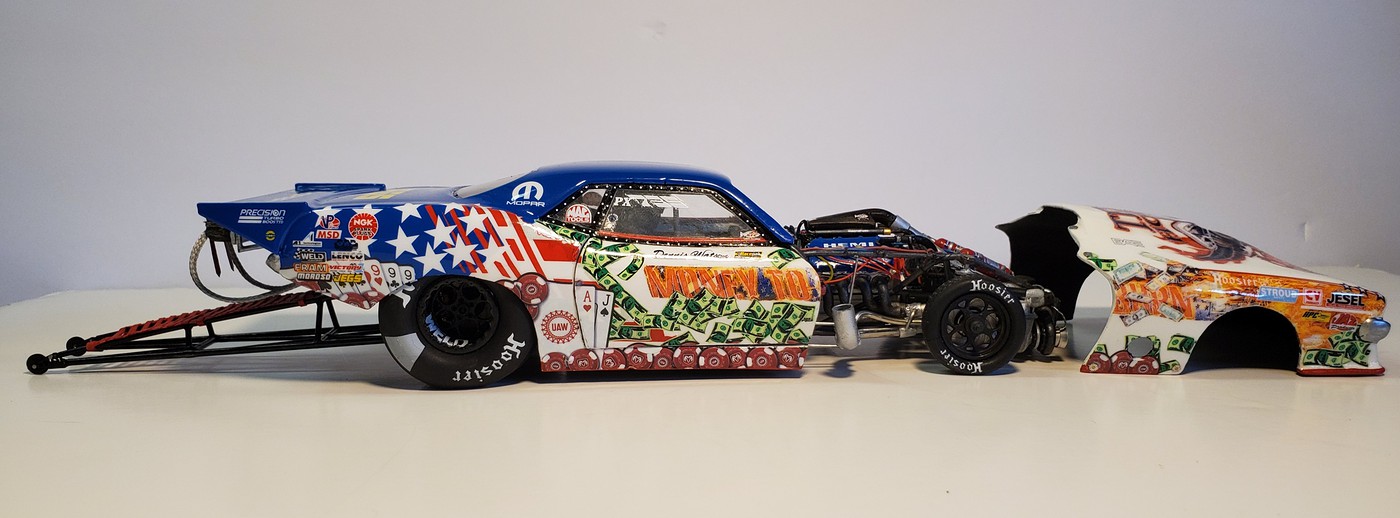
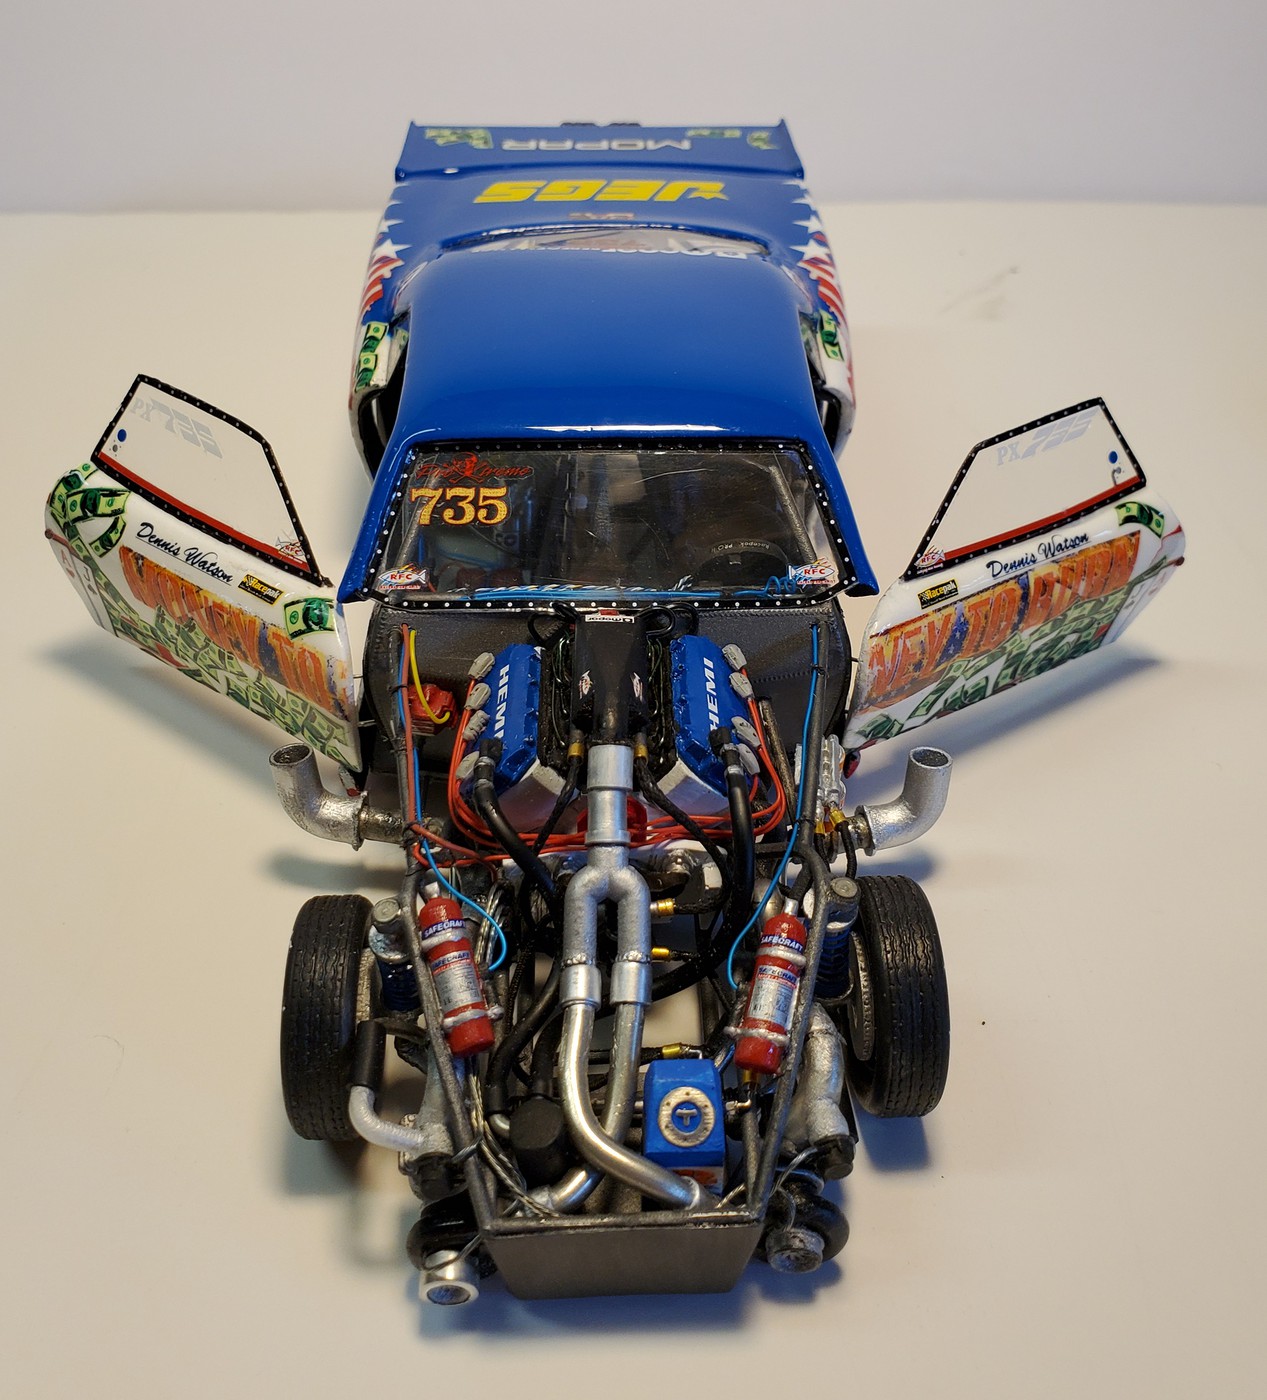
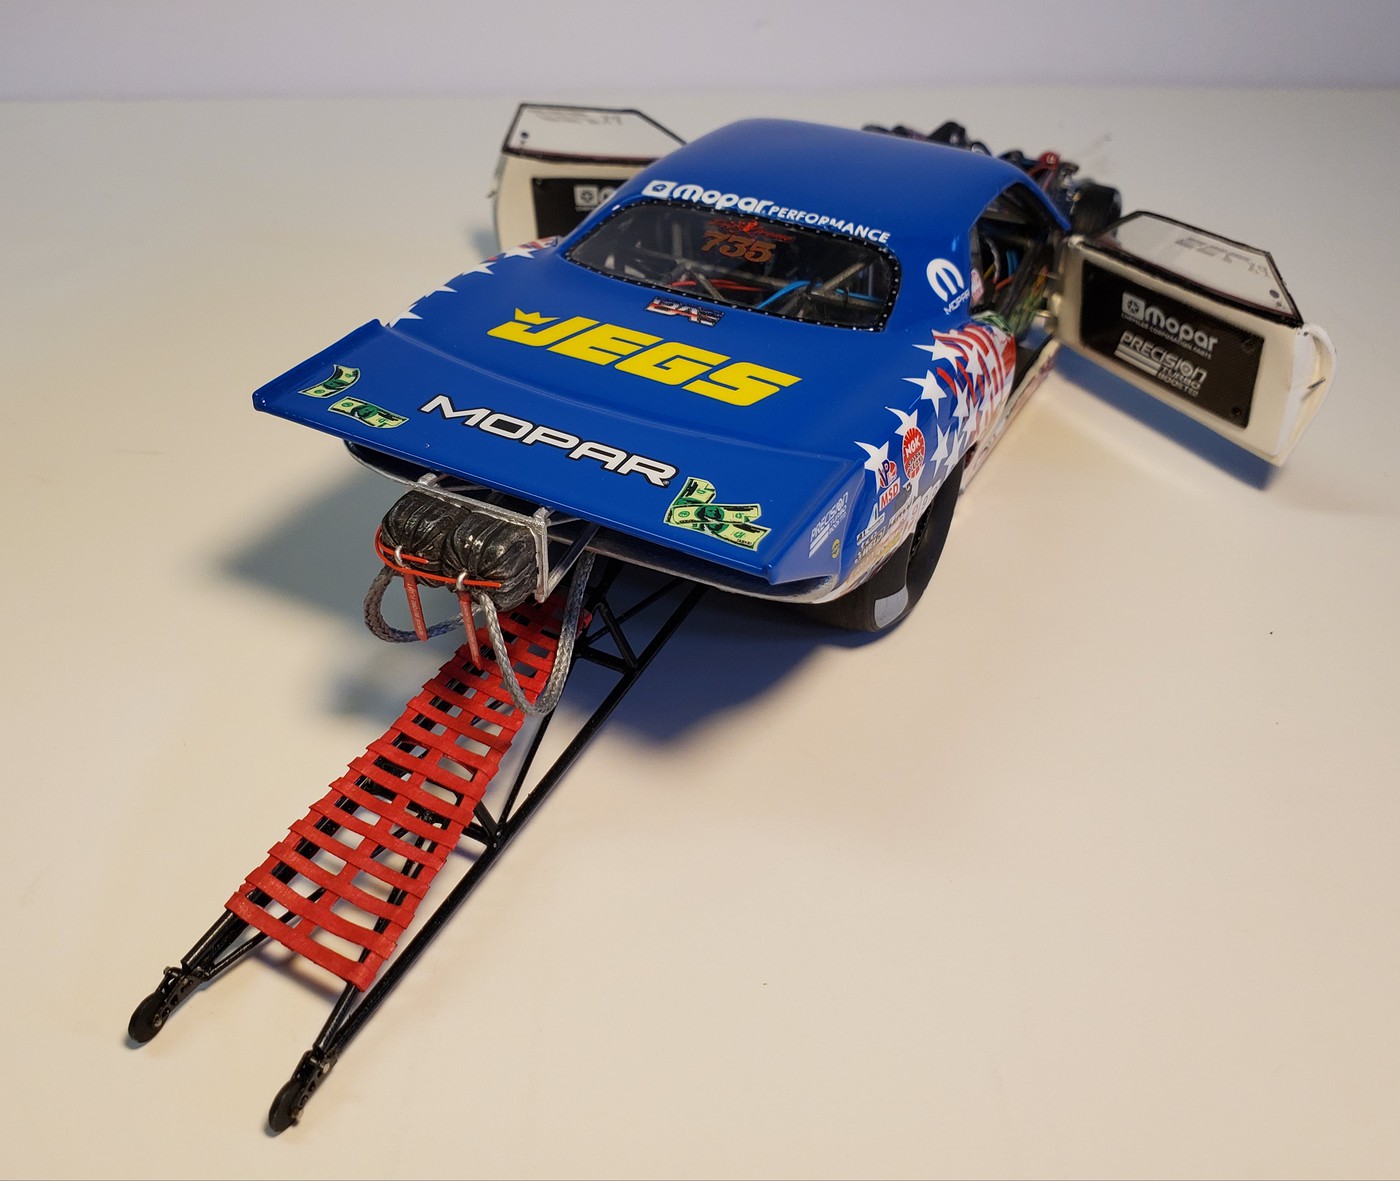
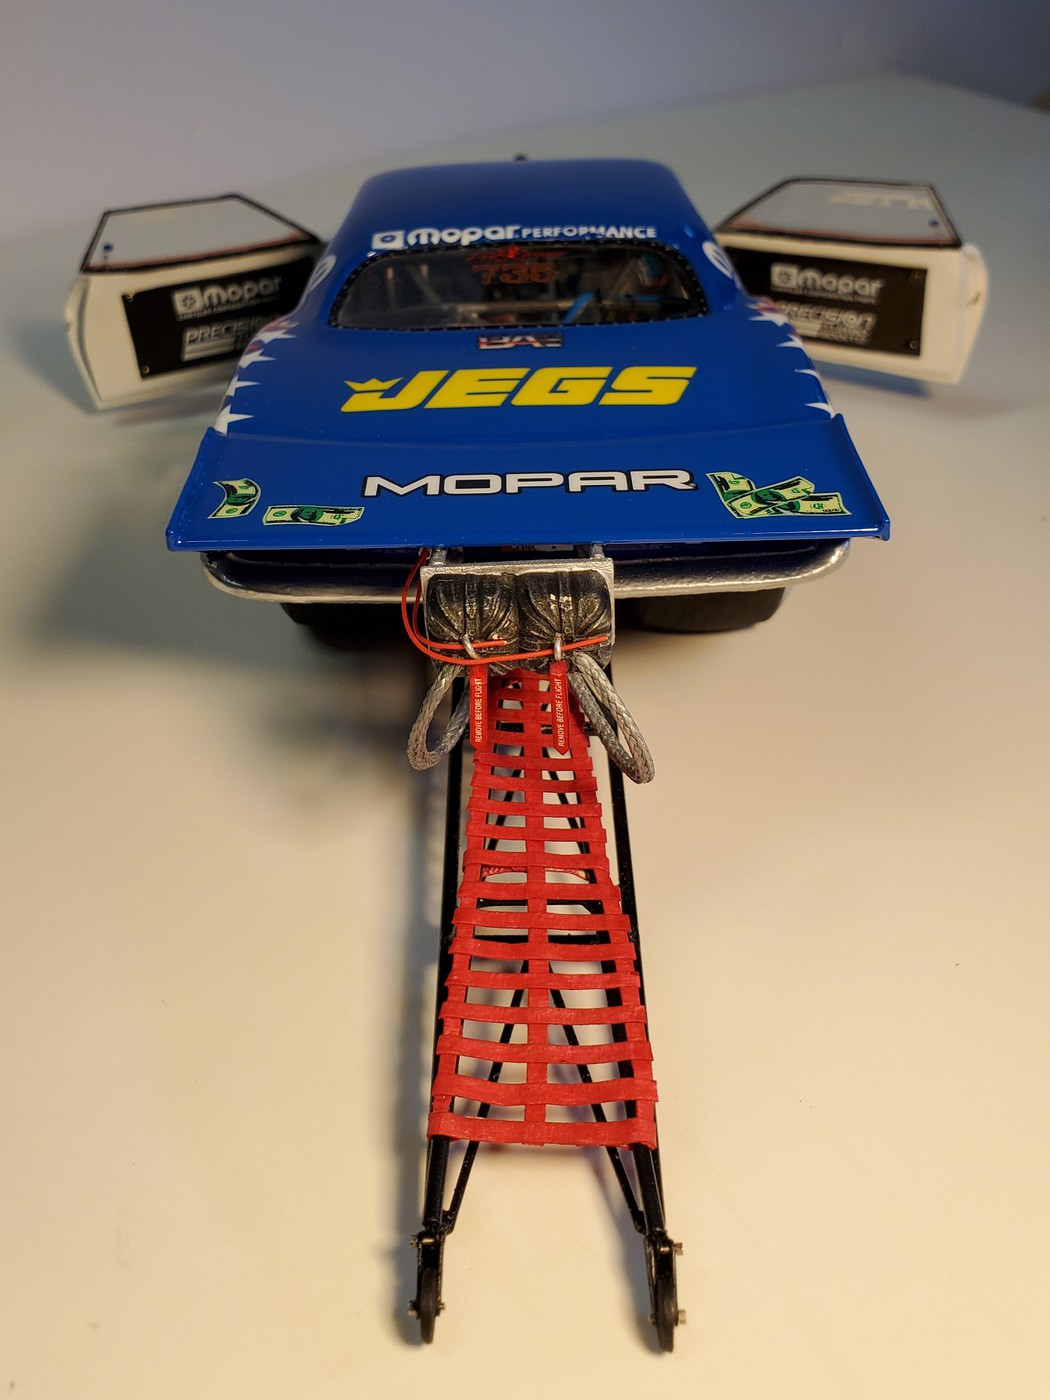
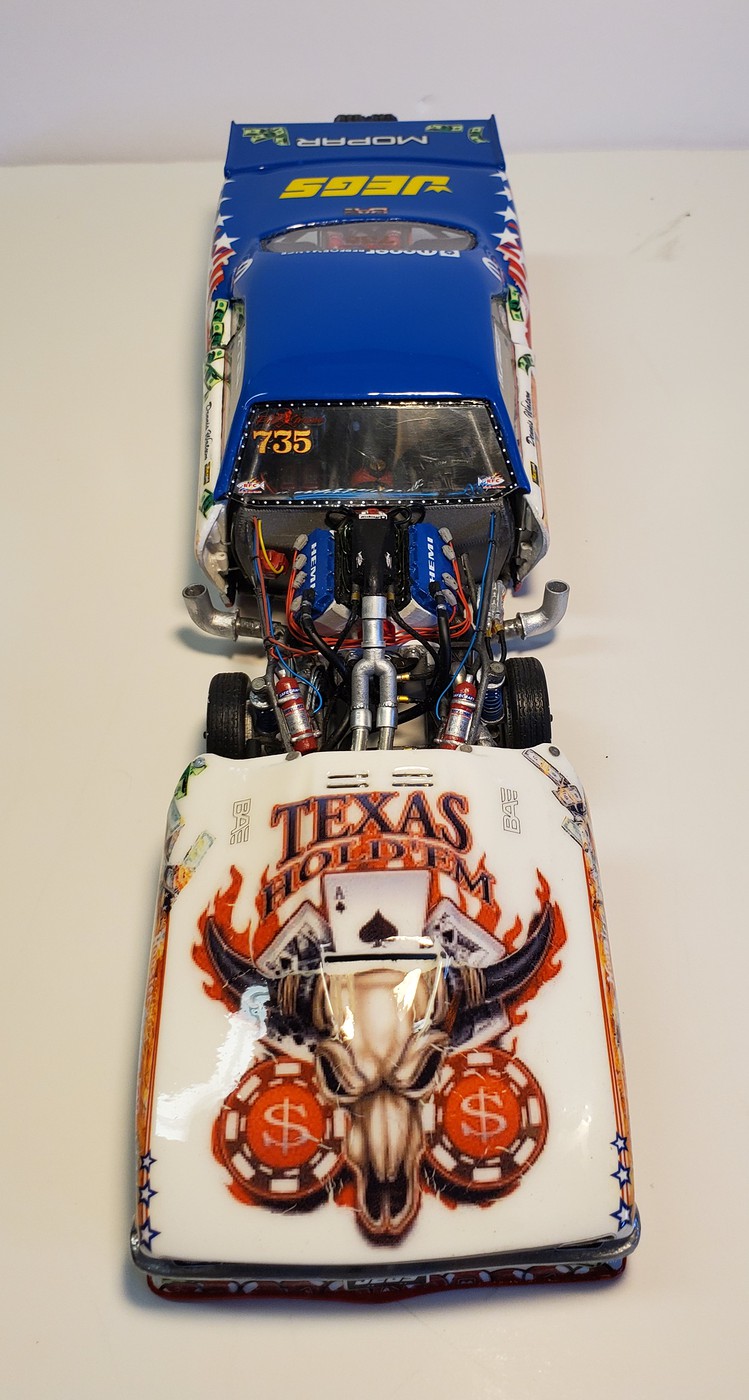
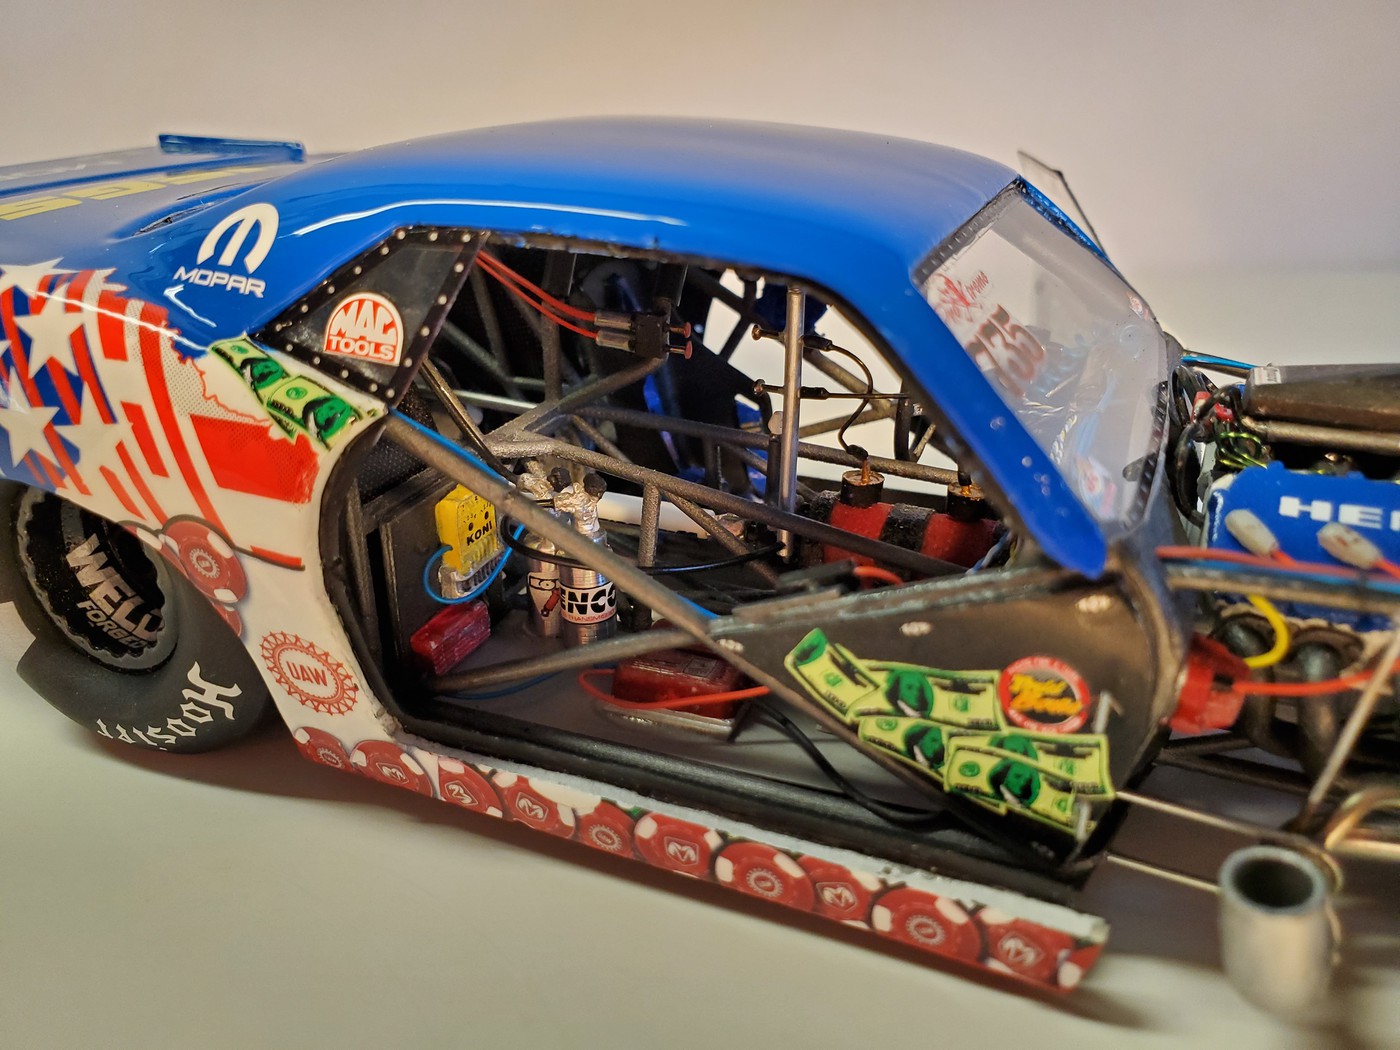
Another recently completed build. This is another scratchbuilt/kitbashed creation using a resin body that I created along with a 3d printed chassis and lots of scratchbuilt, resin cast and aftermarket components. The subject matter is a phantom designed race car using homemade printed graphics along with decals from numerous other decal sheets.
This was my first attempt at building a full blown detailed pro mod with a turbo setup. Lots of learning as I went figuring out all of the plumbing and detailing nuances. At first glance it may appear to be rather busy in regards to the added details but as you look at it closer I feel that it represents the look pretty accurately.
There is well over 1,000 individual pieces in this build with a build time of about six months.
-
1
-
-
There are plenty of readily available kits that could be used for law enforcement decals. Revell has a Ford Expedition a Chevy Malibu and a Fox body Mustang as well as plenty of Lindberg Charger and Ford Crown Vic. police car kits still accessible. Meng has a modern era F350 truck kit and everyone knows that trucks are synonymous with Texas. If not Texas State Troopers you could also go with border patrol subject matter. They use so many different types of vehicles.
-
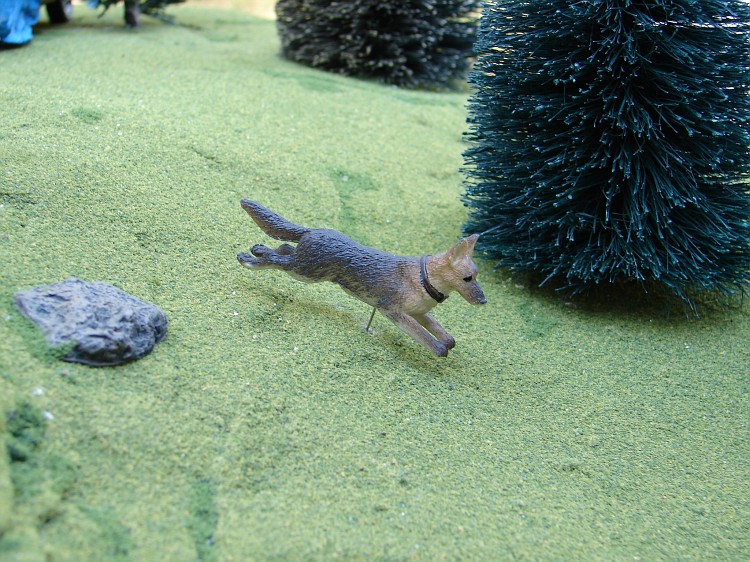
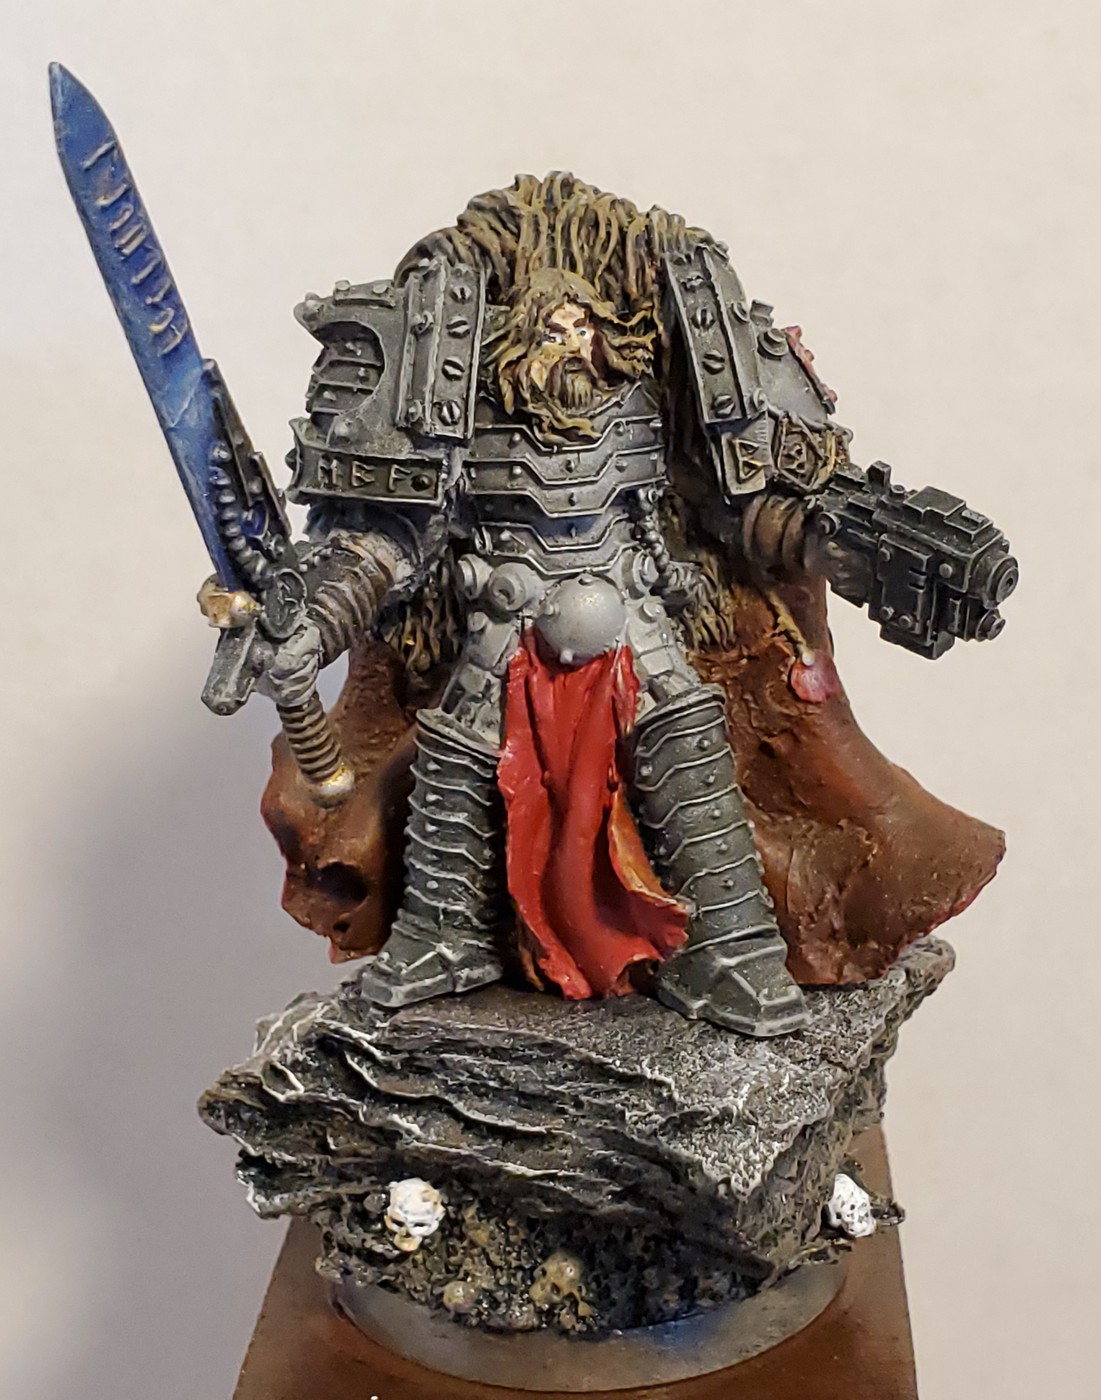
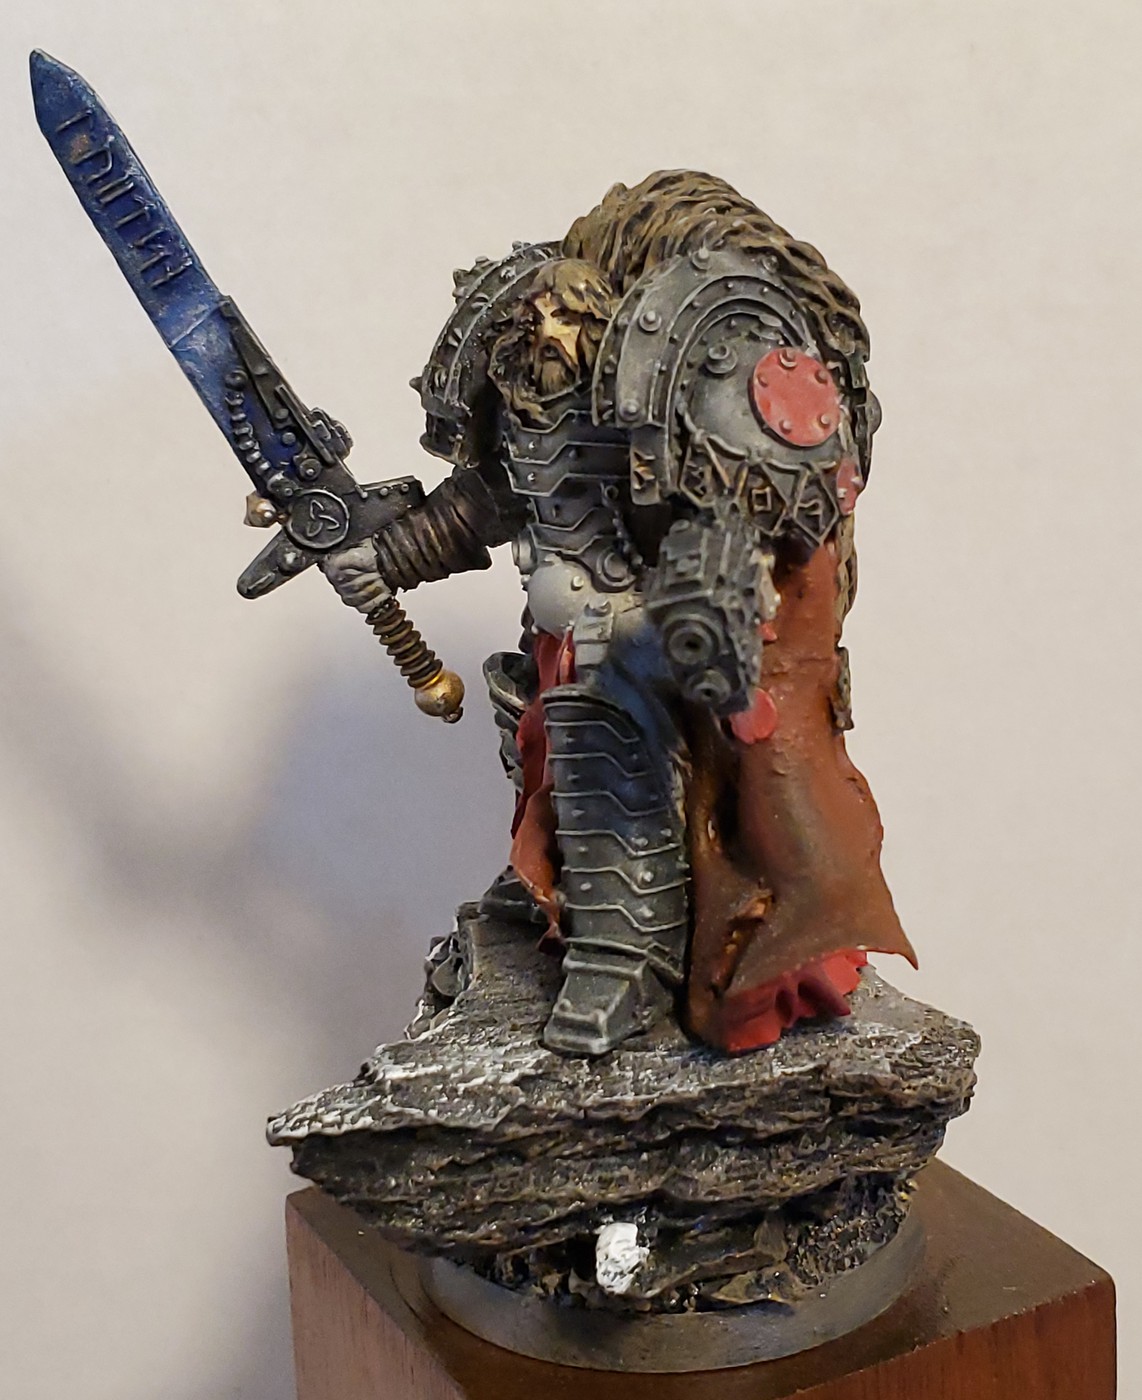
Here is a recently completed build. I'm not a very prolific figure builder but I still like to dabble in them with the hopes that each next build might be better than the last. This is a Hi-tech Miniatures item of the Viking god Odinn. It's meant to be a gaming piece but I simply like them as display items.
-
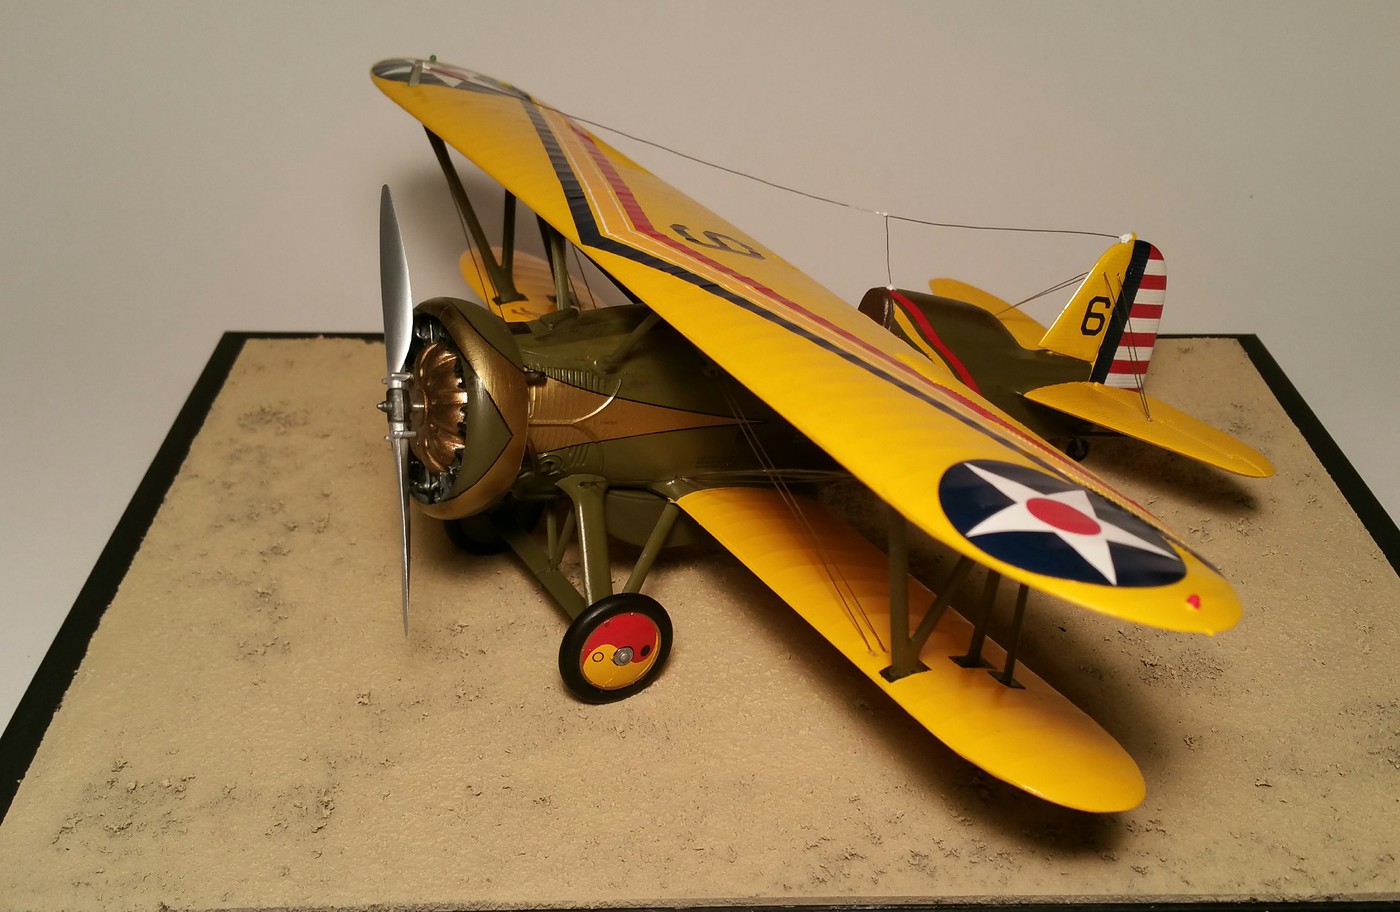
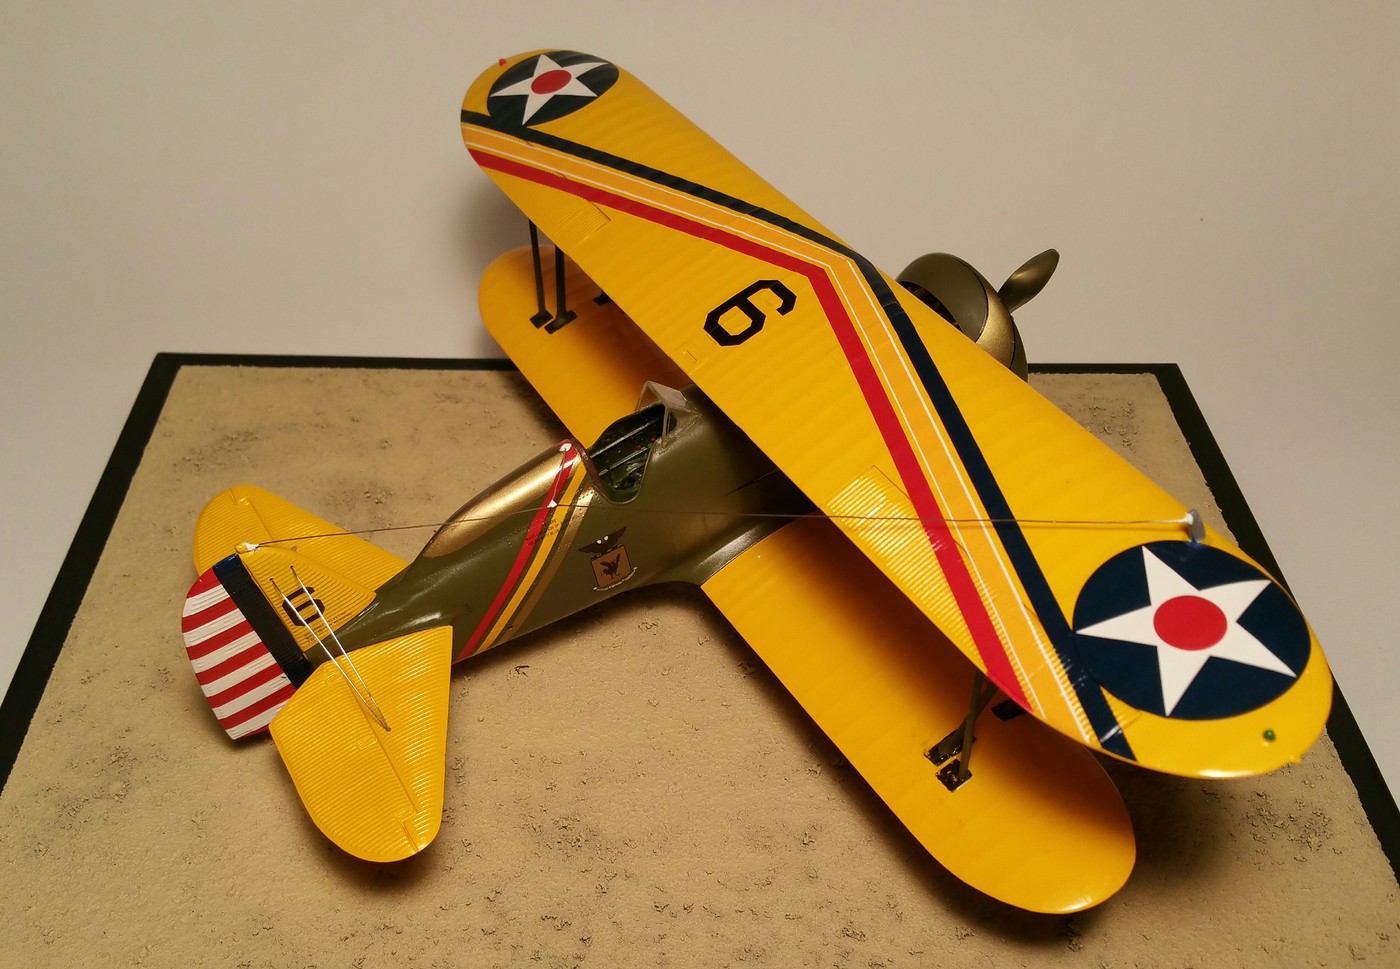
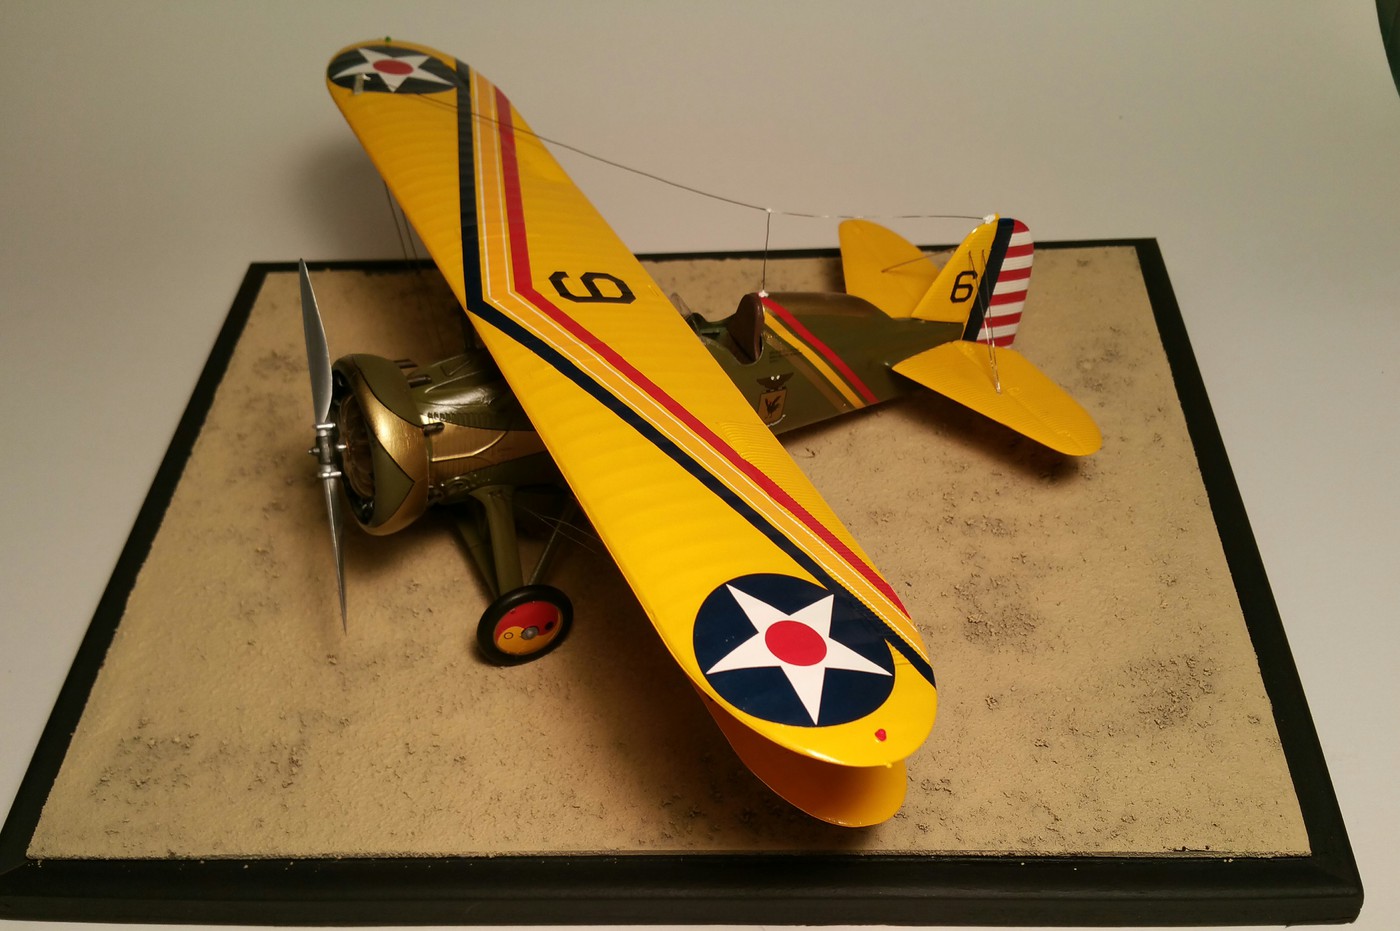
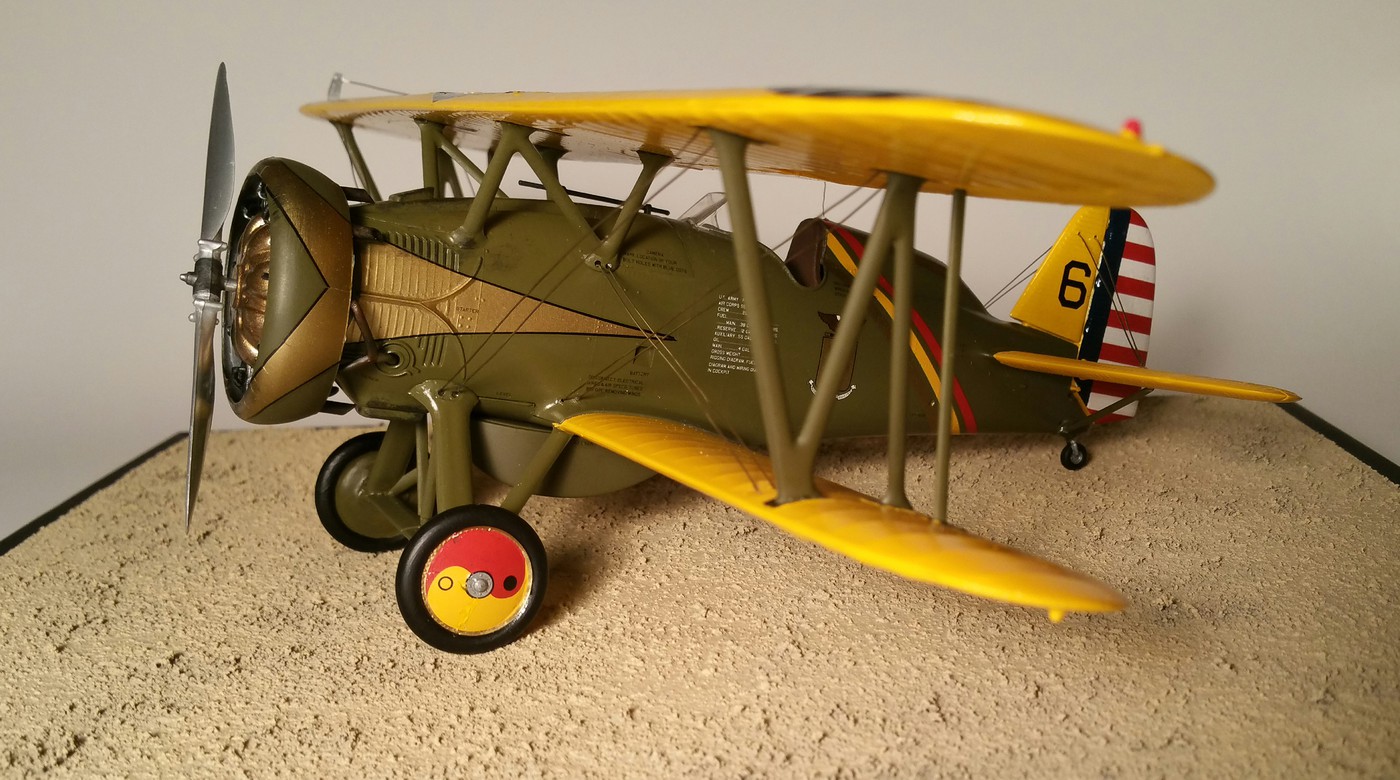
This one is complete. Added the rigging and made a base that possibly resembles the 1933 ground cover at Wheeler Field in Hawaii. Only pics. I could find were black and white and it looks like most of the shots are dirt/hard packed sand. Had to take liberties. It looks o.k. anyways. I had fun with this.

-
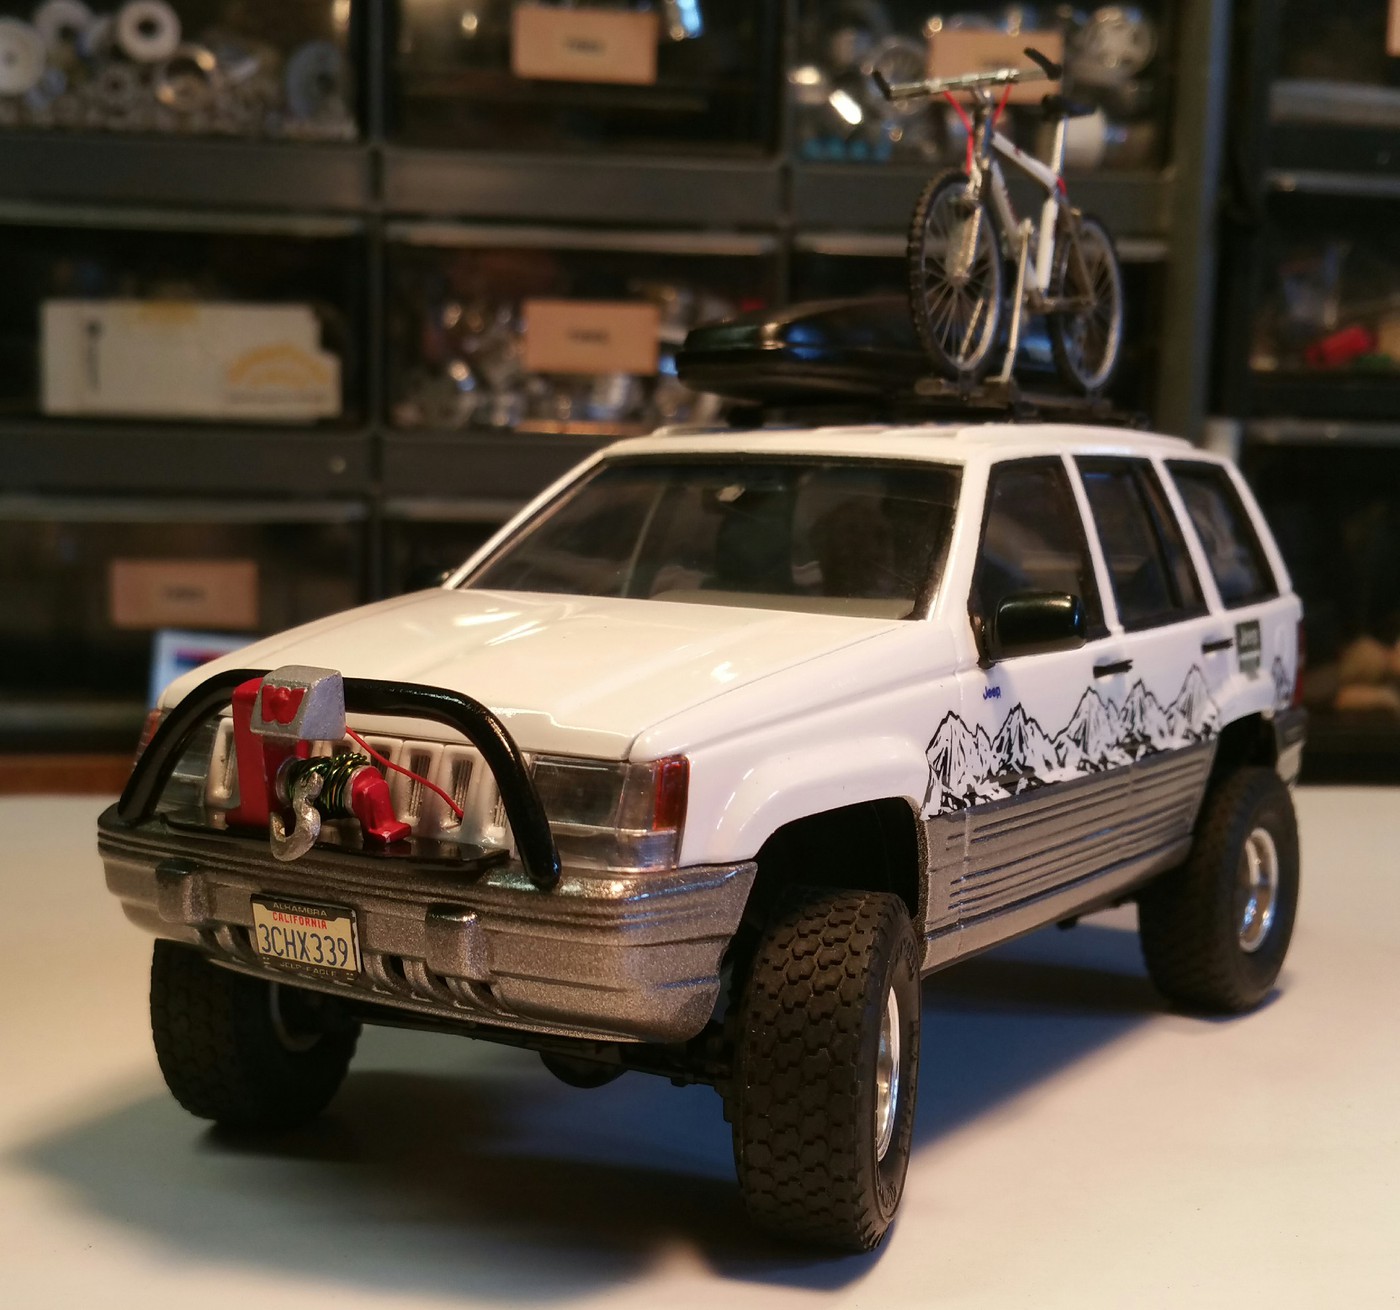
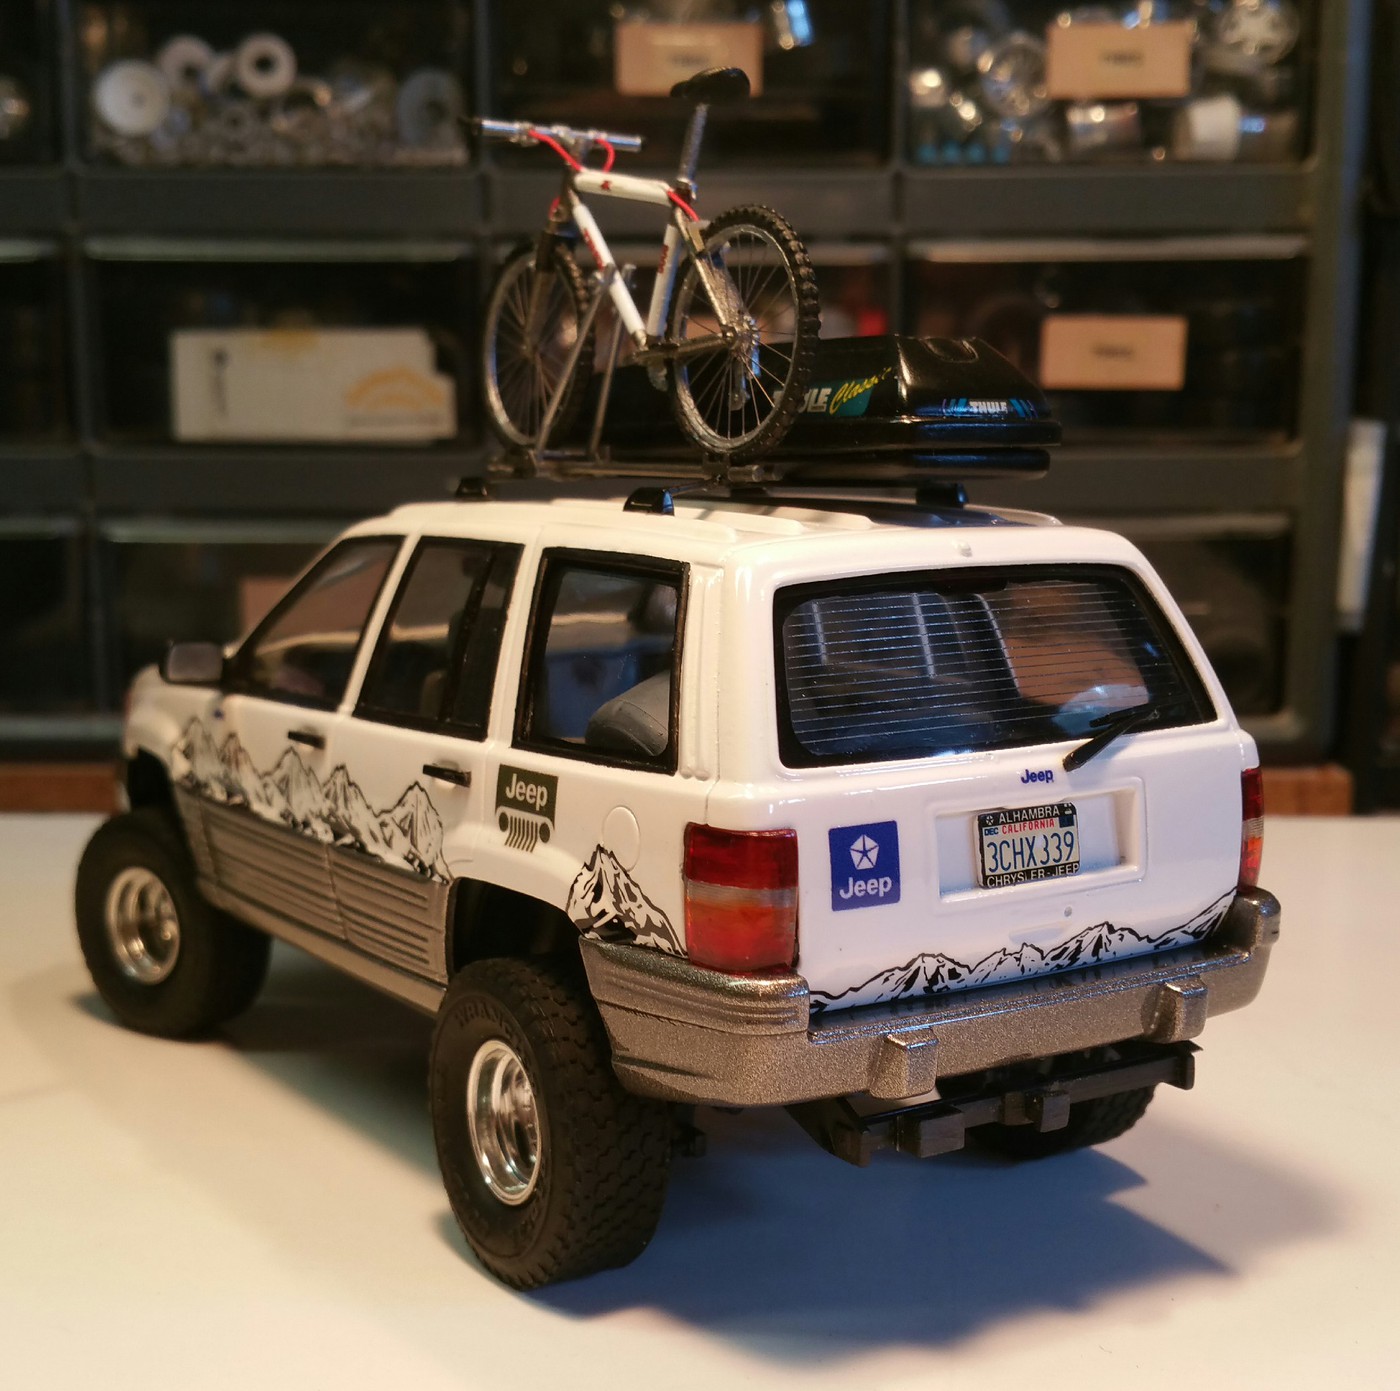
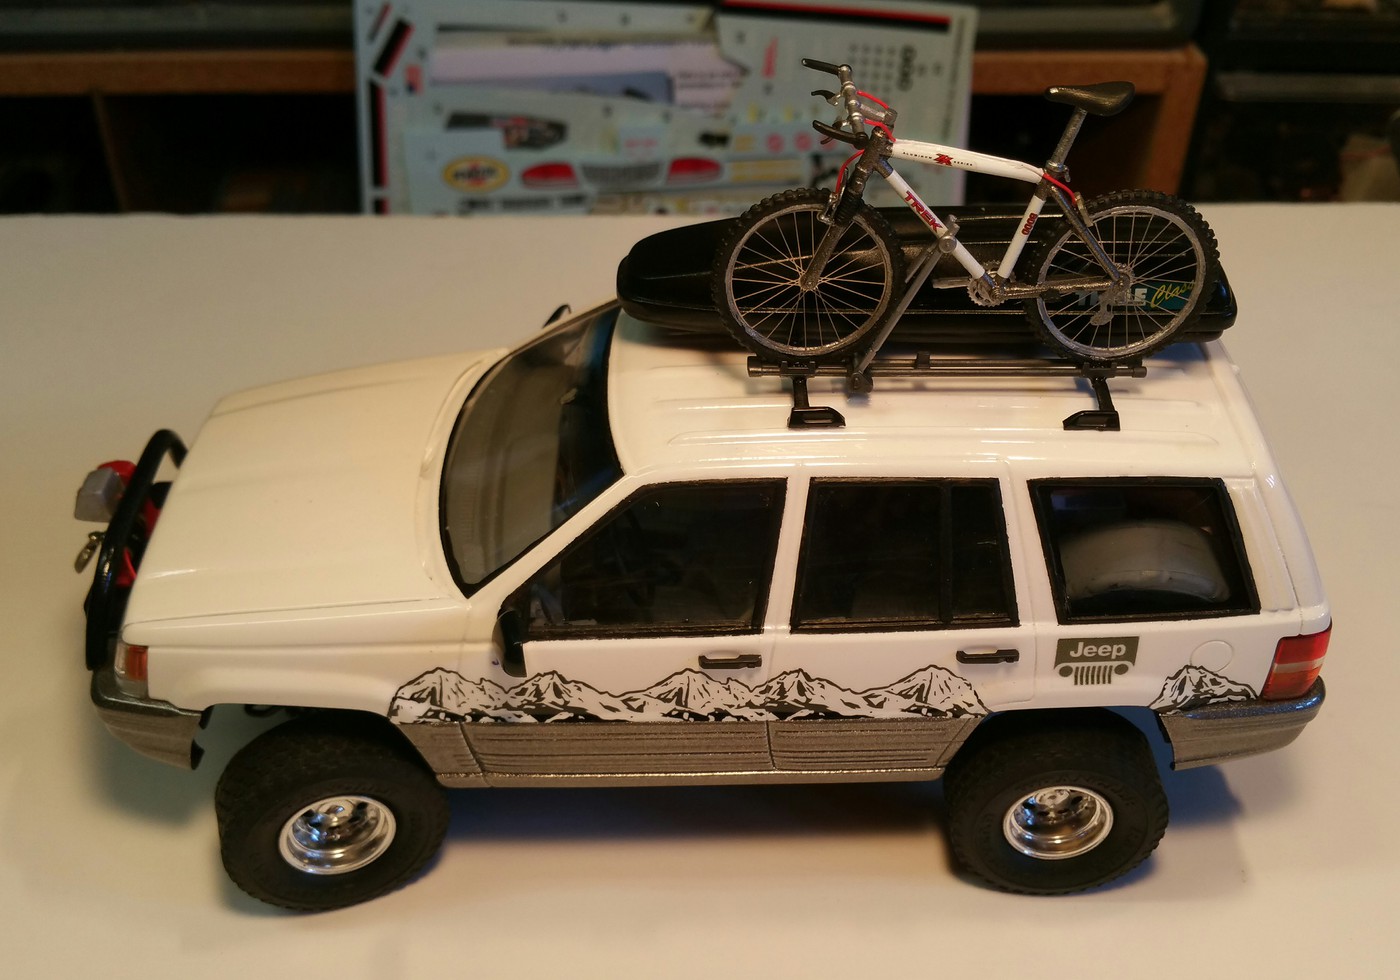
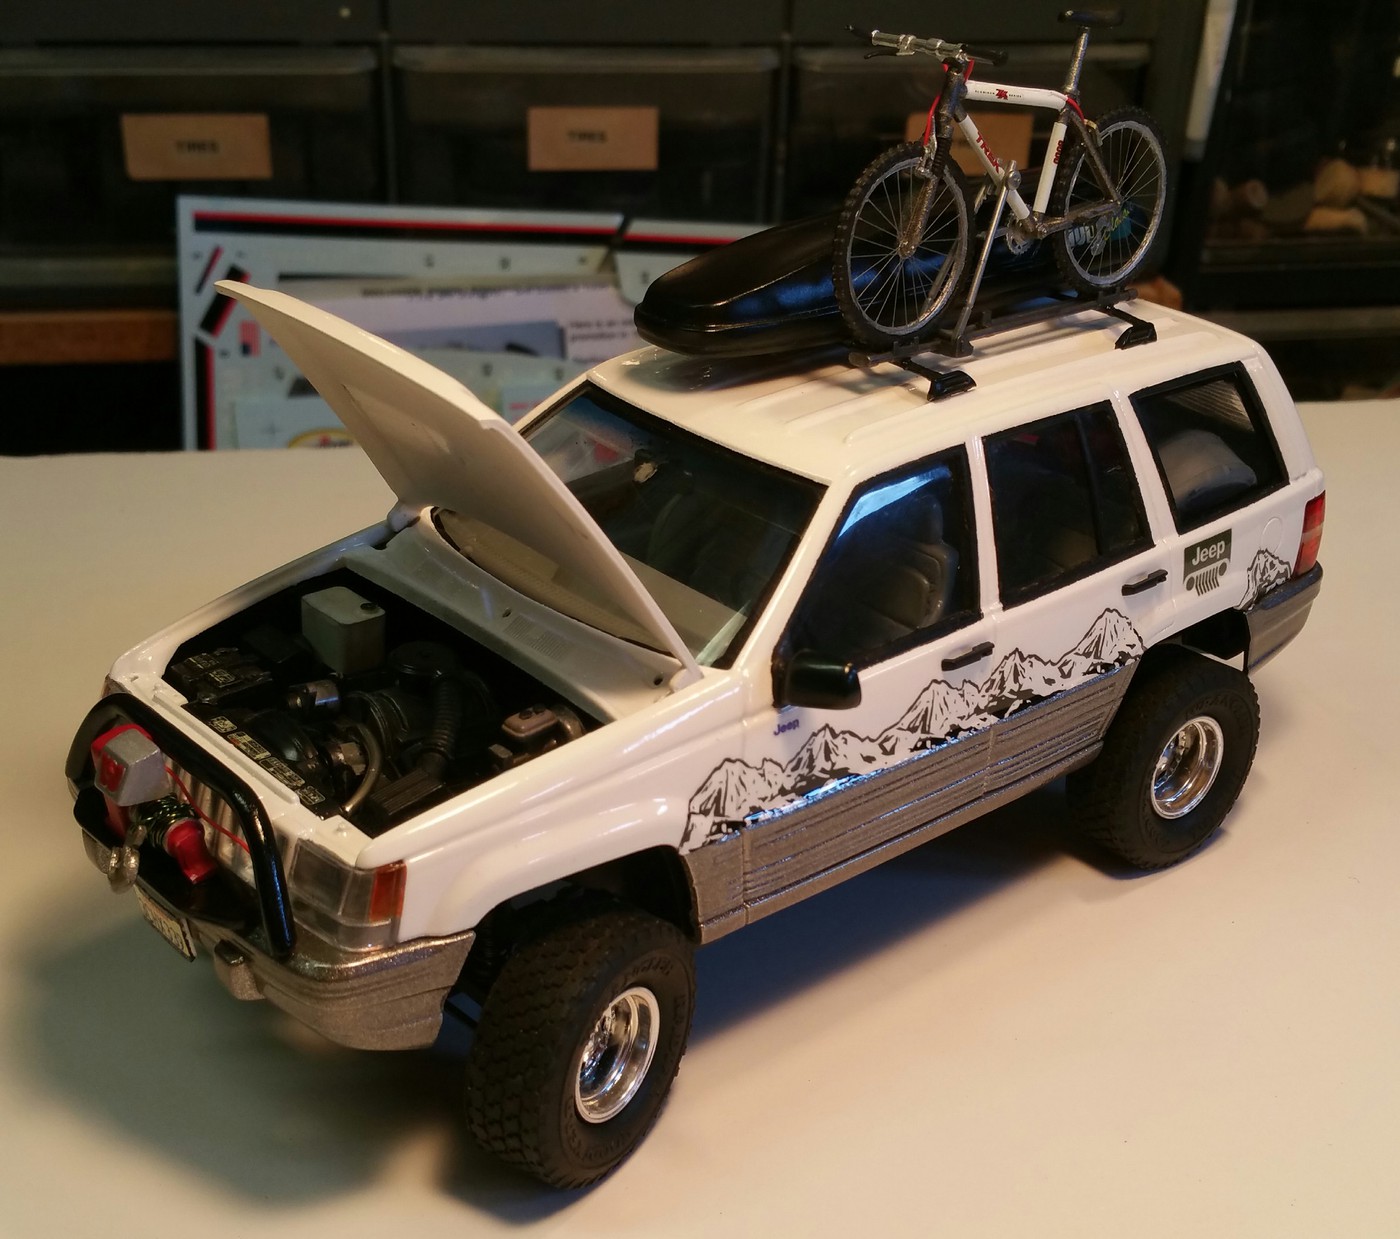
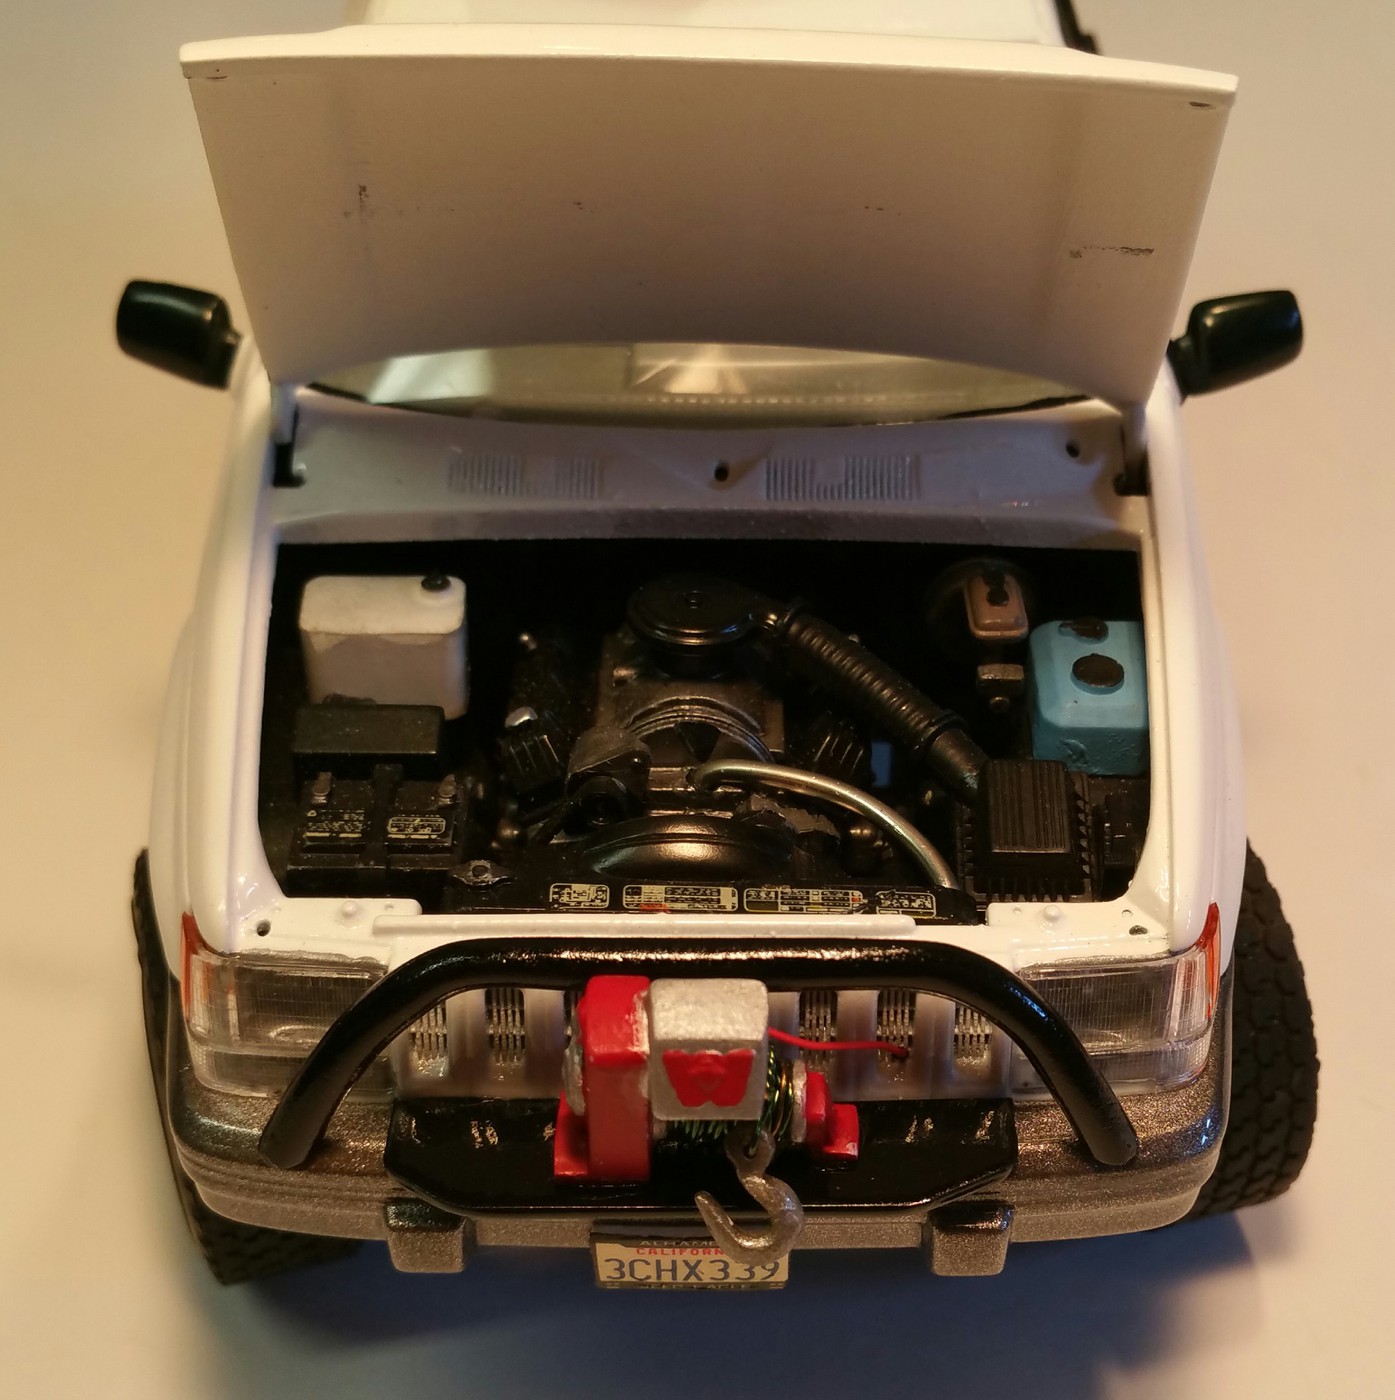
Here is another recently completed build. It's a Tamiya Jeep Grand Cherokee with a few subtle changes. The suspension has been lifted, aftermarket tires and wheels along with added rooftop components from an older Fujimi detail set that includes the mountain bike, luggage/ski carrier and some added custom graphics. I also created a front brush guard and added a winch.
-
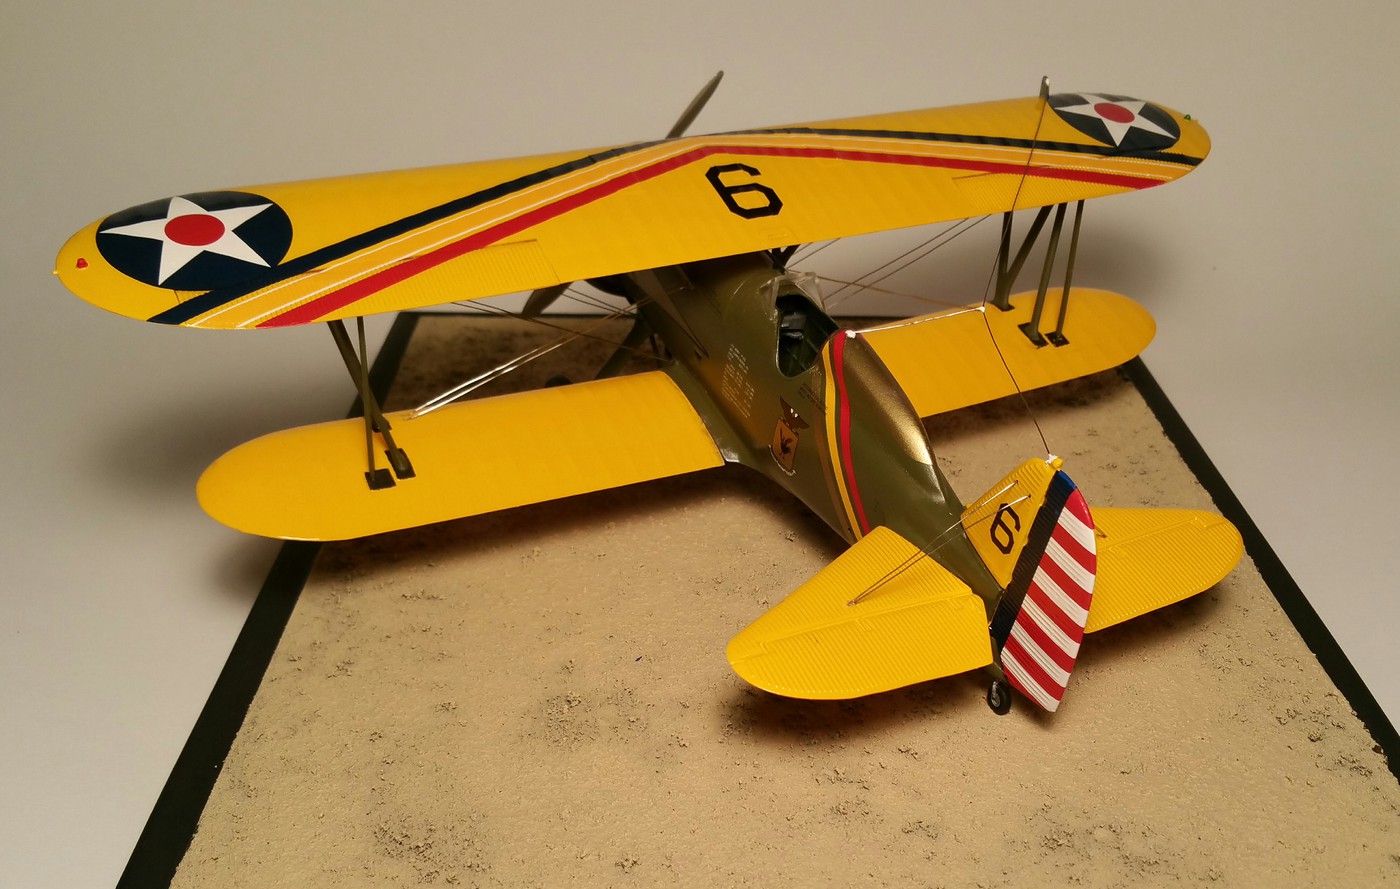
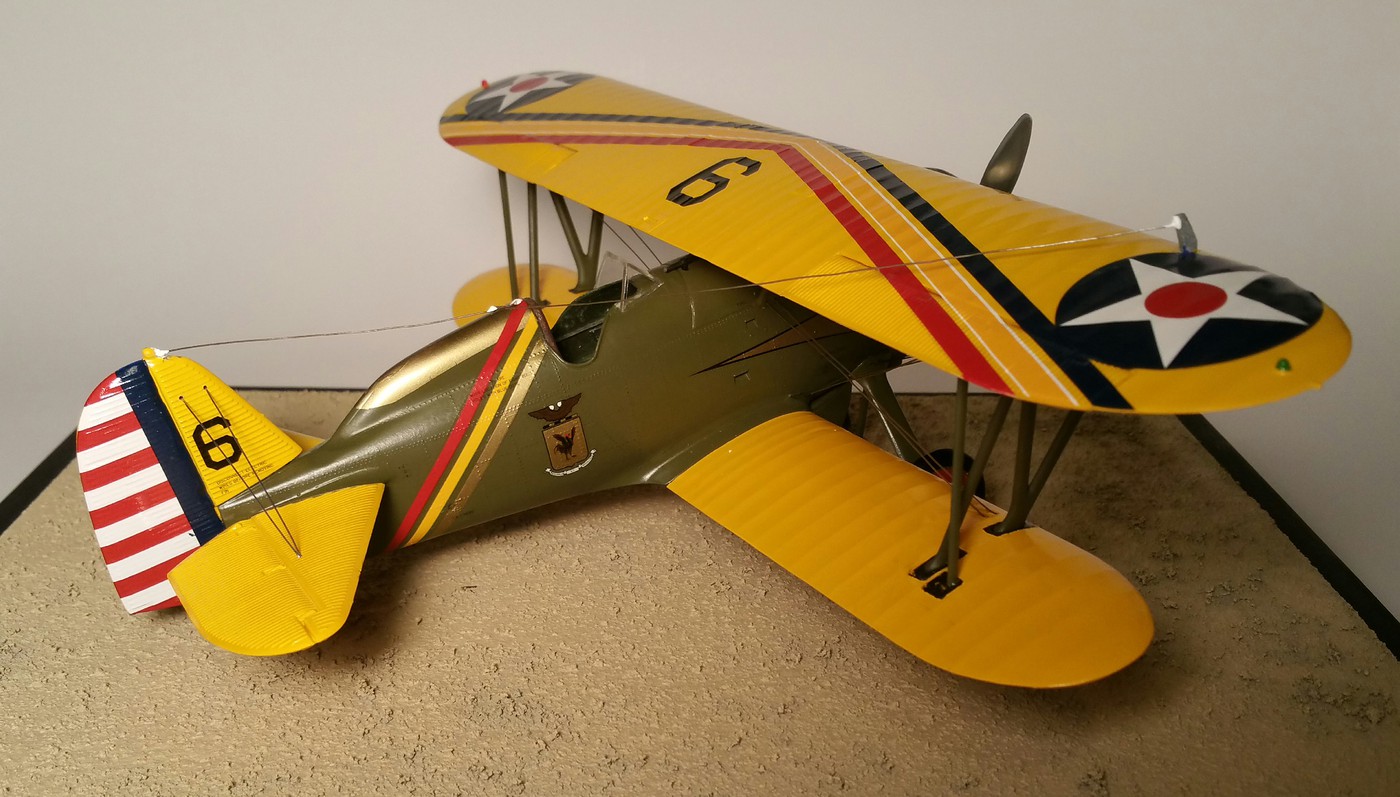
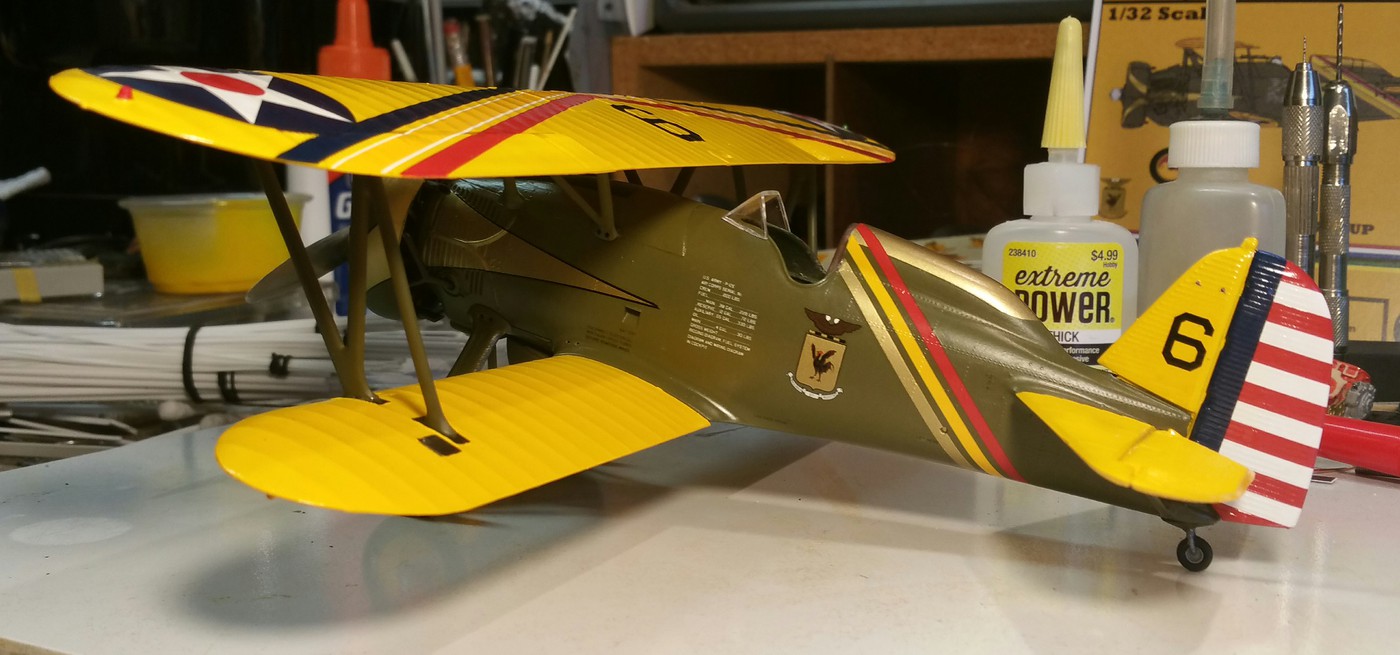
In the downhome stretch for getting this one completed. Most of the decals are in place. Still working on the stencils throughout. There are plenty of little stencil details to be added. They are hard to see but add so much extra detail to the finished product.
Yellow wings decals are great to work with. That being said, the engine cowl stripes and the landing gear spinners were a pain to get to lay down without lots of massaging. That being the case I did have to add some spot touchups to a few areas because the decals wanted to come apart while constantly moving them around. Not perfect work but I'm still pleased with the outcome.
I still have a couple of small pieces to add along with the rigging and some weathering to call this one done.
-
Great work. Love the decal work and paint scheme.
-
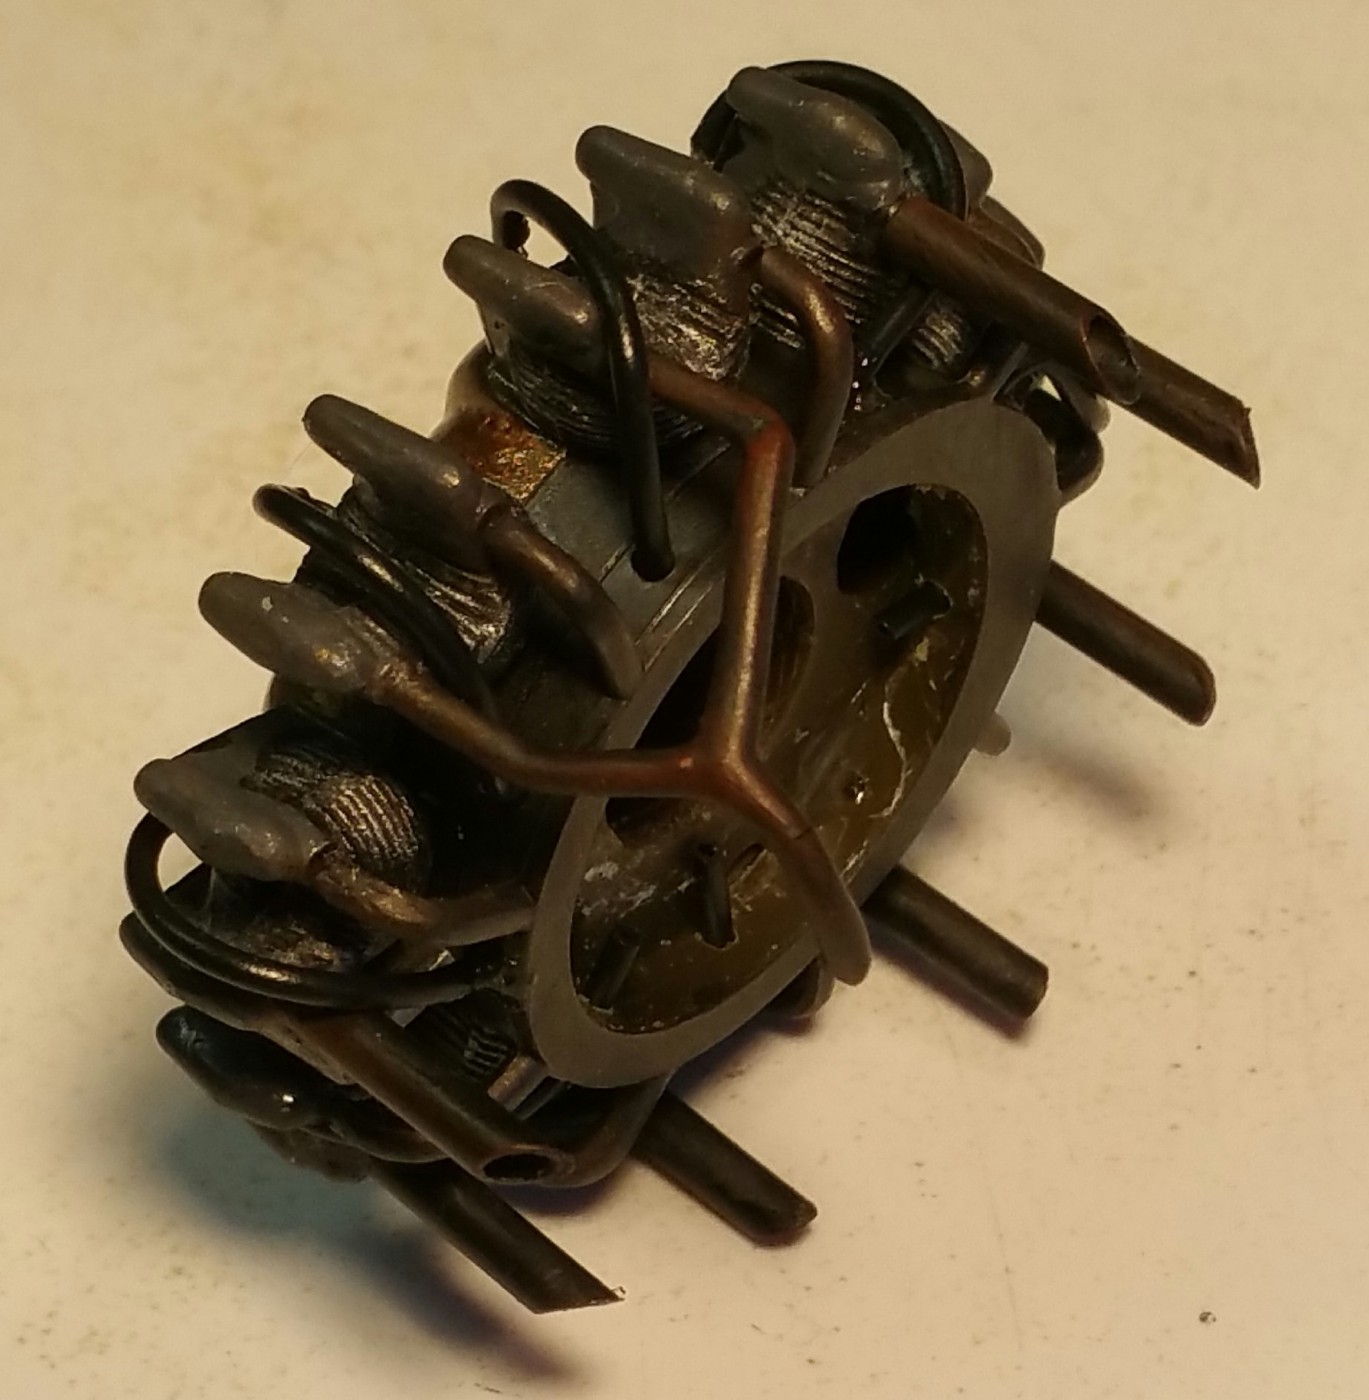
Engine assembly and detail is complete. Now I can get started on final assembly.
-
1
-
-
Very nice job Gil.
-
Very impressive builds on all. Especially the helicopters. Never built one myself but I can only imagine how delicate some of the components are.
-
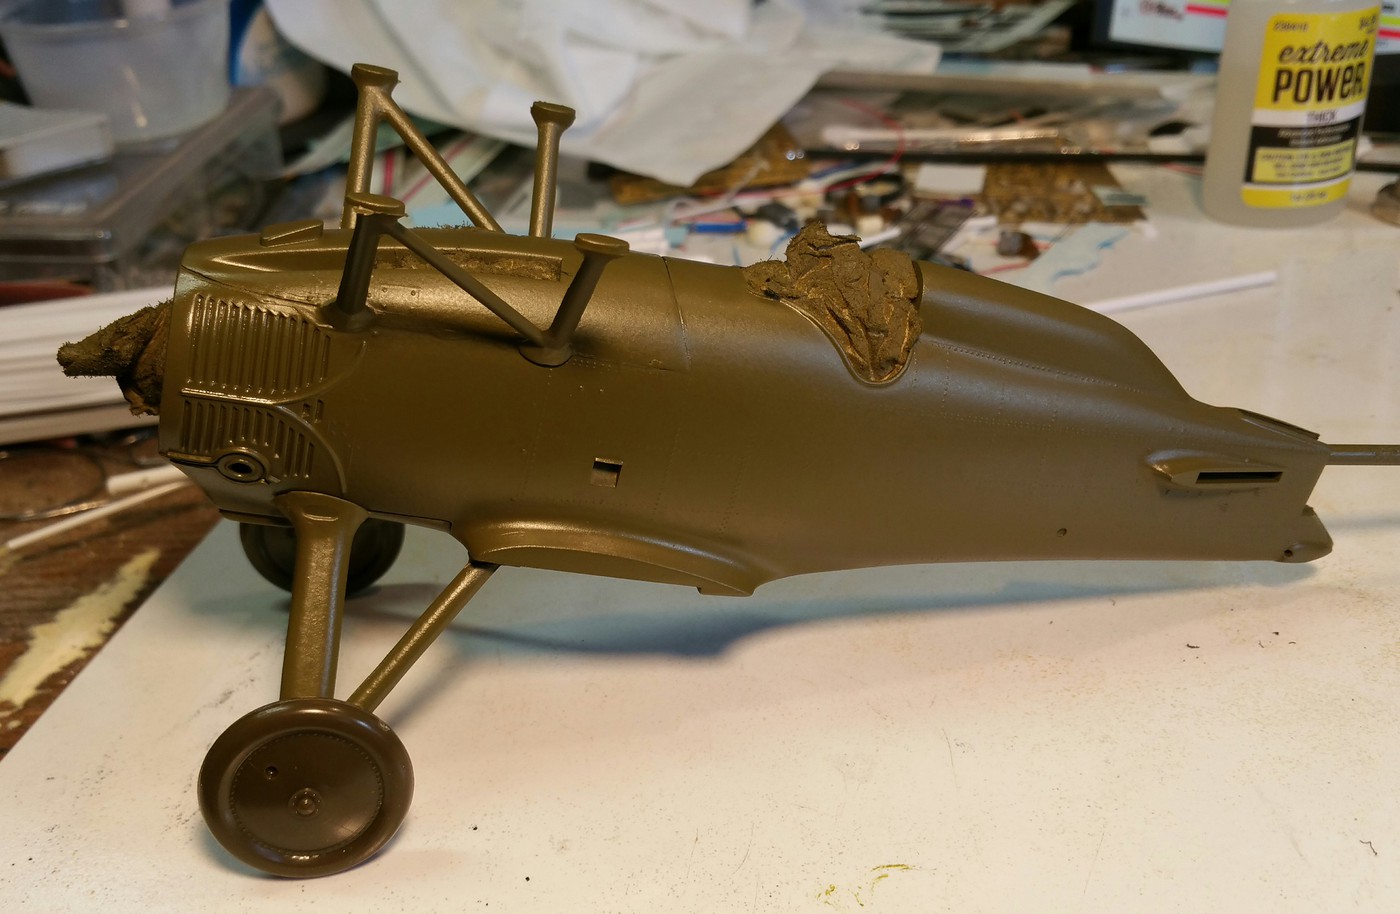
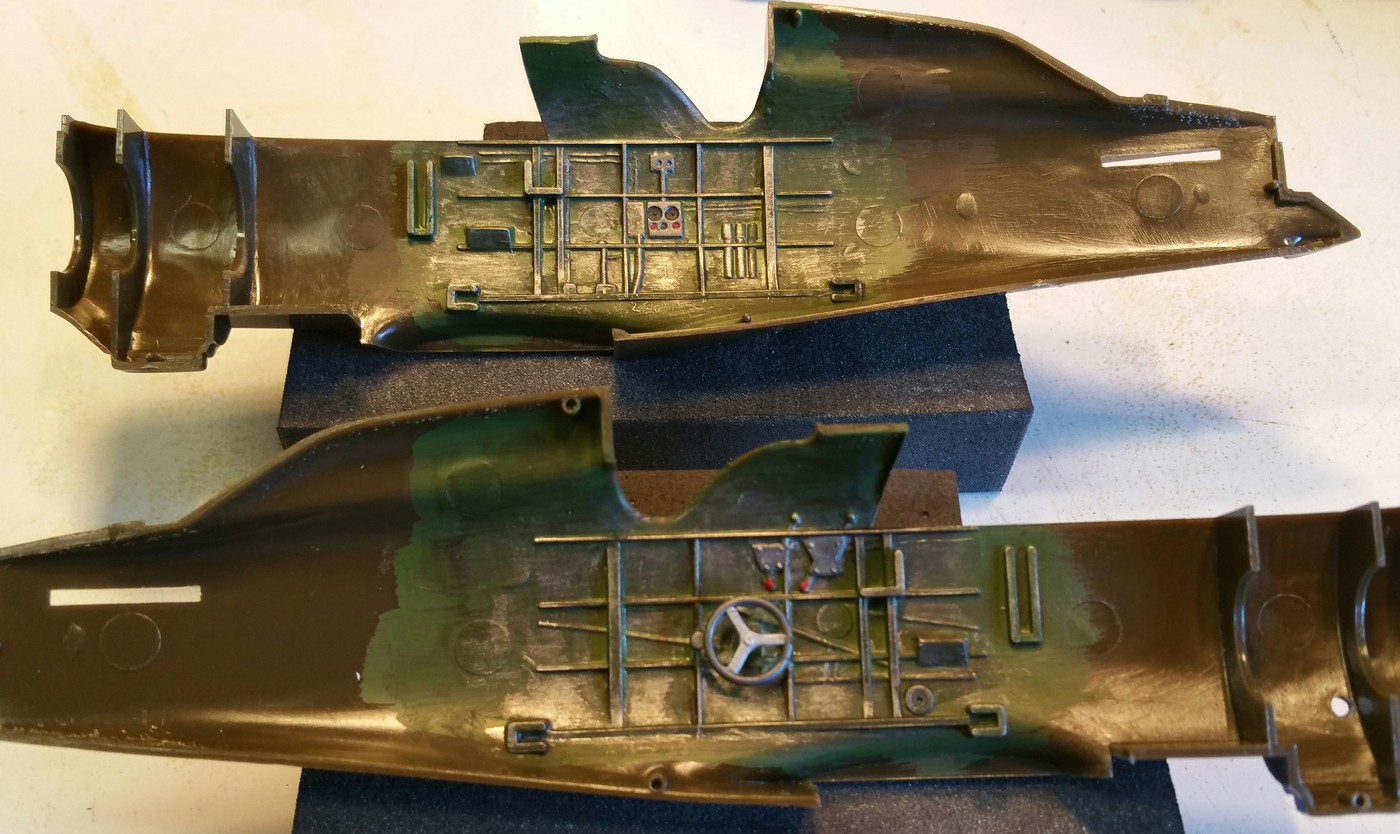
A bit more progress. Fuselage is painted. I still need to add some gloss to the finish. Wings are painted and test fit. Also started working on the engine. I was originally going to build this straight out of the box but even though I'm no expert on aircraft details I felt that some of the details were a bit soft so I decided to access some research and add some extra details. The cleanup on the engine was a labor as a lot of seam lines are in all of the worst places. I also decided to replace the exhaust pieces with styrene tubing as the kit pieces were going to be next to impossible to drill out the ends. Lots of paint details as well as there are so many different colors on the engine.
So far I'm happy with the progress.
-
1
-
-
Awesome work Gil.
-
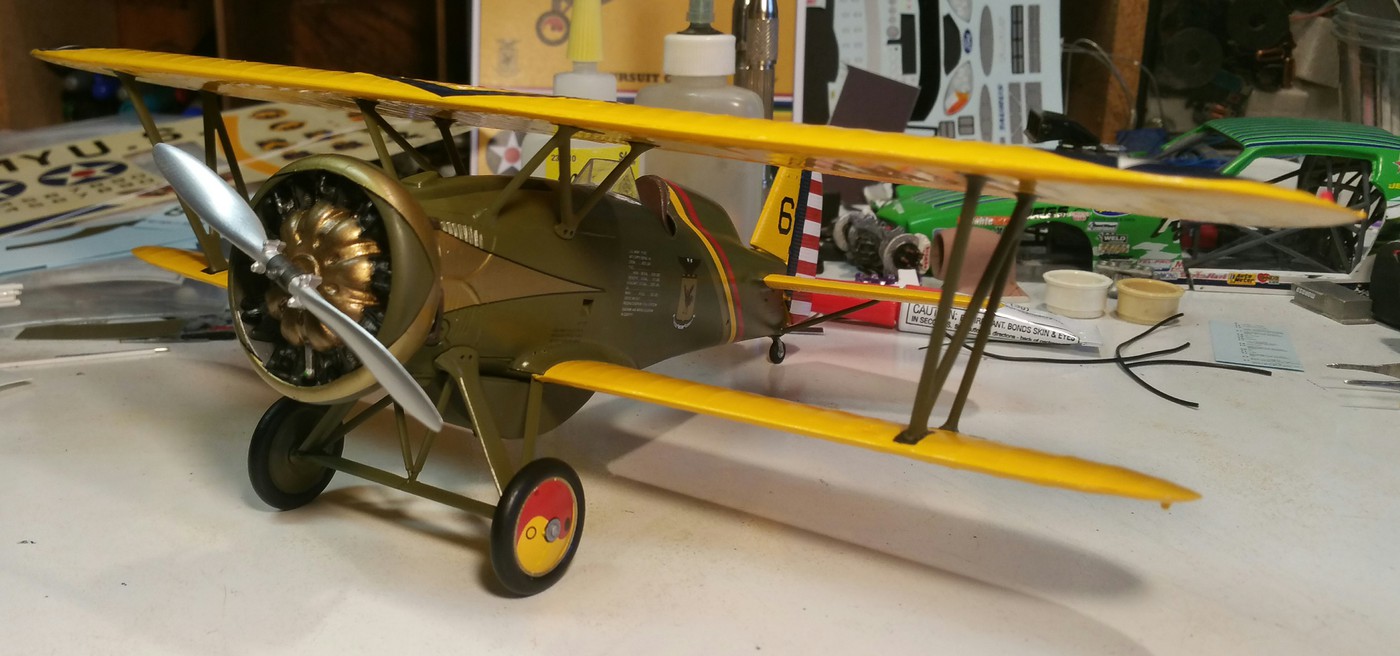
Here is my next airplane project. I primarily build automotive subjects so when it comes to aircraft my skill set may not be that of some better aircraft builders but I still have fun with these builds and I love the history behind so many of these builds.
This is a 1/32 scale Hasegawa Boeing P 12 E biplane. It will be pretty much out of the box with added Yellow Wings decals
-
6 hours ago, TimDarrah said:
Wayne,
How long did you have to wait to get your order and did they ever reply to any e-mails you sent them? I've sent them 2 e-mails and heard nothing back. Plus they charge VAT even though it's a "non-EU" order.
Tim
If I remember I've placed two orders and both took about 3 weeks each time. I never tried to communicate through email. I belong to a Facebook group devoted to GT Racing scale models and the decal seller and creator (obviously the person who runs Slotfabrik) is part of the same group and any questions or concerns were sent through Facebook messenger. He responded pretty promptly there. His name is Folasf Osu and the exact group name is called GT Racing Scale Models
-
9 hours ago, TimDarrah said:
Wayne,
Thanks for the info. What decal solvent did you use? I always use Solv-a-set.
Tim
Same.
-
Awesome build Gil. Love the camo and technique used.


91 Elliott IROC Daytona
in Cars, Trucks, & Motorcycles
Posted · Edited by 1320Wayne
Another completed build. This one actually started over 7 or 8 years ago. Part of my crazy 2020 plan was to concentrate on finishing older started builds before starting on anything new. This started as a True Value plastic promo which I combined with an AMT Nascar kit for the chassis, suspension and engine with lots of added extra details.