


trekriffic
-
Posts
40 -
Joined
-
Last visited
Content Type
Profiles
Forums
Events
Posts posted by trekriffic
-
-
For those of you still following this thread, I posted finished pics in a new thread here:
http://forum.ipmsusa3.org/index.php?/topic/8395-uss-enterprise-ncc-1701-in-11000-scale/
Live long and prosper!
-
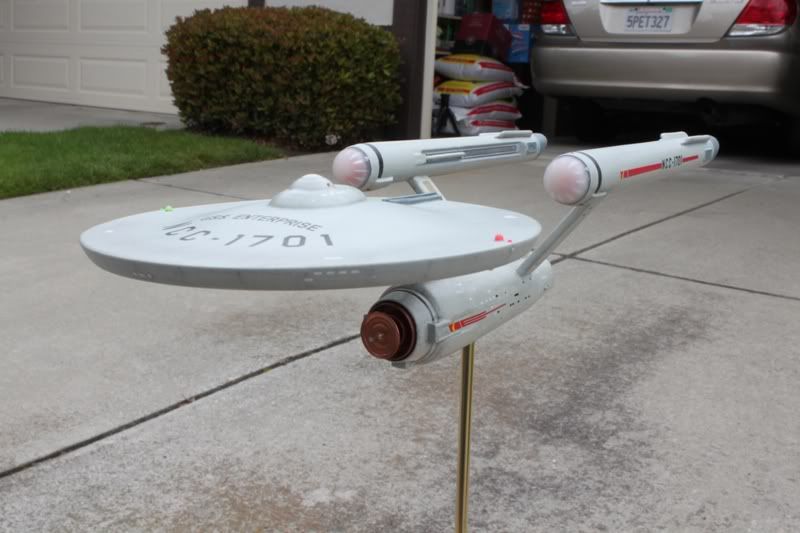
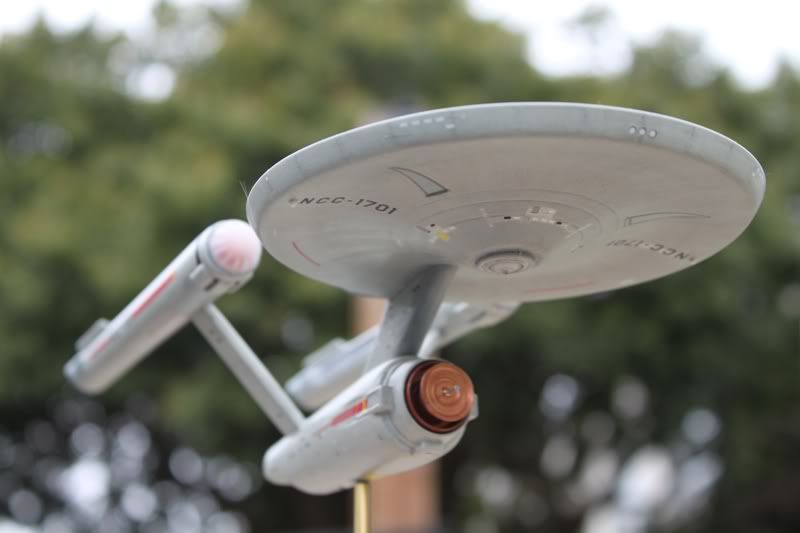
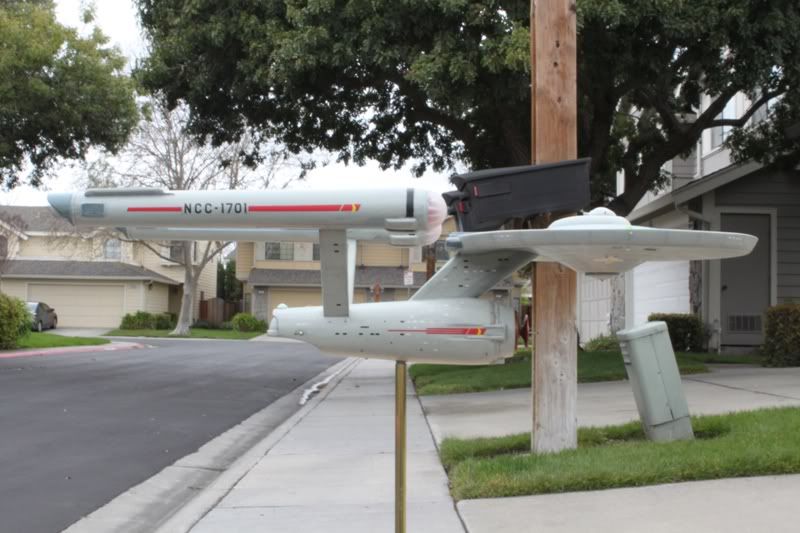
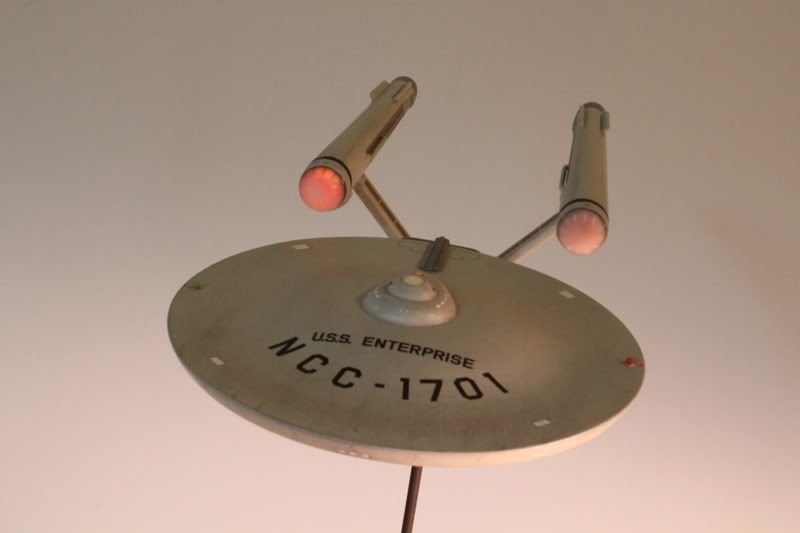
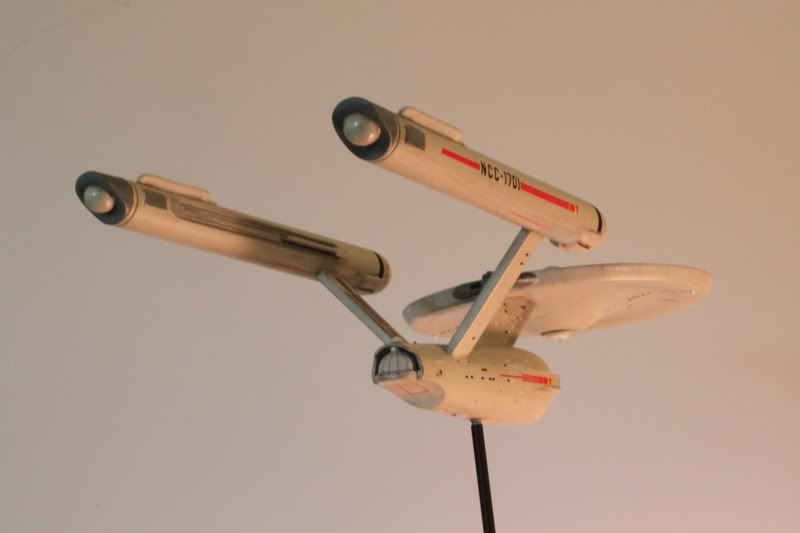
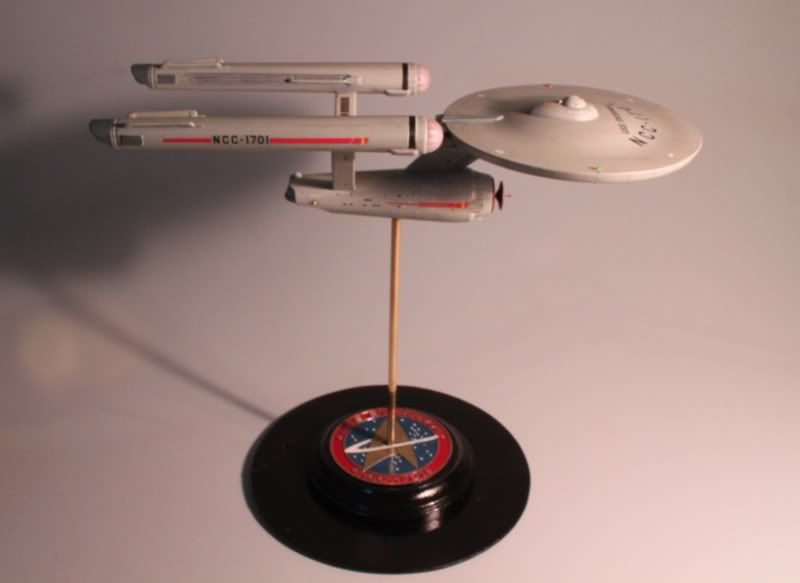
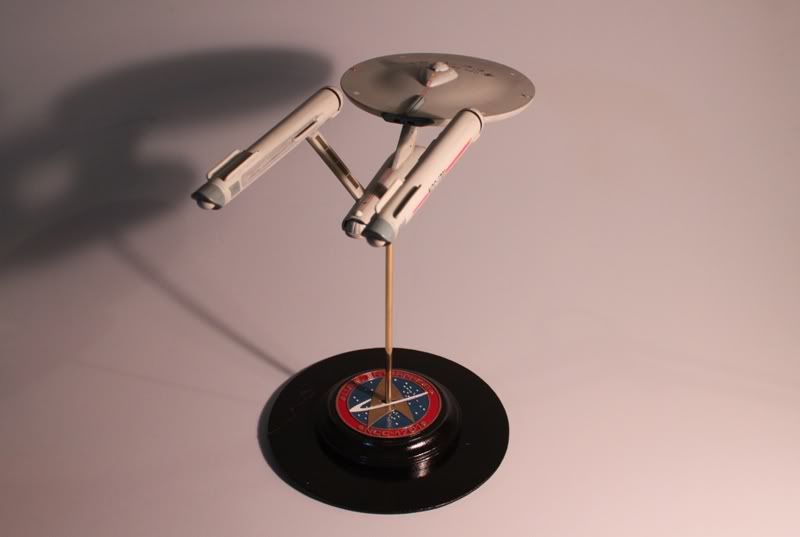
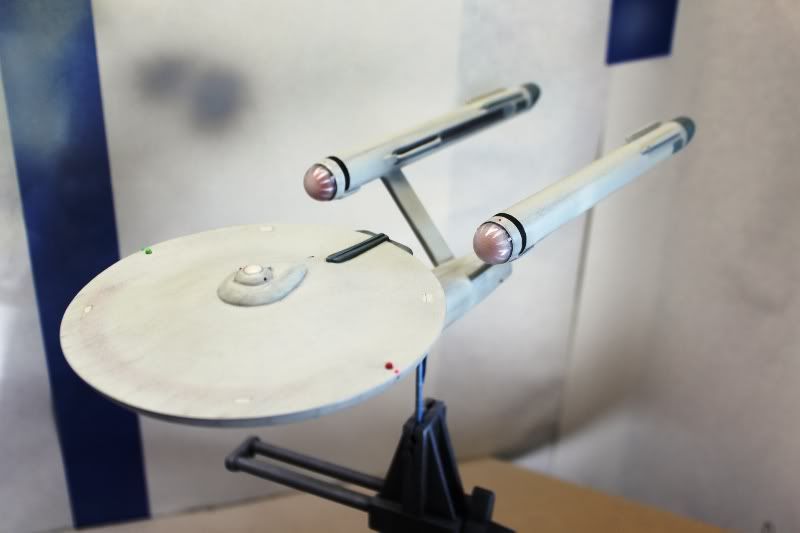
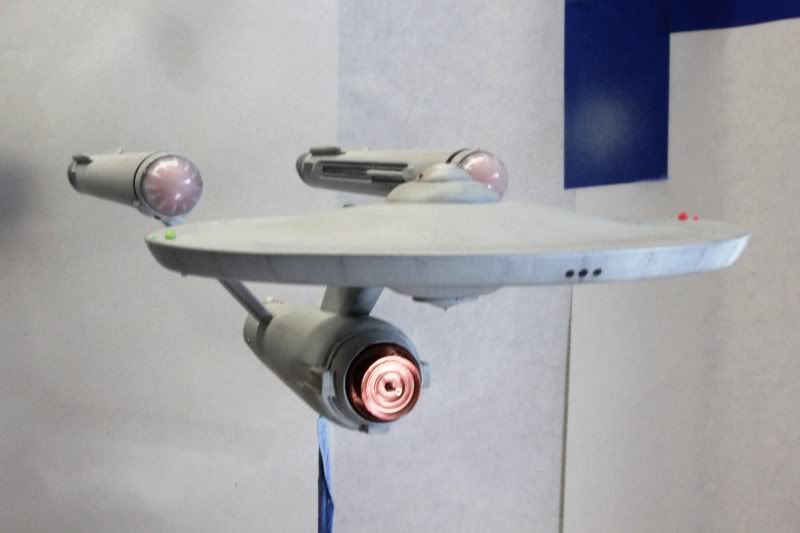
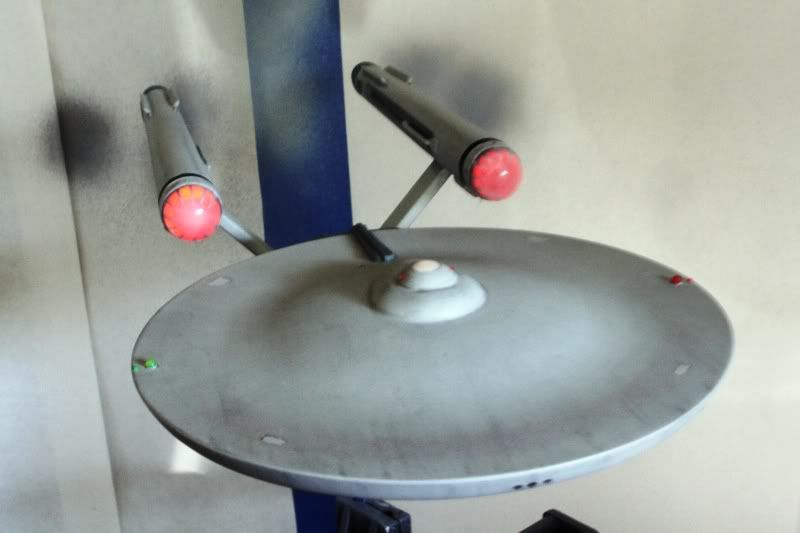
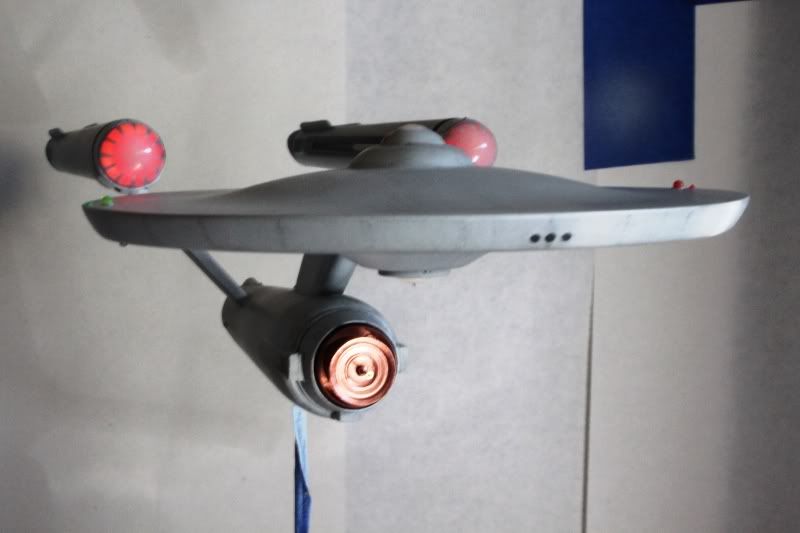
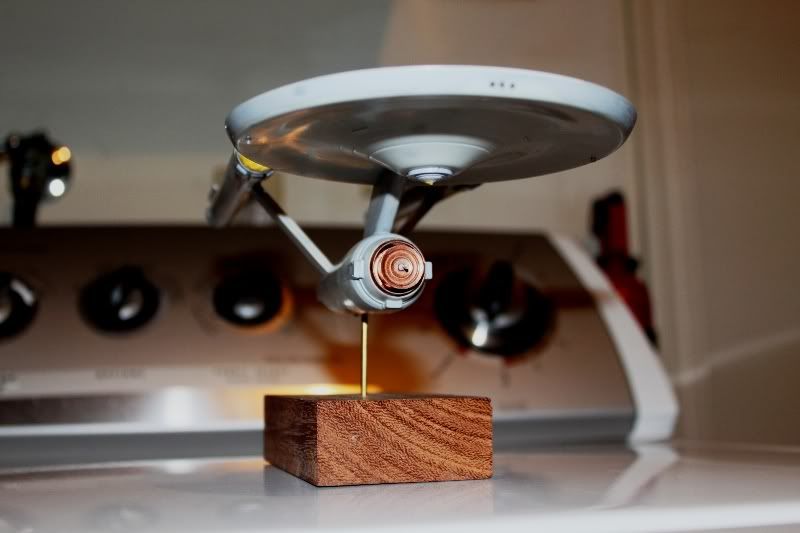
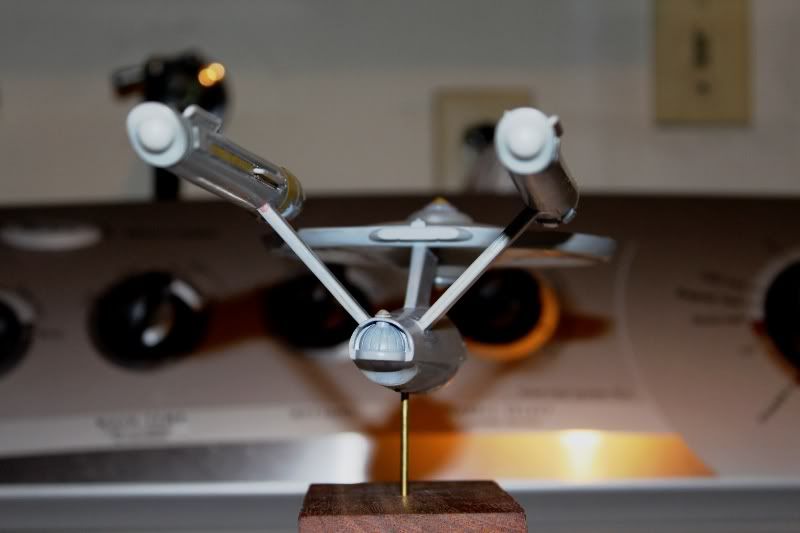
Here are the finshed pics of my recently completed production series version of the most famous starship in science fiction history-the USS Enterprise!
Outdoor pics taken on an overcast day to capture the actual colors. I've been told she looks much larger than actual size in the first three pics:

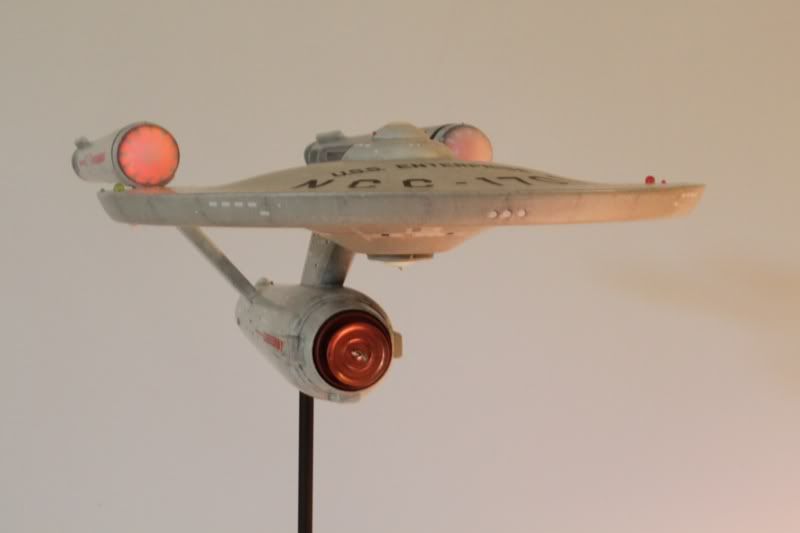
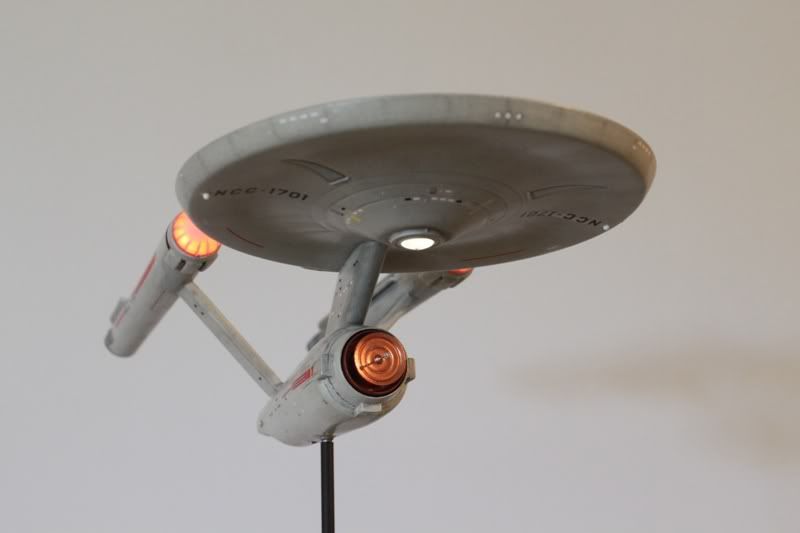
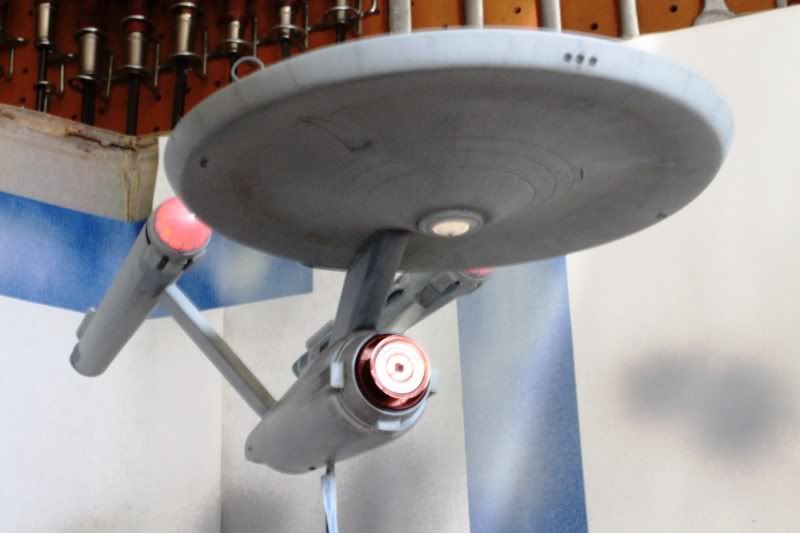
Shots taken indoors against a neutral backdrop with "natural" lighting:
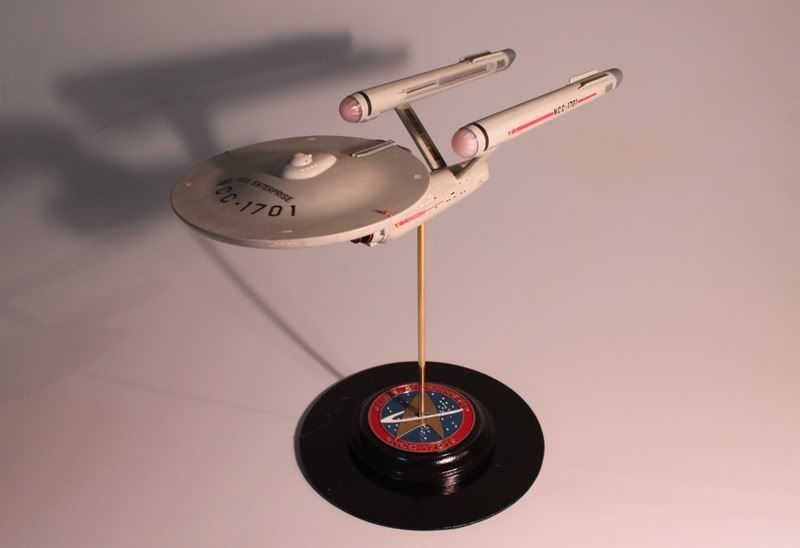
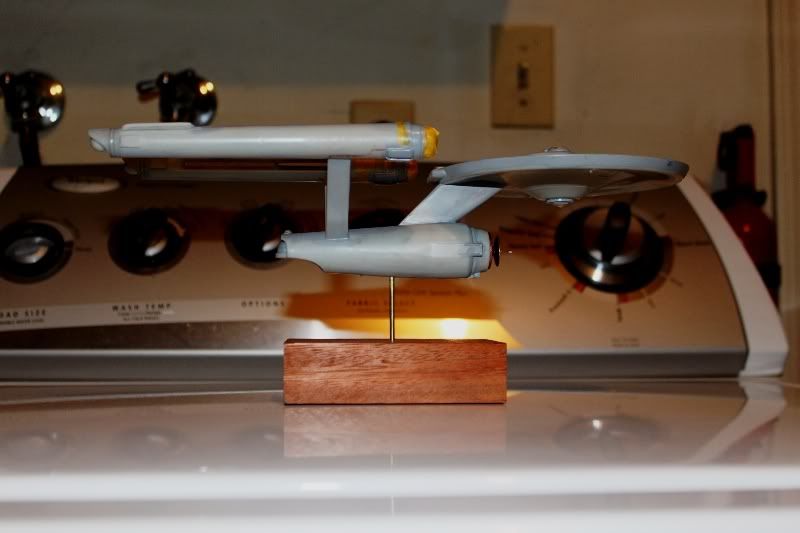
On the stand:
Anyone interested in this model's construction can view my build thread here:
http://forum.ipmsusa...e__gopid__56178
For more finished and in progress pics view my album on Photobucket:
http://s146.photobucket.com/albums/r259/Trekriffic/TOS%20Enterprise%201-1000%20scale/
-
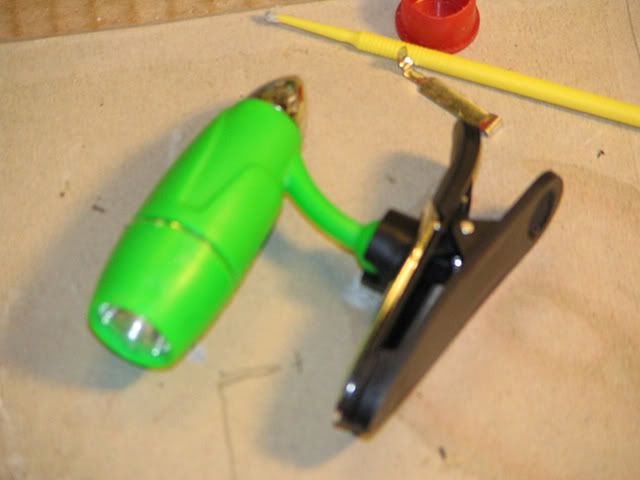
Hi everyone. Sorry not to have posted much lately. I did end up making the bulbs with brass collars for the stern strobes:
I also did the following...
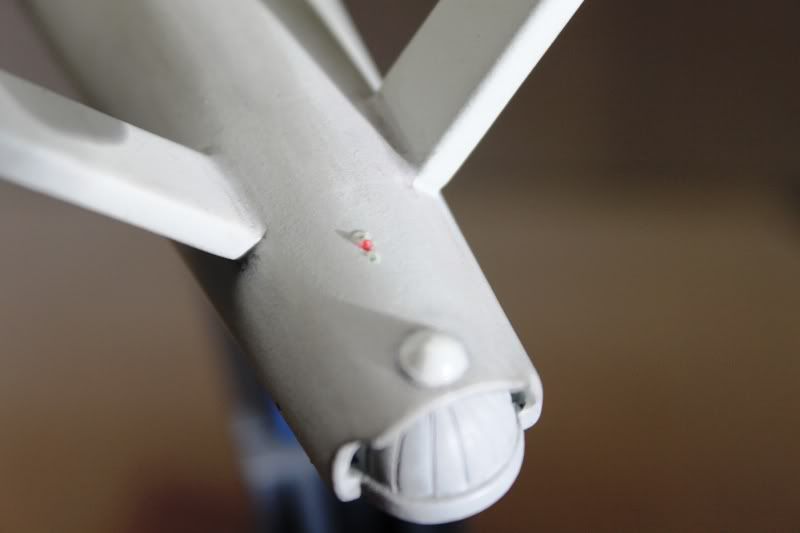
1) Added the tiny lights that go above the bussard dome collars. They light up too.:
2) Finished the spine lights over the hangar bay:
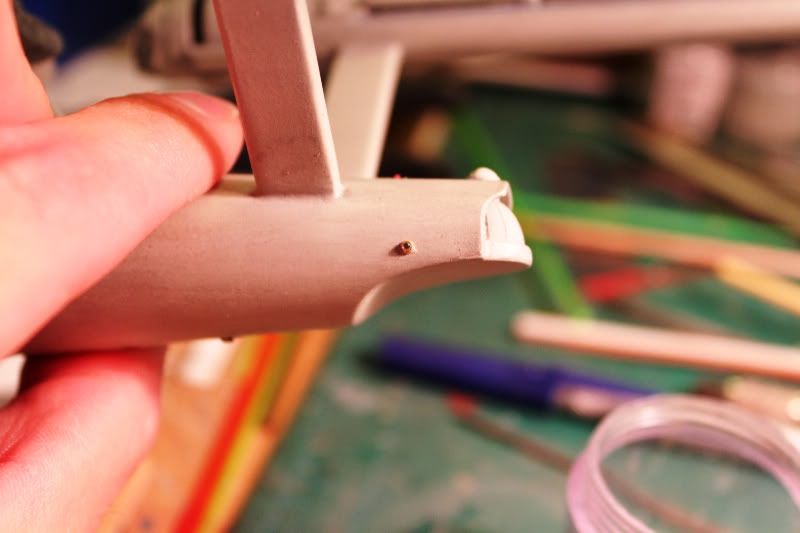
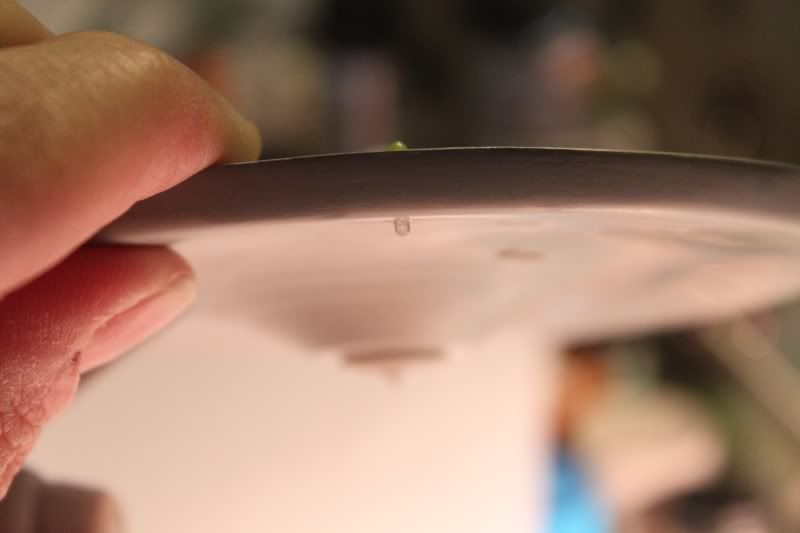
3) Shaped and filed the tiny teardrop-shaped lights outboard of the flashers on the upper saucer:
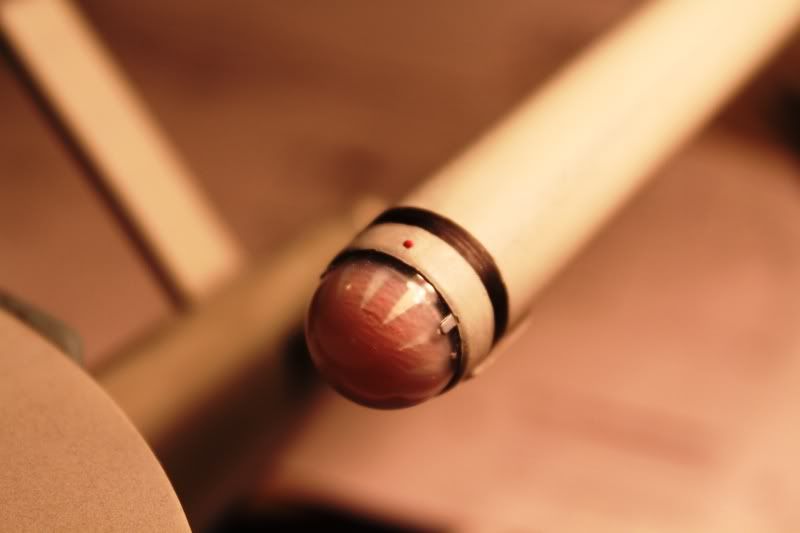
4) Replaced the round nipples on either side of the bridge deck with clear red acrylic rod so they light up:
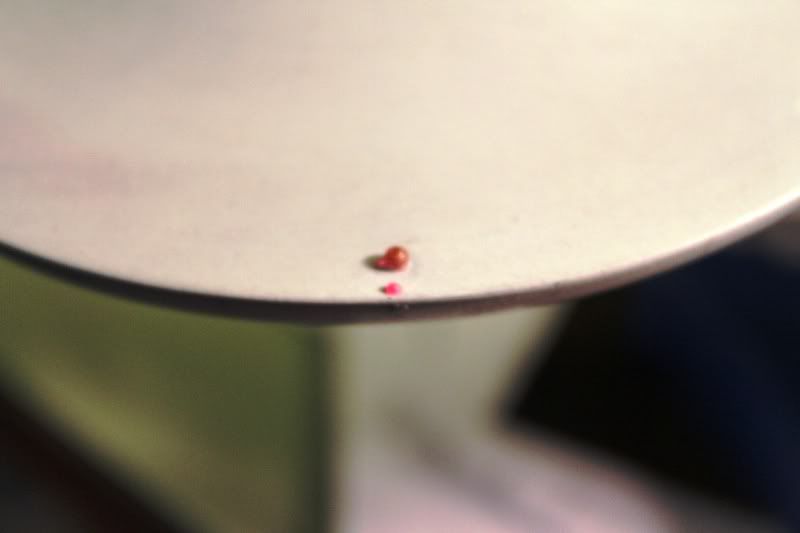
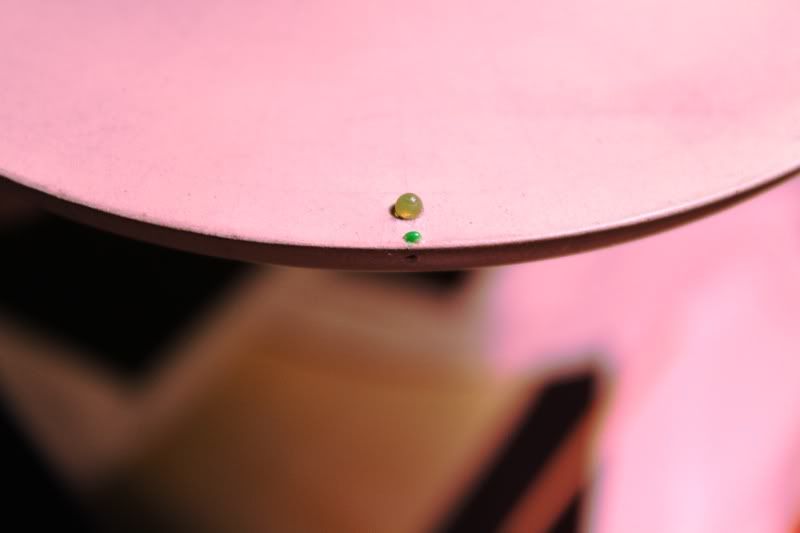
5) Drilled holes and added the tiny lights that can be seen on the saucer rim itself at the 90 and 270 degree positions:
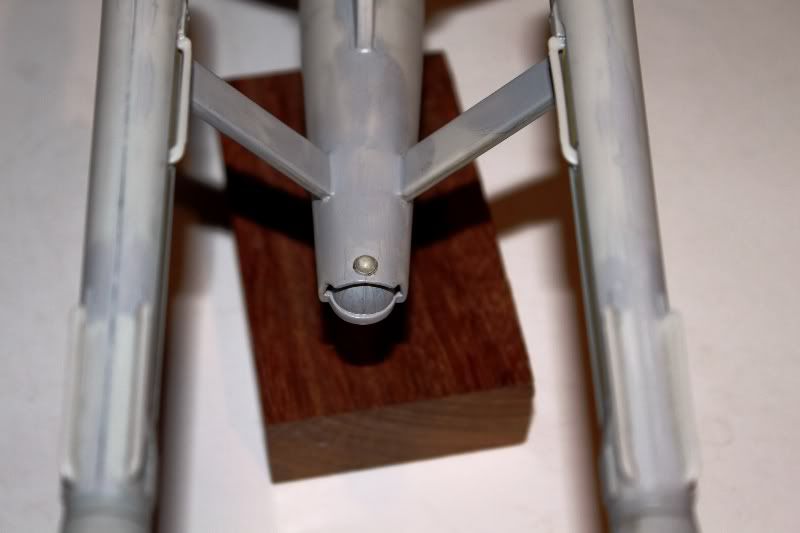
6) Replaced the plastic tip on the brass deflector spike with a brass piece turned on my dremel/lathe.
I also repainted the dish to be copper metallic with no weathering.:
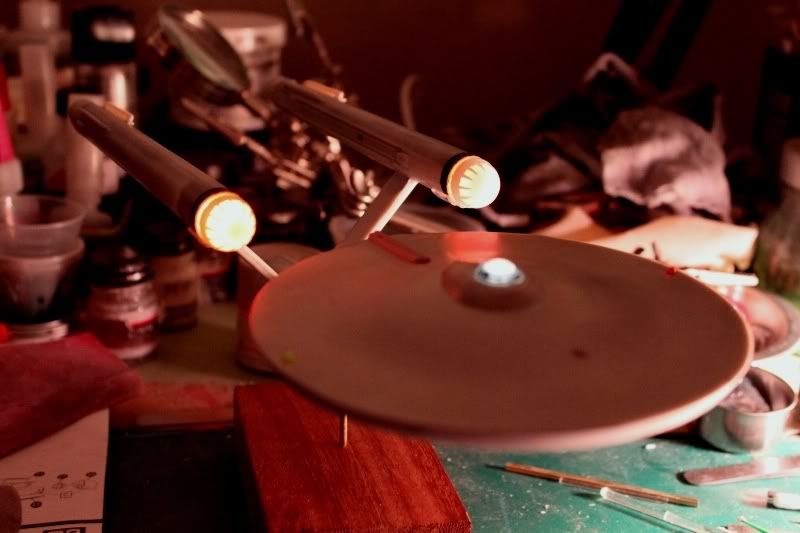
Here is the ship as she looks right now after basecoating and weathering with pastels and gel ink pens and a few coats of Dullcote.
I tried to keep it subtle...
Lit up!
SInce these pics were taken I've given her a rubdown with Model Wax.
She's satiny smooth now and just a tad darker than before. The weathering is even a little more muted.
Next up is decals!
-
No. That kit appears to have died on the vine I'm afraid.
-
I love seeing models lit up. This looks very cool. Nice job on the build.
Did the hangar bay come with this kit or was it scratch built?
Bill
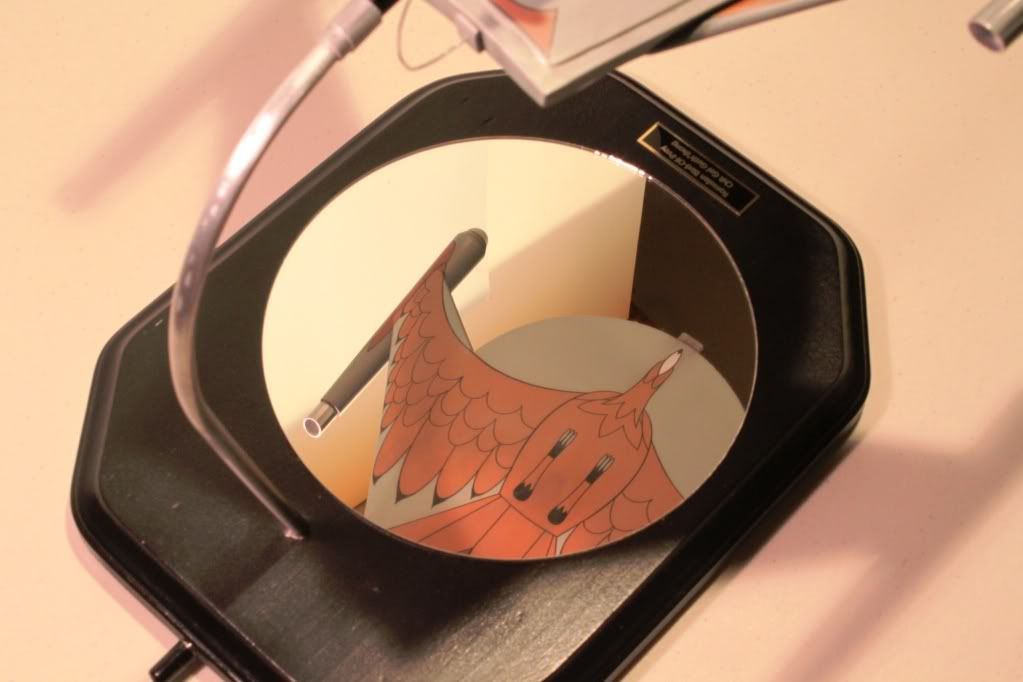
The hangar bay was scratch built Bill.
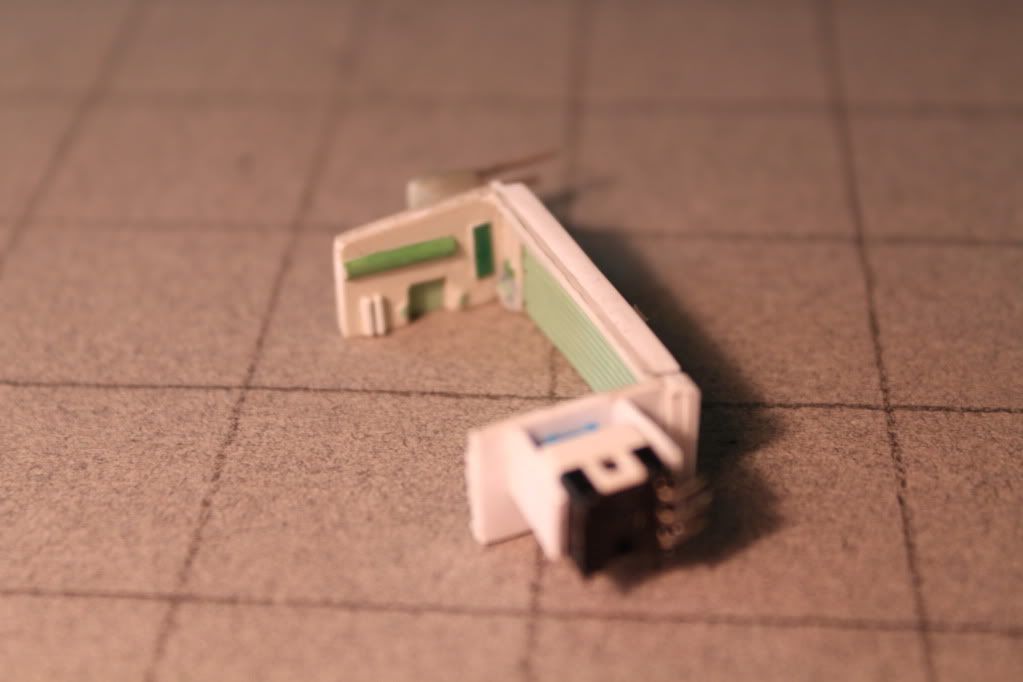
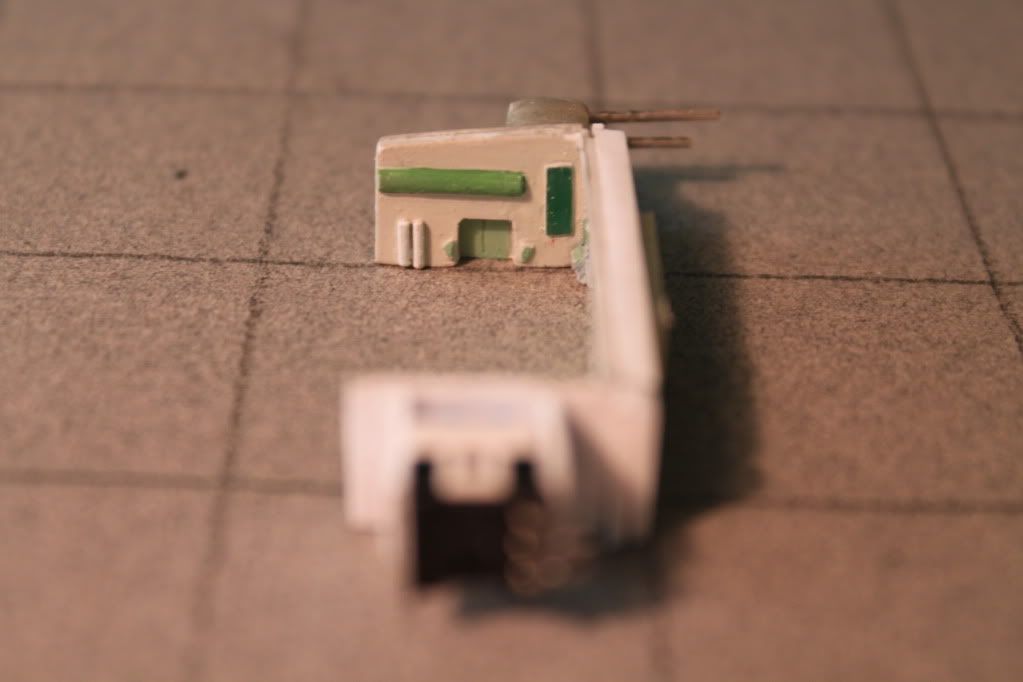
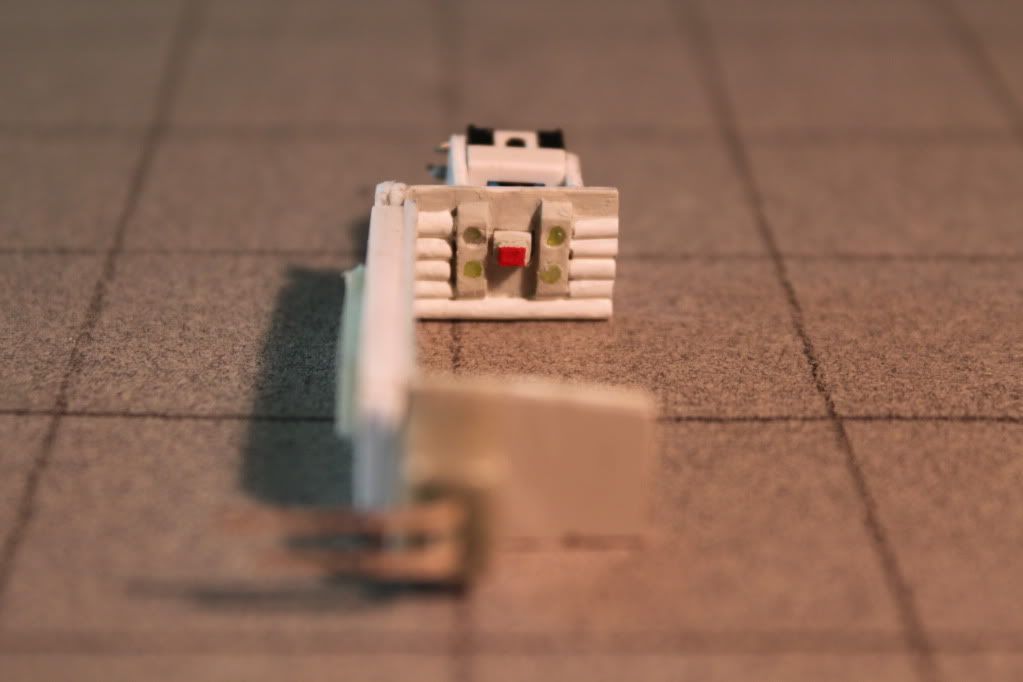
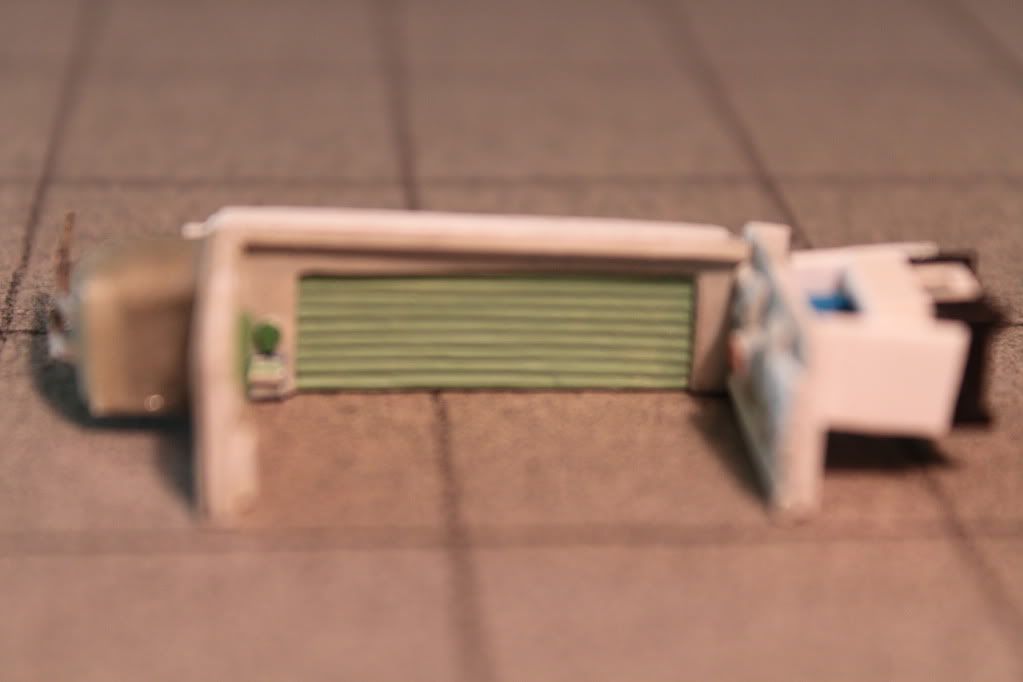
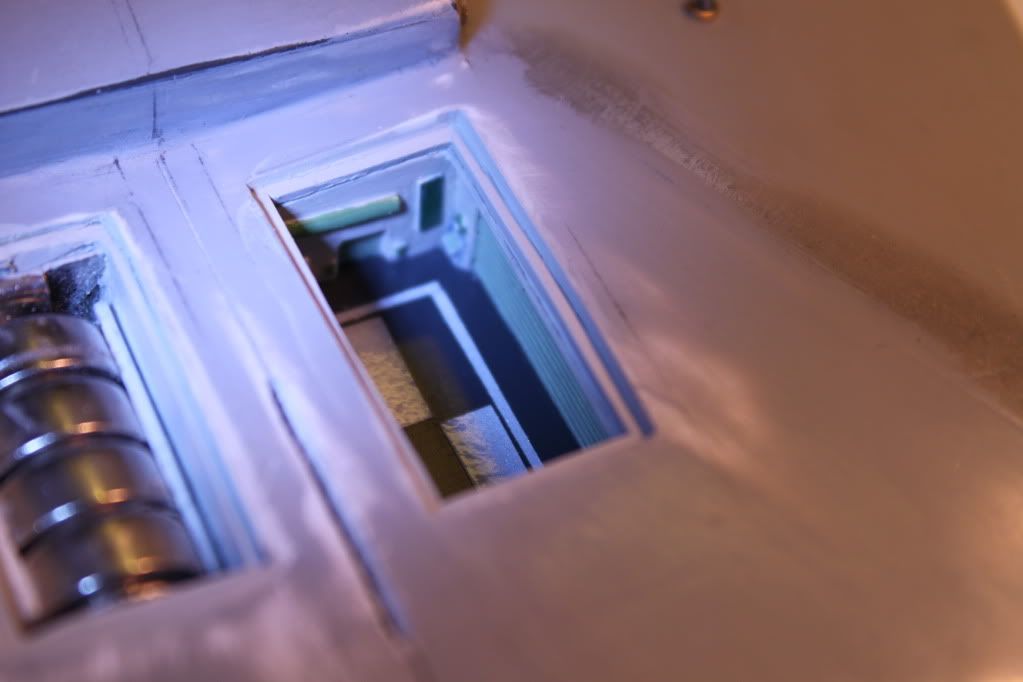
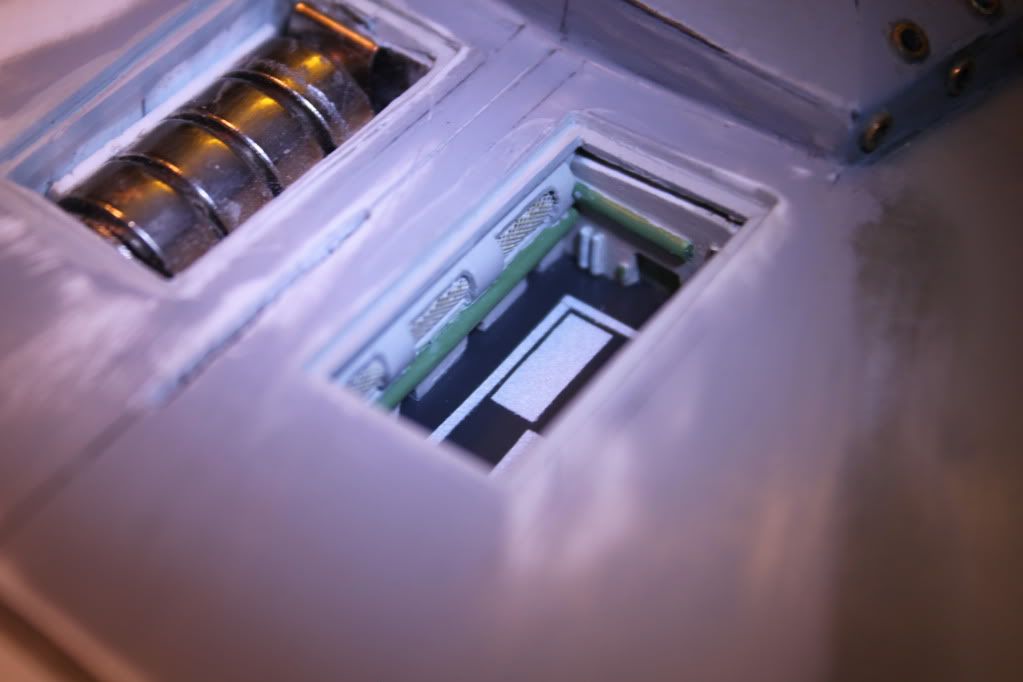
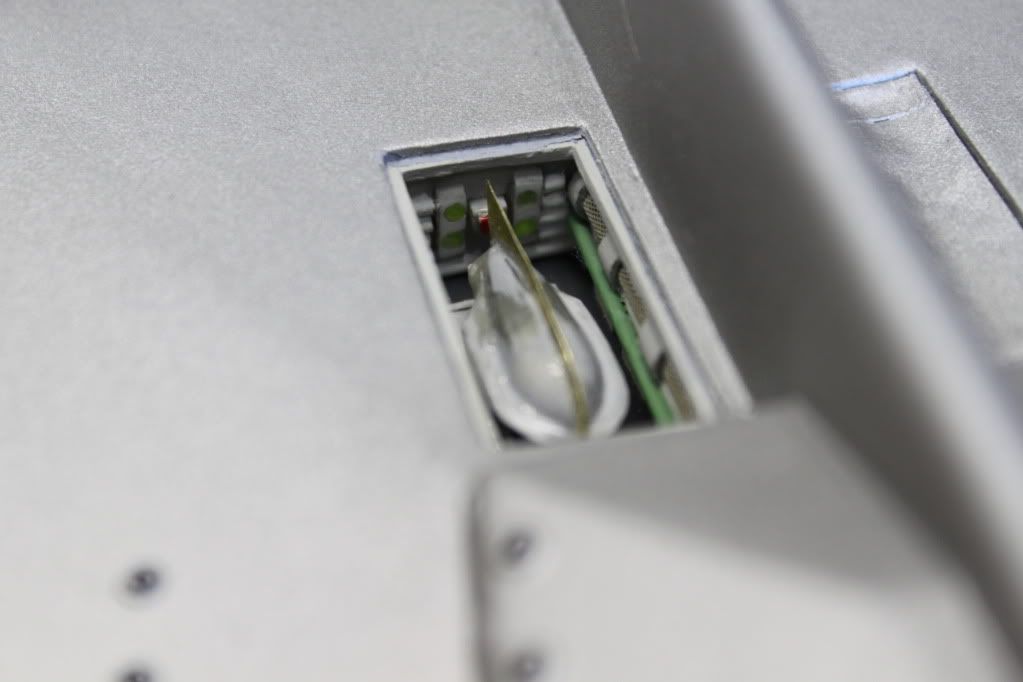
It's lit with a green rectangular LED in the forward bulkhead, 4 spot lights along the base of the inboard wall, and one "tractor beam" LED in the center of the floor.
Here are some in progress shots of it:
Fiber optic spotlights:
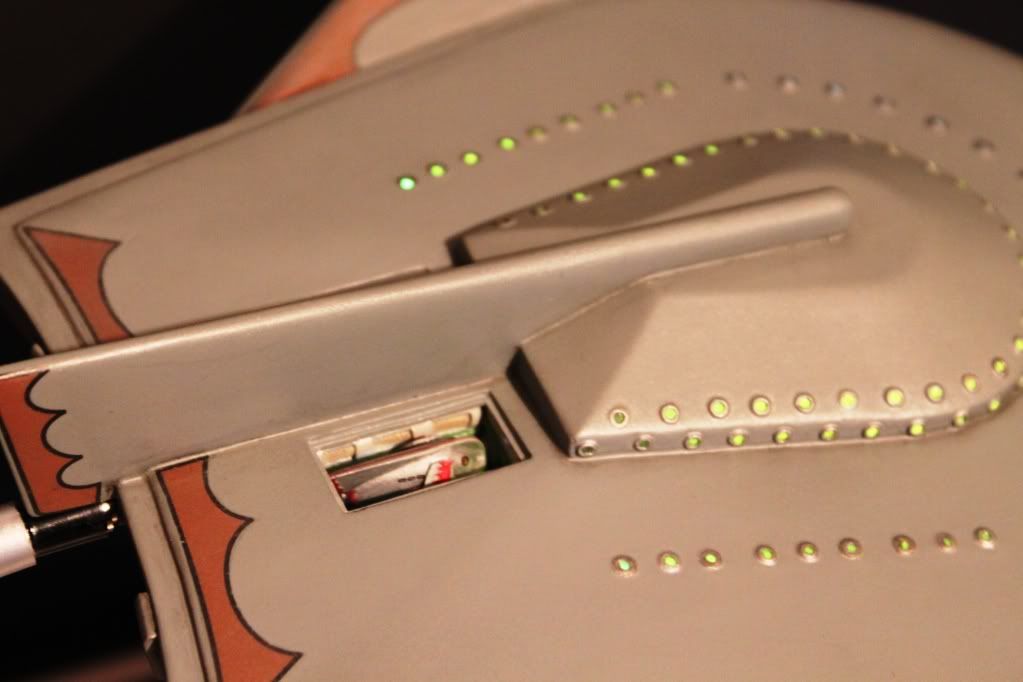
Test fitting (the other bay is the onboard battery box):
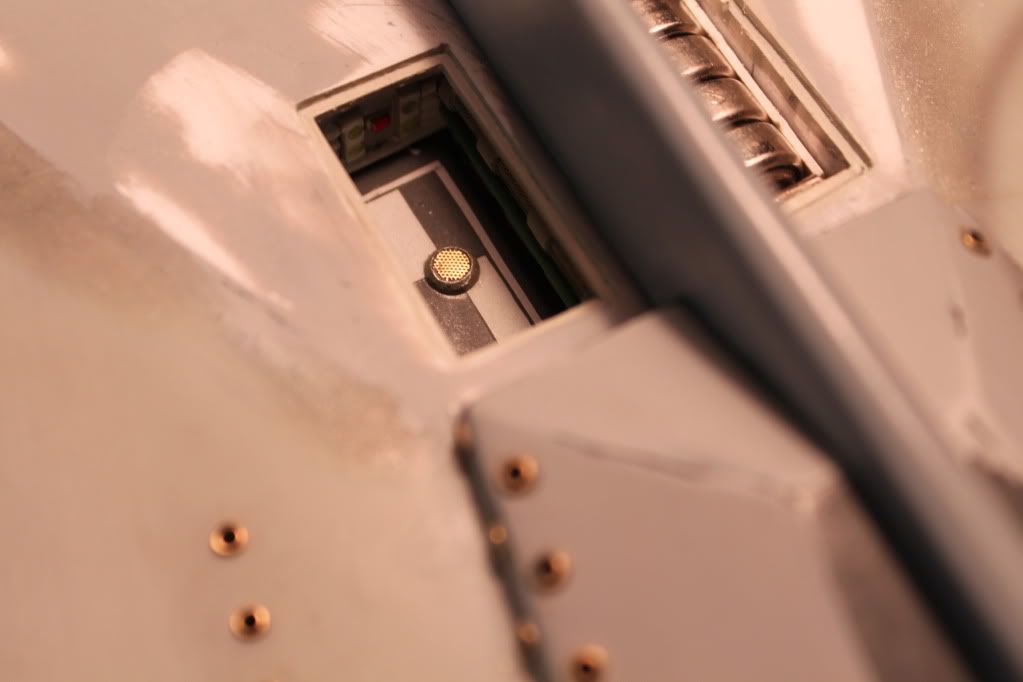
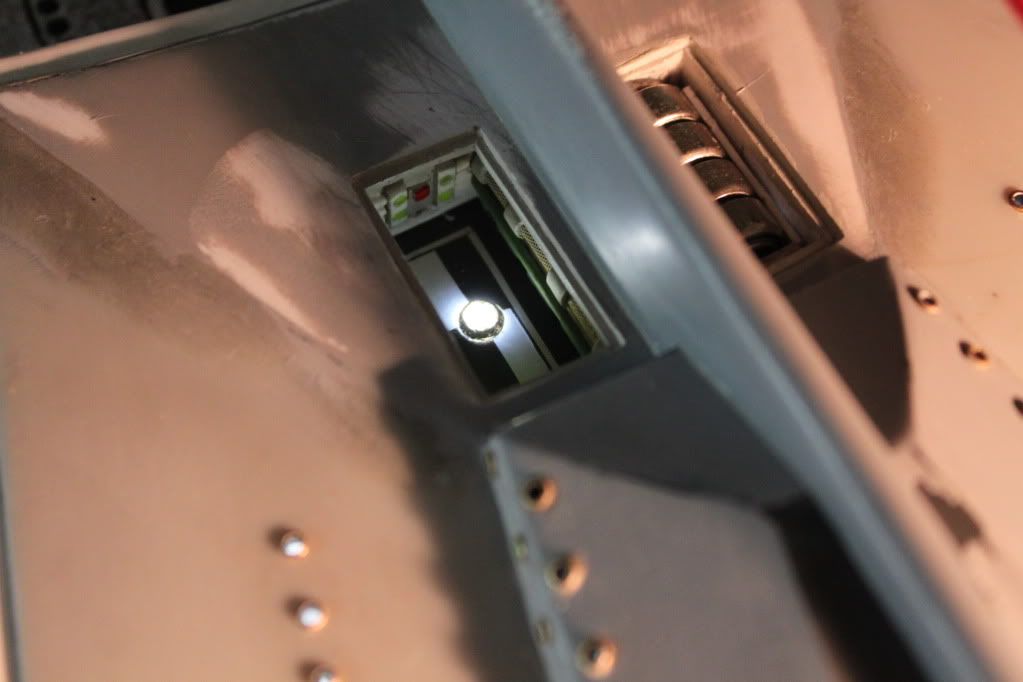
Lit up:
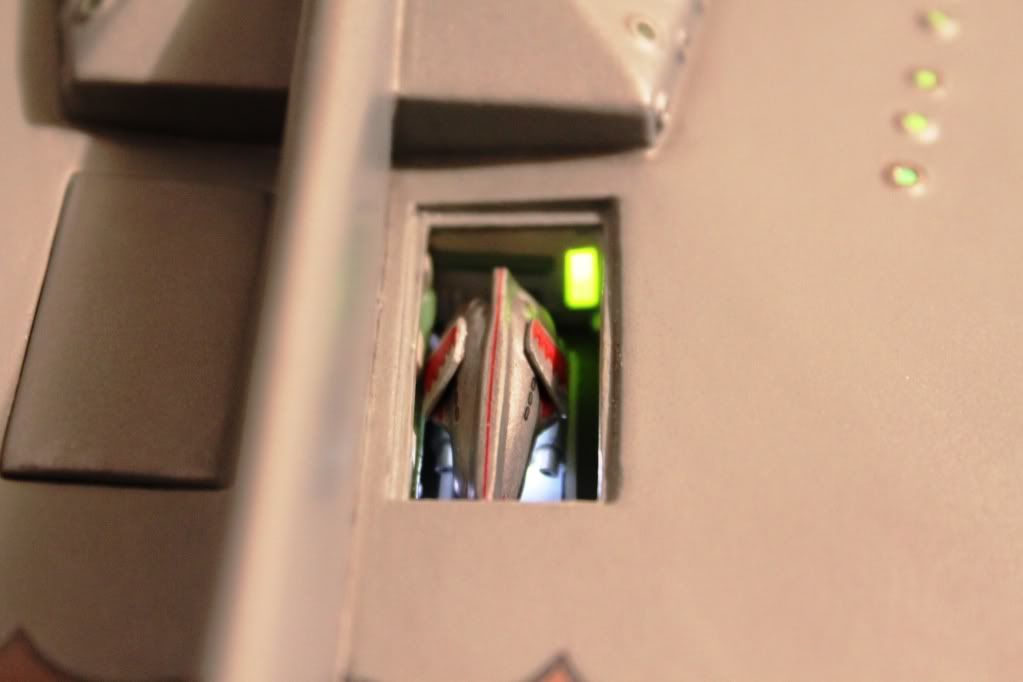
Tractor bean emitter installed and lit::
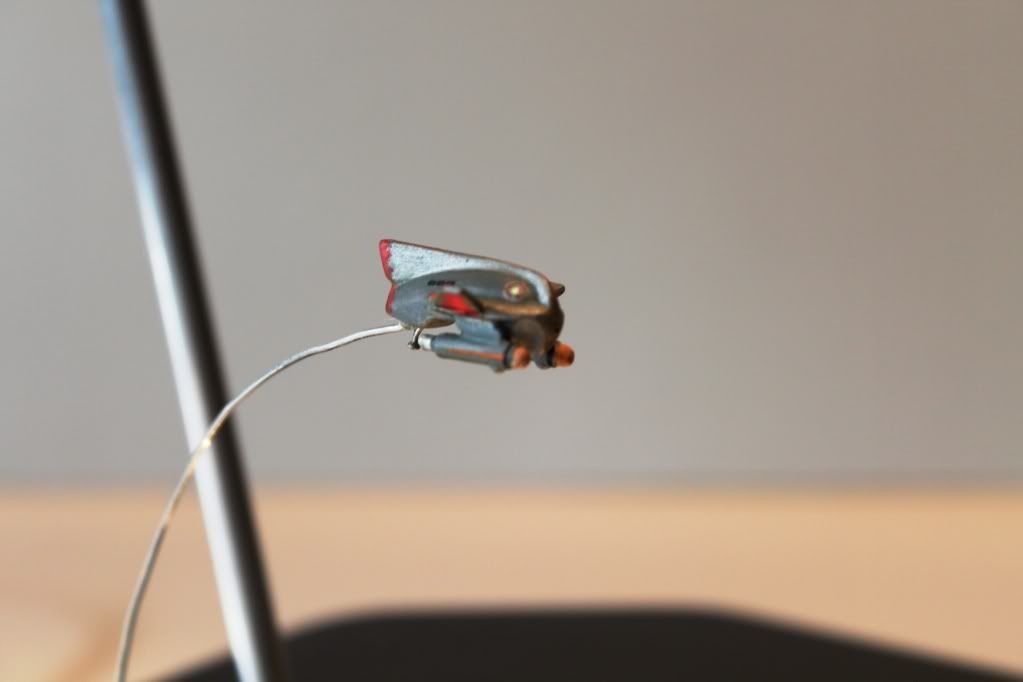
Talon fighter (in progress) in bay:
You can see all the WIP pics on this build here:
-
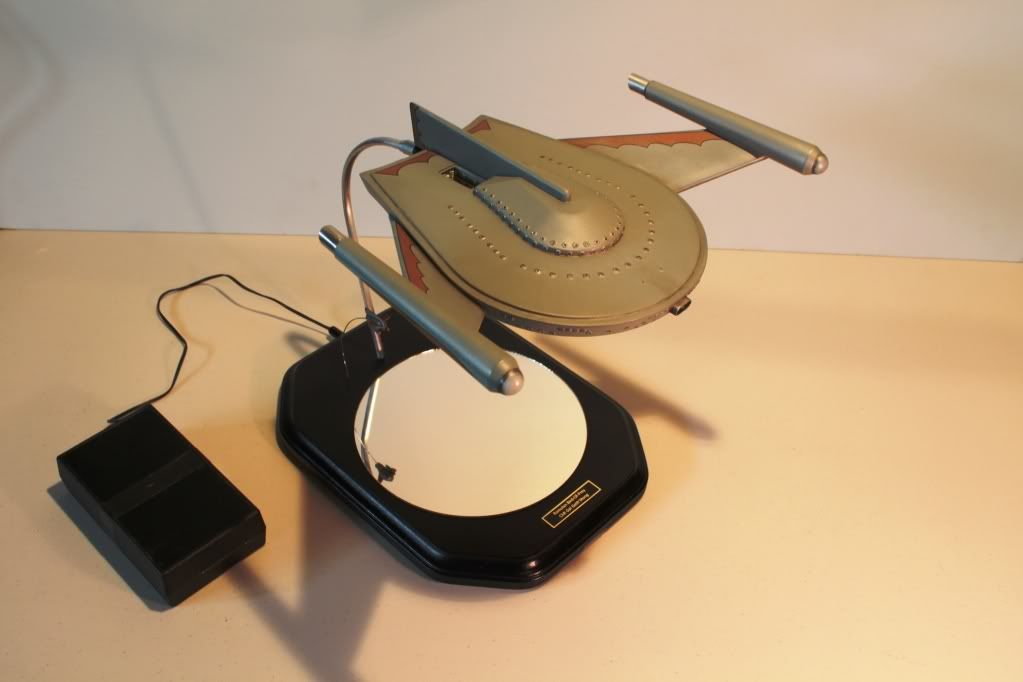
Here are some more pics of the hangar bay and fighters:
-
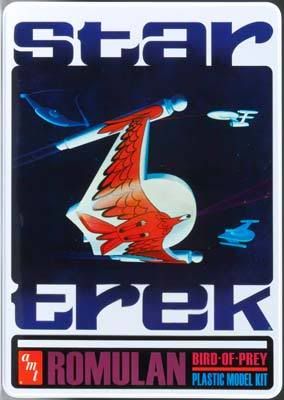
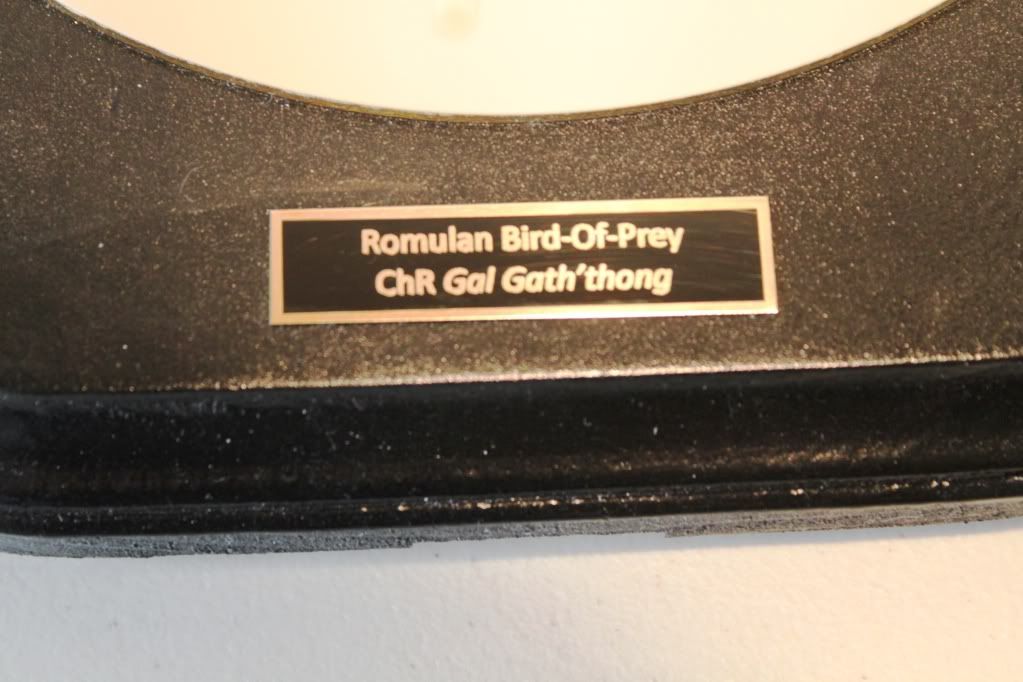
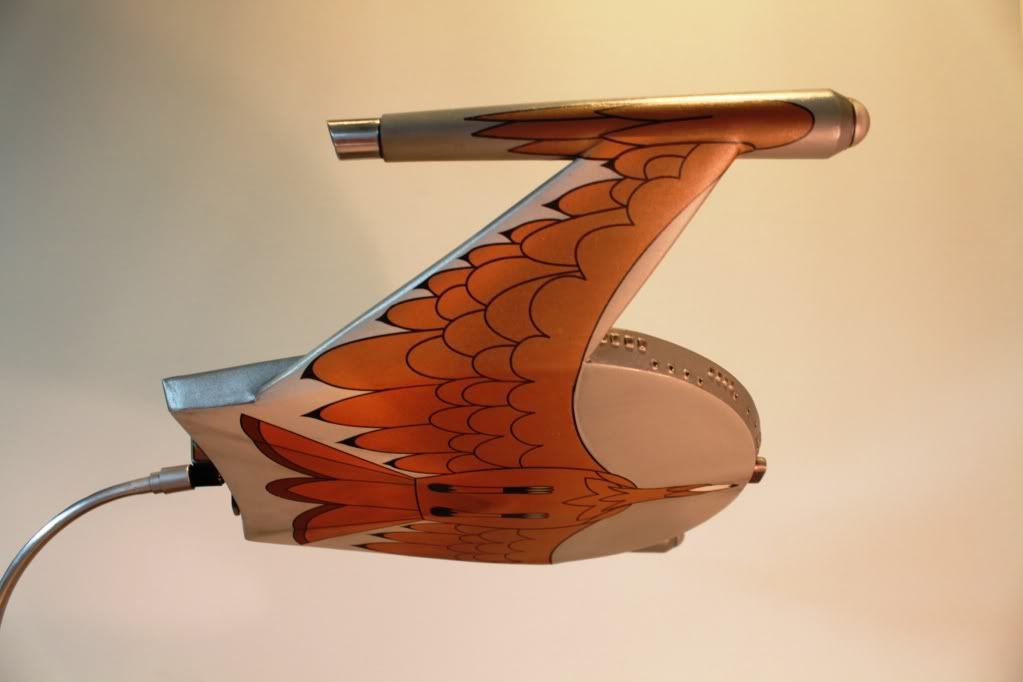
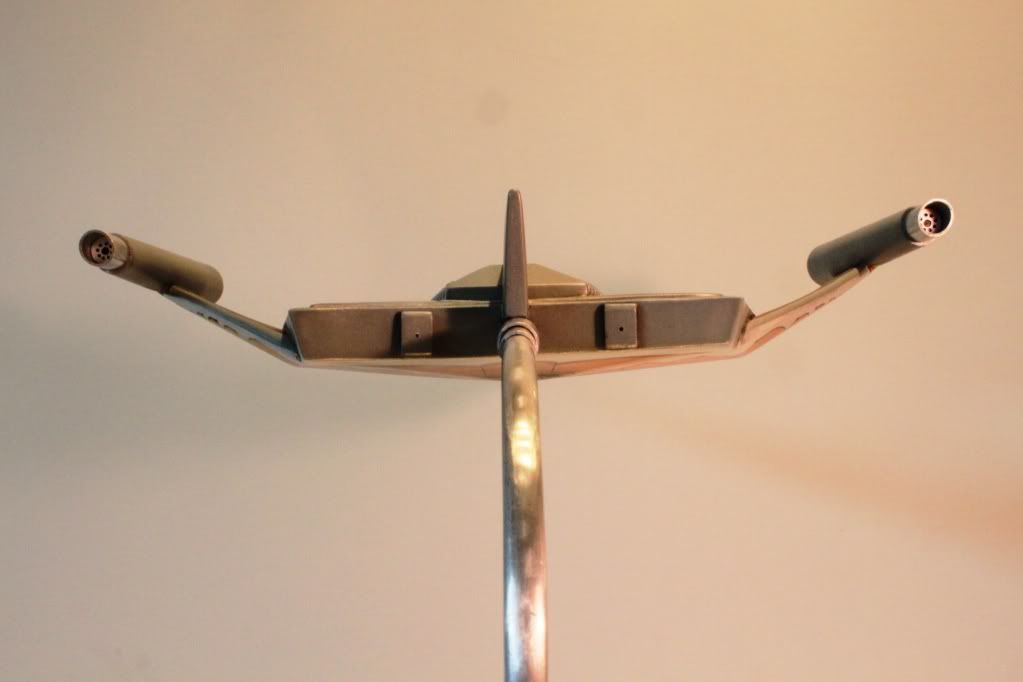
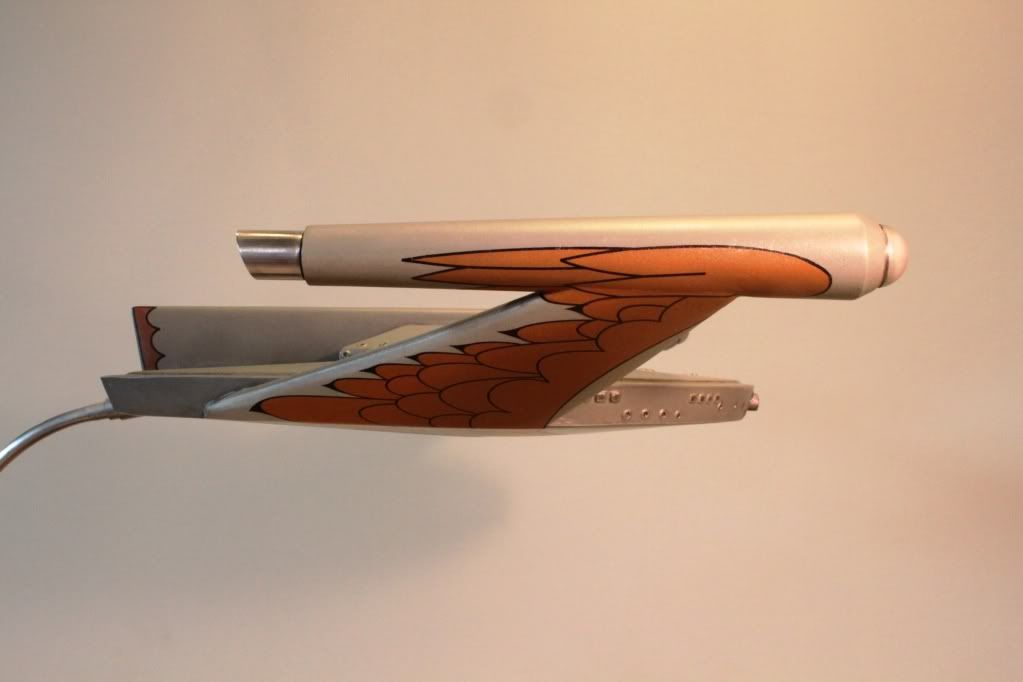
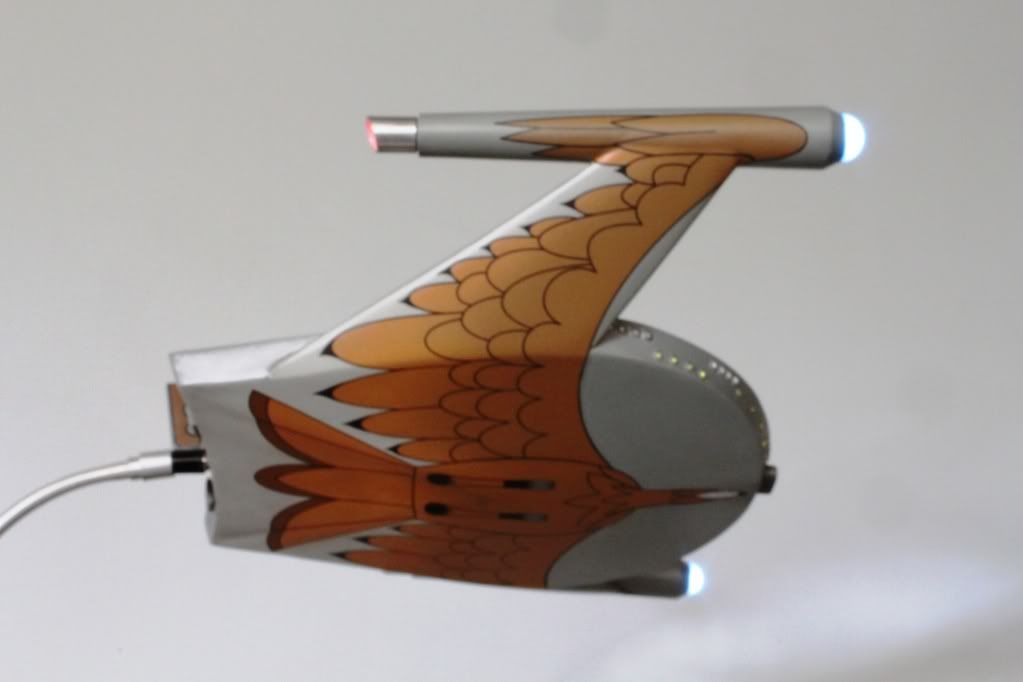
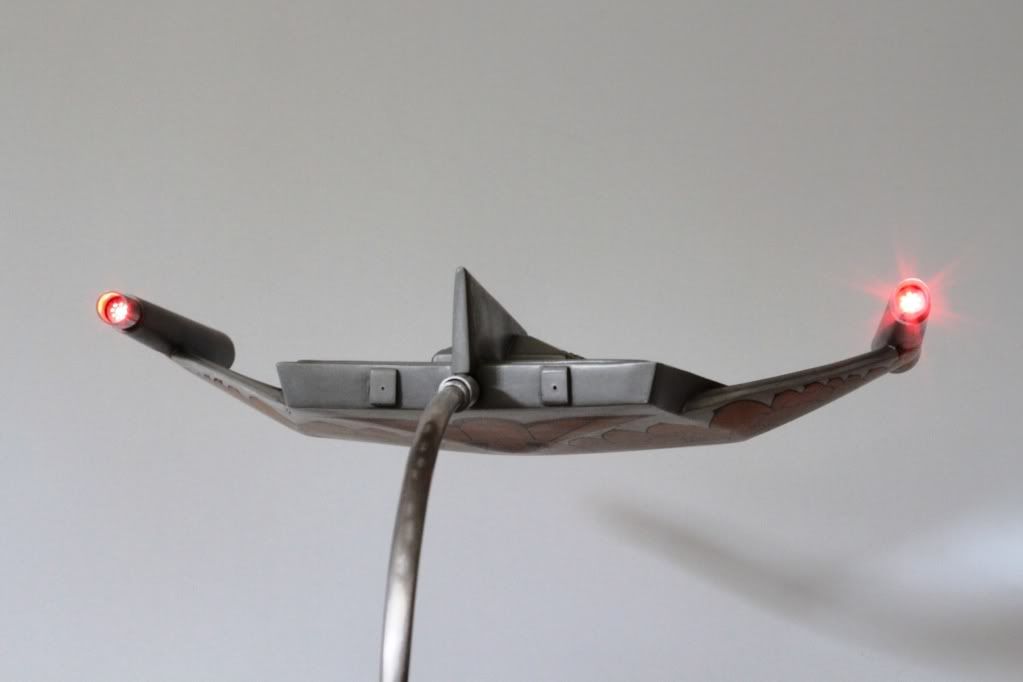
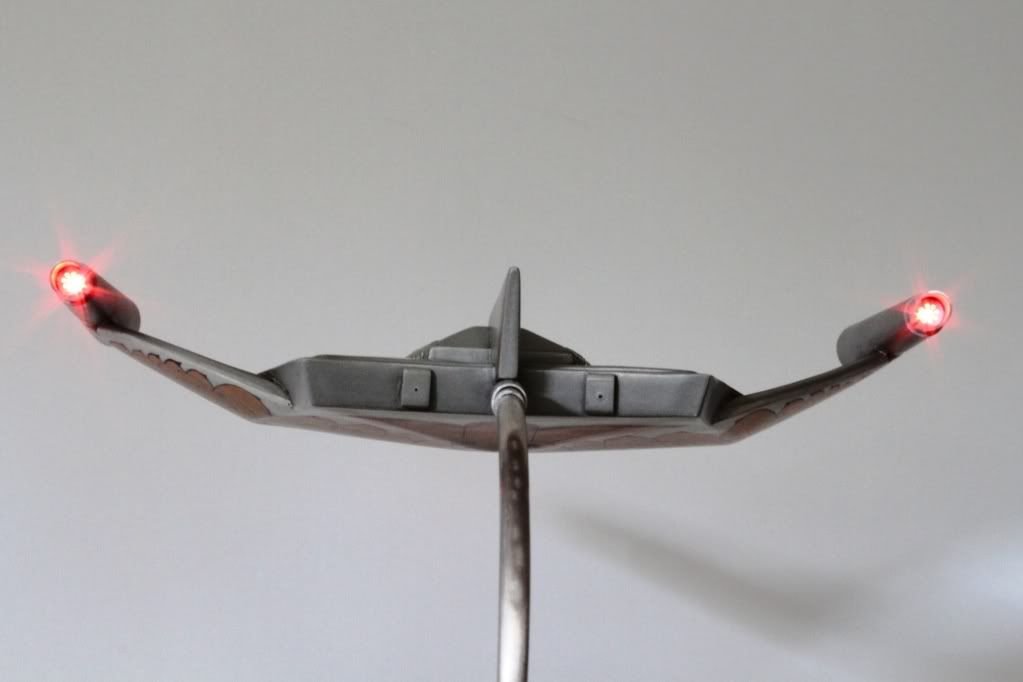
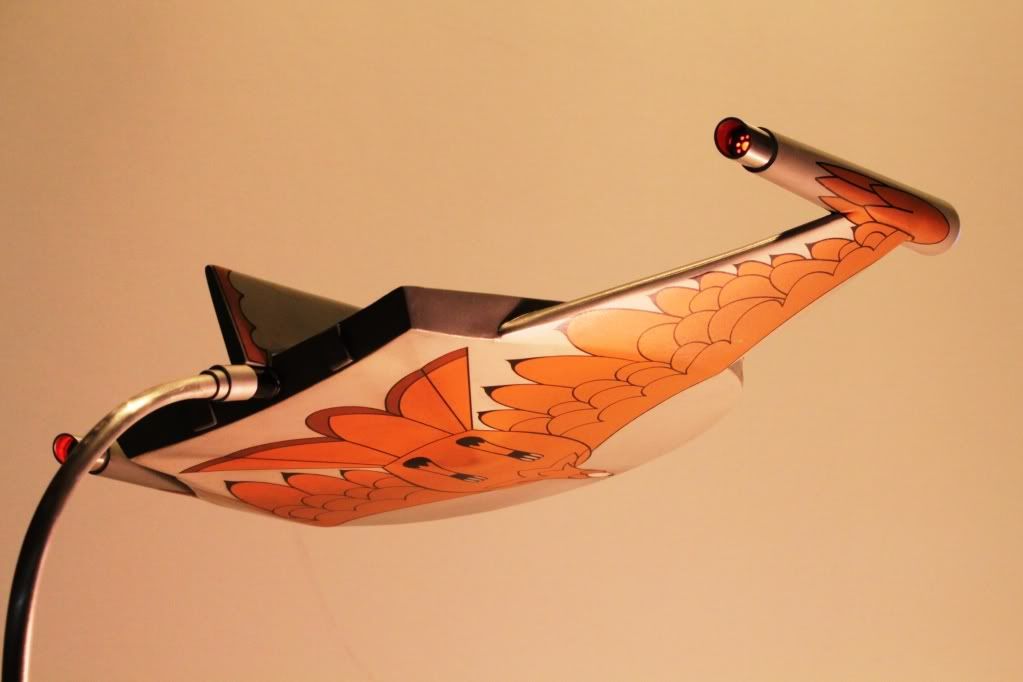
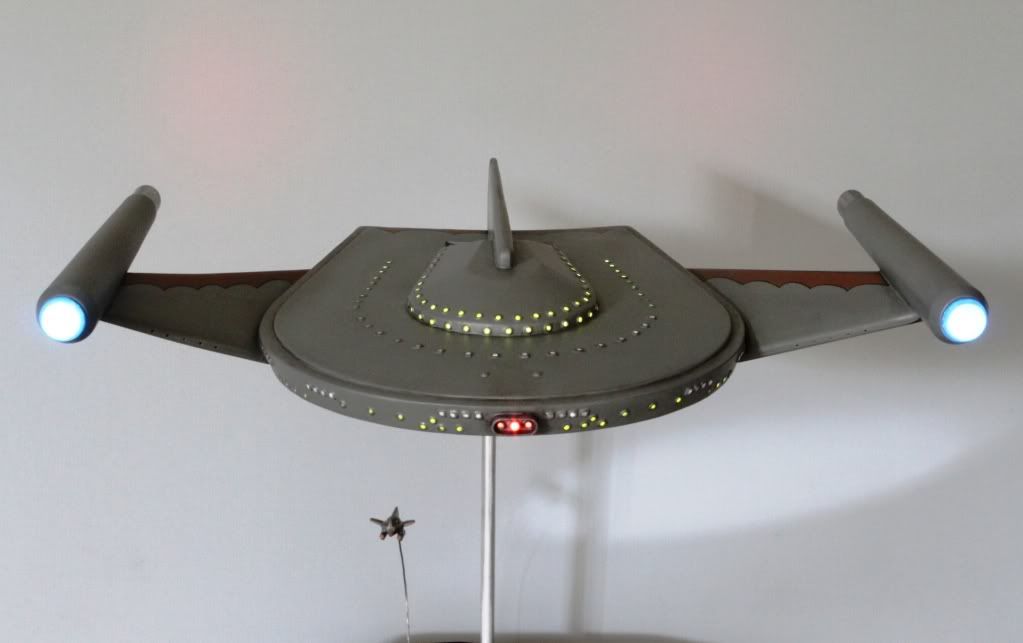
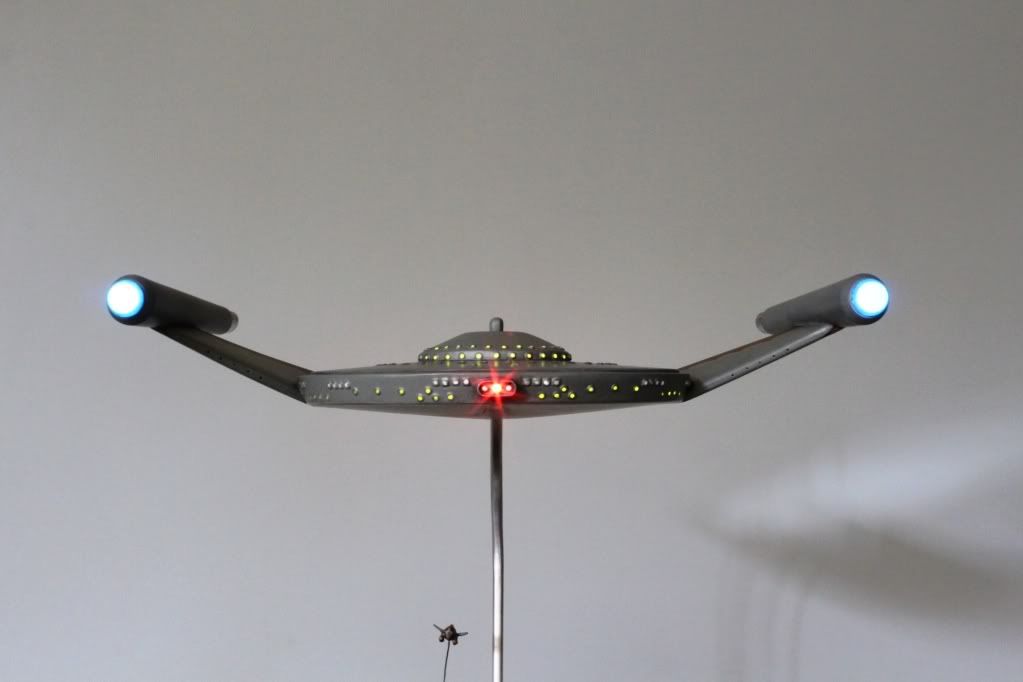
This is my build of the re-issued AMT Romulan Bird-Of-Prey kit completed after about 9 months of work.
The kit was extensively modified in an effort to more closely approximate the look and feel of the studio model.
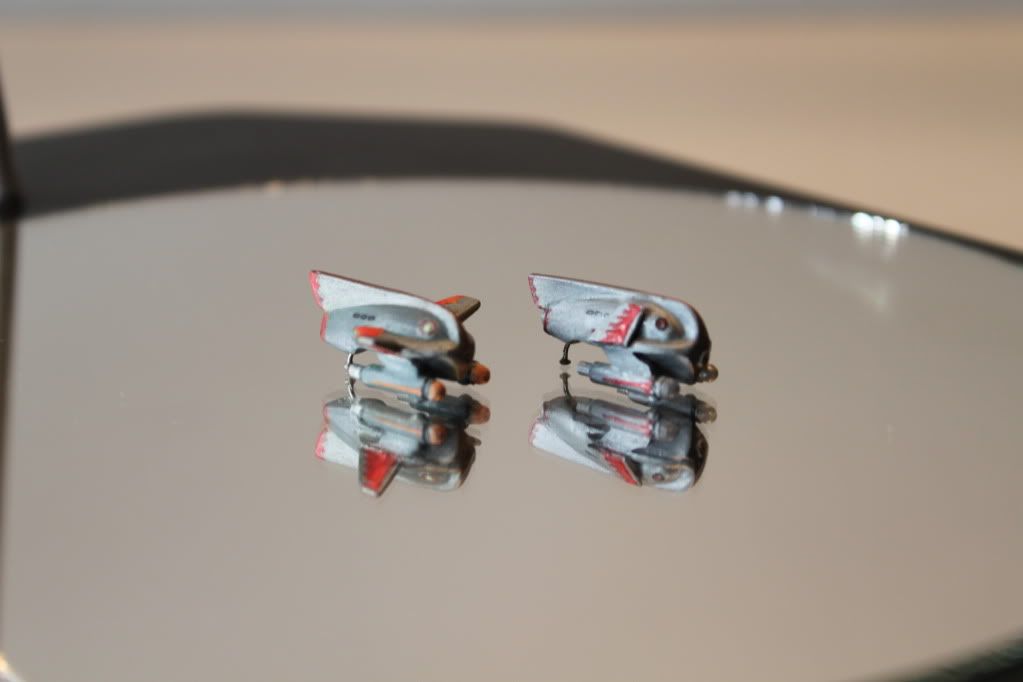
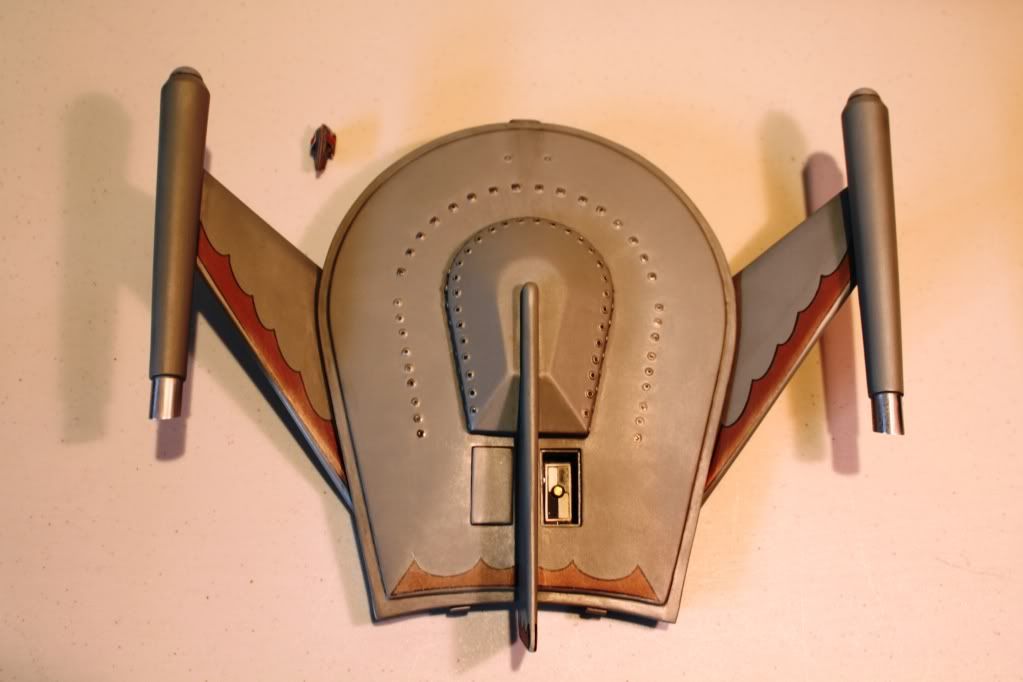
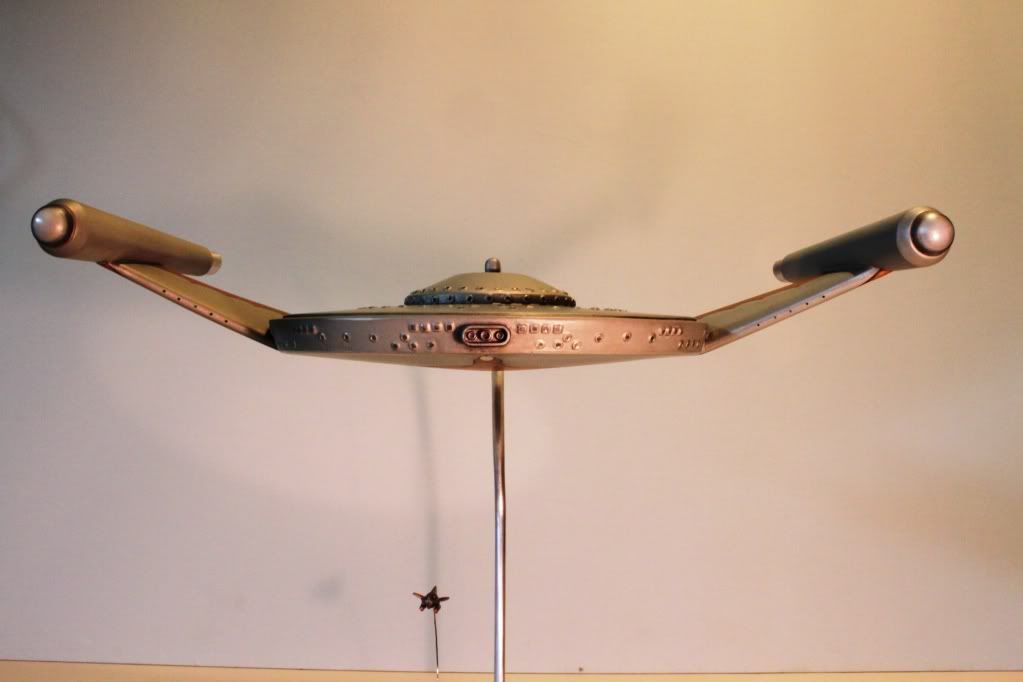
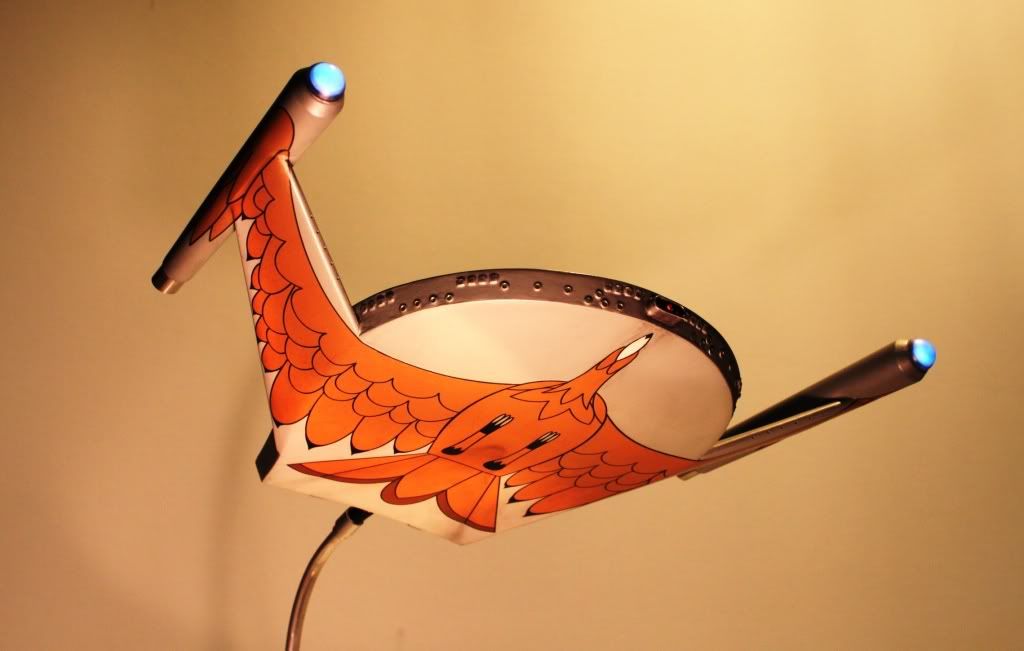
Most of the changes involved lengthening the hull and flattening the aft angle of the upper cupola, shortening and adjusting the angle of the wings for a more forward tilt, adding a stepped rim and angle to the hull perimeter with styrene tubing and sheet, drilling and filing out round windows and square sensor ports then framing the openings with brass tubing, construction of a hangar bay complete with two "Talon" fighters of my own design, and installation of an LED lighting system powered either by internal batteries or an external battery box.
The stand was also custom made.
Decals were from JTGraphics.
Box Art:
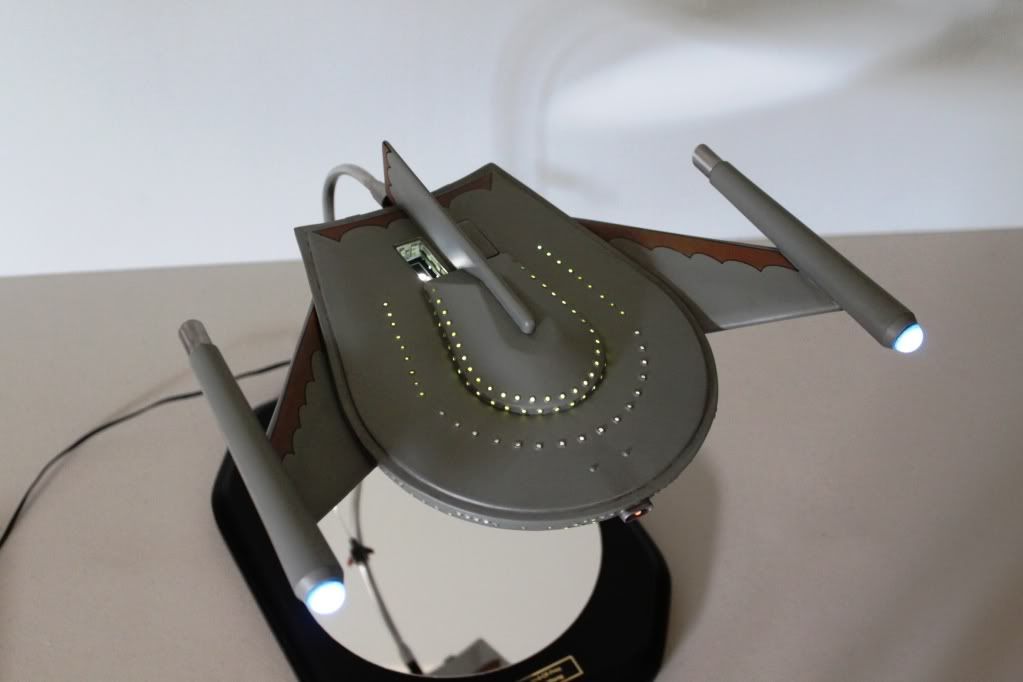
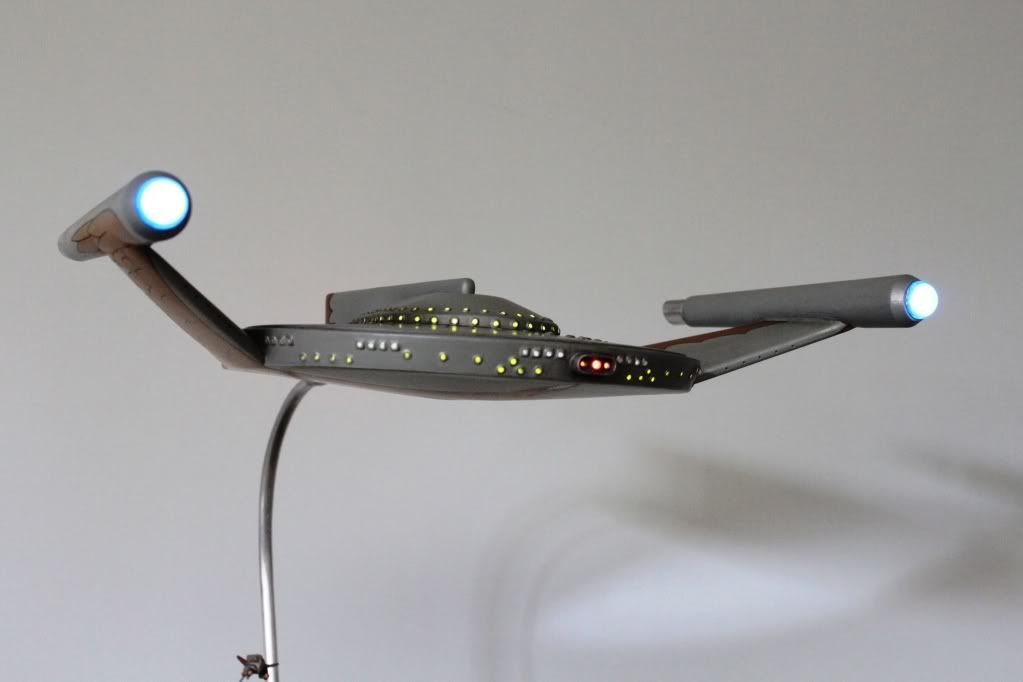
And here are pics of my model:
Let there be lights!
Kirk: "Full astern! Emergency warp speed!"
Here's a video where I discuss the construction. The Tholian I refer to is the admin over on The Tholian Web forum who asked me to make the vid.
-
Updates from last weekend...
So after work last Friday night I skipped (errrr... make that strode purposefully) out to the garage and spent about an hour on the old girl.
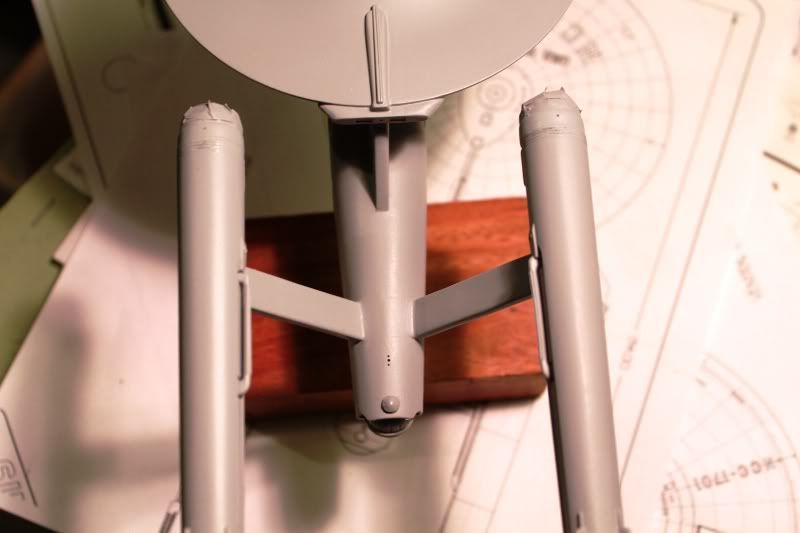
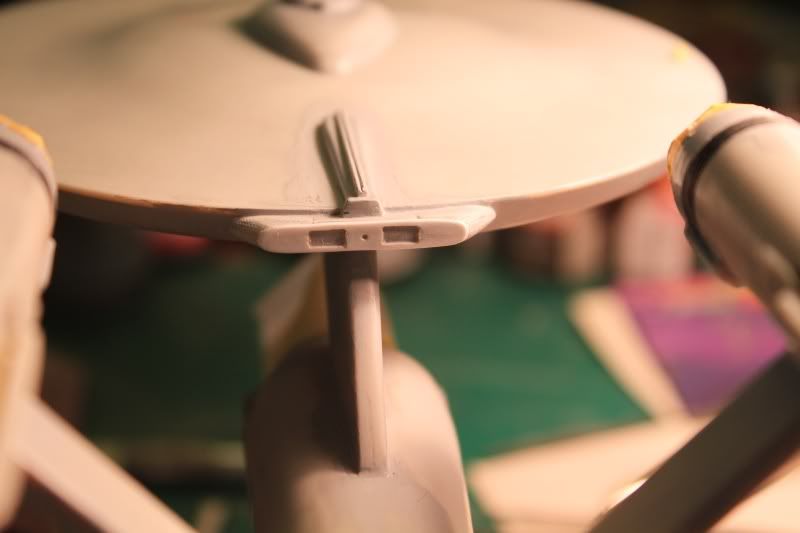
First thing I wanted to do before spraying her with Testors black enamel was to drill holes for the lights on the spine over the shuttle bay and the tops of the bussard collars.
I figured it would be easier to see what I was drilling against a gray exterior as opposed to one painted black.
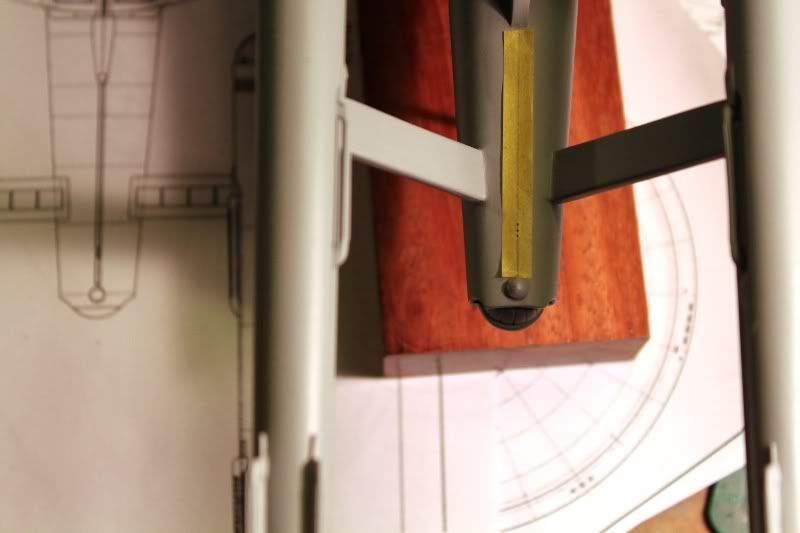
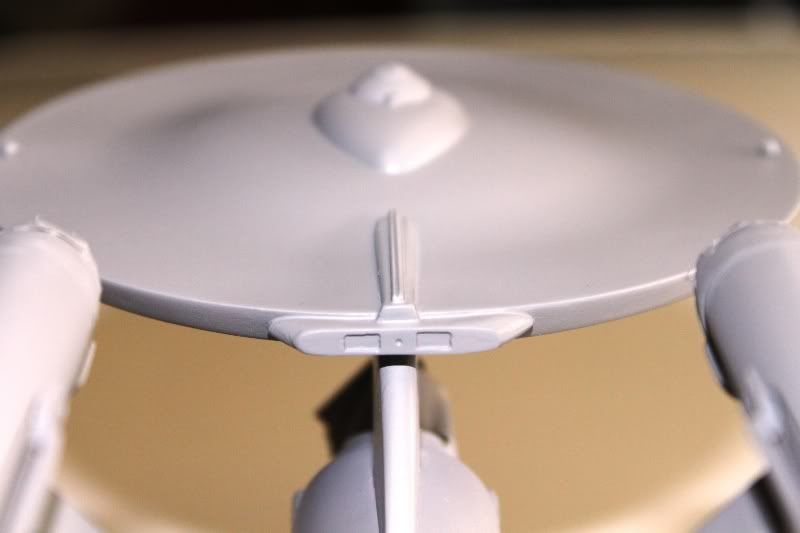
For the spine lights, I drew a line down the center of a piece of Tamiya masking tape and using my drafting calipers took measurements off Alan Sinclair's blueprint (which I had previously blown up to match the size of the model) and transferred the location of the three tiny lights onto the tape using the front edge of the stern beacon as my reference point.
After that I laid the tape down as close to the centerline of the secondary hull as I could using my drafting calipers to measure where the pencil line was centering it from the front edge of the hangar beacon, between the nacelle struts, and up to the centerline of the dorsal.
Then I took my straight pointed dental pick and pressed it thru the tape where I'd marked where the lights should be leaving indents for drilling into the model...
I removed the tape and drilled with my pinvise.
The center hole of the three spine lights is about 33% larger than the other two.
The holes on the bussard collars are the same size as the middle hole of the spine lights...
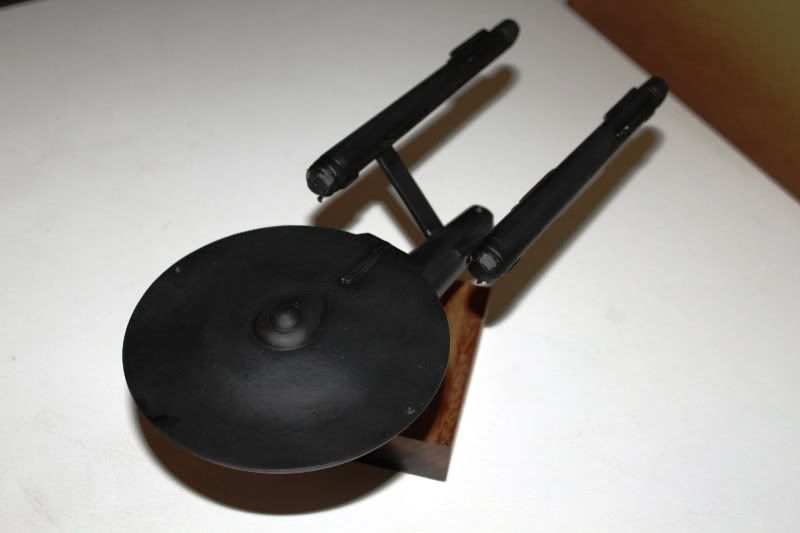
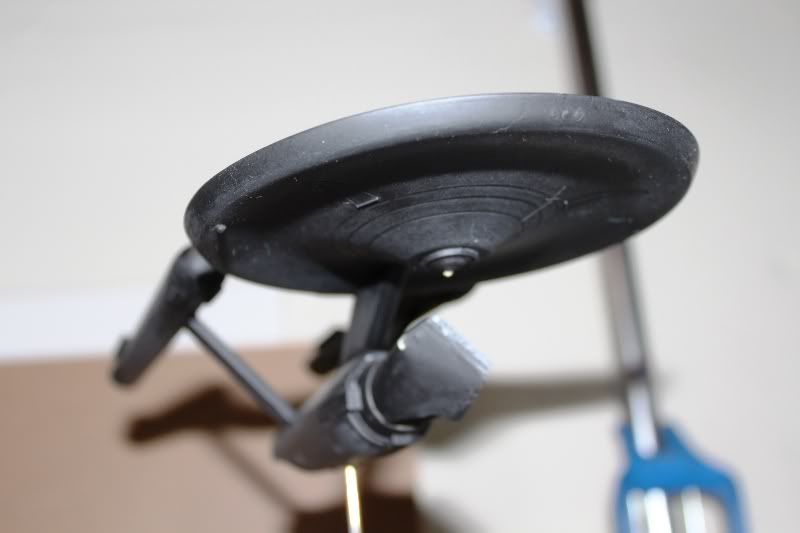
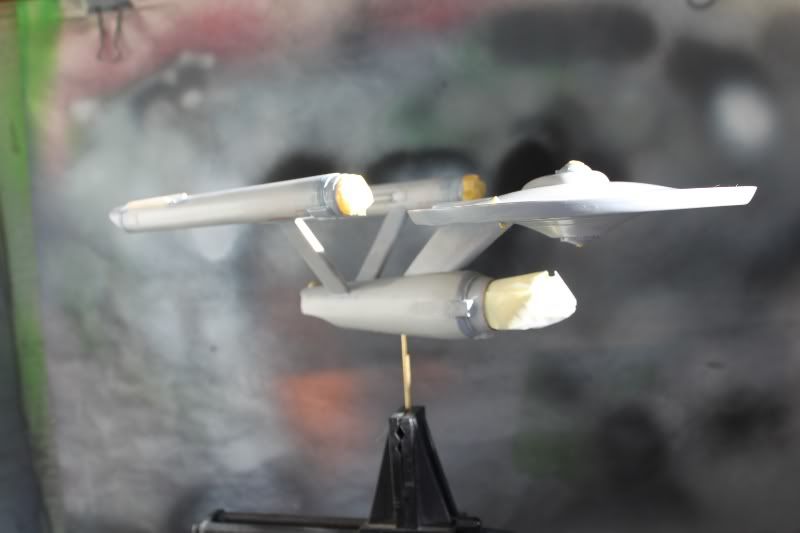
Here she is after the black paint dried...
And after giving her a light sanding to smooth everything out.
Of course, she'll need dusting off after this.
Sanding really attracts any crap floating around in the air doesn't it?
So tomorrow it'll be time for the basecoat to be airbrushed.
Before I do that, though, I'll mask off the areas I want left black such as the ridged baffles behind the bussard collars and the impulse engine vents.
Once I'm done with the painting I'll turn clear green and red acrylic rod in my dremel and insert them into the holes I drilled out last night.
I figure I'll just glue on the tiny teardrop shaped lights on the edge of the saucer outboard of the running lights.
I'm not sure yet if I'll just use the decals for the blinkers on the sides of the shuttle bay or if I need to drill more holes and make those out of clear rod.
If I do that I might as well turn some brass tubing for the metal collars around those lights.
You can see them here...
I'll probably make the bulbs for these as they don't sit flush to the surface like a decal would and I'm really trying to be a stickler for details on this build if you hadn't guessed that already! ;)
-
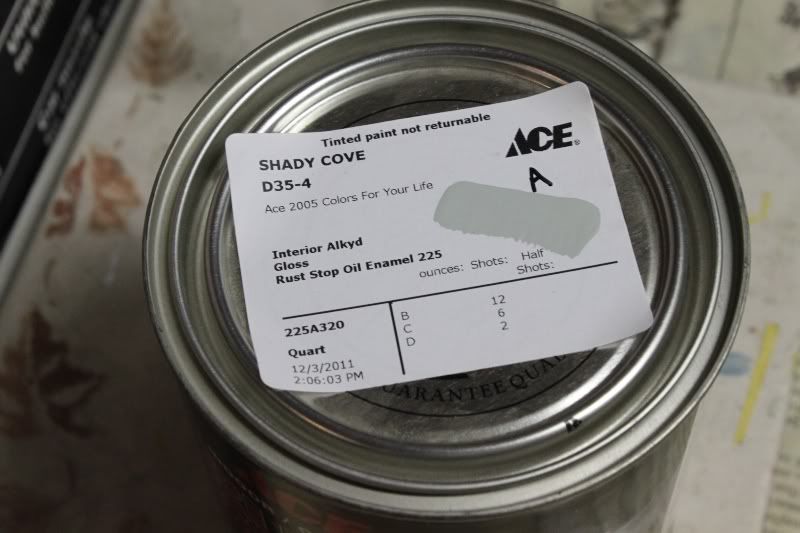
Musings on the next steps...So I was checking for light bleed the other night and noticed some minor leakage around the rim of the bussards. I'll sort that out by applying some more Mr Surfacer with a brush. This will be followed by some light sanding with 600 grit paper and even finer grit polishing pads. Then I'll shoot the entire model with a coat of Testors flat black before I airbrush the first basecoat of Shady Cove enamel. Using the airbrush should allow me the control I need to have some of the black showing thru to leave faint weathering streaks. After the initial coat dries I'll be using Alan Sinclair's blueprint of the upper saucer to draw the gridlines using a mechanical pencil.I printed the drawing off onto 8.5 x 11 inch paper and then zoomed out to 124% on the copier at work to match the 5" diameter of the kit. I'll cut it out and lay it down on the model then make tick marks along the rim of the saucer where the gridlines terminate. I'll do the same thing along the perimeter of the B-C deck housing then use a piece of styrene strip to draw the radial lines. The tick marks will be erased before more paint is applied. The circular lines will be drawn with a compass. I don't want the compass needle to mar the upper sensor dome so I'll cut a short length of tubing to fit snugly around the periimeter of the bridge (with a slot cut out where the turbolift is) and glue a round, flat piece of styrene to the top of the tubing with a hole dead center for the compass needle to rest in. The tubing will need to fit snugly enough around the bridge deck without gluing of course. The compass needle will thus rest just above the level of the dome without touching it. Once the gridlies are drawn I'll seal with a light spray of Dullcote and use them as a guide to mask off and paint the rust ring with Testors Rust and lightly scribe lines where the four rectangular upward facing saucer window decals will go. Then I'll mask off and paint the front of the dorsal and the area under the front of each nacelle behind the three flux constrictors with a mix of the hull color and Intermediate Blue. The rust ring, gridlines, and weathering streaks will then be muted down to be very subtle after another thinned down layer of the basecoat.
As far as the nacelle encaps, the rear retangles on each side of the nacelles, and the impulse engine vent assembly and accelerator on the back of the upper saucer, I plan on painting those a 50/50 mix of Testors Medium Gray and Euro Grey as Medium Gray seems too light and Euro Gray seems a little too dark. The slot on the inside of the nacelles will probably be painted Medium Gray as they appear to be a shade lighter than the rest. These will be painted after the second basecoat has been applied to the rest of the ship. I'll allow 2-3 days for the paint to cure before hitting her with Glosscote, then apply decals, wait a day and spray with more Glosscote, and then finally 3-4 coats of Dullcote. Then I'll unmask the clear bits, clean up any "holidays" (hopefully there won't be any) and call her done!
Well, all except for the base which will be a resin U.S.S. Enterprise base I bought from The Model Base Guy years ago for this build.
Here's a pic:
-
Curses! Foiled again!
Top notch work!
-
I grew up when all the moon missions were going on and I absolutely love this! Well done sir!
-
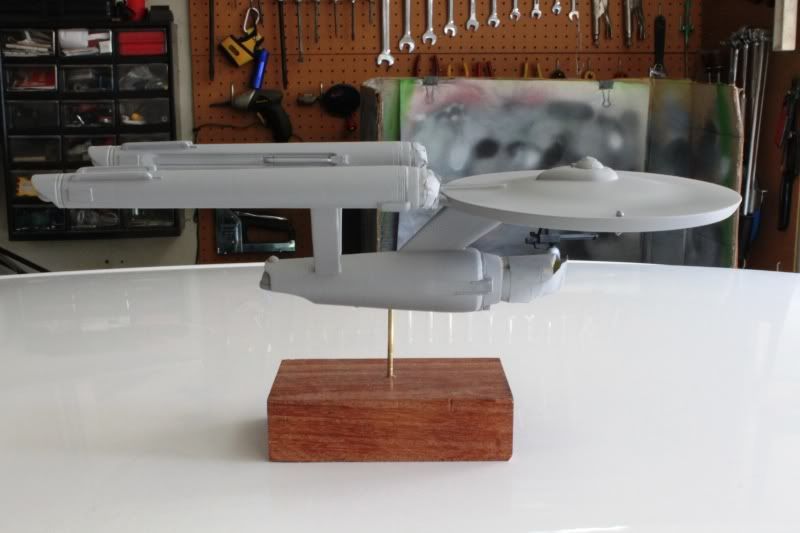
Pics from this past weekend...
Masked and ready for the first coat of primer:
I wasn't satisfied with just using a decal for the impulse engine vents so I cut a piece of thin styrene sheet using an impulse engine from another 1/1000 kit as a template to trace the outline. Then I and cut out the rectangles with an exacto thin chisel blade and drilled the tiny center hole before gluing it to the face of the kit part. This is a nice improvement in my opinion and really defines the vent openings:
After priming I noticed several spots that needed more sanding so I dobbed on red putty as needed and sanded and sanded until I was satisfied everything was uber smooth. Based on the photos below, I'm quite satisfied that no seams are visible. After a quick go over with 600 grit to ensure absolute smoothness she'll be ready for the initial basecoat:
Thanks for reading!
-
Good job on the ships, I really like this dio. Any green Martian head hiding behind a rock somehwere? ;)
Funny! I'd thoguht about taking a few more pics with a Martian poking it's head out from behind the rocks but never got around to it.
Here's another pic of the two ships side-by-side:
-
Very martainy(?)!!! It really captures the look of the "RED PLANET". Is the TWA ship lit up or are the little blue lights just MV lenses? COOL!
Bill
The TWA Mars Liner is lit. Here's the lighting assembly made from booklight parts and an empty xacto blade tube::
The booklight:
-
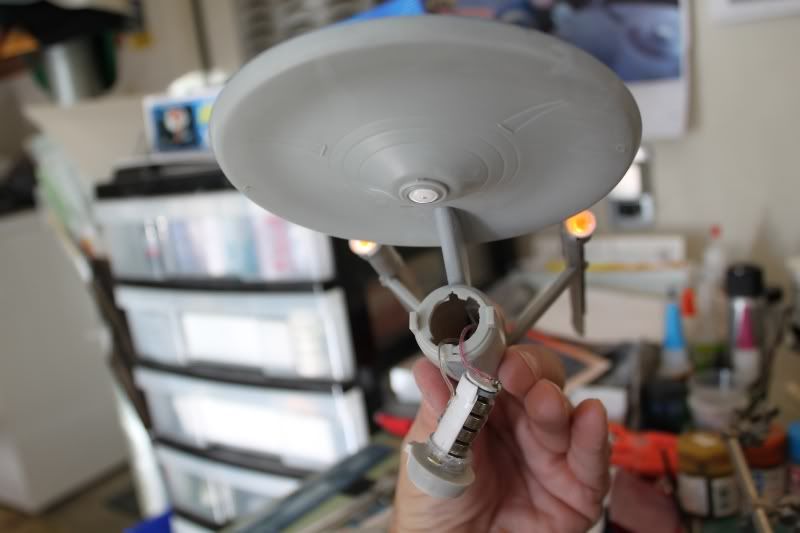
Update with pics!
I glued the bussards in place and lit her up. These pics are a tad overexposed but you get the idea...
Pics from today...
I made a round headed post to fit inside the flight deck control beacon,drilled a countersunk hole into the upper cowling directly above the door control booth,inserted the mounting post into the hole and glued it with CA,glued the beacon dome to the mounting post with crystal clear craft glue, then puttied around the base of the metal collar with AVES. I'm going to start calling it the flight deck rather than the hangar bay since someone pointed out that the hangar is where craft are stored prior to being moved to the flight deck. In this case the Enterprise's hangar is below the flight deck.
Basically ready for priming. Still need to mask the stern beacon and the running lights. The deflector housing will be unlocked, masked and left dangling for priming separate from the rest of the ship. The horizontal inner nacelle grills were painted and masked. I used gunmetal metalizer as a base then brushed on aluminum metalizer. I didn't think to snap a photo but the aluminum over the dark gunmetal looks fantastic!
Paint for the main hull color...
There are a few other lights I might add after the first primer coat but I'll leave what those might be to your imagination.
Thanks for reading. Comments welcome!
-
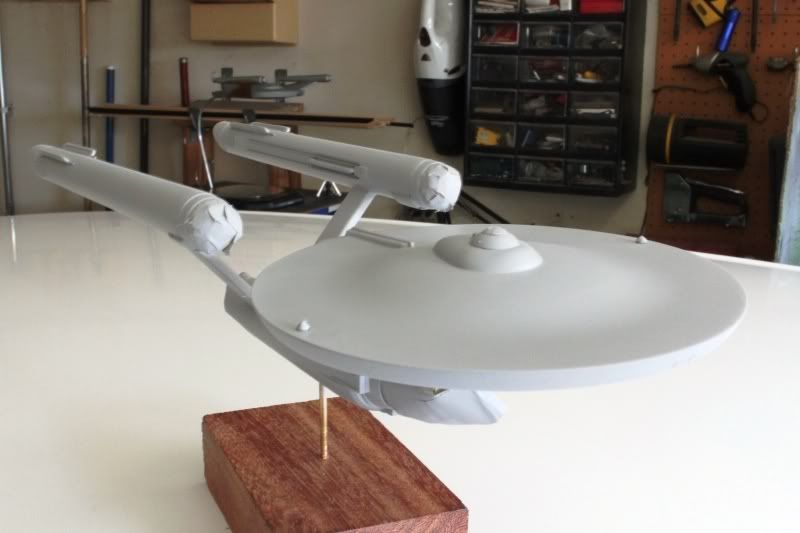
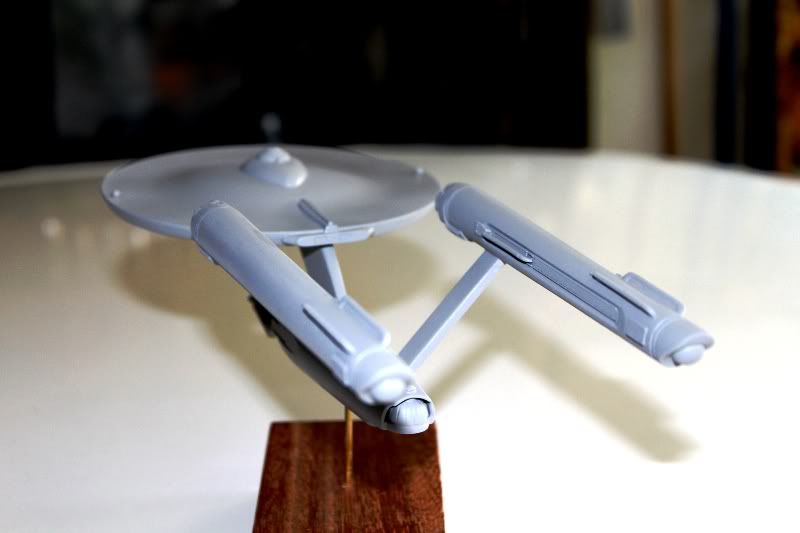
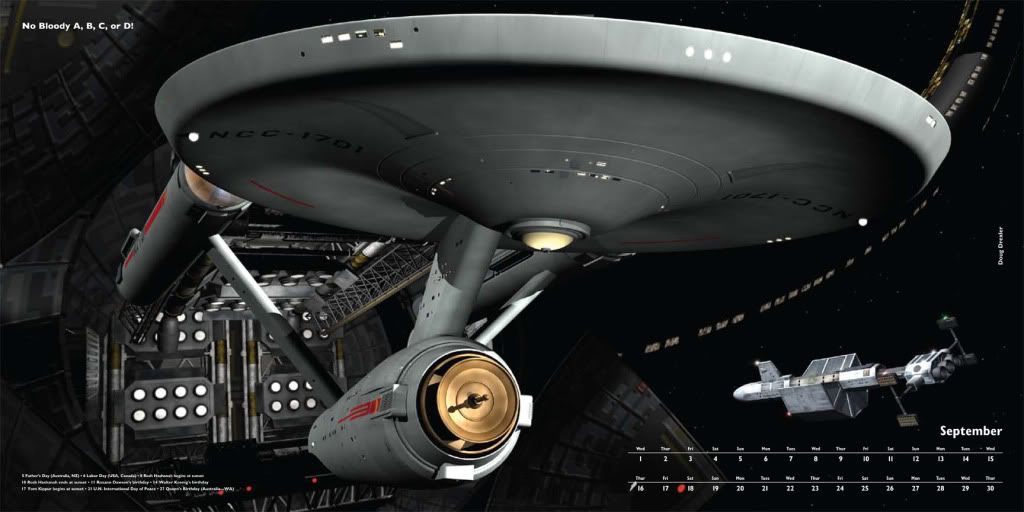
Hi everyone! These are some in-progress shots on my 1/1000 scale build of the Polar Lights kit.
This will be the production series version of this kit and is being constructed as part of the Group Build over on The Tholian Web forum.
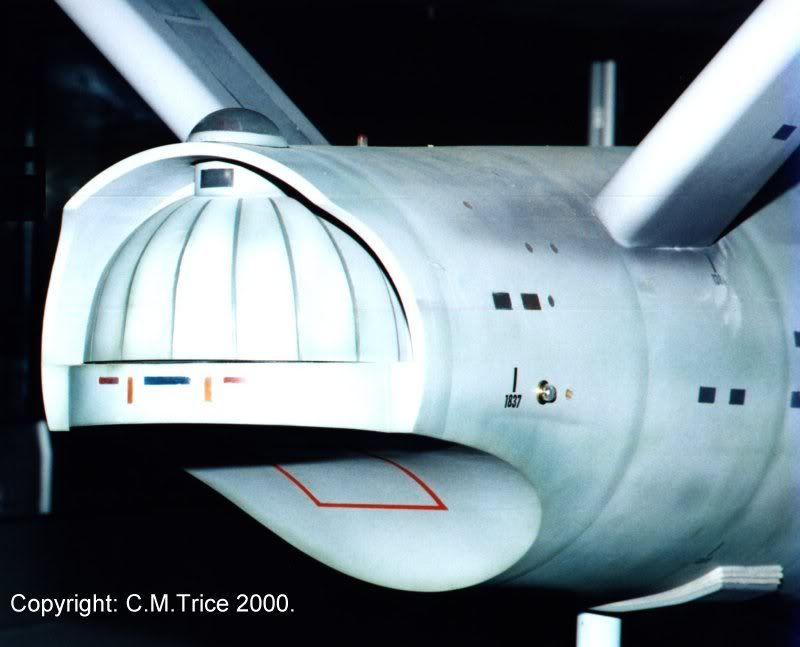
Just so you all know, this image taken from the 2010 SOTL calendar is kind of what I'm using for inspiration.
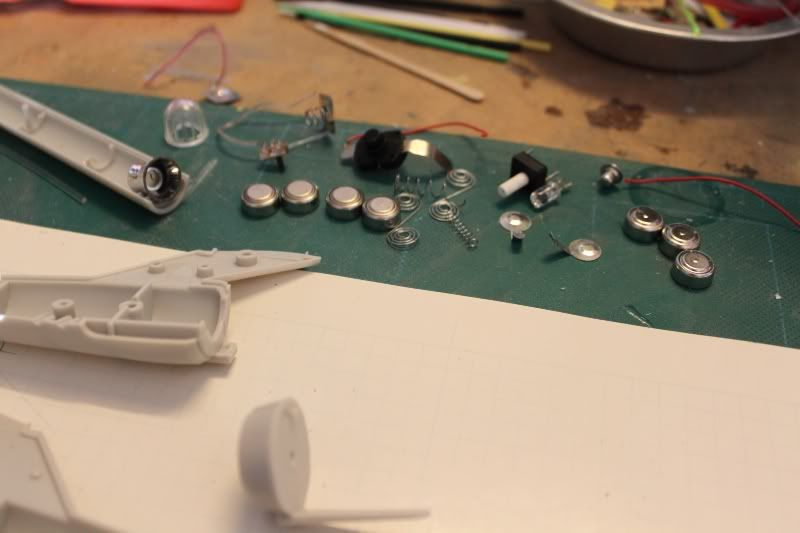
Shown here are various parts scavenged from booklights I found at the local Dollar Tree store.
Four of the 1.5V batteries, wiring, metal contacts (one with and one without a spring), and slide switch will be used to construct an internal battery pack so the finished model will not need an external power source. Each nacelle will have a reflector behind the LED in each bussard.
The lights will be static which should look nice for photographing.
The finished battery pack made from the booklight parts and Evergreen and clear acrylic tubing is wired up and attached with CA to the back of the deflector housing.
I won't go into details about all the material I had to remove from the inside of the secondary hull to accomodate all the battery parts and wiring but, believe me, it was a lot!
Brass tabs at the front of the battery pack mate to slots cut into the secondary hull and the housing turns to lock into place.
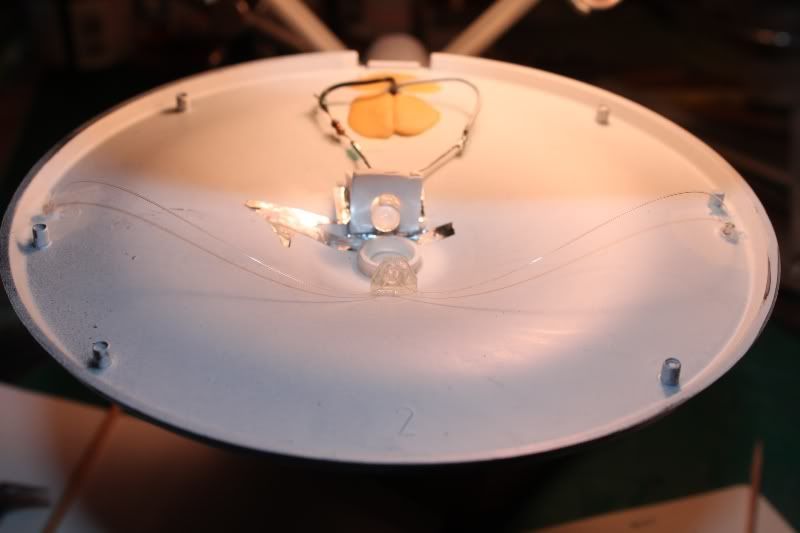
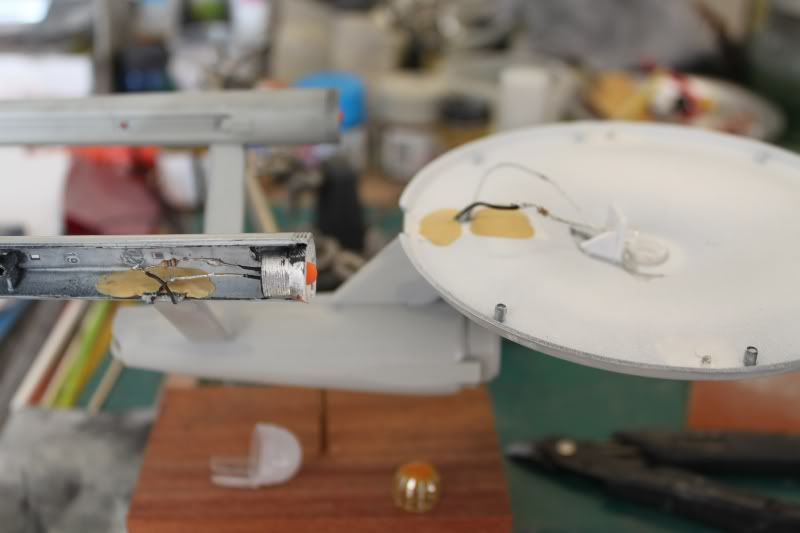
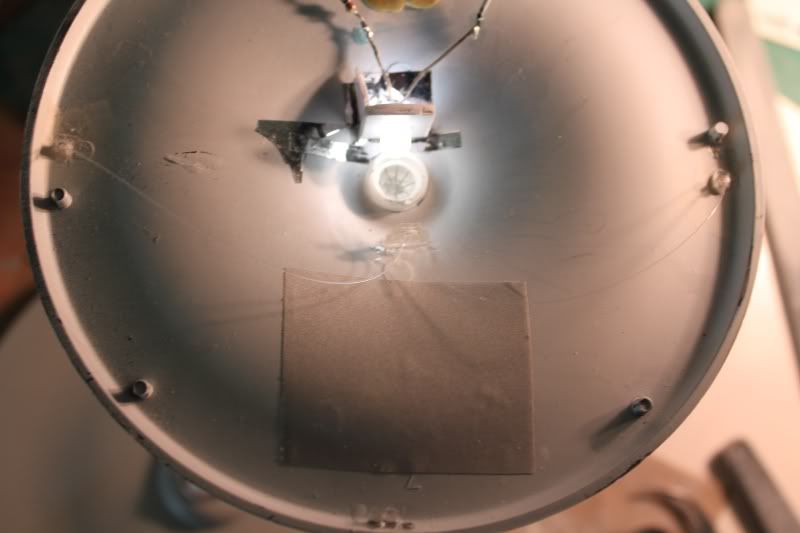
A high brightness white LED is wired between the upper and lower sensor domes in the primary hull.
This LED will later be painted with fluoresent white acrylic paint so it spreads it's glow evenly around the interior much like an incandescent light bulb would.
Wires are soldered to the LEDs in each nacelle.
The LEDs are painted with white fluoresent and orange acrylic paint.
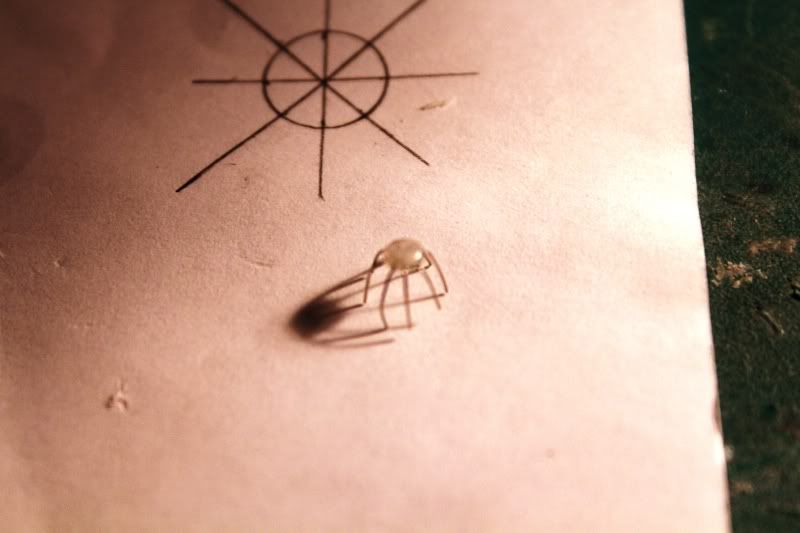
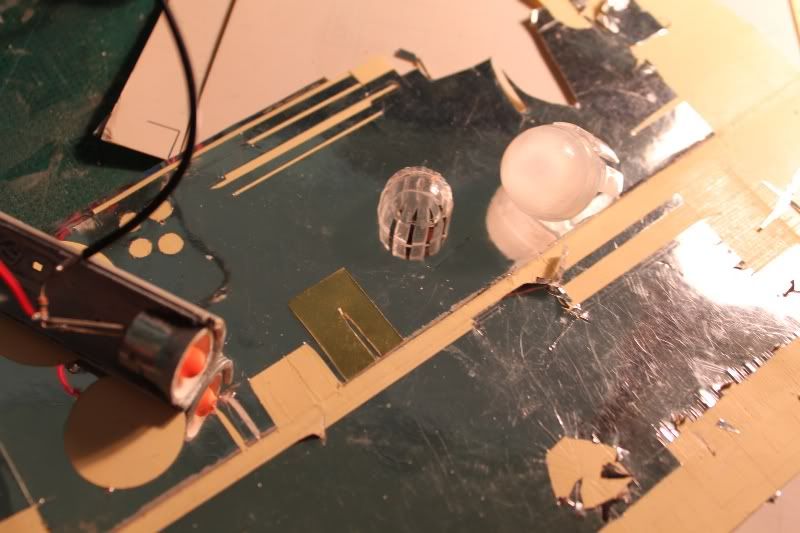
A wire cage or "spider" is constructed using 30 gauge solid wire and a clear styrene disk.
This will be inserted into the lower saucer sensor dome to give it the "pie slice" look seen in several fan made images which I have come to admire.
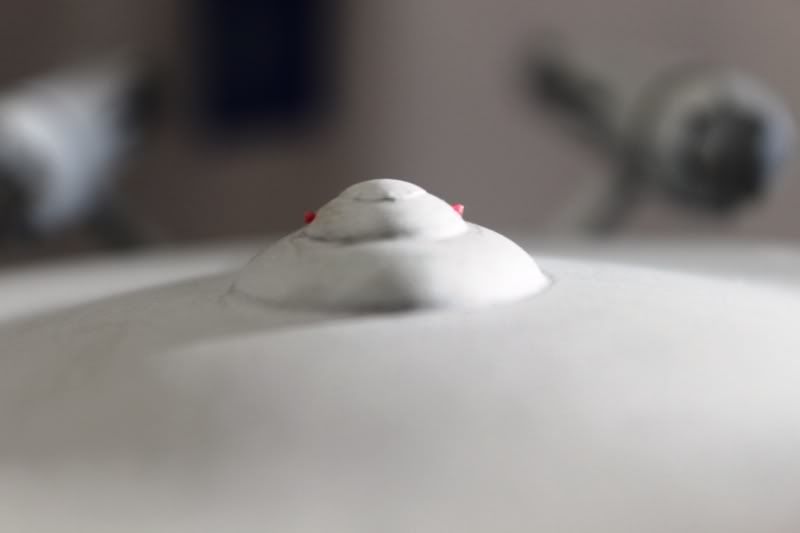
The cage after insertion into the lower dome. The insides of the sensor domes are painted with white fluorescent acrylic so they will have a nice even glow with the light on. Fiber strands are run to the lower running lights.
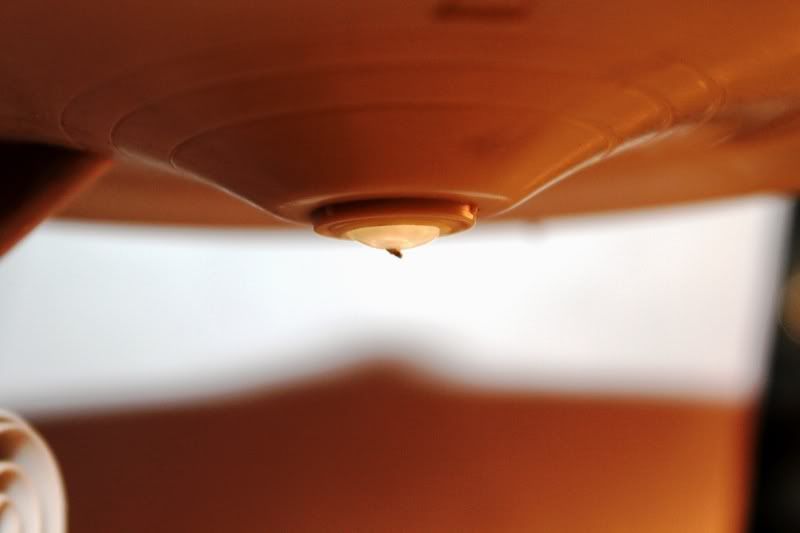
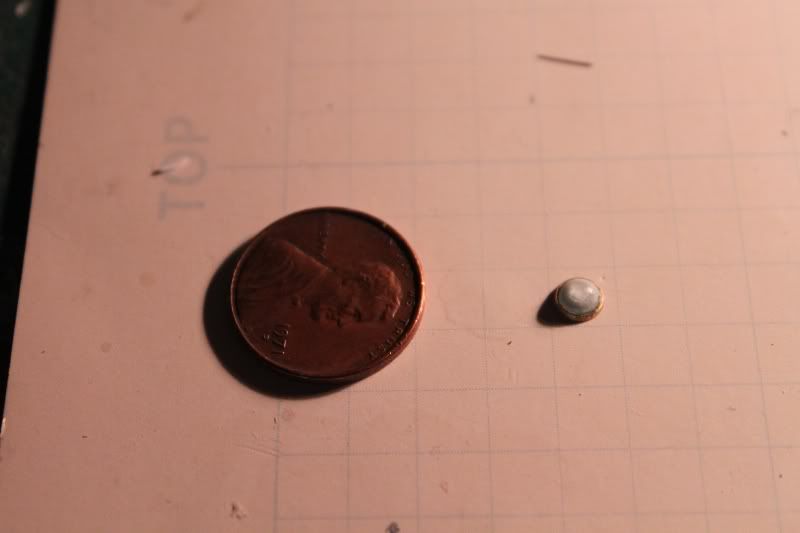
I didn't care for the look of the kit molded "nipple" on the lower saucer dome so I used the other dome in the kit (the one provided for use in building the pilot versions) and drilled out a small hole in the center. Then I turned some aluminum bar stock at high speed on my dremel and made a tiny round bead with a tiny shaft using my scribing tool. Then I glued it into the hole in the center of the lower sensor dome. This is the location of the ion pod in my opinion. Some may disagree but, for the sake of this build, it's the ion pod!
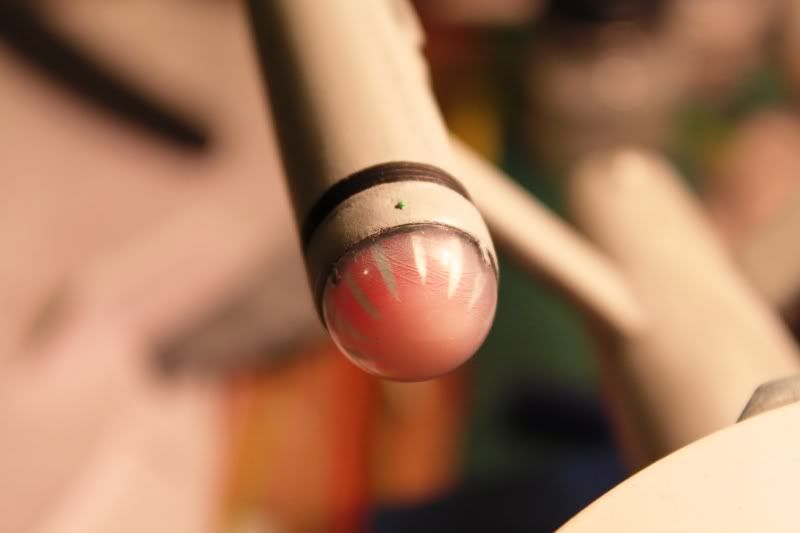
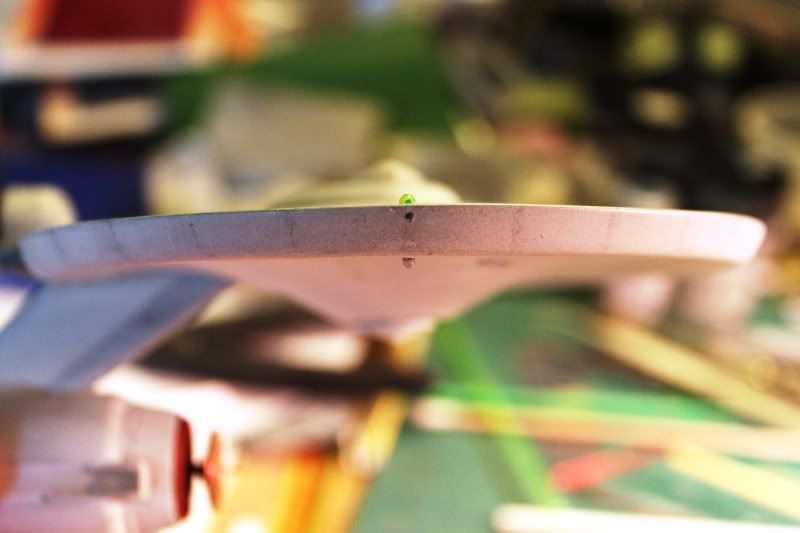
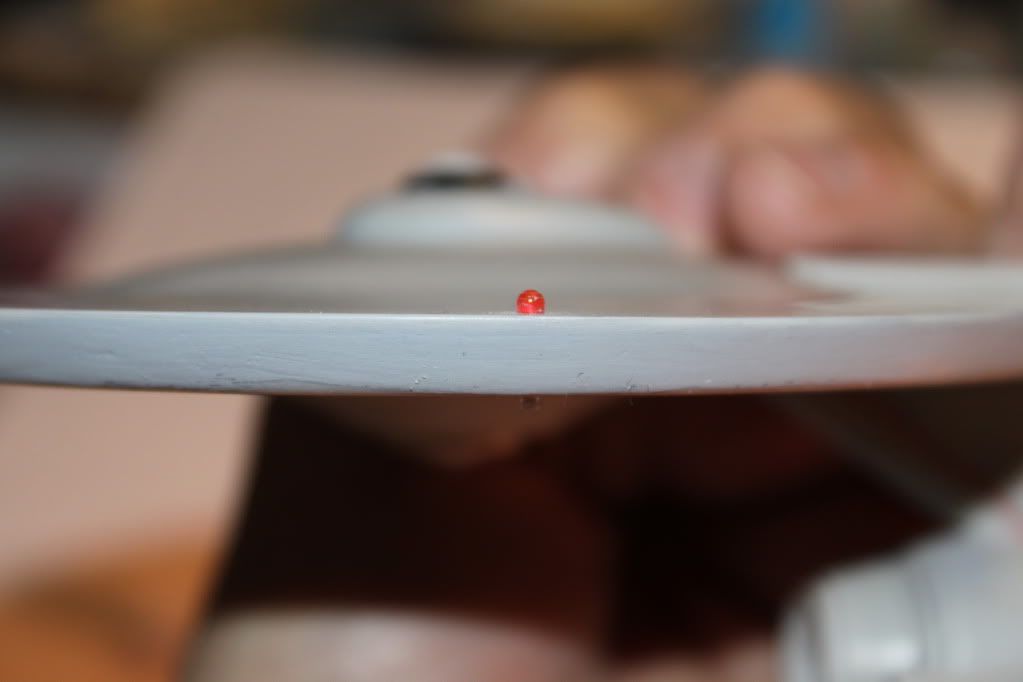
Upper port and lower starboard running lights were turned on my dremel using red and clear acrylic rod. Looking at some great still shots of the studio model I left them as globes rather than hemisphers sitting up slightly above the surface of the model.
Work on the bussards involved making a brass template for use in cutting strips of adhesive-backed aluminum foil to make the fan blades to stick to the dome inserts. The template will allow me to make each fan blade identical to the other. The inserts have had about 1/8" removed from the backside to accomodate the LED reflector. The ridges for the fan blades were also sanded flat as the fit was too tight otherwise; I have cracked a few bussard domes in the past so I knew this going in.
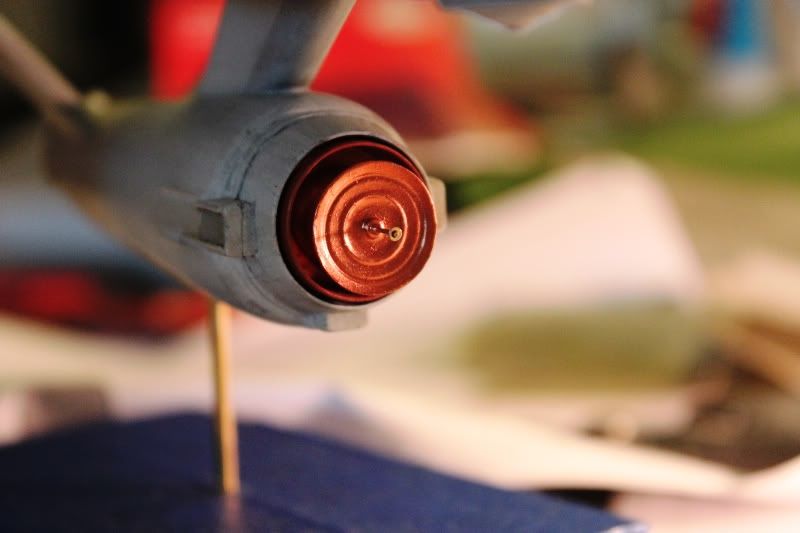
Light test after painting the interior of the bussard insert with transparent turn-signal amber enamel followed by red acrylic paint thinned with alcohol and allowed to pool in the center. The outer bussard domes were previously frosted on the inside with Floquil clear flat.
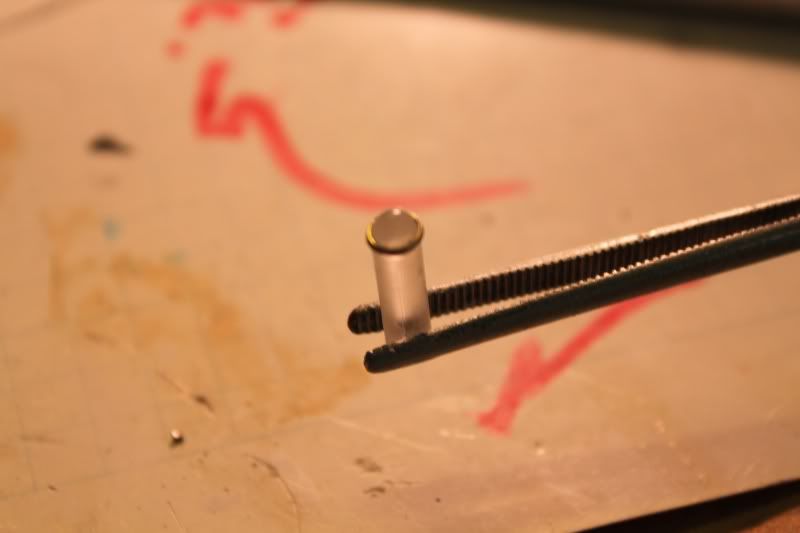
The stern beacon over the shuttle bay doors was the wrong shape and you could see the square slot in the kit part for mounting to the tab on the hull so I made a new one from scratch. Then I took brass tubing and ground a bevelled edge with the dremel before slicing it on my mini-cutoff saw. Much better in my opinion.
Then I sliced the acrylic rod off below the metal collar using a miter saw, hollowed out the inside with a round router bit, and painted it with white fluorescent paint tinted with just a hint of blue. My fingers almost cramped up from holding this tiny piece as I worked on it.
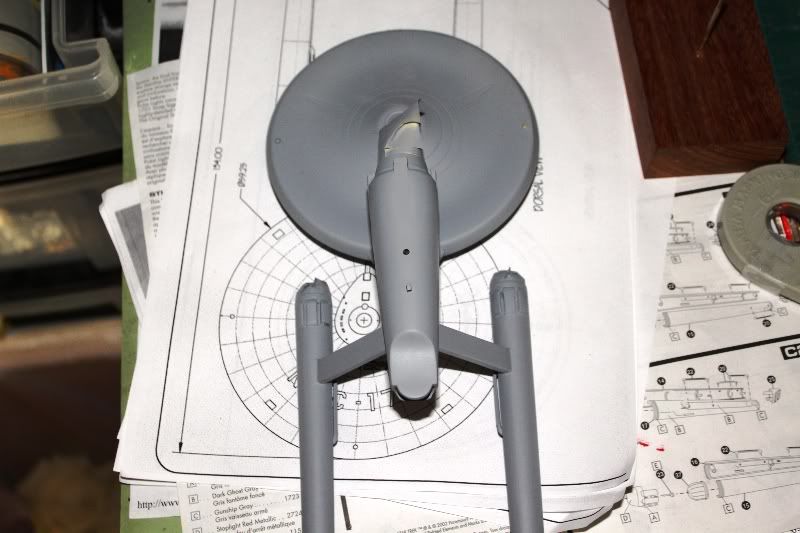
So, as of this writing, all hull seams have been filled and scraped and puttied and the majority of the sanding is complete. I did fill in the kit scribed lines in the front of the dorsal and on the front undersides of the nacelles with red putty. These areas will eventually be masked off and painted a slightly darker, greener shade of the hull color. Left to attach are the bussard domes, hangar bay beacon, intercoolers and reactor loops, and end caps on the nacelles. The deflector dish will be attached last and may be left removeable after the rest of the ship is finished.
It should be ready for priming with gray rattle can Tamiya primer tomorrow.
With any luck I should be finished by New Years.
Thanks for reading ! Comments welcome!
-
What a beautiful paintjob on this! And nice photography too! Congratulations!
-
Interesting desgns. I really like the "tank".
-
Well done. Interesting choices. It's your model, so make it however you like. But trying to suggest that the model used in the original series looked like this is rewriting history to justify your choice, and that's not cool. Nice model, and yes, it looks like the Smithsonian model, but the OS Enterprise was definitely NOT painted like that.
I agree with you. The modifications I made along with the inaccuracies inherent in the kit pretty much eliminated any chance of calling this model screen accurate. In hindsight, I definitely think Miarecki went over the line in his hubris with the heavy-handed weathering scheme. At the time I built this model; however, I was not aware of all the controversy surrounding the work he performed during the restoration and just wanted it to look cool.
-
-
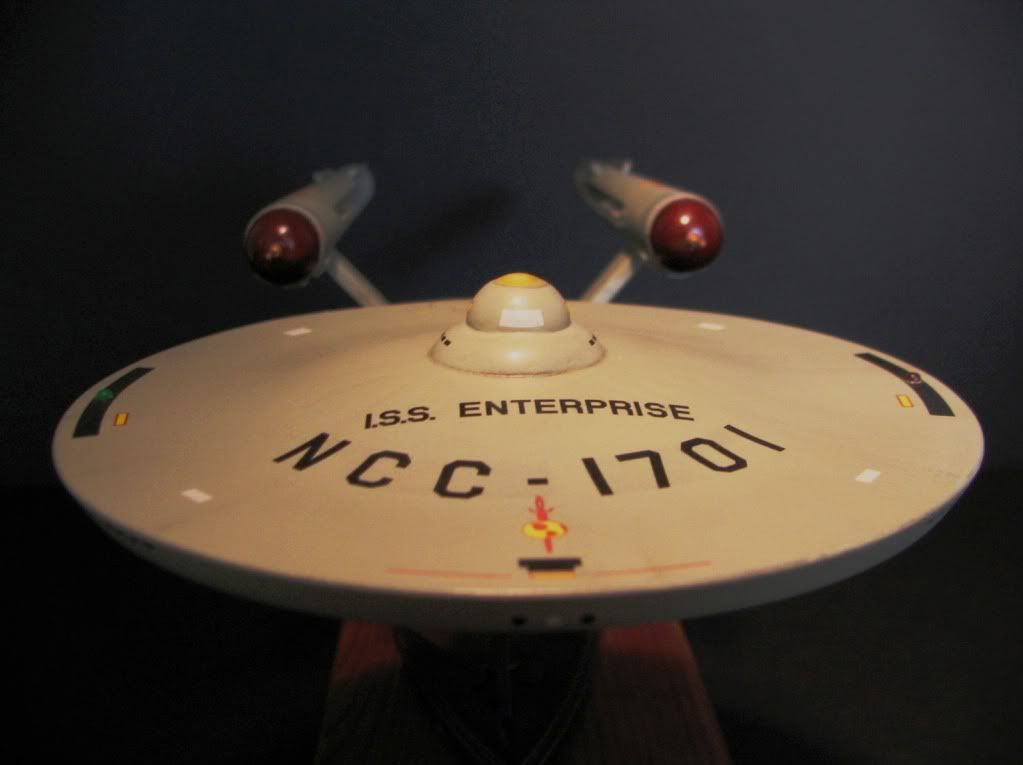
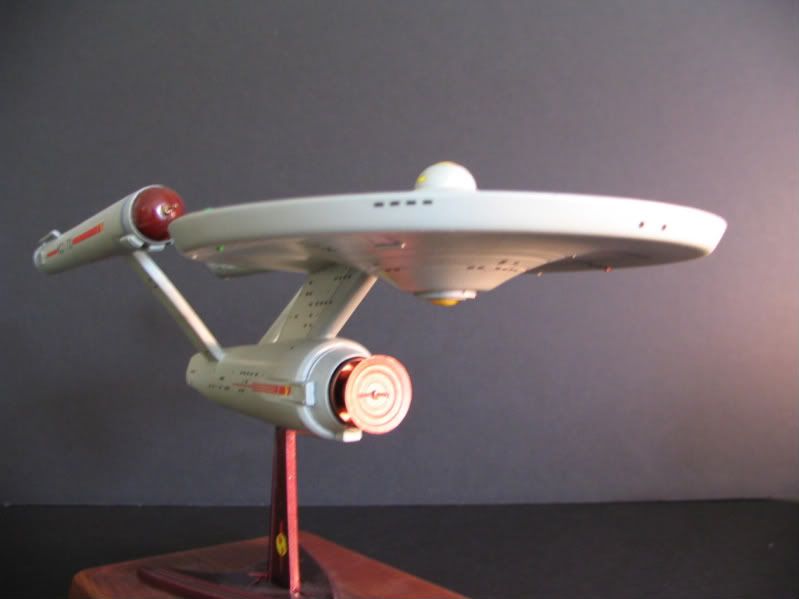
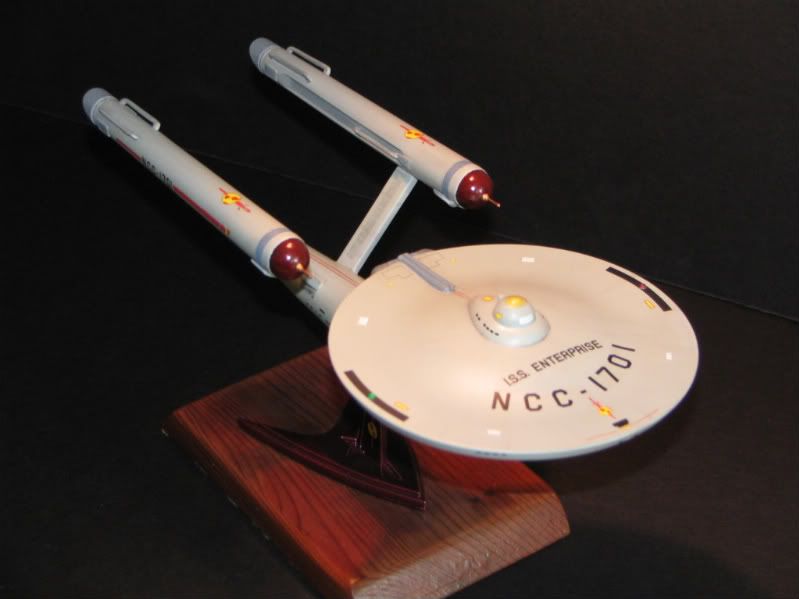
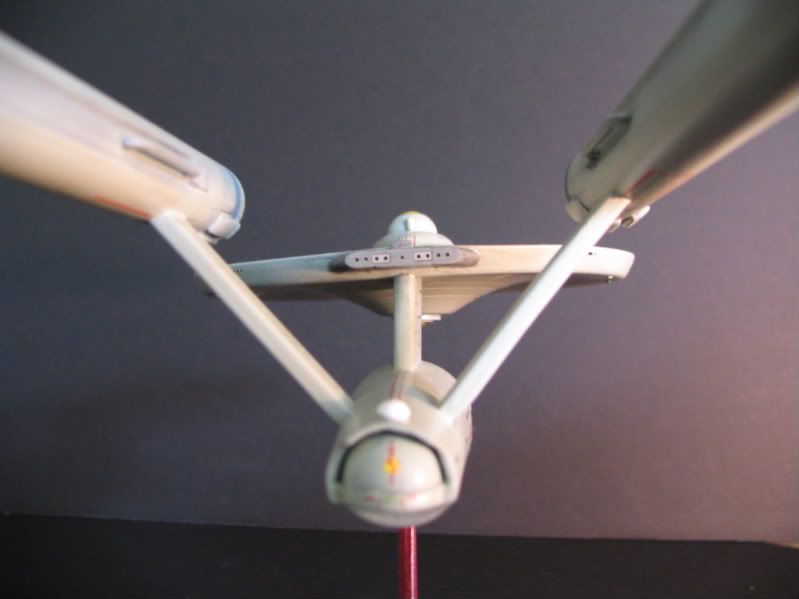
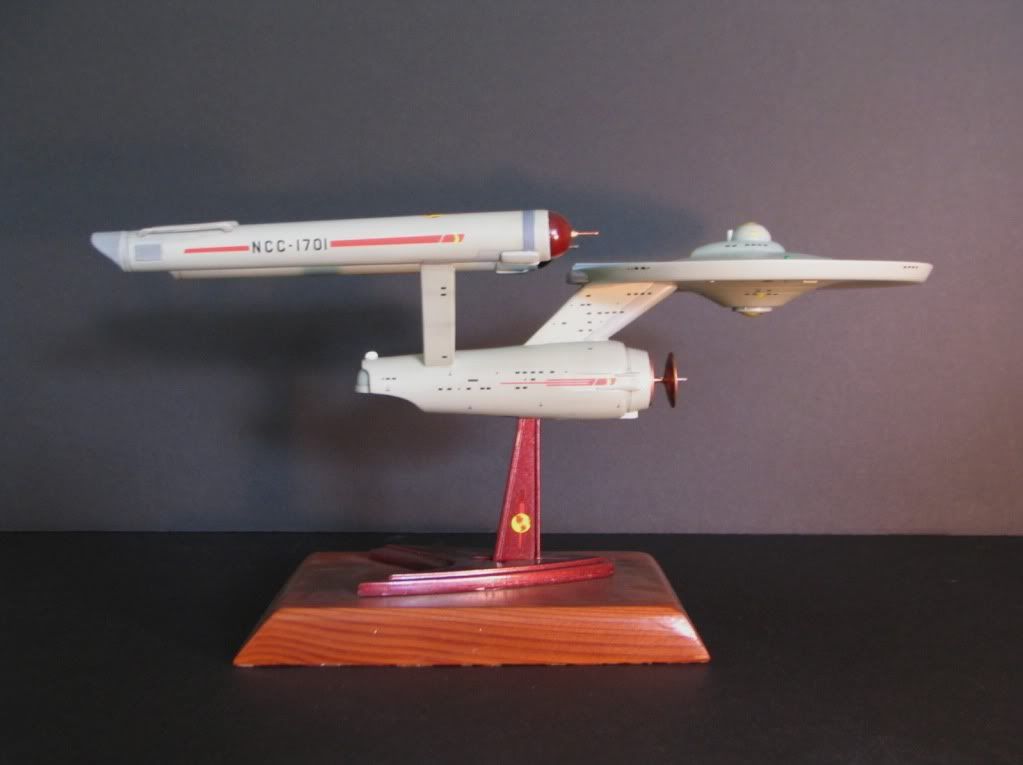
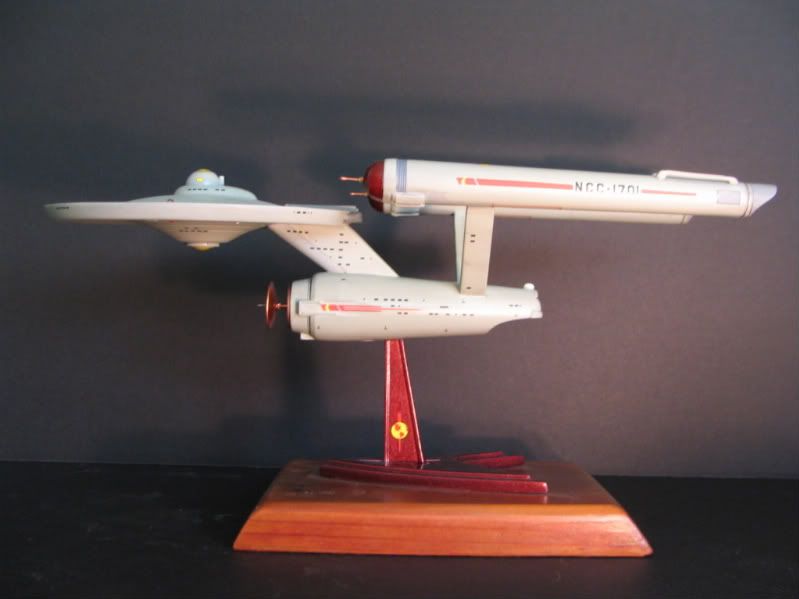
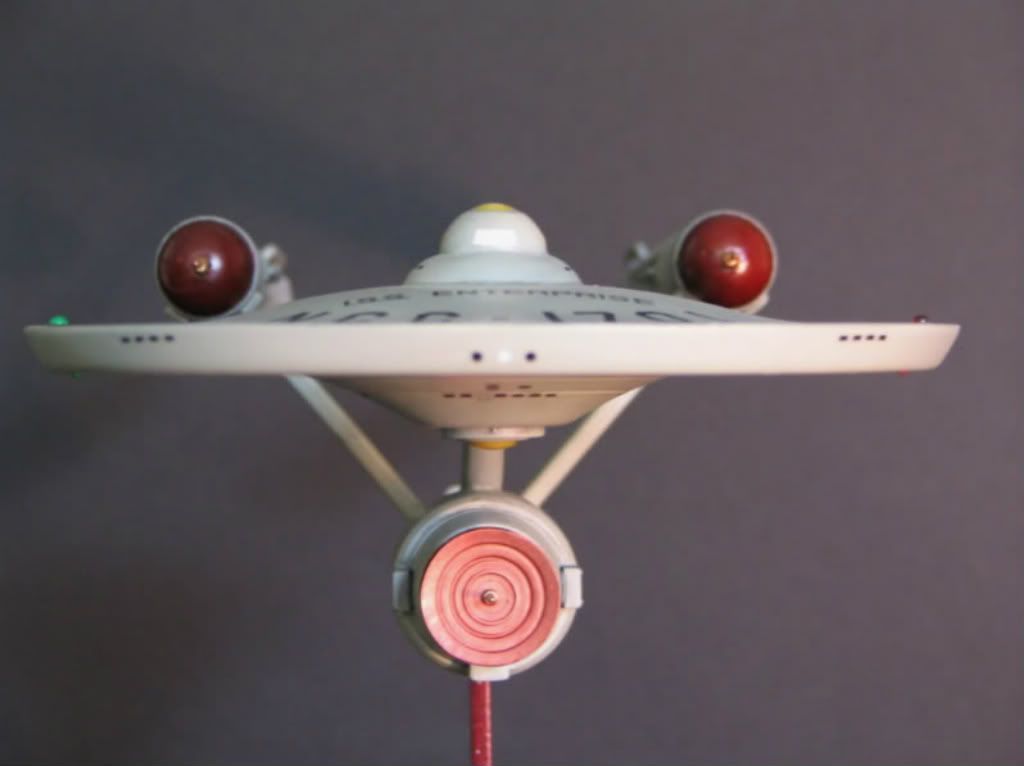
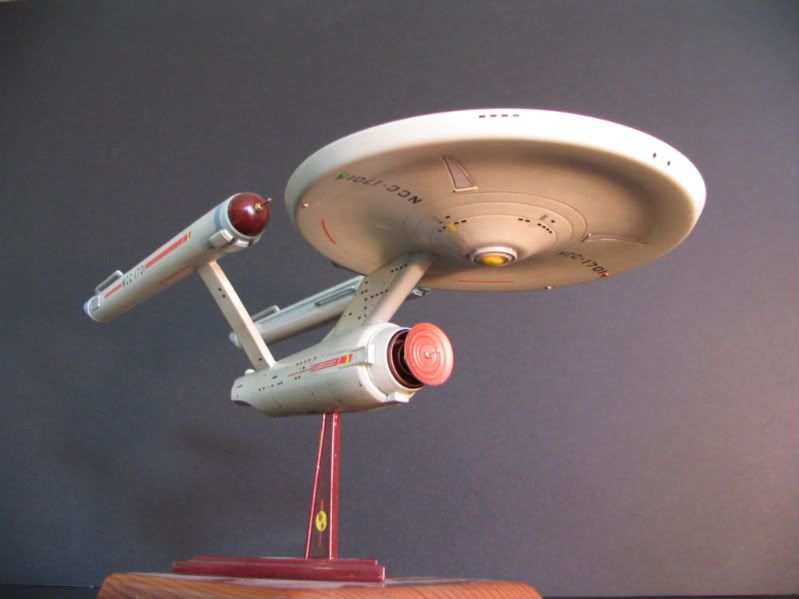
This is my I.S.S. Enterprise from the original series episode "Mirror, Mirrror". Built from the 1/1000 Polar Lights kit.
-
Very nice BOP. I have one of these in my stash. I hope it turns out as well as yours did Mike!
-
Michael,
Did you ever complete this build? I like what you were doing with this.
-
Space Seed Homage:


USS Enterprise NCC-1701 in 1/1000 scale
in Space, Sci-Fi & Fantasy
Posted · Edited by trekriffic
Thanks Greg!