


canberrasig
-
Posts
56 -
Joined
-
Last visited
Content Type
Profiles
Forums
Events
Posts posted by canberrasig
-
-
Absolutely lovely GIL!

John
-
Thanks guys, it was a fun project, so much so I fancy doing another, but not yet! The next down the line will be a NASA WB.57F, then a B.57E not sure what scale this will be yet.
John
-
Well, my original intension to do a WIP was thwarted somewhat, so if you are at all interested in how then you can take a look at my site http://ipmscanberrasig.webs.com/apps/forums/topics/show/8963524-airfix-1-48-canberra-b-2-into-martin-eb-57a So here it is all done and dusted. I hope you like her
Thanks for looking
John
-
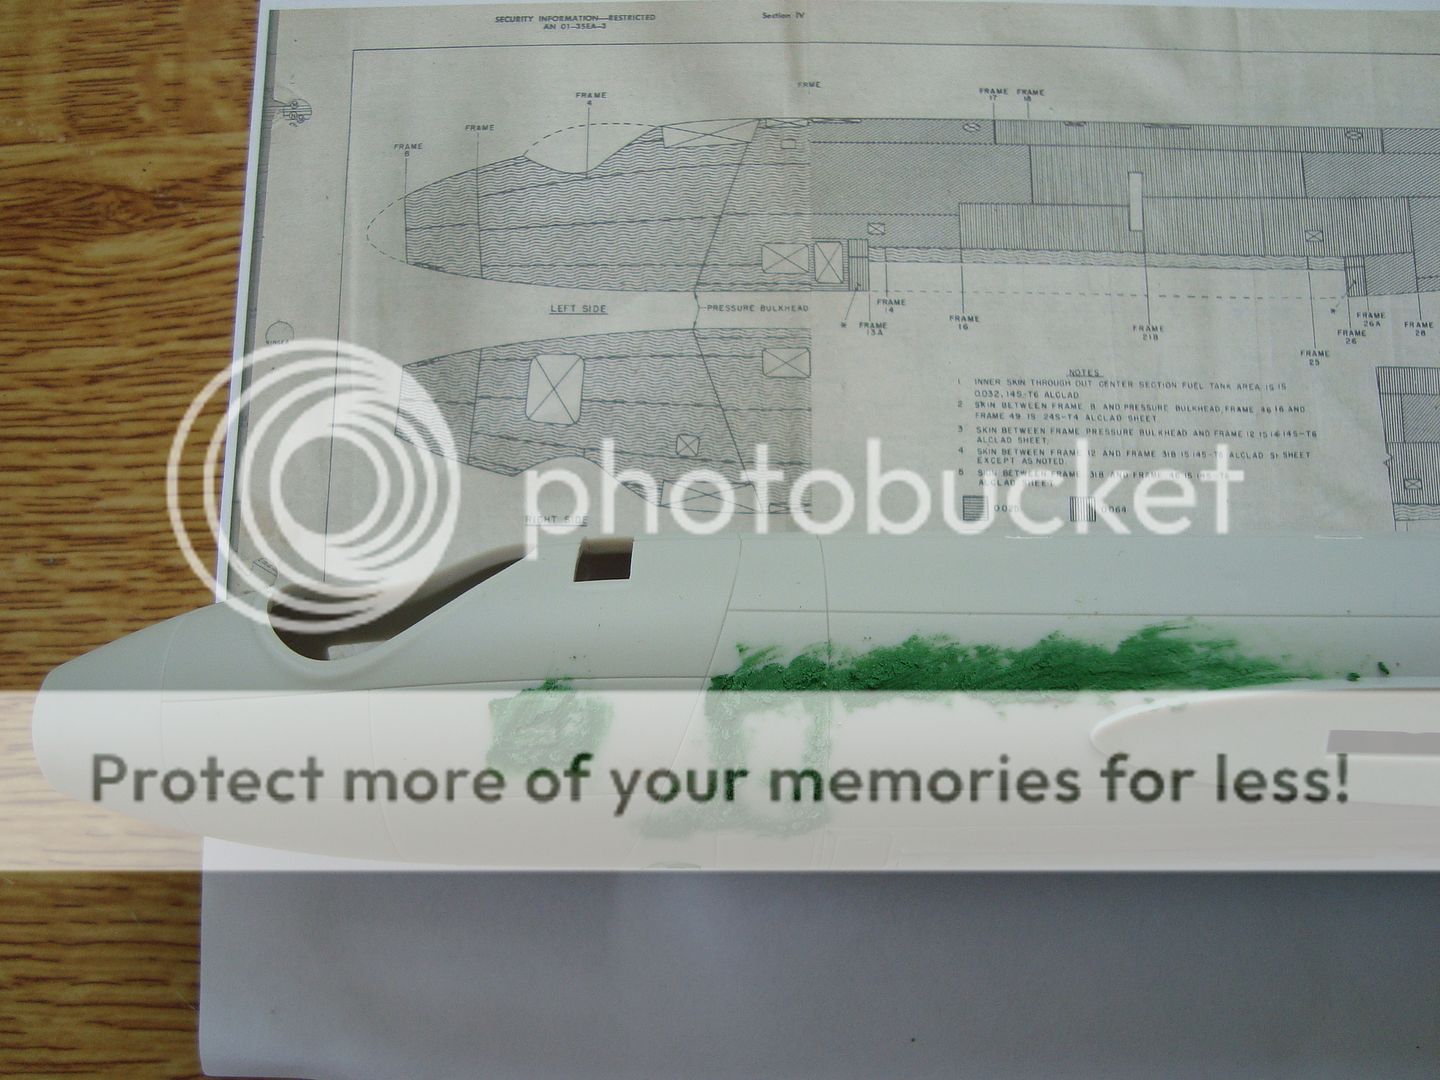
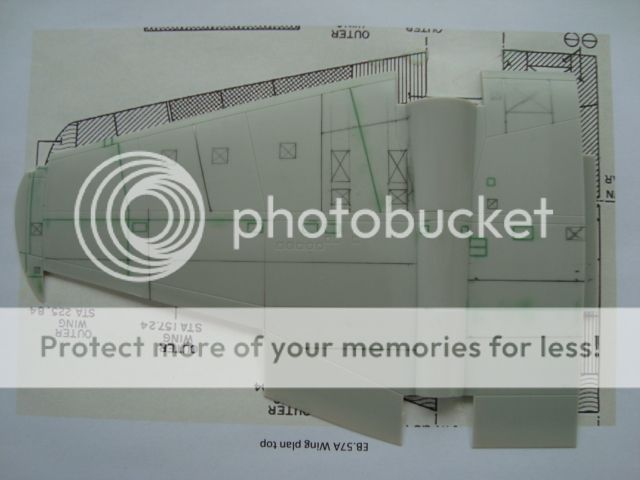
Let battle commence! First job is to fill the panel lines that are not applicable to the B.57A, or indeed the Canberra B.2, luckily there isn't that much. As you may be able to see from the drawing behind the model I'll need to add a few extra panels though.
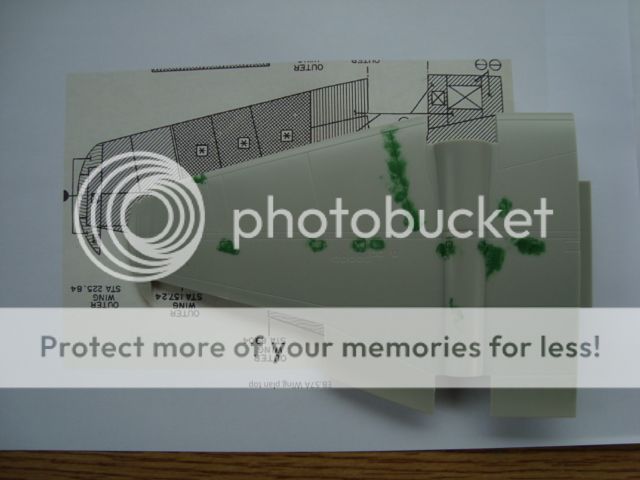
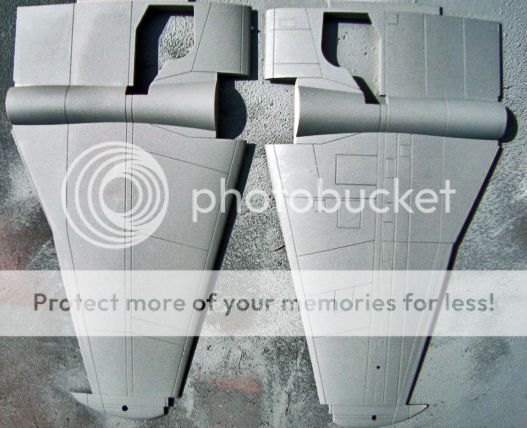
And the same process underway on the wings, those of you who watched the B.57G build will be familiar with the work involved. This wing differs in that it will be the four x.50 cal. wing.
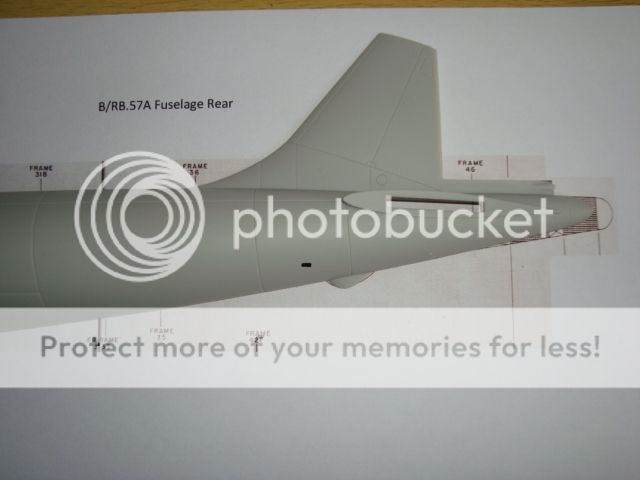
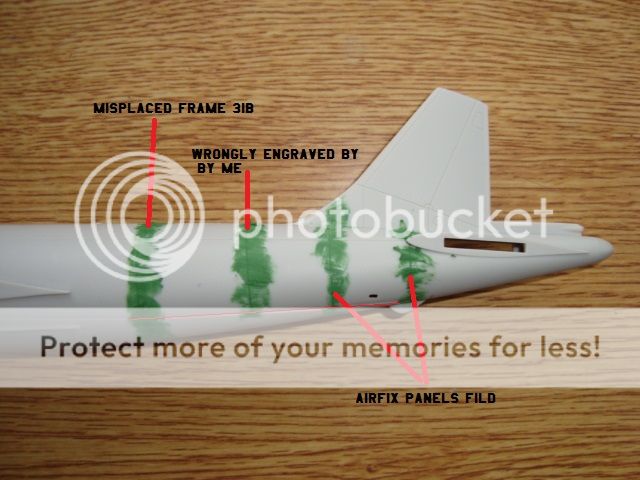
I've scanned the drawings in the B.57A Repair manual and I've discovered another potential shape issue with the Airfix Canberra. The front end is just about spot on the only slight problem is the extreme nose being a bit off, but nothing major. The thing I picked up is the extreme tail end as you will see from the following photo Airfix may have made this area a bit on the thin side, as yet I'm not 100% sure if this is right or wrong I suspect there are two types of tail cone one with a tail warning radar as in the drawing and one without which is more like the kit . I'm still trying to work it out, but either way it's nothing too bad, if it is right and if you want to get it right it will need fixing. Will I fix it? I don't know, not this time! If it is right then it could apply to Every Canberra except the B.57E. Also of note is the miss match of the frames.
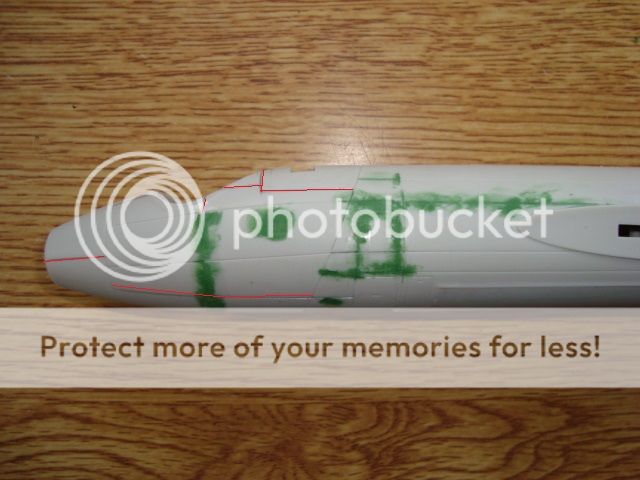
Work is well underway with the filling and re-scribing. As you will see from the following photos I'm concentrating on the fusalage first. I've marked out the newly engraved panels in red.
This next photo showing the work on the rear fuselage. The panel line I've had to fill that I wrongly placed was down to the fact I was using Airfix's misplaced Frame 31B as the datum for my measurements. I'll re-engrave the frame 31B further forward, then start again. Of the four filled lines, the one third from the left doesn't exist on the aircraft and the forth needs moving to the right.
And so, on to the wings. I've filled all the non applicable Airfix panel lines and drawn on the new B.57A ones. The ones with the "X" in the centre are hatches.
That's the upper wings done.
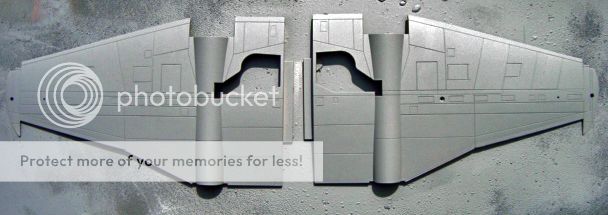
I've now started on the underside, I don't know why, but I've found the .50cal. wing harder going than the 20mm one but not too bad I guess.The underside is all engraved now too, I've taken a photo of an unmodified wing for those that aren't familiar with the kit. I hope you can see an improvement :) There is quite a lot more to do on the under side than the top, which is a bit of a shame as it won't be seen!
John
-
Hey John
I think we talked about a Canberra I saw while deployed last year. Sorry I never got any pictures for you, she would slip in and out unannounced. It was great seeing the old gal flying, amazing how long this plane has been in service. Good luck on your build, look forward to your post.
Hi Arthur
Yes indeed we did, it is a shame about the photos but who knows you may get another chance and with NASA bringing another F out of the bone yard and back in the air your chances have improved even more!
-
Hi guys, this is a build I started on my SIG site but I thought some of you may like to see it. This is part of the on going build for the IPMS UK Nationals this year. Our theme is 60 Years of the Martin B.57 Canberra and 50 Years of the GD RB/WB.57F.
So after much deliberation I've decided after the B.57G my next big build would be a 1/48 EB.57A using the Airfix B.2 as my starting point. I'm not sure how well this will work out but I'm going to give it a good shot! Progress my be a bit slow on this one as the cockpit interior will need some major mod's, but it should be fun!
Photos to follow soon. John
-
Thank you chaps! Gil, the method used to produce the markings was basically, after a long search on Google I found some of the more tricky markings like the "daisy" and concentric circles. The oblongs and squares were done on MS paint. Then the various parts were put on a word document for sizing, then printed off on ink jet decal paper. I used white decal with a black area around the image so I could paint up to the shape. Although I'd used white decal I painted the area where they were to go white as the colour is not dense enough to cover over black. The hole lot was then covered with Humbrol Matt varnish rattle can. Job done! :D
I noticed that the USAF did a similar thing with a B-36 during the mid 1950's. Source: B-36 Peacemaker in Detail and Scale, author Wayne Wachsmuth. Nice Trio!
Mark Fiedler
That's interesting Mark, I'd like to see that beast! The B.57 Canberra, like her British sister was involved in a lot of interesting trials with some nice paint jobs.
John
-
Hi All
This is the latest and I think, the last of the Satellite calibration Canberra. It's built using the 1/72 Italeri B.57B and as before home made markings.
And the three amigo's
John
-
Thanks Bill and GIL! It was quite a challenging but fun build, it's just a shame Airfix couldn't be bothered to get it right in the first place!
John
-
I'll be keeping an eye on the B.45 build I have the Mack2 1/72 kit that I want to build as an RB.45 at some stage. They are both looking good!
John
-
This is the Airfix 1/48 B.57G with all the necessary corrections made to the kit to accurately represent a Vietnam era B.57G, in fact all the corrections are applicable to any canon armed B.57 in general. The ladder and bomb door and the door dolly are home made. I've used some after market parts from Edward, Aeroclub, and parts of the Classic Airframe B.57. The model is brush painted using Xtracrylix apart from the underside which is auto rattle can. The decals are a mix of kit and Zotz B.57 Canberra's in Vietnam ZTZ48/040. For the full build and all the corrections go to, http://ipmscanberrasig.webs.com/apps/forums/topics/show/8621422-1-48-airfix-classic-airframes-13-bs-b-57g-
Thanks for looking!
John
-
Very Nice Bill ! It's turned out very well. If any one is interested I'm doing a B.57G build using the Airfix kit plus a good bit of the CA kit. http://ipmscanberrasig.webs.com/apps/forums/topics/show/8621422-1-48-airfix-classic-airframes-13-bs-b-57g-
John
-
Hi Guys
This year will see the 60th Anniversary of the first flight of the Martin B.57 Canberra. To mark this event the IPMS UK Canberra SIG will have a B.57 themed display for the year. Other than the B.57's I already have I've just finished these two. The first is one of two RB.57A-1's operated by the Taiwanese AF for over flights of the Chinese mainland. One of the two was shot down but this one survived and was subsequently converted to an RB.57F. The kit is based on the old Airfix B(I)6 with FROG wings the build can be seen here. http://ipmscanberras...b-57a-1-in-1-72
The next one is RB.57D 53-3973 This is the High Planes RB.57D kit, not the best kit in the world, in fact I've started and stopped this model more times than any I've ever built. The colour scheme was for the calibration of satellite based recon system. The Aircraft lost a wing in flight and crashed in a school yard, thankfully no one was hurt on the ground and pilot ejected safely too. Again, the build can be seen here at http://ipmscanberras...h-planes-rb-57d
Thanks for looking
John
-
That's looking good Bill, The CA kit is so much better than the Airfix offering but they boath have issues but the CA less so.
John
-
Thank Gil! Yes it dose stand out a bit :D
John
-
Thanks Arthur that would be fantastic! I'd love to see her, they have been over to the UK but I couldn't get down to see them, who knows, one day!
John
-
Hi Arther, This one was scraped back in 1975/76. As you rightly say the only flying Canberra's at the moment are the two NASA WB.57F's and a TT.18 in Australia, but there are perhaps 3 more in the UK and one in the USA. Nice photo! that looks like the NASA detachment to Afghanistan? were you there?
John
-
Hi all I've been away for a while but now I'm back with, you guessed it, another Canberra! :) This is the new Airfix PR.9 modified with the nose from the old Airfix B(I)6. with a mix of kit and home made decals. All paint work was done with car rattle cans. This Canberra spent a lot of time in the USA working with NASA on gust response work. If you wont to see the build it can be found on my site. http://7721696-hapr-9-wh793-this-time-at-the-end-of-the-story
Thanks for looking
John
-
Sorry Gil I forgot to say, the white, it's Acrylic Auto paint from a rattle can. I don't use an airbrush and painting white with the old hairy stick is beyond my skill set. If only more cars were painted in British and American Camouflage colours :)
John
-
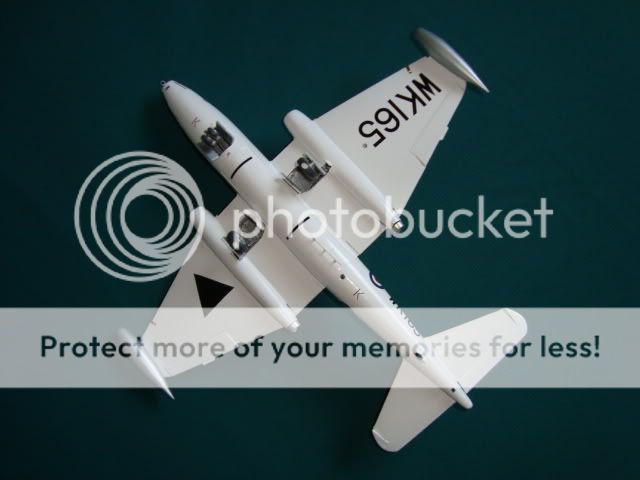
Thanks David and Gil, David got it in one, it is thought to be a photo calibration marking as are the two black lines on the bomb bay doors. Later on she had a collection of black rectangles painted behind one of the wheel wells. The white B(I)8 in my little photo also had the triangle.
John
-
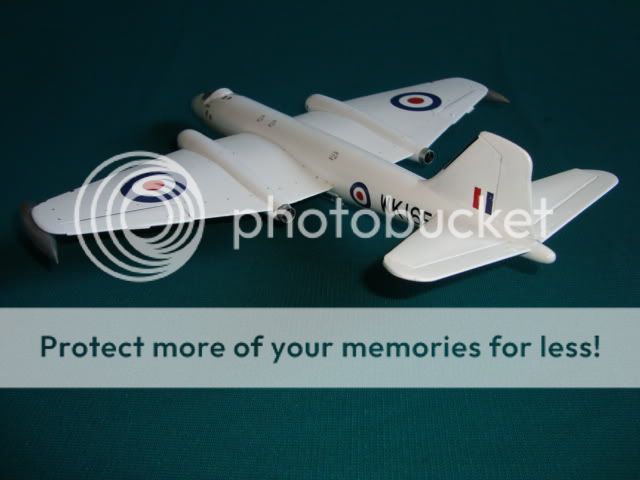
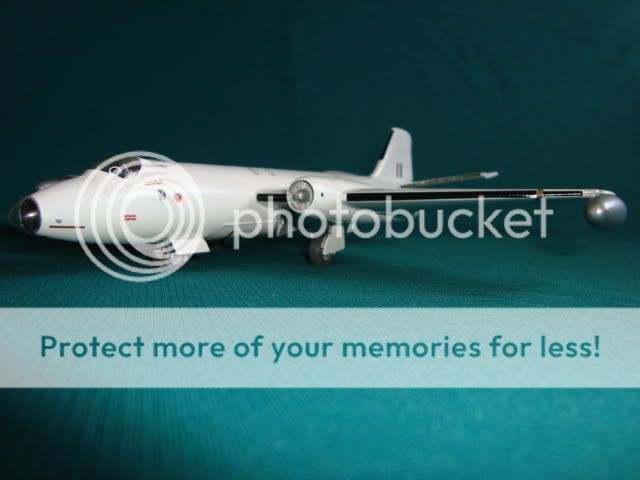
This is the old Airfix 1/72 B(I)6 kit with a corrected nose profile. and resin engine fronts. If you want to have a look at the build it's here http://ipmscanberras...xt-build?page=1 WK165 was the last of 75 B.2's built by Avro, she spent her entire flying life in Australia engaged in various R&D and weapons trials. She is now superbly restored at the South Australian Aviation Museum http://www.saam.org.au/
Thanks for looking!
John
-
Very nice, lovely Job!!
:smiley20: John
-
Wow! Sharp model! That big wing gives it a sort of "bat like" quality.
GIL
Thanks Gil, yep she's definitely batty
John
-
I'm back with, yes you guessed it another Canberra , This time it's Canberra. HAPR.9 WH793. The HAPR.9 was what would be called today a "proof of concept" airframe not a true PR.9 prototype. In a way it was English Electric response to the work GL Martin were doing with the RB.57D. Although it had problems with drag from the deeper cord inboard of the engines it ultimately resulted in the very successful PR.9. Apart from the pilots seat, canopy and rudder this is all Airfix. The nose comes from a B.2 kit. The increased cord inboard of the engines was made using plastic card and filler. For a WIP see HAPR.9 WIP Thanks for looking.
John


 I've now started on the underside, I don't know why, but I've found the .50cal. wing harder going than the 20mm one but not too bad I guess.


 :smiley20:


1/72 Folland Gnat, the "New" Airfix
in Aircraft
Posted
Lovely!
John