GaryDavis
-
Posts
311 -
Joined
-
Last visited
-
Days Won
17
Content Type
Profiles
Forums
Events
Everything posted by GaryDavis
-
LOL...Man...that was a very fast response Rick!!! As fast as the car is...LOL. I have that car in 1/20. Seeing your work makes me want to jump on it right now! But...way to many projects a head of it right now... It sure is a pleasure seeing your work....Thanks for posting it...
-
Great job on this very cool car Rick. Your attention to detail is outstanding....what scale is this build??
-
help with model cars and dealing with chrome parts
GaryDavis replied to Ronald's topic in Cars, Trucks, & Motorcycles
Hey Peter...ya got me going on this new product. I'm going to have to go to their site and take a look. It sounds like they're going along the same lines as the Molotow paint pens. How fast does it dry? -
help with model cars and dealing with chrome parts
GaryDavis replied to Ronald's topic in Cars, Trucks, & Motorcycles
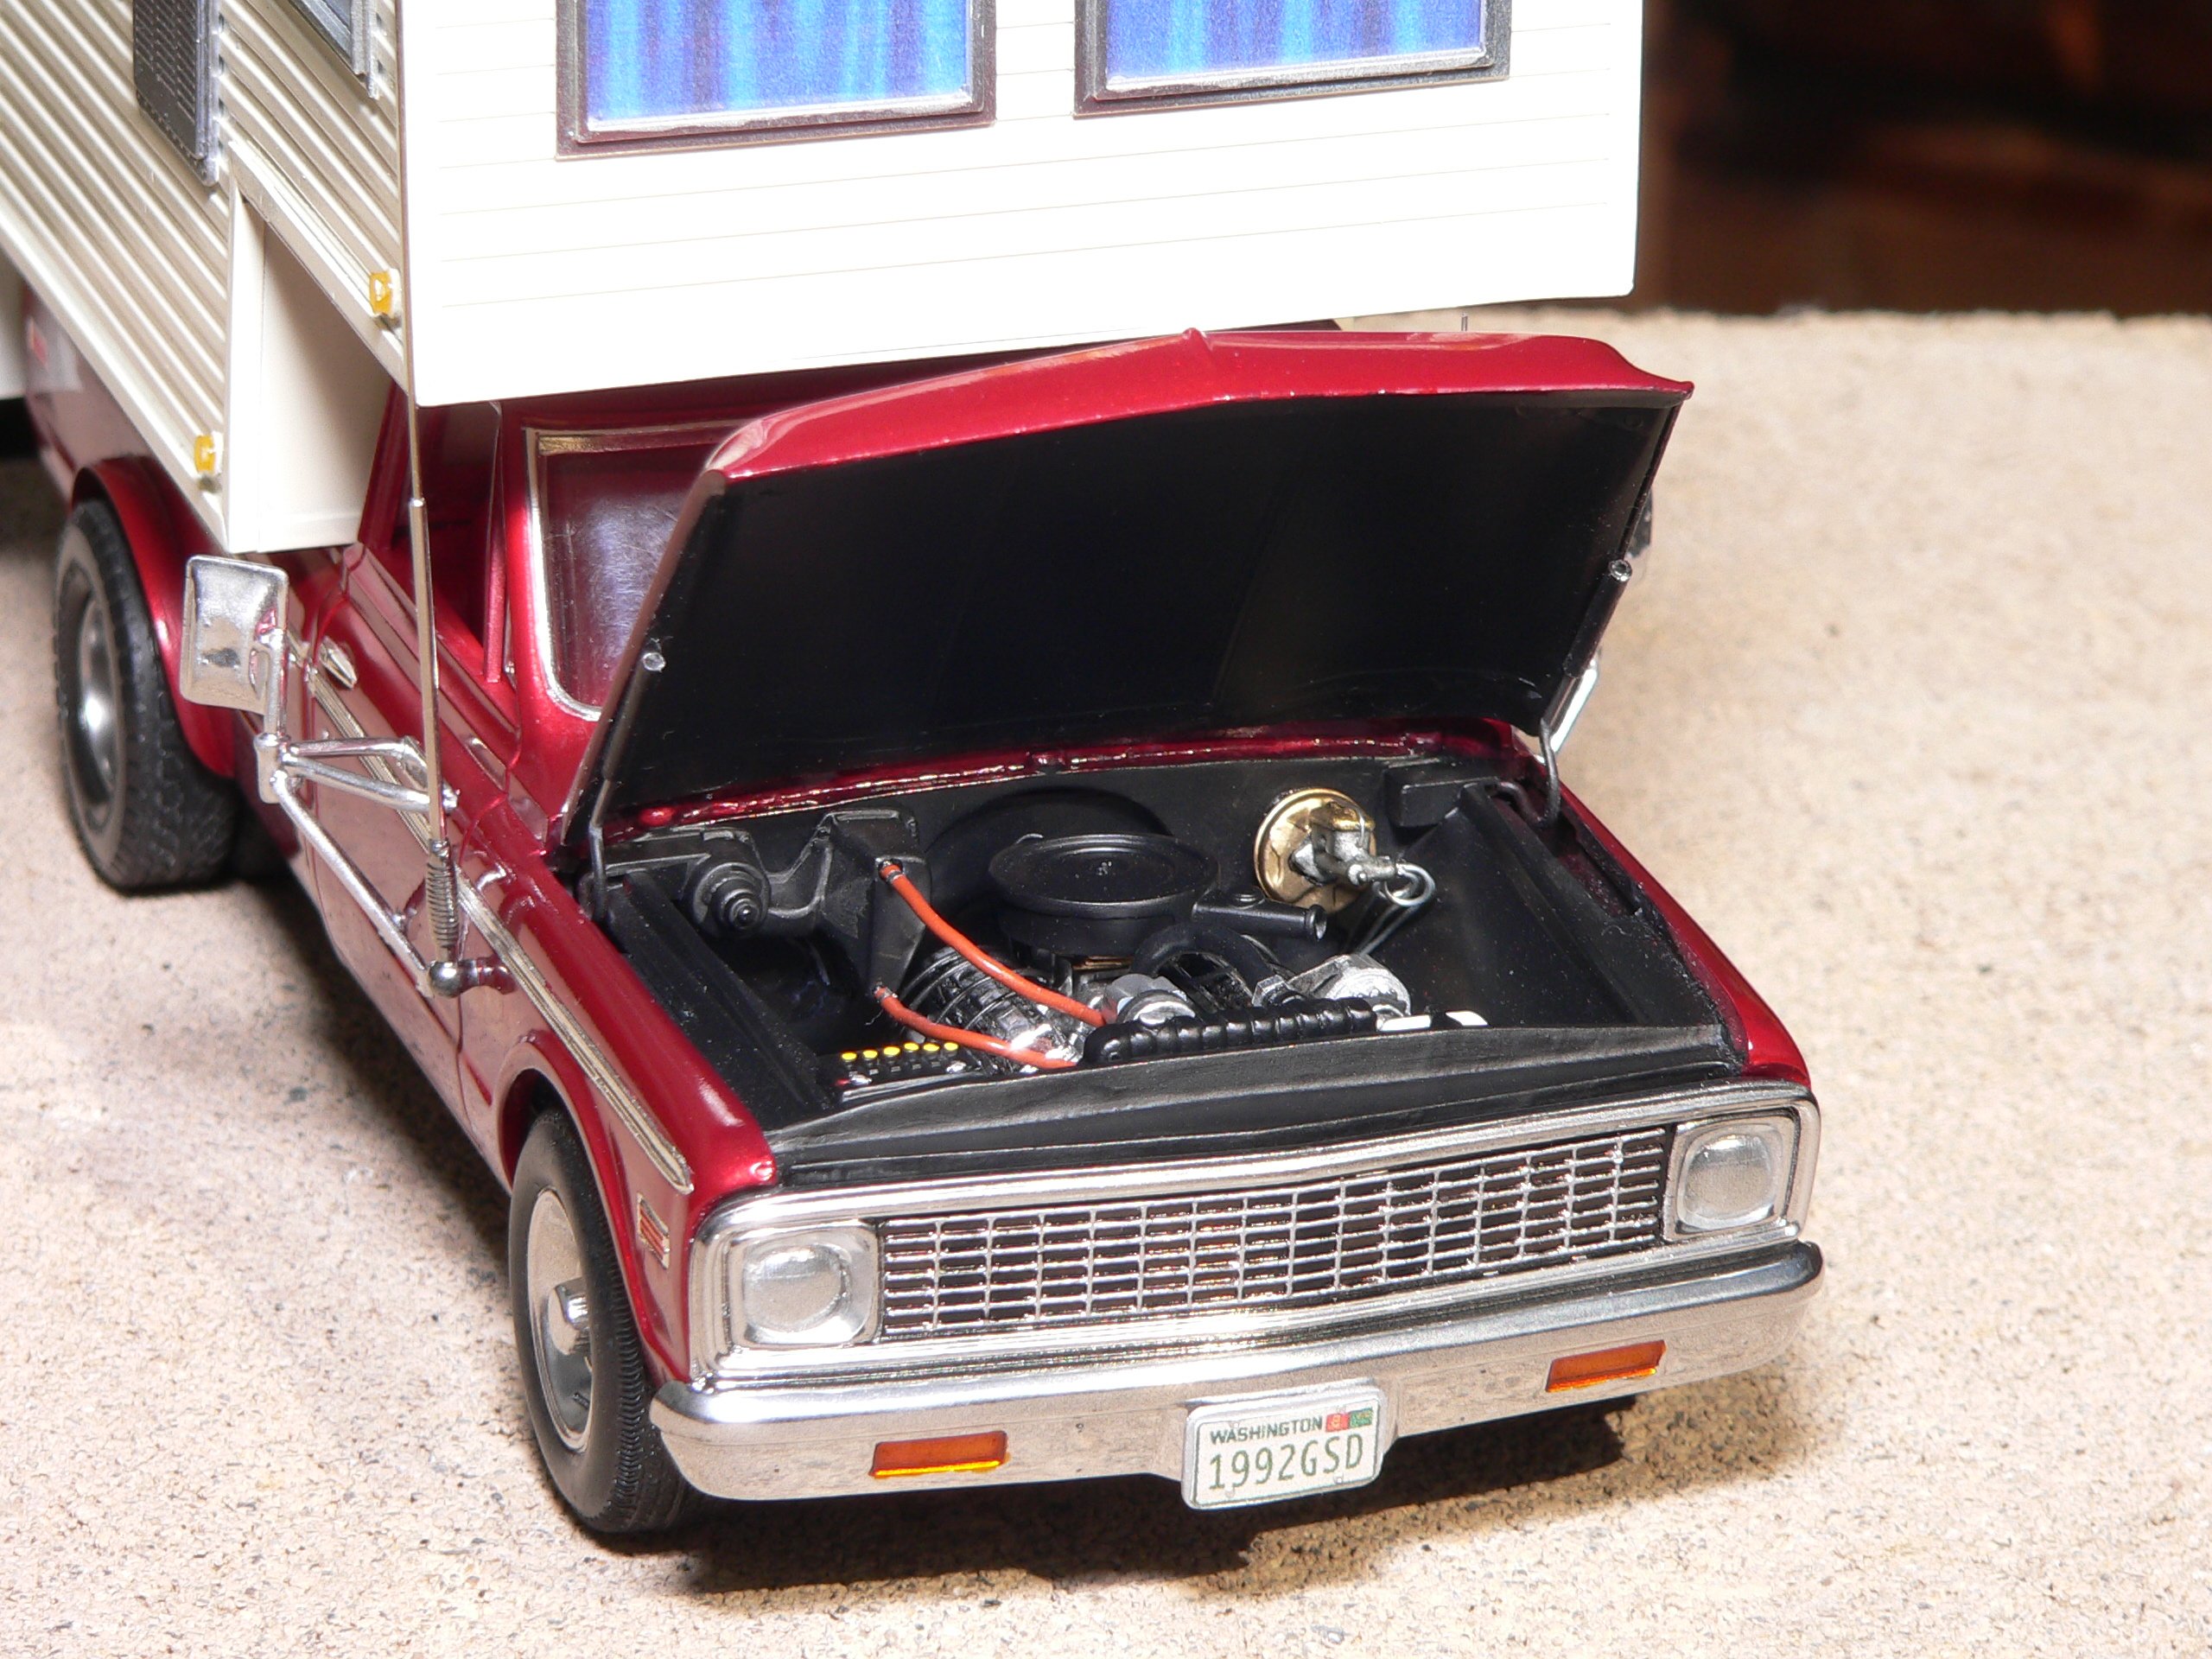
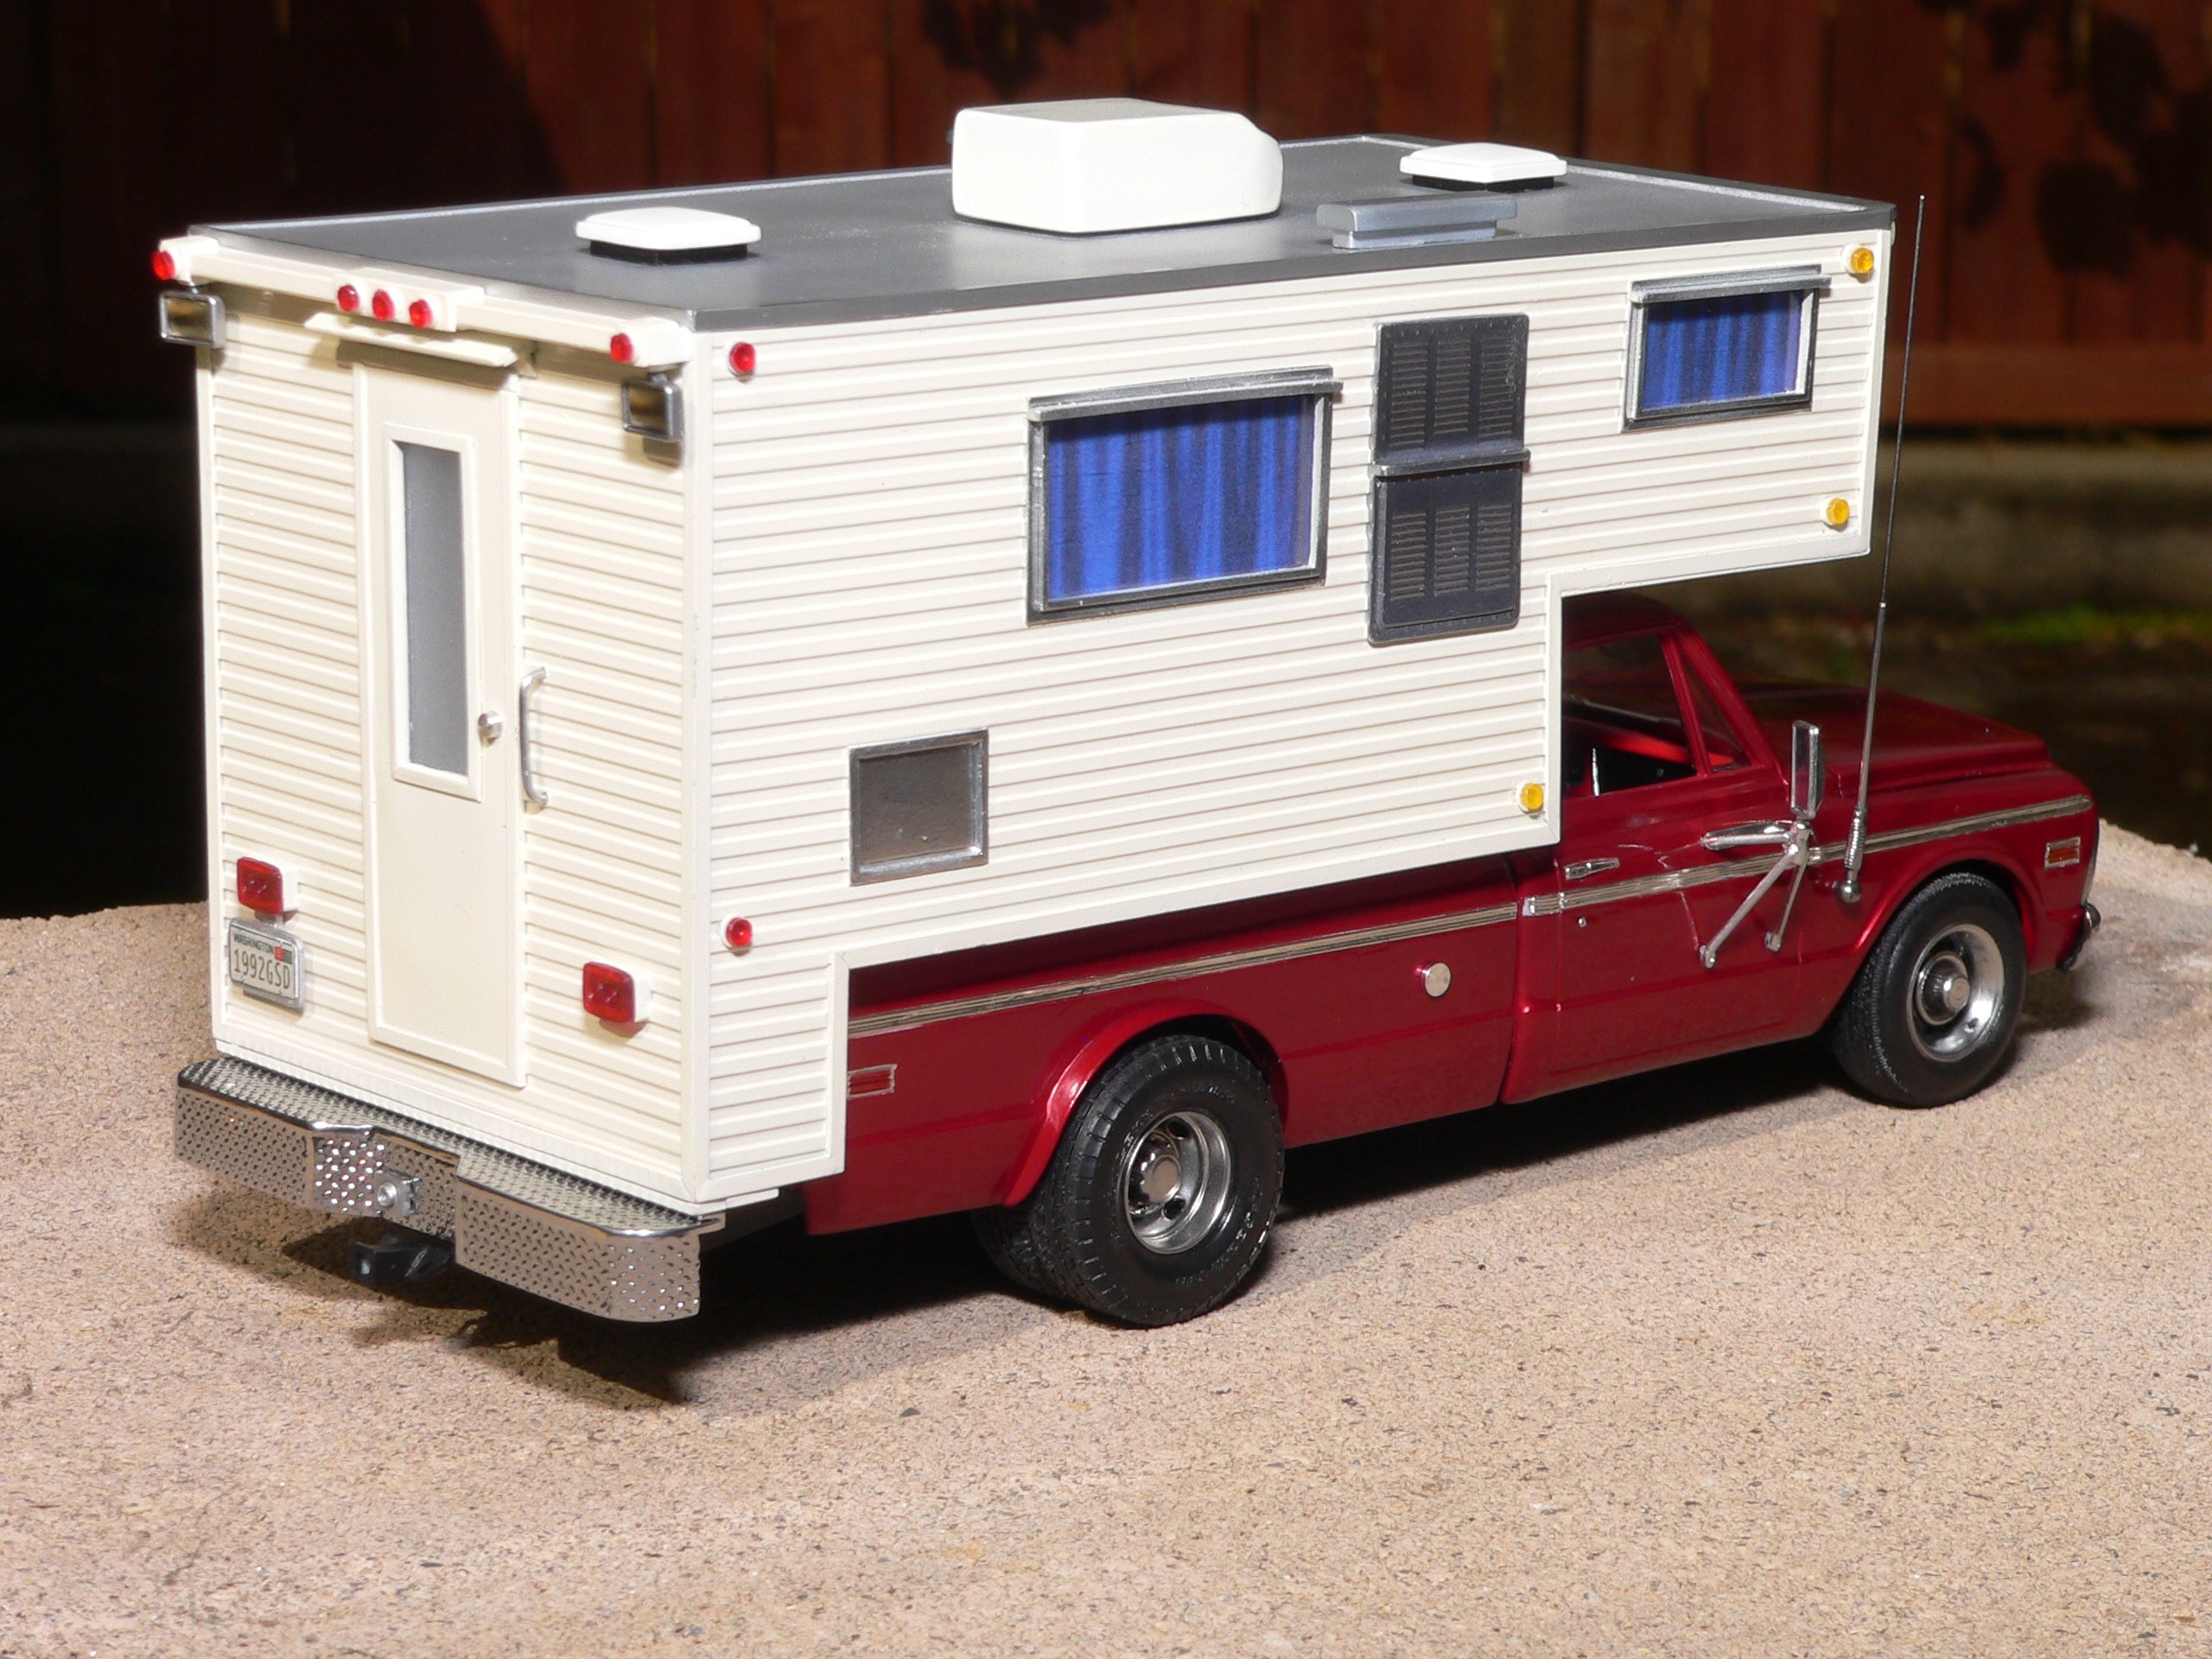
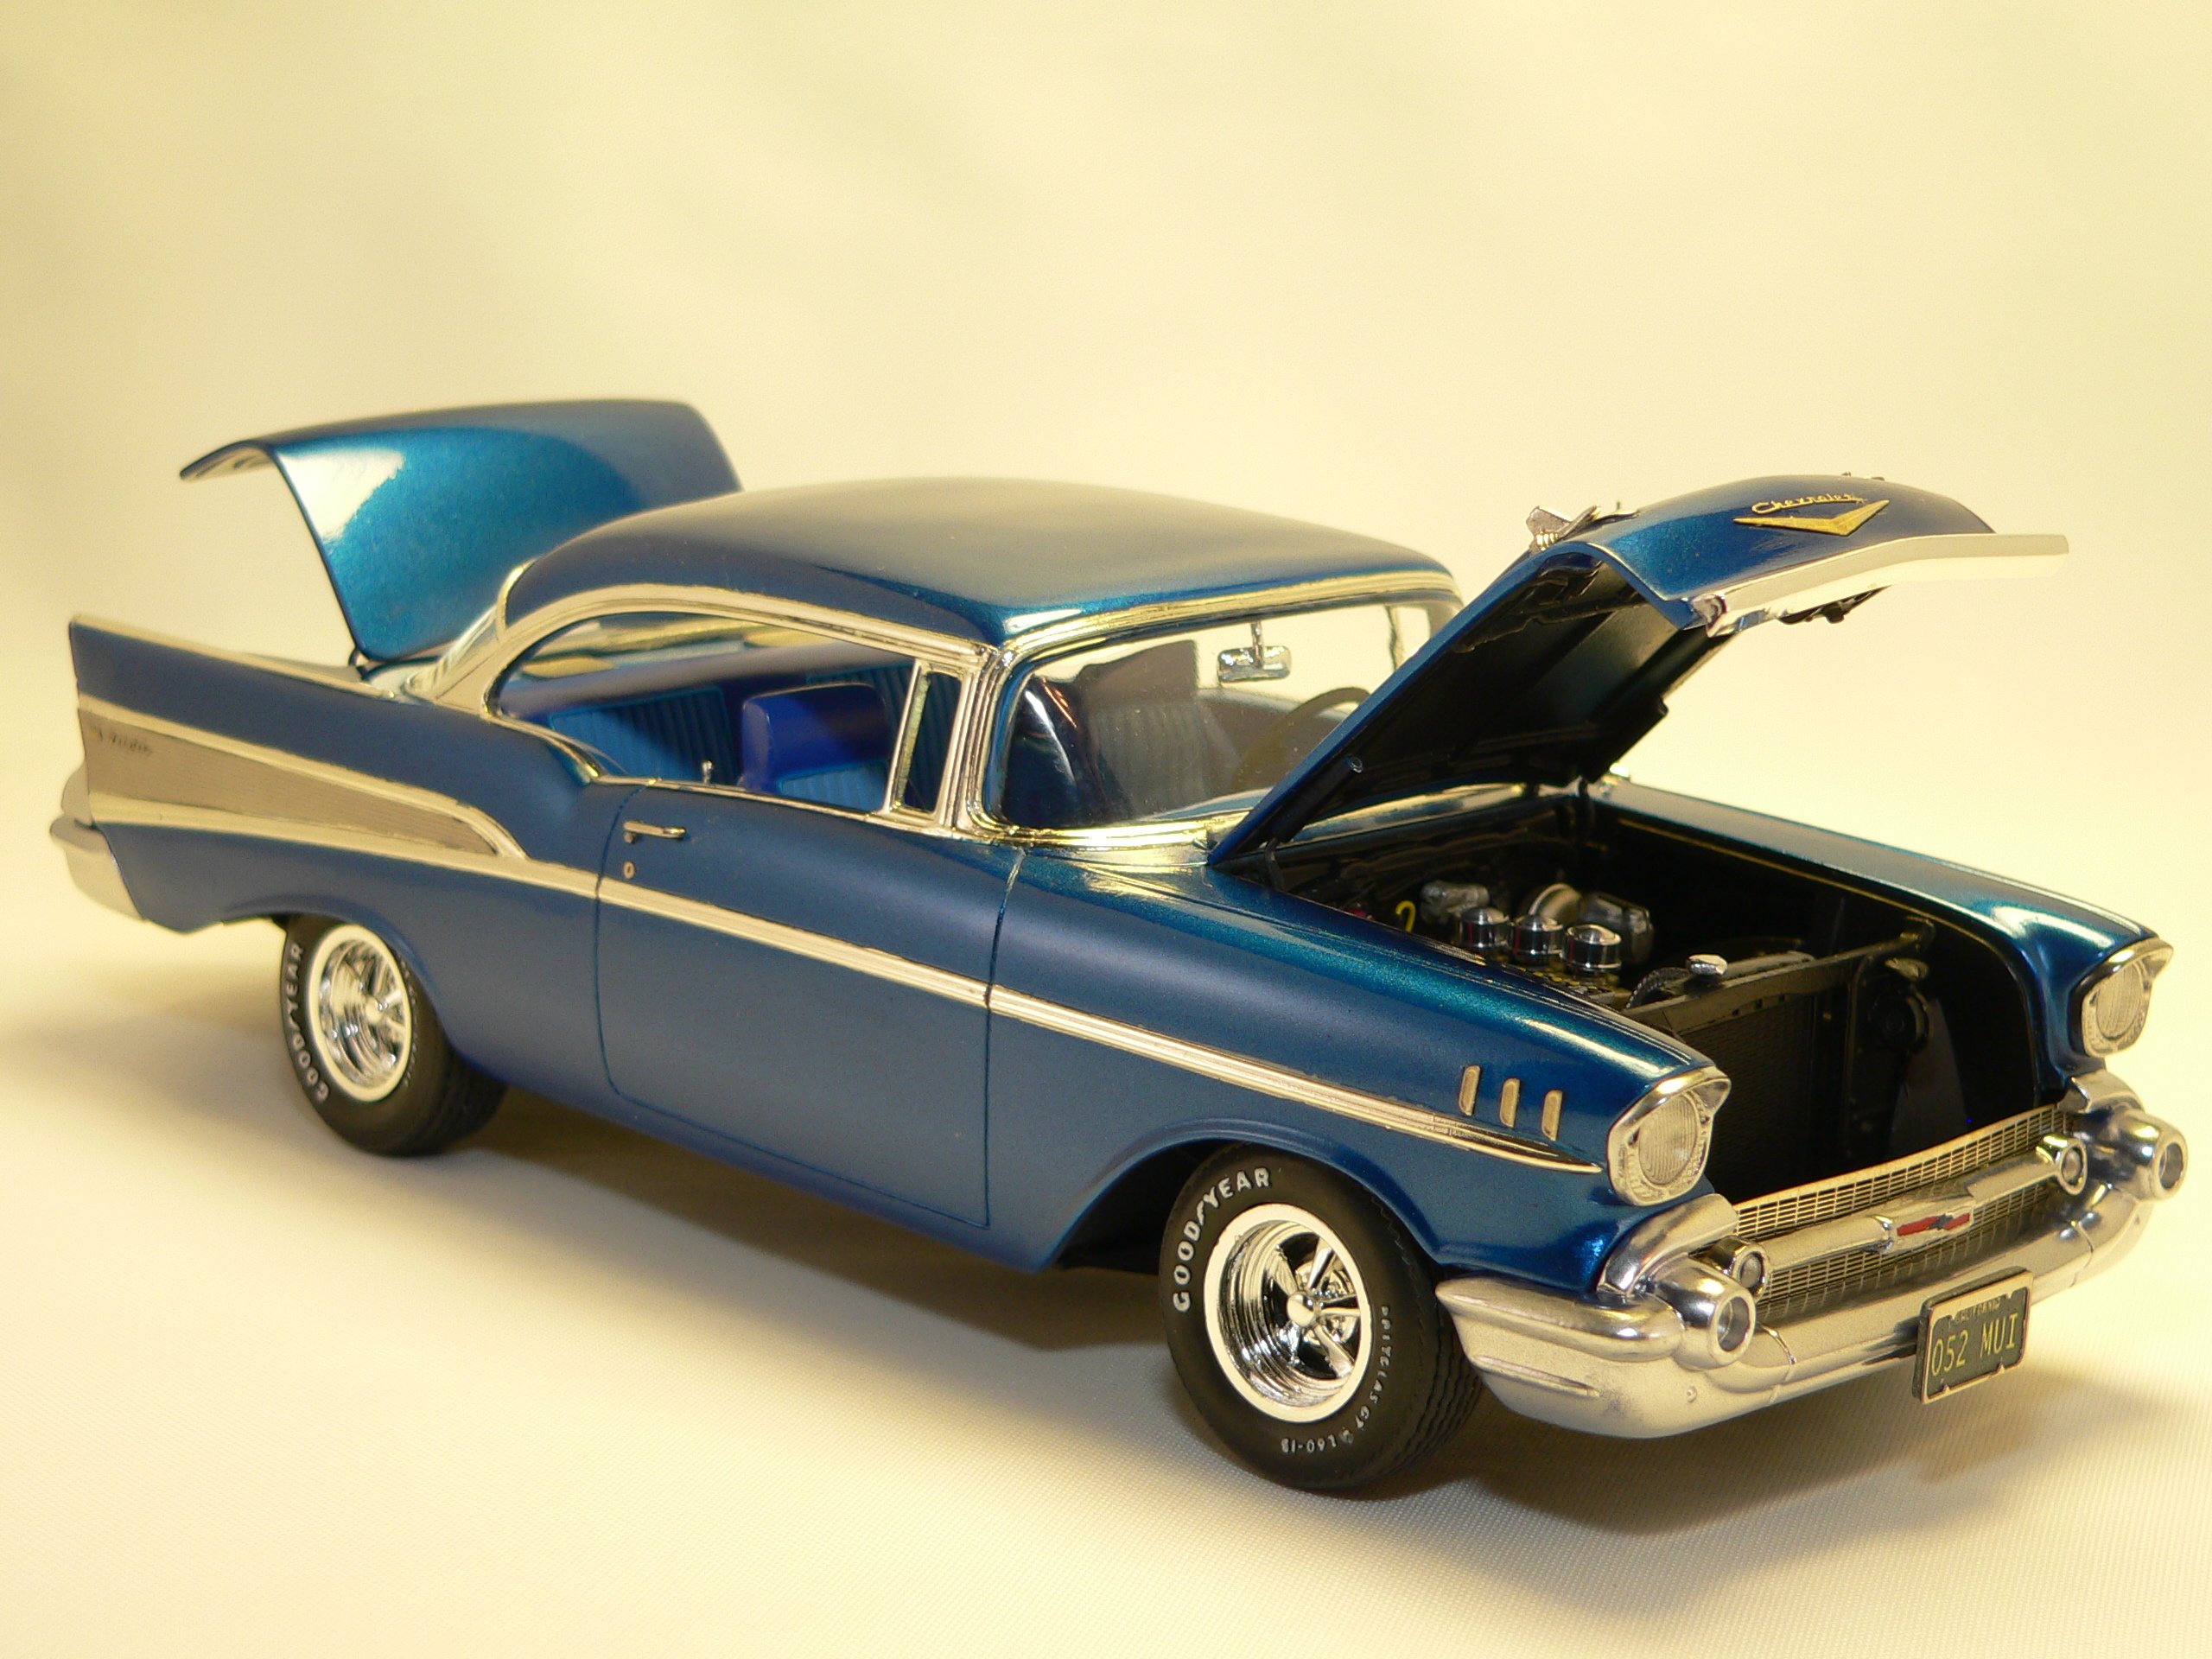
Hey Peter...I bought the ALSA 8 oz bottle about 14 yrs ago and I still have at least 71/2 oz's left. That's the basic same price I paid for it too. I really like this stuff though. It is a little spendy but man....ya can't go wrong with the way it turns out. Here are a few pics of what I used it on... The wheels (front and rear)... front grill and bumper and the fabbed rear bumper of a 72 chevy... Also...I used it on this 57 chevy bumpers and wheels. The chrome trim is Bare Metal foil.
-
That sure looks REAL Dak. Great job on this build.
- 1 reply
-
- 1
-

-
Hodges......get rid of the bitches!!!
-
#25 Race Team outside pics...3-15-18
GaryDavis replied to GaryDavis's topic in Cars, Trucks, & Motorcycles
Thank you joe...it was a blast to build... -
help with model cars and dealing with chrome parts
GaryDavis replied to Ronald's topic in Cars, Trucks, & Motorcycles
Hey Michael... you bet you can use a semi gloss(or semi flat...or just a flat clear...depending on the look you're after) on the Chrome parts. I'd forgotten about that technique. I just strip and re-shoot. But...In the case of a humungus amount of chrome like you mentioned...I think I'd cut from the spure...do the touchup on the small spots...wait a week...then apply the semi clear a little at a time. Now...Myself...I would shoot a thinned out amount thru my airbrush. You could brush it on but make sure to thin it a little. Hey Ron...you're very welcome. -
help with model cars and dealing with chrome parts
GaryDavis replied to Ronald's topic in Cars, Trucks, & Motorcycles
Hey Ron...First off...I think you'll enjoy build scale cars, if you like 1/1 cars. OK..to try and answer your questions... Personally... I strip all the chrome(using concentrated laundry bleach...Clorox is what I use) from every build that I do. The Chrome that's applied to most of the the kits are way too brite for the smaller scales. I will leave the chrome for 1/12th and larger builds. To re-chrome....I shoot a Black or Blue High gloss base coats. Alclad II has Chrome that has a little learning curve. You can use Alclad polished Aluminum as it works good too. I also use ALSA Mirror Chrome which has a small learning curve but does not rub off when dry. If you want to leave the chrome and just touch up where it was cut from the sprue...then you can use a small paint brush( 3 0 or smaller) and a dab of Model Master Chrome Silver #FS 17178. Model Master has another chrome paint but it's not as good. I've used both and this one works the best between the two. Put a small amount of paint in a mixing pallet and add a drop or two of Lacquer thinner. Don't mix it in just let the thinner hit the edges of the paint and then load you brush and apply to the spot on the part. NOW...since MOLOTOW has come out with 3 paint pens and a refill bottle...all one has to do is just touch the part with it and it's rechromed. But...the small down side of it is..it takes at least 3-4 days for it to dry. It's is remarkable how well this paint looks when applied. If you can work with the dry time...then Molotow is the way to go. You can do a search on the web and watch a a few videos that's out there on it. Well Ron...I hope I've shed a little light on the chrome thing for you. Just remember there's no right or wrong..it's what ever works best for you. Gary -
#25 Race Team outside pics...3-15-18
GaryDavis replied to GaryDavis's topic in Cars, Trucks, & Motorcycles
Thank you for the compliment Andrew....it is Appreciated... -
#25 Race Team outside pics...3-15-18
GaryDavis replied to GaryDavis's topic in Cars, Trucks, & Motorcycles
Thank you Mark...yea...I'm thinking about going to the RENTON show. If I go this yr...I'll bring it. -
#25 Race Team outside pics...3-15-18
GaryDavis replied to GaryDavis's topic in Cars, Trucks, & Motorcycles
The Sun came out for this day only...and I got a few outside pics shot. -
#25 Race Team outside pics...3-15-18
GaryDavis replied to GaryDavis's topic in Cars, Trucks, & Motorcycles
Hey Ed..thank you for the compliment... Thanks Robin...That was the idea that I wanted to bring together. A race team that ran the Western Regional circuit. -
#25 Race Team outside pics...3-15-18
GaryDavis replied to GaryDavis's topic in Cars, Trucks, & Motorcycles
This build is complete. Here are a few finished pics of it all. It's raining out (go figure) so inside shots will have to do for now. Thanks for stopping in and looking around. The finished trailer... Car loaded on the trailer... Hocked up ready for the road... -
Hey Doc.....did we ever get this taken care of? I've sent so much stuff out in the past 6mo....I don't remember if I sent this to you. Do you still need them? Let me know...
-
2016 Kevin Harvick Busch Hunting SS
GaryDavis replied to 1320Wayne's topic in Cars, Trucks, & Motorcycles
Sorry for the late reply Wayne...man...this is a killer build. Those decals must've taken you quite awhile to apply. Getting the right sit on these cars makes or brakes the overall look and fell. You sure did a good job with that. Great looking build Wayne -
#25 Race Team outside pics...3-15-18
GaryDavis replied to GaryDavis's topic in Cars, Trucks, & Motorcycles
Thank you Rusty and Rob..for the comments and taking the time to stop in for a look. It is really appreciated... -
#25 Race Team outside pics...3-15-18
GaryDavis replied to GaryDavis's topic in Cars, Trucks, & Motorcycles
This Project is finished. Now...It's off to build the trailer... Thanks to ALL who has stopped in and commented on this build. Here's a few pics of the #25 Anniversary Special Sprintcar.... -
#25 Race Team outside pics...3-15-18
GaryDavis replied to GaryDavis's topic in Cars, Trucks, & Motorcycles
The Decals are on ( second time around for the rear #s). I'll let them set and snuggle in over night as I use Walthers Solvaset. After applying it...It really wrinkles the decal up annnnd that's not a good time to play with the decal. It sure works good though. Makes the decal look like it's painted on. Hopefully I'll be able to finish this puppy up by tomorrow and post finished pics. But...here's a few pics of the finished tires and wheels. -
#25 Race Team outside pics...3-15-18
GaryDavis replied to GaryDavis's topic in Cars, Trucks, & Motorcycles
Here's a paint update...got the second color on this past few days. I decided to go with a darker red( Chrysler Clariet Red) instead of the Poppy Red. It still needs to be rub out and the separation stripes put on but....it's starting to get to the finish. I'm still working with the new molds for the tires. I'm trying a new RTV and there's a little learning curve. Getting there though. Here's a few pics of the paint...Thanks for looking in and commenting.... -
#25 Race Team outside pics...3-15-18
GaryDavis replied to GaryDavis's topic in Cars, Trucks, & Motorcycles
Here's the first color of paint on shots. I some how missed a few little imperfections at the primer stage that really showed themselves in the Met. Silver stage... Soooo...had to do a little sanding and added more putty for the final fix( I hope). Waiting for the body to dry(washed it) and then I'll reprime the touch up area and then shoot more Met. Silver on it. Then I'll tape off and shoot the Poppy Red. All of the other putty areas did good Here's a few pics of the work that was done. ALL of the detail painting painting is finished along with ALL the re-chroming of the Nerf bars and suspension parts. Thanks for looking in folks... -
#25 Race Team outside pics...3-15-18
GaryDavis replied to GaryDavis's topic in Cars, Trucks, & Motorcycles
Hey Dave....Thanks for the compliment. Good to see you here. I've got more accomplished but need to take pics for an update. -
#25 Race Team outside pics...3-15-18
GaryDavis replied to GaryDavis's topic in Cars, Trucks, & Motorcycles
UPDATE... I've got the front and rear suspension fabbed along with the dash and steering unit. This puppy is almost ready for final sanding and then off to primer and paint...Here's a few pics of the suspension...thanks for stopping in and looking.... -
#25 Race Team outside pics...3-15-18
GaryDavis replied to GaryDavis's topic in Cars, Trucks, & Motorcycles
Here's a progress update....the Roll bar and support has been Fabbed and is in mock up. When the joint dries on the support bar...I'll make the rear shock mounts for both sides. The torsion bar tubes still need to be fabbed and added to the body. Those(both sides) and the side nerf bars will be done then. Here's a few pics to look at. To me it's starting to give off that cool feeling when looking at these bad boys in the pits...ya know?? LOL Thanks for looking in... -
#25 Race Team outside pics...3-15-18
GaryDavis replied to GaryDavis's topic in Cars, Trucks, & Motorcycles
Here's a small update...the nerf bars are in mock up and the roll bar body mounts are setting up for tomorrow...Her's a few pics to look at the progress.. Thanks for stopping by and looking in folks.....
.jpg.b88790cf4d96d982a17352f6d4292ae3.jpg)