


dsteingass
-
Posts
173 -
Joined
-
Last visited
-
Days Won
2
Content Type
Profiles
Forums
Events
Posts posted by dsteingass
-
-
I think the guy on the back is supposed to be Lee Marvin lol
-
yes, those are some pretty bad figures...eek, but your Jeep and gun look fantastic!
-
I get my local hobby shop's brand in the purple, it is a medium CA, it fills gaps and can be accellerated with accellerator. good thing that is all I expect from it eh?
-
That is fantastic! absolutely love his epic mustache!
-
That is amazing! nice paintjob! Can you explain the grasses to me? I have an entire cabinet full of various basing materials, woodland scenics, GF9 turfs, etc. but I've never seen such cool clumps of grass! Silfor? is that a company?
-
I built this as my first IPMS/USA review, and of course didnt notice the sloppy paint on the shield (oops)

-
Last year, the Fort Wayne, IN Air National Guard switched from F-16s to A-10s. I live about 5 miles north of the runways, but man....when they fly over, those engines definately make a unique screaming sound. I used to love seeing the F-16s light up their afterburners in formation at night, but it was a rare sight since you heard it much later than seeing it, but I can see why those screming A-10 engines could frighten a whole village!
-
Squadron Green putty can be thinned with acetone nail polish remover too. I use the green putty straight from the tube, then dip q-tips in acetone and smooth over the putty.
As for cleaning the mold-release agent off the resin so paint and glue will stick to it.....lemon dishwashing liquid!! or the orange stuff would probably work too, just fill the sink like doing dishes, scrub, rinse and dry
-
Oh yeah, I've built this kit! very fun kit, like the man says, lots of sanding, of course I didnt bother with reproducing the textures like he is.
-
OMG I am ordering that now
I am more of a David Tennet fan..he wears Chucks
-
Thanks man!
-
Thanks!,
Stalingrad (or any Flying Lead! game) only needs a 2x2 table and uses cheap 1/72 figures mounted on pennies
Alas tho, this was gifted to my Uncle, my 6x4 table is now sporting the beginnings of a LEGO train layout ;)
Outstanding set up you have there! That is awesome! I wish I had the space to build up a wargame table like that! Keep these pics coming!
-
playing with the panoramic setting on my Droid Camera
-
Cool! did you get the new FineCast resin Lord Commissar? or the old metal one?
Very cool! I will be bringing two war hammer figures to Nats this year. Queek Head Taker (skaven war lord) and IG Lord Commissar.
-
When building gaming terrain, it becomes more than just a diorama, it becomes functional. It blocks line of sight, it provides cover, it provides a place to set a sniper miniature above the battlefield. I have to trade-off form for function., realism for playablity. These buildings are not much more than objectives or line of sight blockers really, but they definately set the place for a battle, even if the time is somewhat flexible (6th century-modern era, as half-timbered houses are still commonly seen).
A properly painted and terrained battlefield makes fighting with painted toy-soldiers into a dynamic diorama really.
-
My Holy Grail kit aquisition from Games Day 2011 in Chicago. This is what it looks like built My link
and this is my lovely pile of unclean resin!!
I can't wait to take my time and painfully detail this kit!
-
I often see fantastically painted Armor kits accompanied by plain, featureless, faceless figures. This breaks my heart, since figure painting (especially faces) is very easy to do, but it can understandably be scary. With smaller scale figures features such as eyes can be painted, but arent necessary, because you really wouldnt see the whites of their eyes at the altitude you are looking at it on a tabletop. Sometimes with 1/72 scale soft plastic figures the mold is the enemy, casting a featureless or malformed face. With 1/35 you have a little more real estate, and your figure, being cast in resin is even better.
CLEAR DEFINITION is more important than neatness here, being able to clearly differentiate shadows and highlights are important, just like when painting clothing.
1. free your mind- don't get settled on one face-painting technique until you are comfortable with it. The Internet is chock-full of face-painting articles,but I will show you my method for 28mm and please just take it for what it is, take parts, some, all or none, just practice. practice makes perfect, like all things.- Pick up a cheap set of Tamiya 1/35 figs to practice on before committing to your expensive resin model.
color twice, and clean-up is easy. Acrylics in the 21st century come in sooo many pre-mixed, high-pigment colors, that you can save yourself a lot of time buying pre-mixed shades.
3. understand light: When you airbrush a car-body with a metallic color, light will reflect and shine realistically, causing highlights and shadows when you paint a face a *generic flesh color* it will not do this, you need to create the illusion of shadows and highlights. Look at a real face, the color appears lighter where the light plays: bridge of nose, ears, eyelids, cheek bones.
4. Choose 3 flesh shades to start with a darker shadow color, a base color, and a highlight color. These will all be based on the same base color. Alternatively, you can mix a tiny bit of white or brown with a base color but as previously mentioned, this is a pain.
5. If using pre-mixed Vallejo Game color, I would use Dark Flesh (or rosy flesh for that red tint white skin has), as the shadow, Bronze Flesh or Dwarf flesh as the base color, and Pale Flesh or Elf Flesh as the highlight. You can of course, substitute any brand you wish, but at first, limit yourself to three.
6. Prime/Basecoat: priming white or priming black: you can find many articles arguing the finer points of either white or black basecoats, suit yourself. White basecoat will give you brighter colors, black basecoat will give you darker colors, since most acrylic paints are not truly opaque but more translucent. Exceptions of course are high-pigment paints (or as the Home Depot calls them HD paint), Games Worksho's Foundation paints are high-pigment, so they cover even over black.
7 I find layering easier than blending. to layer: start with the shadow color, paint all the skin solidly the shadow color, then paint the base color, leaving the shadow color in the recesses, then paint the highlight color only on the raised parts.
Don't get FRUSTRATED: when you paint the shadow color, the face WON'T look right. When you paint the base color, the face WON'T look right...PERSERVERE, when you add the highlight, the face WILL start to look right. your mind will start to recognize the human face once the highlight is added.
8. you can then wet you brush and blend the layers together if you wish , but make sure you leave CLEAR DEFINITION lines.
7. Use a Wash: Flesh washes are amazing, you can wash a highlighted face with a chestut or other red-tinted wash to give the face it's deep skin rosy color it gets from human blood beneath the skin. Once the wash is dry- re-apply your highlights on the prominent features of the face. your face will now pop out, and you will smile
I would always recommend rading through Dr. Faust's painting clinic here
-
that looks like fun right there!
-
HAHA...Seriously, I can help here...what scale figure are you using?
Because I was using the Master Class video as a tutorial and the builder uses enamels. I've tried acrylics and like them but the technique for faces escapes me. No online tutorial or video makes sense to me. The pilot figure I'm working on was first painted with Andrea and Vallejo. Turned out looking like Tammy Faye Baker had joined the Luftwaffe! Thanks for the response!
Kent
May I ask why? Vallejo Acrylics are perfectly suited right out of the dropper tube for figure skin, blending is really an oil-painting technique adapted to the wonderful technology of acrylic paints and the plethora of pigments they can bring to your painting bench. In my experience, enamels are best left for things that had enamel in real life.....57 Chevys and bathtubs ;) Enamels can take days to harden, oils can take a week, collecting every bit of dust that lands in the wet paint whle acrylics dry quickly, and so give you the perfect amount of time to blend one wet layer into the previous wet layer. May I suggest experimenting with just the acrylics and either a chestnut or appropriately-colored ink or wash (for caucasian skin) ? It will run into the recesses where human skin has it's rosy bits. Then you can apply lighter shades of your base color as extreme highlights (bridge of nose, ears, etc.).
How long should I allow enamels to dry before blending on a face? I'm using Vallejo acrylics as an undercoat with Model Master Enamels for the top coats as show in the Master Class Figure video. There's no discussion on how long to allow the base coat of enamel or enamel shading to dry before blending.
Thanks!
Kent
-
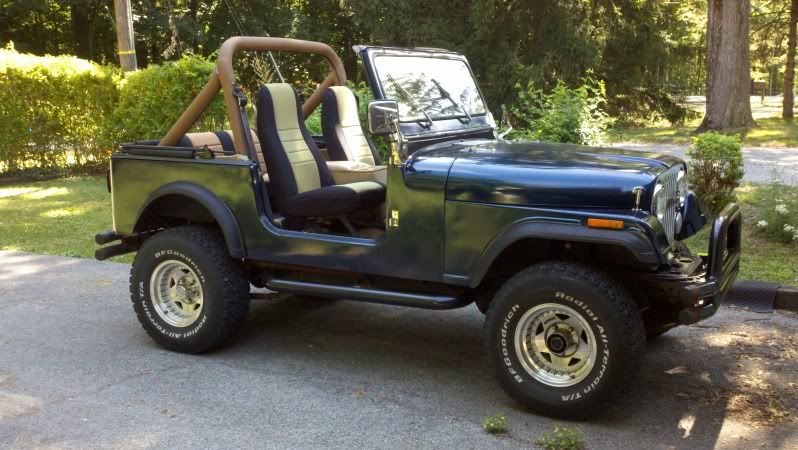
here is my toy.
Obviously, my only choice for the base is the Revell 1977 CJ-7, does anyone know of a supplier for scale aftermarket parts in 1/24?
-
Can I ask what mfr makes that orange paint?
-
wait....it was destroyed once...then you rebuilt it...and then it was destroyed a second time when someone drove into the shop????
-
you know, that just made me look at my kits...I have a few unbuilt kits, but none that I don't intend to build...and you are right...because I know I'll have fun while building it. My problem is that I have sooo many things started, and few finished. ..new plastic ADD ;)
-
Watch out!...their stuff is addictive!! Pick up an issue of White Dwarf magazine while you are out ;)
Welcome Dave. We seem to have a pretty good group here. I hope that you feel comfortable here. I went to school in Angola so I knew Fort Wayne reasonably well.
My wife and I have our two grandsons with us this week. They brought one of the Warhammer 40,000 kits with them. They had wanted to get into Warhammer but their mom (our daughter) said "Wait until you are with Grandpa". There has been lots of cutting, gluing, painting etc. going on here. Tonight, I will take them to a local hobby shop to see what the war gaming is like. If I am not here tomorrow, you will know what happened.
As Mandy said, when you get up to West Michigan, give a call.


 playing with the panoramic setting on my Droid Camera


Captain America
in Figures
Posted
thanks, oh and the water is jusst some hazy gloss varnish spooged into the puddle and left to dry streaky,,,accidental effect